

Paynecta
Connect Paynecta to PayLexer to accept M-Pesa payments in Kenyan shillings through Paynecta's hosted checkout.
Paynecta is a Kenya-based payment platform built around M-Pesa. Shoppers pay on Paynecta's hosted checkout page: they enter and confirm their M-Pesa number there, then approve the payment prompt on their phone. Payments settle to the payout account you set up in Paynecta, such as your Paybill, Till Number or bank account.
- Supported Regions (Merchant Accounts): Kenya
- Supported Currencies: KES
This gateway appears in checkout only when the selected currency is KES.
Supported Features
- Hosted checkout that redirects shoppers to Paynecta's secure payment page
- M-Pesa payments, approved by the shopper with a prompt on their phone
- Real-time payment notifications, signed by Paynecta and verified by PayLexer
- Every shopper return double-checked with Paynecta before the store shows a result
- Automatic background check that completes paid orders if a notification is missed
- Payments of up to KES 250,000 each
Paynecta does not support refunds or subscriptions in PayLexer. Only one-time payments are available, and refunds are made from your own M-Pesa account.
Before You Start
Make sure you have:
- Paynecta Account – Don't have one? Sign up for Paynecta →
- Verified Paynecta business – Paynecta cannot take any payment until your business passes its verification. See Paynecta's verification guide
- Paynecta credit – Paynecta takes its fee from a prepaid credit balance, so an empty balance stops payments. See Paynecta's credit and fees guide
- PayLexer Account – Required to configure the integration. Create your account →
- A website where you want to integrate
Looking for a different payment processor? View all supported gateways →
Configuring Paynecta
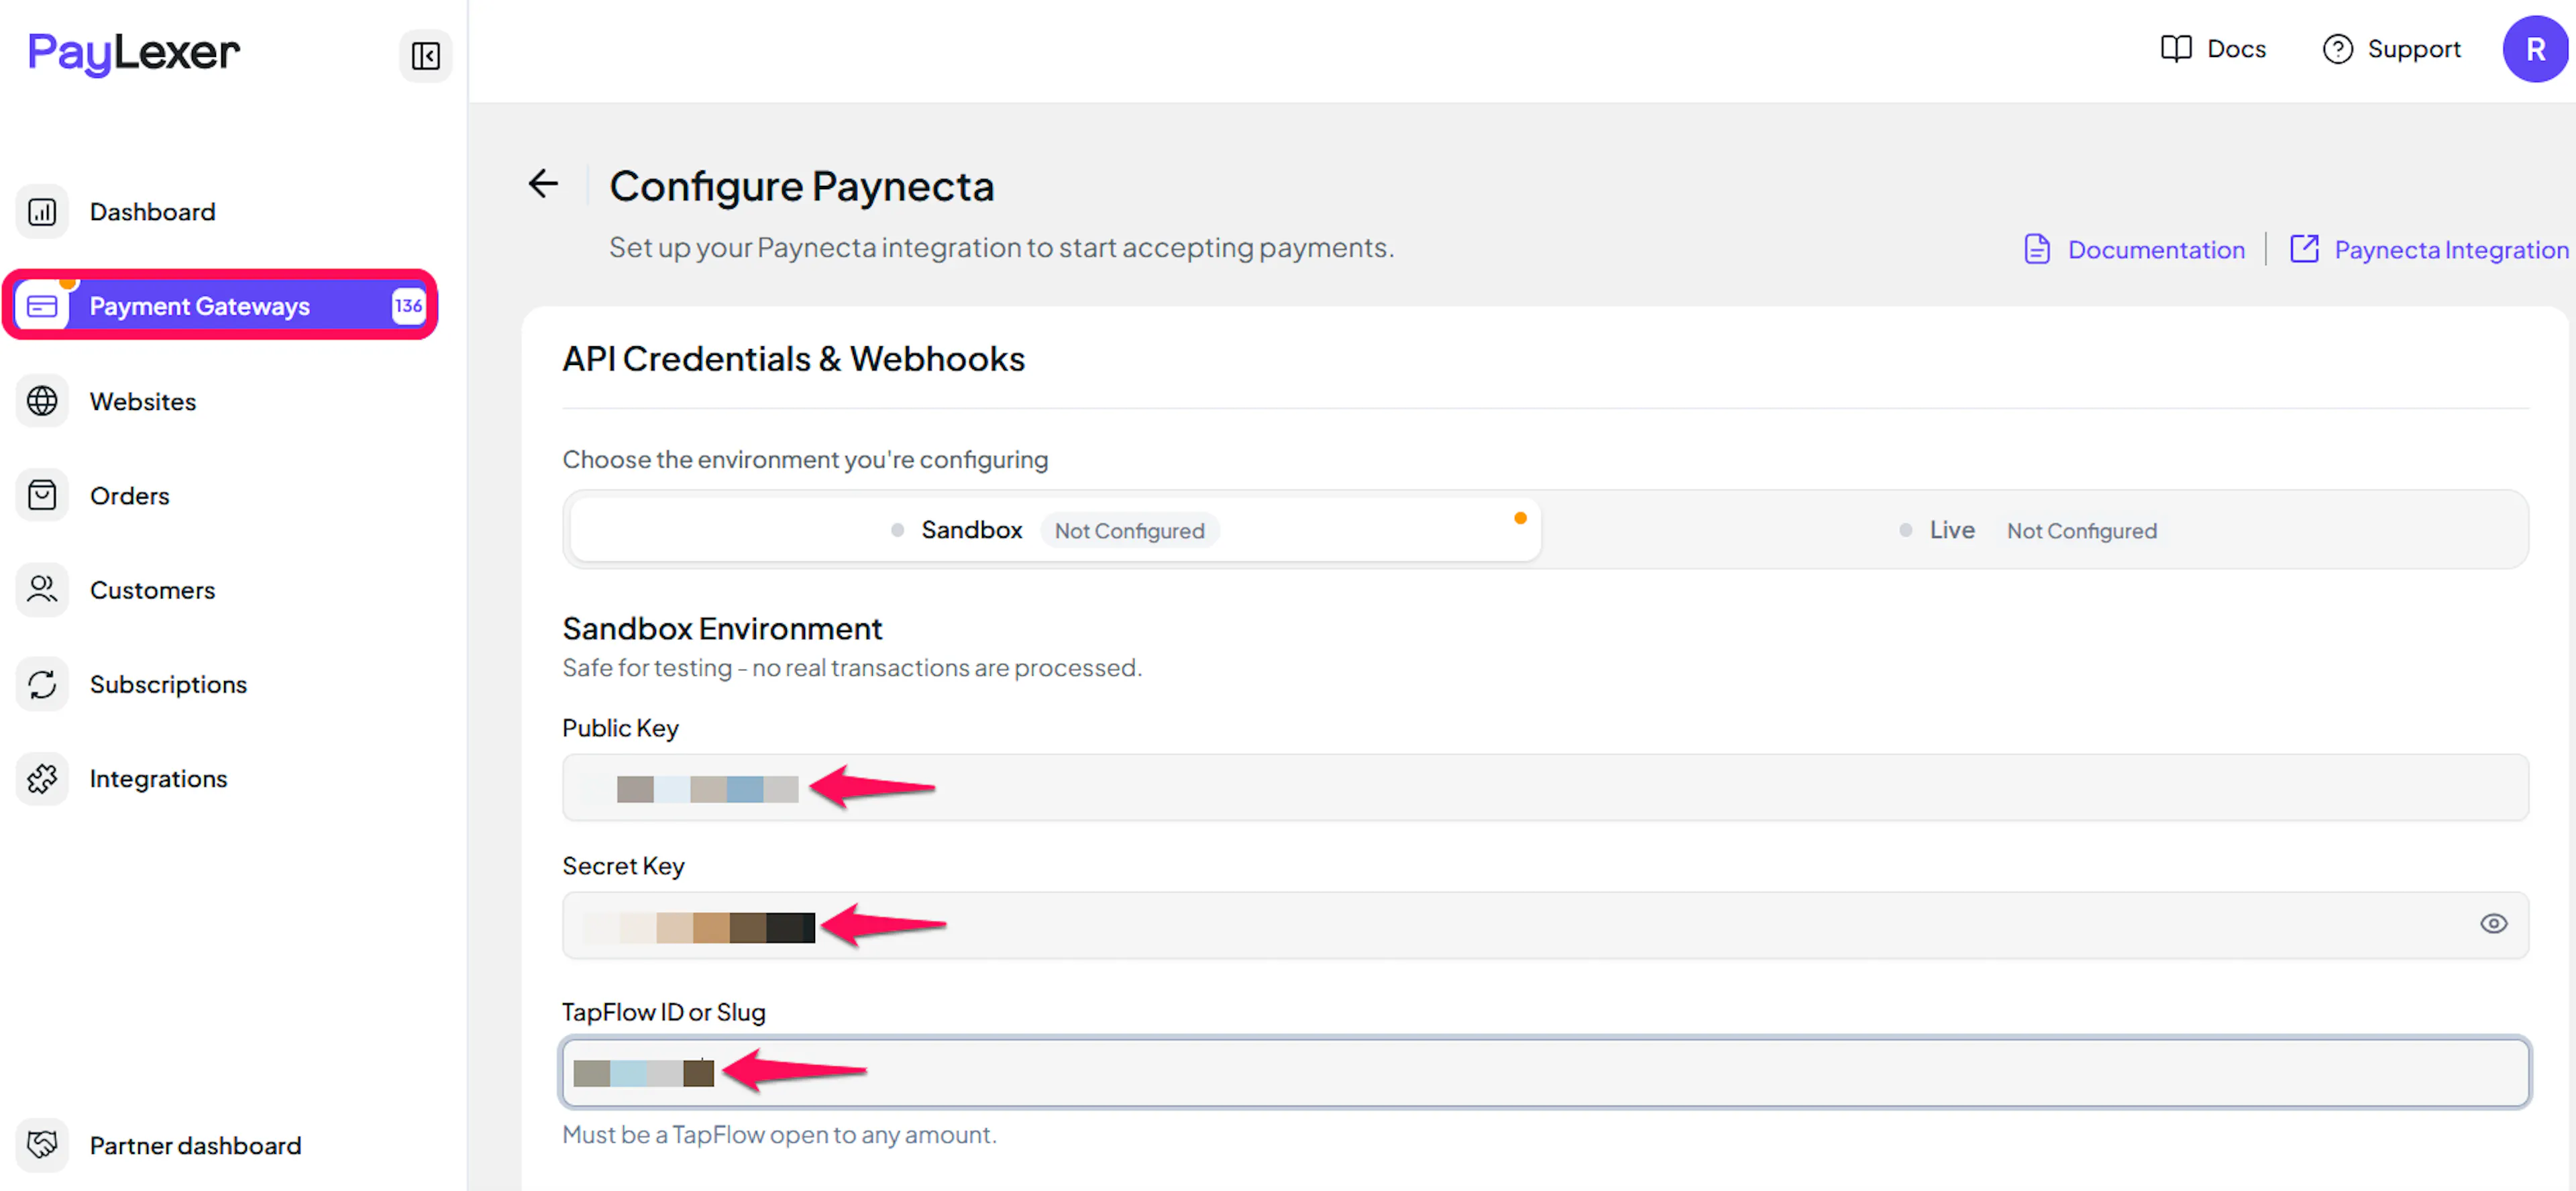
You need a Public Key, a Secret Key and a TapFlow ID or Slug from Paynecta for this integration, plus a Webhook Signing Secret for payment notifications.
Getting API Credentials
Log in to the Paynecta dashboard
Sign in to your Paynecta dashboard.
Generate your API keys
Open Settings → API keys and generate a key pair. Copy the Public Key (starts with pyn_pk_) and the Secret Key (starts with pyn_sk_).
Paynecta shows the Secret Key only once. Copy it before you close the panel. Generating a new pair stops the old pair working immediately, so update PayLexer straight away if you ever replace your keys.
Choose a TapFlow
A TapFlow is one of your Paynecta payment pages. PayLexer collects every payment through the TapFlow you choose. Copy its ID (starts with tap_) or its address (slug).
The TapFlow must accept any amount. A TapFlow set to a fixed price is refused by Paynecta at checkout. It must also be switched on and have a payment method added.
Adding Credentials to PayLexer
Open PayLexer Dashboard
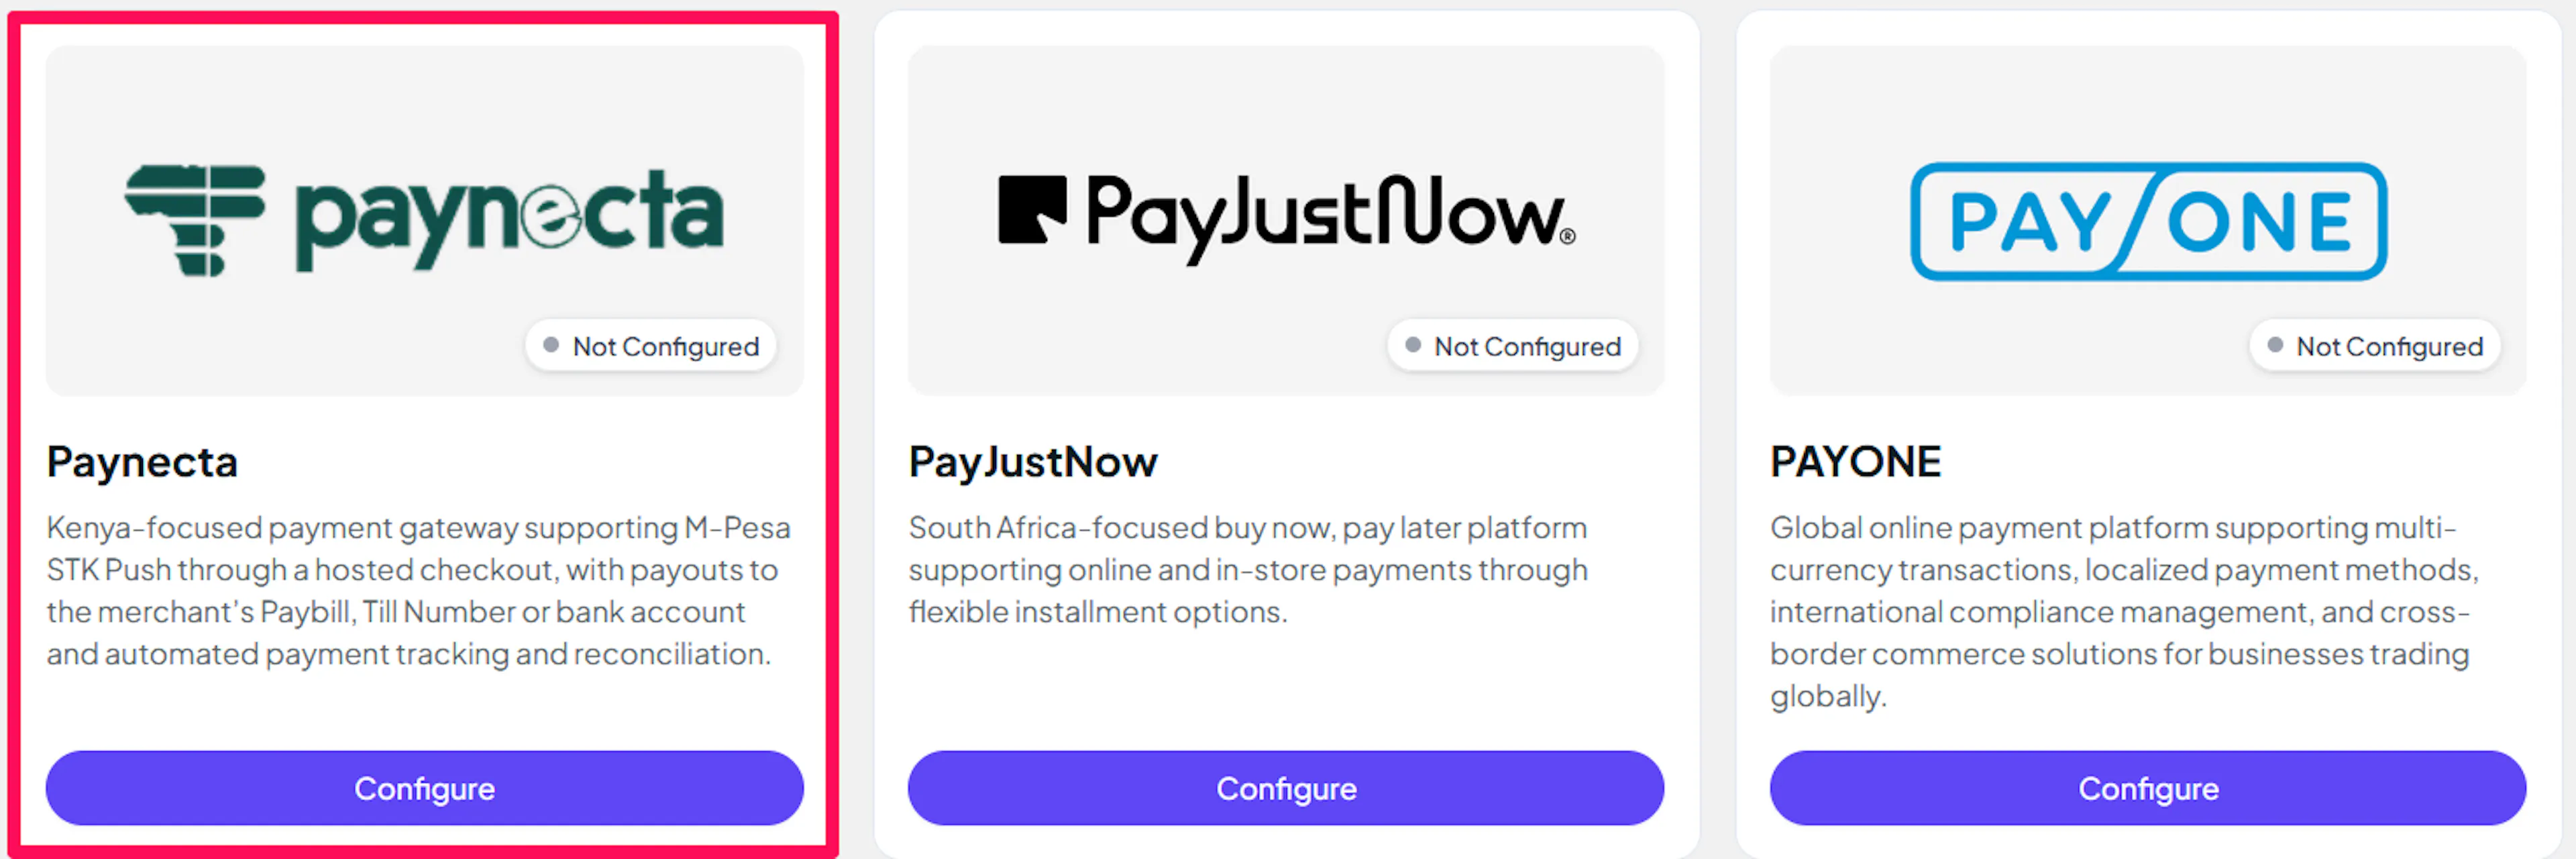
Log in to your PayLexer dashboard and go to Payment Gateways, find Paynecta and click Configure.
Enter your credentials
Paste the Public Key, Secret Key and TapFlow ID or Slug you copied from Paynecta into the corresponding fields.
Understanding Live/Production and Sandbox Settings:
| Environment | Purpose |
|---|---|
| Live / Production | Used for real transactions. |
| Test / Sandbox | Used for testing only. No real money is processed. |
How PayLexer selects credentials:
- Debug/Test mode ON → Test credentials are used
- Debug/Test mode OFF → Live credentials are used
Paynecta has no sandbox. Every Paynecta key is a live key and every payment is real money, even on the Sandbox tab. Enter your keys on the Live tab. If you also fill in the Sandbox tab, payments made in Debug/Test mode are still real M-Pesa charges.
Verify and save
Click Verify Connection to check your credentials with Paynecta, then click Save Changes.
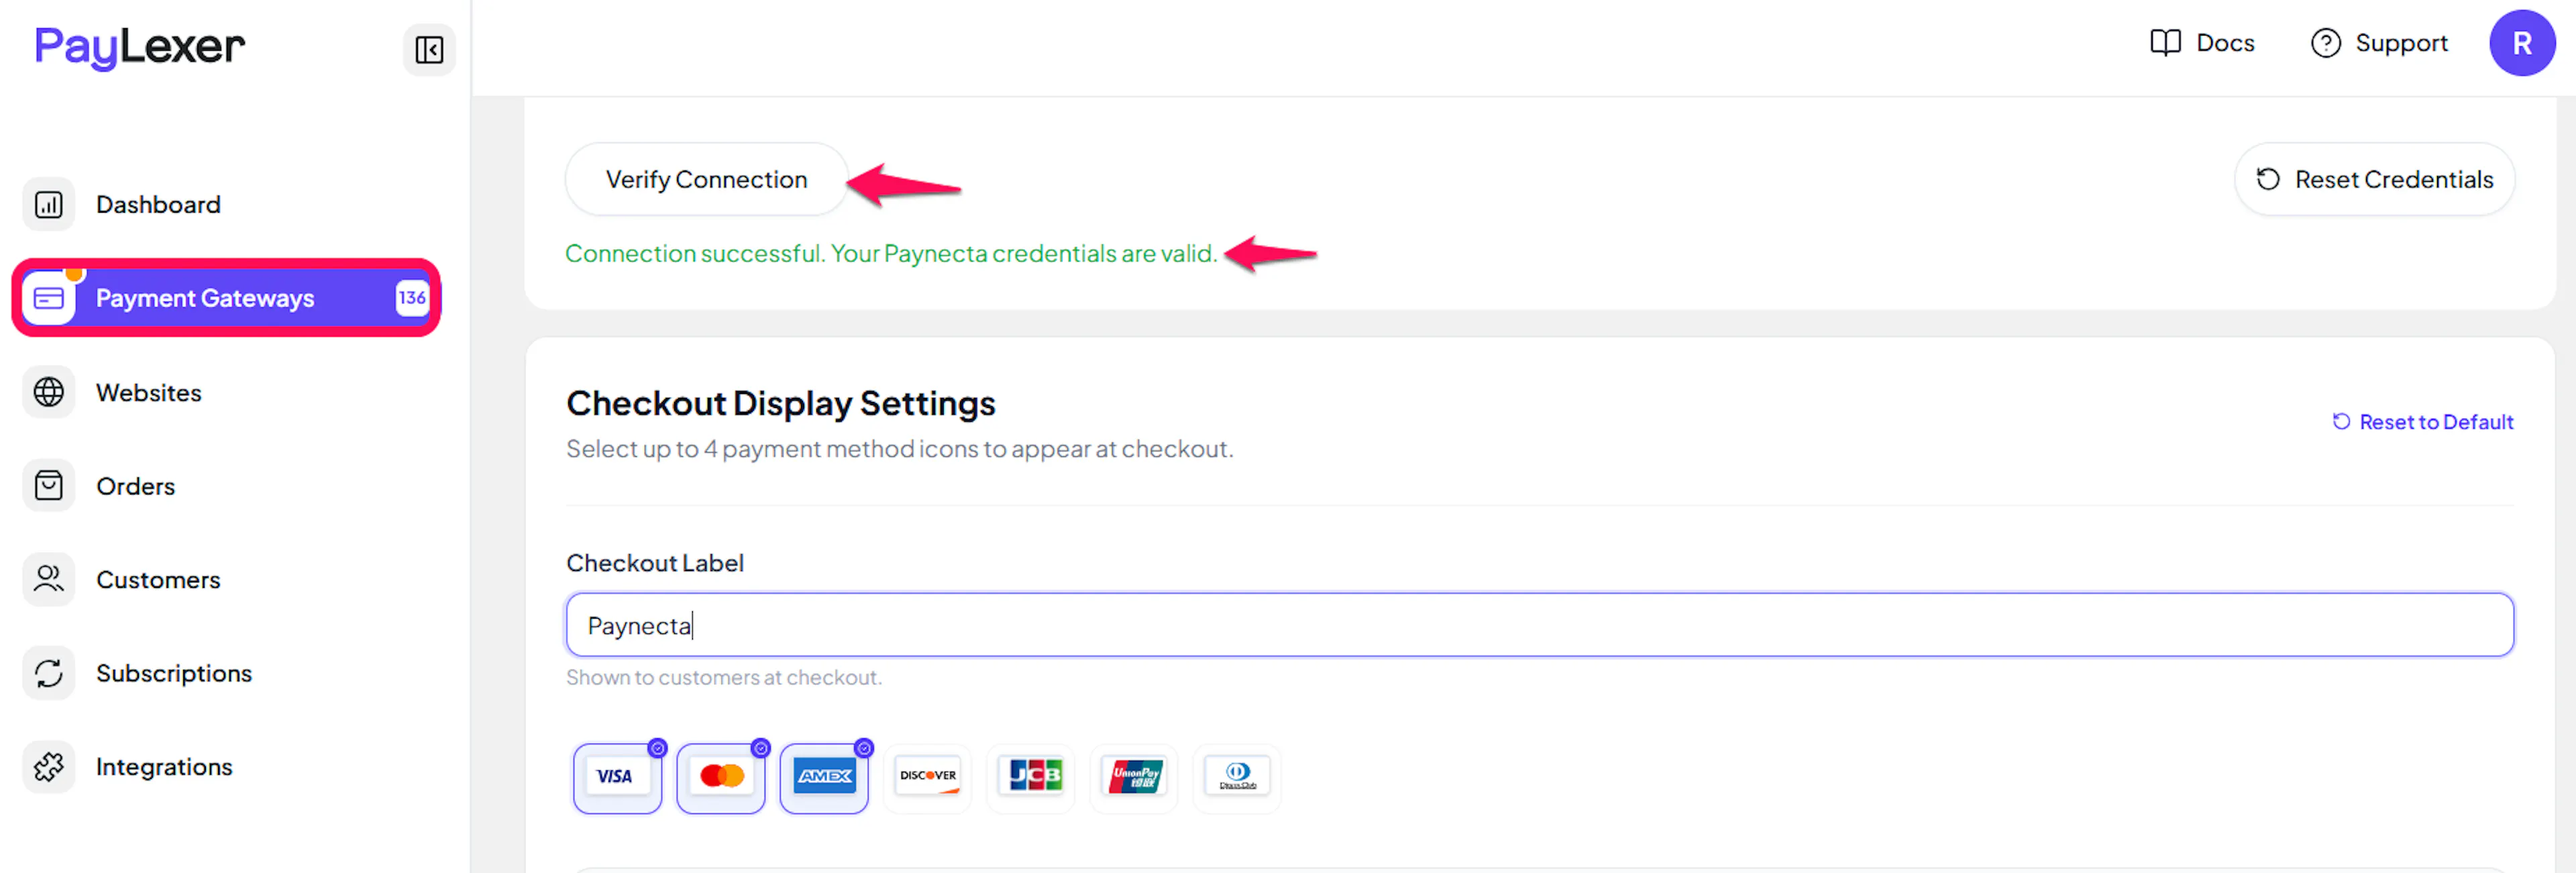
Verify Connection checks that your Public Key and Secret Key work together. It does not create a payment and does not check the TapFlow, which is only used when a shopper checks out.
Configuring Webhooks (Mandatory)
Webhooks enable real-time payment updates and significantly improve reliability.
Benefits of Webhooks:
- Instant payment status updates
- Orders complete even if the shopper closes the browser before returning to your store
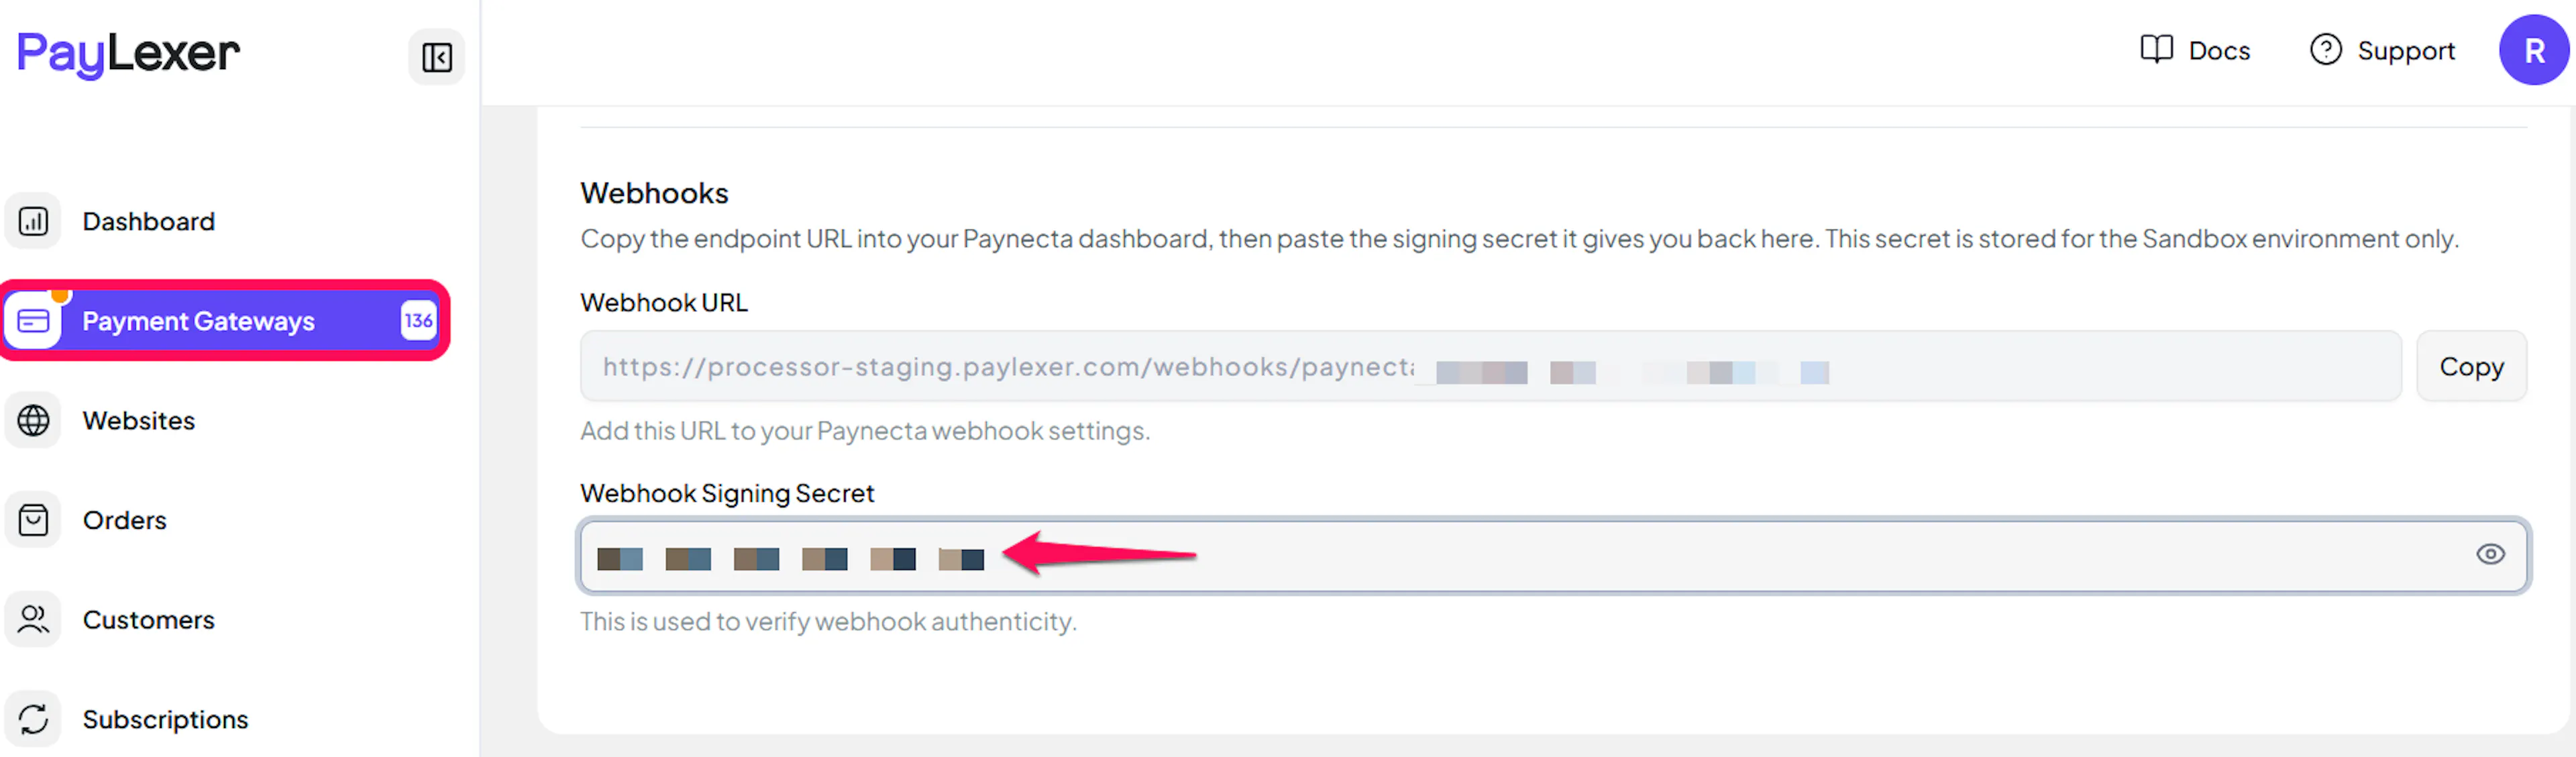
Copy your PayLexer webhook URL
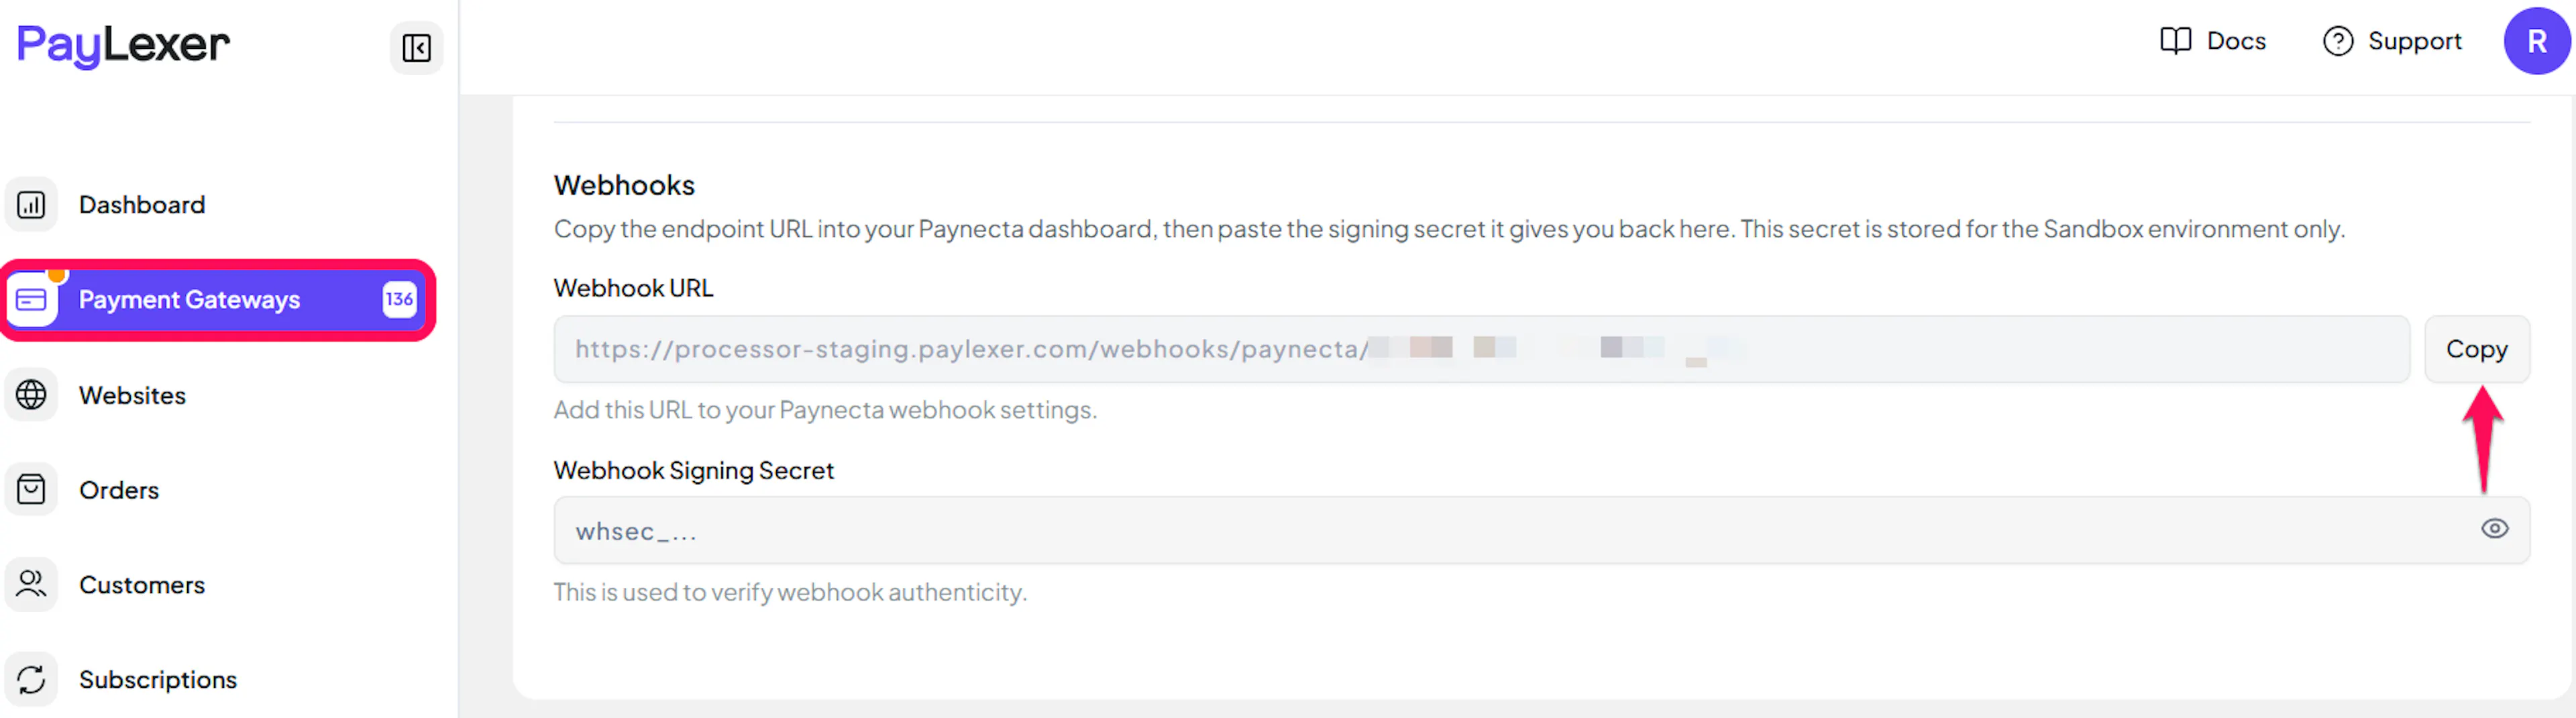
On the Payment Gateways → Paynecta page in PayLexer, copy the Webhook URL. It is generated for your account and shown as a read-only field.
Add the address in Paynecta
In your Paynecta dashboard, open Developers → Webhooks, add a new address and paste the PayLexer webhook URL.
Copy the signing secret
Paynecta shows a signing secret for the address. Copy it. It starts with whsec_.
If you later rotate the signing secret in Paynecta, the new one takes effect immediately. Paste the new secret into PayLexer straight away, or notifications fail their signature check and orders stay unpaid until PayLexer's background check catches up.
Add the signing secret to PayLexer
Back in PayLexer, paste the whsec_ value into the Webhook Signing Secret field for the environment you use and click Save Changes.
Integrate Paynecta to Your Website
If you have already added and configured your site, you can enable Paynecta in your existing setup.
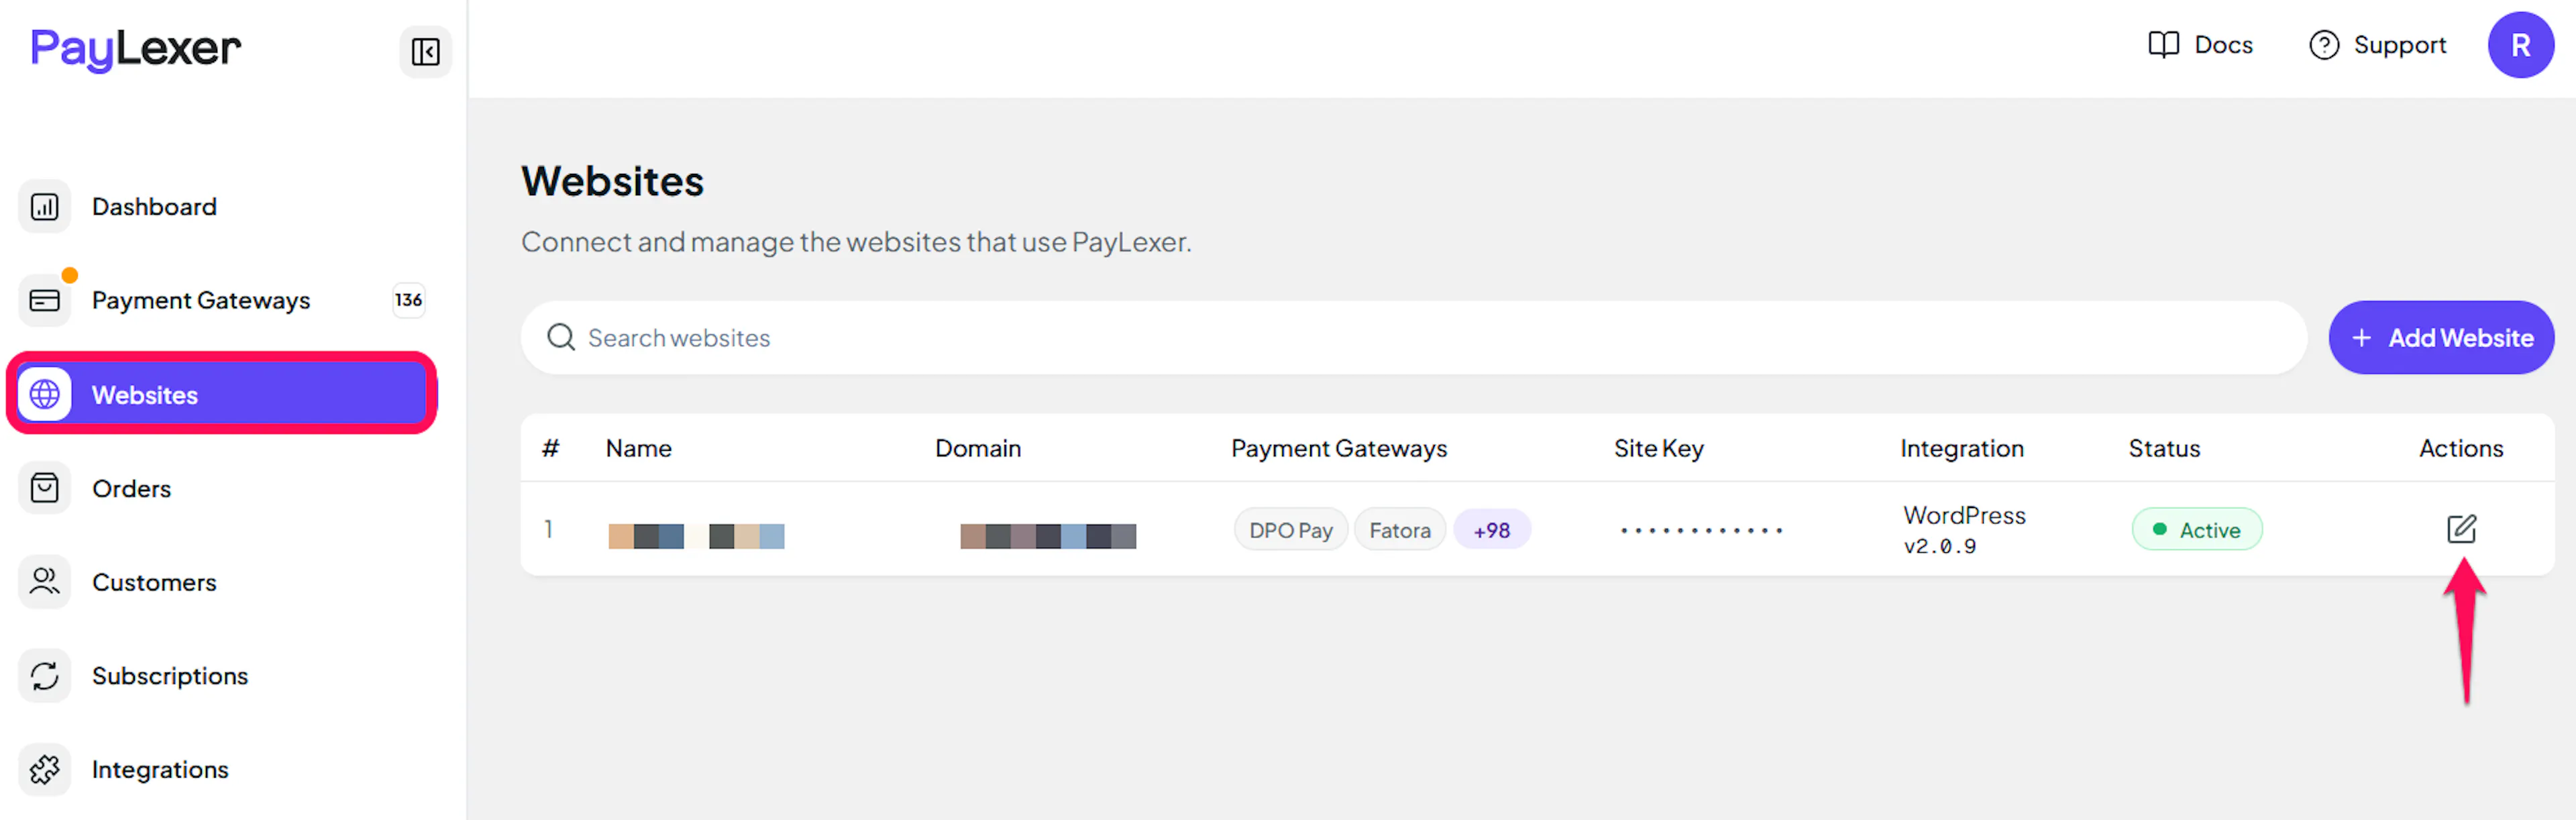
Go to Websites
Navigate to Websites in your PayLexer dashboard.
Open your website
Click your website's row (or the arrow at the end of it) to open its page.
Enable Paynecta
Open the Payment gateways tab, tick the checkbox for Paynecta, then click Save gateways.
If you haven't added a website yet, Continue to Add Your Website →
Troubleshooting
Best Practices
- Paynecta has no sandbox, so test with a small real payment (for example KES 10) before opening checkout to shoppers
- Use a dedicated TapFlow for your website that accepts any amount
- Add the webhook address and signing secret before taking payments, so orders complete in real time
- Keep your Secret Key and signing secret private, and replace them in Paynecta if you suspect they have been exposed
- Reconcile your PayLexer orders against the Paynecta dashboard periodically
FAQs
Still Have Questions?
- Paynecta Support:
- Support Email: hello@paynecta.co.ke
- Contact Paynecta: Paynecta Support
- PayLexer Support: Contact Support