Test Transactions & Platform Integration
Validate your end-to-end payment integration with a full test transaction before going live.
Overview
This guide walks you through testing your payment integration end-to-end before accepting real payments. The steps apply to all supported platforms.
The example below uses WP Travel Engine with Stripe - but the testing logic is identical regardless of which platform or gateway you are using.
Before You Start
Make sure you have completed all prior steps:
-
Configured Payment Gateway – Choose & configure a gateway →
-
PayLexer Account – Create your account →
-
Admin access to your WordPress site
-
Platform Integration Ready – Choose & complete platform integration →
Setup Journey
-
Getting Started – Complete setup guide →
-
Configure Payment Gateway – Choose & configure gateway →
-
Add Your Website – Add your site →
-
Platform Integration – Choose & connect your platform →
-
Test Transactions & Platform Integration – You're here! ✓
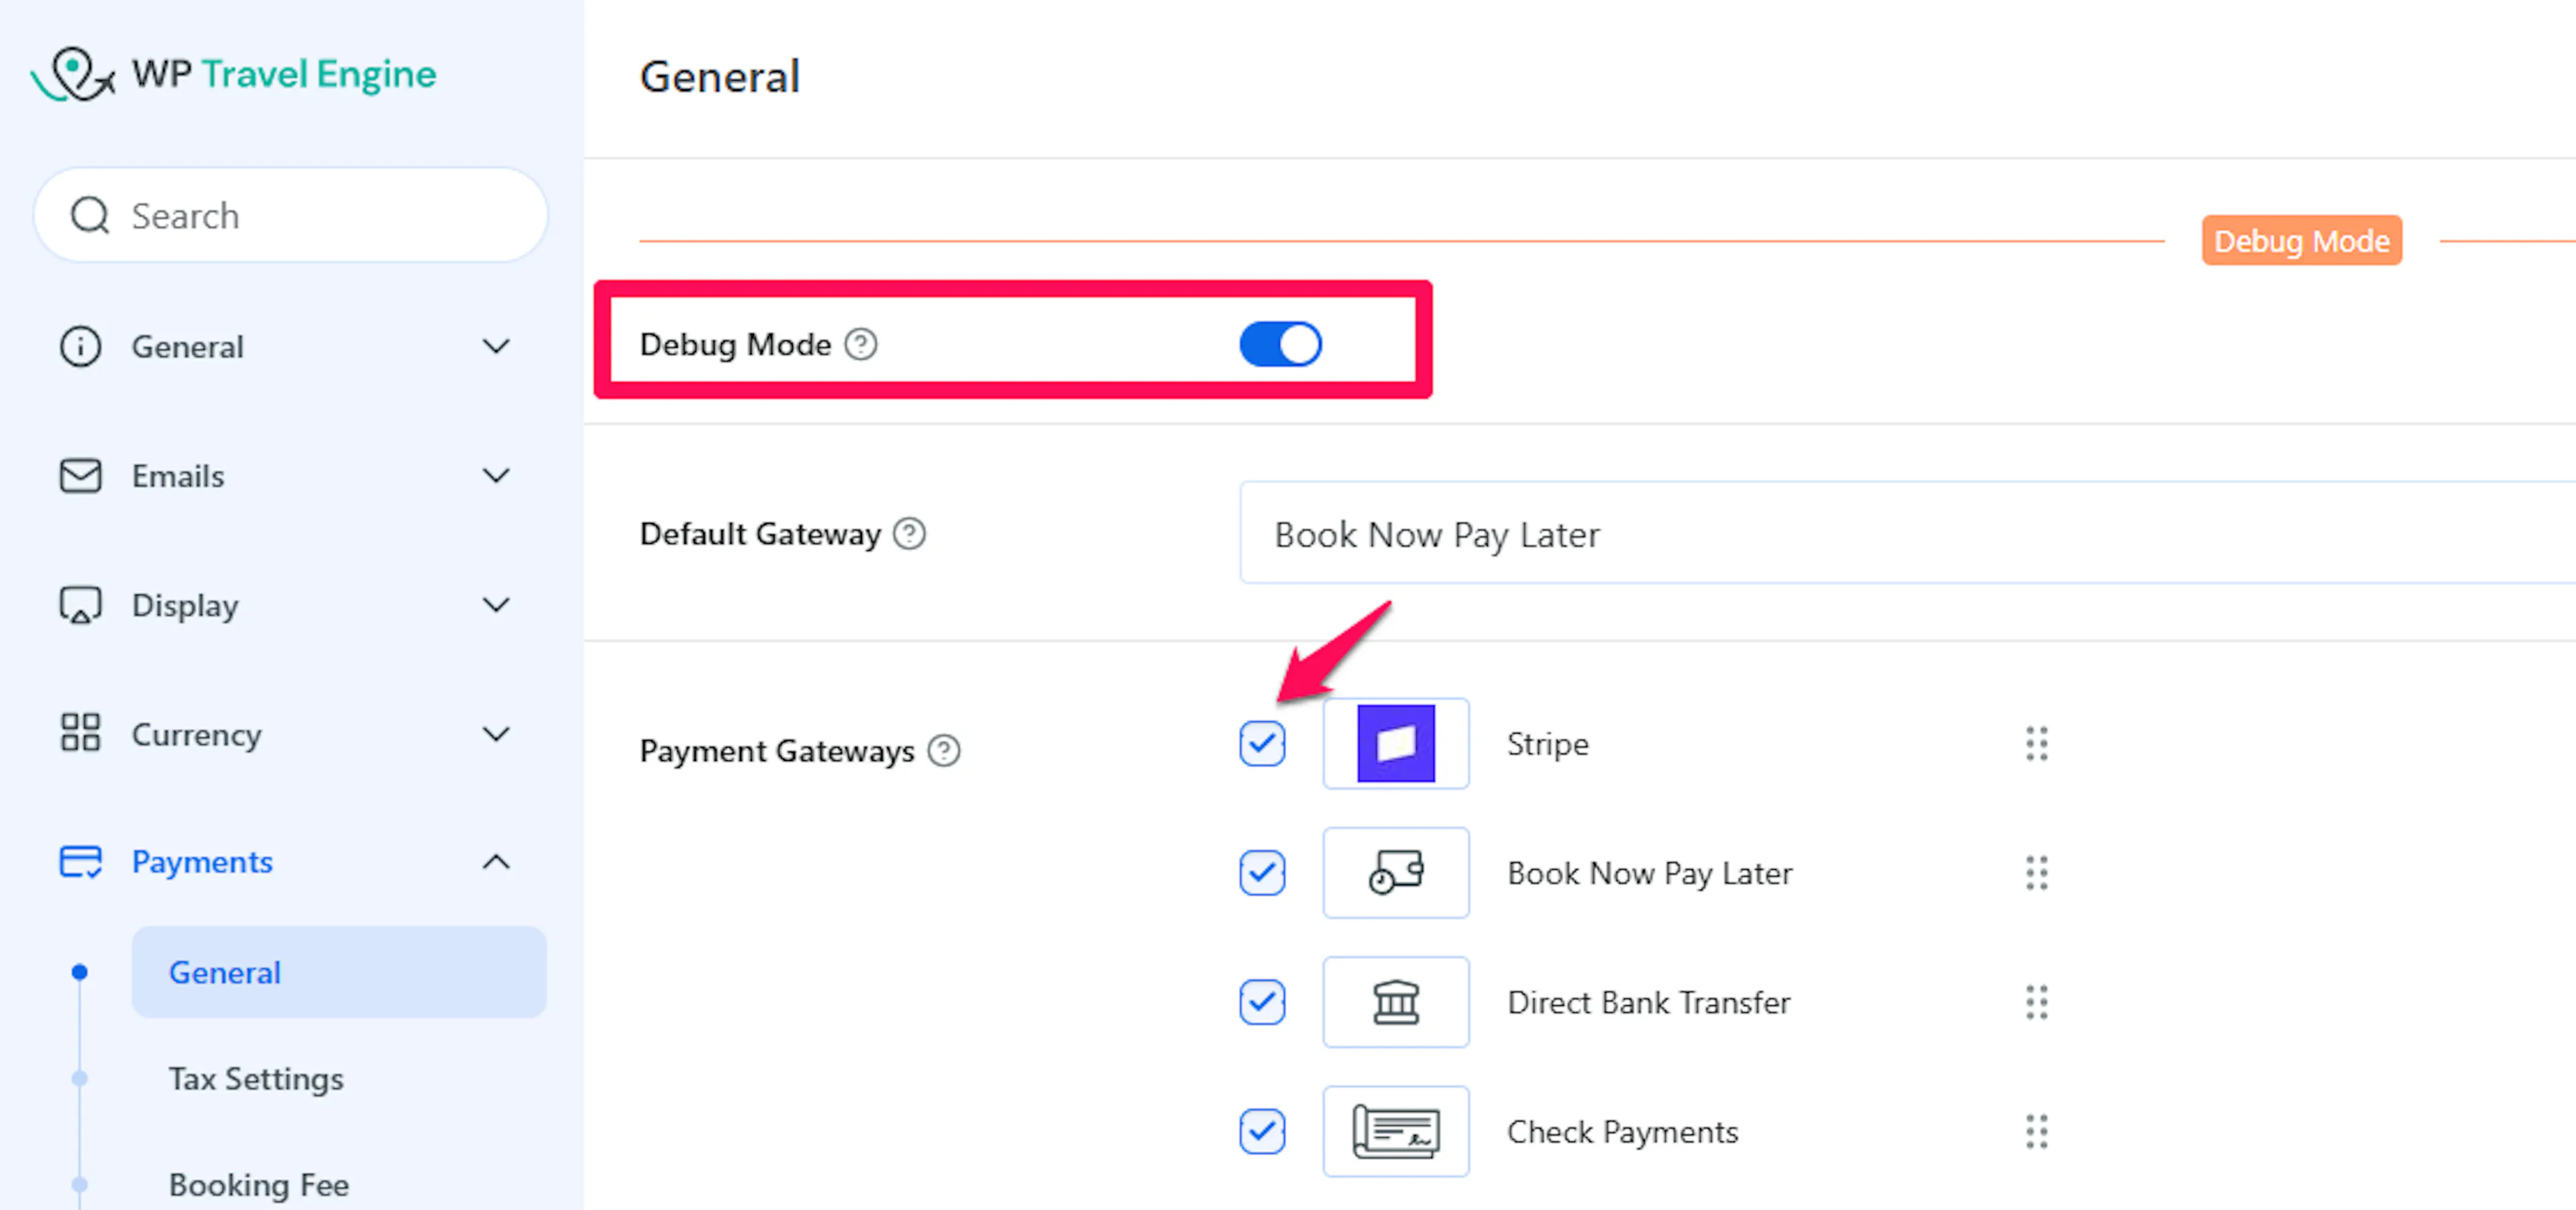
Step 1: Enable Test / Debug Mode
Turn on Test or Debug Mode
Enable Test Mode or Debug Mode in your integration platform.
For example, in WP Travel Engine: go to WordPress Dashboard → WP Travel Engine → Settings → Payments → General, ensure your payment gateway (e.g., Stripe) is checked, and click Save Changes.
This ensures:
-
Test credentials are used from PayLexer
-
No real money is processed
How to enable or disable Test / Debug Mode depends on your platform. Refer to your platform-specific integration guide for the exact steps.
Step 2: Complete a Test Transaction
Visit your website frontend
Open your website in a browser and navigate to a product, trip, or service listing.
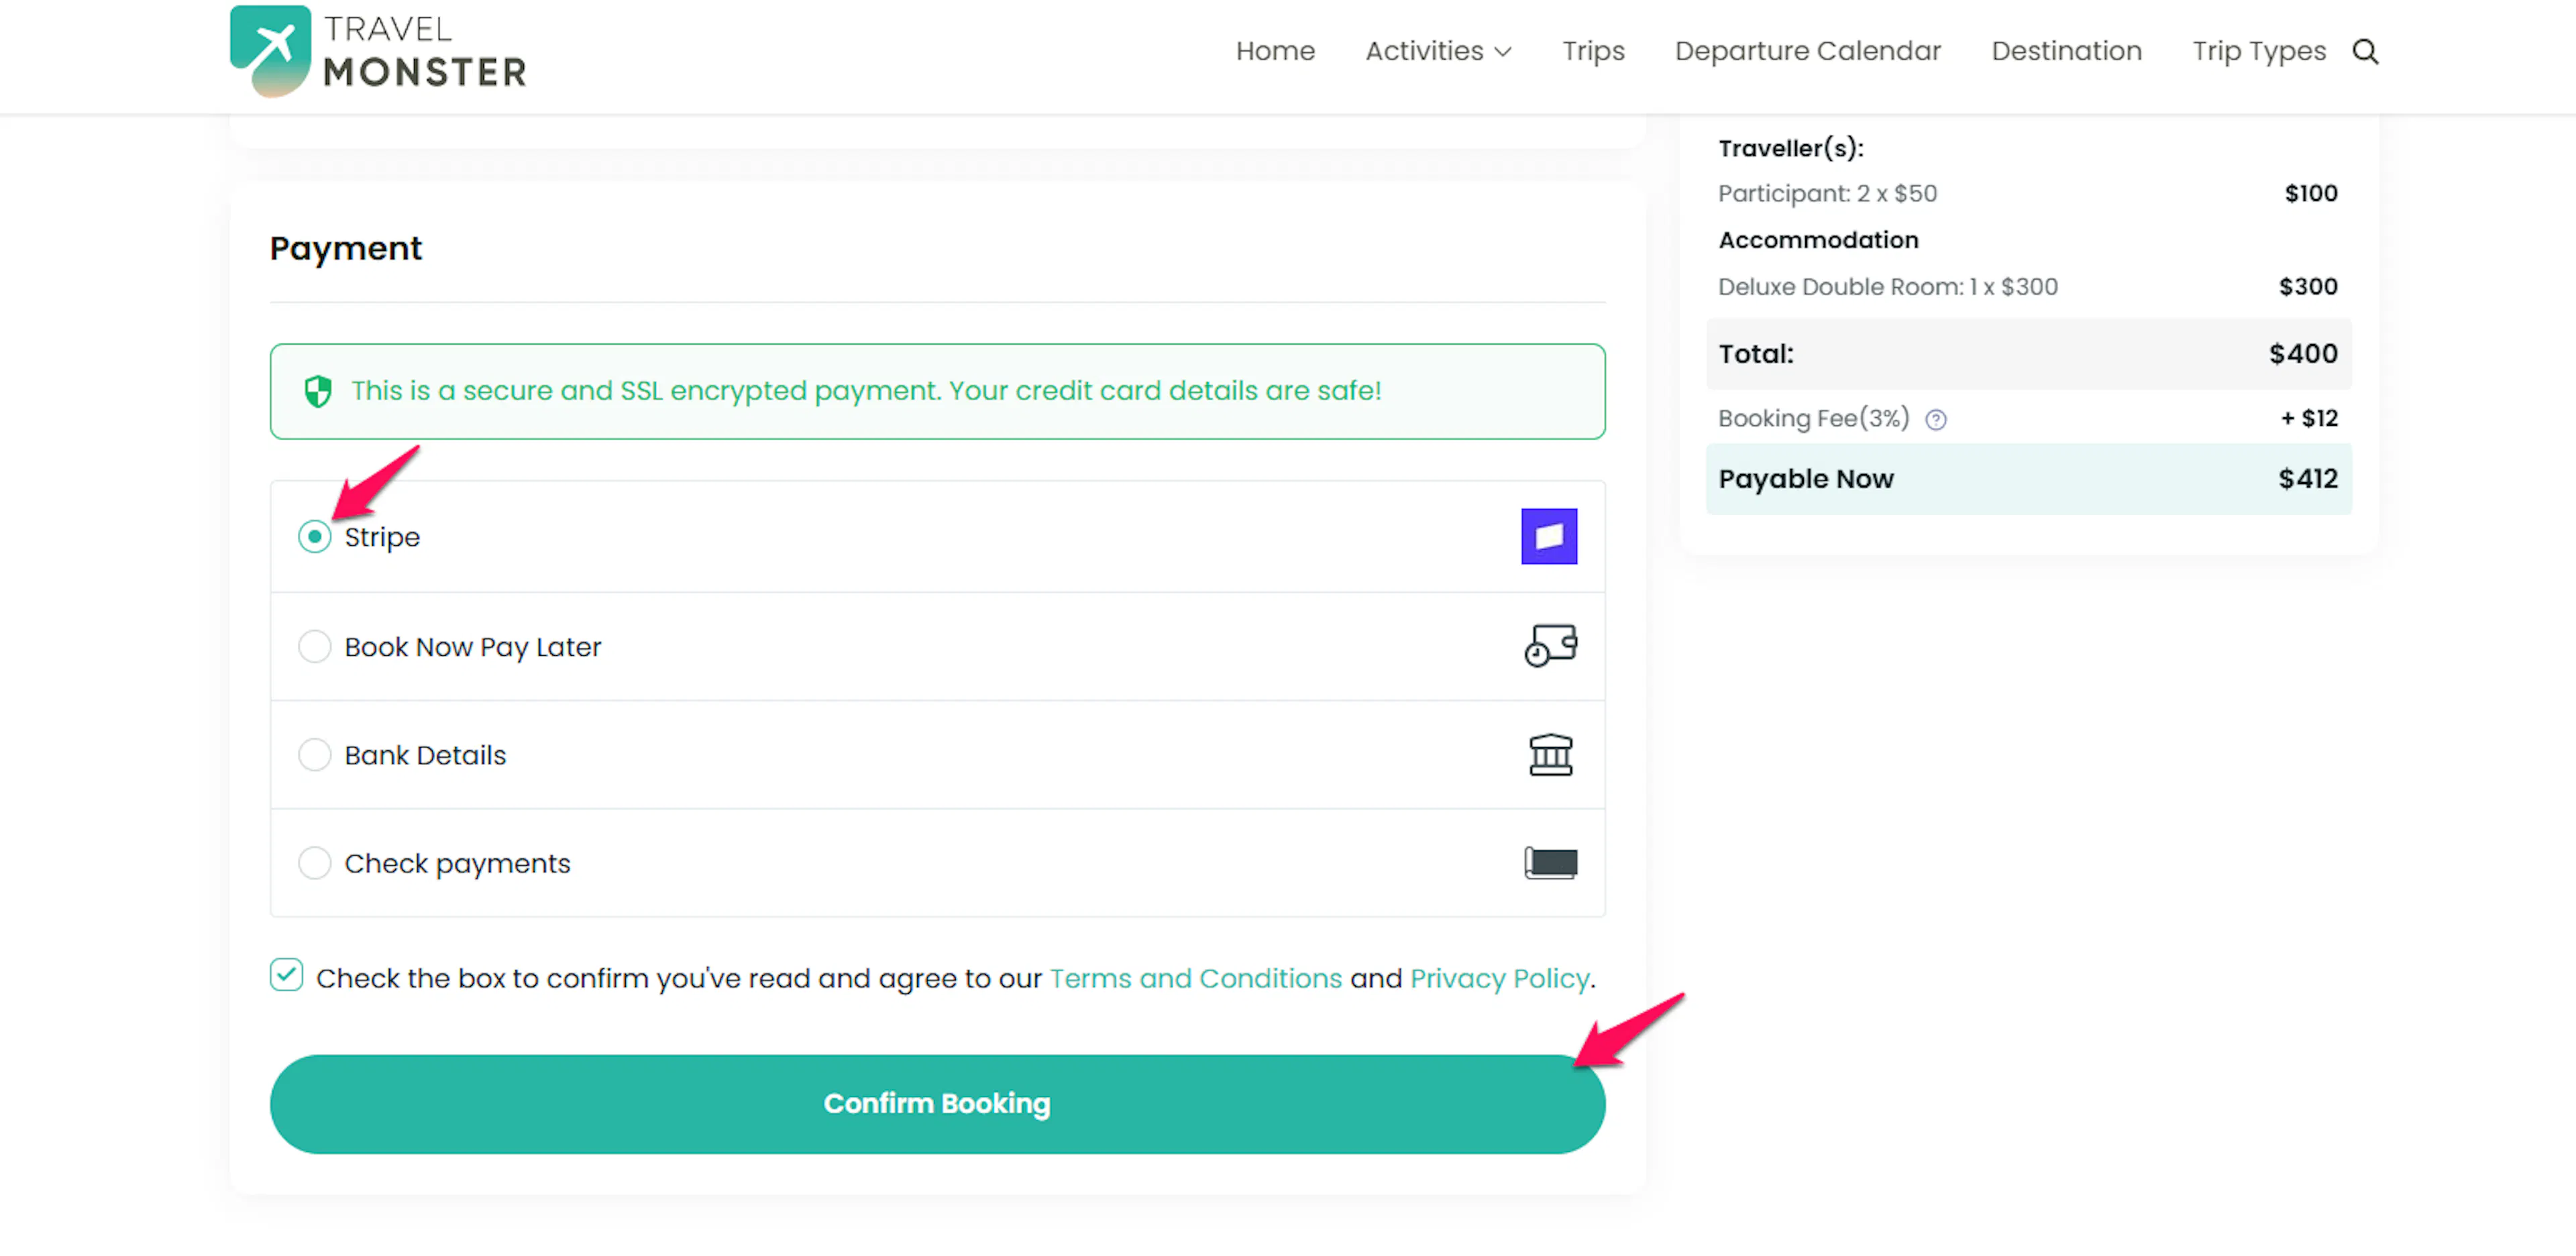
Proceed to checkout
Select a product or service and proceed to the checkout page.
Select your payment gateway
In the payment section, select your configured payment gateway (e.g., Stripe) and enter test customer details.
Enter test payment details
Use the test card or payment details provided by your gateway. Each gateway publishes official test credentials:
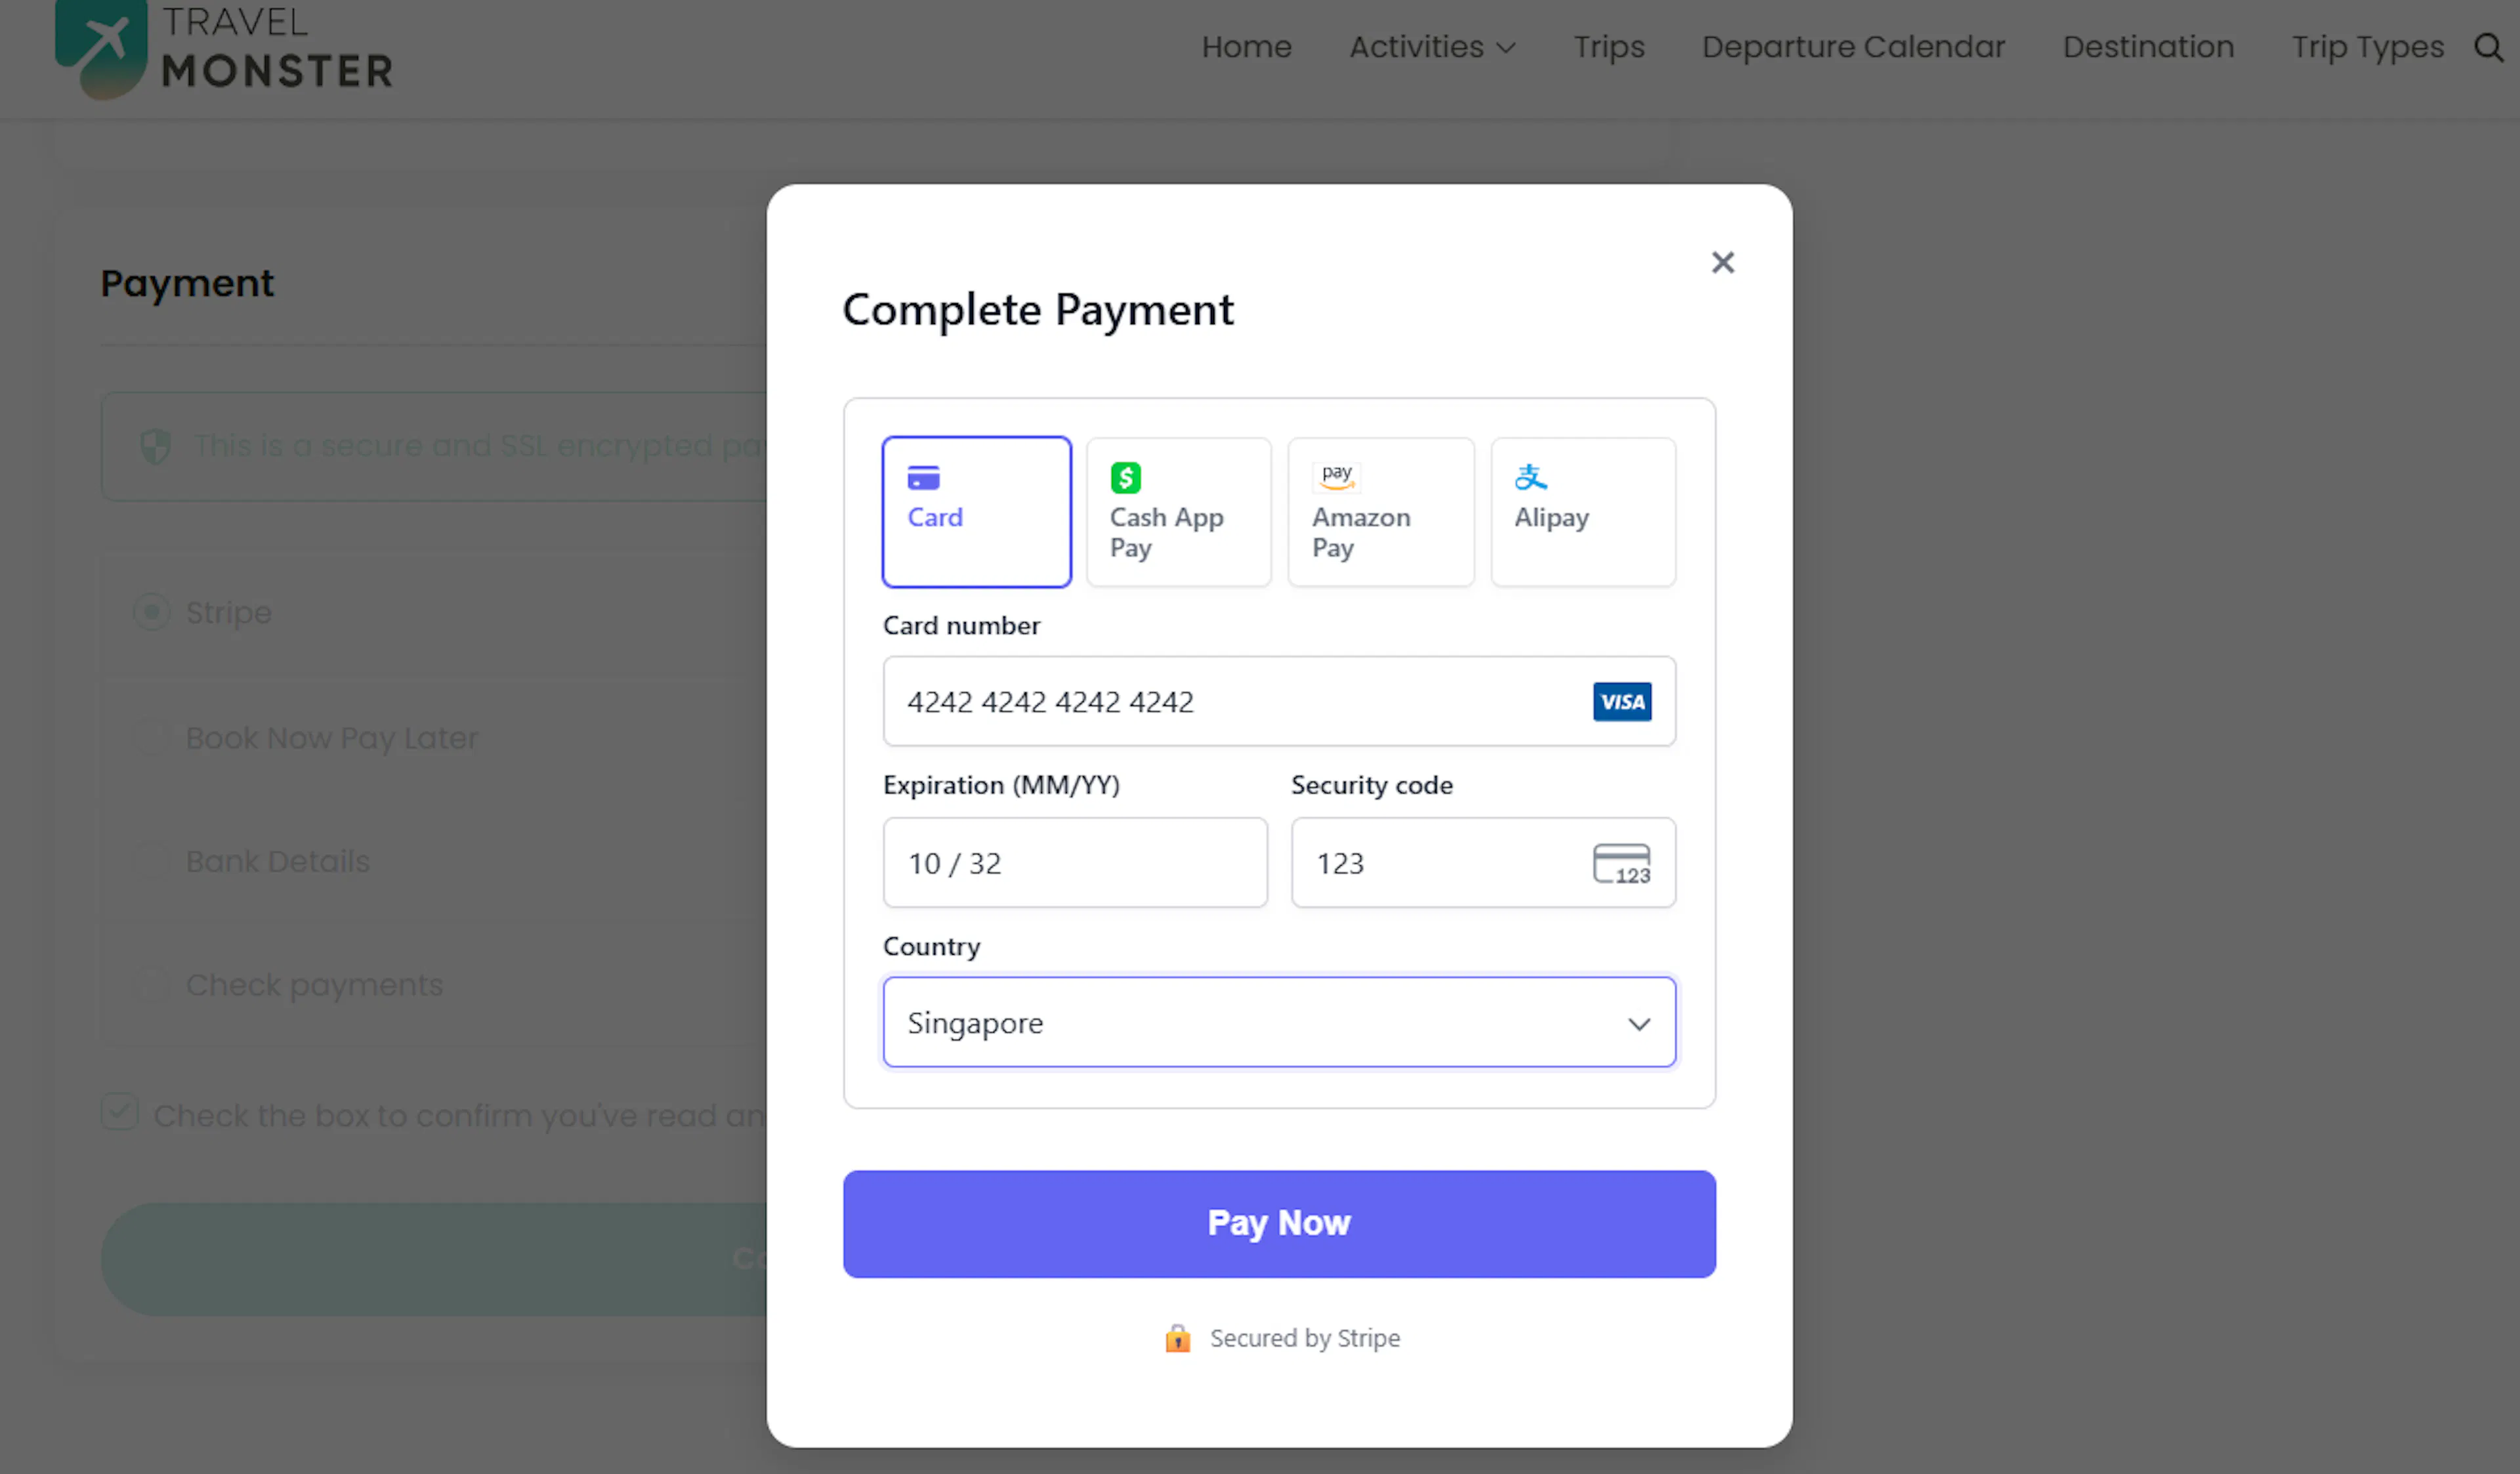
Use your gateway's official test card numbers - never use real card details in Test Mode.
Complete the checkout
Submit the payment and wait for the confirmation page.
Expected results:
-
Checkout completes successfully
-
An order is created in your platform (e.g., a booking in WP Travel Engine)
-
The transaction appears in PayLexer with a Success status

If you successfully complete the checkout process, the Stripe integration is successfully integrated. You can also check WP Travel Engine bookings to confirm the transaction.
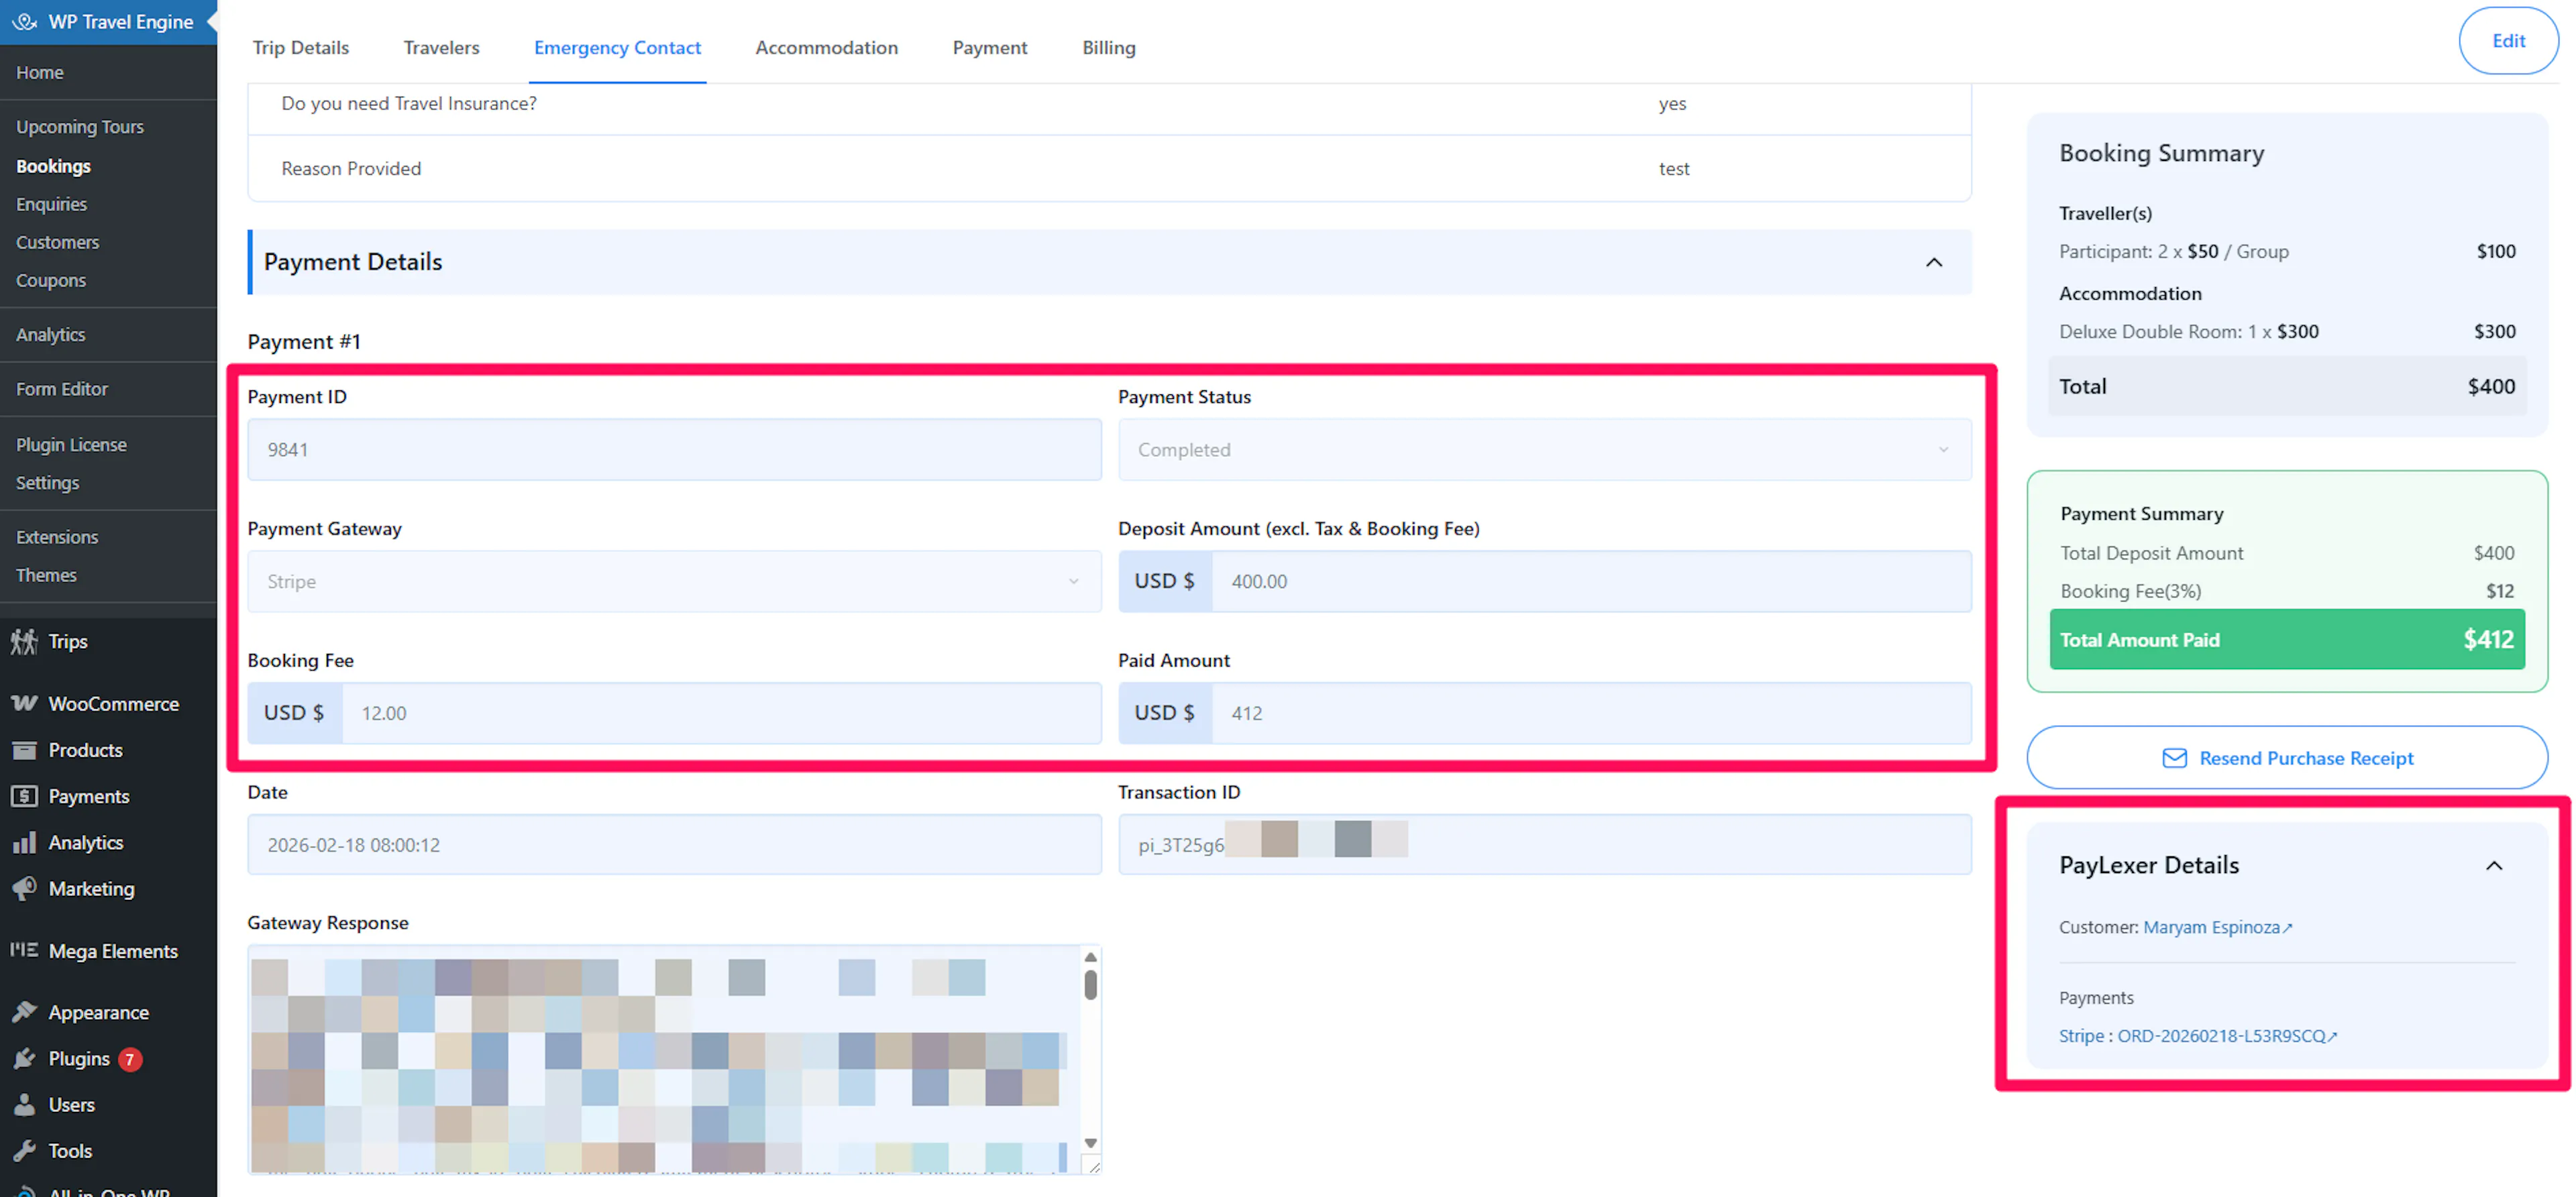
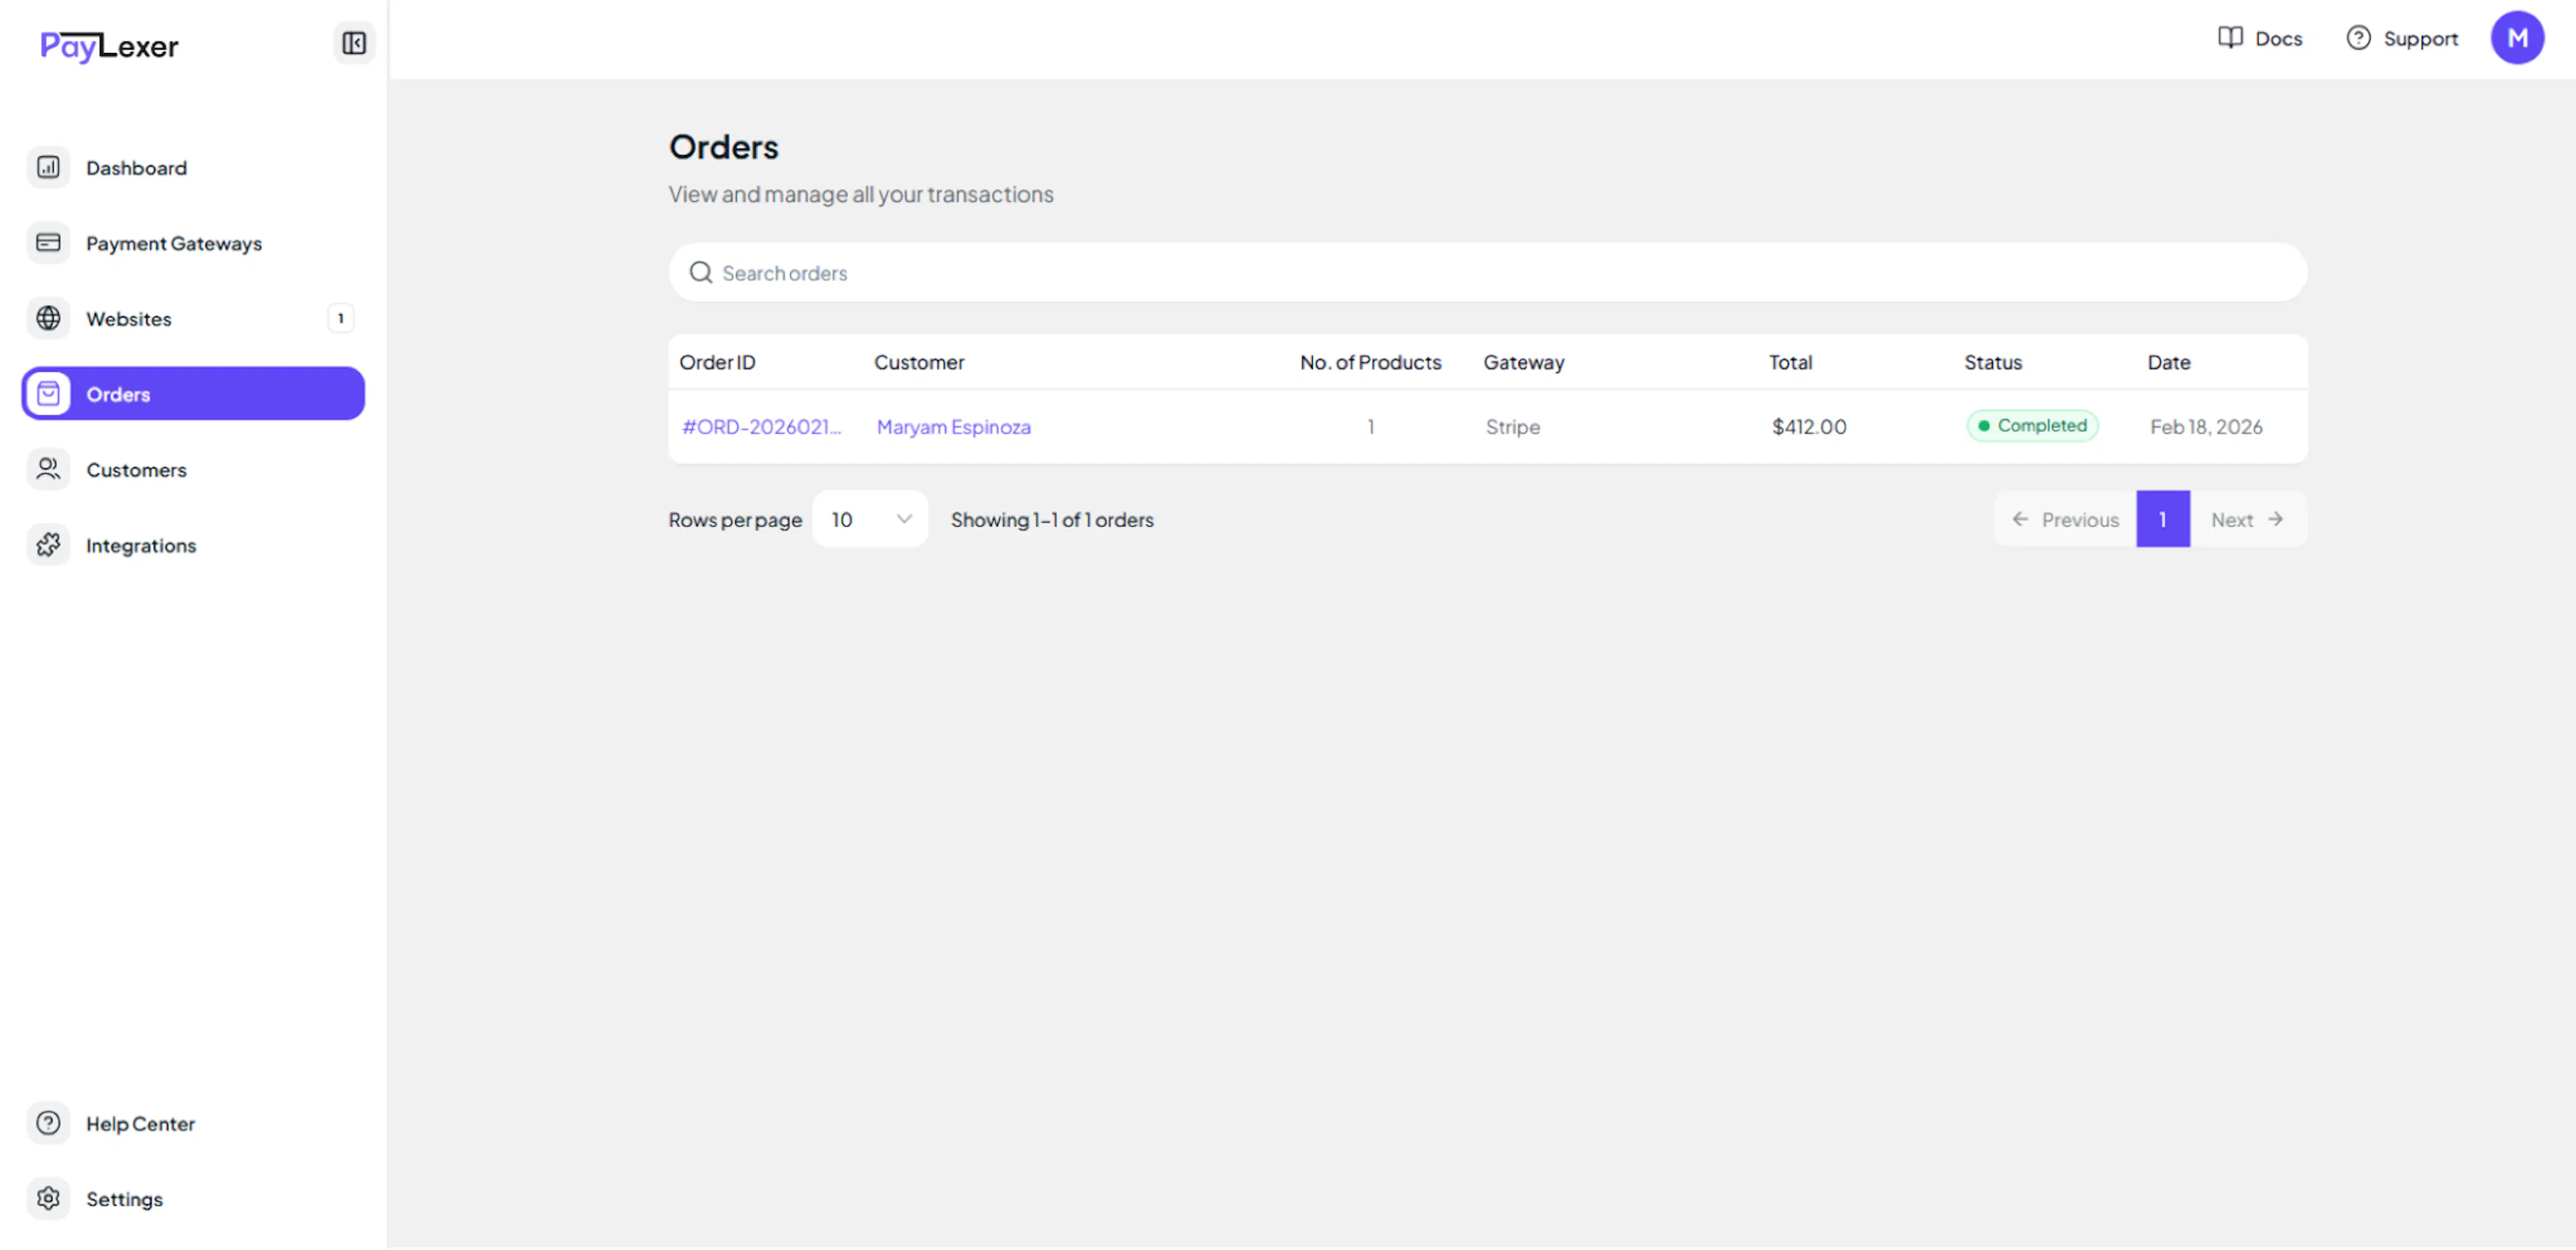
Step 3: Verify in PayLexer
Check PayLexer Orders
Log in to your PayLexer dashboard and go to Orders. Confirm the test order appears with:
-
Correct amount
-
Correct payment gateway
-
Status: Success

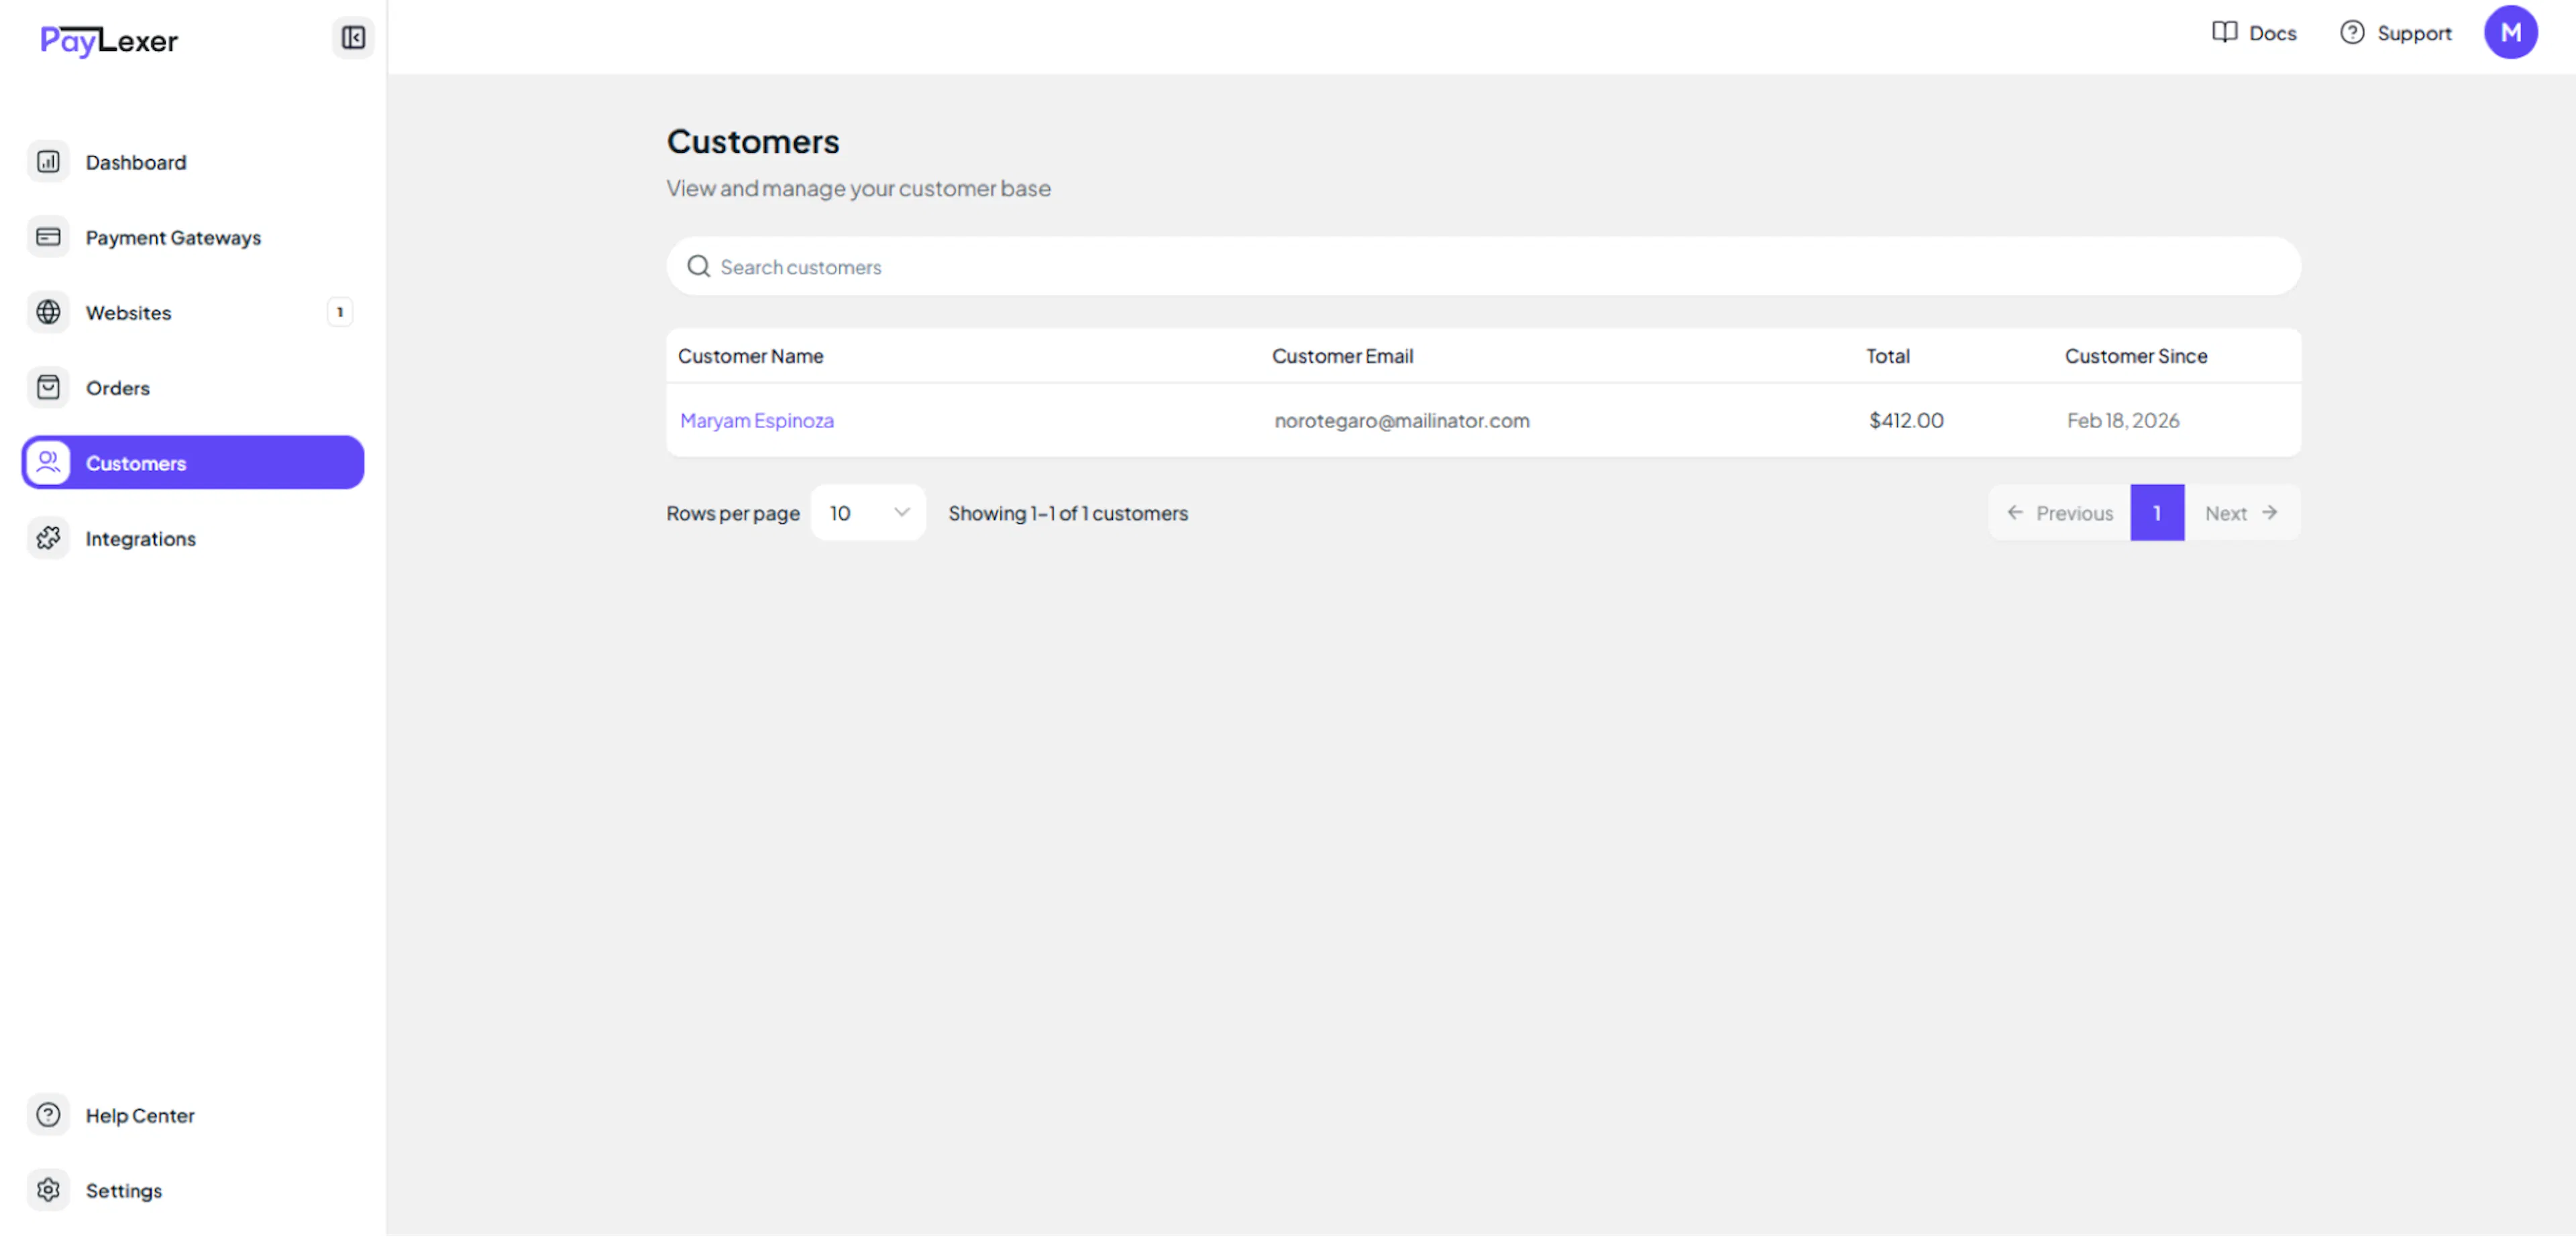
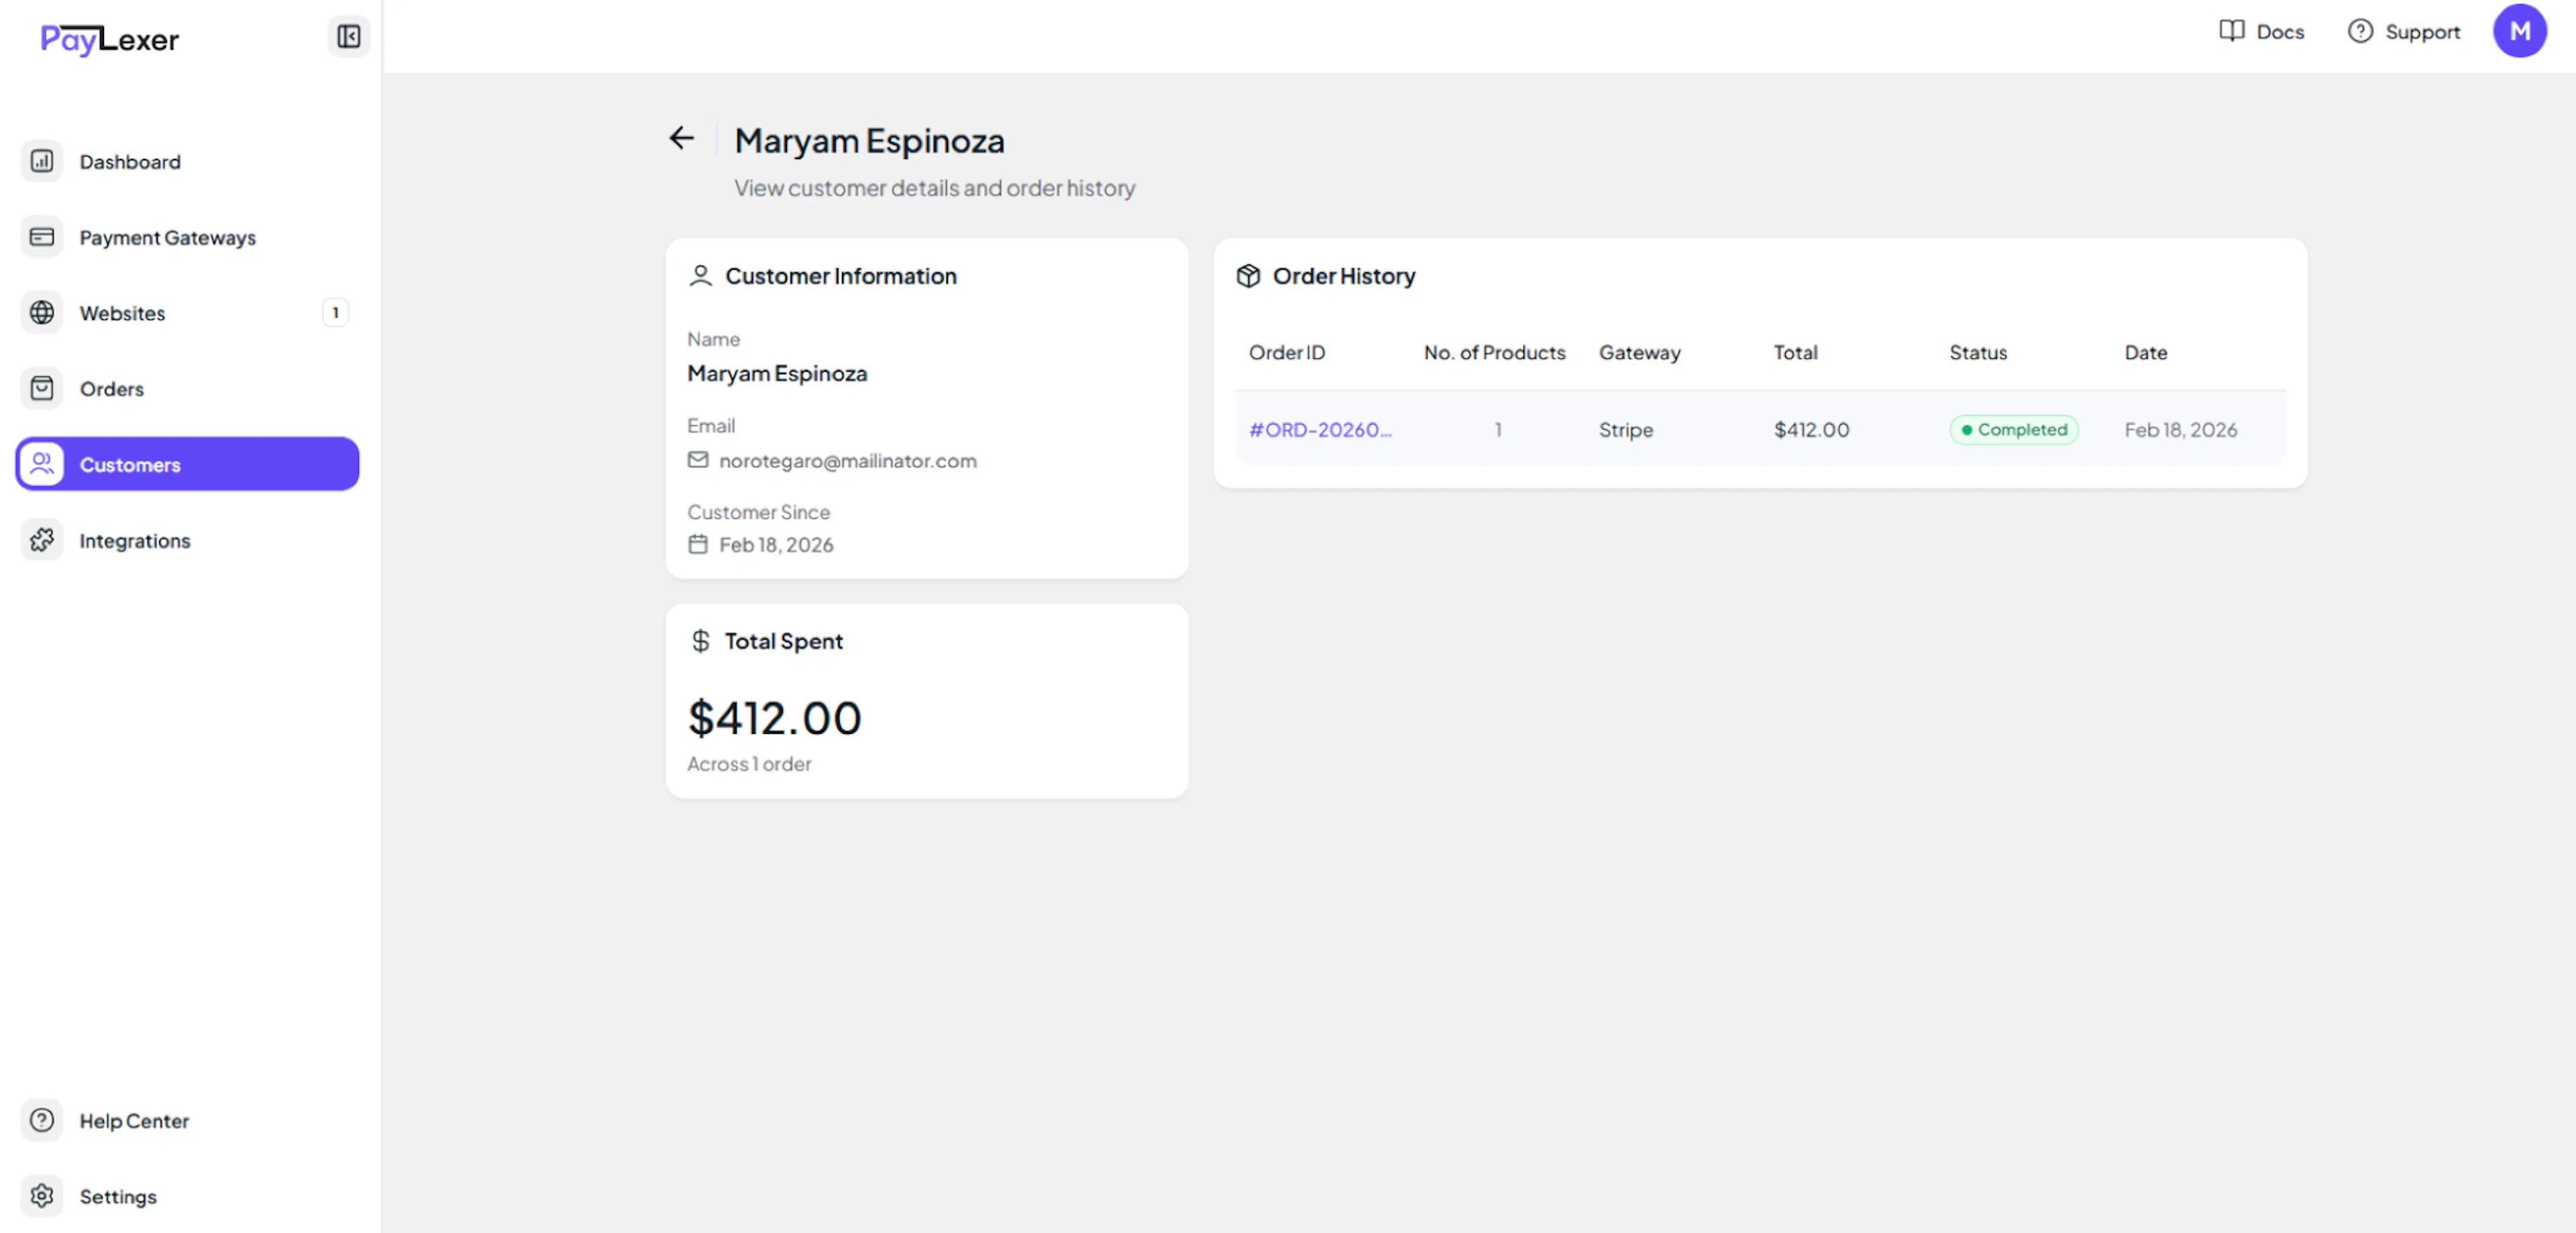
Check the Customer record
Navigate to Customers in PayLexer and confirm the customer record was created correctly.
Common Notes on Transaction IDs
Different systems generate different IDs for the same payment - this is expected behaviour:
| System | ID generated |
|---|---|
| Your platform (e.g., WP Travel Engine) | Booking ID / Order ID |
| PayLexer | PayLexer Order ID |
| Payment gateway (e.g., Stripe) | Transaction ID / Charge ID |
All three IDs are linked to the same payment. Mismatched IDs are not an error.
Go Live - Start Accepting Real Payments
Once you have completed successful test transactions:
Disable Test / Debug Mode
Turn OFF Test Mode or Debug Mode in your platform.
Refer to your platform-specific integration guide for exact steps on disabling Test Mode.
Confirm live credentials are saved
Ensure your Live / Production credentials are saved in PayLexer's Payment Gateway Configuration. When Test Mode is OFF, PayLexer automatically switches to Live credentials.
Run one real transaction
Process one small real payment to confirm the live integration is working correctly before opening up to customers.
Your integration is now live and ready to accept real customer payments.
Troubleshooting
Best Practices
-
Complete at least 2–3 successful test transactions before going live
-
Test with different payment methods if your gateway supports multiple (e.g., card and mobile money)
-
Verify webhooks are working by checking that order statuses update automatically after payment
-
Confirm email notifications are being sent to customers
-
Review that the booking confirmation page looks correct for customers
Still Have Questions?
- PayLexer Support: Contact Support