Add Your Website to PayLexer
Connect your website to PayLexer to enable payment gateway processing before going live or running test transactions.
Overview
Adding your website to PayLexer connects a payment gateway (e.g., Stripe) to your platform (e.g., WP Travel Engine) so you can accept payments. This step must be completed before running test transactions or going live.
Before You Start
Make sure you have:
-
Configured Payment Gateway – Choose & configure a gateway →
-
PayLexer Account – Create your account →
-
Admin access to your website
-
Your website URL ready (e.g.,
https://yourwebsite.com)
Setup Journey
Haven't configured PayLexer yet? Follow these steps in order:
-
Getting Started – Complete setup guide →
-
Configure Payment Gateway – Choose & configure gateway →
-
Add Your Website – You're here! ✓
-
Platform Integration – Choose & connect your platform →
-
Test Transactions & Platform Integration – Verify everything works →
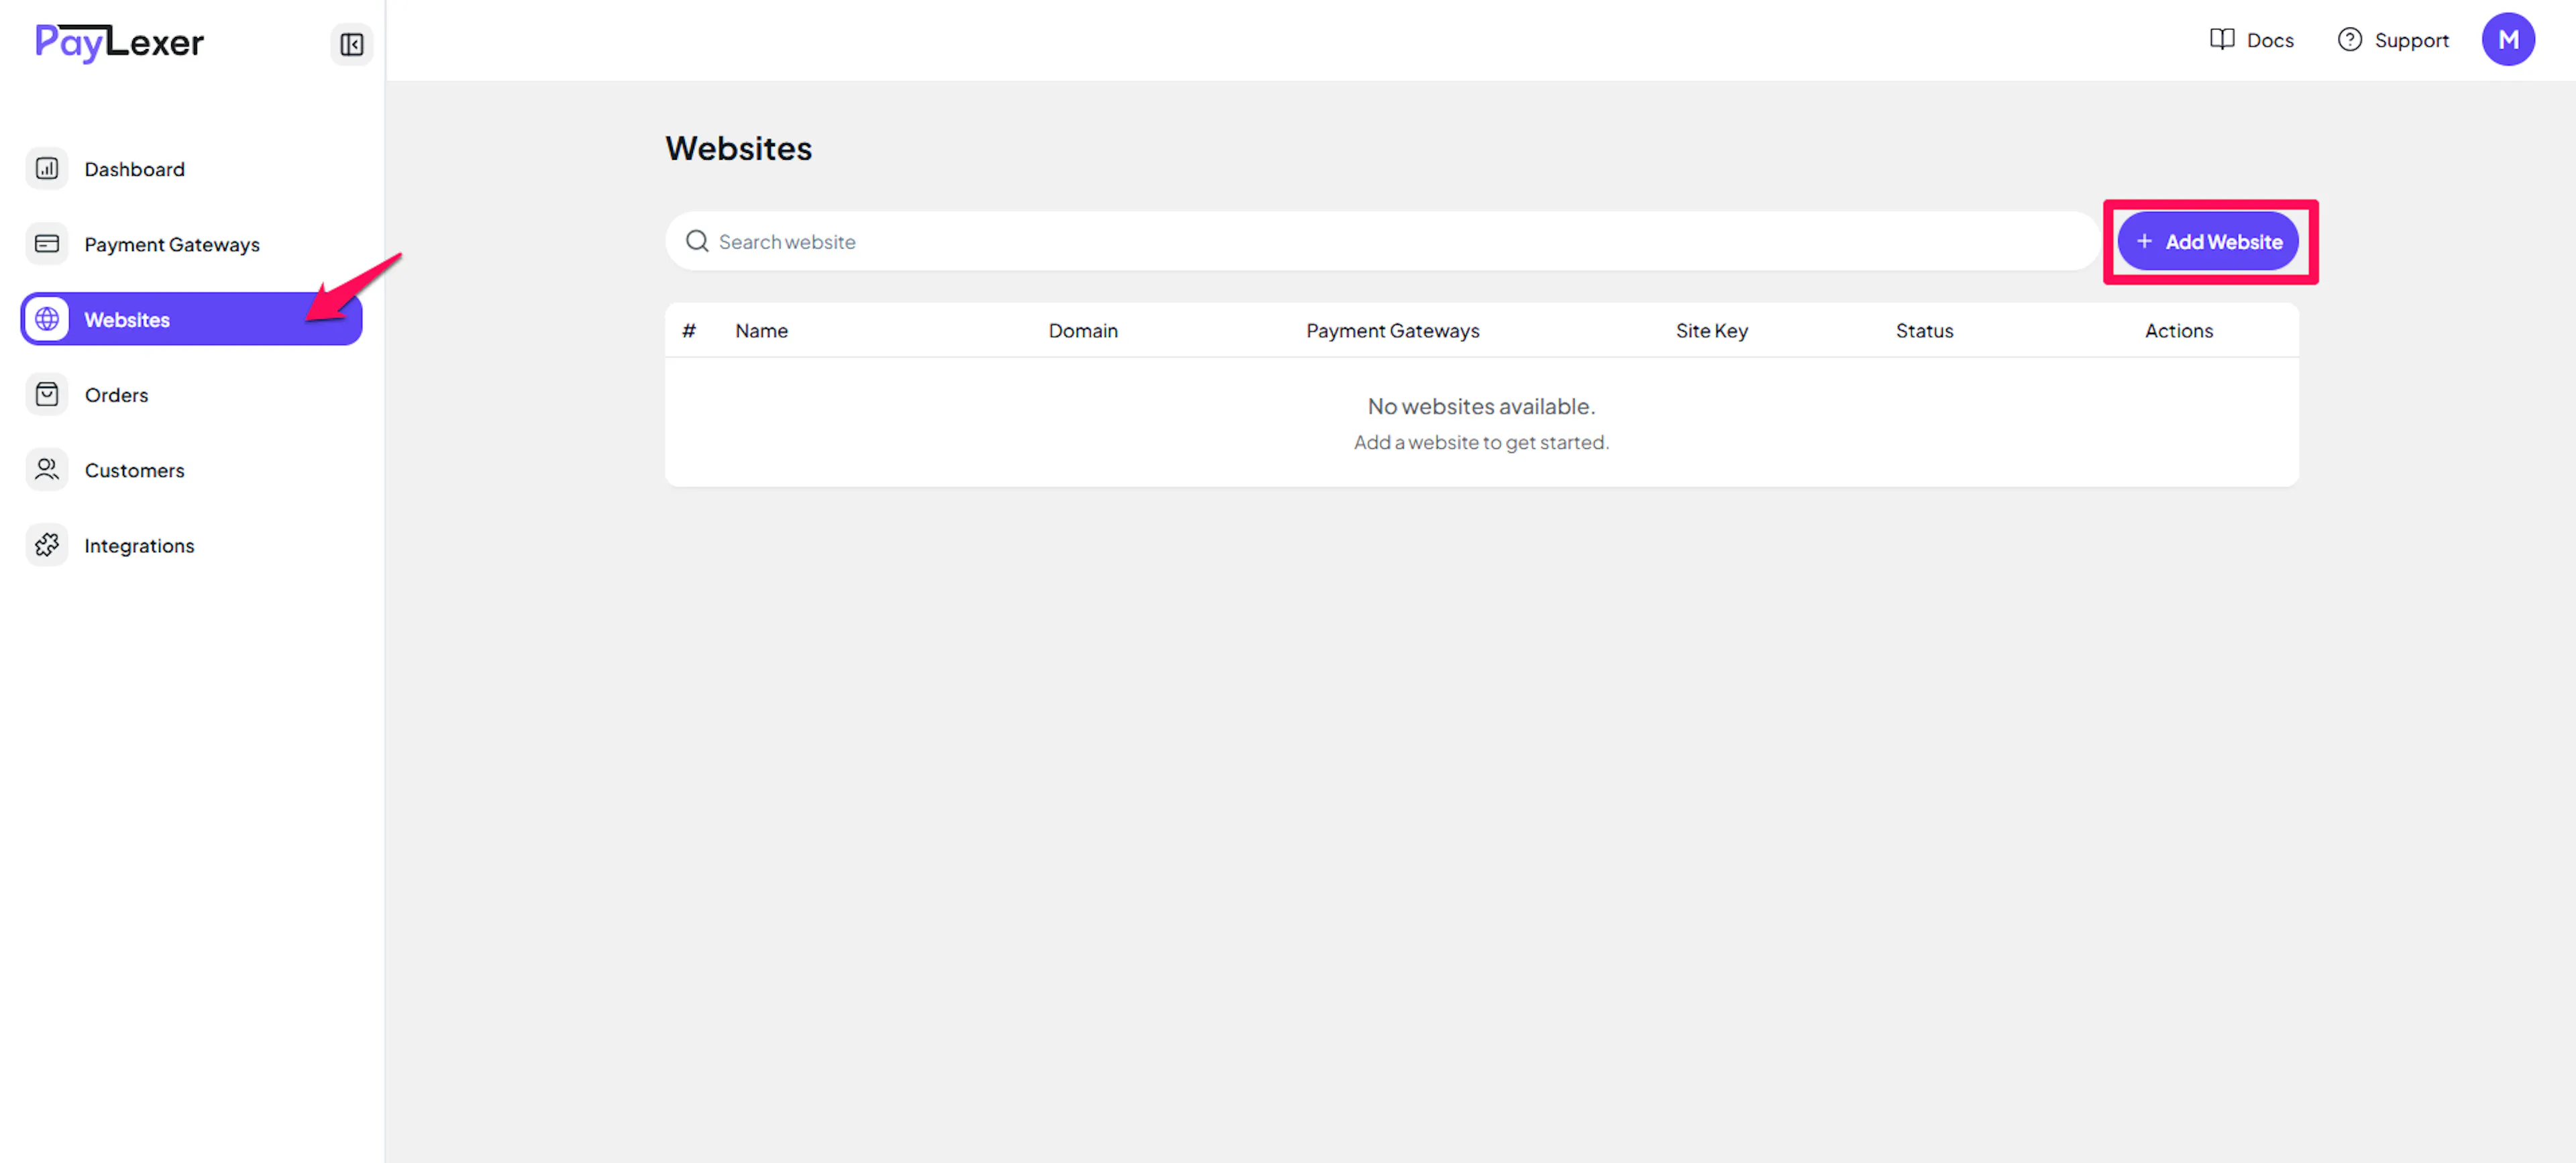
Step 1: Add Your Website to PayLexer
Open Websites
Go to Websites in your PayLexer dashboard and click Add Website.
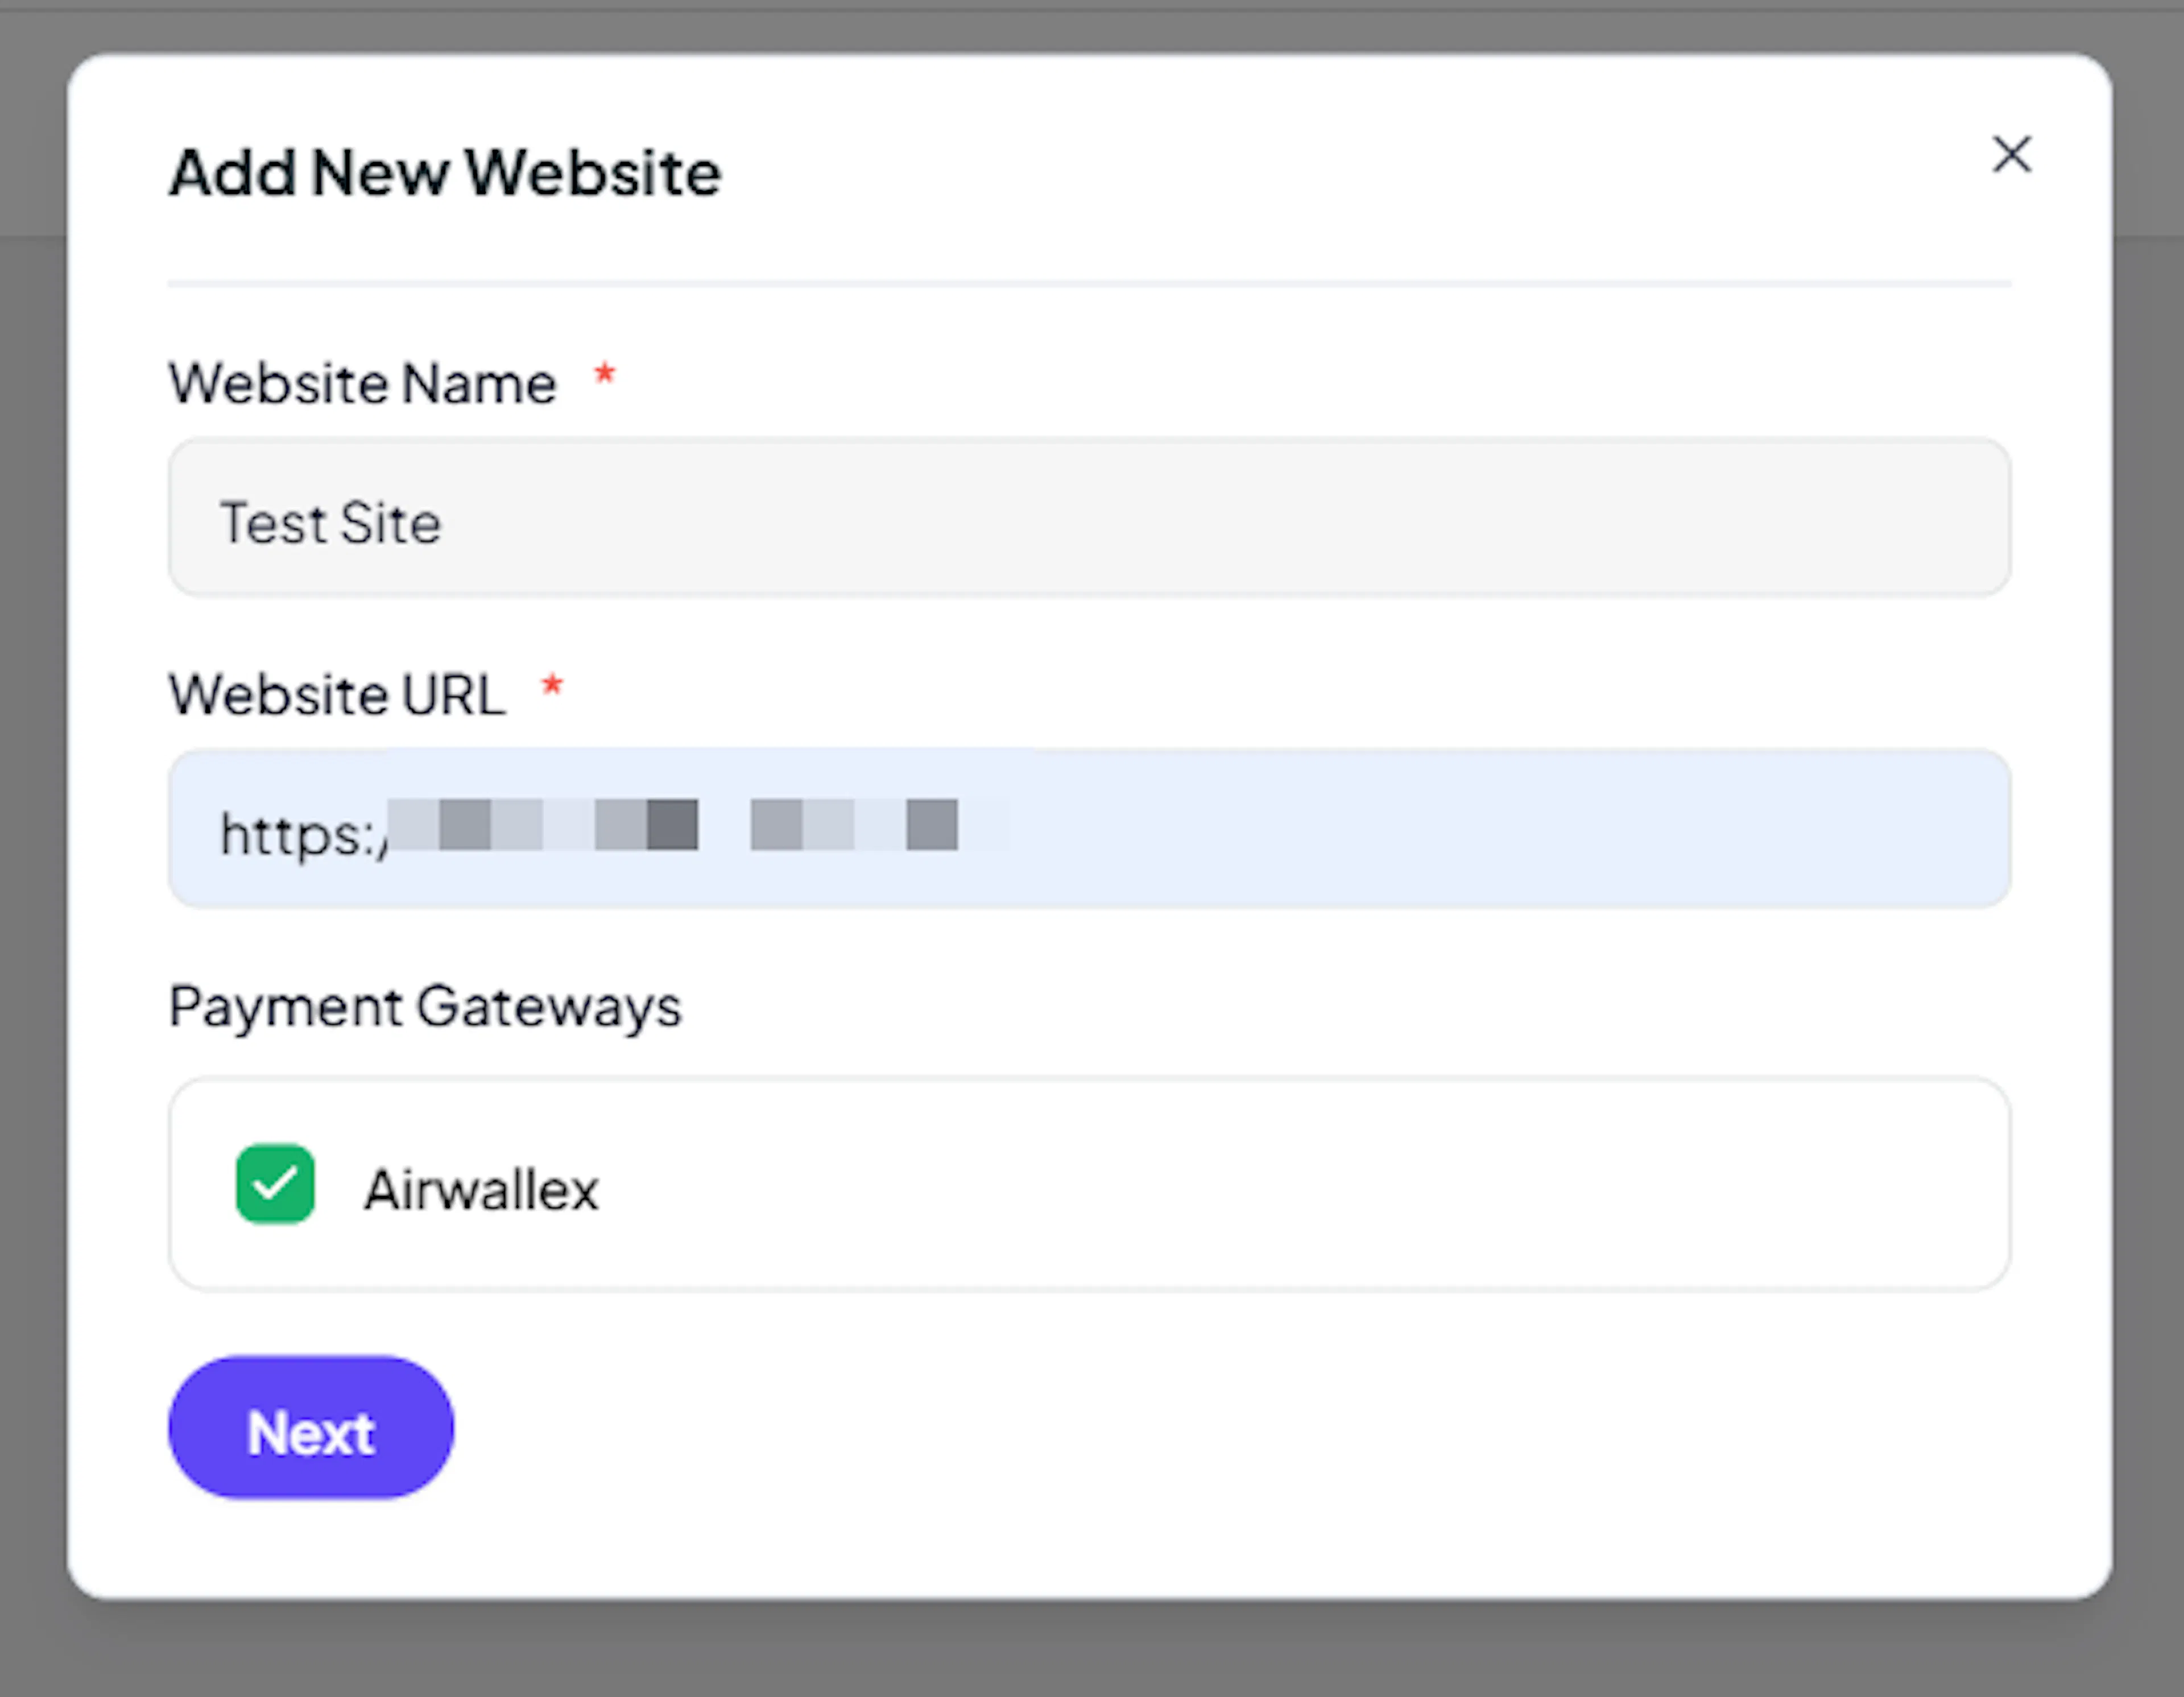
Enter website details
Fill in the following fields:
-
Website Name – A friendly name for reference
-
Website URL – The full URL of your site (e.g.,
https://yourwebsite.com) -
Payment Gateway(s) – Select the gateway(s) you have already configured
Click Next.
Choose your platform and copy credentials
Select WordPress as your platform. PayLexer will generate two credentials:
-
Client ID
-
Site Key
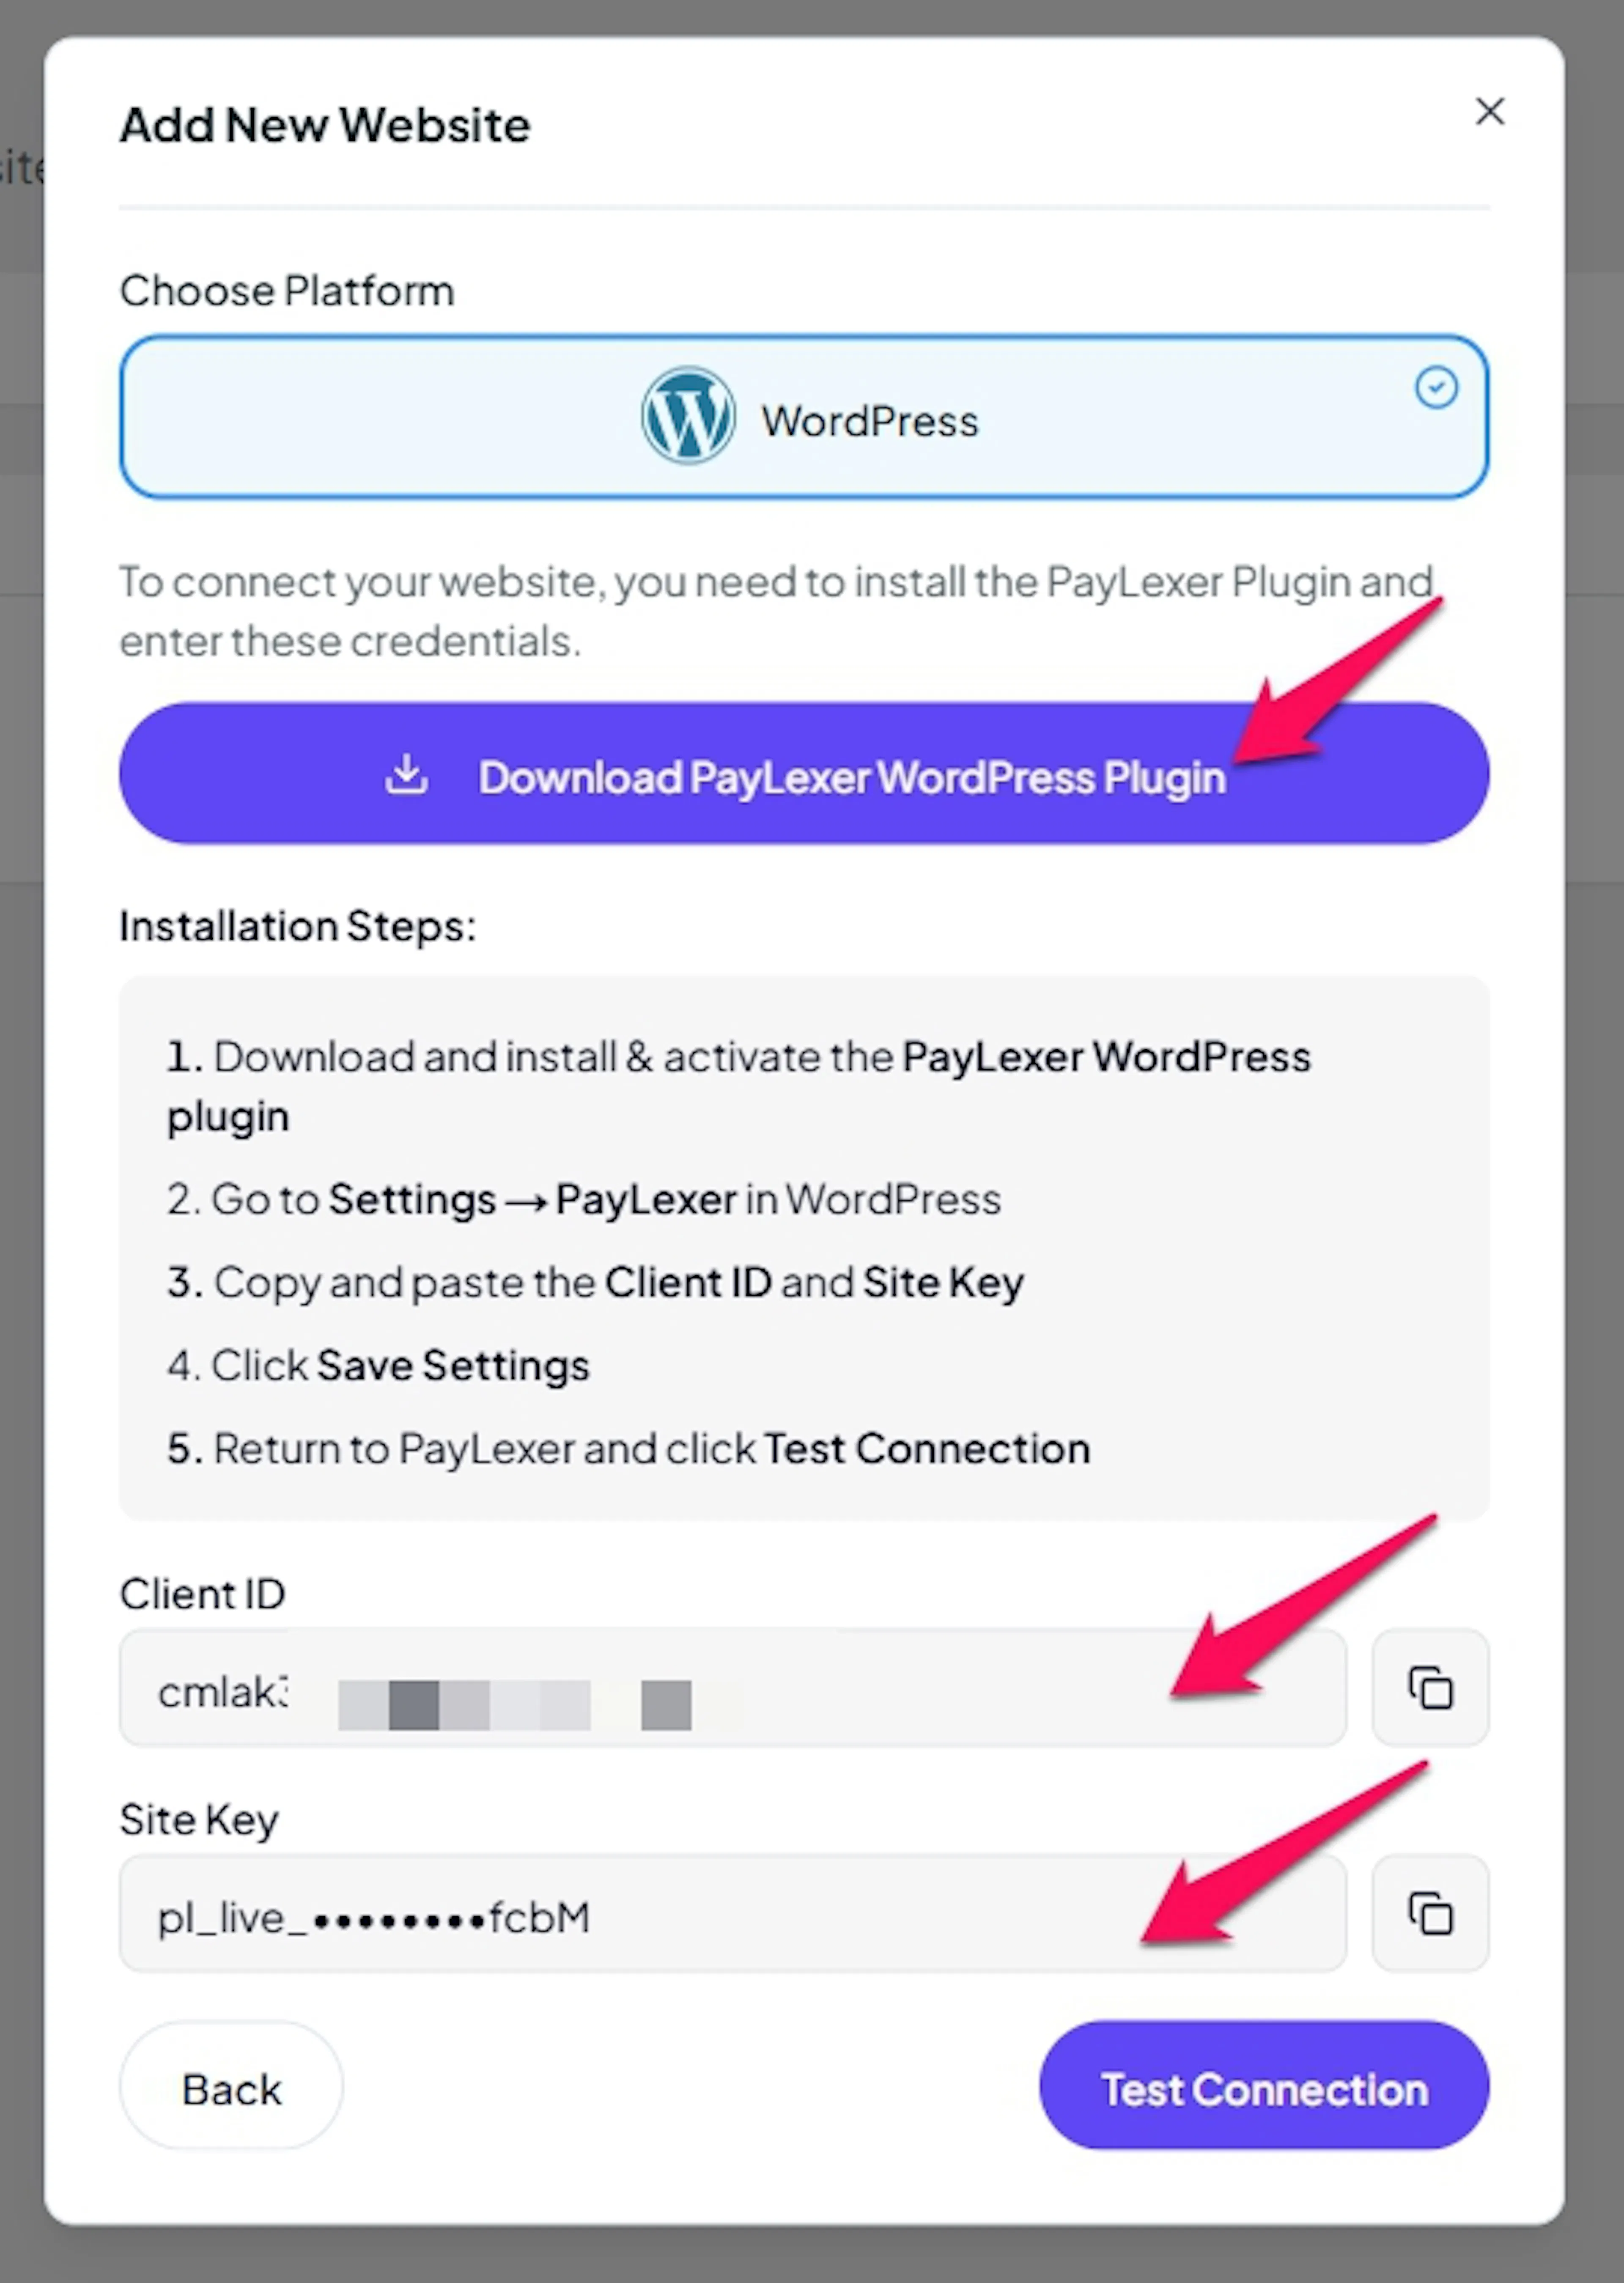
Keep these credentials safe - you will need them in the next step to connect your platform.
Step 2: Choose Your Platform Integration
To fully add your website, use the Client ID and Site Key from Step 1 to connect your platform to PayLexer. Follow the guide for your platform:
| Platform | Guide |
|---|---|
| WP Travel Engine | WP Travel Engine Integration → |
| WooCommerce | WooCommerce Integration → |
| Easy Digital Downloads | Easy Digital Download Integration → |
| FluentCart | FluentCart Integration → |
| Other platforms | Request Platform Integration → |
Your website is not fully added in PayLexer until the platform integration is completed and the connection test passes successfully.
Next Step
Once your platform integration is complete and your website shows as Connected, proceed to run your first test transaction:
→ Test Transactions & Platform Integration
Still Have Questions?
PayLexer Support: Contact Support