

DOKU
Connect DOKU to PayLexer to accept Indonesian Rupiah payments through cards, bank transfers, virtual accounts, and local e-wallets on a DOKU-hosted checkout page.
DOKU is one of Indonesia's largest and longest-running payment gateways, headquartered in Jakarta and operating since 2007. It provides a DOKU-hosted checkout page that accepts cards, bank transfers, virtual accounts, QRIS, and local e-wallets such as OVO, DANA, and ShopeePay, so merchants can accept Indonesian payments without building a custom payment form.
- Supported Regions (Merchant Accounts): Indonesia and Malaysia
- Supported Currencies: Indonesian Rupiah (IDR) only
This gateway appears in checkout only when the selected currency is IDR.
Supported Features
- Hosted checkout page where customers pay on DOKU and return to your site
- Card payments, bank transfers, and virtual accounts
- Local Indonesian e-wallets (OVO, DANA, ShopeePay) and QRIS
- Refunds processed from PayLexer
- HMAC-signed webhook notifications for real-time payment status
DOKU processes Indonesian Rupiah (IDR) only, and IDR is a zero-decimal currency. All amounts are whole rupiah, so a fractional amount such as 87.50 is rounded to 88 before it reaches DOKU. DOKU does not support subscriptions or recurring billing.
Before You Start
Make sure you have:
- DOKU Account – DOKU onboards merchants through its sales team. Contact DOKU to get started →
- PayLexer Account – Required to configure the integration. Create your account →
- A website where you want to integrate
Looking for a different payment processor? View all supported gateways →
Configuring DOKU
You need a Client ID and Secret Key from DOKU for this integration.
Getting API Credentials
Your DOKU credentials live in the DOKU Back Office. Use the sandbox Back Office for testing and the live Back Office for production.
Log in to the DOKU Back Office
Sign in to the DOKU sandbox Back Office for testing, or the DOKU live Back Office for production.
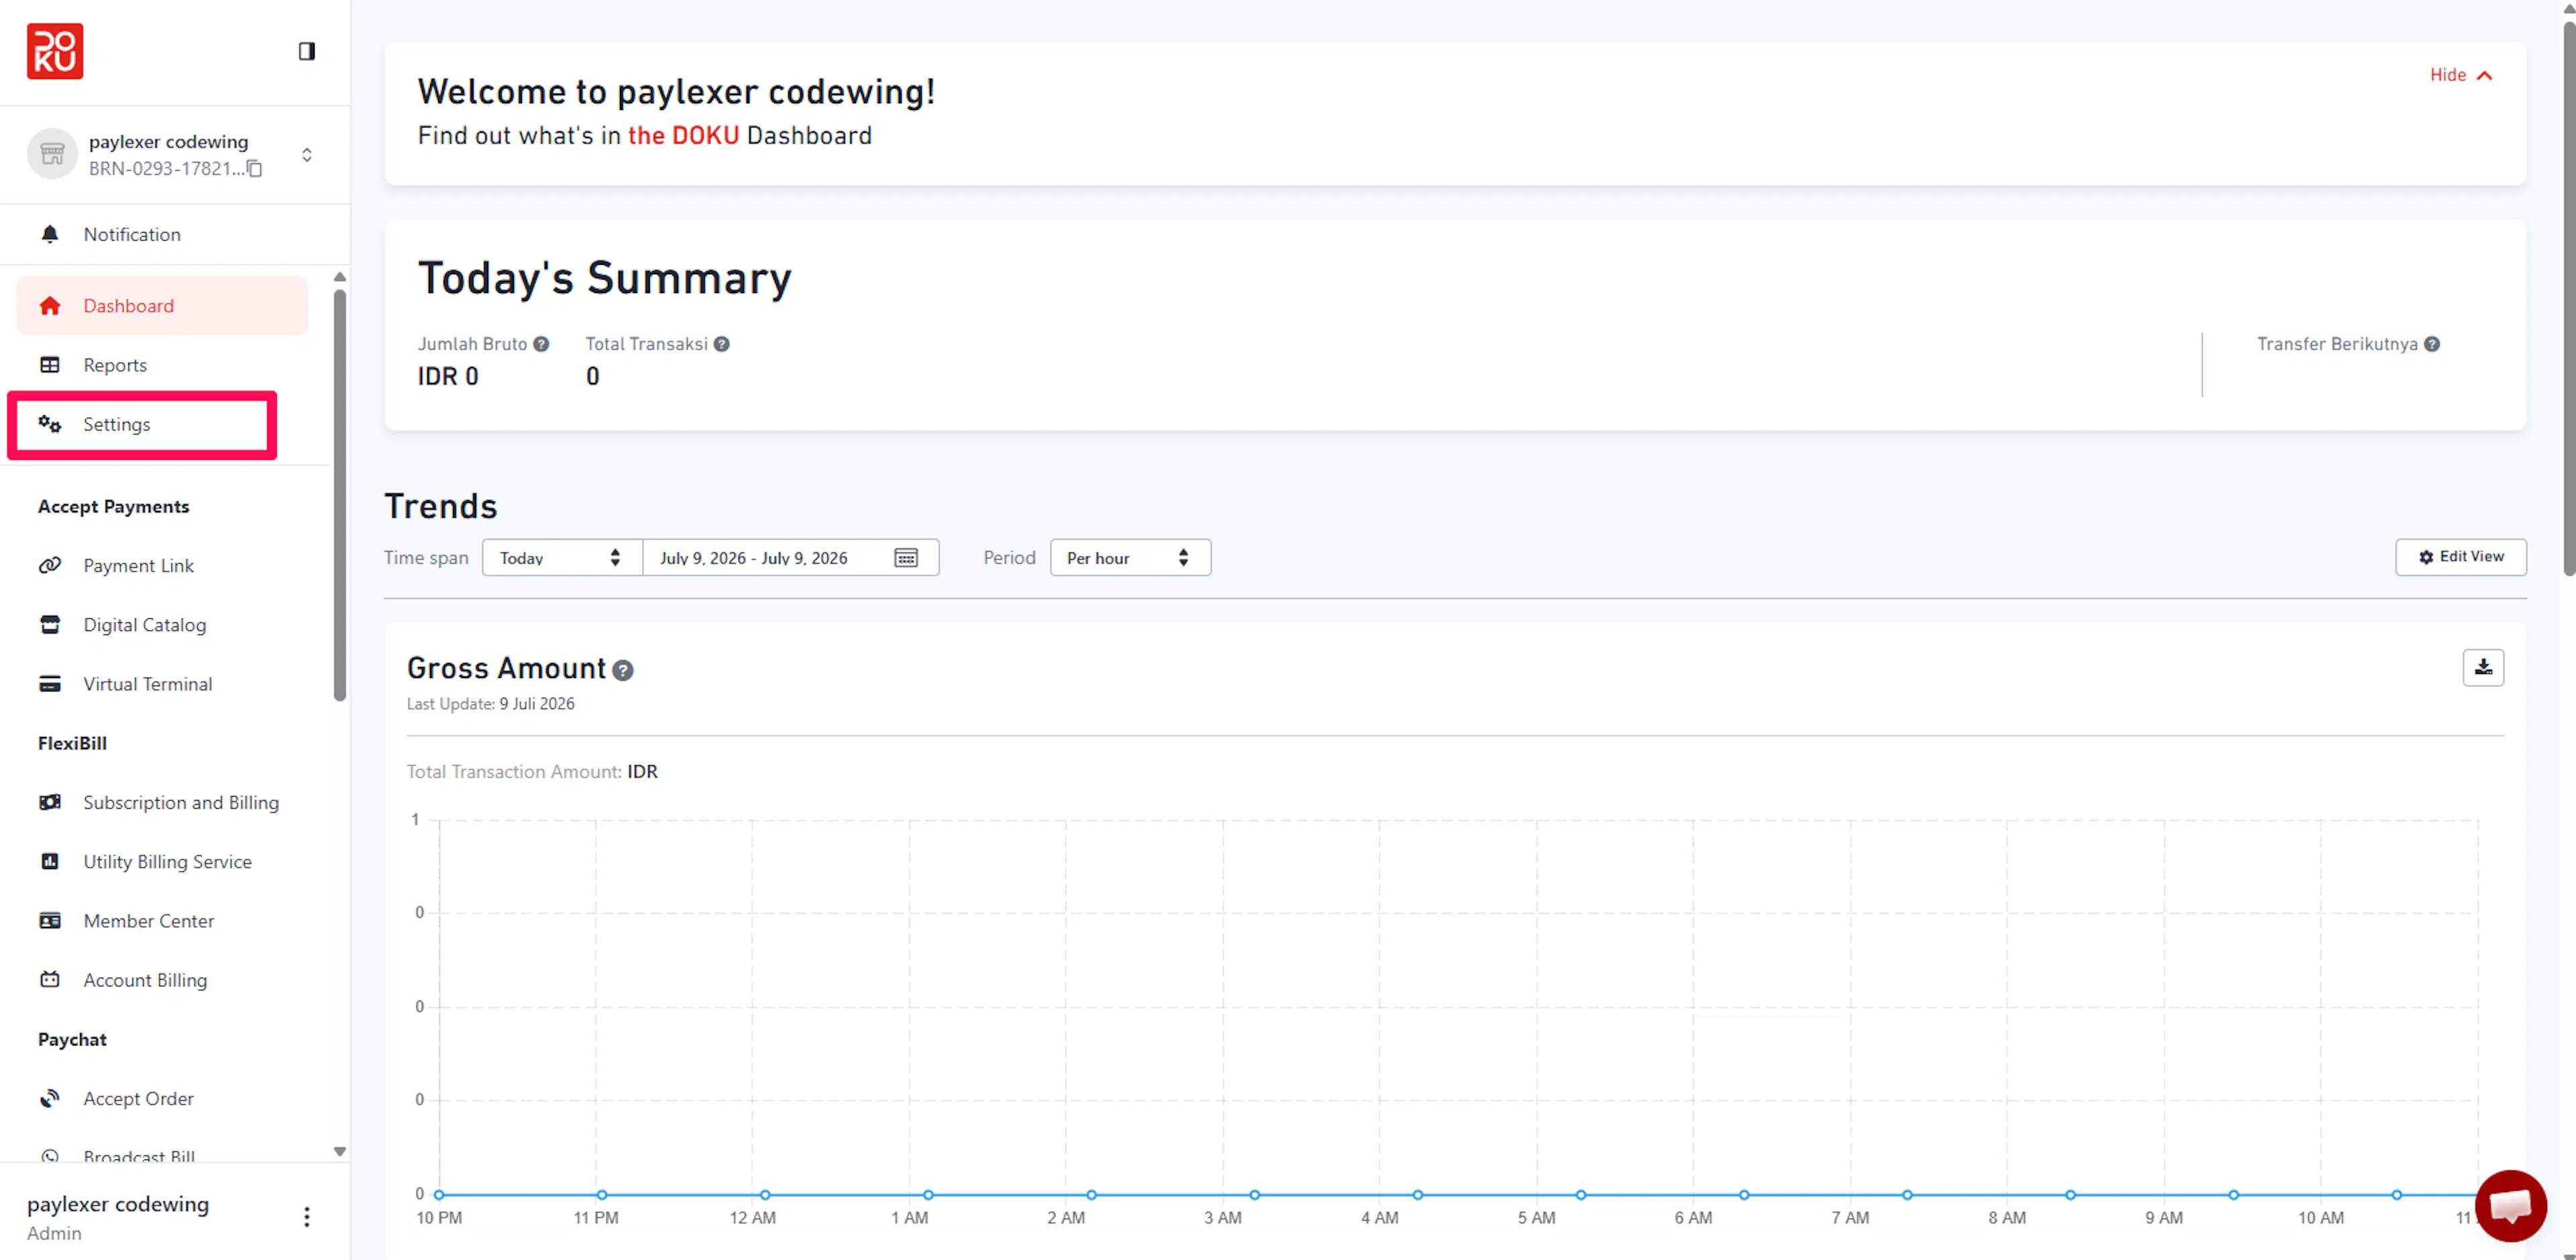
Open your account settings
Go to Settings -> General -> Account in the DOKU Back Office.
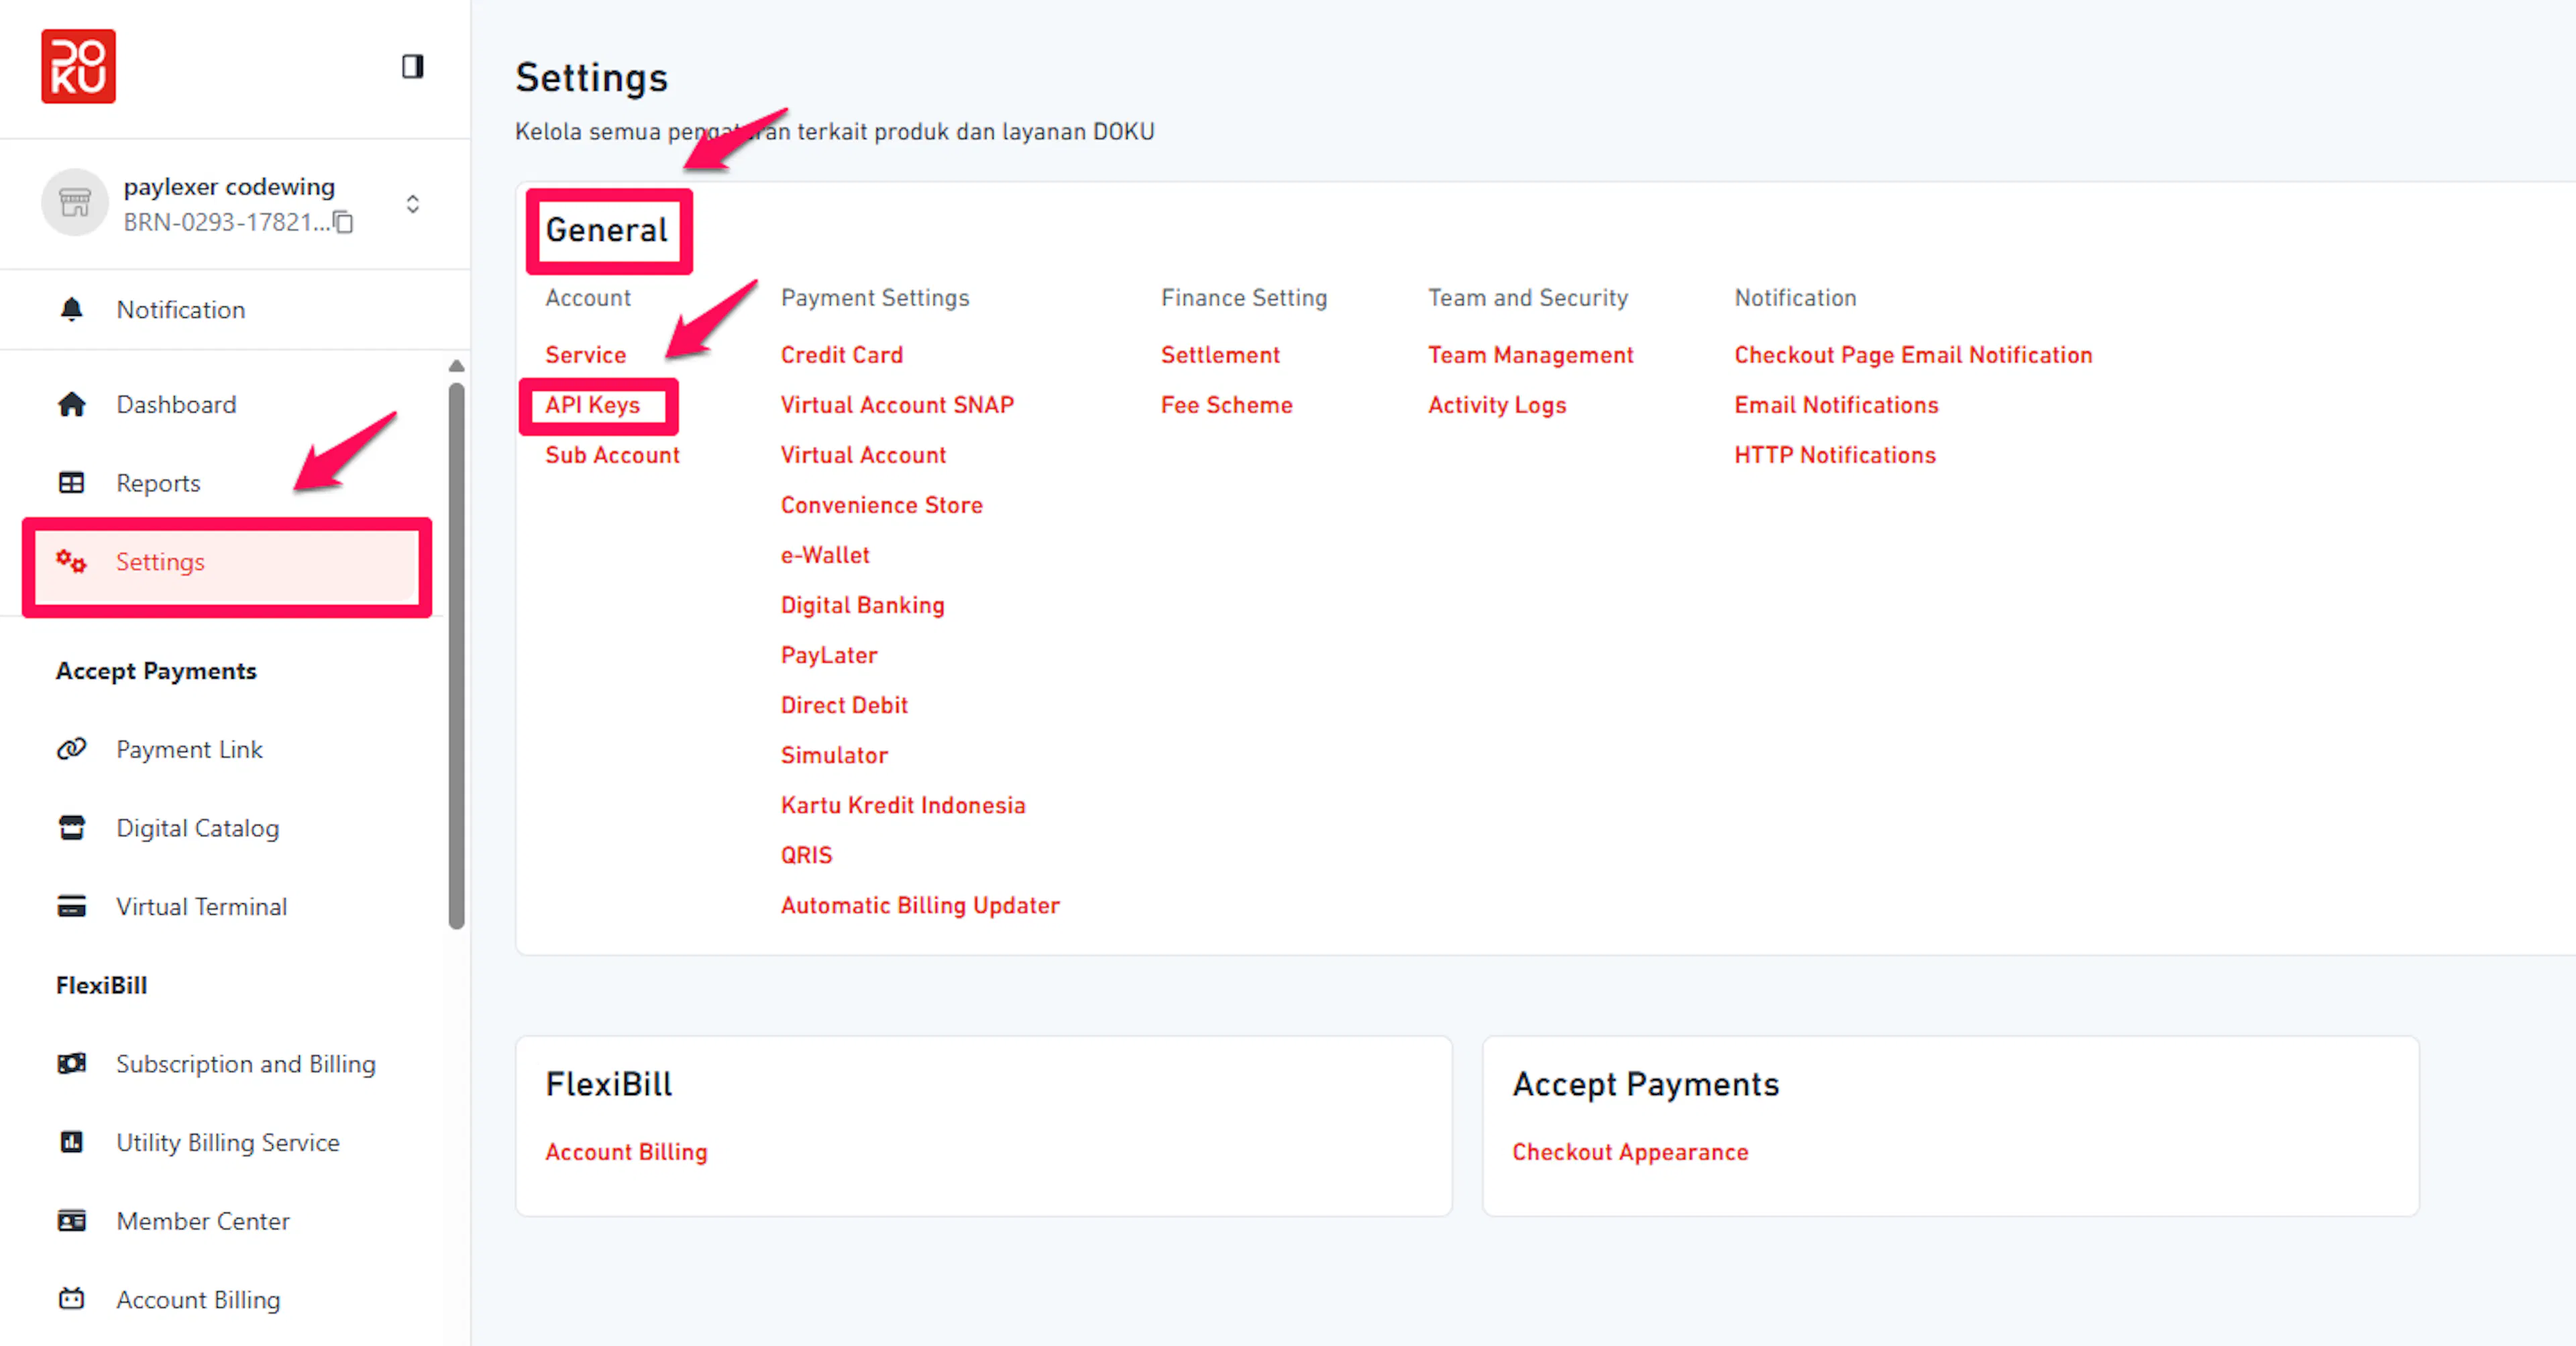
Open API Keys
Click API Keys. DOKU opens the developer API keys page - for sandbox this is [https://sandbox.doku.com/bo/developer/api-keys].
Copy your Client ID and Secret Key
Copy the Client ID and the Secret Key for the environment you are configuring.
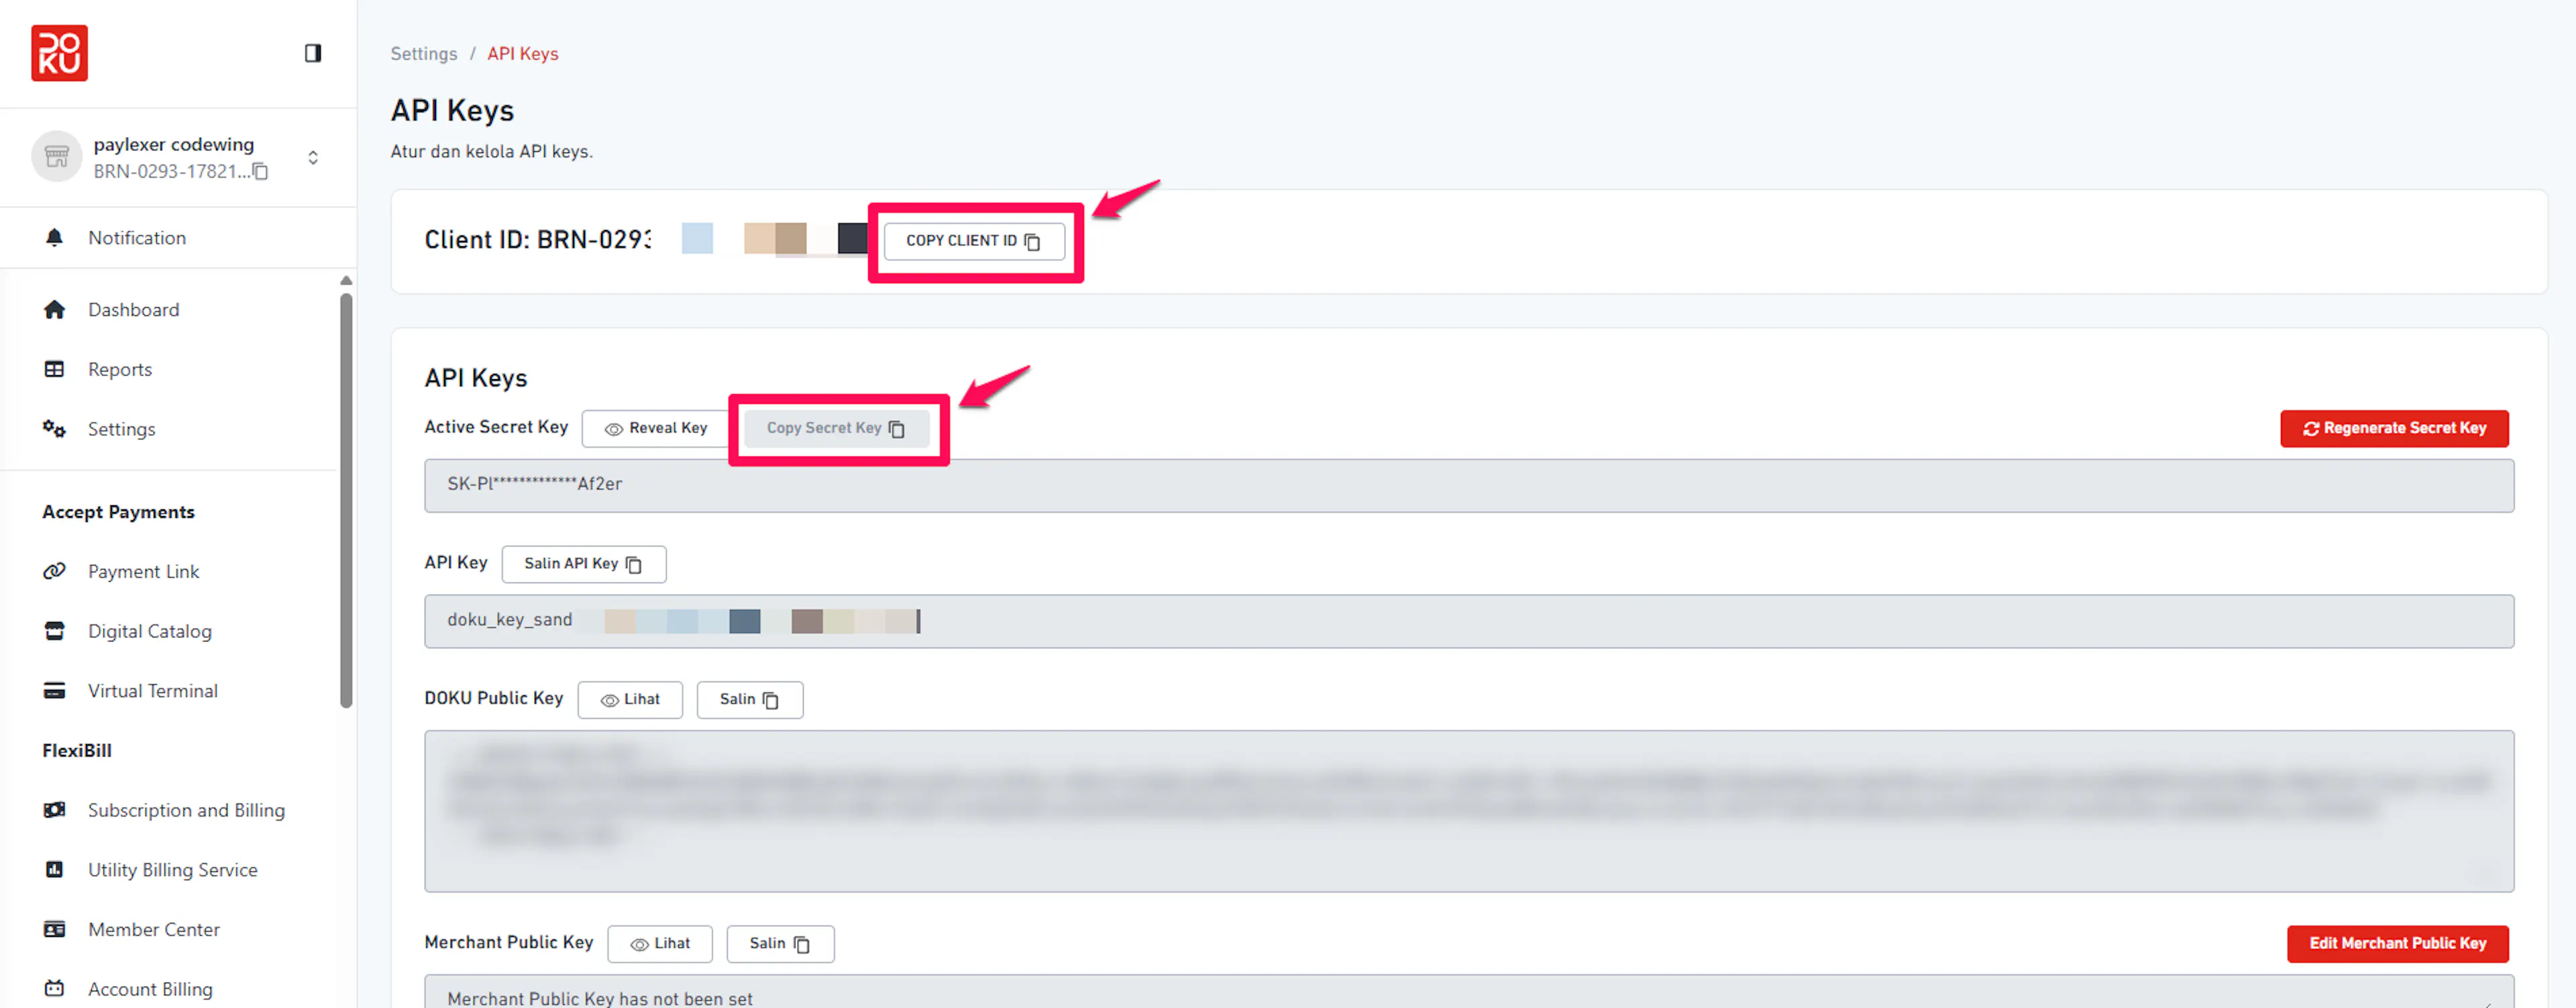
The Secret Key is a sensitive credential. Never expose it publicly or commit it to source control. DOKU also uses this same Secret Key to sign webhook notifications.
Adding Credentials to PayLexer
Open PayLexer Dashboard
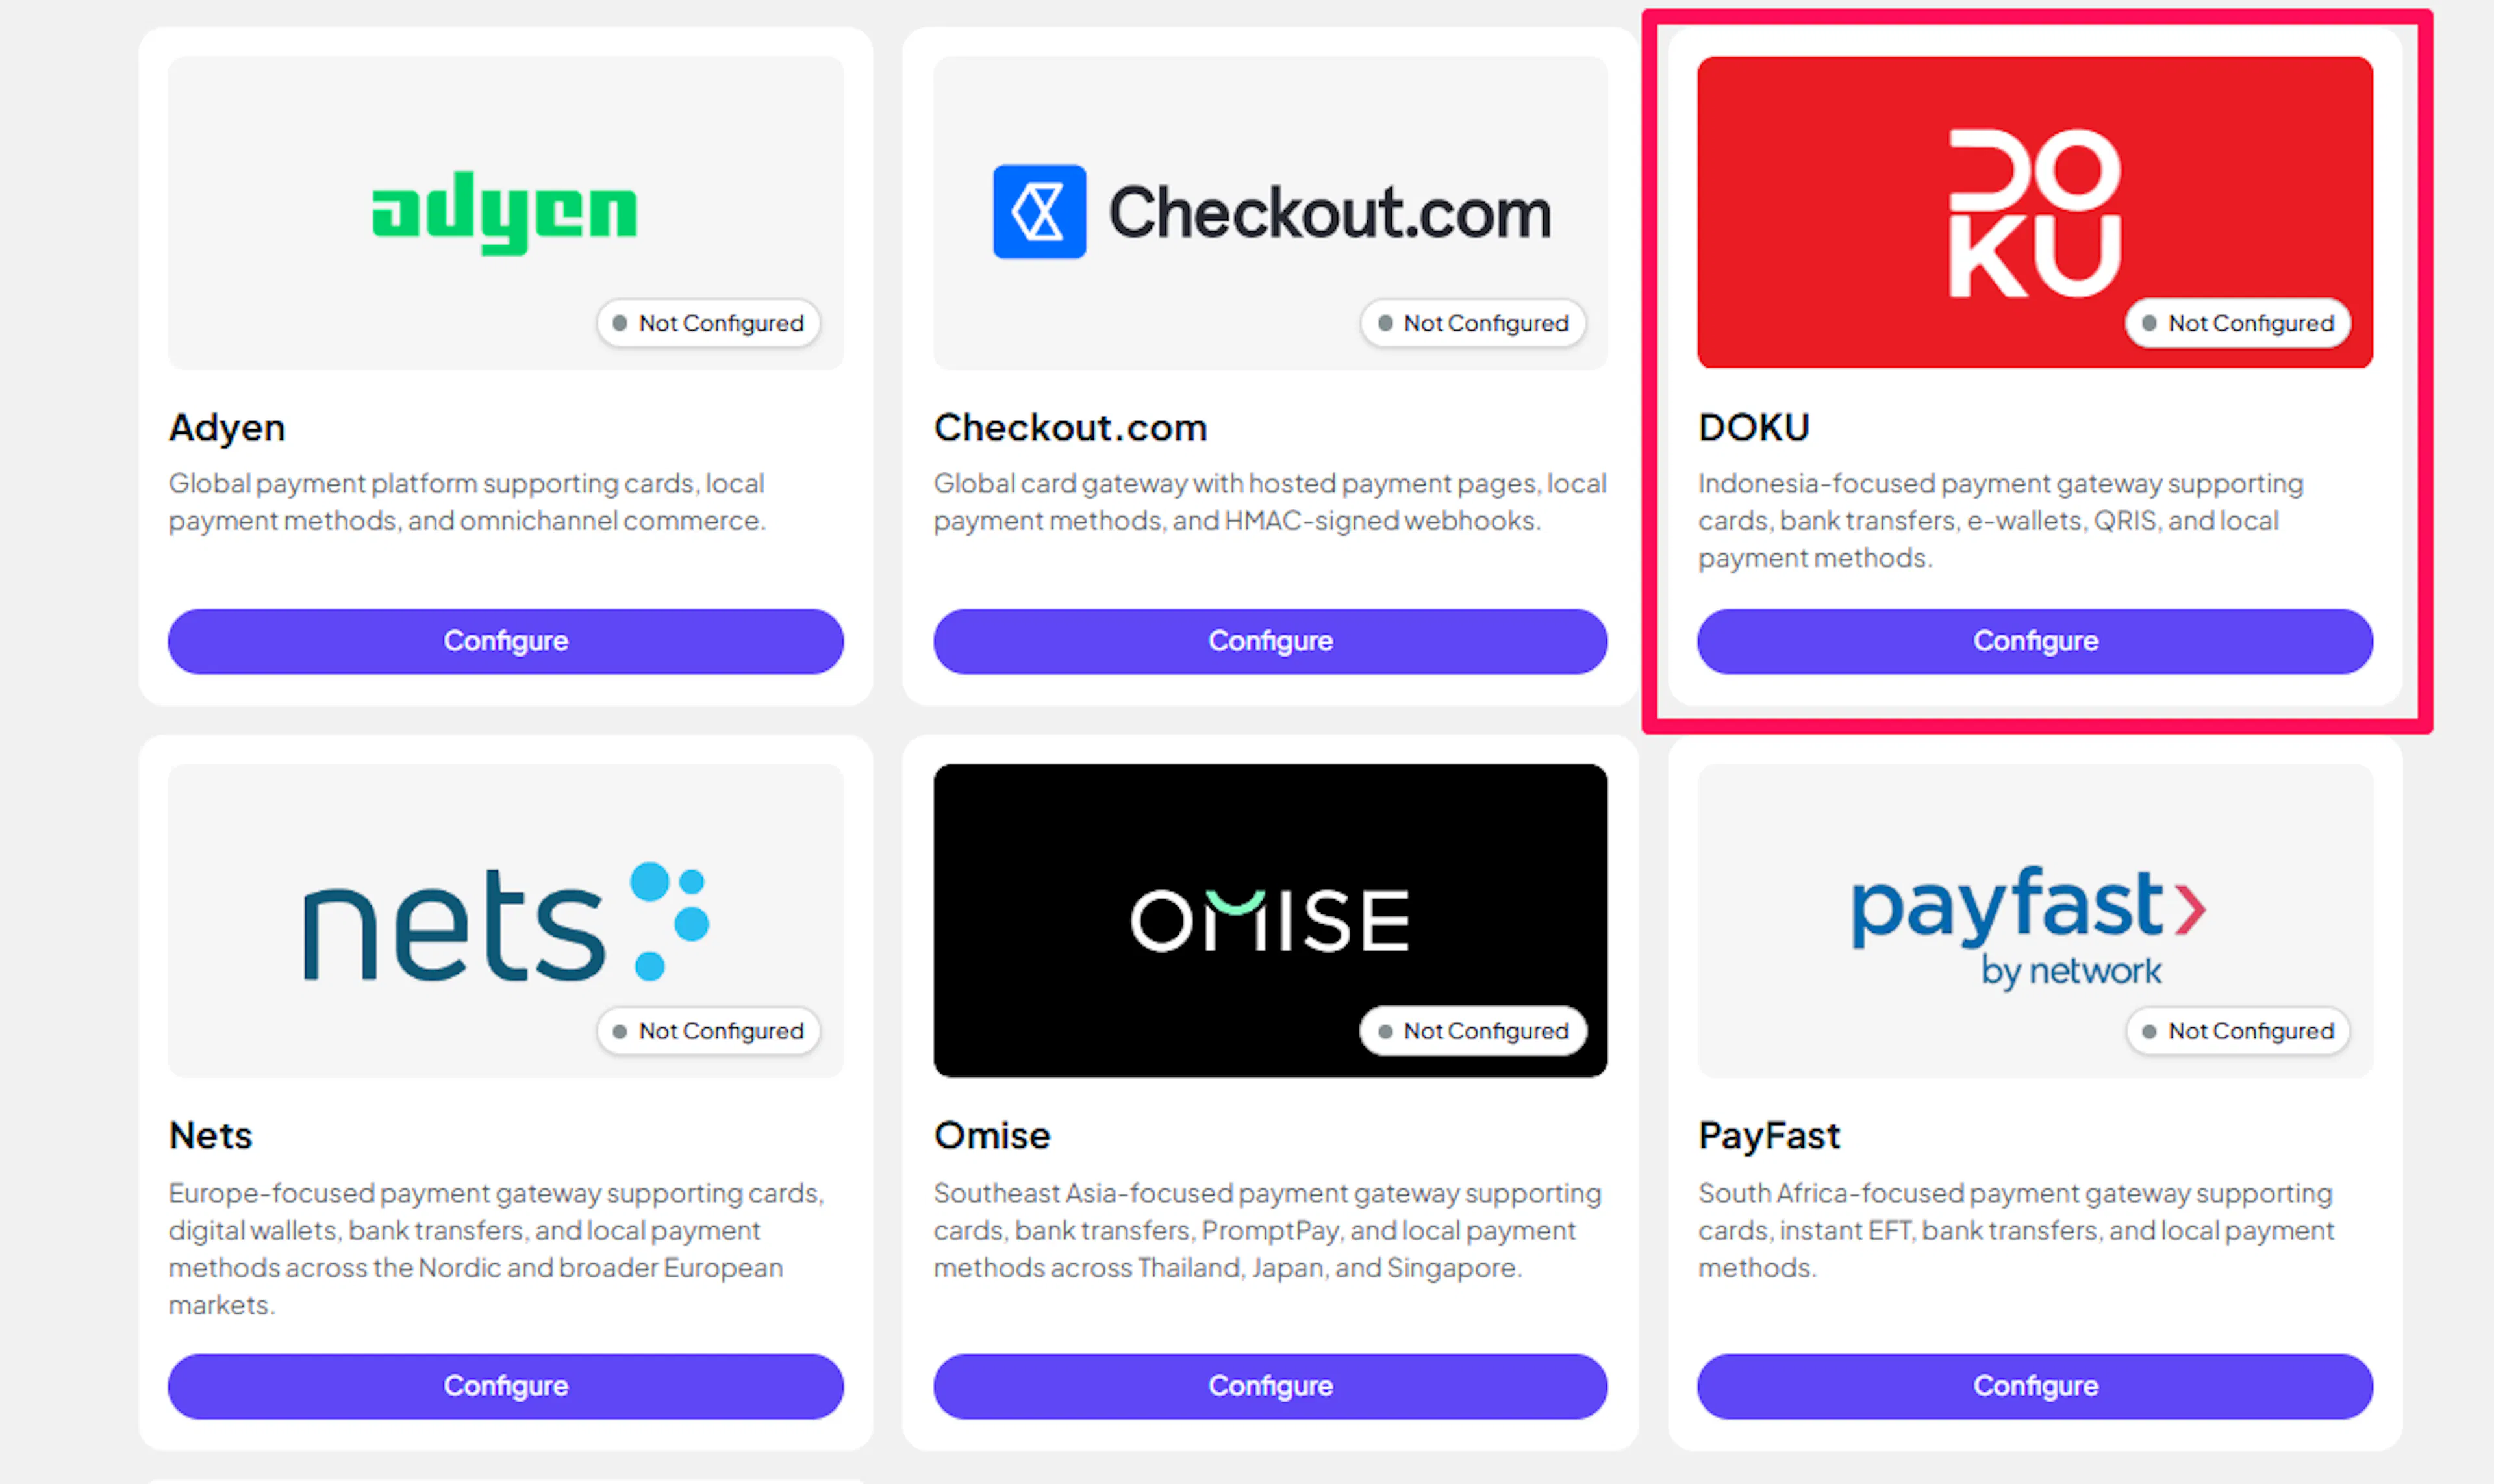
Log in to your PayLexer dashboard and navigate to Payment Gateways -> DOKU and click Configure.
Enter your credentials
Paste the Client ID and Secret Key you copied from DOKU.
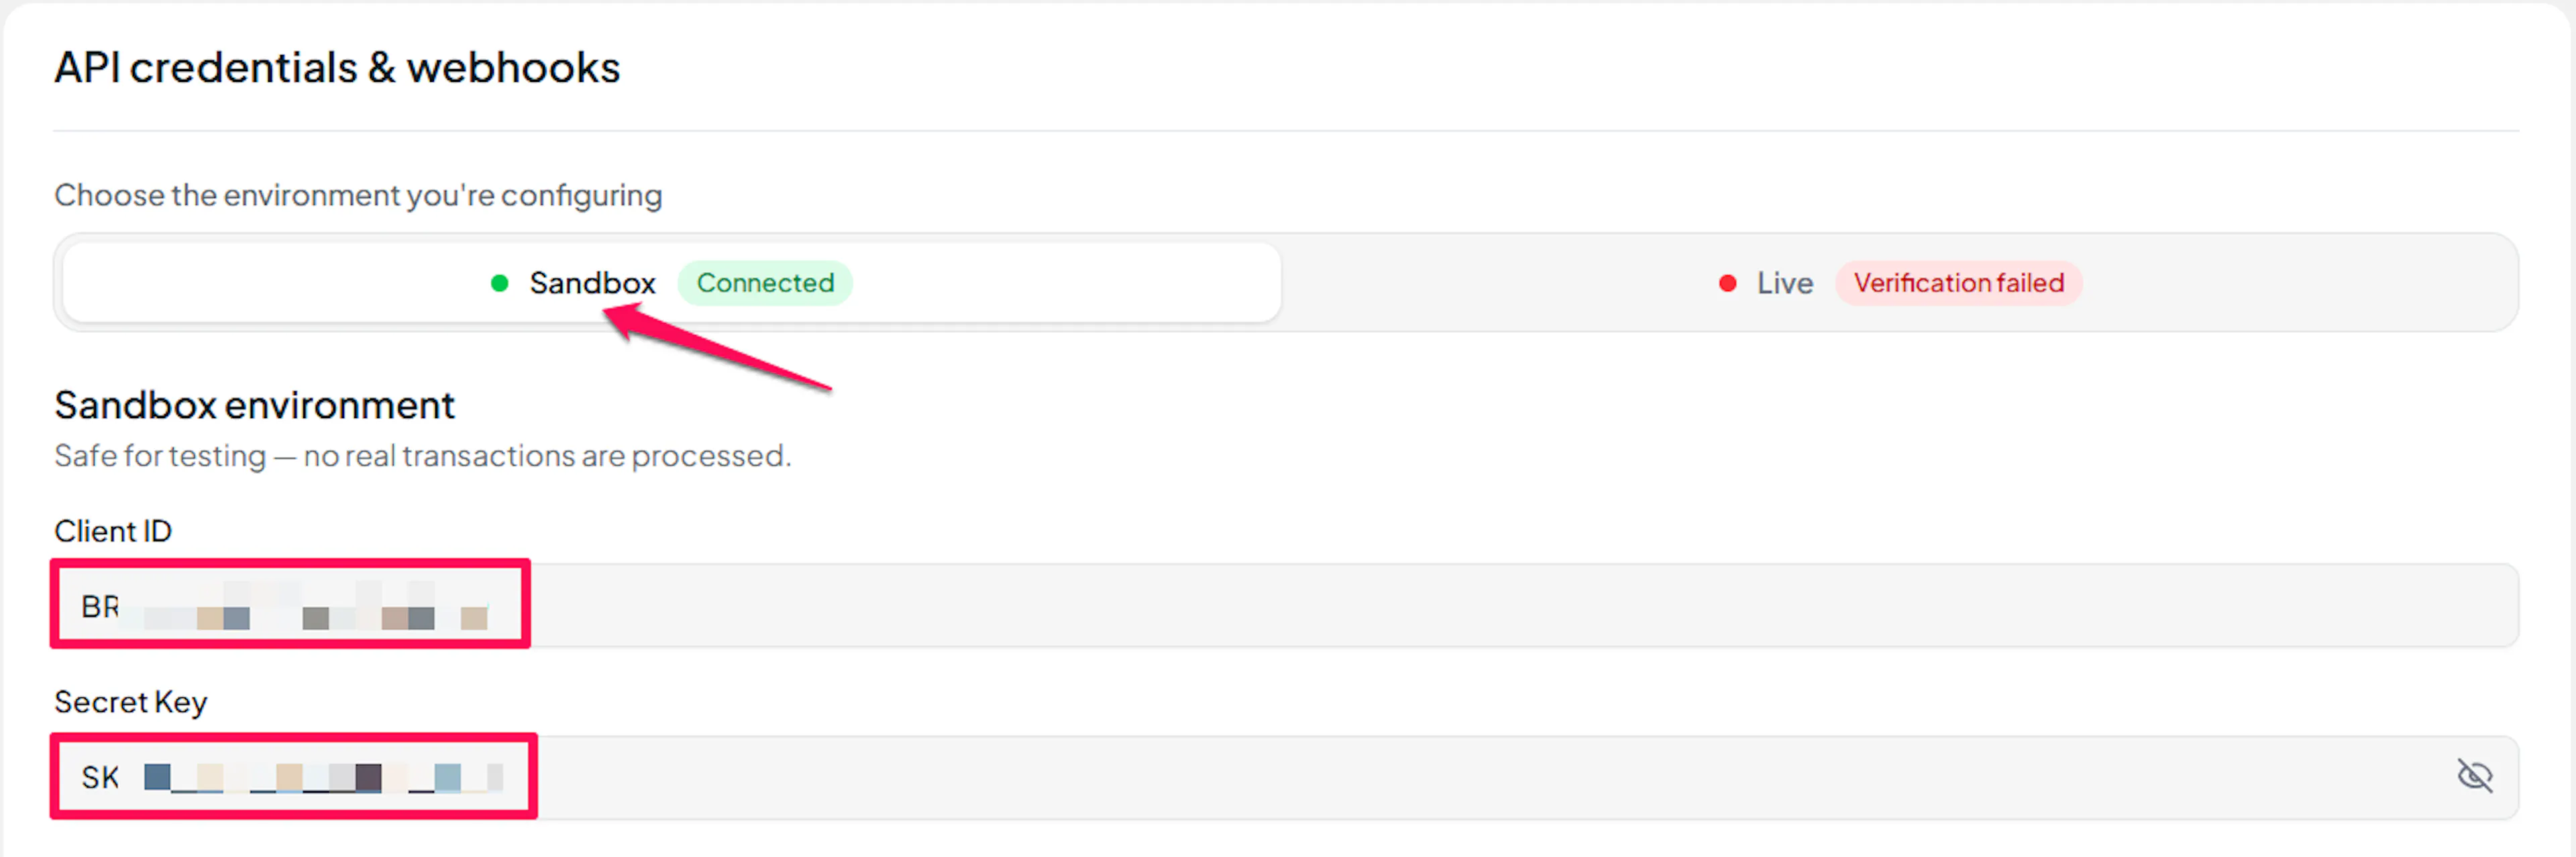
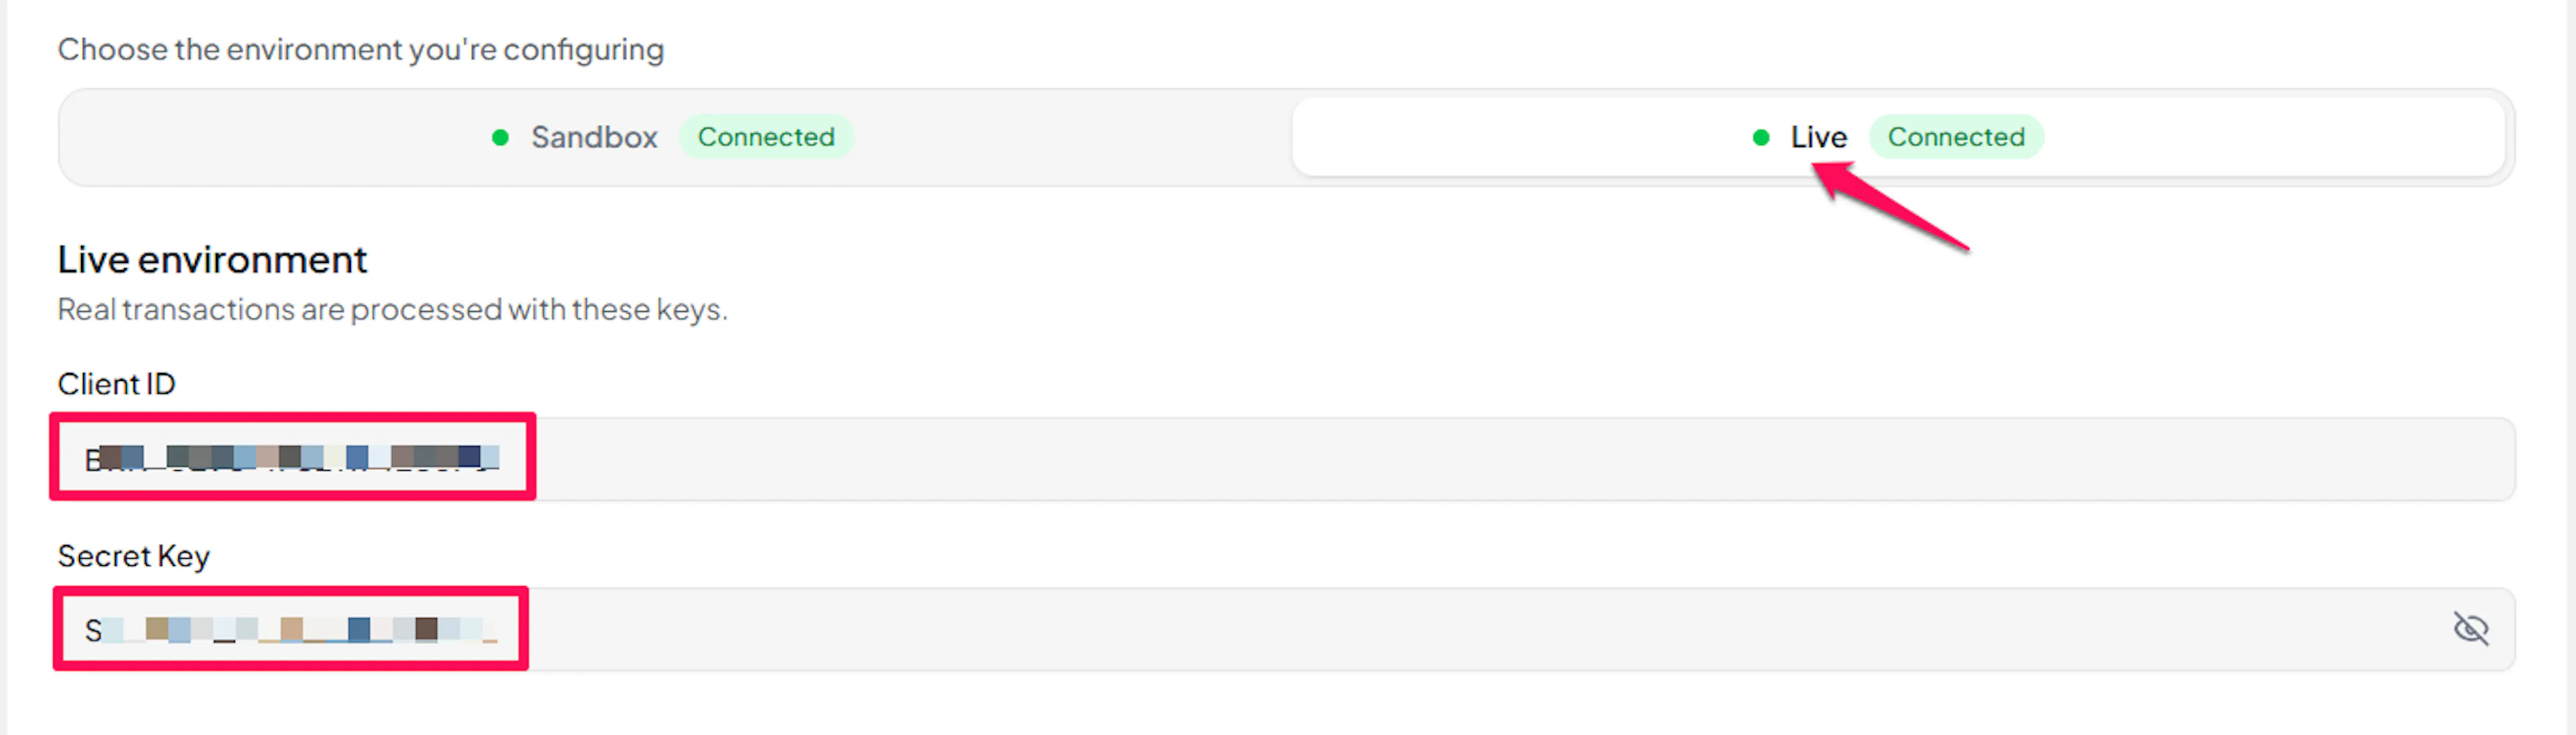
Understanding Live/Production and Sandbox Settings:
| Environment | Purpose |
|---|---|
| Live / Production (Mandatory) | Used for real transactions. Cannot be empty, even when testing. |
| Test / Sandbox (Optional) | Used for testing only. No real money is processed. |
How PayLexer selects credentials:
- Debug/Test mode ON -> Test credentials are used
- Debug/Test mode OFF -> Live credentials are used
Test and save
Click Save to save your configuration and verify your credentials. Click Verify Connection to test the connection.
Configuring Webhooks (Mandatory)
Webhooks enable real-time payment updates and significantly improve reliability.
Benefits of Webhooks:
- Instant payment status updates
- Automatic refund processing
- Dispute notifications
DOKU delivers the final payment result through a webhook, so this step is required. DOKU signs each webhook with your Secret Key, so there is no separate webhook secret to enter in PayLexer.
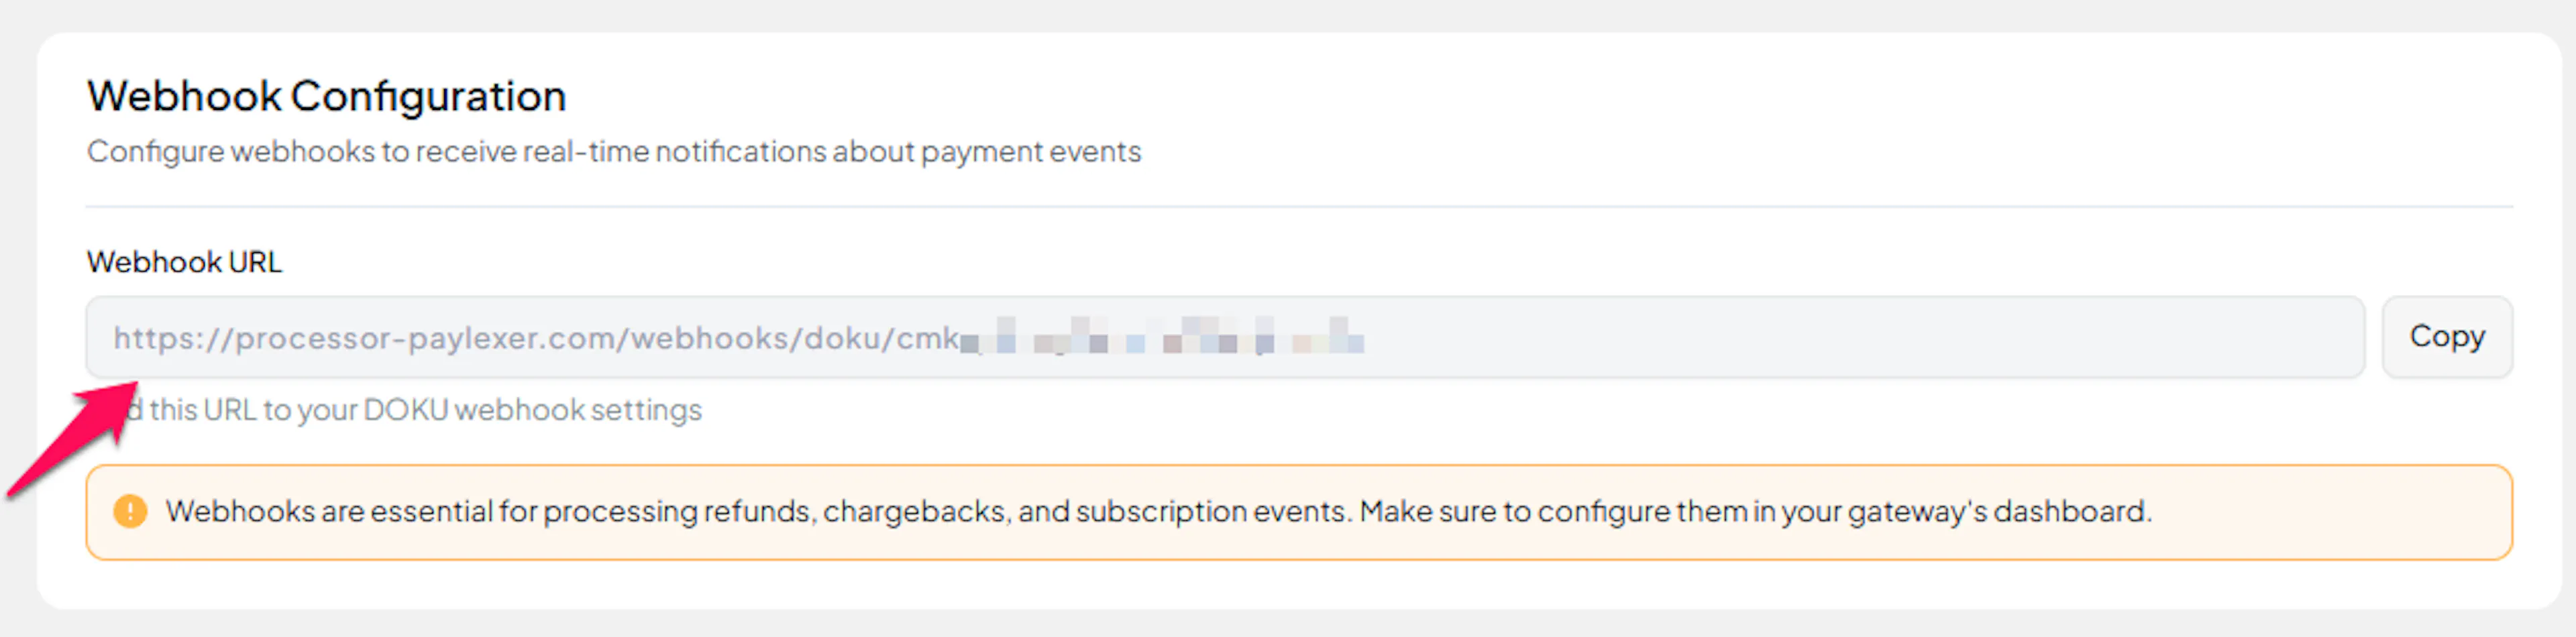
Copy your PayLexer webhook URL
In Payment Gateways -> DOKU, copy the Payment Notification URL that PayLexer generates for your website.
Open the DOKU notification settings
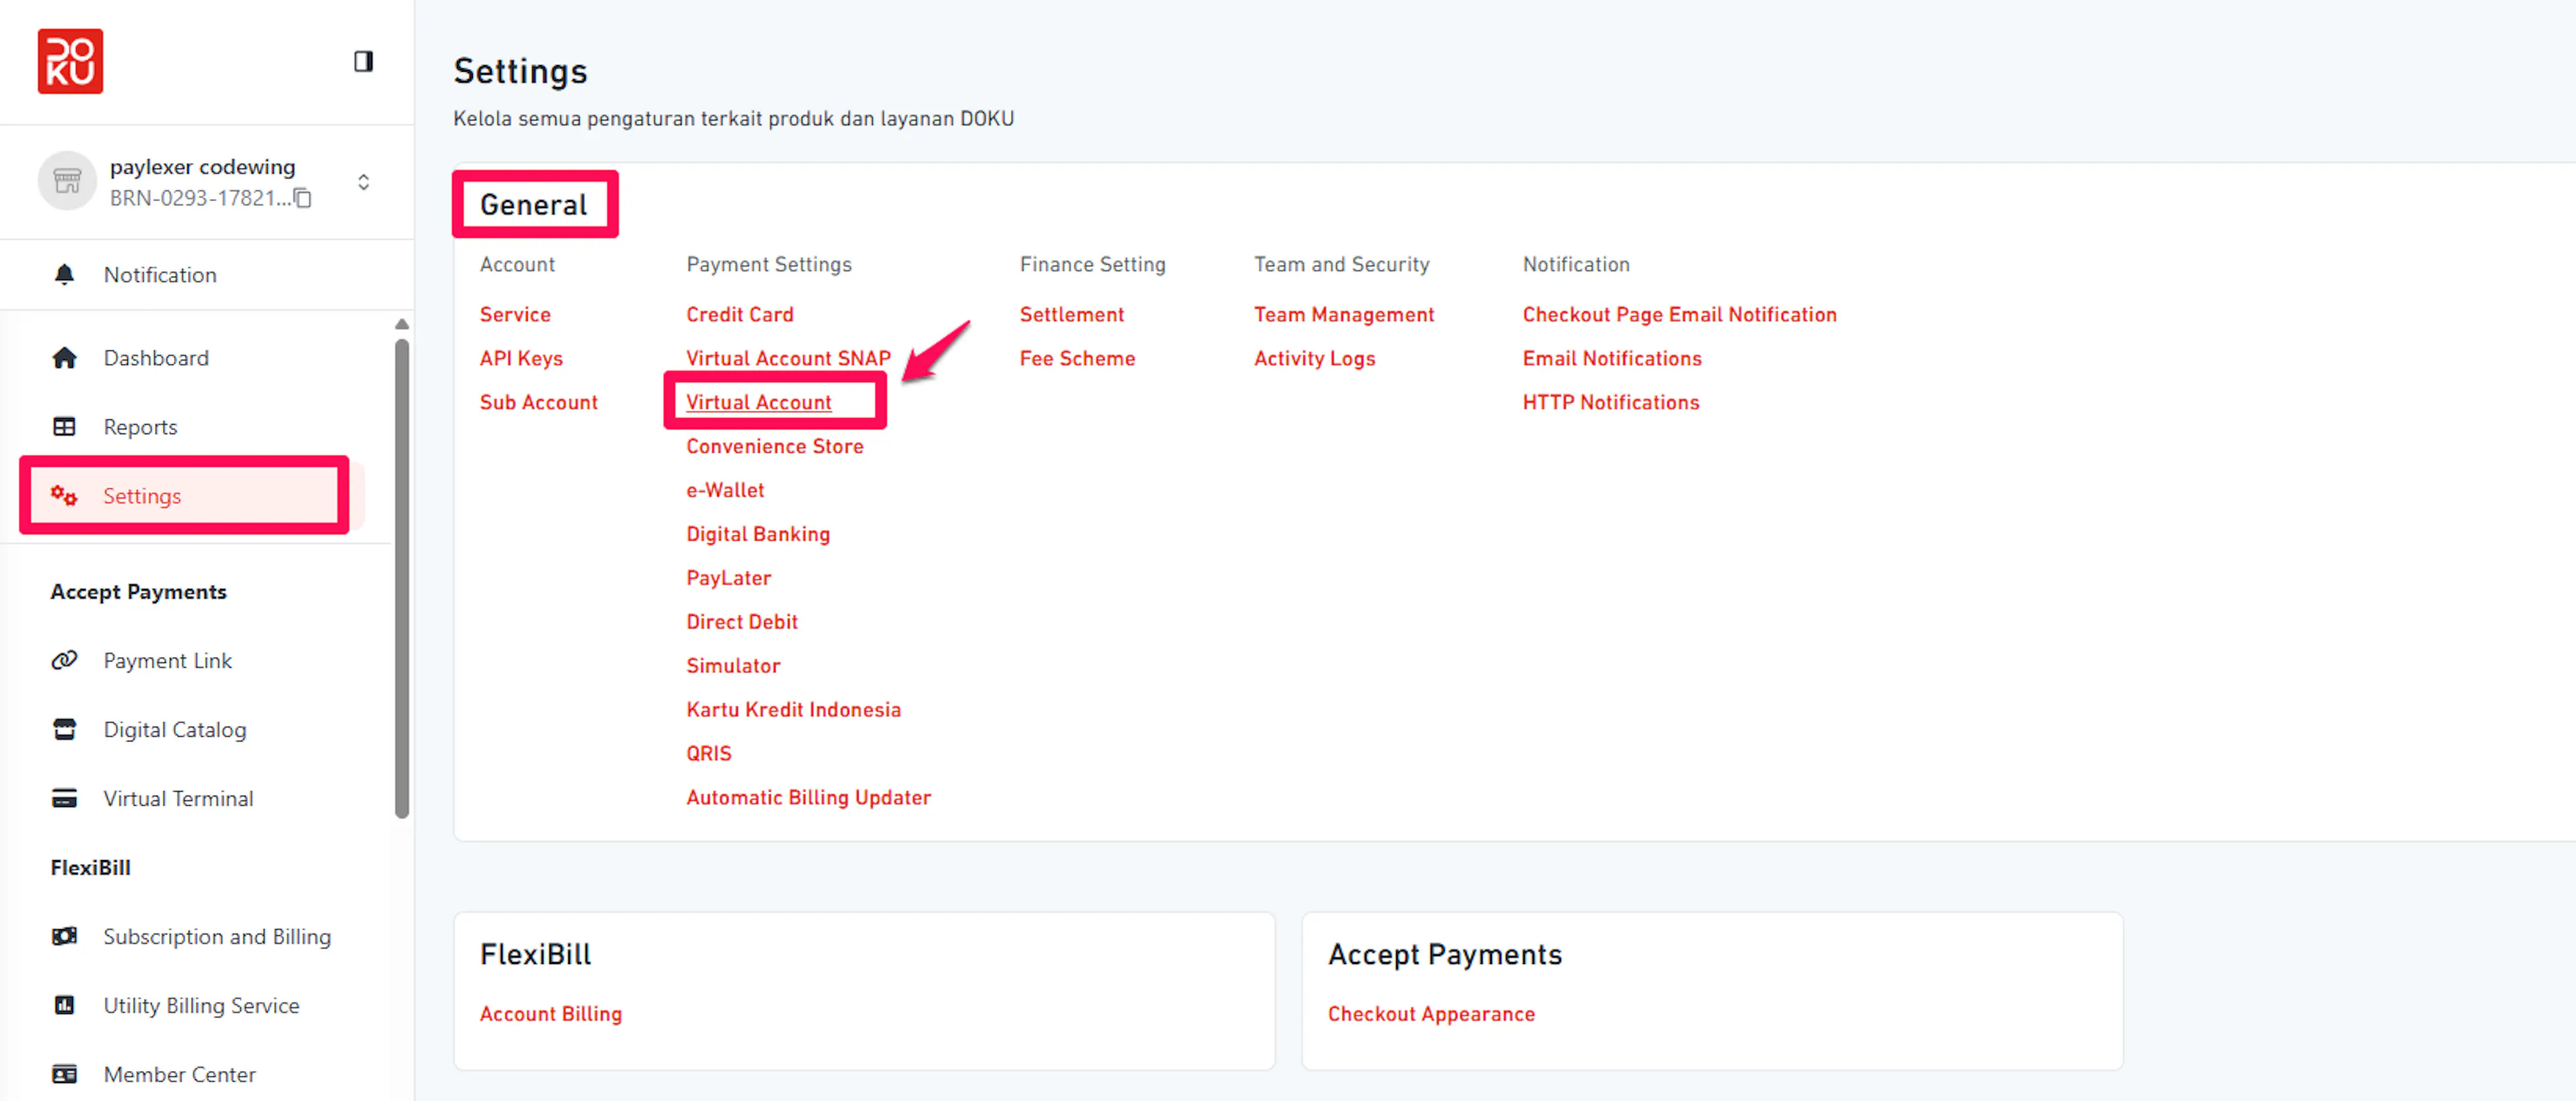
In the DOKU Back Office, Go to Settings → Payment Settings, then select the specific payment channel you want to configure (e.g. Virtual Account, Credit Card, e-Wallet, QRIS, Direct Debit, etc.).
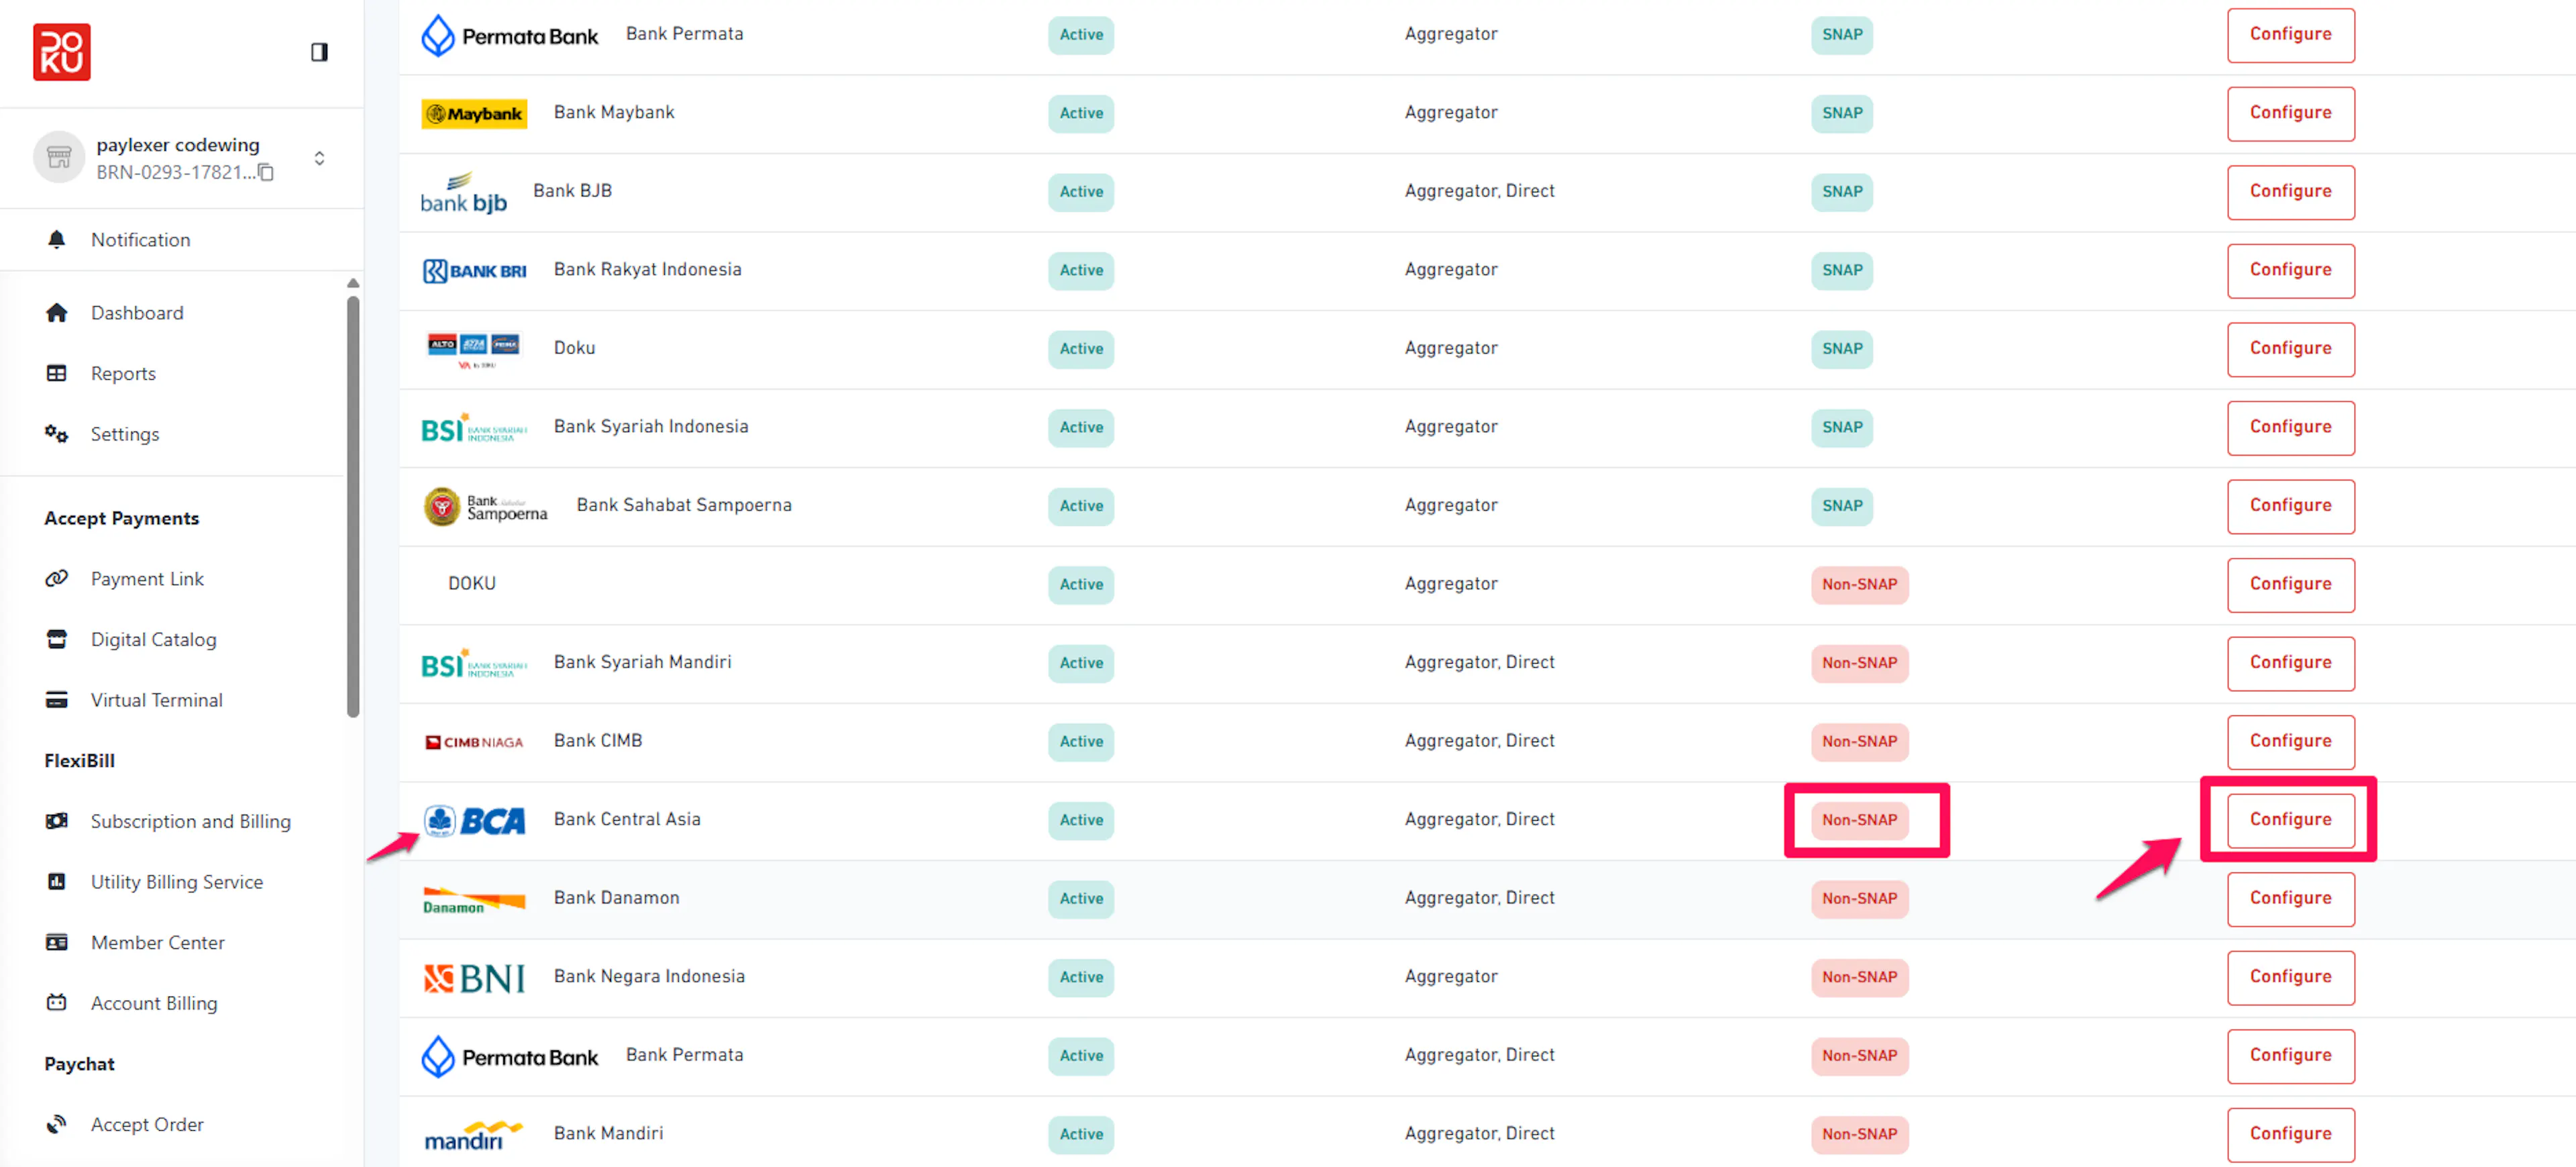
Paste the notification URL and save
Paste the PayLexer URL into the Payment Notification URL field (and the Inquiry URL field if DOKU requires one), then click Save.
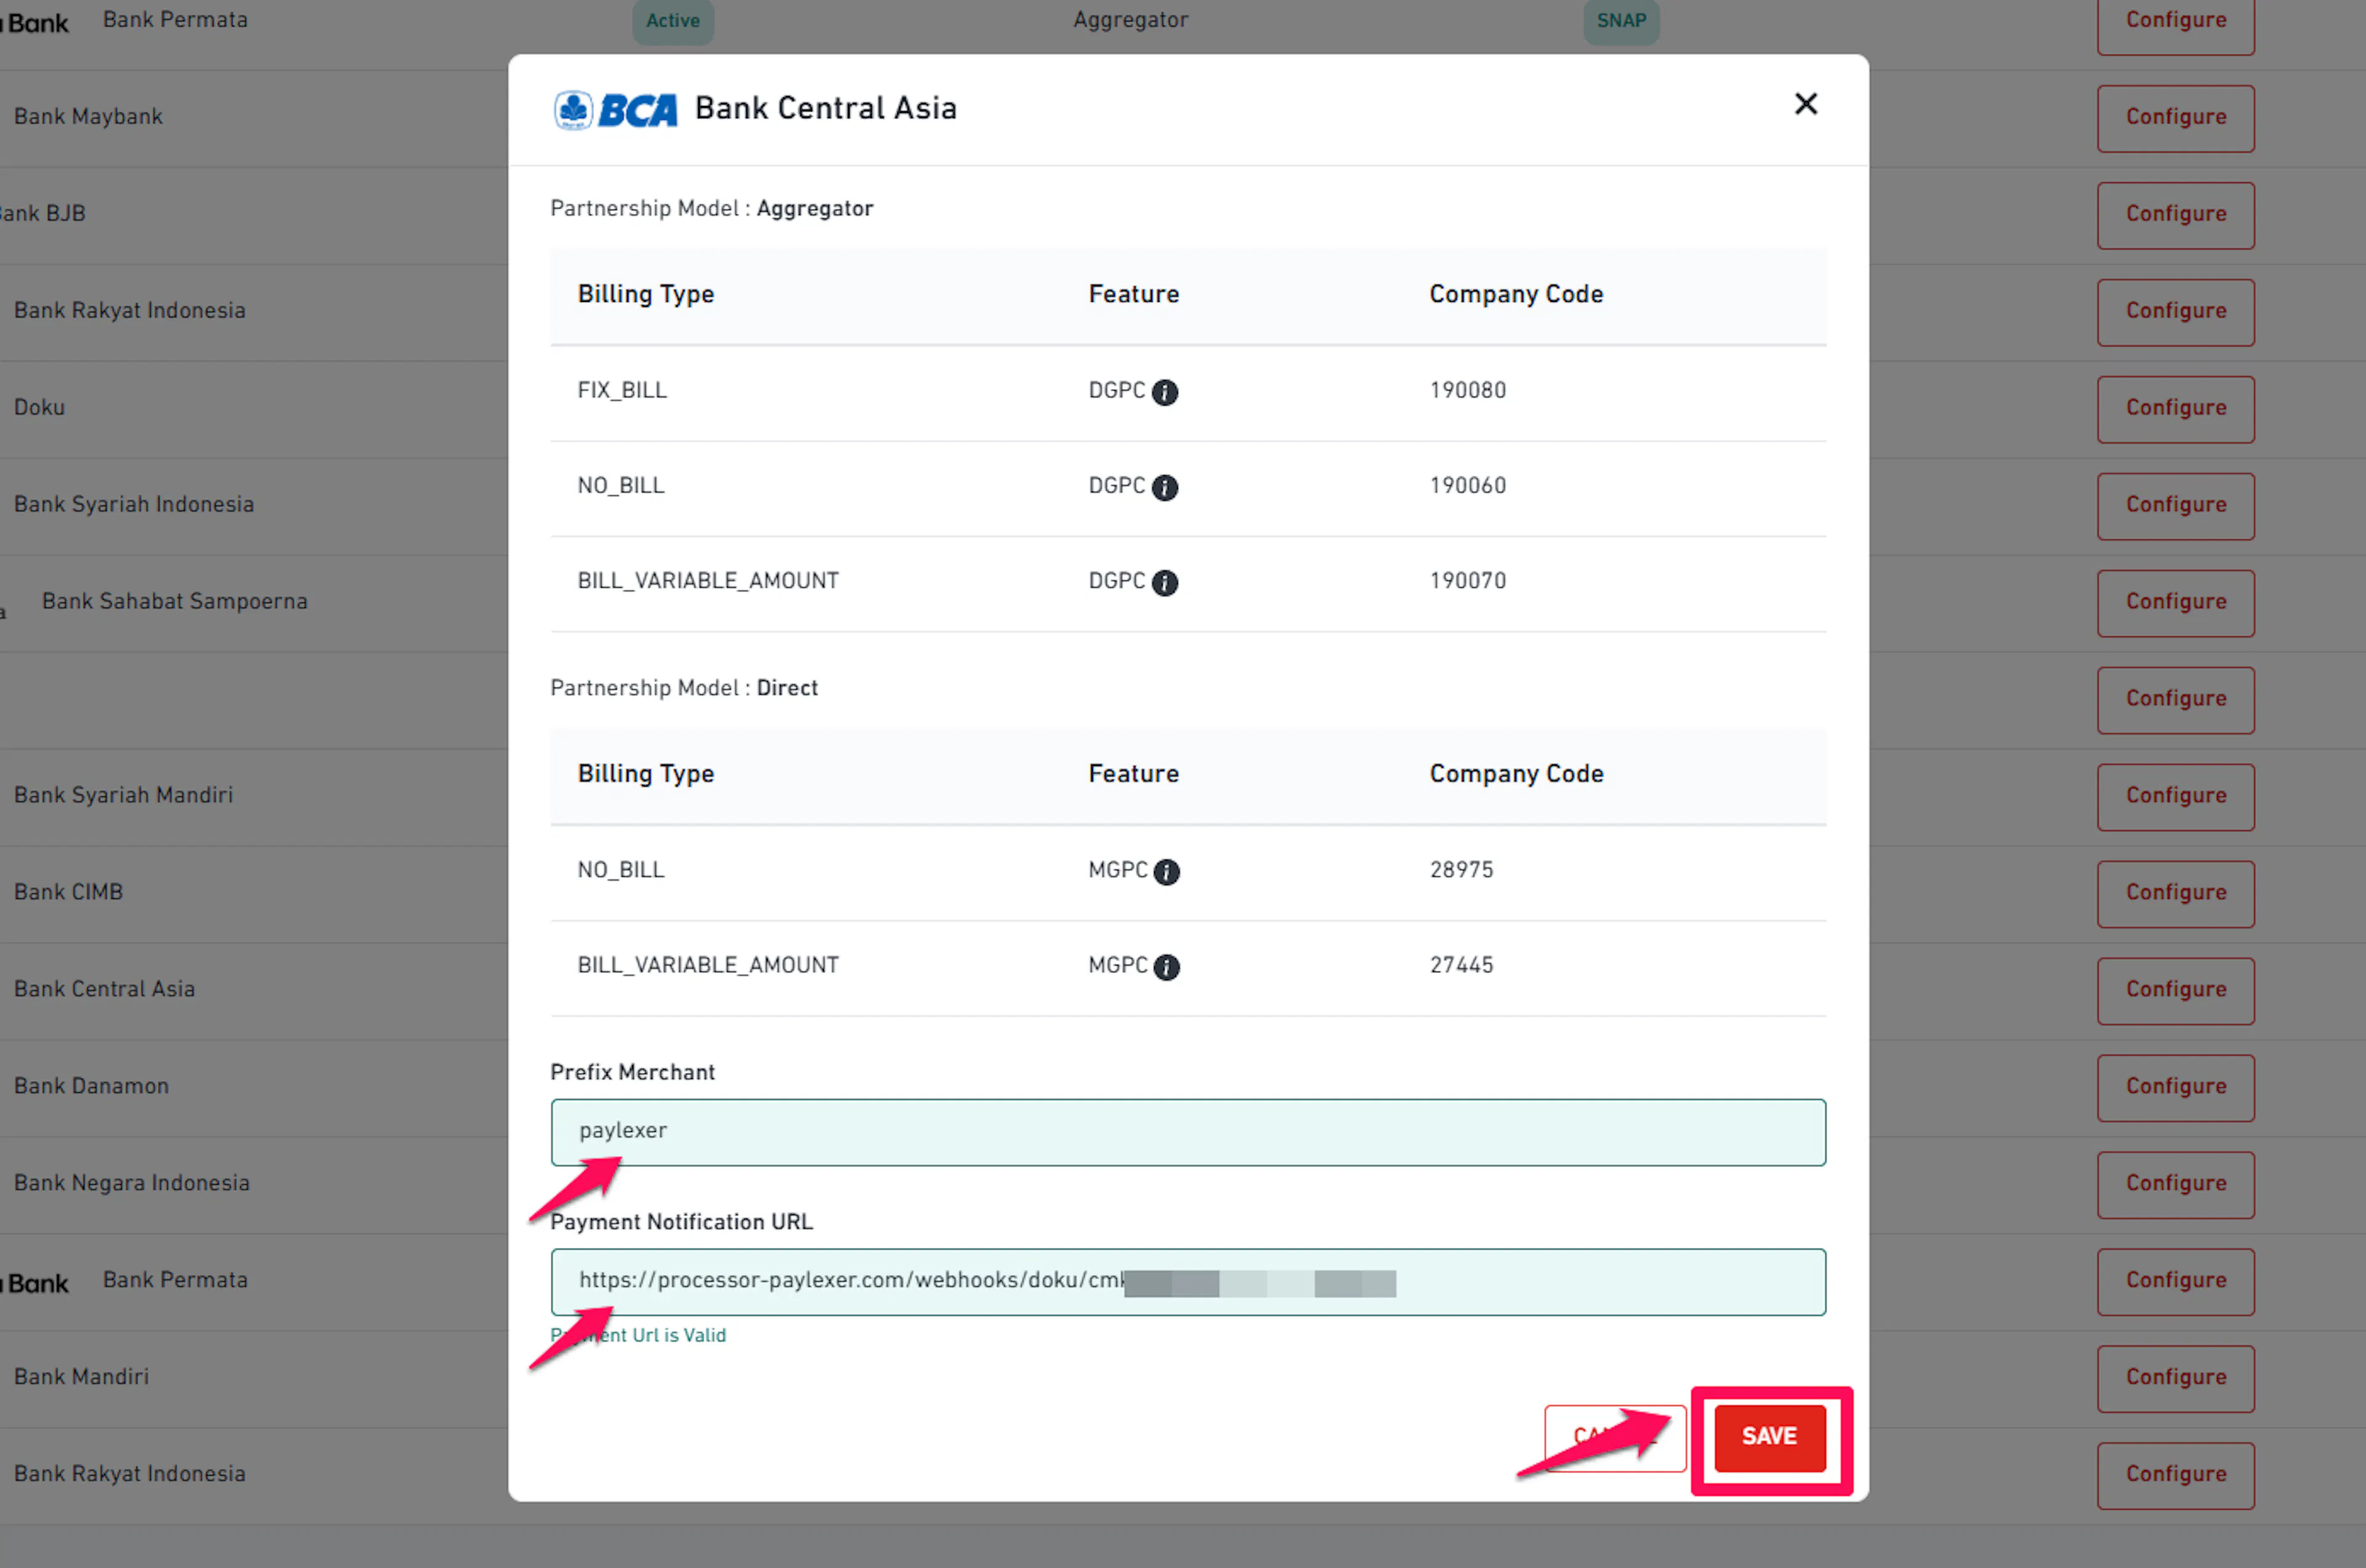
Paste the URL exactly as PayLexer provides it - no trailing slash and no extra query string. DOKU includes the URL path when it signs the webhook, so an altered path causes signature verification to fail and notifications to be rejected.
DOKU shows the URL as Valid once it can reach your PayLexer endpoint.
Integrate DOKU to Your Website
If you have already added and configured your site, you can enable DOKU in your existing setup.
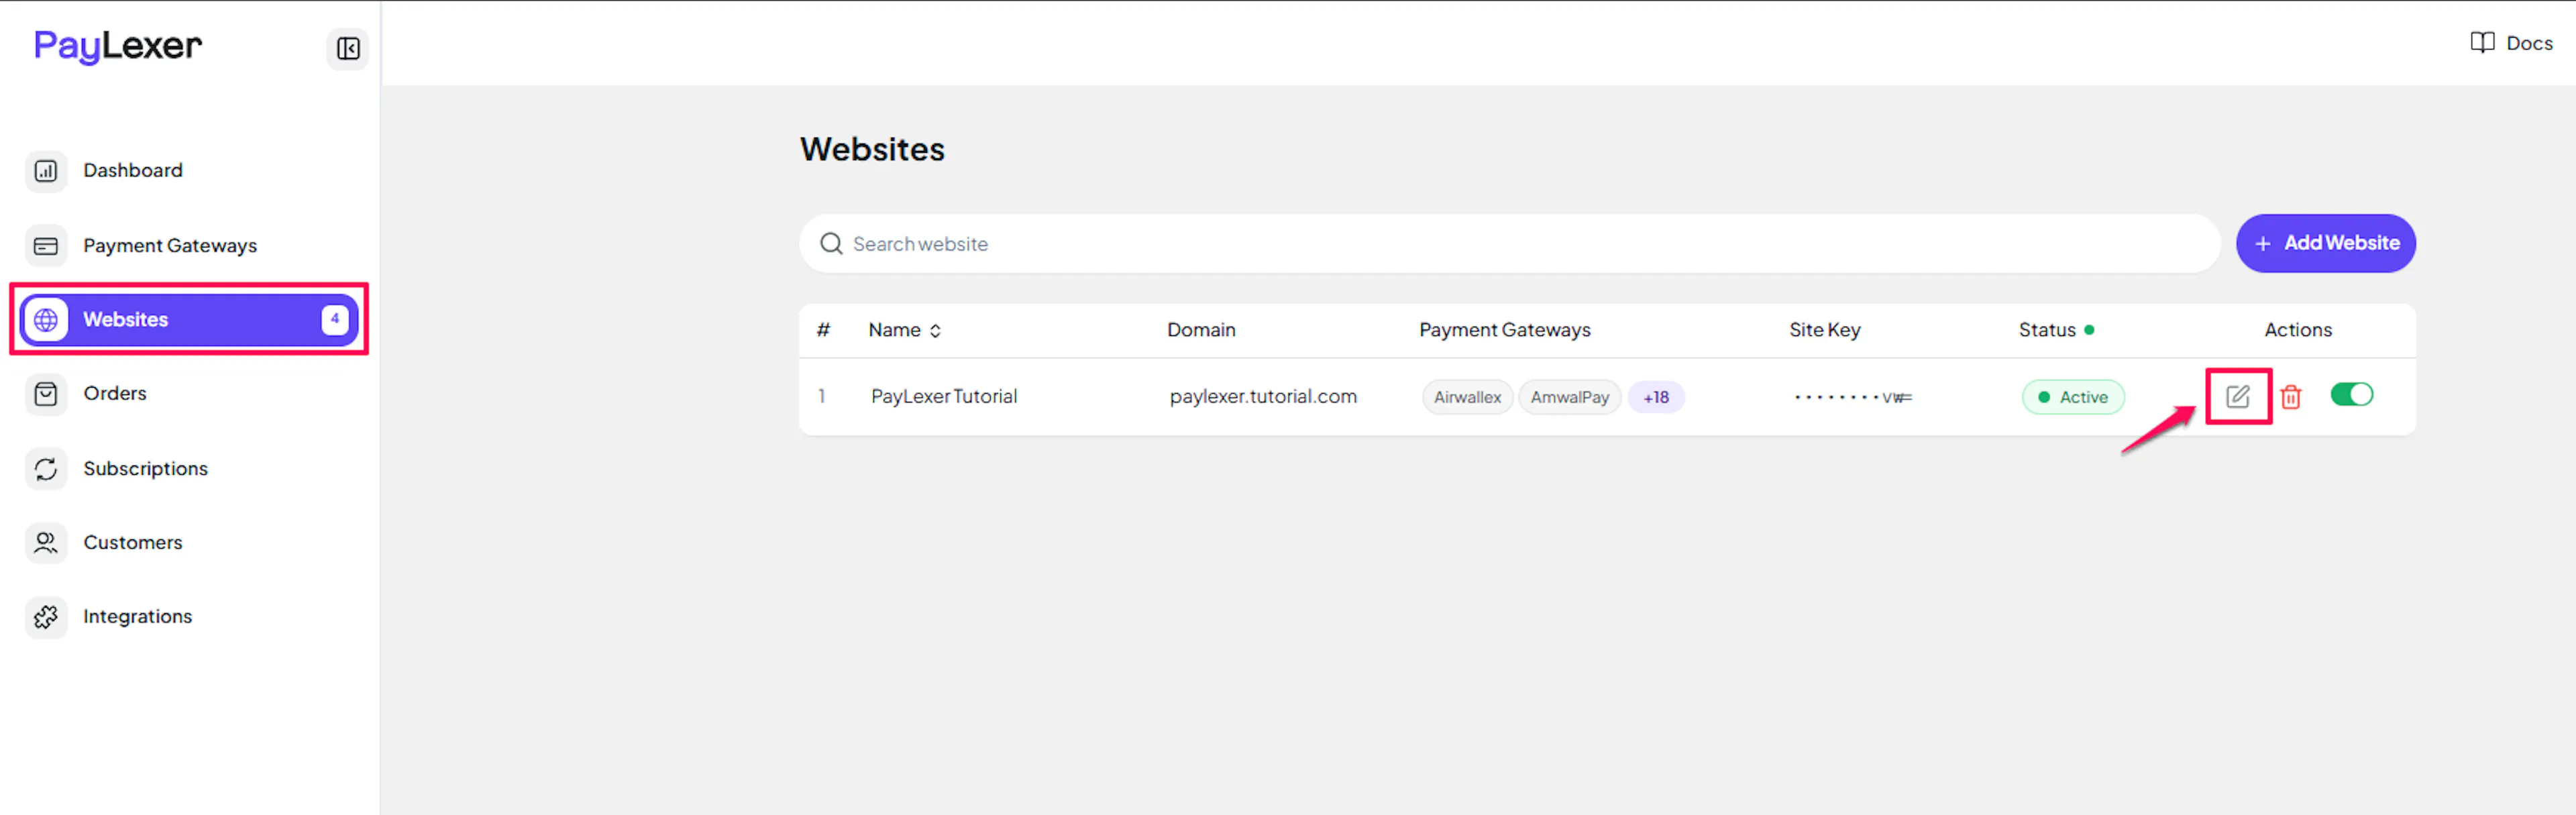
Go to Websites
Navigate to Websites in your PayLexer dashboard.
Edit your website
Click the Edit Icon of your added website.
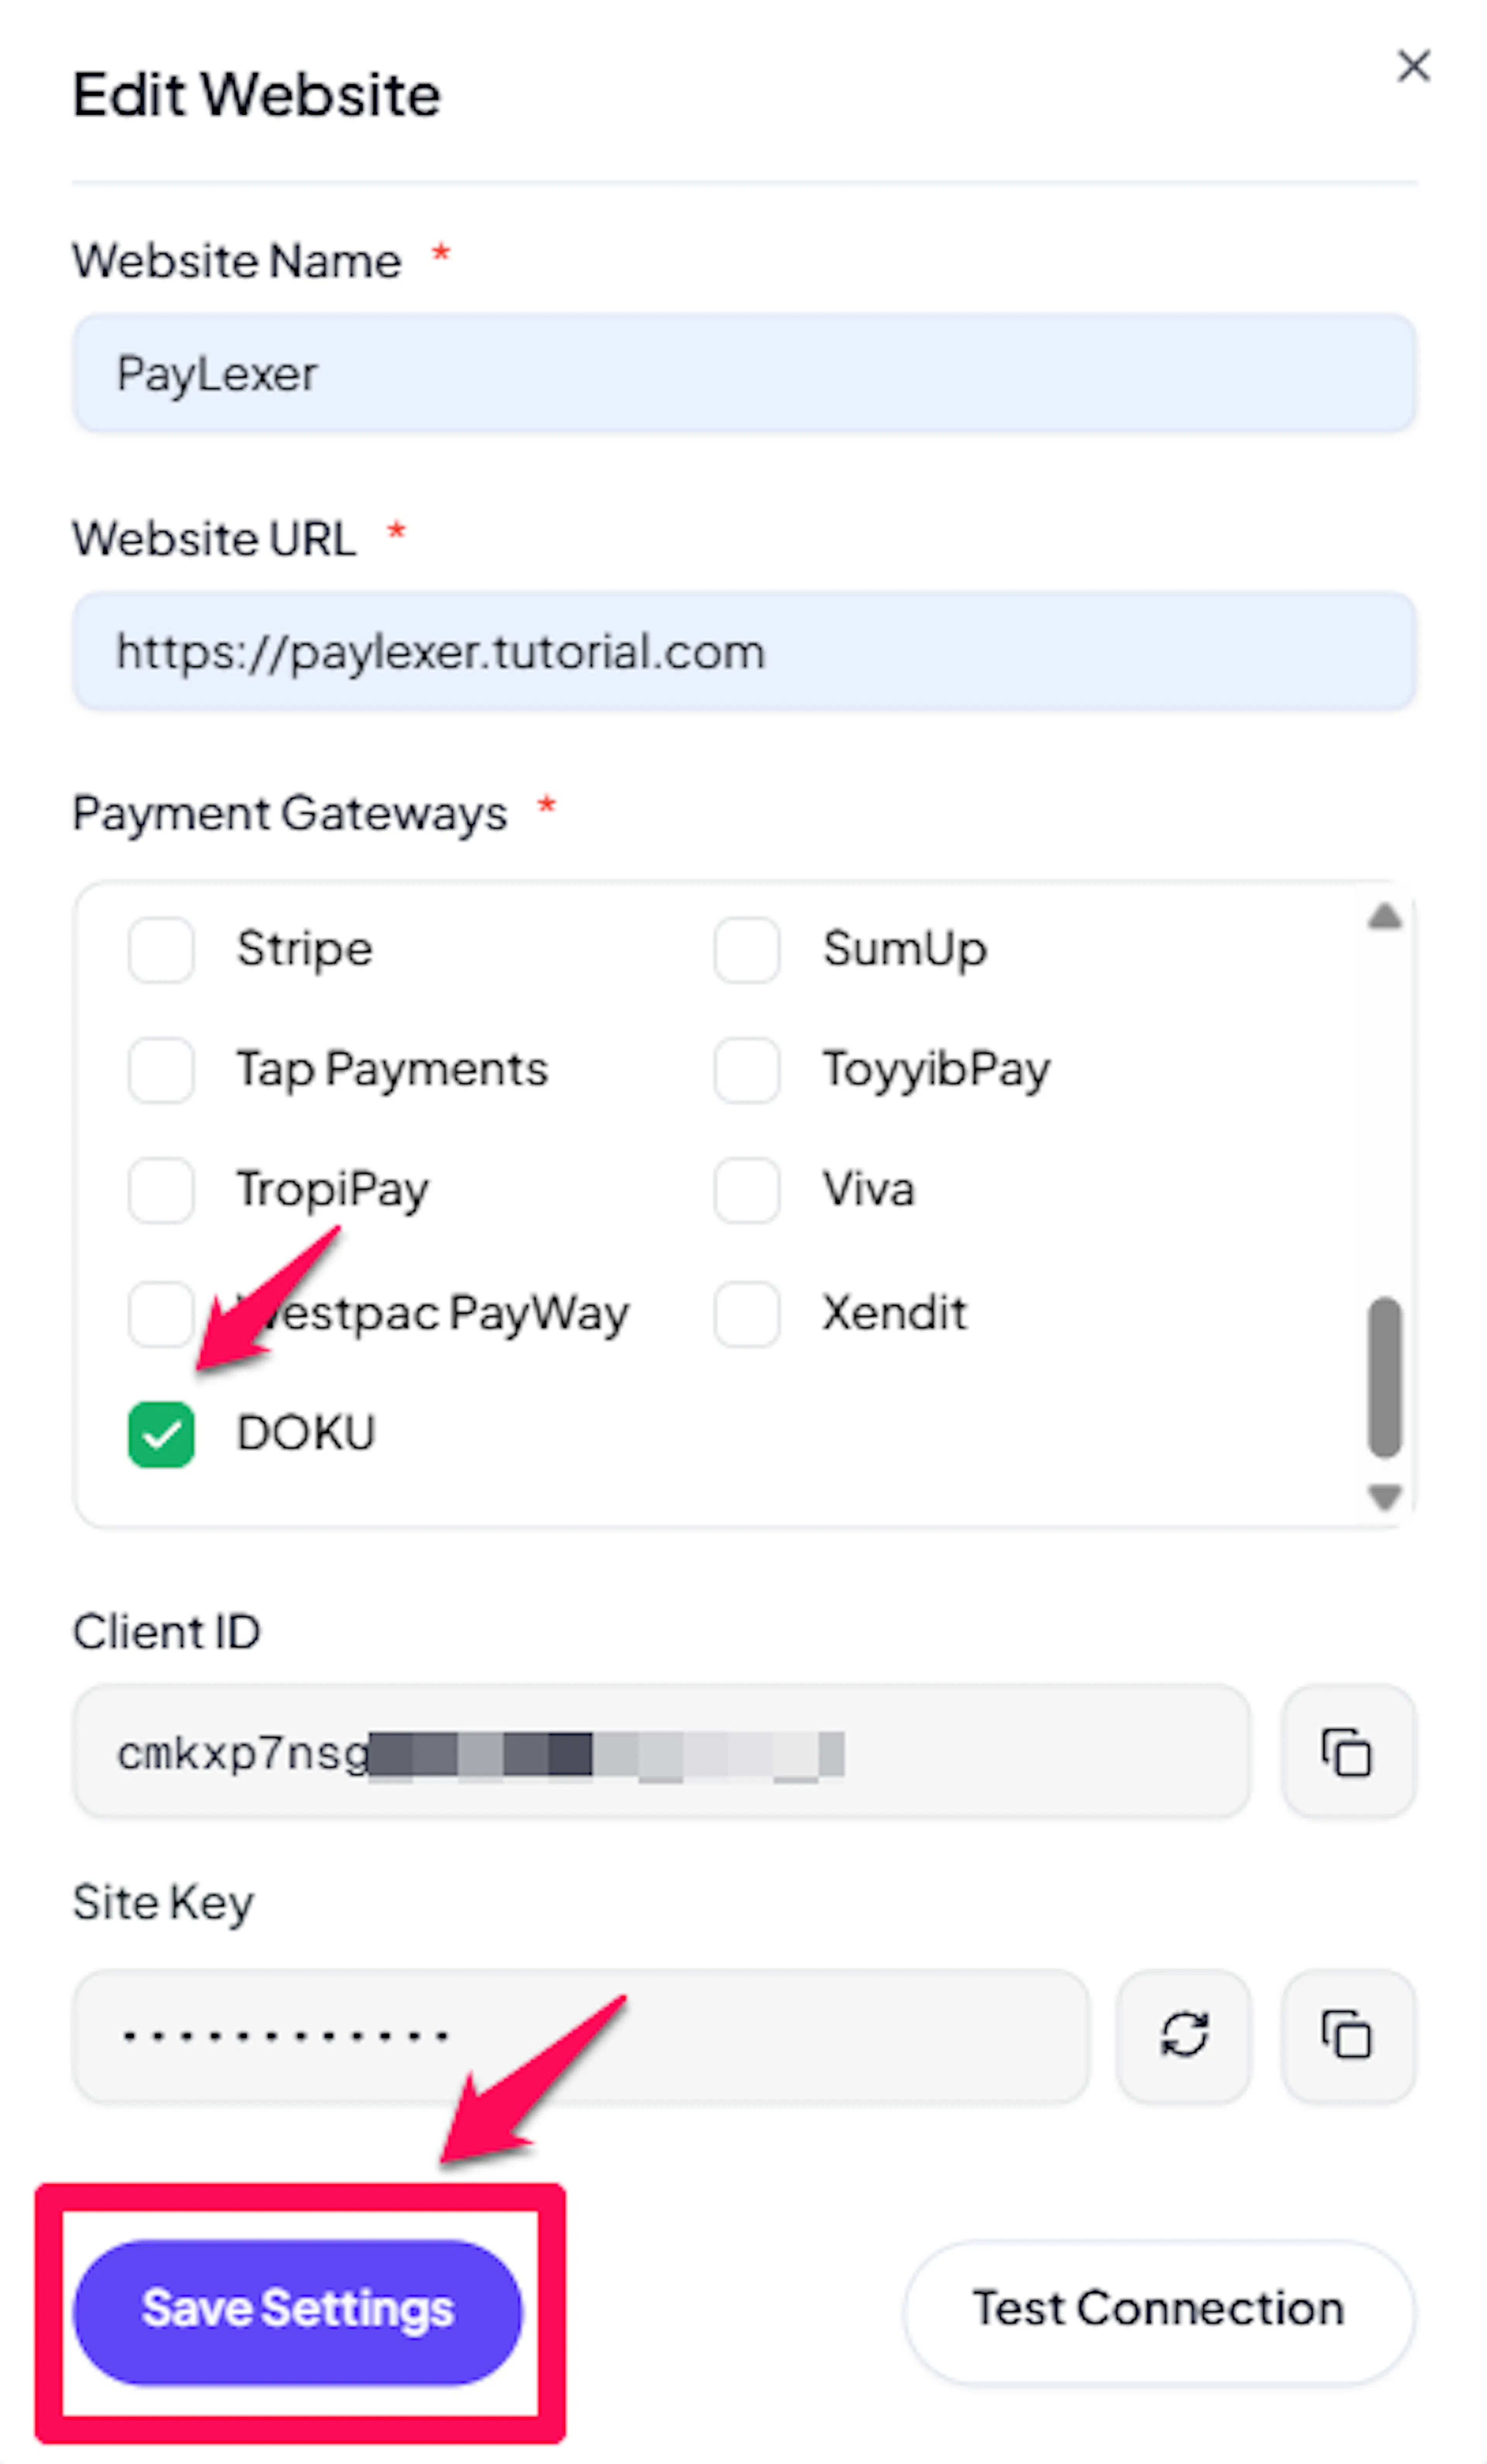
Enable DOKU
Click the checkbox to enable DOKU for the website.
If you haven't added a website yet, Continue to Add Your Website →
Troubleshooting
Best Practices
- Test in the DOKU sandbox before enabling production.
- Configure the Payment Notification URL so payment statuses update automatically.
- Use whole-rupiah prices, since IDR does not use decimal amounts.
- Keep your Secret Key private - it authenticates both API calls and webhook signatures.
FAQs
Still Have Questions?
- DOKU Support: DOKU Help Center
- PayLexer Support: Contact Support