PayFast
Accept payments from South African customers using PayFast on PayLexer.
PayFast is a South African payment gateway that lets you accept card payments, EFT, and more from South African customers. It is widely used for both one-time payments and recurring subscriptions. PayFast uses a form-POST checkout flow - PayLexer builds a signed HTML form and posts it to the PayFast-hosted checkout page, where the customer completes payment before being redirected back to your site.
-
Supported Regions (Merchant Accounts): South Africa - view full list
-
Supported Currencies: ZAR (South African Rand) - view full list
This gateway appears in checkout only when the selected currency is ZAR. Amounts are passed in major units - for example, R 100.00 is submitted as 100.00, not 10000.
Before You Start
Make sure you have:
-
PayFast Account – Don't have one? Sign up for PayFast →
-
PayLexer Account – Required to configure the integration. Create your account →
-
A website where you want to integrate
Looking for a different payment processor? View all supported gateways →
Configuring PayFast
You need a Merchant ID, Merchant Key, and Passphrase from PayFast for this integration.
Getting Your Credentials
Log in to your PayFast account
Go to payfast.co.za/merchant and sign in.
Navigate to Settings
In the left sidebar, click Settings, then Developer Settings.
Copy your credentials
On the Developer Settings page you will find:
-
Merchant ID - your unique numeric merchant identifier
-
Merchant Key - your private merchant key
Copy both values and keep them in a secure location.
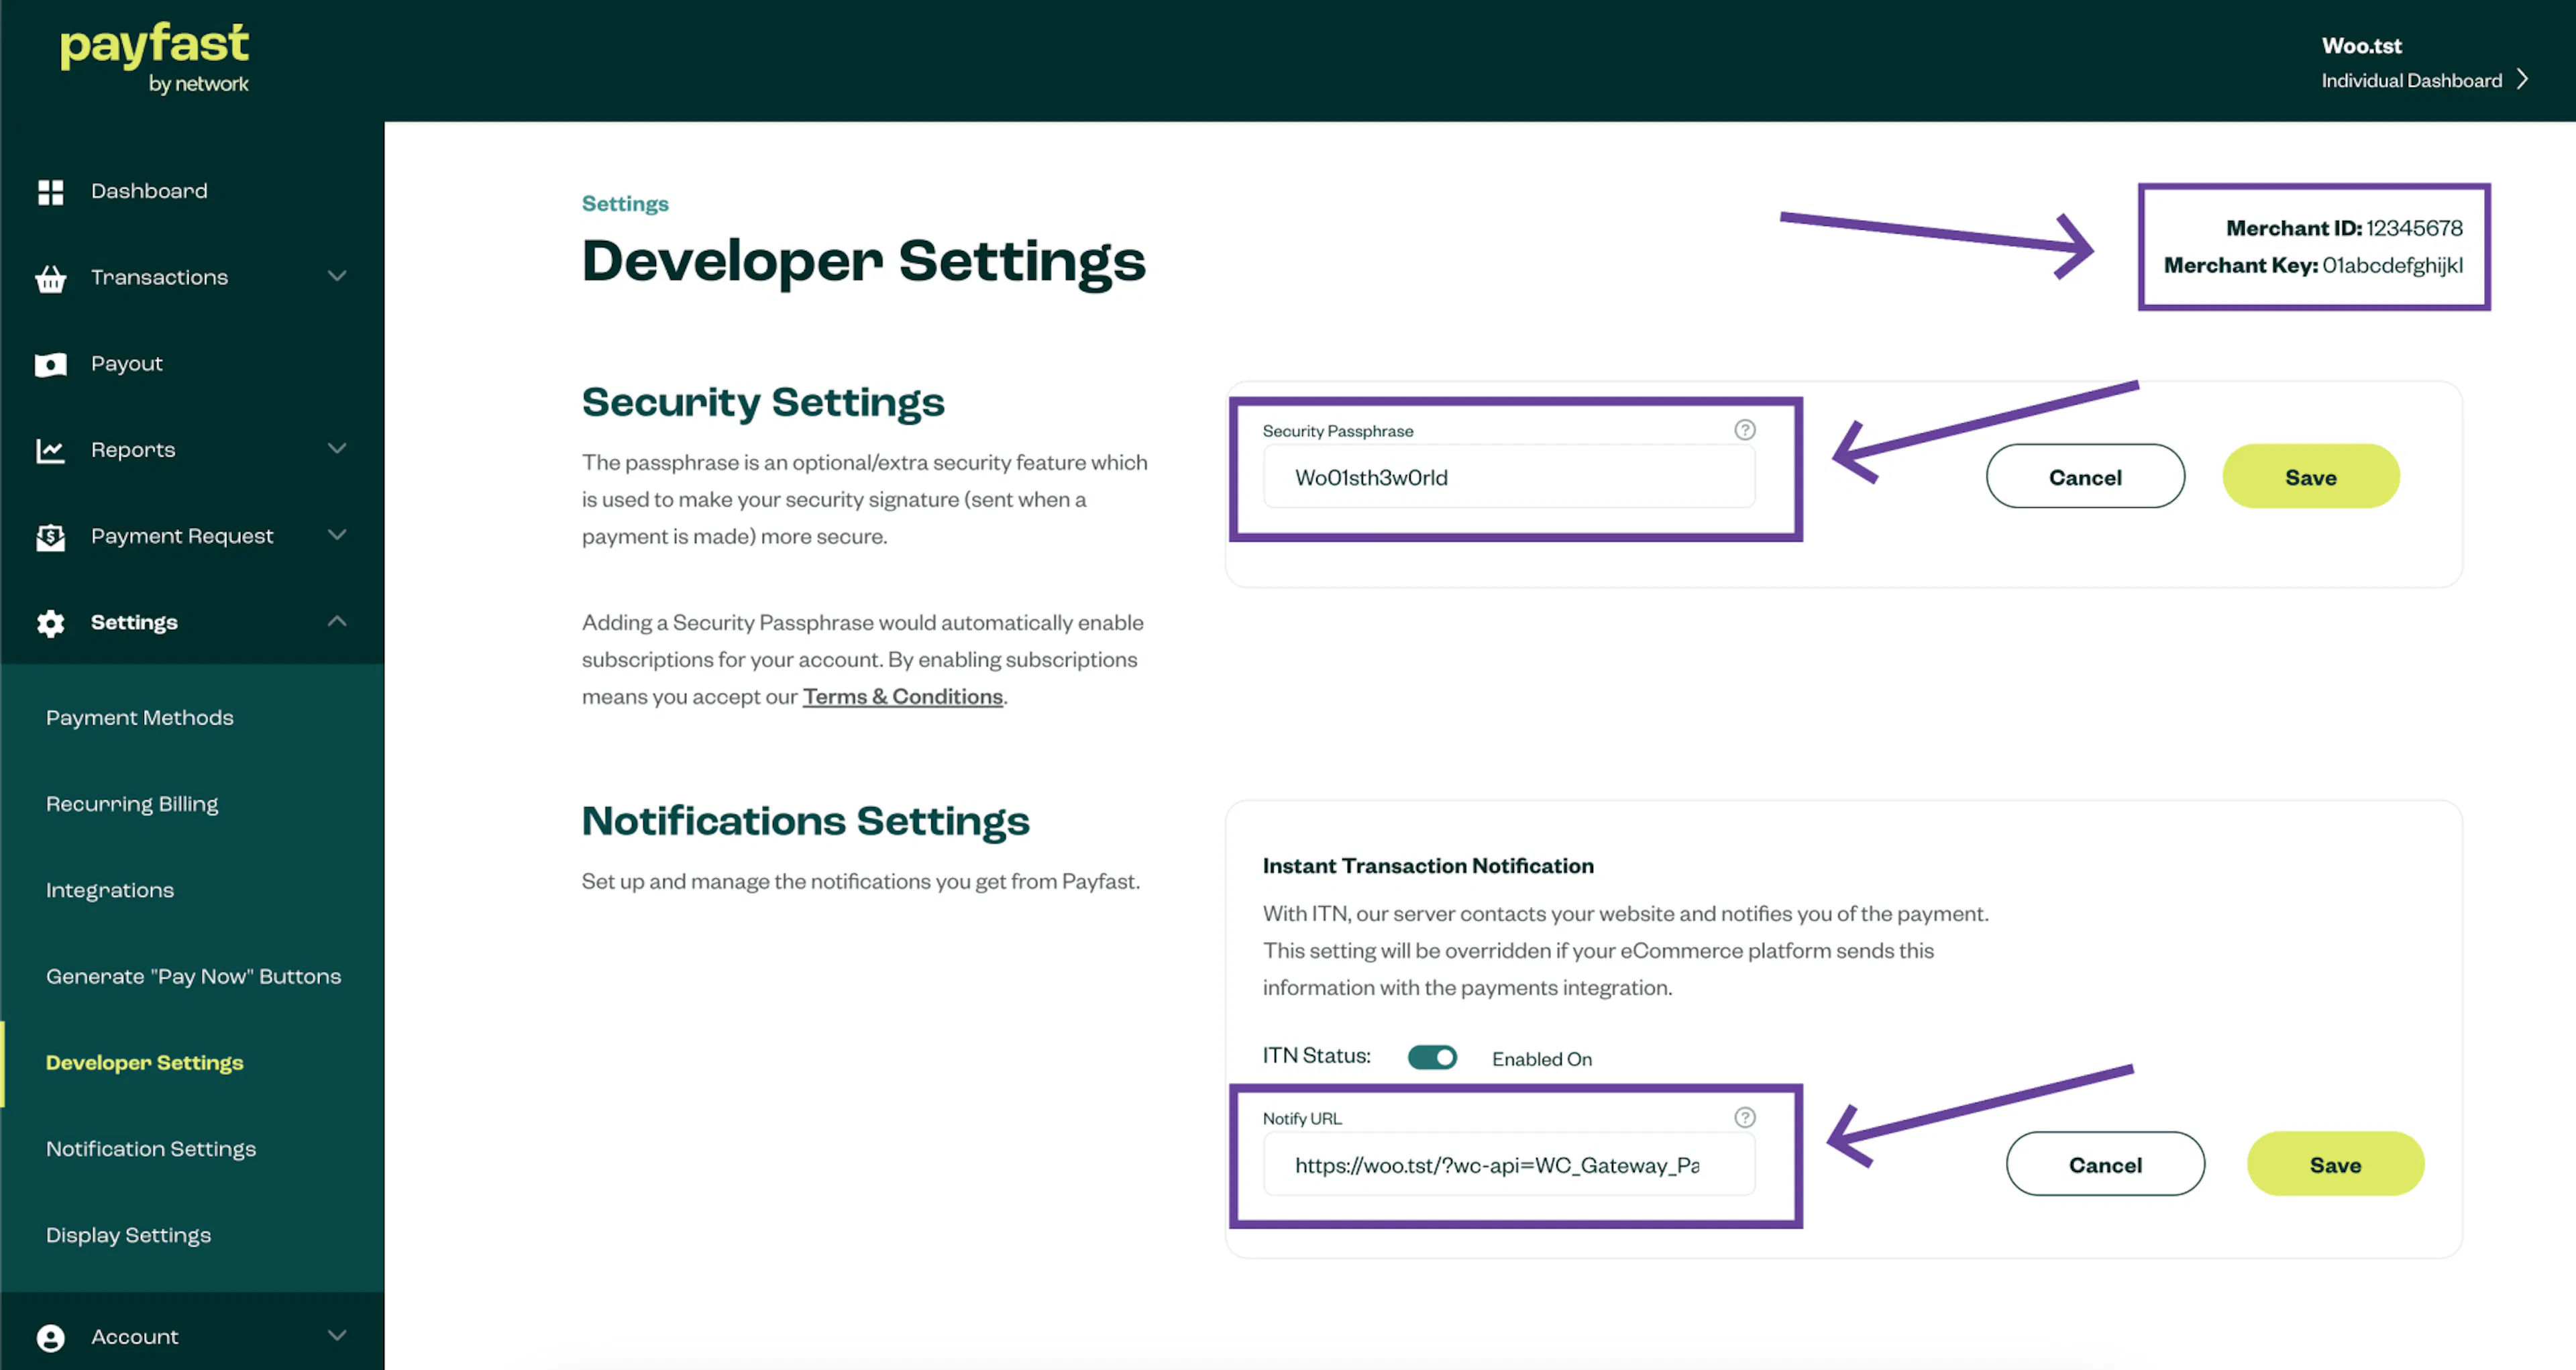
Set your Passphrase
Still on the Developer Settings page, locate the Security Passphrase field. If you have not set one, create a strong passphrase now and save it.
The Passphrase is not shown again after you save it. Store it securely. PayLexer uses it to validate incoming ITN (webhook) notifications from PayFast.

Adding Credentials to PayLexer
Open PayLexer Dashboard
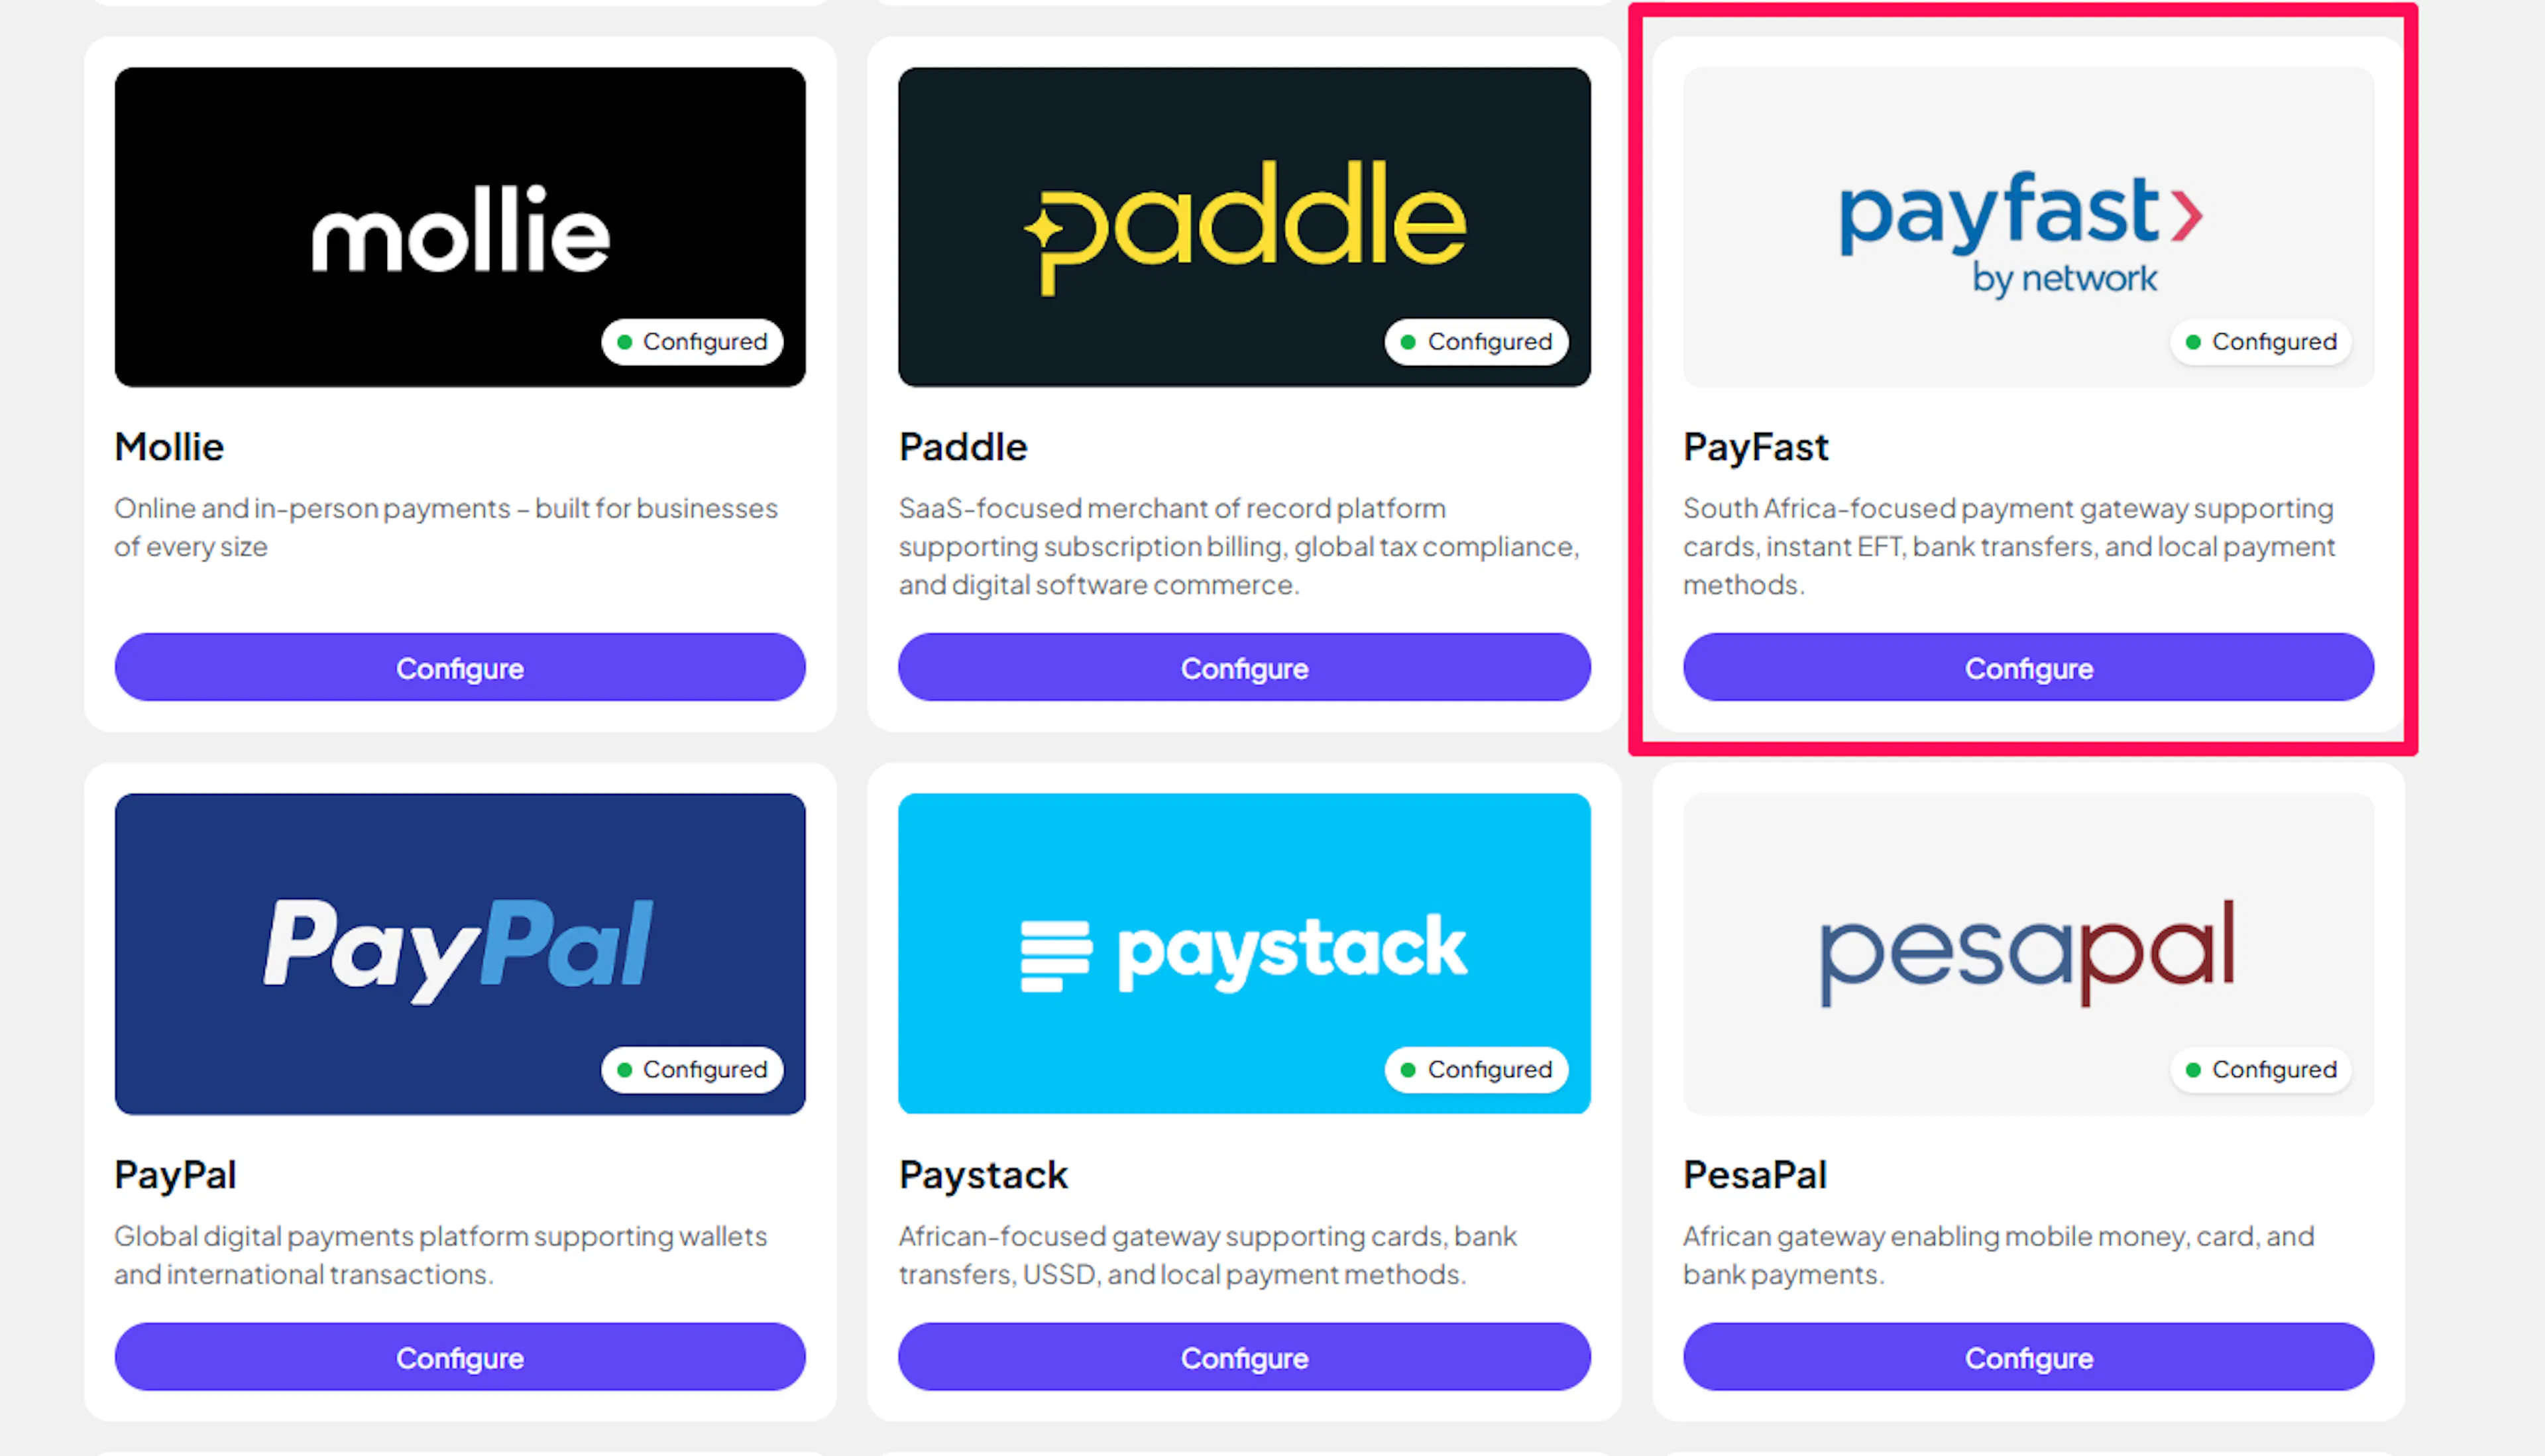
Log in to your PayLexer dashboard and navigate to Settings → Payment Gateways and click Add Gateway. Find PayFast in the list of available gateways and click Configure.
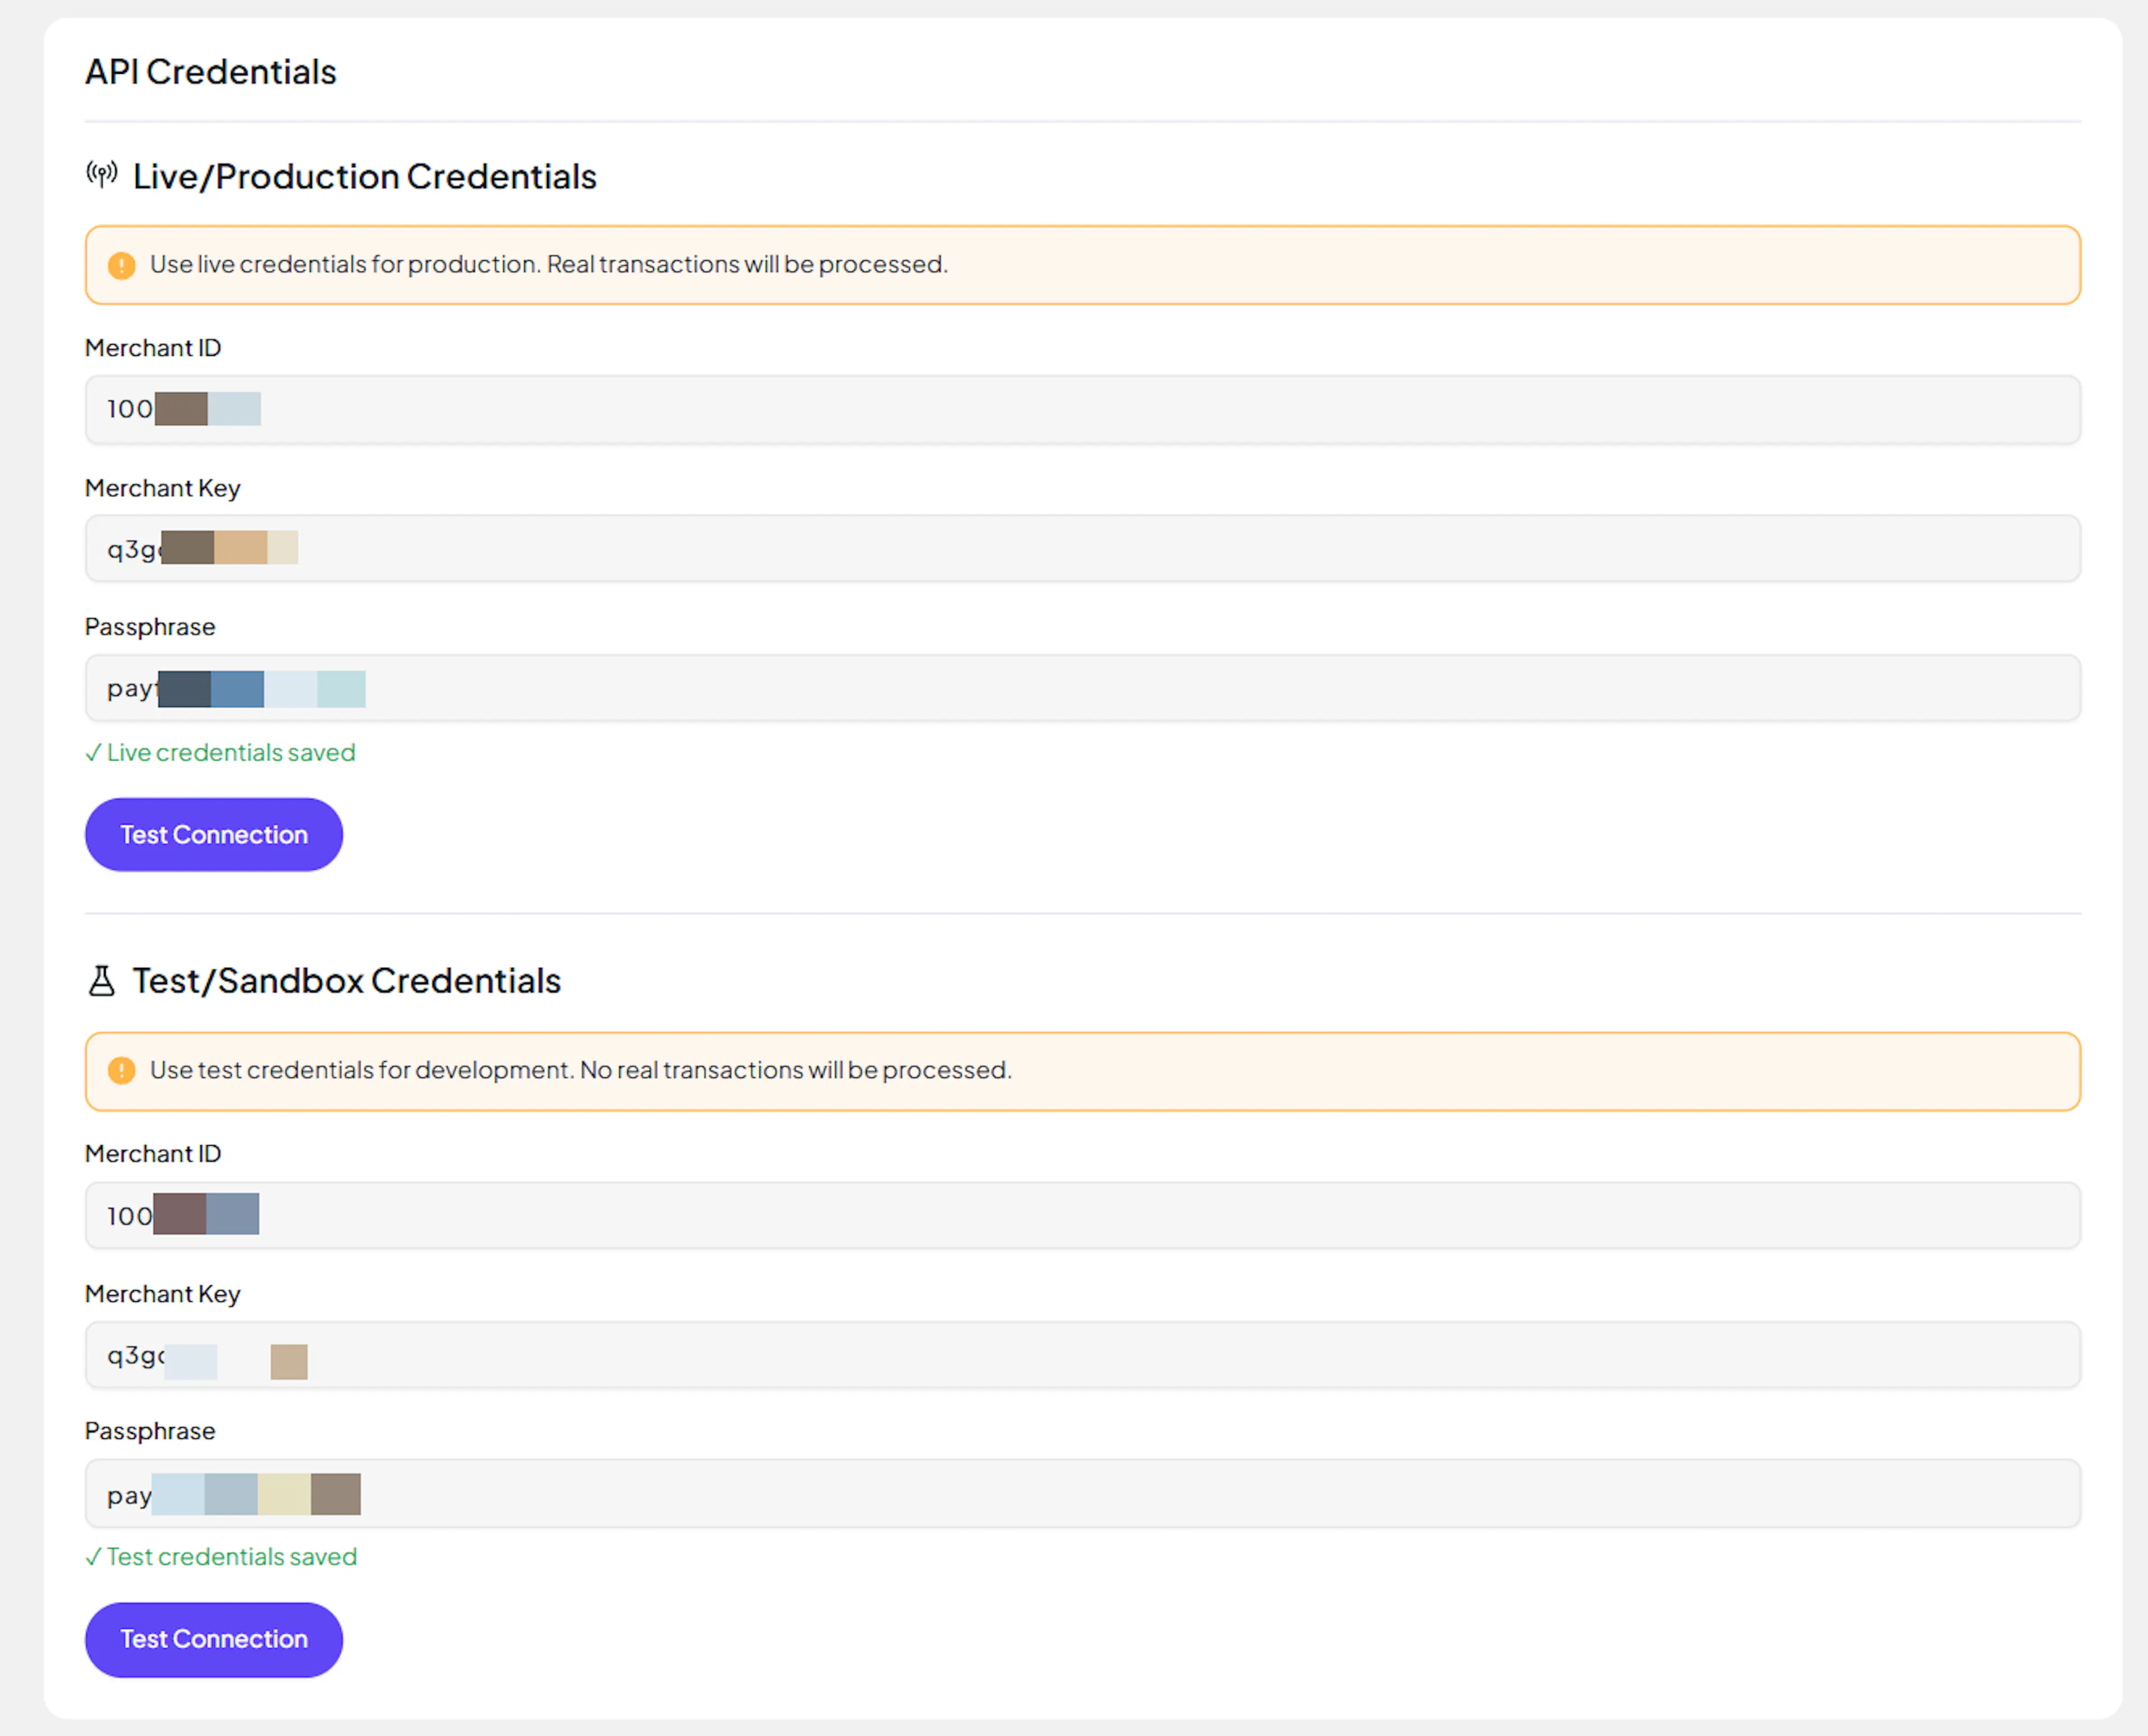
Enter your credentials
Paste the Merchant ID, Merchant Key, and Passphrase in the respective fields.

Understanding Live/Production and Sandbox Settings:
| Environment | Purpose |
|---|---|
| Live / Production (Mandatory) | Used for real transactions. Cannot be empty, even when testing. |
| Test / Sandbox (Optional) | Used for testing only. No real money is processed. |
How PayLexer selects credentials:
-
Debug/Test mode ON → Test credentials are used
-
Debug/Test mode OFF → Live credentials are used
Test and save
Click Test Connection to verify your credentials, then click Save Configuration.
Webhooks (Automatic)
PayFast uses ITN (Instant Transaction Notification) to deliver real-time payment status updates. PayLexer automatically includes the ITN callback URL in every payment request - no manual webhook configuration is required in your PayFast dashboard.
Benefits of automatic ITN handling:
-
Instant payment status updates
-
Automatic subscription event tracking
-
No webhook setup required in the PayFast dashboard
Payment status is not available by polling. PayFast delivers status updates exclusively via ITN. A payment will show as Pending in PayLexer until the ITN notification arrives. Make sure PayLexer is reachable from the internet before taking payments.
PayFast sends an ITN notification for each of the following payment statuses:
ITN payment_status | PayLexer event |
|---|---|
COMPLETE | Payment succeeded |
FAILED | Payment failed |
PENDING | Payment processing |
CANCELLED | Payment canceled |
For subscriptions, PayLexer also maps:
| Condition | PayLexer event |
|---|---|
COMPLETE + subscription_type field present | Subscription created (first payment) |
COMPLETE + no subscription_type (renewal) | Subscription renewed |
| FAILED + subscription token present | Subscription payment failed |
| CANCELLED + subscription token present | Subscription cancelled |
In production, PayLexer automatically validates that ITN requests come from a known PayFast IP. To enforce this strictly, set PAYFAST_ENFORCE_IP_ALLOWLIST=true in your environment. Do not enable this in sandbox - sandbox ITNs originate from non-listed IPs and will be blocked.
Integrate PayFast to Your Website
If you have already added and configured your site, you can enable PayFast in your existing setup.
Go to Websites
Navigate to Websites in your PayLexer dashboard.
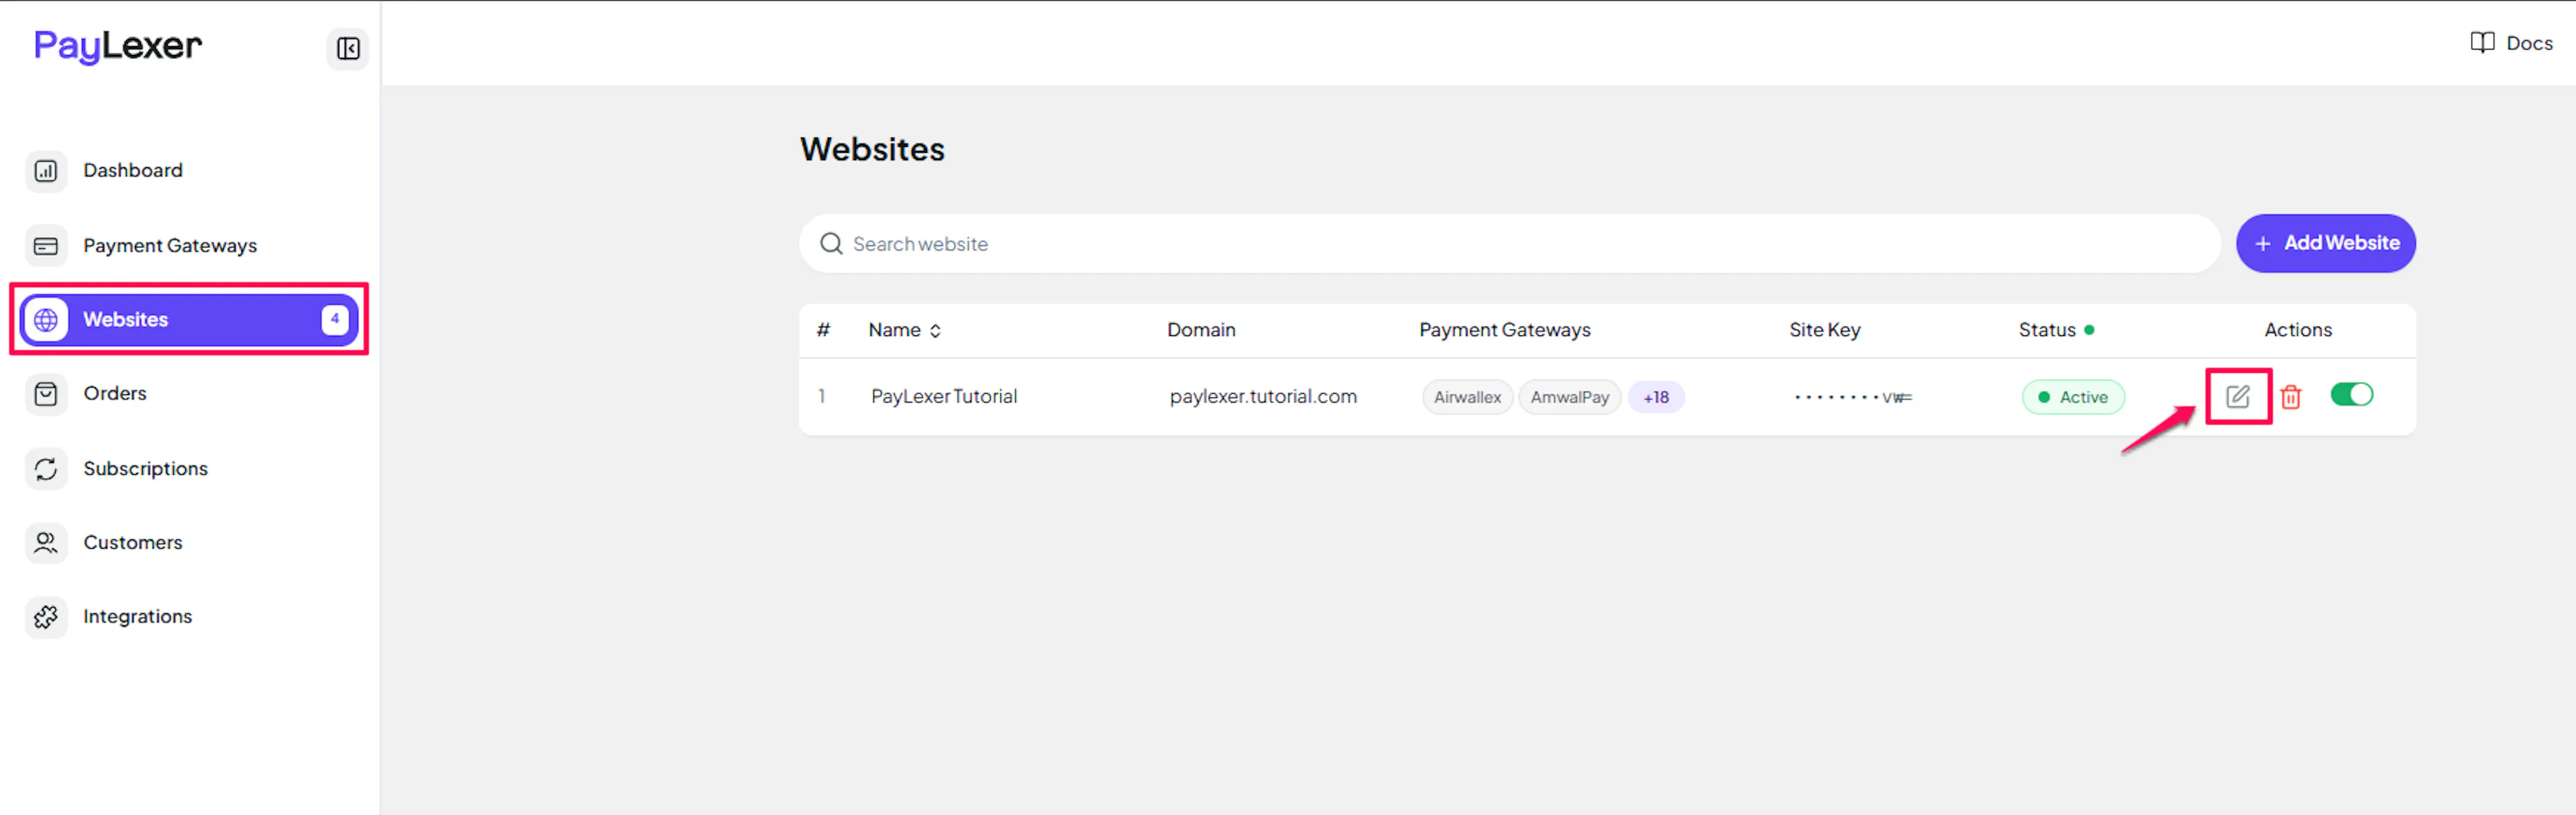
Edit your website
Click the Edit Icon of your added website.
Enable PayFast
Click the checkbox to enable PayFast for the website.
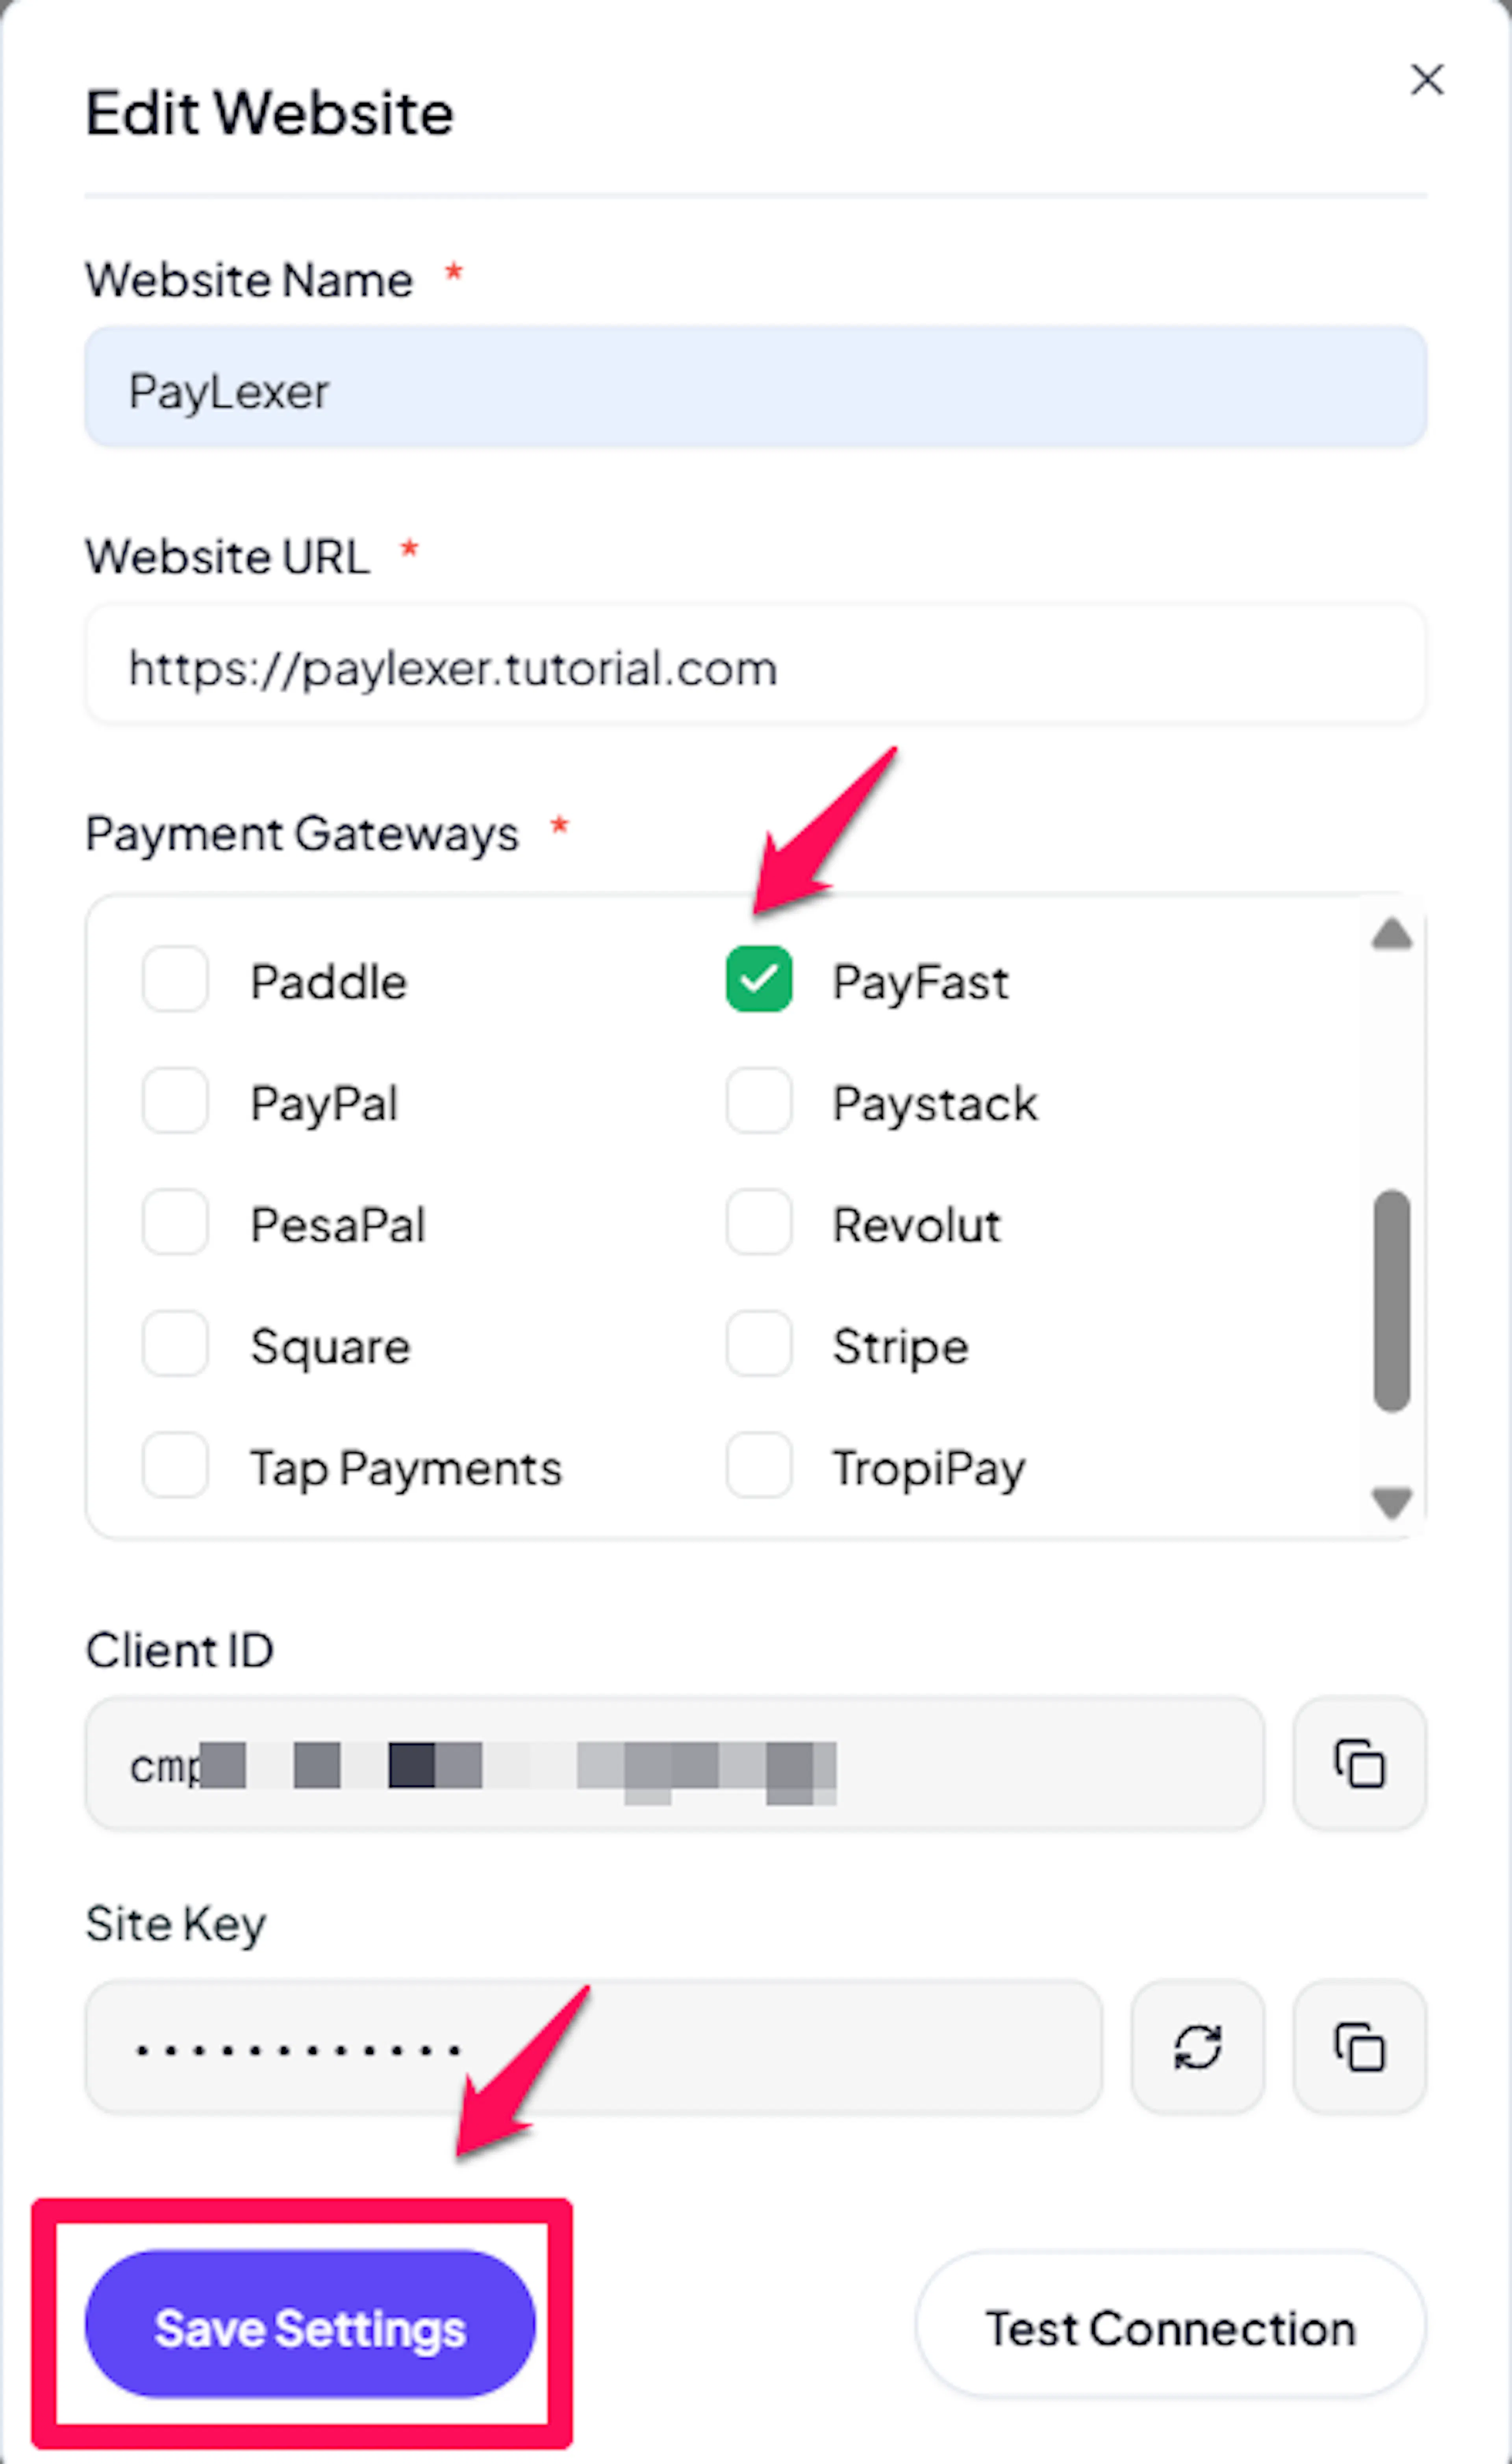
PayFast is now active for this website. Run a test transaction before switching off Debug/Test mode.
If you haven't added a website yet, Continue to Add Your Website →
Test Mode
PayFast provides a sandbox environment for testing payments without real money. To use it, set Environment to Test when configuring your PayFast gateway in PayLexer.
Use the credentials from your PayFast sandbox account. Register a sandbox merchant at sandbox.payfast.co.za.
The sandbox checkout endpoint is automatically used when Environment is set to Test:
https://sandbox.payfast.co.za/eng/process
Log in to the sandbox with a test buyer account to complete checkout flows during testing. Create test buyer accounts in the PayFast sandbox portal.
[IMAGE: PayFast sandbox checkout page]
PayFast sandbox does not support subscription management REST API calls (cancel, pause, resume). These operations return a 419 response in sandbox and are treated as a local success by PayLexer so your test flows are not blocked.
Subscription Support
PayFast supports recurring billing. When creating a subscription through PayLexer, the initial payment is completed via the standard PayFast checkout. After the first successful charge, PayFast issues a subscription token that PayLexer uses for all subsequent subscription management.
Supported billing frequencies:
| Frequency | PayLexer interval value |
|---|---|
| Monthly | month |
| Quarterly | quarterly |
| Biannual (every 6 months) | biannual |
| Annual | year |
PayFast does not support daily or weekly subscription billing. Attempts to create a subscription with a daily or weekly interval will be rejected.
Frequently Asked Questions
PayFast delivers payment status exclusively via ITN. If a payment stays in Pending status, check that:
-
PayLexer is reachable from the internet (not running on localhost without a tunnel).
-
Your Passphrase in PayLexer matches exactly what is set in the PayFast dashboard.
Live credentials are mandatory to save the configuration. Test credentials are optional but highly recommended so you can safely test payments before going live.
Check the Debug Mode setting in your platform. When Debug Mode is ON, PayLexer uses your Test credentials. When OFF, it uses Live credentials.
Transactions appear in three places: your platform's booking or order pages, PayLexer Dashboard → Orders, and your PayFast Dashboard. All three show the same transactions with different IDs.
PayFast settles all transactions in South African Rand (ZAR).
Yes. PayLexer supports PayFast recurring billing for monthly, quarterly, biannual, and annual plans. See the Subscription Support section above for details.
The most common cause is a Passphrase mismatch. Verify that the Passphrase stored in PayLexer matches the Passphrase set in your PayFast Integration Settings exactly - including case and any special characters.
If PAYFAST_ENFORCE_IP_ALLOWLIST is enabled, PayLexer blocks ITN requests that do not originate from a known PayFast production IP. Ensure you have not accidentally enabled this setting in your sandbox environment, and confirm that no upstream proxy is masking the PayFast IP before it reaches PayLexer.
Still Have Questions?
-
PayFast Support: PayFast Developer Docs
-
PayLexer Support: Contact Support