Braintree
Connect Braintree to PayLexer to accept cards, PayPal, digital wallets, and subscriptions on your website.
Overview
Braintree is a global payment platform owned by PayPal that enables businesses to accept payments online and in mobile apps. It operates across 40+ countries and supports a wide range of currencies, making it a strong choice for businesses targeting customers in North America, Europe, Australia, and beyond. Braintree is known for its developer-friendly API, built-in fraud protection tools, and native support for recurring billing and digital wallets.
Supported Features
-
Credit and debit cards (Visa, Mastercard, American Express, Discover, JCB, UnionPay)
-
PayPal and Venmo (US only)
-
Apple Pay and Google Pay
-
ACH Direct Debit (US only)
-
Recurring billing and subscription management
-
Advanced fraud protection (Kount integration)
-
Multi-currency and international payments
-
Webhook notifications for real-time payment events
Before You Start
Before connecting Braintree to PayLexer, make sure you have:
-
A Braintree merchant account - Sign up for a free sandbox account to test before going live.
-
A PayLexer account - Create a PayLexer account if you don't have one.
-
A website where you want to integrate.
Looking for a different payment processor? View all supported gateways →
Configuring Braintree
Getting API Credentials
You need three credentials from your Braintree dashboard: your Merchant ID, Public Key, and Private Key. Braintree provides separate sets for Live (Production) and Sandbox (Test) environments.
Log in to your Braintree dashboard
-
For Live credentials: go to braintreegateway.com and sign in.
-
For Sandbox credentials: go to sandbox.braintreegateway.com and sign in.
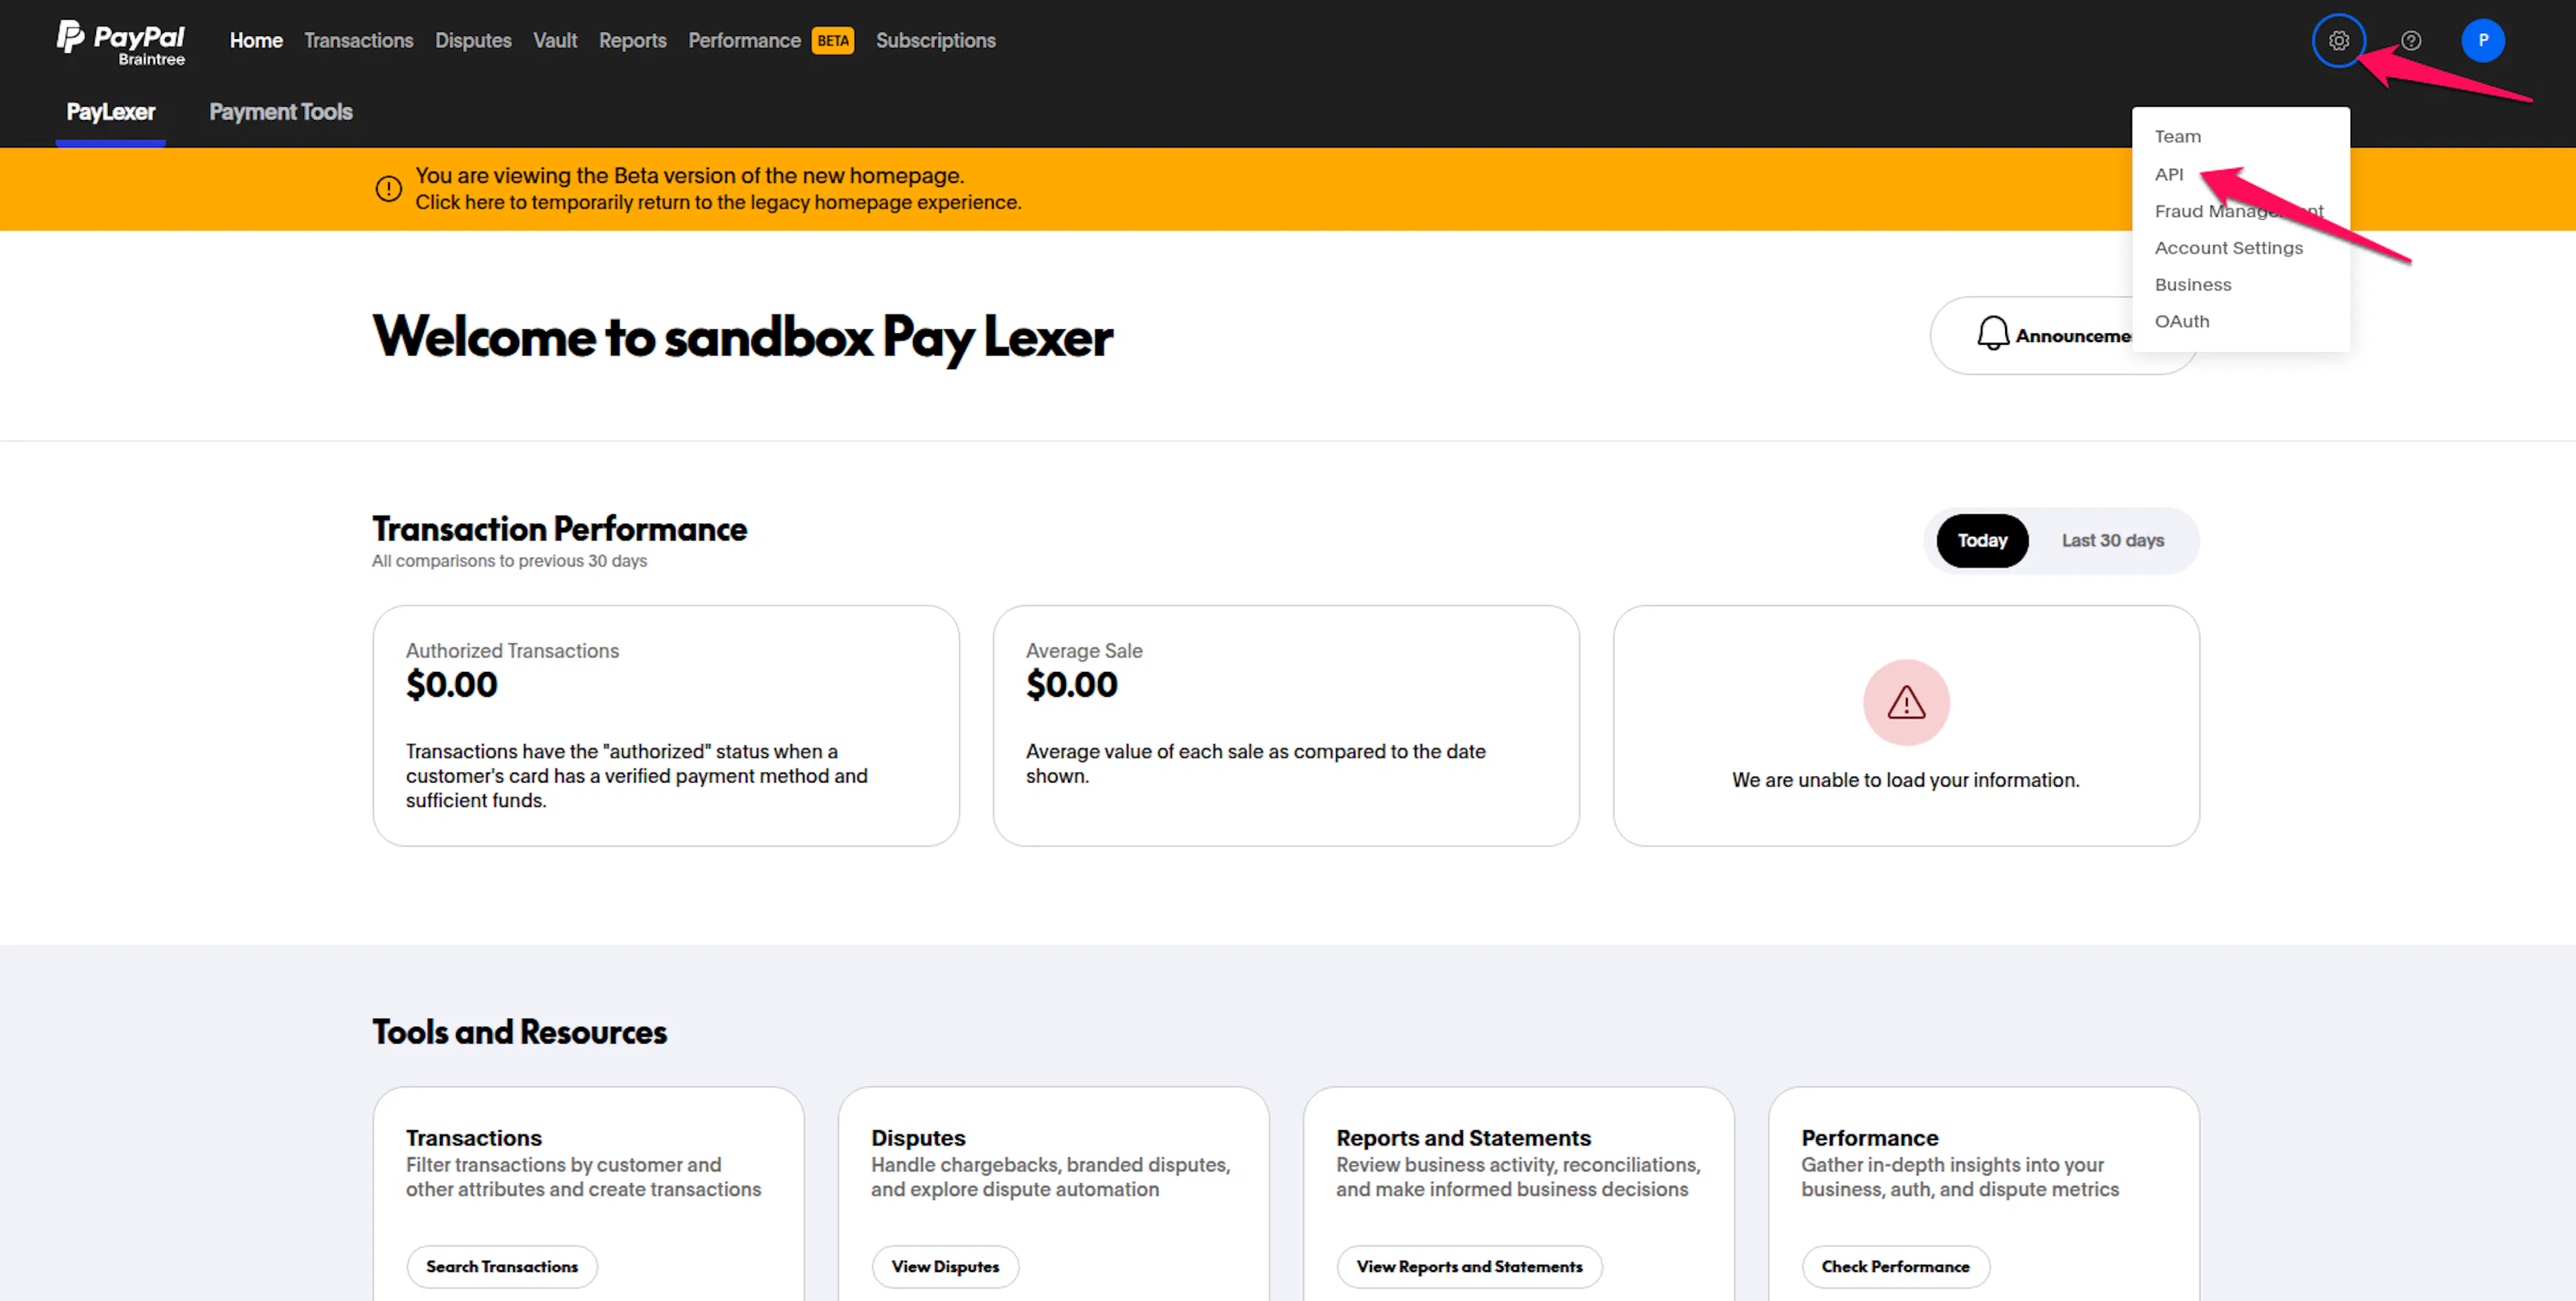
Open API Keys
-
Click the gear icon (Settings) in the top-right corner.
-
Select API from the dropdown menu.
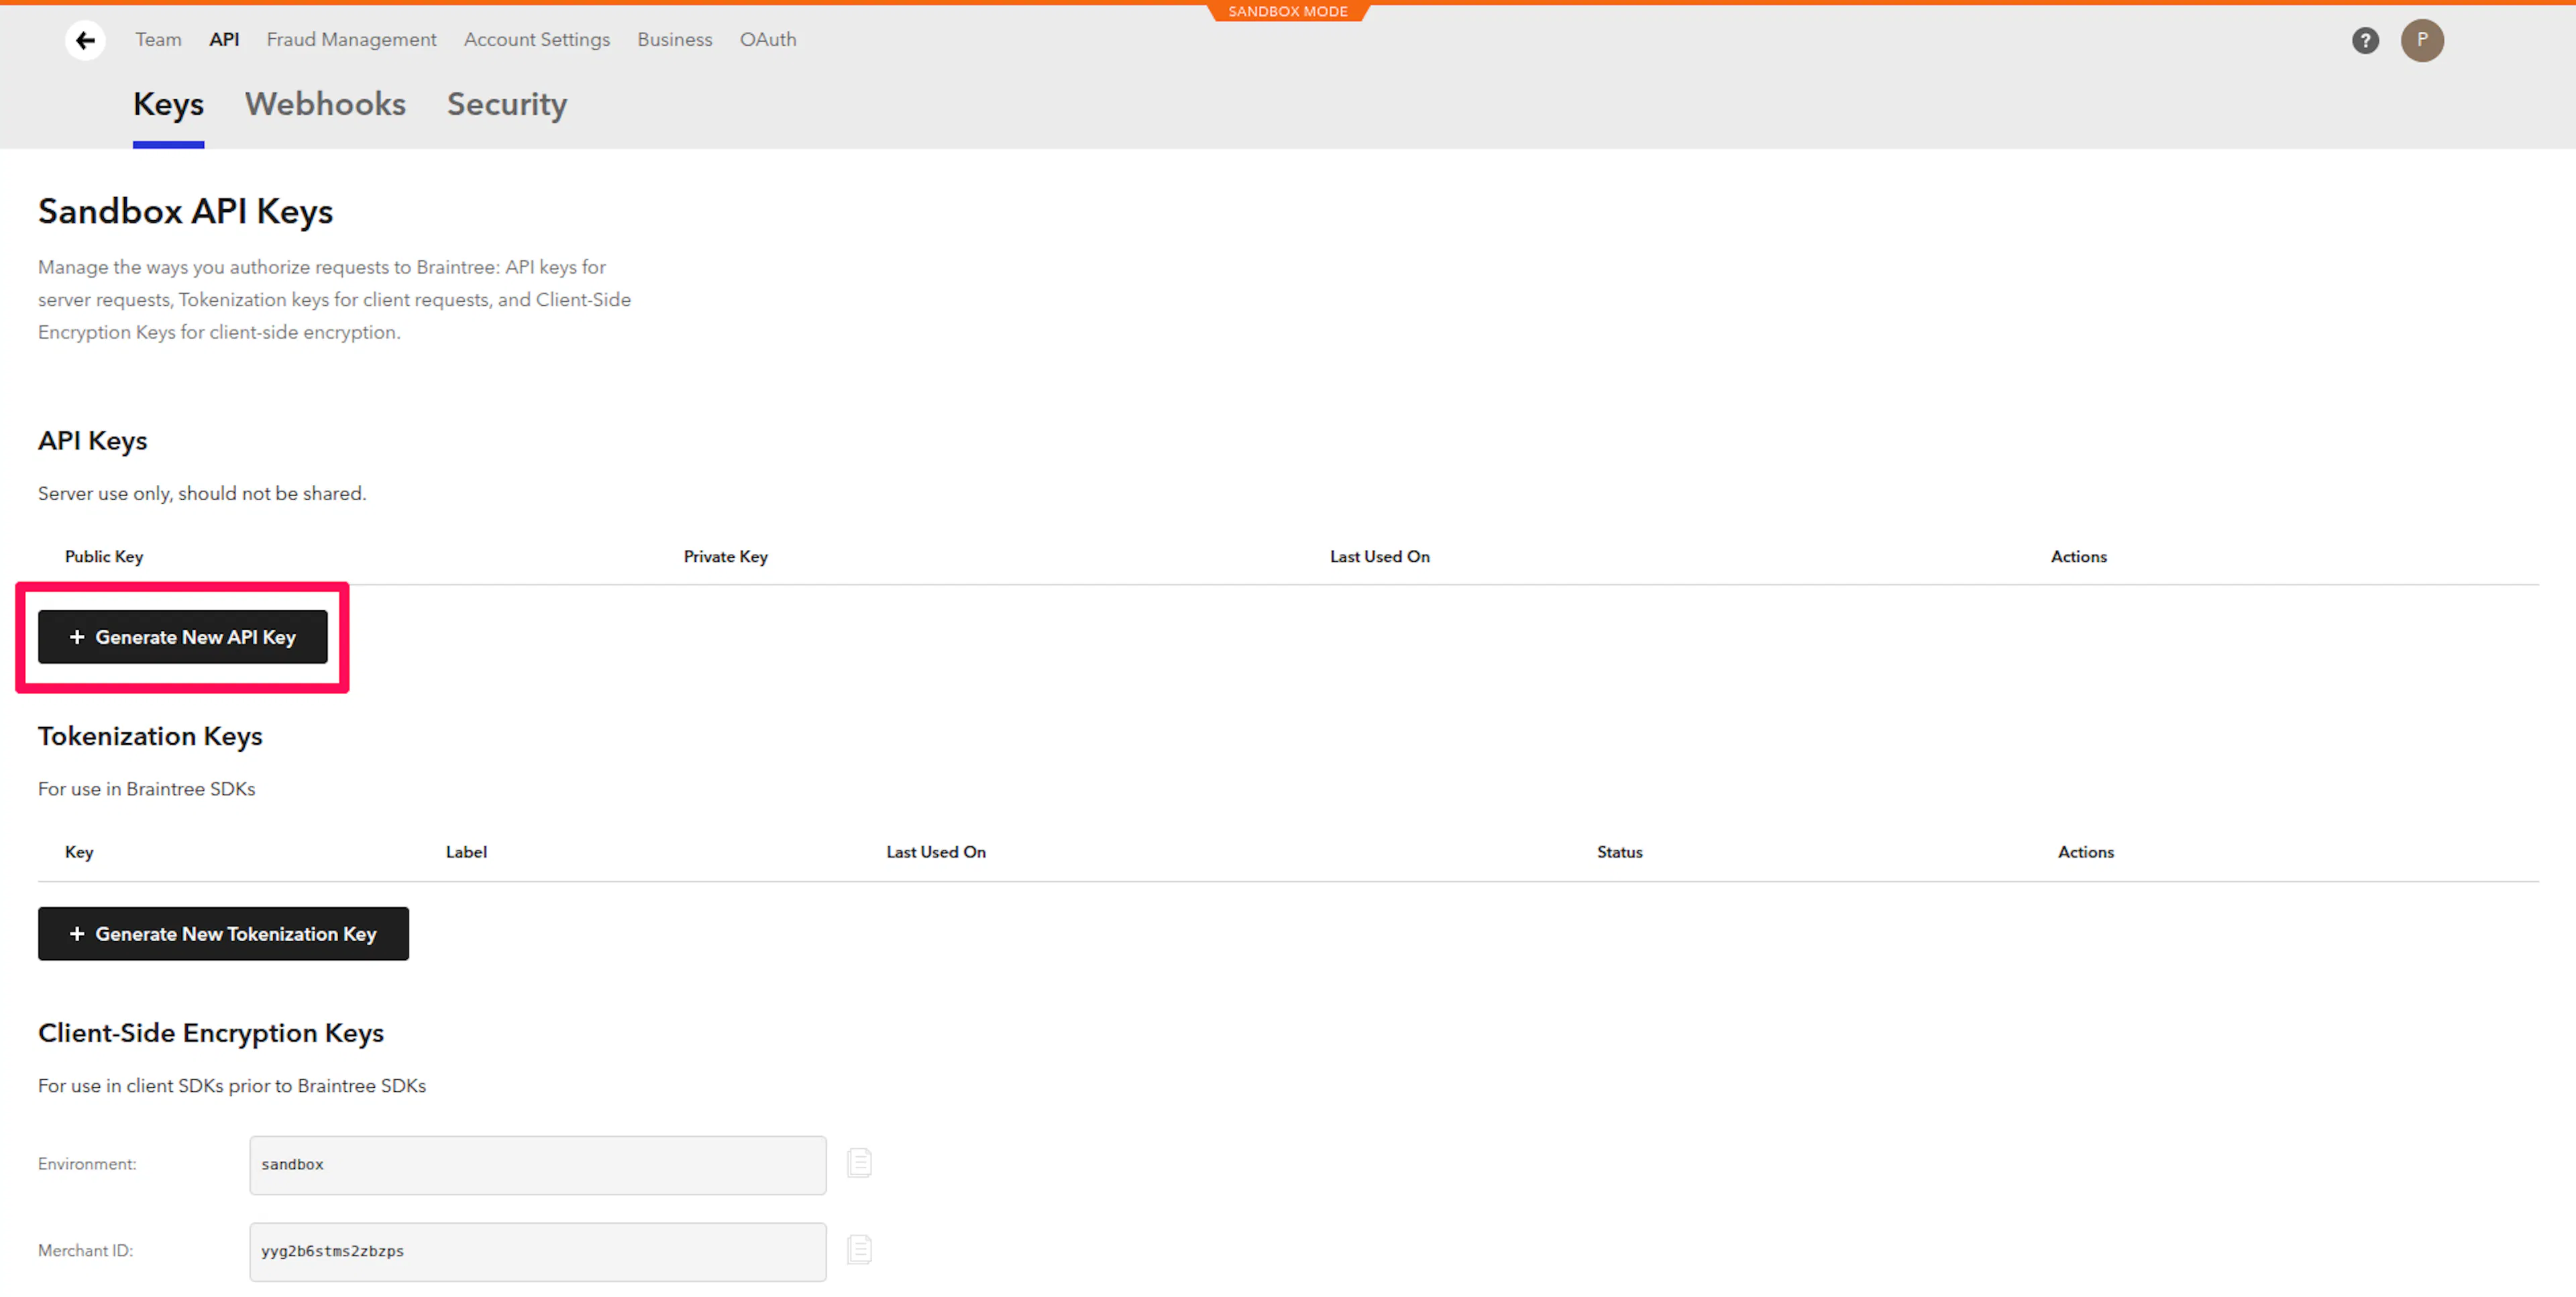
Generate and copy your credentials
On the API Keys page, click Generate New API Key to create a new key pair.
Once generated, click View below the Private Key row to reveal it. All three credentials will now be visible:
-
Merchant ID - Copy this value.
-
Public Key - Copy this value.
-
Private Key - Copy this value. Treat this like a password - do not share it.
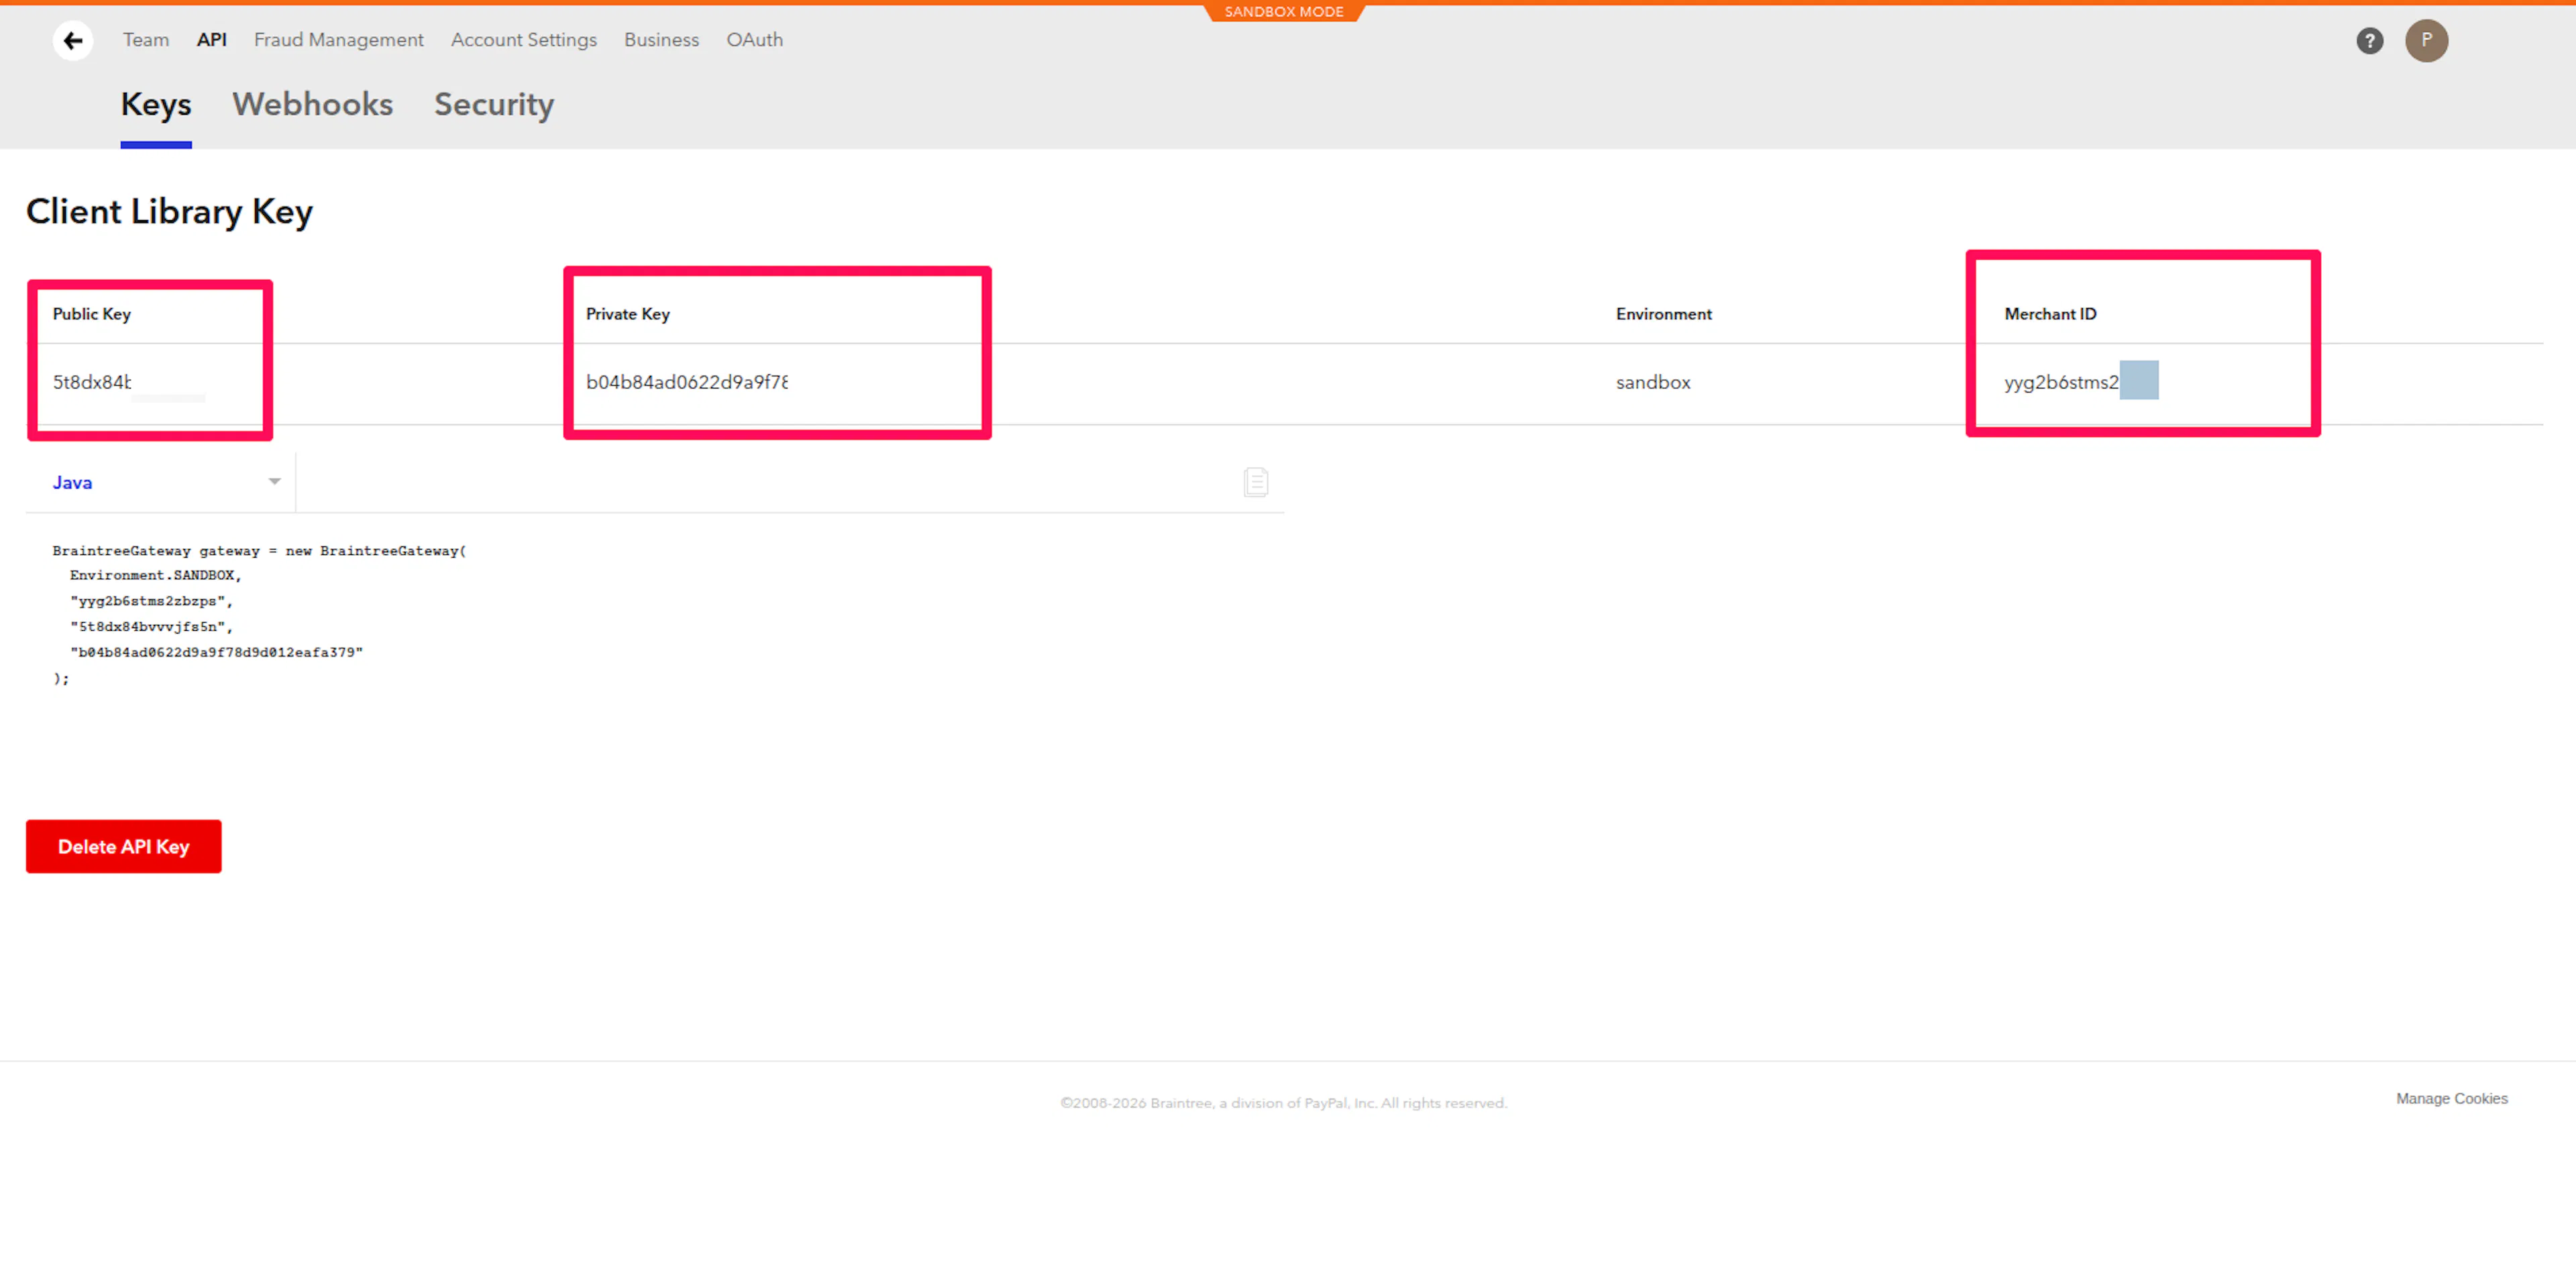
Copy all three values before navigating away. You can click View again in a future session to re-reveal the Private Key, but you must click it each time - it is not shown by default.
Adding Credentials to PayLexer
Open Gateway Settings in PayLexer
-
Log in to your PayLexer dashboard.
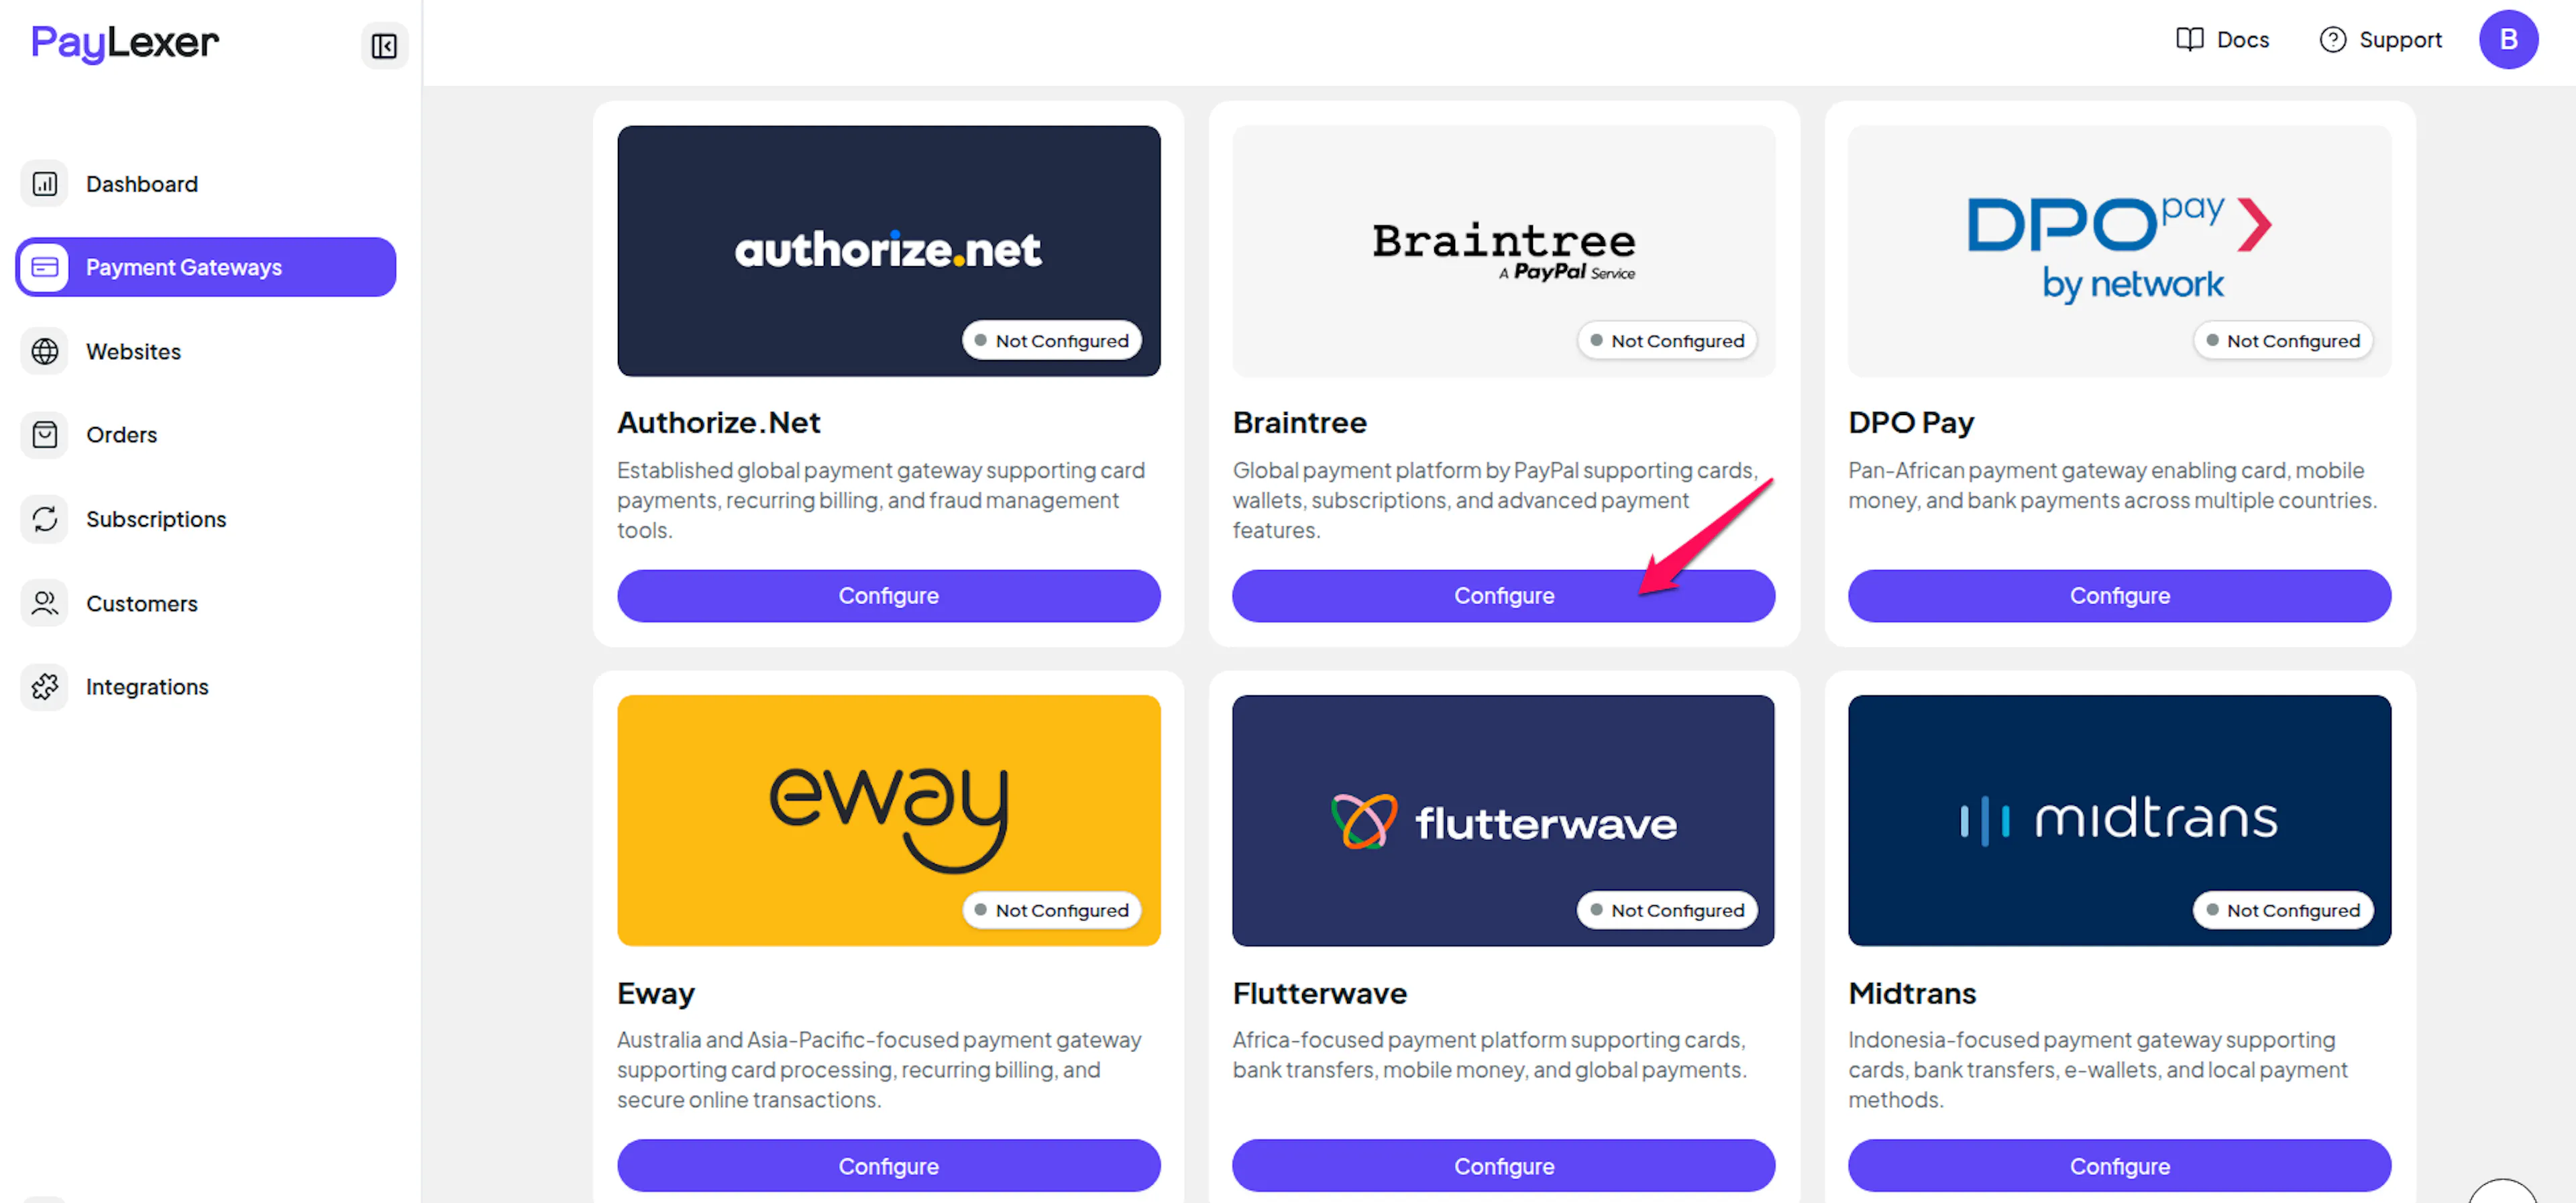
-
Navigate to Payment Gateways and select Braintree.
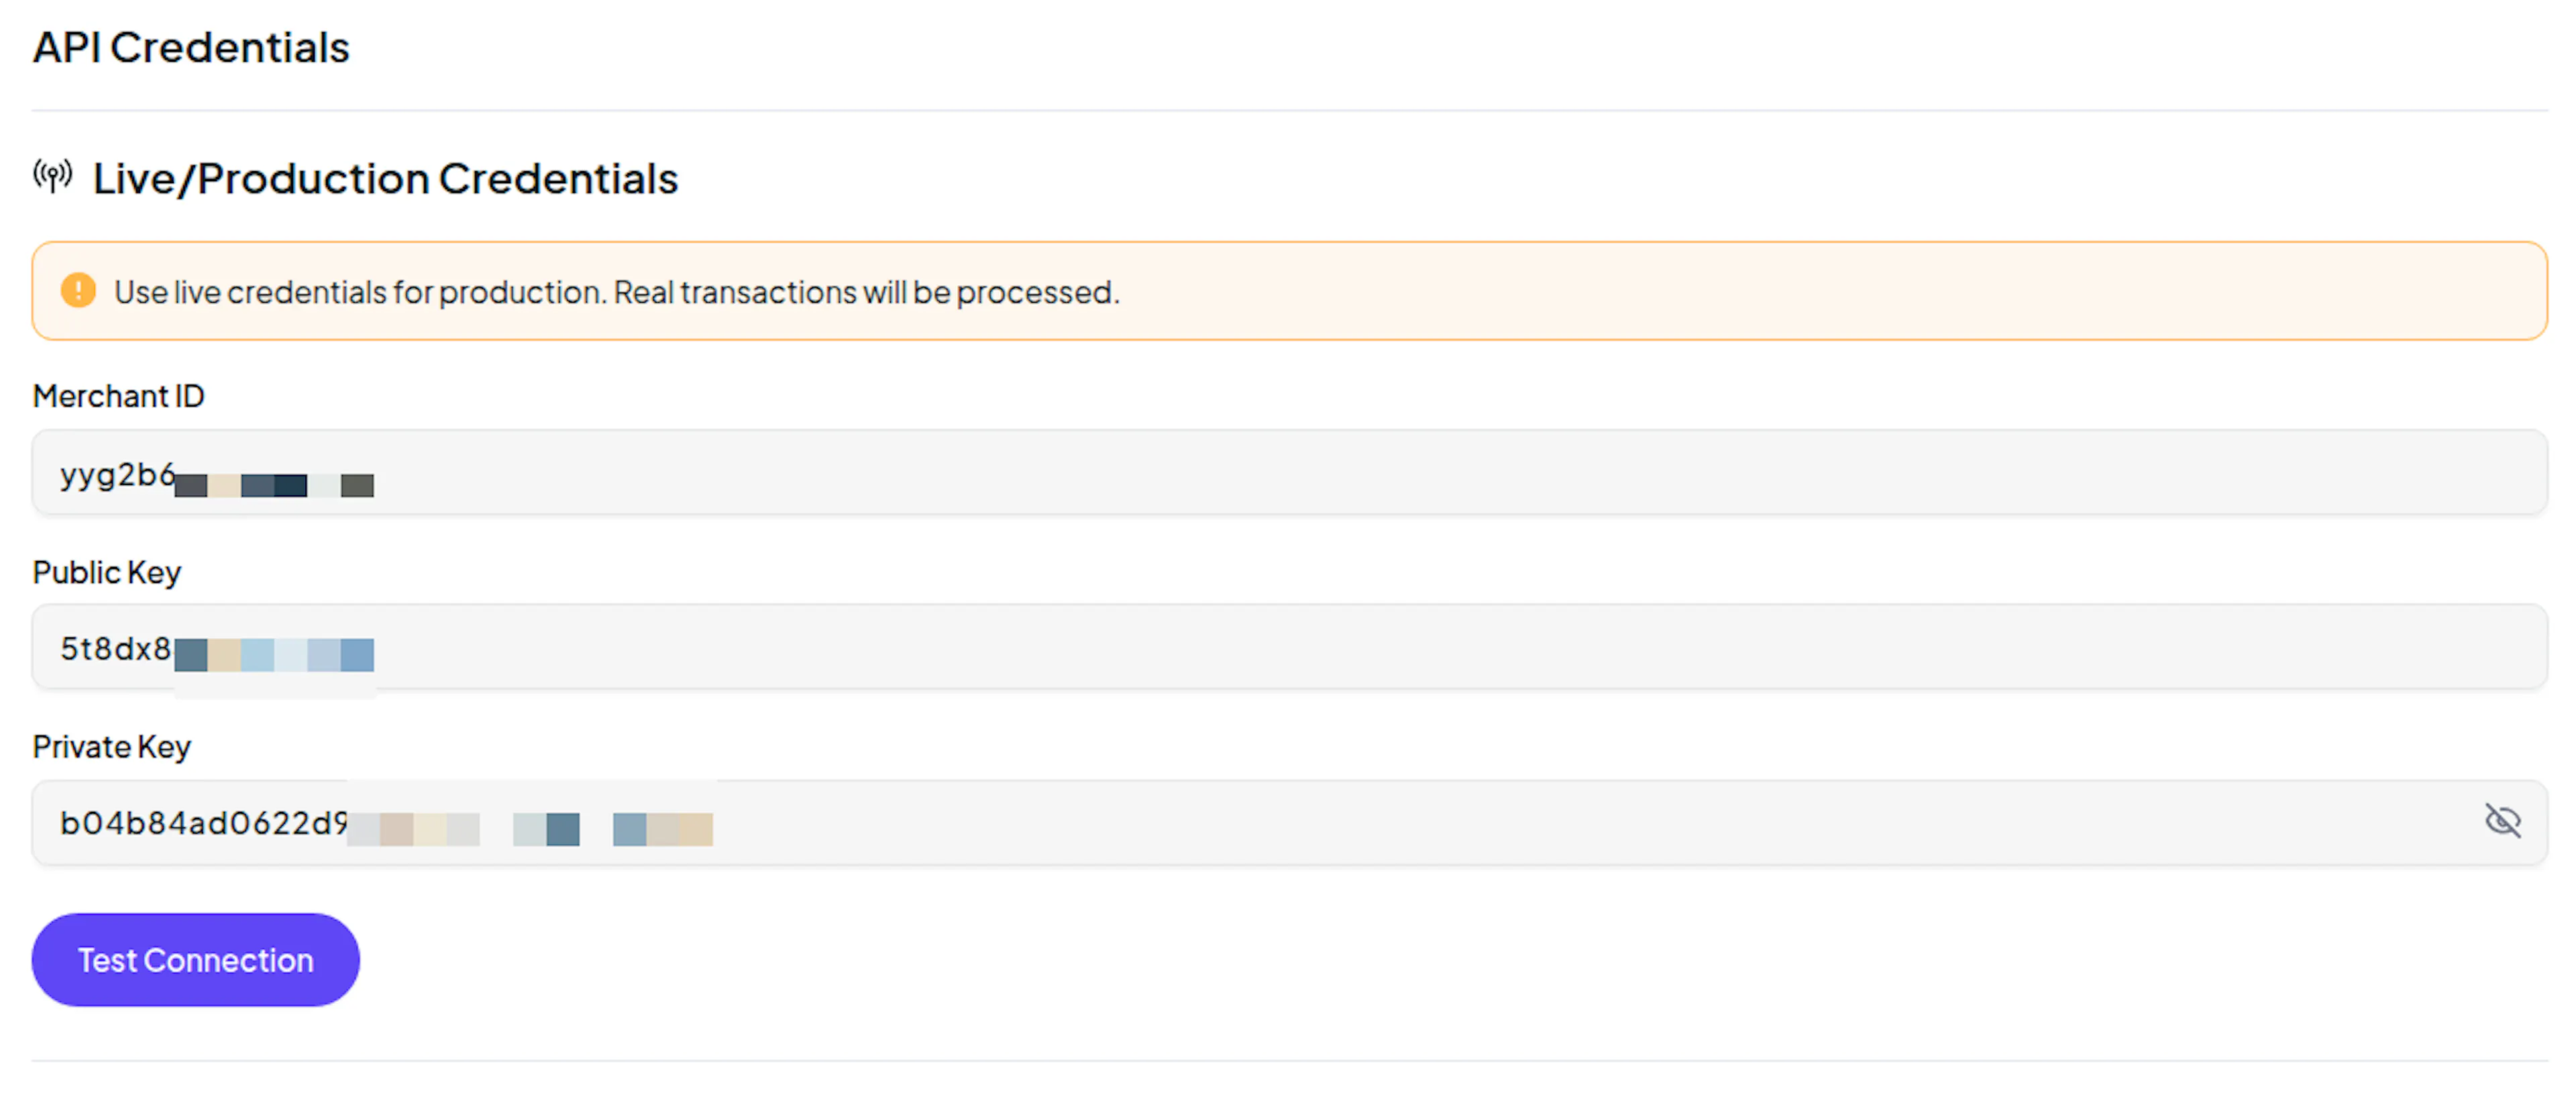
Enter your Live credentials
In the Live / Production section, paste:
-
Merchant ID - Your Live Merchant ID from Braintree.
-
Public Key - Your Live Public Key from Braintree.
-
Private Key - Your Live Private Key from Braintree.
Understanding Live/Production and Sandbox Settings:
| Environment | Purpose |
|---|---|
| Live / Production (Mandatory) | Used for real transactions. Cannot be empty, even when testing. |
| Test / Sandbox (Optional) | Used for testing only. No real money is processed. |
How PayLexer selects credentials:
-
Debug/Test mode ON → Test credentials are used
-
Debug/Test mode OFF → Live credentials are used
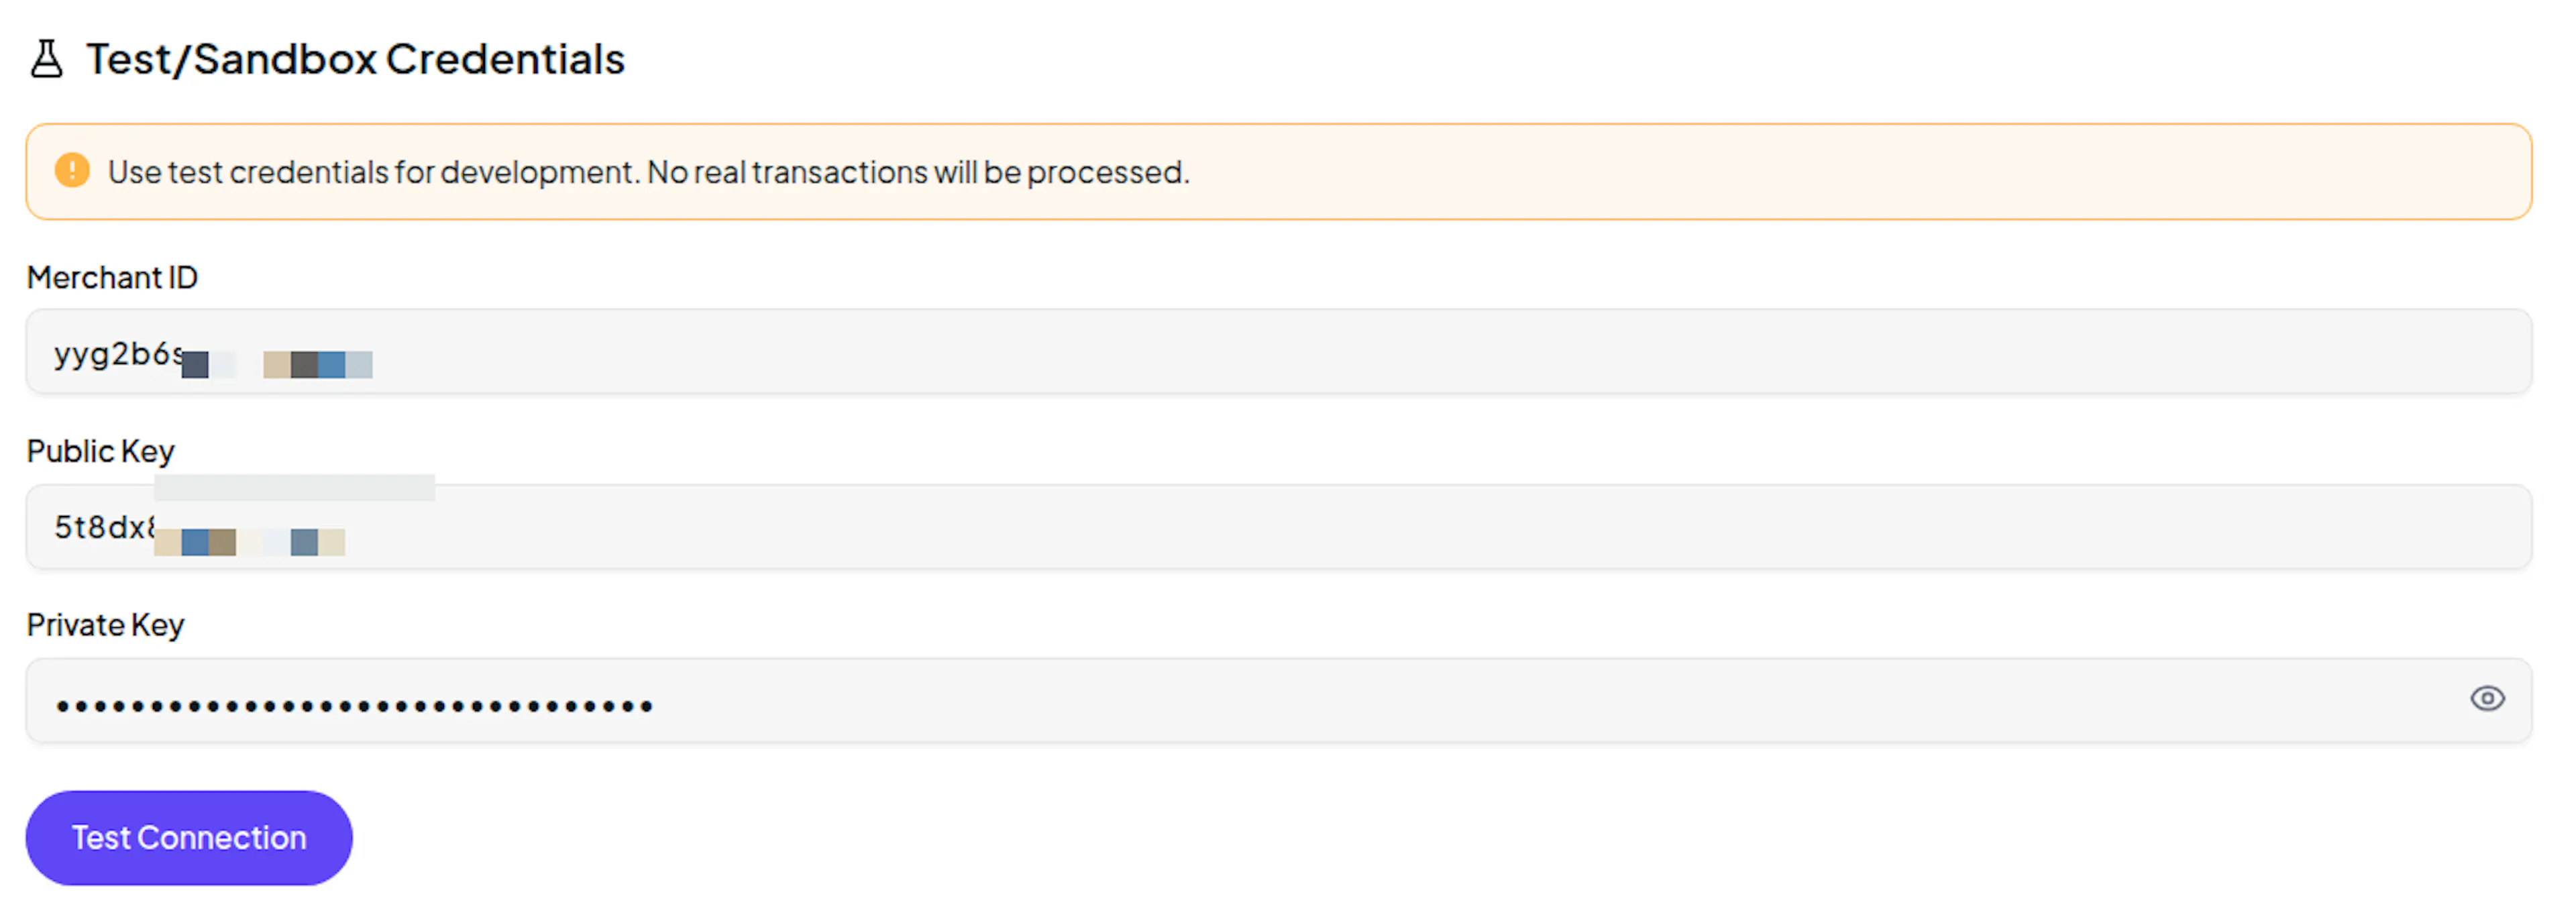
Enter your Sandbox credentials (optional)
In the Test / Sandbox section, paste the equivalent credentials from your Braintree Sandbox dashboard:
-
Sandbox Merchant ID
-
Sandbox Public Key
-
Sandbox Private Key
Save your settings
Click Save to store your credentials.
Braintree is now connected to PayLexer. You can verify the connection by running a test transaction with Sandbox mode enabled.
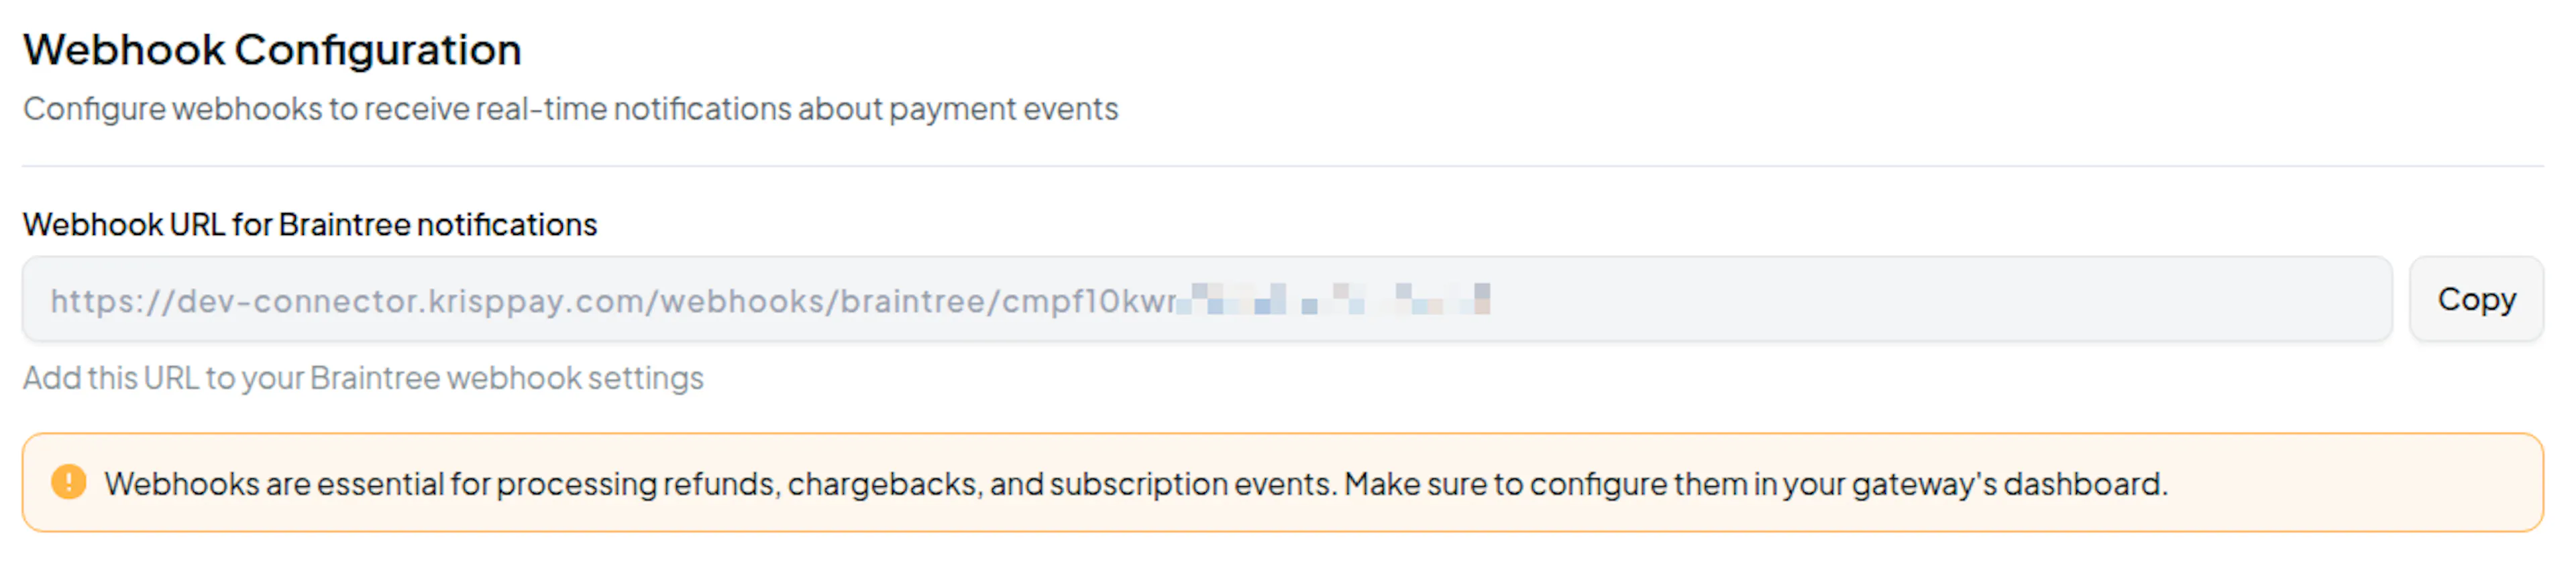
Configuring Webhooks
Webhooks allow Braintree to notify PayLexer in real time when payment events occur - such as successful charges, failed payments, and subscription updates. Enabling webhooks is strongly recommended.
Copy your PayLexer Webhook URL
-
In PayLexer, go to Payment Gateways -> Braintree.
-
Copy the Webhook URL shown on the page.
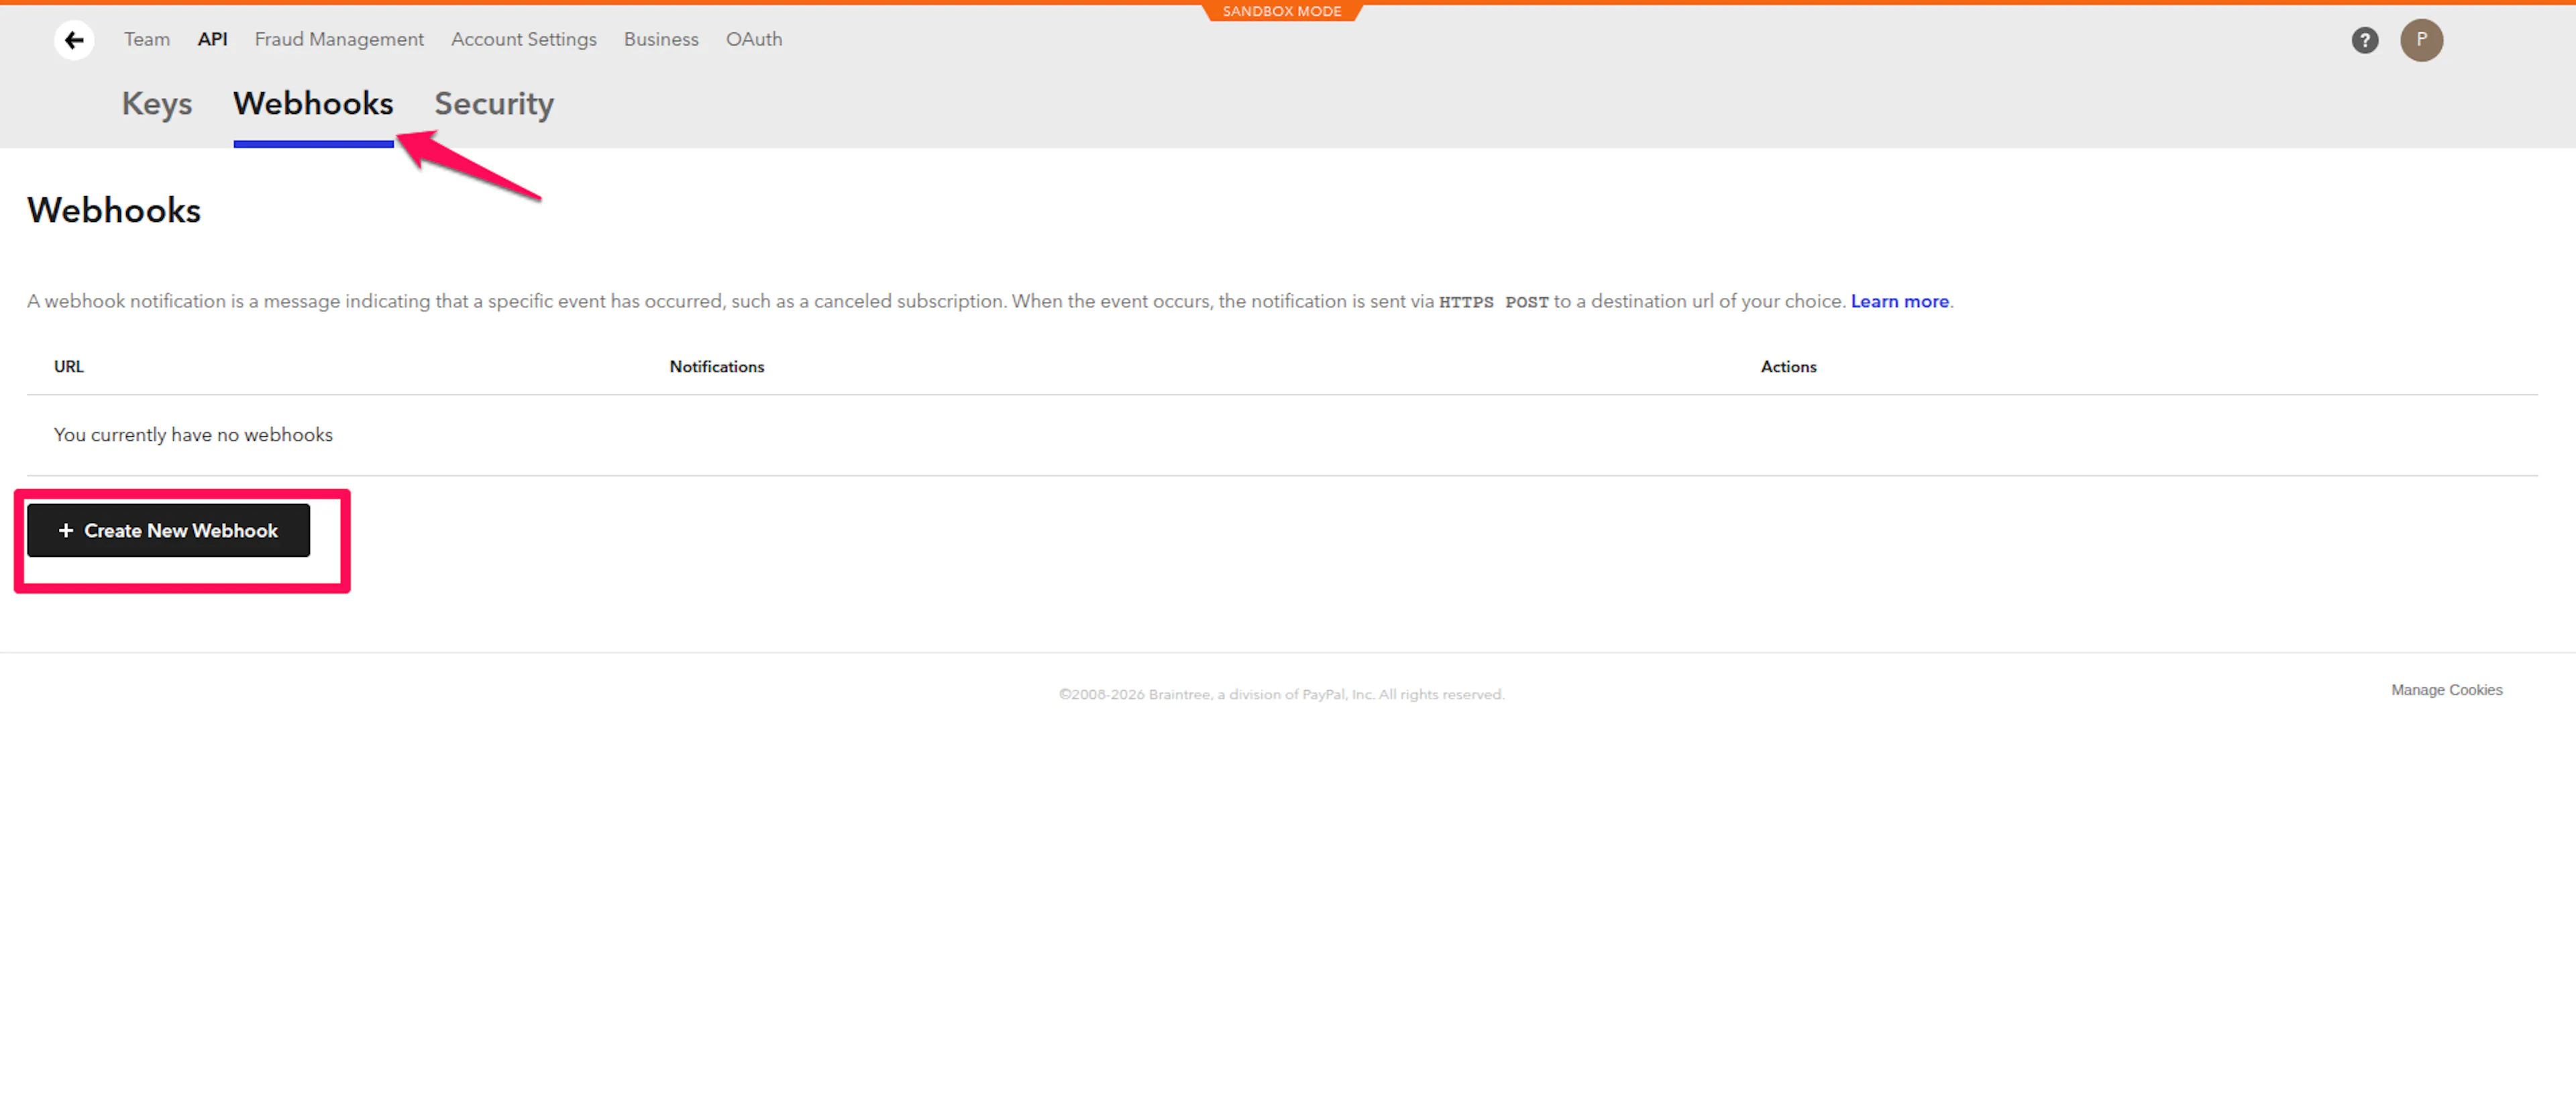
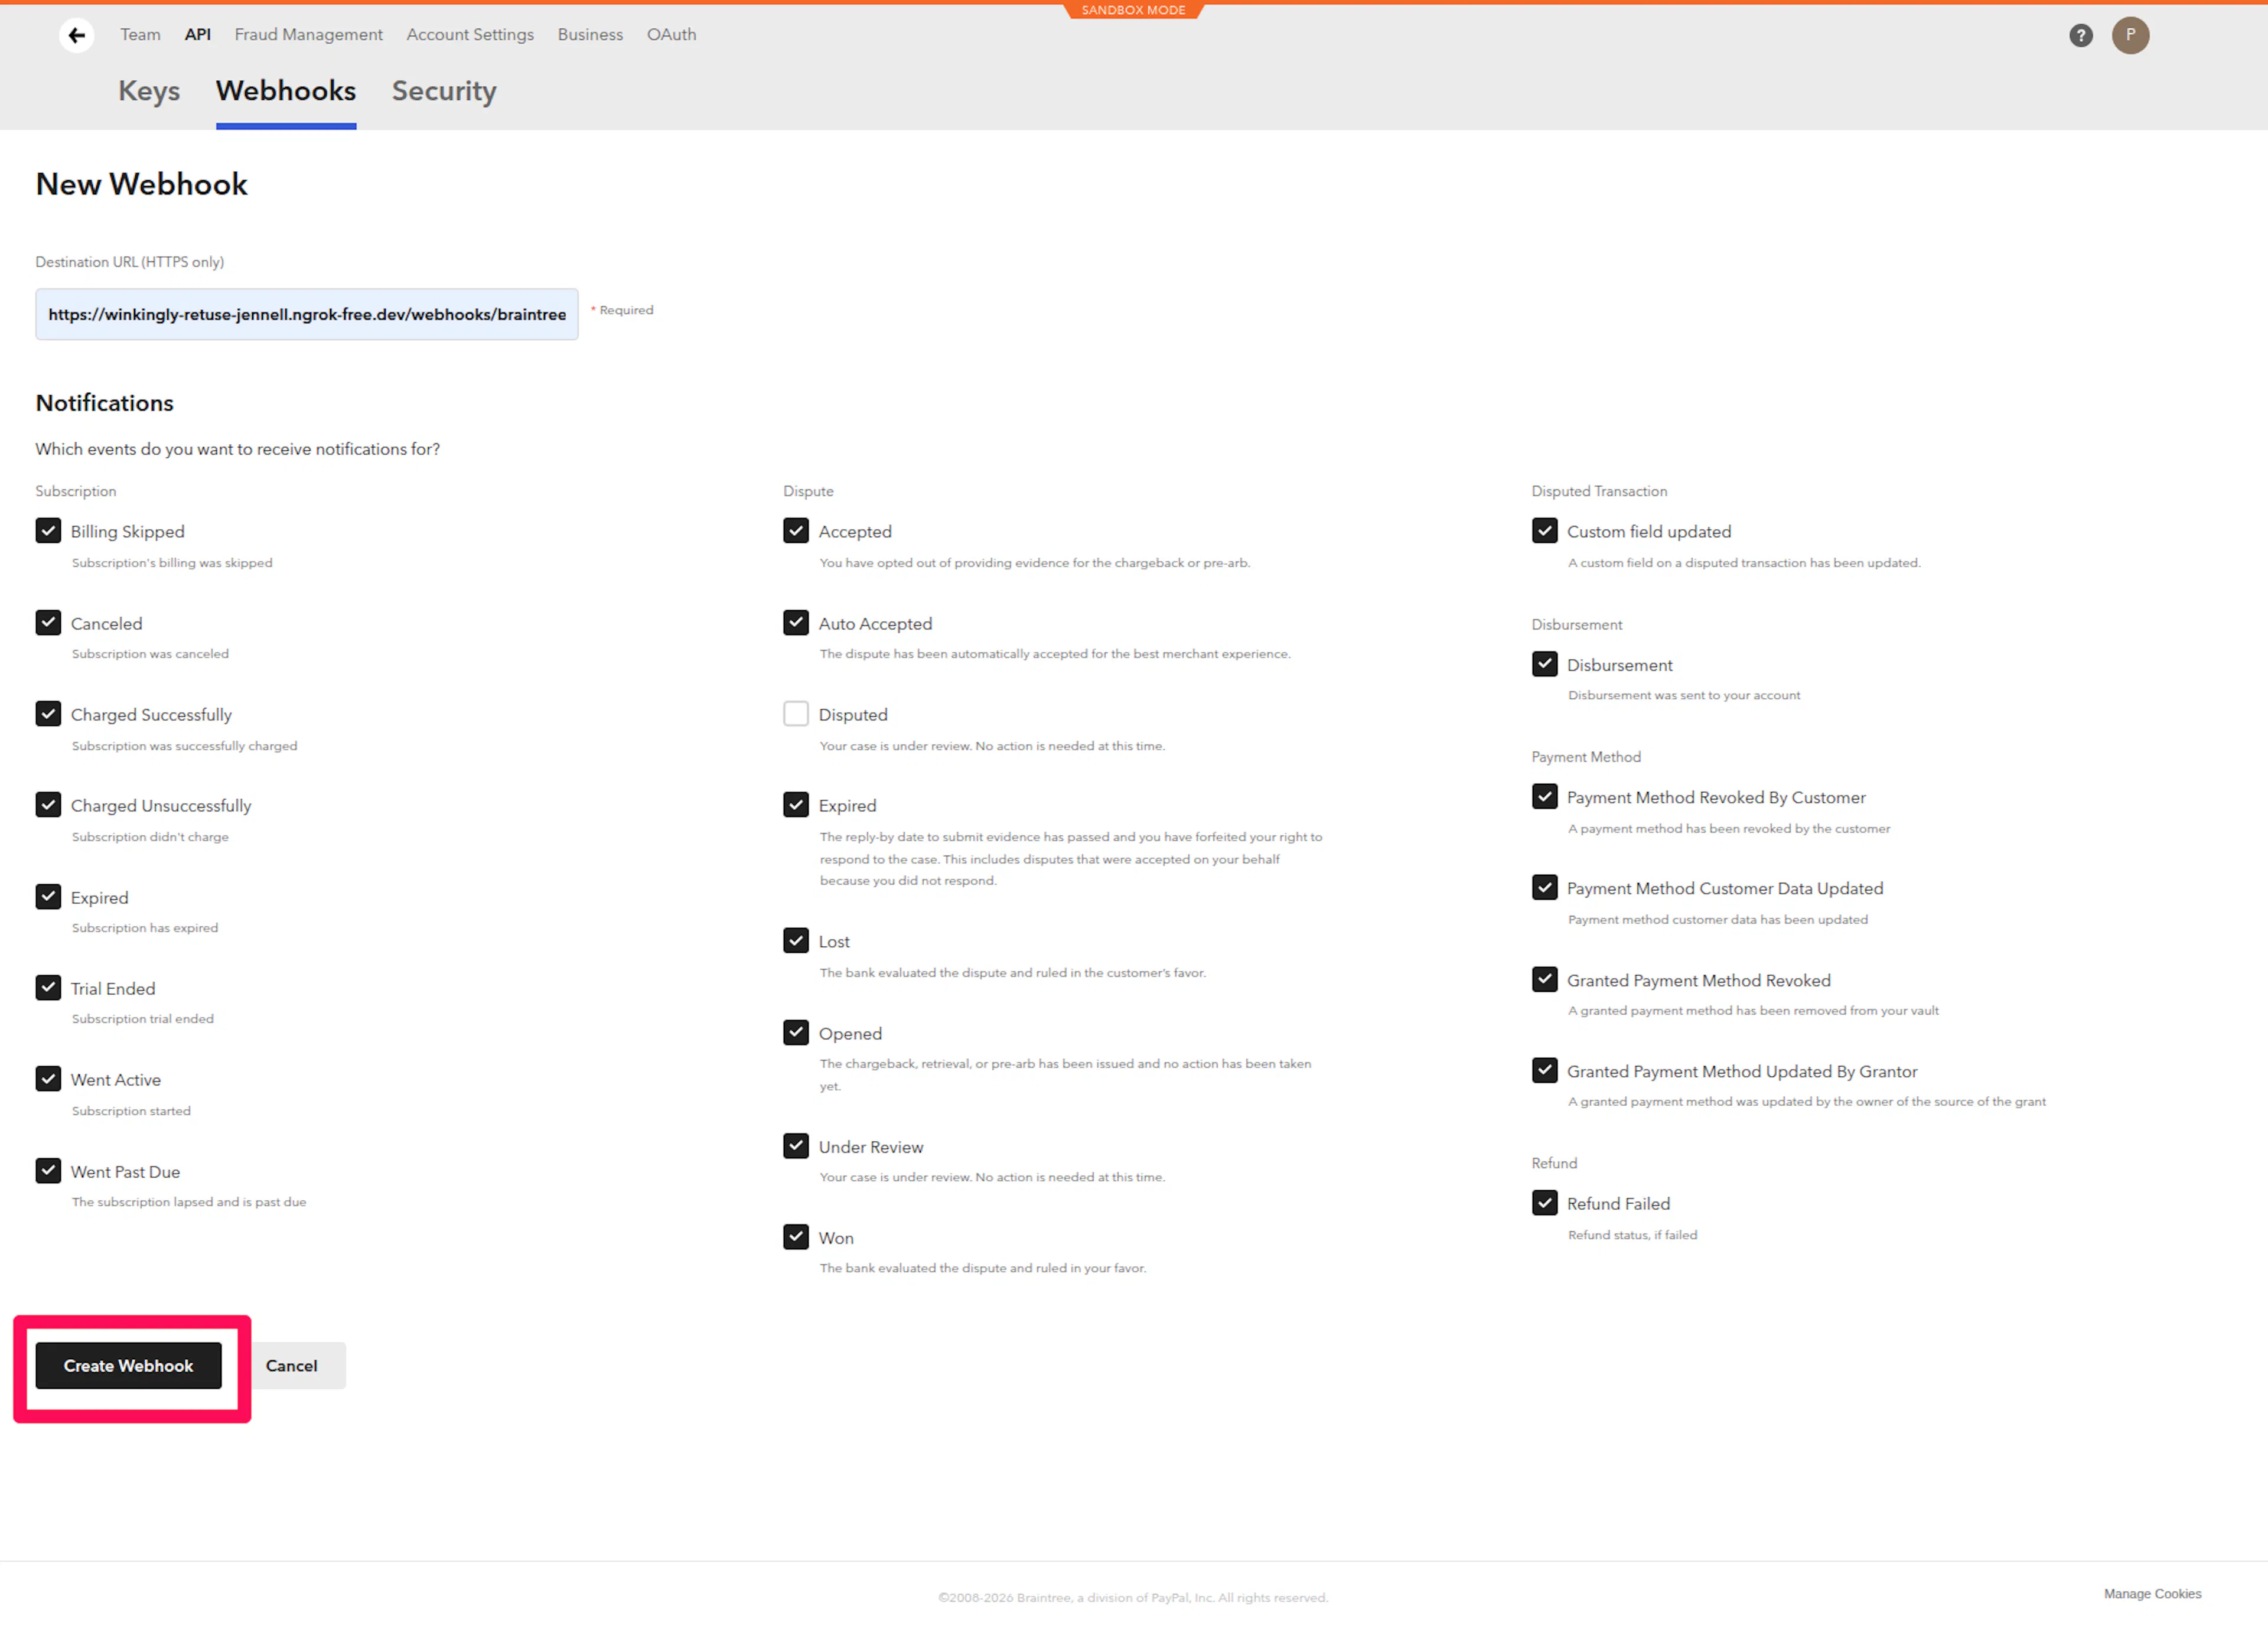
Create a webhook in your Braintree dashboard
-
In the Braintree dashboard, go to Settings -> API -> Webhooks.
-
Click Create New Webhook.
-
Paste your PayLexer Webhook URL into the Destination URL field.
-
Select the events you want to send. Recommended events:
-
subscription_charged_successfully -
subscription_charged_unsuccessfully -
subscription_canceled -
dispute_opened -
dispute_won -
dispute_lost -
payment_method_revoked_by_customer
-
-
Click Create Webhook.
Integrate Braintree to Your Website
Once your credentials are saved, enable Braintree as an active gateway on your website.
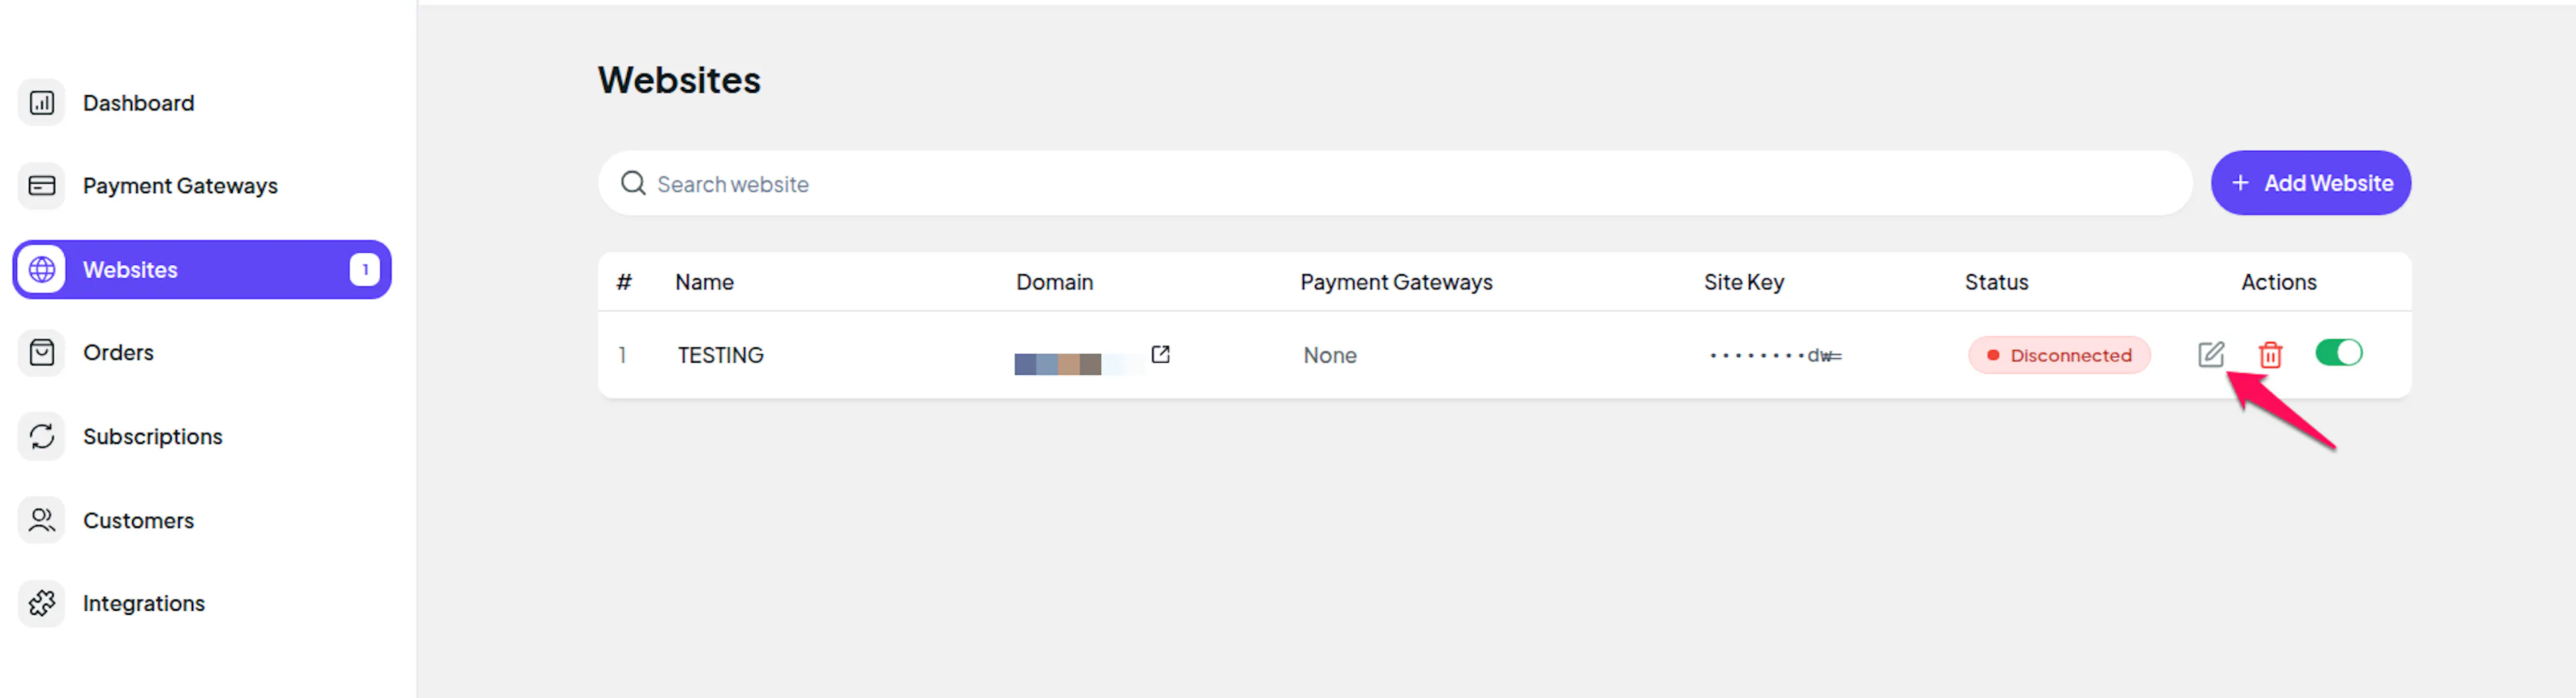
Open your website settings
-
In PayLexer, navigate to Websites.
-
Find your website and click Edit.
Enable Braintree
-
Scroll to the Payment Gateways section.
-
Toggle Braintree to enabled.
-
Click Save Changes.
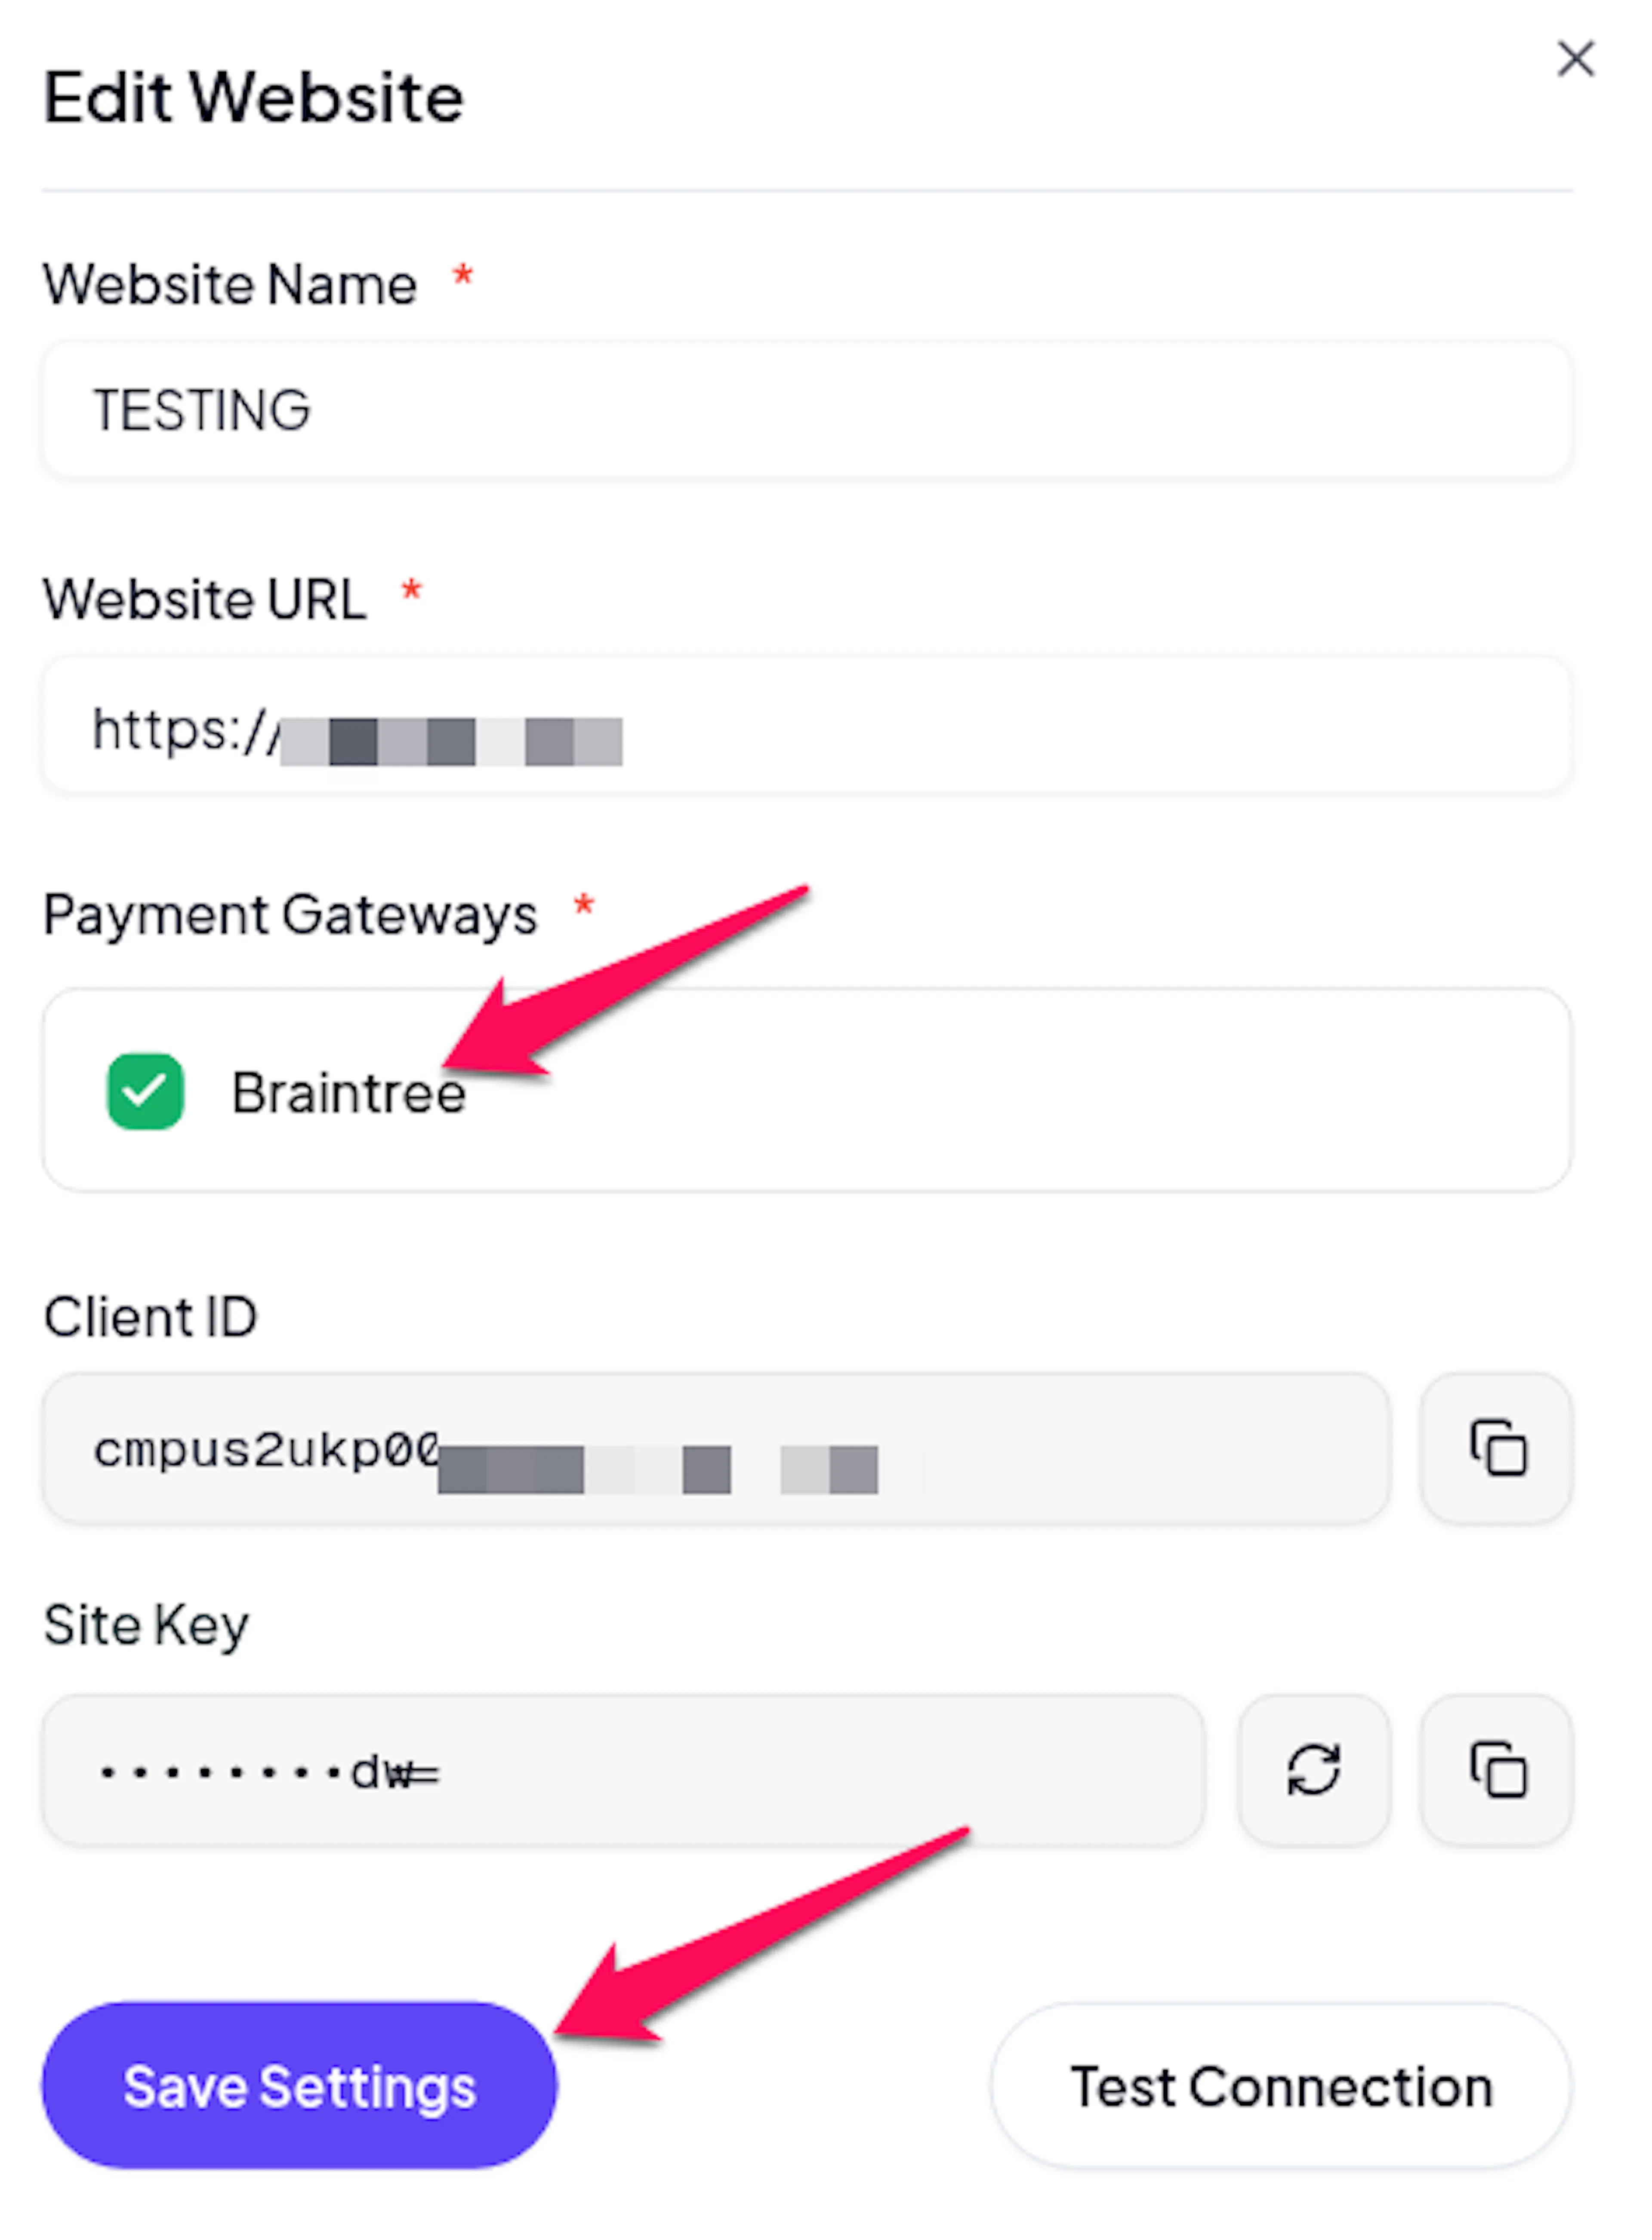
Braintree is now active on your website and ready to process payments.
Troubleshooting
-
Double-check that you copied the correct Merchant ID, Public Key, and Private Key from the correct environment (Live vs Sandbox).
-
Braintree Private Keys do not expire, but they can be revoked. Verify the key is still active in your Braintree API Keys settings.
-
Make sure there are no leading or trailing spaces in the pasted values.
-
If you regenerated an API key in Braintree, the old Private Key is immediately invalidated - update it in PayLexer.
-
Confirm the Webhook URL in Braintree matches exactly what PayLexer shows on the Braintree settings page.
-
Check that the specific event types (e.g.
subscription_charged_successfully) are selected in Braintree. -
Use Check URL in the Braintree webhooks section to trigger a test ping and confirm delivery.
-
Ensure your website's server is reachable from the internet - localhost URLs will not work for live webhooks.
-
If webhooks are not configured, PayLexer may not receive real-time confirmation. Add the webhook as described above.
-
Check whether Test/Debug mode is enabled in PayLexer - if it is, Braintree will use Sandbox credentials and only process test transactions.
-
Log in to your Braintree dashboard and confirm the transaction appears there. If it does but not in PayLexer, the webhook configuration is the likely cause.
-
3D Secure must be enabled in your Braintree merchant account settings before it will trigger.
-
Some card issuers do not support 3D Secure - these transactions may proceed without the step or be declined depending on your settings.
-
In Sandbox mode, use Braintree's 3D Secure test card numbers to simulate different authentication outcomes.
Best Practices
-
Always test with Sandbox credentials and Test/Debug mode enabled before switching to live credentials.
-
Enable webhooks for reliable, real-time payment status updates - do not rely solely on redirect-based confirmation.
-
Keep your Private Key confidential. Rotate it immediately via the Braintree dashboard if you suspect it has been exposed.
-
Enable Braintree's Advanced Fraud Protection tools in your merchant account to reduce chargebacks.
-
Use Braintree's built-in 3D Secure to reduce fraud liability for card-not-present transactions where supported.
-
Periodically review your Braintree webhook logs to ensure events are being delivered and processed correctly.
FAQs
Braintree is available for merchants in 40+ countries including the United States, United Kingdom, Australia, Canada, and most of Europe. Supported currencies and payment methods vary by region. Check the Braintree developer docs for an up-to-date country and currency list.
Yes. Braintree has a native subscription and plan management system. When connected to PayLexer, subscription events - charges, failures, and cancellations - are sent to PayLexer via webhooks so your records stay in sync automatically.
Yes. Because Braintree is owned by PayPal, it supports PayPal as a payment method natively. Customers can pay with their PayPal balance or linked cards without leaving your checkout. Venmo is also supported for US customers.
Braintree and PayPal are separate gateway integrations in PayLexer. Braintree provides a full-featured developer API supporting cards, wallets, and subscriptions. PayPal provides the standard PayPal checkout button flow. You can enable both independently depending on your needs.
Braintree provides a set of test card numbers for Sandbox testing. Visit the Braintree testing reference for a full list of test cards covering successful payments, declines, and 3D Secure scenarios.
PayLexer does not charge additional fees for using Braintree. Braintree's own transaction fees apply and are set by your Braintree merchant agreement. Contact Braintree directly or review your merchant account for the current rate structure.
Still Have Questions?
Braintree Support
Visit the official Braintree support and developer resources.
PayLexer Support
Open a support ticket with the PayLexer team.
For API details and advanced configuration, see the Braintree developer documentation.