

Omise
Connect Omise to PayLexer to accept card and local payment method payments across Southeast Asia.
Omise is a Southeast Asian payment gateway that lets merchants accept card payments through an embedded checkout form on the merchant's own store page and local payment methods - such as PromptPay and internet banking through a secure redirect flow. Card details are tokenized in the shopper's browser by Omise.js; PayLexer completes the charge on the server.
- Supported Regions (Merchant Accounts): Thailand, Japan, Singapore, Malaysia
- Supported Currencies: THB, JPY, SGD, MYR
Supported Features
- Card payments via Omise.js embedded on-page form (no redirect)
- Local payment methods (PromptPay, internet banking) via redirect
- Full and partial refunds
- Recurring subscriptions with optional free trial periods and sign-up fees
- Cryptographically signed webhooks (HMAC-SHA256 with timestamp replay protection)
- Test and Live environments via separate key pairs
Before You Start
Make sure you have:
- Omise Account - Don't have one? Sign up for Omise →
- PayLexer Account - Required to configure the integration. Create your account →
- A website where you want to integrate Looking for a different payment processor? View all supported gateways →
Configuring Omise
You need a Public Key and Secret Key from Omise for each environment, plus a Webhook Secret generated when you register PayLexer's webhook URL.
Getting API Credentials
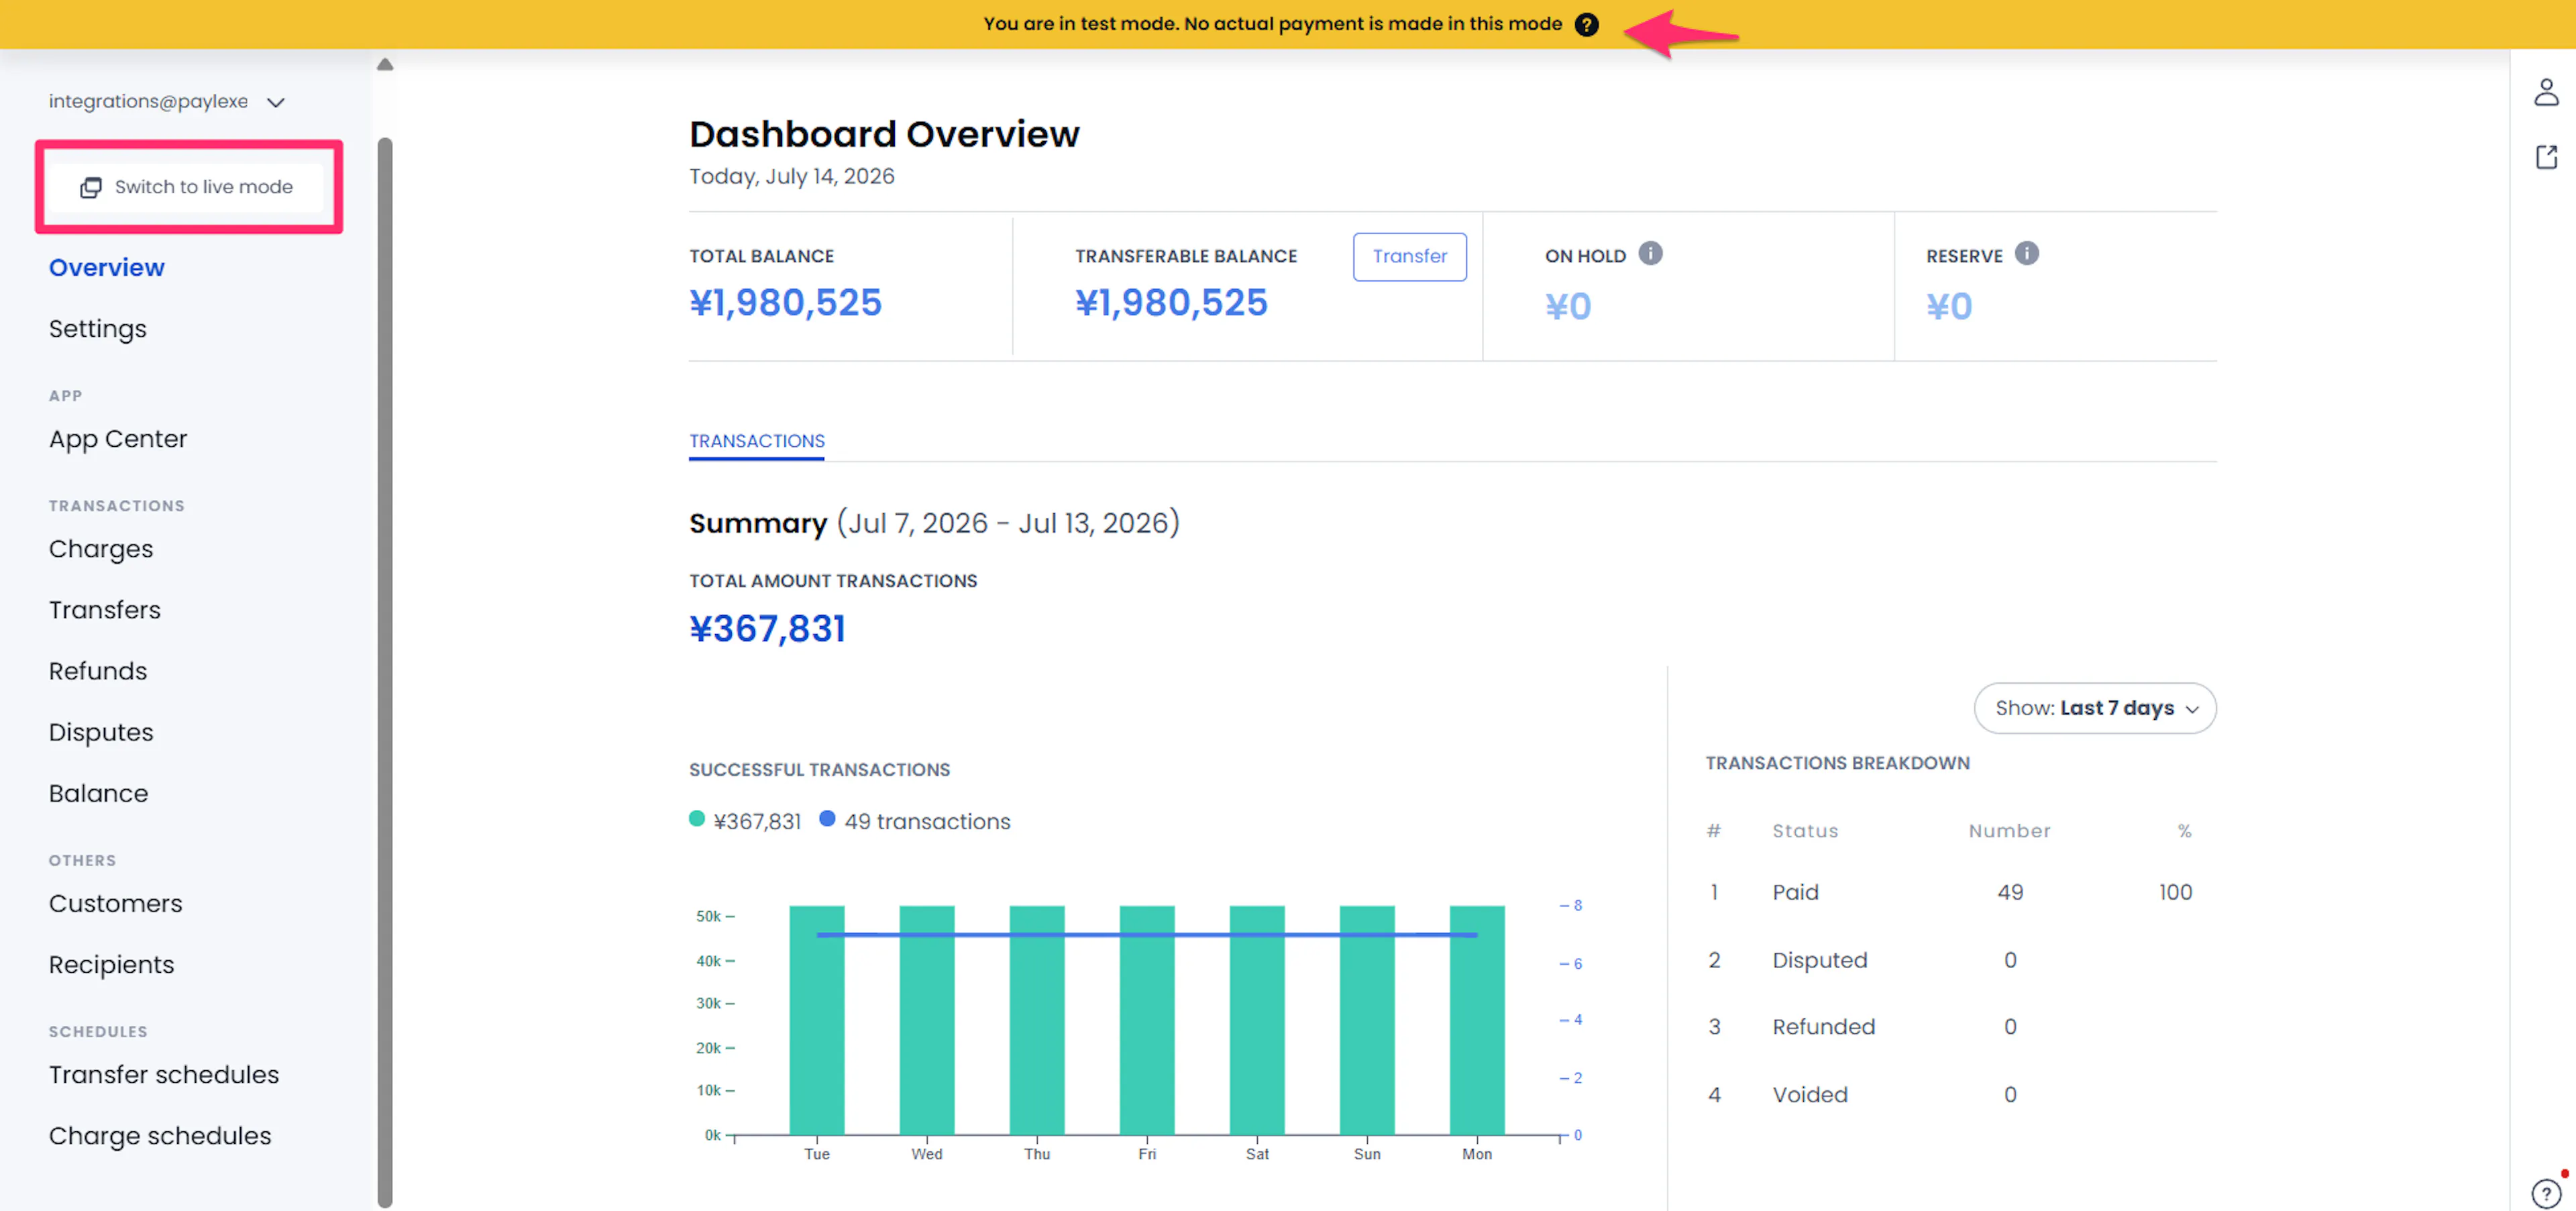
Switch to the correct mode in the Omise Dashboard
Log in to the Omise Dashboard. Check the mode indicator in the top navigation bar.
- To configure Test credentials, click Switch to Test Mode if you are currently in Live mode.
- To configure Live credentials, click Switch to Live Mode if you are currently in Test mode. You need to visit each mode separately to copy both key pairs.
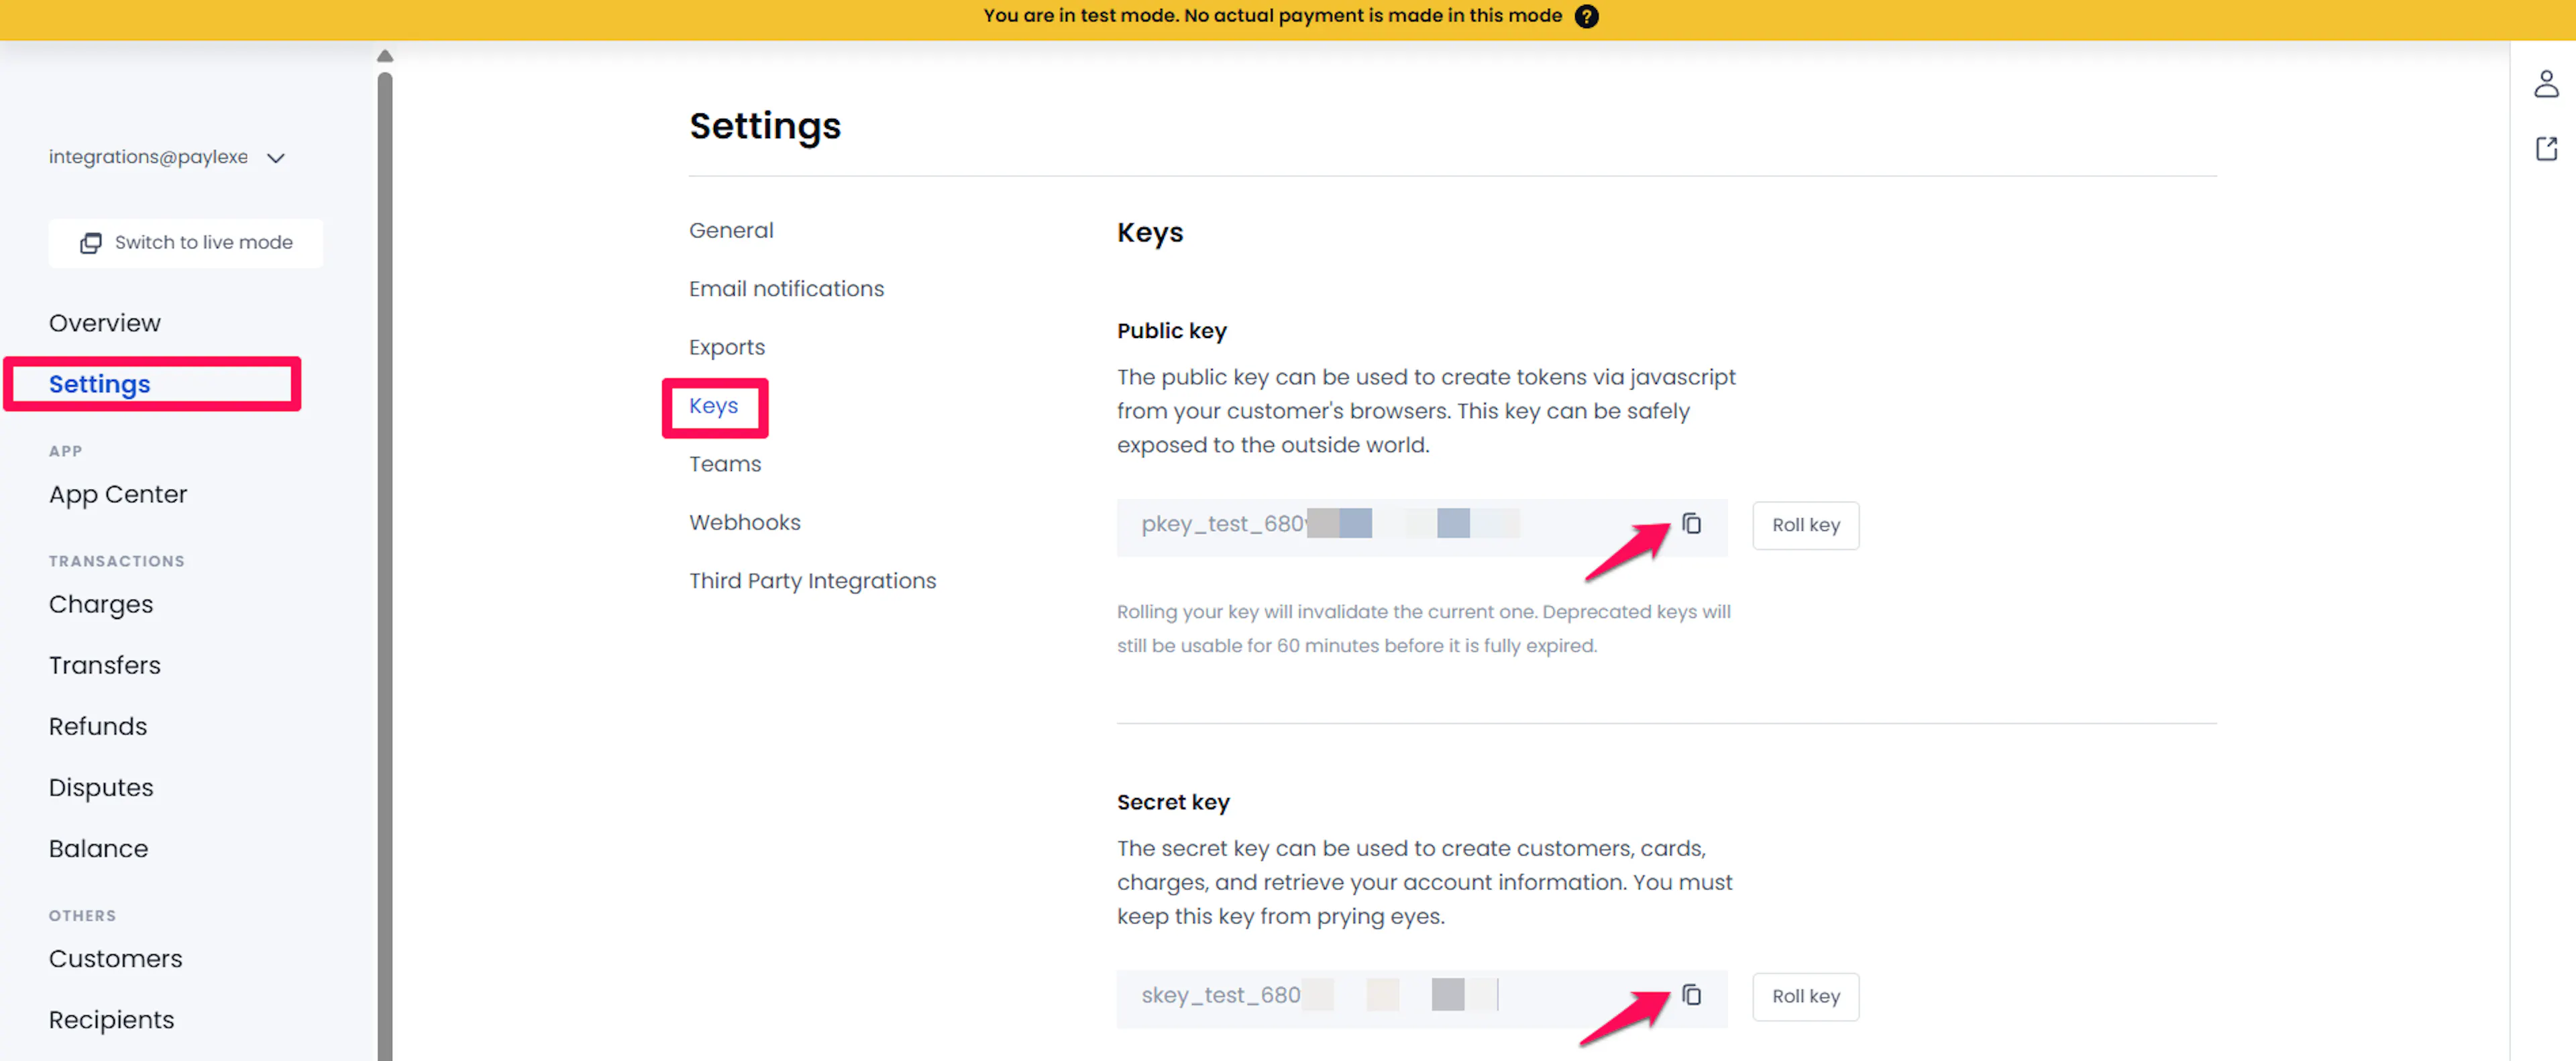
Copy your API keys
Navigate to Settings → Keys in the left sidebar. Your Public and Secret Key is shown on the page,then copy both values.
Repeat this step in the other mode (Test or Live) to collect both key pairs.
Adding Credentials to PayLexer
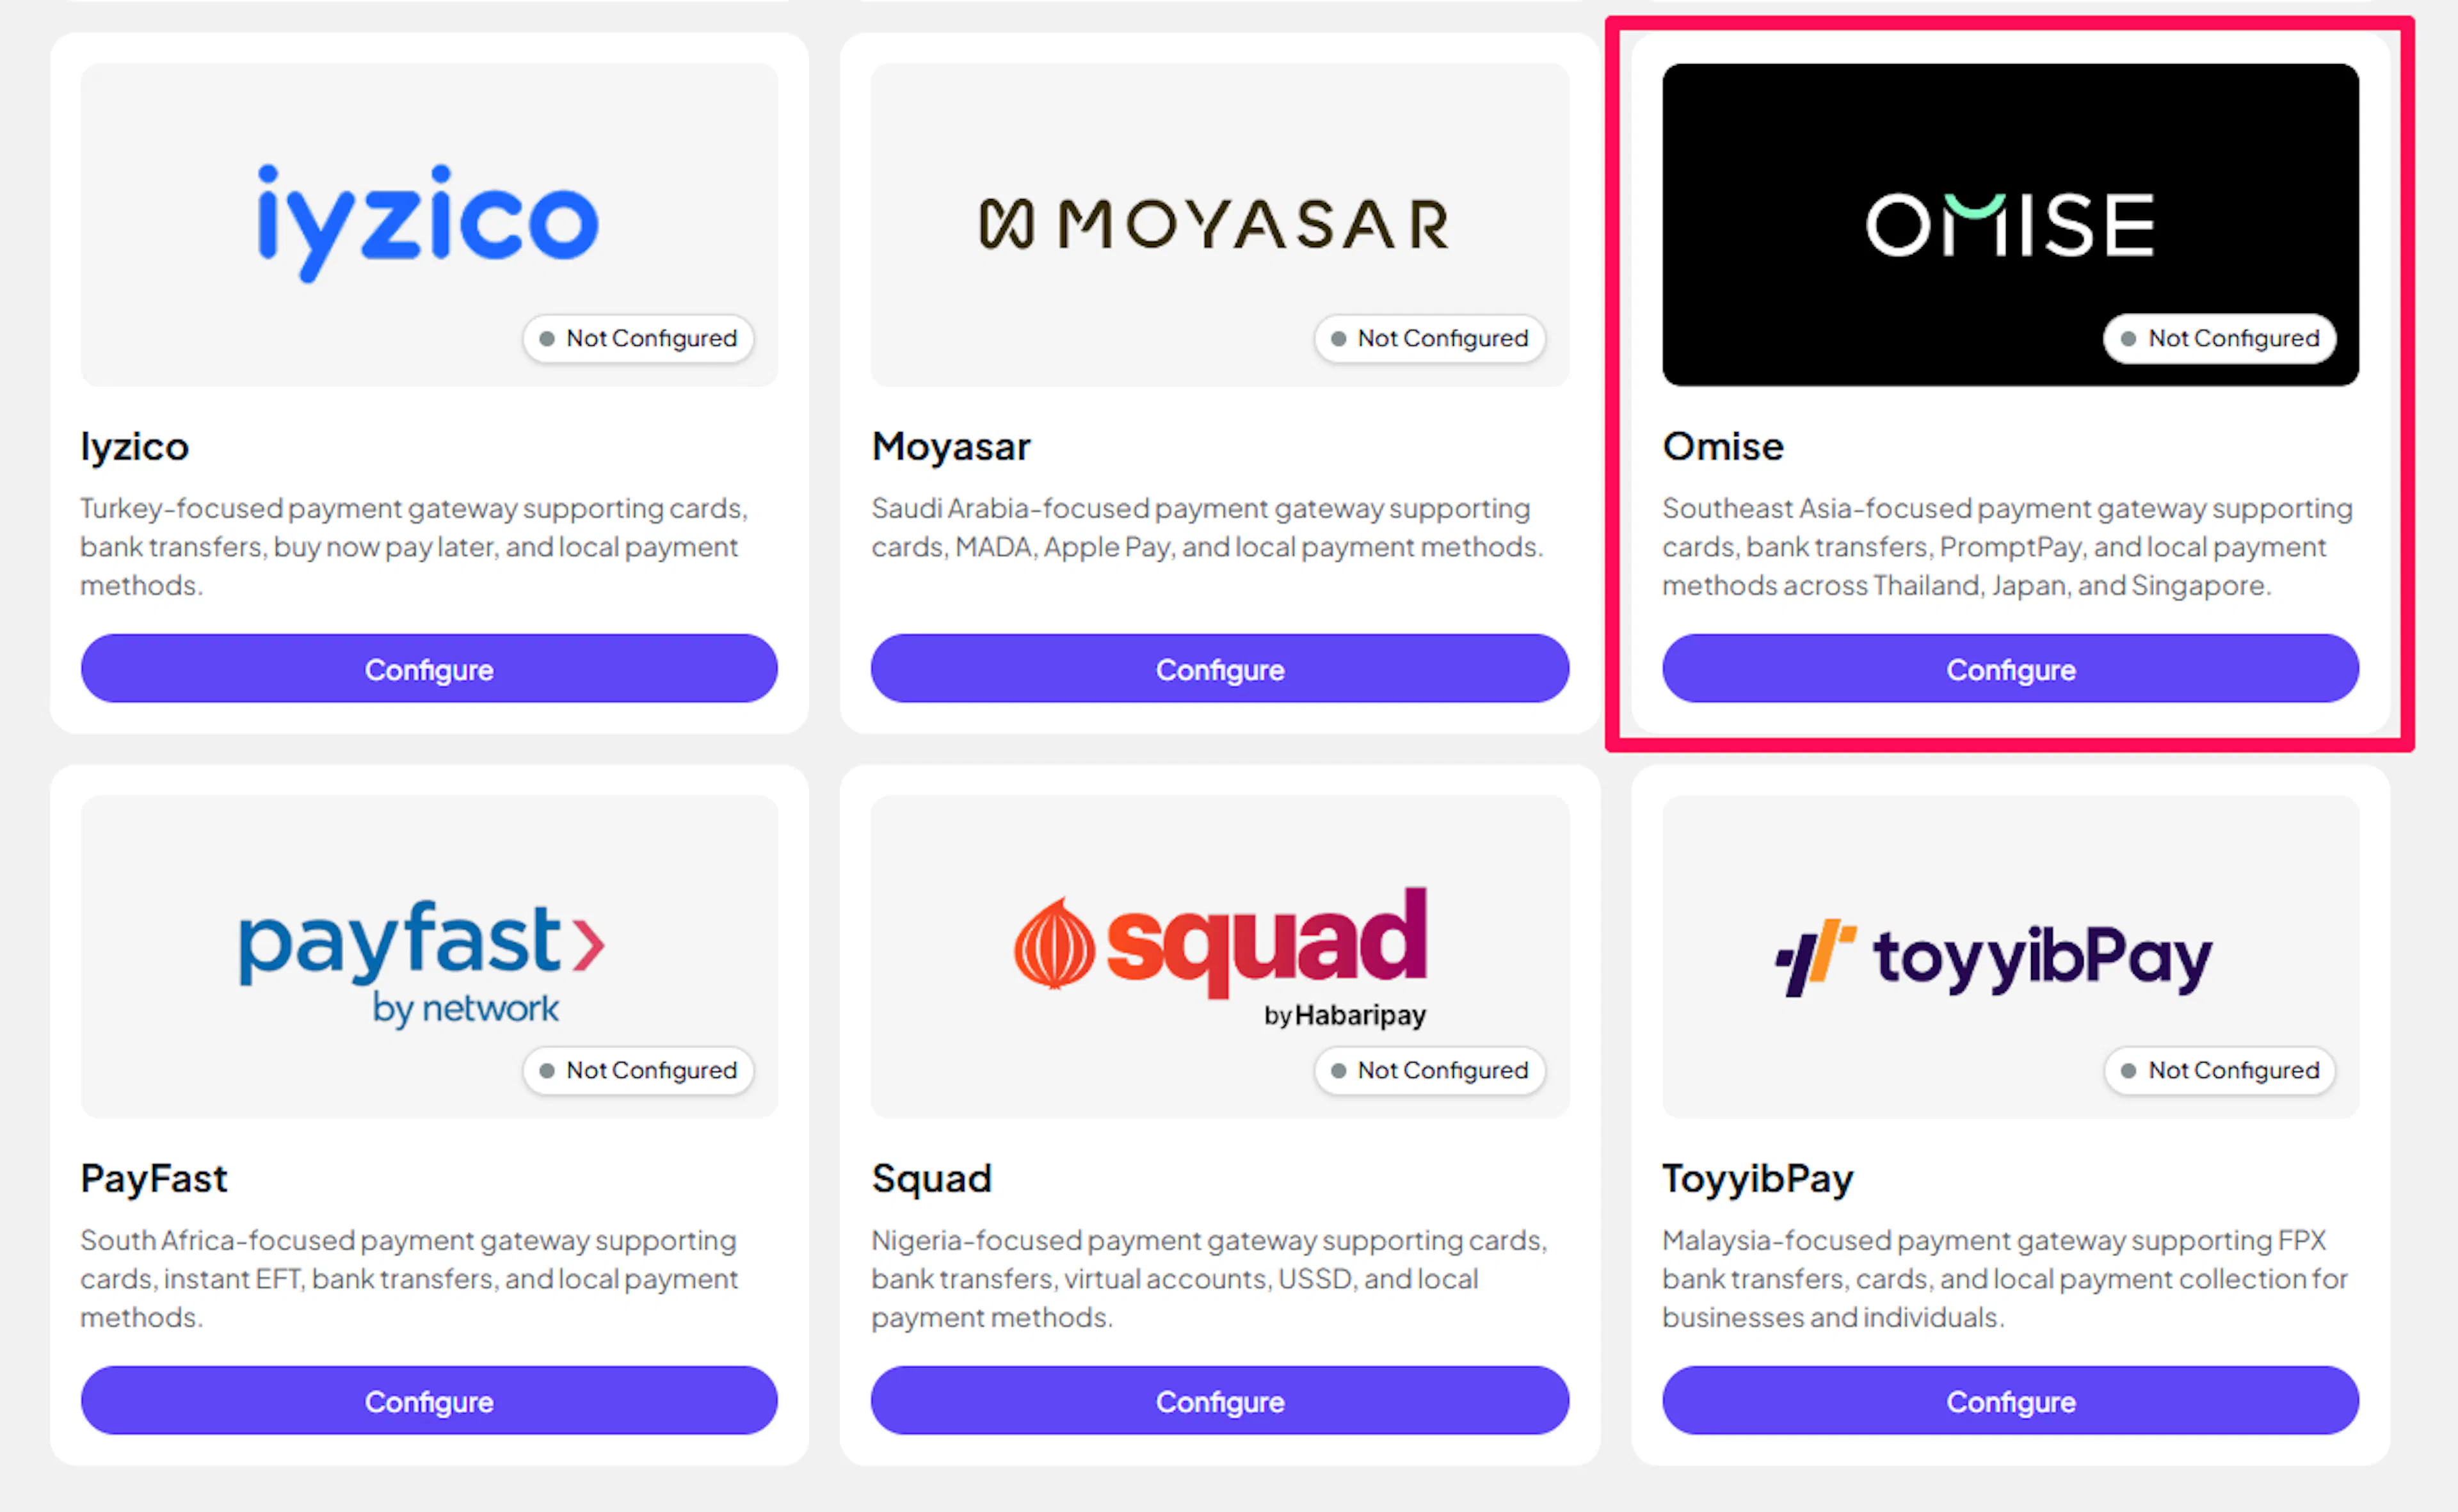
Open PayLexer Dashboard
Log in to your PayLexer dashboard and navigate to Payment Gateways → Omise.
Enter your credentials
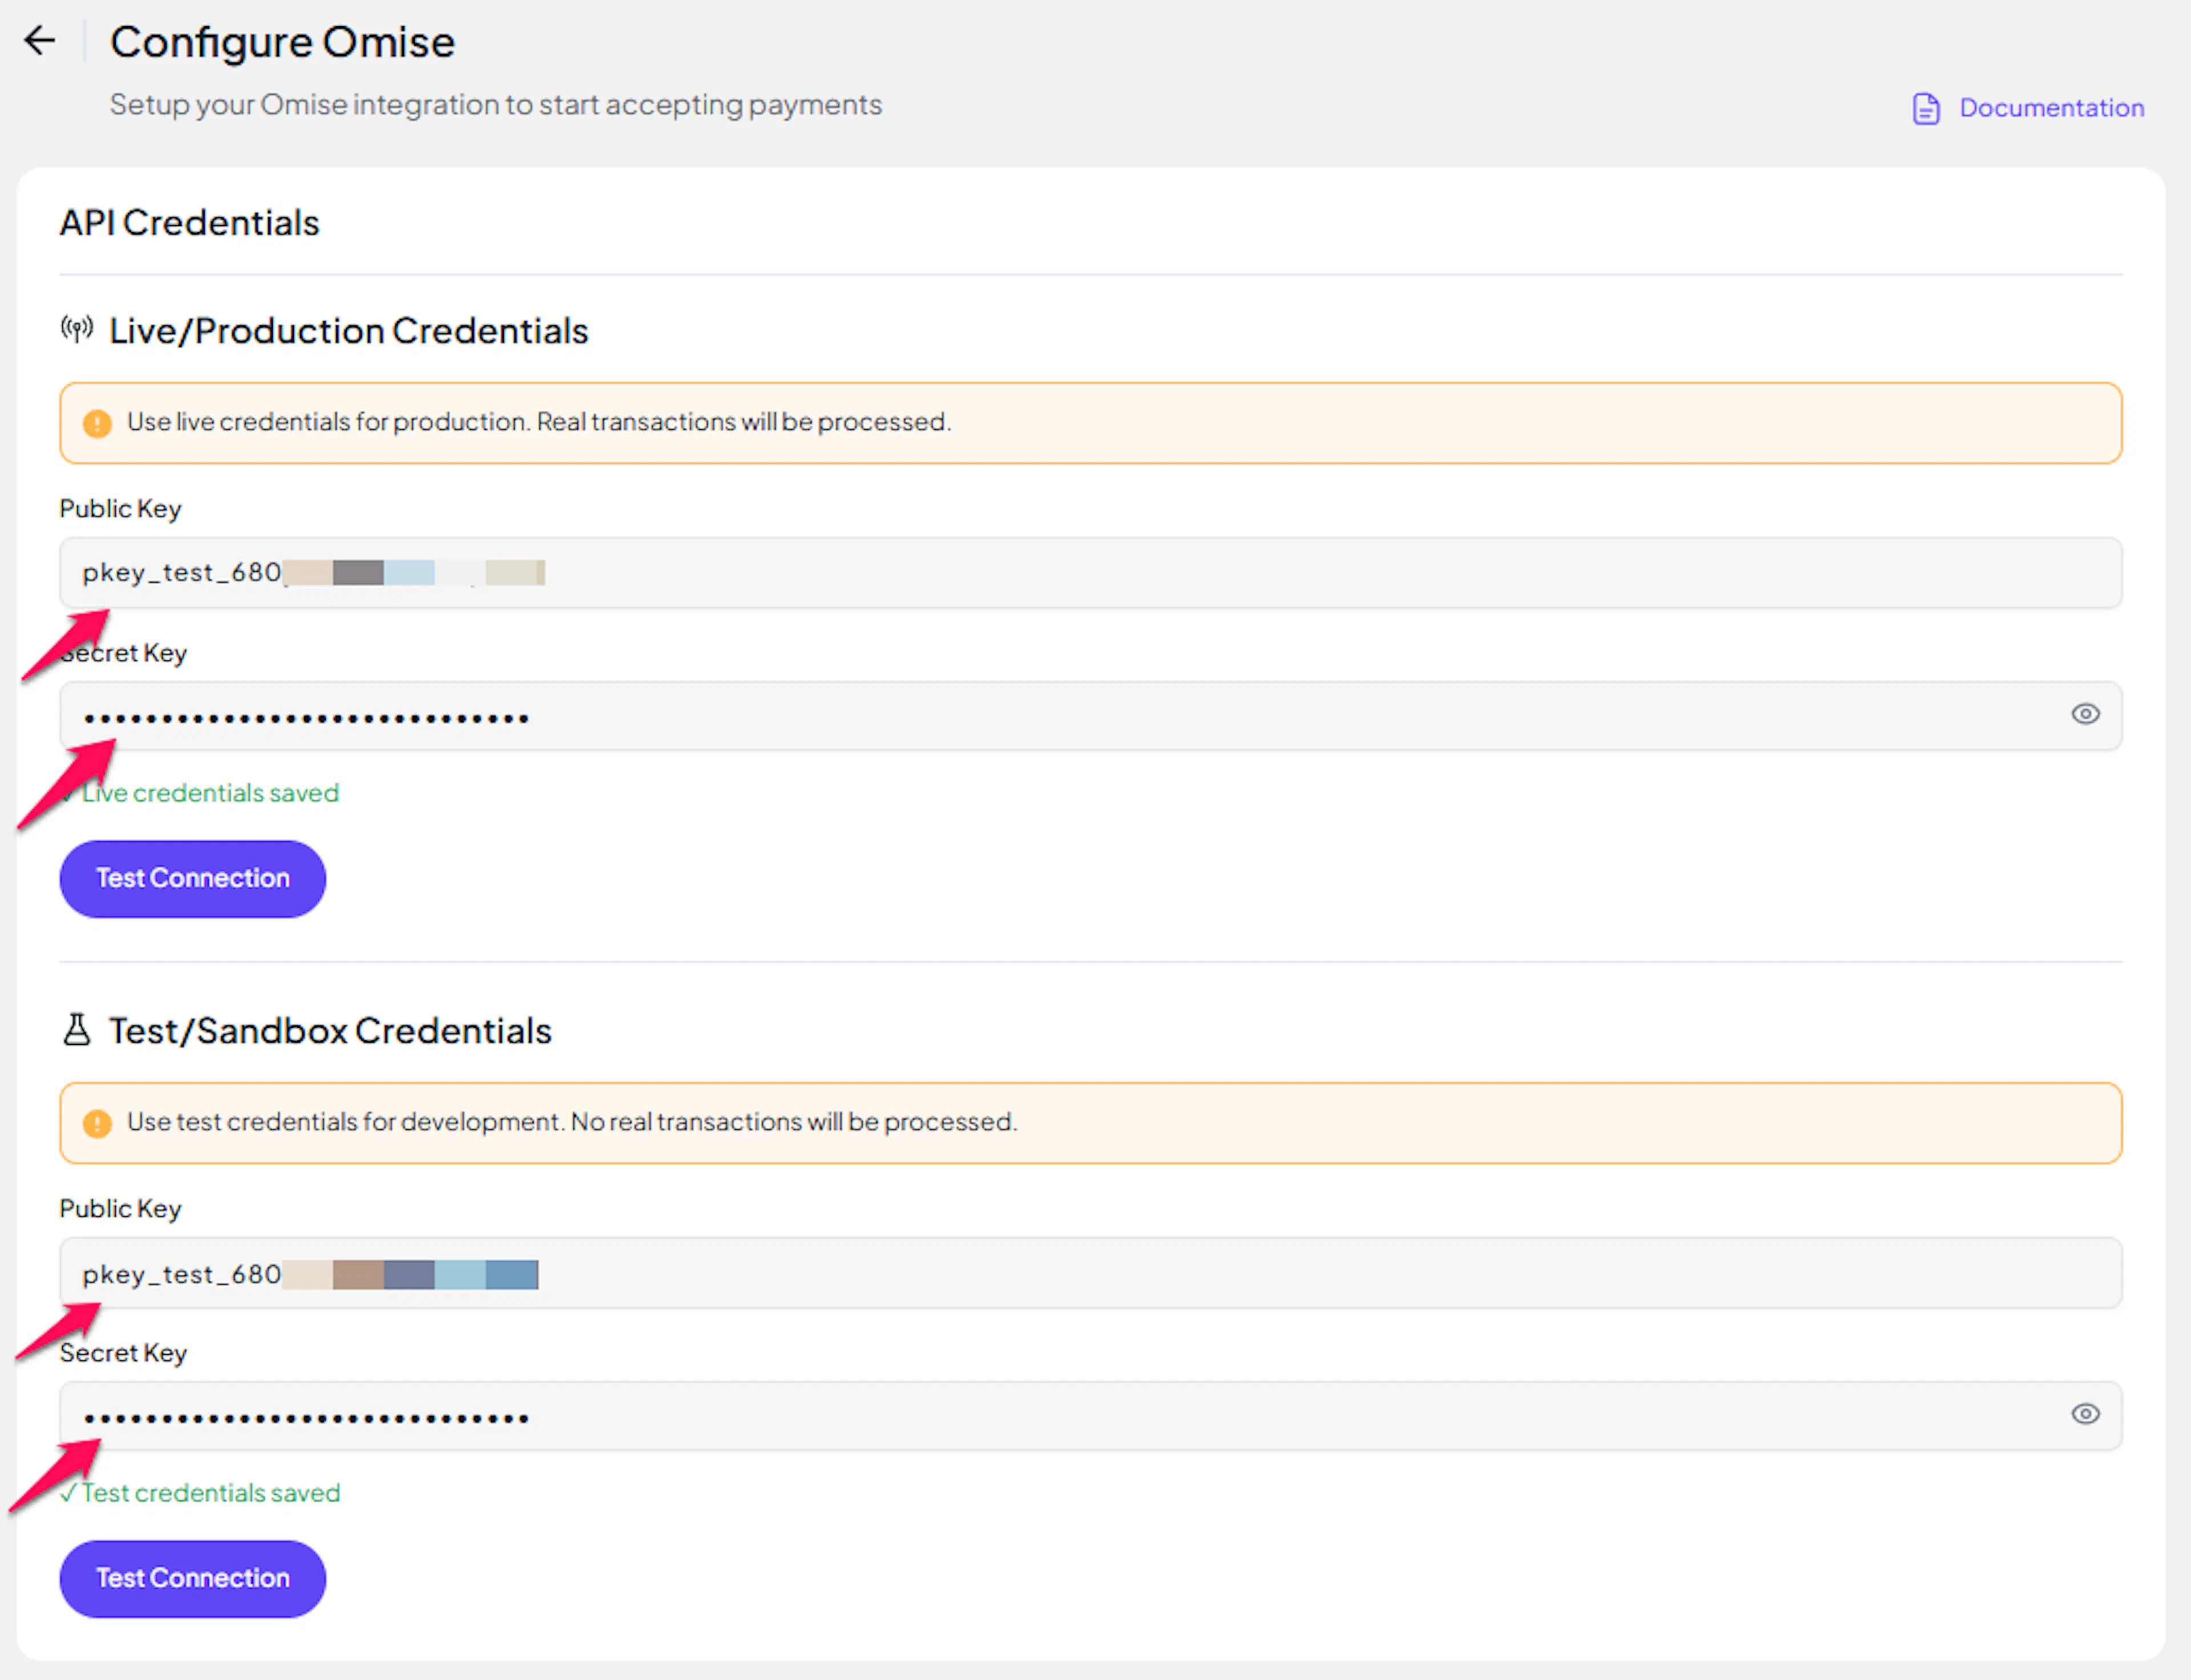
Paste your Live and Test key pairs into the respective fields:
- Public Key - the live Public Key from Omise Dashboard (Live mode)
- Secret Key - the live Secret Key from Omise Dashboard (Live mode)
- Public Key (Test) - the test Public Key from Omise Dashboard (Test mode)
- Secret Key (Test) - the test Secret Key from Omise Dashboard (Test mode)
Understanding Live/Production and Sandbox Settings:
| Environment | Purpose |
|---|---|
| Live / Production (Mandatory) | Used for real transactions. Cannot be empty - enter a placeholder if you are not yet ready to go live. |
| Test / Sandbox (Optional) | Used for testing only. No real money is processed. |
How PayLexer selects credentials:
- Debug/Test mode ON → Test credentials are used
- Debug/Test mode OFF → Live credentials are used
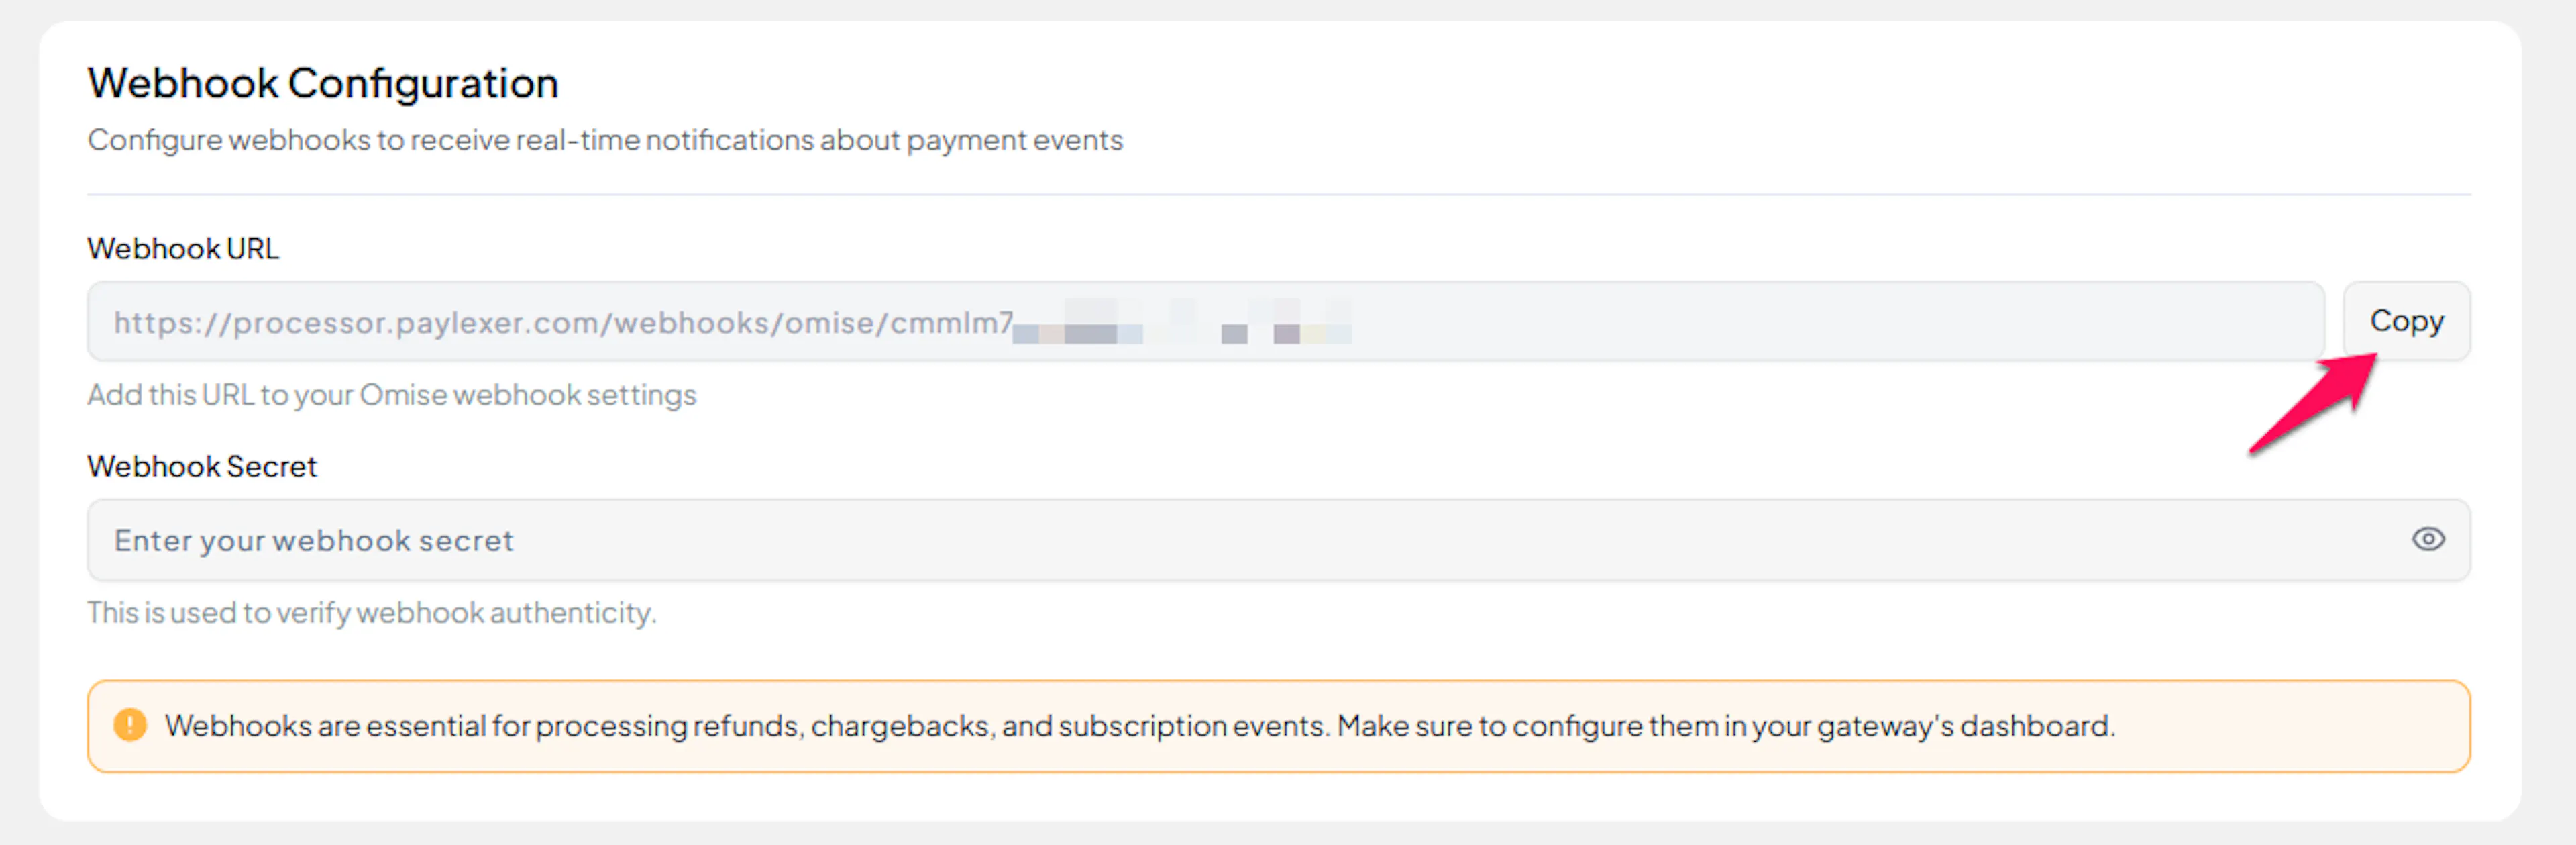
Save and copy the Webhook URL
Click Save Configuration. After saving, a Webhook URL appears on the configuration page. Copy it - you will need it in the next section.
Configuring Webhooks (Mandatory)
Webhooks deliver real-time payment and subscription updates. Omise signs every notification with HMAC-SHA256, so PayLexer can verify each event is genuine before acting on it.
Register the webhook in the Omise Dashboard
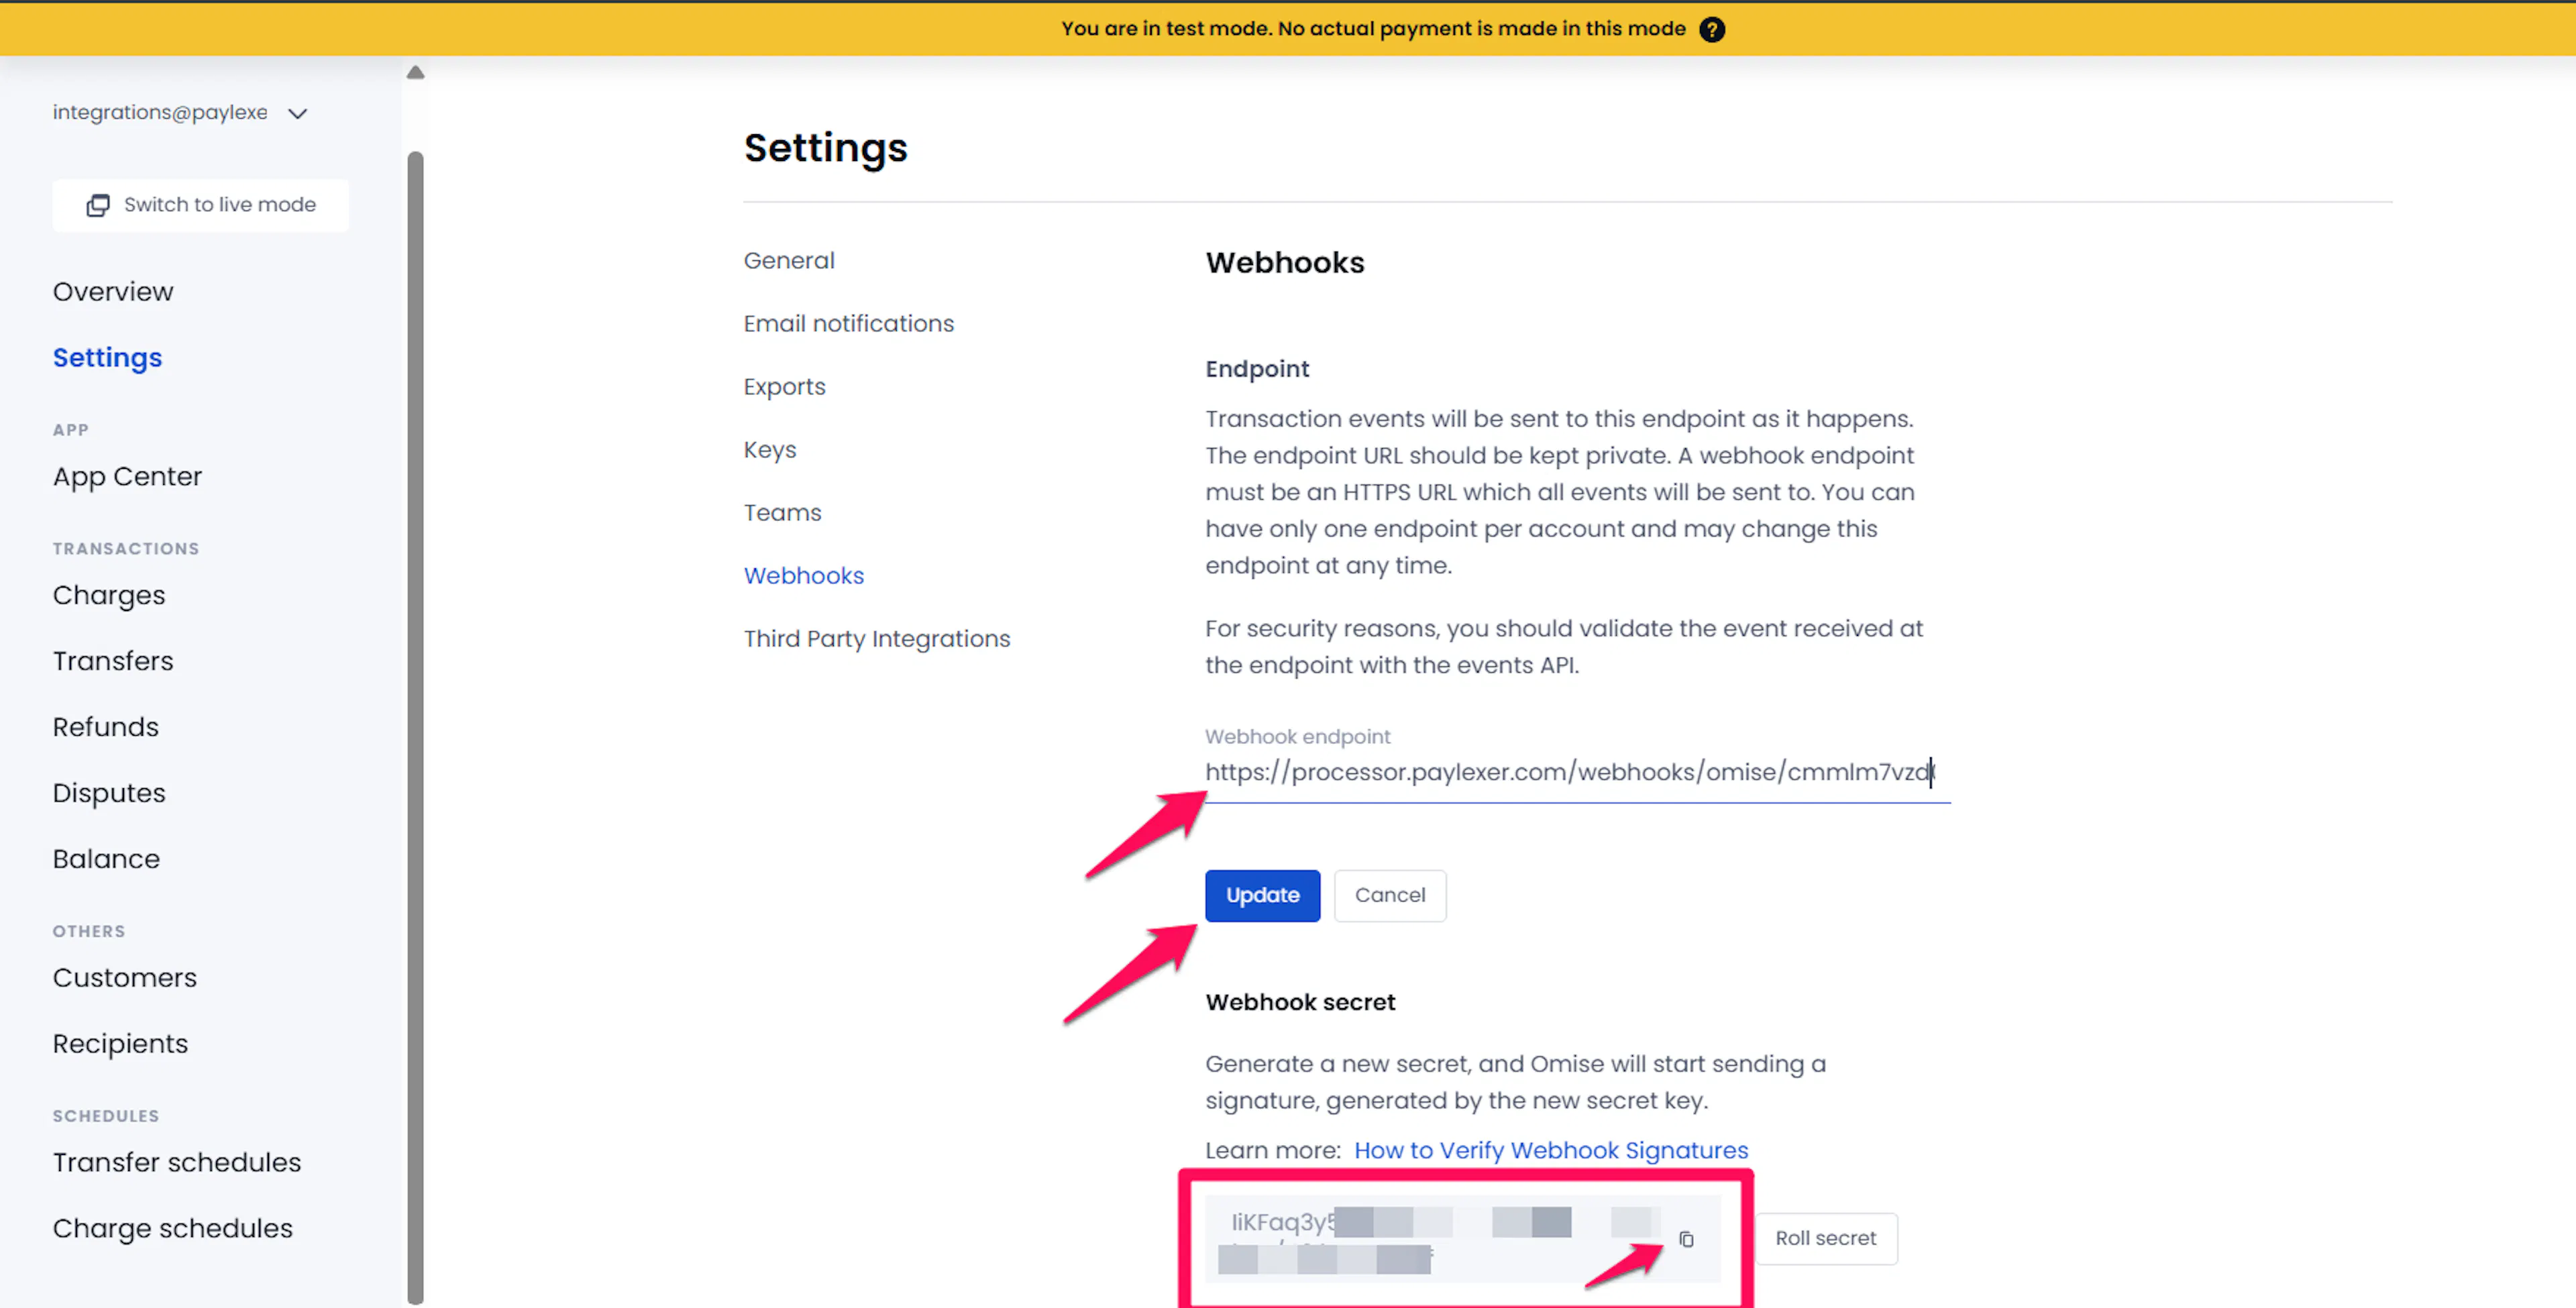
Log in to the Omise Dashboard and navigate to Settings → Webhooks.
Click Set Endpoint and paste the PayLexer Webhook URL you copied in the previous step.
Update the webhook endpoint.
Copy the Webhook Secret
After saving the webhook endpoint, Omise displays a Webhook Secret. Copy this value.
Enter the Webhook Secret in PayLexer
Return to Payment Gateways → Omise in your PayLexer dashboard. Paste the copied value into the Webhook Secret field and click Save Configuration.
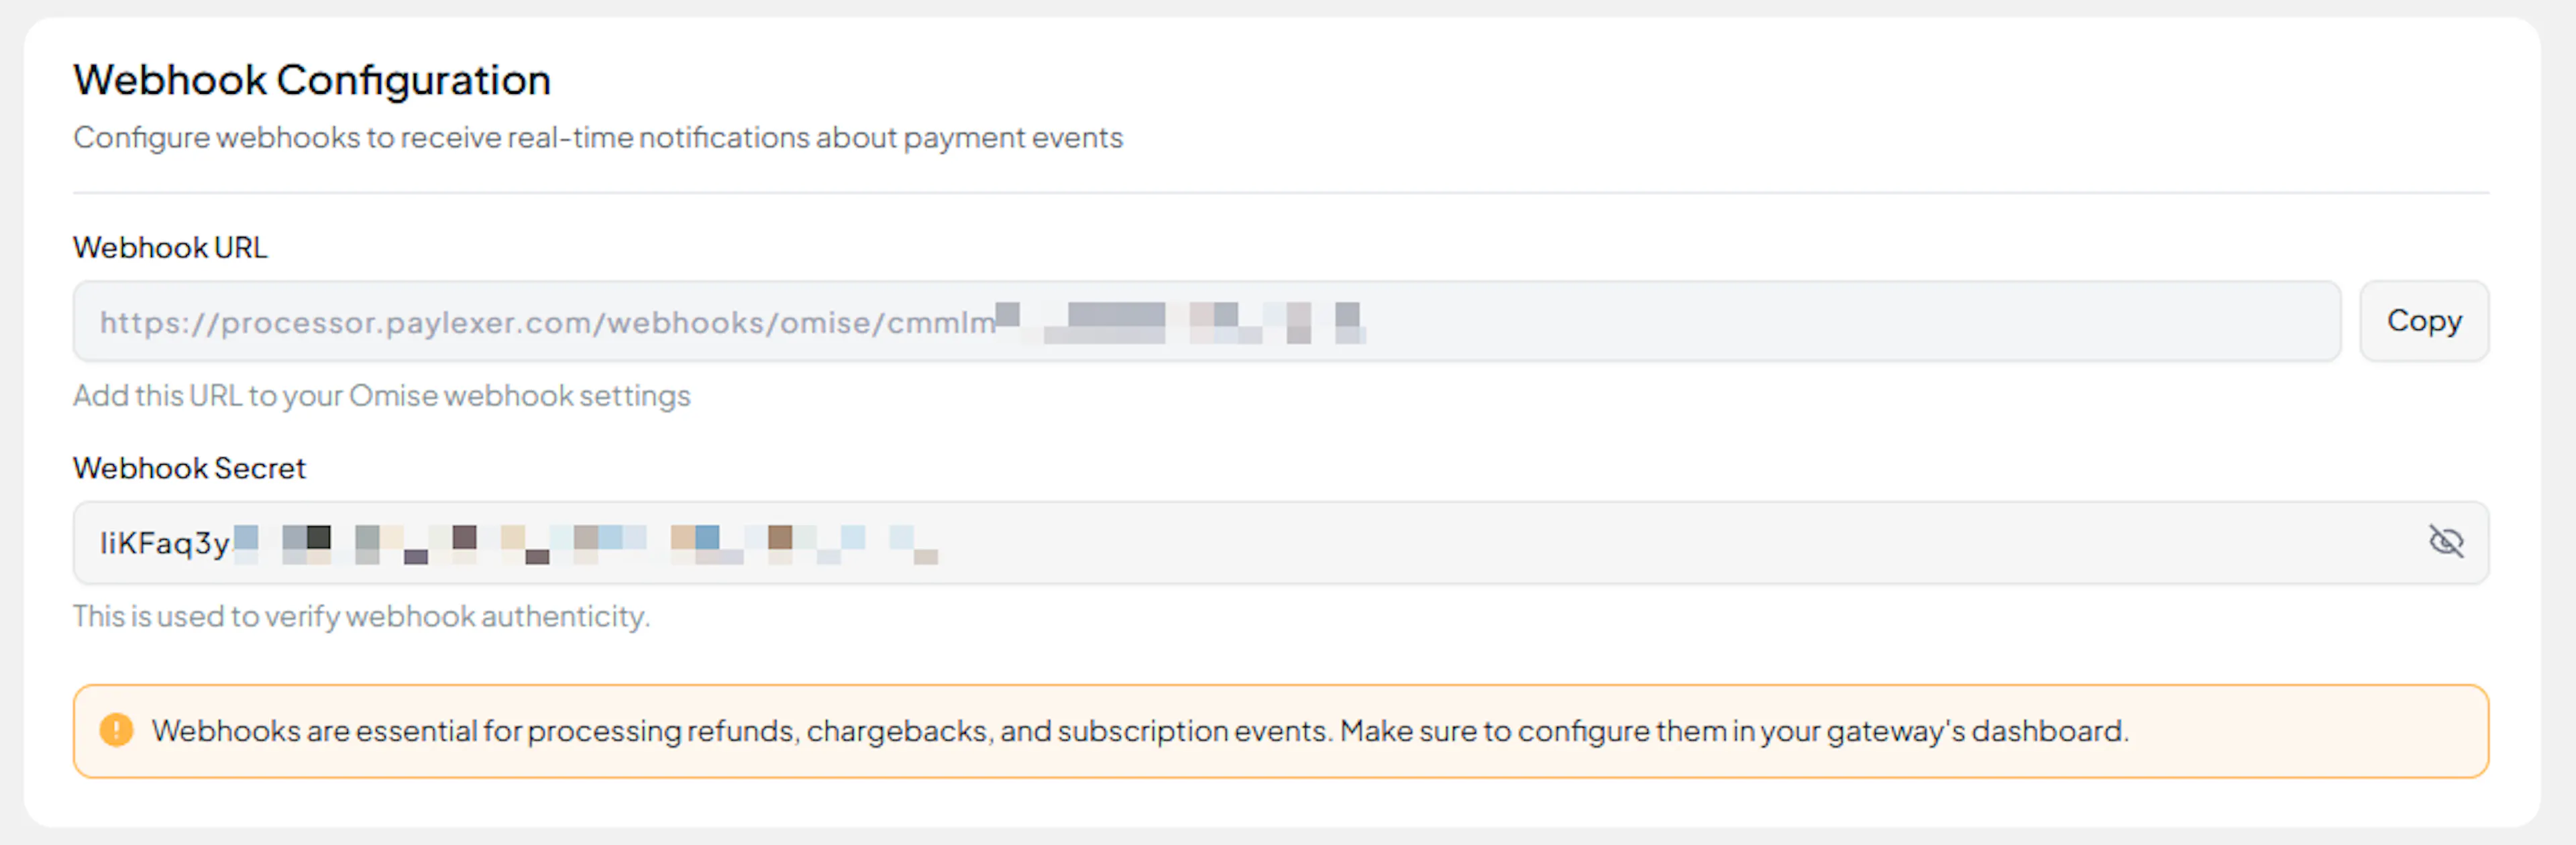
PayLexer will now verify every Omise notification using HMAC-SHA256 before updating any order.
Integrate Omise to Your Website
If you have already added and configured your site, you can enable Omise in your existing setup.
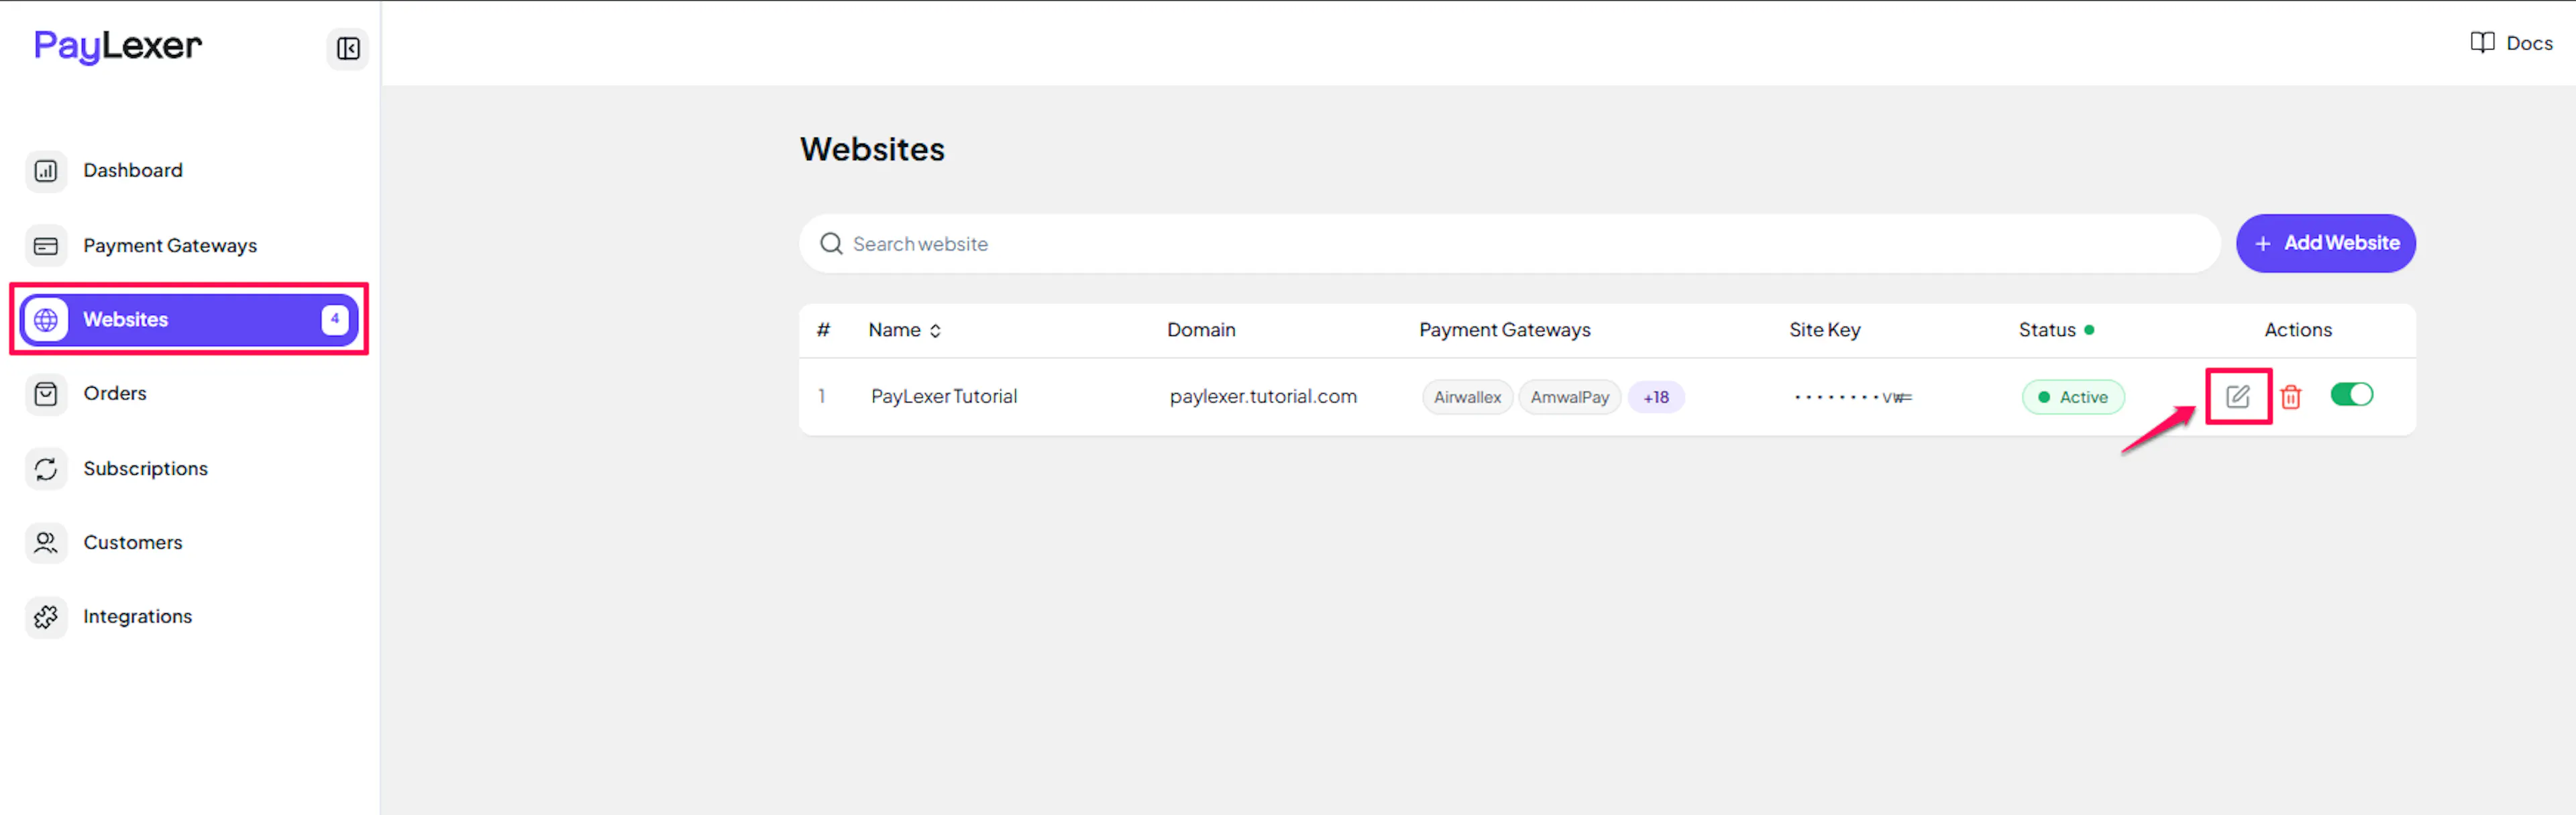
Go to Websites
Navigate to Websites in your PayLexer dashboard.
Edit your website
Click the Edit Icon of your added website.
Enable Omise
Click the checkbox to enable Omise for the website.
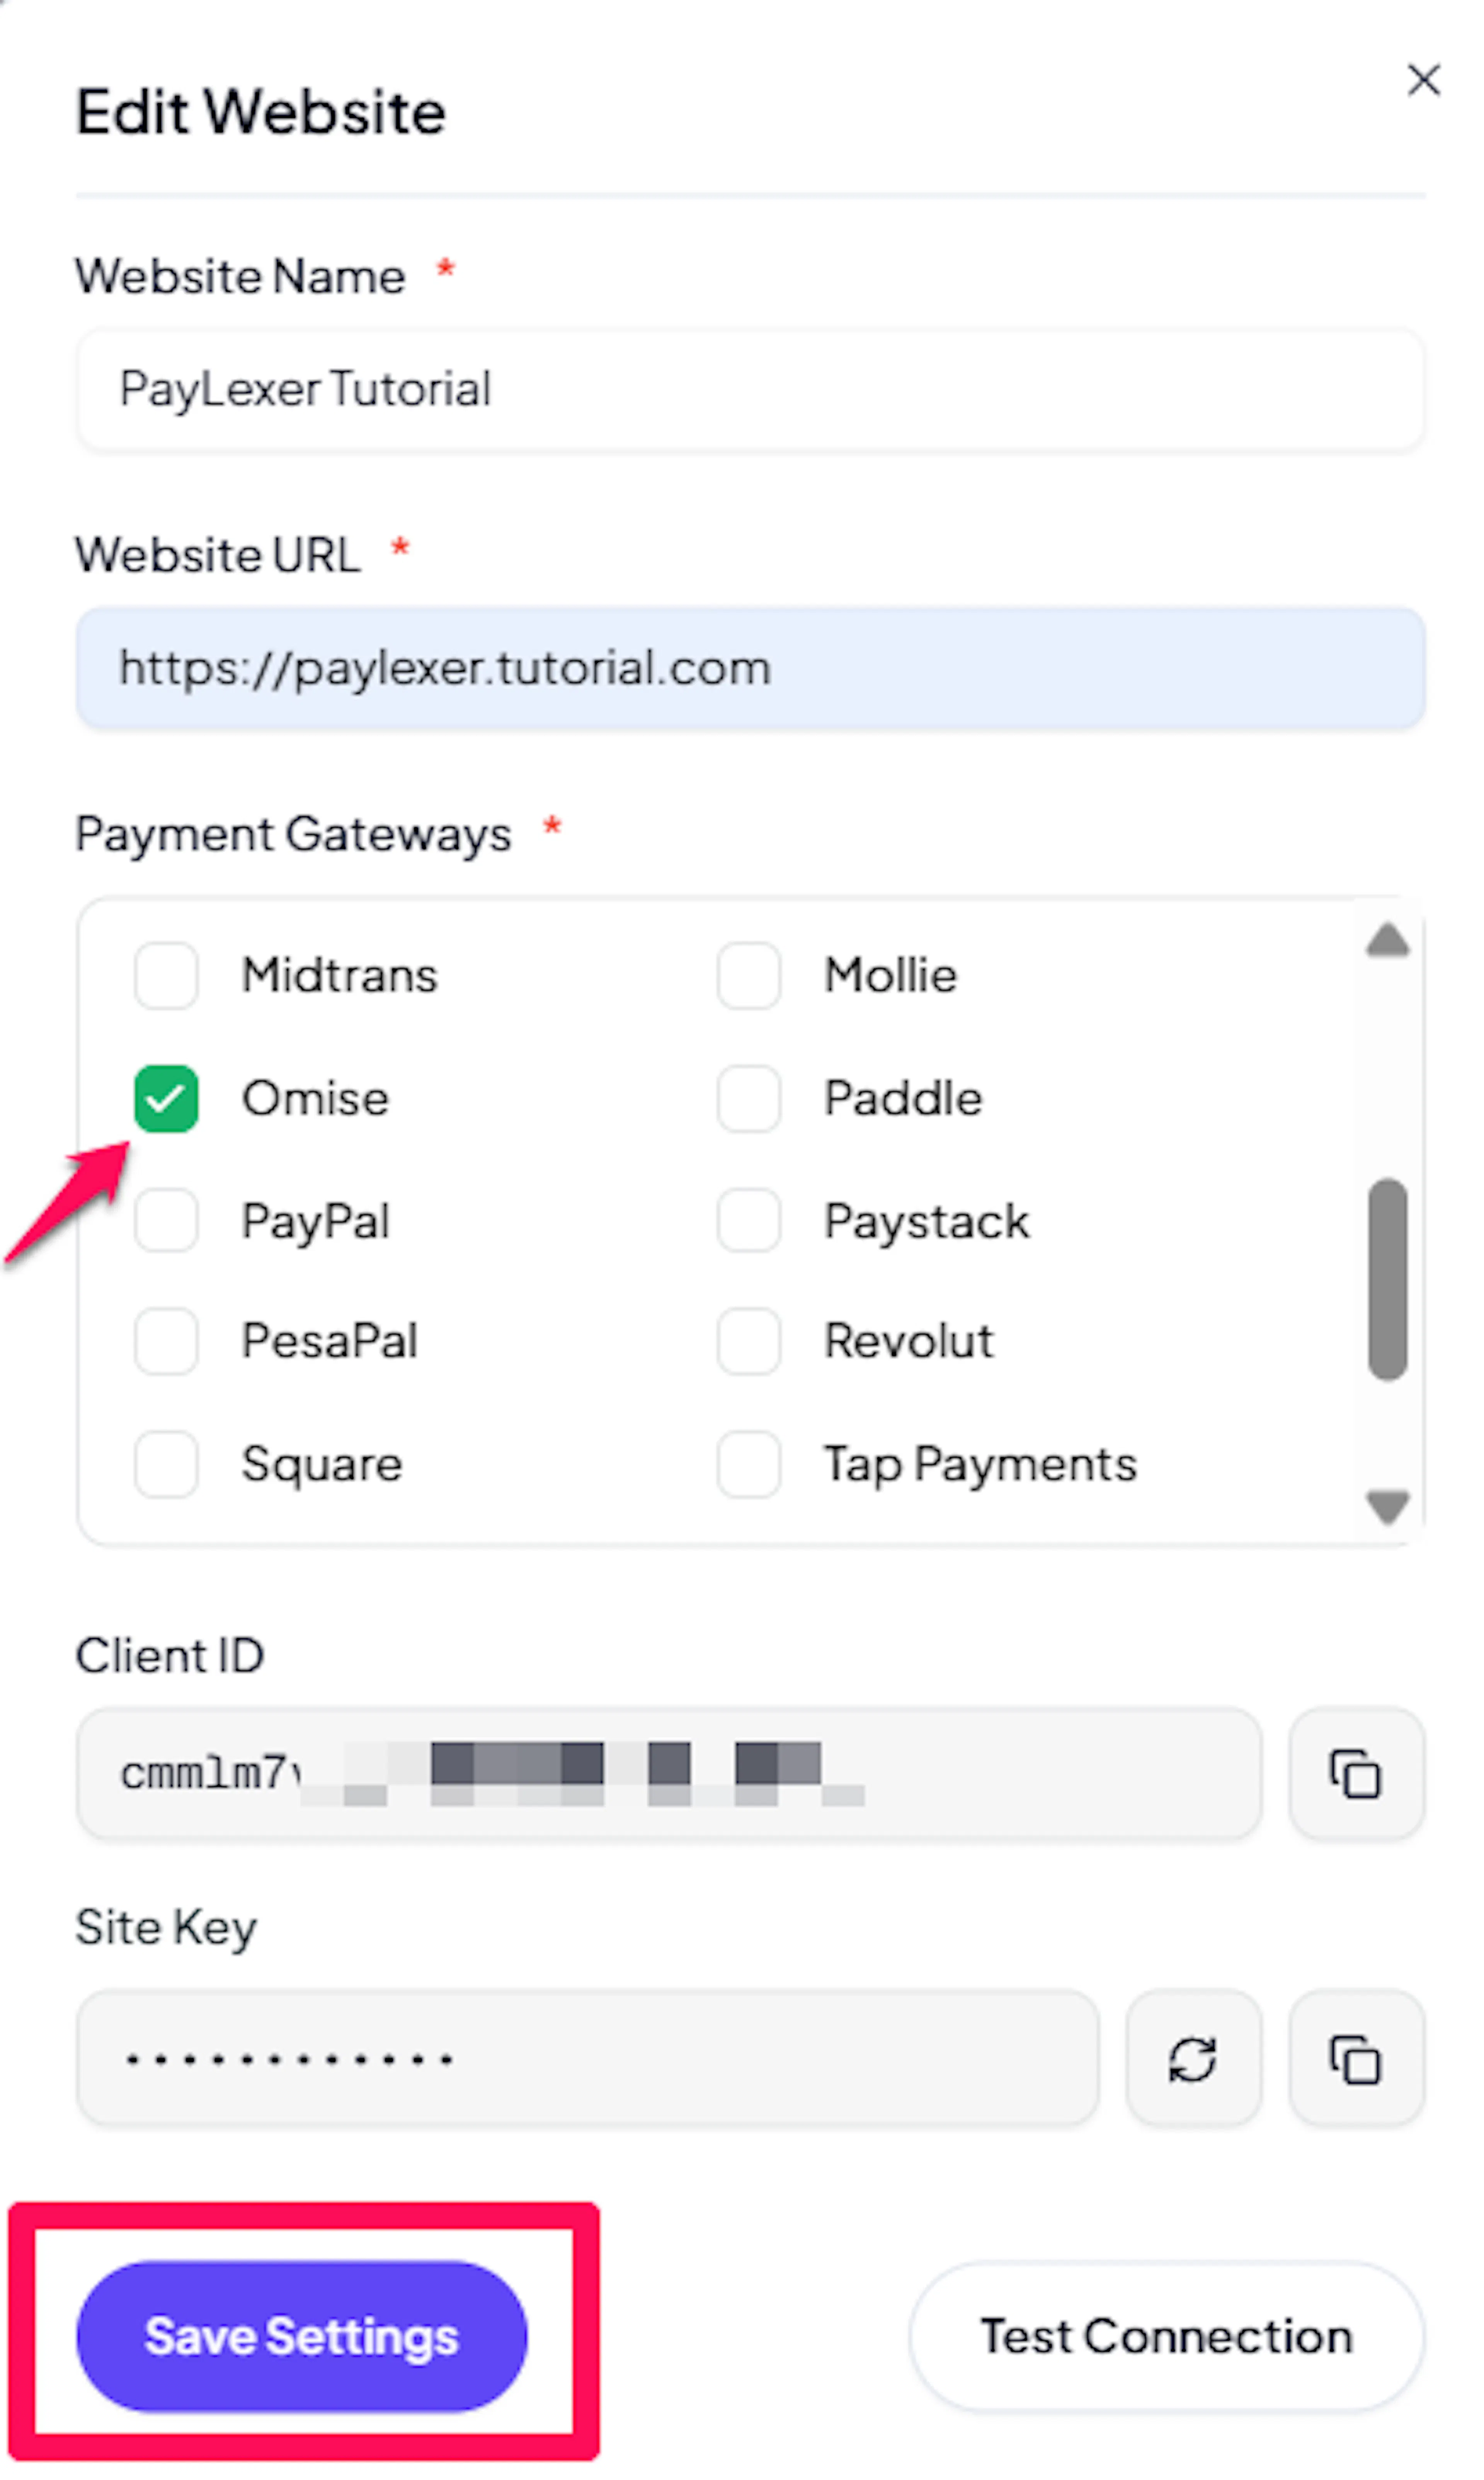
Omise is now active for this website. Run a test transaction before switching off Debug/Test mode.
If you haven't added a website yet, Continue to Add Your Website →
Troubleshooting
Best Practices
- Run at least one full test transaction before going live. Use your test key pair in PayLexer's Test fields so no real money is processed.
- Register the PayLexer webhook URL in the Omise Dashboard as soon as you save your credentials. Without webhooks, payment and subscription confirmations will not be delivered in real time.
- Keep your Secret Keys and Webhook Secret confidential. If any value is compromised, regenerate it in the Omise Dashboard and update it in PayLexer immediately.
- For subscriptions with a sign-up fee, PayLexer charges the sign-up fee immediately as a separate transaction before the recurring schedule starts. Confirm your Omise account can process charges in the selected currency before enabling sign-up fees.
FAQs
Still Have Questions?
- Omise Support: Omise Help Center
- PayLexer Support: Contact Support For API references and advanced configuration, see the Omise developer documentation.