

Amazon Pay
Connect Amazon Pay to PayLexer so shoppers can check out with the payment methods and addresses already saved in their Amazon account.
Amazon Pay is a checkout service from Amazon, one of the world's largest online retailers, that lets shoppers pay on other merchants' websites using the card and address details already saved in their Amazon account. It's built on the trust and familiarity of the Amazon checkout experience, without routing the sale through the Amazon marketplace itself.
- Supported Regions (Merchant Accounts): North America, Europe, and Japan - view full list
- Supported Currencies: USD, EUR, GBP, JPY - view full list
Supported Features
- Checkout via the official Amazon Pay button - shoppers sign in with their Amazon account and approve the payment without typing card details
- Full and partial refunds
- Test (Sandbox) and Live (Production) environments with fully separate credentials
- Automatic payment verification against Amazon's own records before an order is marked paid
Amazon Pay does not currently support subscriptions or recurring billing in PayLexer. It's available for one-time payments only.
Before You Start
Make sure you have:
- Amazon Pay Account – Don't have one? Get started with Amazon Pay →
- PayLexer Account – Required to configure the integration. Create your account →
- A website where you want to integrate
Looking for a different payment processor? View all supported gateways →
Configuring Amazon Pay
You need a Public Key ID, Private Key, Store ID, and Merchant ID from Amazon Pay for this integration.
Getting API Credentials
Access Amazon Pay Integration Central
Sign in to your Amazon Seller Central account and open Amazon Pay Integration Central.
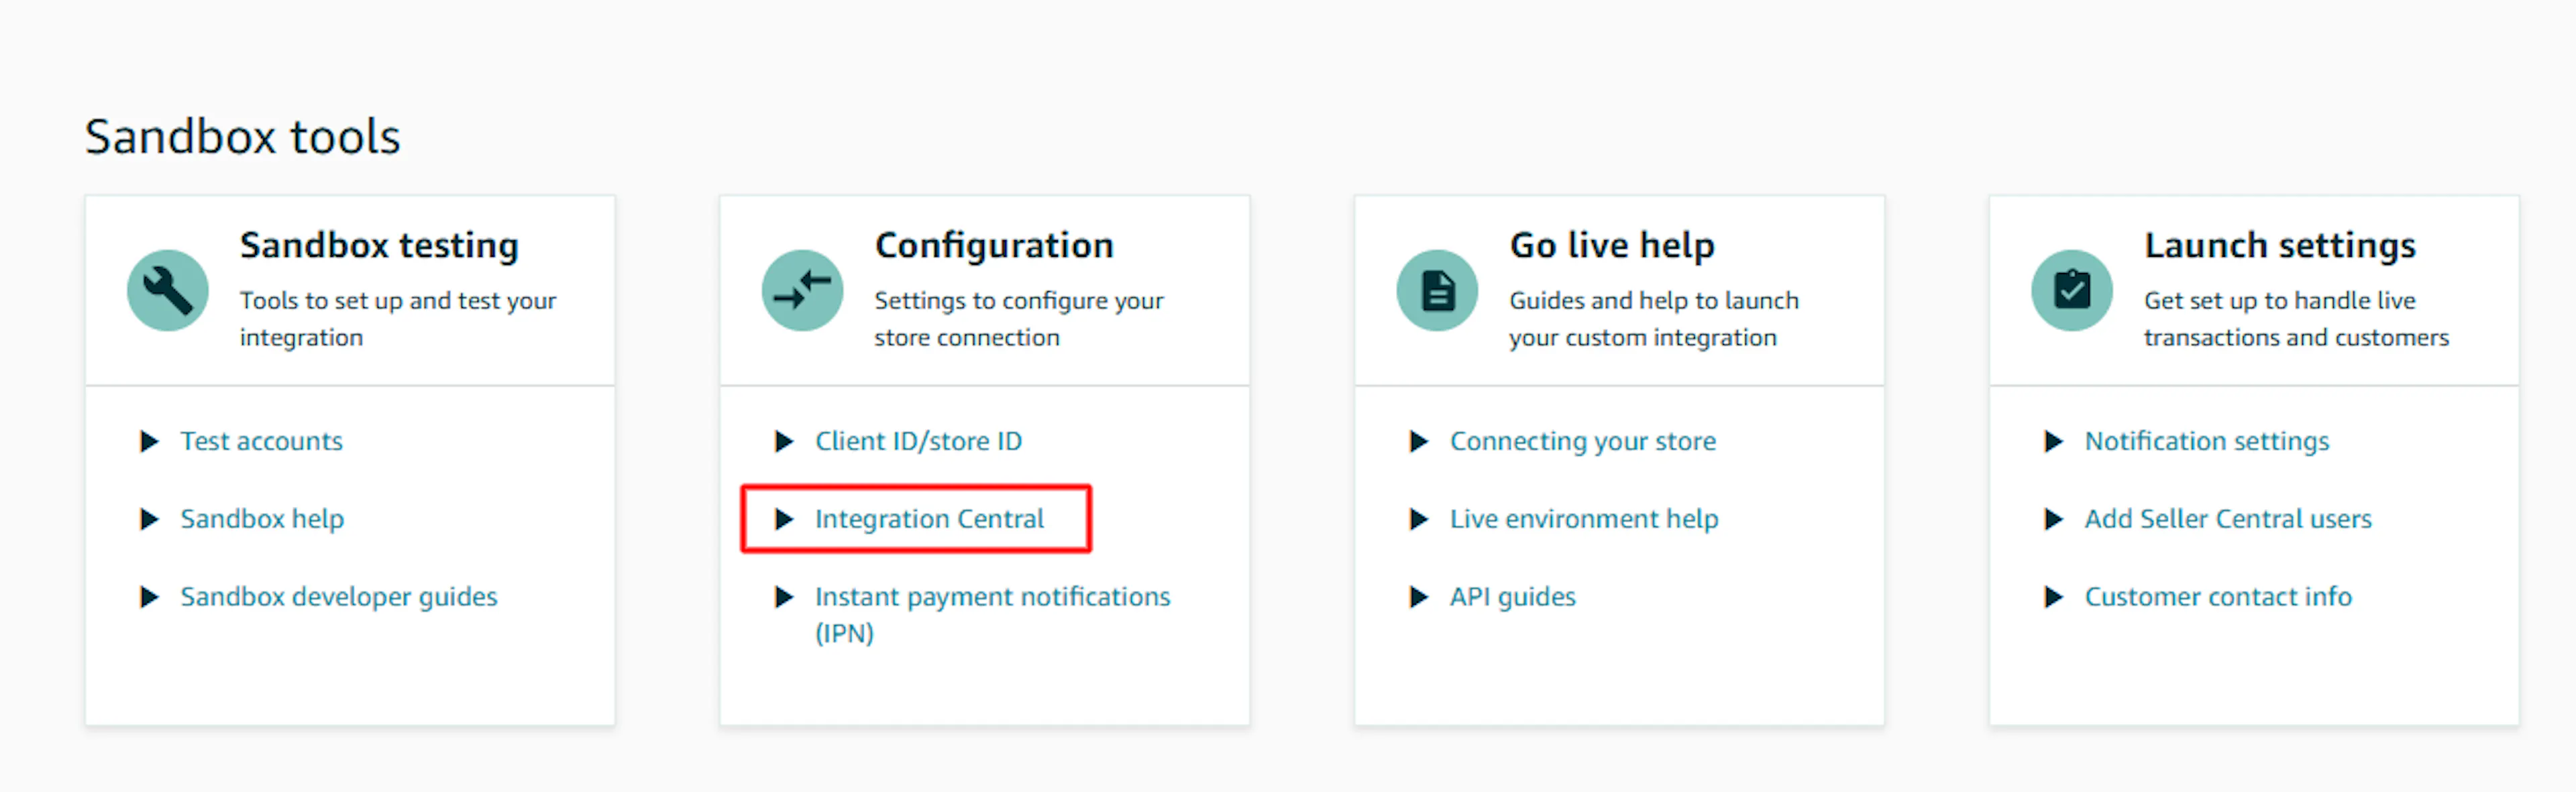
Create a Client/Store ID
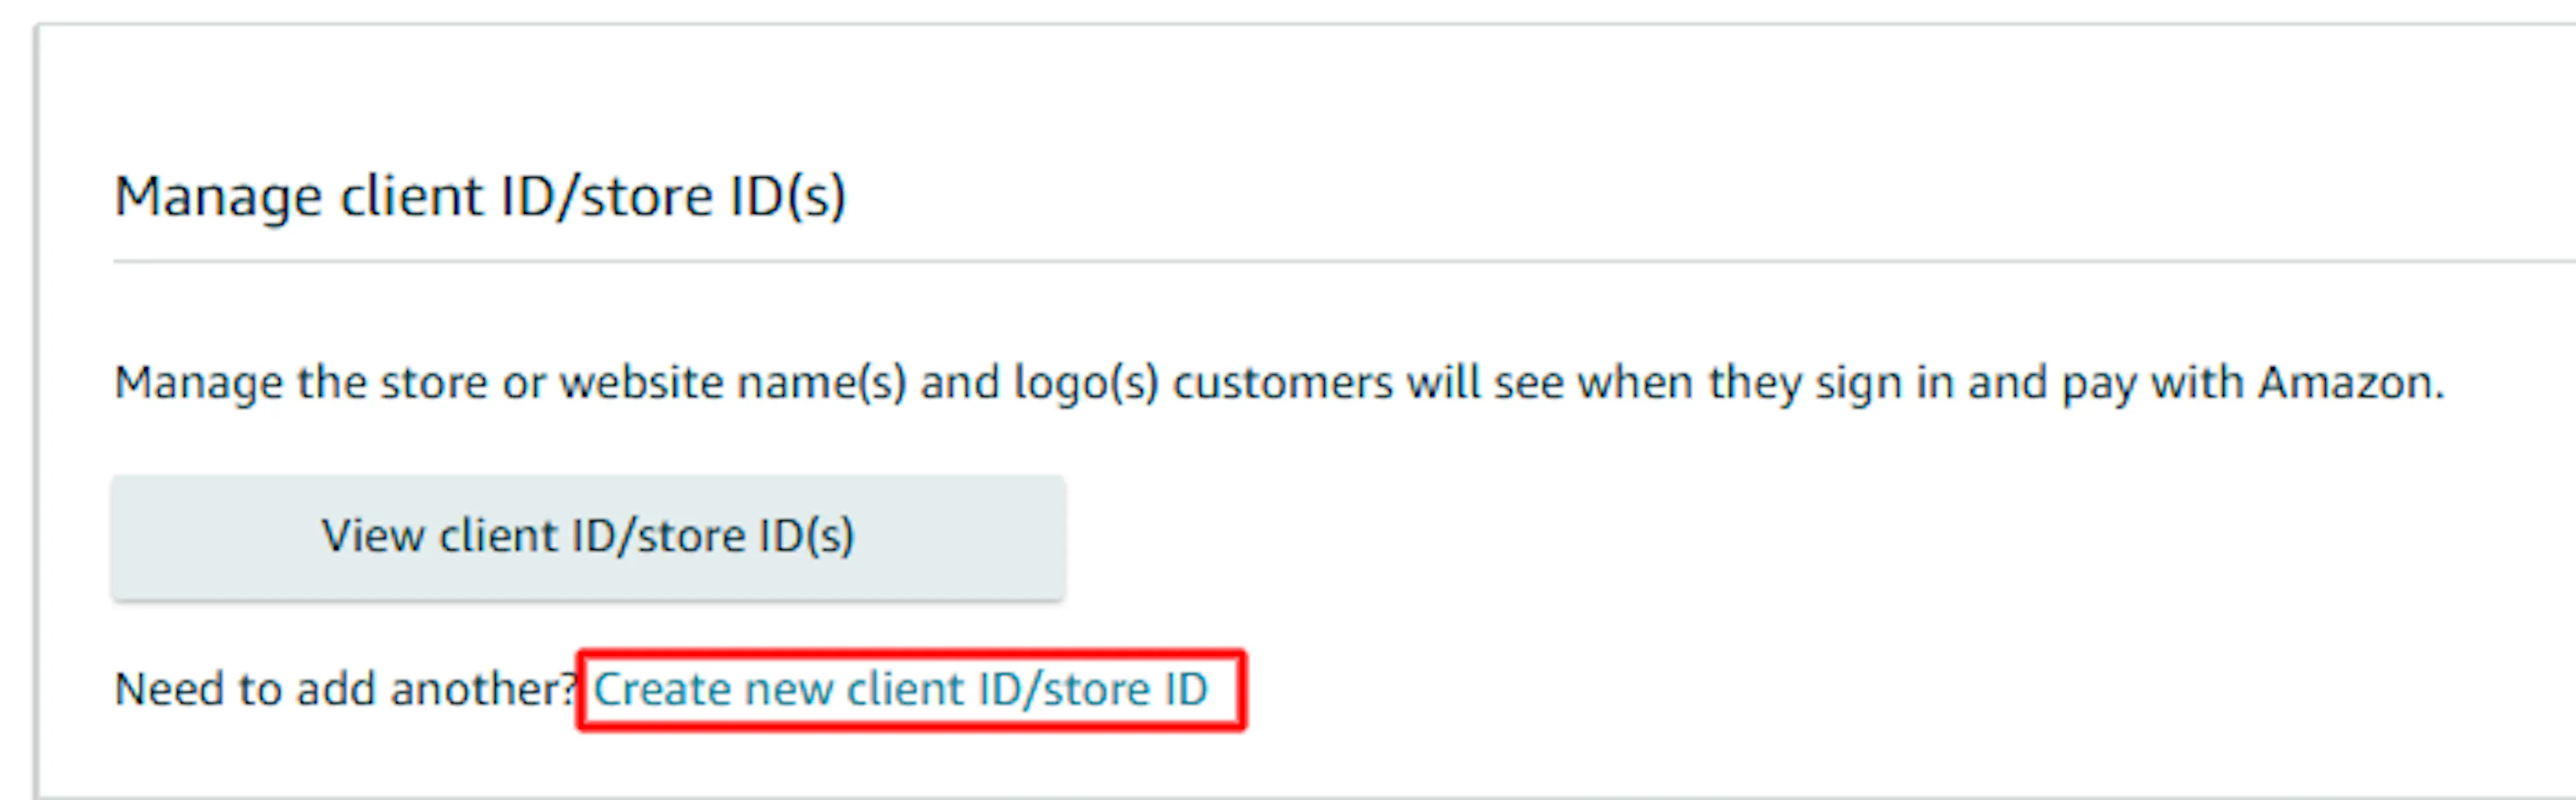
Under API access, a store must exist before you can create API keys. Open Manage Client/Store ID configurations and click Create new Client/Store ID -fill in an application/store name, your privacy policy URL, allowed JavaScript origins, and a customer support email, then save.
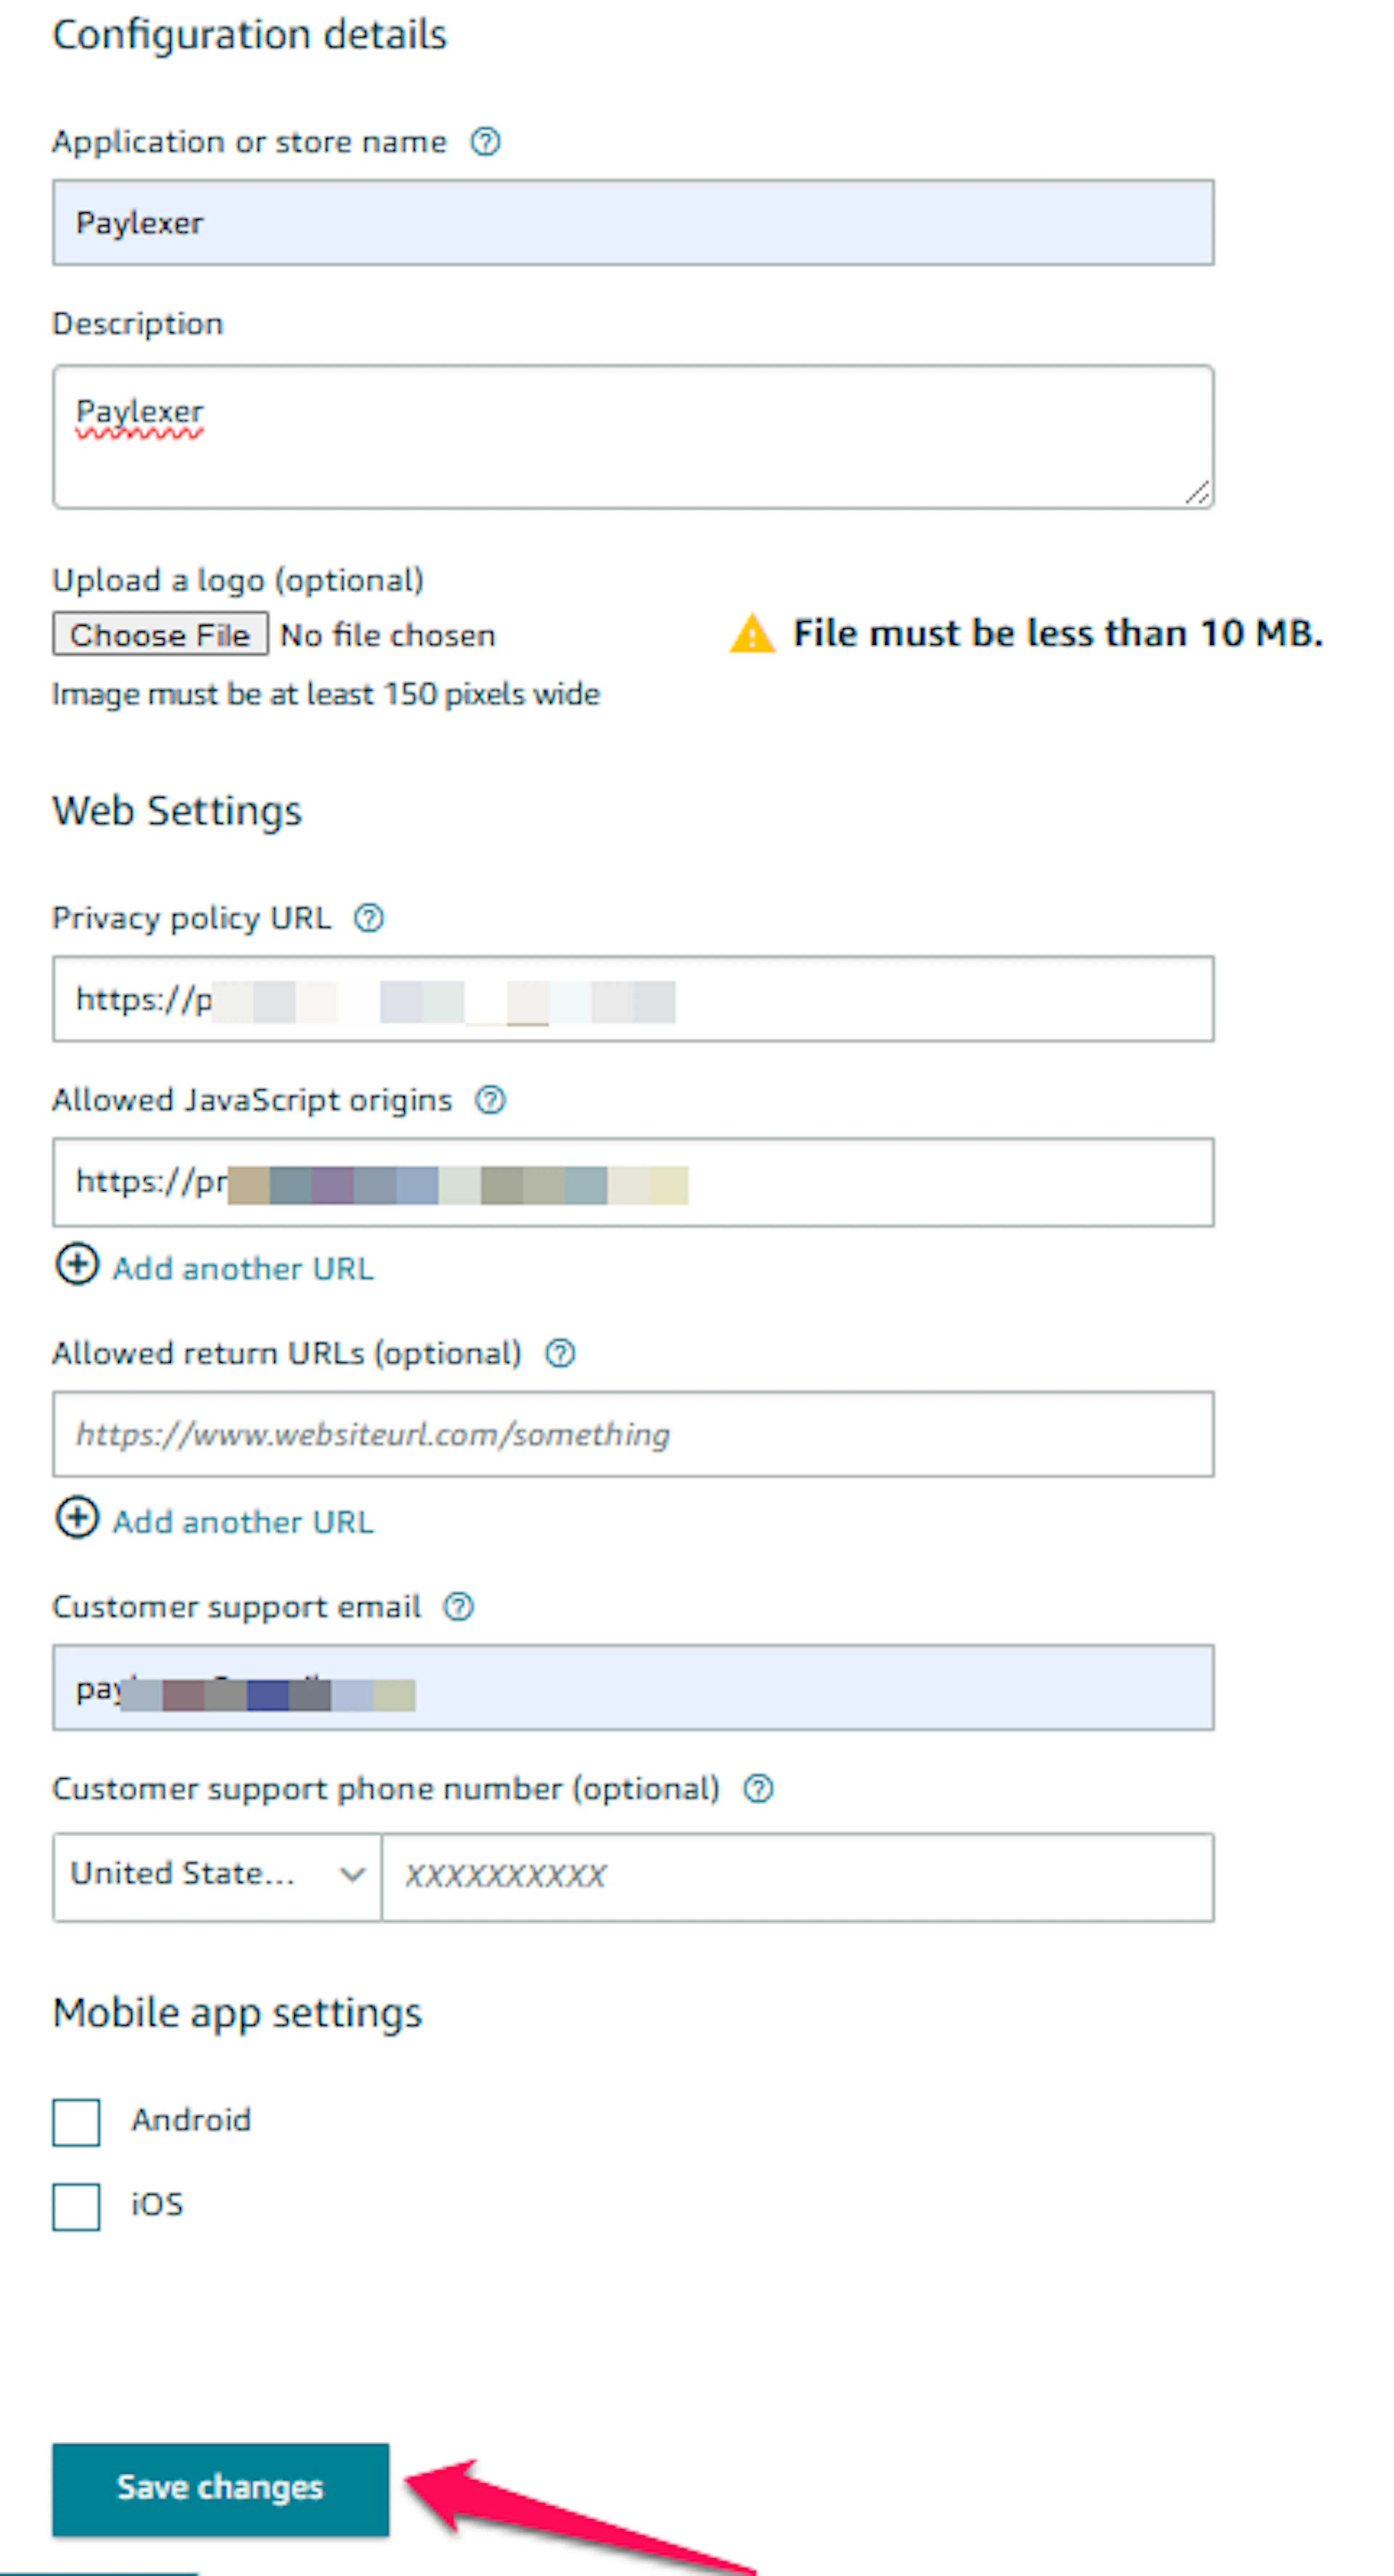
This step only registers your store with Amazon Pay - it doesn't generate any keys yet. The Create API keys button on the next screen stays disabled ("Add Store ID first") until this is done.
Copy your Store ID and Merchant ID
Back in API access → API keys, select the store you just created. The page shows your Store ID and Merchant ID side by side, each with its own Copy button.
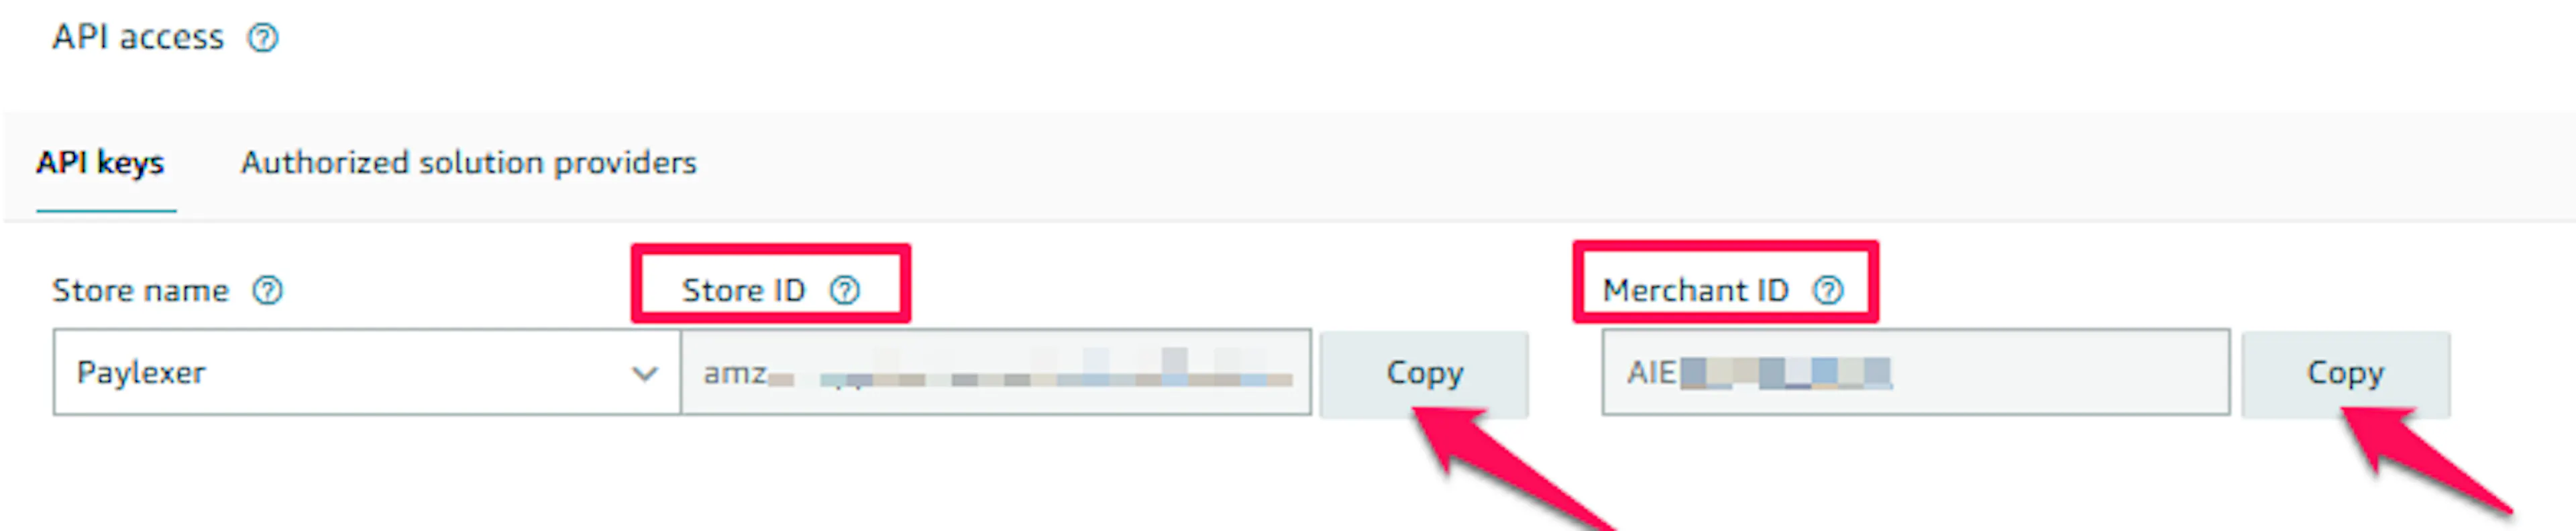
Create your API keys (public/private key pair)
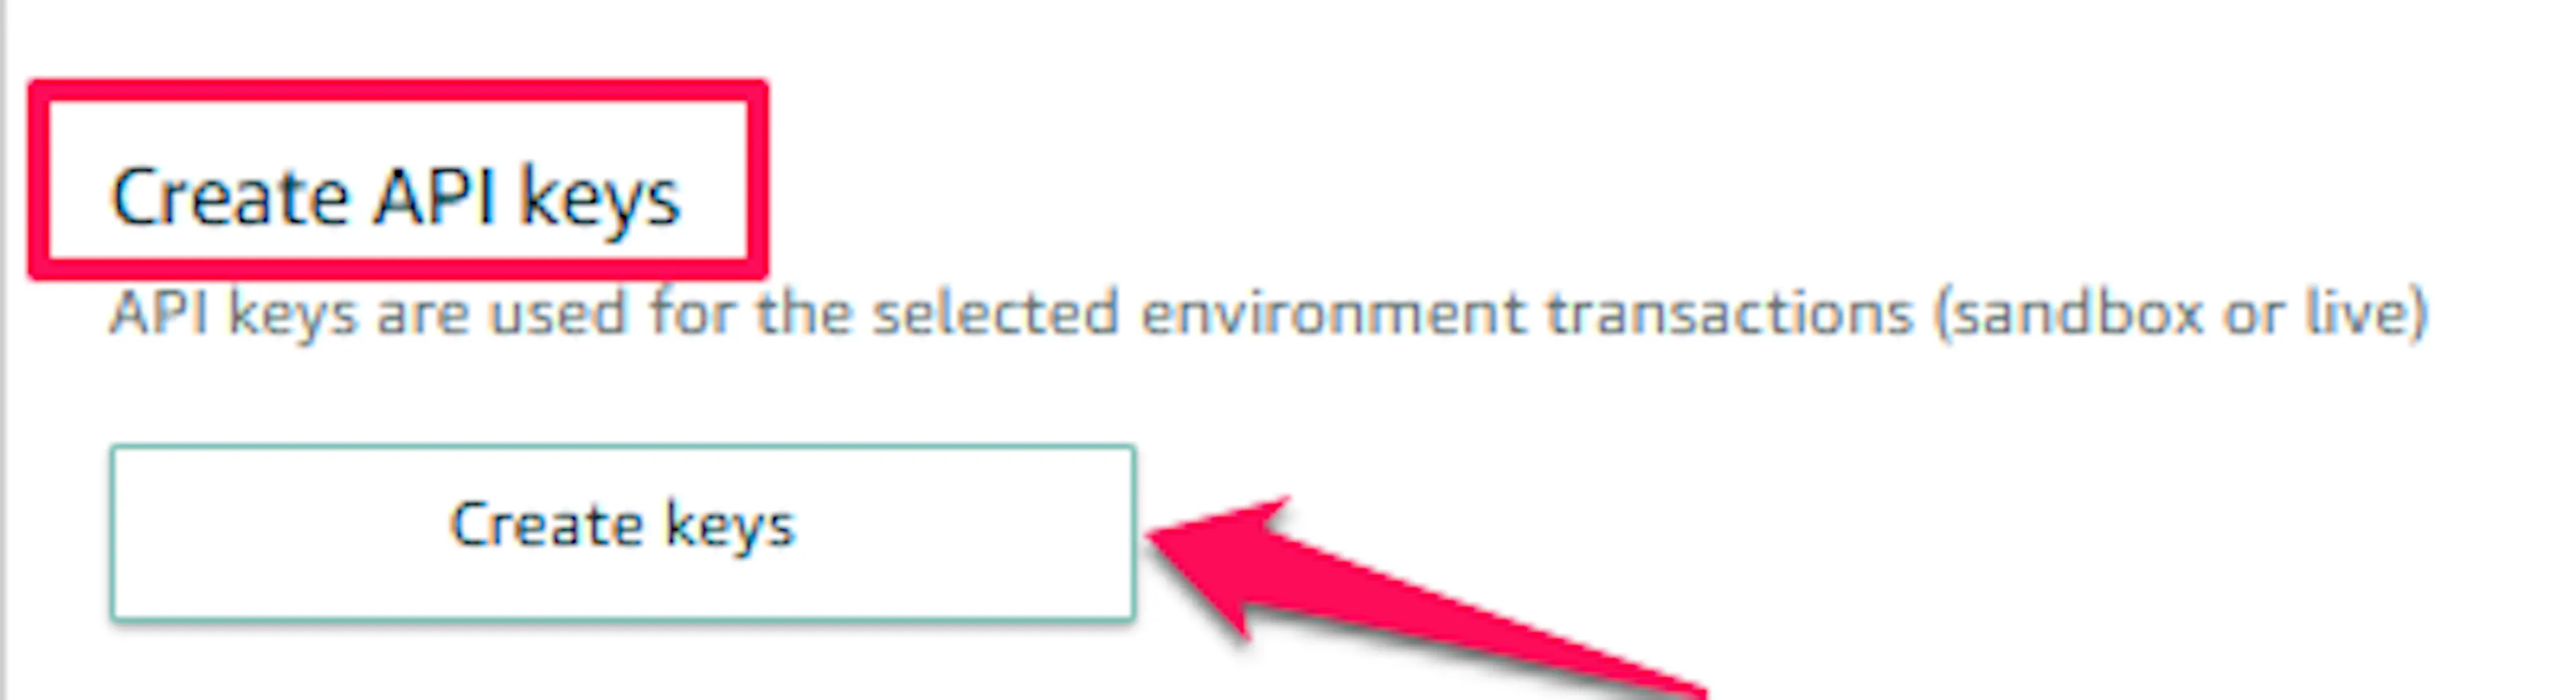
Under Create API keys, click Create keys. Amazon Pay generates a Public Key ID and downloads the matching Private Key (.pem) to your browser automatically save it somewhere safe, since Amazon does not store a copy for you to re-download.
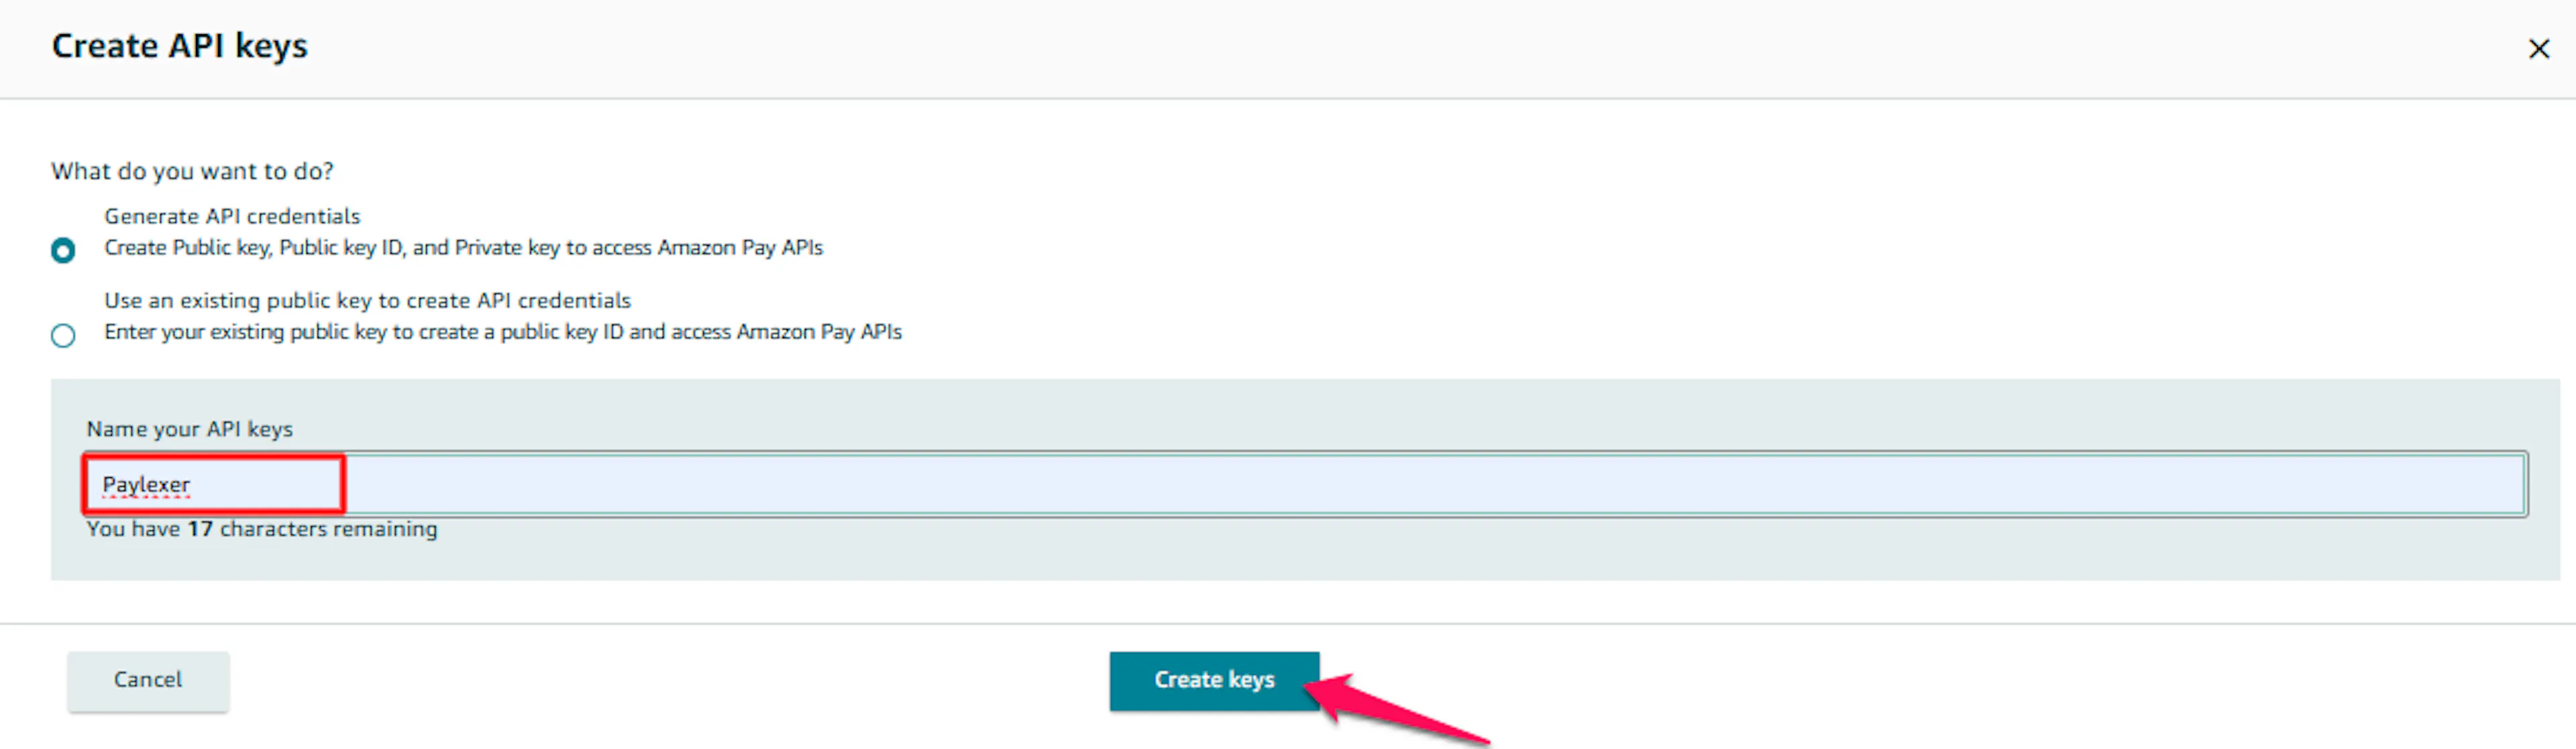

API keys are created separately per environment (sandbox or live) - repeat this step once for each environment you plan to use.
Adding Credentials to PayLexer
Open PayLexer Dashboard
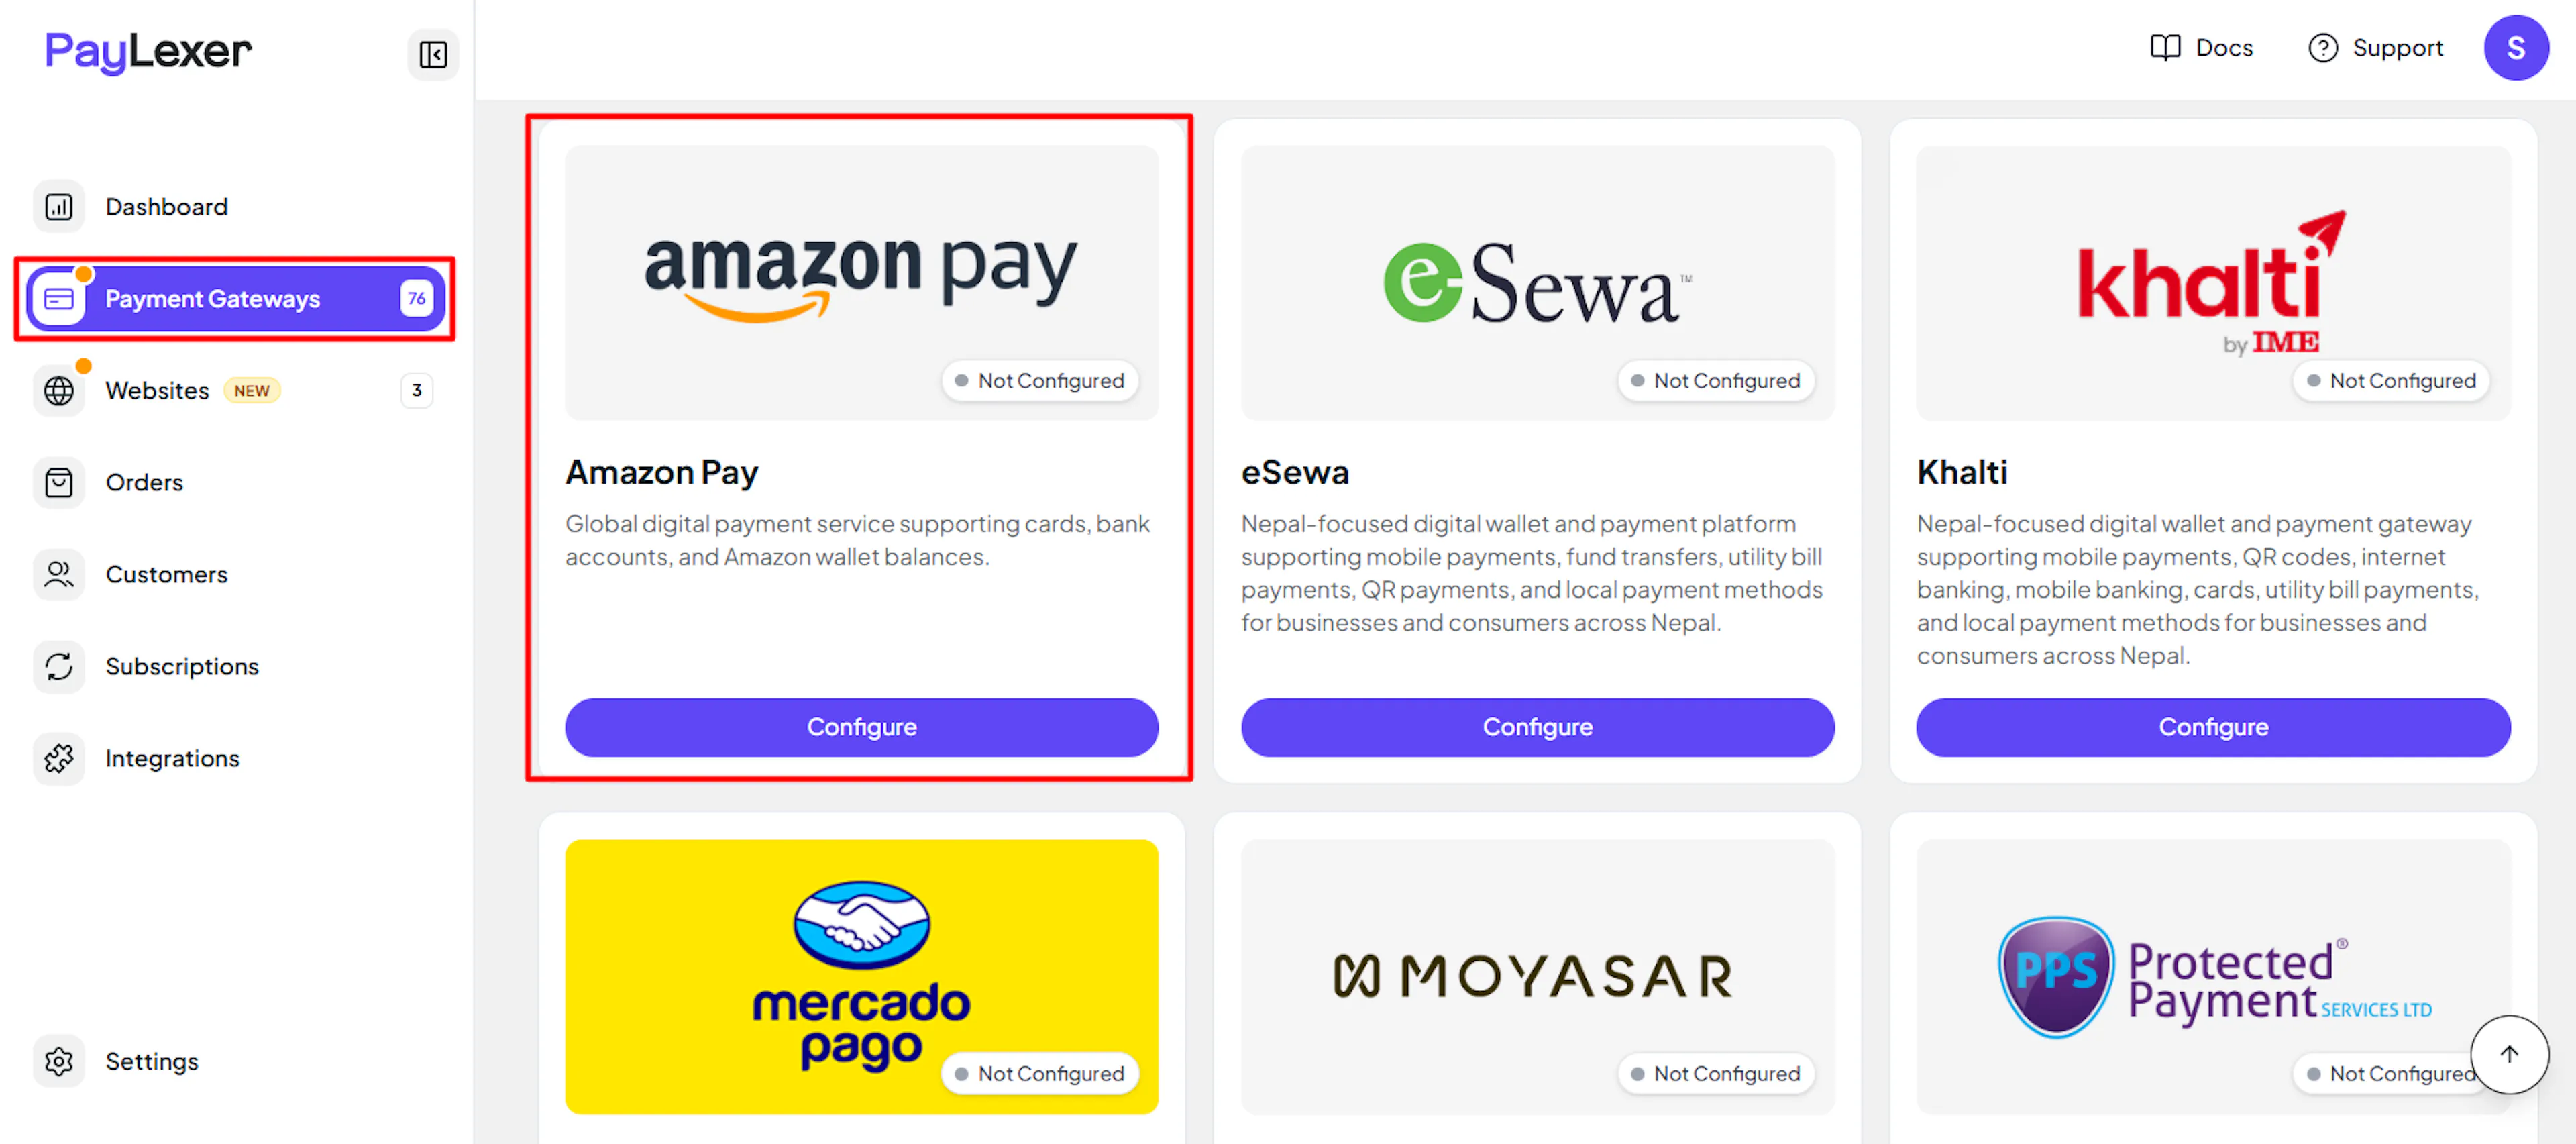
Log in to your PayLexer dashboard and navigate to Payment Gateways → Amazon Pay.
Enter your credentials
Paste the Public Key ID, Downloaded Private Key (PEM), Store ID, and Merchant ID you copied from Amazon Pay into the corresponding fields, and select your Marketplace Region (North America, Europe, or Japan).
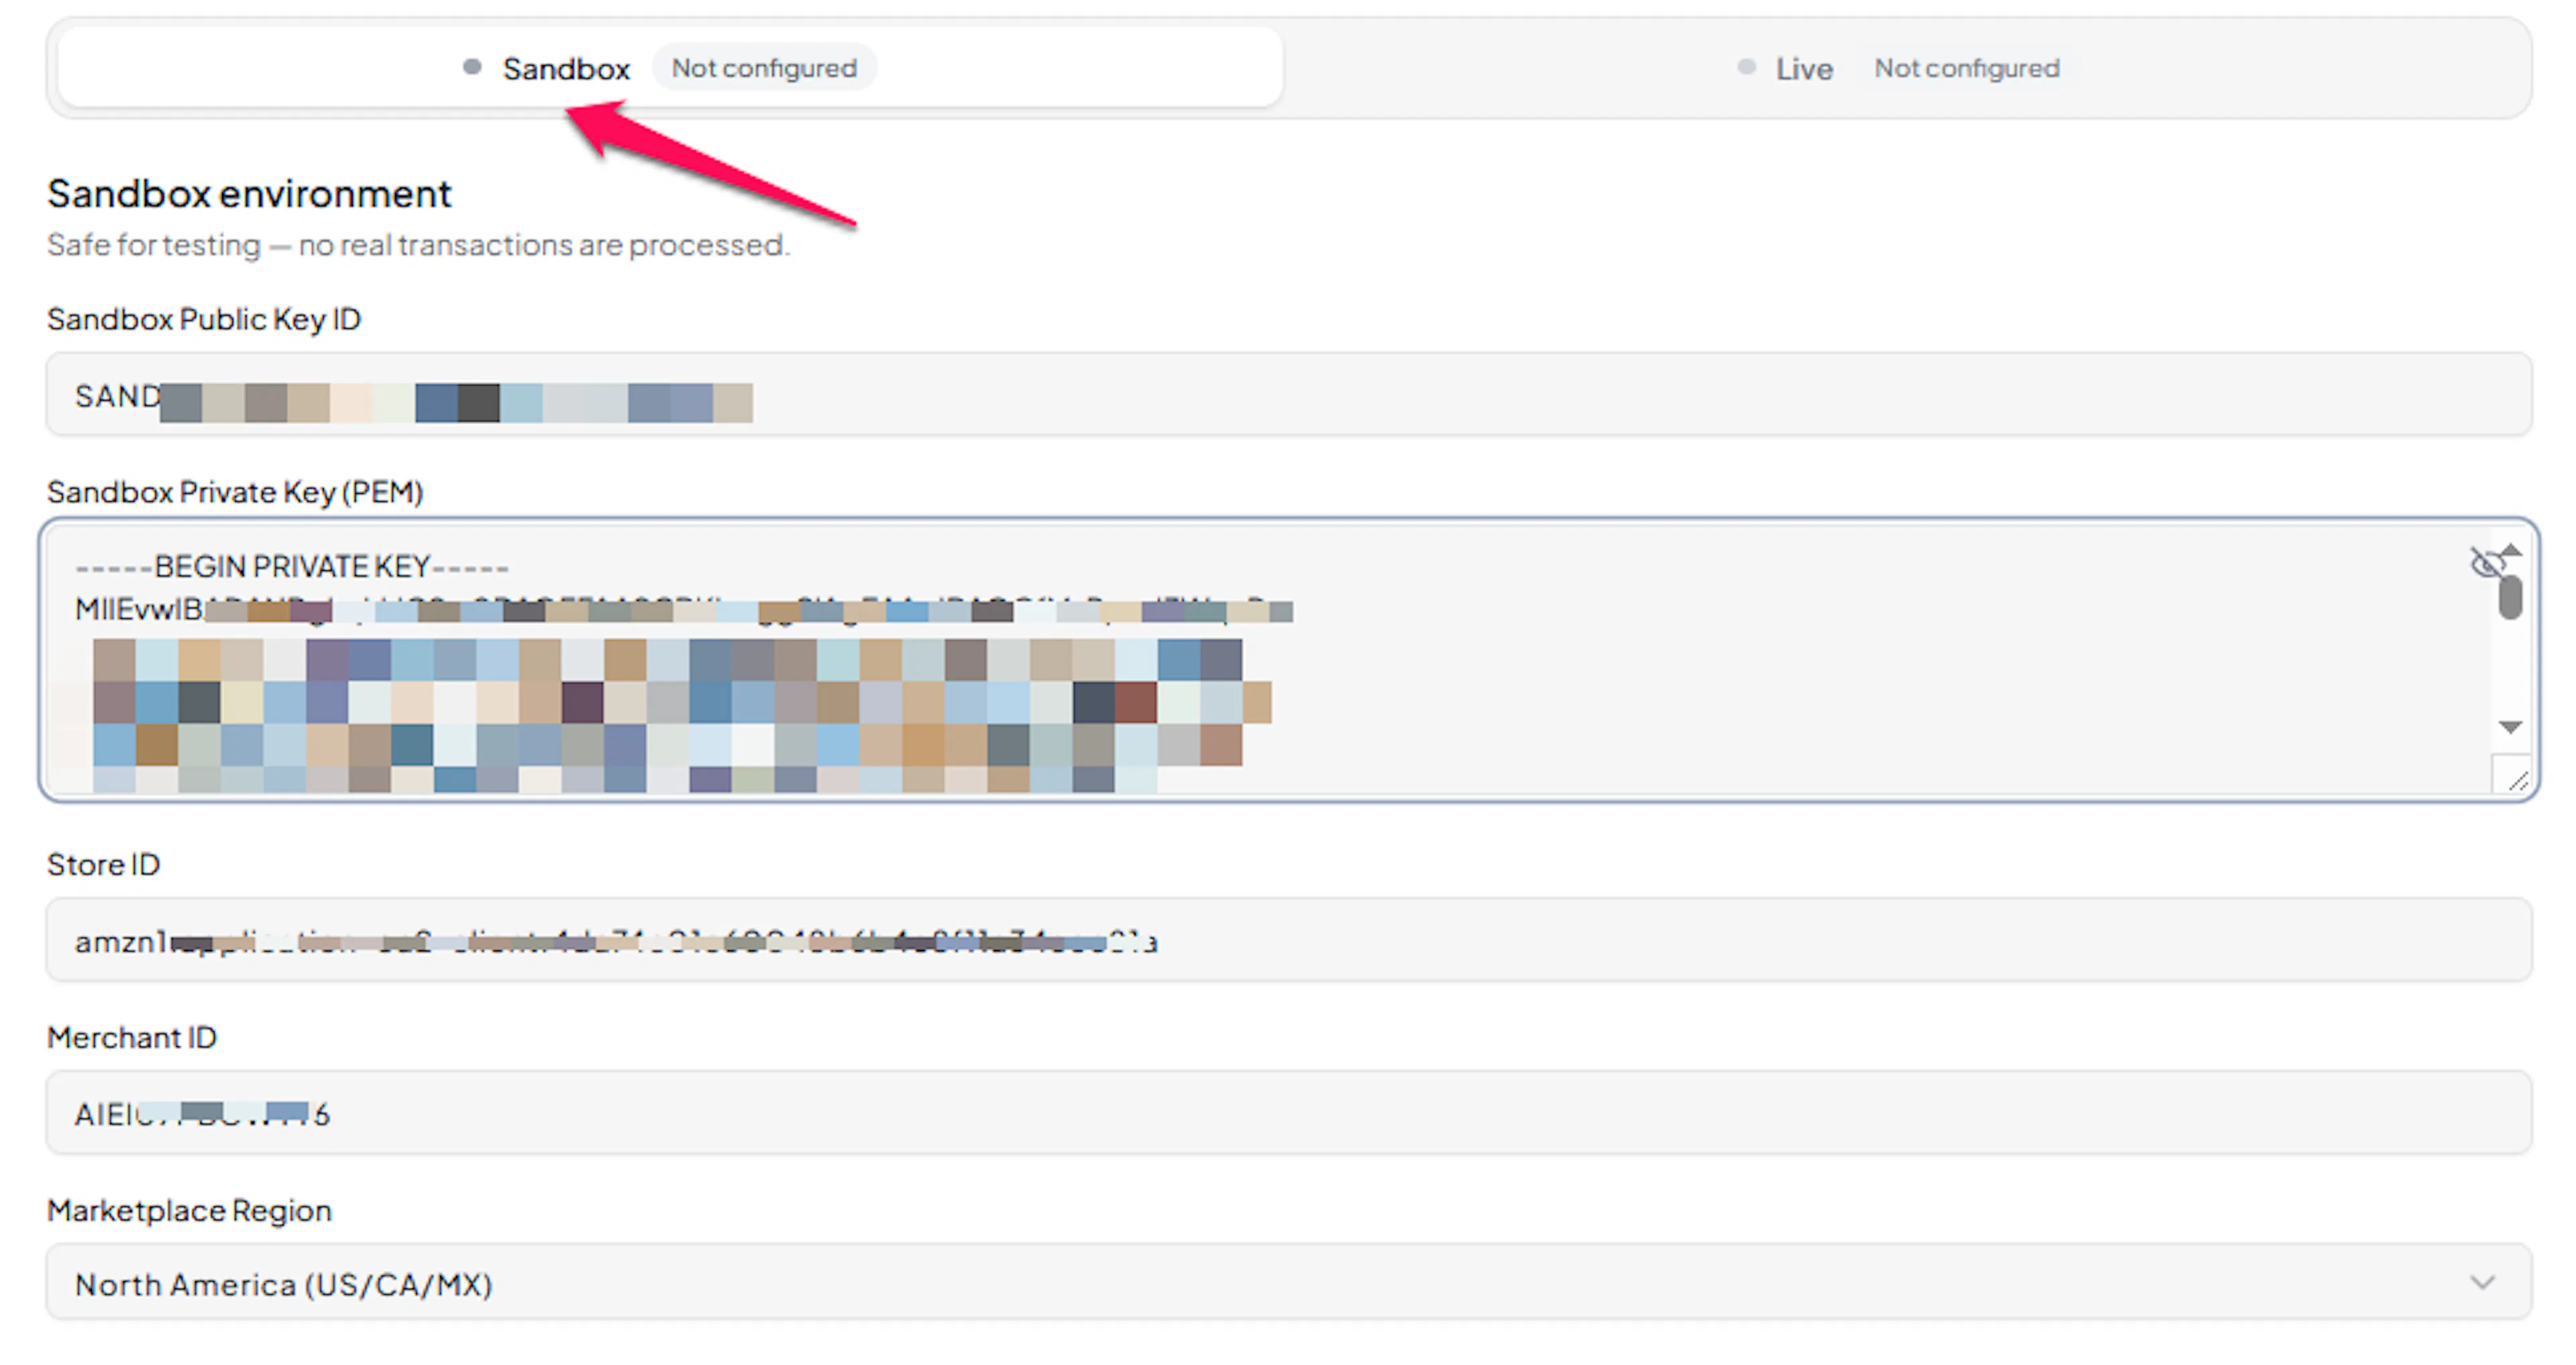
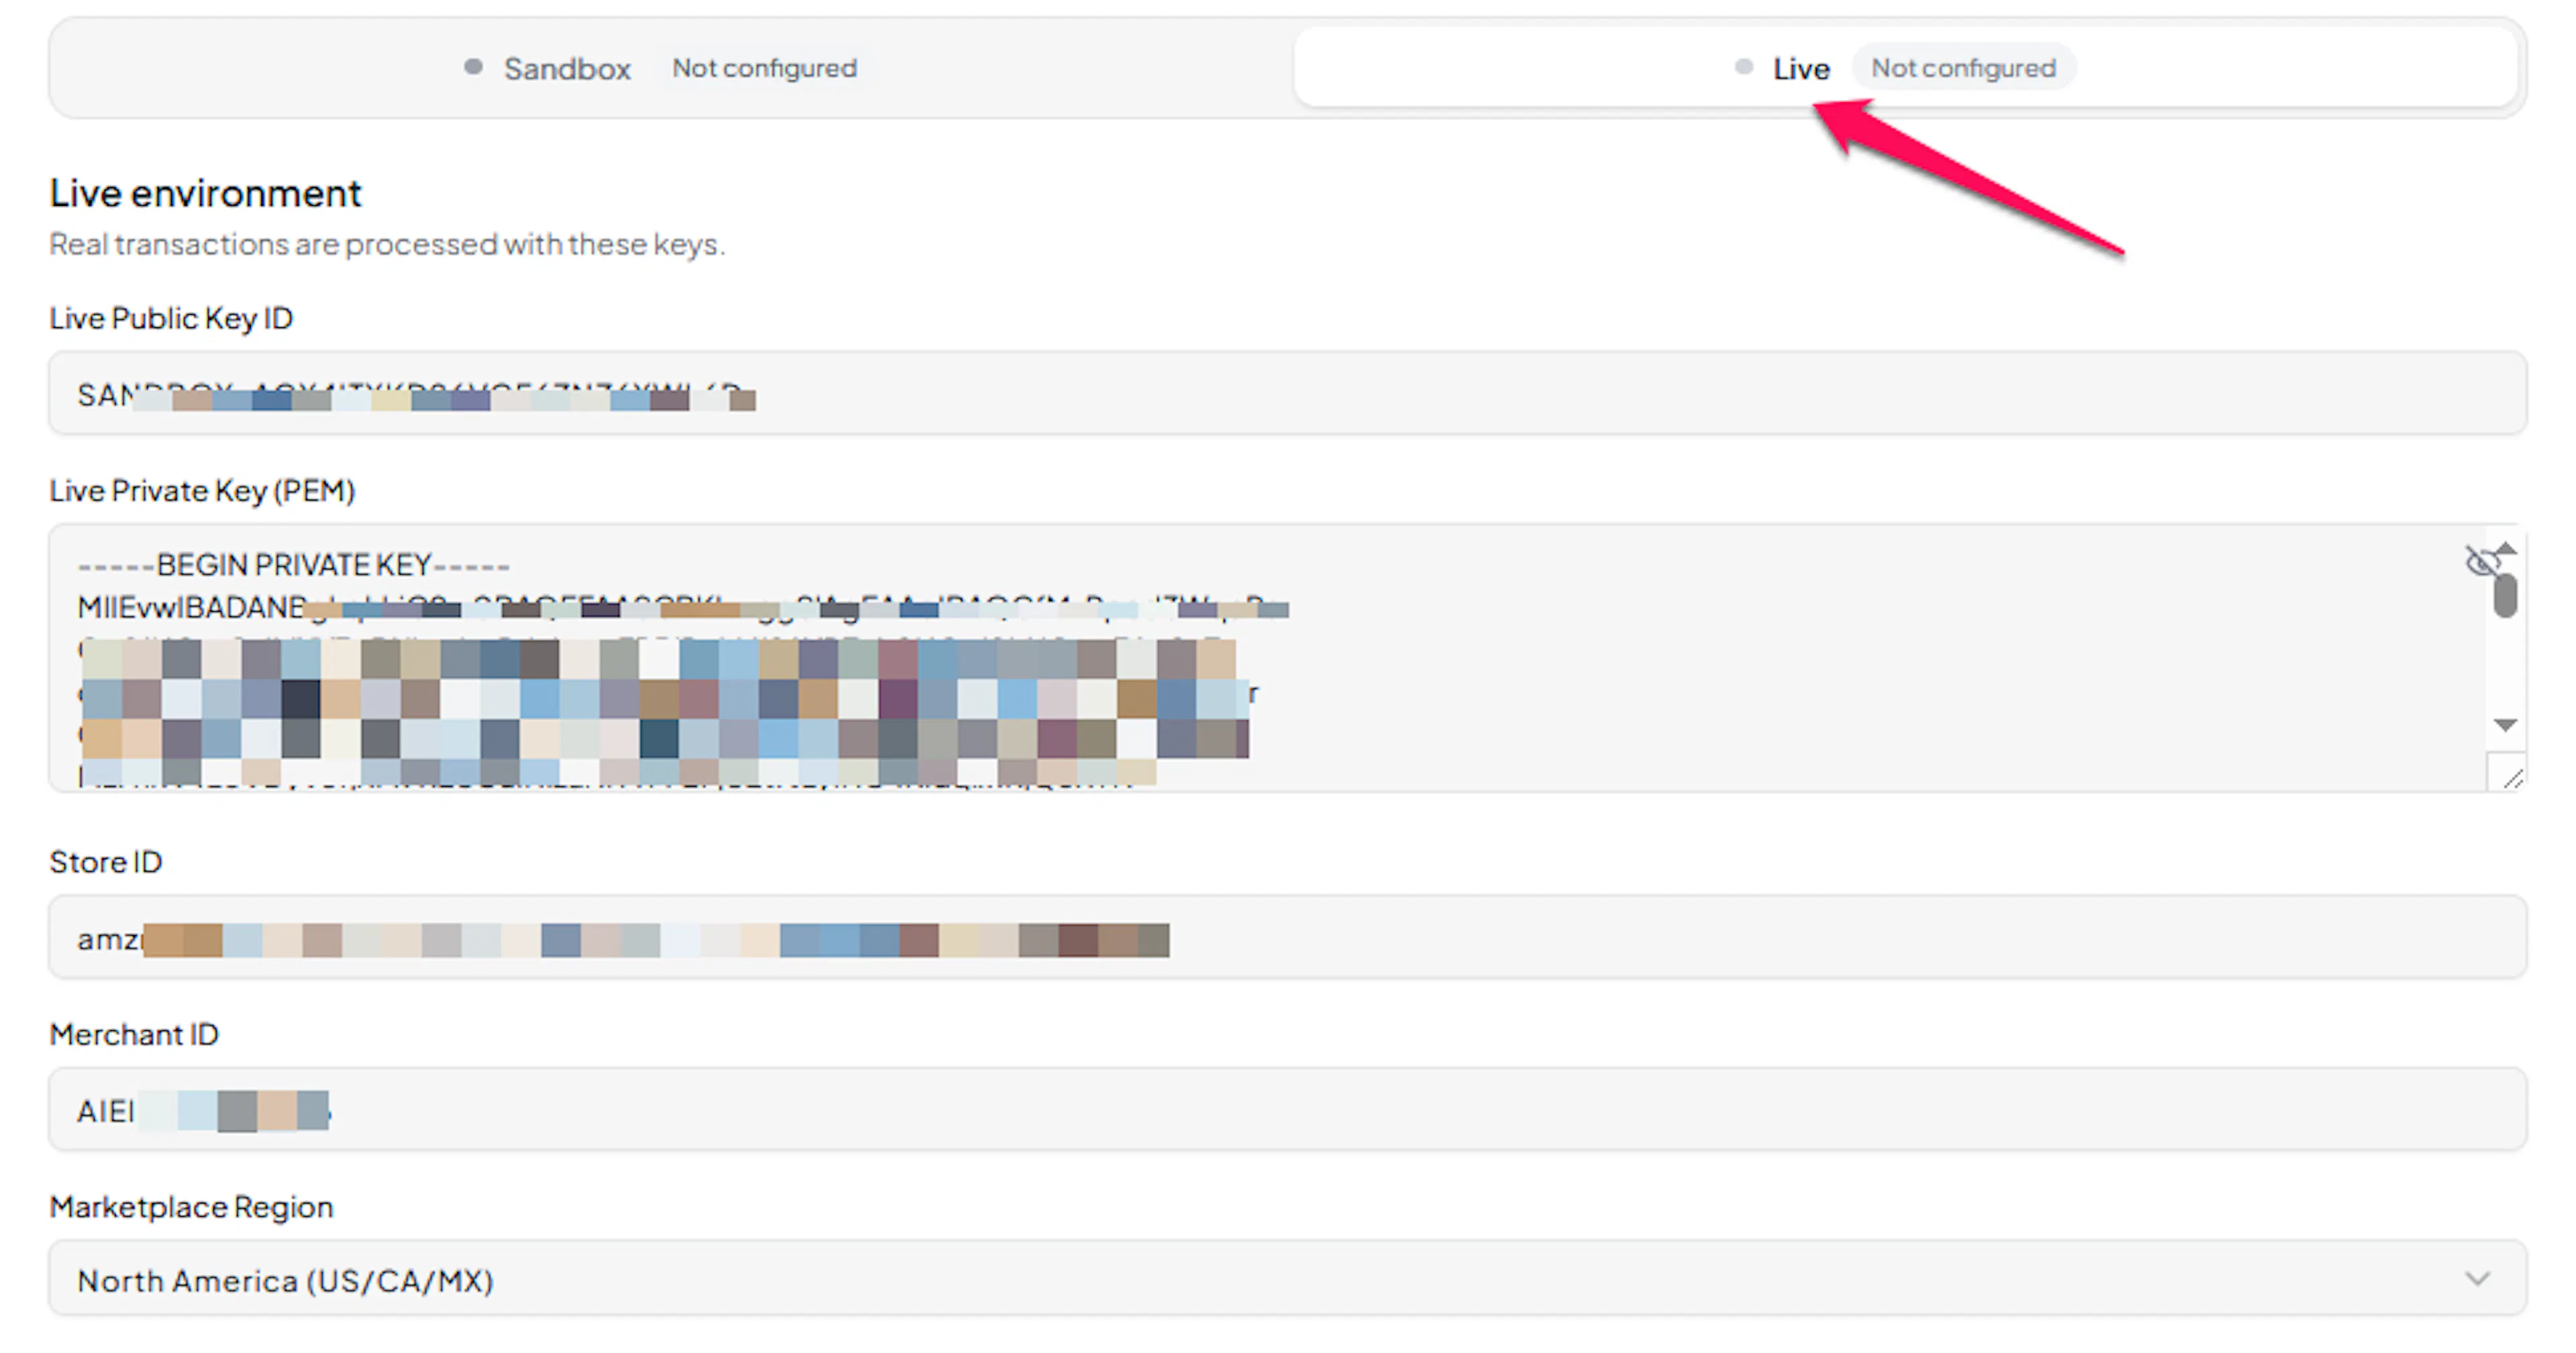
Understanding Live/Production and Sandbox Settings:
| Environment | Purpose |
|---|---|
| Live / Production (Mandatory) | Used for real transactions. Cannot be empty, even when testing. |
| Test / Sandbox (Optional) | Used for testing only. No real money is processed. |
How PayLexer selects credentials:
- Debug/Test mode ON → Test credentials are used
- Debug/Test mode OFF → Live credentials are used
Test and save
Click Save to save your configuration and verify your credentials. Click Verify Connection to test the connection.
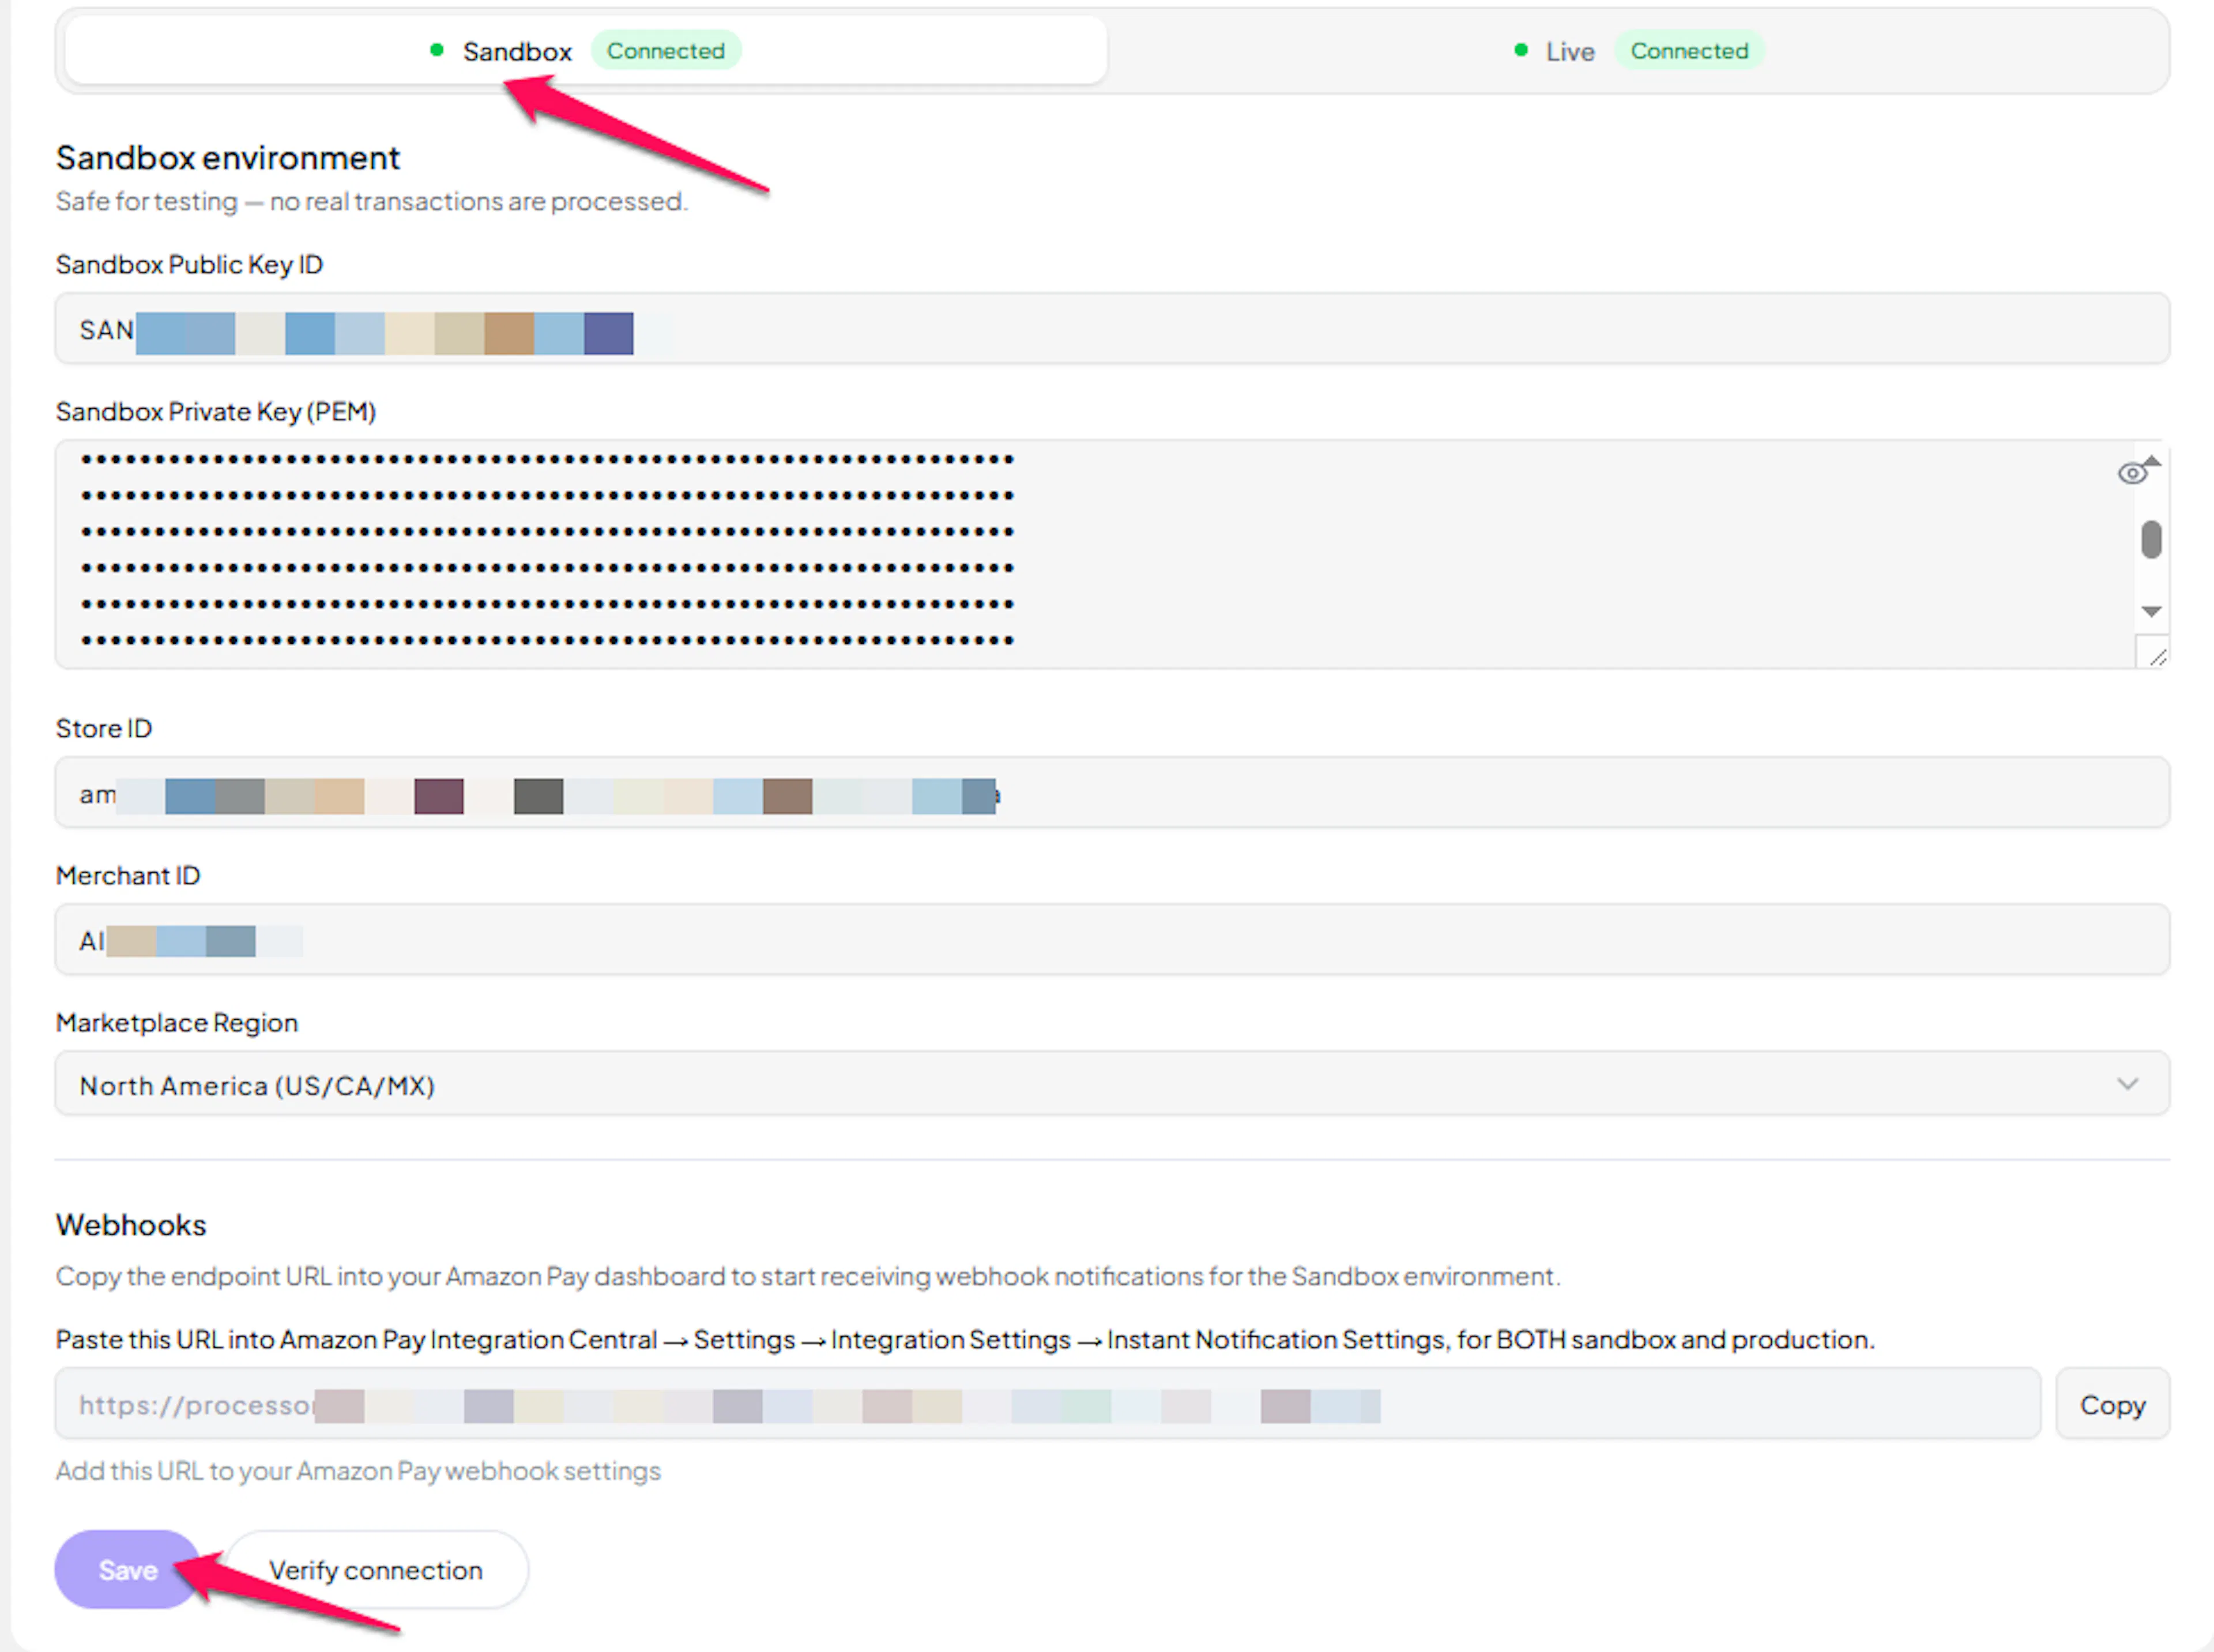
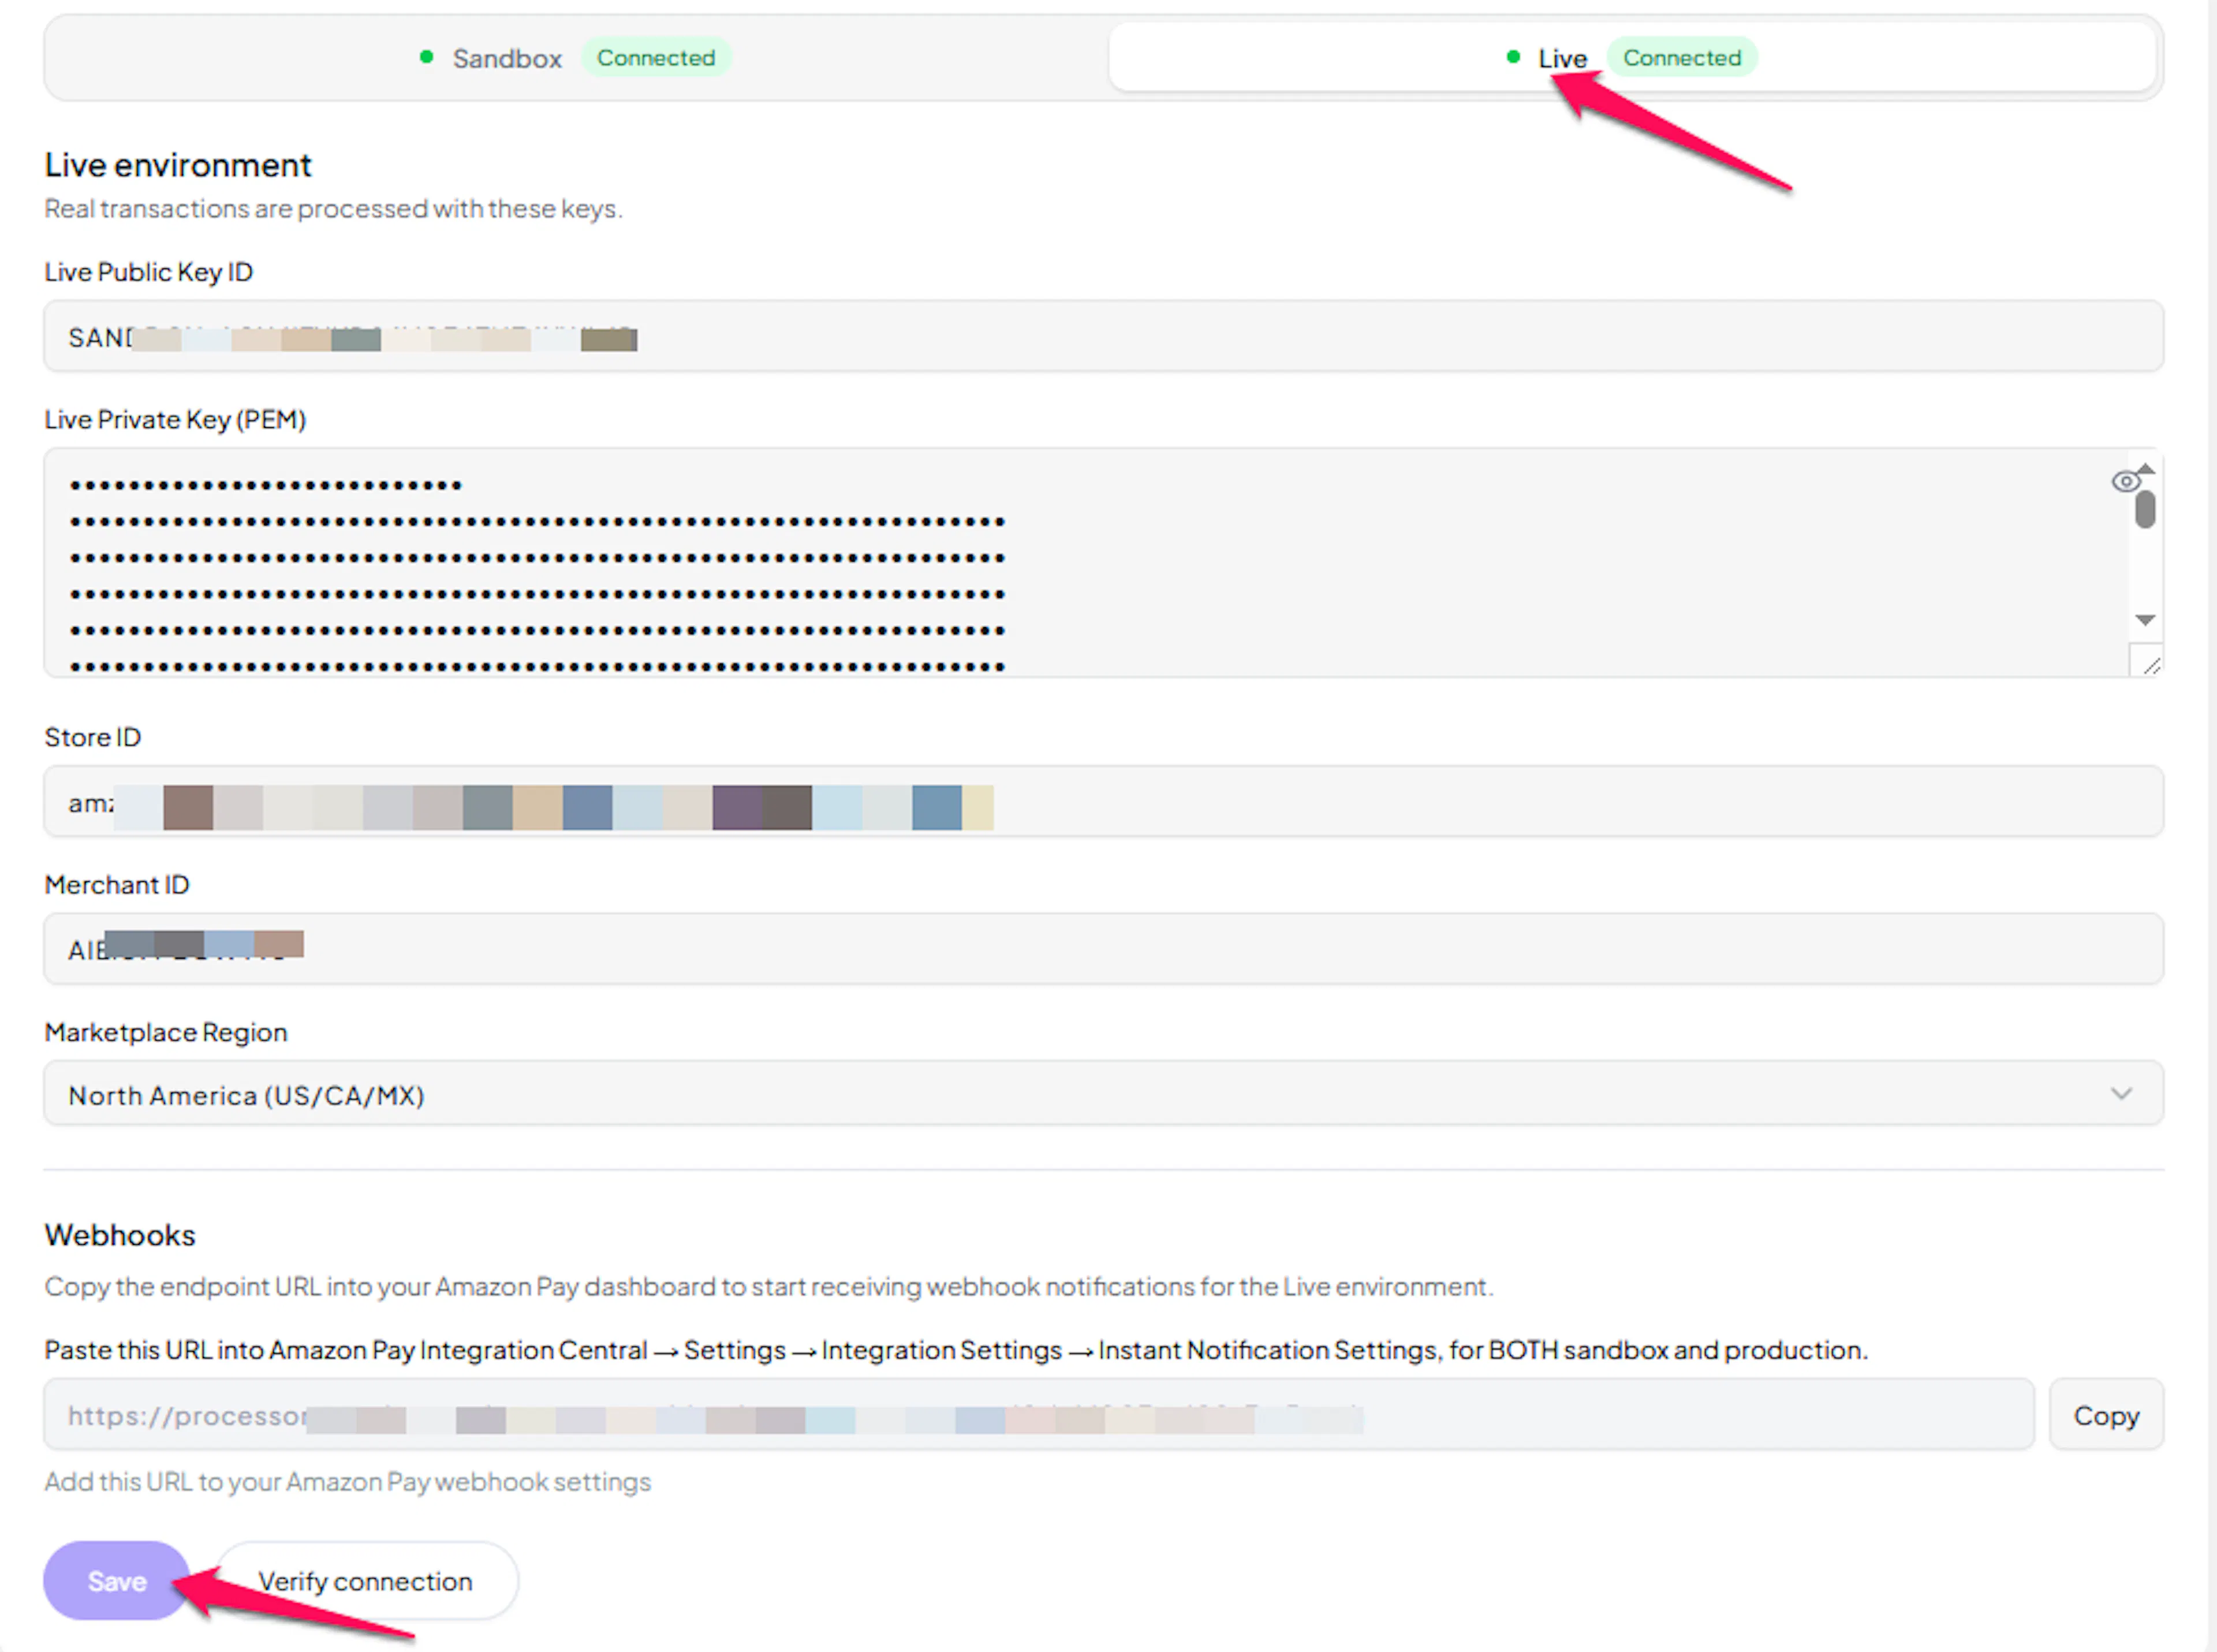
Configuring Webhooks (Mandatory)
Webhooks enable real-time payment updates and significantly improve reliability. Amazon Pay's webhook configuration works the other way around from most gateways: instead of copying a secret out of Amazon and into PayLexer, you copy a URL out of PayLexer and paste it into Amazon.
Benefits of Webhooks:
- Instant payment status updates
- Automatic refund processing
- Notifications for payment state changes Amazon reports asynchronously
Copy your webhook URL from PayLexer
On the Amazon Pay configuration page in PayLexer, copy the Webhook URL shown for your account.

Paste it into Amazon Pay's Integration Settings
From Configuration section, open Instant payment notifications (IPN). On the Integration Settings page, find Instant Notification Settings and click Edit, then paste the URL you copied.
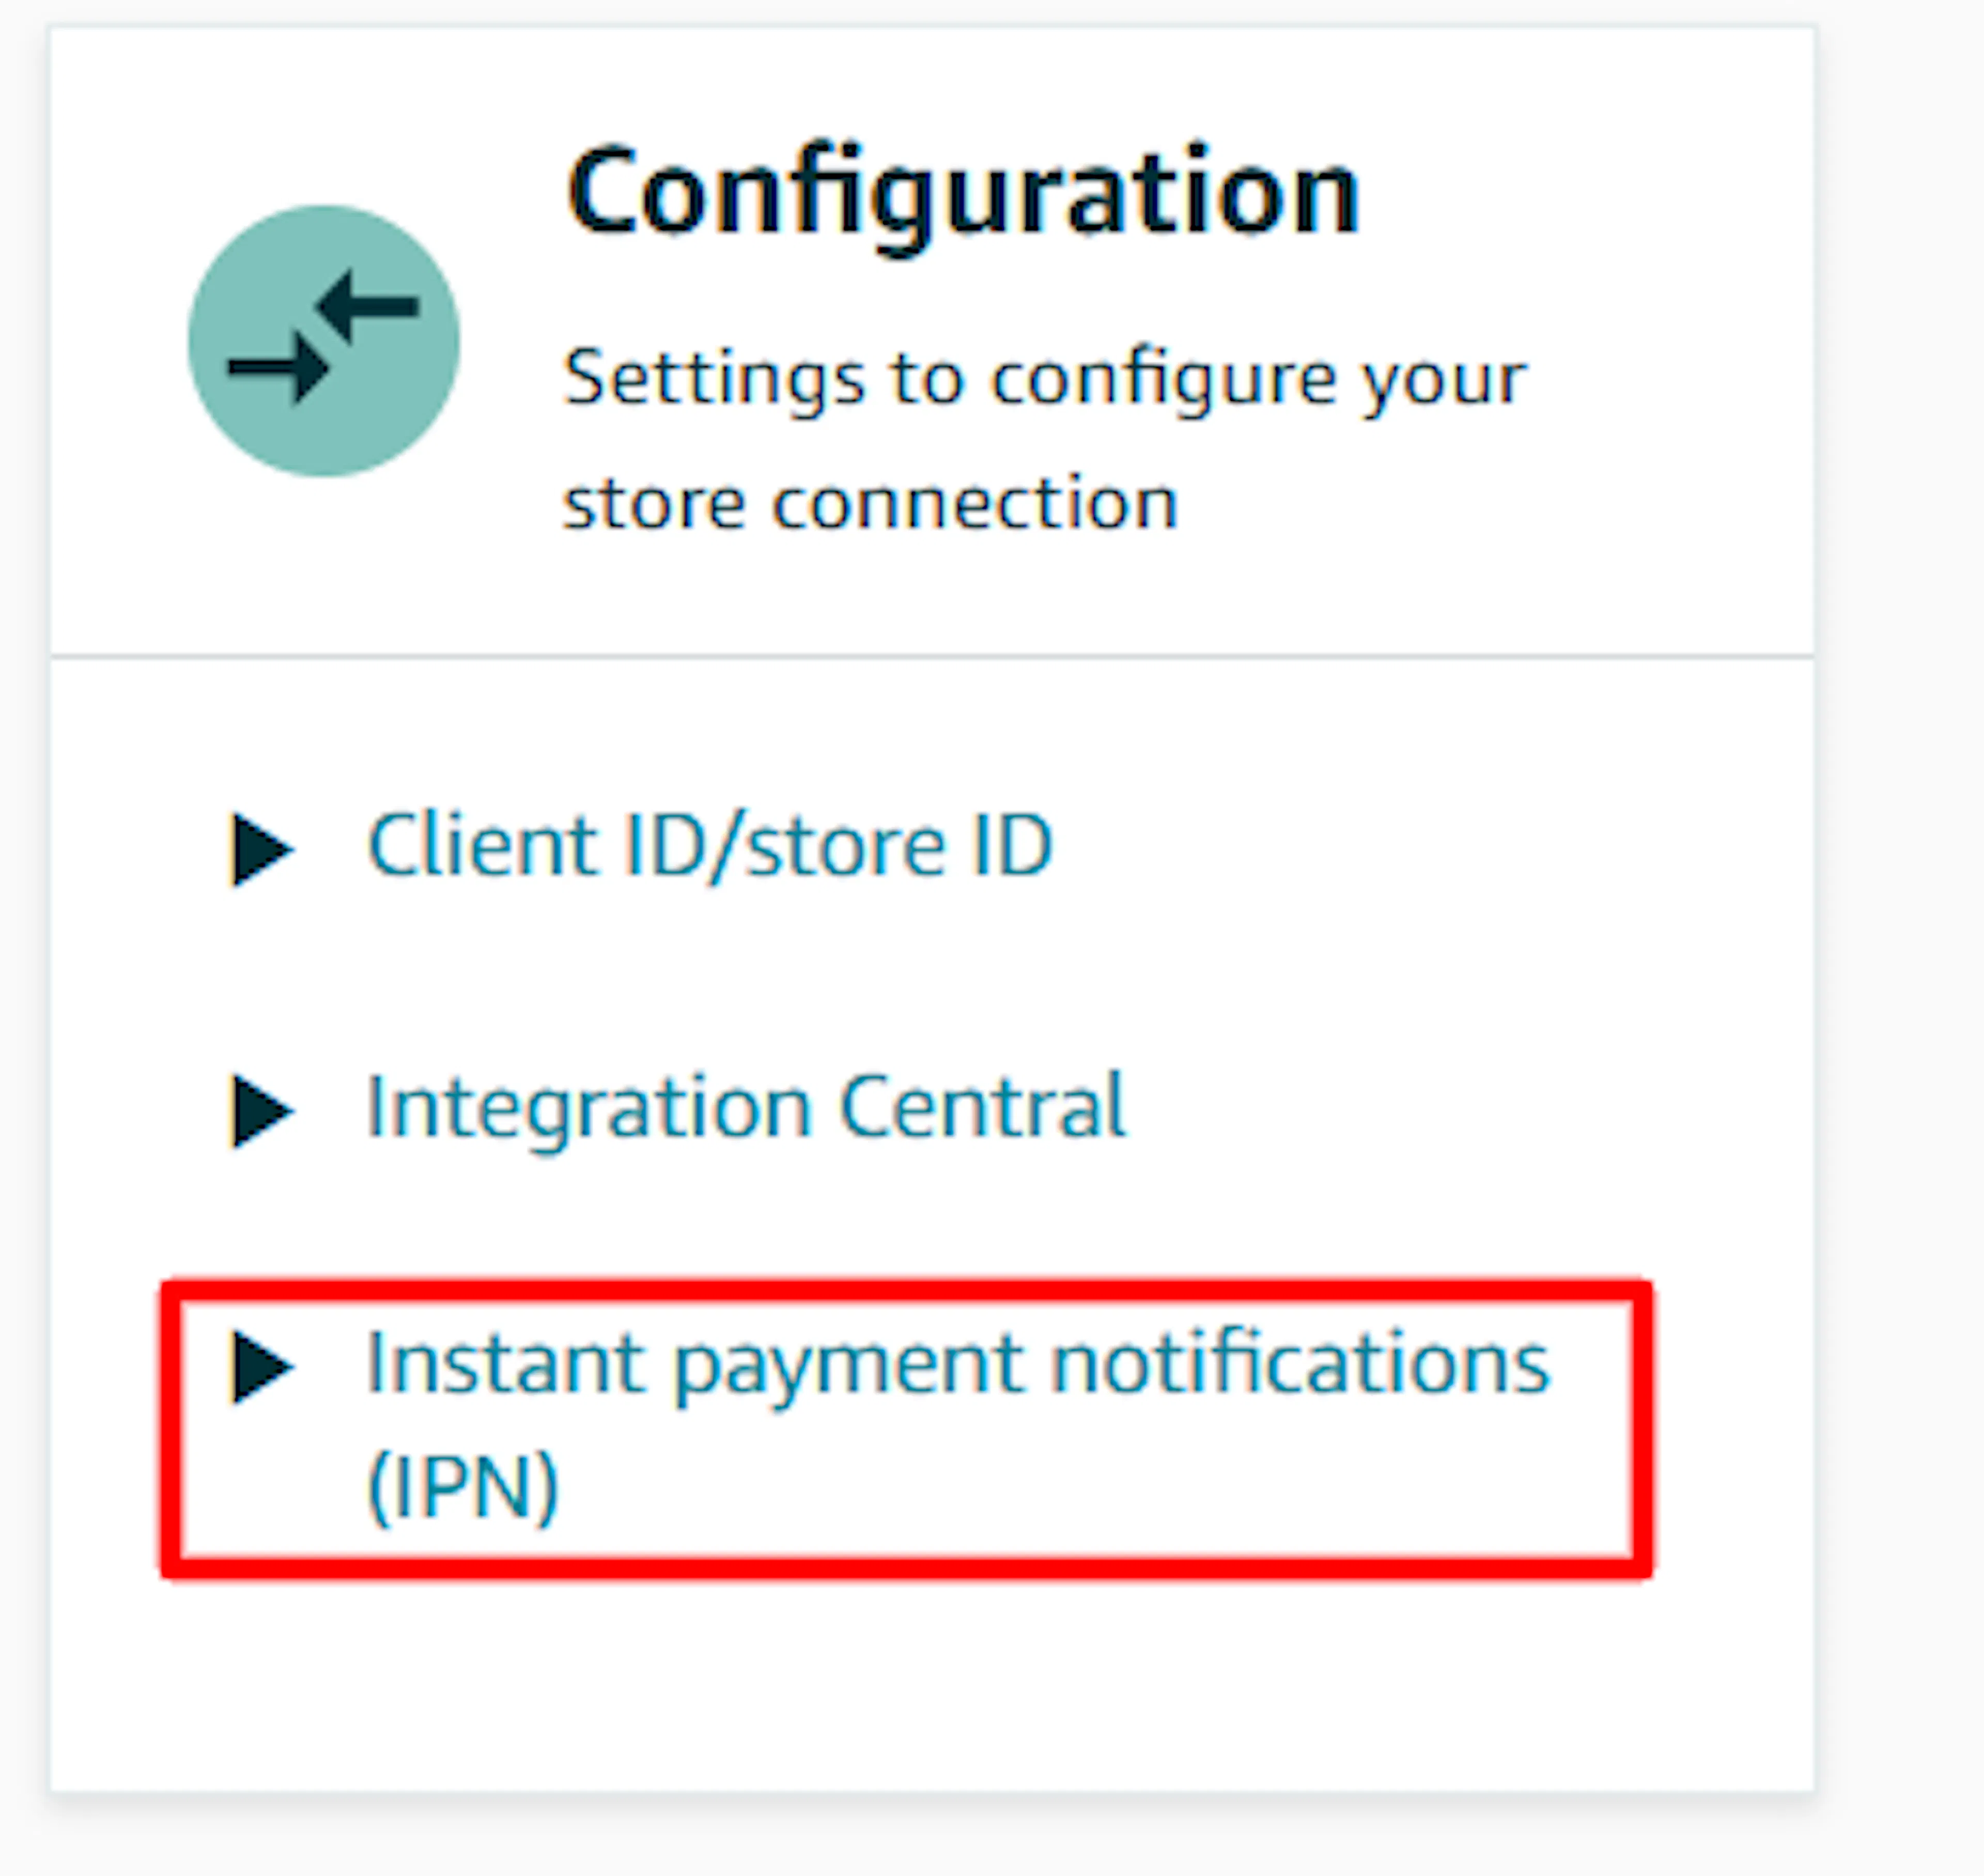


Register the same URL for both your Sandbox and Production environments in Amazon Pay - PayLexer determines which of your credentials to use based on which object the notification refers to, not on the URL itself.
Update your Amazon Pay notification settings
Click Update to apply the settings on the Integration Settings page. No further confirmation step is needed on the PayLexer side.

Amazon Pay's notifications carry no signature of their own. PayLexer never trusts a notification at face value every one is independently re-checked against Amazon's own records before anything about an order changes, so a forged or garbled notification can't affect your orders.
Integrate Amazon Pay to Your Website
If you have already added and configured your site, you can enable Amazon Pay in your existing setup.
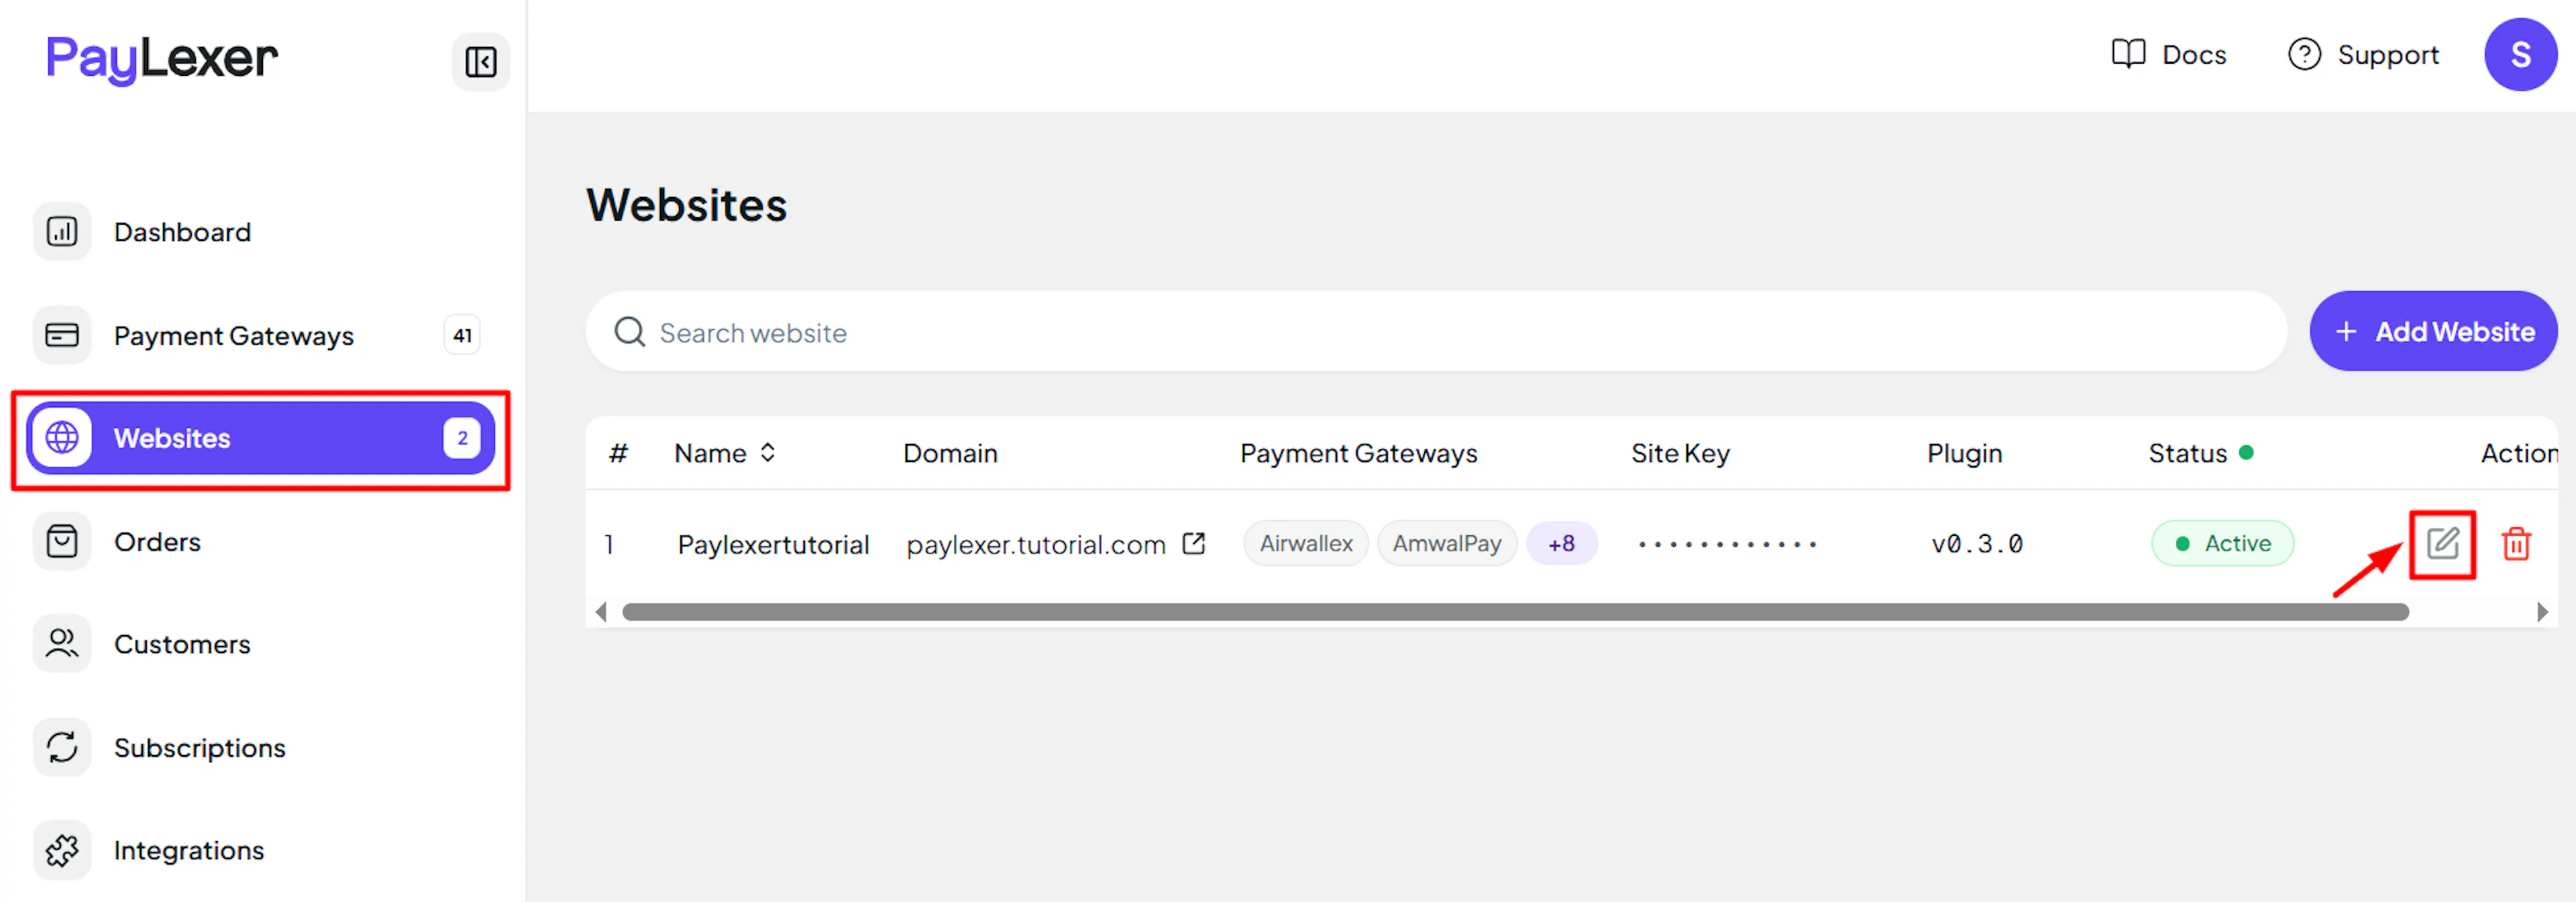
Go to Websites
Navigate to Websites in your PayLexer dashboard.
Edit your website
Click the Edit Icon of your added website.
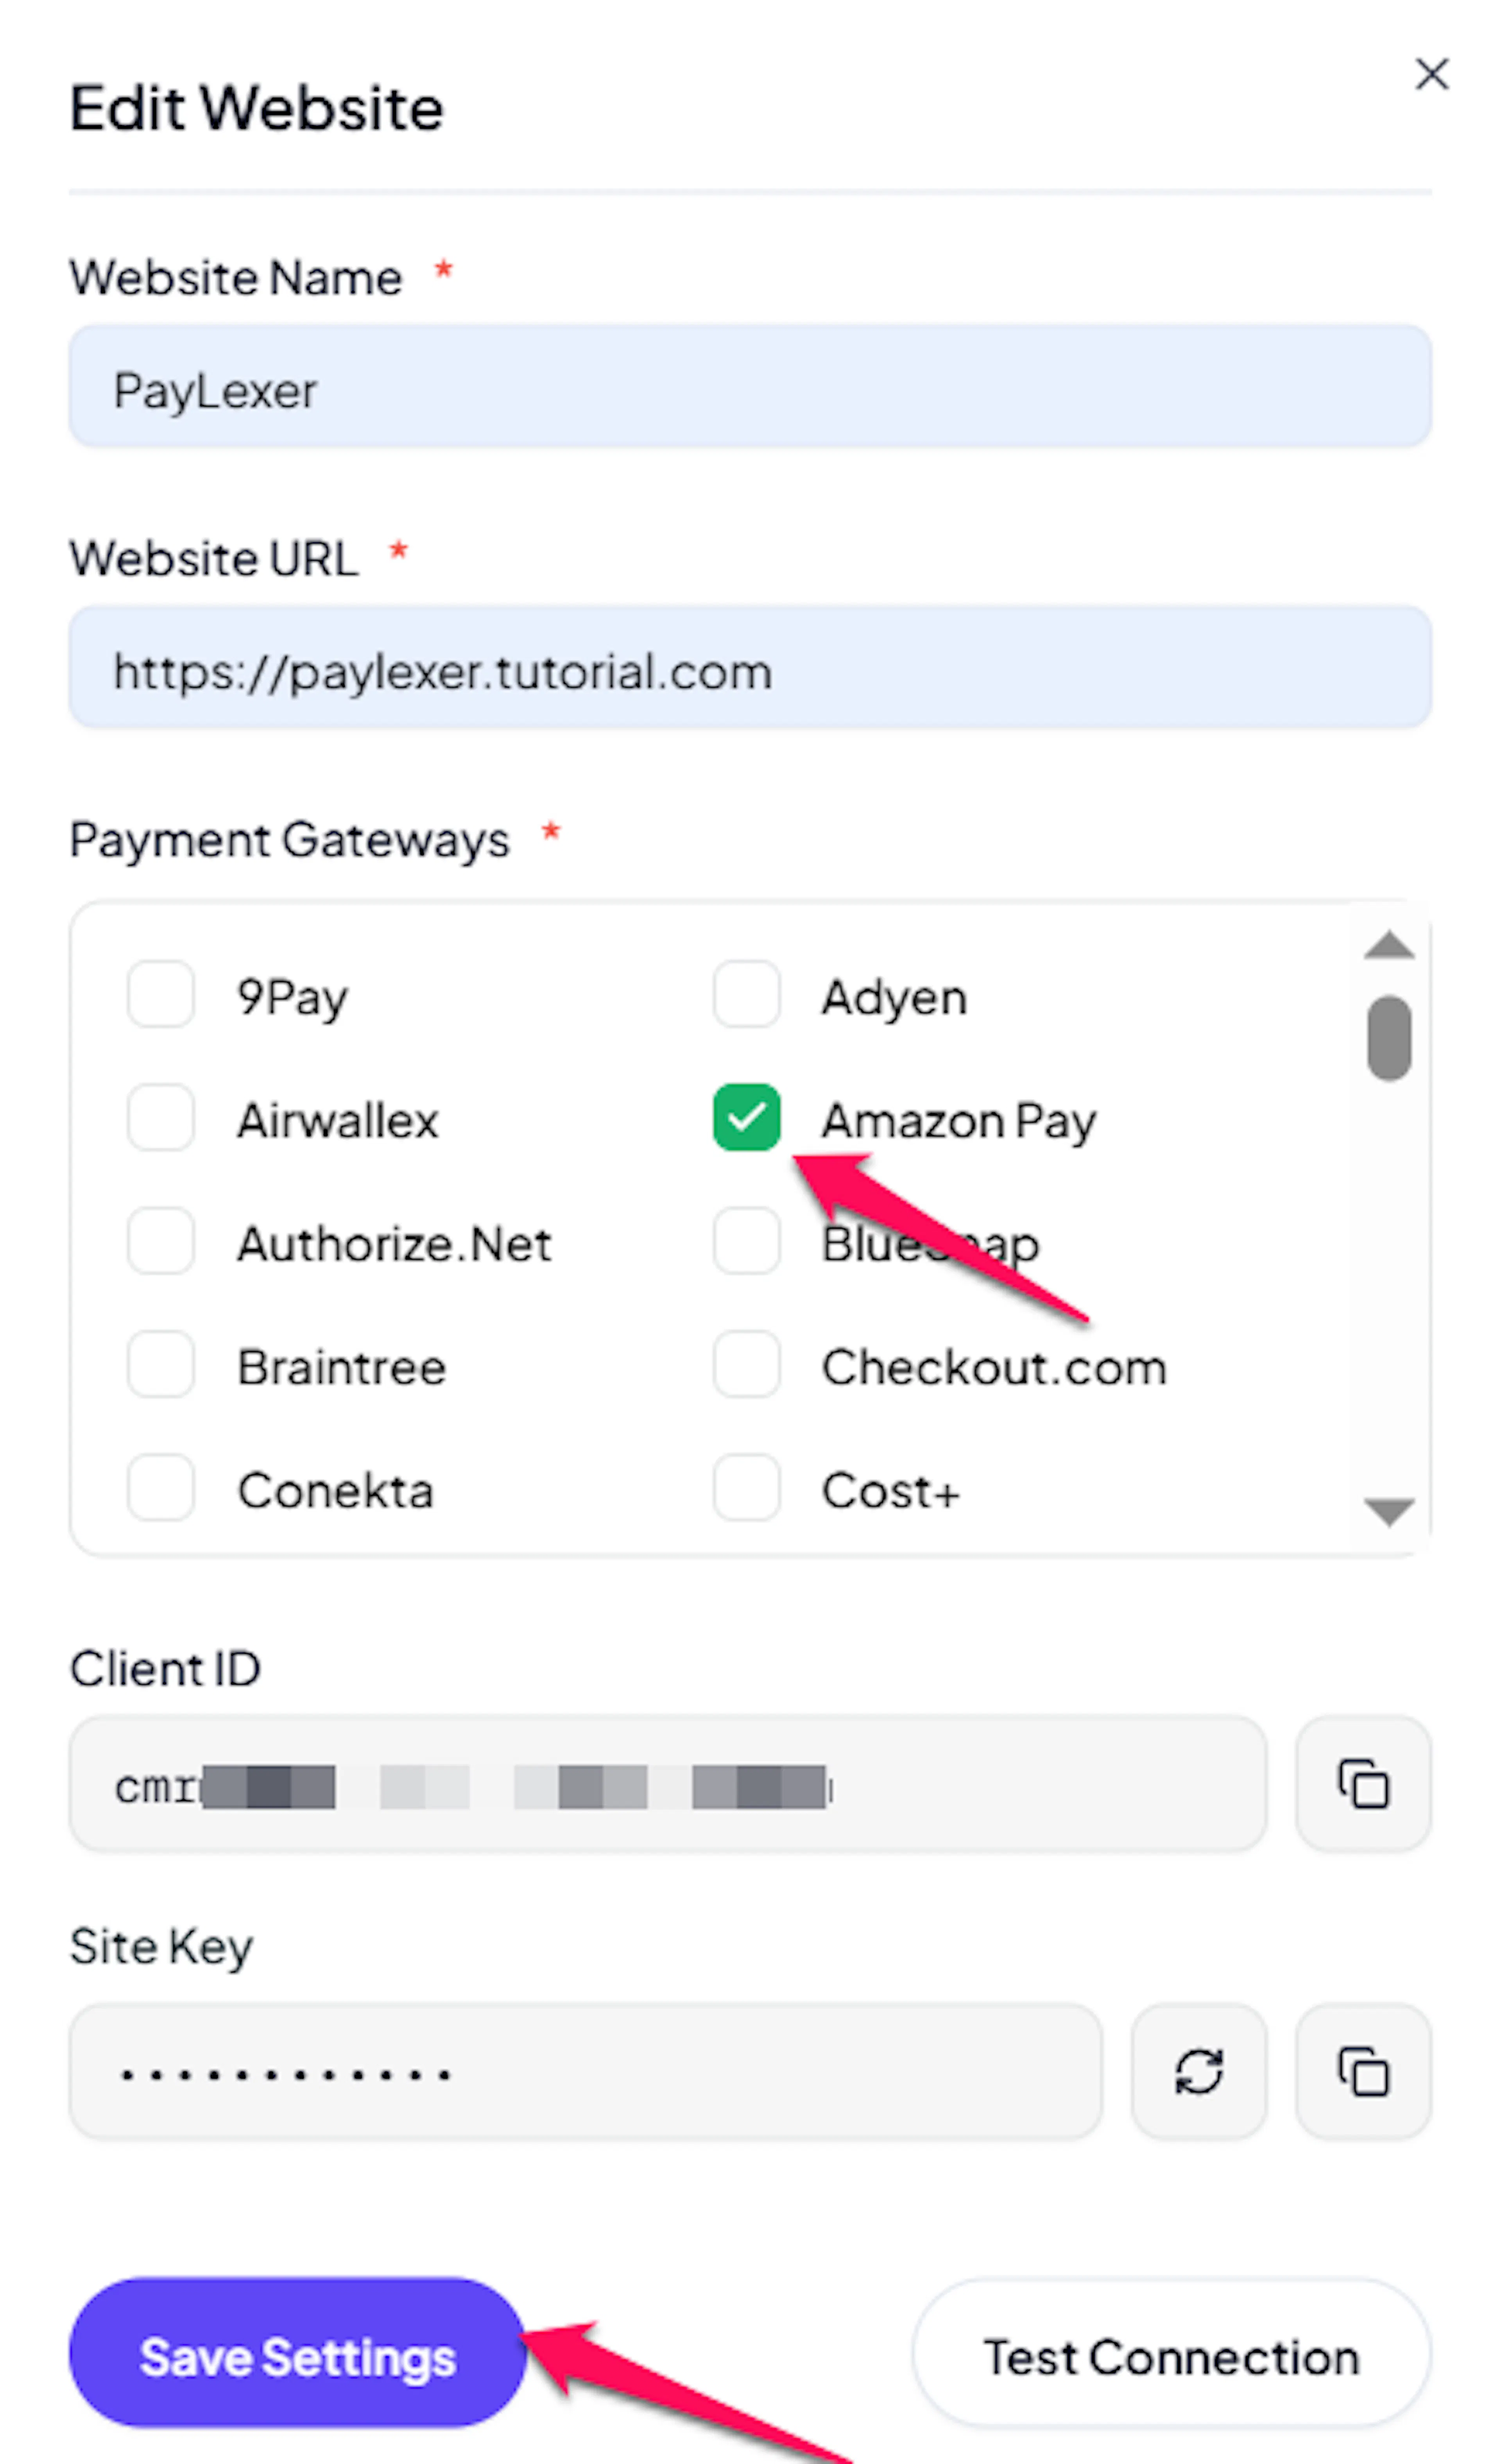
Enable Amazon Pay
Click the checkbox to enable Amazon Pay for the website.
If you haven't added a website yet, Continue to Add Your Website →
Troubleshooting
Best Practices
- Test in Sandbox before enabling production, using a separate Sandbox key pair
- Enable webhooks for faster, more reliable payment status updates
- Keep your Private Key (PEM) secure - treat it the same as any other secret credential, since it's what proves requests come from your account
- Register your webhook URL for both Sandbox and Production in Amazon Pay Integration Central, not just one
FAQs
Still Have Questions?
- Amazon Pay Support: Amazon Pay Support
- PayLexer Support: Contact Support