

Interswitch Payment Gateway
Connect Interswitch to PayLexer to accept card, bank transfer, and USSD payments across Nigeria, Kenya, Uganda, and DR Congo, with hosted checkout and full or partial refunds.
Interswitch is a Lagos-headquartered African payment infrastructure company that built and runs much of Nigeria's card-payment network, including Verve, Nigeria's own card scheme. Through the Interswitch Payment Gateway (IPG) you can accept cards (including Verve), bank transfers, and USSD from shoppers across West and East Africa. Shoppers pay on Interswitch's own hosted checkout page, so card details never touch your site.
- Supported Regions (Merchant Accounts): Nigeria, Kenya, Uganda, DR Congo - view full list
- Supported Currencies: NGN, KES, UGX, CDF, USD - view full list
Interswitch serves each country from different servers, so the Region you select in PayLexer must match the country your Interswitch account was opened in. A mismatch does not produce a helpful error - checkout simply fails.
Supported Features
- Hosted checkout page - shoppers are redirected to Interswitch to pay, then returned to your site
- Card payments including Verve, plus bank transfers and USD
- Server-side verification of every payment before an order is marked paid
- Signed webhooks (HMAC-SHA512) as a backup confirmation route
- Sandbox (test) mode for end-to-end testing before going live
Interswitch on PayLexer is a payments-only gateway. Subscriptions and free trials are not supported, because Interswitch publishes no API for creating, billing, or cancelling a recurring plan. A subscription request for Interswitch is rejected with a clear message rather than creating something your customers could not cancel. Full and partial refunds are not supported from the PayLexer dashboard.
Before You Start
Make sure you have:
- Interswitch Account – Don't have one? Sign up for Quickteller Business →
- PayLexer Account – Required to configure the integration. Create your account →
- A website where you want to integrate
Interswitch's test mode is available as soon as you register. Going live requires verification - BVN for sole traders, or company documents for registered businesses - which Interswitch typically reviews within 24 to 48 hours. Registration is free, and Interswitch charges no integration or platform fee.
Looking for a different payment processor? View all supported gateways →
Configuring Interswitch
You need a Client ID, Client Secret, Merchant Code, and Pay Item ID from Interswitch for this integration, plus the Region your Interswitch account was opened in.
Getting API Credentials
Open Quickteller Business
Log in to Quickteller Business.
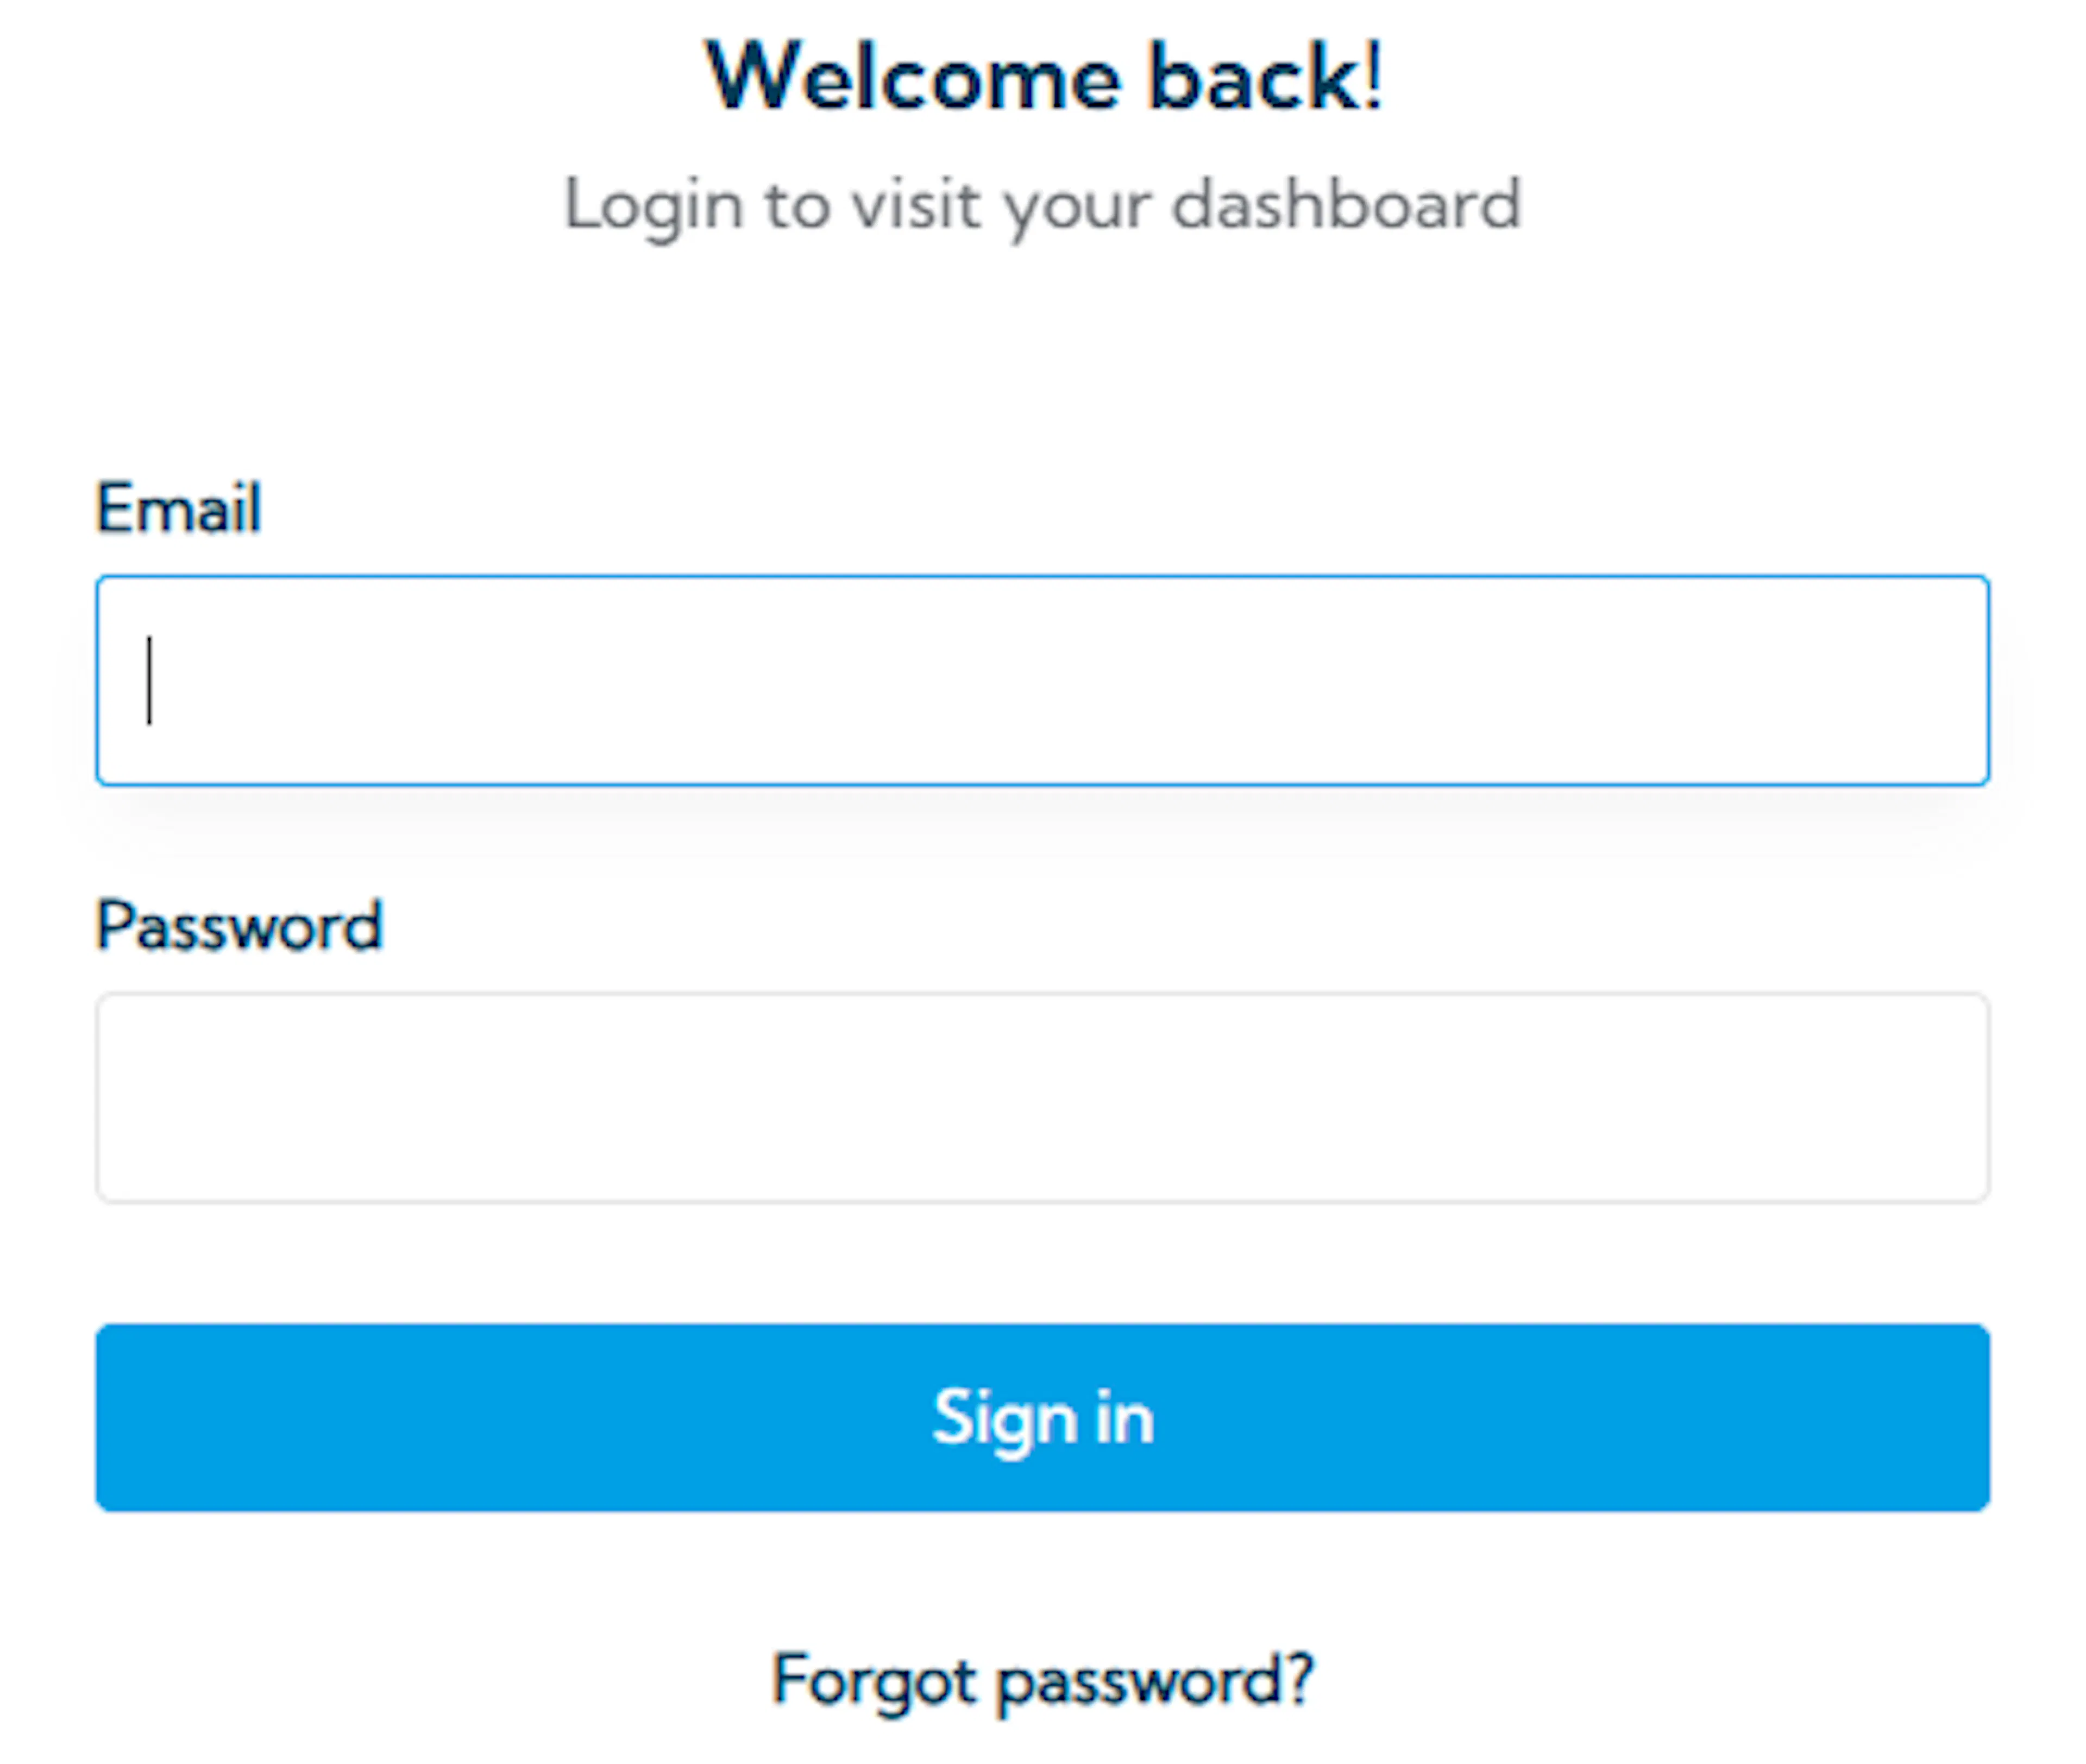
Quickteller Business serves test and live from the same dashboard, toggled inside the dashboard itself. There is no separate sandbox portal to log in to.
Open Integration Credentials
Go to Developer Tools -> Integration Credentials, then copy your Client ID (it starts with IKIA) and your Client Secret.
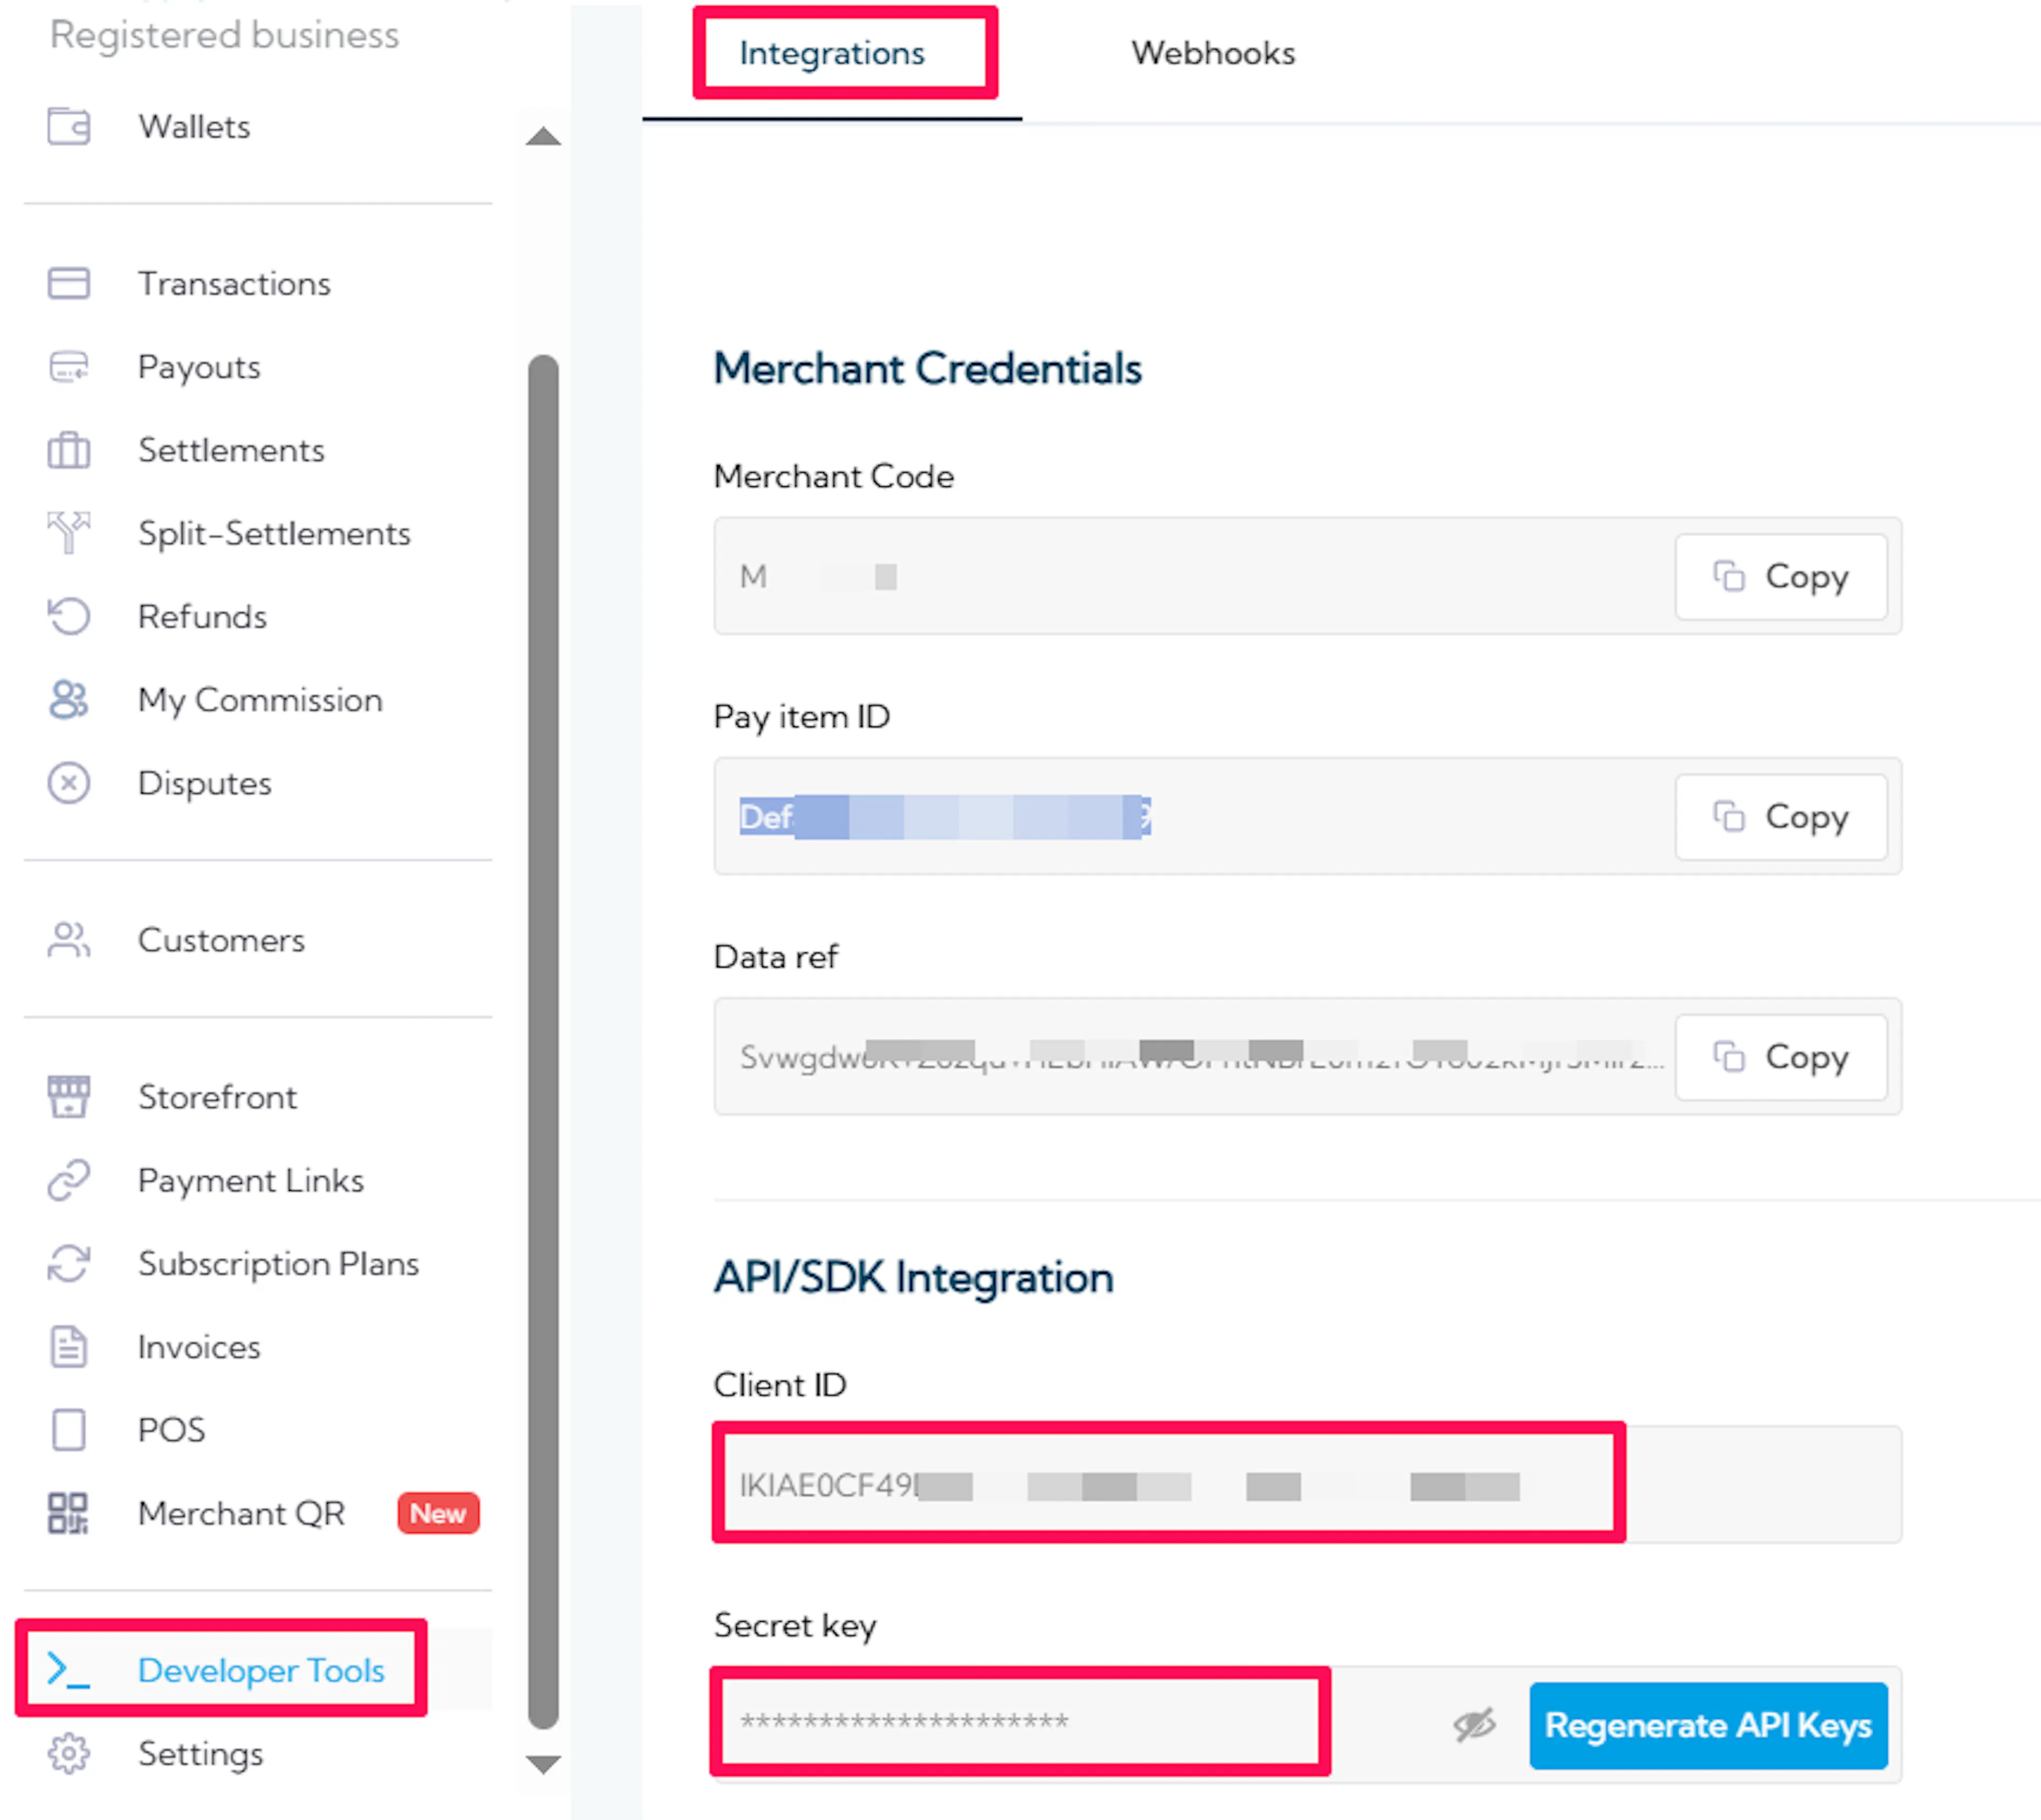
Your Client Secret authenticates refunds. Treat it like a password and never share it.
Copy your Merchant Code and Pay Item ID
On the same screen, copy your Merchant Code (for example MX6072) and your Pay Item ID (for example 9405967).
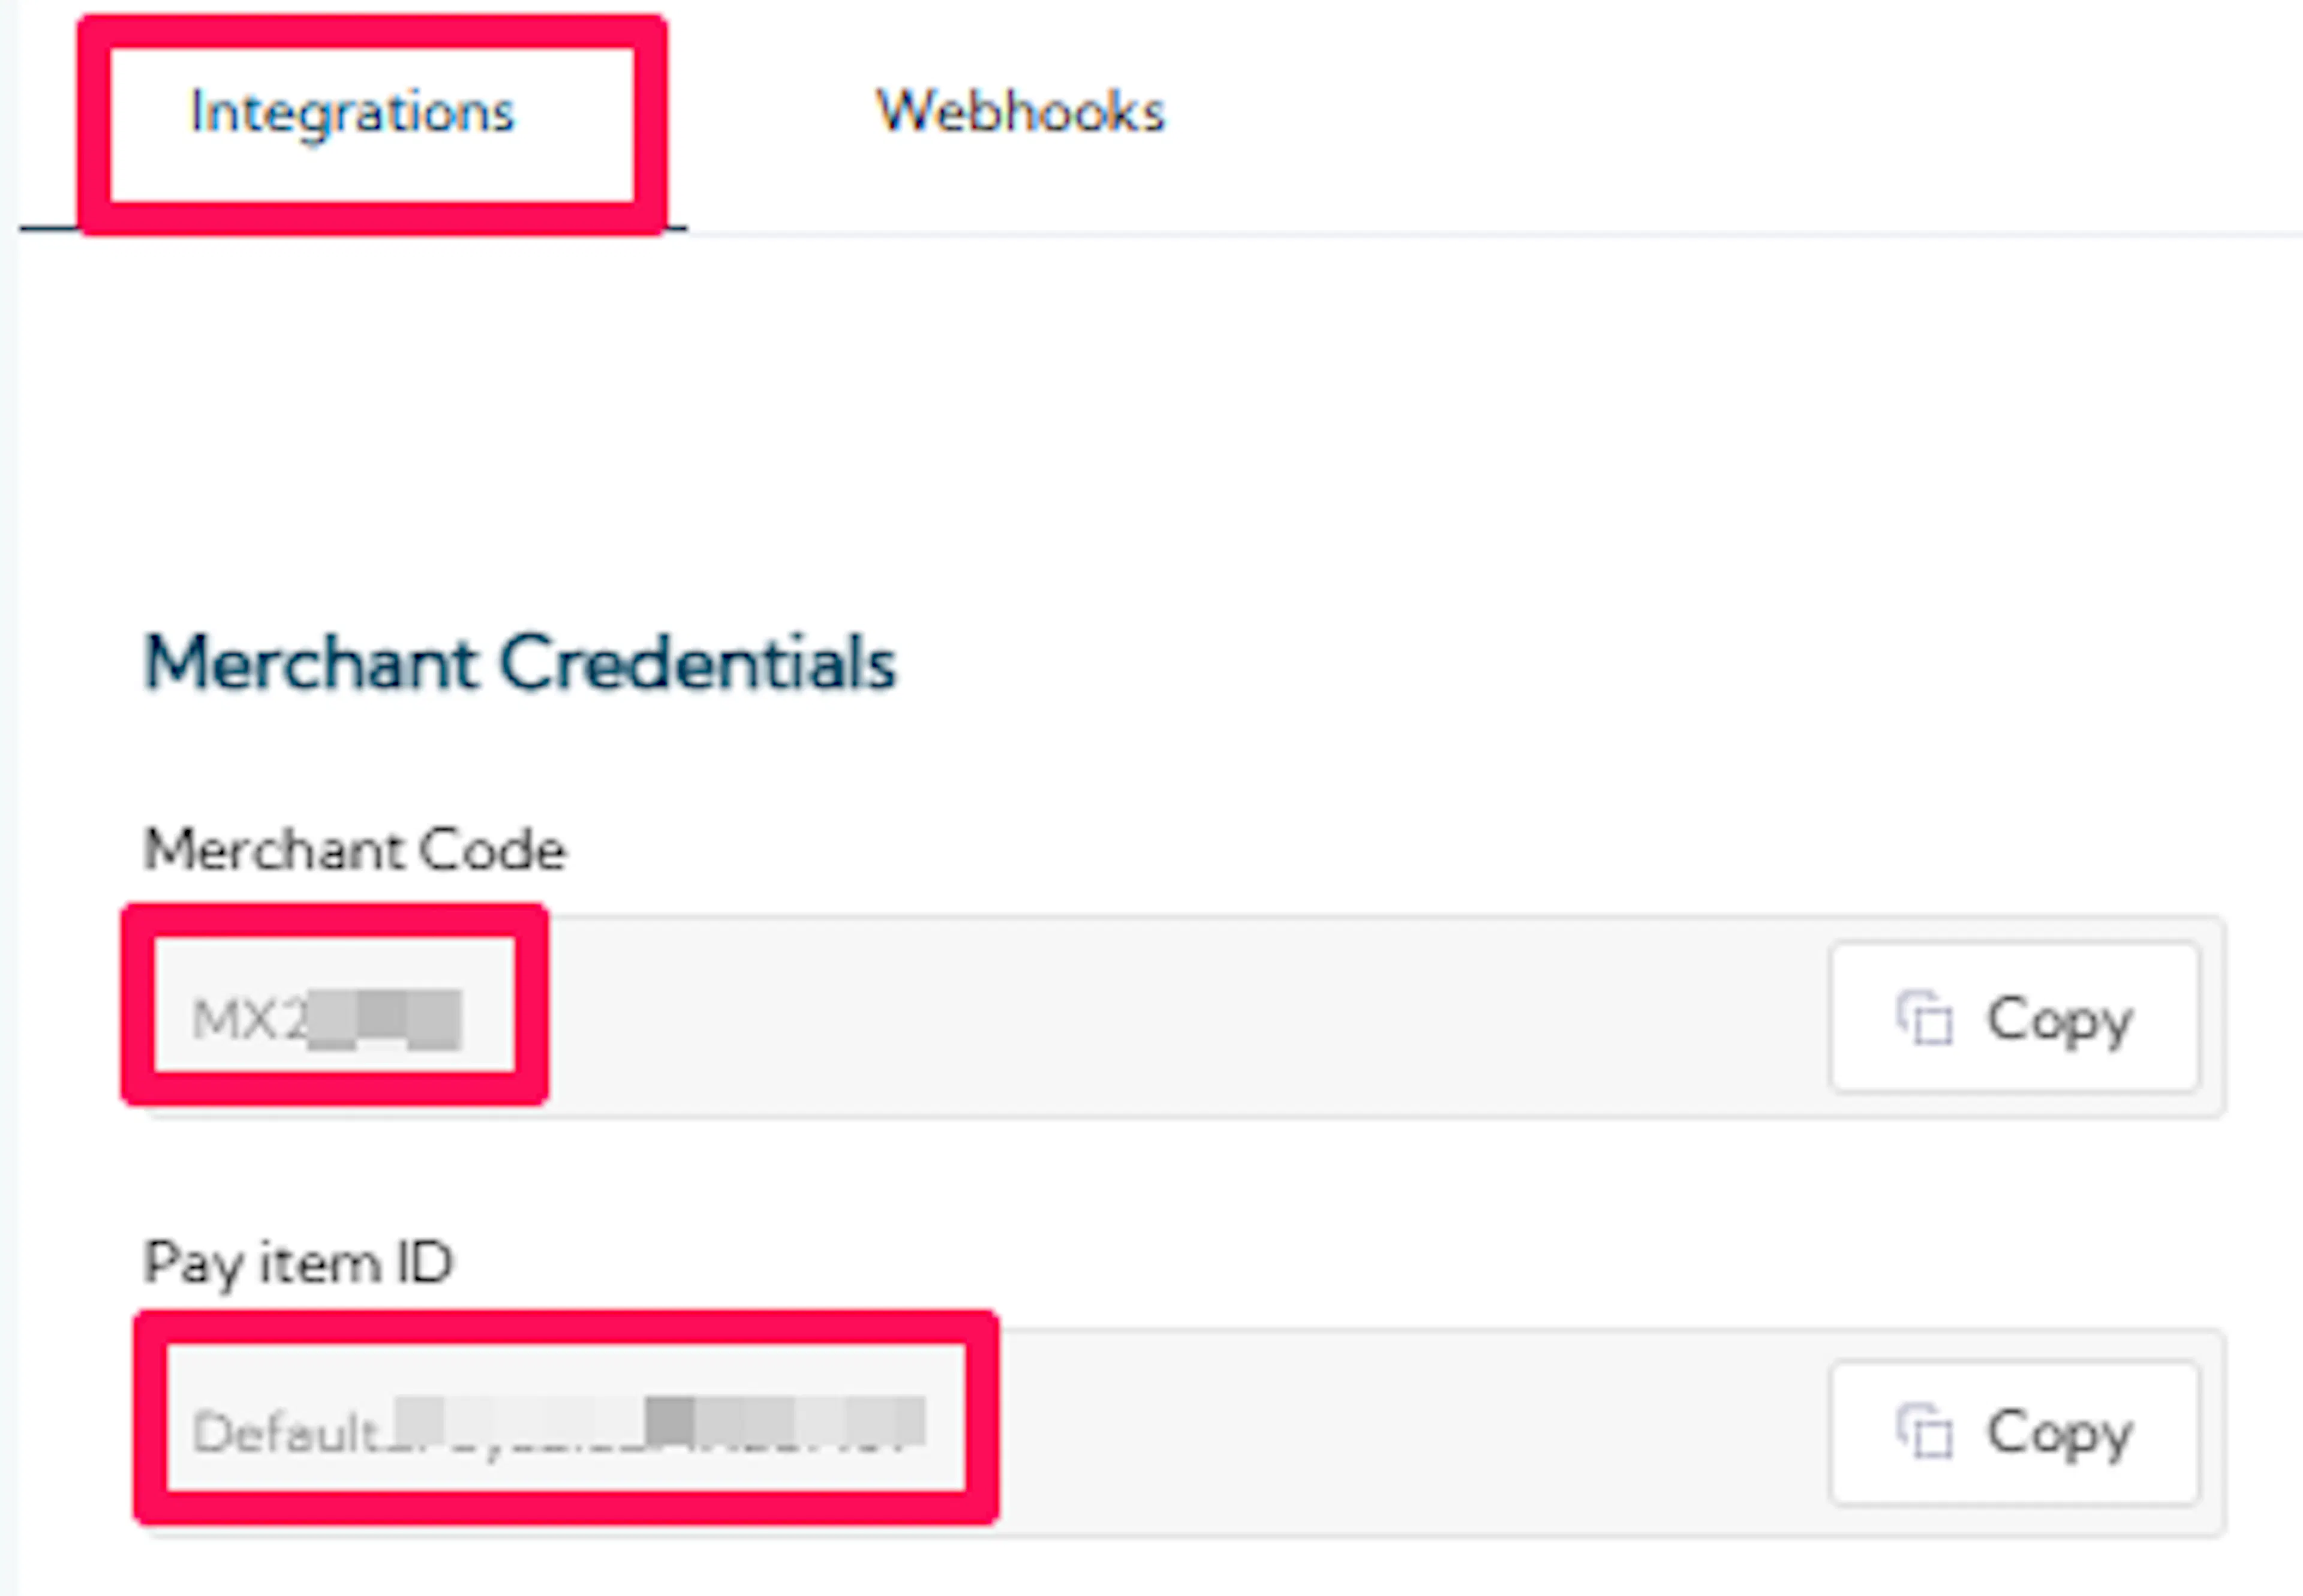
The Pay Item ID is also called the Payable Code - it identifies the collection account your money is credited to. It is not your Merchant Code. Entering the Merchant Code in both fields is the most common setup mistake.
Note the country your account was opened in
Interswitch runs separate servers for Nigeria, Kenya, Uganda, and DR Congo. Note which country your Interswitch account belongs to, because you select it as the Region in the next section.
Adding Credentials to PayLexer
Open PayLexer Dashboard
Log in to your PayLexer dashboard and navigate to Payment Gateways -> Interswitch.
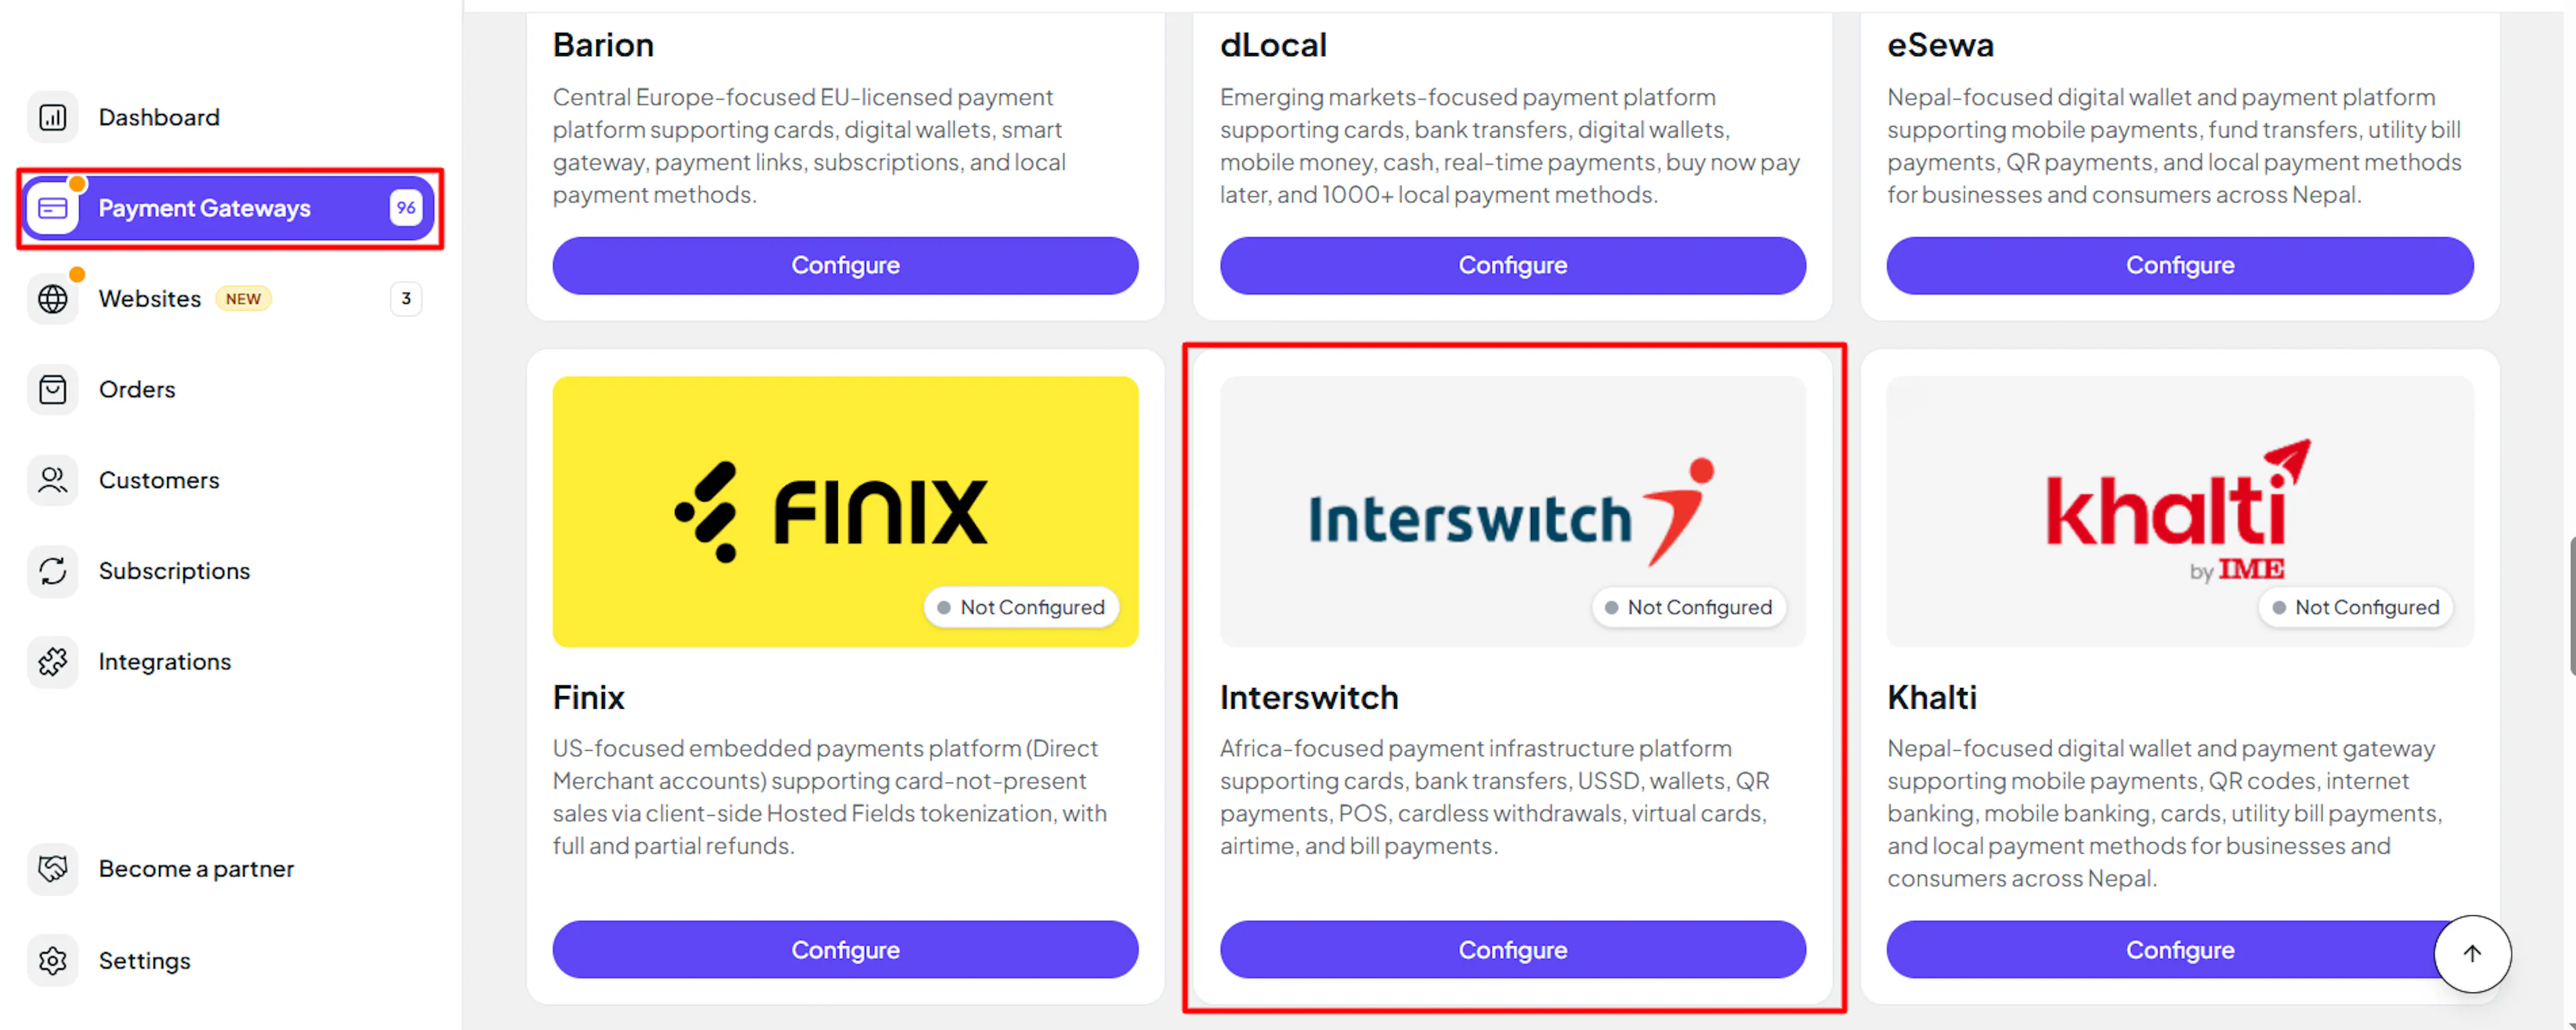
Enter your credentials
Paste the Client ID, Client Secret, Merchant Code, and Pay Item ID you copied from Interswitch into the corresponding fields, then choose your Region (Nigeria, Kenya, Uganda, or DR Congo).
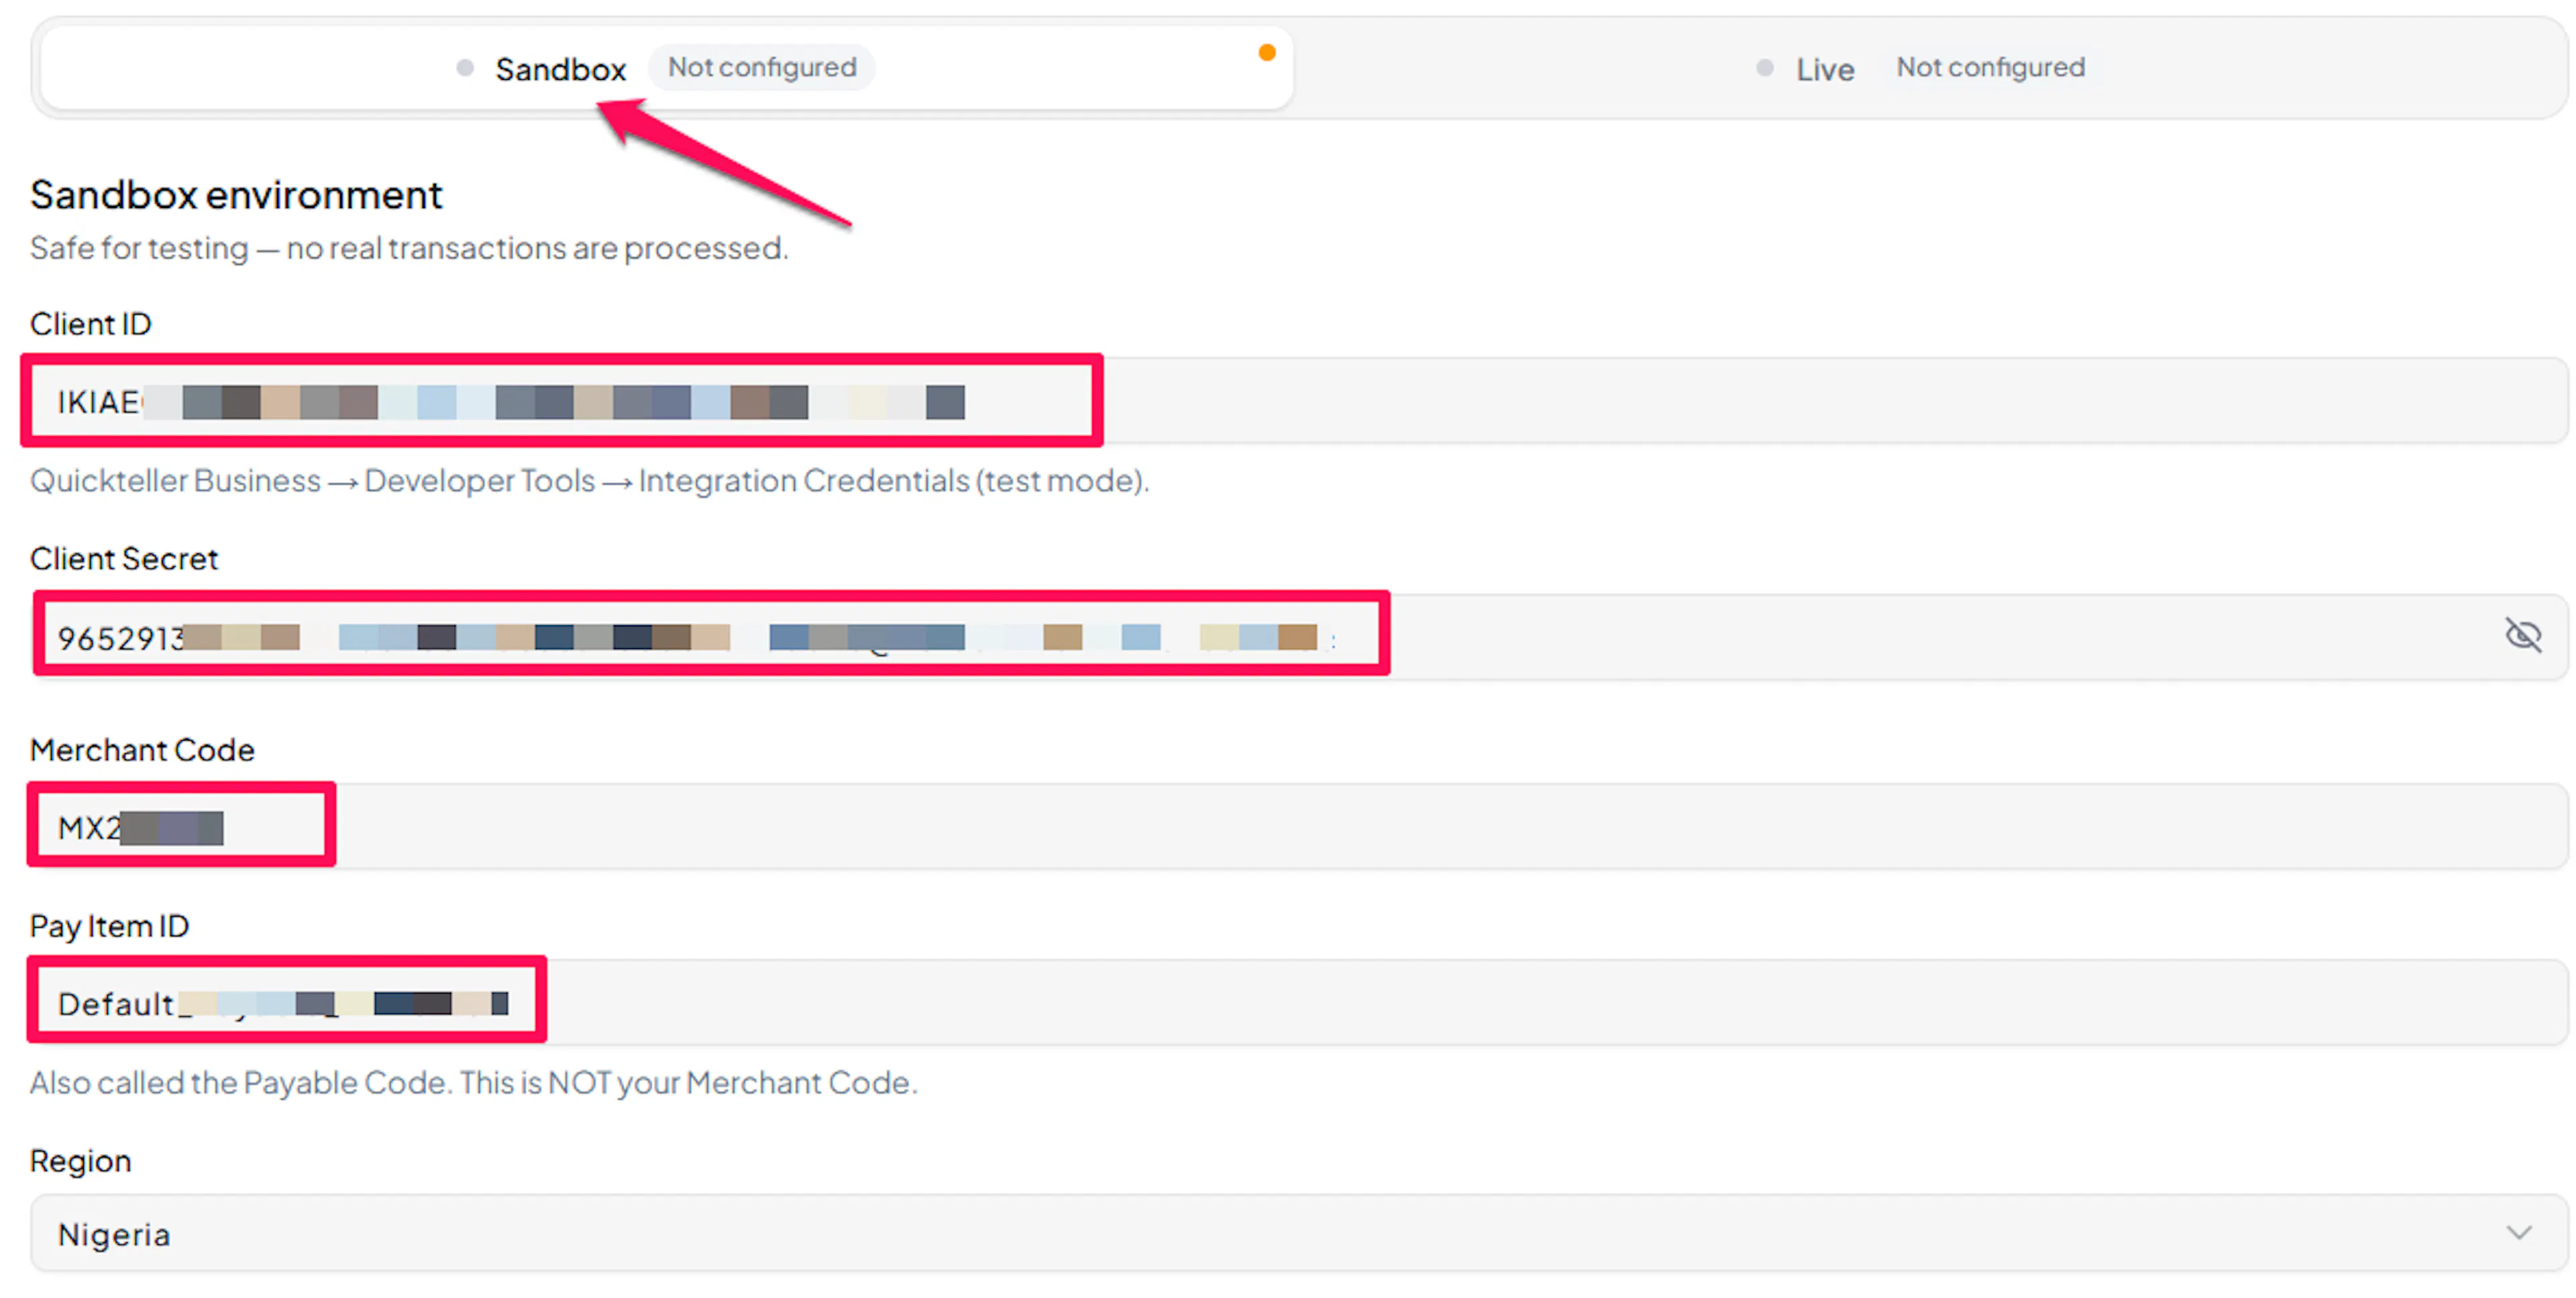
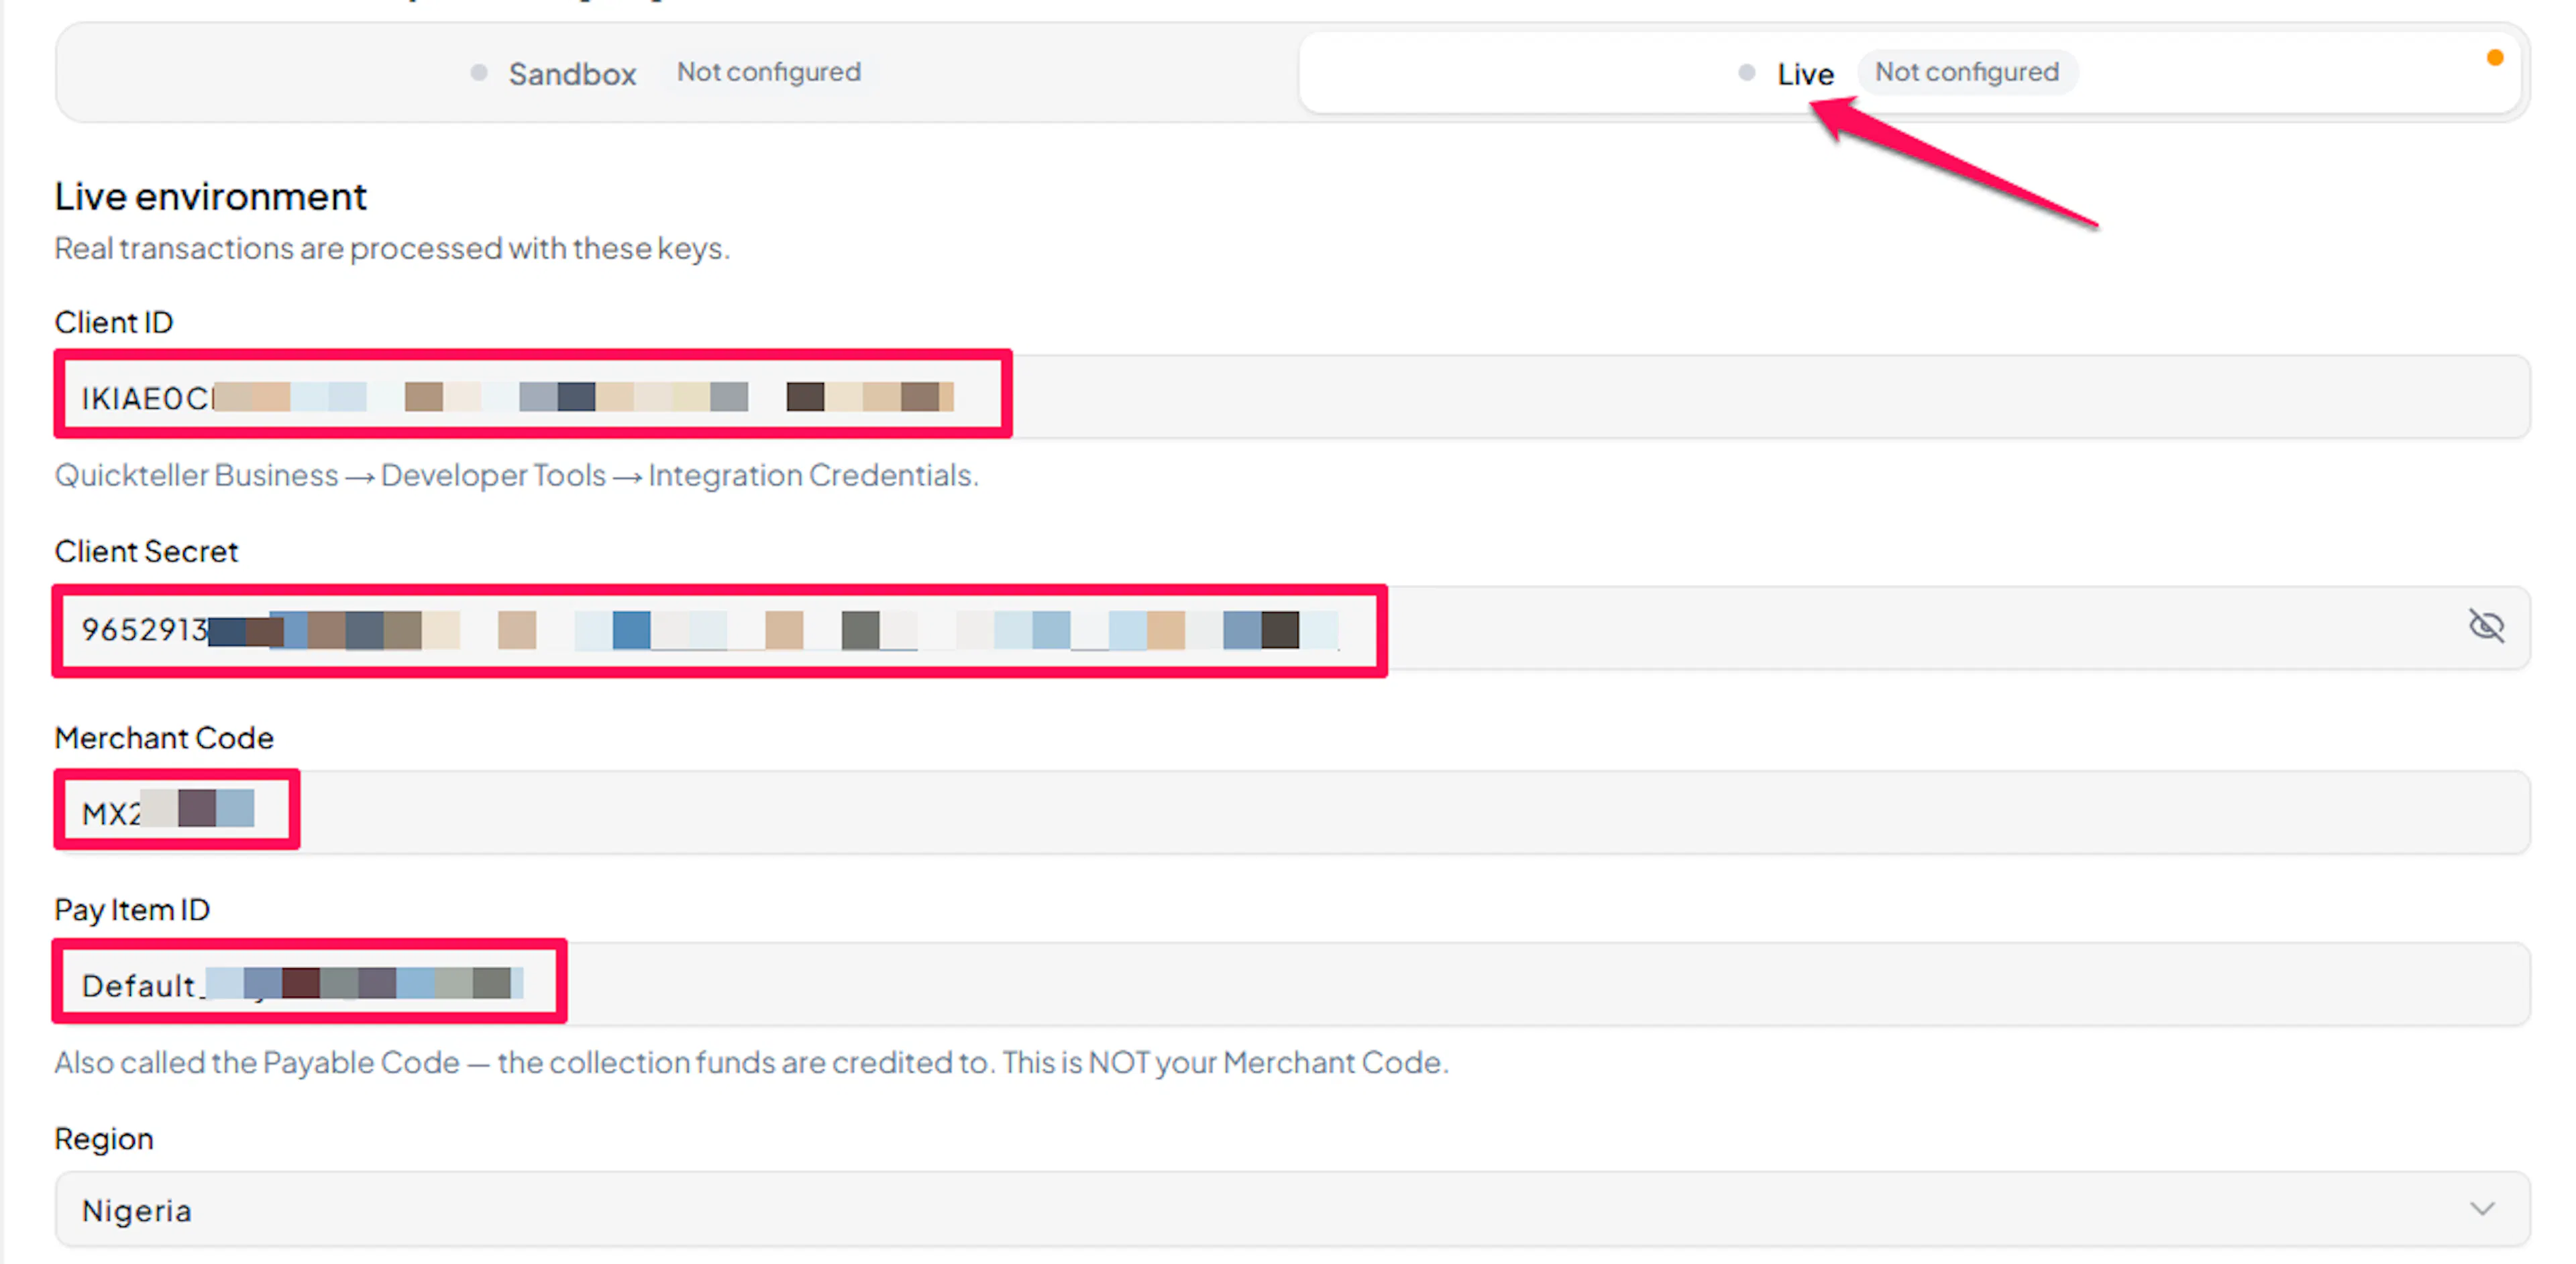
Understanding Live/Production and Sandbox Settings:
| Environment | Purpose |
|---|---|
| Live / Production | Used for real transactions. |
| Test / Sandbox | Used for testing only. No real money is processed. |
How PayLexer selects credentials:
- Debug/Test mode ON → Test credentials are used
- Debug/Test mode OFF → Live credentials are used
Configuring Webhooks (Mandatory)
Webhooks enable real-time payment updates and significantly improve reliability.
Benefits of Webhooks:
- Instant payment status updates
- Orders still complete when a shopper pays and then closes the tab
- Bank transfer and USSD payments are picked up when they arrive after checkout
Copy your PayLexer webhook URL
In Payment Gateways -> Interswitch, copy the Webhook URL that PayLexer generates for your account.

Add the environment to the URL
Interswitch notifications do not say which mode they came from, so the environment travels in the URL:
- For your test webhook, add
?env=testto the end of the URL. - For your live webhook, add
?env=liveto the end of the URL.
Create the webhook in Quickteller Business
Go to Developer Tools -> Webhooks, add a new webhook, and paste the PayLexer Webhook URL you just prepared.
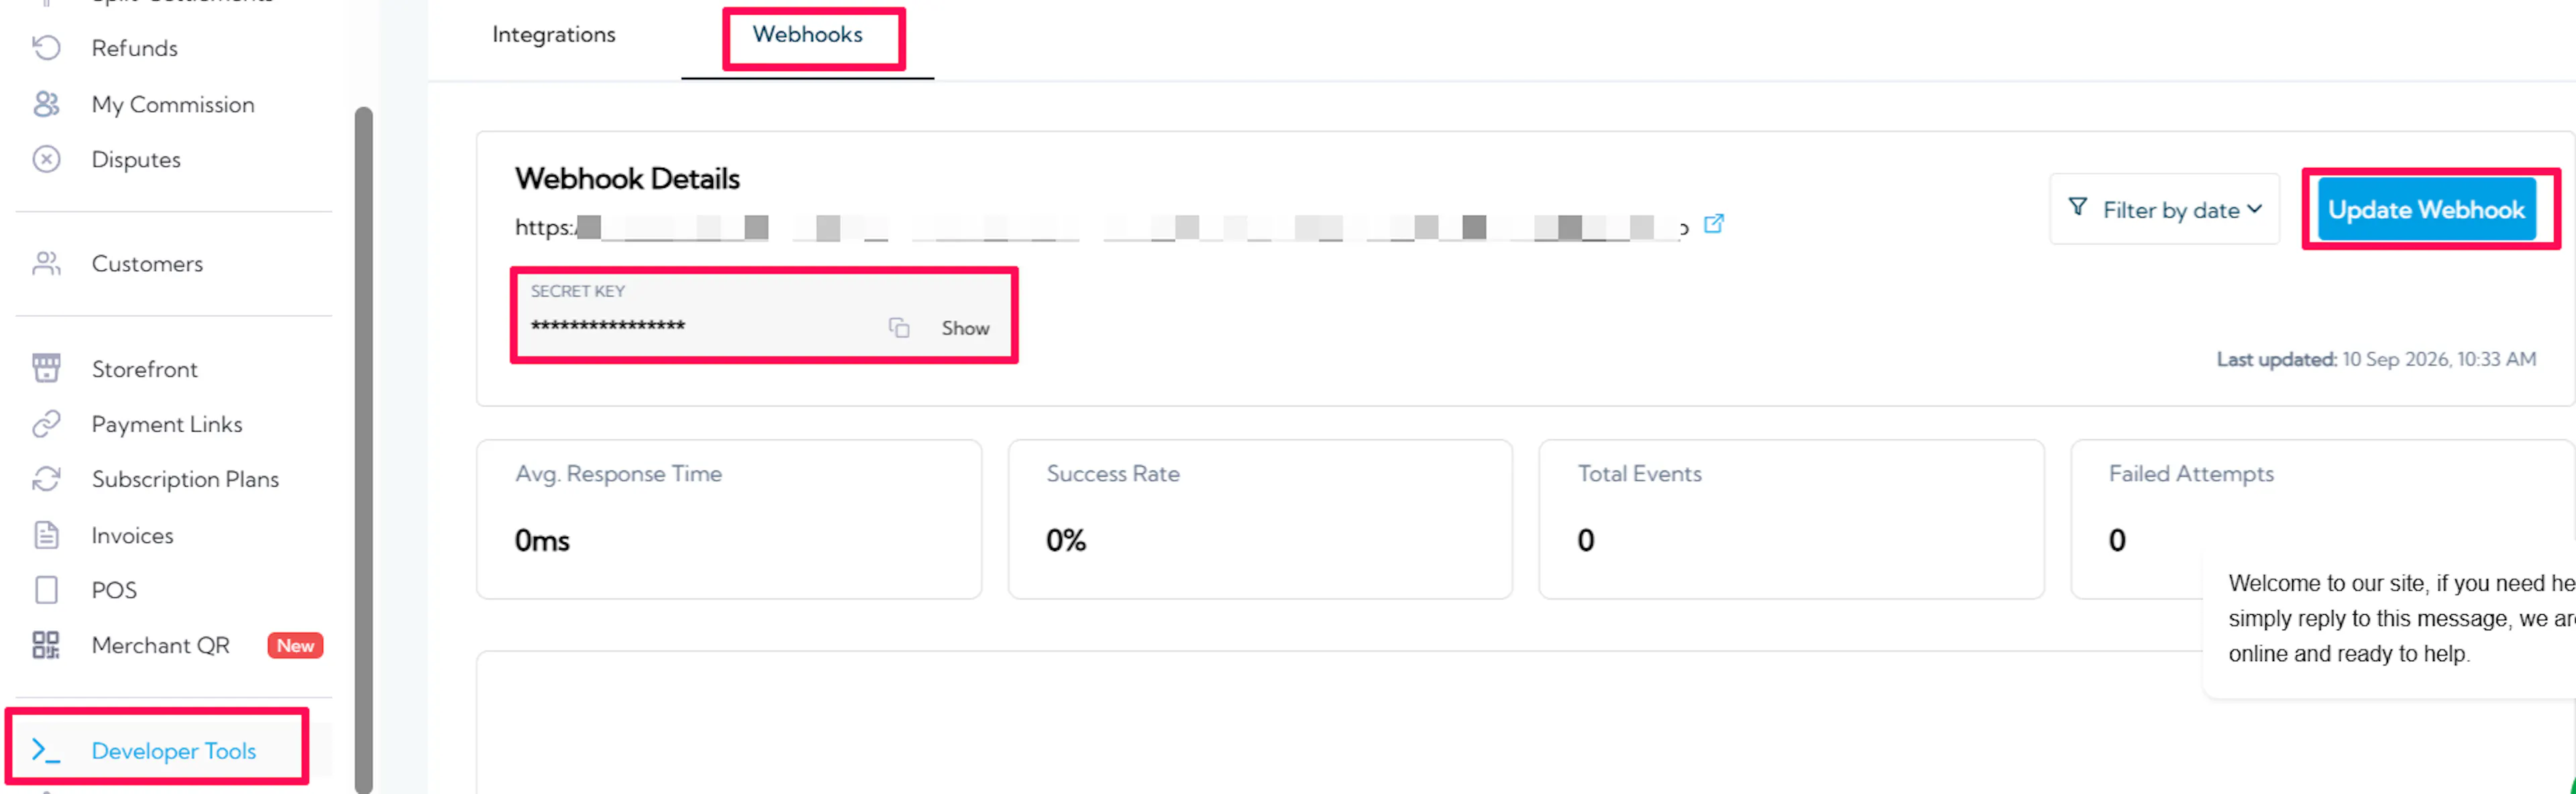
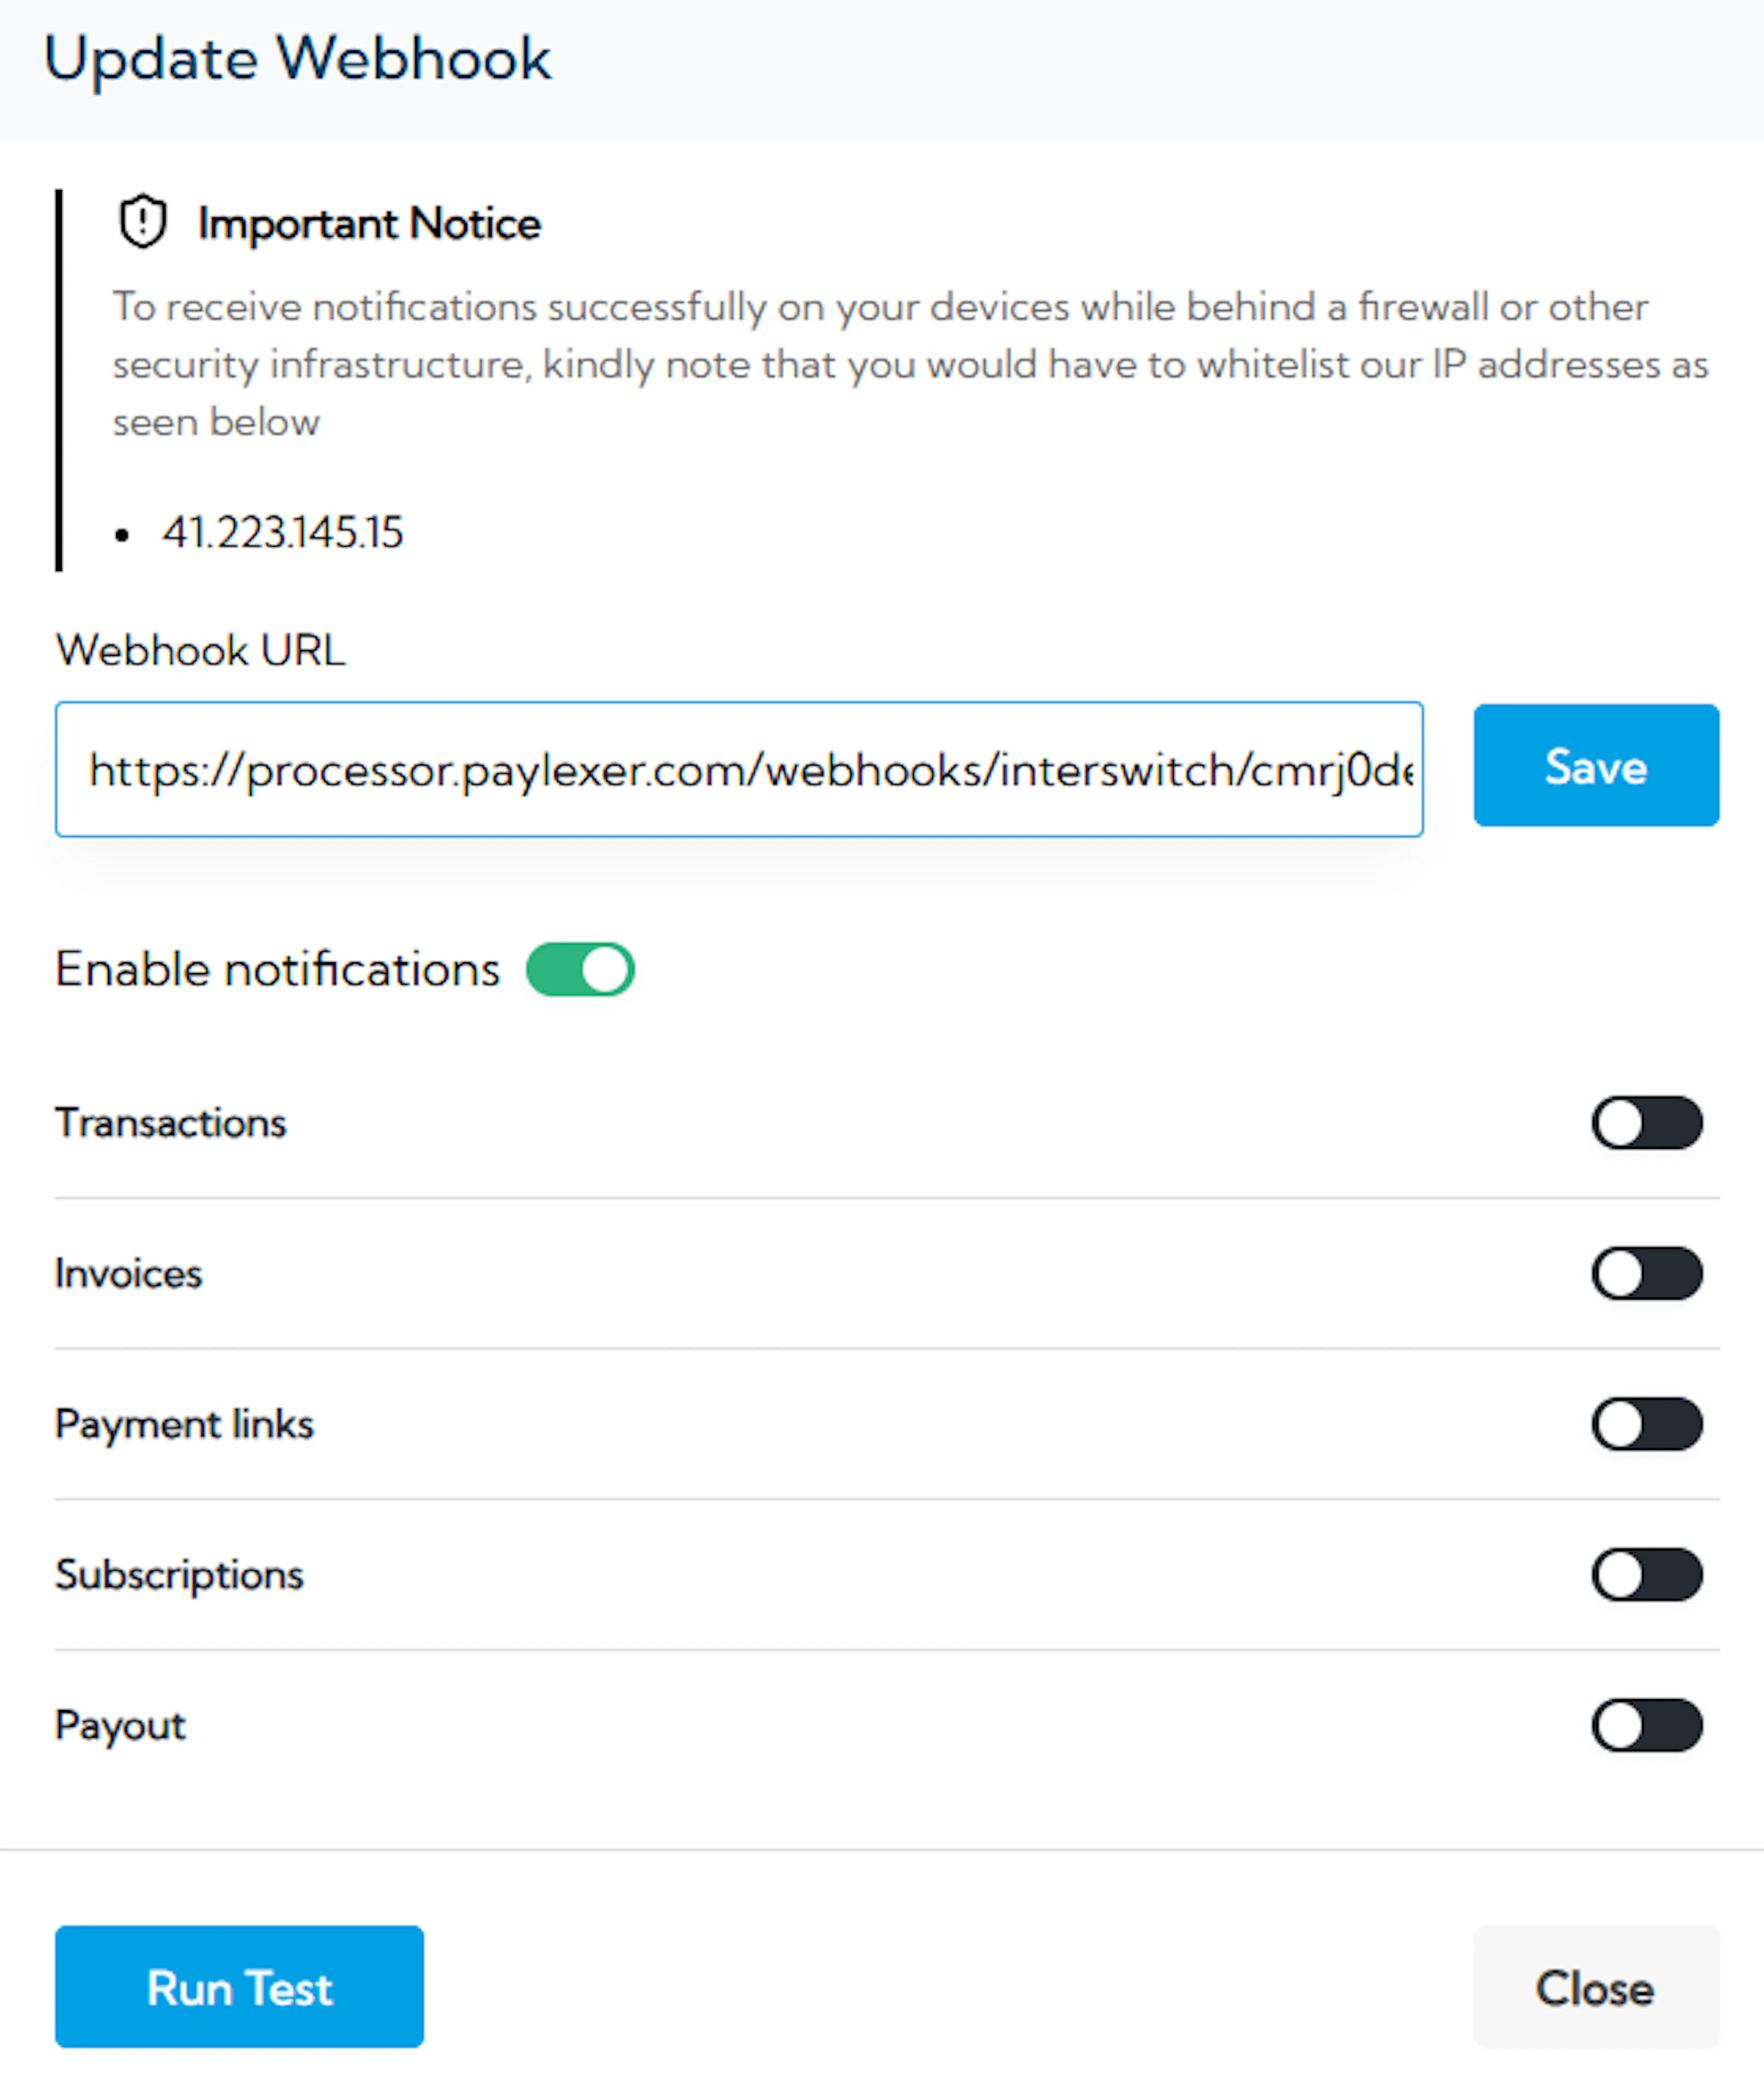
Copy the Webhook Secret into PayLexer
Copy the Webhook Secret Interswitch generates, paste it into the Webhook Secret field in Payment Gateways -> Interswitch in PayLexer.
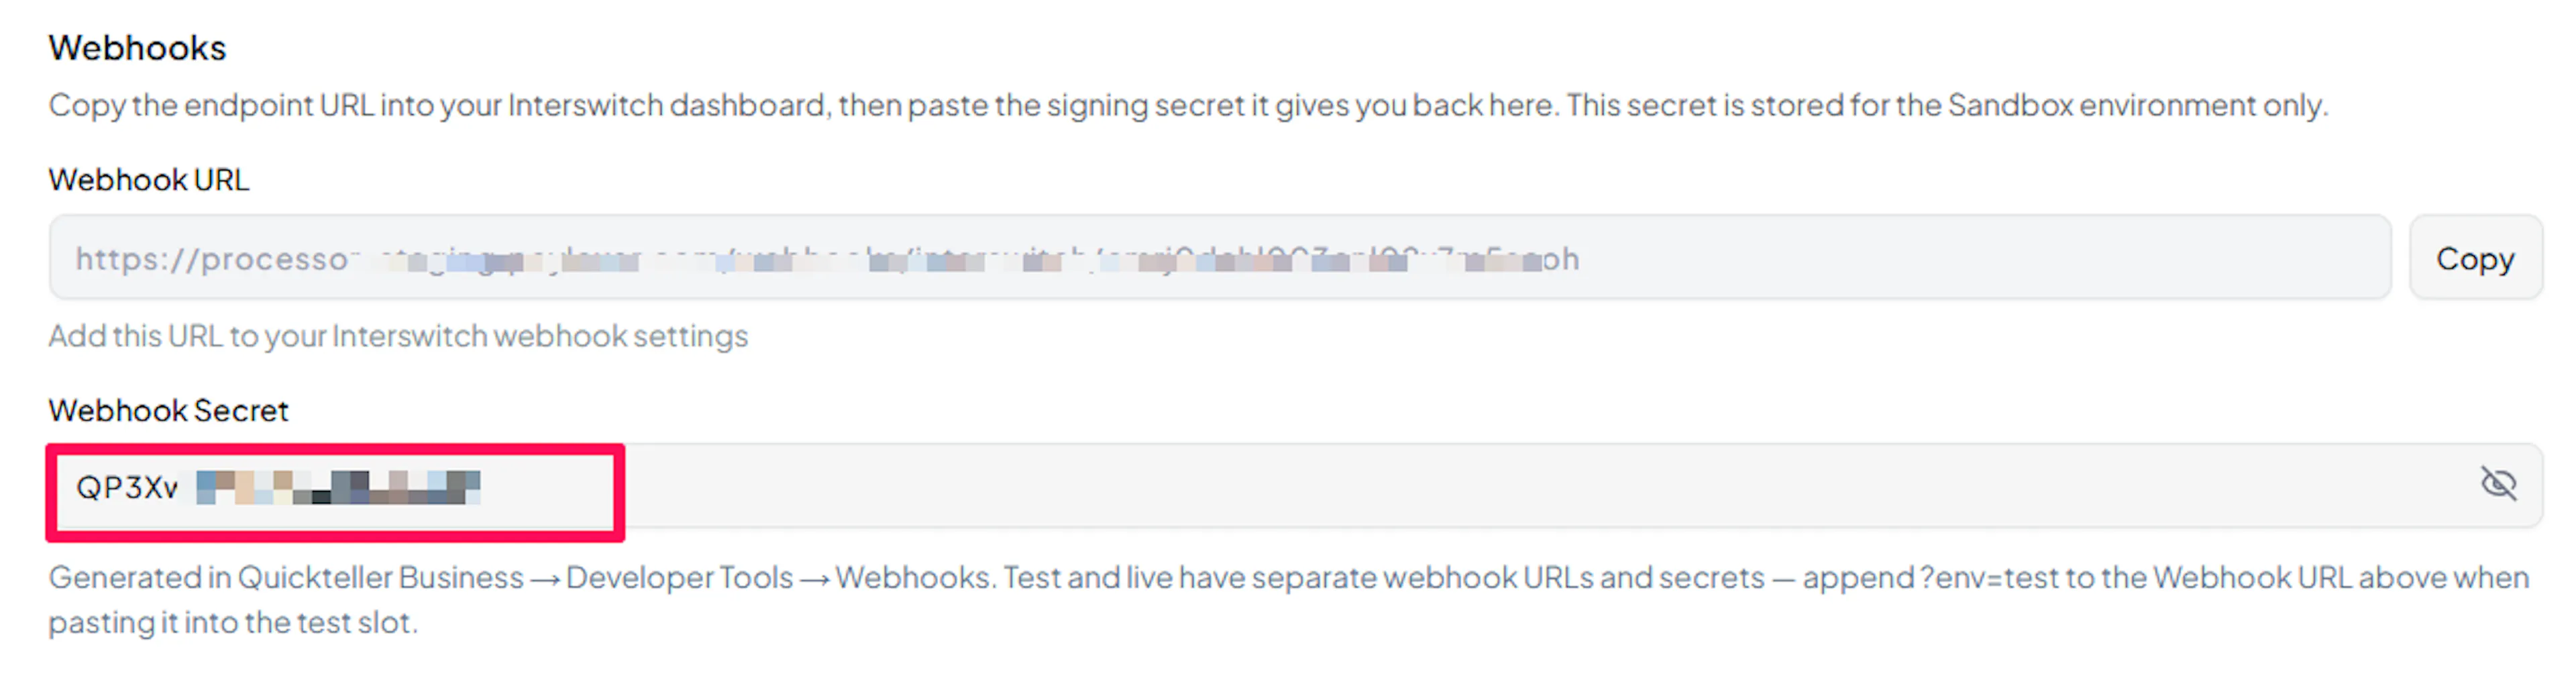
Test and live have separate webhook URLs and separate Webhook Secrets in Interswitch. Set up both, and paste each secret into its matching Test or Live field in PayLexer. PayLexer verifies the signature on every notification and ignores any that fails.
Test and Save
Click Save to save your configuration and verify your credentials. Click Verify Connection to test the connection.
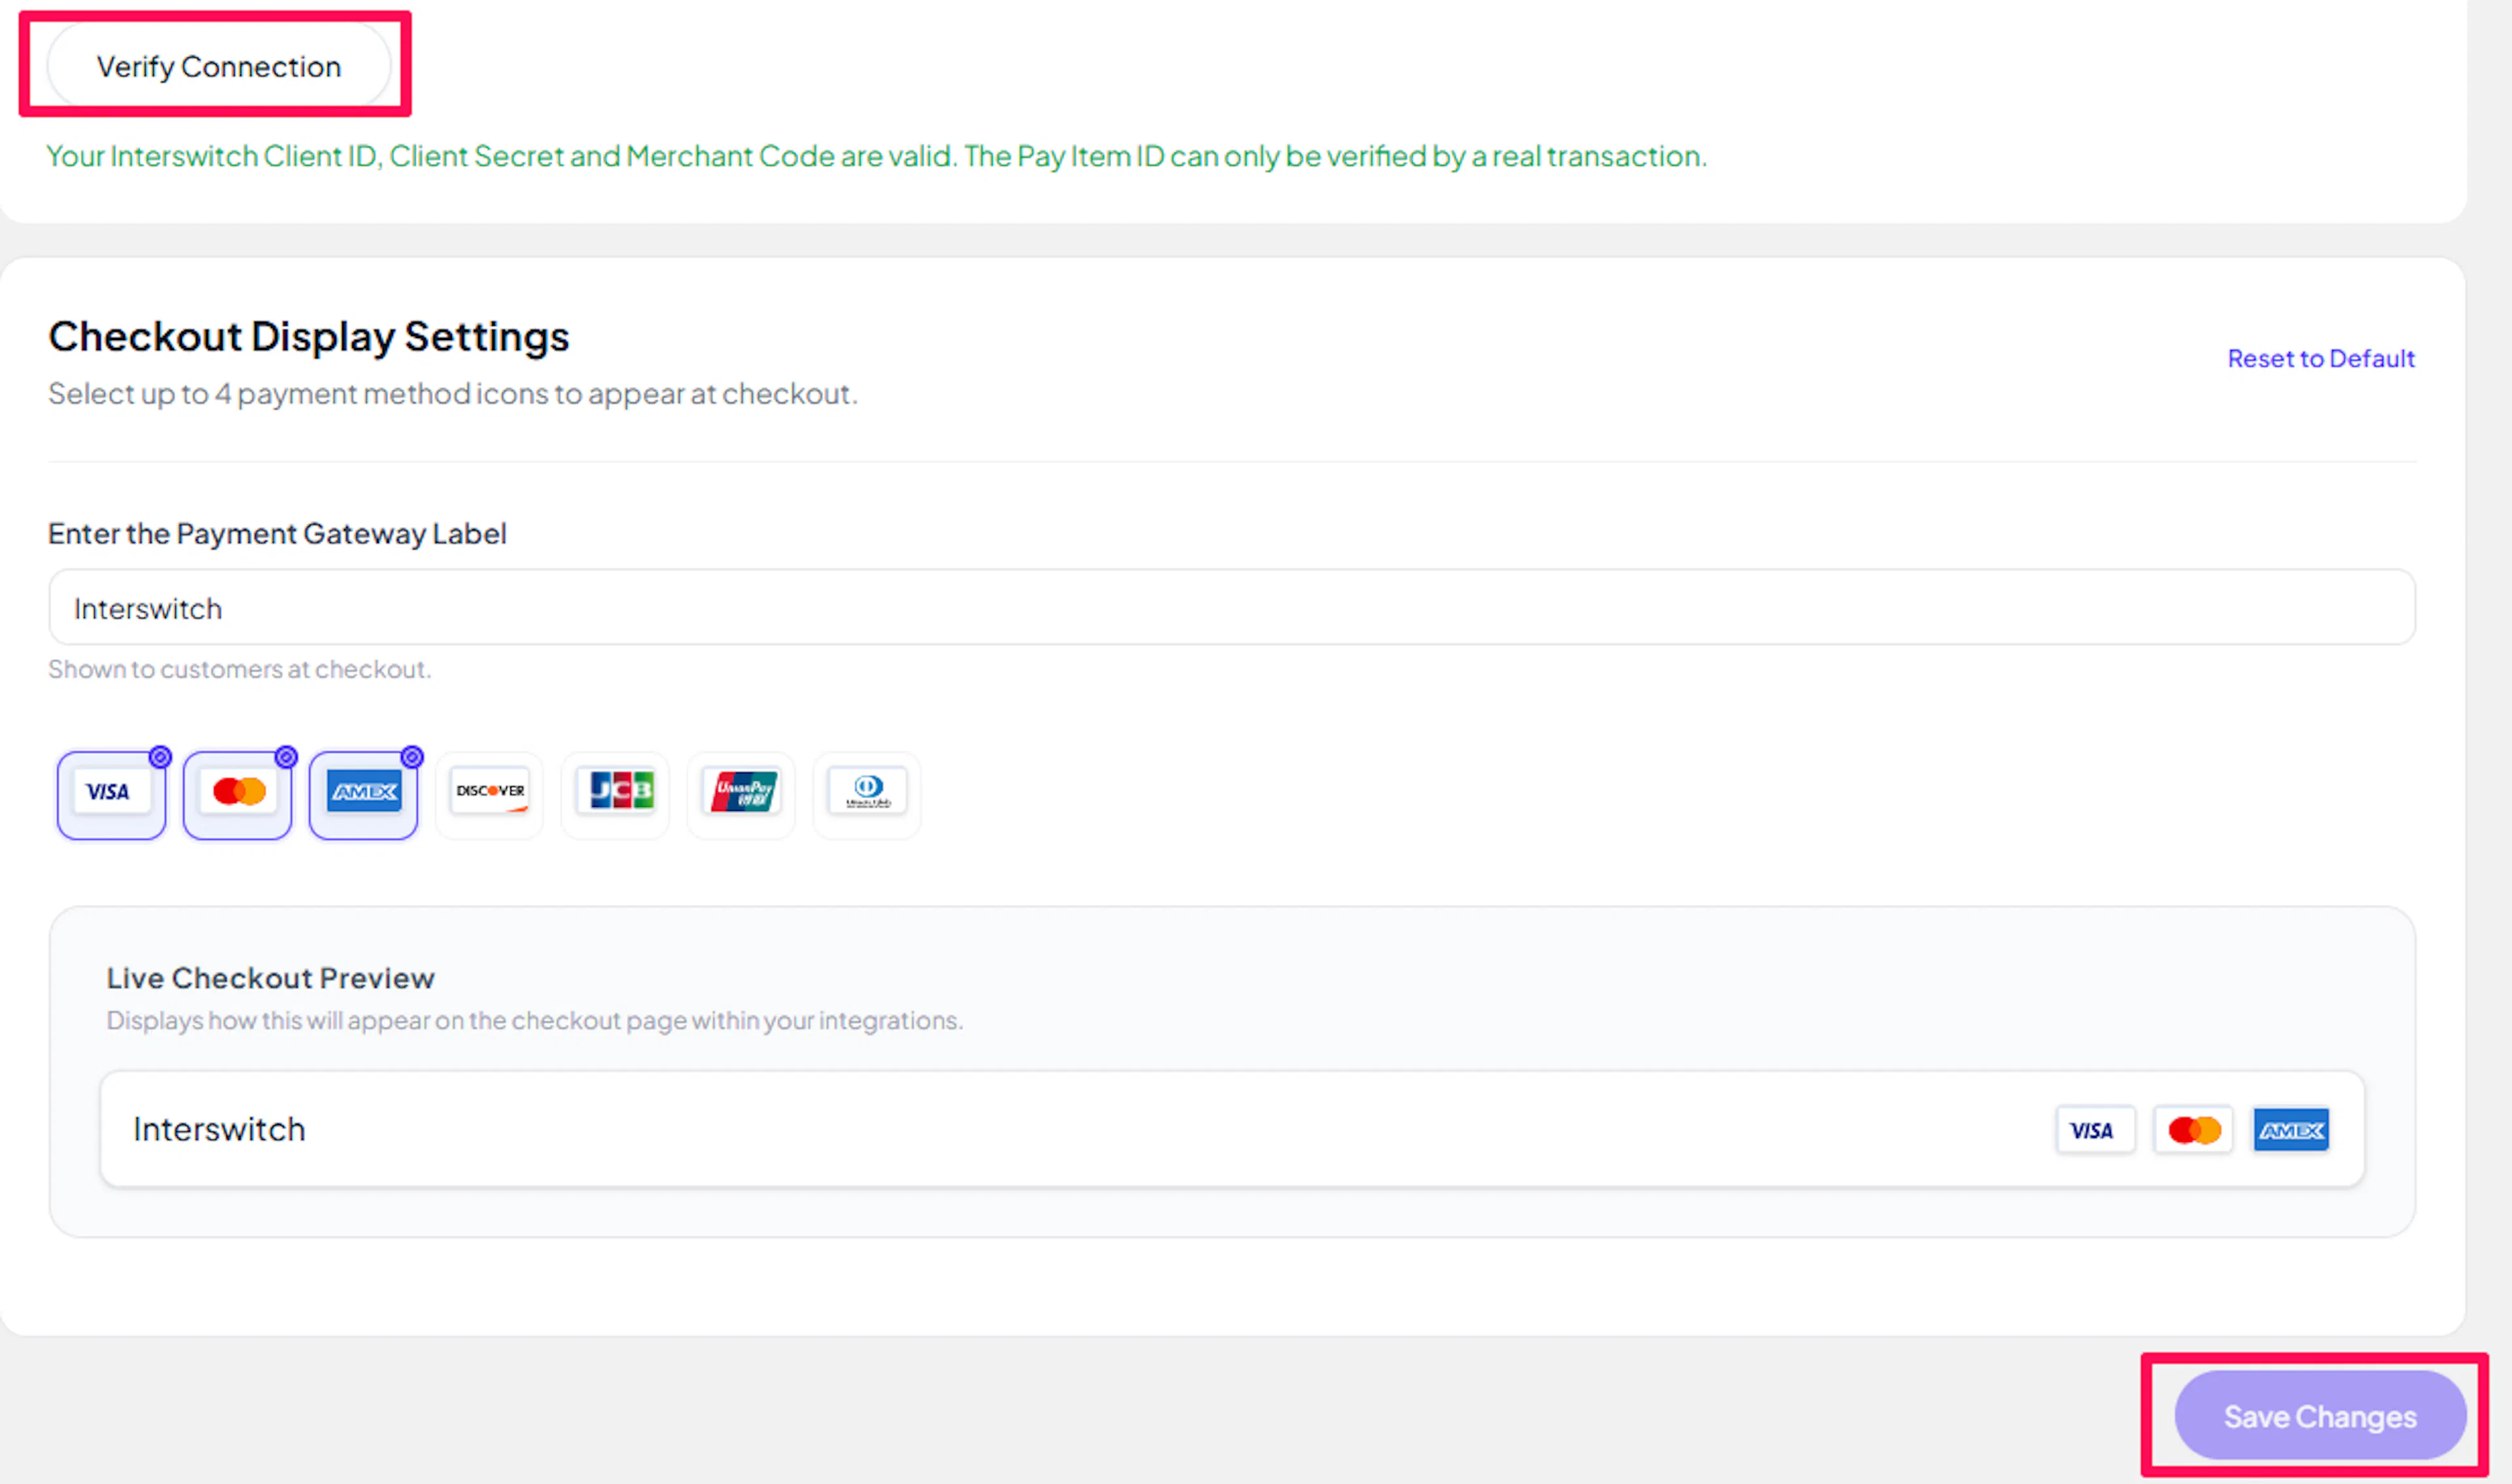
Verification checks your Client ID, Client Secret, and Merchant Code, and confirms that your Region is correct. The Pay Item ID can only be verified by a real transaction, so run one small test payment before going live.
Integrate Interswitch to Your Website
If you have already added and configured your site, you can enable Interswitch in your existing setup.
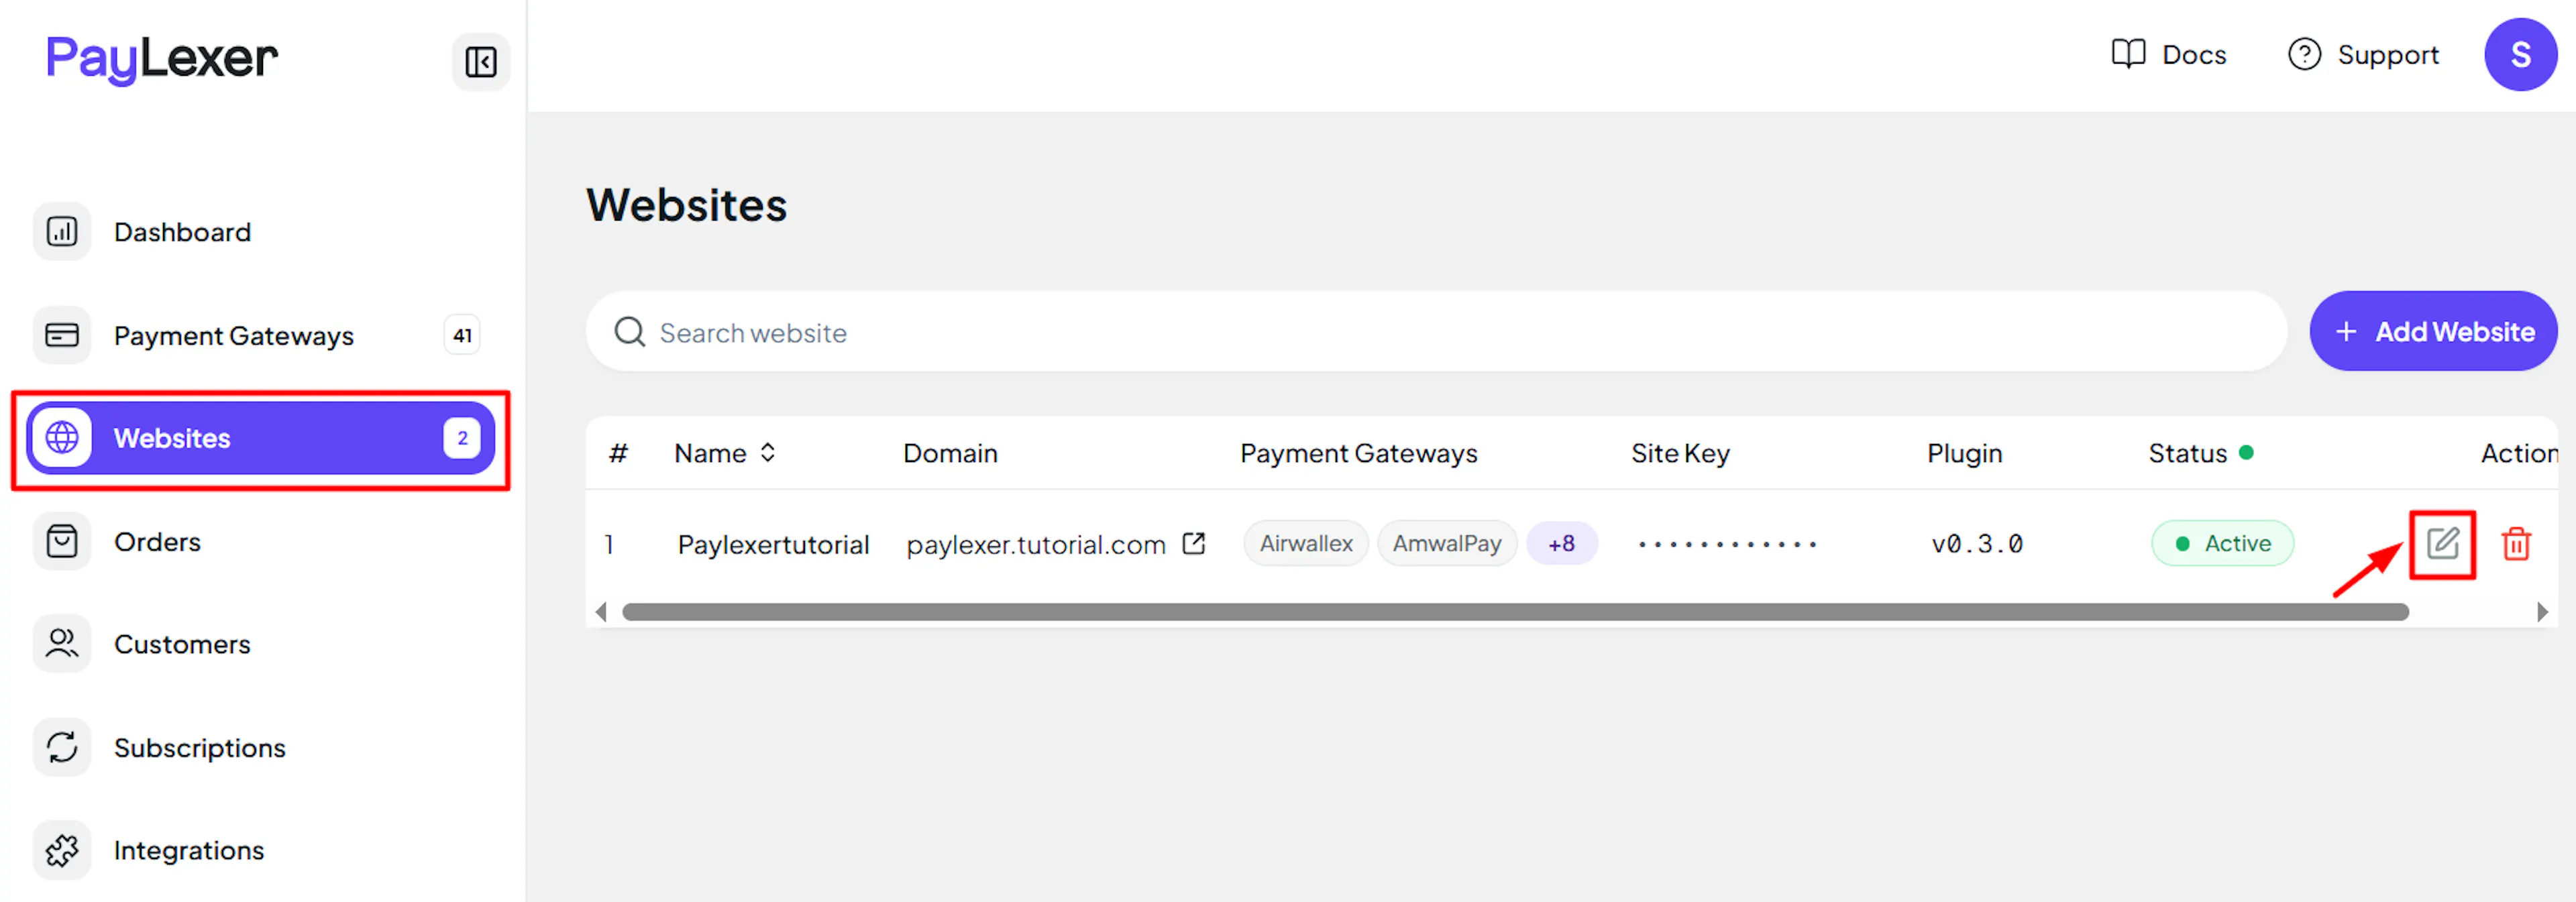
Go to Websites
Navigate to Websites in your PayLexer dashboard.
Edit your website
Click the Edit Icon of your added website.
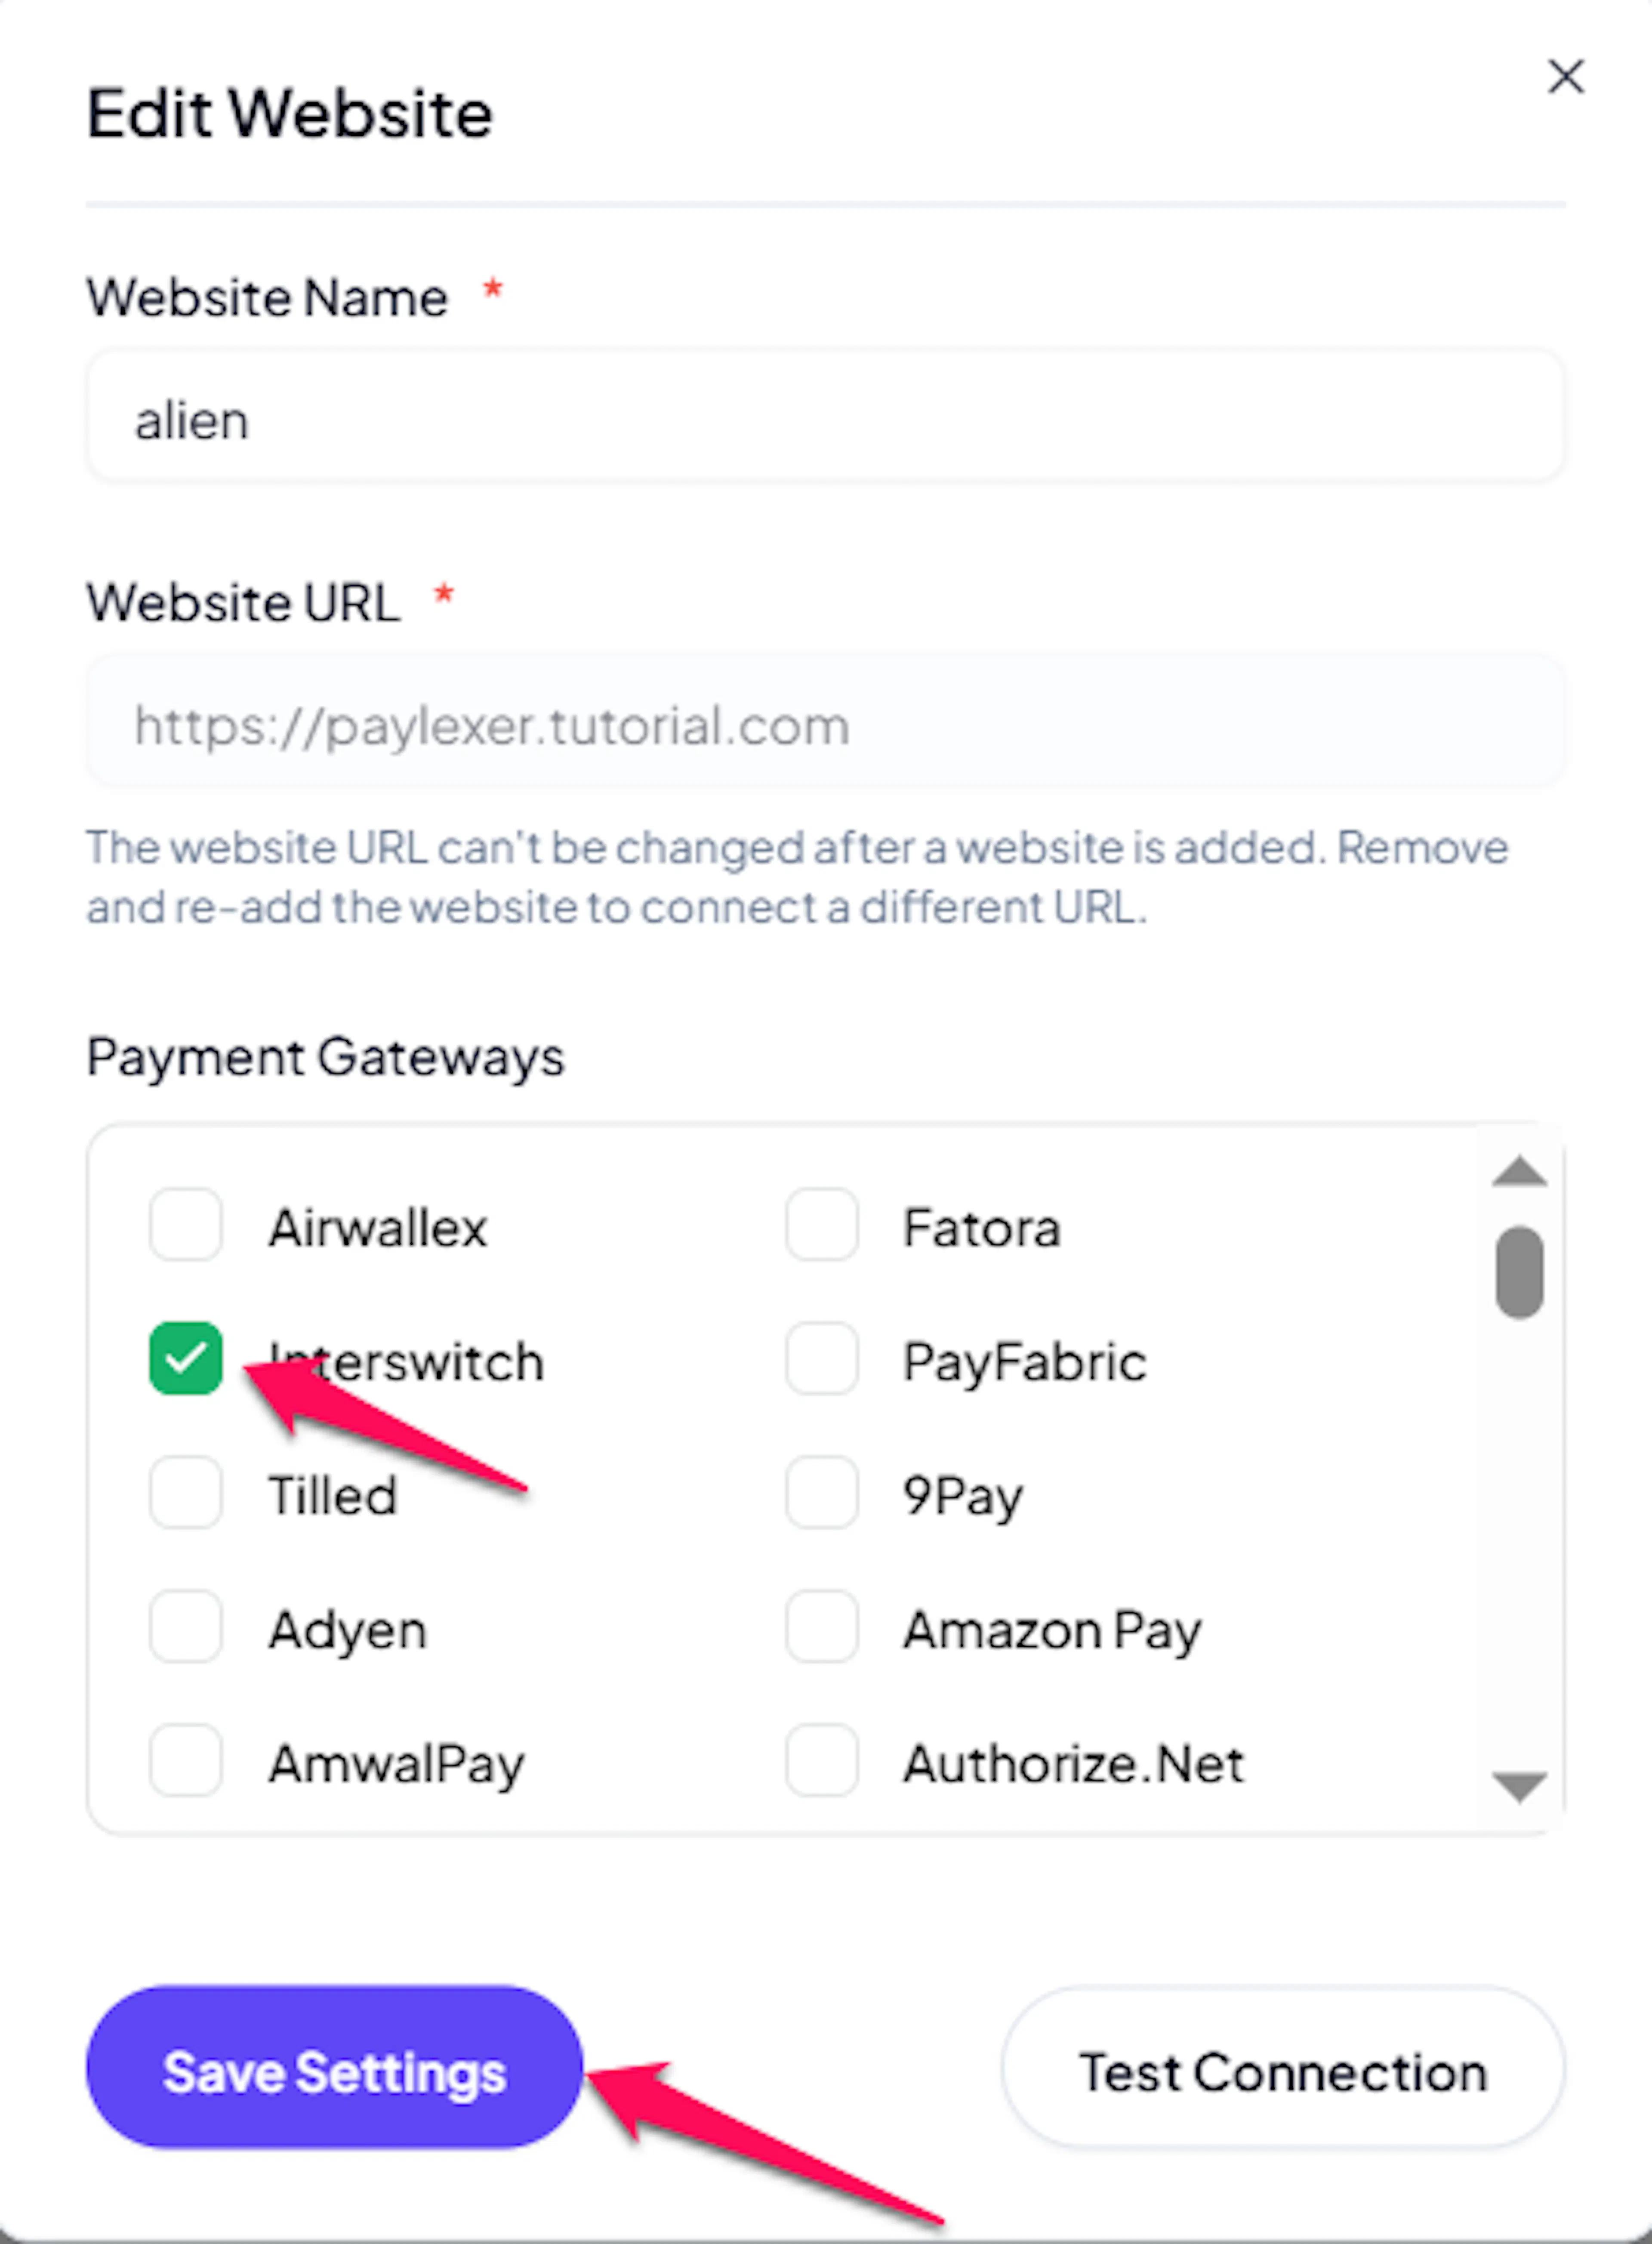
Enable Interswitch
Click the checkbox to enable Interswitch for the website.
If you haven't added a website yet, Continue to Add Your Website →
Troubleshooting
Best Practices
- Test in sandbox before enabling production - complete a full checkout and a refund with Test credentials first.
- Set the Region to the country your Interswitch account was opened in, and re-check it whenever checkout starts failing.
- Configure both the test and live webhooks, each with its own
?env=value and its own Webhook Secret. - Run one small real payment after going live, since the Pay Item ID cannot be verified any other way.
- Only offer Interswitch on orders priced in NGN, KES, UGX, CDF, or USD.
- Start Interswitch's live verification early, since live payments depend on its approval.
FAQs
Still Have Questions?
- Interswitch Support: Interswitch Developer Documentation
- PayLexer Support: Contact Support