

2Checkout
Connect 2Checkout (Verifone) to PayLexer to accept one-time payments and subscriptions on 2Checkout's hosted checkout.
2Checkout is a global payment platform, now part of Verifone. PayLexer sends shoppers to 2Checkout's hosted checkout page (ConvertPlus), where they pay by card or any other method enabled on your 2Checkout account, and 2Checkout bills subscription renewals itself.
- Supported Regions (Merchant Accounts): Global
- Supported Currencies: USD, EUR, GBP, AUD, CAD, JPY, INR - view full list
Supported Features
- Hosted checkout that redirects shoppers to 2Checkout's secure payment page
- Cards payments
- Recurring subscriptions
- Sign-up fees on subscriptions
- Full and partial refunds
Before You Start
Make sure you have:
- 2Checkout Account – Don't have one? Sign up for 2Checkout →
- PayLexer Account – Required to configure the integration. Create your account →
- A website where you want to integrate
Looking for a different payment processor? View all supported gateways →
Configuring 2Checkout
You need a Merchant Code, Secret Key and Buy-link Secret Word from 2Checkout for this integration.
Getting API Credentials
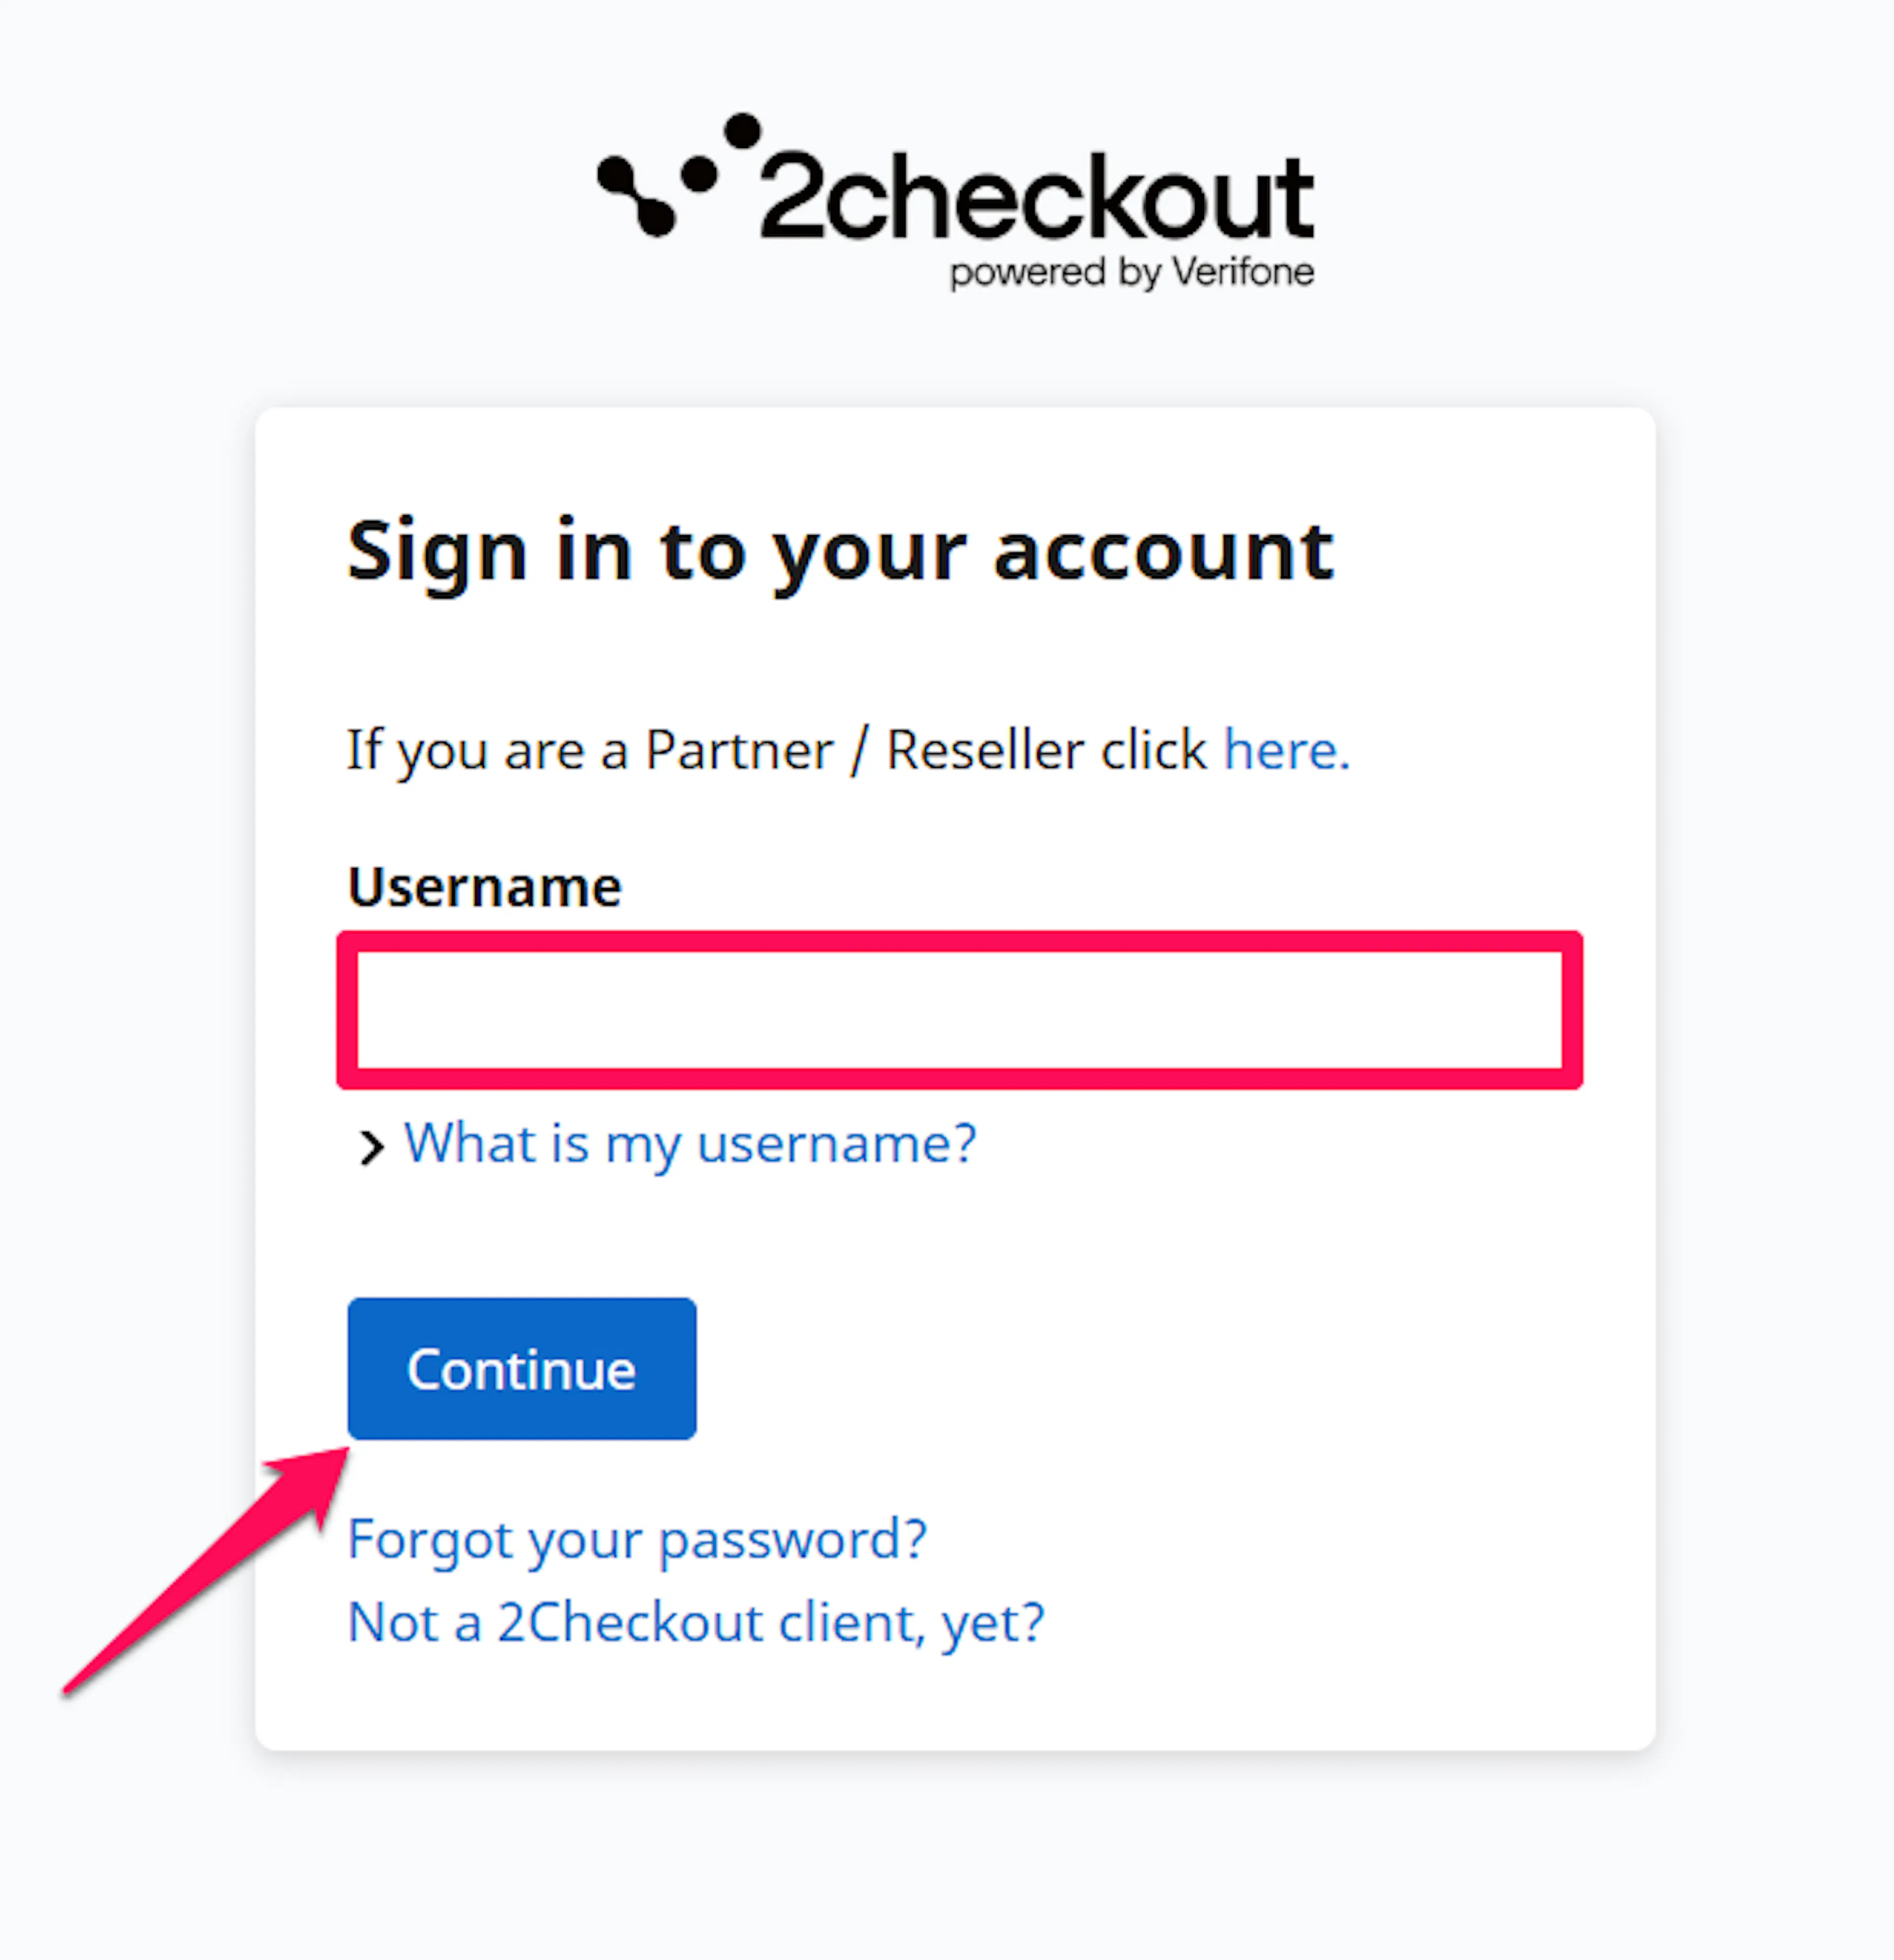
Log in to the 2Checkout Merchant Control Panel
Sign in to your 2Checkout Merchant Control Panel.
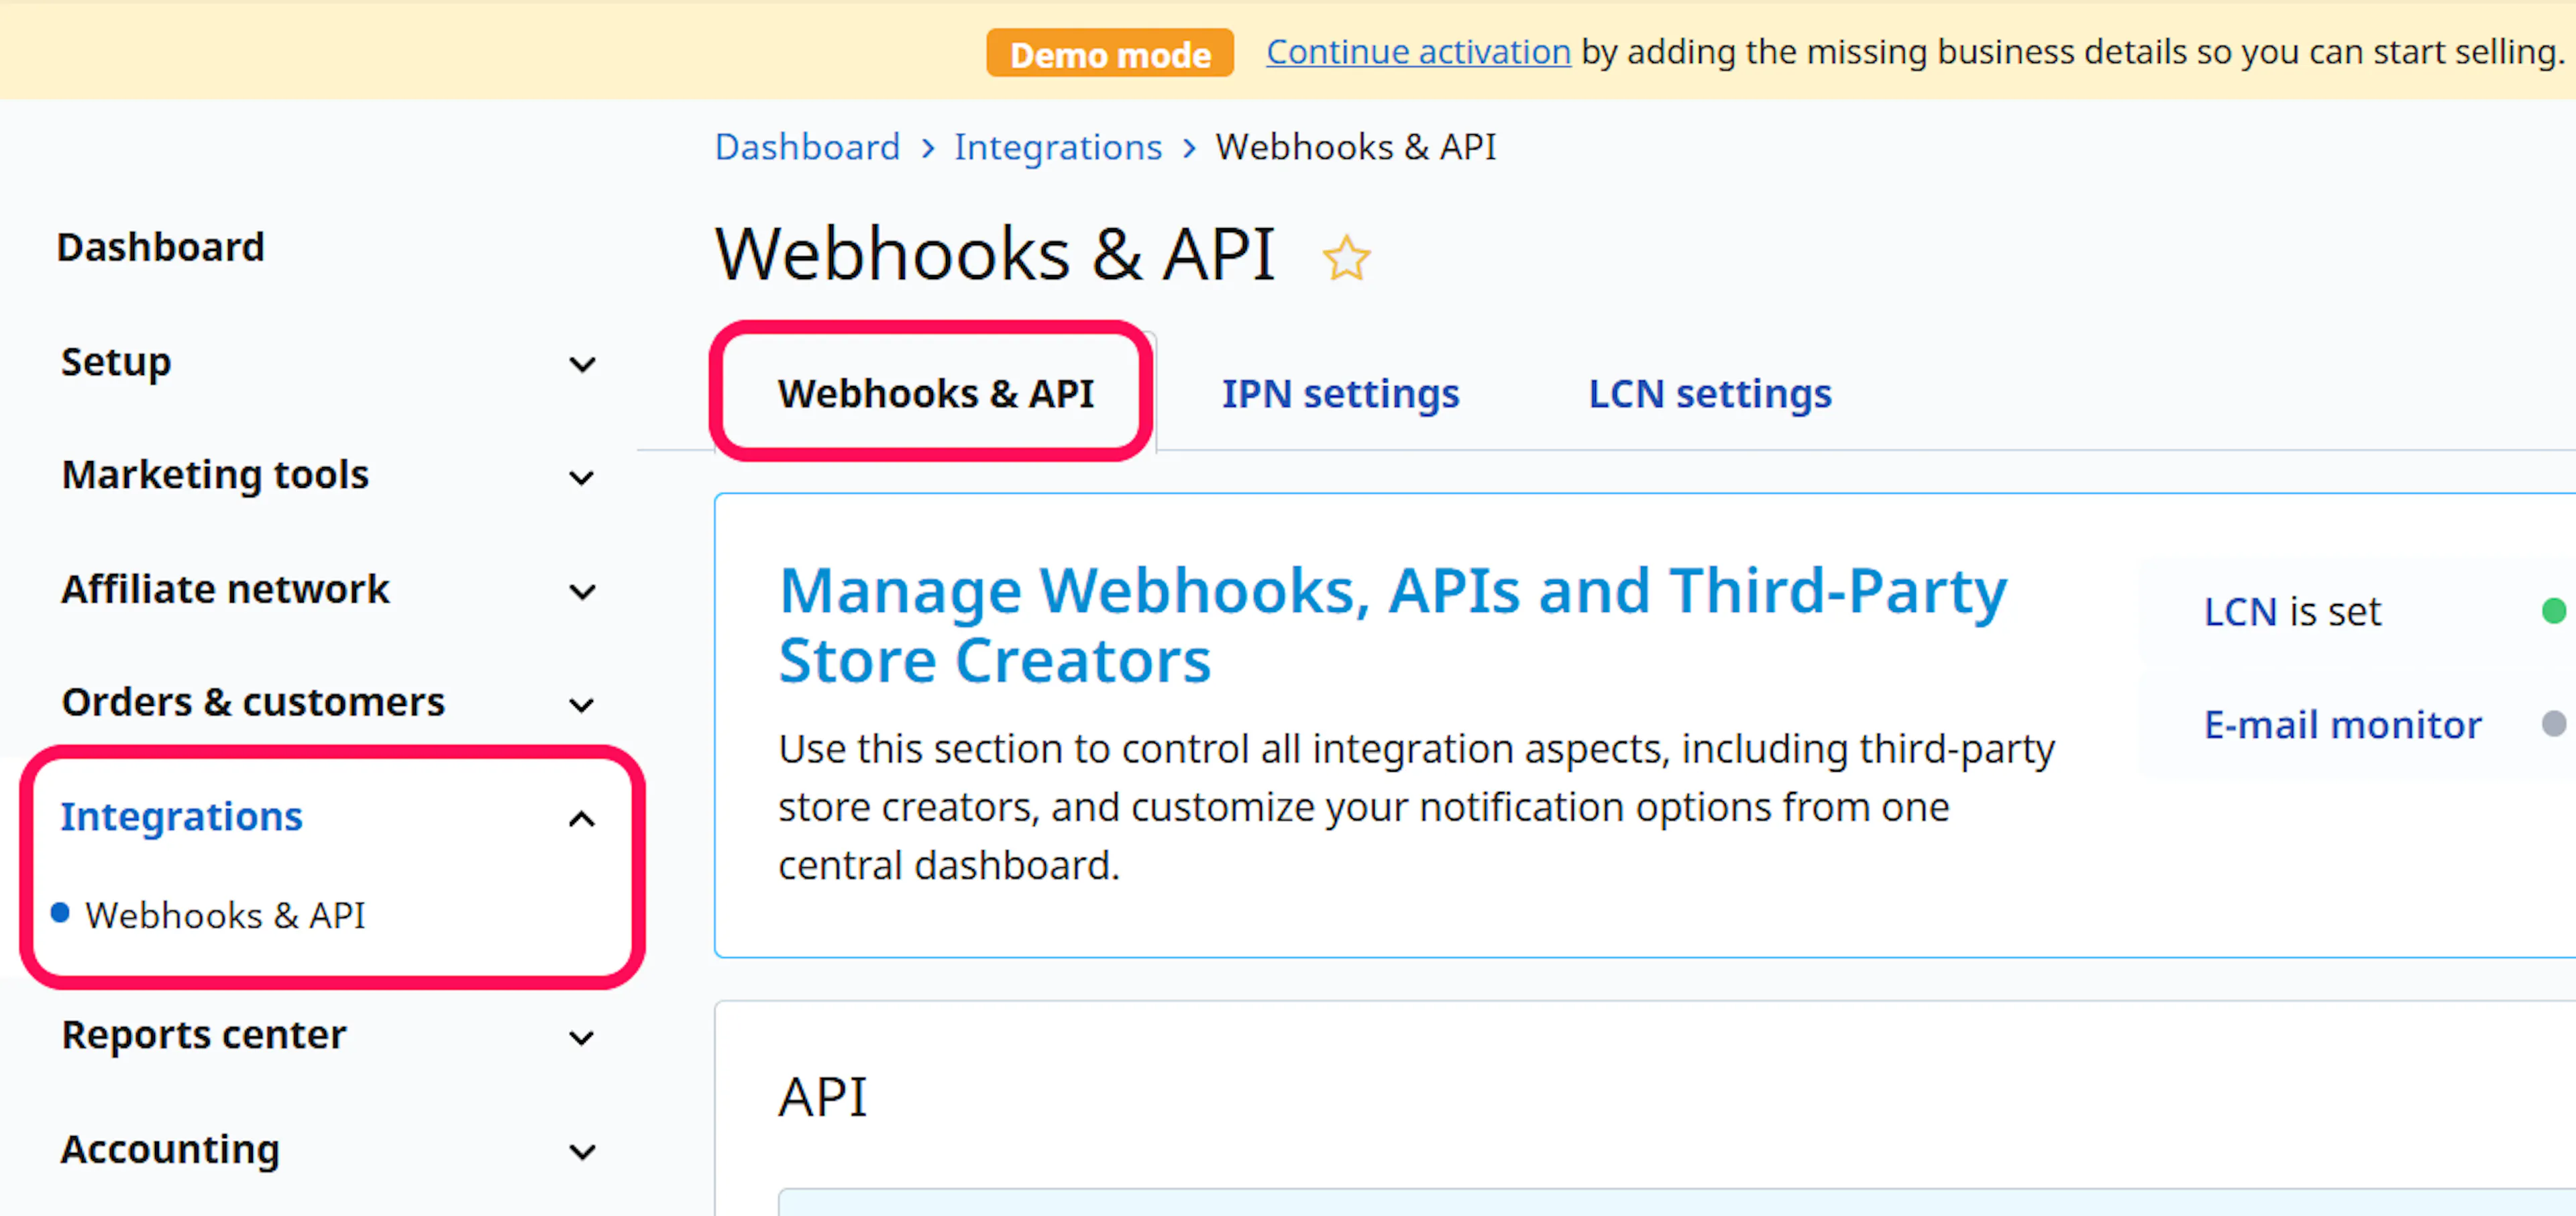
Open Webhooks & API
Go to Integrations → Webhooks & API.
Copy your credentials
Copy your Merchant Code, Secret Key and Buy-link Secret Word.
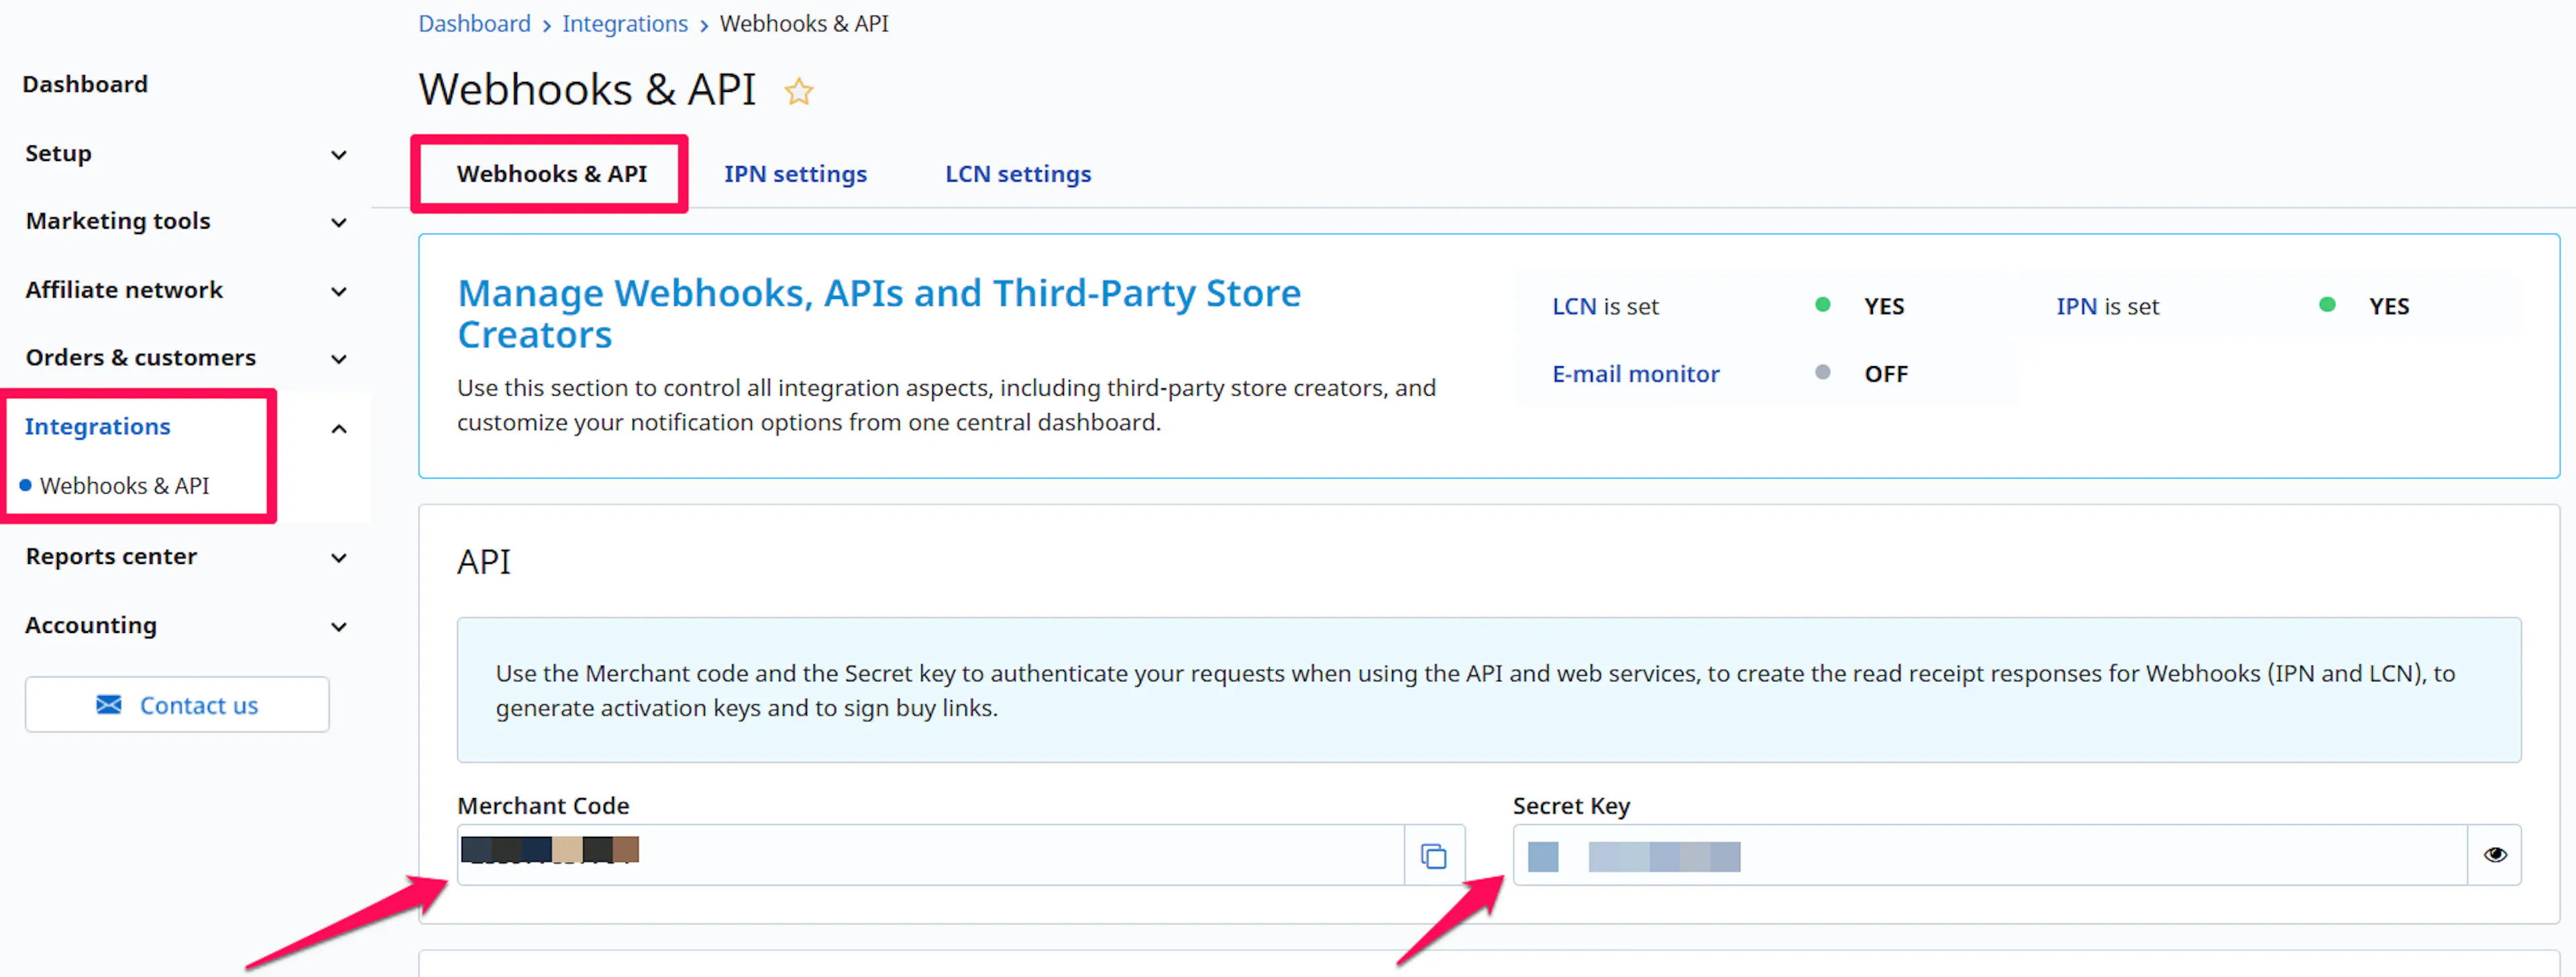
Keep your Secret Key and Buy-link Secret Word private. The Secret Key is how PayLexer checks that notifications genuinely came from 2Checkout, and the Buy-link Secret Word signs every checkout link so nobody can change the price.
Adding Credentials to PayLexer
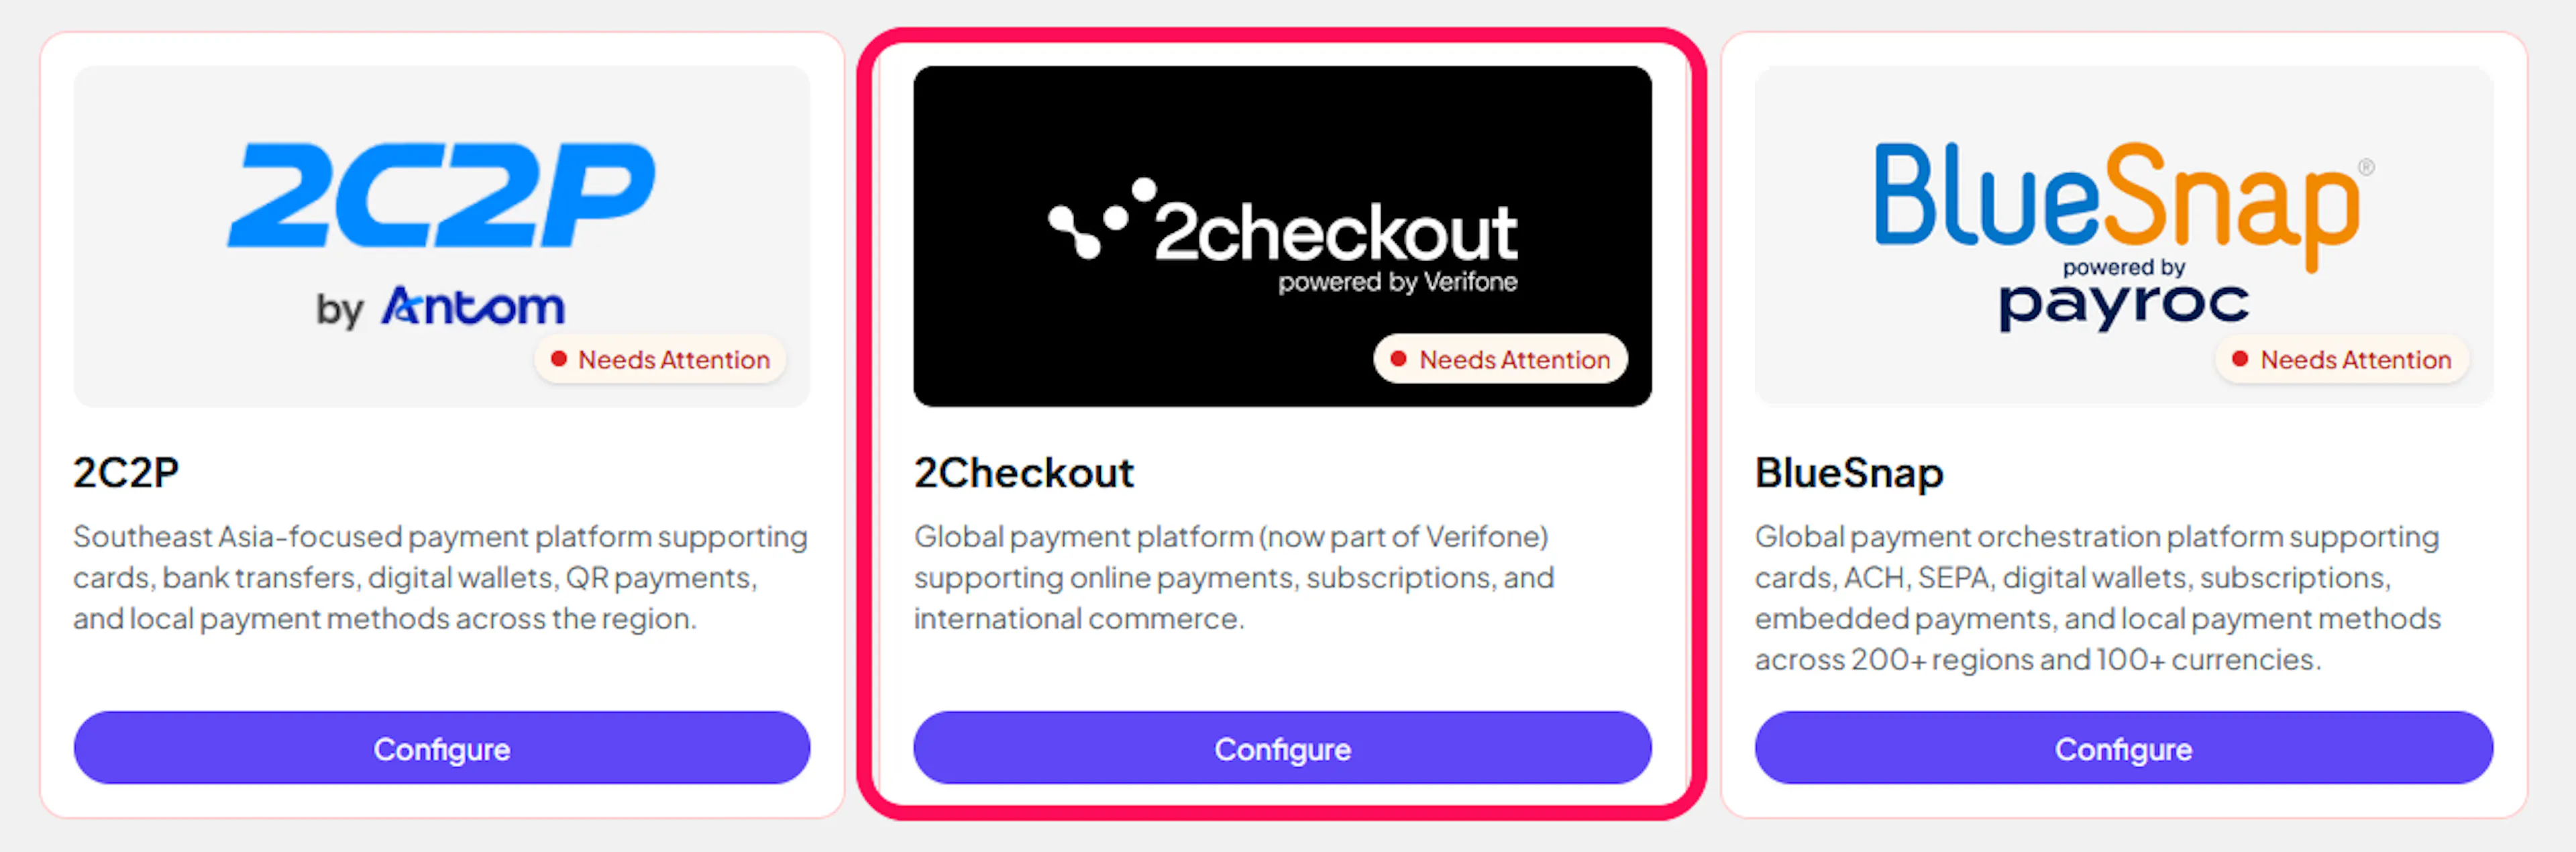
Open PayLexer Dashboard
Log in to your PayLexer dashboard and go to Payment Gateways, find 2Checkout and click Configure.
Enter your credentials
Paste the Merchant Code, Secret Key and Buy-link Secret Word you copied from 2Checkout into the corresponding fields.
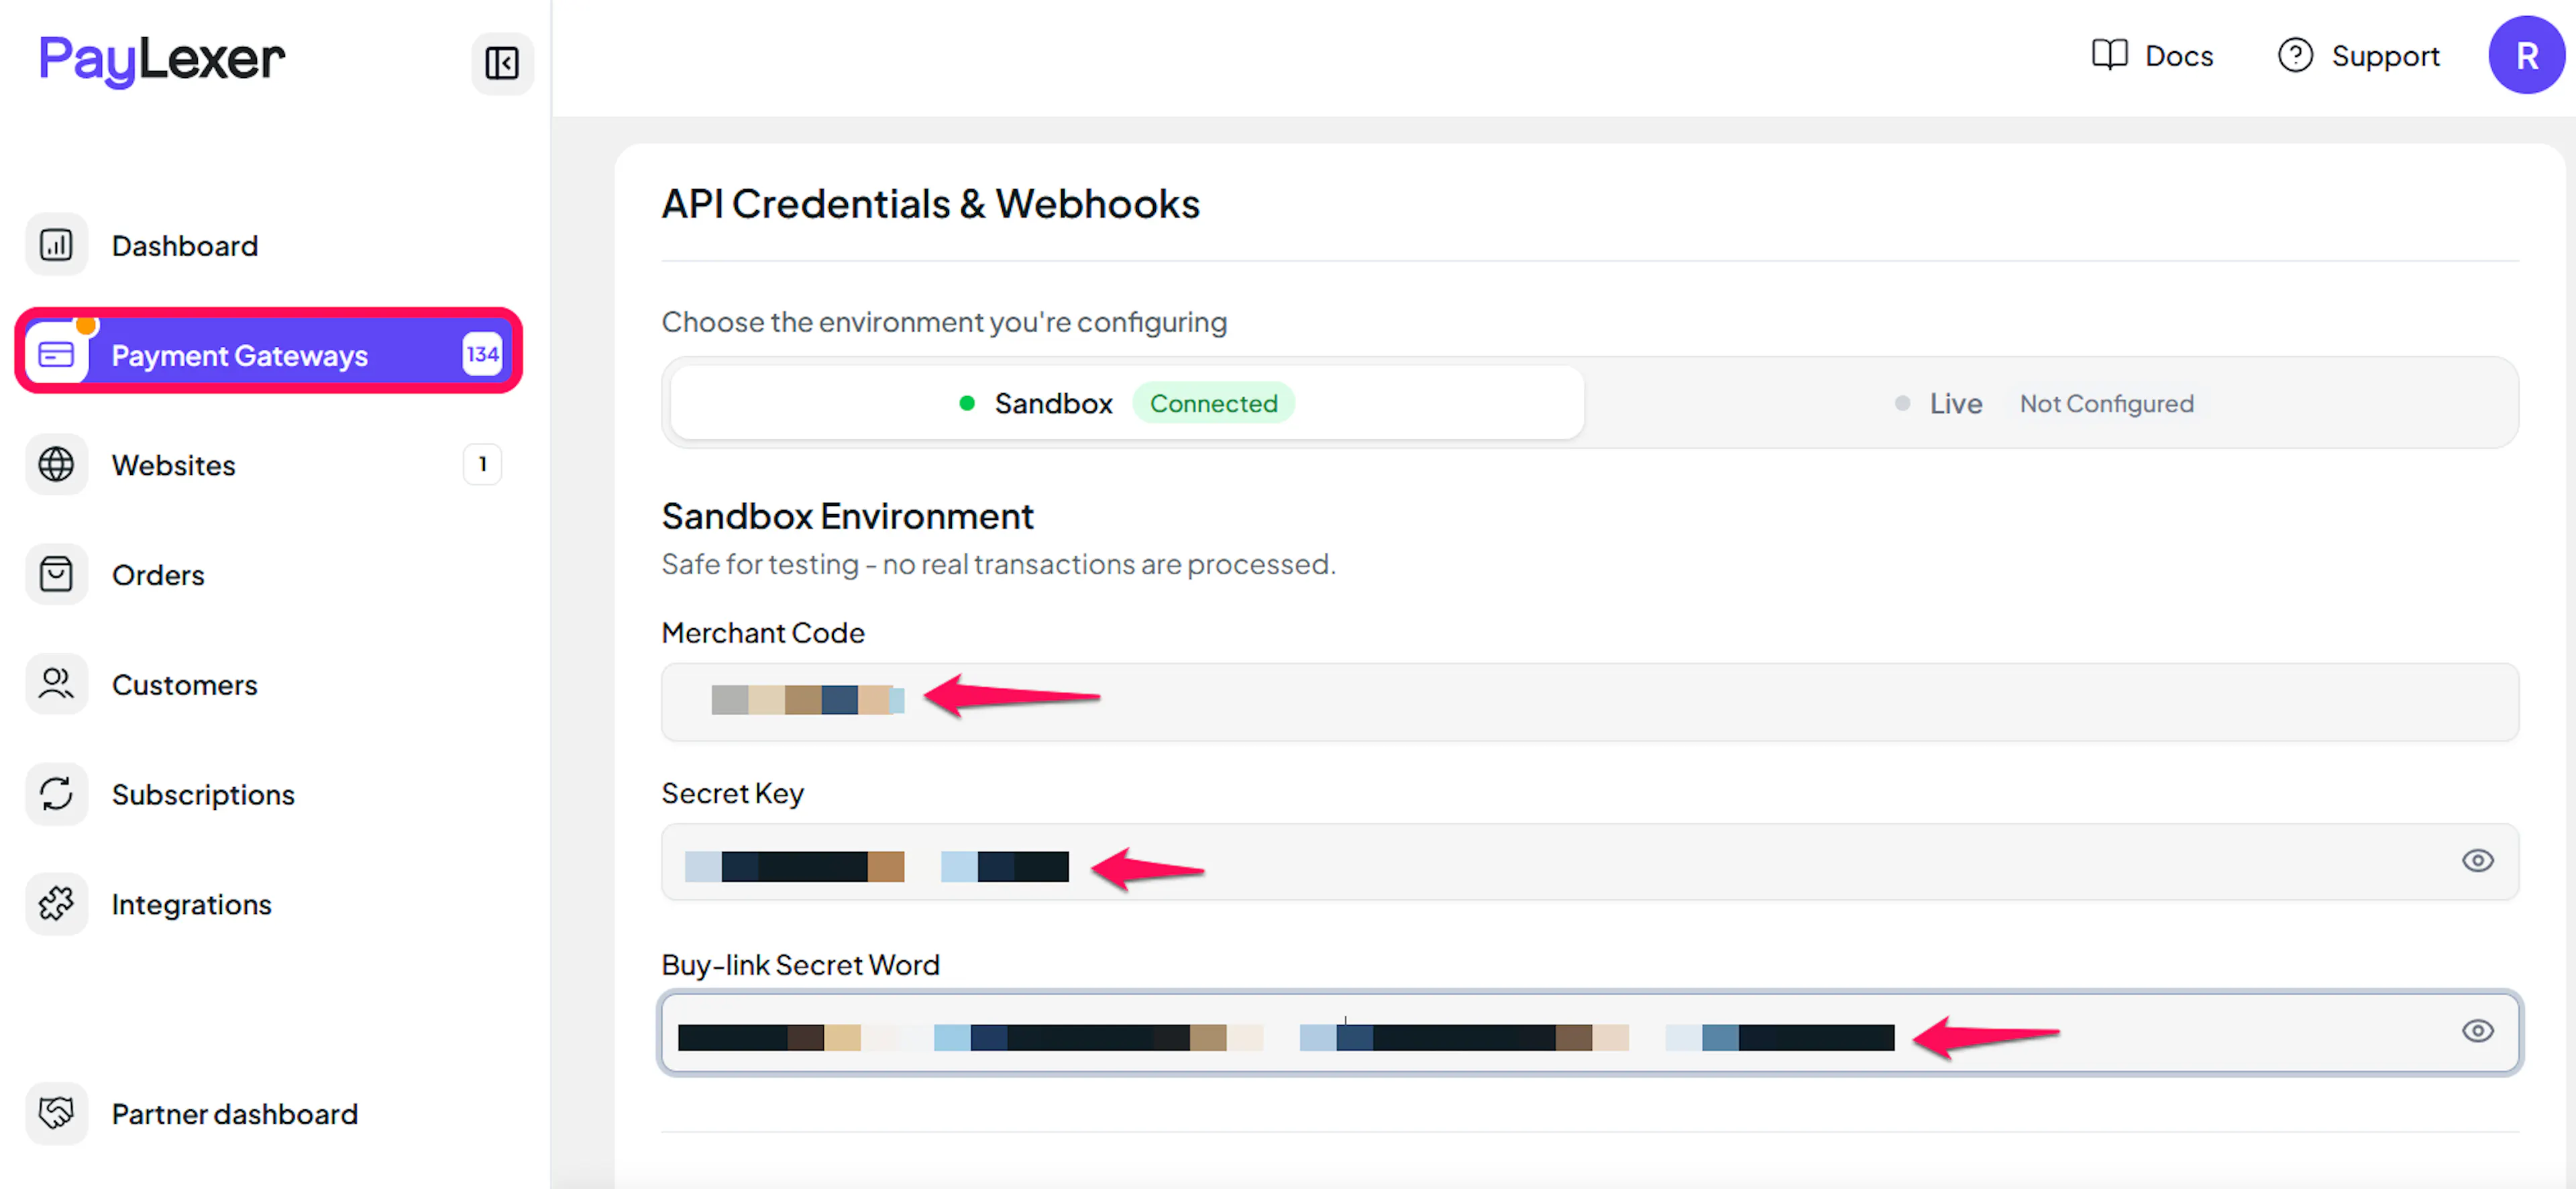
Understanding Live/Production and Sandbox Settings:
| Environment | Purpose |
|---|---|
| Live / Production | Used for real transactions. |
| Test / Sandbox | Used for testing only. No real money is processed. |
How PayLexer selects credentials:
- Debug/Test mode ON → Test credentials are used
- Debug/Test mode OFF → Live credentials are used
Verify and save
Click Verify Connection to check your credentials with 2Checkout, then click Save Changes.
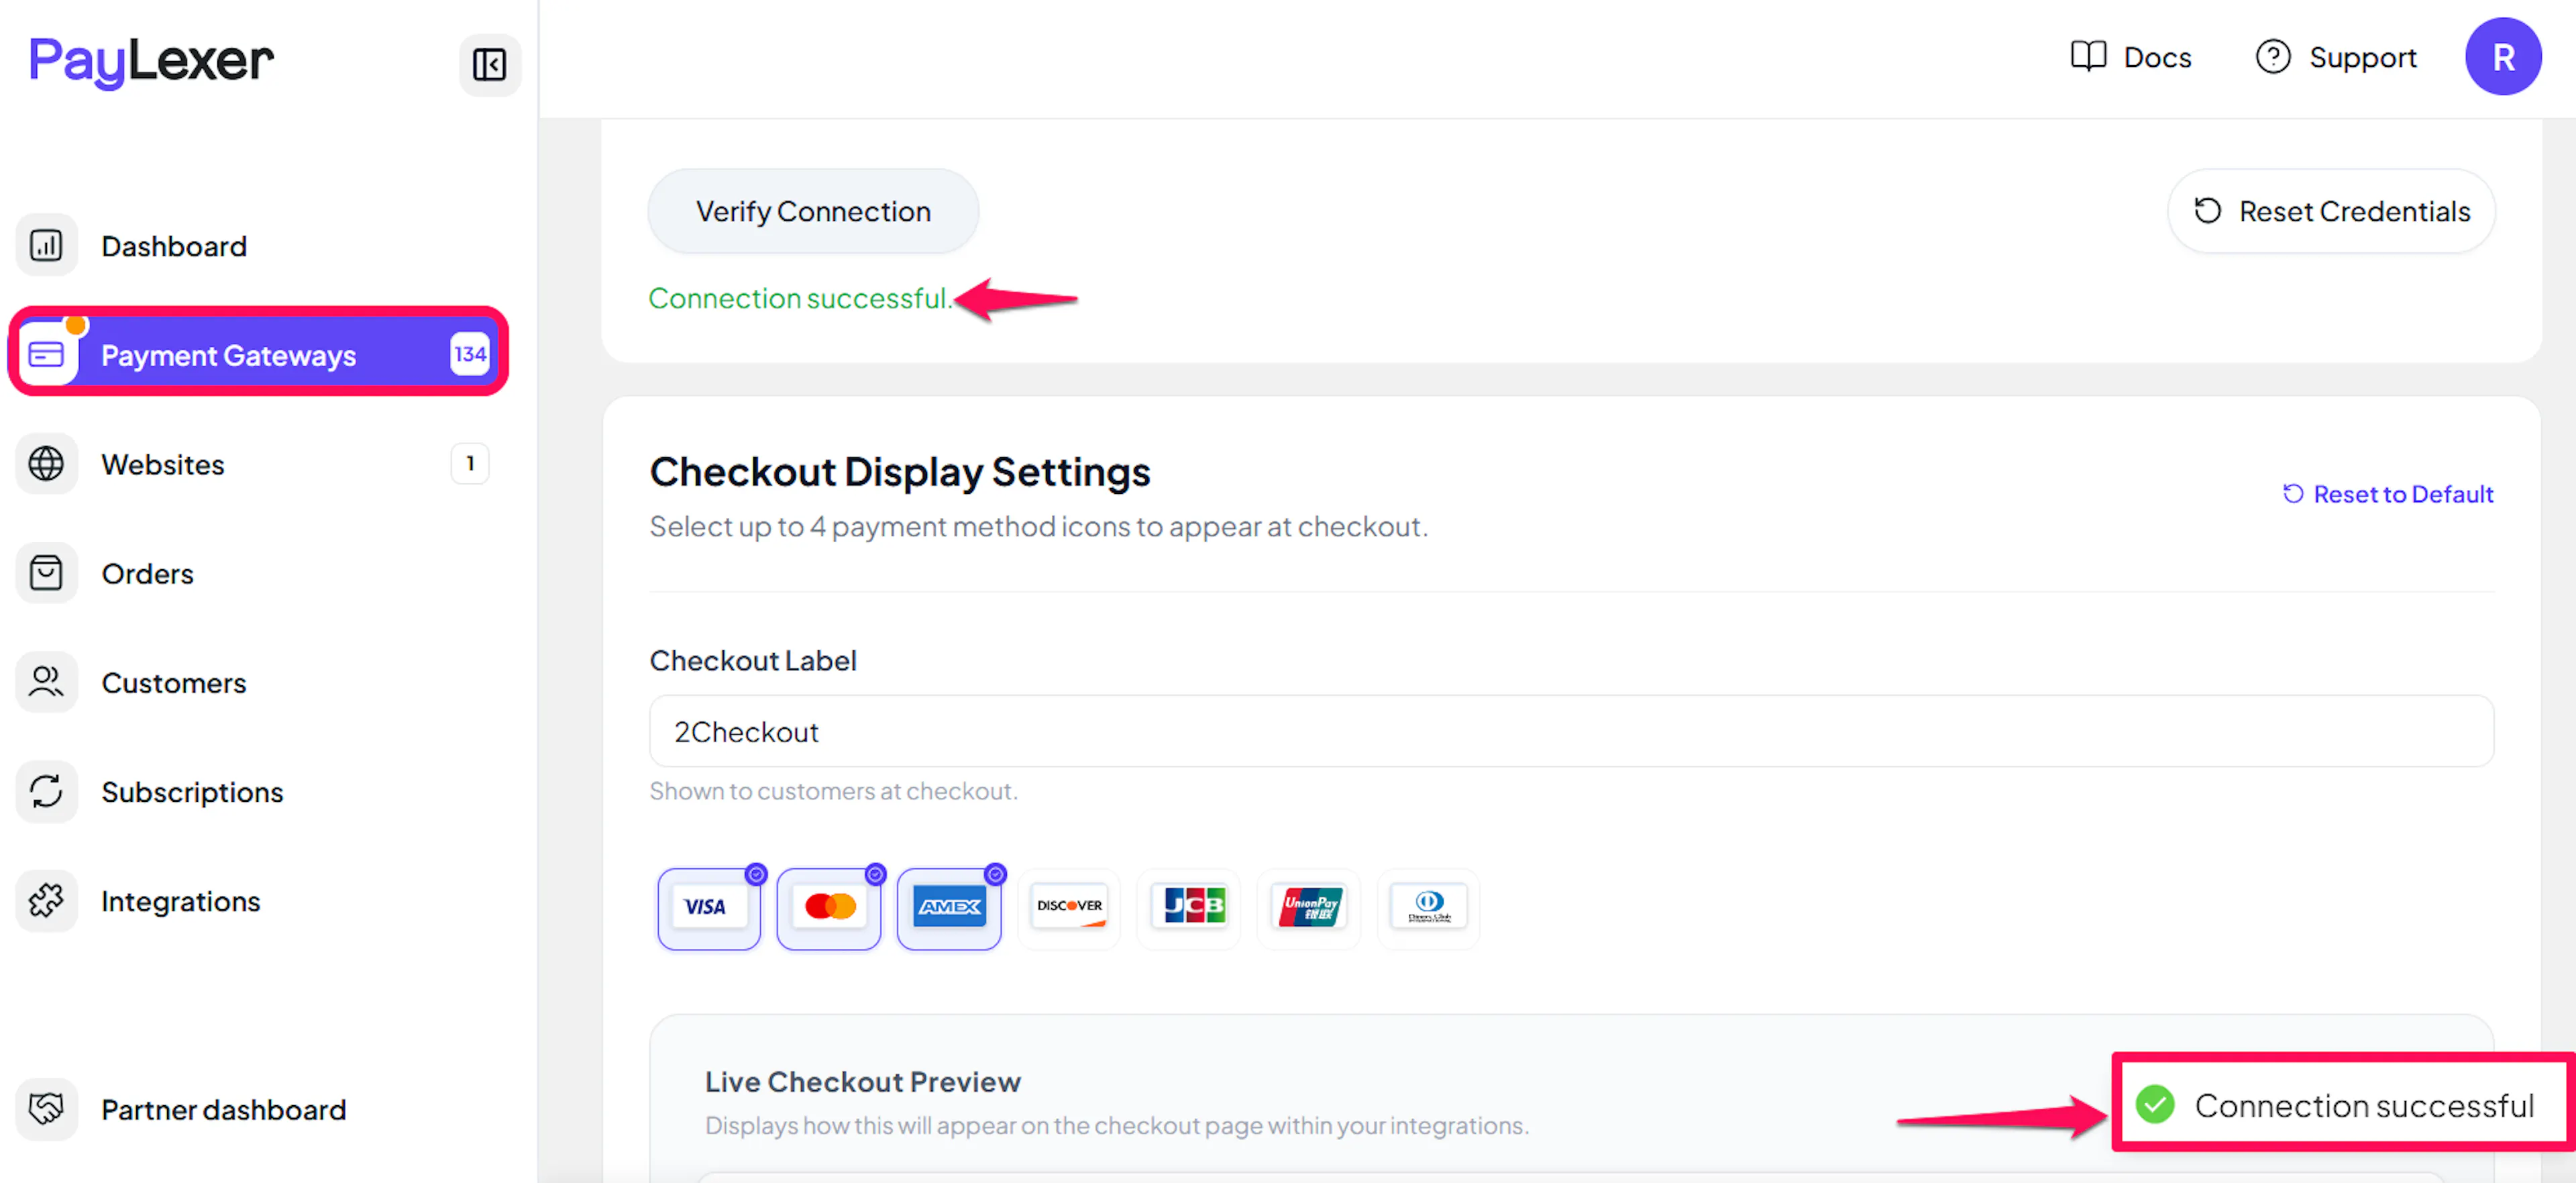
Verify Connection checks your Merchant Code and Secret Key. It cannot check the Buy-link Secret Word: if that one is wrong, 2Checkout refuses the checkout link when a shopper tries to pay.
Configuring Webhooks (Mandatory)
Webhooks enable real-time payment updates and significantly improve reliability.
Benefits of Webhooks:
- Instant payment status updates
- Automatic refund processing
- Subscription renewals, failed renewals and cancellations reflected in PayLexer
- Orders complete even if the shopper closes the browser before returning to your store
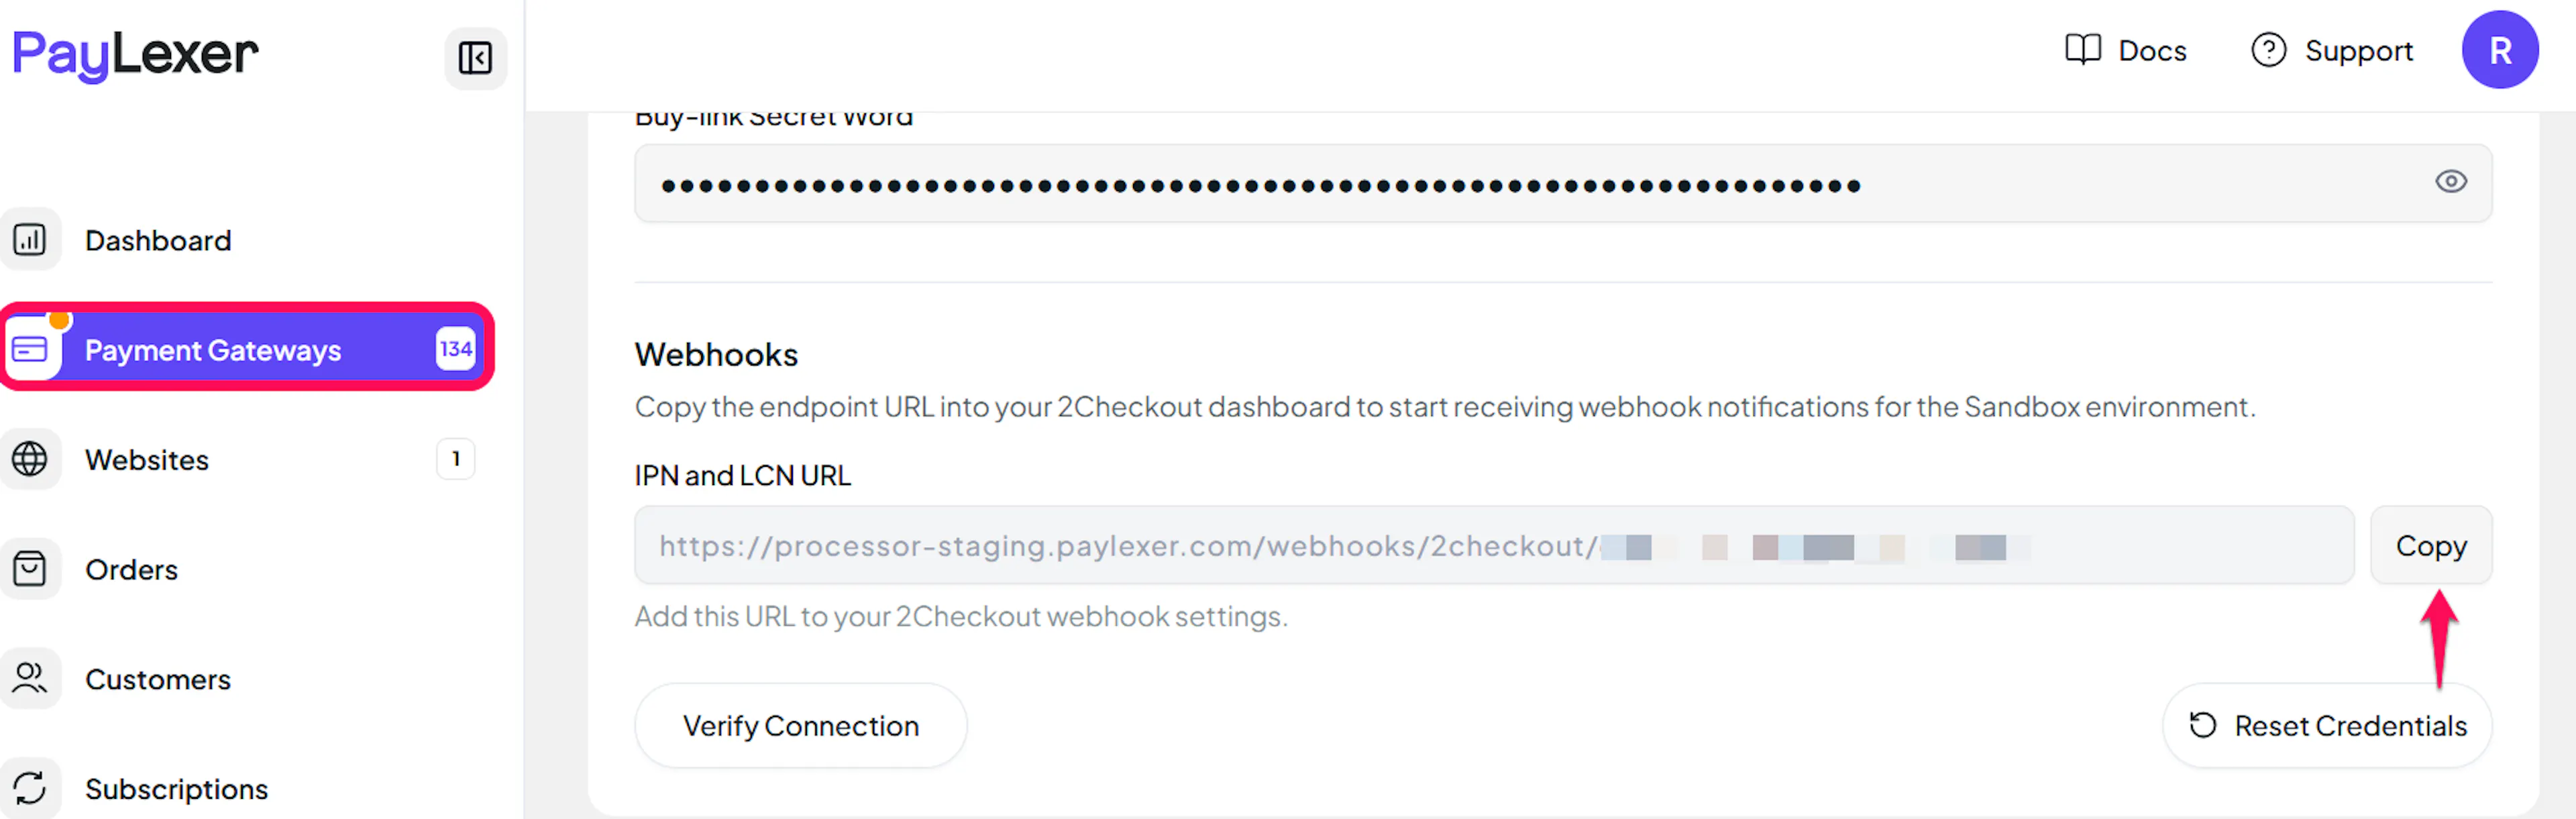
2Checkout sends two kinds of notifications: IPN (order notifications, for payments, refunds and renewals) and LCN (subscription notifications, for expiries and cancellations). Both go to the same PayLexer address and are checked with your Secret Key, so there is no separate webhook secret to enter.
Copy the IPN and LCN URL from PayLexer
On the 2Checkout configuration page in PayLexer, find the Webhooks section and click Copy next to IPN and LCN URL.
Add the IPN URL in 2Checkout
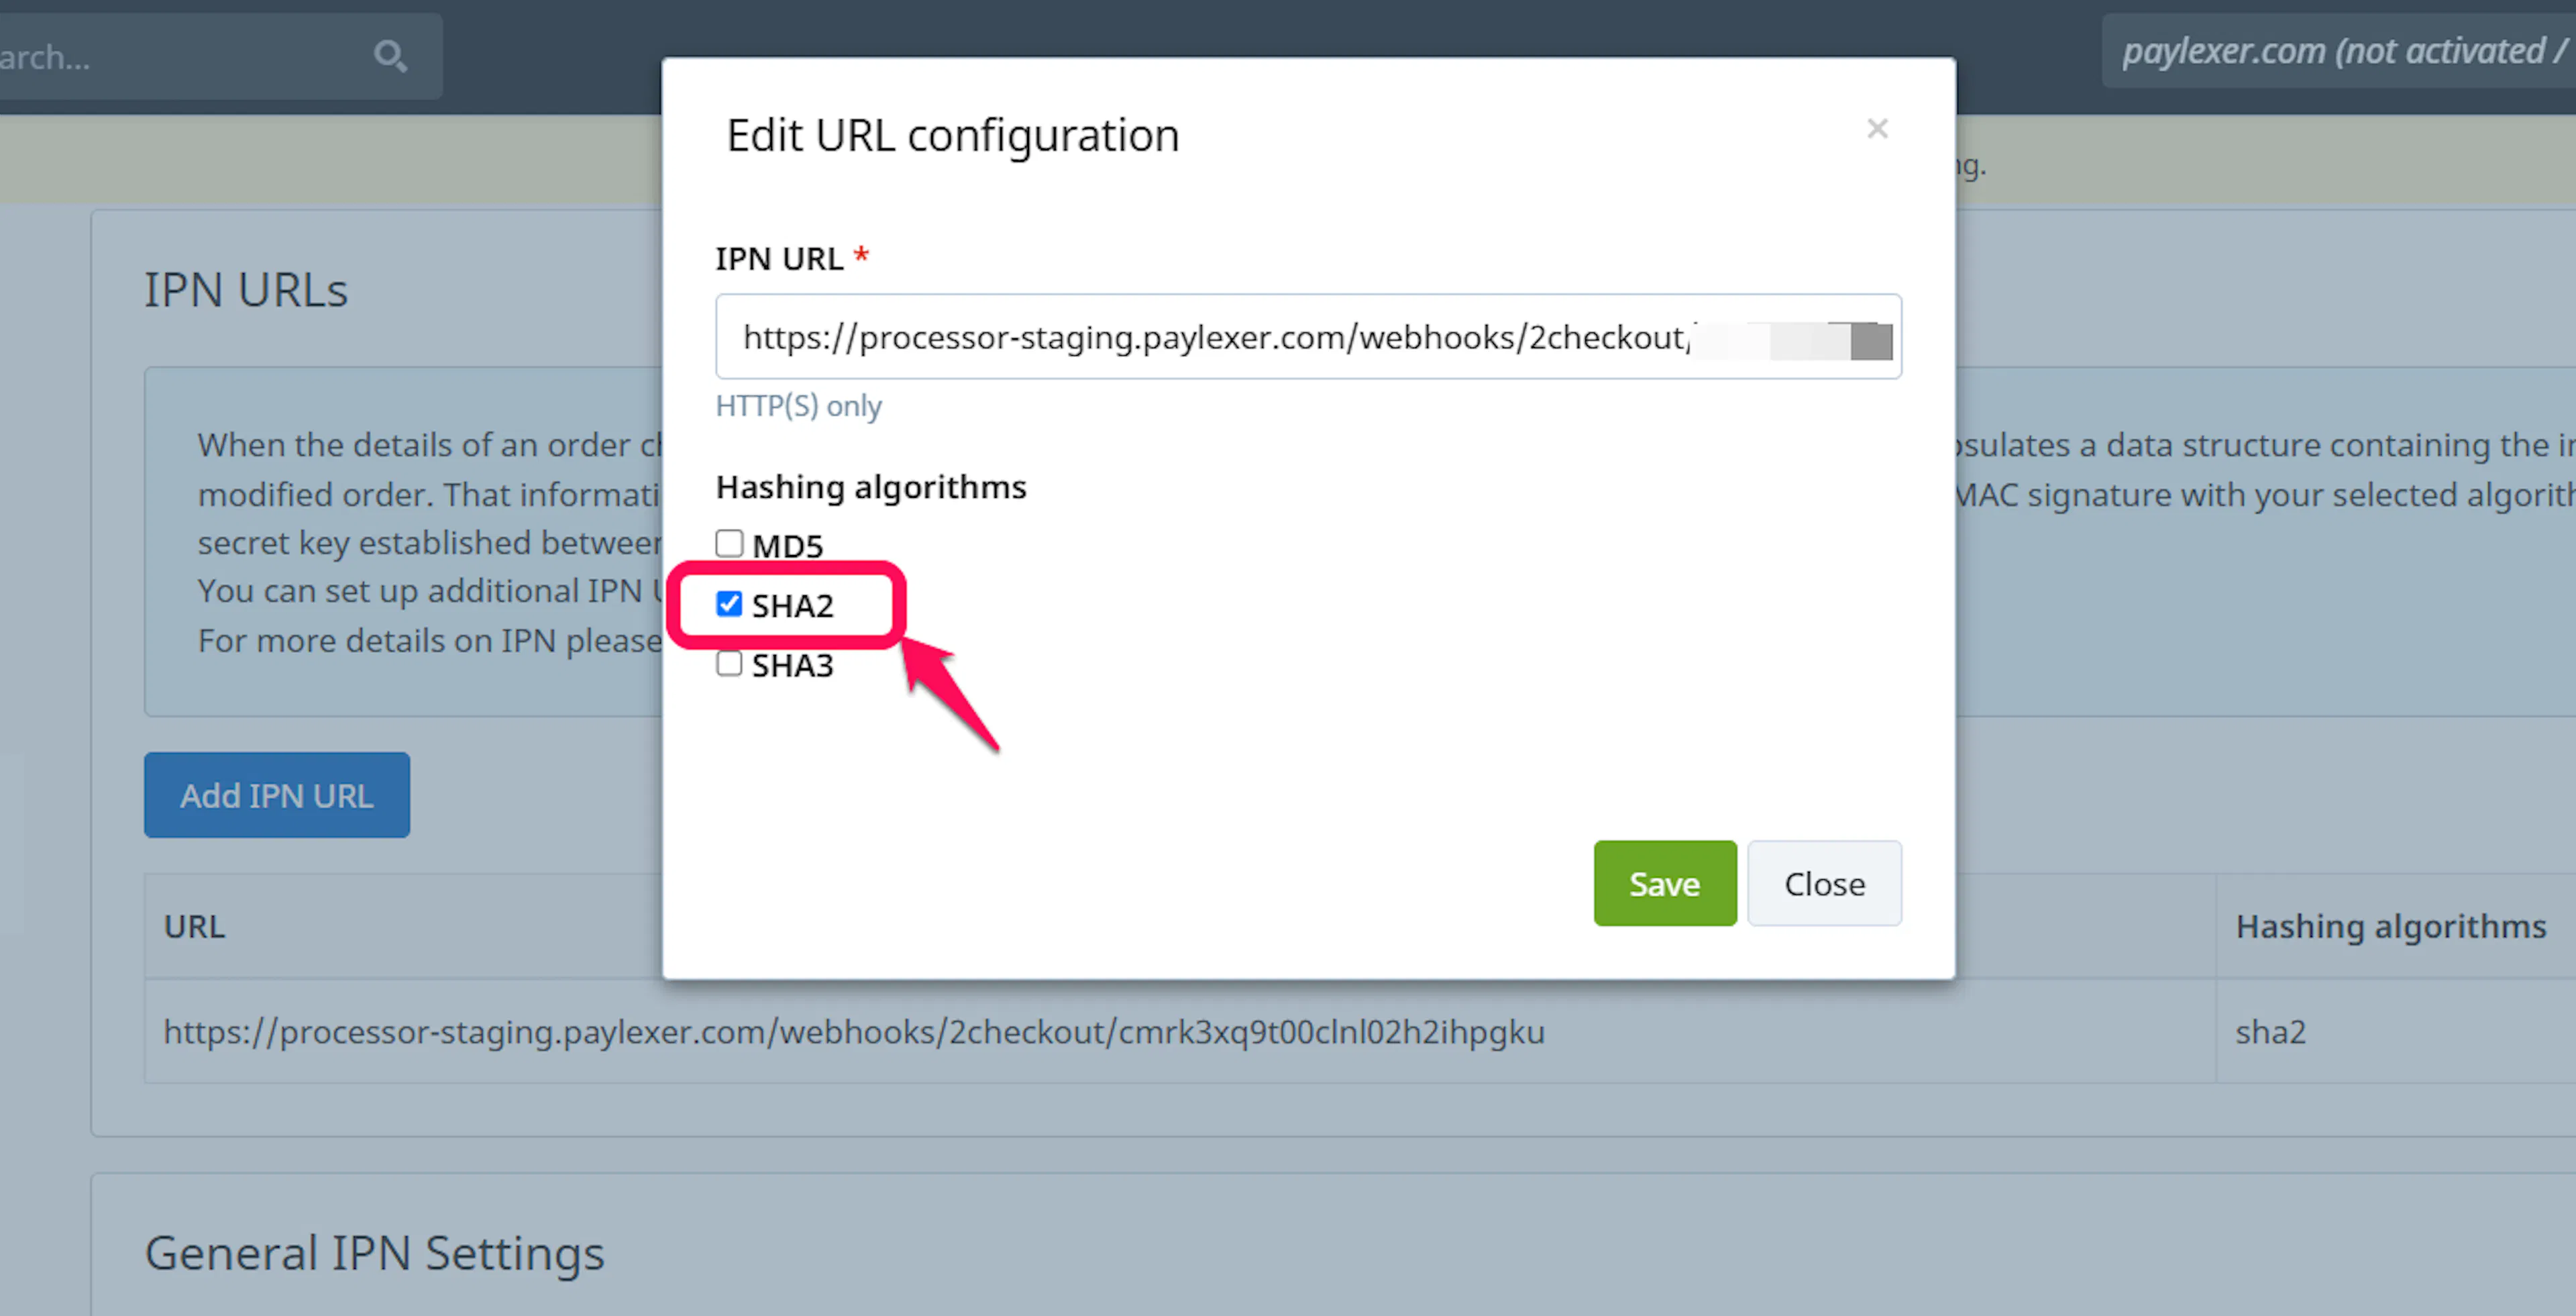
In the 2Checkout Merchant Control Panel, go to Integrations → Webhooks & API and open the IPN Settings tab. Add the URL you copied, select SHA2 as the hashing algorithm, and save.
Add the LCN URL in 2Checkout
On the same page, open the LCN Settings tab, add the URL you copied, and save.

Integrate 2Checkout to Your Website
If you have already added and configured your site, you can enable 2Checkout in your existing setup.
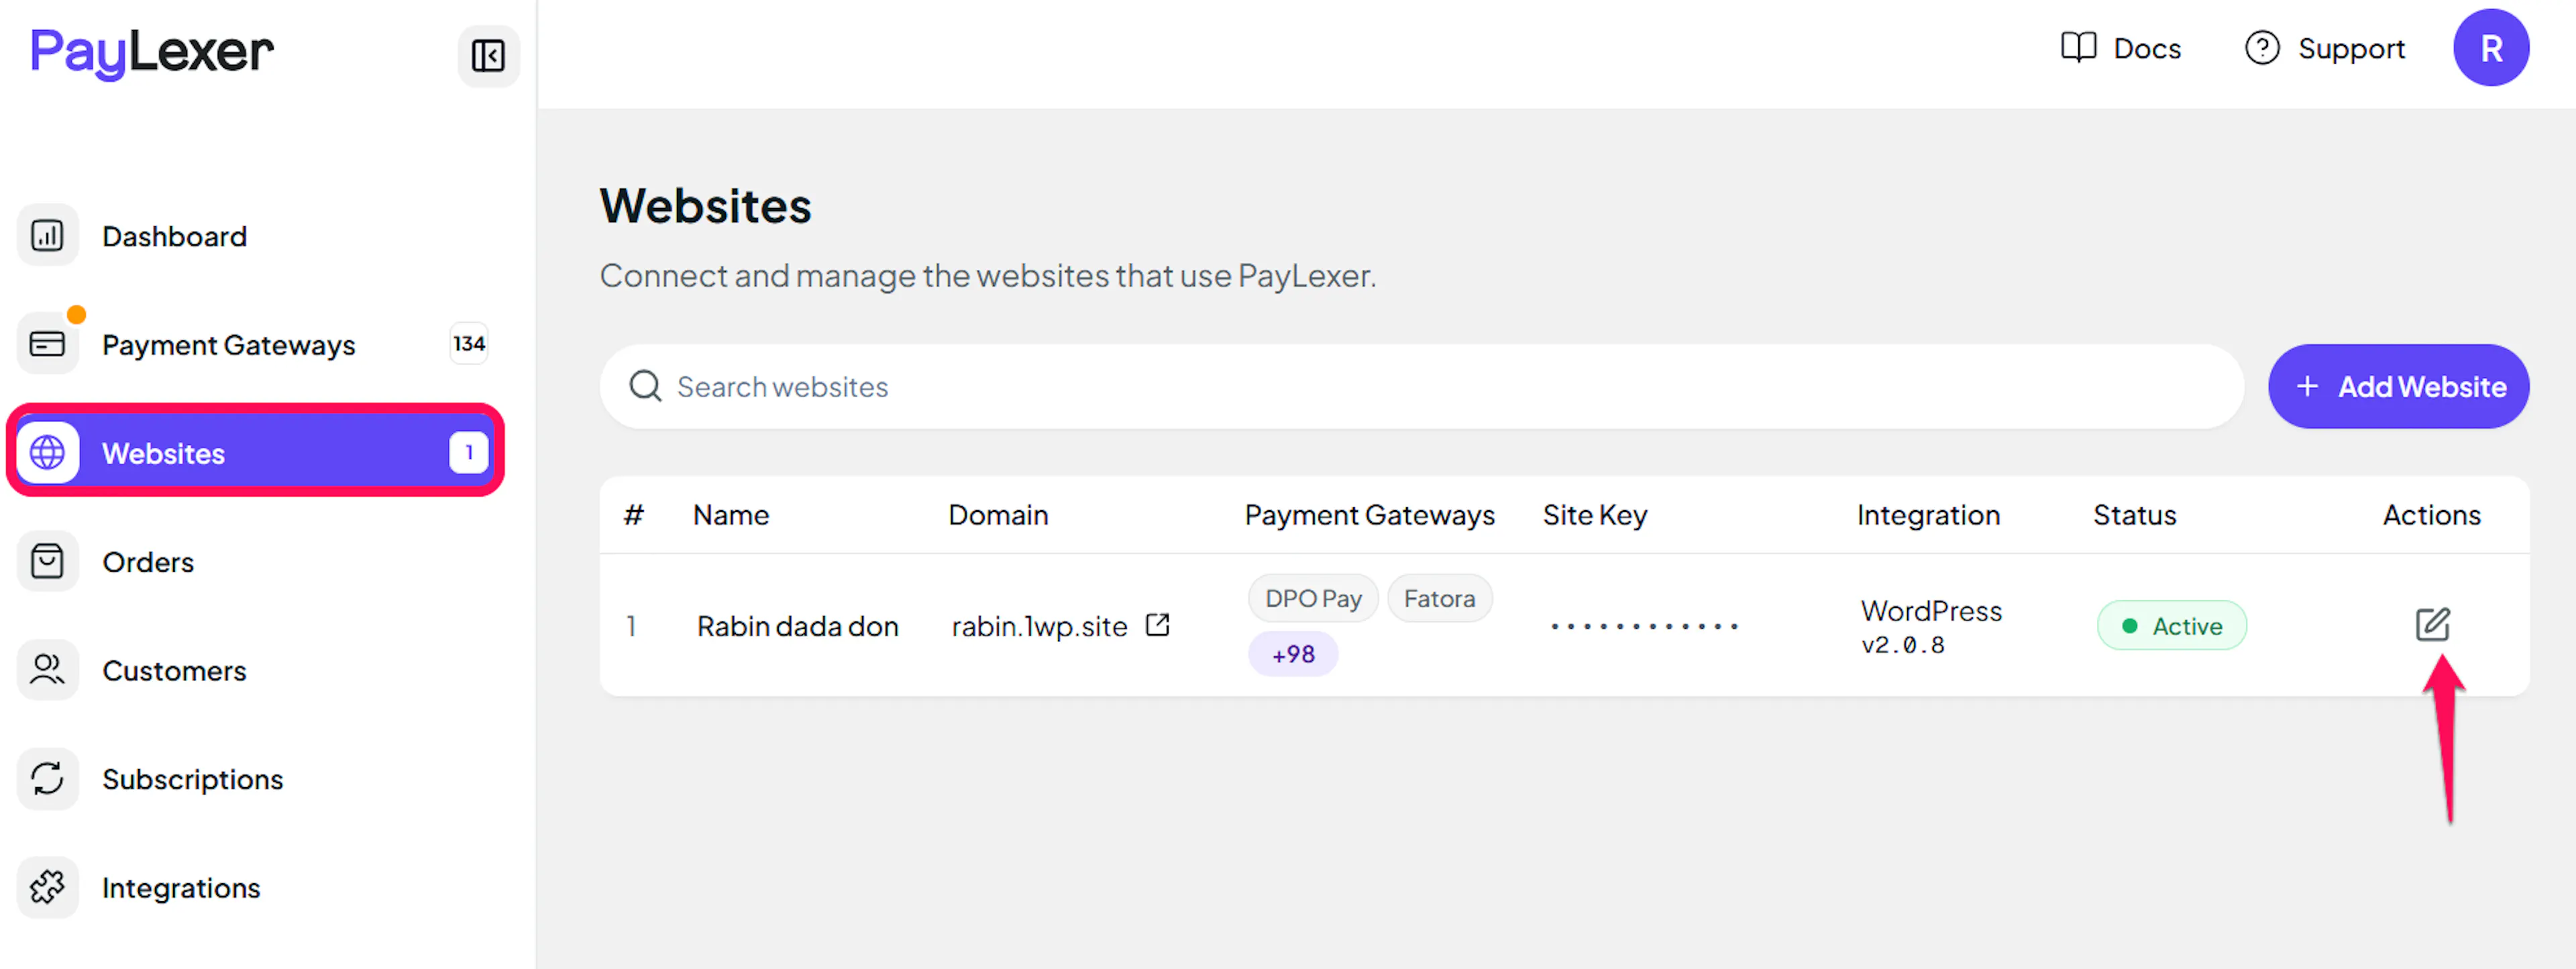
Go to Websites
Navigate to Websites in your PayLexer dashboard.
Open your website
In your website's row, click the Edit icon (pencil) in the Actions column to open its page.
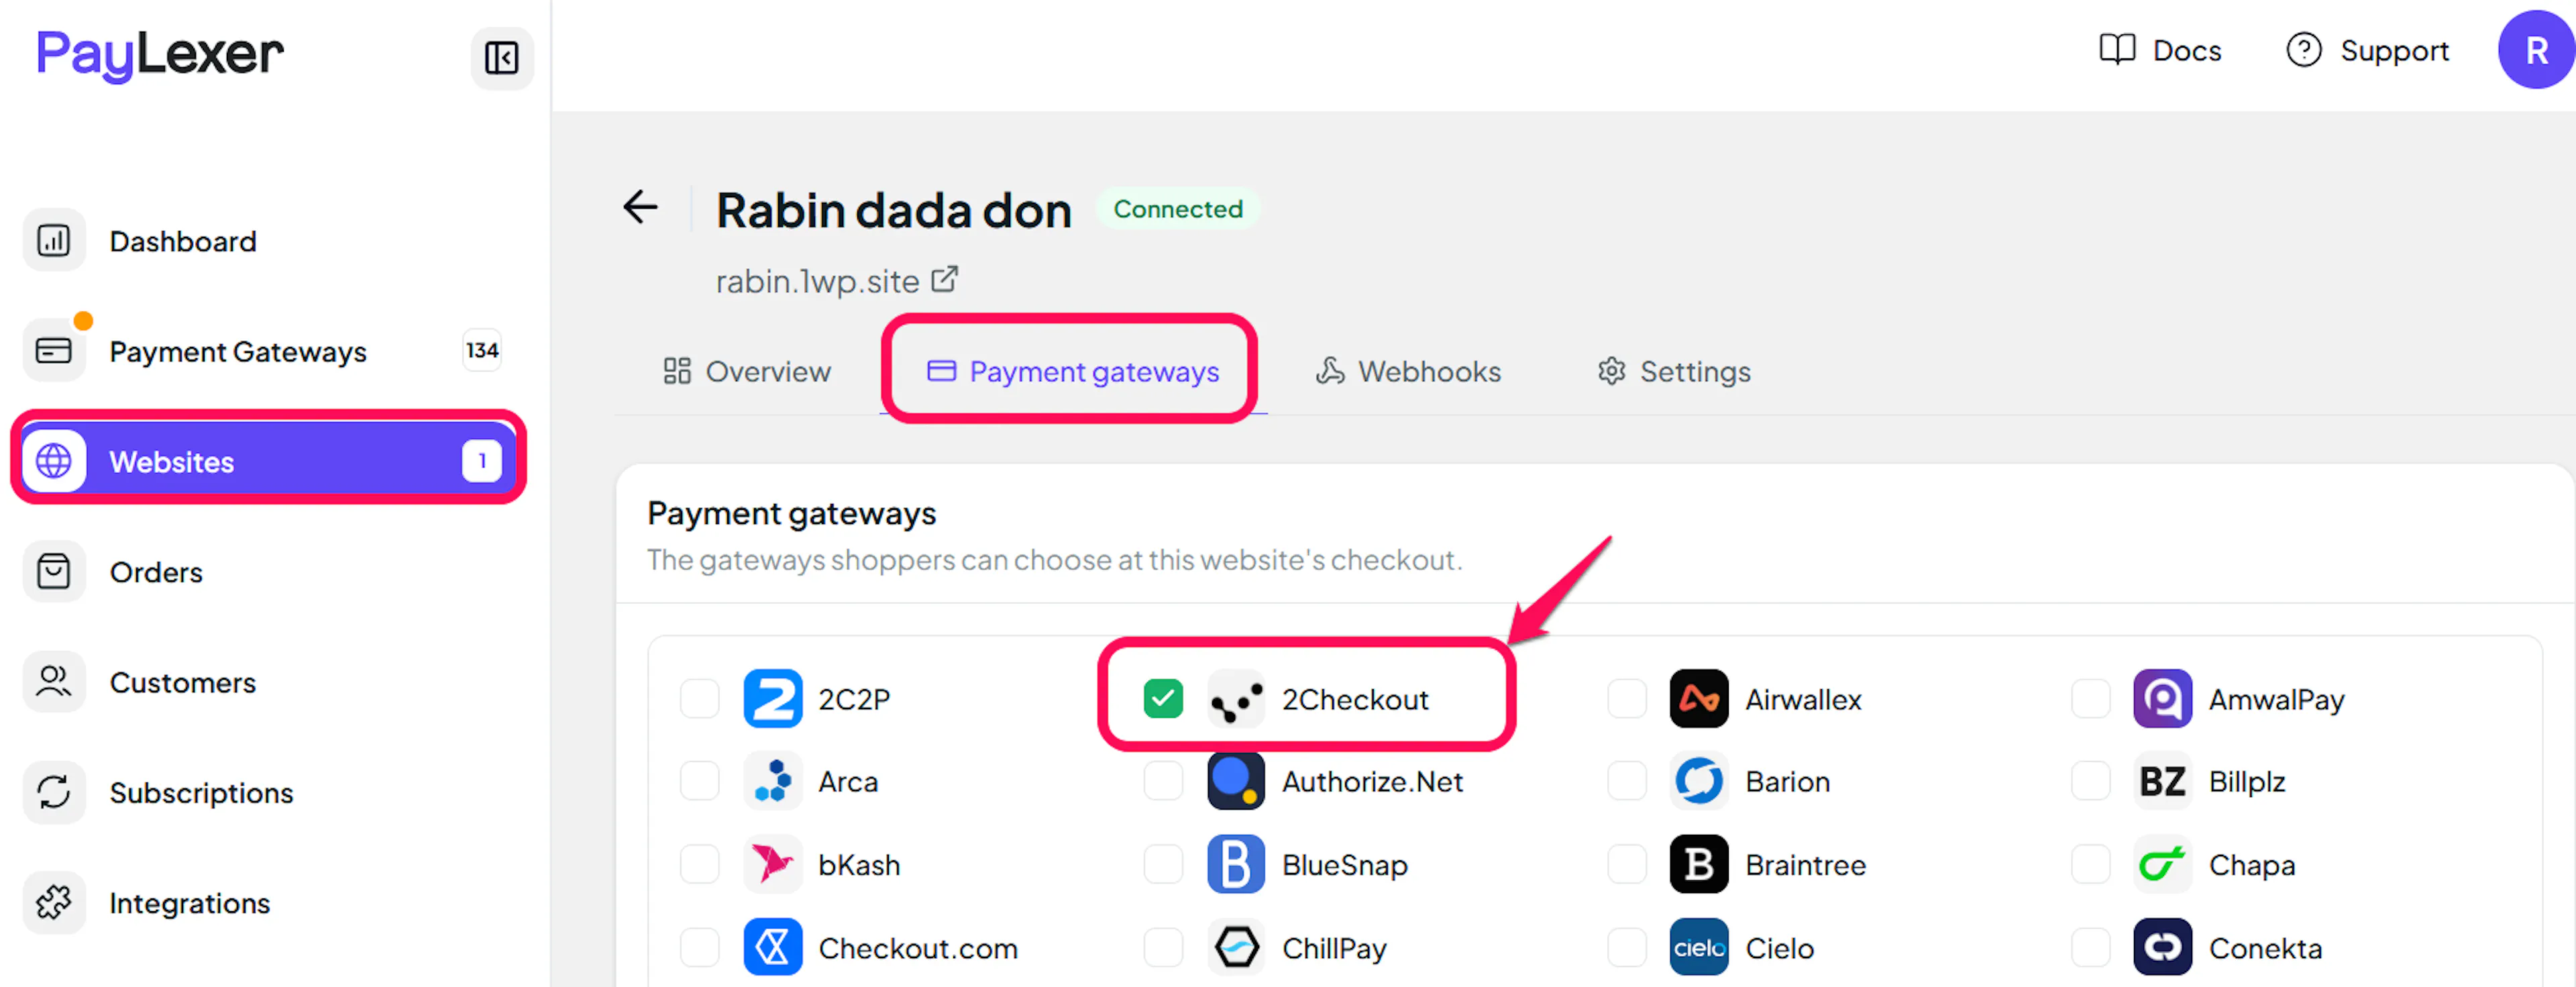
Enable 2Checkout
Open the Payment gateways tab, tick the checkbox for 2Checkout, then click Save gateways.
If you haven't added a website yet, Continue to Add Your Website →
Troubleshooting
Best Practices
- Test in sandbox before enabling production: with Debug/Test mode ON, place test orders using 2Checkout's test card details
- Set up both the IPN and the LCN URL before taking payments, so payments, refunds and subscription changes all reach PayLexer
- Complete 2Checkout's account activation before you switch Debug/Test mode OFF
- Keep your Secret Key and Buy-link Secret Word private, and update them in PayLexer if you regenerate them in 2Checkout
- Reconcile your PayLexer orders against the 2Checkout Merchant Control Panel periodically
FAQs
Still Have Questions?
- 2Checkout Support: Contact Support
- 2Checkout Help & FAQs: 2Checkout Help & FAQs
- PayLexer Support: Contact Support