

WooshPay
Connect WooshPay to PayLexer to accept cards, UPI, EasyPaisa, JazzCash, Google Pay and Apple Pay on your website.
WooshPay is a global payment platform that gives merchants one account for cards, e-wallets, bank transfers and QR payments, with local payment methods across South Asia. Through a single integration, WooshPay lets you accept the methods shoppers in the region actually use, including UPI in India and EasyPaisa and JazzCash in Pakistan, alongside cards, Google Pay and Apple Pay.
Customers complete payment on WooshPay's own hosted page, so card details never touch your website.
- Supported Regions (Merchant Accounts): Global - view full list
- Supported Currencies: INR, PKR, BDT, NPR, LKR, USD
WooshPay shows payment methods based on the order currency and what WooshPay has enabled on your account. For example, UPI is available only for INR orders, and EasyPaisa and JazzCash are offered for PKR orders.
Supported Features
- Hosted checkout that redirects shoppers to WooshPay's secure payment page
- Local and international card payments
- UPI payments for INR orders
- EasyPaisa and JazzCash wallets for PKR orders
- Google Pay and Apple Pay
- Full and partial refunds on card payments. Refund support for other methods depends on WooshPay
- Real-time webhook notifications for payments and refunds, secured with HMAC-SHA256 signatures
- Automatic recording of refunds issued directly inside the WooshPay dashboard
- Separate test and live credentials for safe testing
WooshPay does not support subscriptions or recurring billing in PayLexer yet. Only one-time payments are available.
Before You Start
Make sure you have:
- WooshPay Account – Don't have one? Sign up for WooshPay →
- PayLexer Account – Required to configure the integration. Create your account →
- A website where you want to integrate
Looking for a different payment processor? View all supported gateways →
Configuring WooshPay
You need a Secret Key and a Webhook Signing Secret from WooshPay for this integration.
Getting API Credentials
Log in to WooshPay
Sign in to your WooshPay dashboard.
Open the Developers page
Open the Developers tab, then the API keys tab. You will see a Publishable key and a Secret key.
WooshPay issues a different secret key for each environment. Test keys start with sk_test_ and live keys start with sk_live_.

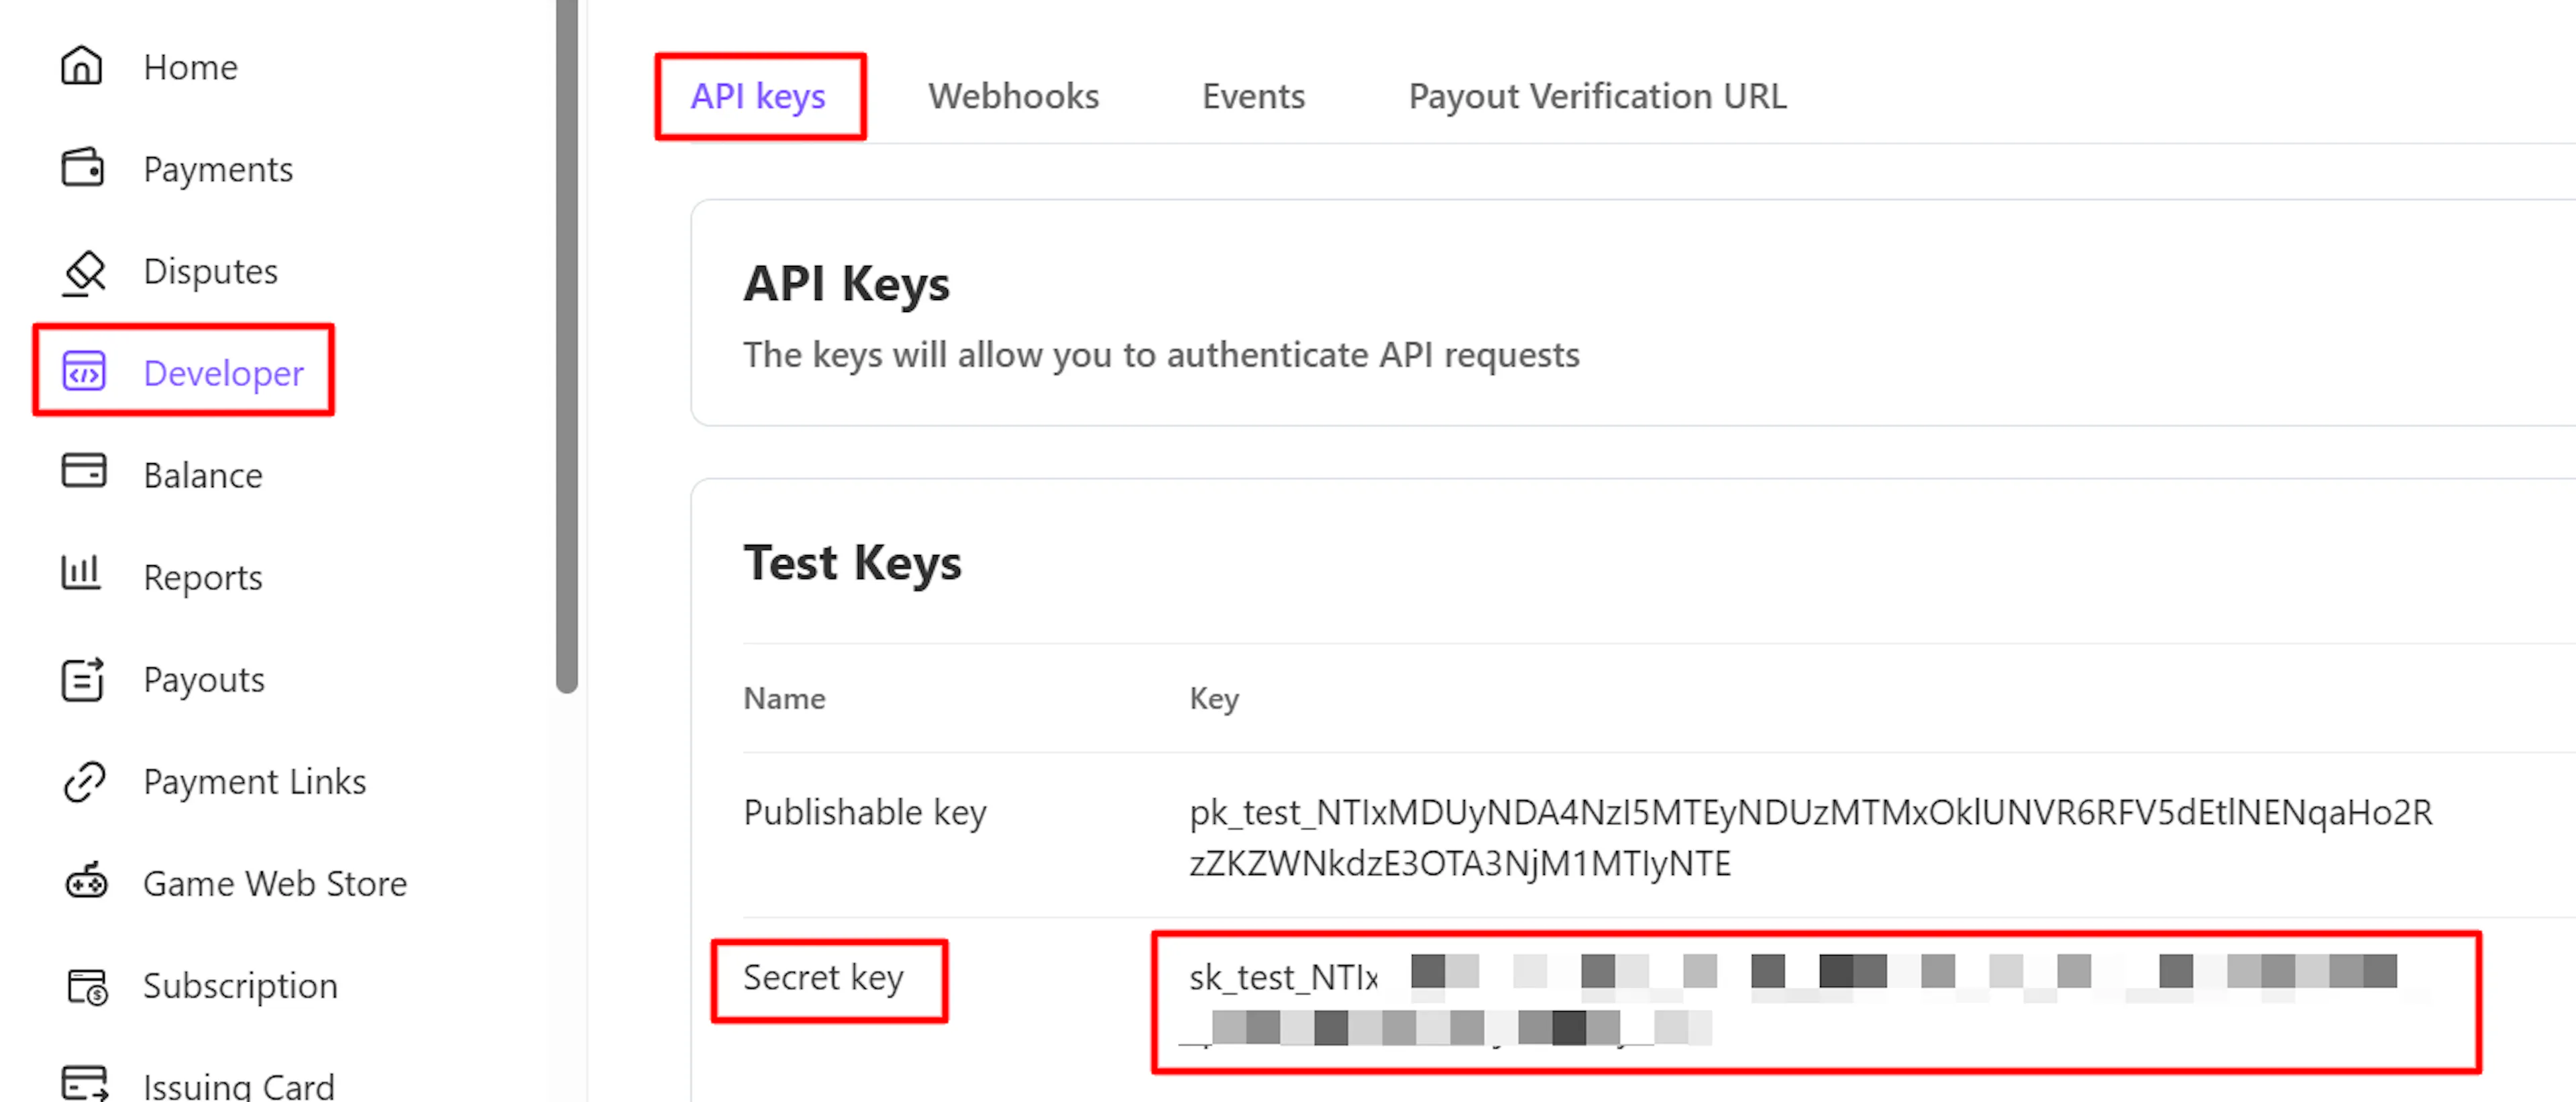
Copy the Secret key
Copy the Secret key. Keep it private. It authorizes payments and refunds on your account.
The Publishable key (starting pk_) is not required. PayLexer uses WooshPay's hosted checkout, so customers enter their payment details on WooshPay's own page and only the Secret key is needed.
Adding Credentials to PayLexer
Open PayLexer Dashboard
Log in to your PayLexer dashboard and navigate to Payment Gateways → WooshPay.
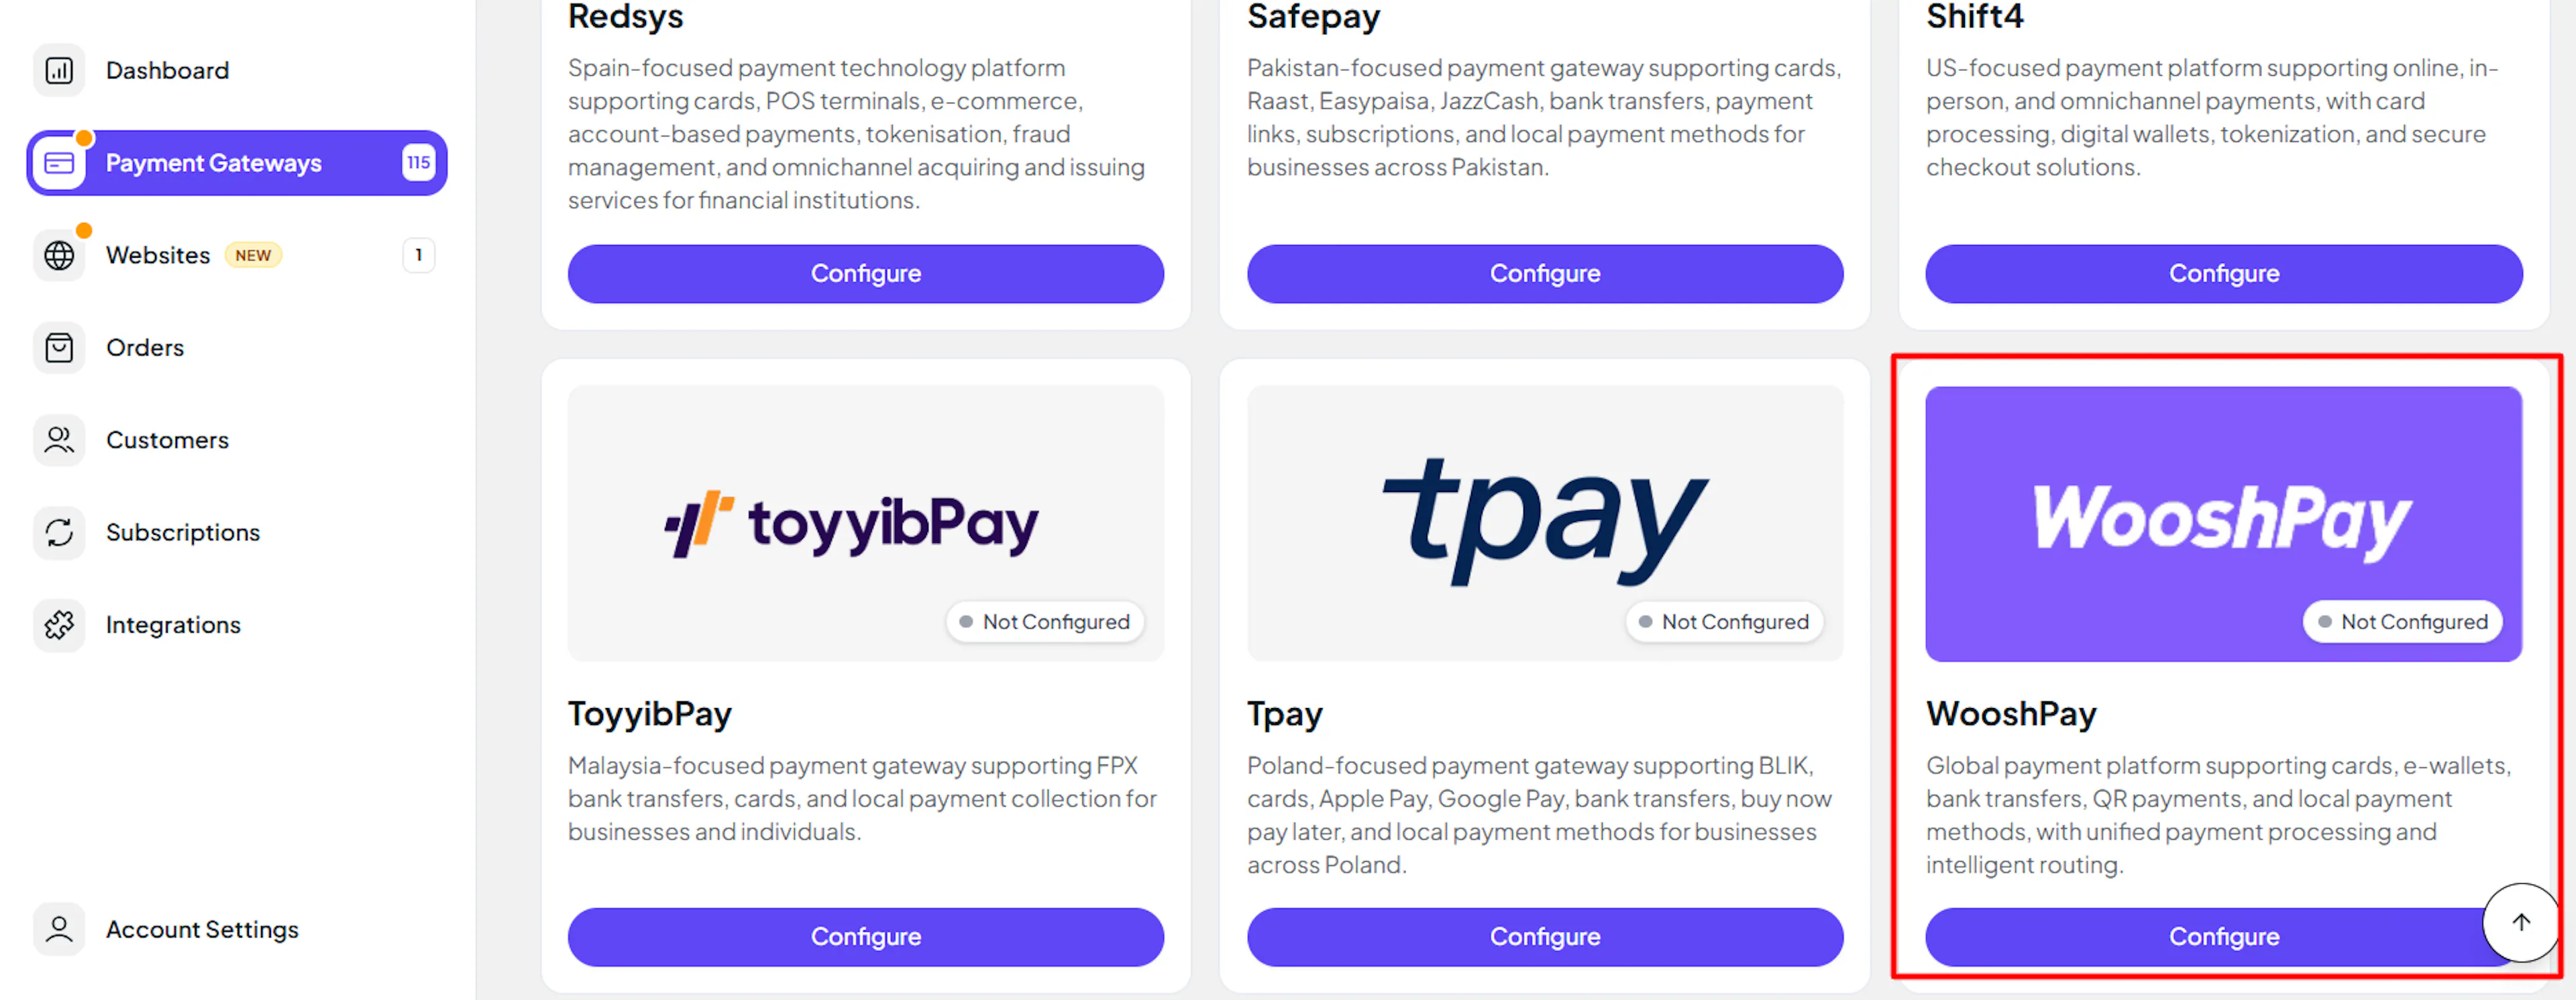
Enter your credentials
Paste the Secret Key you copied from WooshPay into the Secret Key (sk_live_…) or Secret Key (sk_test_…) field, depending on the environment.


Understanding Live/Production and Sandbox Settings:
| Environment | Purpose |
|---|---|
| Live / Production | Used for real transactions. |
| Test / Sandbox | Used for testing only. No real money is processed. |
How PayLexer selects credentials:
- Debug/Test mode ON → Test credentials are used
- Debug/Test mode OFF → Live credentials are used
Configuring Webhooks (Mandatory)
Webhooks enable real-time payment updates and significantly improve reliability.
Benefits of Webhooks:
- Instant payment status updates
- Automatic refund processing
Copy your PayLexer webhook URL
On the Payment Gateways → WooshPay page in PayLexer, copy the Webhook URL. It is generated for your account and shown as a read-only field.

Add a webhook endpoint in WooshPay
In your WooshPay dashboard, open Developers, then the Webhooks tab to the right of API keys. Click Add endpoint and paste the PayLexer webhook URL.

Select the events and save
Select at least these events, then save the endpoint:
payment_intent.succeededpayment_intent.payment_failedpayment_intent.canceledpayment_intent.processingcharge.refund.updated
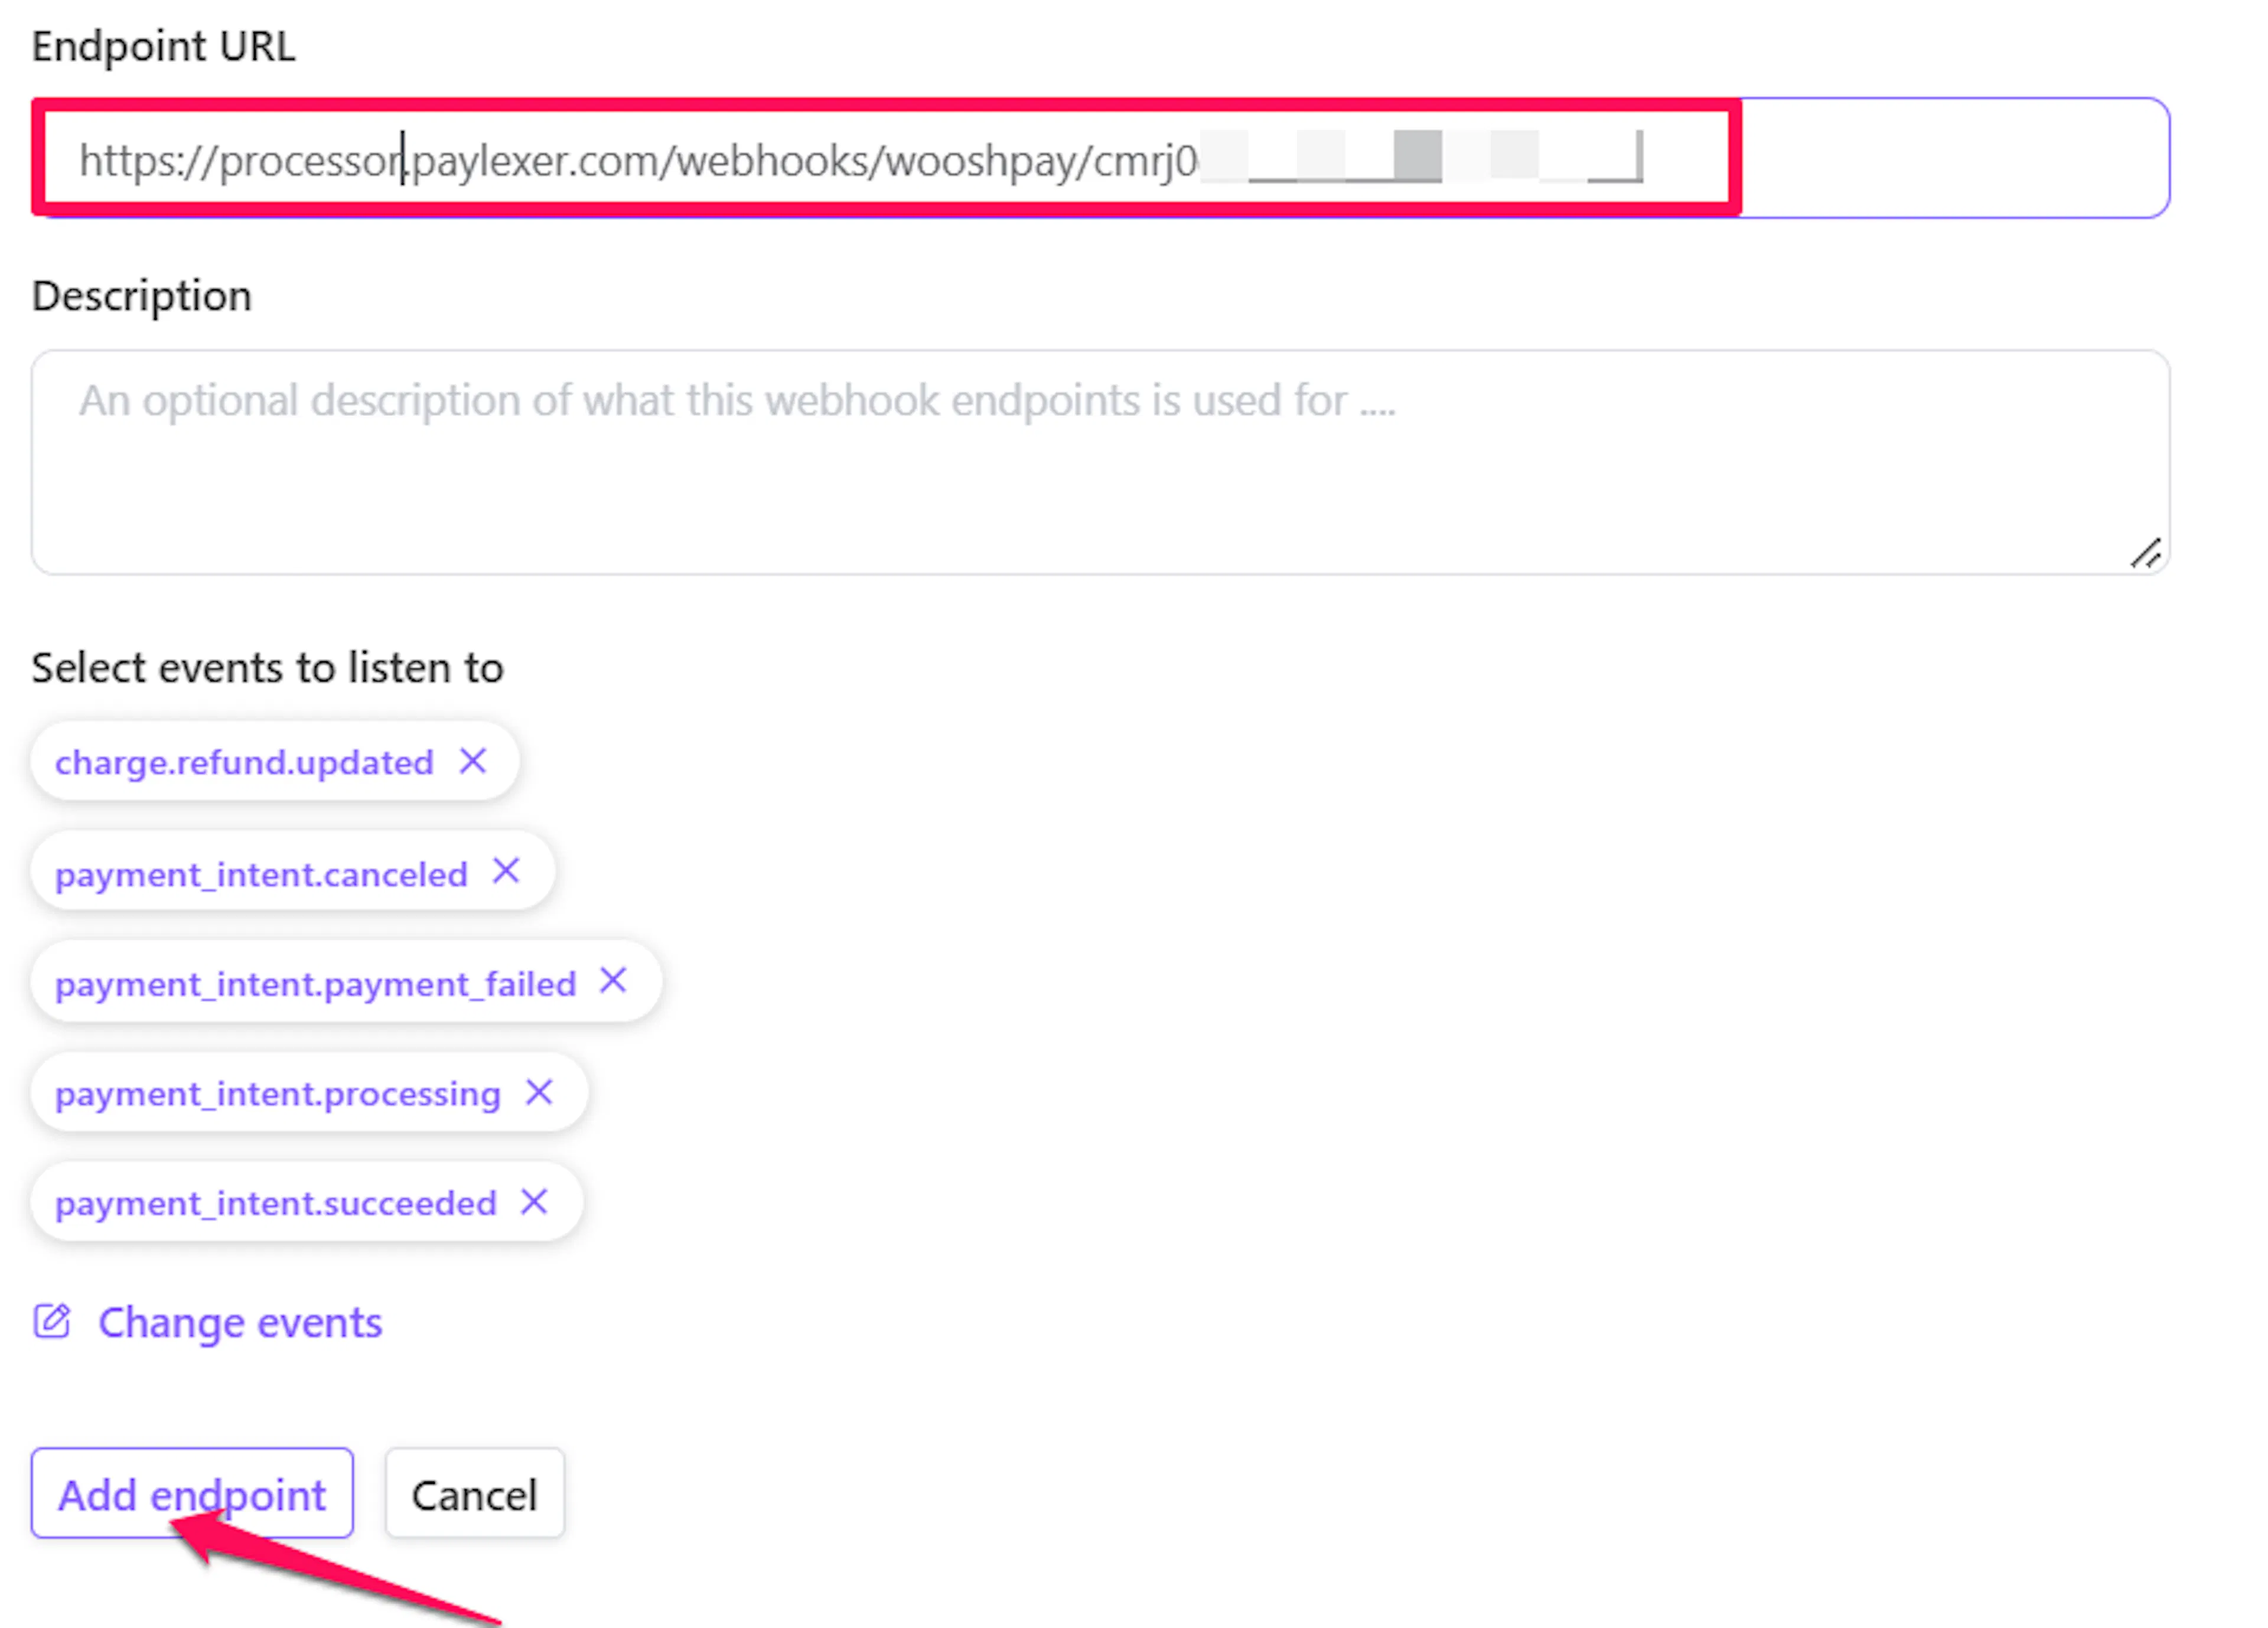
After saving, WooshPay returns you to the API keys tab. Open the Webhooks tab again to continue.
Reveal the signing secret
Click the endpoint you just added. Below the endpoint URL, open the Signing secret tab and click Reveal. Copy the value, which starts with whsec_.
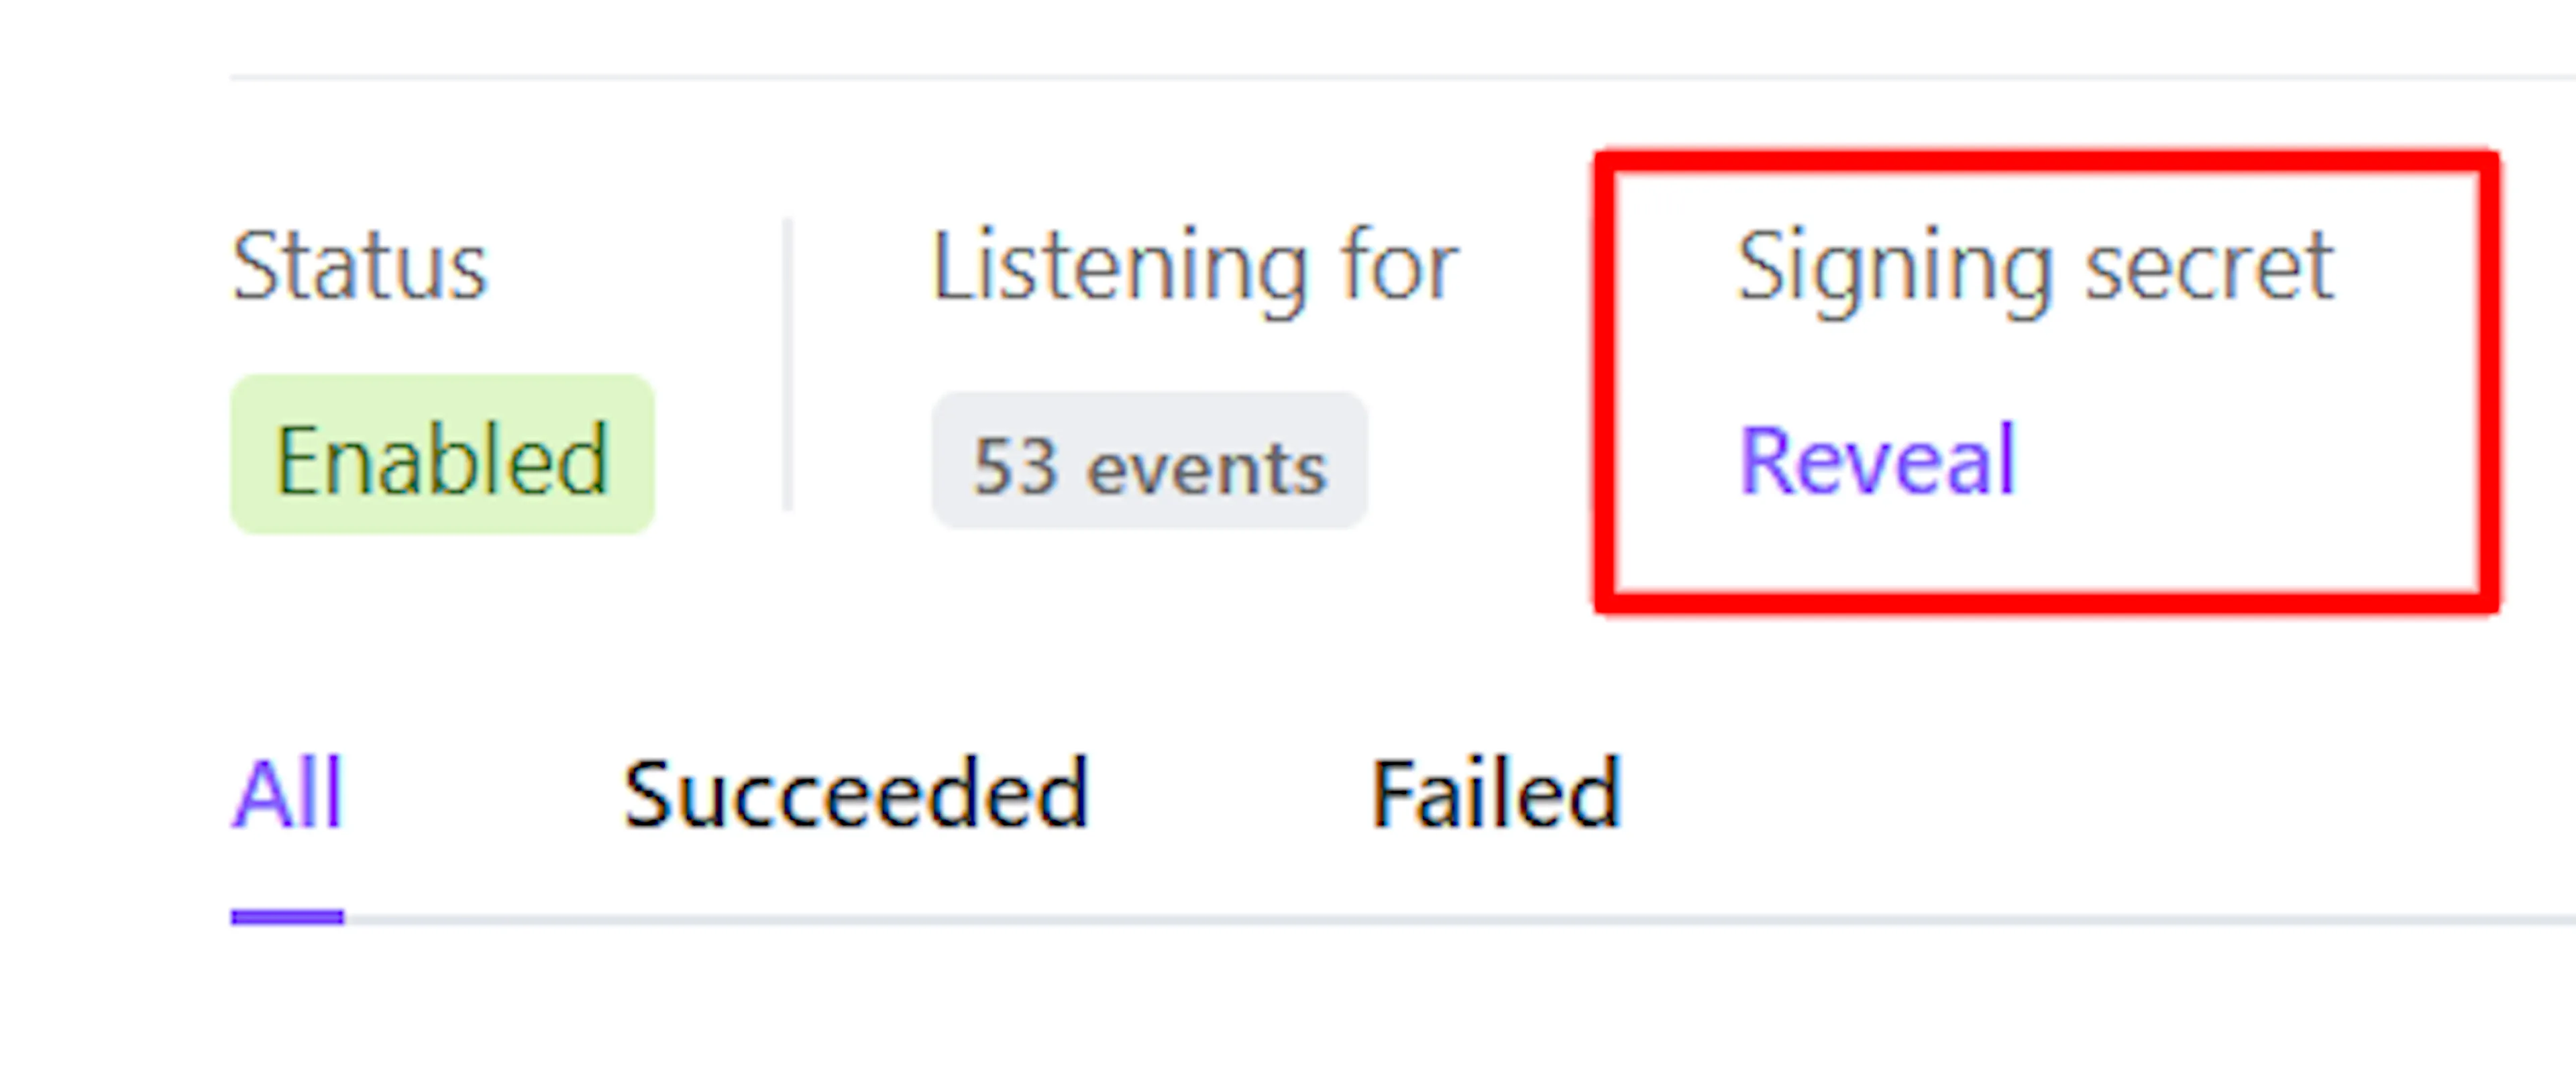
WooshPay also shows the endpoint's ID, which starts with we_ and is easier to spot. The ID is not the signing secret. If you paste the we_ ID into PayLexer, every notification fails its signature check and orders stay pending even after customers have paid.
Add the signing secret to PayLexer
Back in PayLexer, paste the whsec_ value into the Webhook Signing Secret (whsec_…) field for the matching environment.

Test and live are separate in WooshPay. Repeat these steps in each environment, so each one has its own endpoint and its own signing secret.
Test and Save
Click Save to save your configuration and verify your credentials. Click Verify Connection to test the connection.

Integrate WooshPay to Your Website
If you have already added and configured your site, you can enable WooshPay in your existing setup.
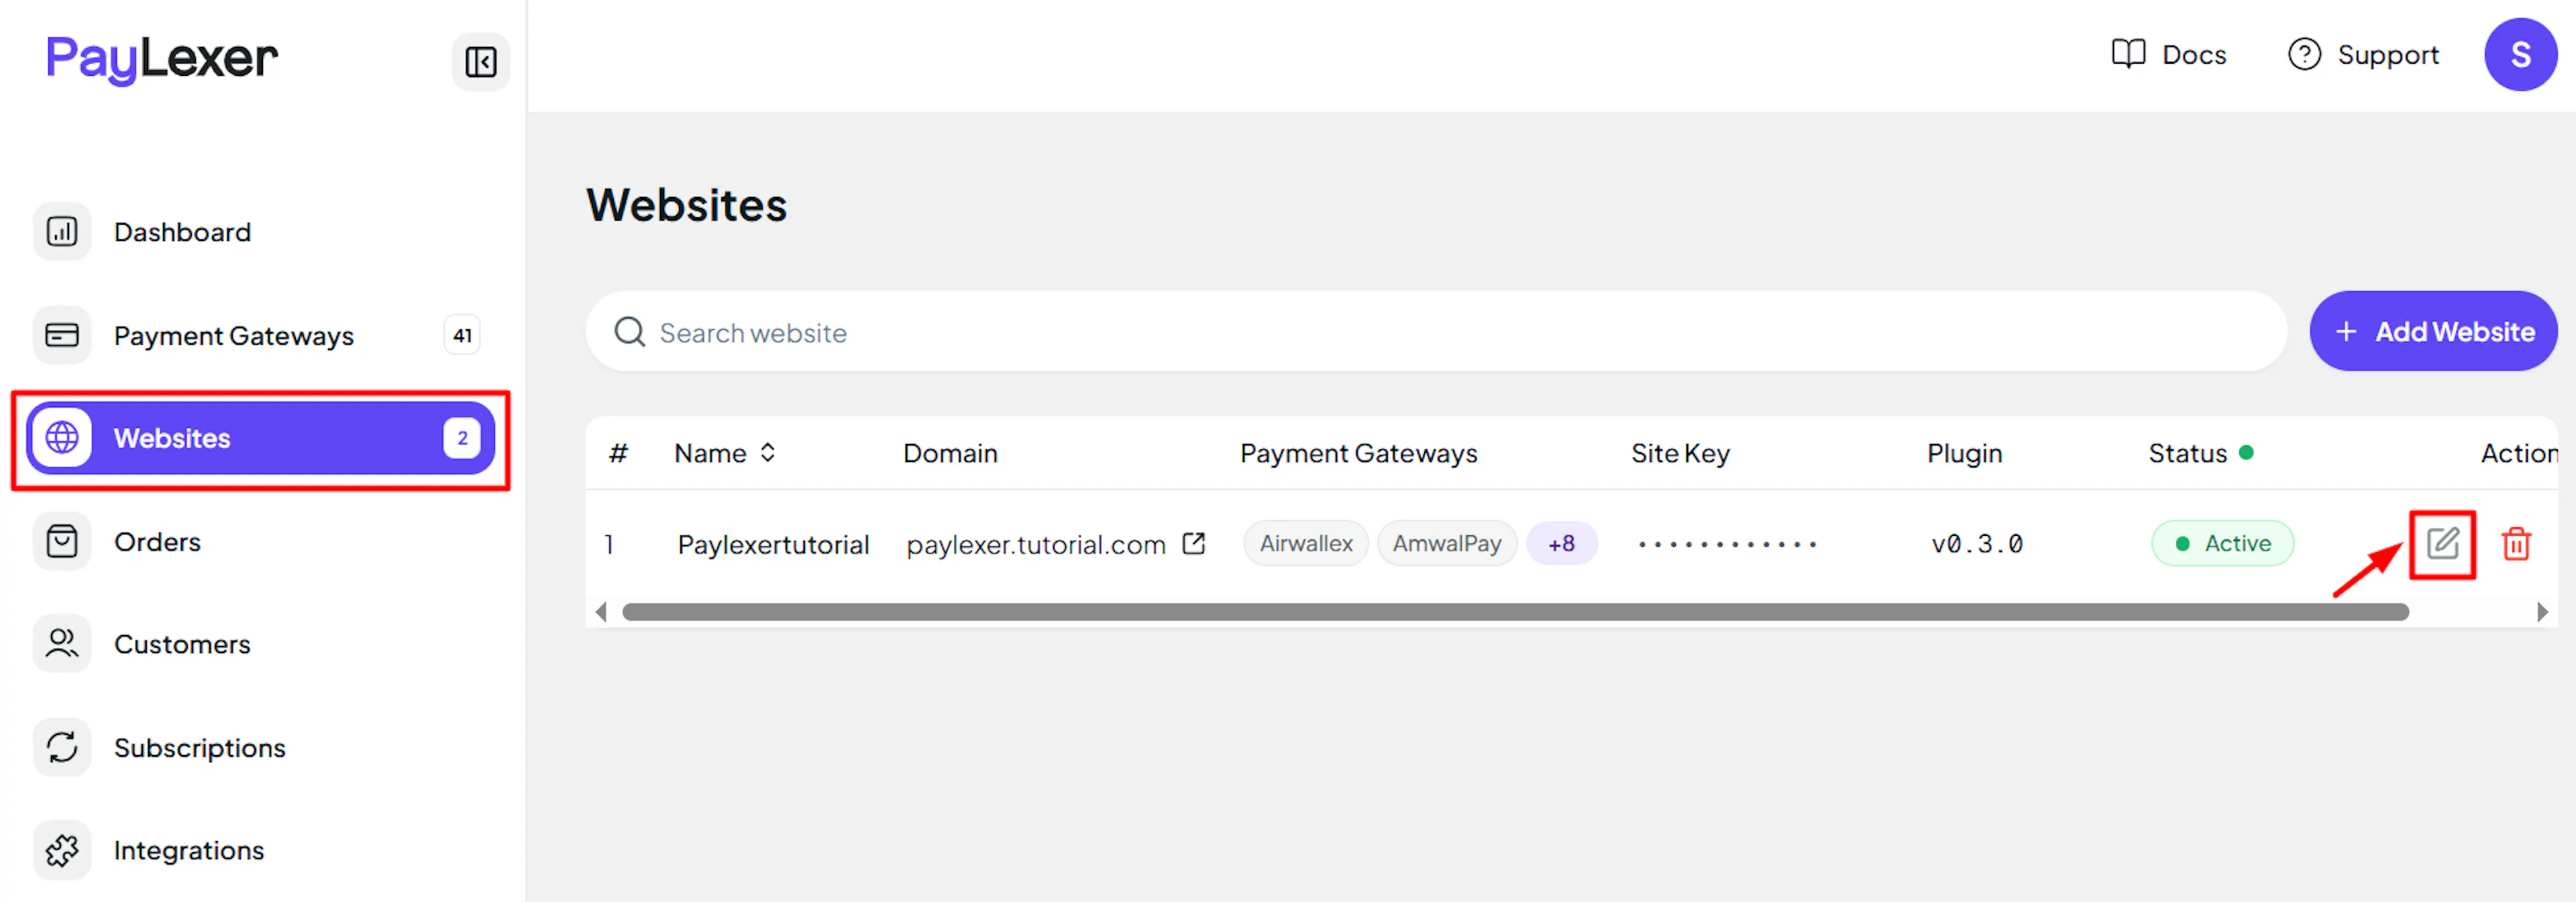
Go to Websites
Navigate to Websites in your PayLexer dashboard.
Edit your website
Click the Edit Icon of your added website.
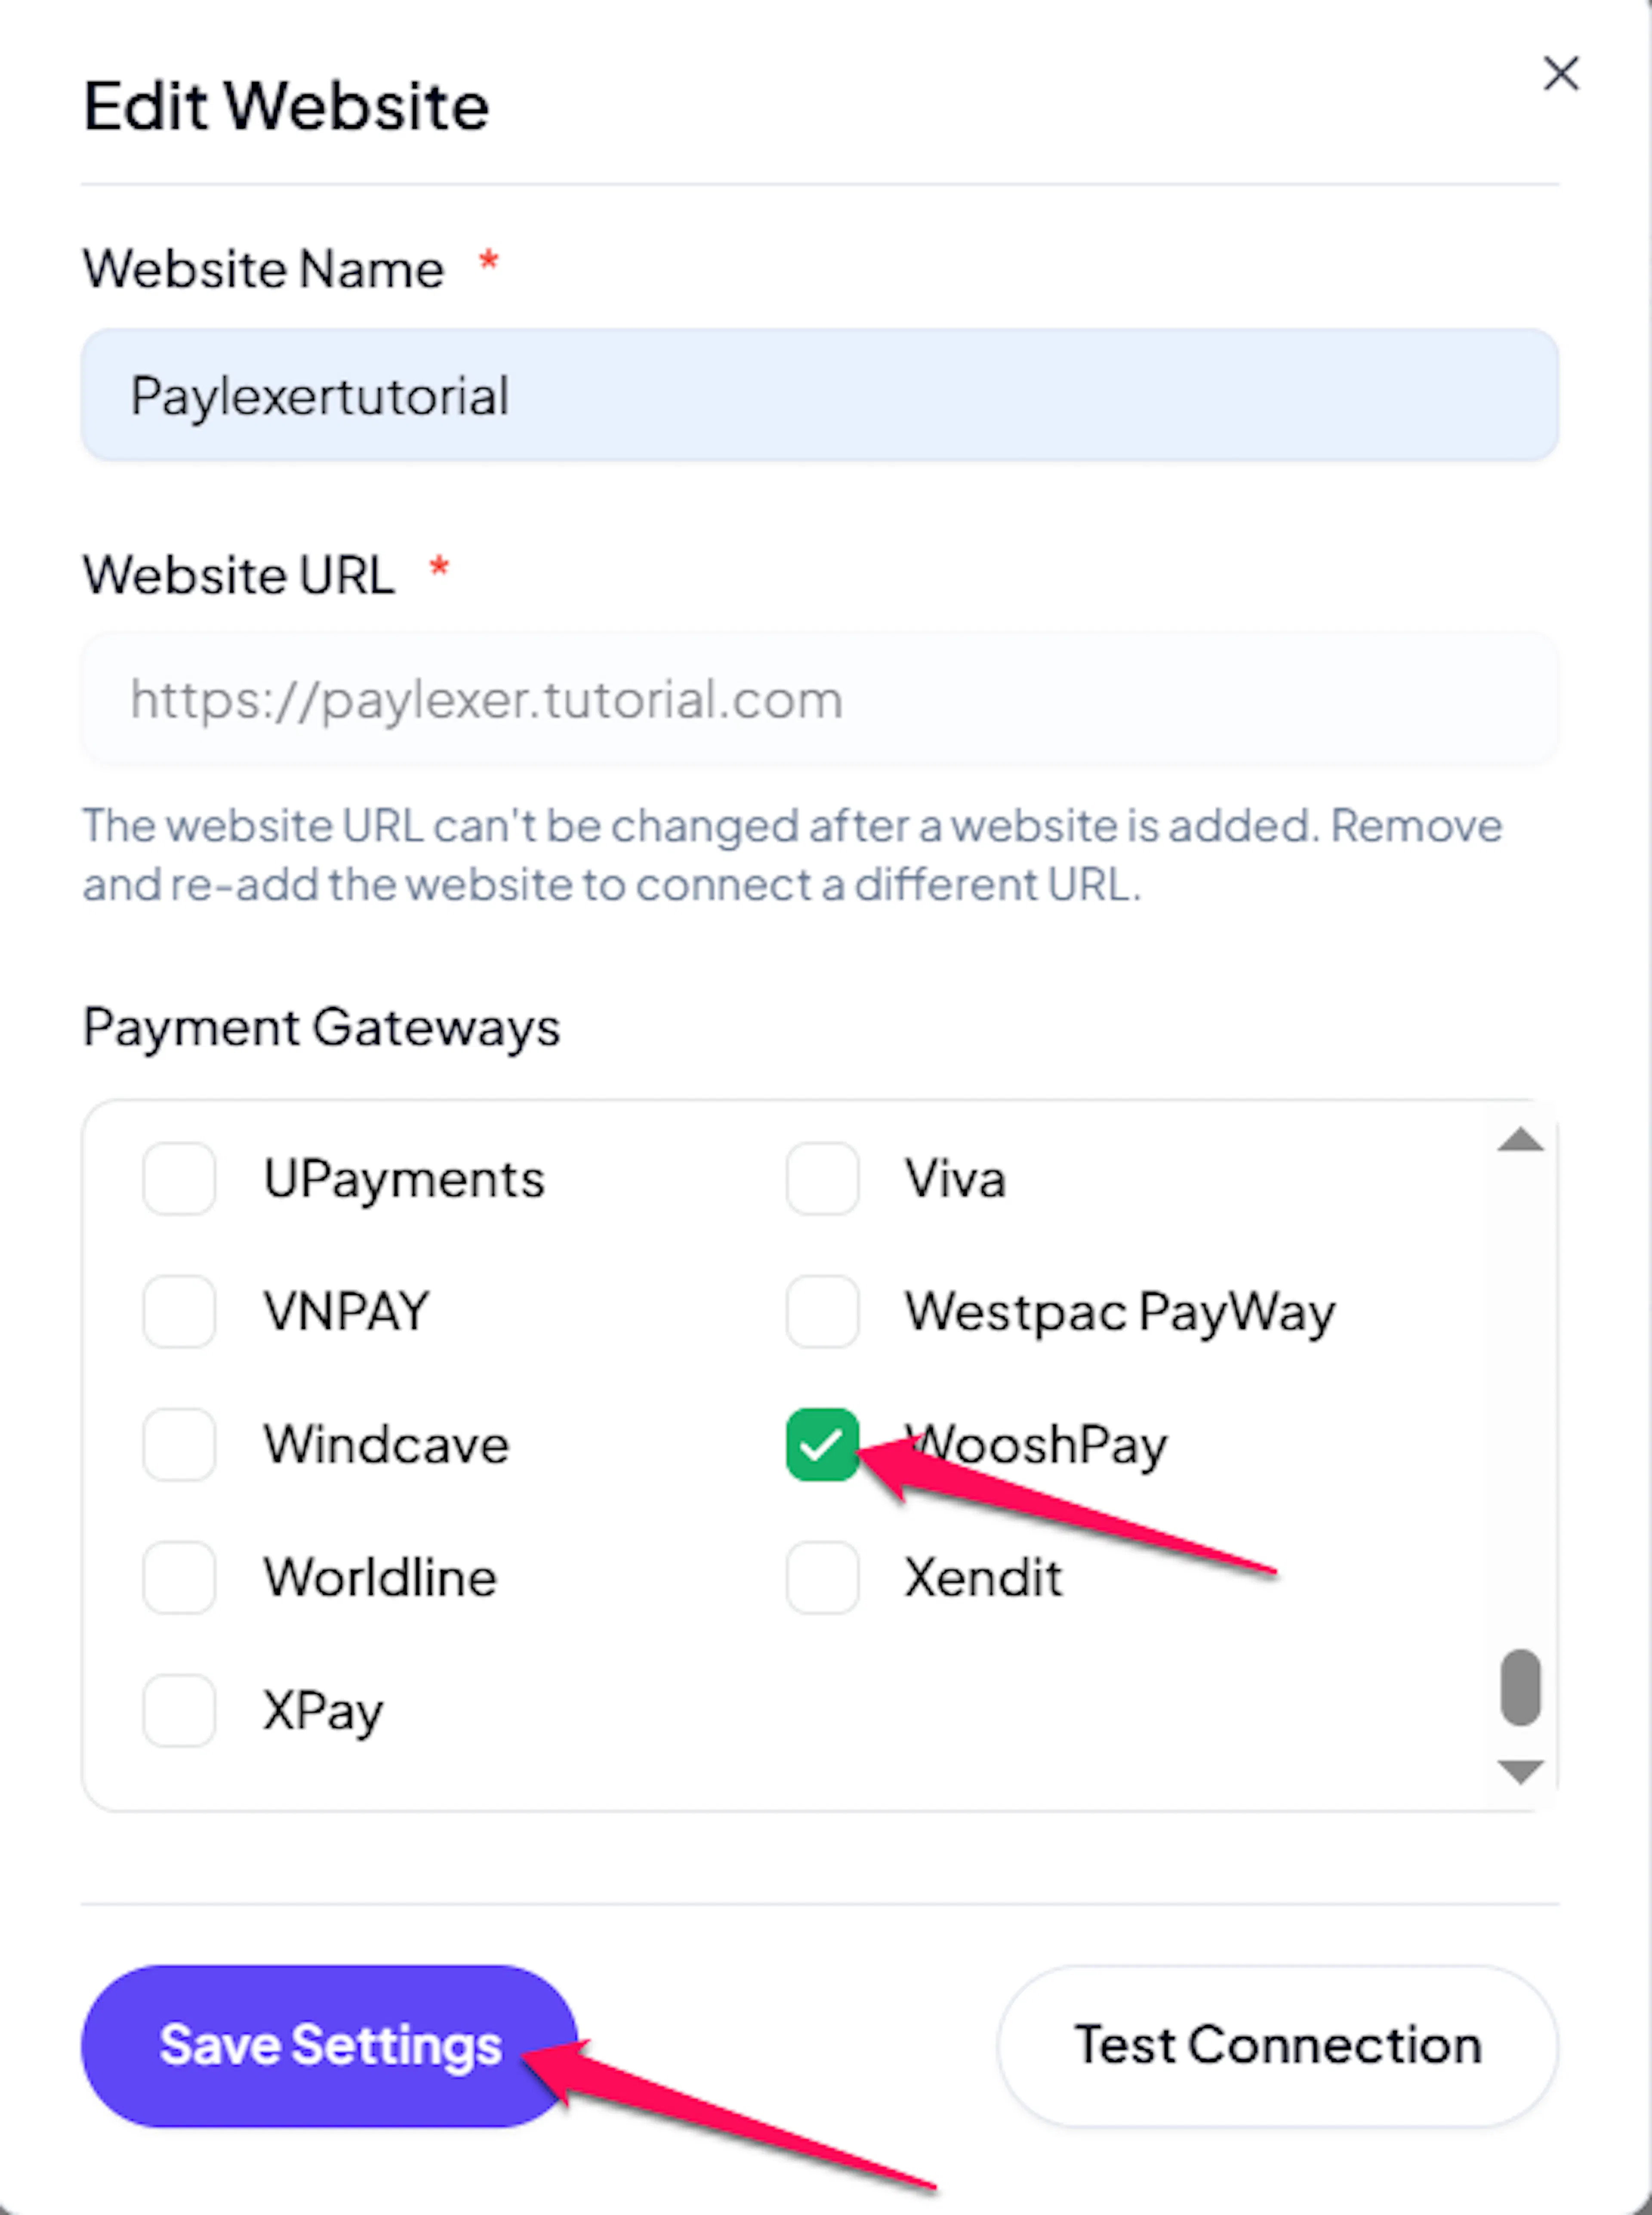
Enable WooshPay
Click the checkbox to enable WooshPay for the website.
If you haven't added a website yet, Continue to Add Your Website →
Troubleshooting
Best Practices
- Test in sandbox before enabling production, using your WooshPay test keys with Debug/Test mode ON
- Add your PayLexer webhook endpoint in WooshPay and save its
whsec_signing secret before taking live payments - Set up a separate webhook endpoint and signing secret for test and for live
- Keep your Secret key private and contact WooshPay support if you suspect it has been exposed
- Offer an alternative refund route for UPI customers, since UPI payments cannot be refunded through WooshPay
- Reconcile your PayLexer orders against your WooshPay dashboard periodically
FAQs
Still Have Questions?
- WooshPay Support: WooshPay Support
- PayLexer Support: Contact Support