

KOMOJU
Connect KOMOJU to PayLexer to accept cards and popular Japanese local payment methods, run subscriptions, and process refunds.
KOMOJU is a Japan-focused payment gateway operated by Degica, headquartered in Tokyo, Japan. It lets businesses accept international credit cards alongside popular local Japanese methods - convenience store (konbini) payments, bank transfer, Pay-easy, Paidy, and e-money wallets - through a single hosted checkout, with built-in support for automatic recurring subscriptions.
- Supported Regions (Merchant Accounts): Japan-focused, with support for international merchants selling to Japan.
- Supported Currencies: JPY, USD, EUR, GBP, AUD, CAD, CHF, CNY, HKD, SGD, NZD, TWD, KRW, THB, PHP, MYR, IDR, VND, BRL, PLN - view full list
Supported Features
- One-time payments through KOMOJU's secure hosted checkout page
- Popular Japanese local payment methods including convenience store (konbini), bank transfer, Pay-easy, Paidy, and e-money wallets
- Recurring subscriptions billed automatically by KOMOJU on a weekly, monthly, or yearly schedule
- Full and partial refunds
- Real-time payment, refund, and subscription updates through webhooks
- Multi-currency support across 20 currencies
Before You Start
Make sure you have:
- KOMOJU Account – Don't have one? Sign up for KOMOJU →
- PayLexer Account – Required to configure the integration. Create your account →
- A website where you want to integrate
Looking for a different payment processor? View all supported gateways →
Configuring KOMOJU
You need a Secret Key from KOMOJU for this integration.
Getting API Credentials
Log in to KOMOJU
Sign in to your KOMOJU merchant dashboard.
Understand Test and Live mode
KOMOJU has separate Test and Live environments, each with its own Secret Key. Test Mode starts by default and supports integration without real payments. Live Mode requires a separate commercial-use application, business screening, and contract approval.
Activating Live Mode (Commercial Use) - See KOMOJU's How to Apply for Live Mode (Commercial Use) guide.
Open Merchant Settings
Go to Merchant Settings to view your API credentials for the selected mode.
Copy the Secret Key
Copy the Secret Key. Copy the test key while in Test Mode and the live key while in Live Mode so you can add both to PayLexer.

Adding Credentials to PayLexer
Open PayLexer Dashboard
Log in to your PayLexer dashboard and navigate to Payment Gateways → KOMOJU.
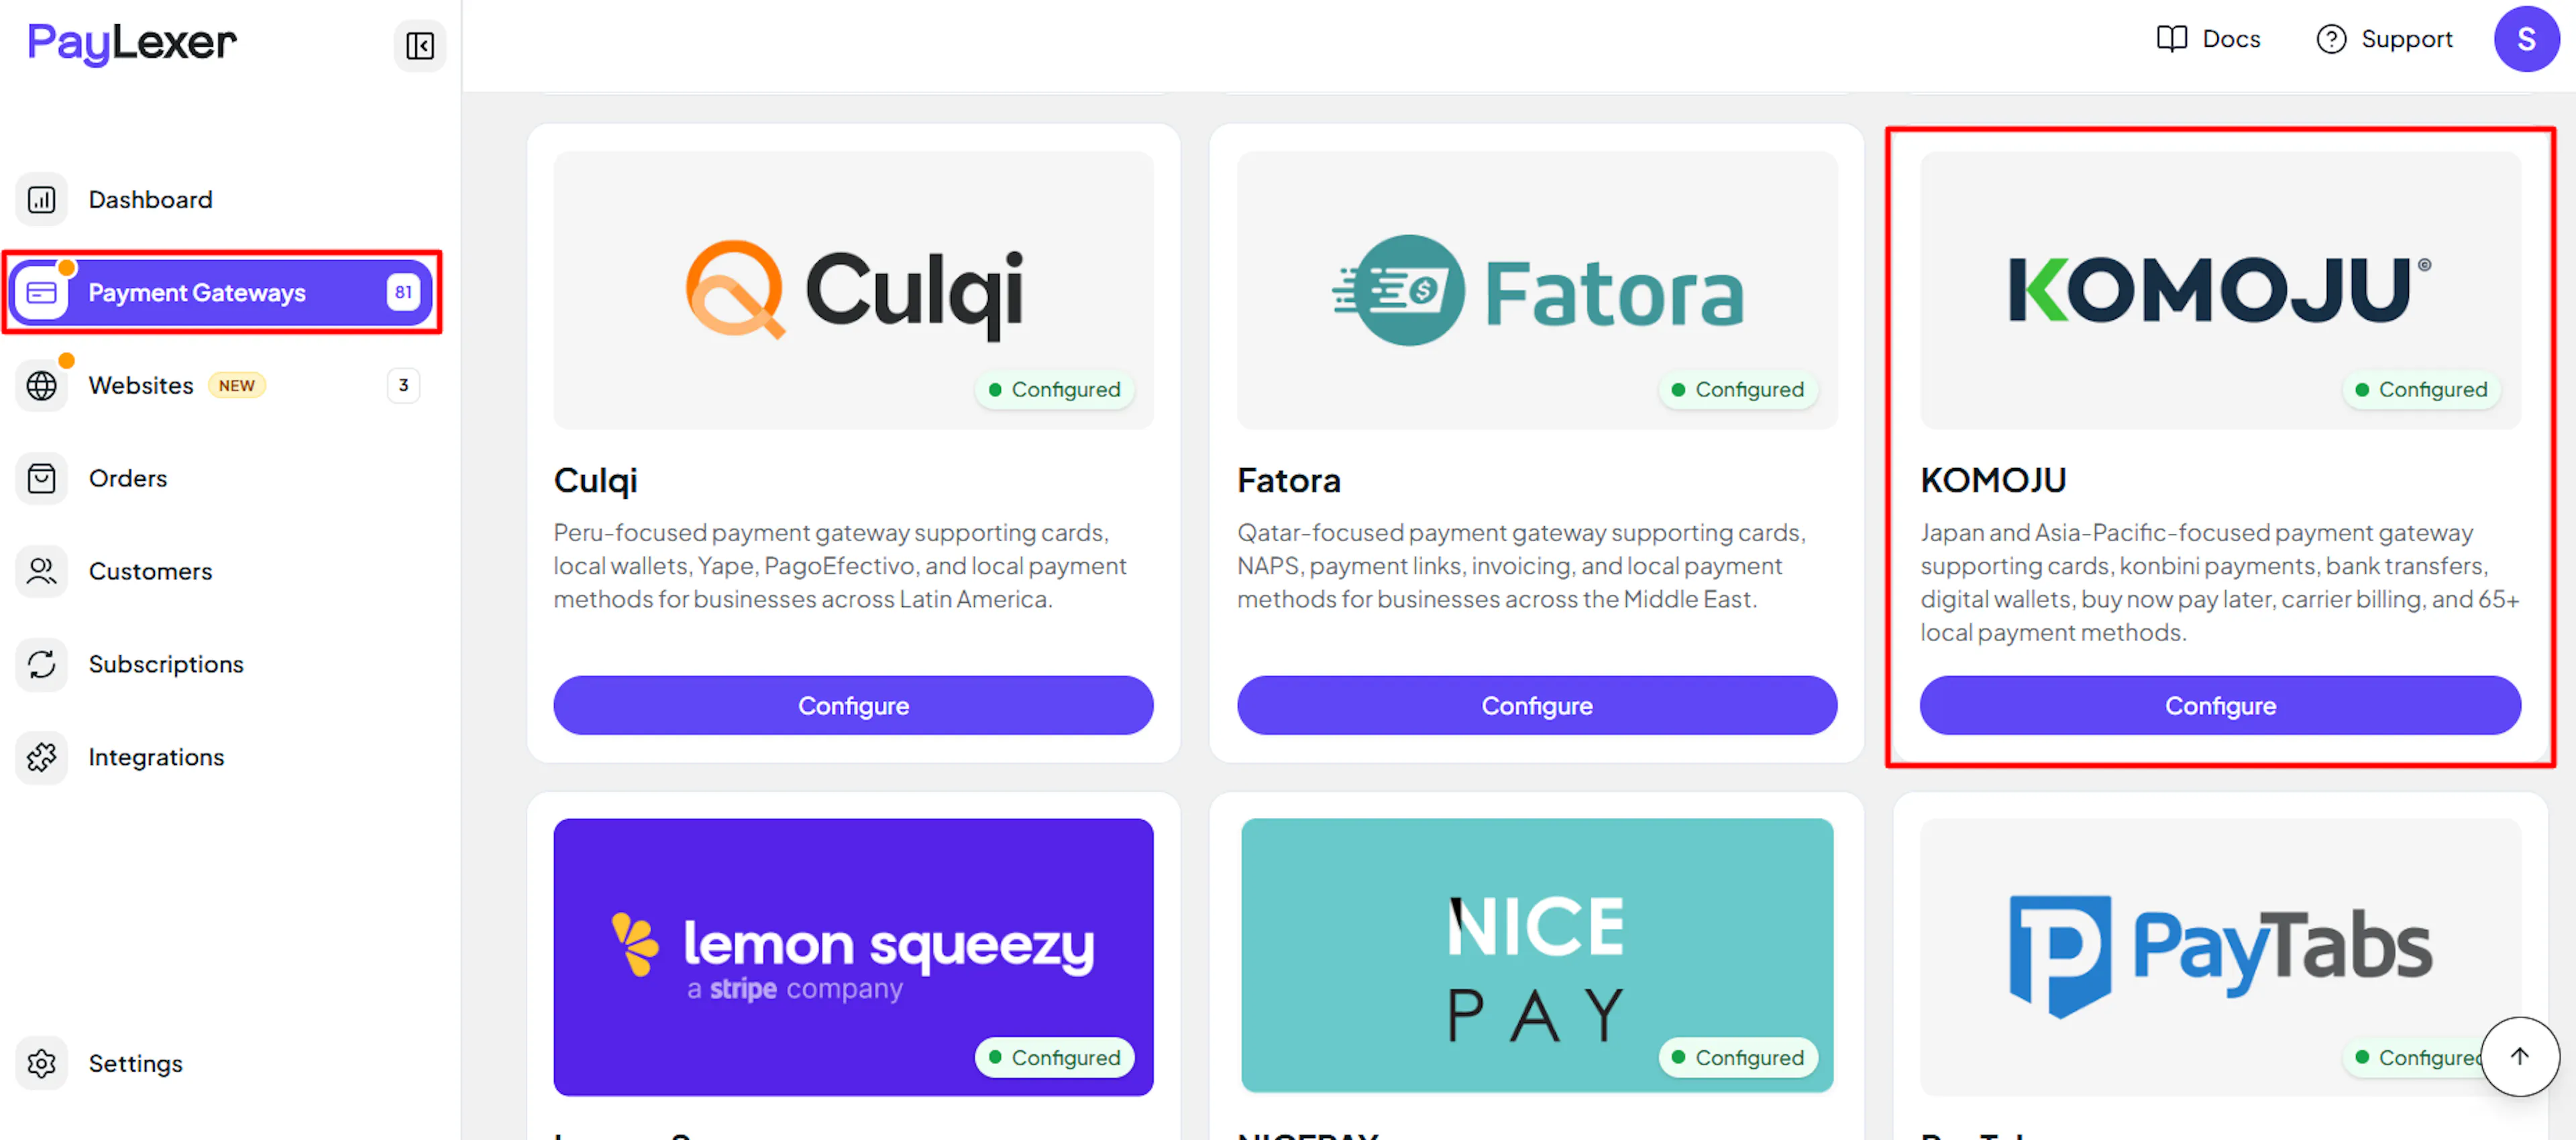
Enter your credentials
Paste the Secret Key you copied from KOMOJU into the corresponding field.


Understanding Live/Production and Sandbox Settings:
| Environment | Purpose |
|---|---|
| Live / Production | Used for real transactions. Cannot be empty, even when testing. |
| Test / Sandbox | Used for testing only. No real money is processed. |
How PayLexer selects credentials:
- Debug/Test mode ON → Test credentials are used
- Debug/Test mode OFF → Live credentials are used
Test and save
Click Save to save your configuration and verify your credentials. Click Verify Connection to test the connection.
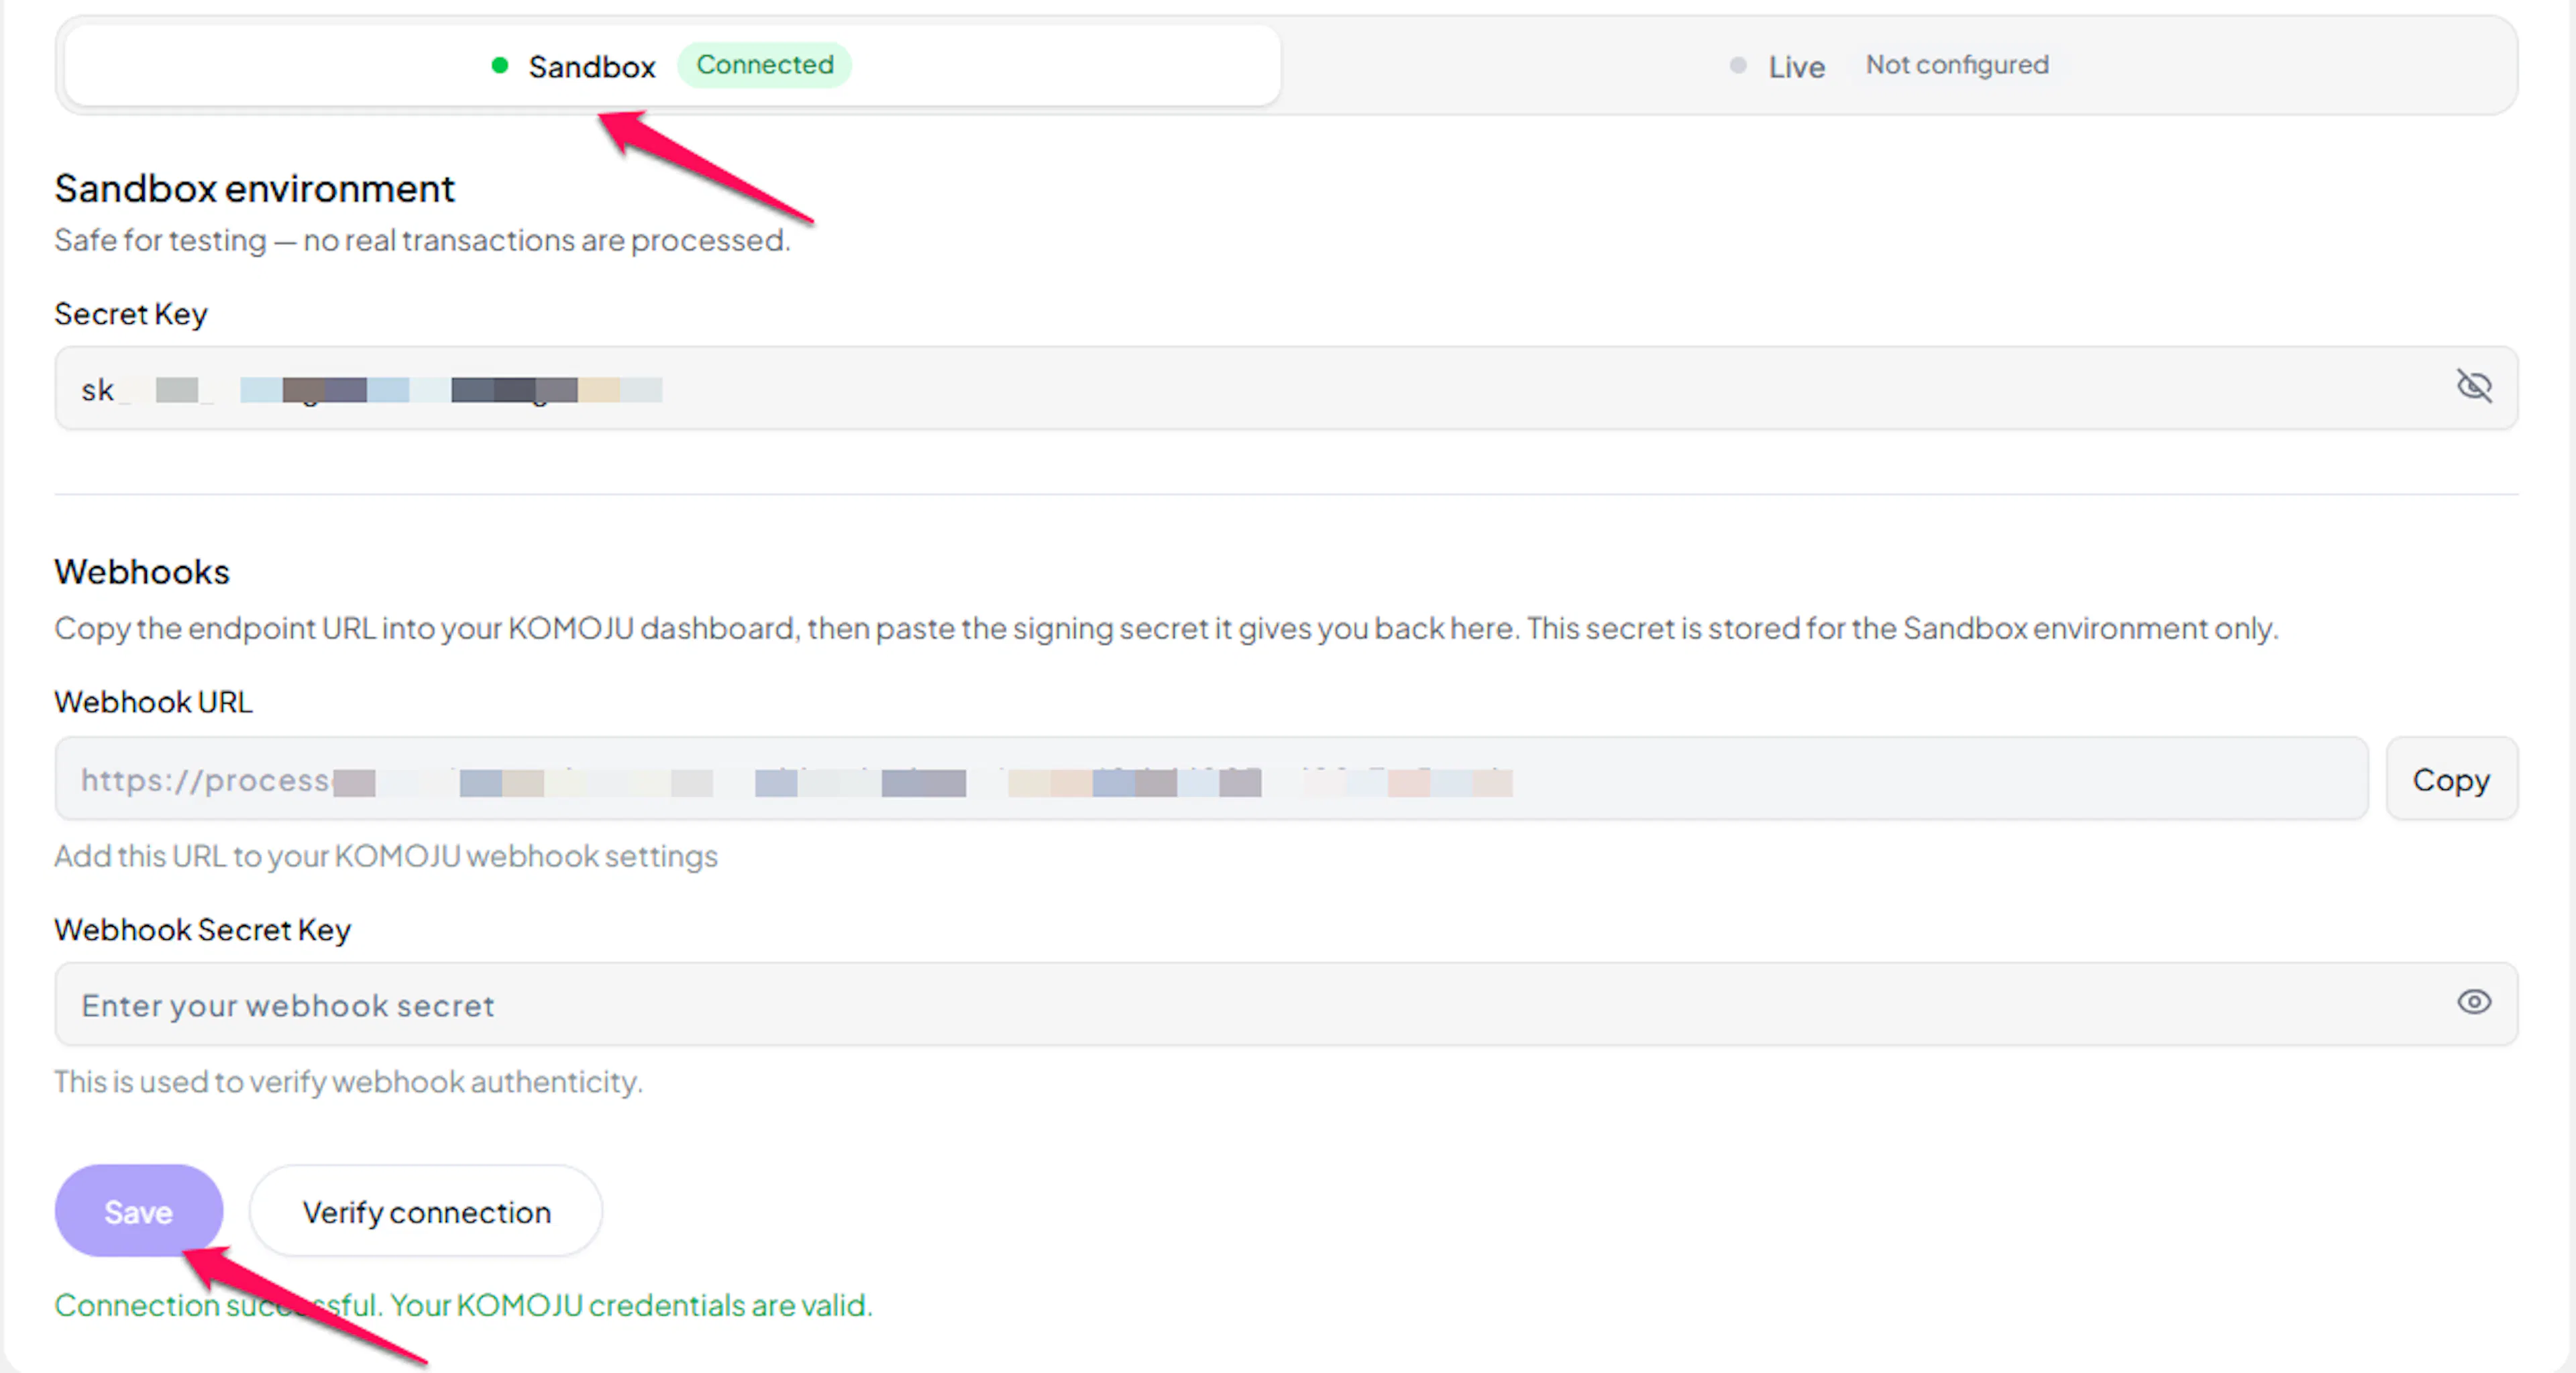
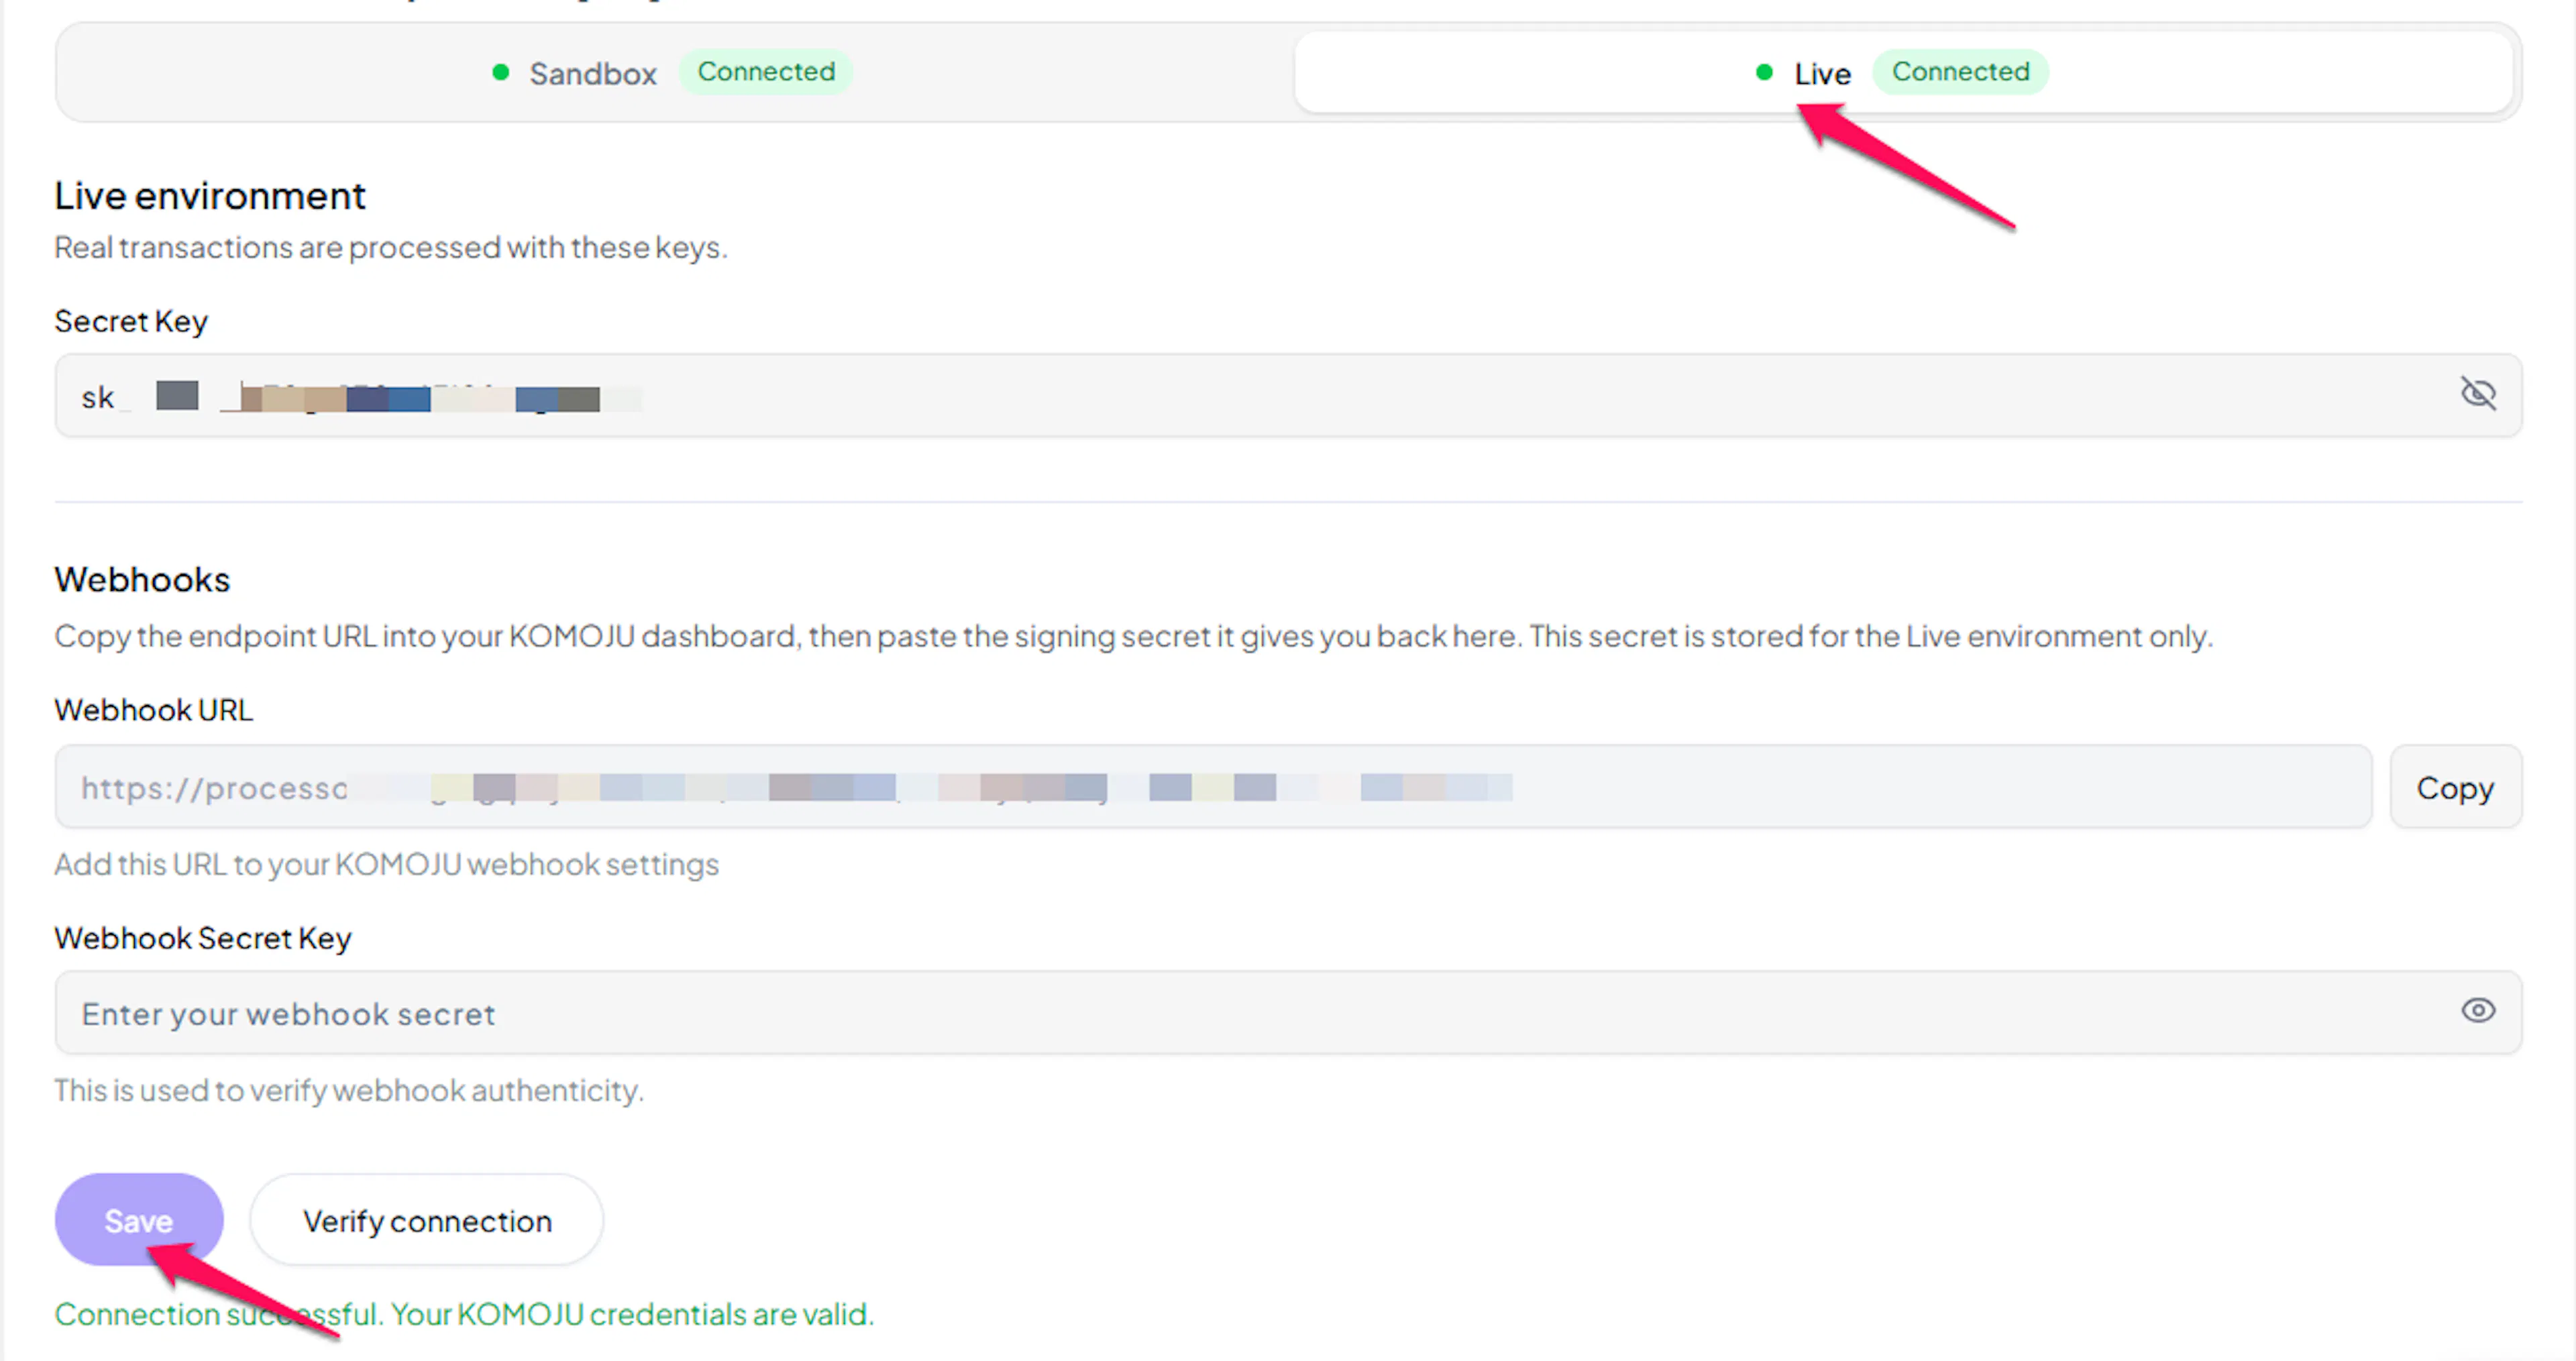
Configuring Webhooks (Mandatory)
Webhooks enable real-time payment updates and significantly improve reliability.
Benefits of Webhooks:
- Instant payment status updates
- Automatic refund processing
- Subscription renewal and cancellation notifications
KOMOJU subscriptions and asynchronous methods (such as konbini and bank transfer) rely on webhooks to confirm payment. Configure webhooks before going live, or orders paid this way may stay pending.
Copy your PayLexer Webhook URL
In Payment Gateways → KOMOJU in your PayLexer dashboard, copy the Webhook URL shown in the webhook section.

Add the webhook in KOMOJU
In your KOMOJU dashboard, Manage → webhook create a new webhook. Paste the Webhook URL you copied from PayLexer as the endpoint.

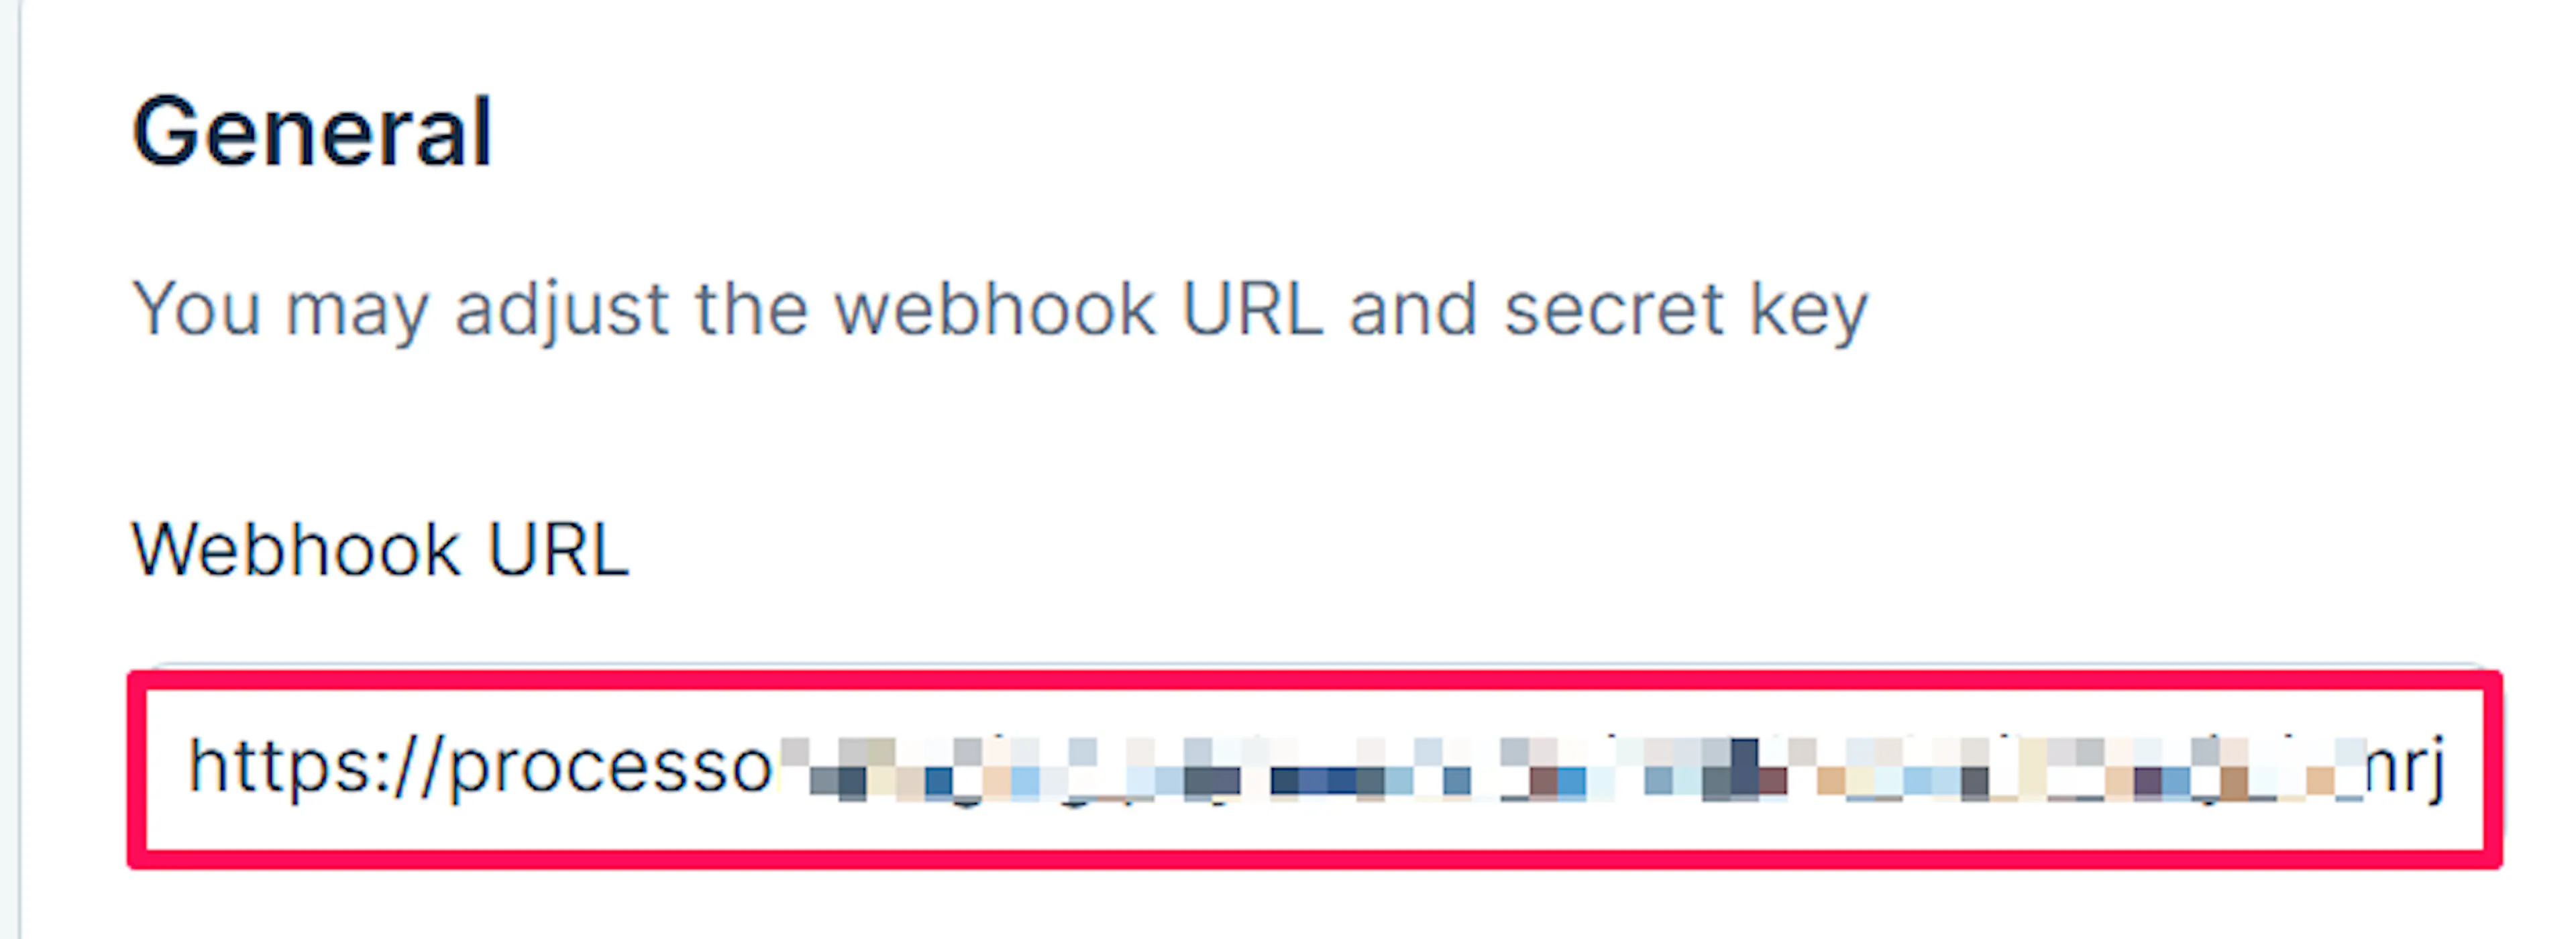
Enable the required events
Enable the payment, refund, subscription, and customer events so PayLexer receives every update.
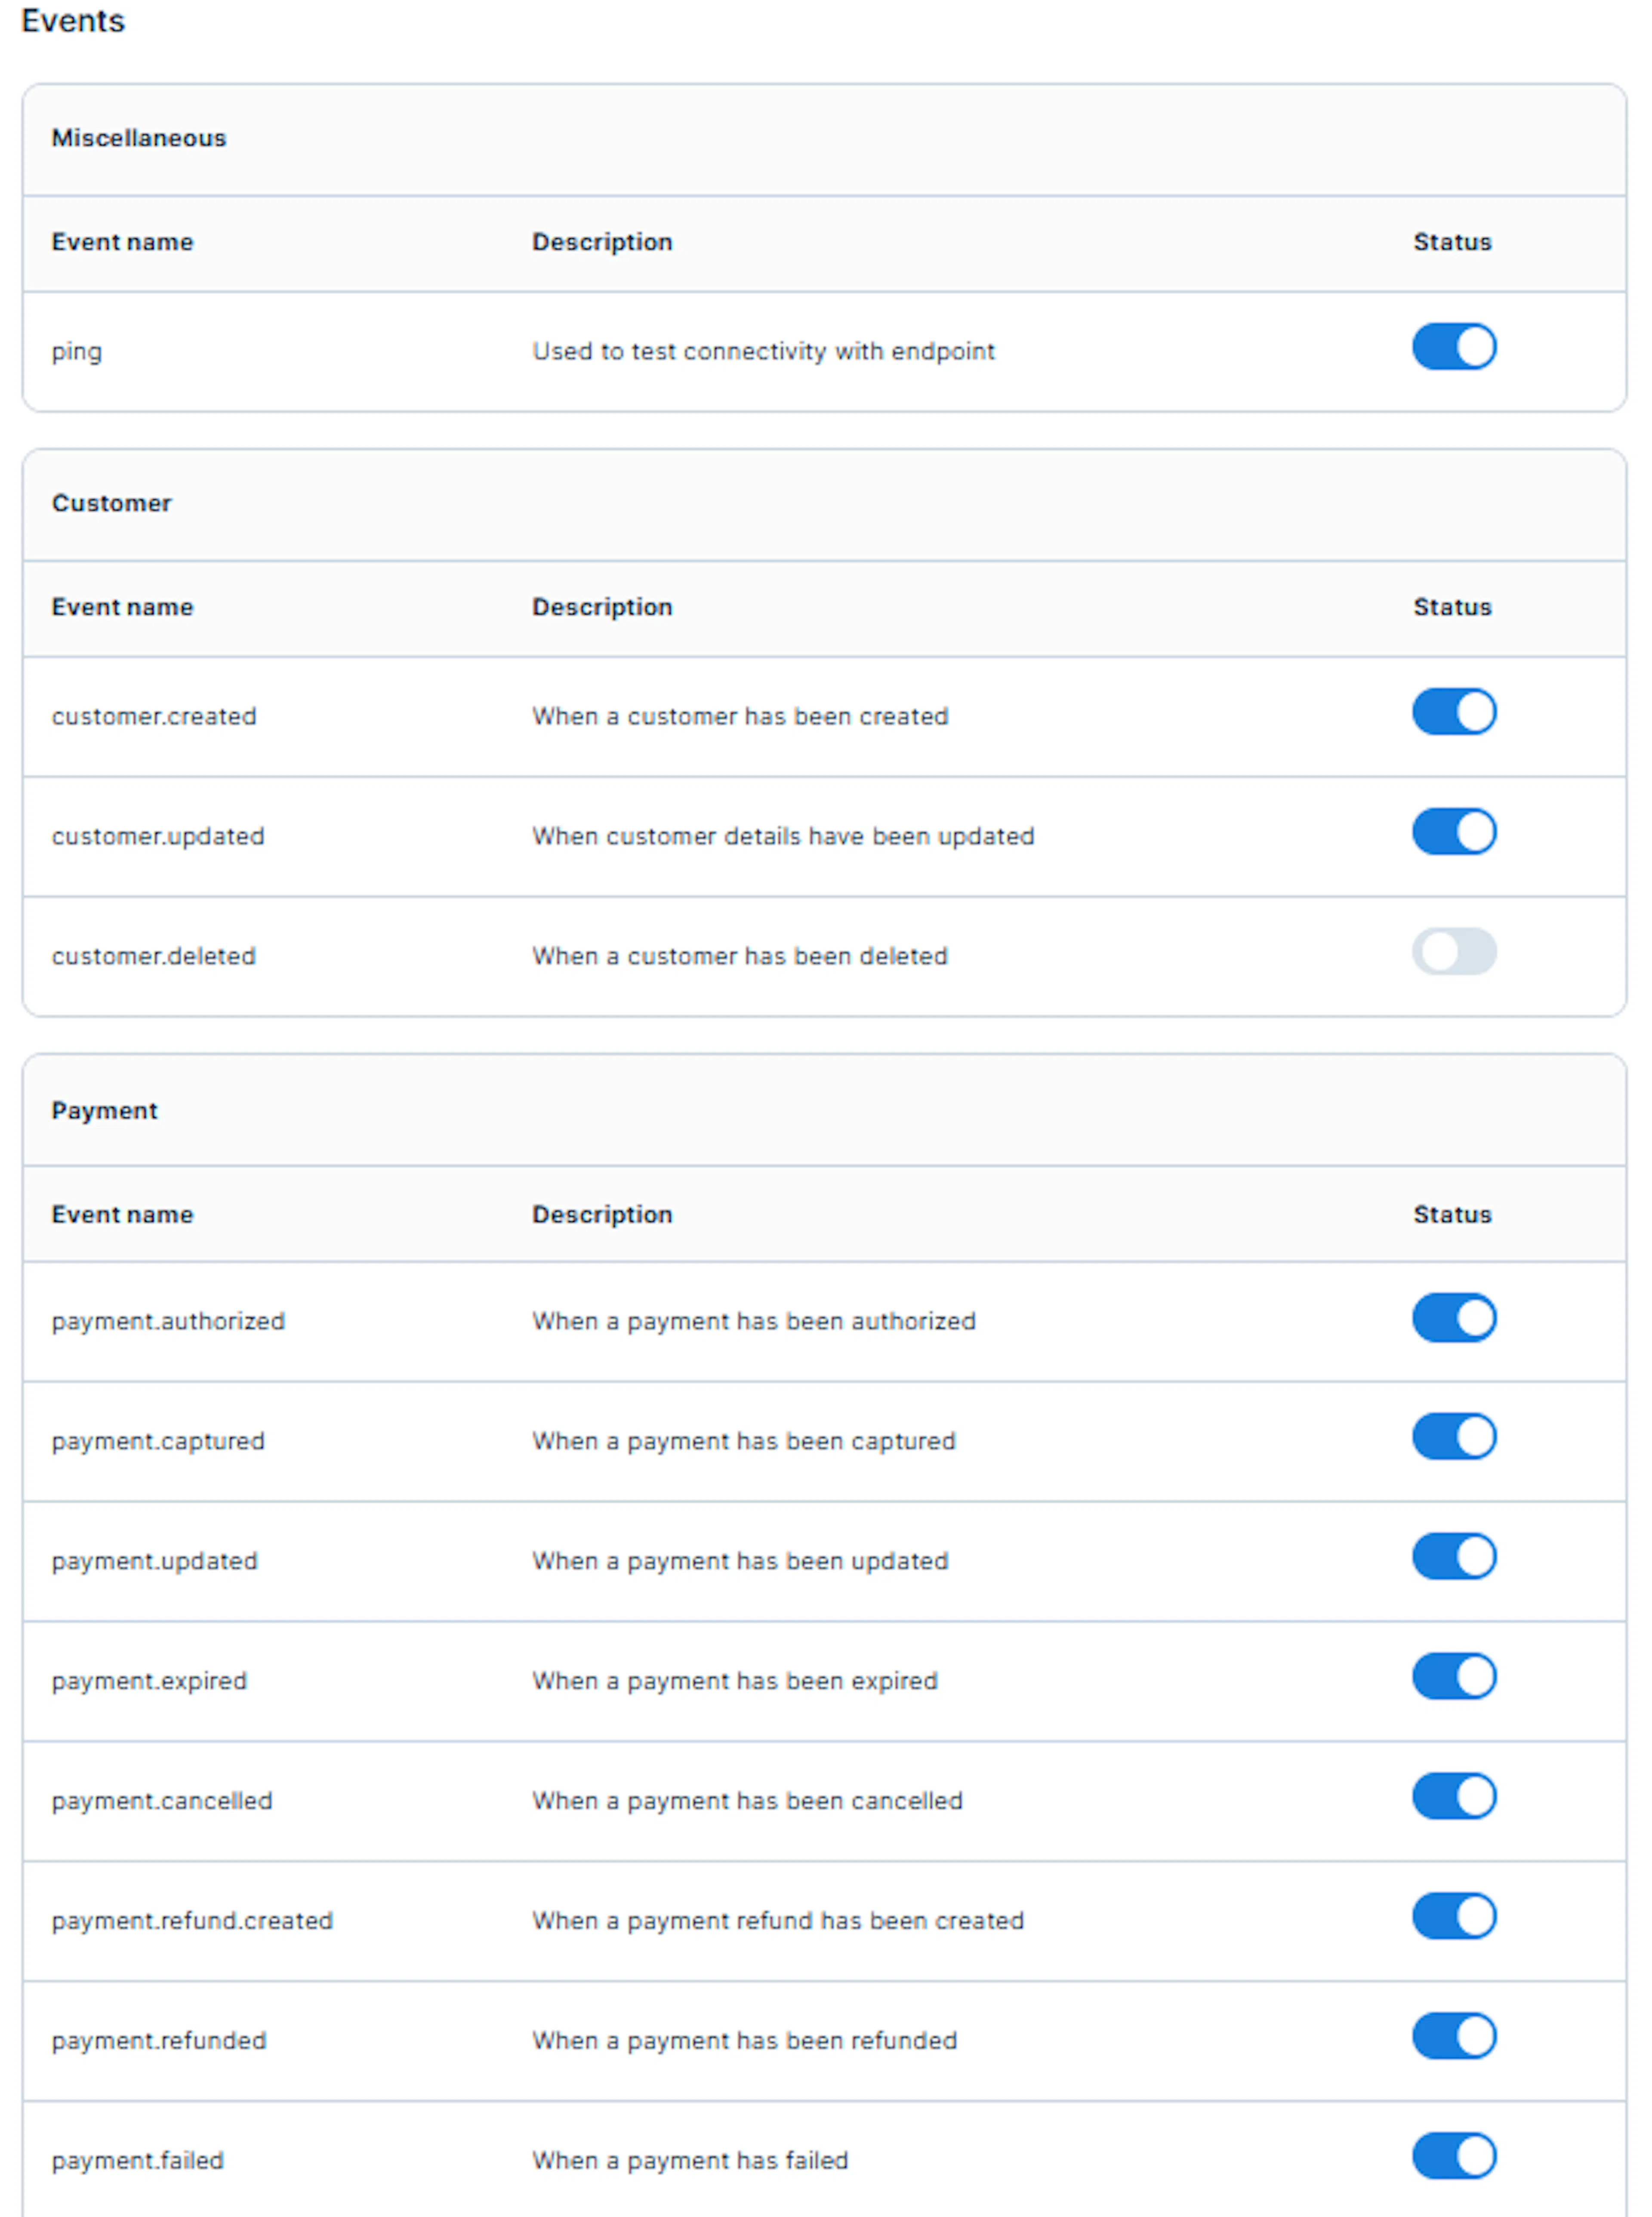
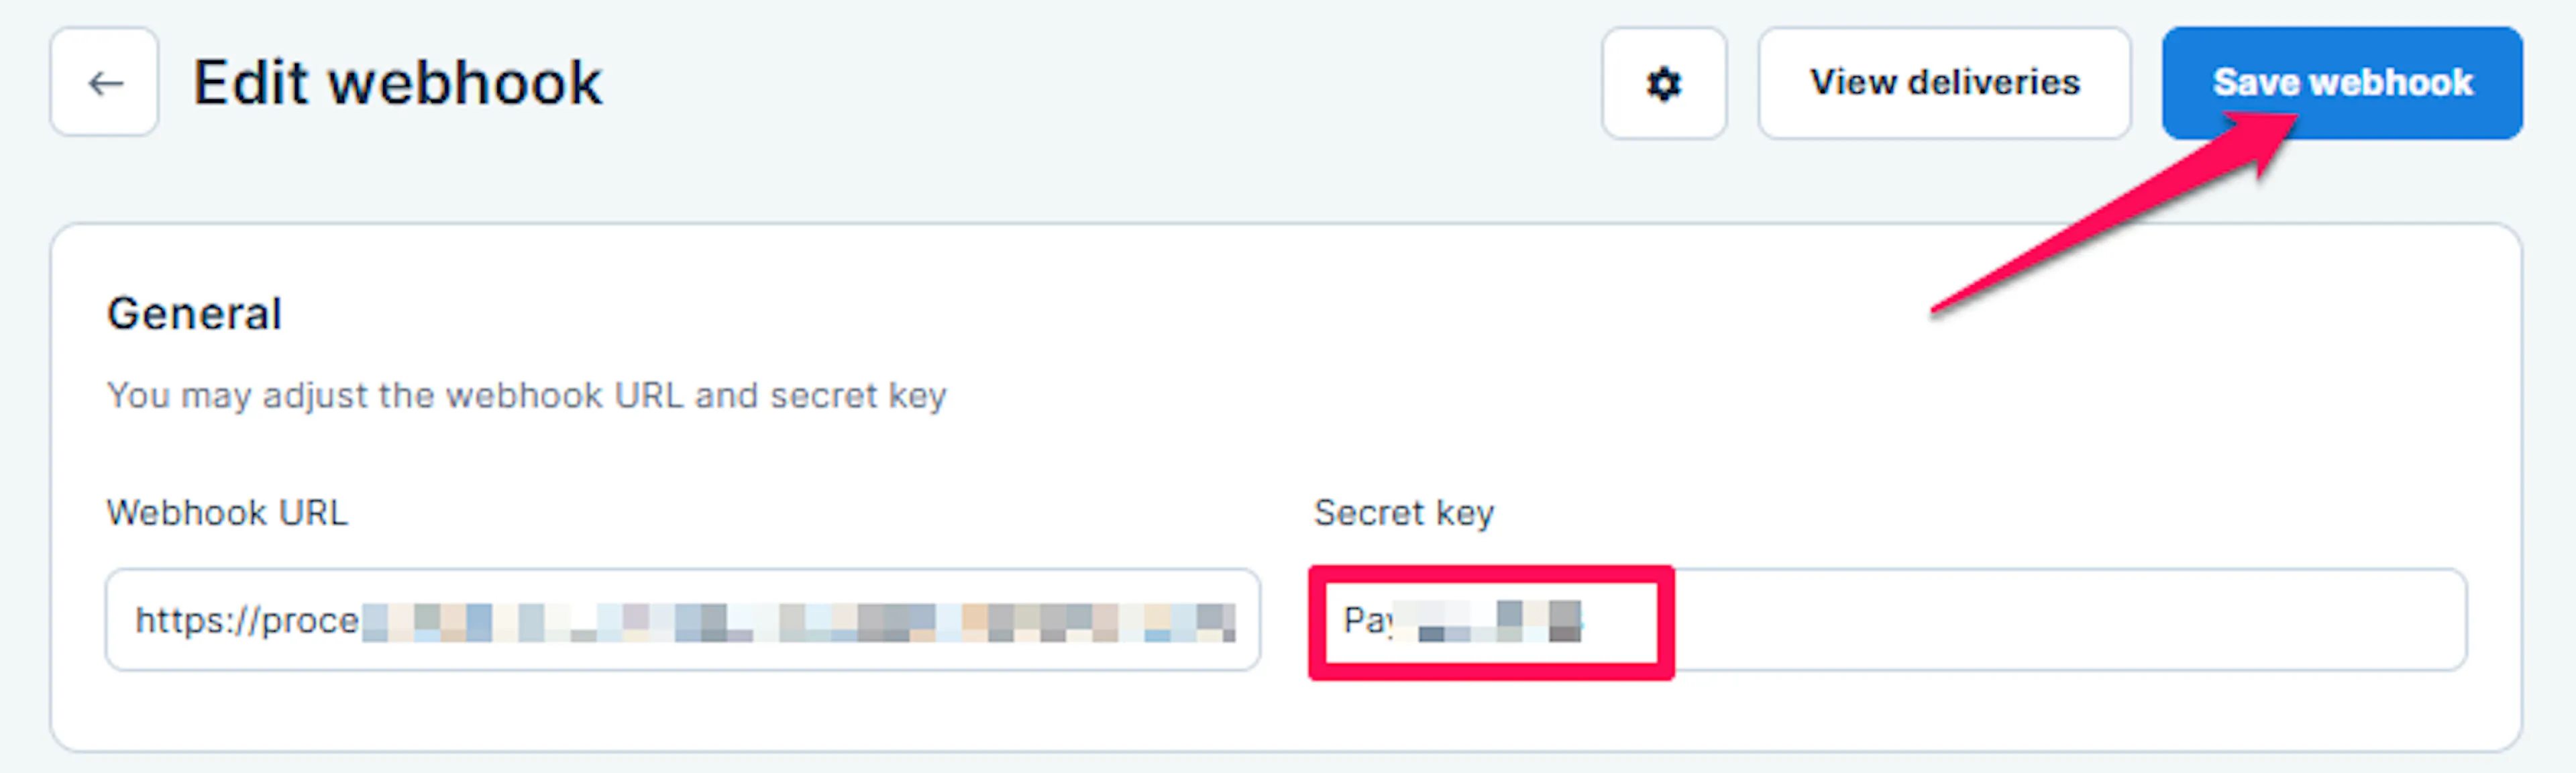
Set and copy the Webhook Secret Key
Set a Secret Key on the KOMOJU webhook (this signs each notification), then copy that same value.
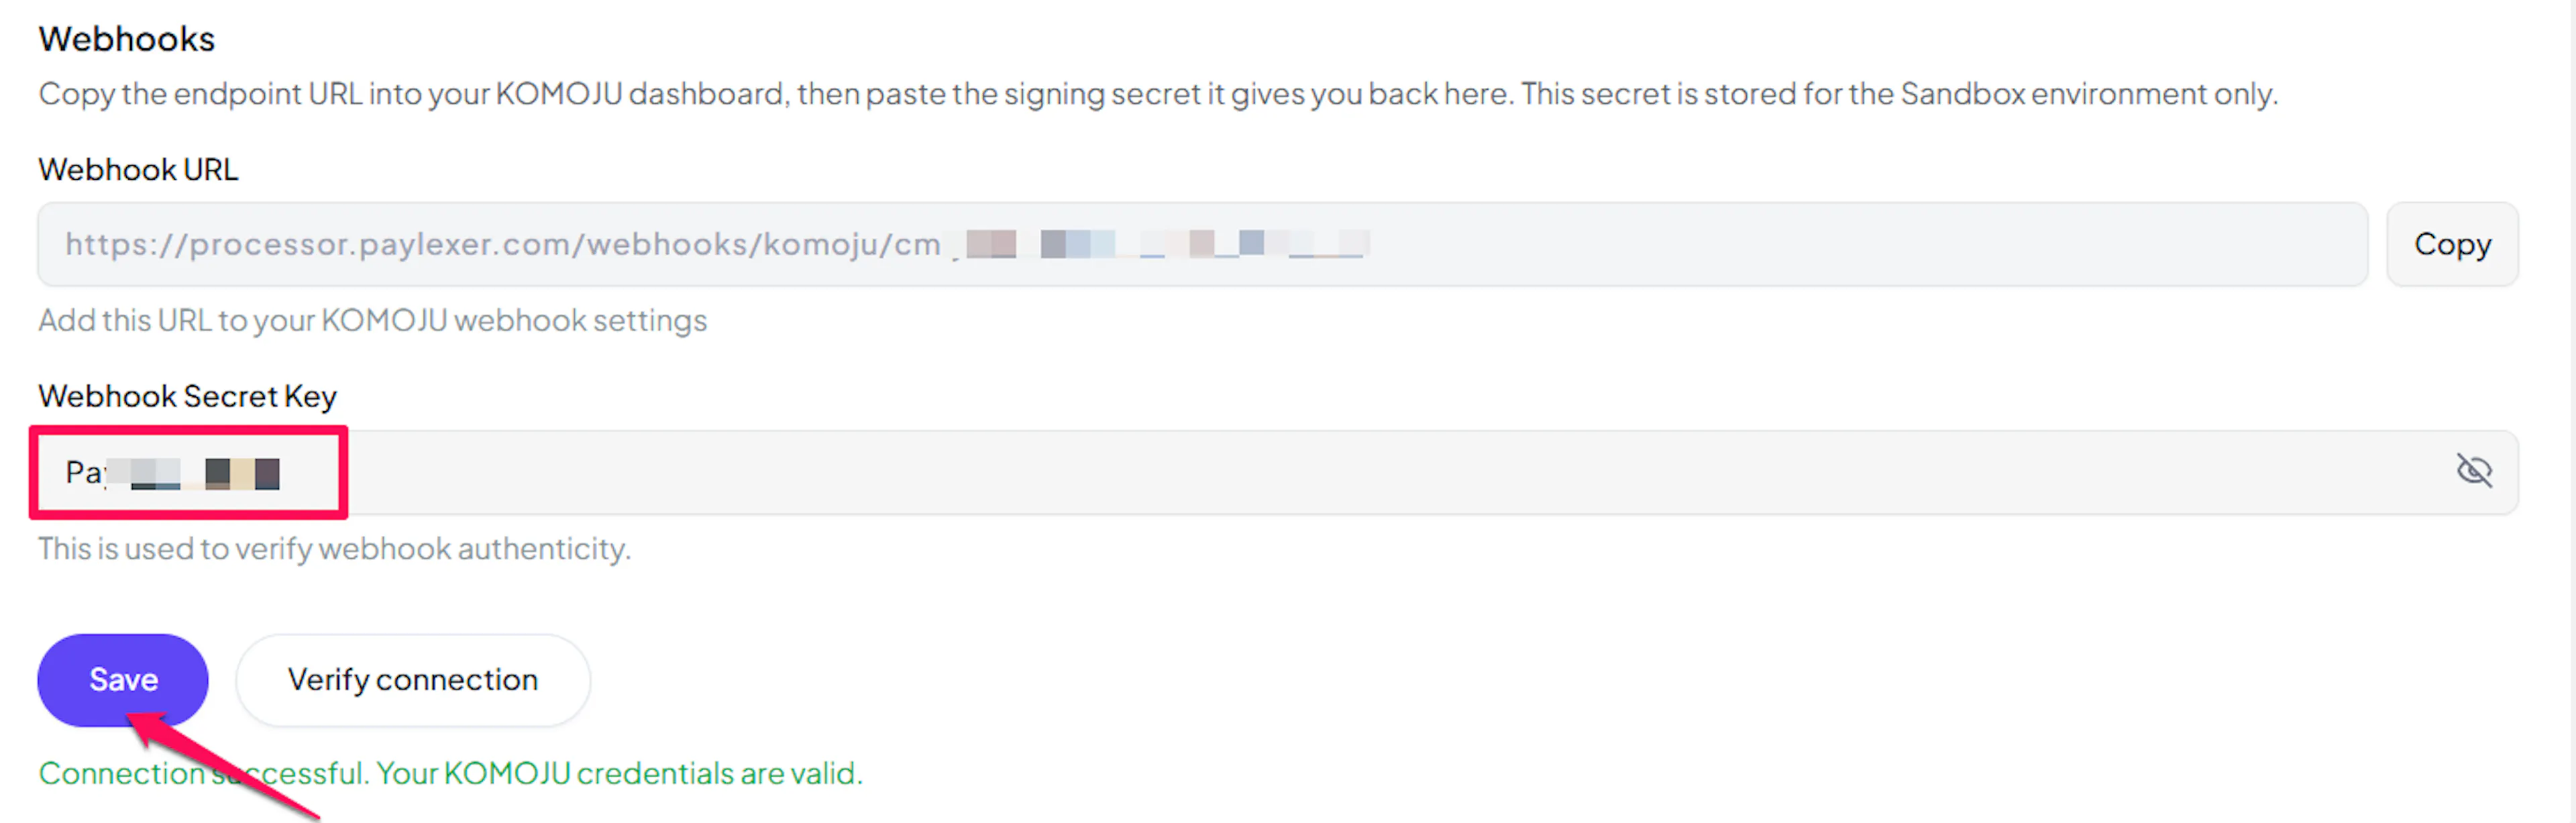
Paste the Webhook Secret Key into PayLexer
Back in PayLexer, paste the value into the Webhook Secret Key field for KOMOJU and click Save. The value must match exactly on both sides.
Integrate KOMOJU to Your Website
If you have already added and configured your site, you can enable KOMOJU in your existing setup.
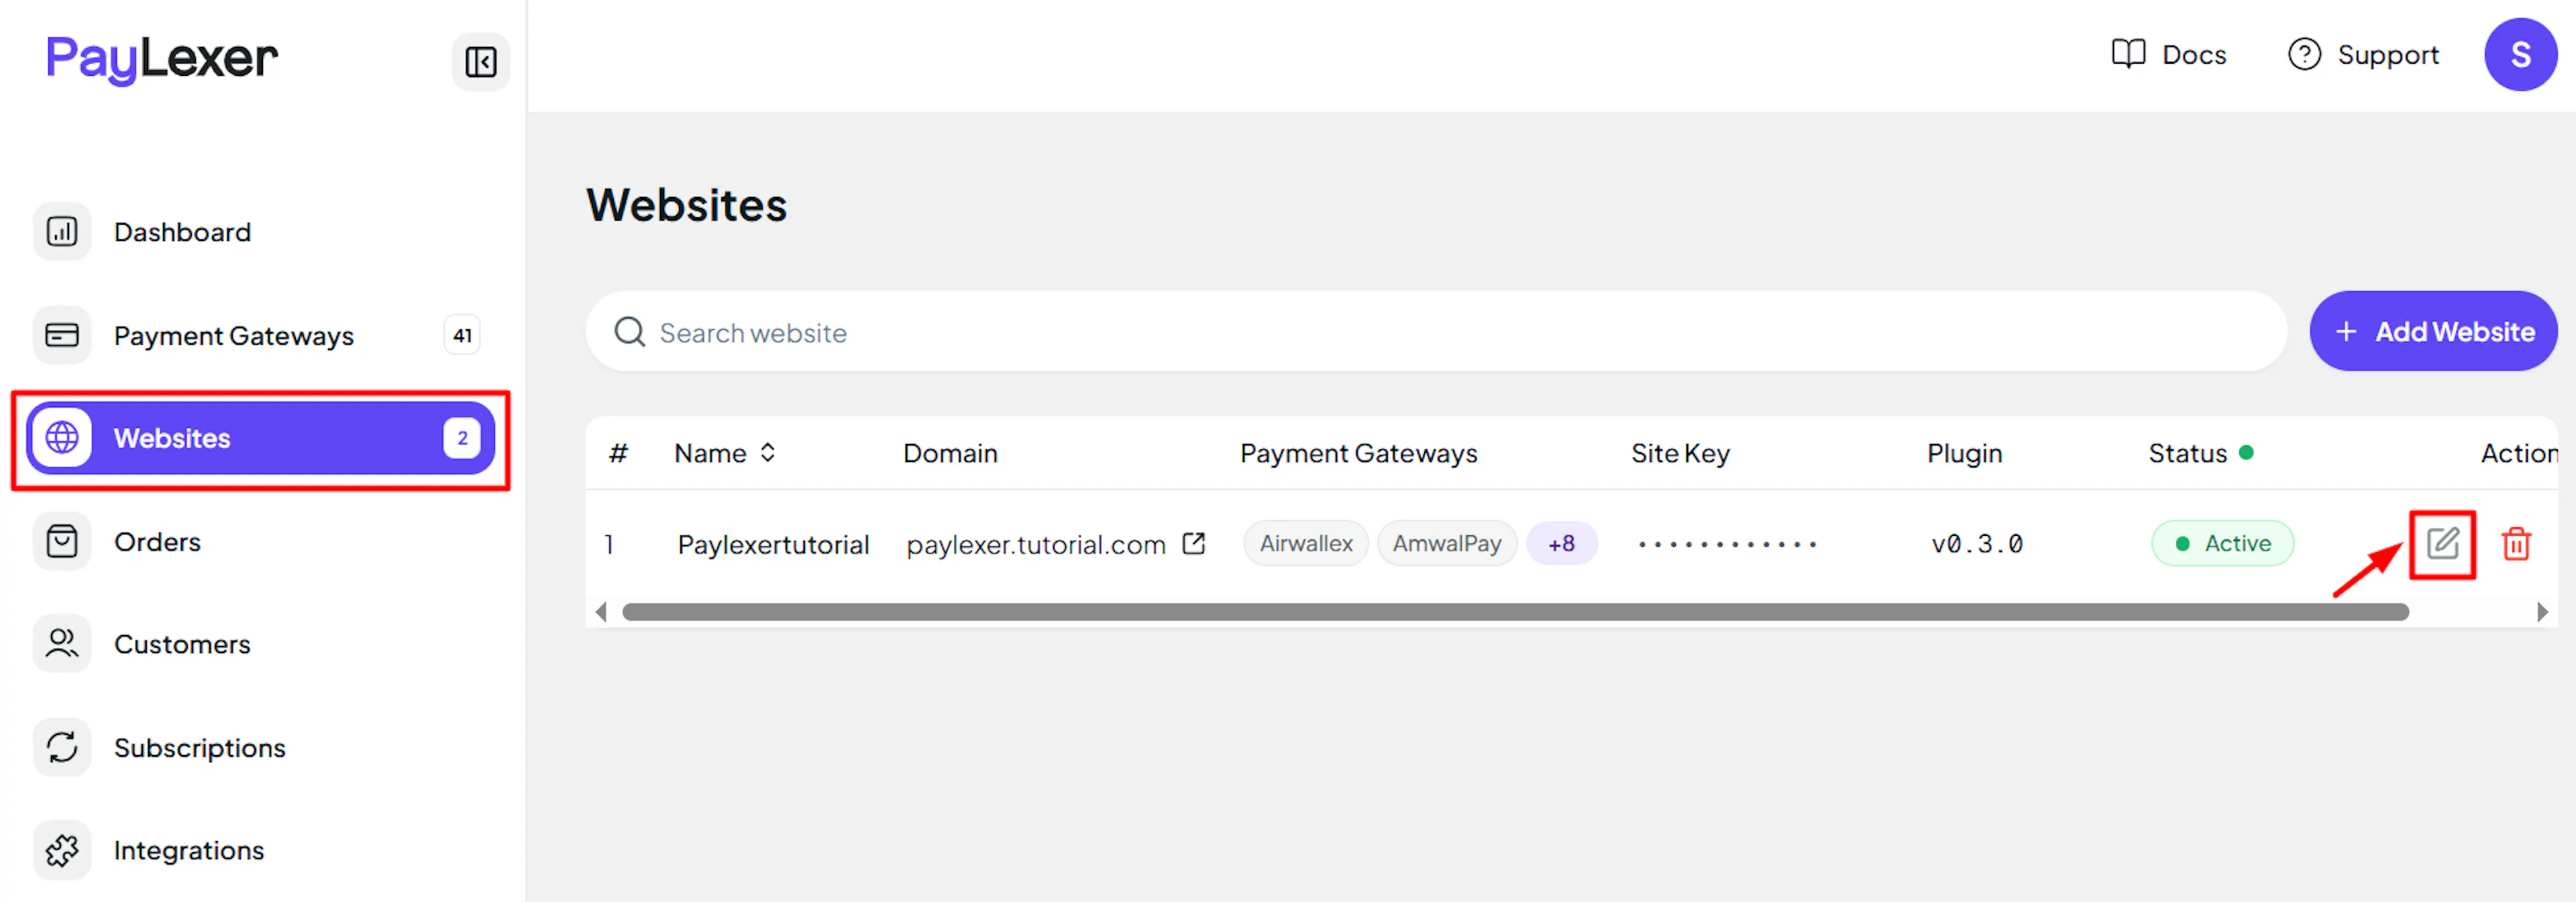
Go to Websites
Navigate to Websites in your PayLexer dashboard.
Edit your website
Click the Edit Icon of your added website.
Enable KOMOJU
Click the checkbox to enable KOMOJU for the website.
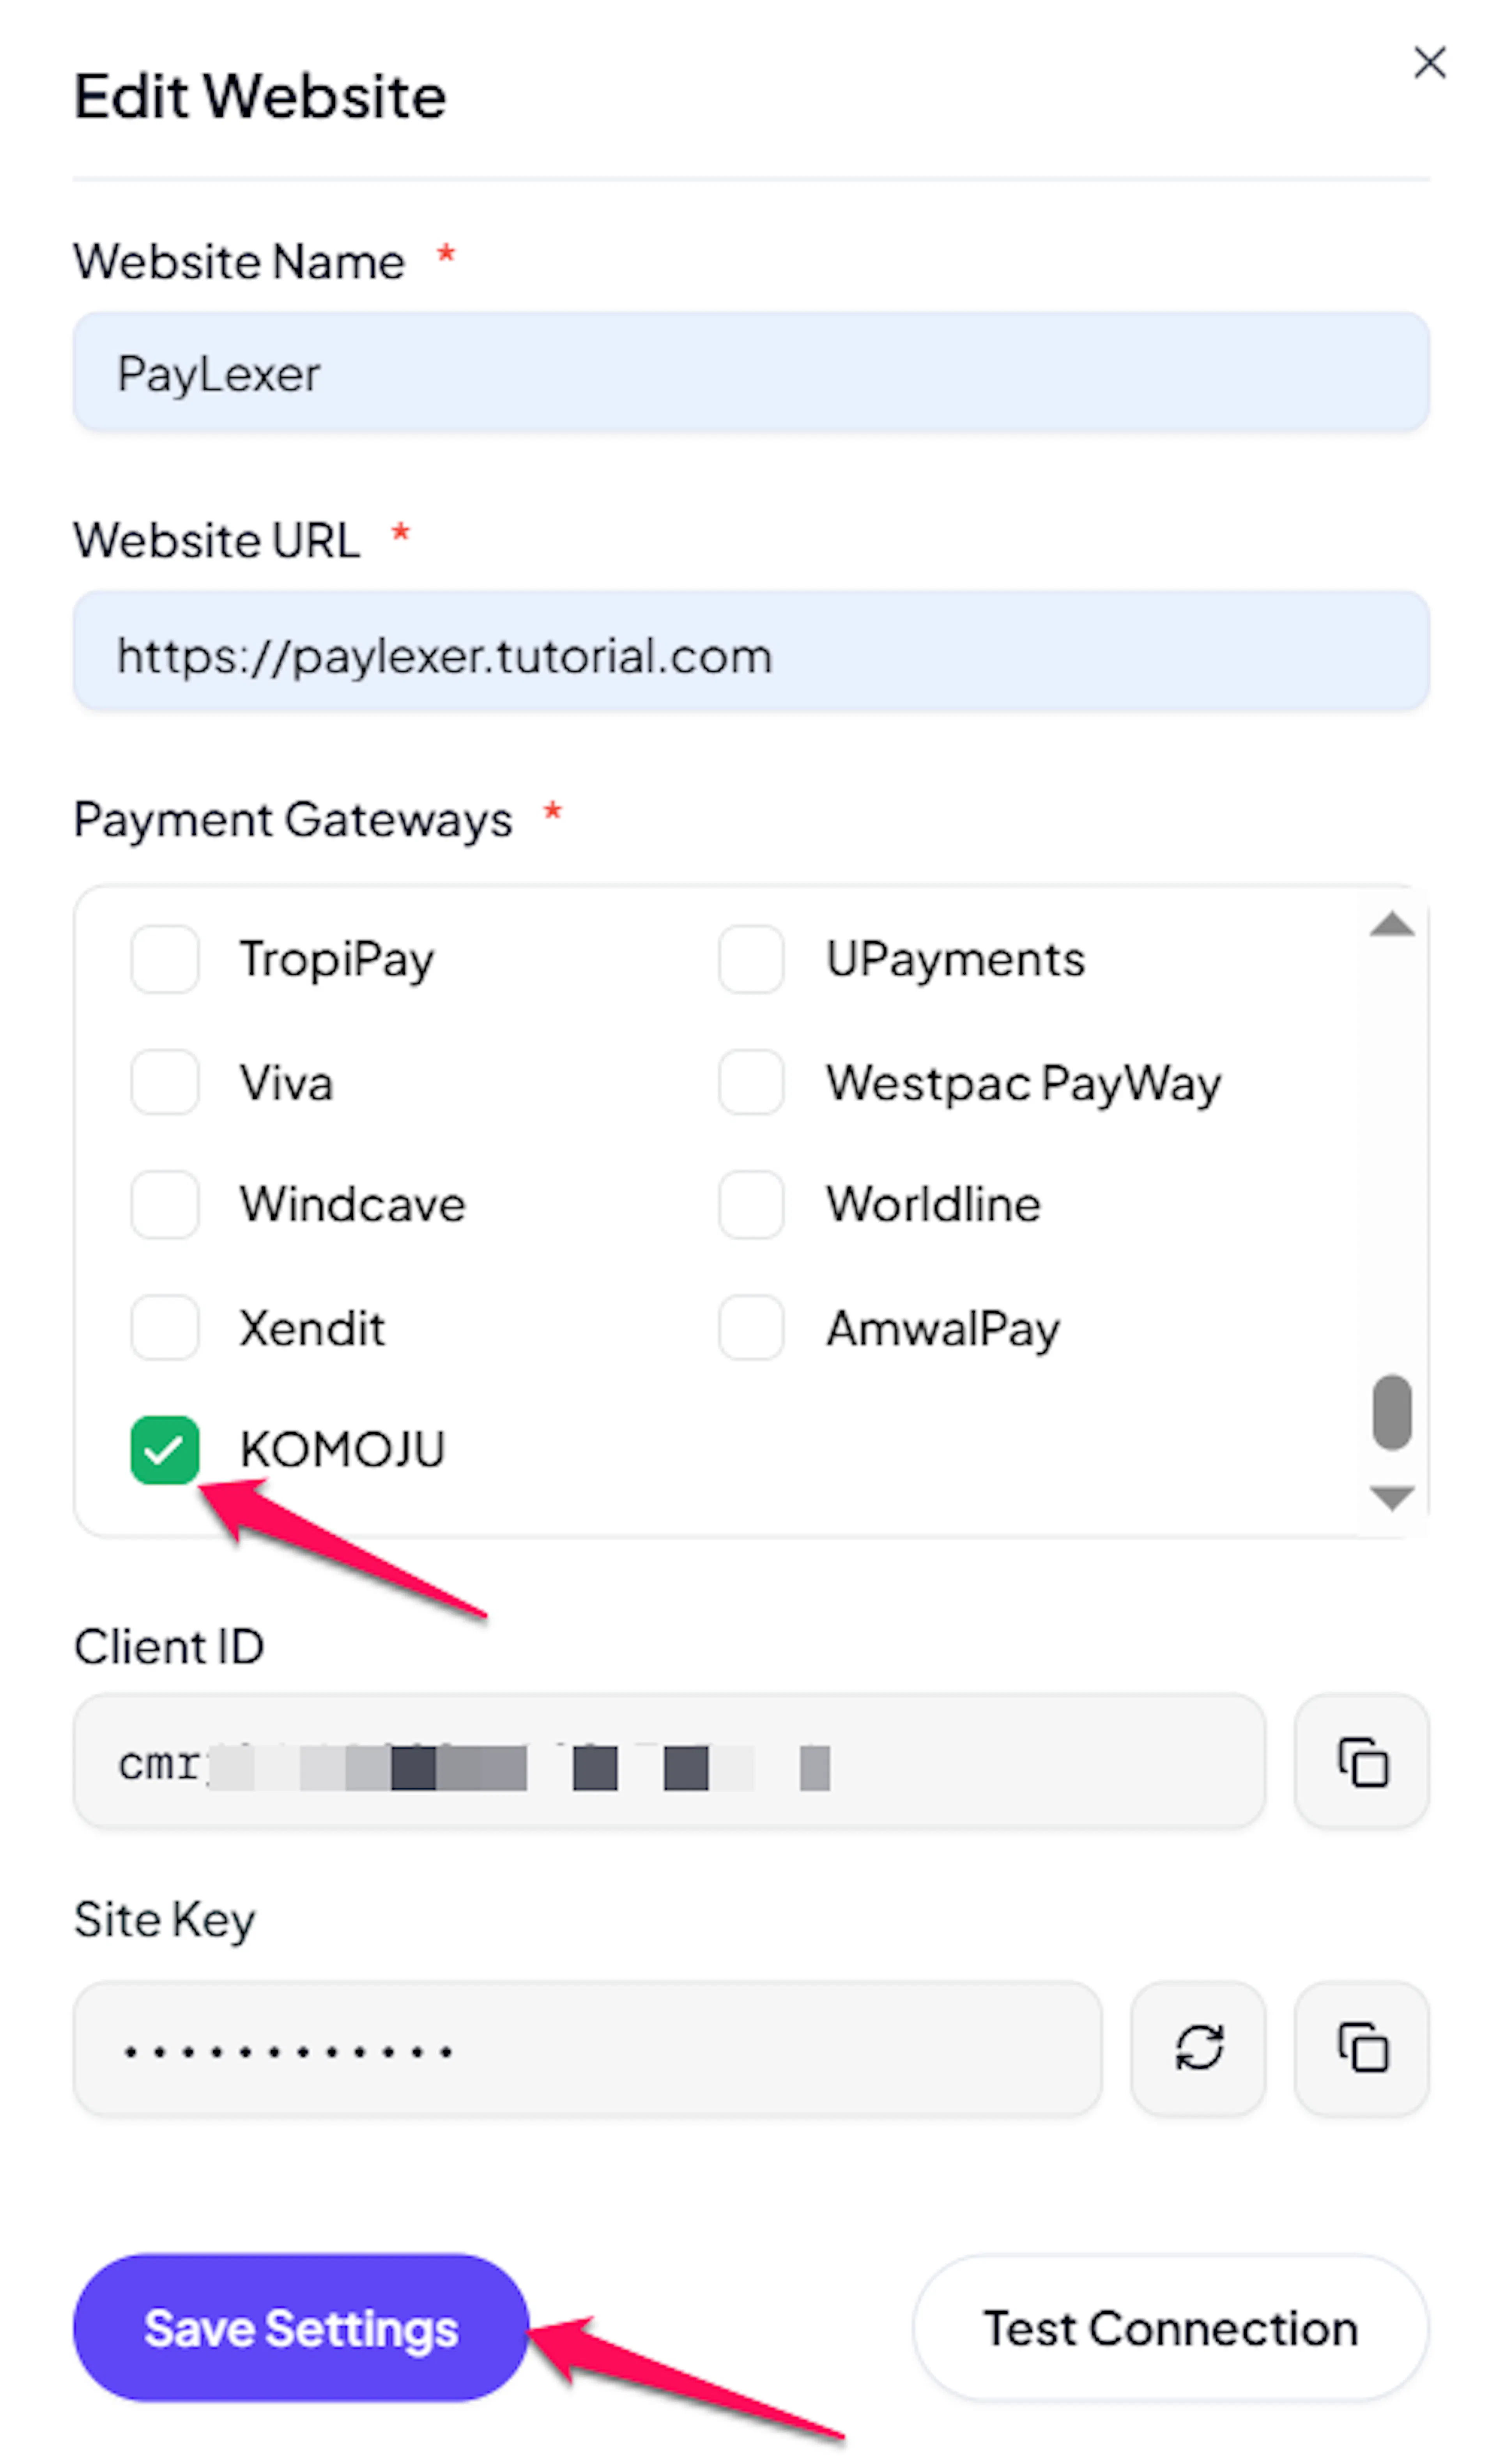
If you haven't added a website yet, Continue to Add Your Website →
Troubleshooting
Best Practices
- Test in sandbox with KOMOJU Test Mode before enabling production.
- Configure webhooks before going live so subscriptions and konbini/bank-transfer payments settle correctly.
- Use the same Webhook Secret Key value in KOMOJU and PayLexer.
- Keep both Live and Test Secret Keys saved so you can switch modes without reconfiguring.
- Price subscription plans in whole units for JPY - the Japanese yen has no decimal places.
FAQs
Still Have Questions?
- KOMOJU Support: KOMOJU Help Center
- PayLexer Support: Contact Support