

ONVO Pay
Connect ONVO Pay to PayLexer to accept cards, SINPE Móvil, SINPE PIN bank deposits, Zunify, Credix, and crypto in Costa Rica and Latin America, with ONVO-managed subscriptions and free trials.
ONVO Pay is a Costa Rican payment platform, registered with Costa Rica's financial regulator, that covers the payment methods Central American shoppers actually use. Alongside cards and Google Pay, it supports SINPE Móvil (Costa Rica's instant mobile bank transfer), SINPE PIN bank deposits, the Zunify wallet, Credix instalment plans, and crypto. PayLexer sends one-time purchases to ONVO's hosted payment page, so every method enabled on your ONVO account is offered without card data touching your site, and ONVO runs recurring billing itself once a subscription starts.
- Supported Regions (Merchant Accounts): Costa Rica, Guatemala, Peru - view full list
- Supported Currencies: USD, CRC, GTQ, NIO, PAB, PEN, MXN, COP, HNL
Supported Features
- Hosted payment page for one-time purchases, presenting every method you have switched on in ONVO (card, Google Pay, SINPE Móvil, SINPE PIN bank deposit, Zunify, Credix, crypto)
- Deferred payment handling, so a SINPE transfer or bank deposit that settles after checkout still completes the order
- Recurring subscriptions billed by ONVO on its own schedule, with renewals reported back to PayLexer automatically
- Free trials on subscriptions
- Full and partial refunds
- Webhook notifications for payment and subscription renewal events, verified with a shared secret
ONVO limits worth knowing before you launch:
- A payment can be refunded once only. A partial refund uses up that single refund, so you cannot refund half today and the rest next week.
- Only card payments can be refunded. SINPE Móvil, bank deposit, and Zunify payments must be returned outside PayLexer.
- Subscriptions are card-only and collect the card in a form on your own page, because ONVO's hosted page cannot start a subscription.
- Sign-up fees are not supported on ONVO subscriptions. Free trials are.
Before You Start
Make sure you have:
- ONVO Pay Account – Don't have one? Sign up for ONVO Pay →
- PayLexer Account – Required to configure the integration. Create your account →
- A website where you want to integrate
Looking for a different payment processor? View all supported gateways →
Configuring ONVO Pay
You need a Secret Key and Publishable Key from ONVO Pay for this integration.
Getting API Credentials
Open the ONVO dashboard
Log in to your ONVO dashboard.
New accounts start in test mode with test keys already generated. Live keys become available once ONVO completes your onboarding.
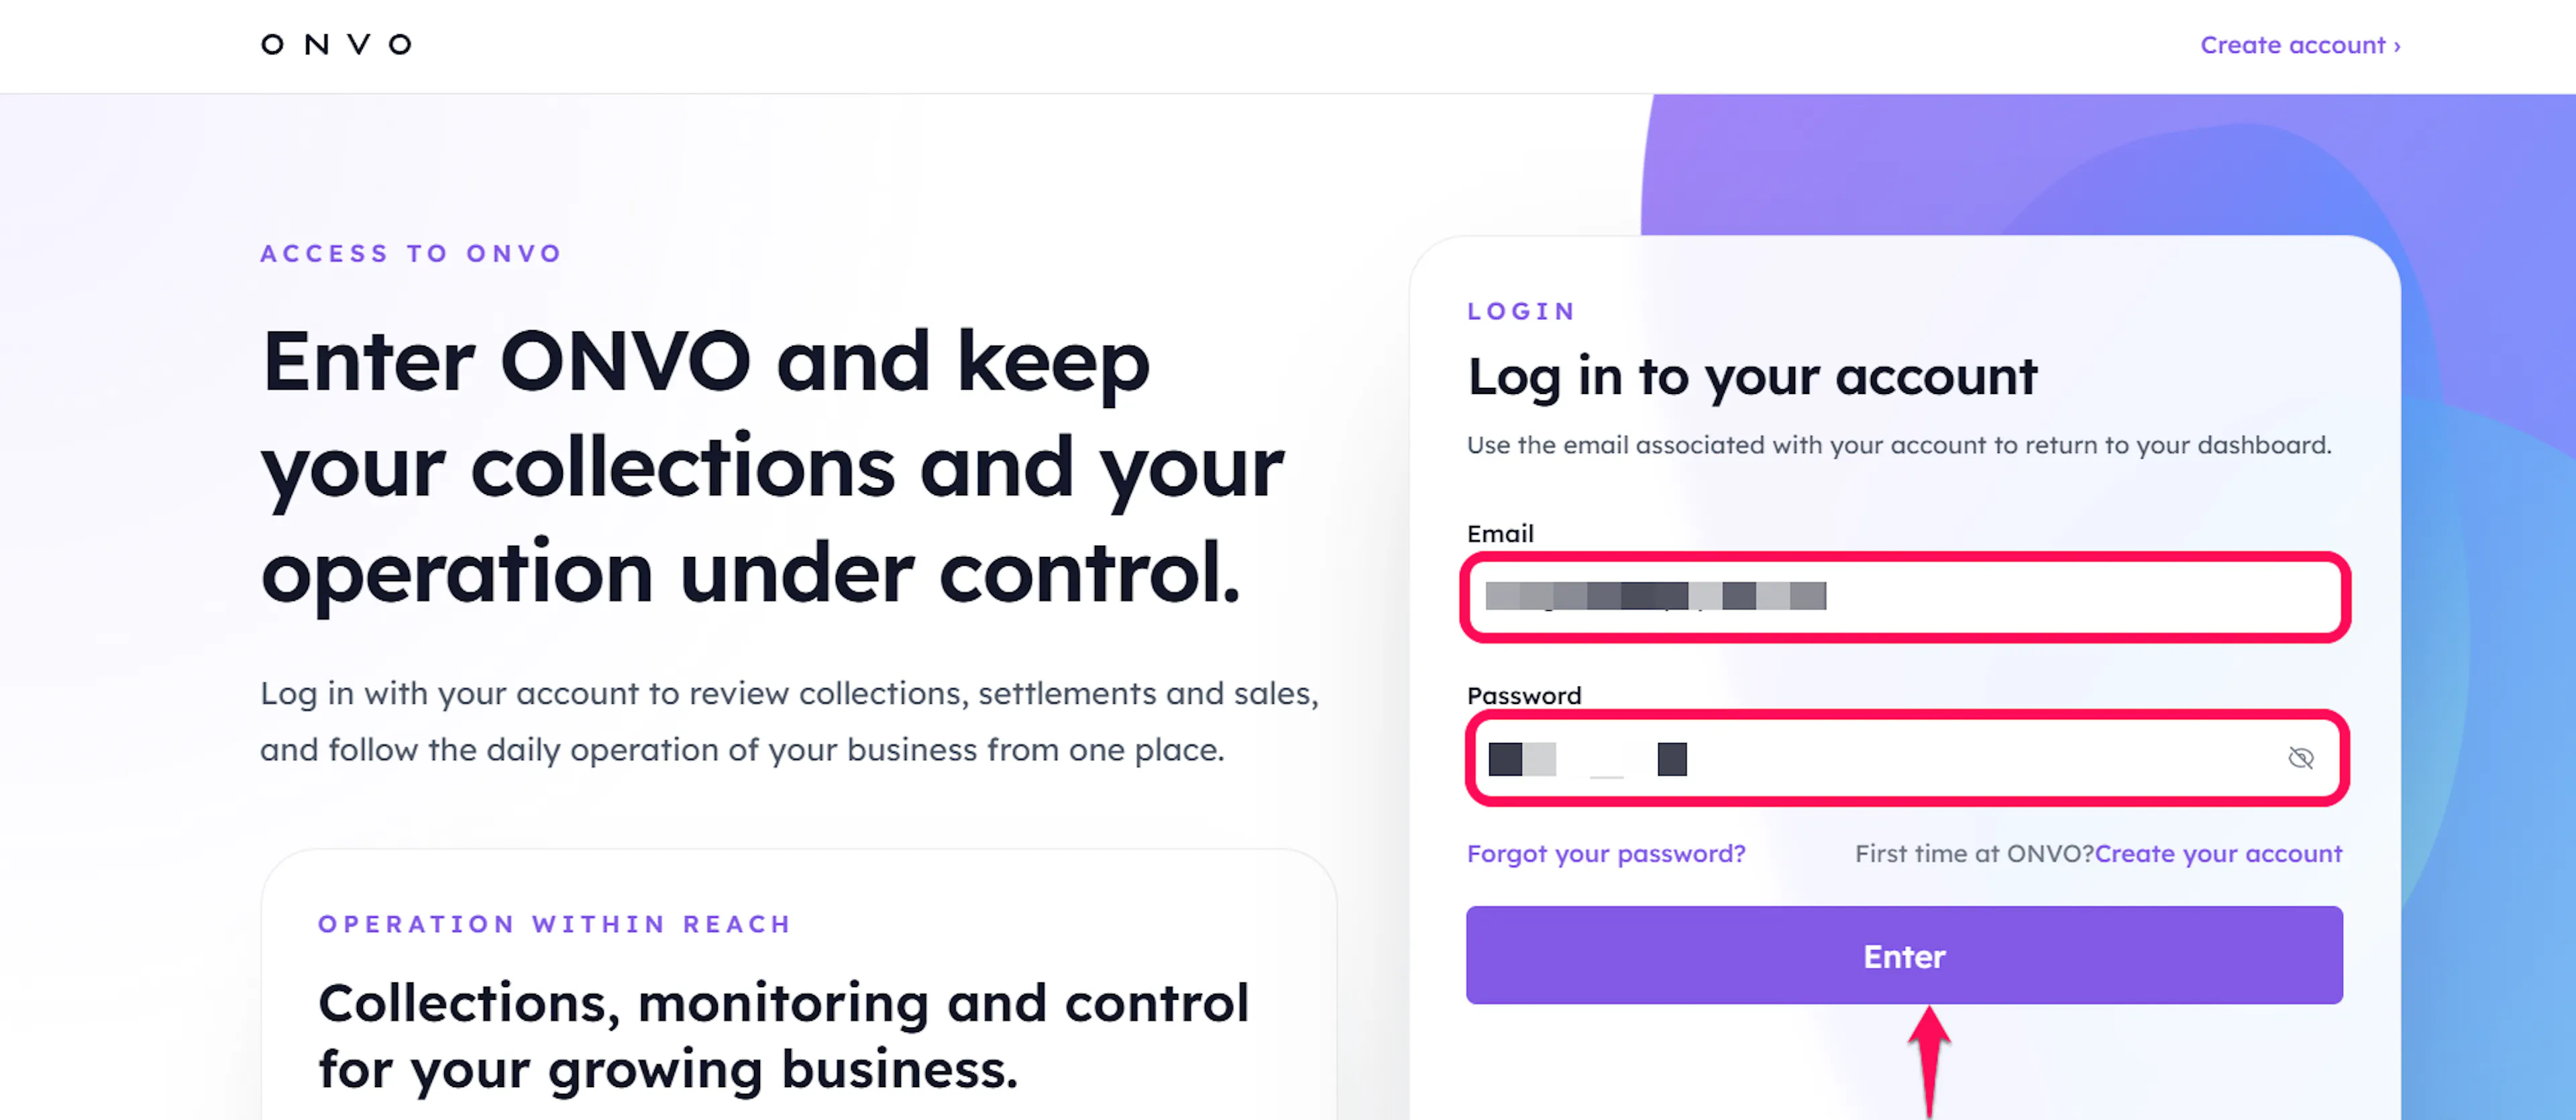
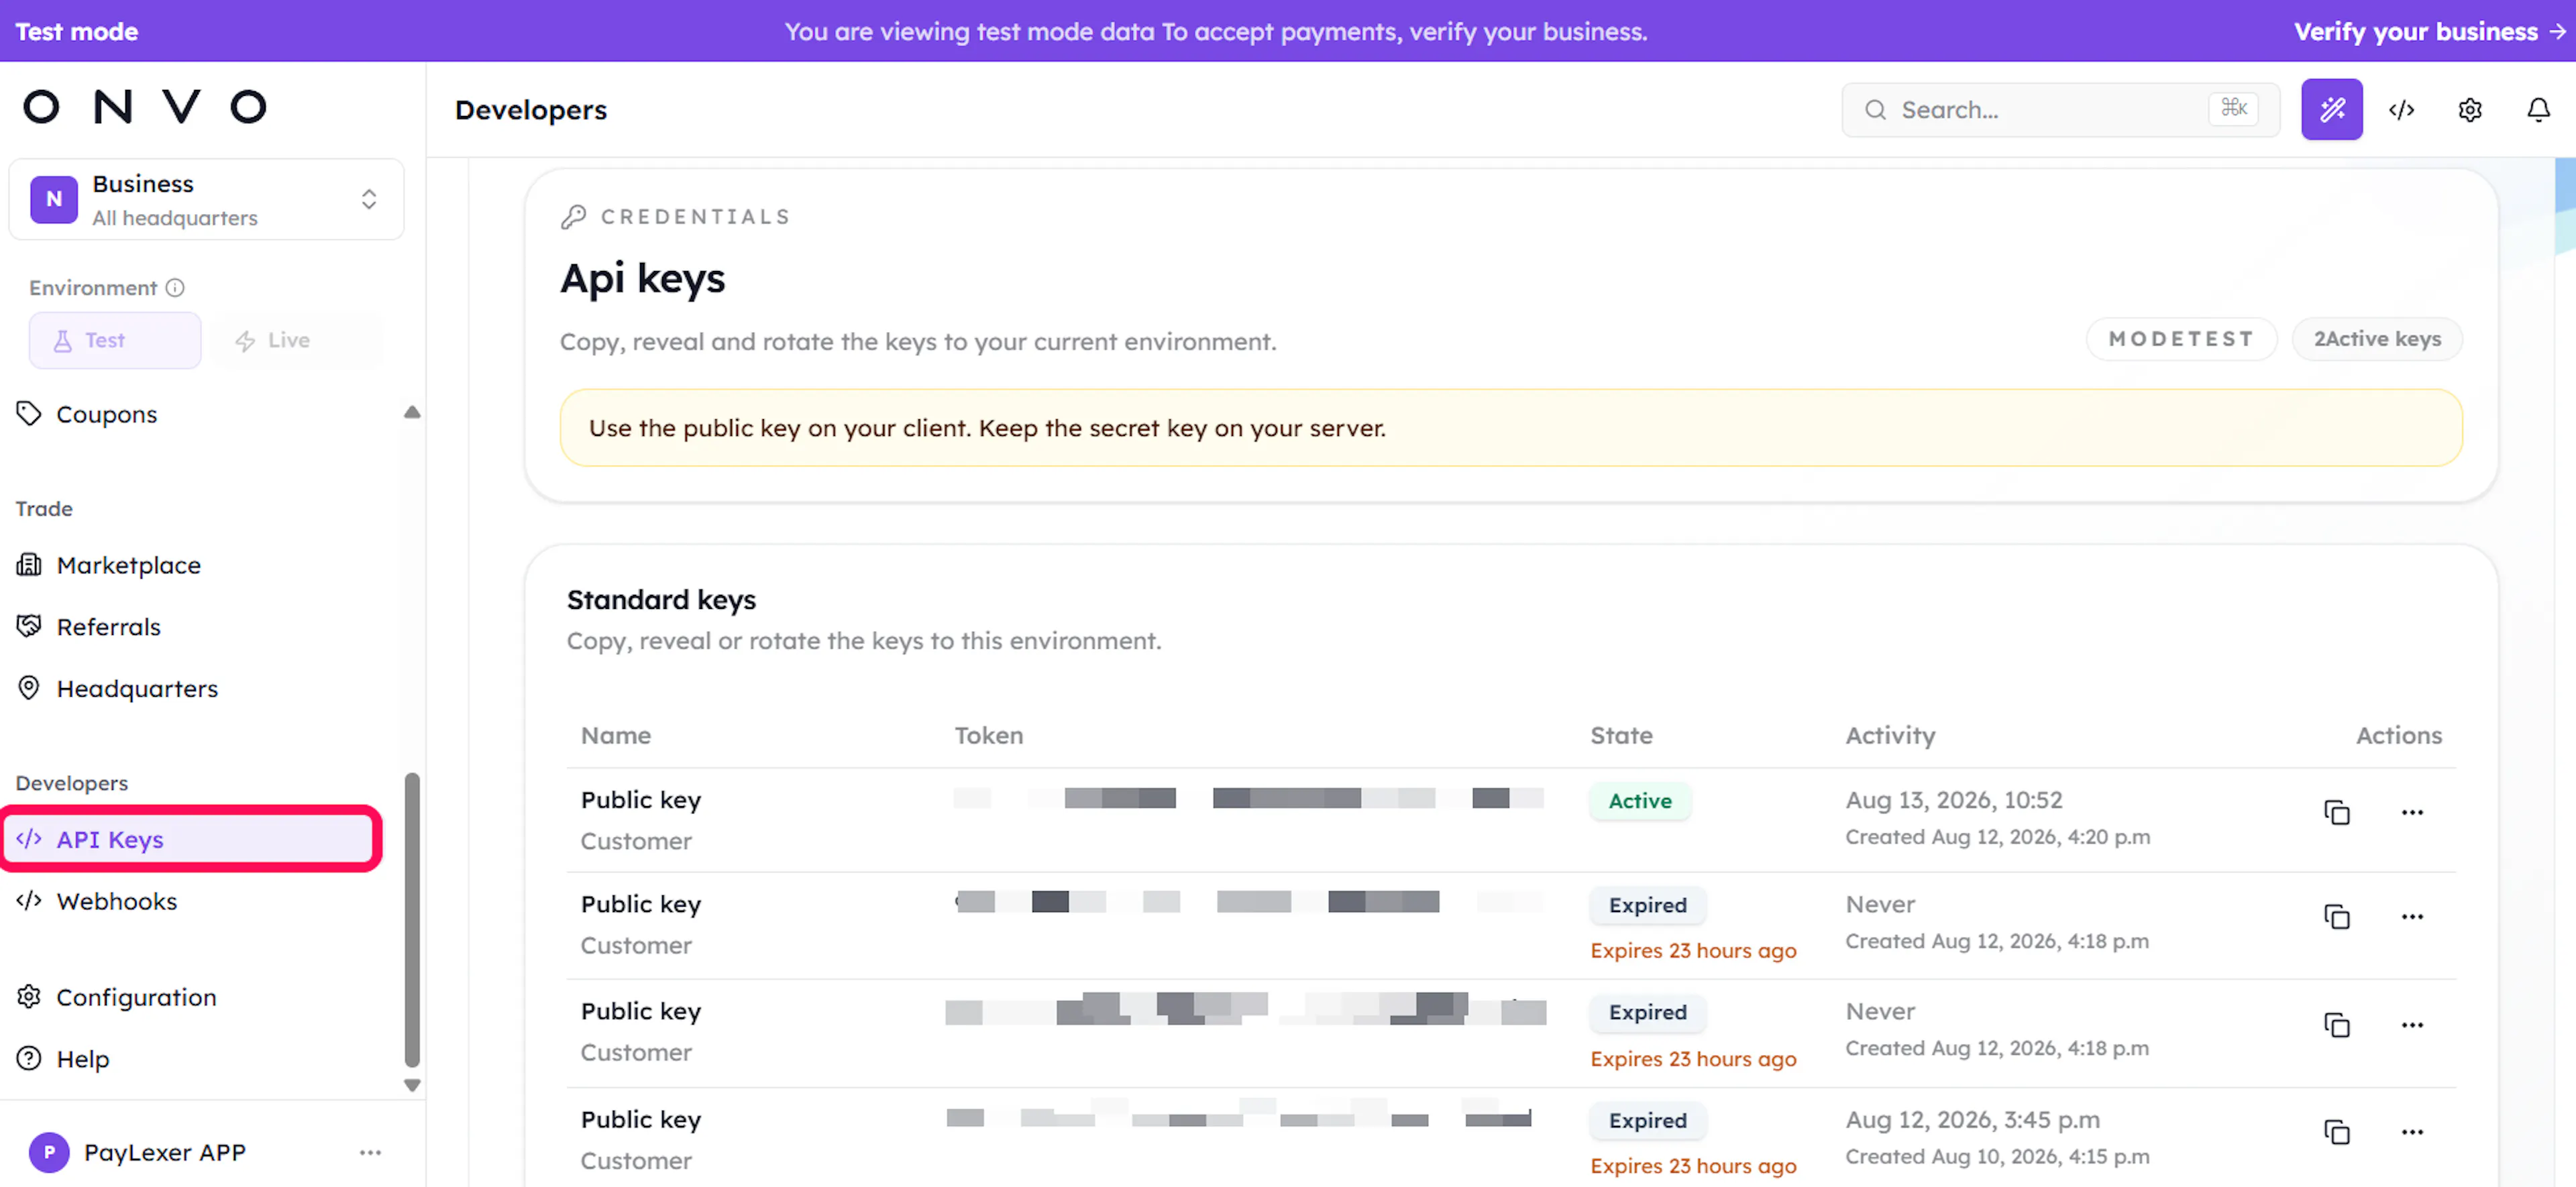
Go to API Keys
In the sidebar, open the Developers section and click API Keys. The page has two tabs: API Keys and Webhooks.
Reveal your Secret Key and Publishable Key
- Click the options menu (three dots) next to the key you need, then click Rotate.
- In the Rotate API key modal, choose when the current key stops working: Now, or an expiration date such as 7 days out.
- Copy the new key and paste it into PayLexer.
Repeat for both the Publishable Key and the Secret Key.
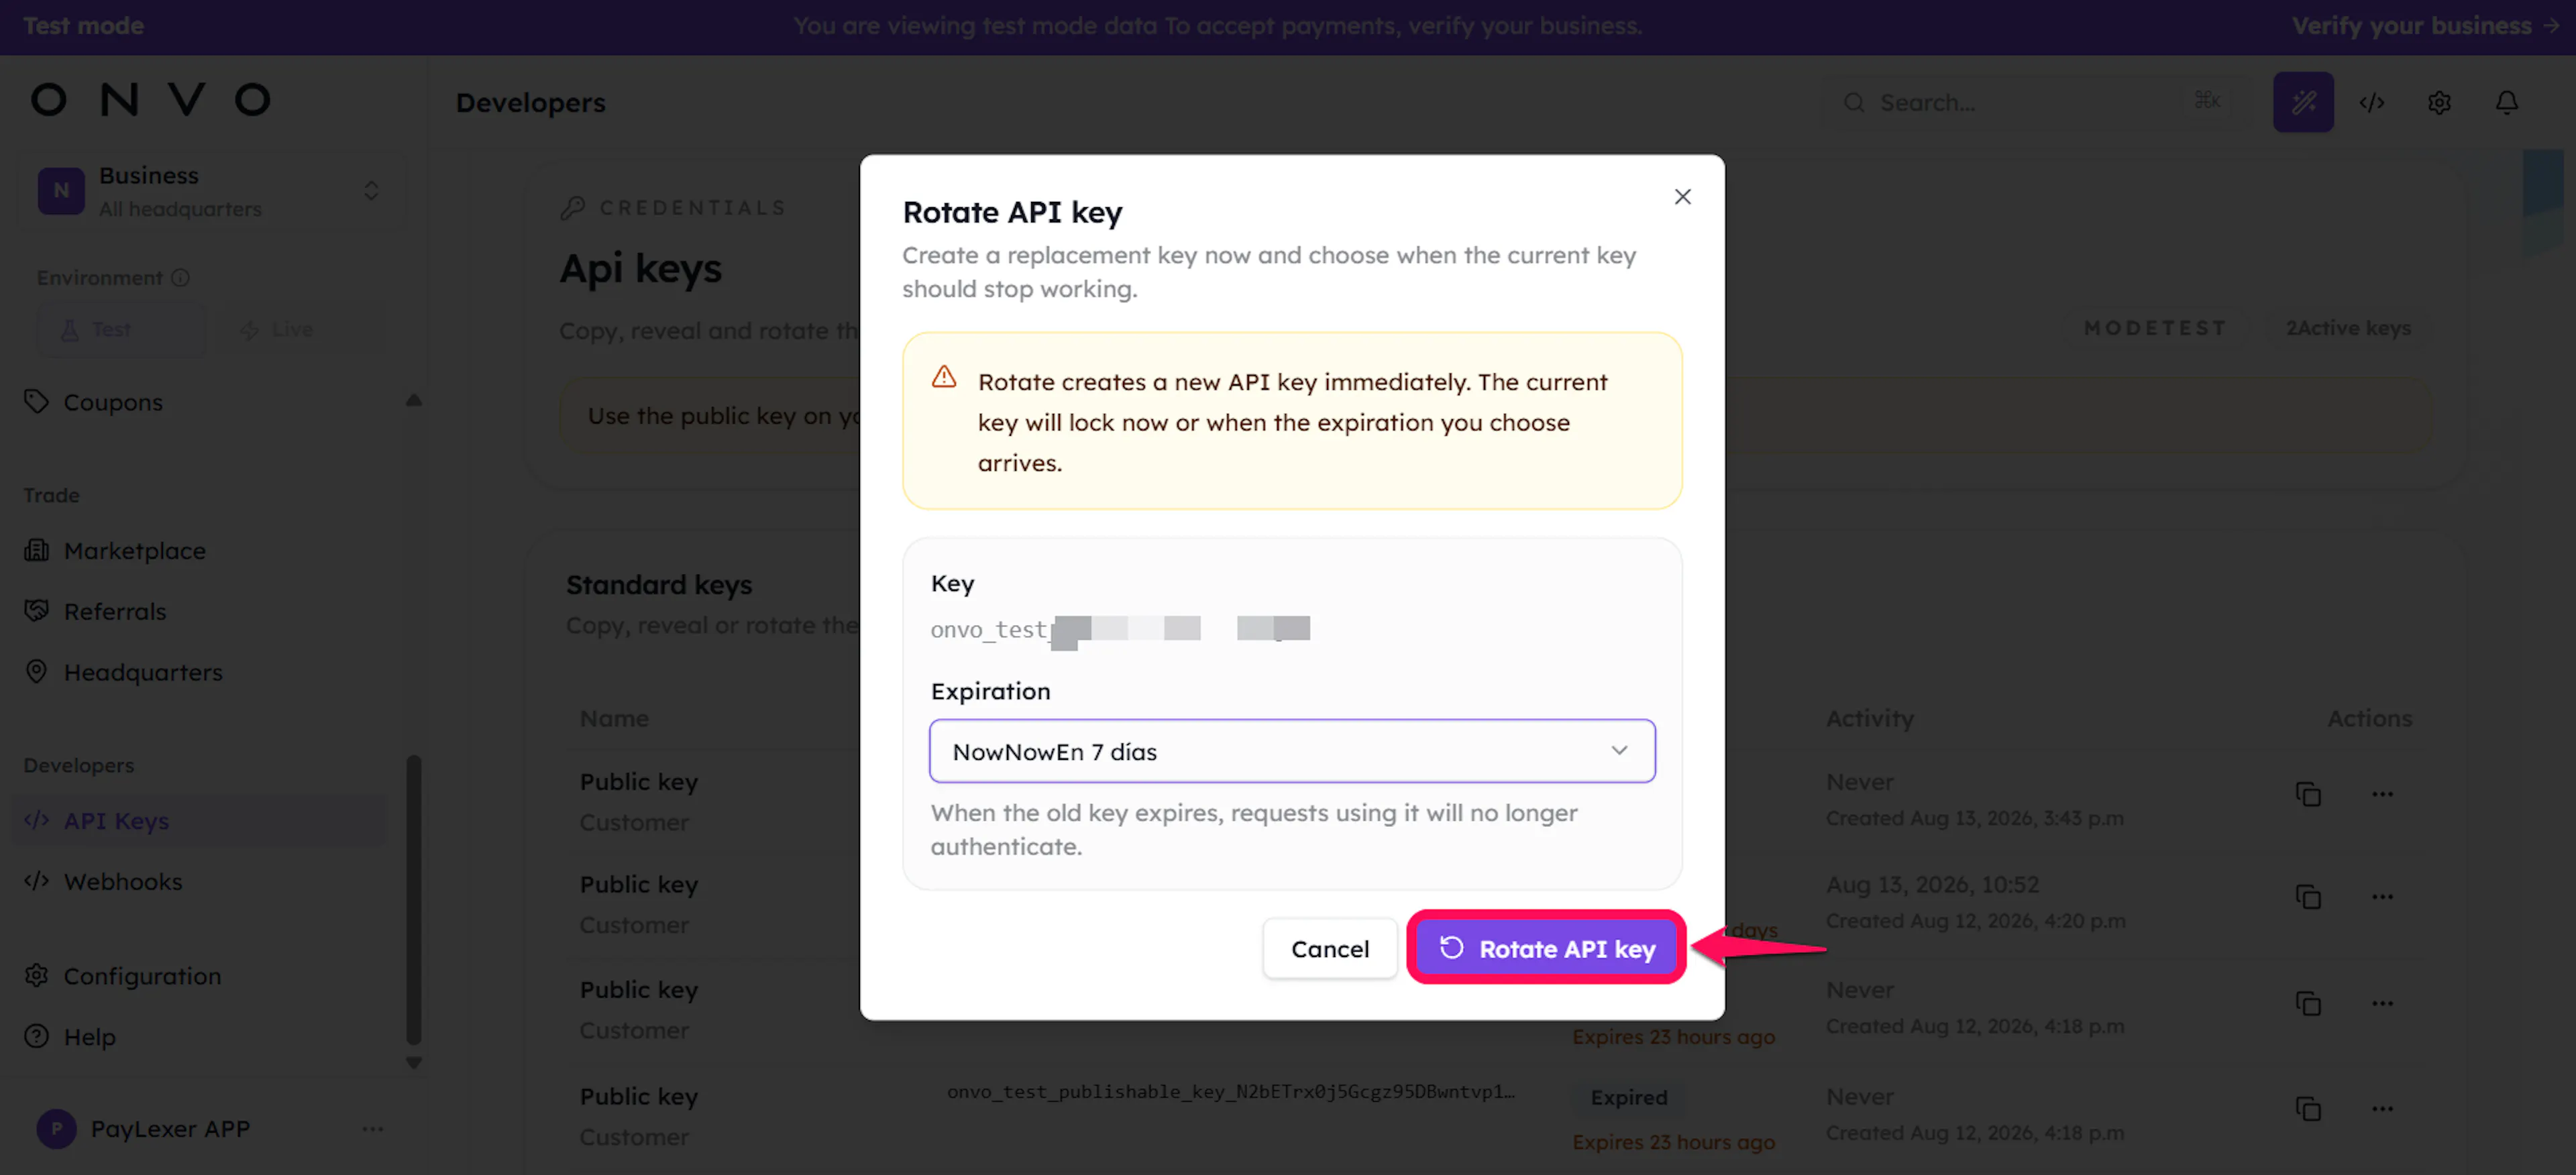
Rotating replaces the key. If the current key is already used by another integration, pick an expiration date instead of Now so that integration keeps working until you update it.
The key prefix decides the environment. onvo_test_secret_key_... and onvo_test_publishable_key_... are test keys; onvo_live_... keys process real money. Switch the dashboard to live mode to rotate live keys.
Adding Credentials to PayLexer
Open PayLexer Dashboard
Log in to your PayLexer dashboard and navigate to Payment Gateways -> ONVO Pay.
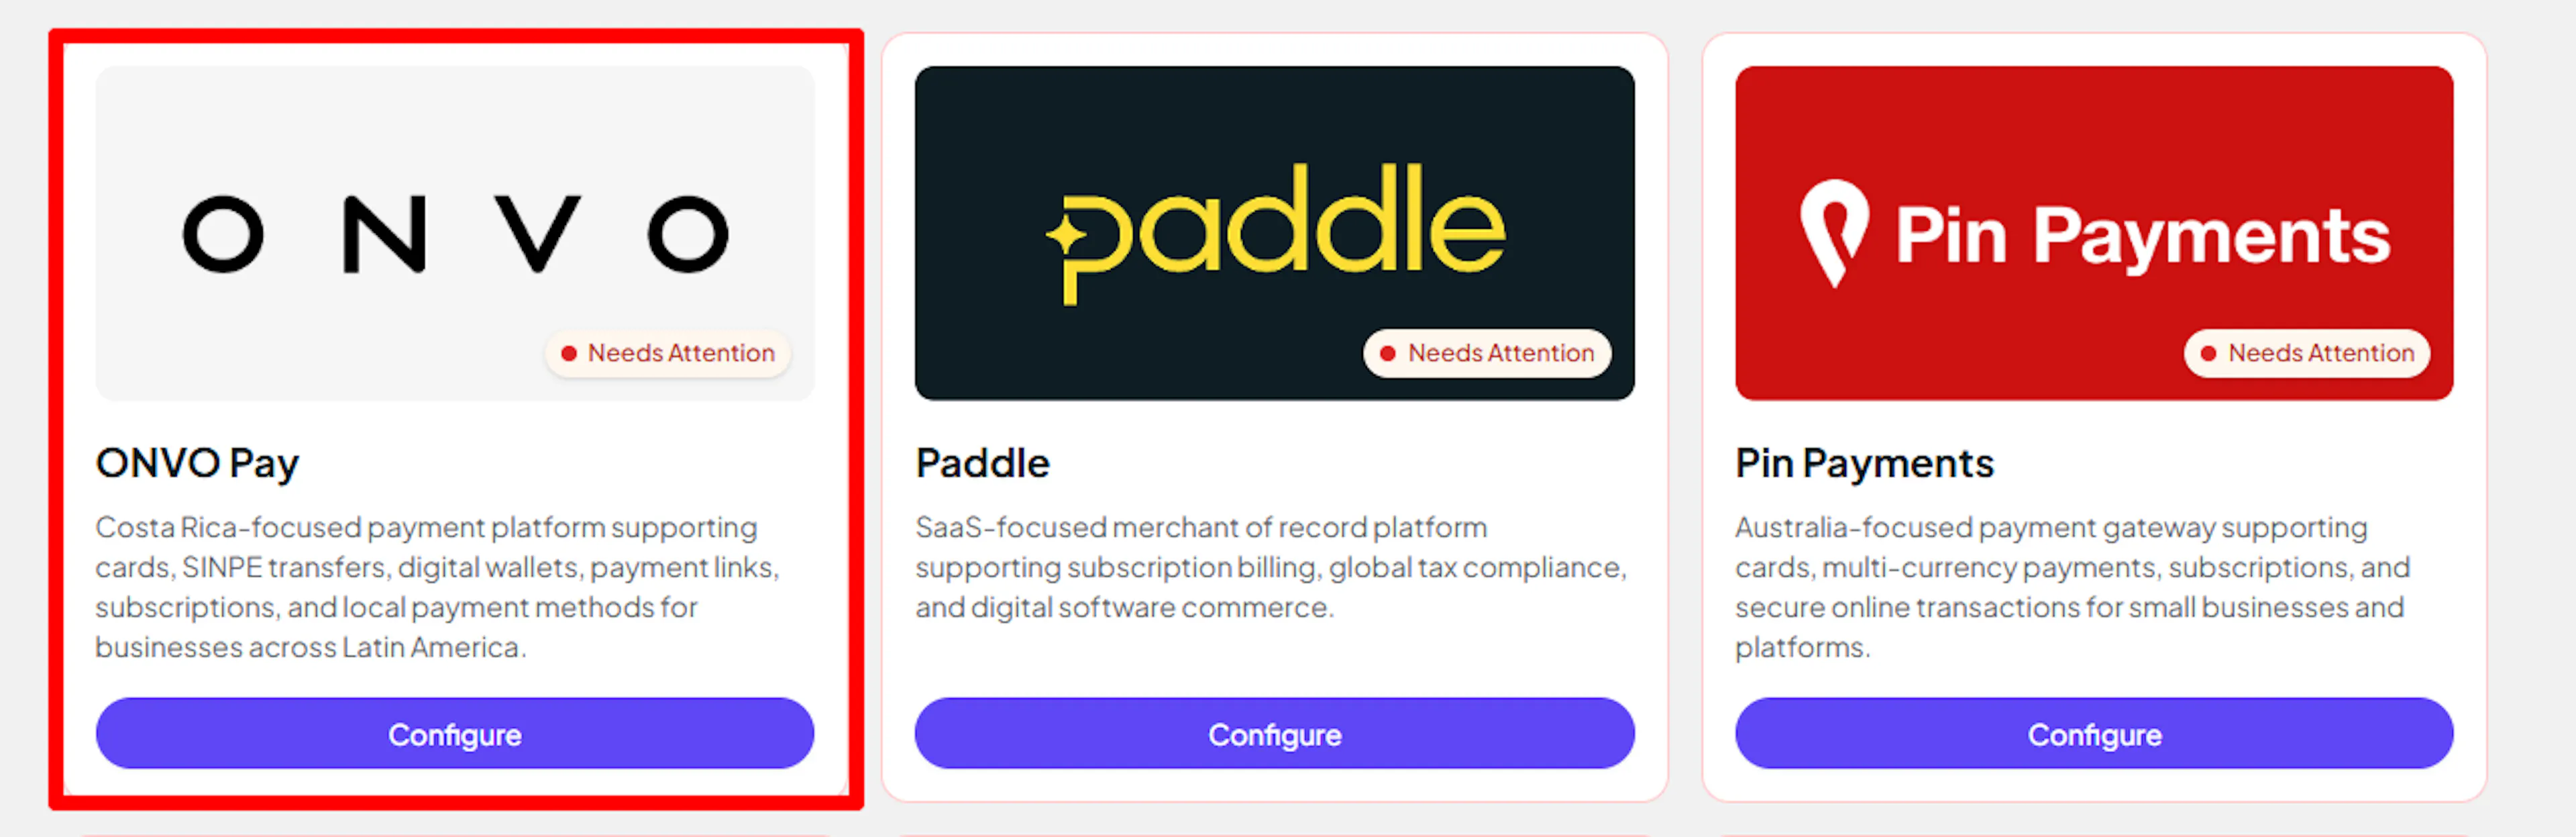
Enter your credentials
Paste the Secret Key and Publishable Key you copied from ONVO into the corresponding fields.
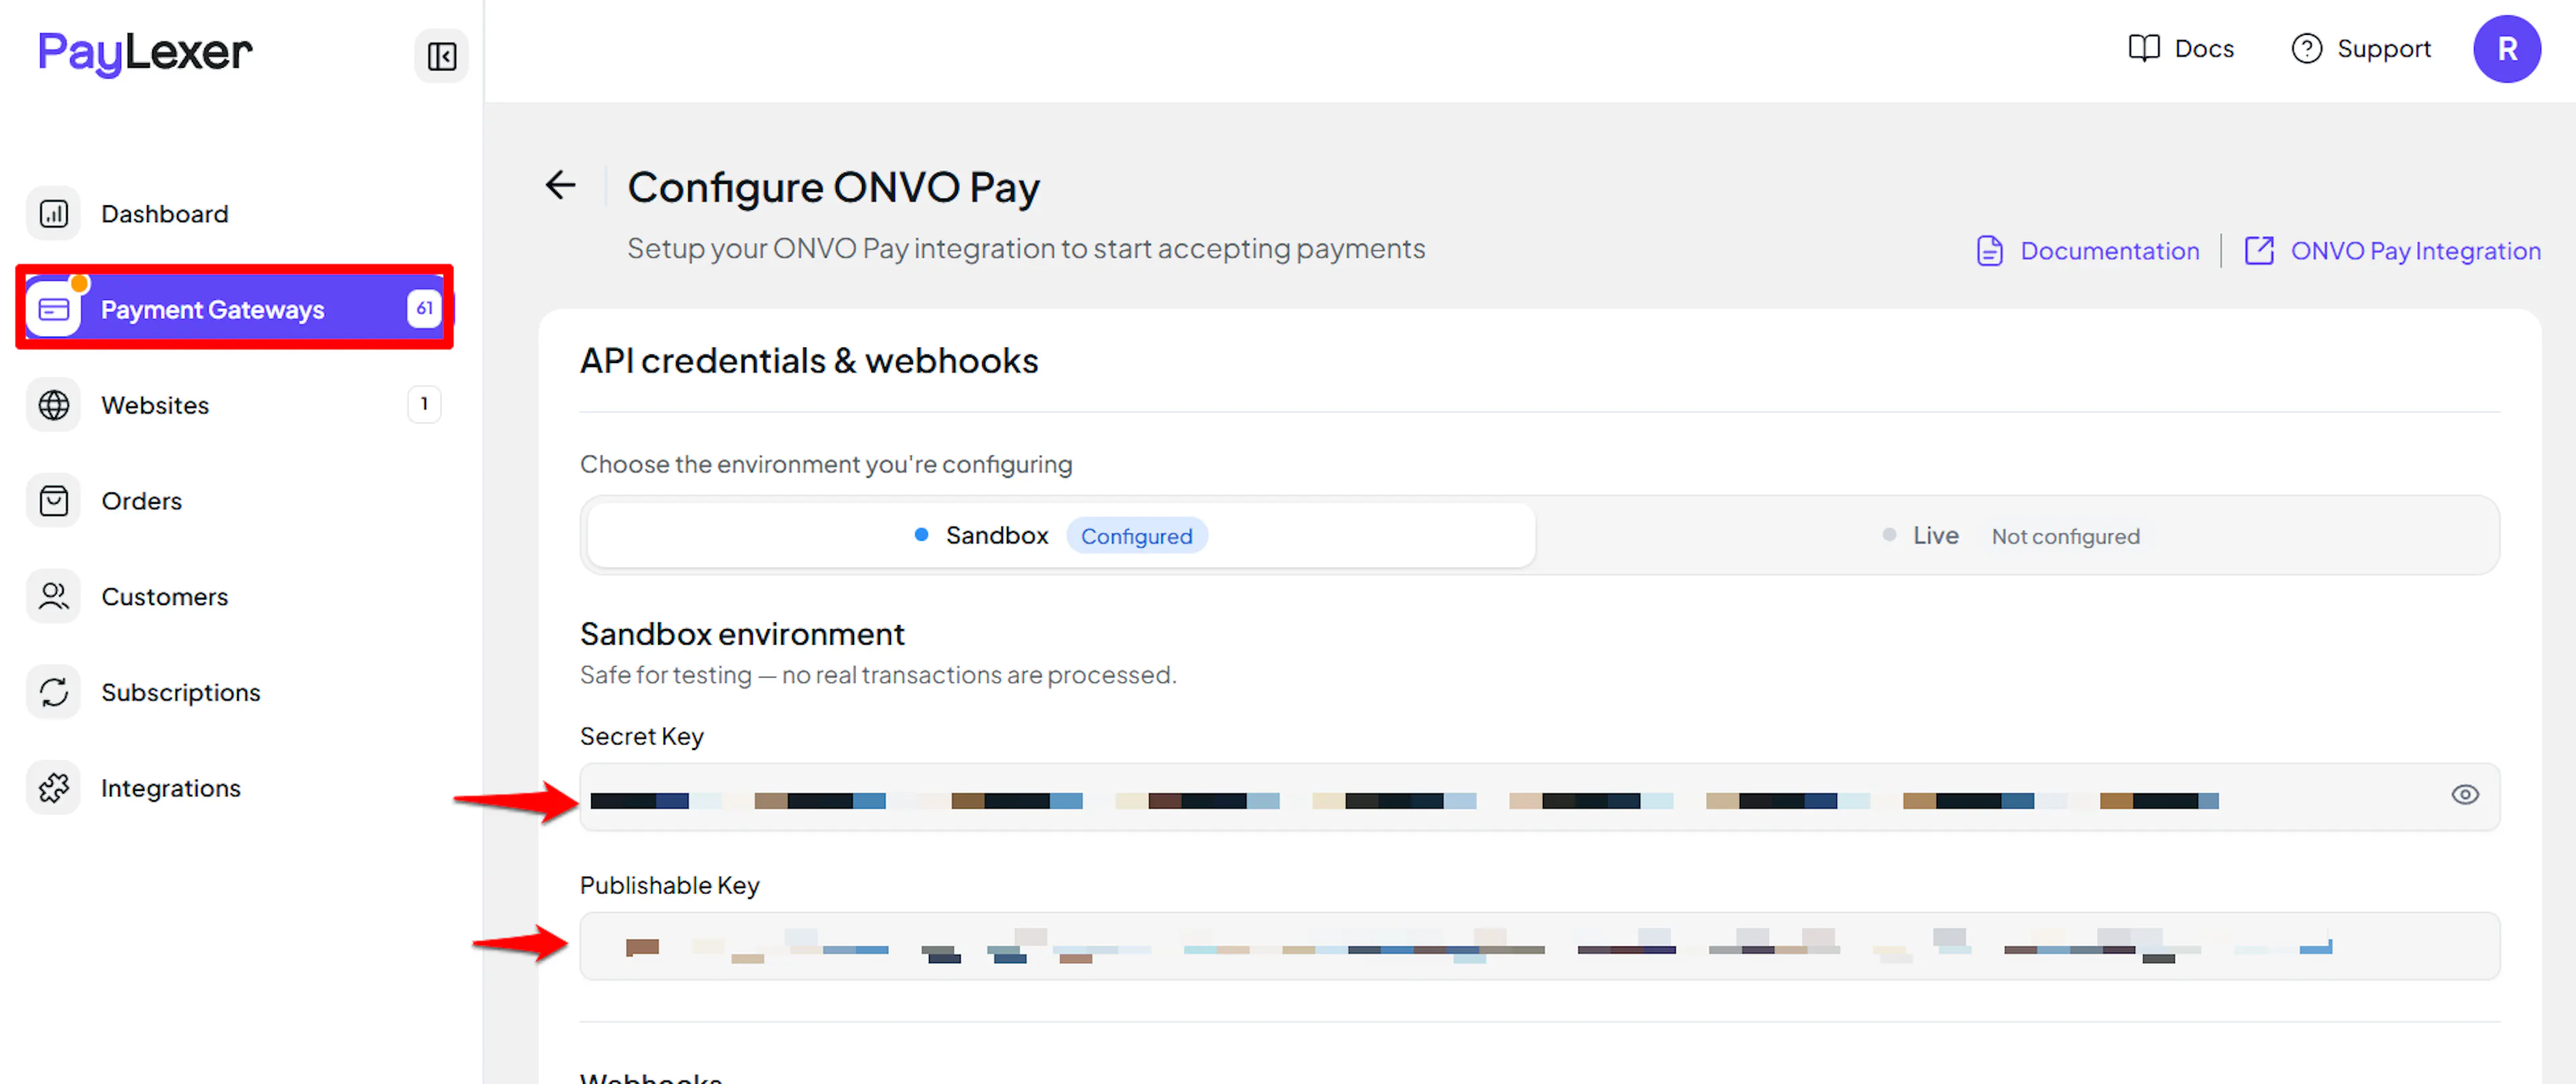
Understanding Live/Production and Sandbox Settings:
| Environment | Purpose |
|---|---|
| Live / Production (Mandatory) | Used for real transactions. Cannot be empty, even when testing. |
| Test / Sandbox (Optional) | Used for testing only. No real money is processed. |
How PayLexer selects credentials:
- Debug/Test mode ON → Test credentials are used
- Debug/Test mode OFF → Live credentials are used
Test and save
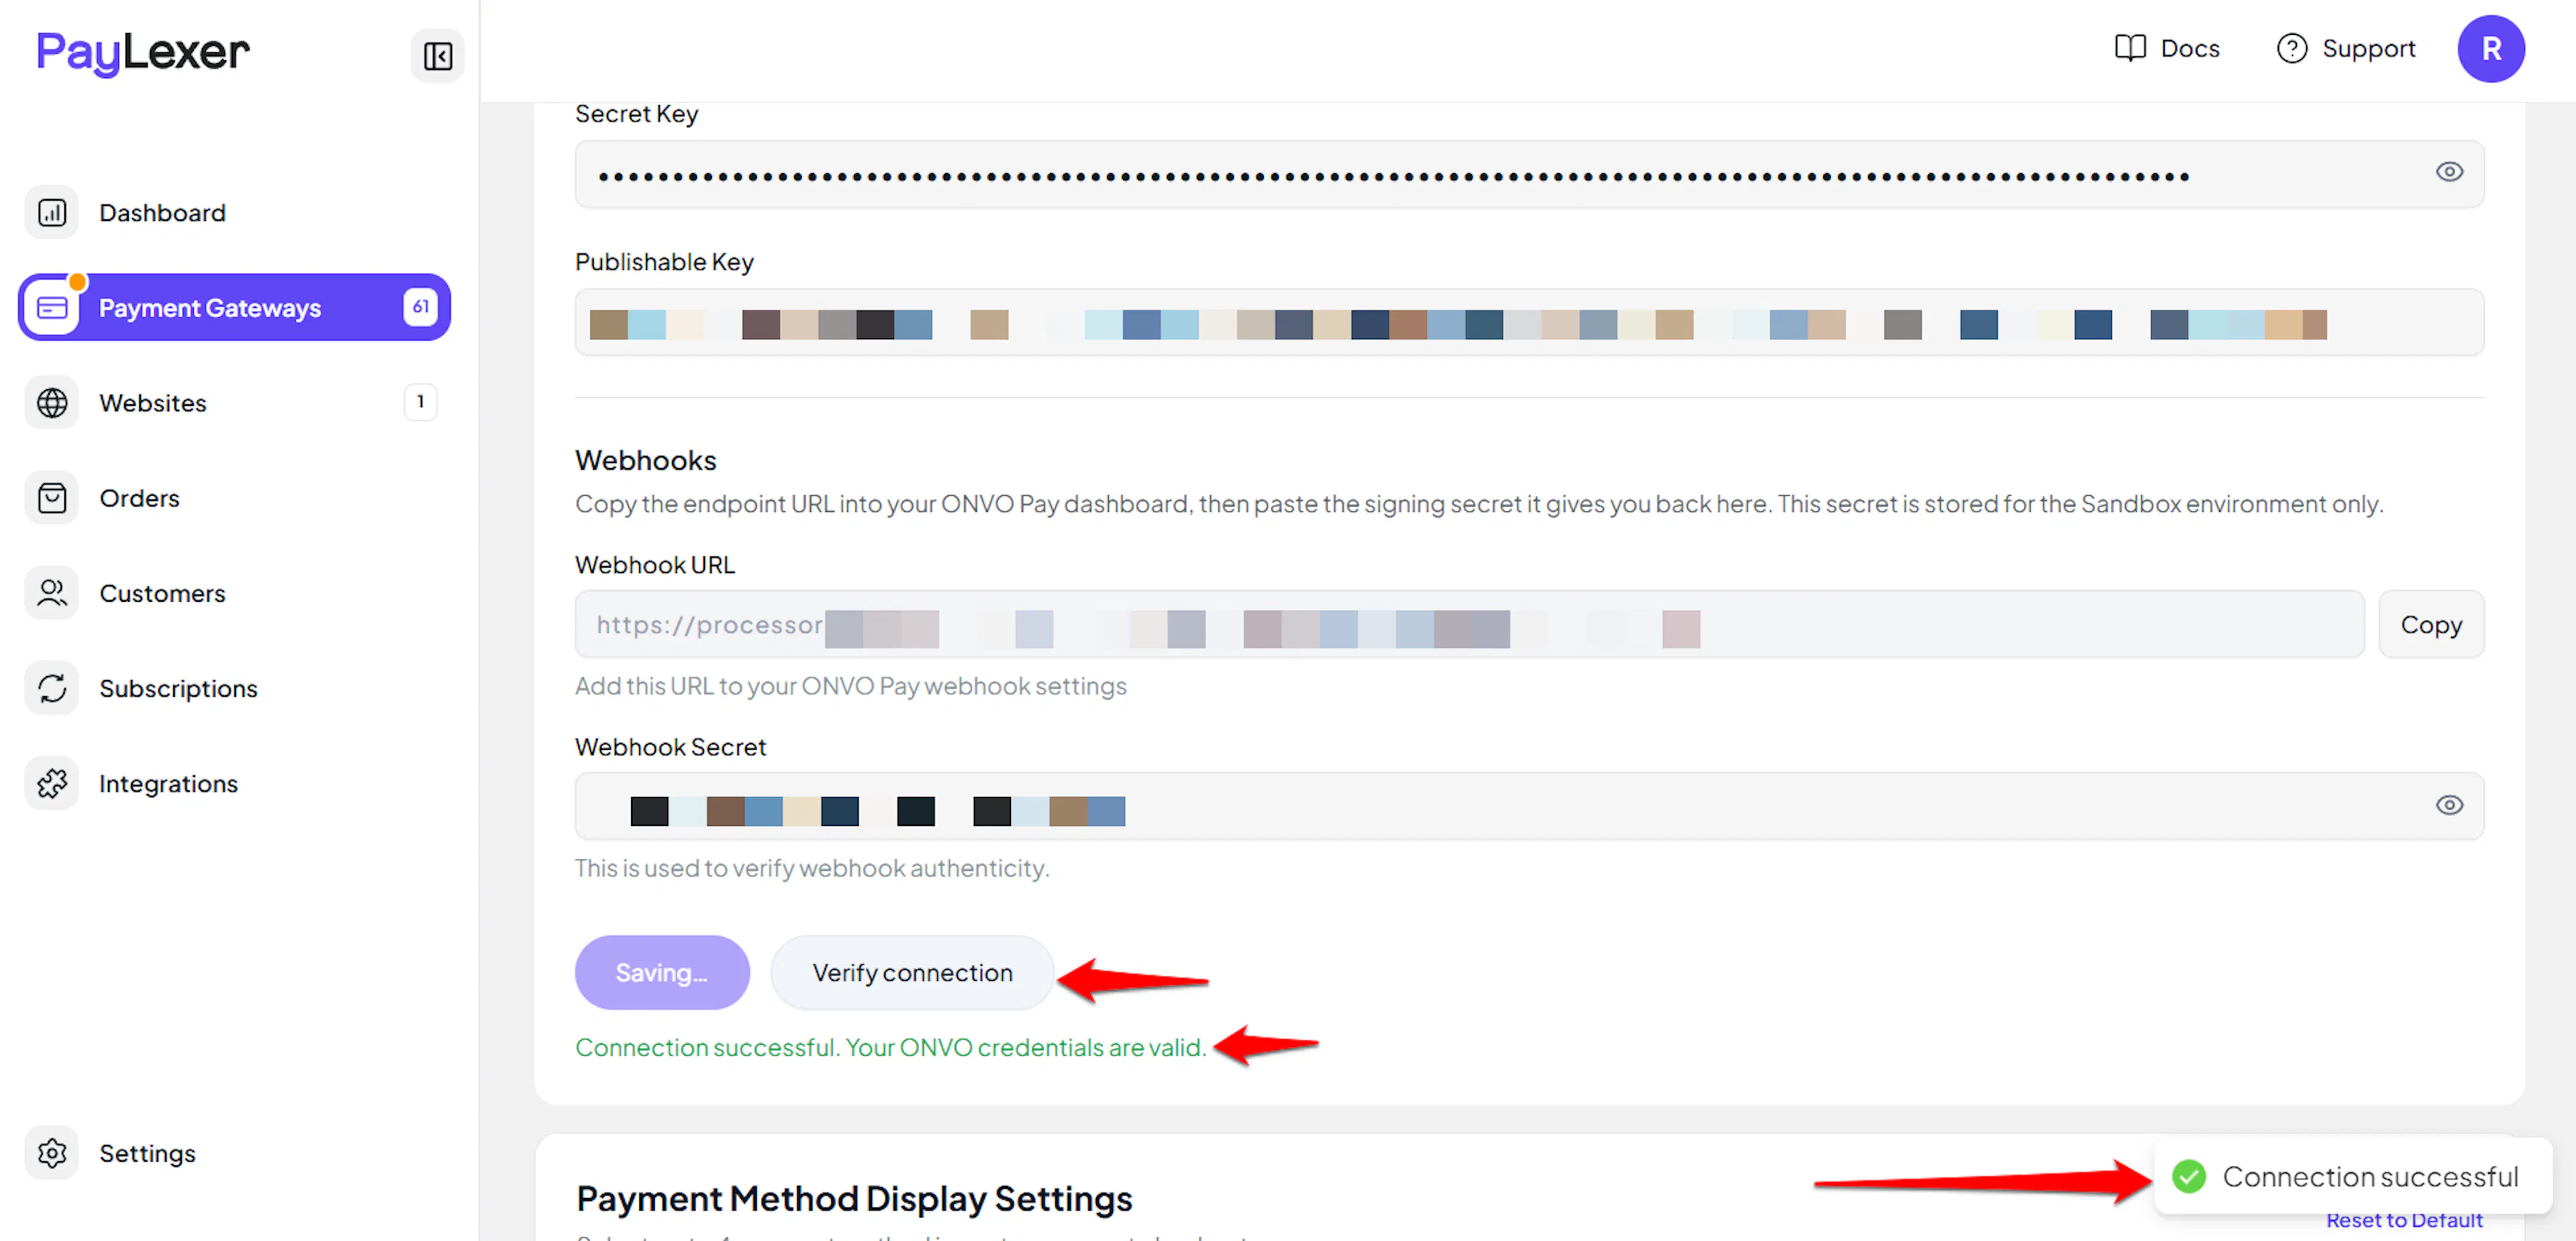
Click Save to save your configuration and verify your credentials. Click Verify Connection to test the connection.
Configuring Webhooks
Webhooks enable real-time payment updates.
Benefits of Webhooks:
- Instant payment status updates
- Confirmation of SINPE transfers and bank deposits that settle after the shopper leaves checkout
- Automatic subscription renewal and renewal-failure updates
ONVO cannot register a webhook URL through its API, so you add it by hand in the ONVO dashboard. Until you do, orders will not update on their own.
Copy your PayLexer webhook URL
In PayLexer -> Payment Gateways -> ONVO Pay, copy the Webhook URL shown for your account.
Add the webhook in ONVO
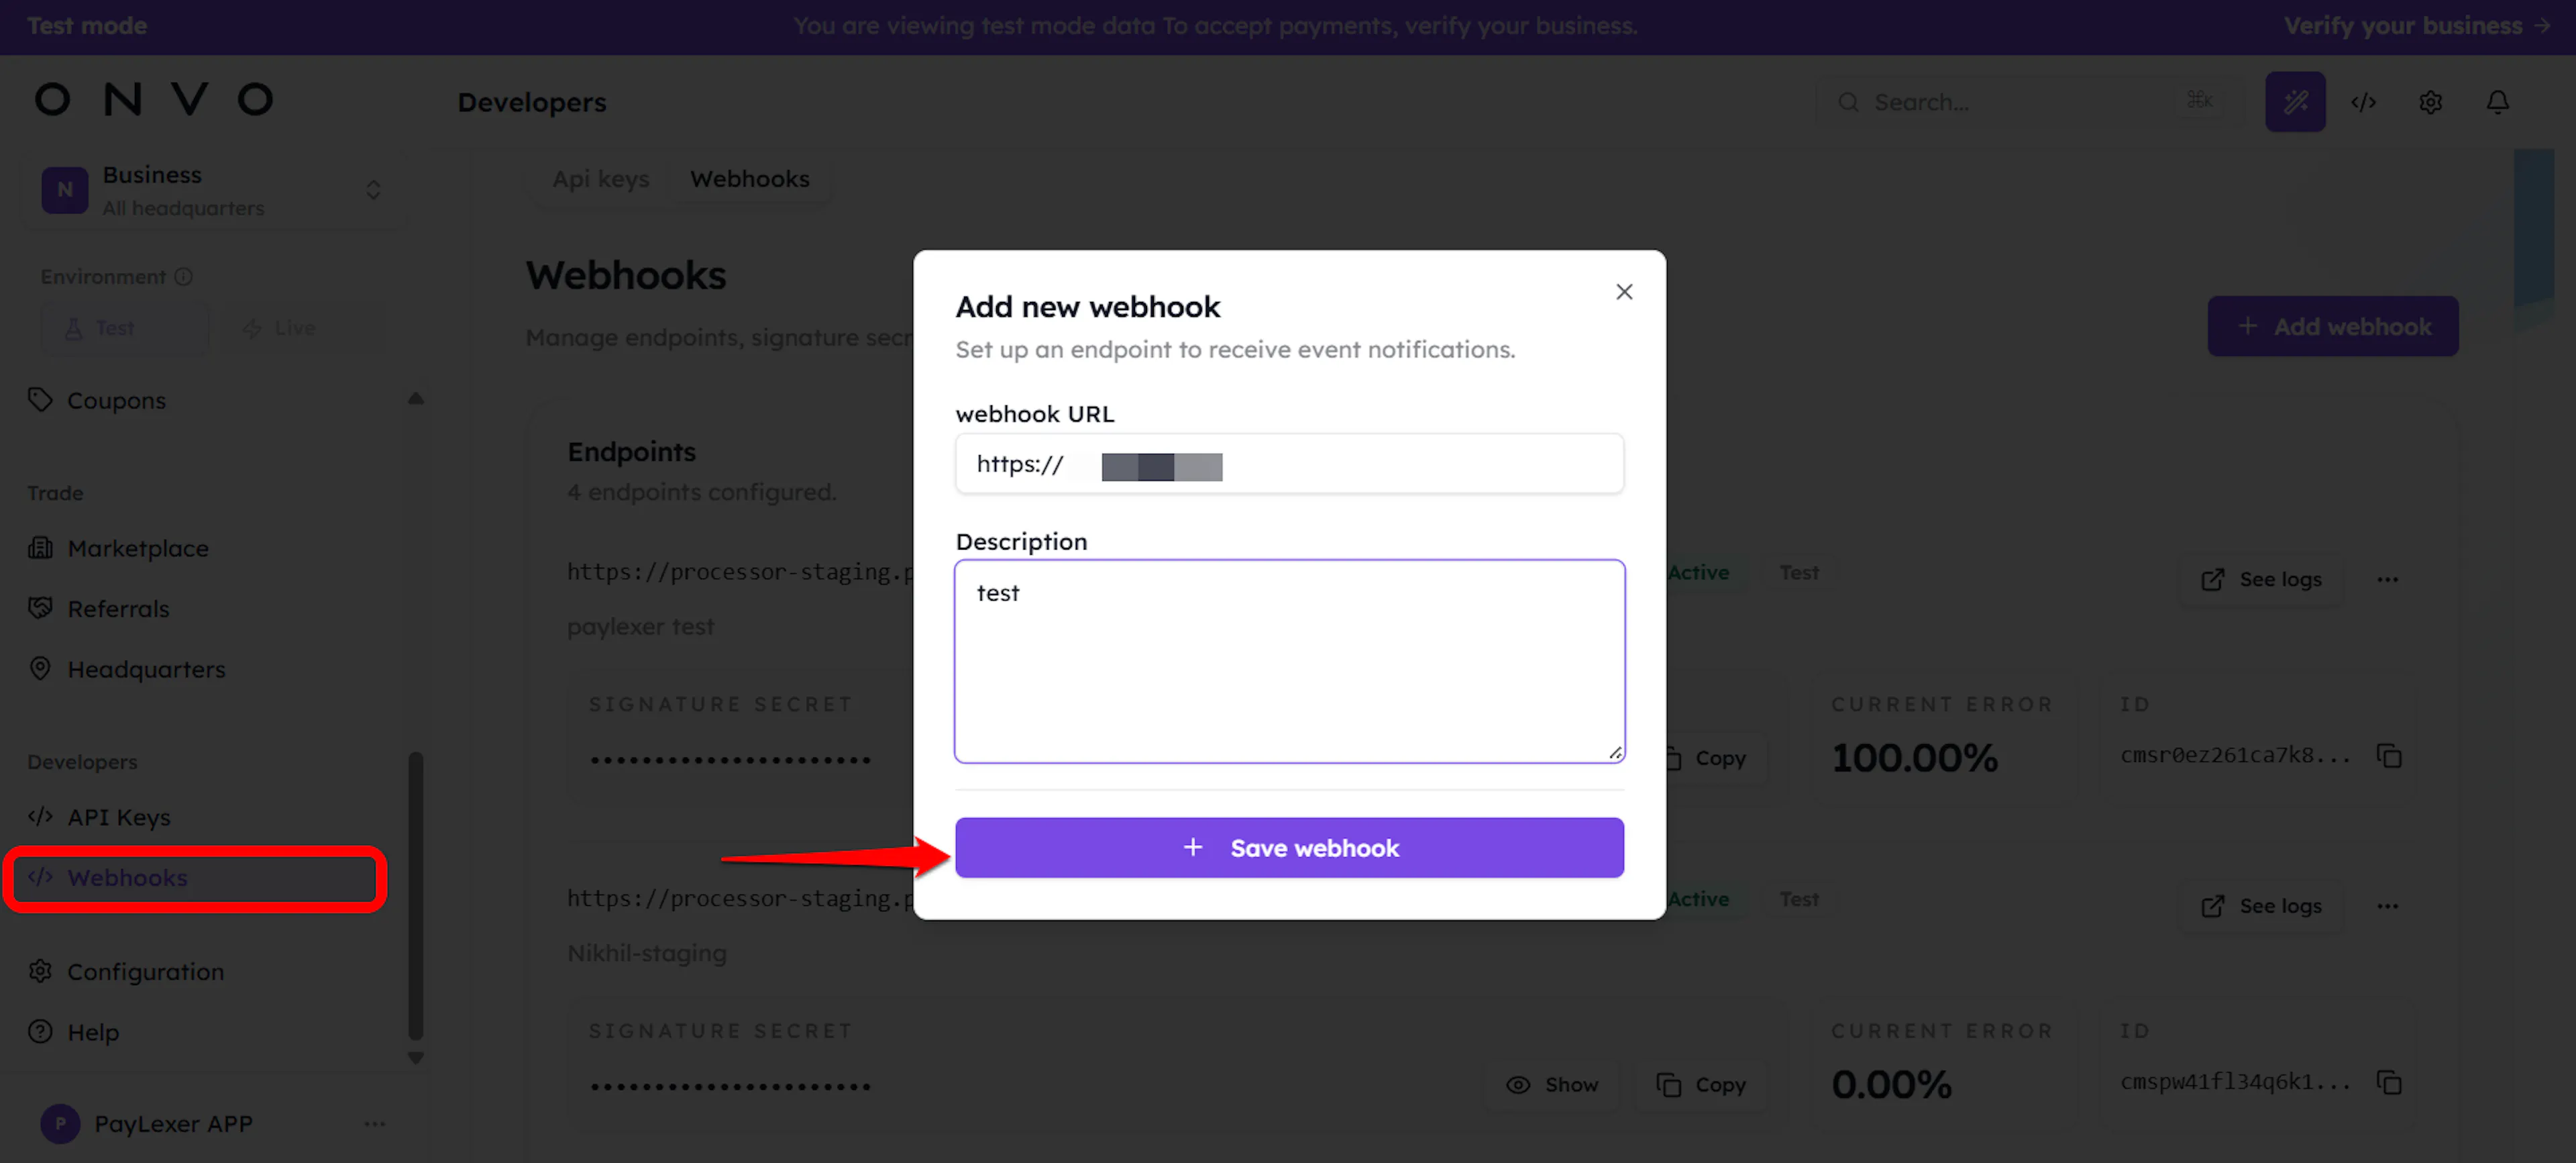
In the ONVO dashboard, go to Developers -> API Keys and open the Webhooks tab, then click Add webhook (Agregar nuevo webhook).
- Paste the PayLexer webhook URL into Webhook URL (URL del webhook).
- Enter a Description (Descripción) so you can recognise the endpoint later, for example "PayLexer".
- Create the webhook.
ONVO sends all supported events to the endpoint, so there is no event list to select.
Copy the Signature secret
The new webhook entry lists a masked Signature secret. Click Show, then Copy.
Add the Webhook Secret to PayLexer
Paste the value into the Webhook Secret field in PayLexer and click Save.
ONVO sends this secret in a request header with every delivery instead of signing the payload. Treat it like a password - keep it out of logs and support tickets, and rotate it in the ONVO dashboard if exposed.
Test and live mode are separate in ONVO. Register the webhook once in each dashboard mode and paste each secret into the matching PayLexer environment.
ONVO does not send events for refunds or subscription cancellations. PayLexer confirms refunds made through PayLexer immediately, while changes made in the ONVO dashboard are picked up within 30 minutes.
Integrate ONVO Pay to Your Website
If you have already added and configured your site, you can enable ONVO Pay in your existing setup.
Go to Websites
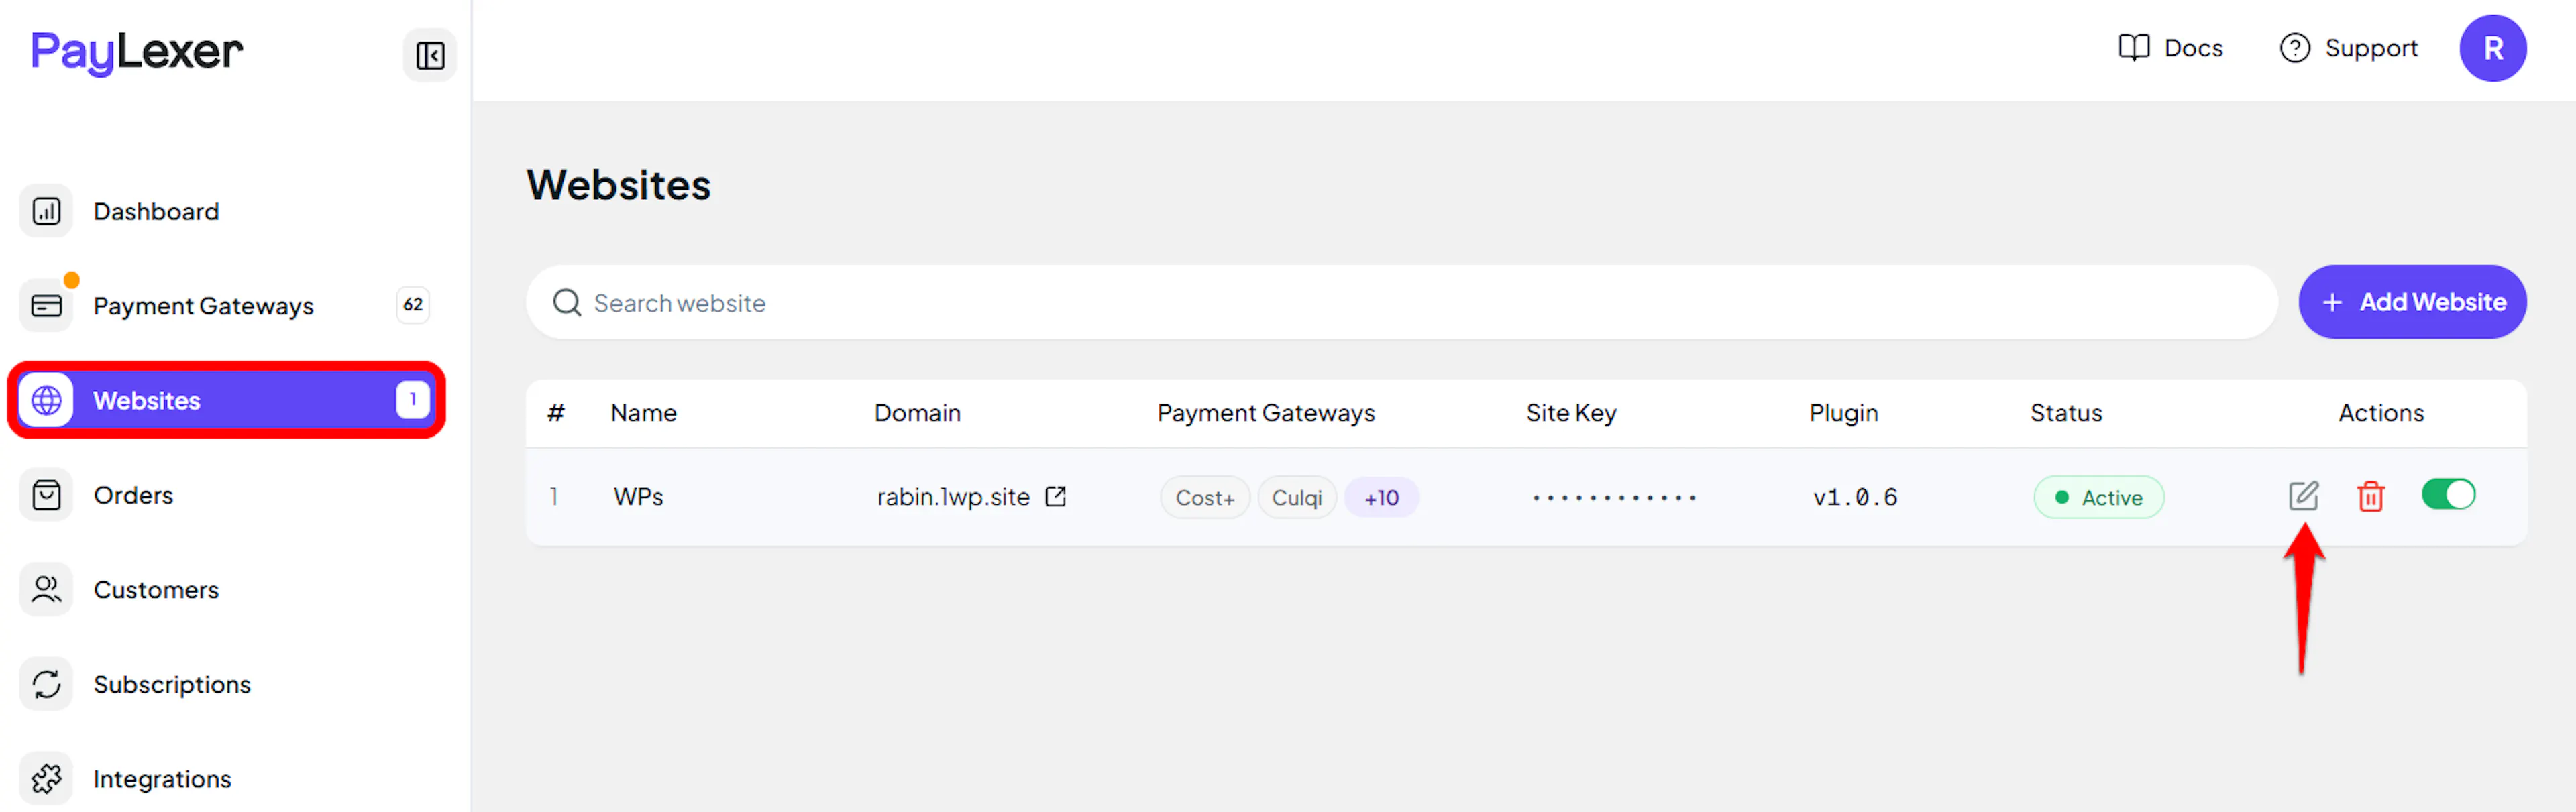
Navigate to Websites in your PayLexer dashboard.
Edit your website
Click the Edit Icon of your added website.
Enable ONVO Pay
Click the checkbox to enable ONVO Pay for the website.
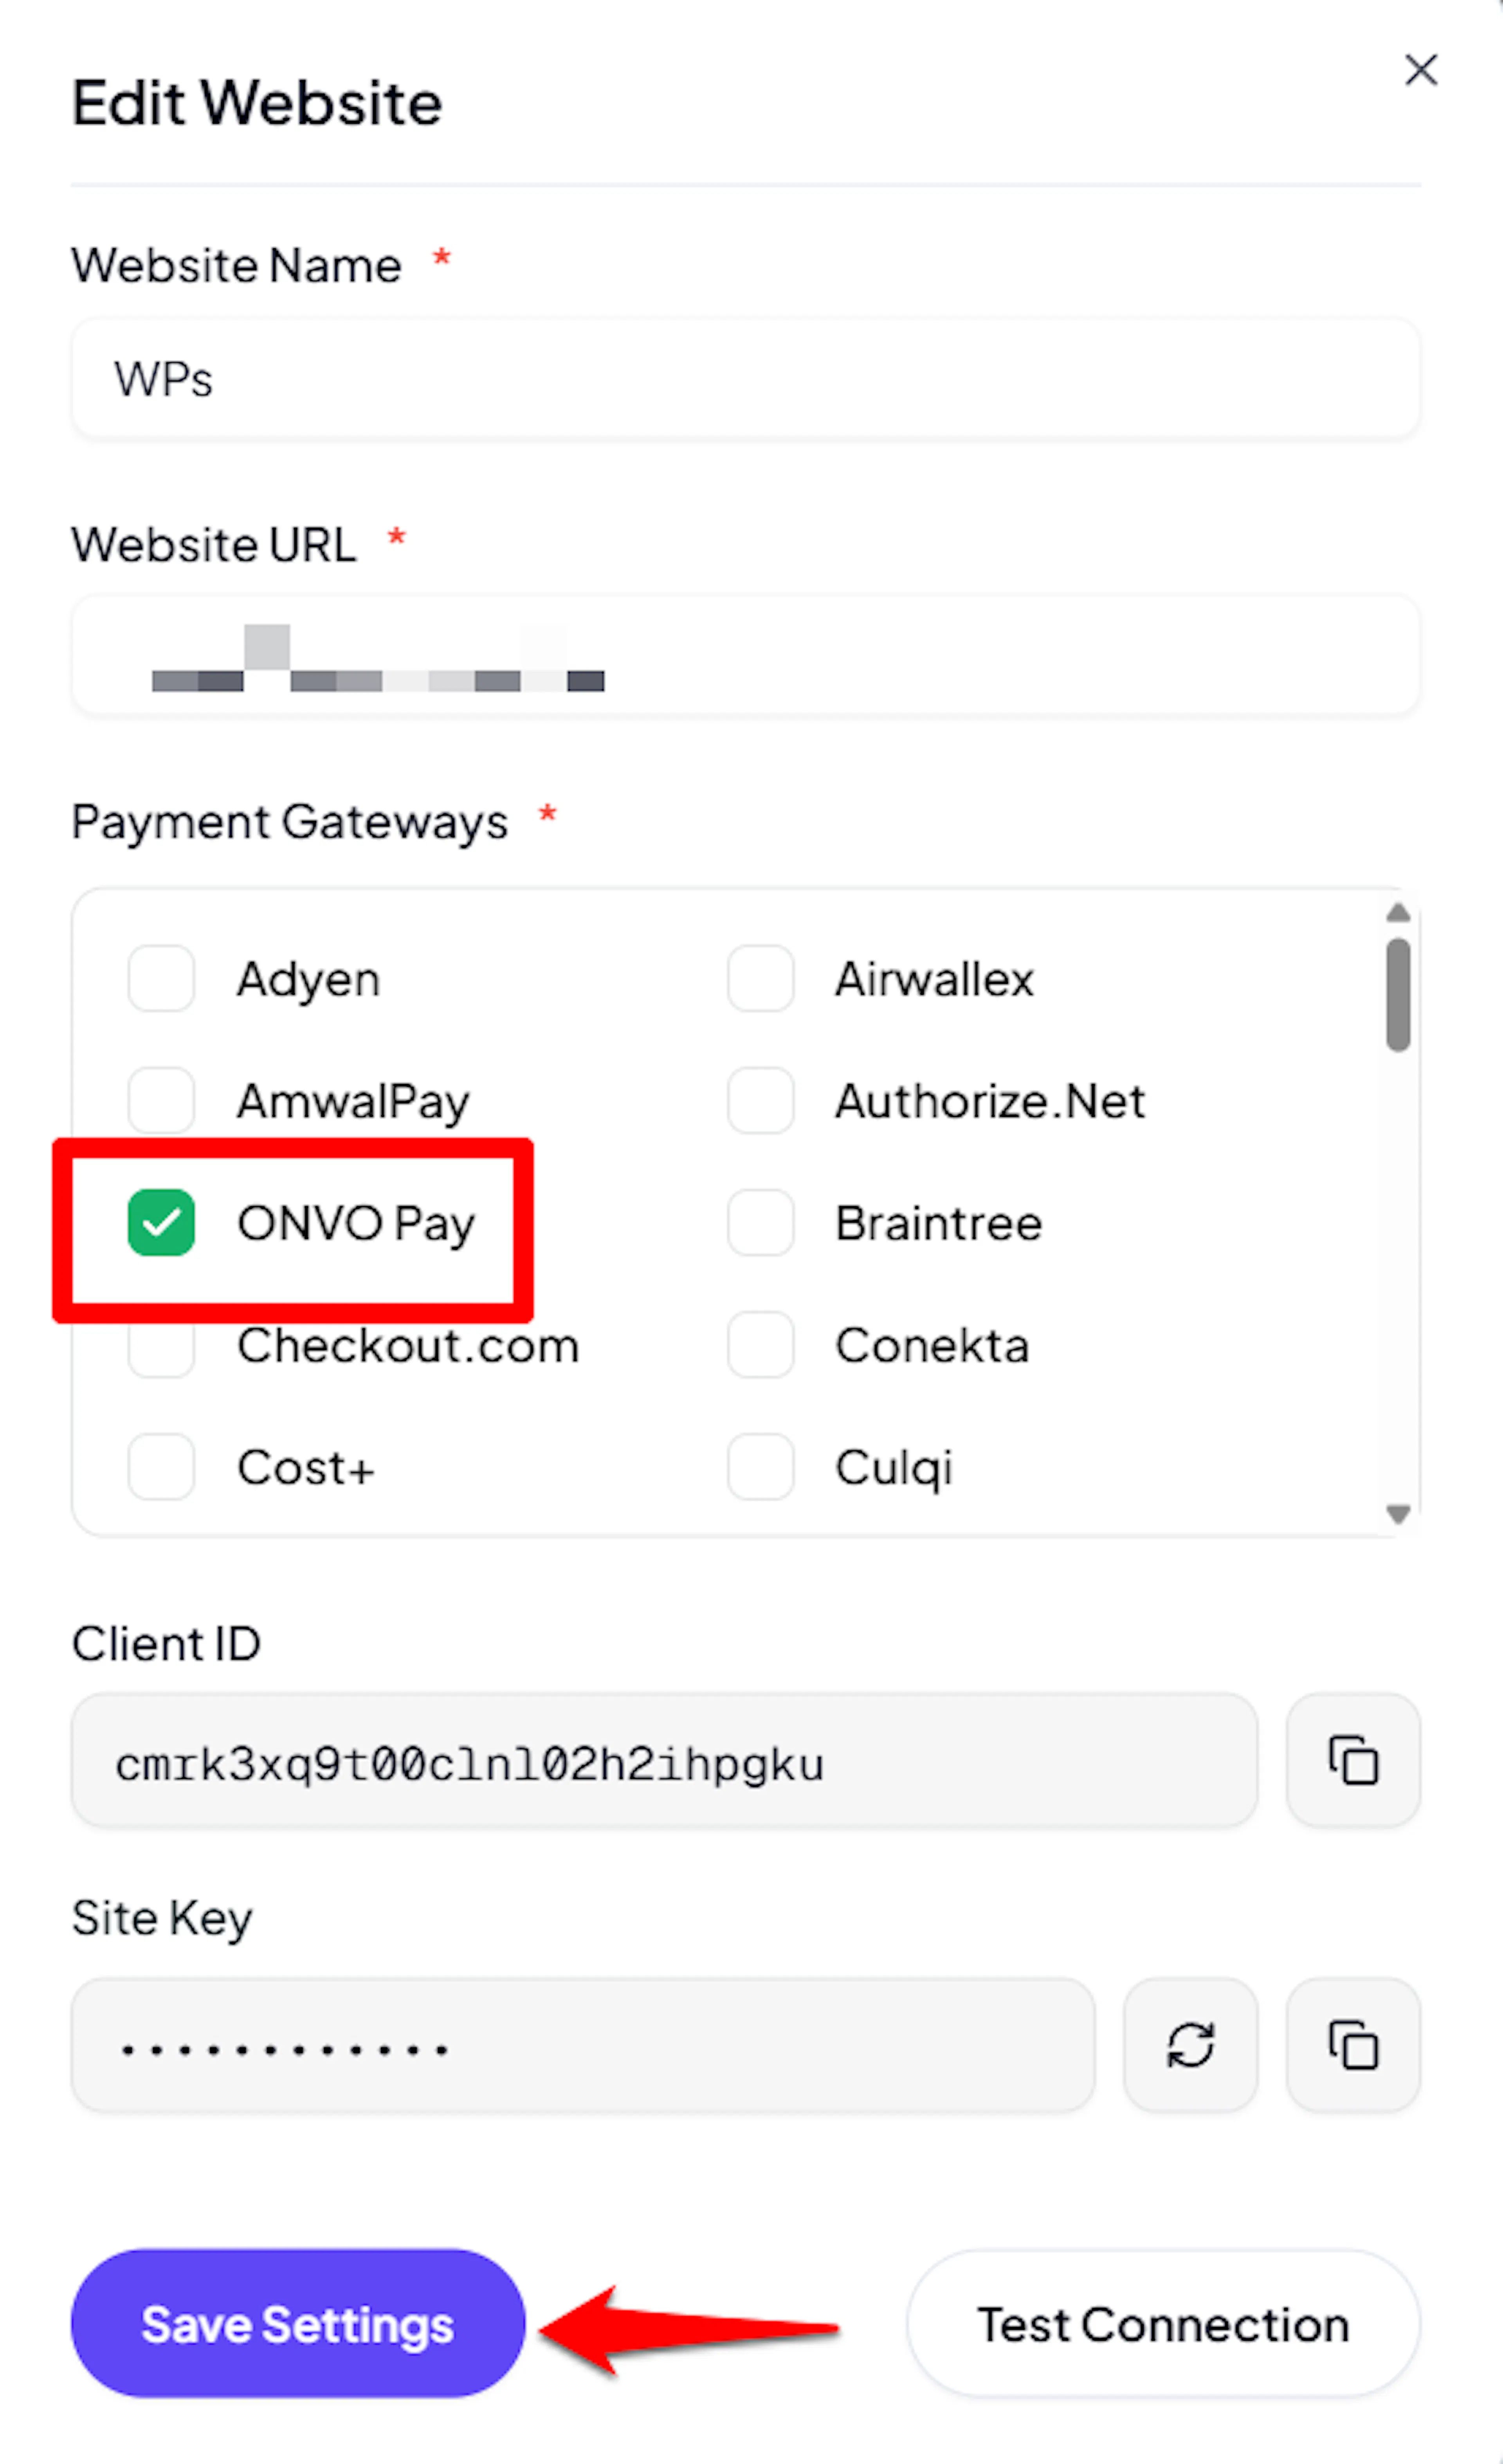
If you haven't added a website yet, Continue to Add Your Website →
Troubleshooting
Best Practices
- Test in sandbox before enabling production. Use
onvo_test_keys and ONVO's test cards and test SINPE numbers to complete a full payment, a refund, and a subscription before switching to live. - Register a webhook in both test and live mode, since ONVO keeps them separate and payment confirmation depends on it.
- Decide refunds in one go. Because ONVO permits a single refund per payment, refund the full amount unless you are certain a partial is final.
- Keep the Secret Key and Webhook Secret confidential, and rotate them in the ONVO dashboard if you suspect exposure.
FAQs
Still Have Questions?
- ONVO Pay Support: ONVO Help Center
- PayLexer Support: Contact Support