

MyFatoorah
Connect MyFatoorah to PayLexer to accept cards, KNET, and other local payment methods across the Gulf region through a hosted checkout page with signed webhook confirmation.
MyFatoorah is a Kuwait-headquartered payment gateway built for merchants selling into the wider Gulf region. It supports card payments, KNET, and other local payment methods. and PayLexer connects to MyFatoorah's hosted checkout page so shoppers enter payment details on MyFatoorah's secure page before returning to your site.
- Supported Regions (Merchant Accounts): Kuwait, Bahrain, Jordan, Oman, UAE, Saudi Arabia, Qatar, and Egypt - view full list
- Supported Currencies: KWD, BHD, JOD, OMR, AED, SAR, QAR, EGP, USD - view full list
Supported Features
- Hosted checkout page for cards, KNET, and other local Gulf payment methods
- Automatic handling of 3-decimal currencies (KWD, BHD, OMR) alongside standard 2-decimal currencies
- Signed webhook confirmation (HMAC-SHA256) for real-time payment and refund status updates
- Idempotent payment status updates, safe against duplicate webhook deliveries
- Refunds initiated directly from PayLexer
Before You Start
Make sure you have:
- MyFatoorah Account – Don't have one? Create a sandbox account to test, or sign up for a live account when you're ready to go live
- PayLexer Account – Required to configure the integration. Create your account →
- A website where you want to integrate
Looking for a different payment processor? View all supported gateways →
Configuring MyFatoorah
You need an API Key from MyFatoorah for this integration.
Getting API Credentials
Open the MyFatoorah Portal
Log in to your MyFatoorah Portal for live account setup. If you're setting up a sandbox account, log in at demo.myfatoorah.com instead.
Go to Integration Settings
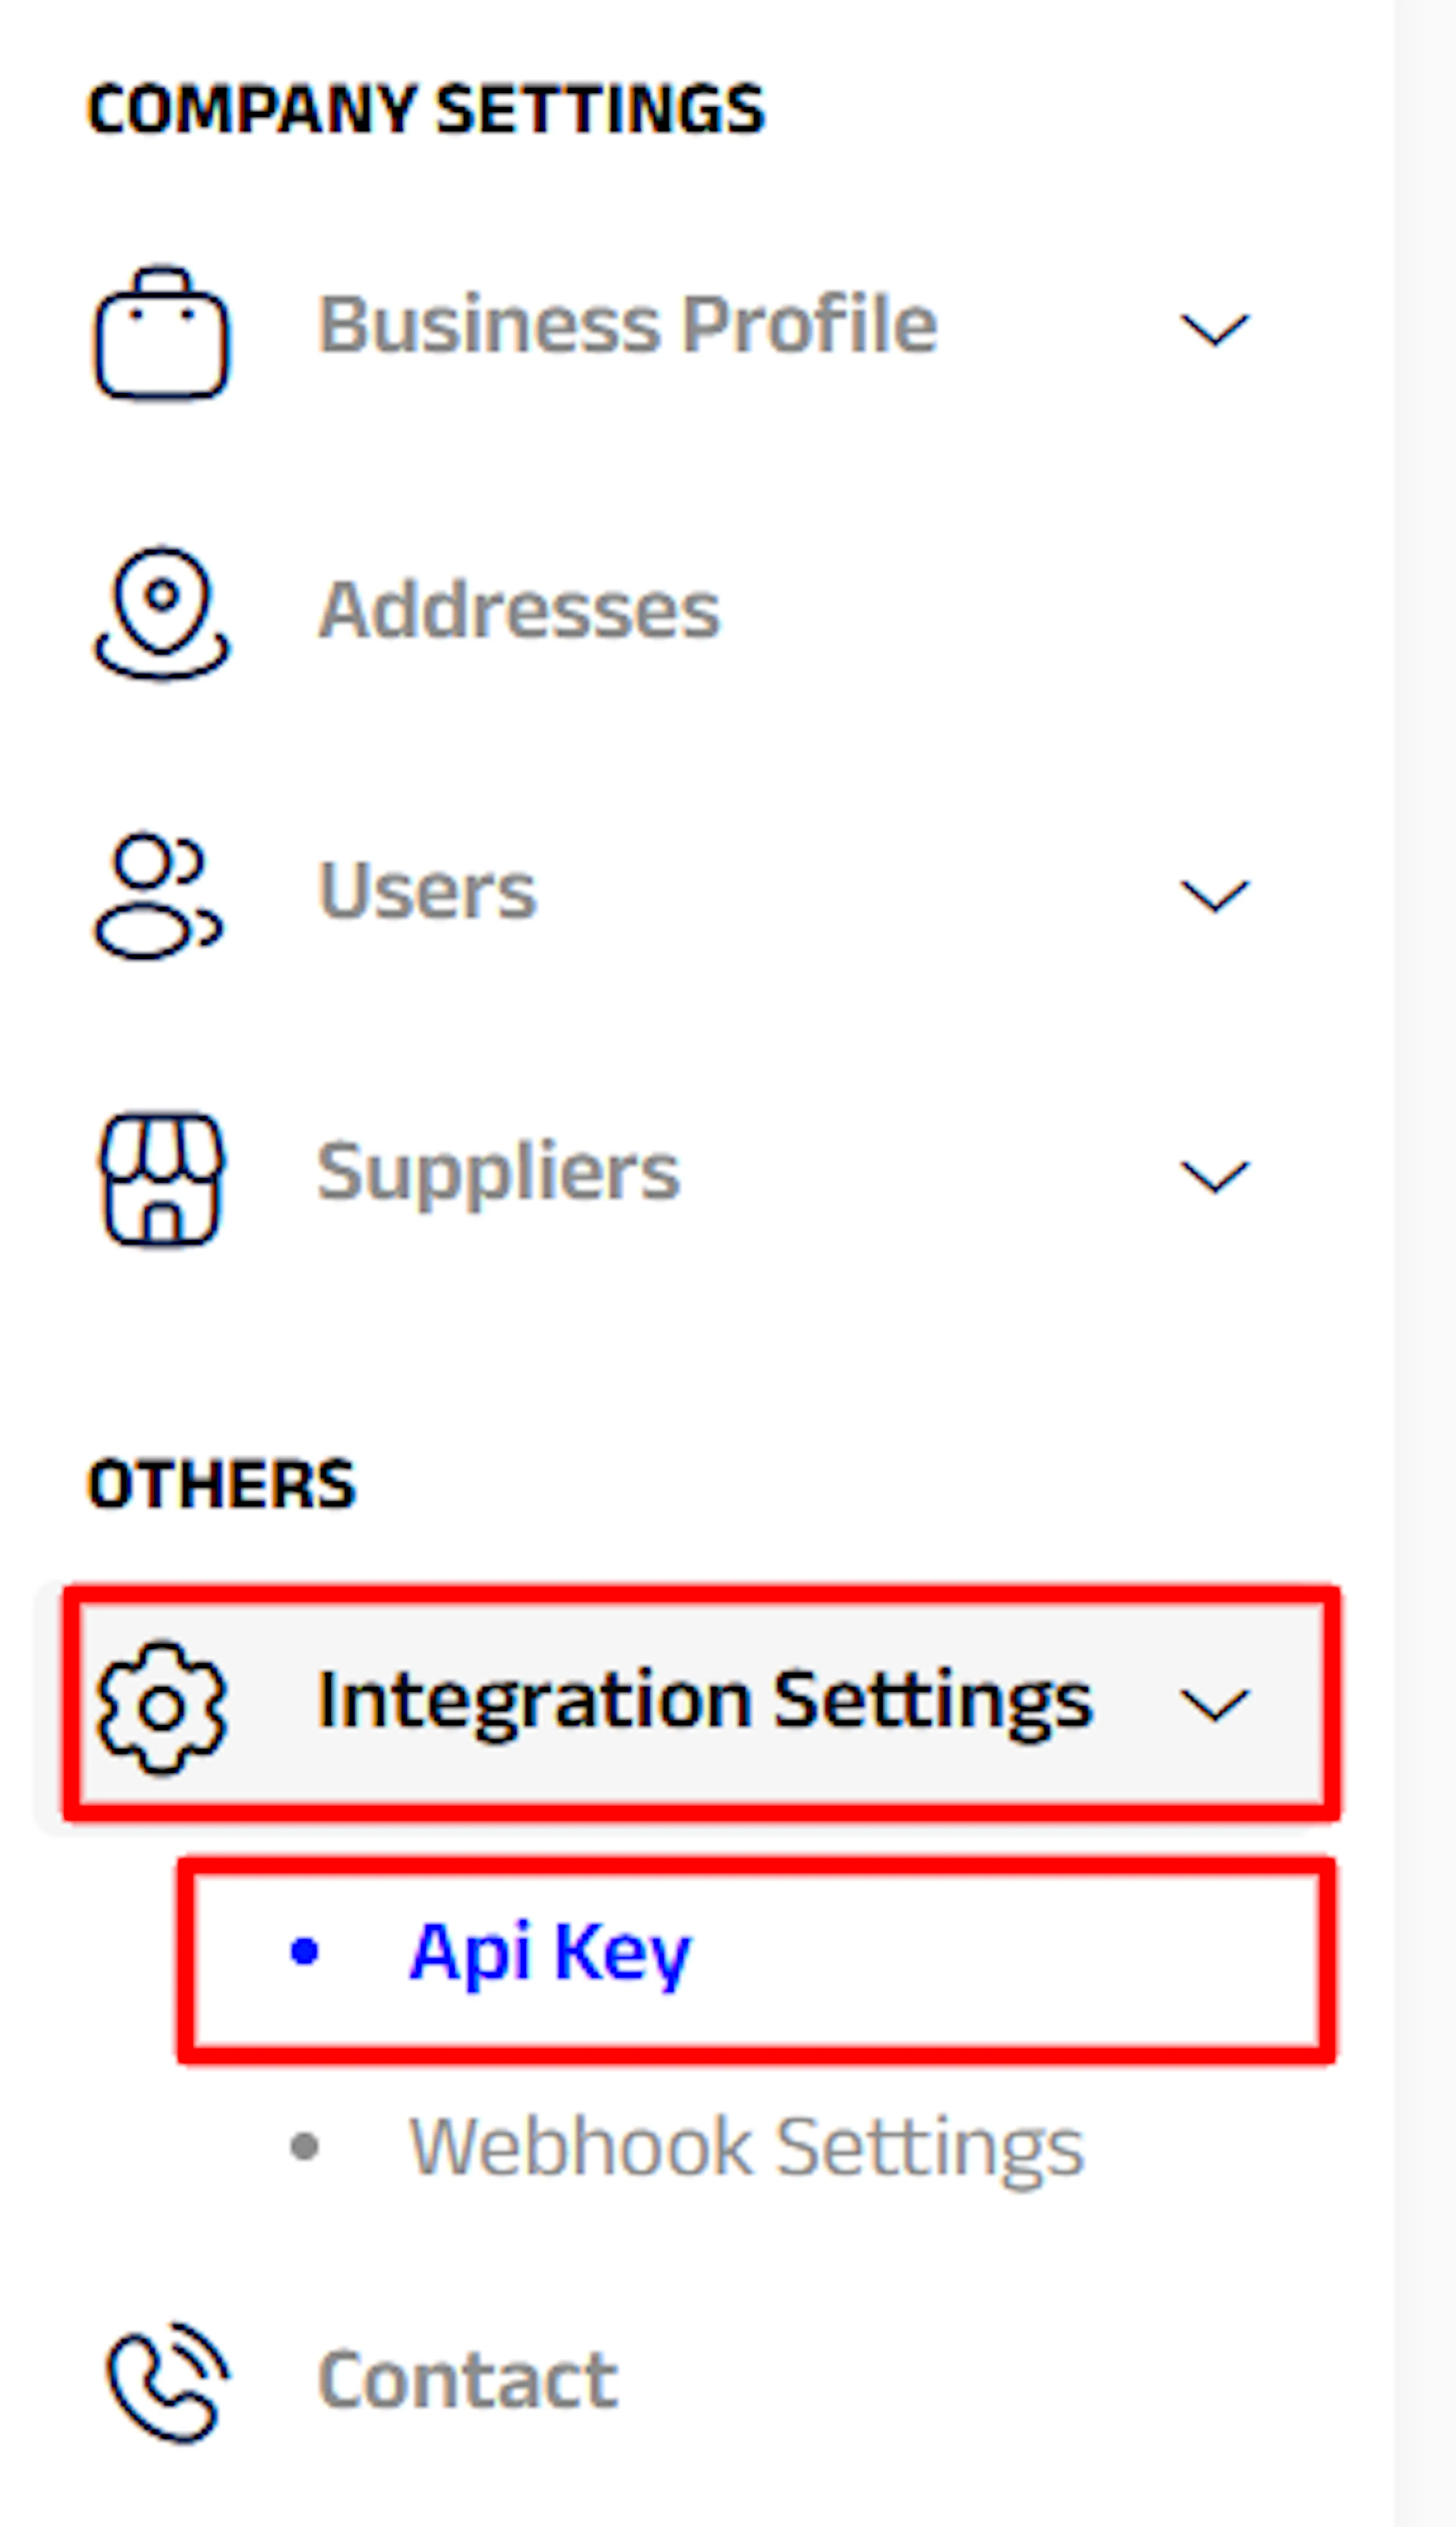
Navigate to Settings → Integration Settings → API Key.
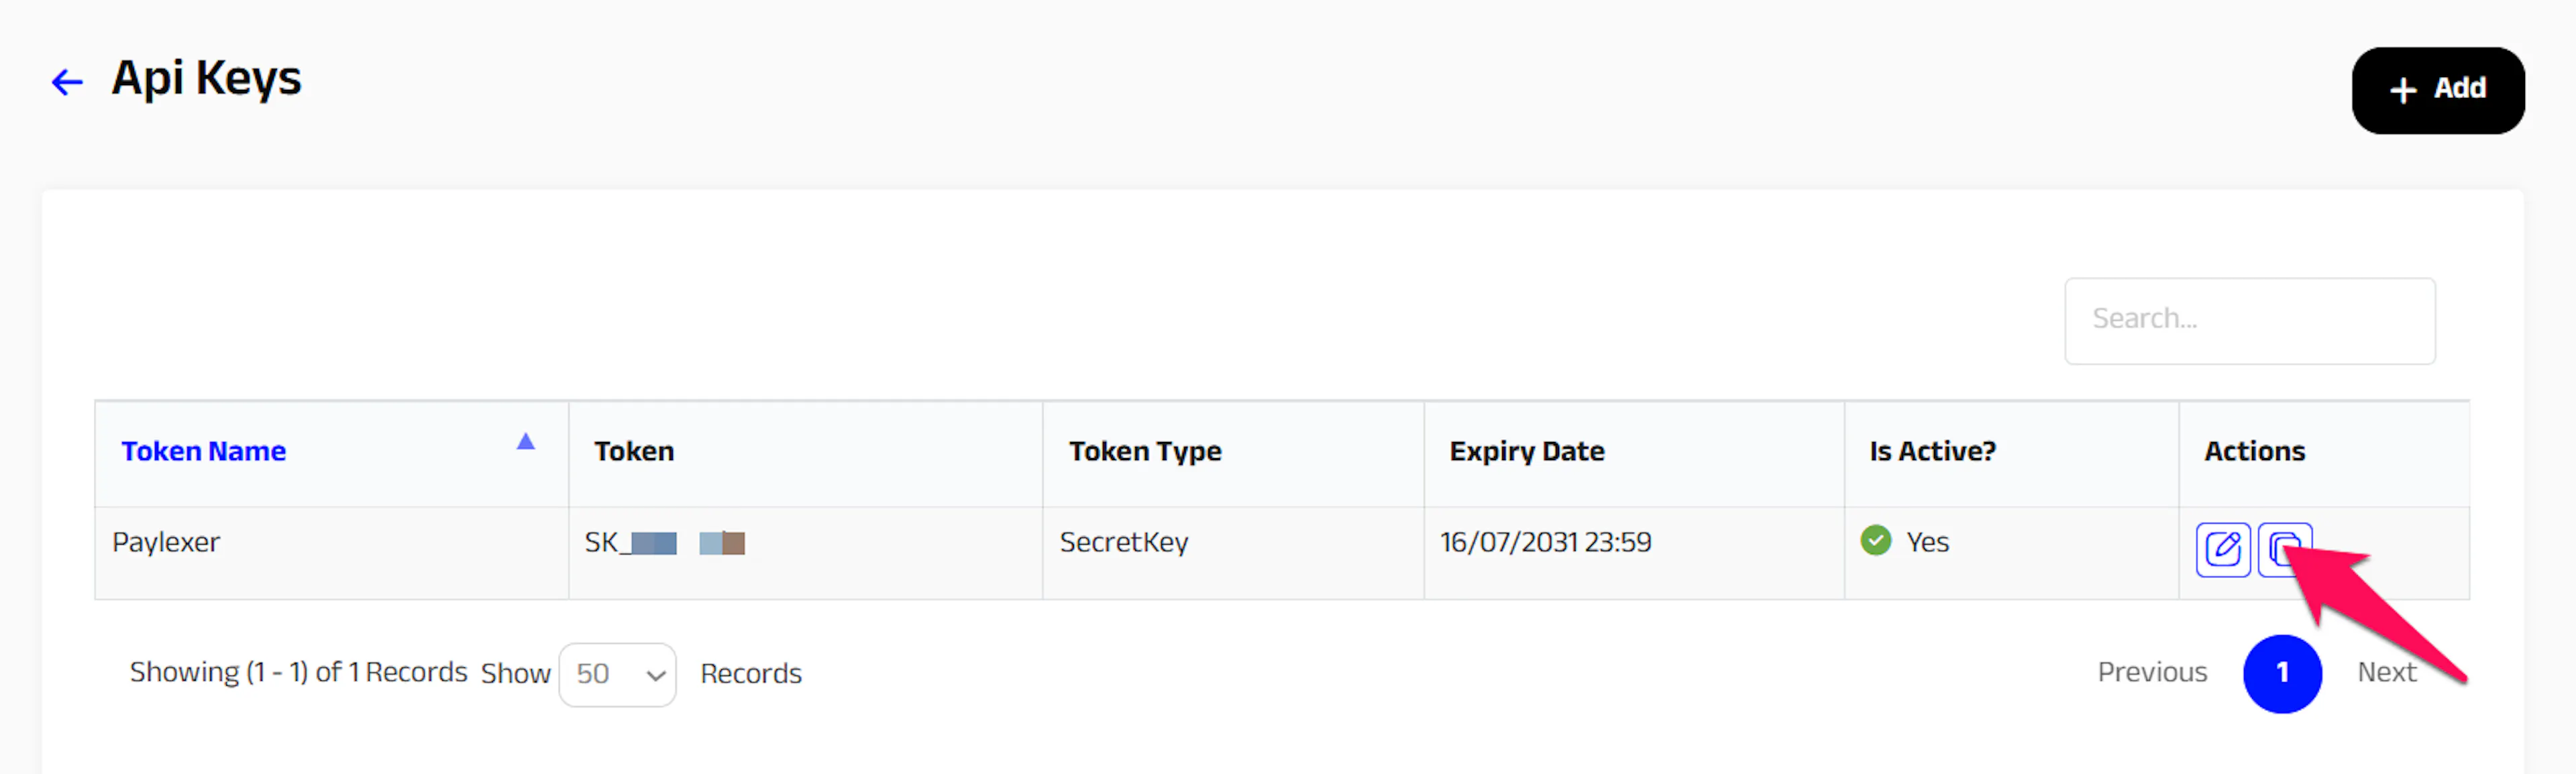
Create a token
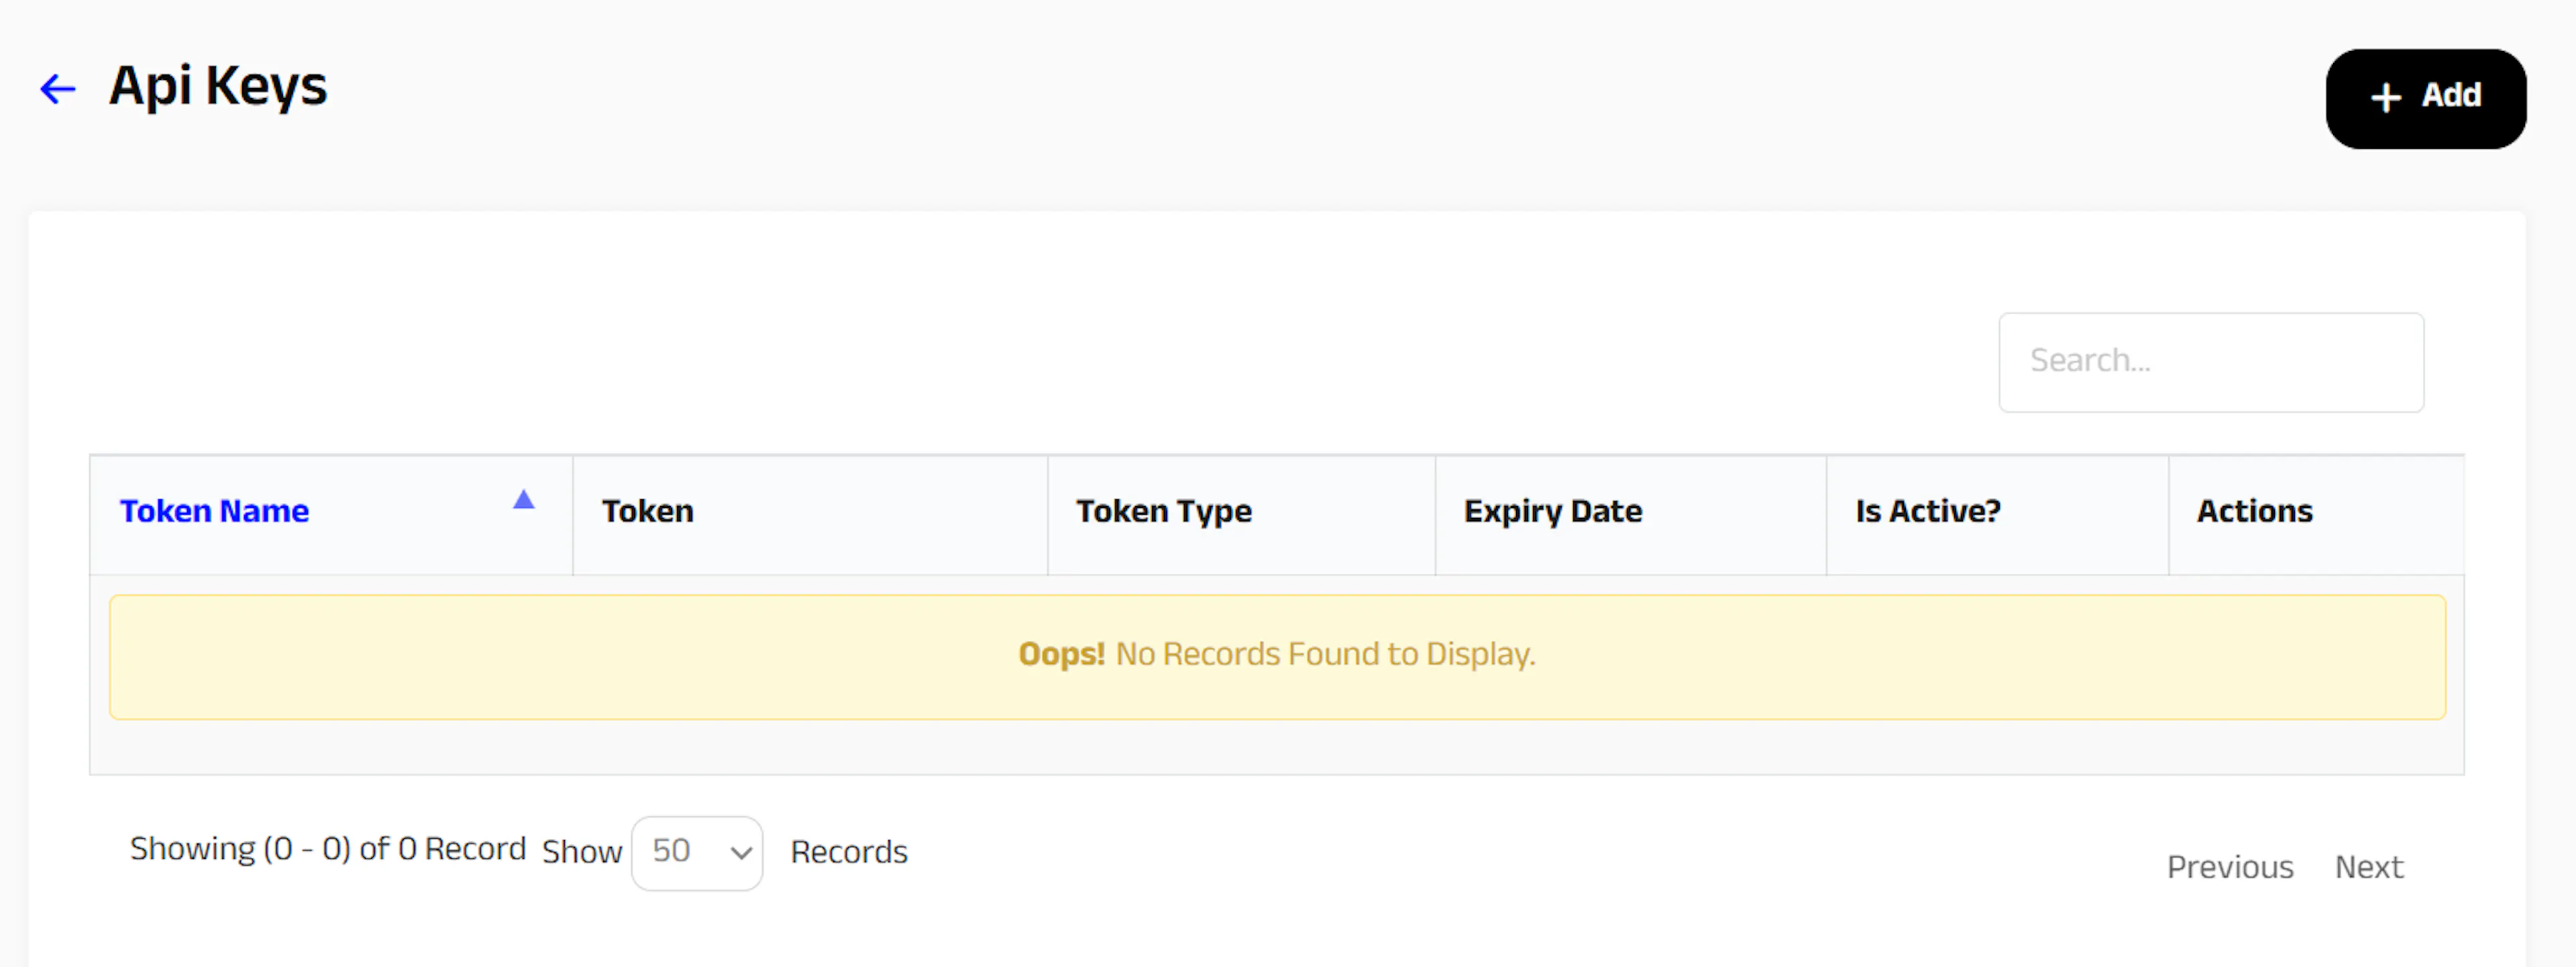
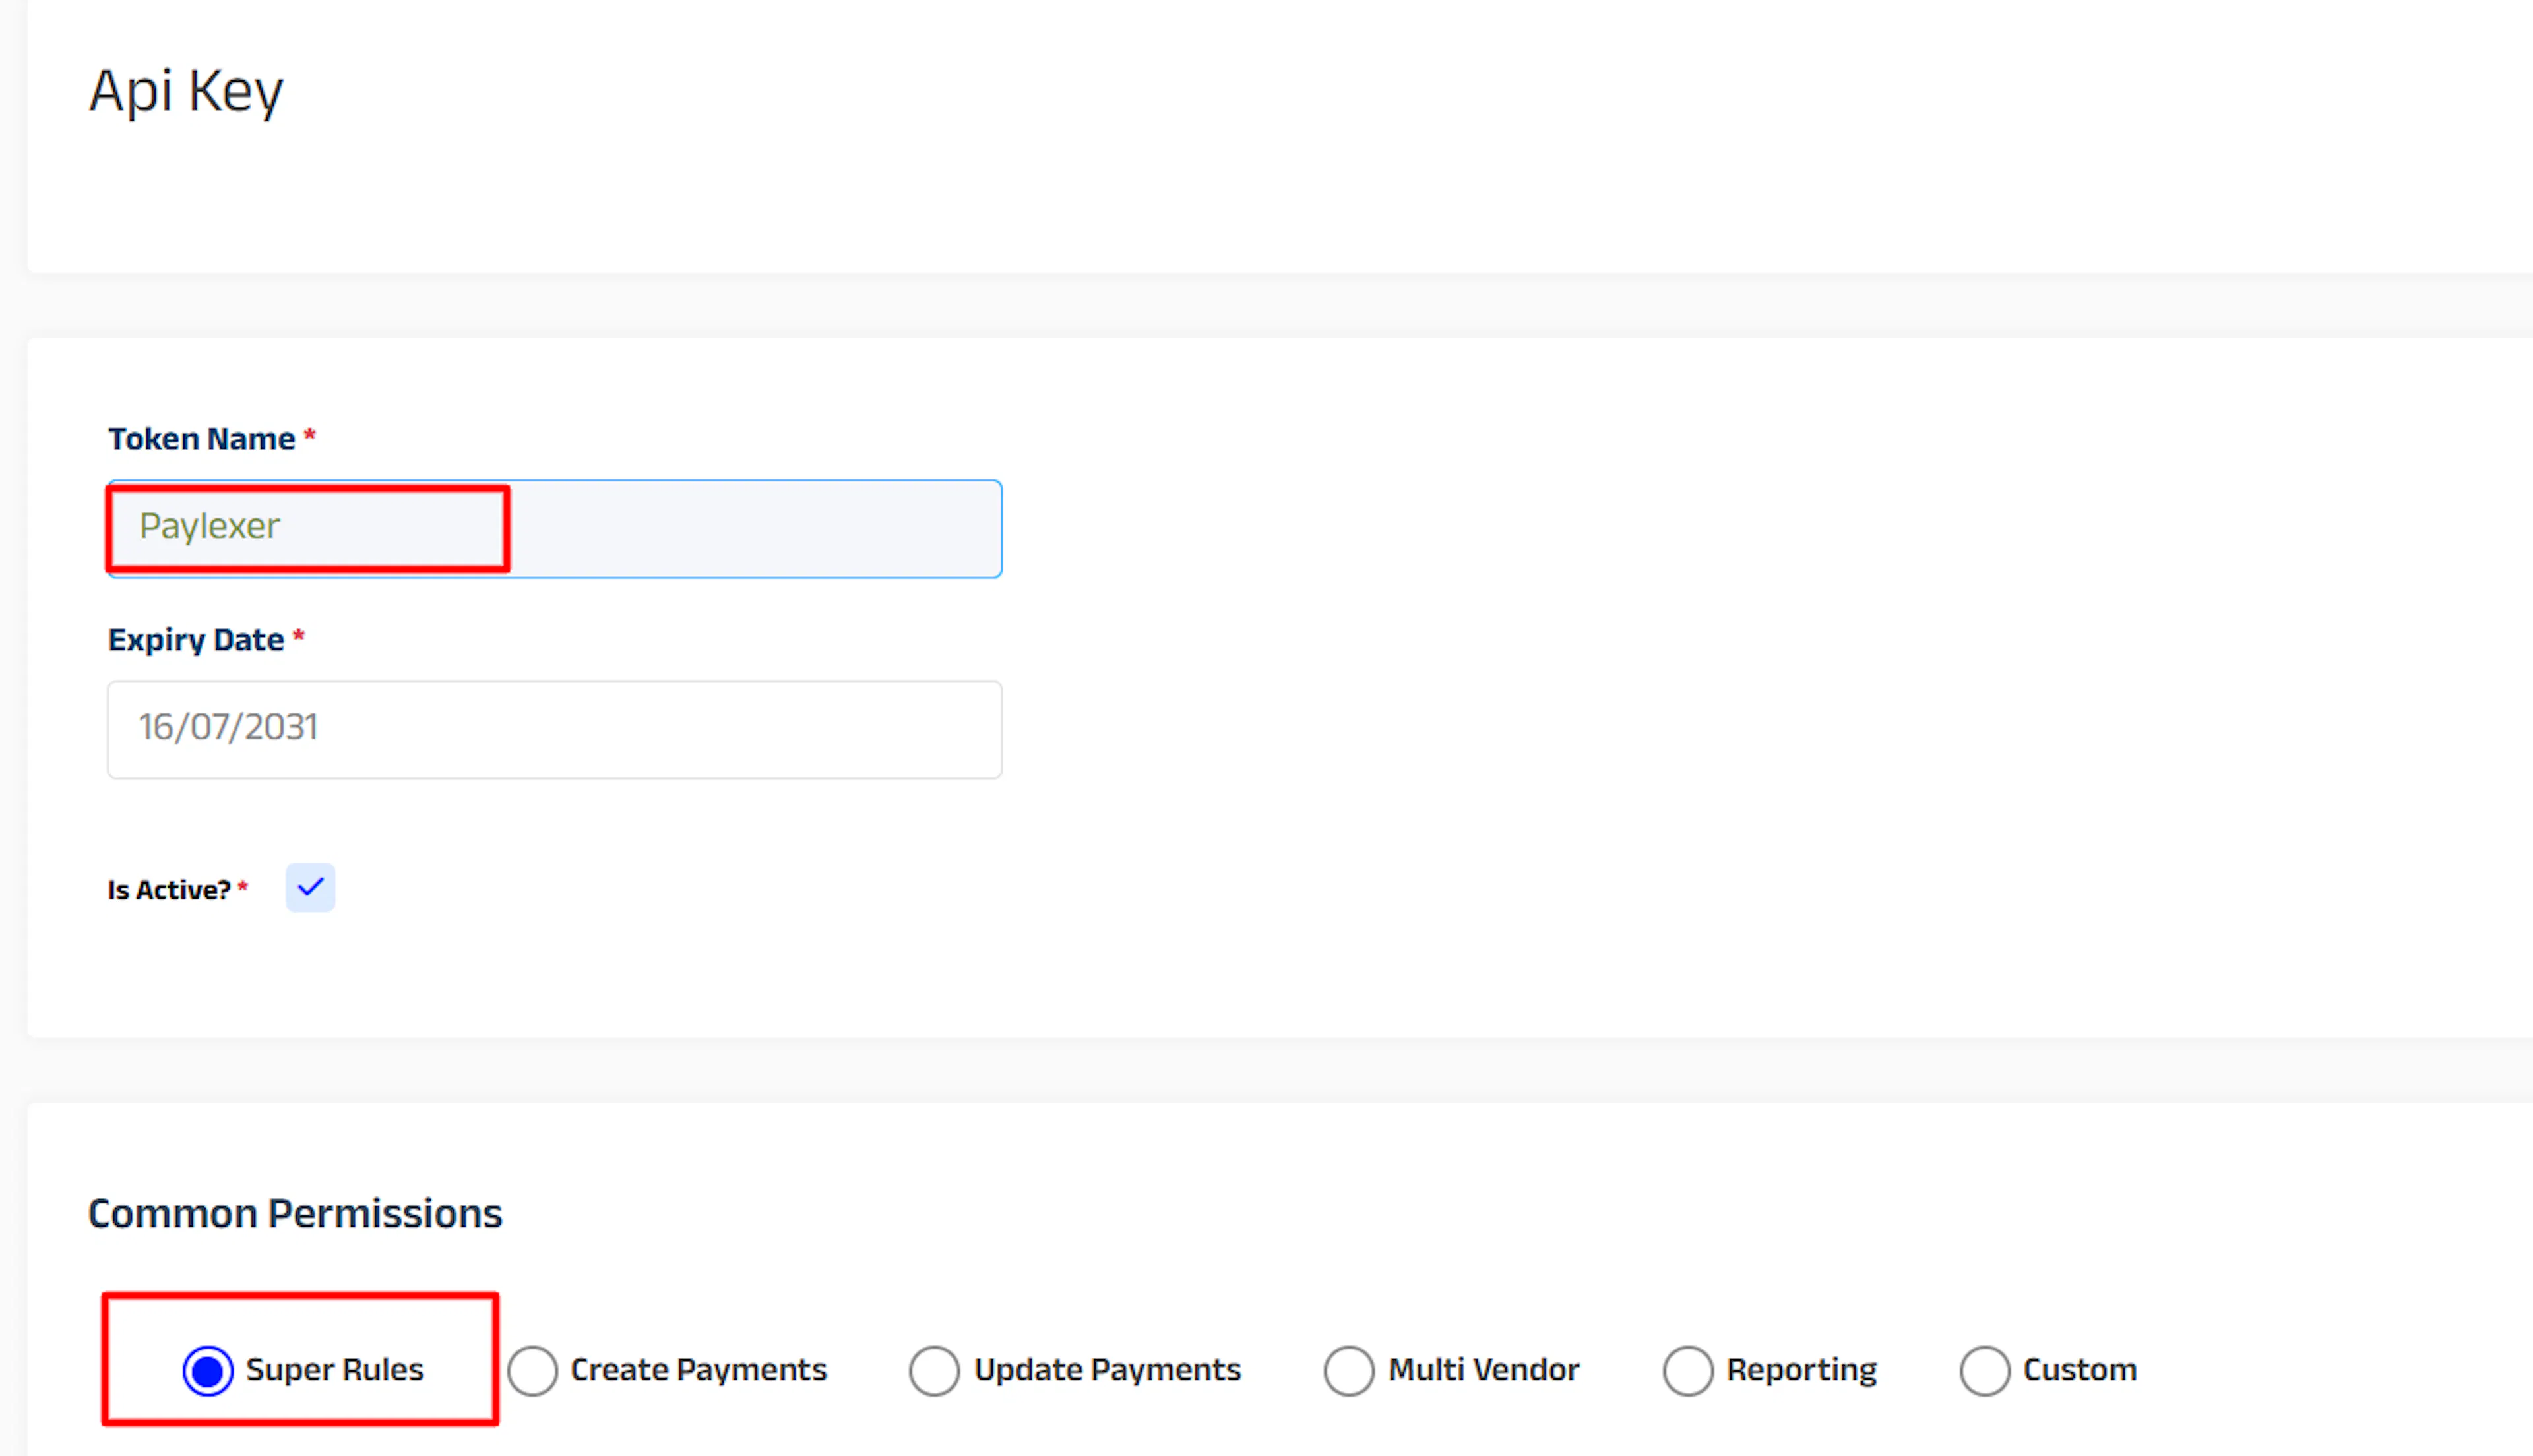
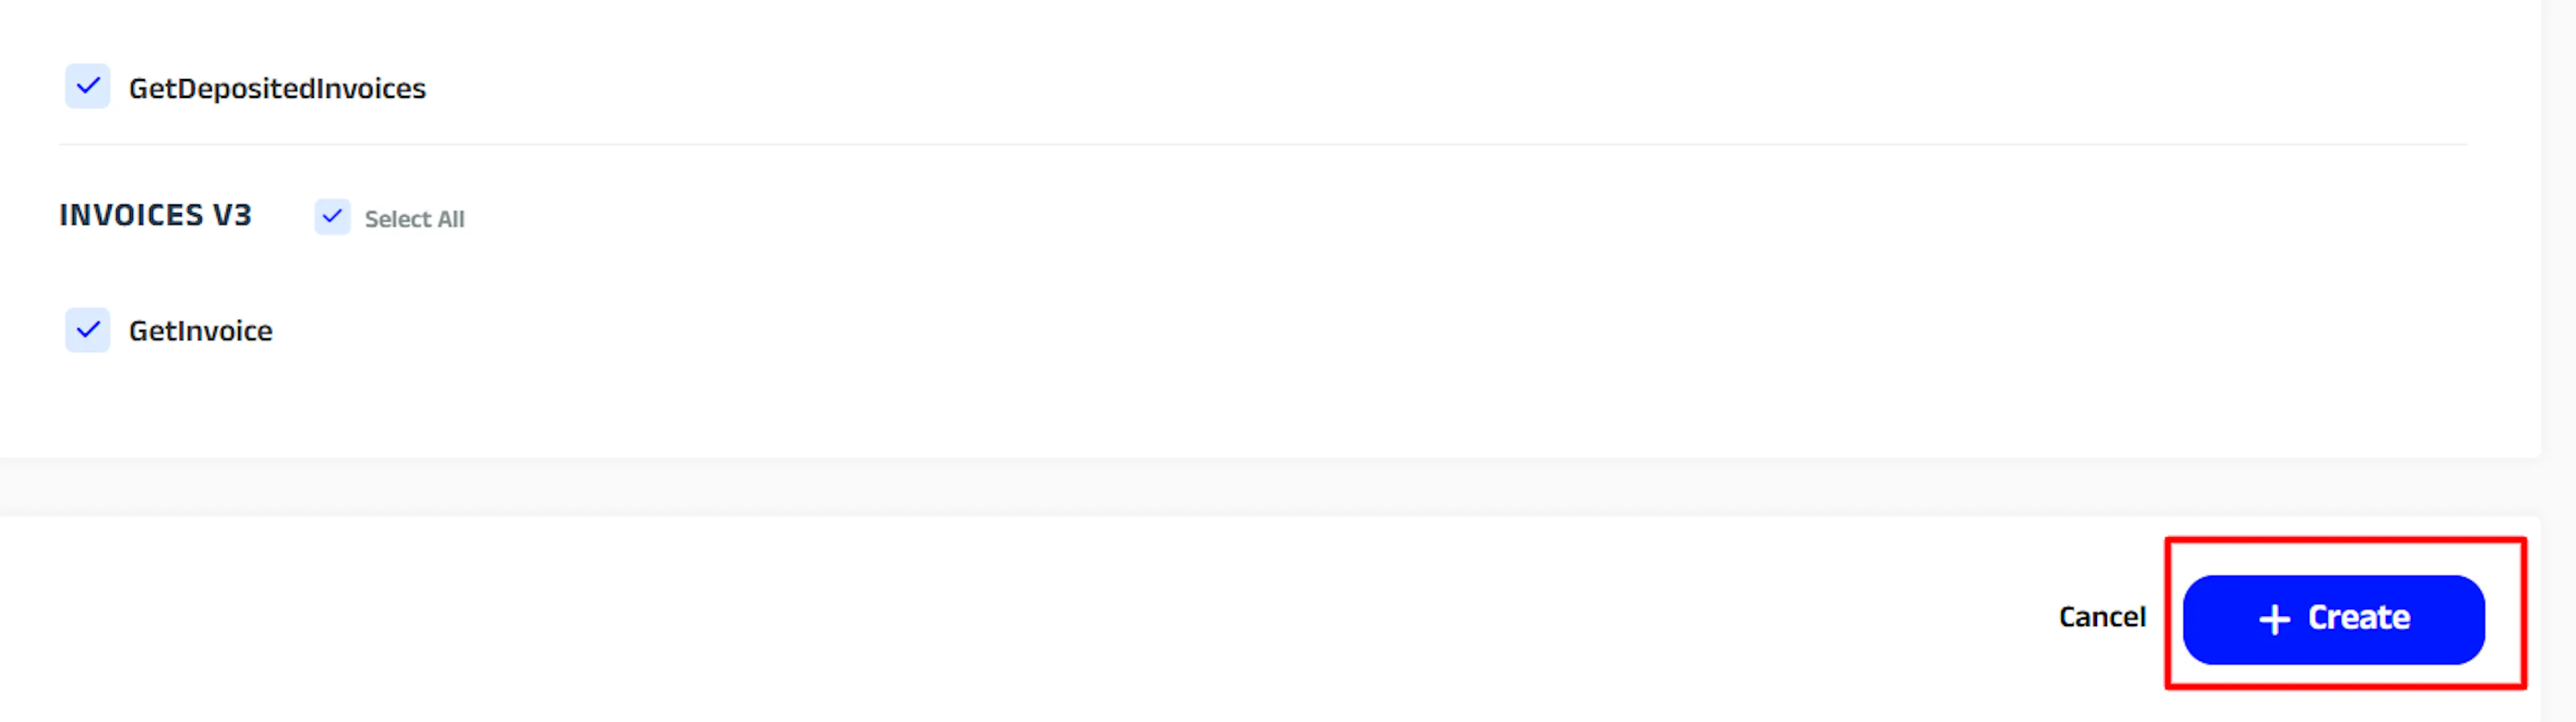
Click the Add button on the top left. Enter a name for the token and fill in the expiry date, then select the appropriate permissions based on your requirements. Click Create.
Copy your API Key
Copy the generated token.
Adding Credentials to PayLexer
Open PayLexer Dashboard
Log in to your PayLexer dashboard and navigate to Payment Gateways → MyFatoorah.
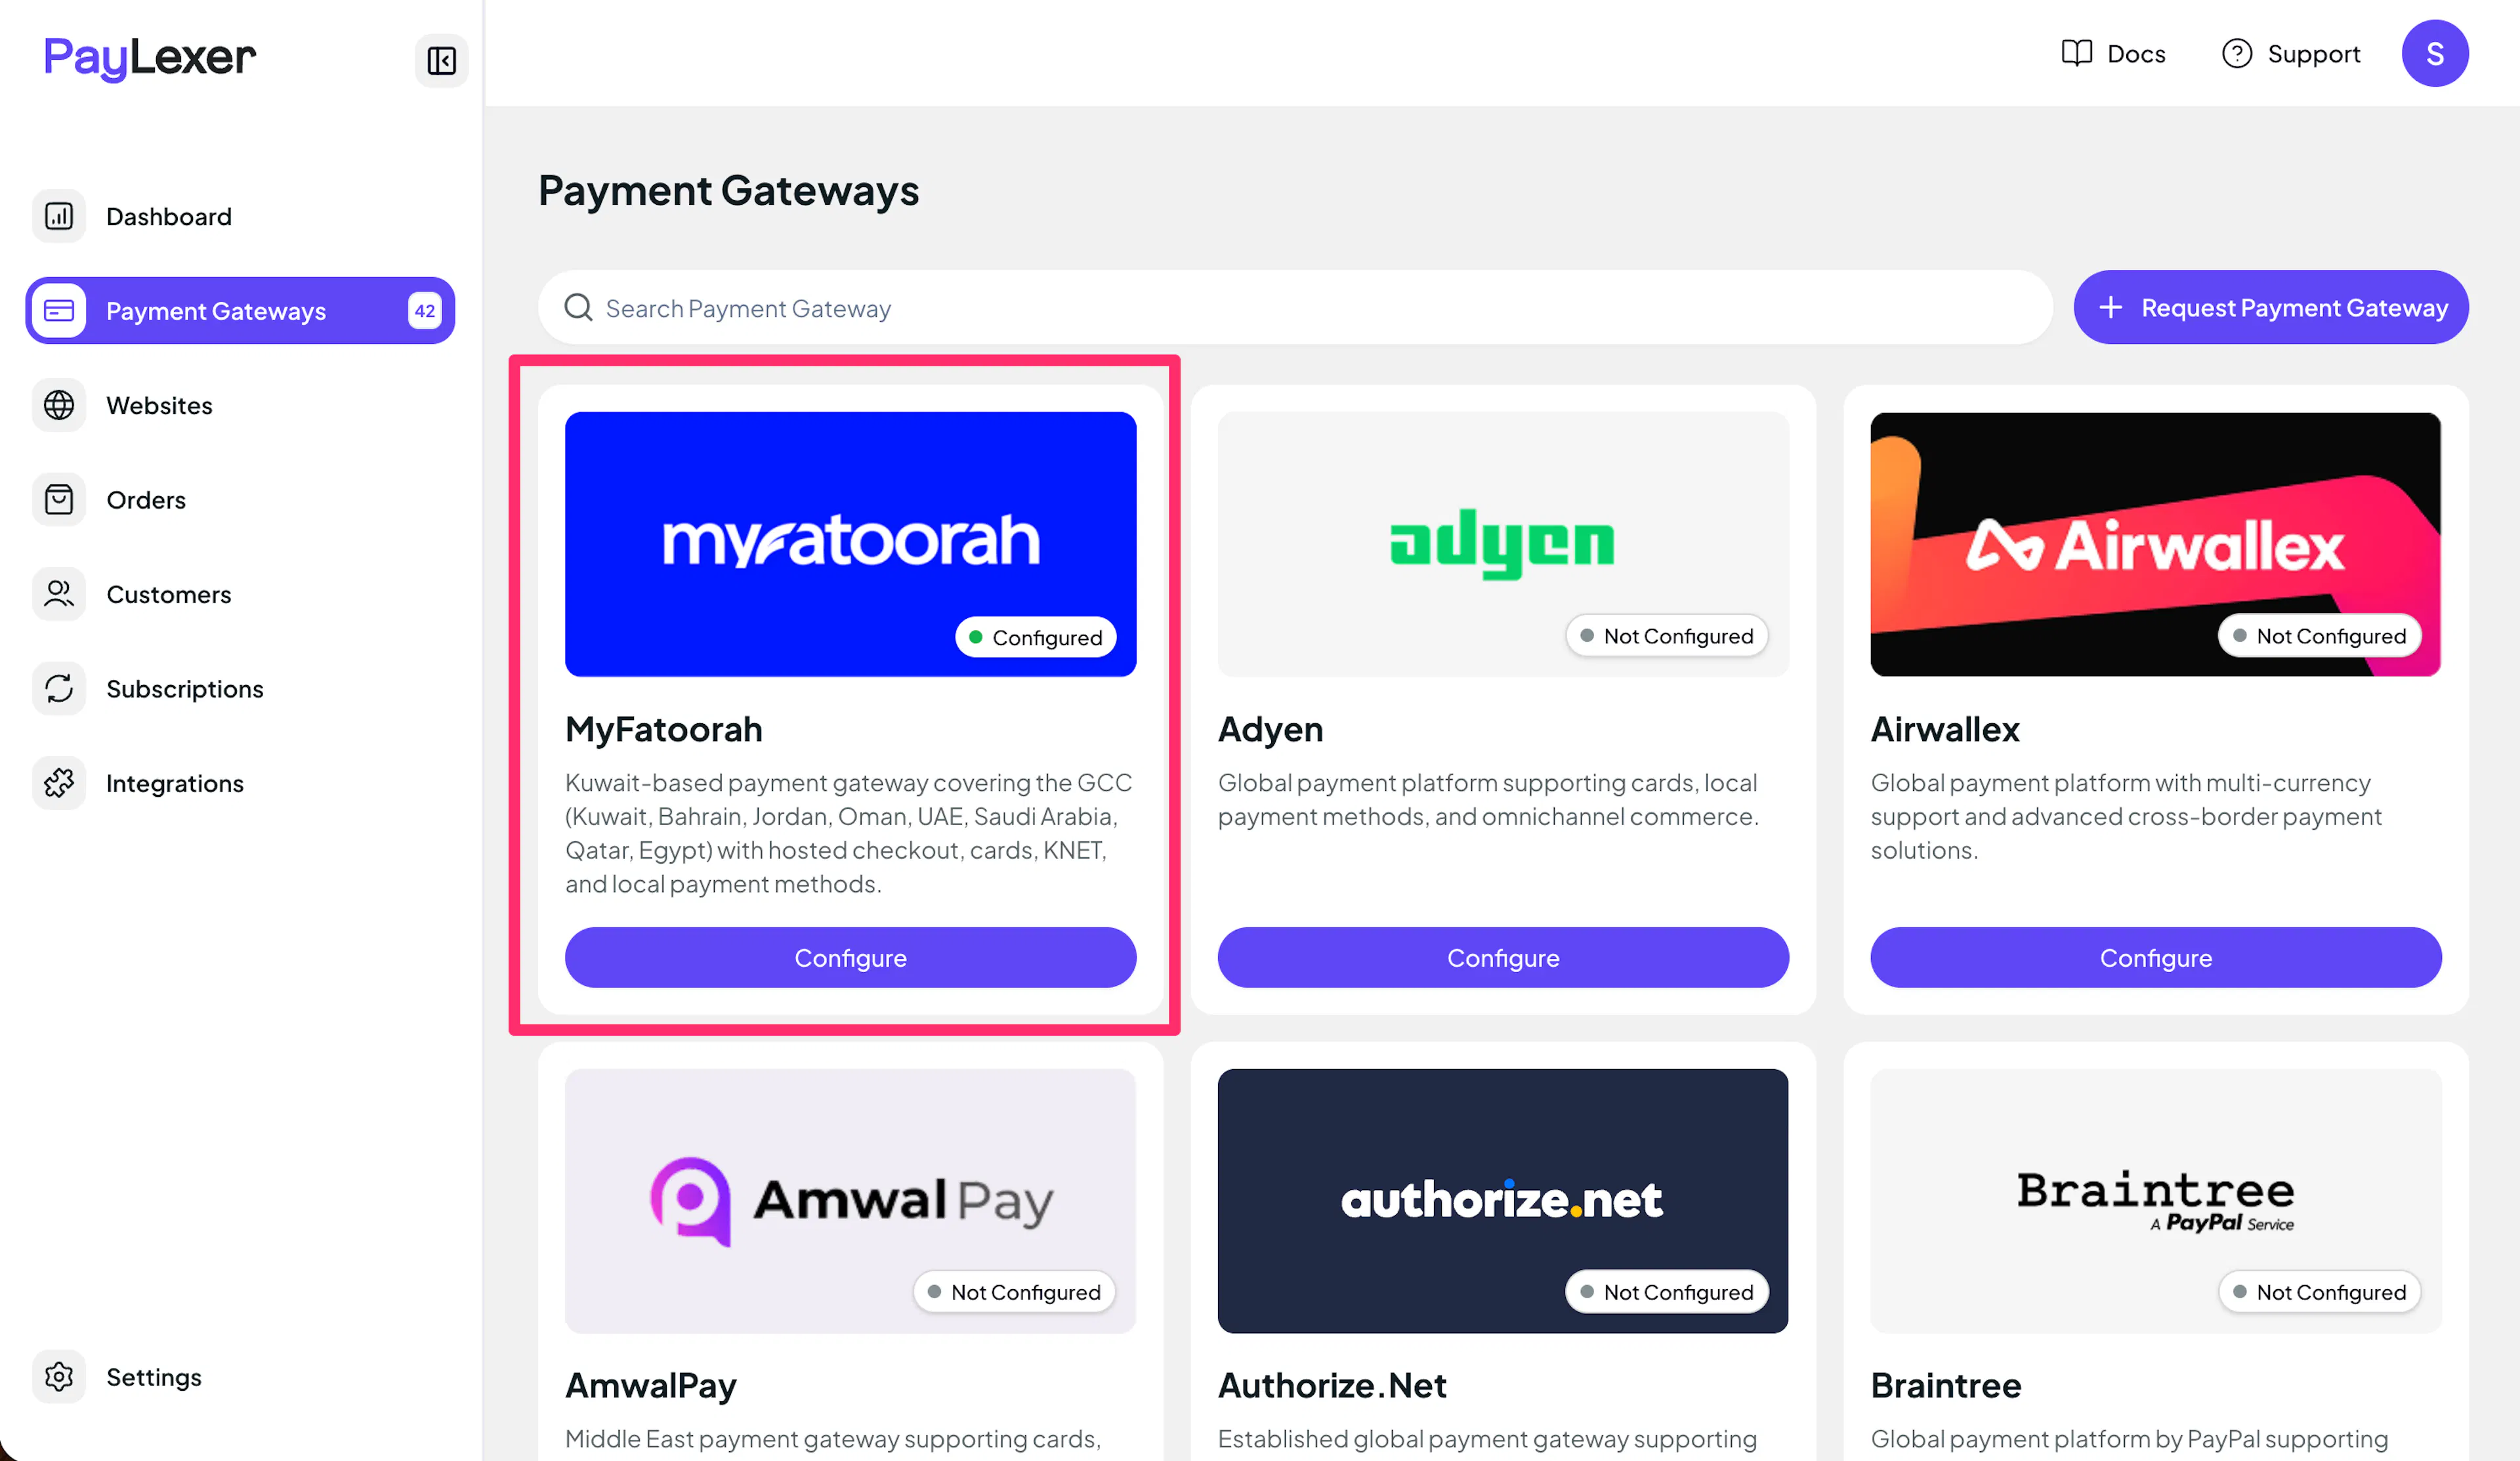
Enter your credentials
Paste the API Key you copied from MyFatoorah.
Understanding Live/Production and Sandbox Settings:
| Environment | Purpose |
|---|---|
| Live / Production (Mandatory) | Used for real transactions. Cannot be empty, even when testing. |
| Test / Sandbox (Optional) | Used for testing only. No real money is processed. |
How PayLexer selects credentials:
- Debug/Test mode ON → Test credentials are used
- Debug/Test mode OFF → Live credentials are used
Test and save
Click Save to save your configuration and verify your credentials. Click Verify Connection to test the connection.
Configuring Webhooks (Mandatory)
Webhooks enable real-time payment updates and significantly improve reliability.
Benefits of Webhooks:
- Instant payment status updates
- Automatic refund processing
- Dispute notifications
MyFatoorah sends HMAC-signed webhooks with a MyFatoorah-Signature header for secure server-to-server confirmation. Since all events are sent to a single portal-configured endpoint, you only need to register the webhook once in the MyFatoorah Portal.
Copy your PayLexer webhook URL
In PayLexer → Payment Gateways → MyFatoorah, copy the Webhook URL shown for your account.
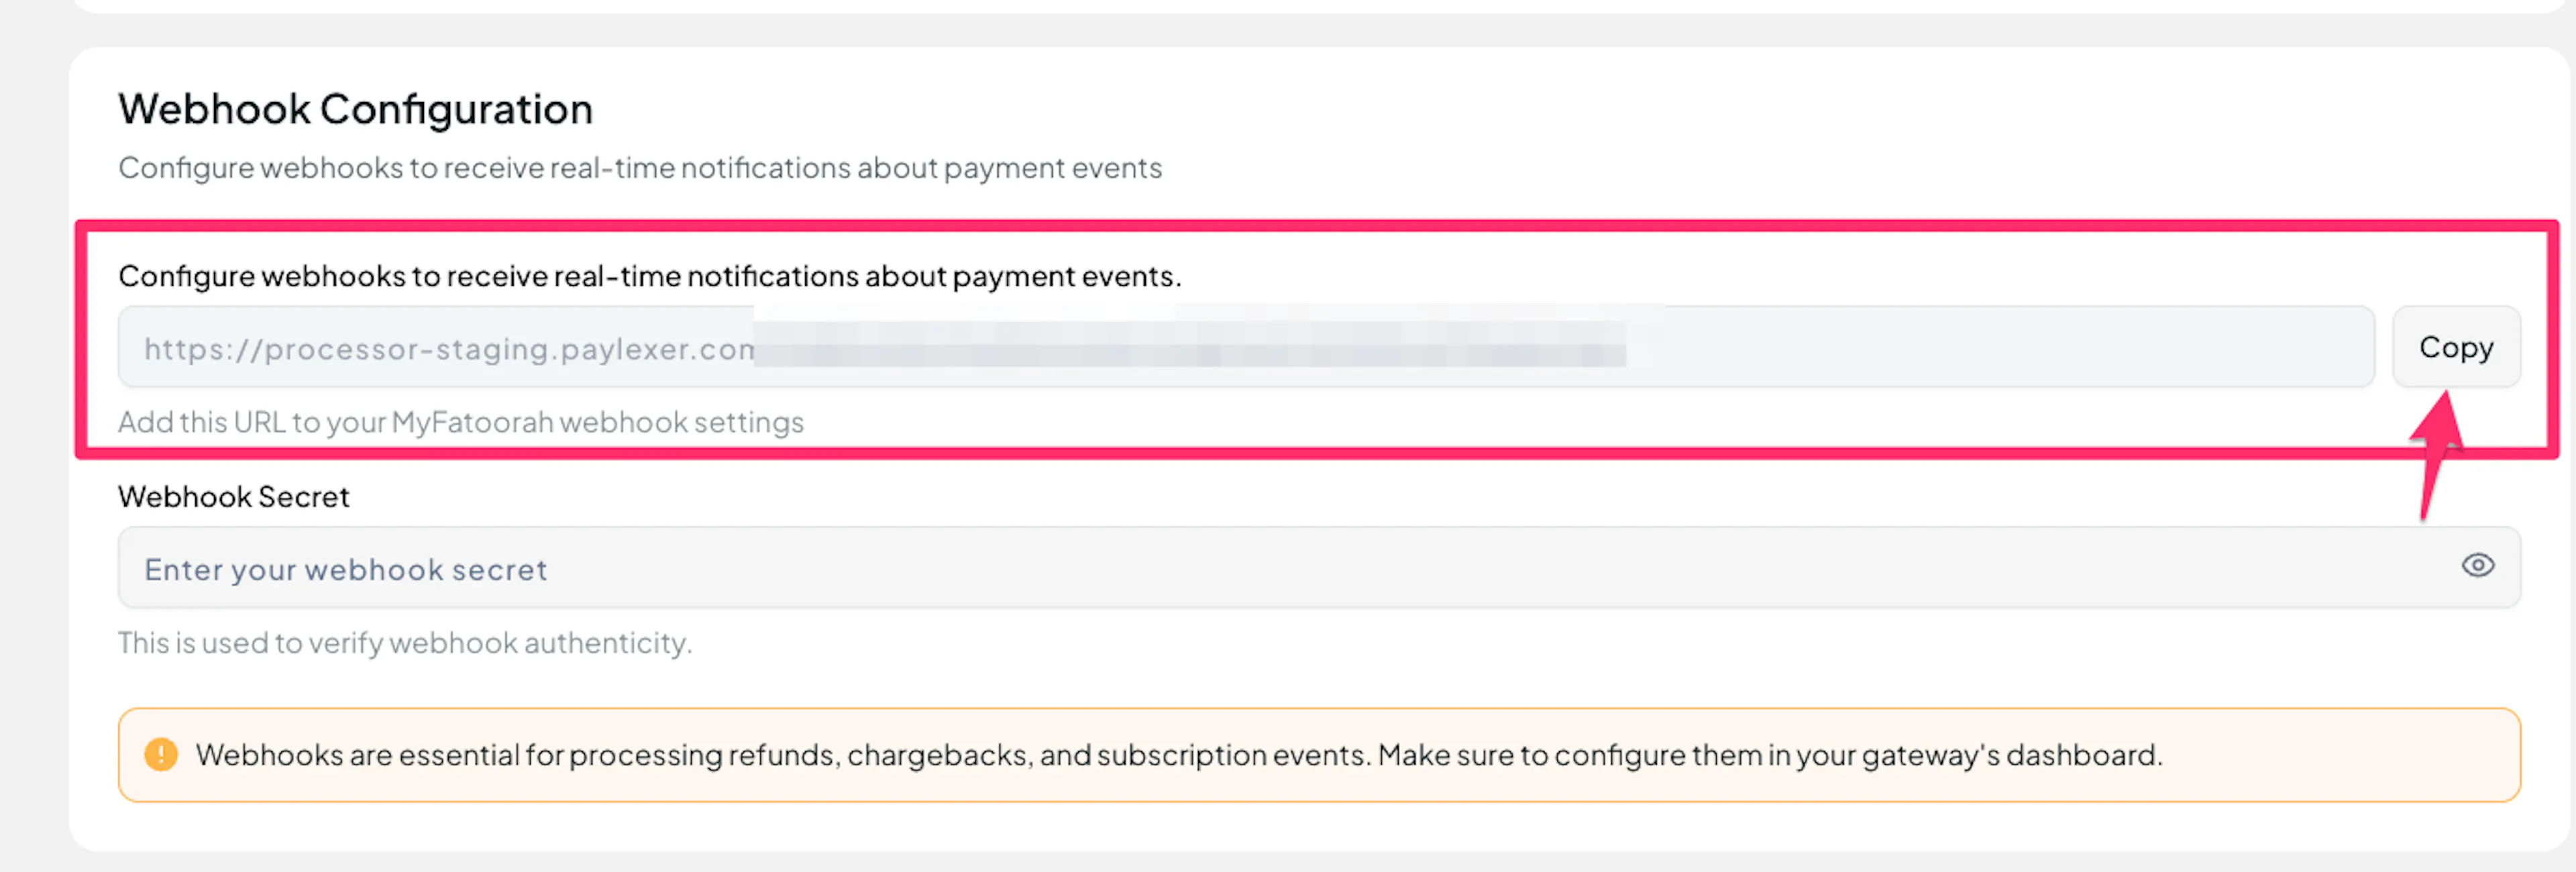
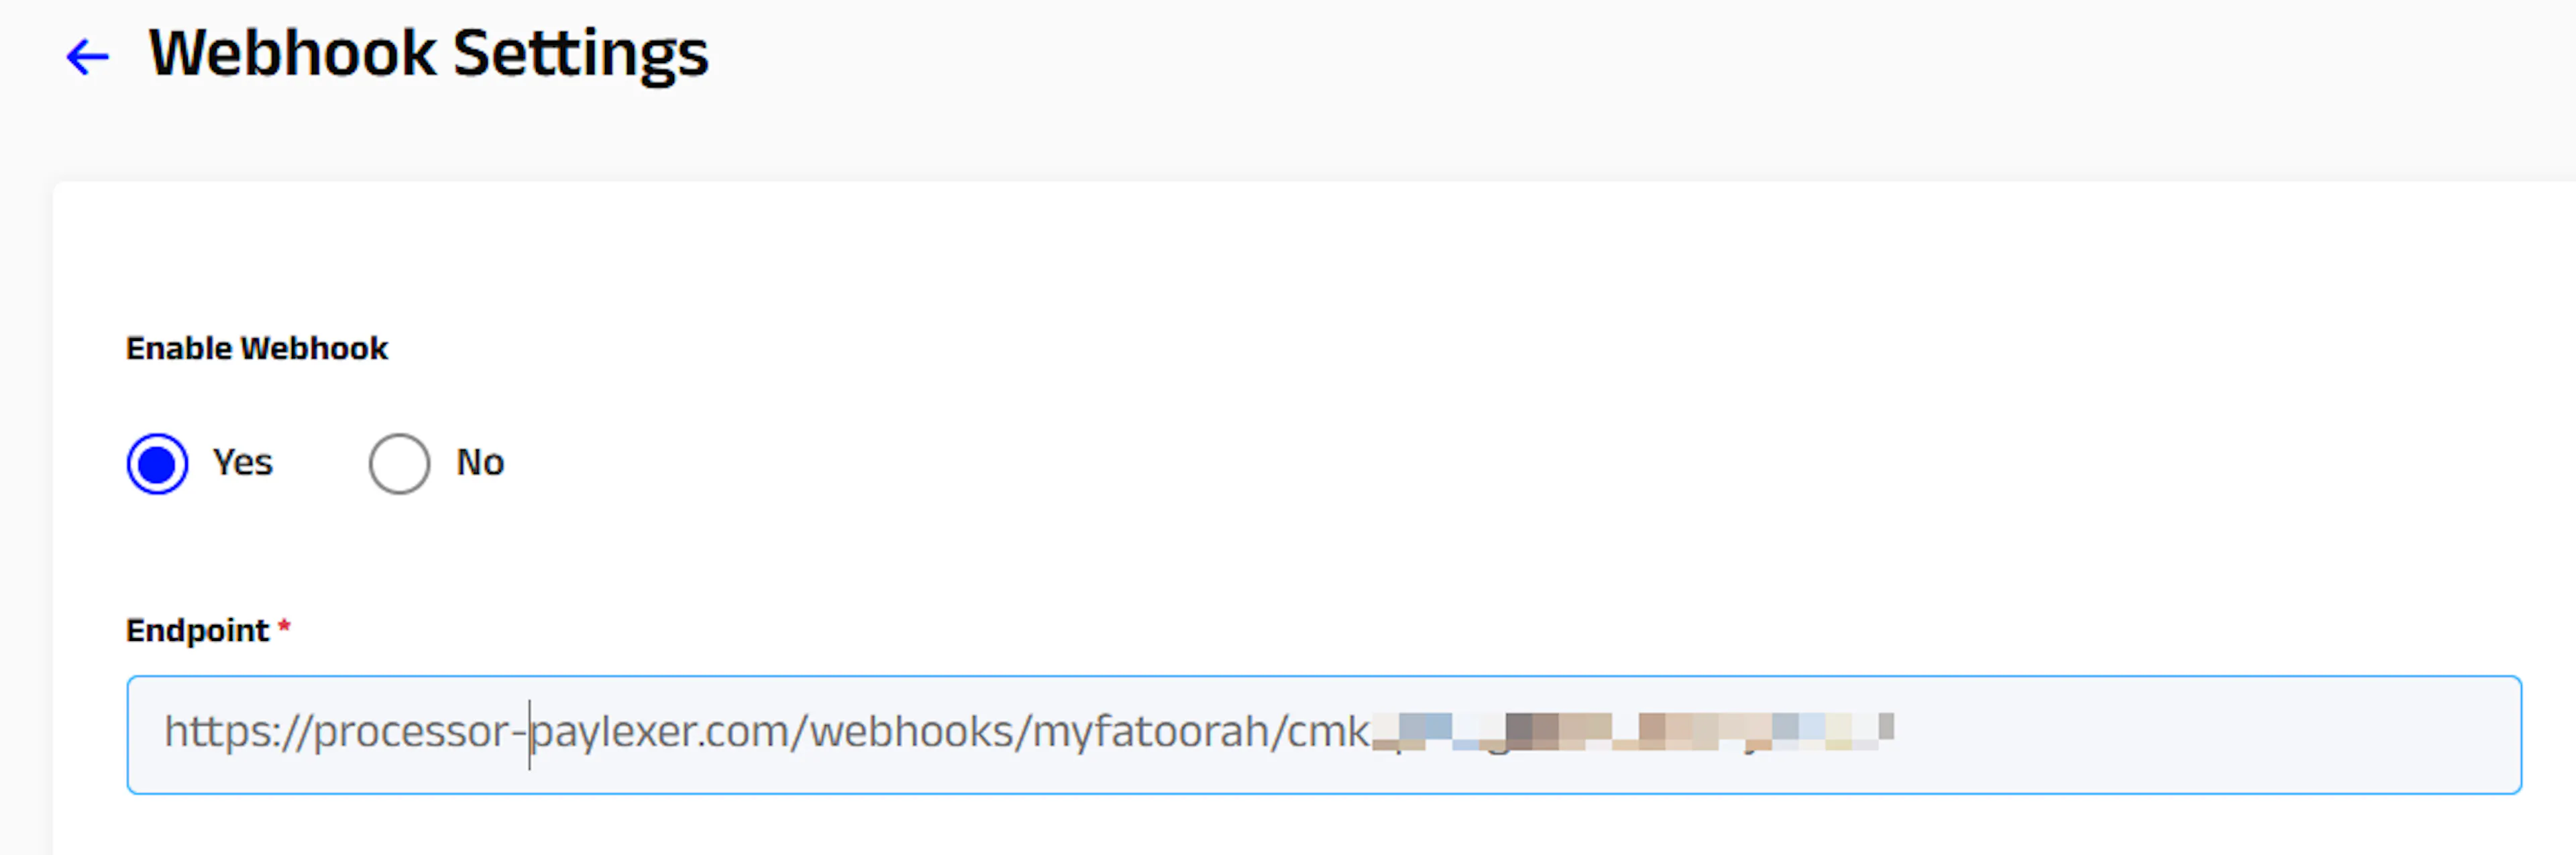
Add the webhook URL in MyFatoorah
In the MyFatoorah Portal, go to Settings → Integration Settings → Webhook Settings and paste the PayLexer webhook URL as the endpoint. Also don't forget to enable the webhook and secret key.
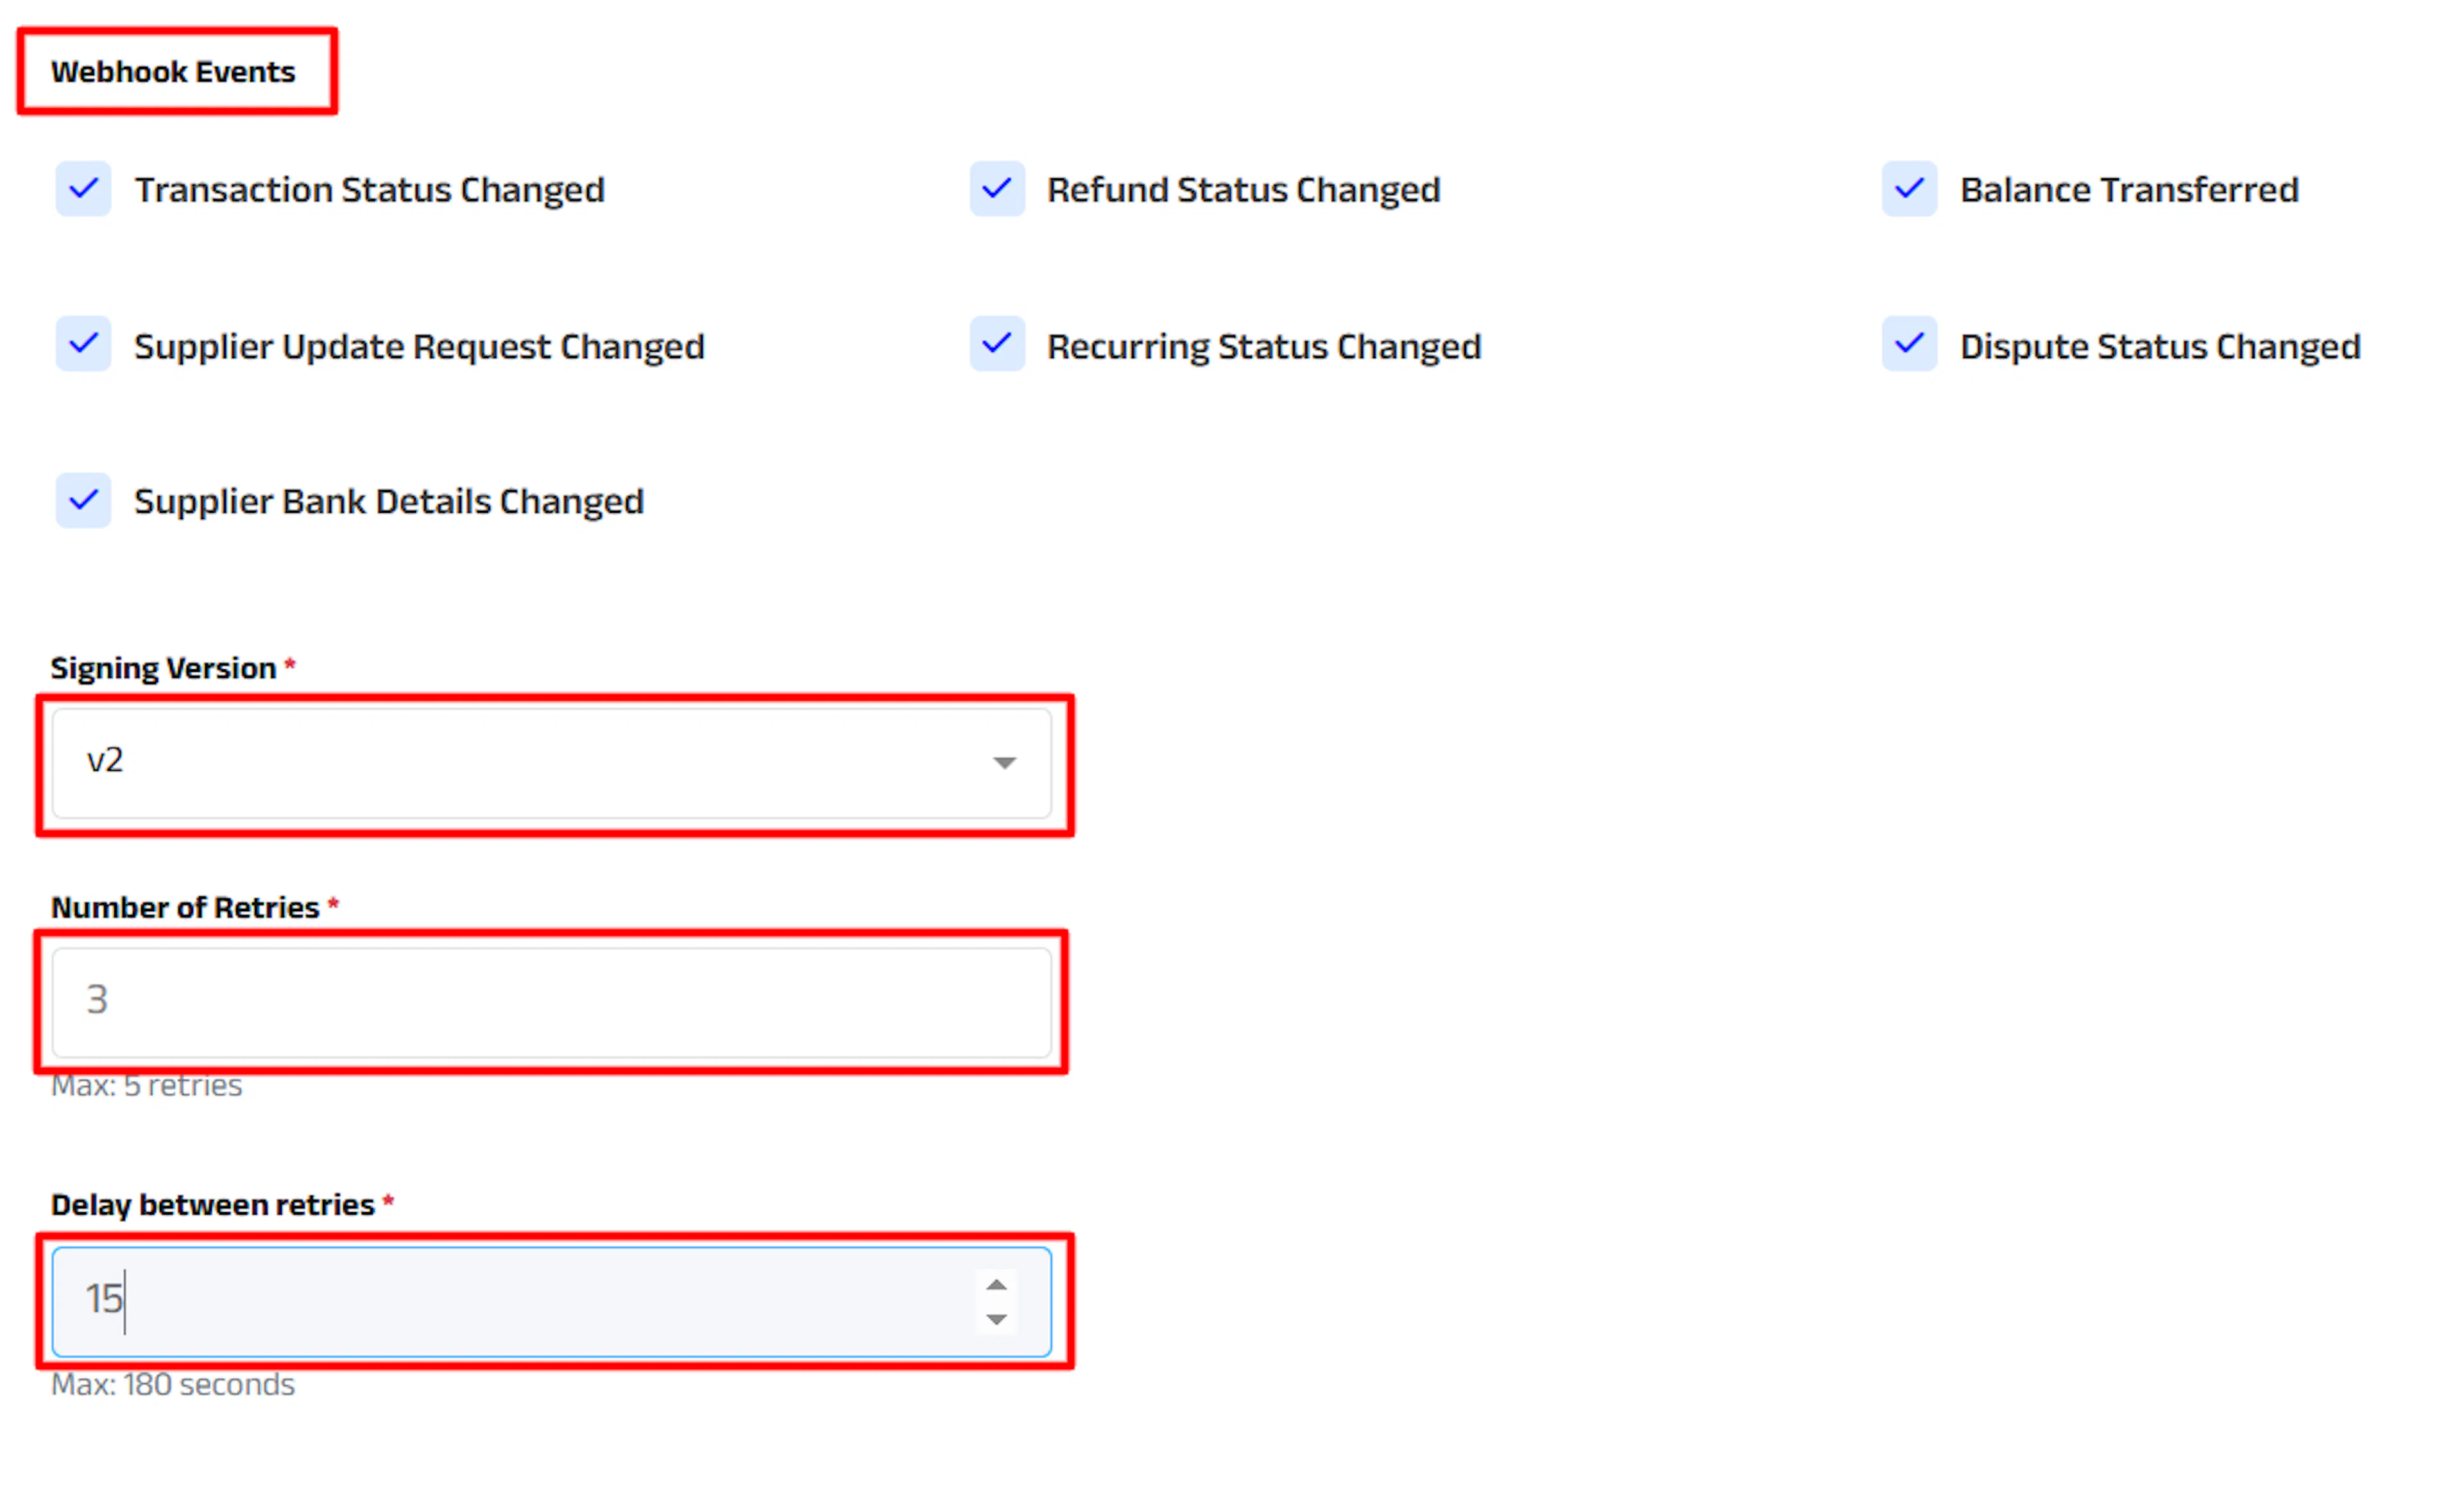
Select webhook events
Select the events you want to receive (we recommend selecting all events), set the Signing Version to v2, and configure the retry count and retry delay as needed.
Add the Webhook Secret to PayLexer
Copy the Webhook Secret Key generated for the webhook in MyFatoorah, then paste it into the Webhook Secret field in PayLexer and click Save Configuration.
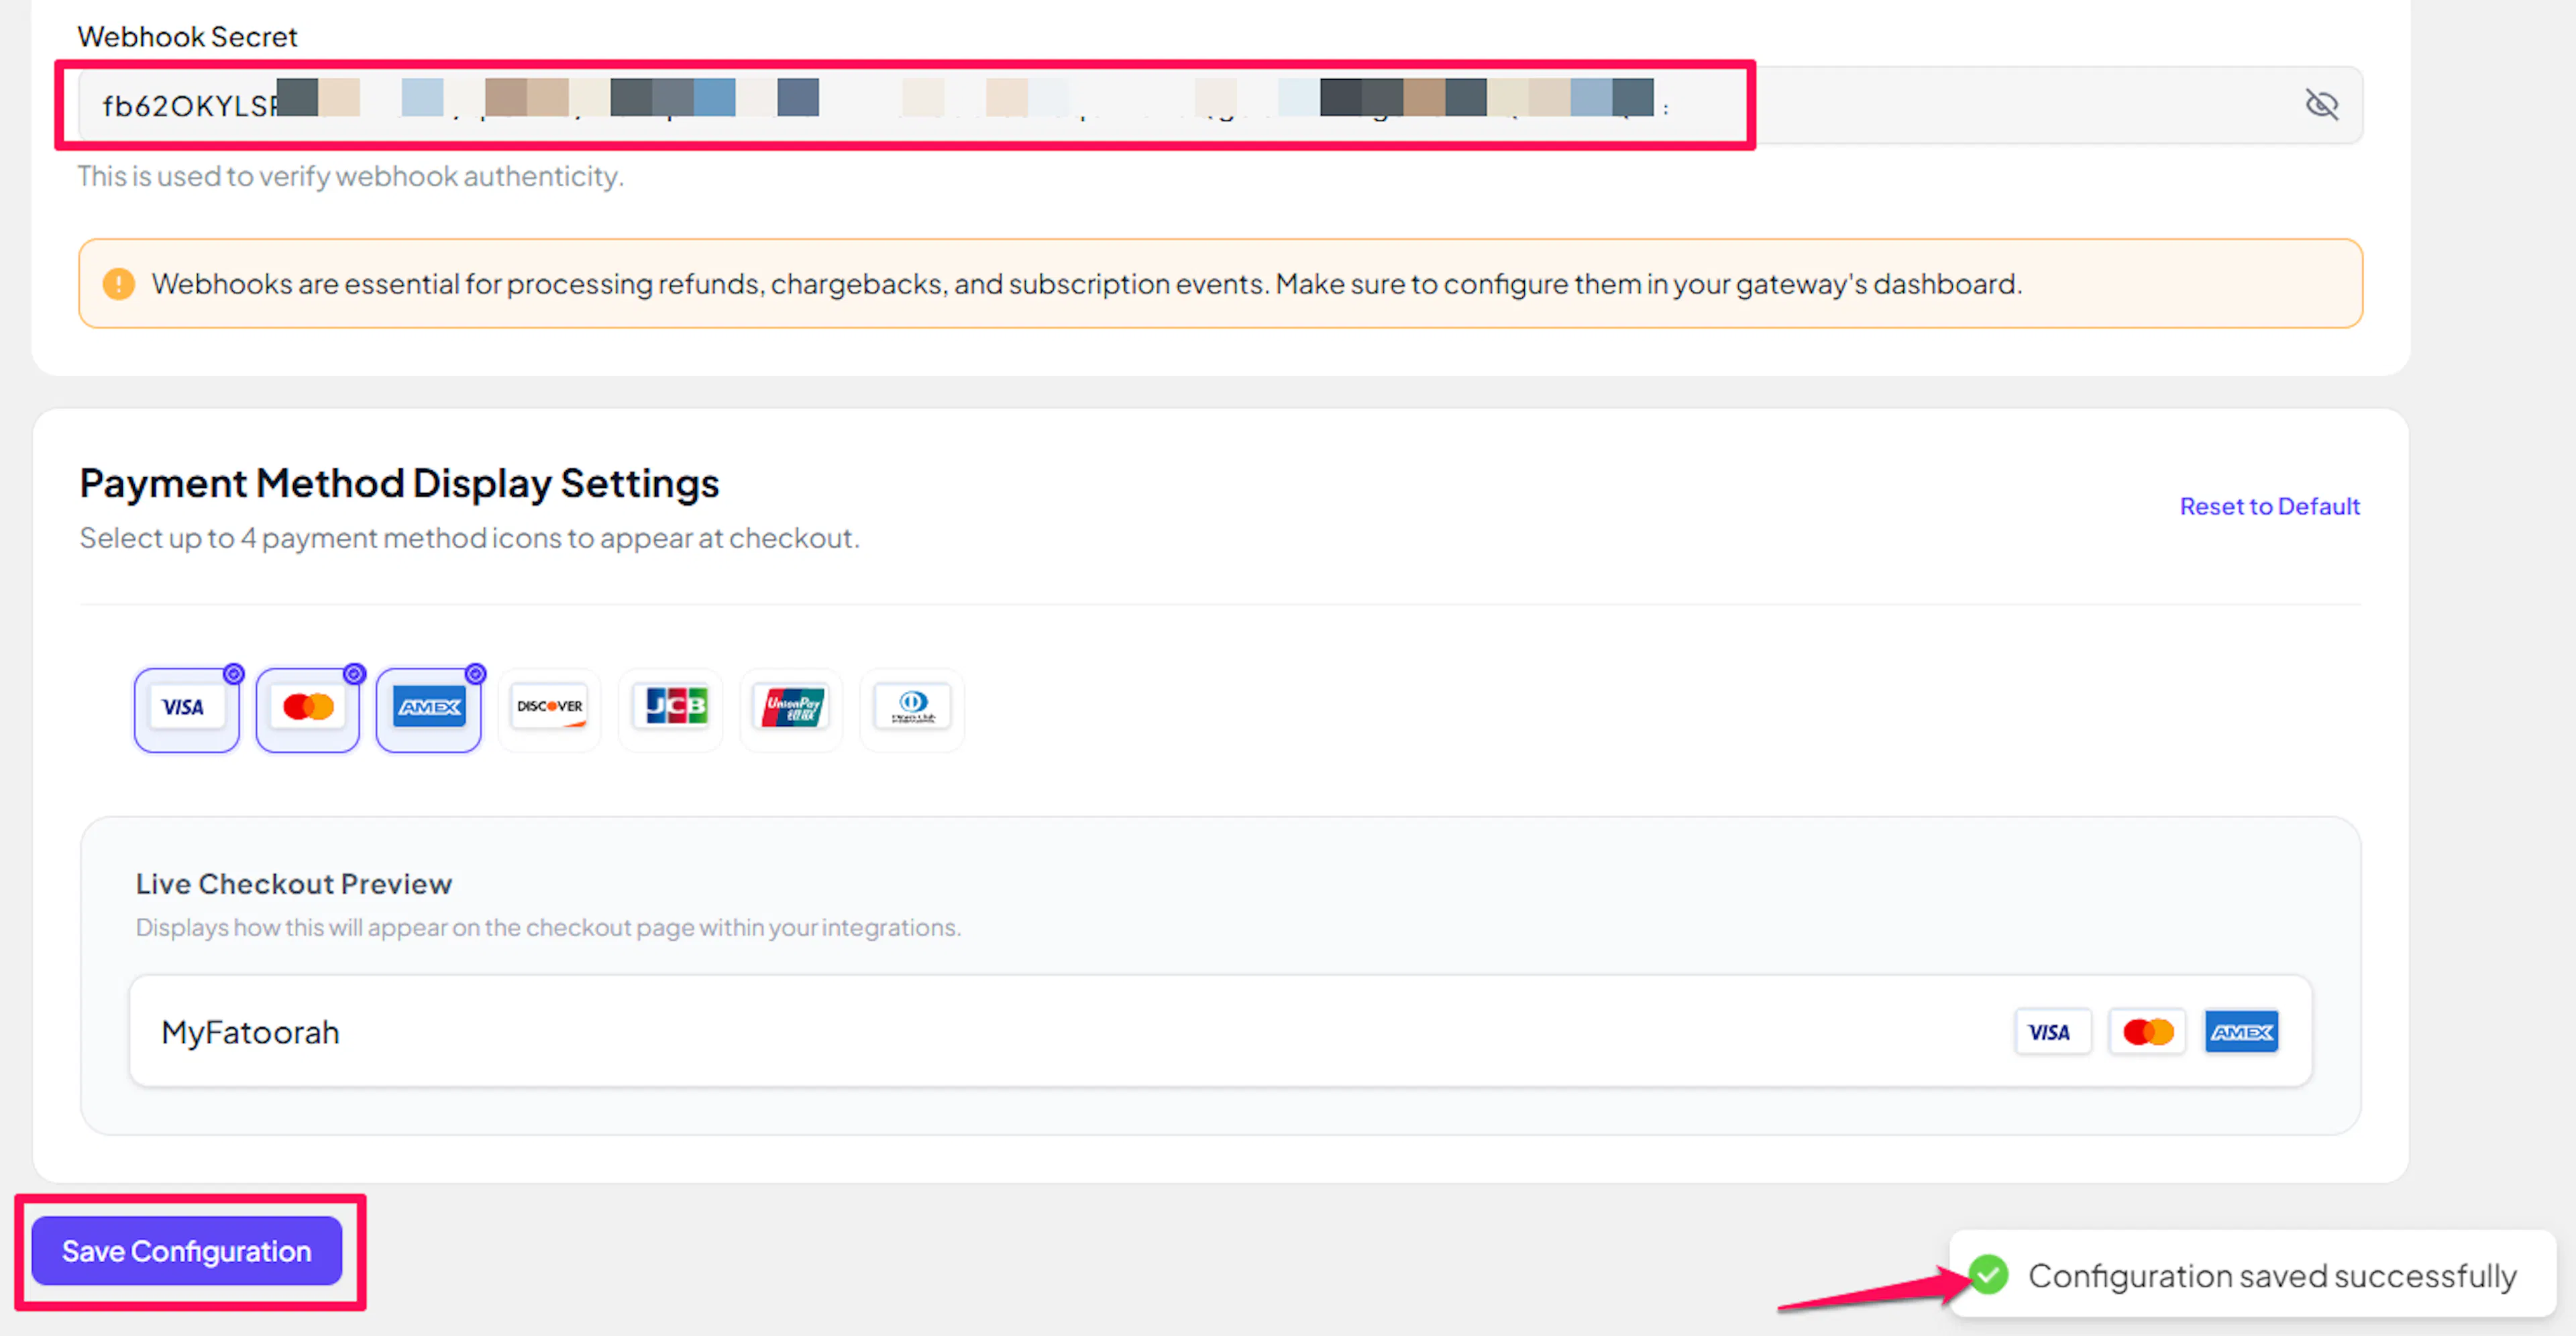
The Webhook Secret is separate from your API Key. Use the Webhook Secret Key from the Webhook Settings page, not the API Key.
Integrate MyFatoorah to Your Website
If you have already added and configured your site, you can enable MyFatoorah in your existing setup.
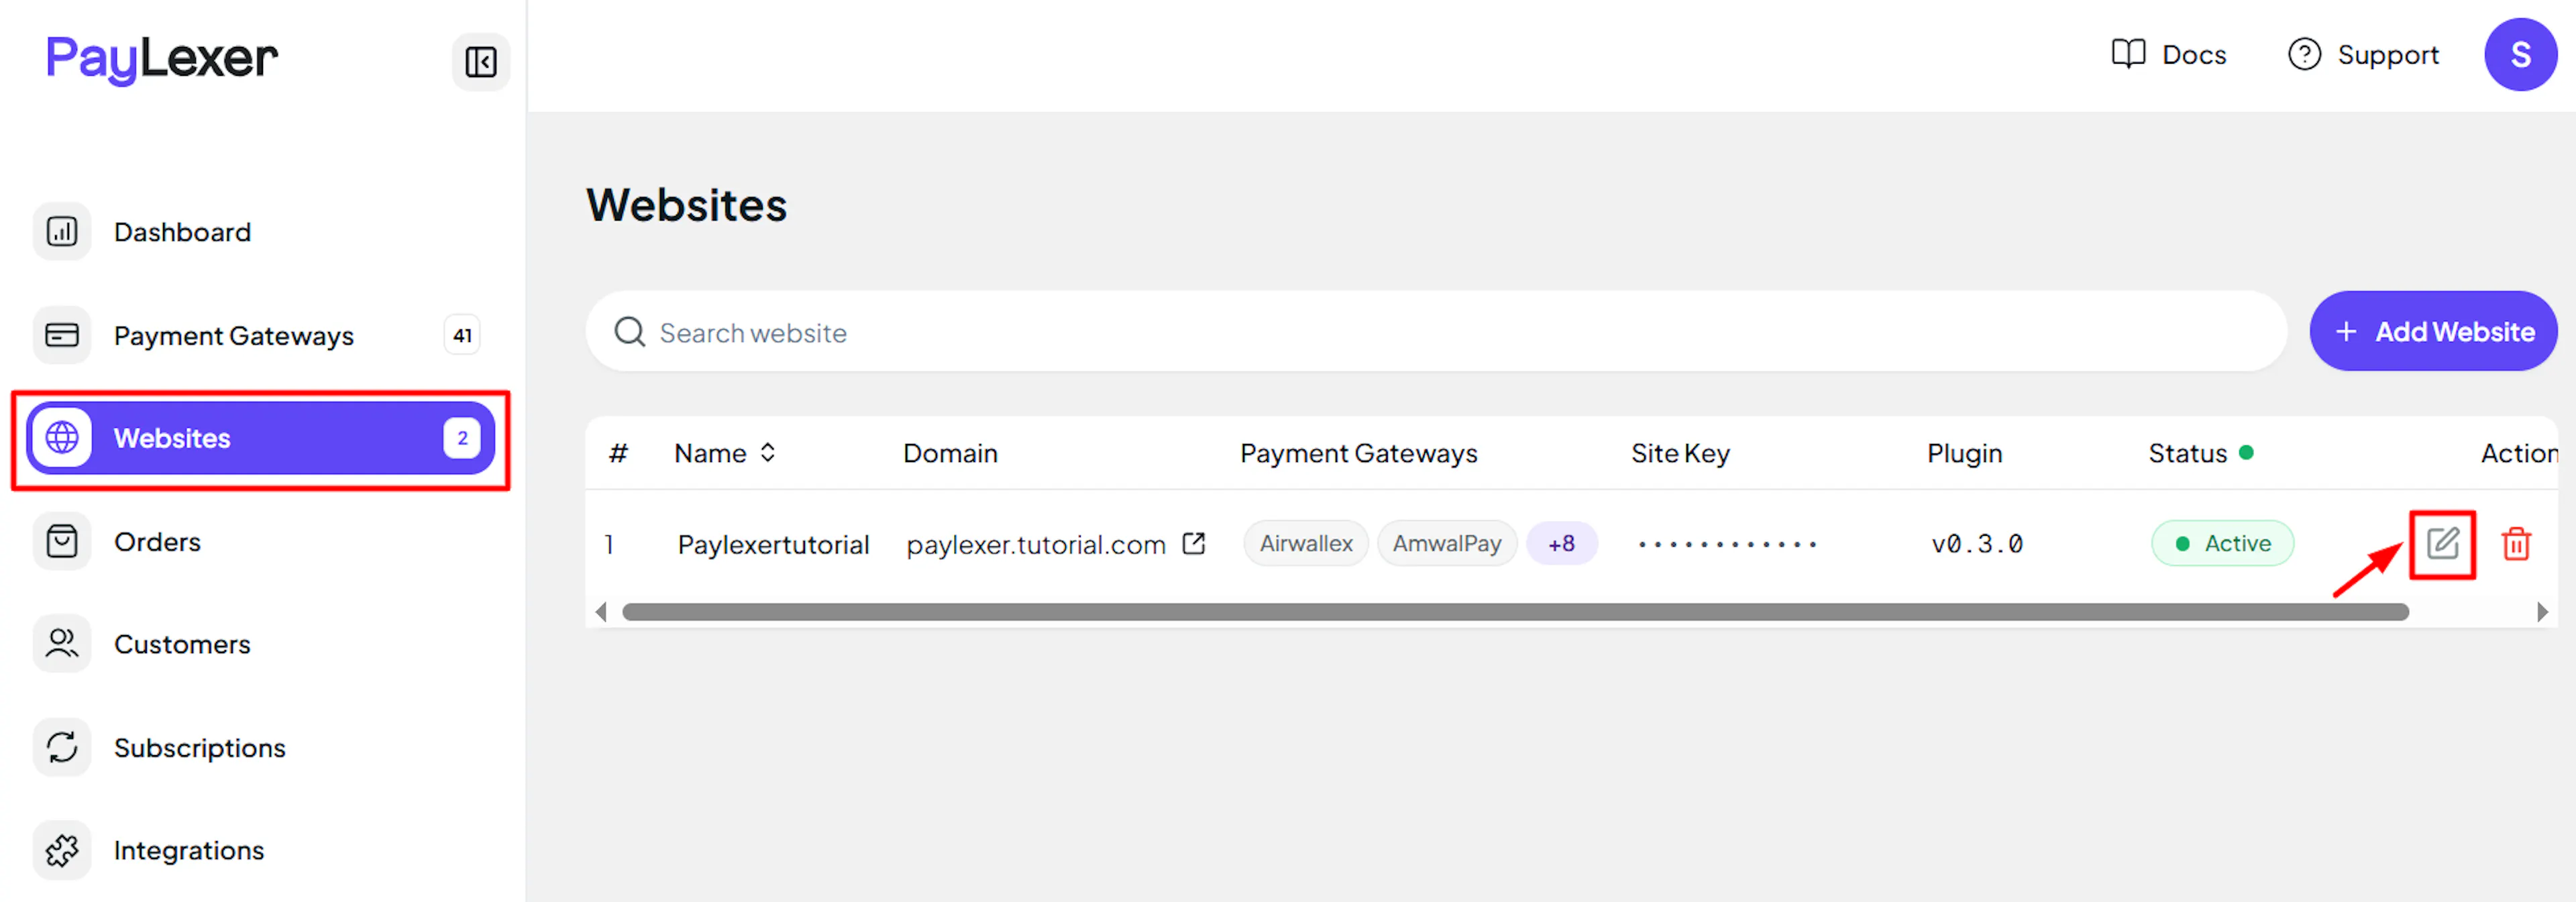
Go to Websites
Navigate to Websites in your PayLexer dashboard.
Edit your website
Click the Edit Icon of your added website.
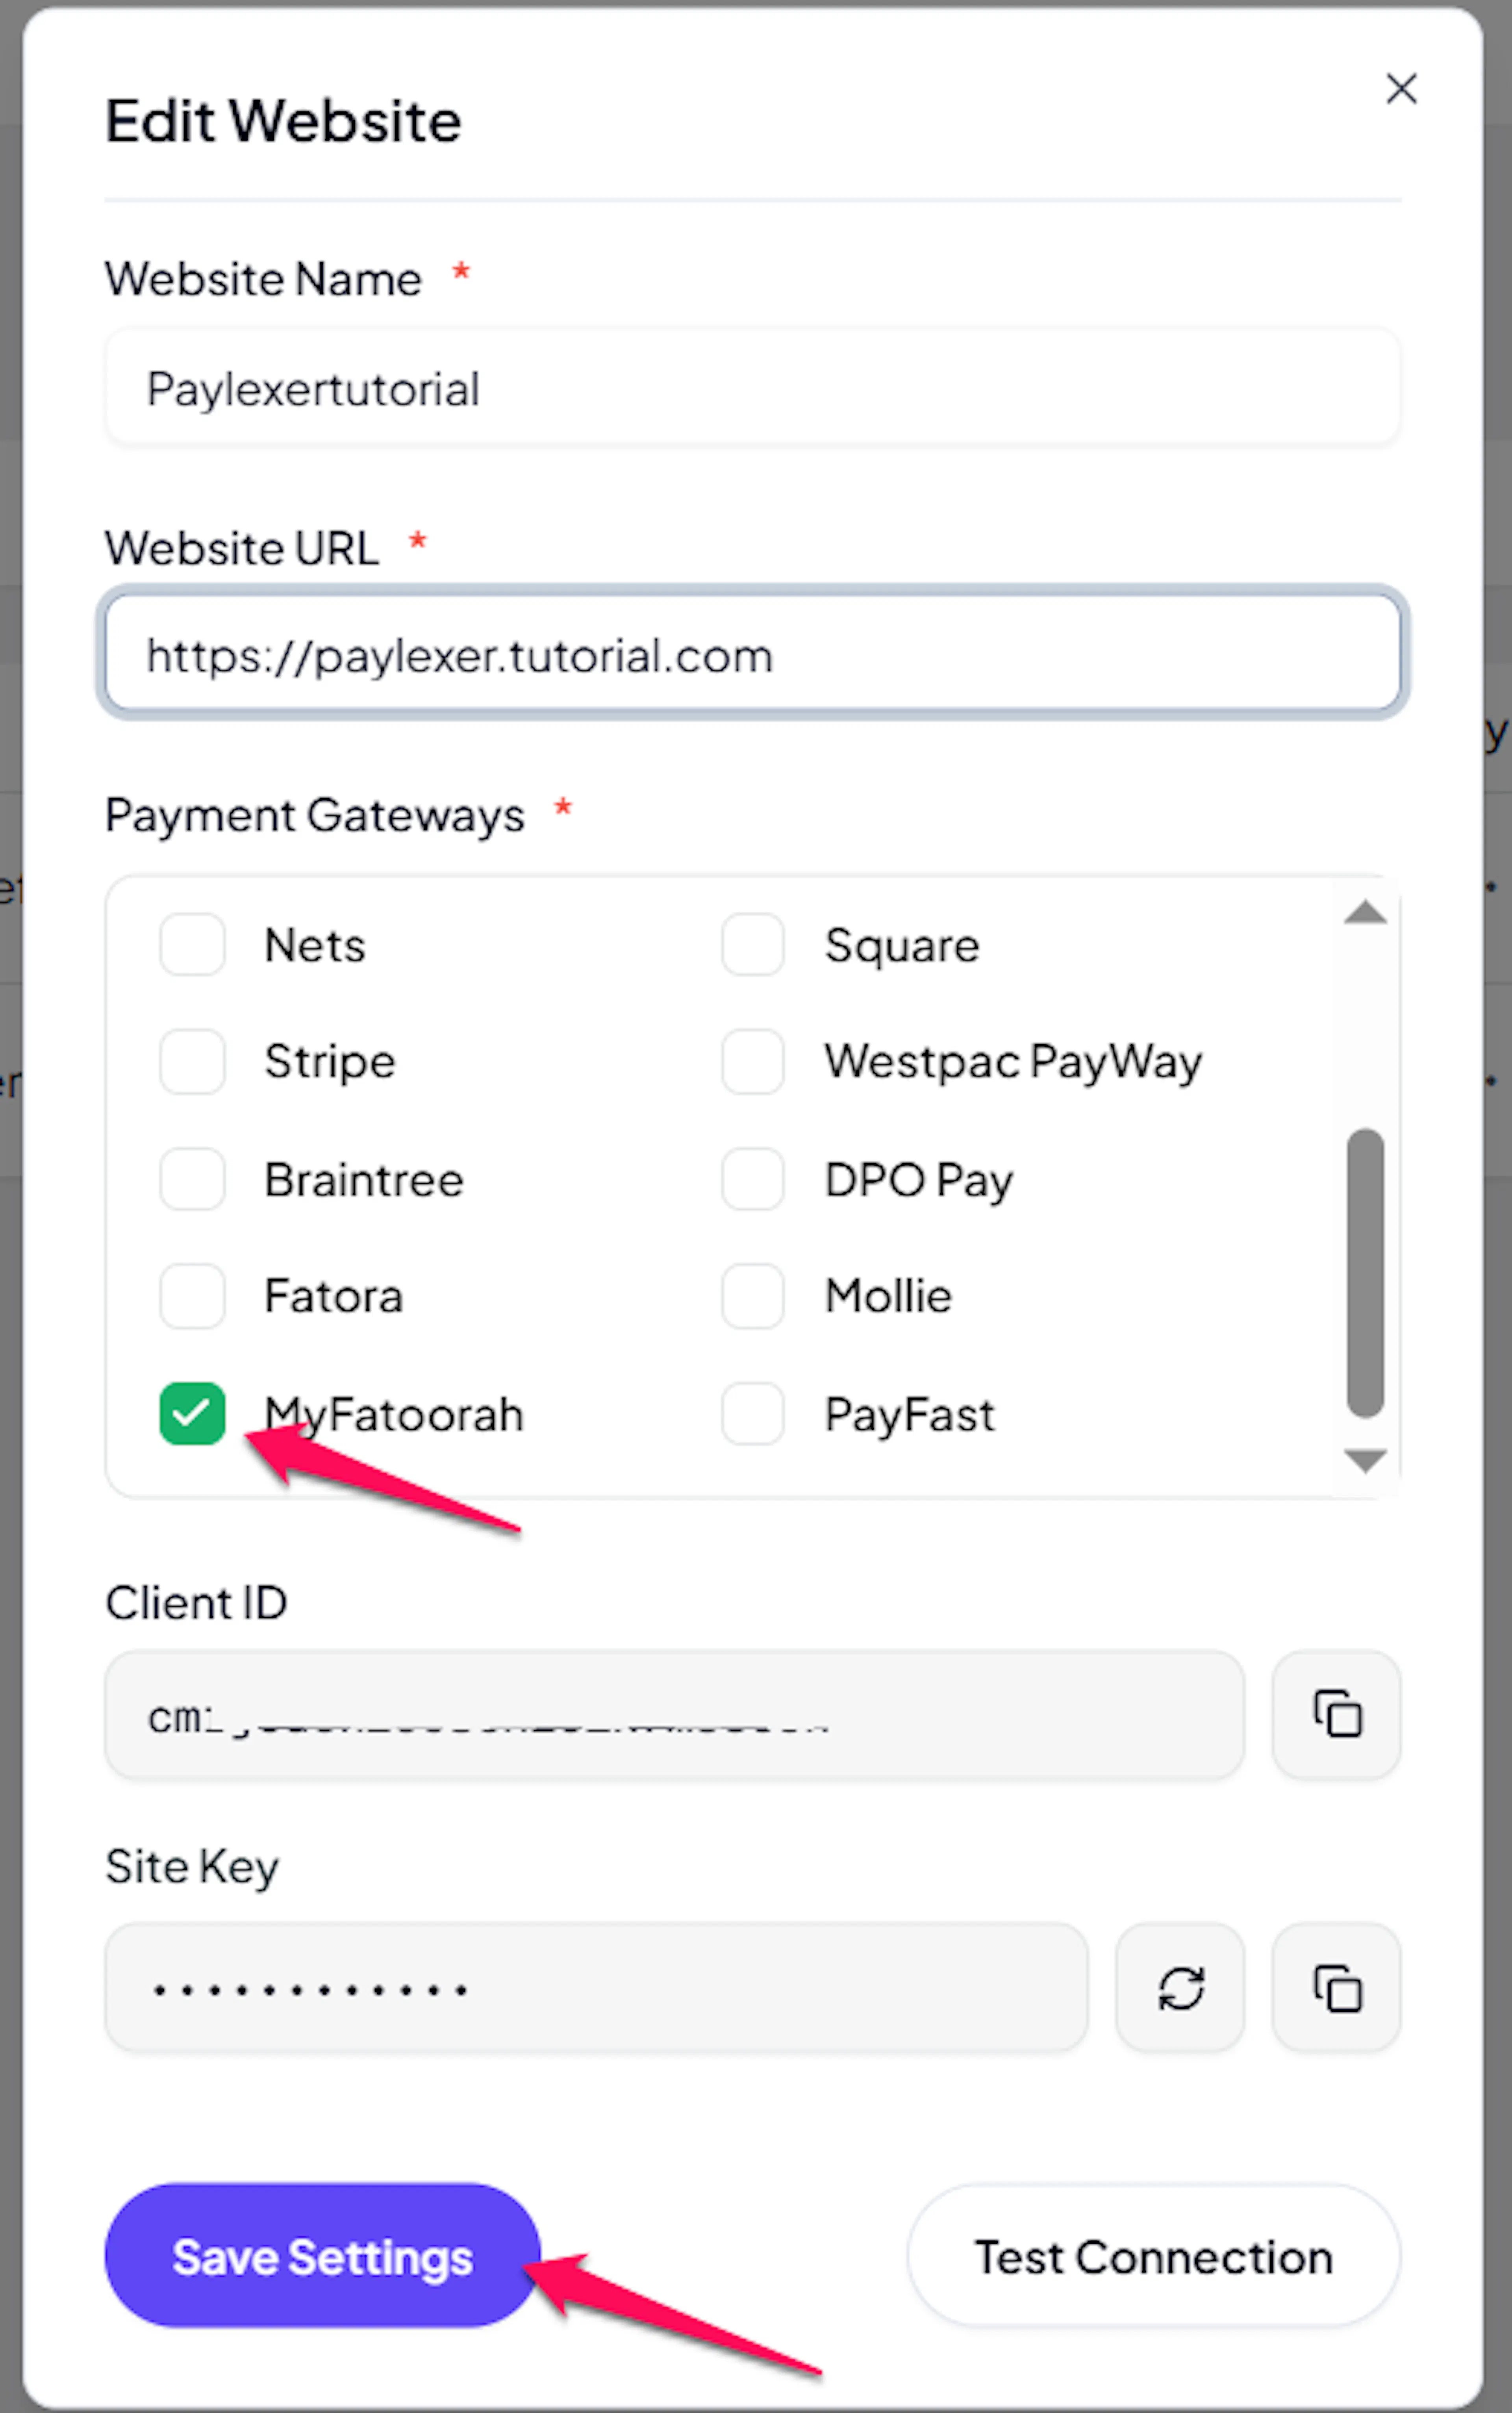
Enable MyFatoorah
Click the checkbox to enable MyFatoorah for the website.
If you haven't added a website yet, Continue to Add Your Website →
Troubleshooting
Best Practices
- Test in sandbox before enabling production. Use Test API Keys to complete a full payment before switching to live.
- Configure webhooks so payment and refund updates sync in real time.
- Keep your API Key and Webhook Secret confidential, and rotate them if you suspect exposure.
- Expect a short delay before refunds finalize. MyFatoorah reviews each refund before confirming it, so a refunded order shows as "requested" until MyFatoorah's webhook confirms completion.
FAQs
Still Have Questions?
- MyFatoorah Support: MyFatoorah Support
- PayLexer Support: Contact Support