

Shift4
Connect Shift4 to PayLexer to accept card payments and recurring subscriptions across North America, Europe, and Oceania through Shift4's hosted payment page.
Shift4 is an integrated payments platform headquartered in Upper Saucon Township, Pennsylvania, processing online, in-person, and omnichannel payments for merchants across North America, Europe, and Oceania. PayLexer connects to Shift4's hosted payment page, so shoppers complete payment on Shift4's own page and card details never touch your website.
- Supported Regions (Merchant Accounts): 36 countries across North America, Europe, and Oceania, including the United States, Canada, Mexico, the United Kingdom, Germany, France, Australia, and New Zealand - view full list
- Supported Currencies: USD, CAD, MXN, EUR, GBP, CHF, PLN, CZK, HUF, RON, BGN, DKK, SEK, NOK, ISK, AUD, NZD, and JPY
Three payment platforms use the name "Shift4", but only one works with this integration. PayLexer connects to Shift4's modern platform at dev.shift4.com, where you can sign up and get keys instantly. Older credentials issued through a Shift4 representative will not work. If your keys are rejected, confirm your Shift4 platform first.
Supported Features
- Hosted payment page for both one-time payments and recurring subscriptions
- Recurring subscription billing with support for free trial periods
- Cancel a subscription immediately or at the end of the current billing period
- Full refunds, whether started from your store's order page or from the Shift4 Dashboard, with the result synced to your PayLexer order
- Partial refunds, repeatable, with each refund kept as its own record
- Real-time webhooks for payments, refunds, and subscription events
- Every webhook re-read directly from Shift4 before it is acted on, so an unverified notification can never settle an order
- Refunds issued directly in the Shift4 Dashboard are matched back to the correct merchant and order
Sign-up fees are not supported for Shift4 subscriptions. If included, the fee is dropped while the recurring amount and interval are retained. To charge a sign-up fee, use a separate one-time product.
Shift4 subscriptions cannot be paused or resumed. Pause requests are refused because Shift4 has no paused state. To stop billing, cancel at the end of the current billing period and have the customer subscribe again later.
Before You Start
Make sure you have:
- Shift4 Account – Don't have one? Sign up for Shift4 →
- PayLexer Account – Required to configure the integration. Create your account →
- A website where you want to integrate
Looking for a different payment processor? View all supported gateways →
Configuring Shift4
You need a Secret Key from Shift4 for this integration. A Public Key is optional and can be left empty.
Getting API Credentials
Open the Shift4 Dashboard
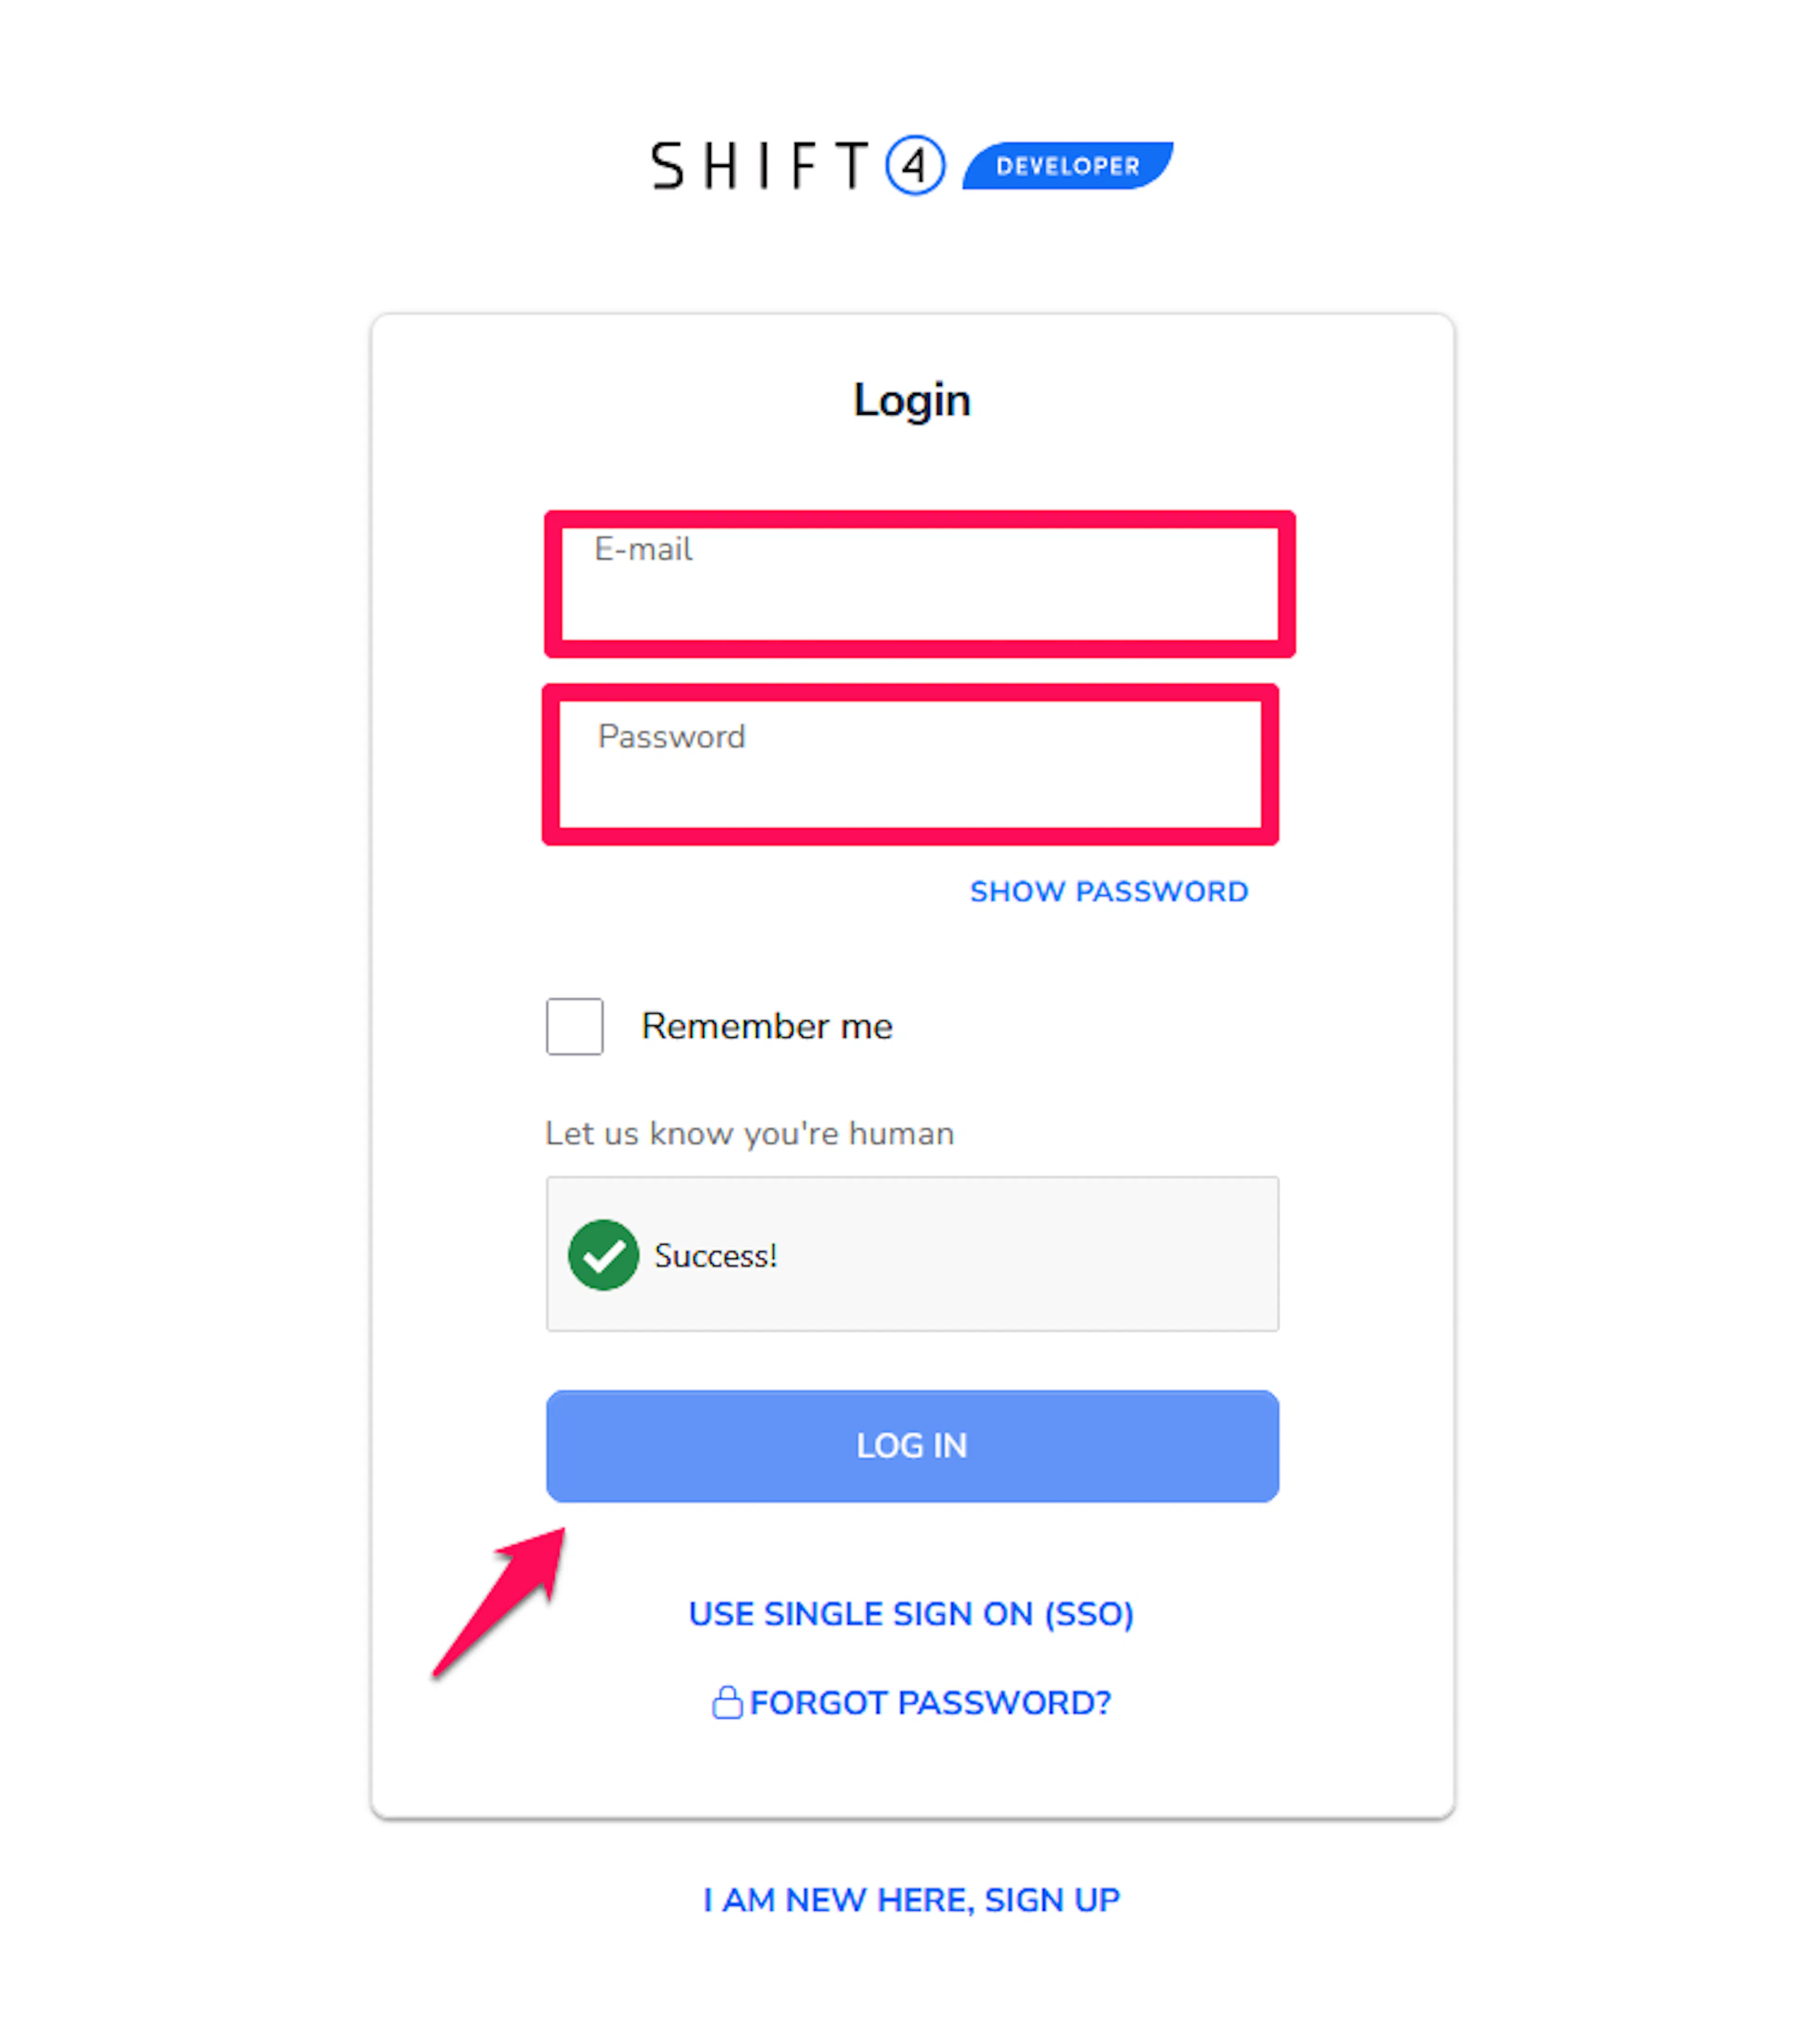
Log in to your Shift4 Dashboard.
Switch to the mode you are configuring
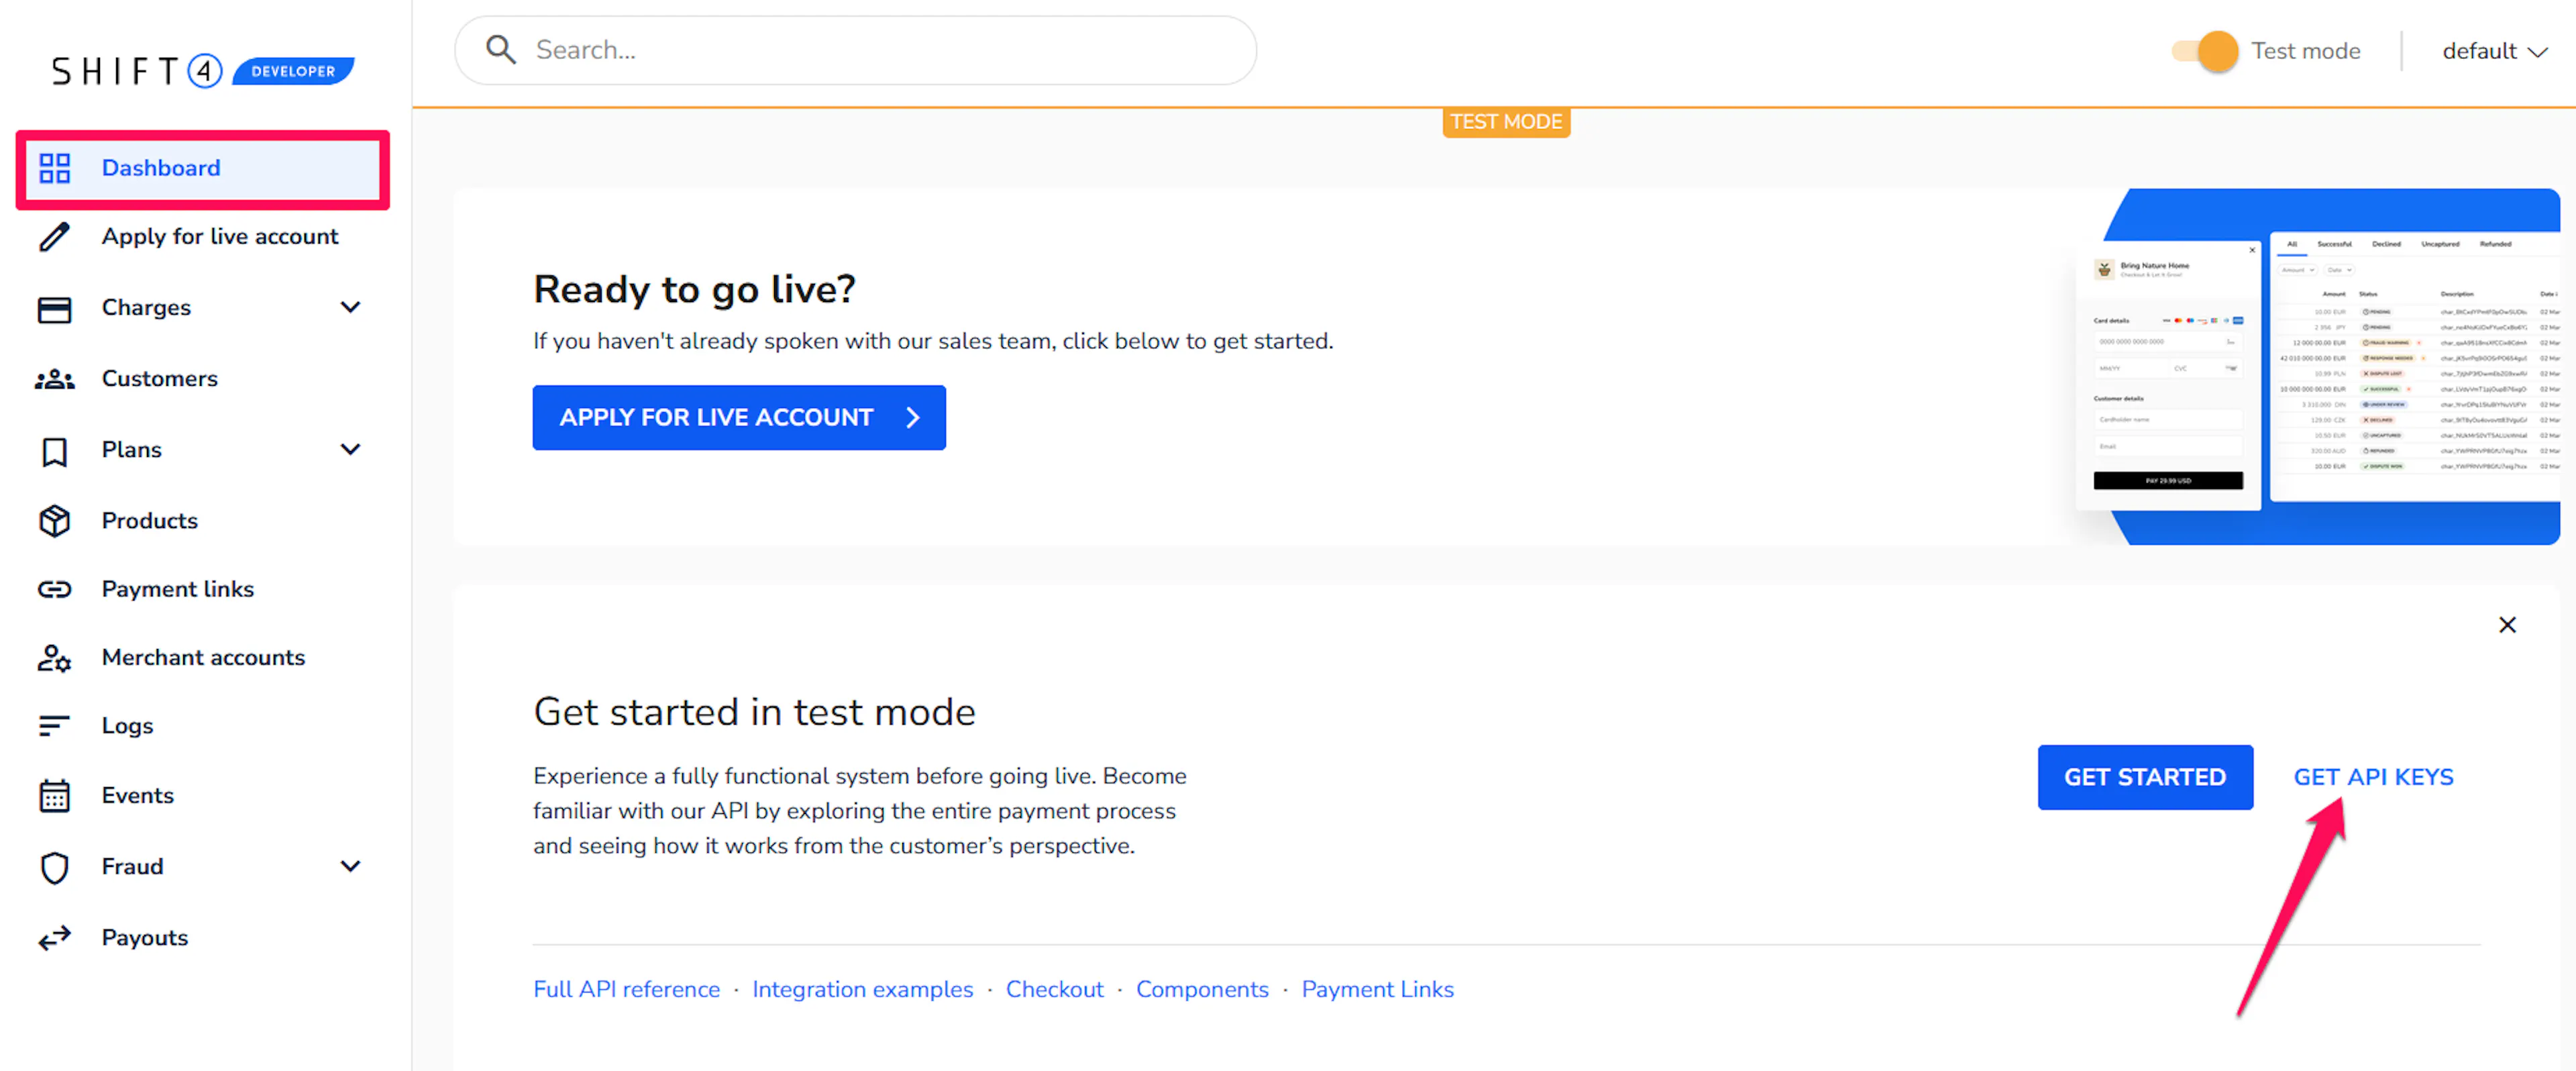
One Shift4 account holds both a test mode and a live mode, and each mode has its own pair of keys. Use the mode toggle in the dashboard to switch to the mode you want before copying anything.

Click GET API KEYS
In the dashboard, click the GET API KEYS button. This opens a page displaying your API keys.
Copy your Secret Key
Copy the Secret Key from the API keys page. A test key starts with sk_test_ and a live key starts with sk_live_.
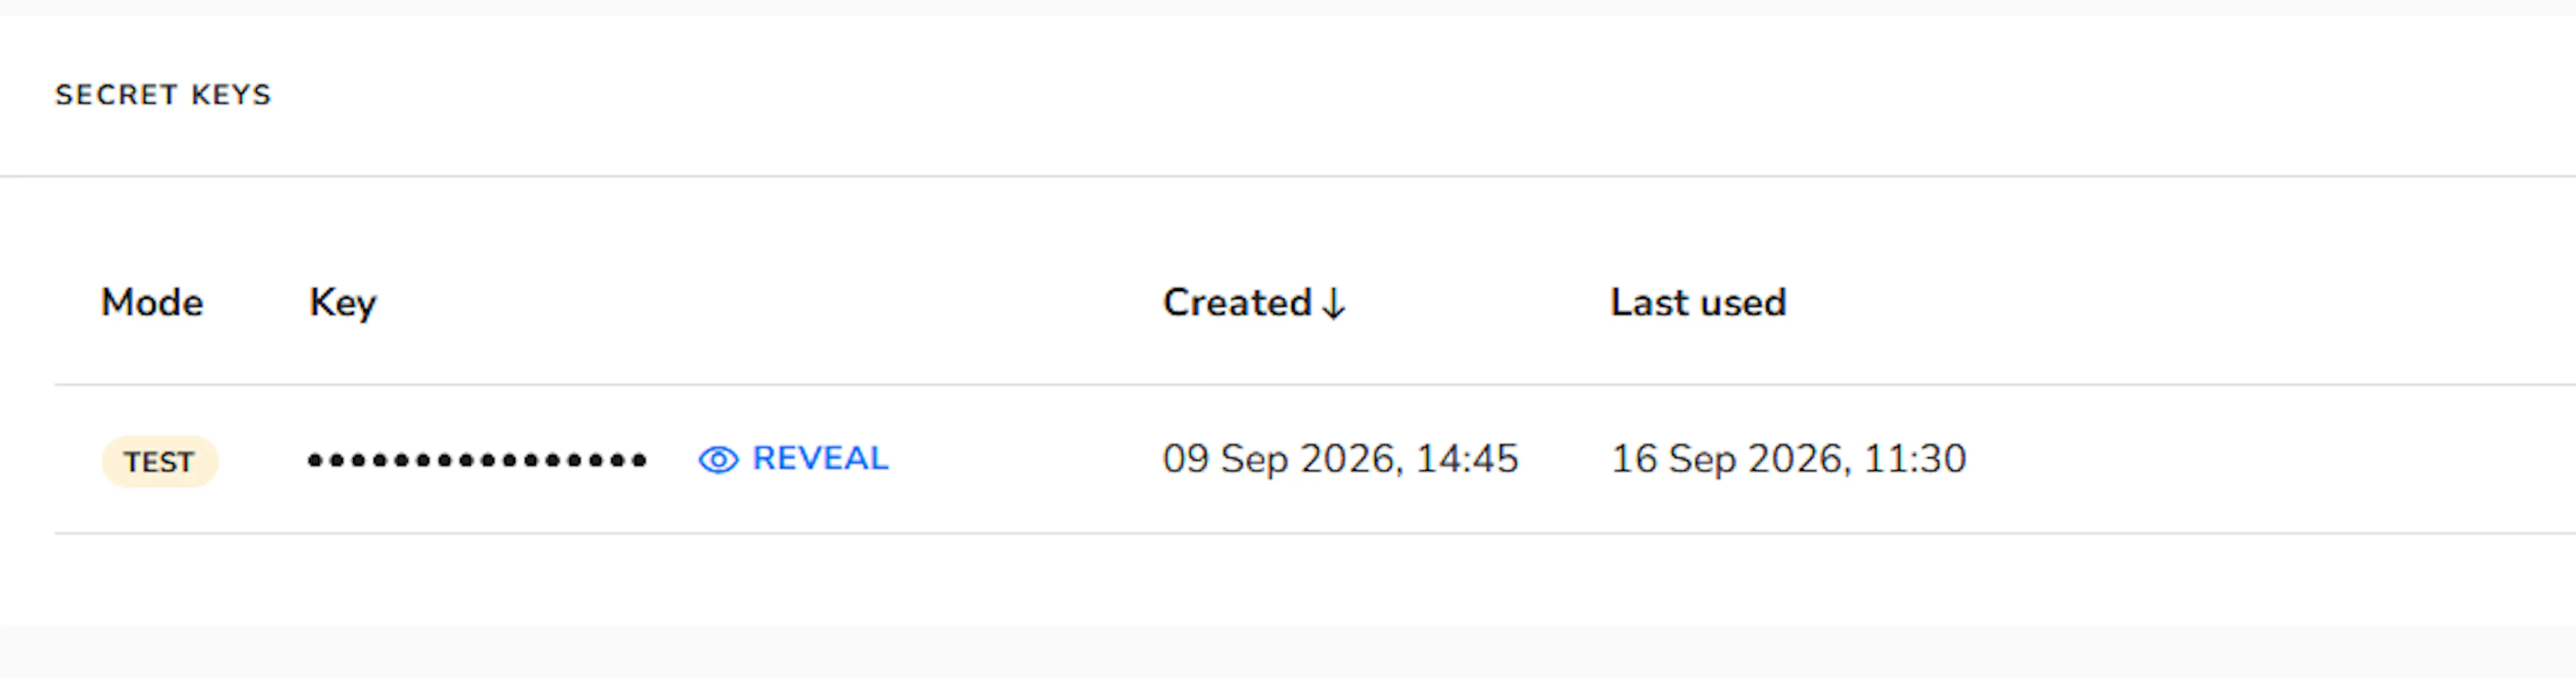
The Secret Key is the only credential this integration needs. It authenticates API calls, verifies incoming webhooks, and its prefix identifies test or live mode. If you rotate it, update the new key in PayLexer immediately.
Copy your Public Key (optional)
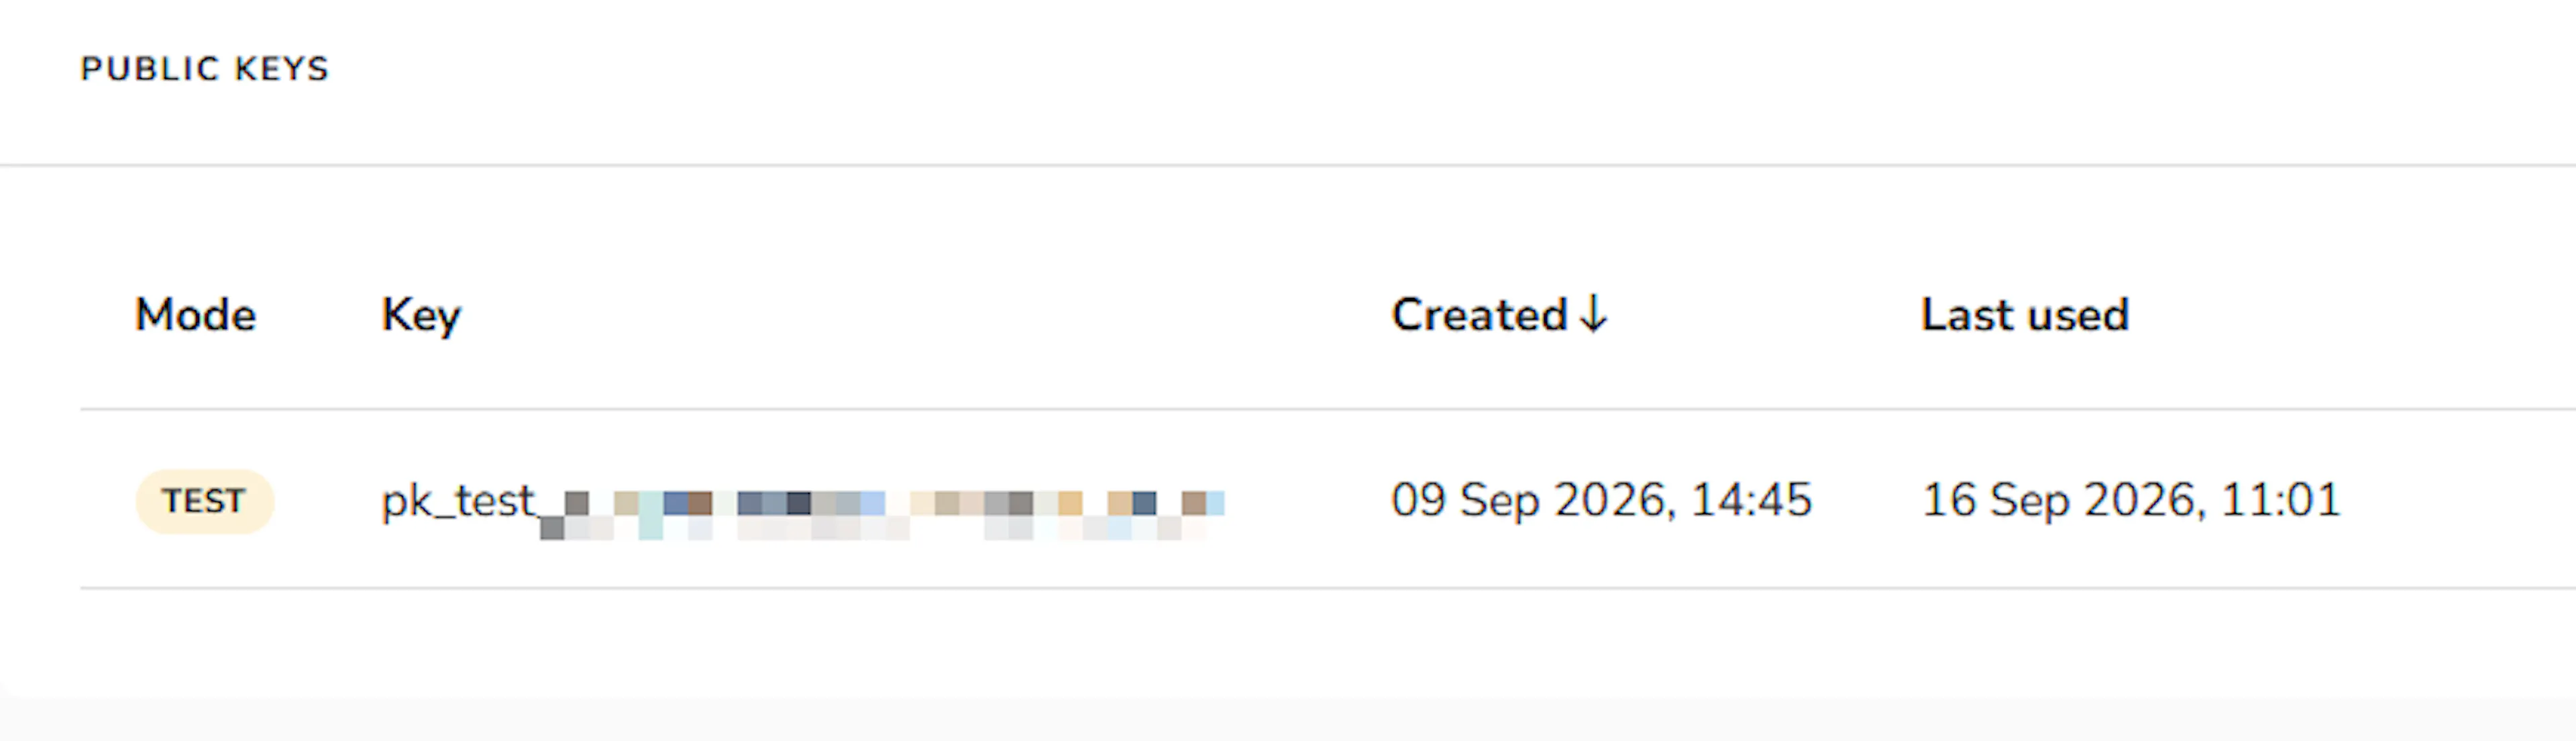
The same page shows a Public Key starting with pk_test_ or pk_live_. You can copy it into PayLexer for completeness, but the hosted payment flow does not require it.
Adding Credentials to PayLexer
Open PayLexer Dashboard
Log in to your PayLexer dashboard and navigate to Payment Gateways → Shift4.
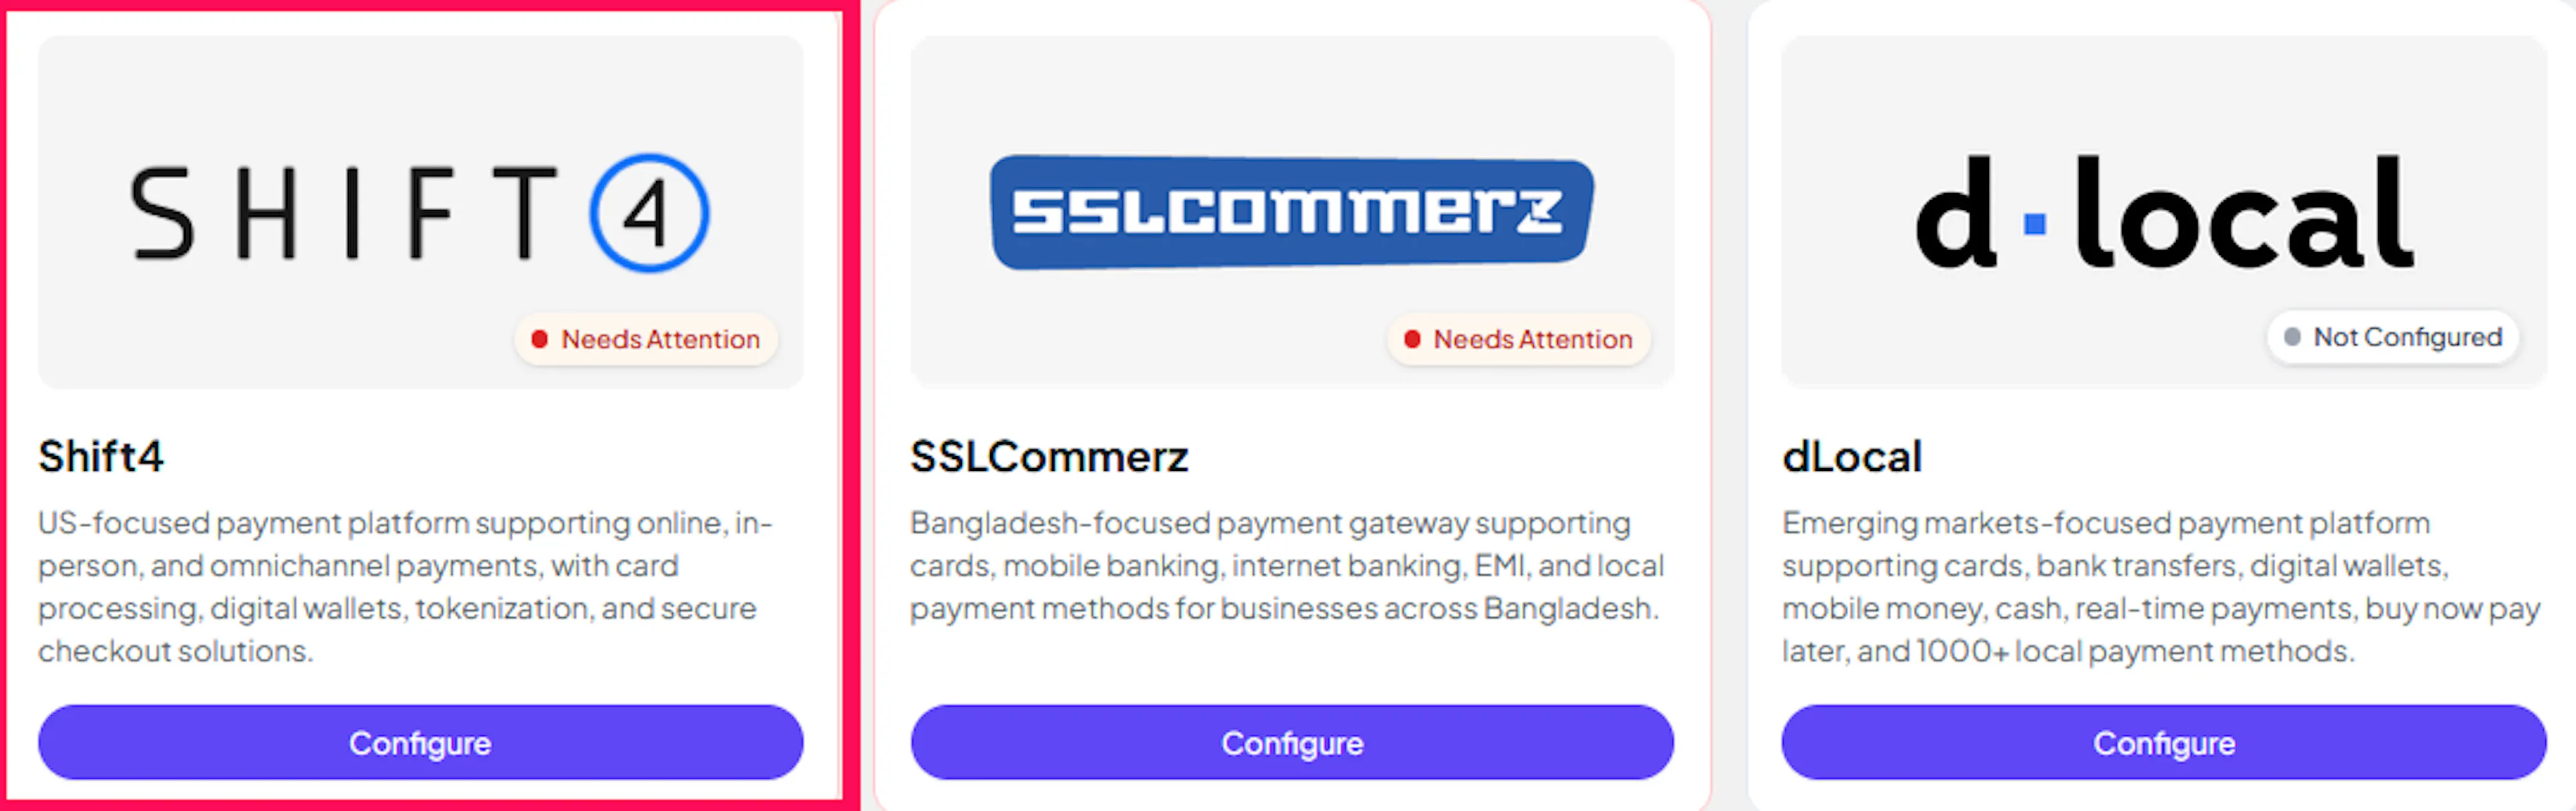
Enter your credentials
Paste the Secret Key you copied from Shift4 into the matching field, and the Public Key if you copied one.
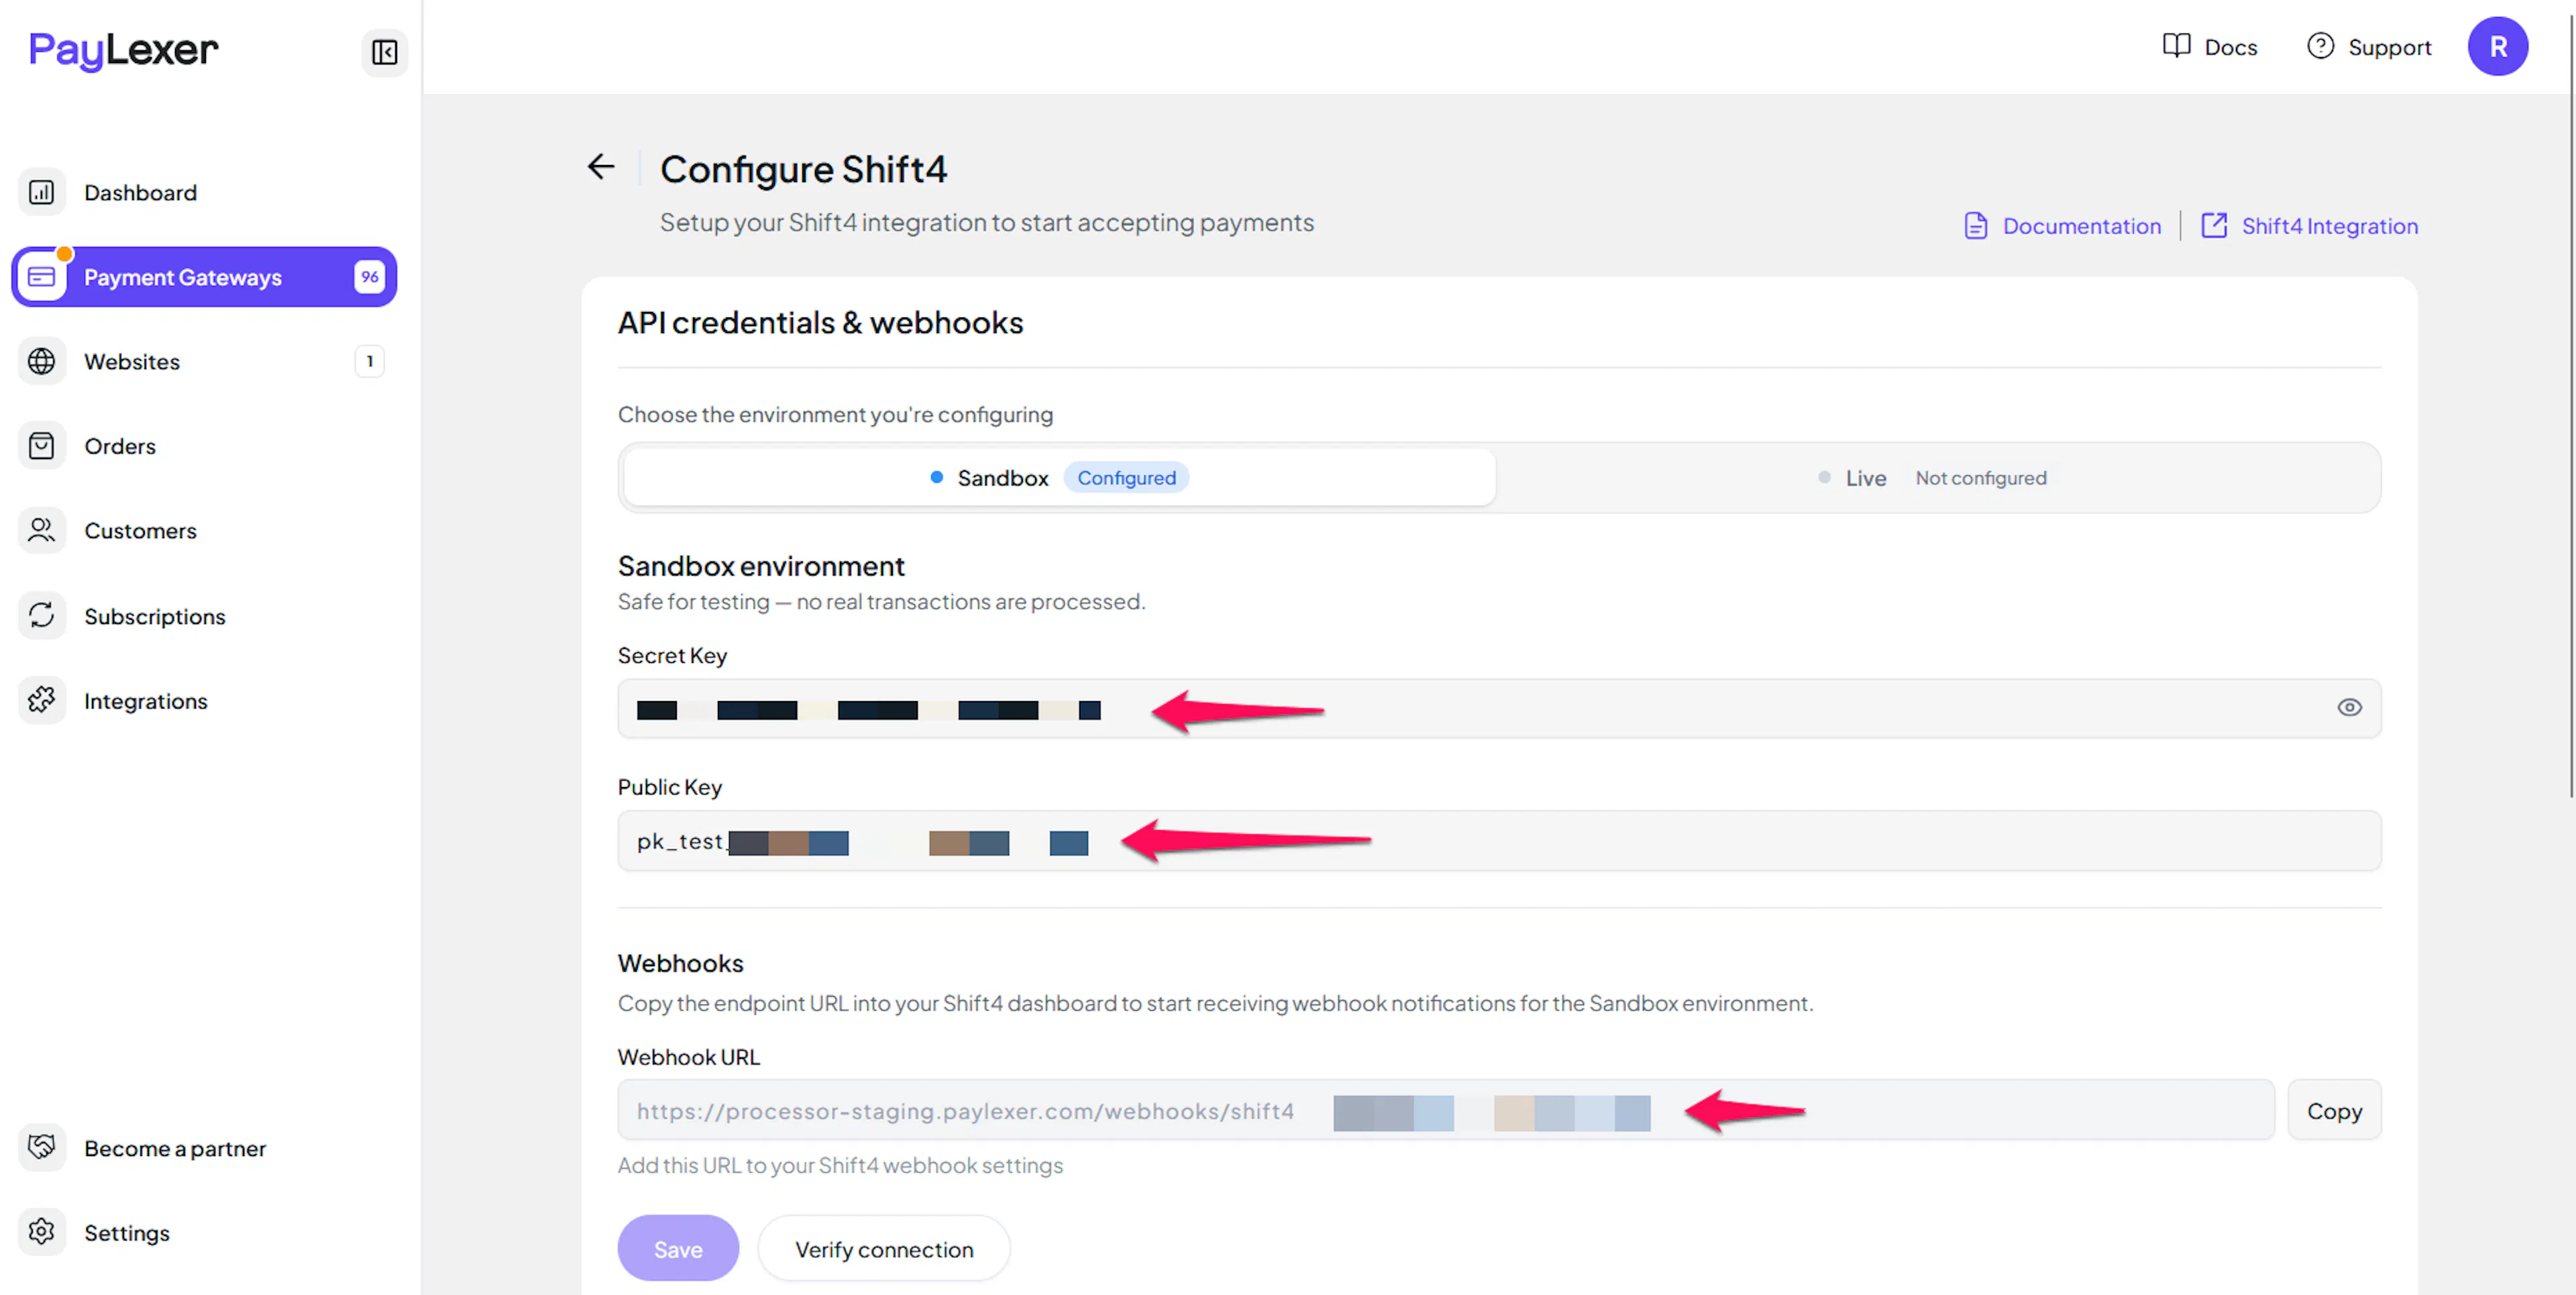
Understanding Live/Production and Sandbox Settings:
| Environment | Purpose |
|---|---|
| Live / Production | Used for real transactions. |
| Test / Sandbox | Used for testing only. No real money is processed. |
How PayLexer selects credentials:
- Debug/Test mode ON → Test credentials are used
- Debug/Test mode OFF → Live credentials are used
Shift4 keys carry their own mode, and the key wins over the field it was pasted into. A sk_live_ key pasted into the Test field is still treated as live and will move real money. Check the prefix before saving.
Test and save
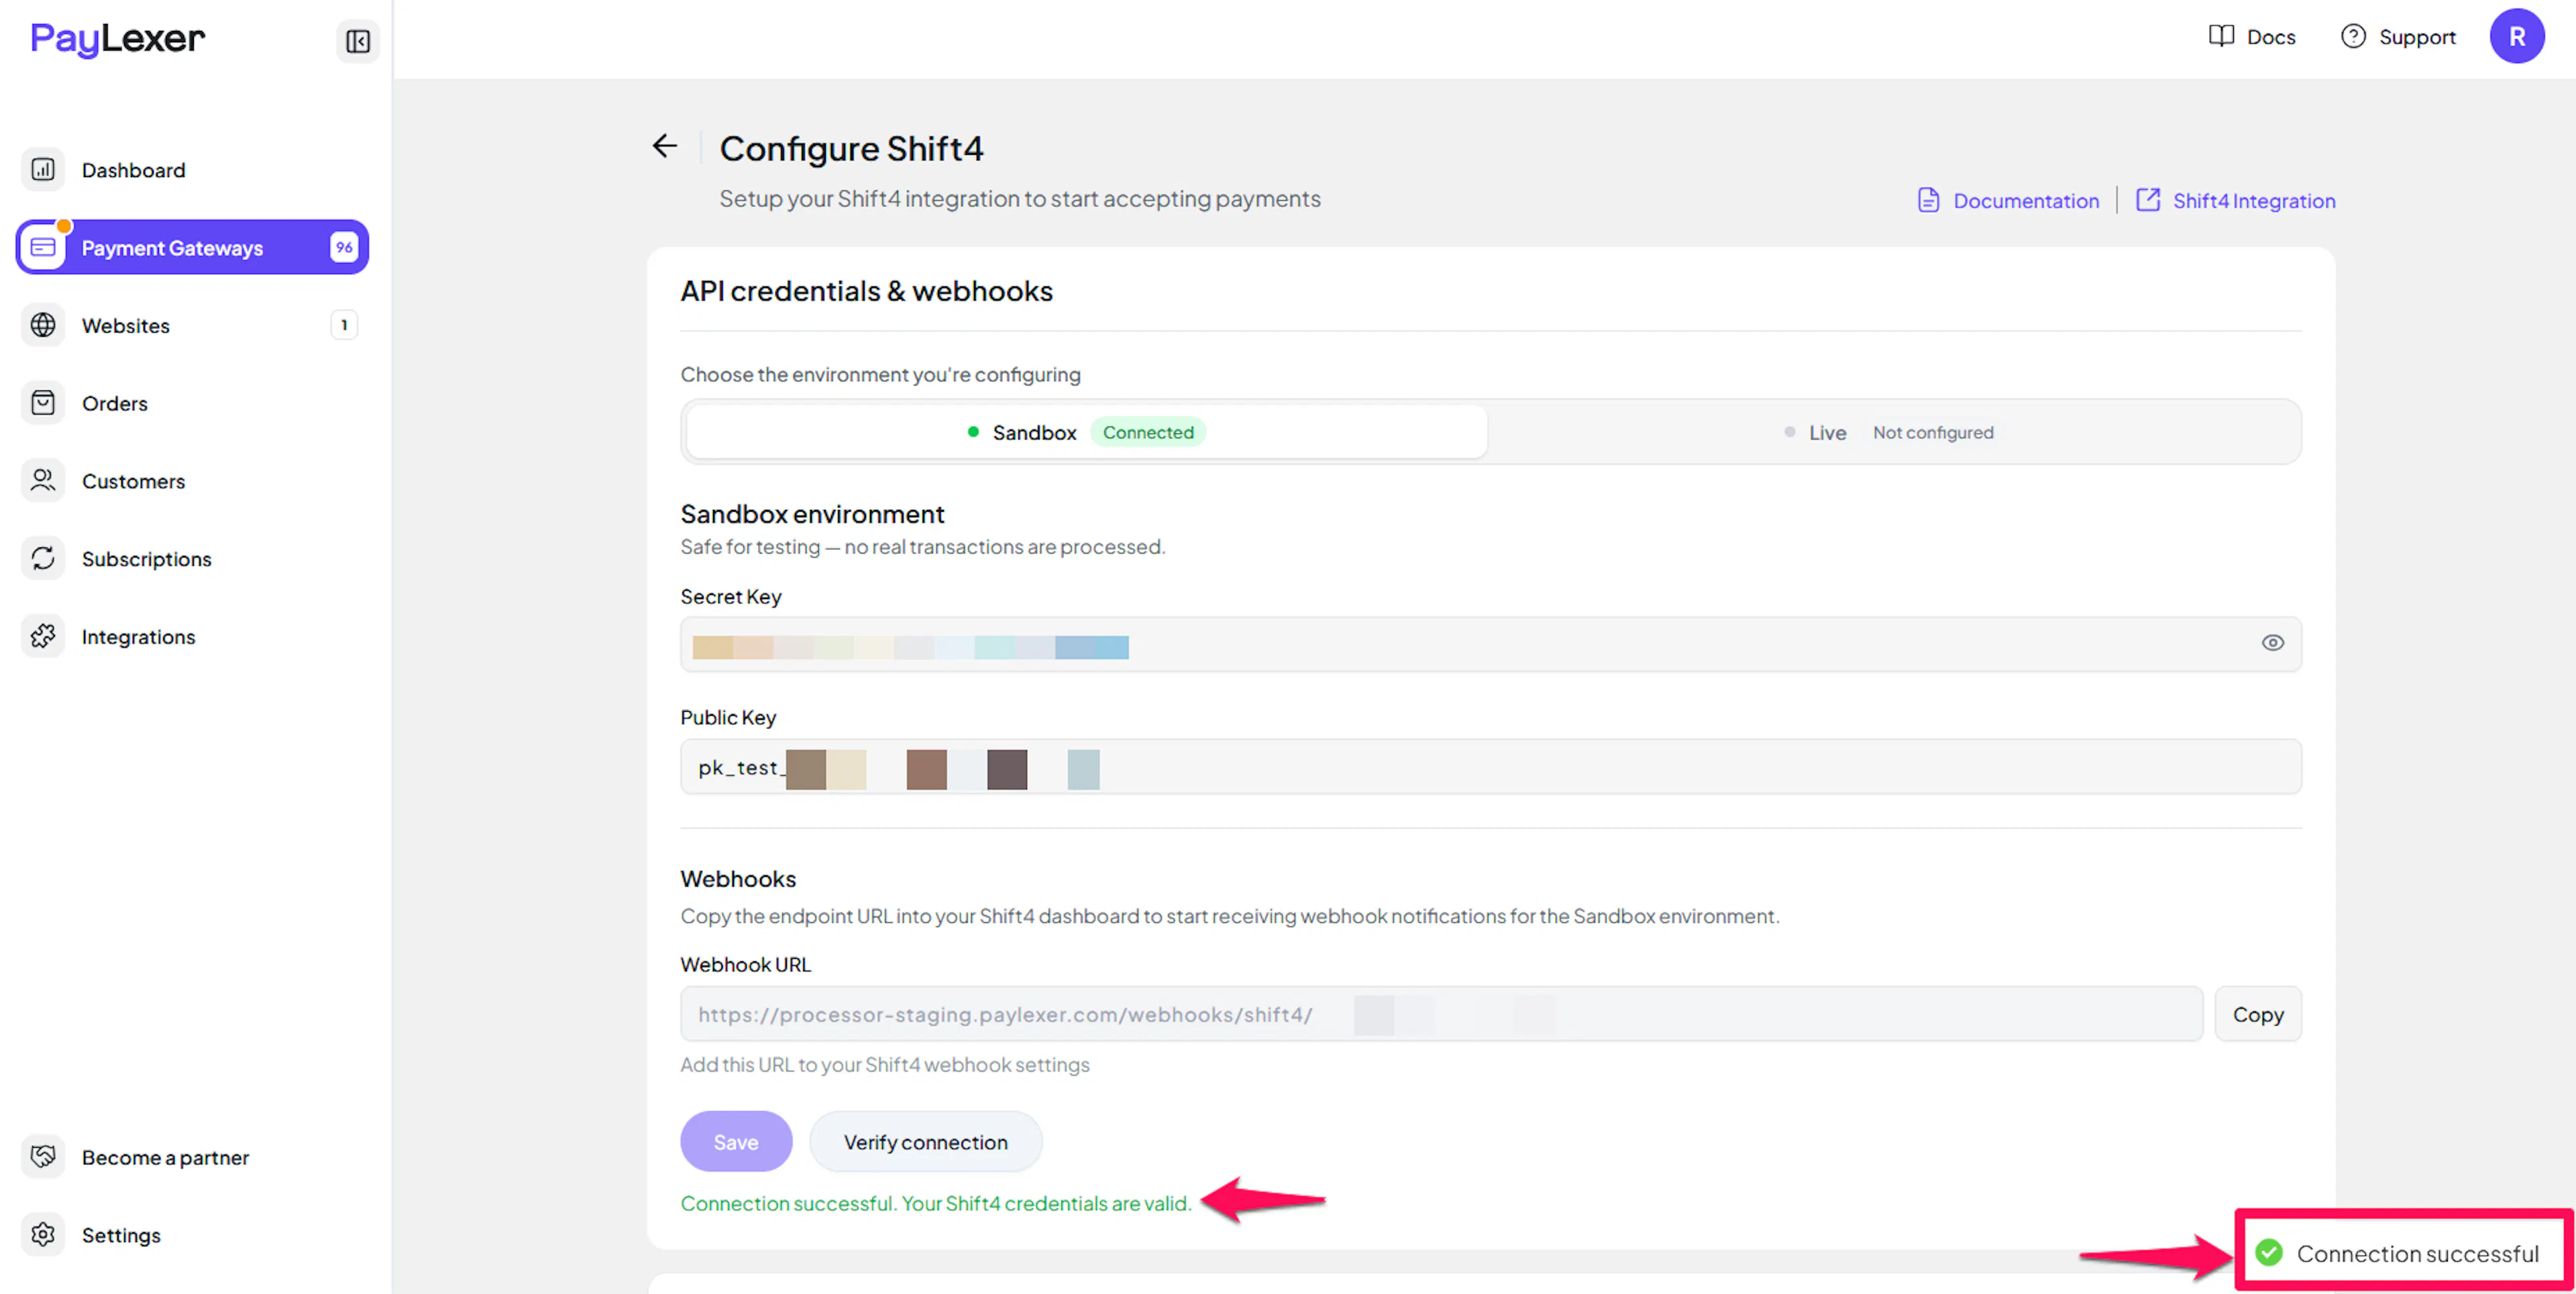
Click Save to save your configuration and verify your credentials. Click Verify Connection to test the connection.
Configuring Webhooks (Mandatory)
Webhooks enable real-time payment updates and significantly improve reliability.
Benefits of Webhooks:
- Instant payment status updates
- Automatic refund processing
- Subscription renewal, failure, and cancellation updates
Shift4 does not sign its webhooks and issues no signing secret, so there is no secret to collect and PayLexer does not ask for one. Instead, PayLexer takes only the event's identifier from each notification and re-reads the full event directly from Shift4 using your Secret Key. Anything that cannot be confirmed that way is discarded and your order is left untouched.
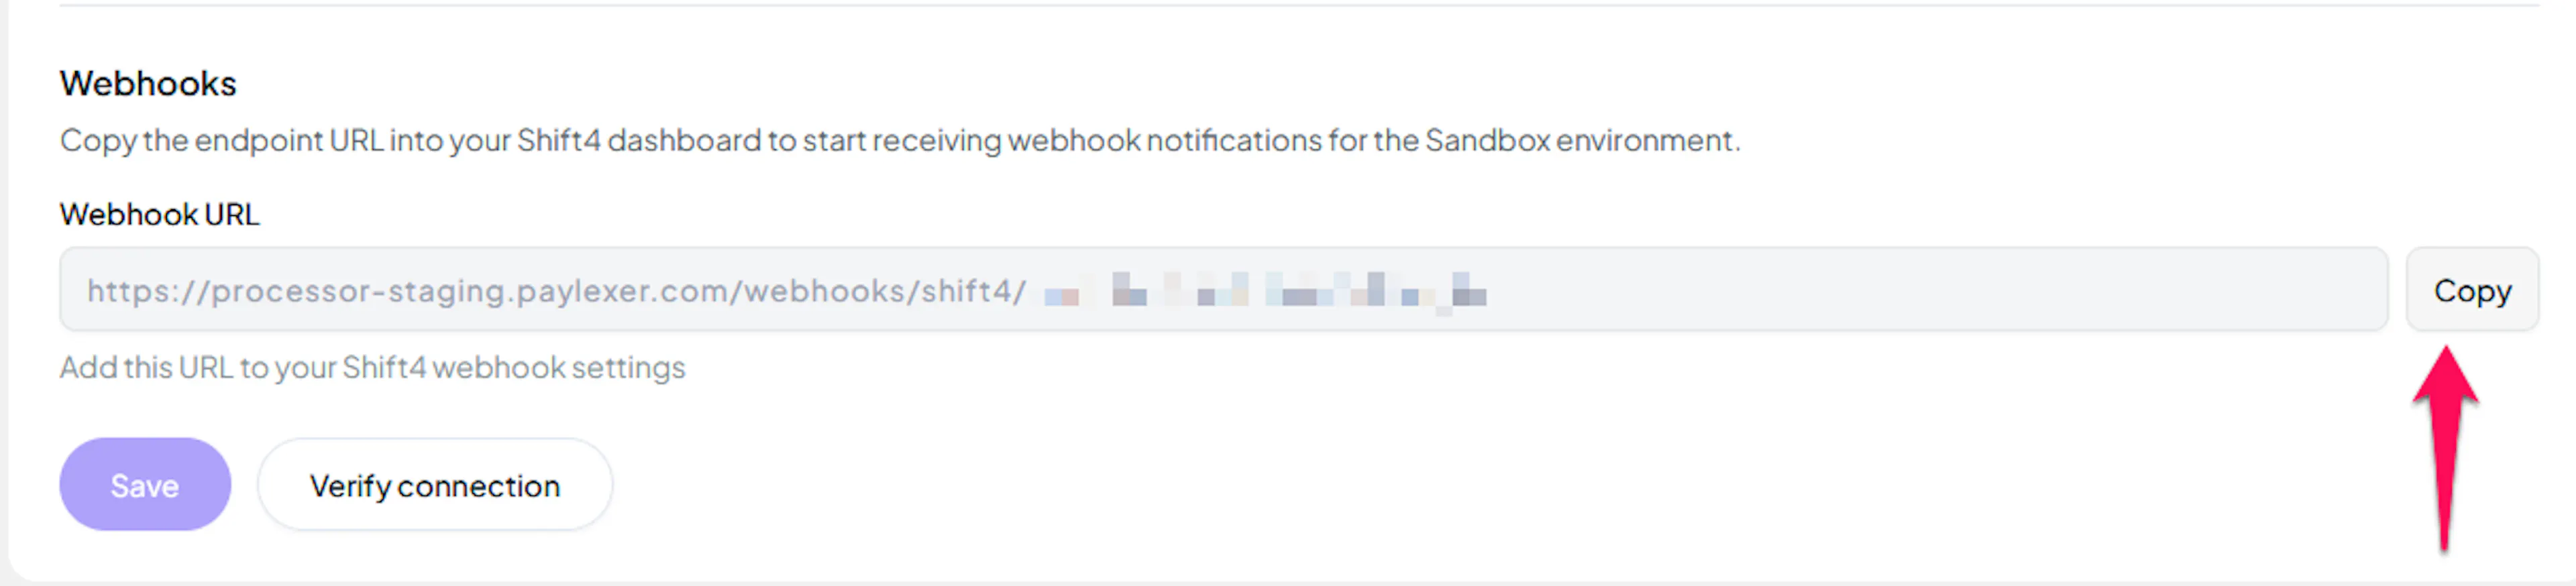
Copy your PayLexer webhook URL
In PayLexer → Payment Gateways → Shift4, copy the Webhook URL shown for your account.
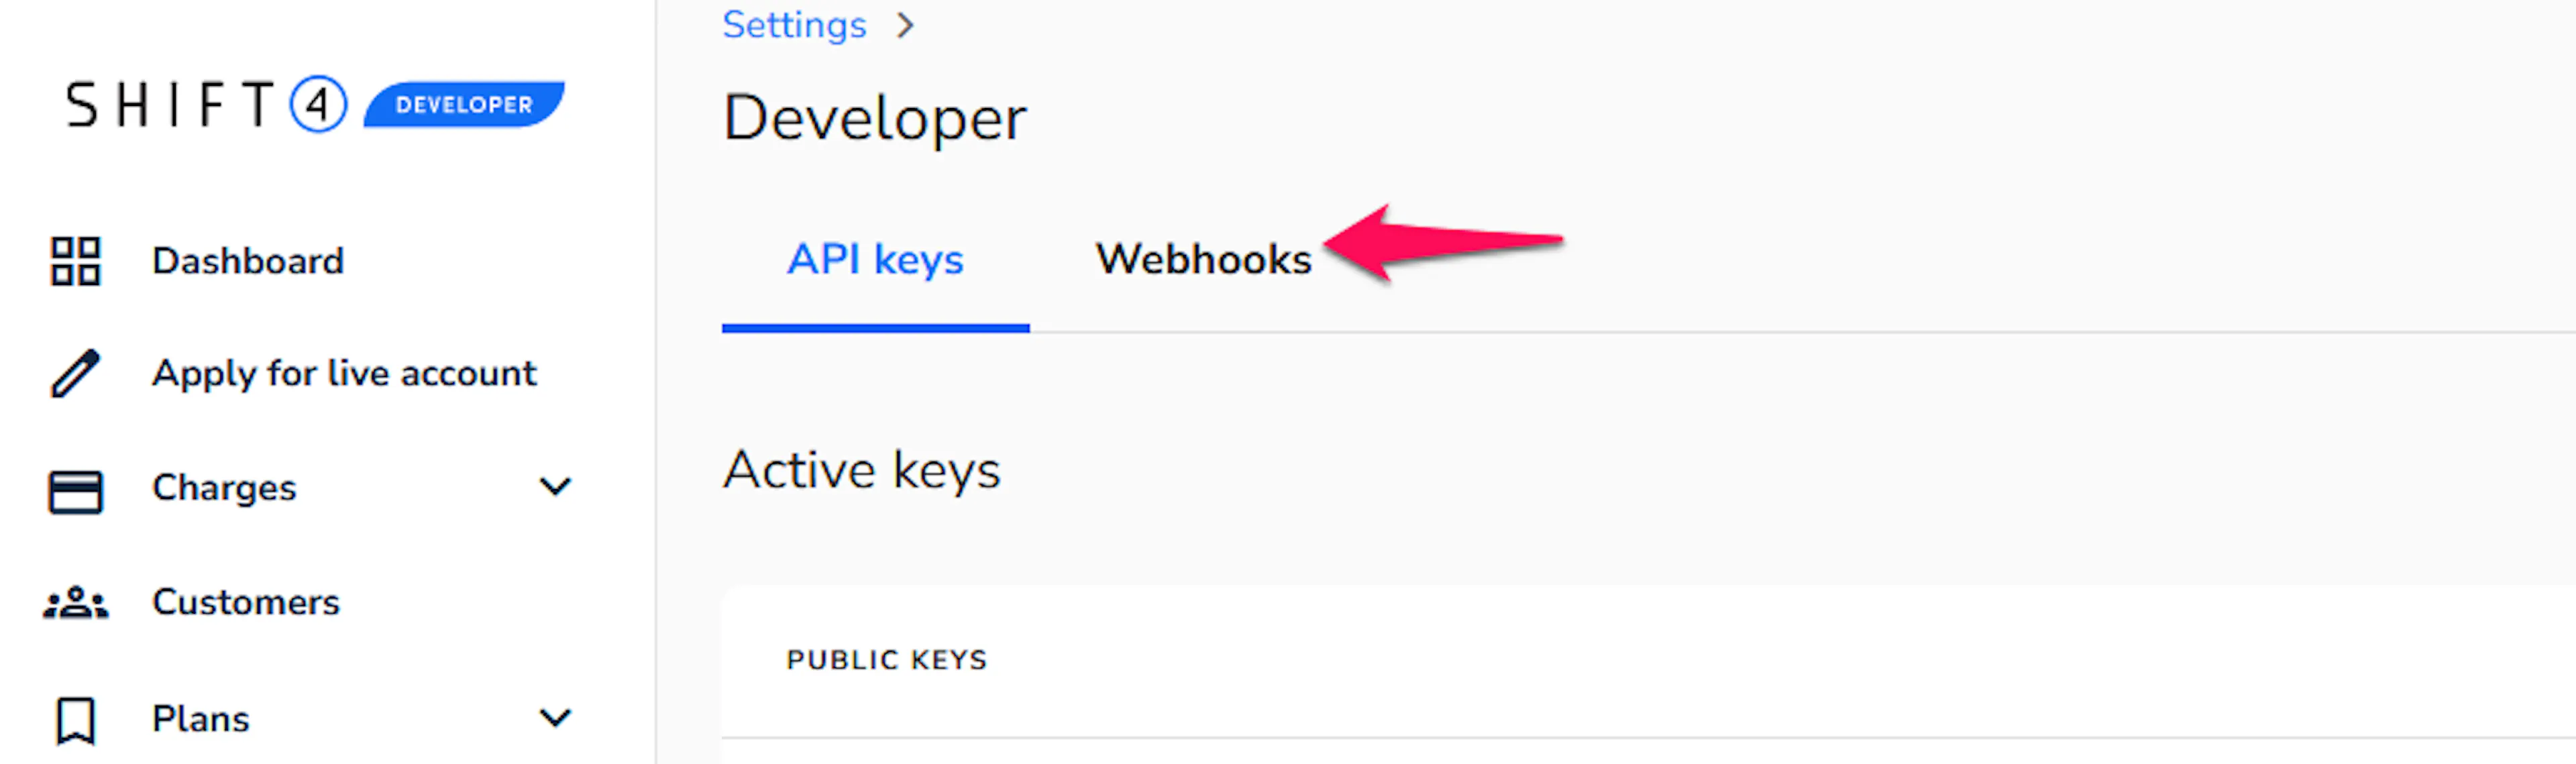
Open the Webhooks tab in Shift4
In the Shift4 Dashboard, click the Webhooks tab to open the webhooks configuration page.
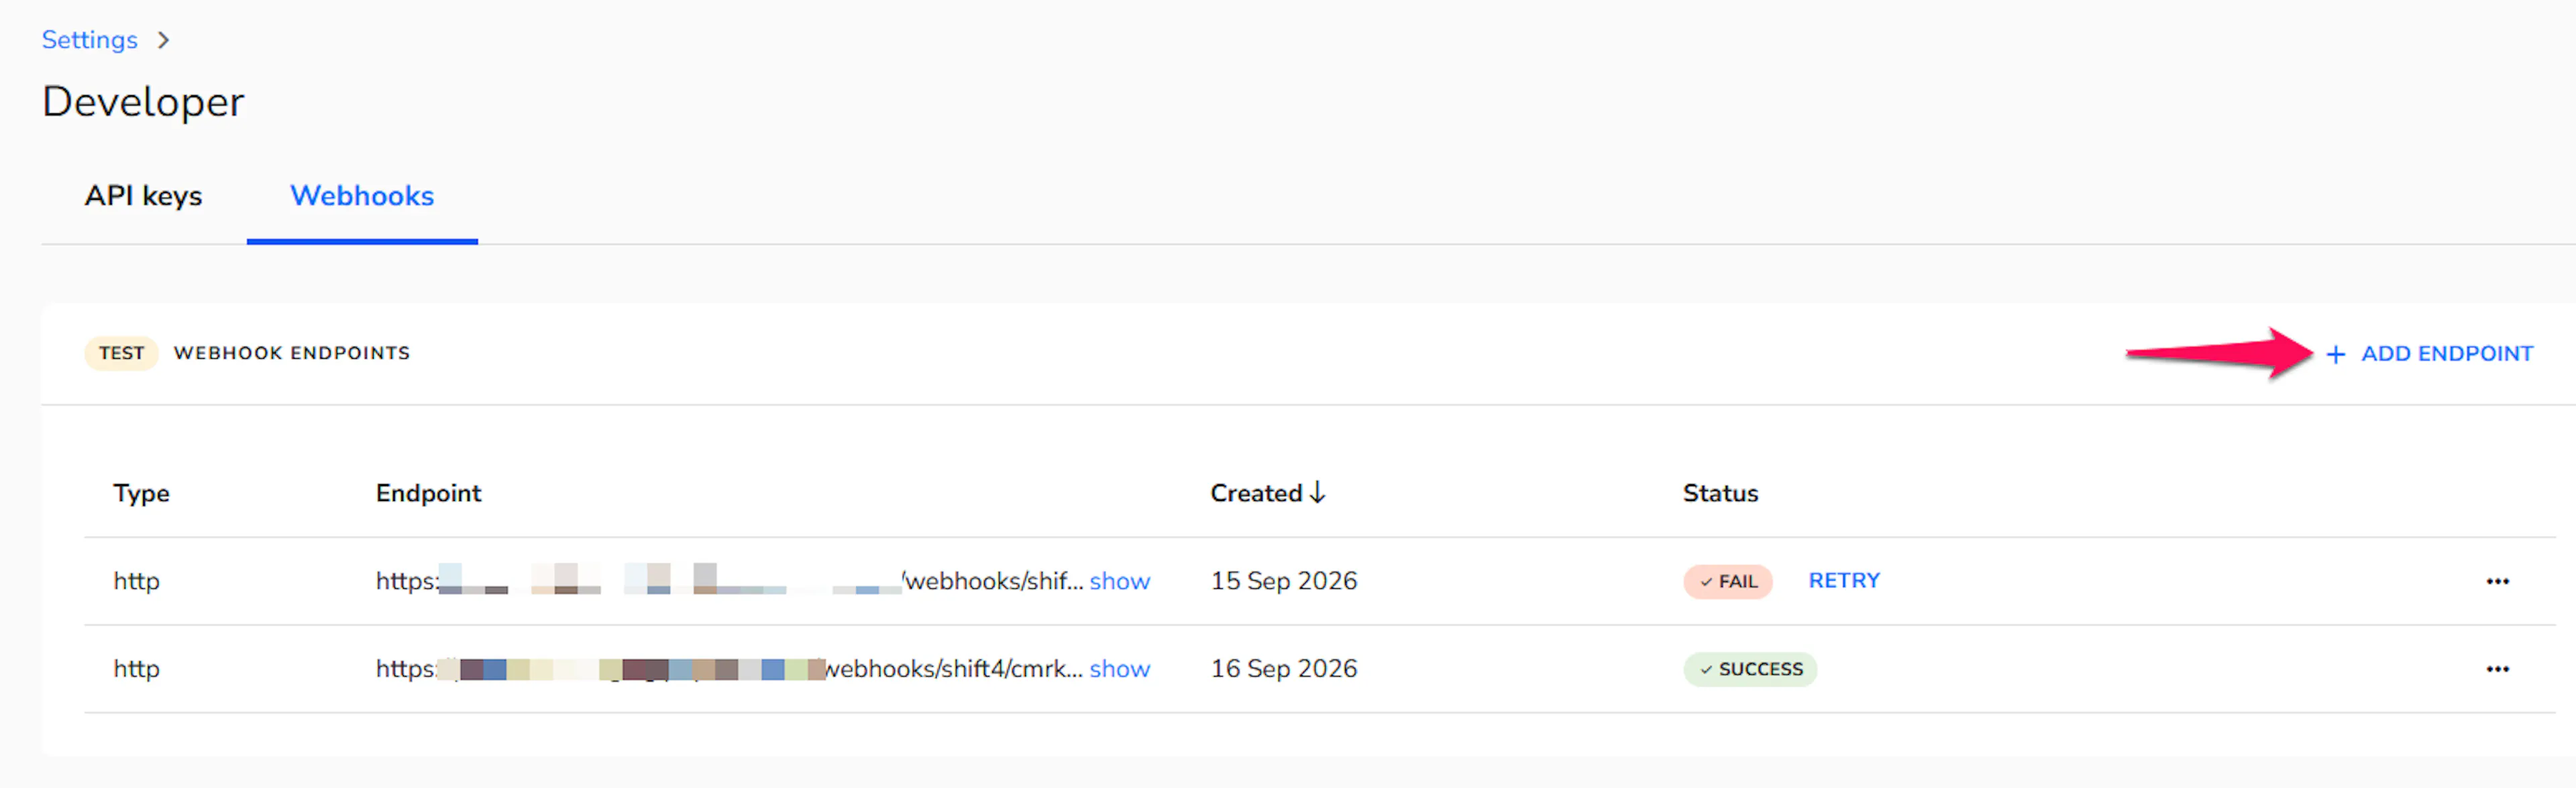
Add a new endpoint
Click the ADD ENDPOINT button. An aside menu opens with the HTTPS tab selected by default.
Enter the webhook URL
In the input field below the label Provide the webhook URL:, paste the PayLexer webhook URL you copied earlier.
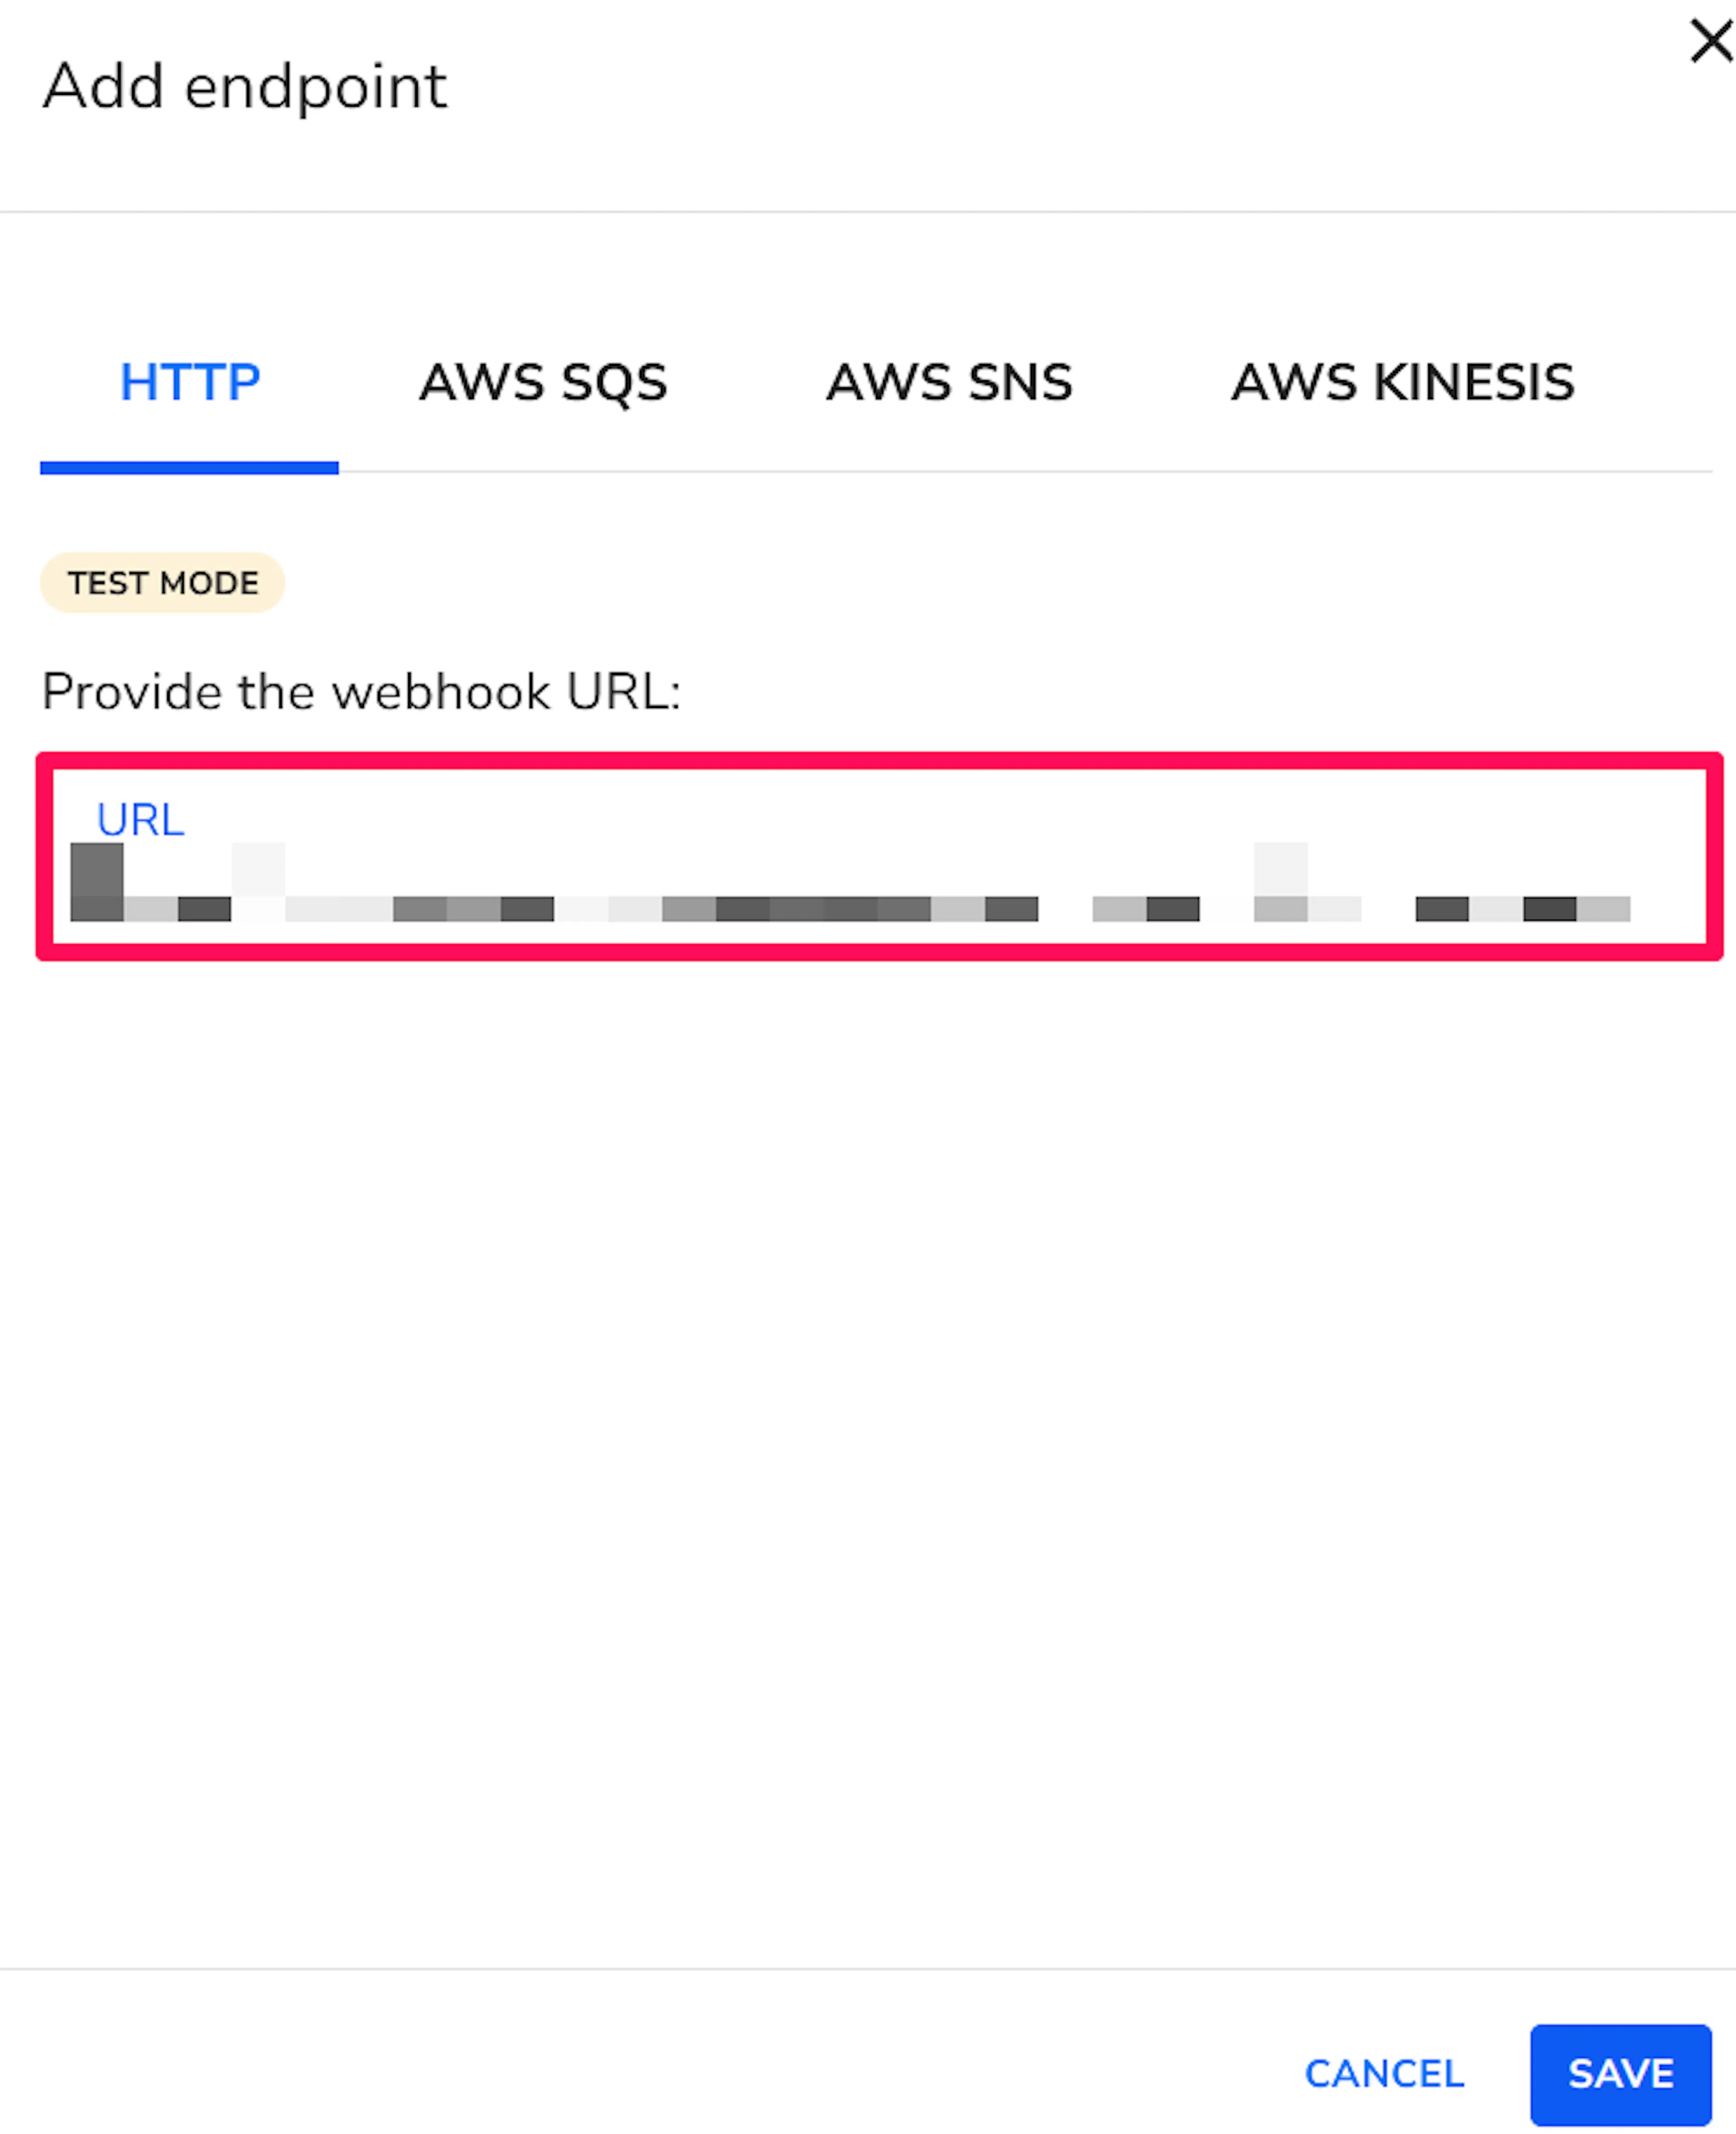
Save the endpoint
Click Save to create the webhook endpoint.
Each webhook URL is registered as either test or live, and only receives events from that mode. If you use both test and live credentials in PayLexer, register the webhook URL once per mode.
There is no event-type selection on a Shift4 webhook. Your endpoint receives every event your account produces, including ones PayLexer has no use for. That is expected. PayLexer accepts and ignores anything it does not act on.
Test the webhook
Run a test payment and confirm the order updates in PayLexer.
Integrate Shift4 to Your Website
If you have already added and configured your site, you can enable Shift4 in your existing setup.
Go to Websites
Navigate to Websites in your PayLexer dashboard.
Edit your website
Click the Edit Icon of your added website.
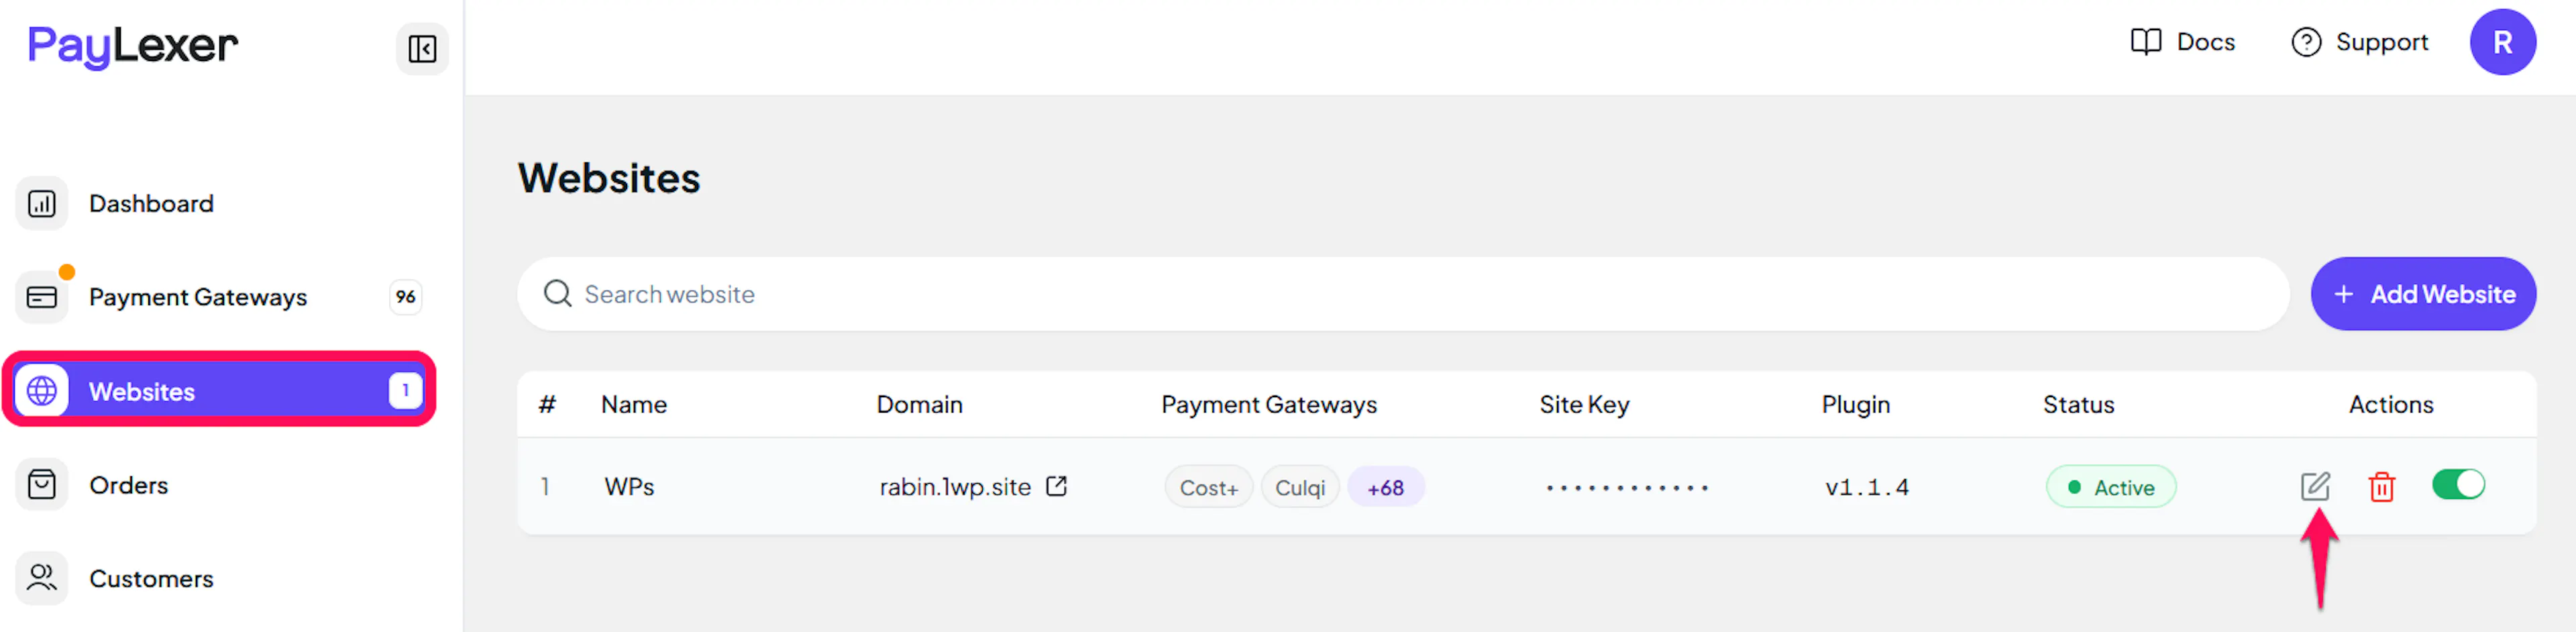
Enable Shift4
Click the checkbox to enable Shift4 for the website.
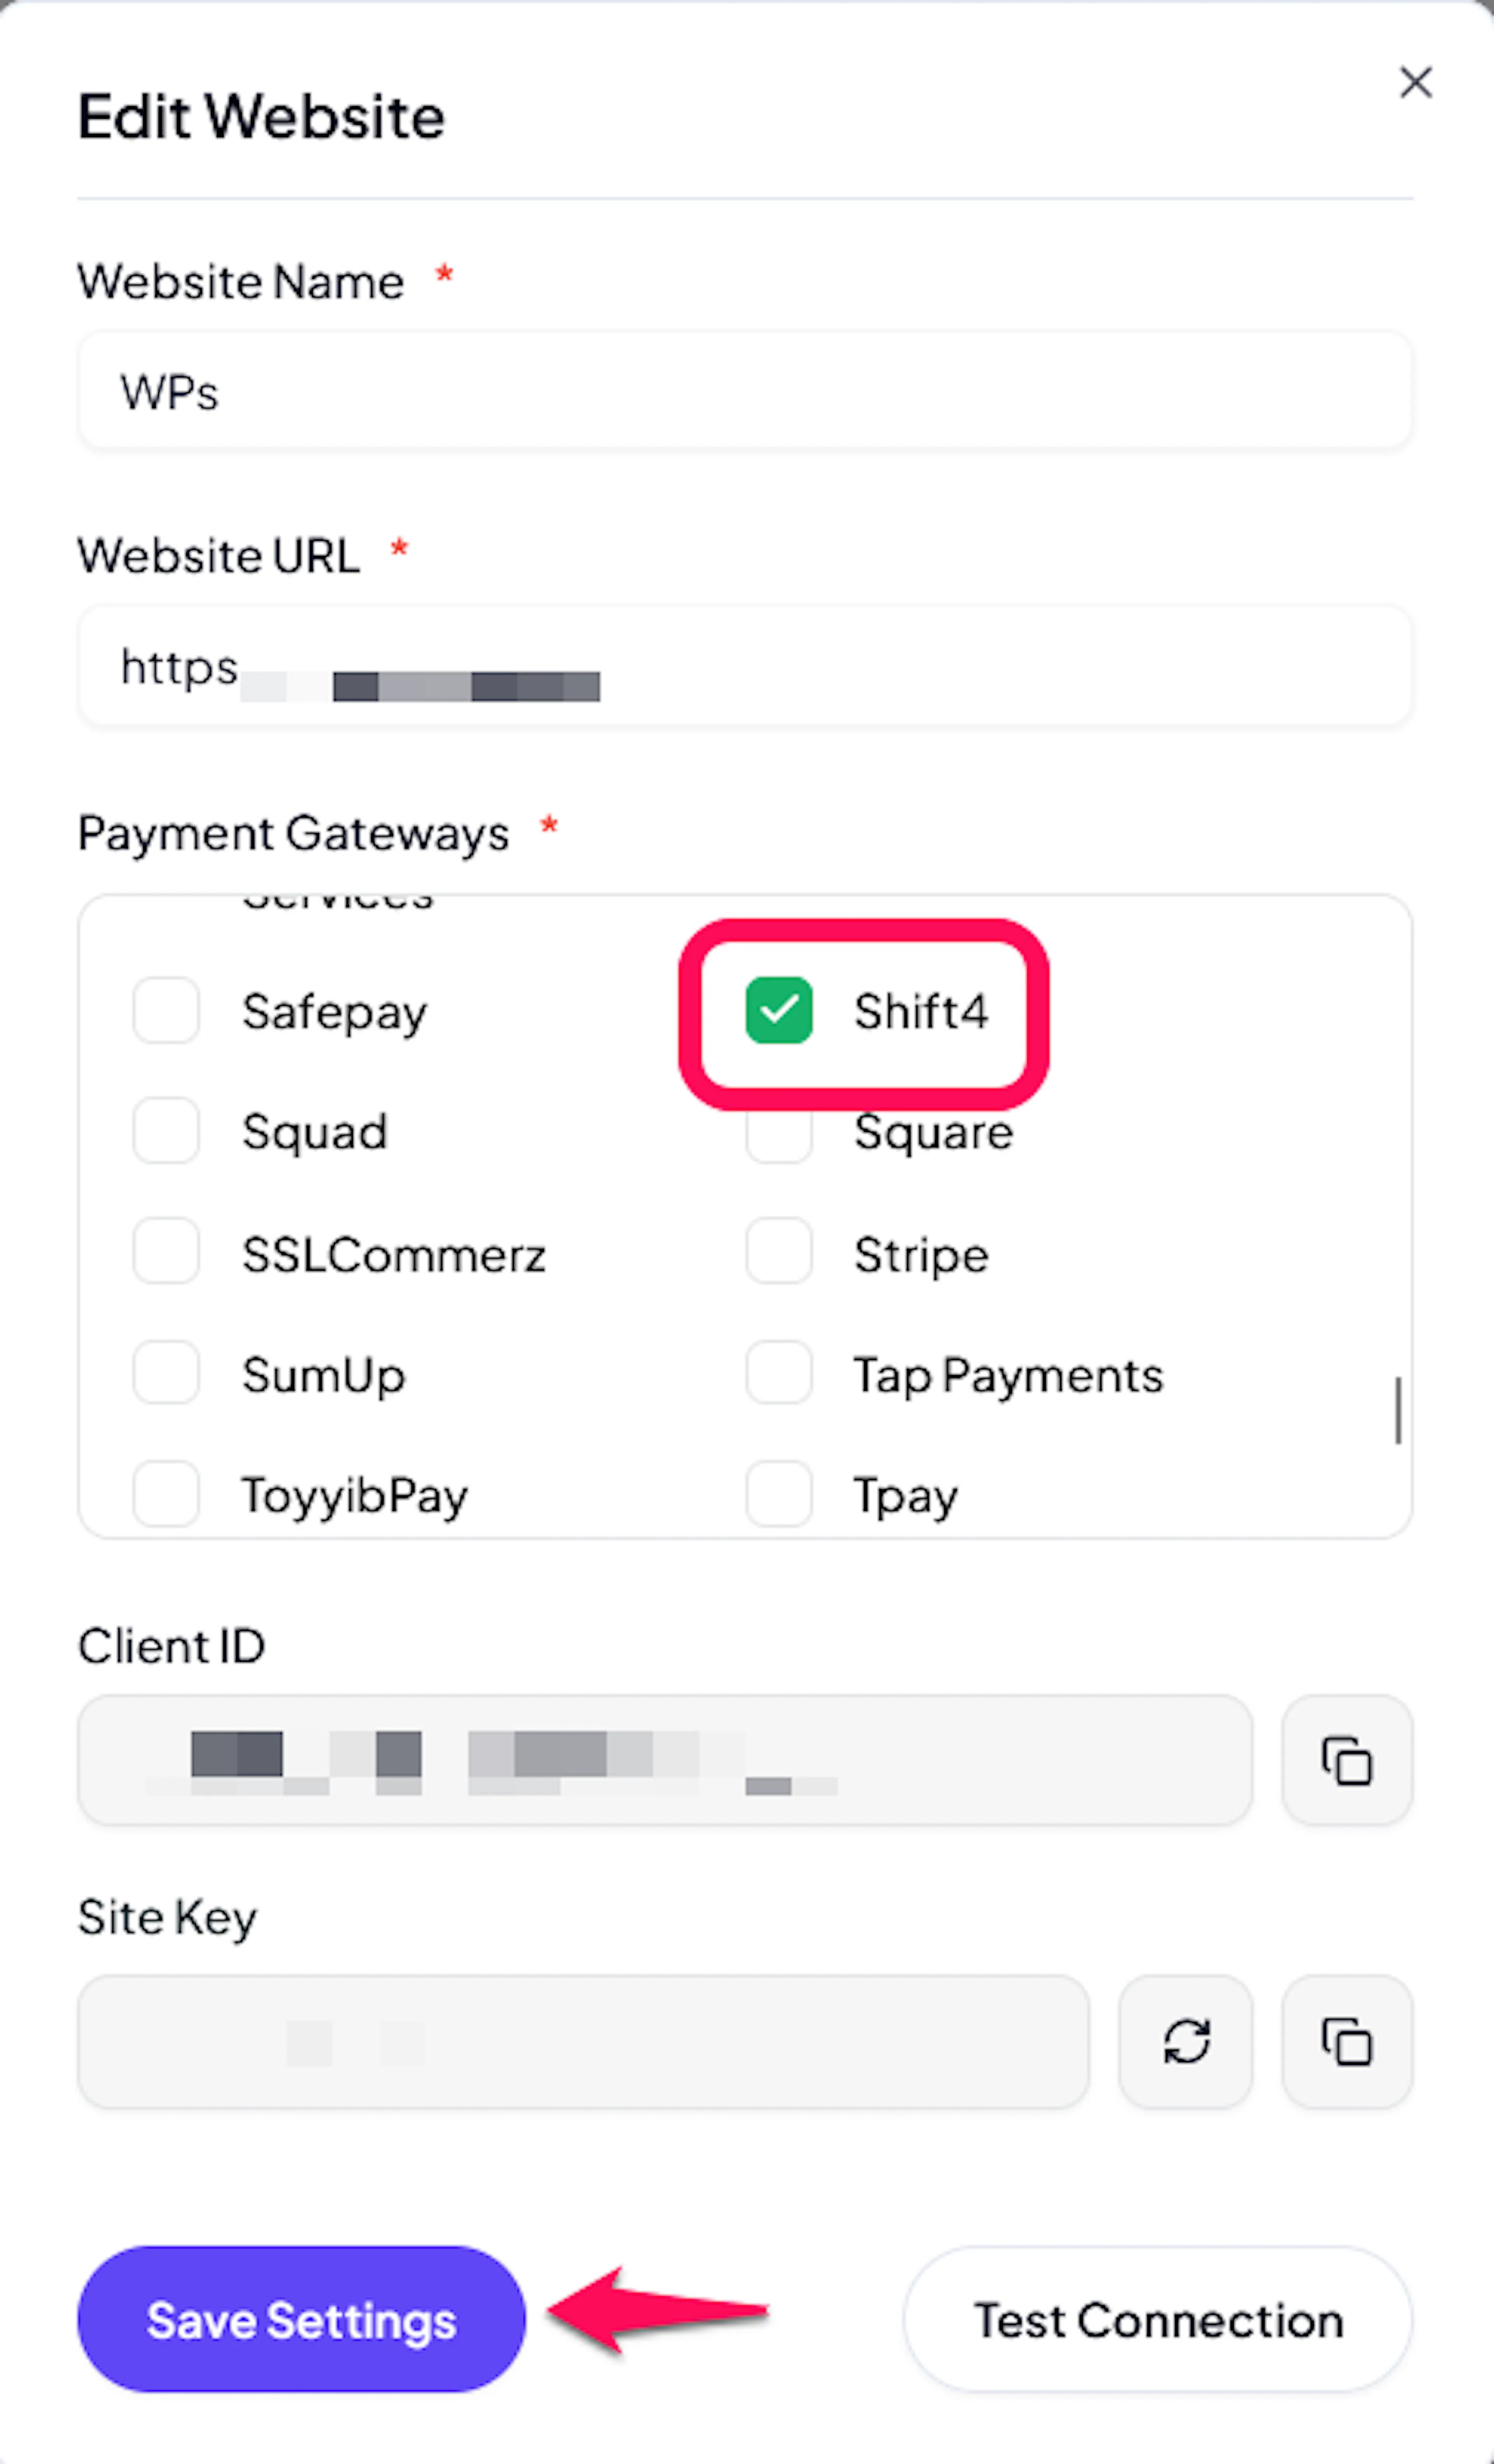
If you haven't added a website yet, Continue to Add Your Website →
Troubleshooting
Best Practices
- Test in sandbox before enabling production. Use a
sk_test_key and complete a full payment, refund, and subscription flow before switching to live. Shift4 publishes test cards for both successful and declined outcomes. - Register the webhook URL in both test and live mode, so test orders behave exactly like live ones.
- Keep your site reachable. Because Shift4 delivers events in order, one endpoint outage delays every event behind it rather than only the one that failed.
- Keep your Secret Key confidential and treat rotating it as a configuration change, since it also underpins webhook trust and mode detection.
- Charge any sign-up fee as a separate one-time product, since Shift4 subscriptions cannot carry one.
- Use cancel at period end rather than looking for a pause, and tell customers to re-subscribe when they return.
- Price subscriptions in a currency you intend to keep, since changing a subscription's price requires supplying both the new amount and the currency.
FAQs
Still Have Questions?
- Shift4 Support: Shift4 Support
- PayLexer Support: Contact Support