

Cost+
Connect Cost+ to PayLexer to accept cards, Apple Pay, Google Pay, and Nordic wallets like MobilePay, Vipps, and Swish through a hosted checkout page with independent payment verification.
Cost+ is a European payment gateway built around transparent cost-plus (IC++) pricing, giving shoppers cards, Apple Pay, Google Pay, and Nordic wallets like MobilePay, Vipps, and Swish on a single hosted checkout page. PayLexer connects to Cost+'s hosted checkout page, so a shopper is redirected to Cost+'s own payment page, pays however they prefer, and returns to your site once the payment settles.
- Supported Regions (Merchant Accounts): Nordics, Baltics, Germany, and Poland - view full list
- Supported Currencies: 87 currencies including EUR, USD, GBP, SEK, NOK, DKK, PLN, and CHF
Supported Features
- Hosted checkout page for cards, Apple Pay, Google Pay, and Nordic wallets - shoppers pay on Cost+'s own secure page, so no card details are ever typed on your own pages
- Independent payment confirmation - every reported status change is re-checked directly with Cost+ before an order is updated, and a change Cost+ cannot confirm is discarded rather than applied
- Automatic recovery for missed payment notifications - PayLexer periodically re-checks any payment that has been waiting too long for a confirmed result, so a lost notification never leaves an order stuck
- Full and partial refunds issued directly from PayLexer
- Automatic refund reconciliation - Cost+ never announces a refund on its own, so PayLexer periodically checks for refund updates and keeps your orders accurate either way
- Credential validation on save, so you find out immediately whether Cost+ accepts your API Key
Recurring subscriptions are not supported for Cost+. This integration handles one-time payments only, with no sign-up fee or free trial option. There is also no way to cancel a payment attempt once the shopper has been sent to Cost+'s page - they must complete, abandon, or let it expire.
Before You Start
Make sure you have:
- Cost+ Account – Don't have one? Sign up for Cost+ →
- PayLexer Account – Required to configure the integration. Create your account →
- A website where you want to integrate
Looking for a different payment processor? View all supported gateways →
Configuring Cost+
You need an API Key from Cost+ for this integration.
Getting API Credentials
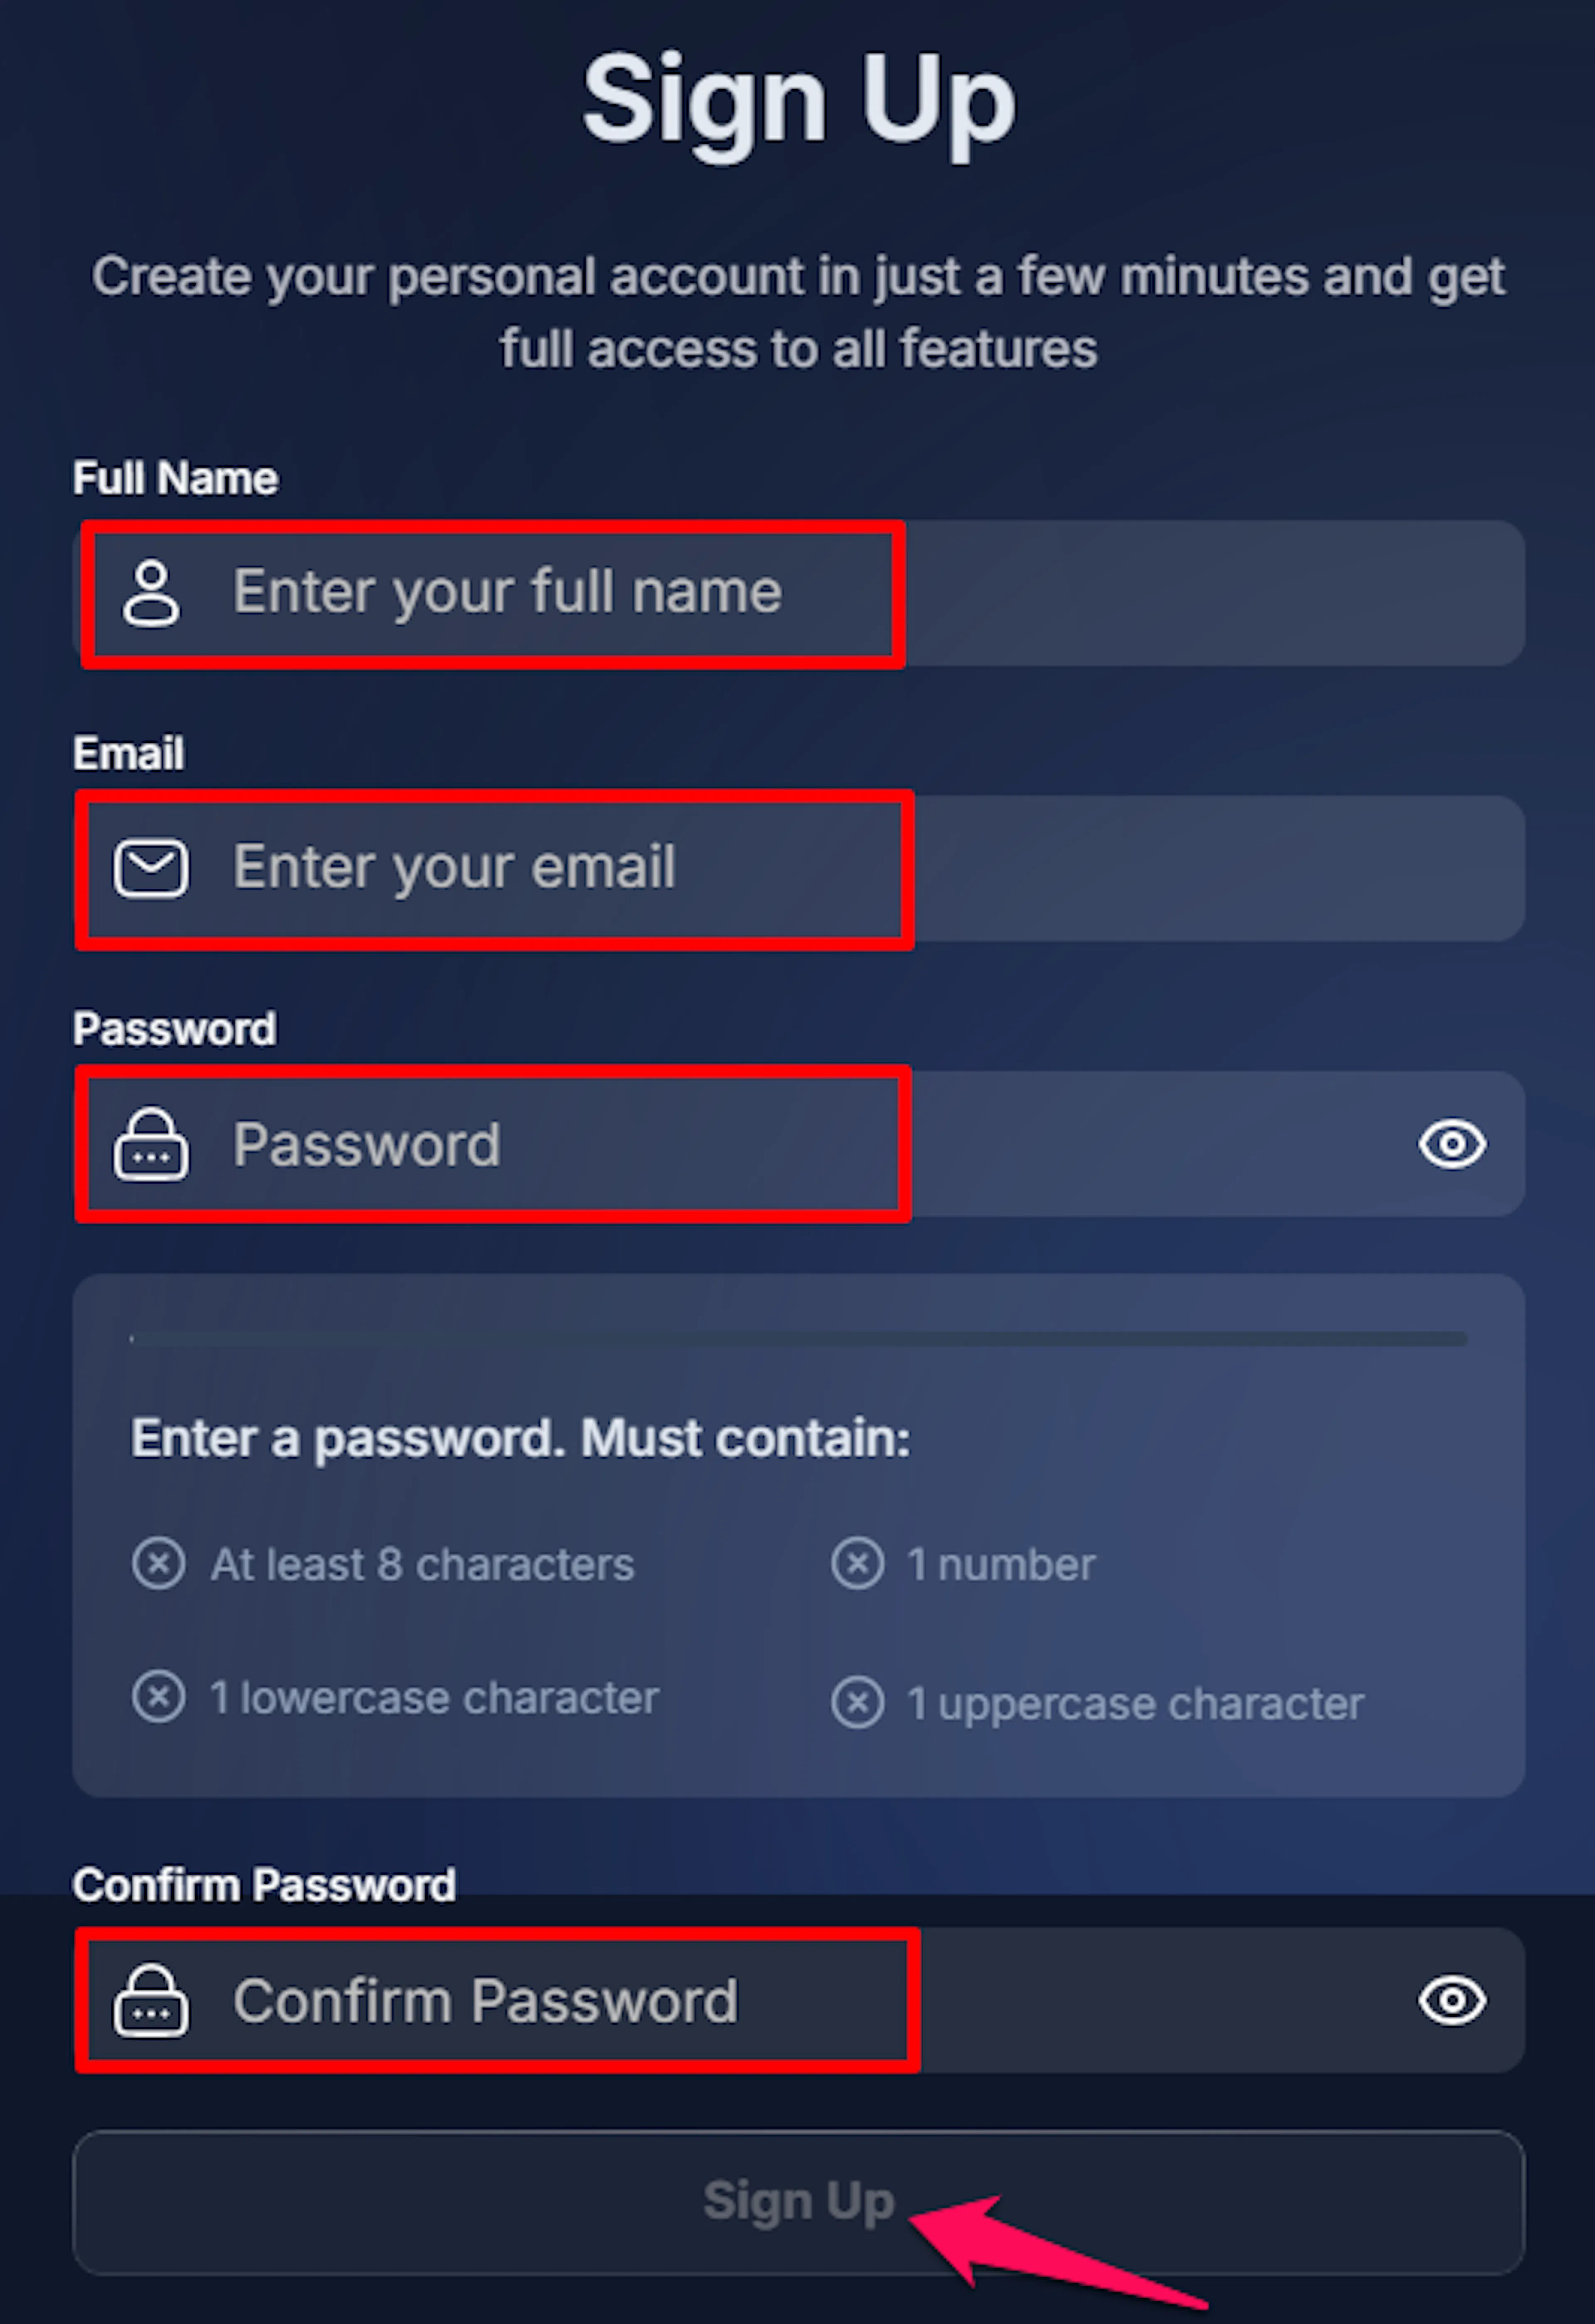
Sign up for Cost+
Register for a Cost+ account with just your name, email, and password. Signup is instant, with no business details or ID required.
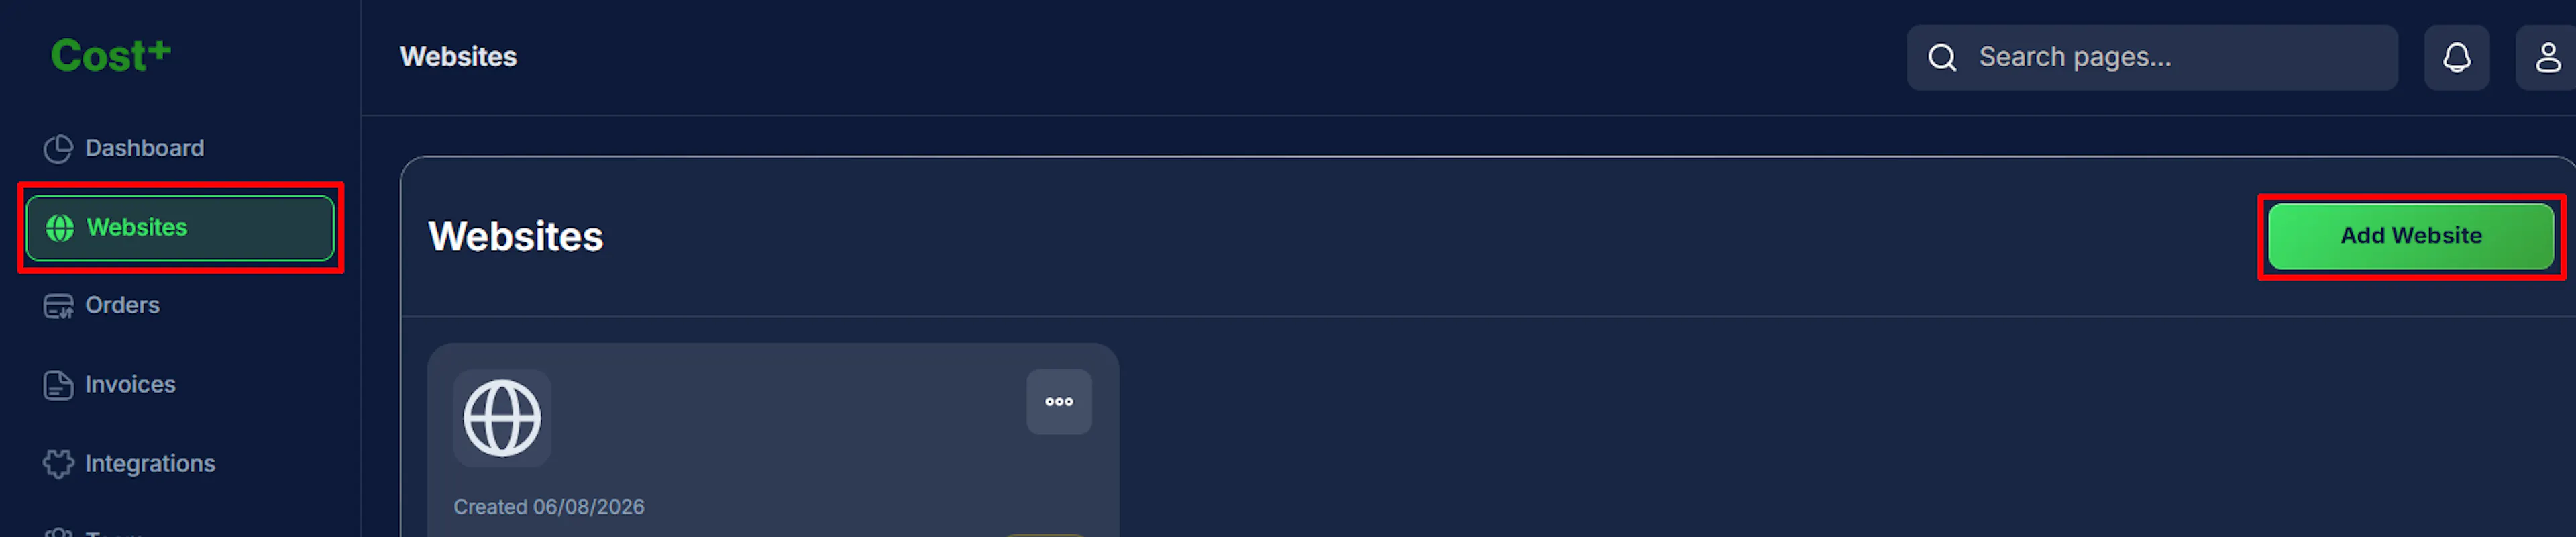
Add a website in the Merchant Portal
In the Cost+ Merchant Portal, click Add Website
Complete the setup wizard:
-
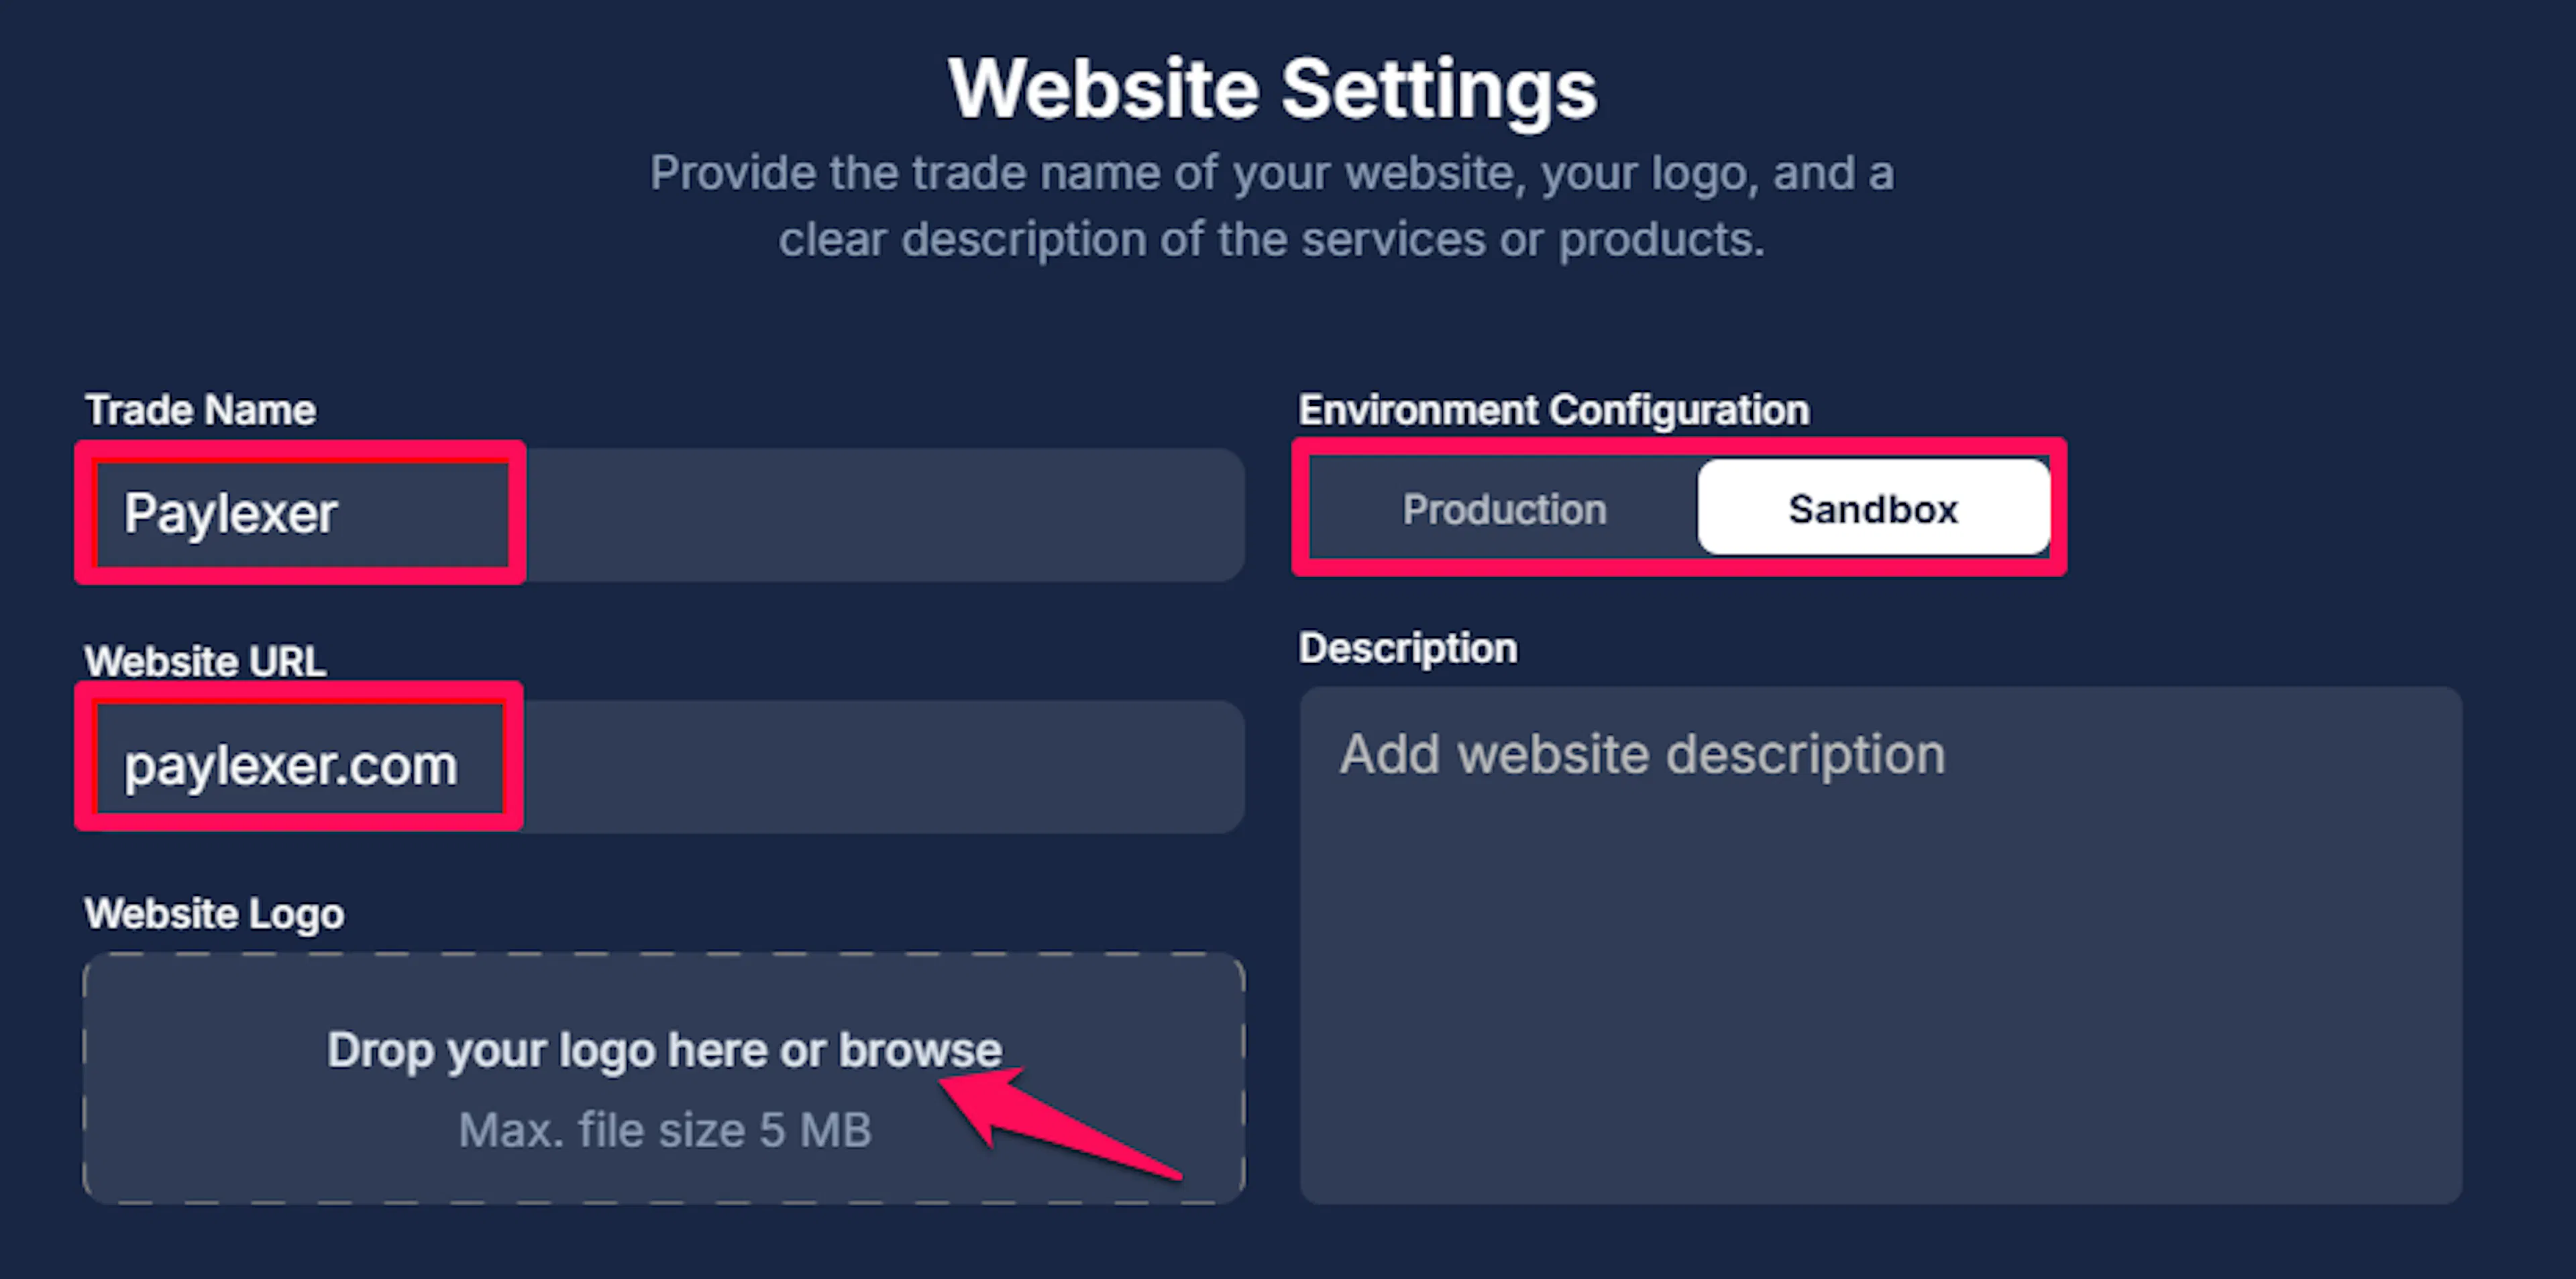
Business details - enter your trade name, the website URL where you want to integrate Cost+, upload your logo, and choose the environment (sandbox for testing, live for real transactions).\
-
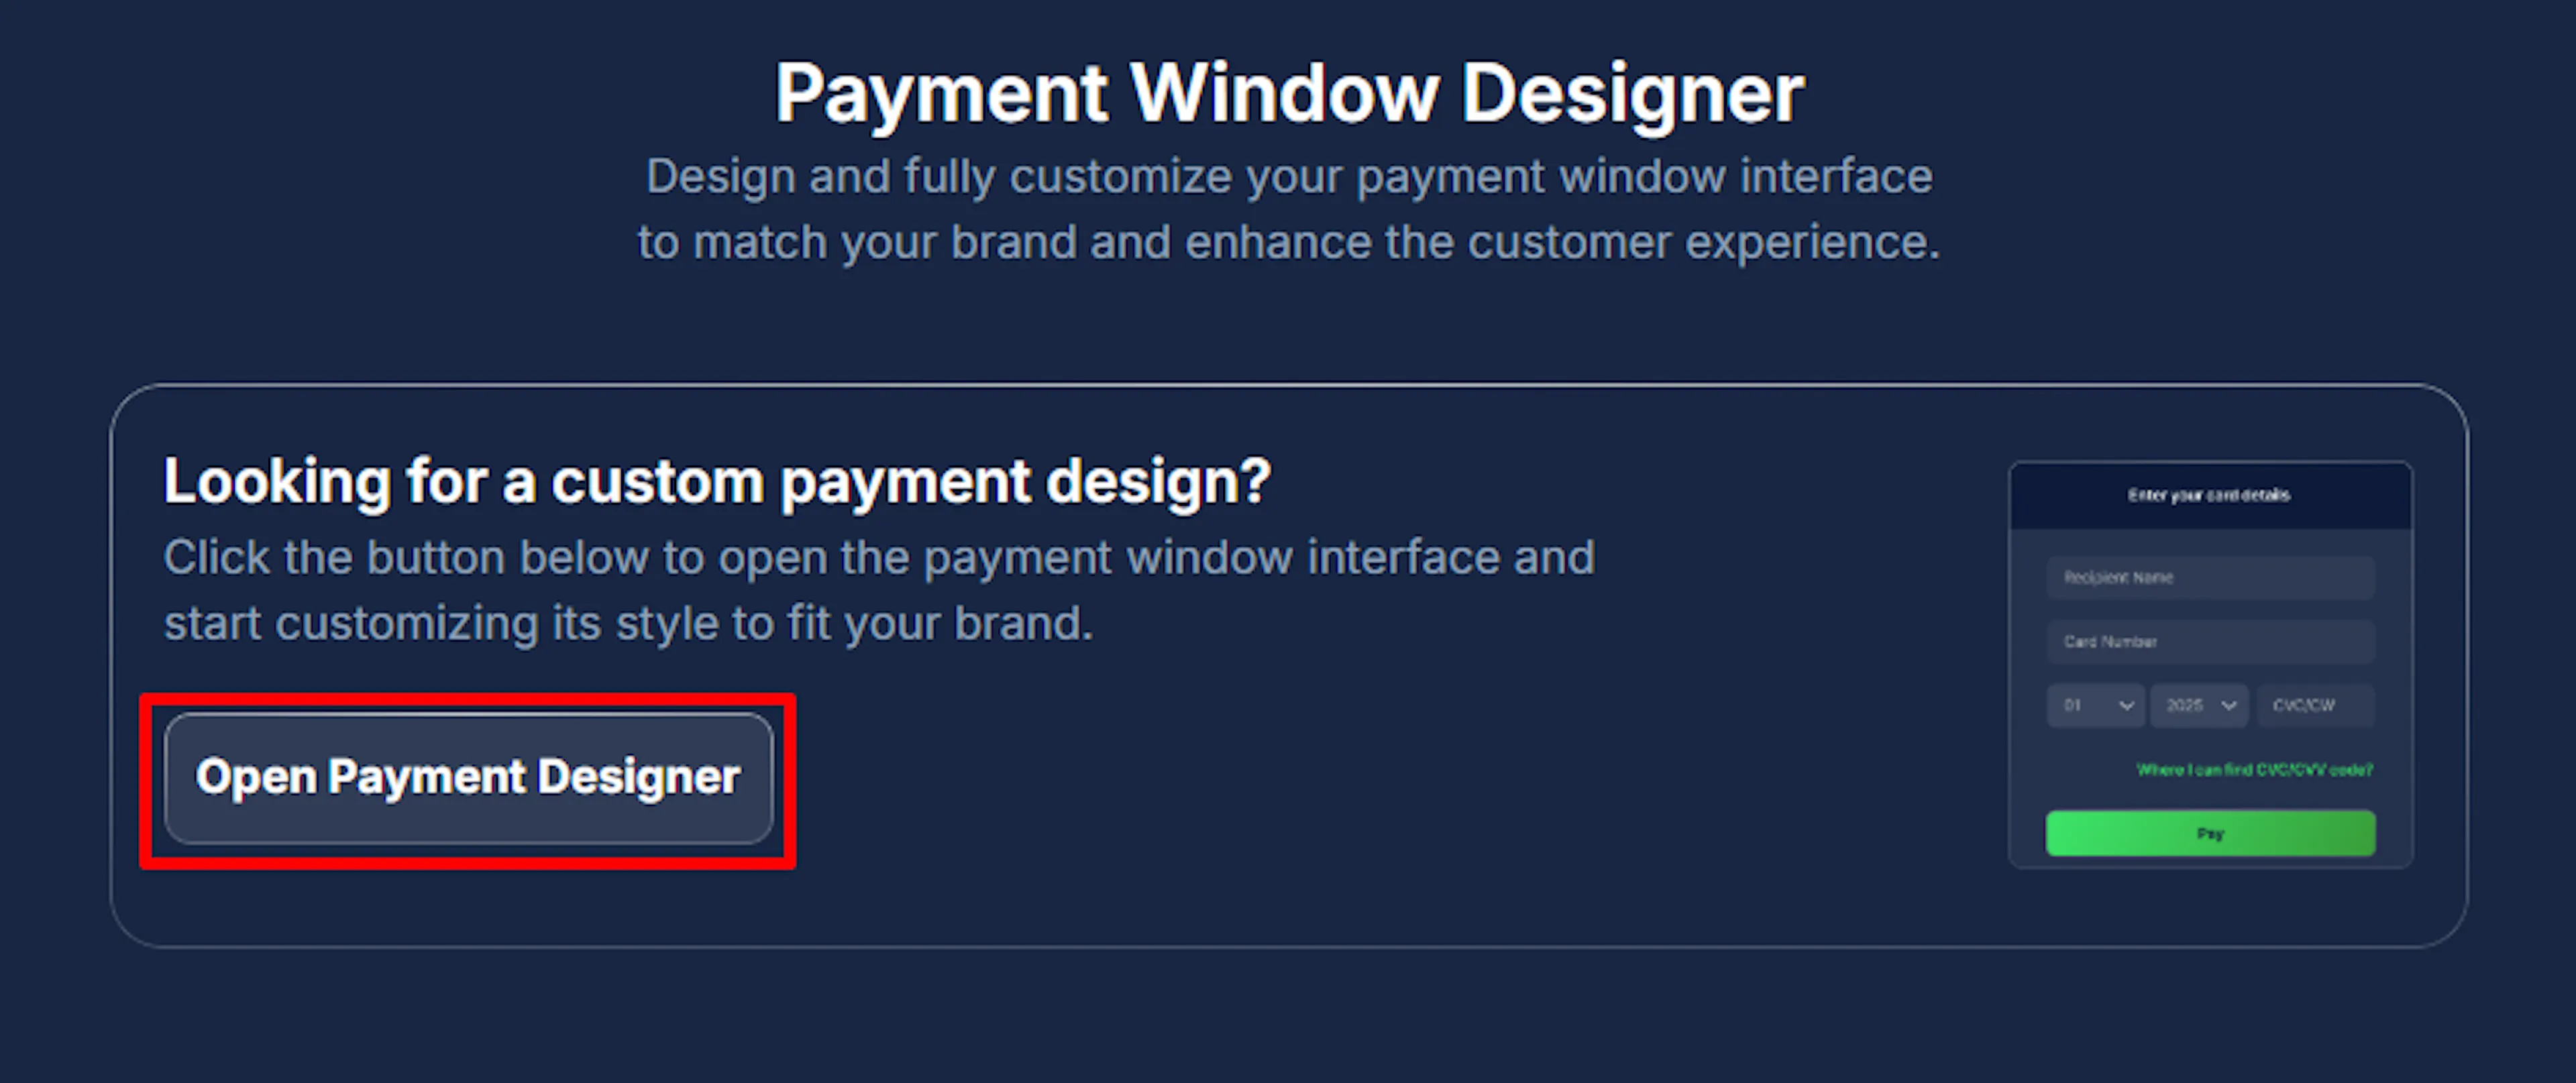
Checkout design (optional) - customize the look of your hosted checkout page, or skip this step.\
-
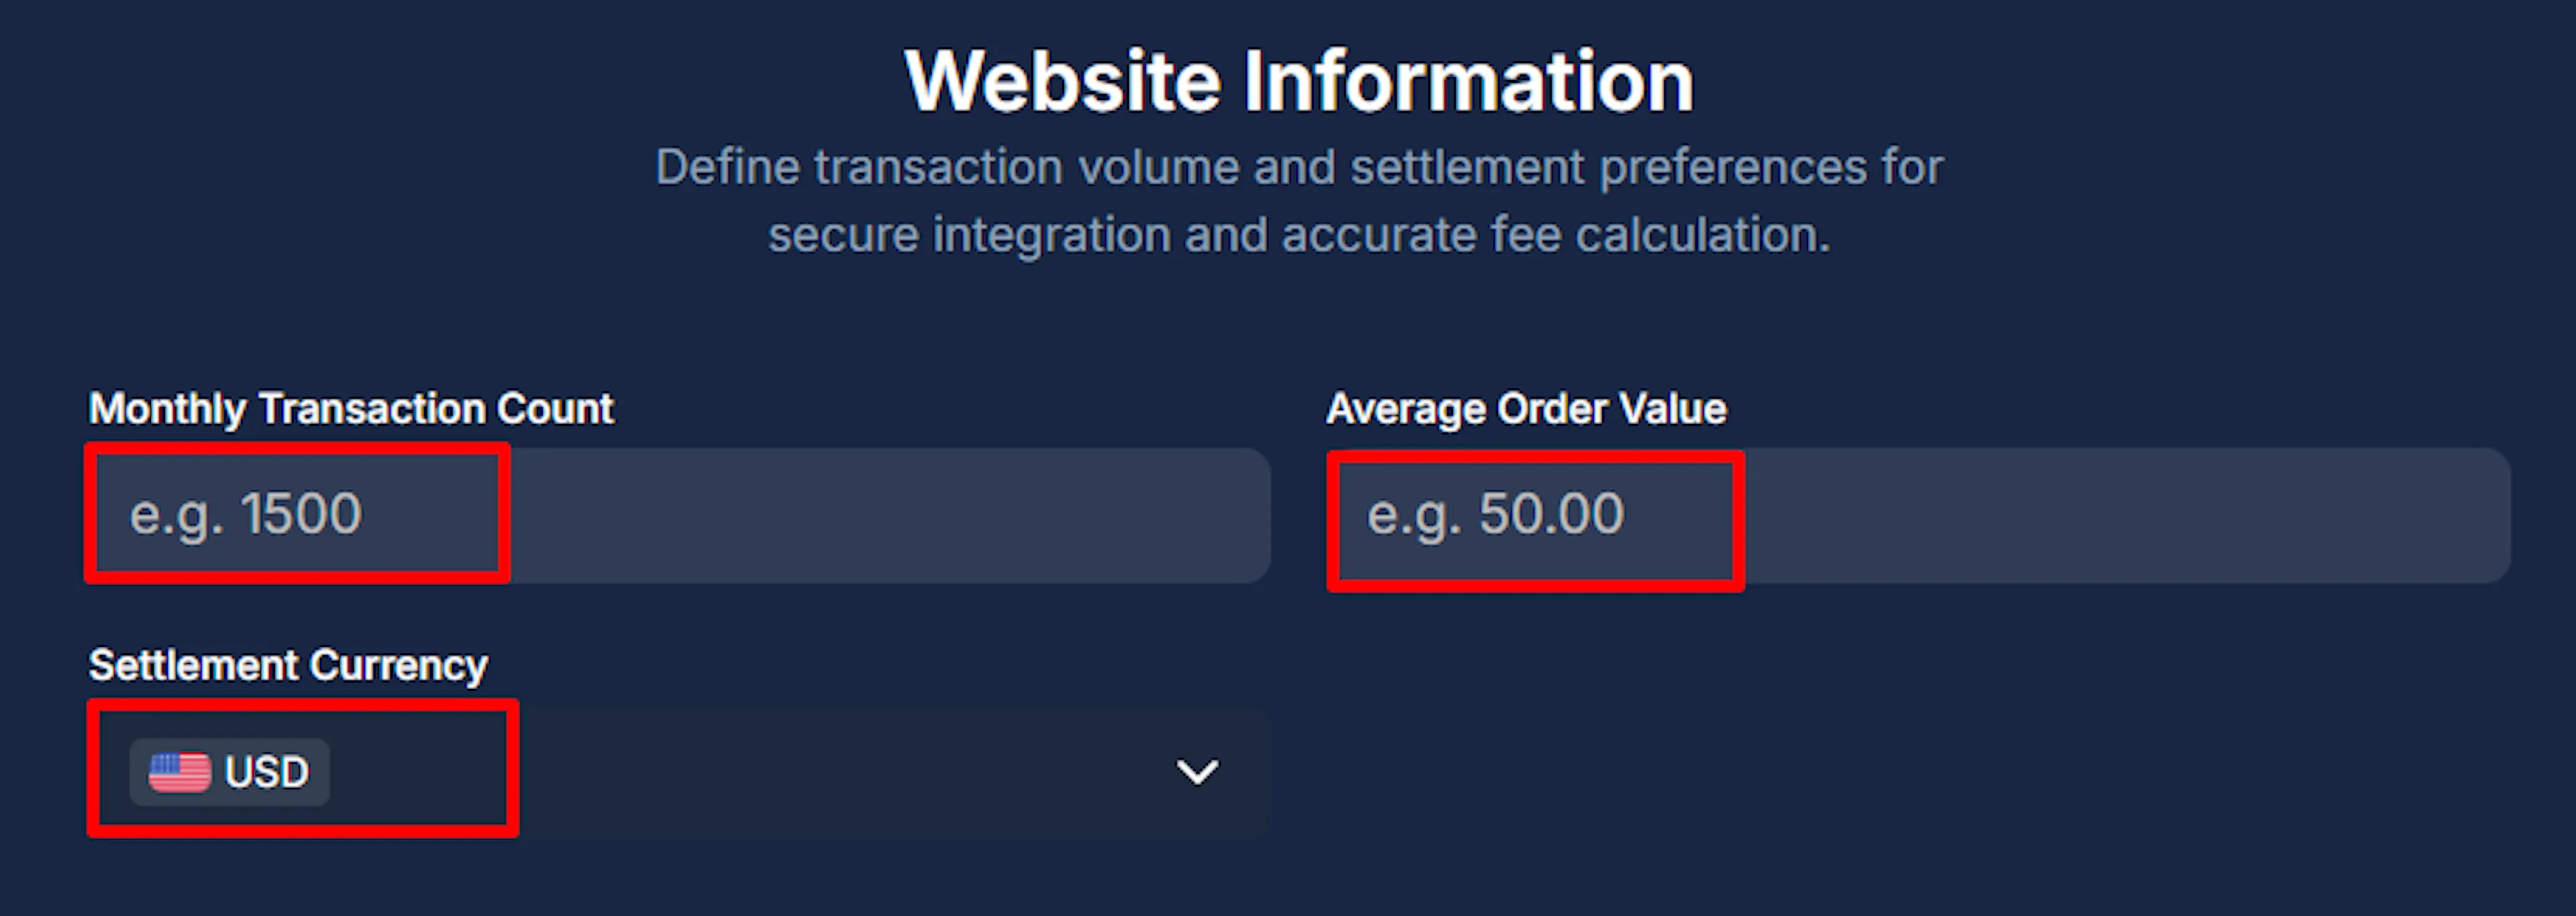
Transaction details - set your expected monthly transaction count, average order value, and the currency (or currencies) you want to let customers pay in.\
-
Payment methods - select which of Cost+'s payment methods to offer at checkout.\
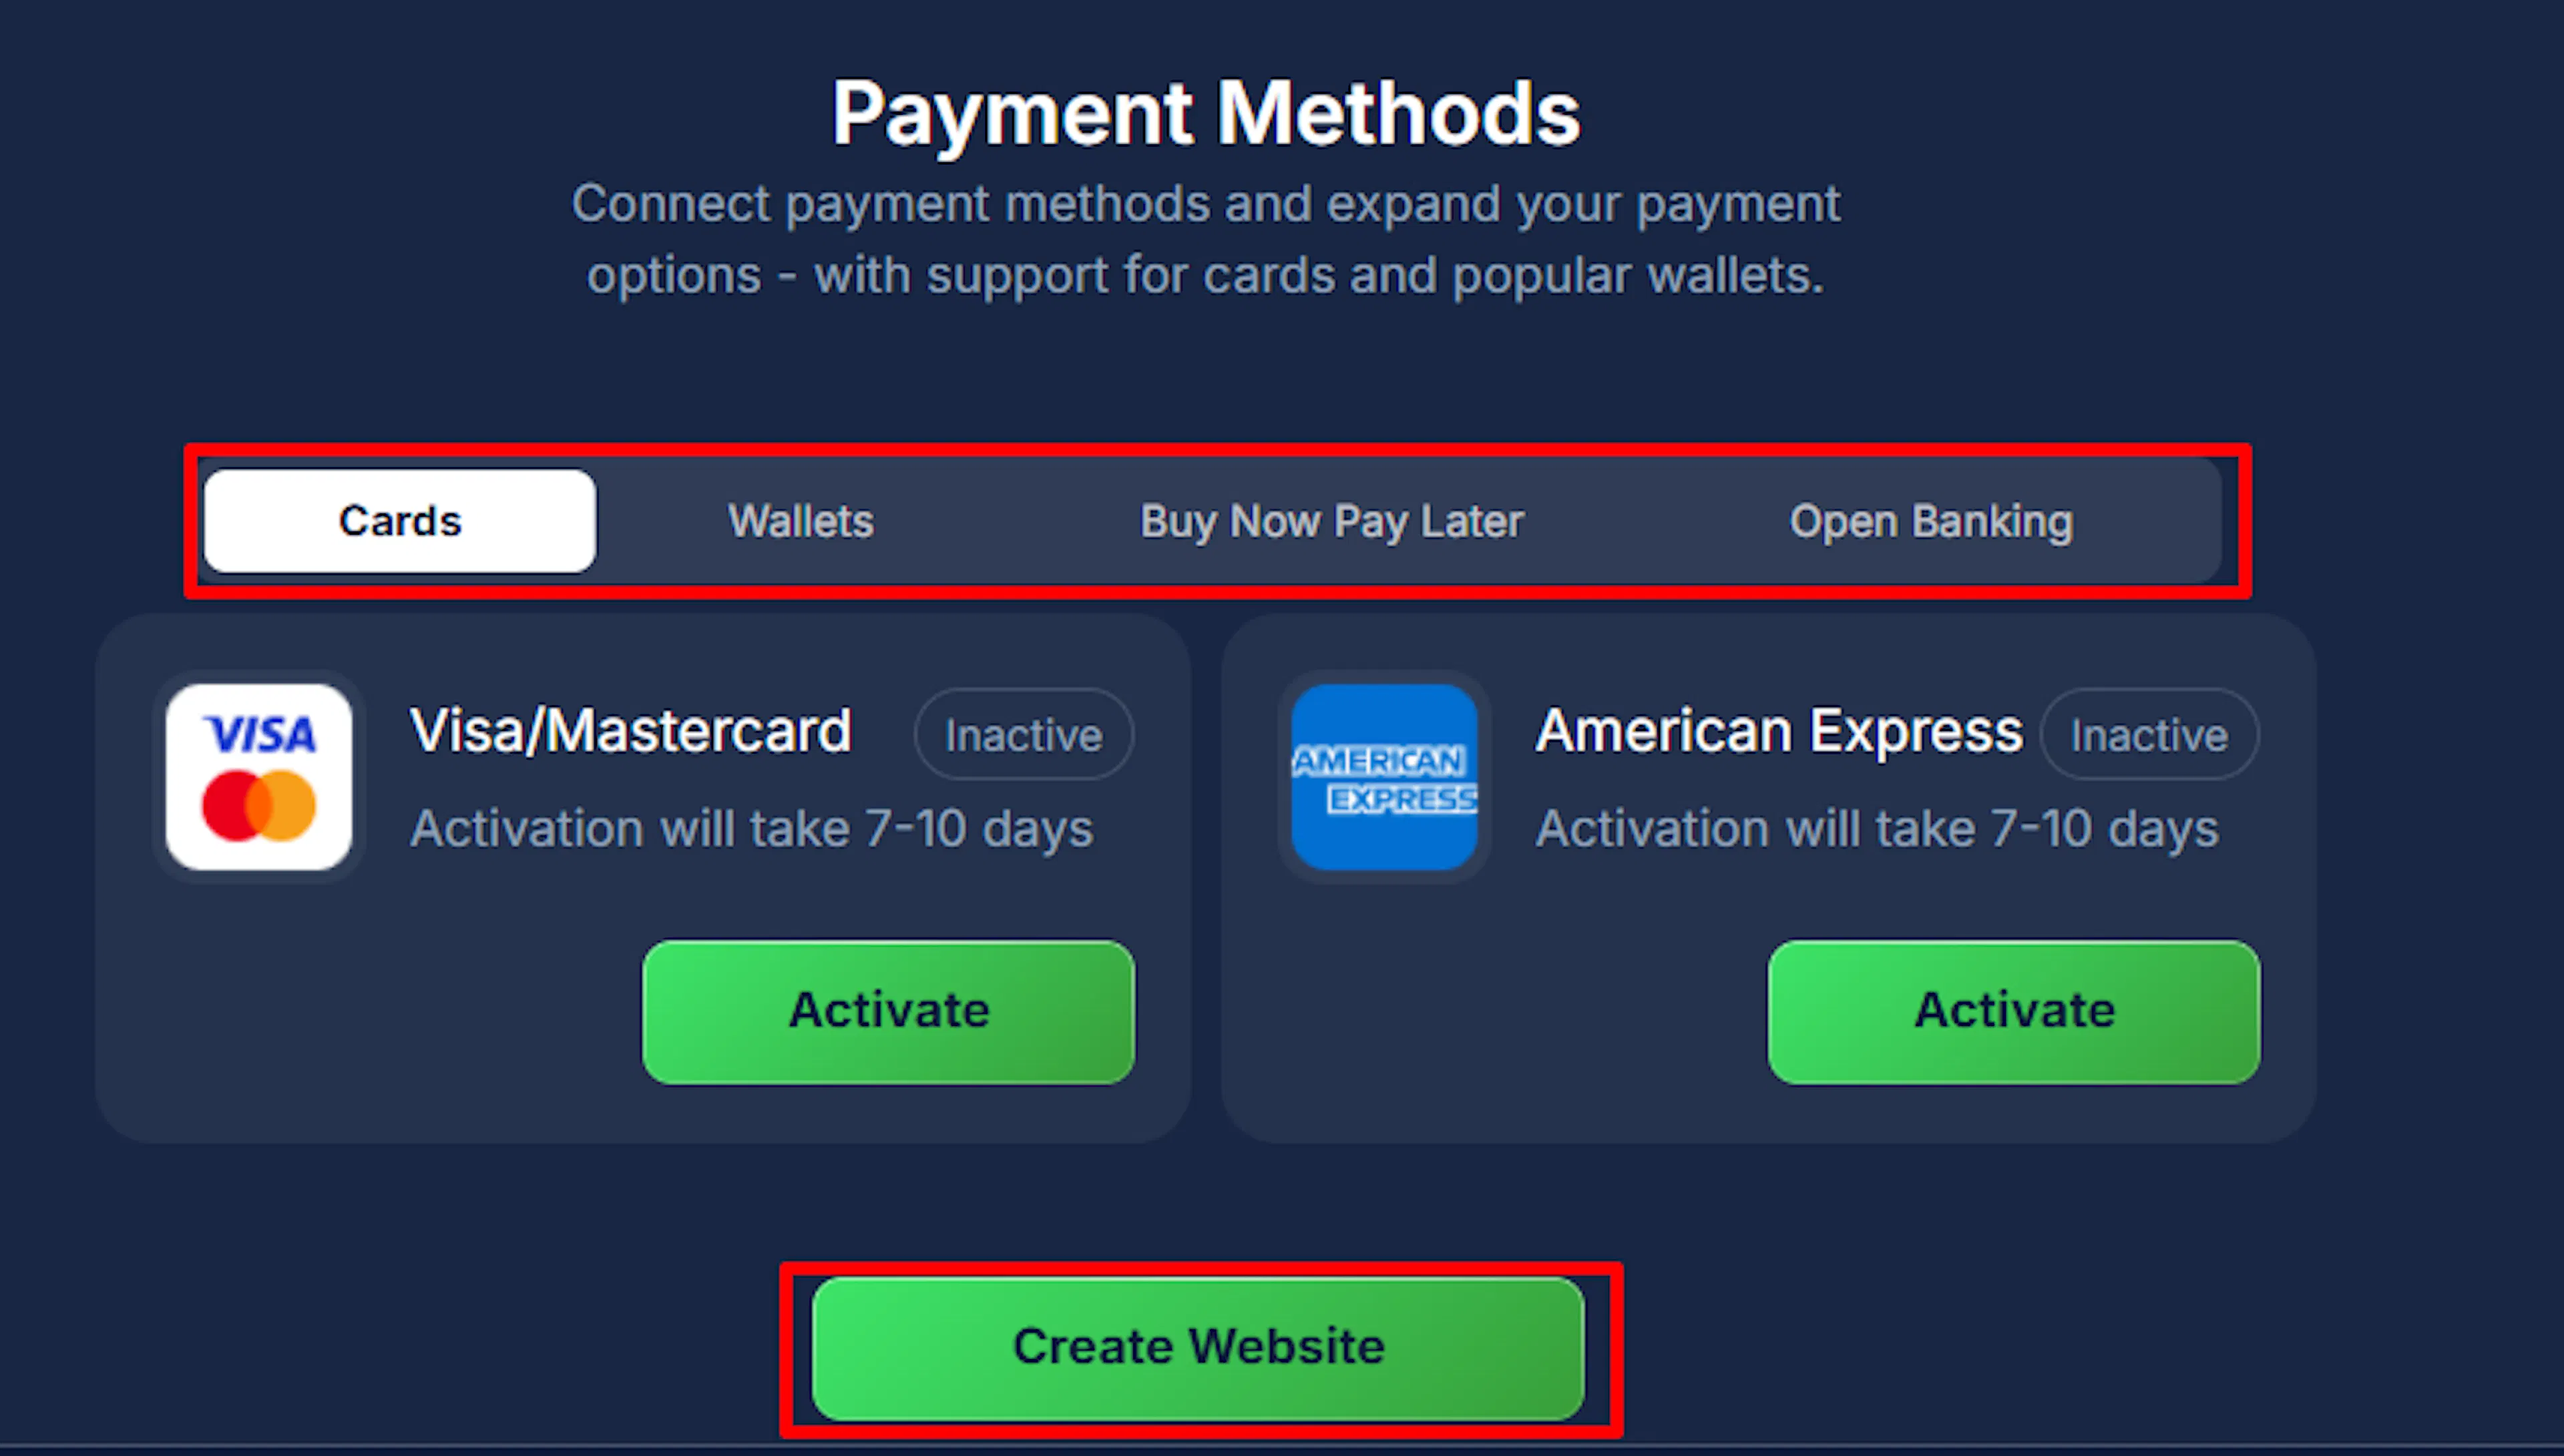
Click Create Website to finish.
Find your API Key
Your sandbox and live websites each have their own separate key.
-
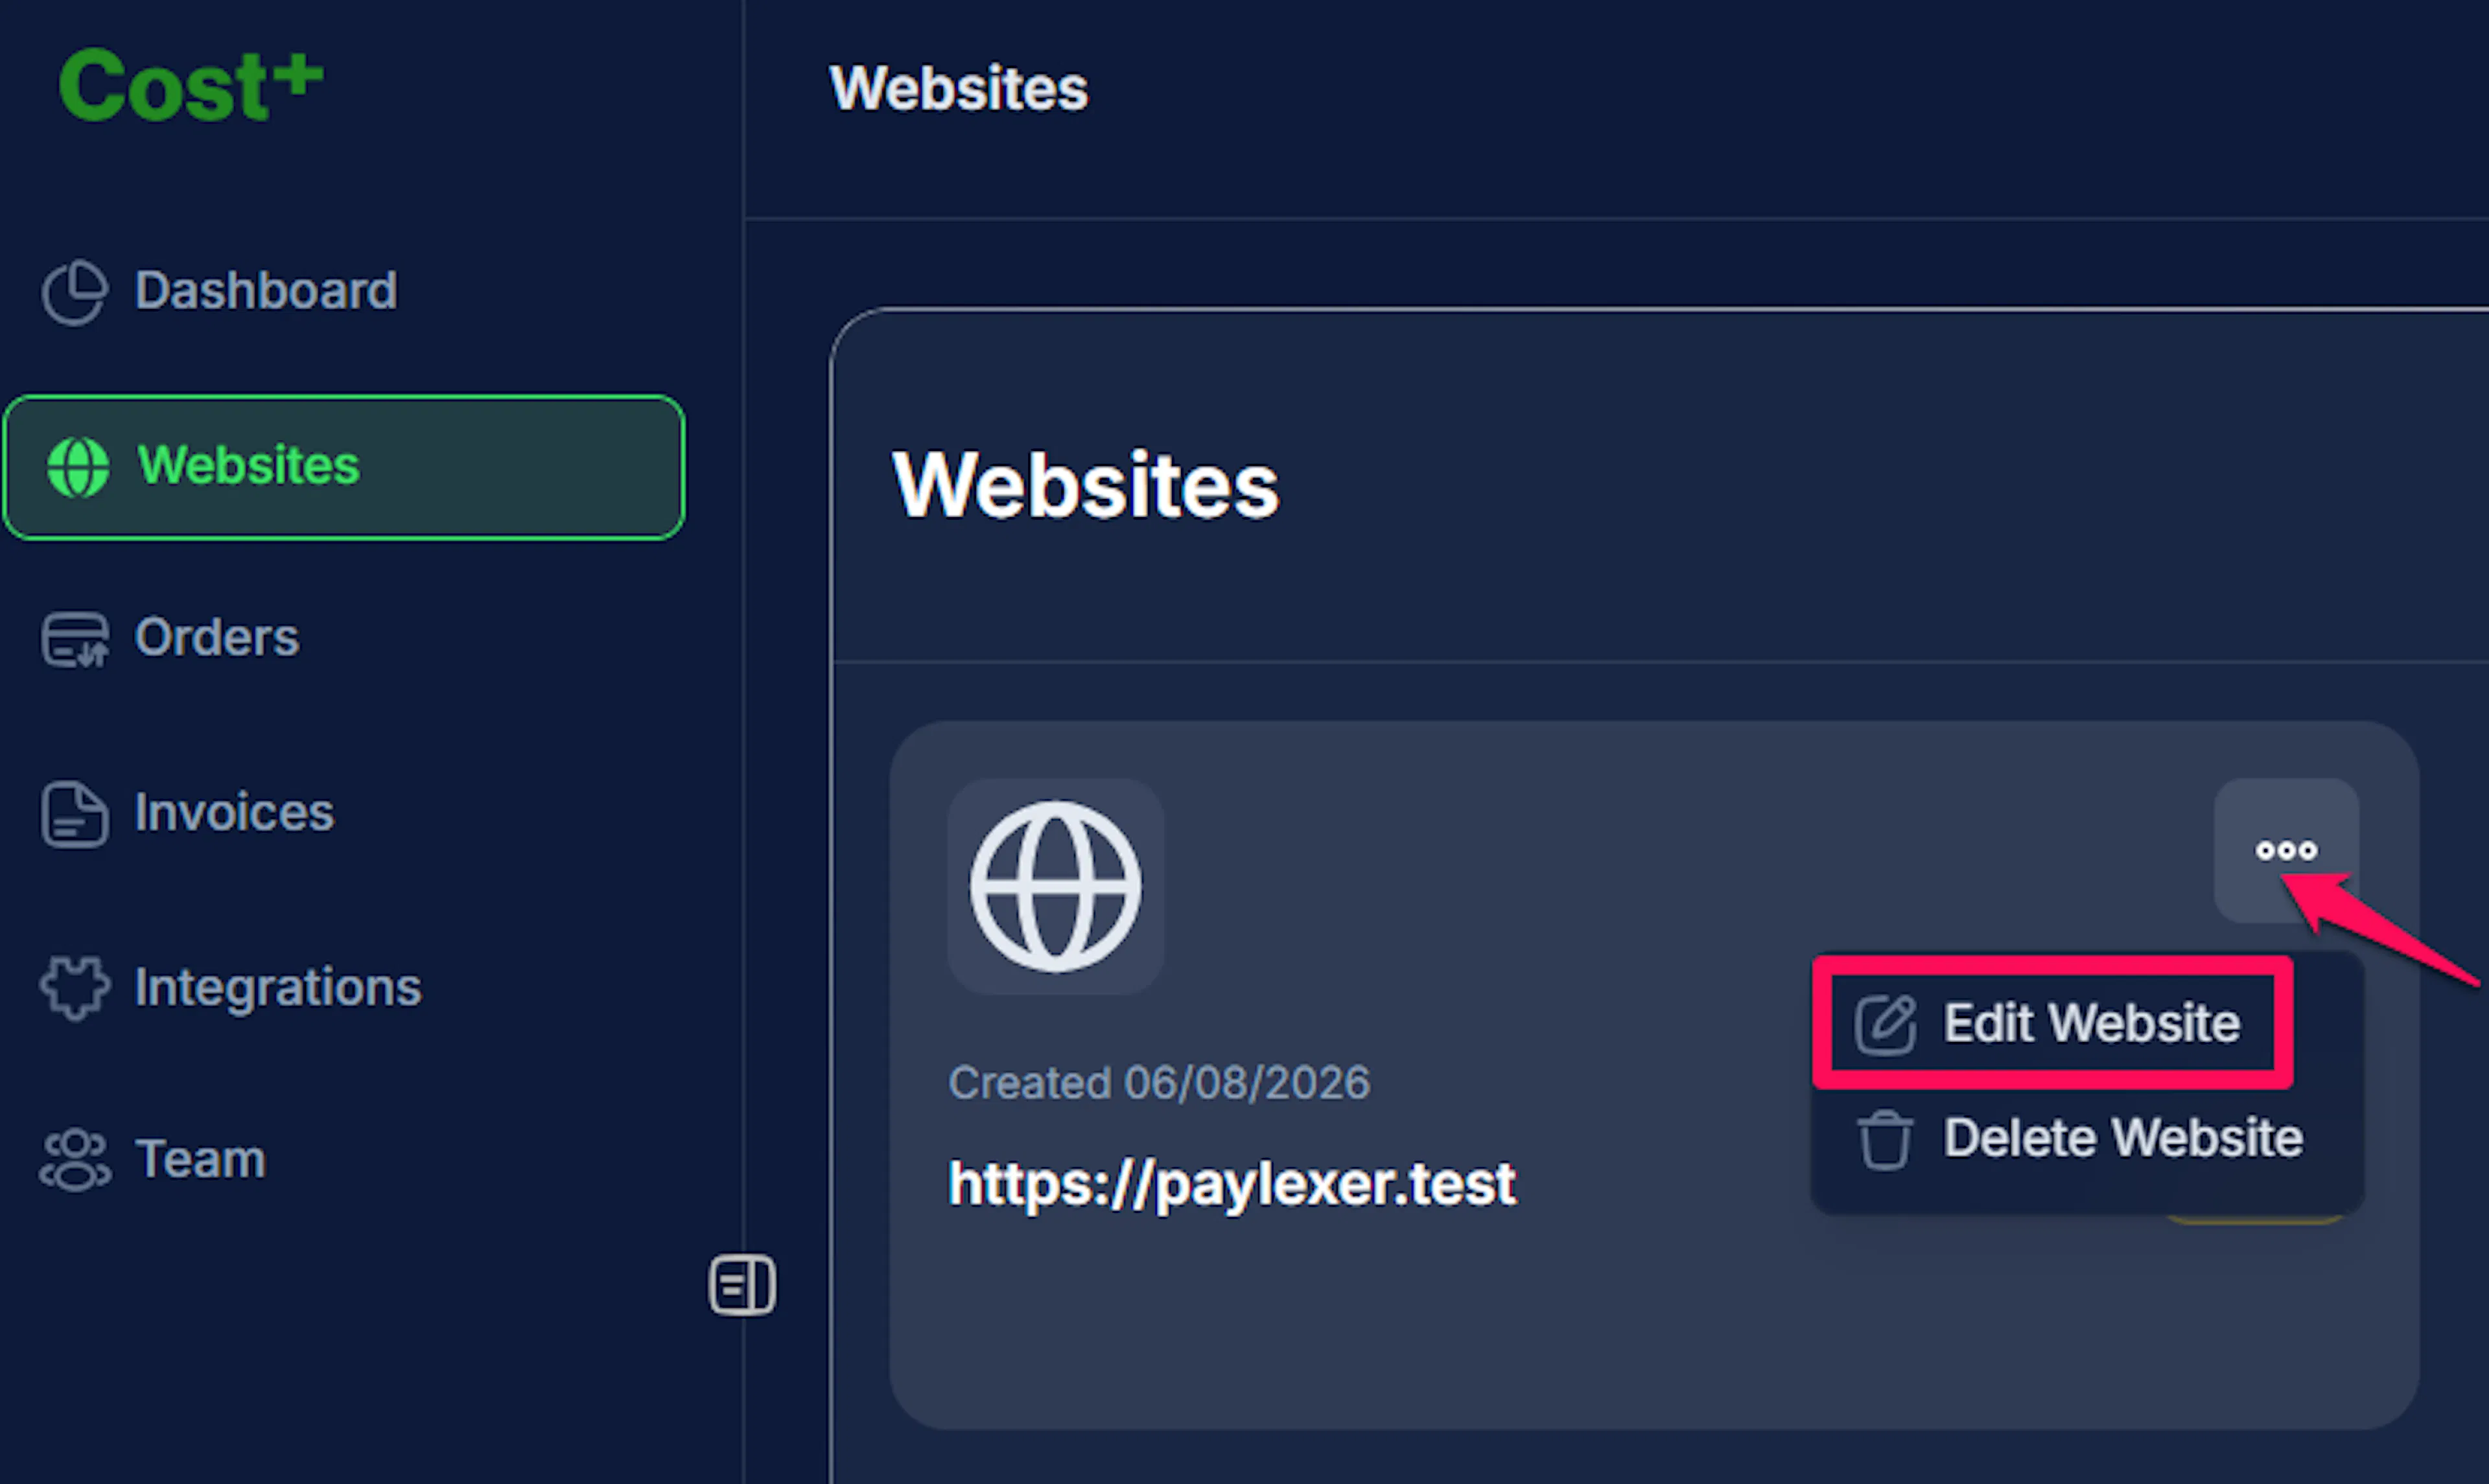
On the Websites list, click the three-dot menu next to the website you created and select Edit Website.\
-
Open the Integration tab, then Custom API, to copy your API Key.\
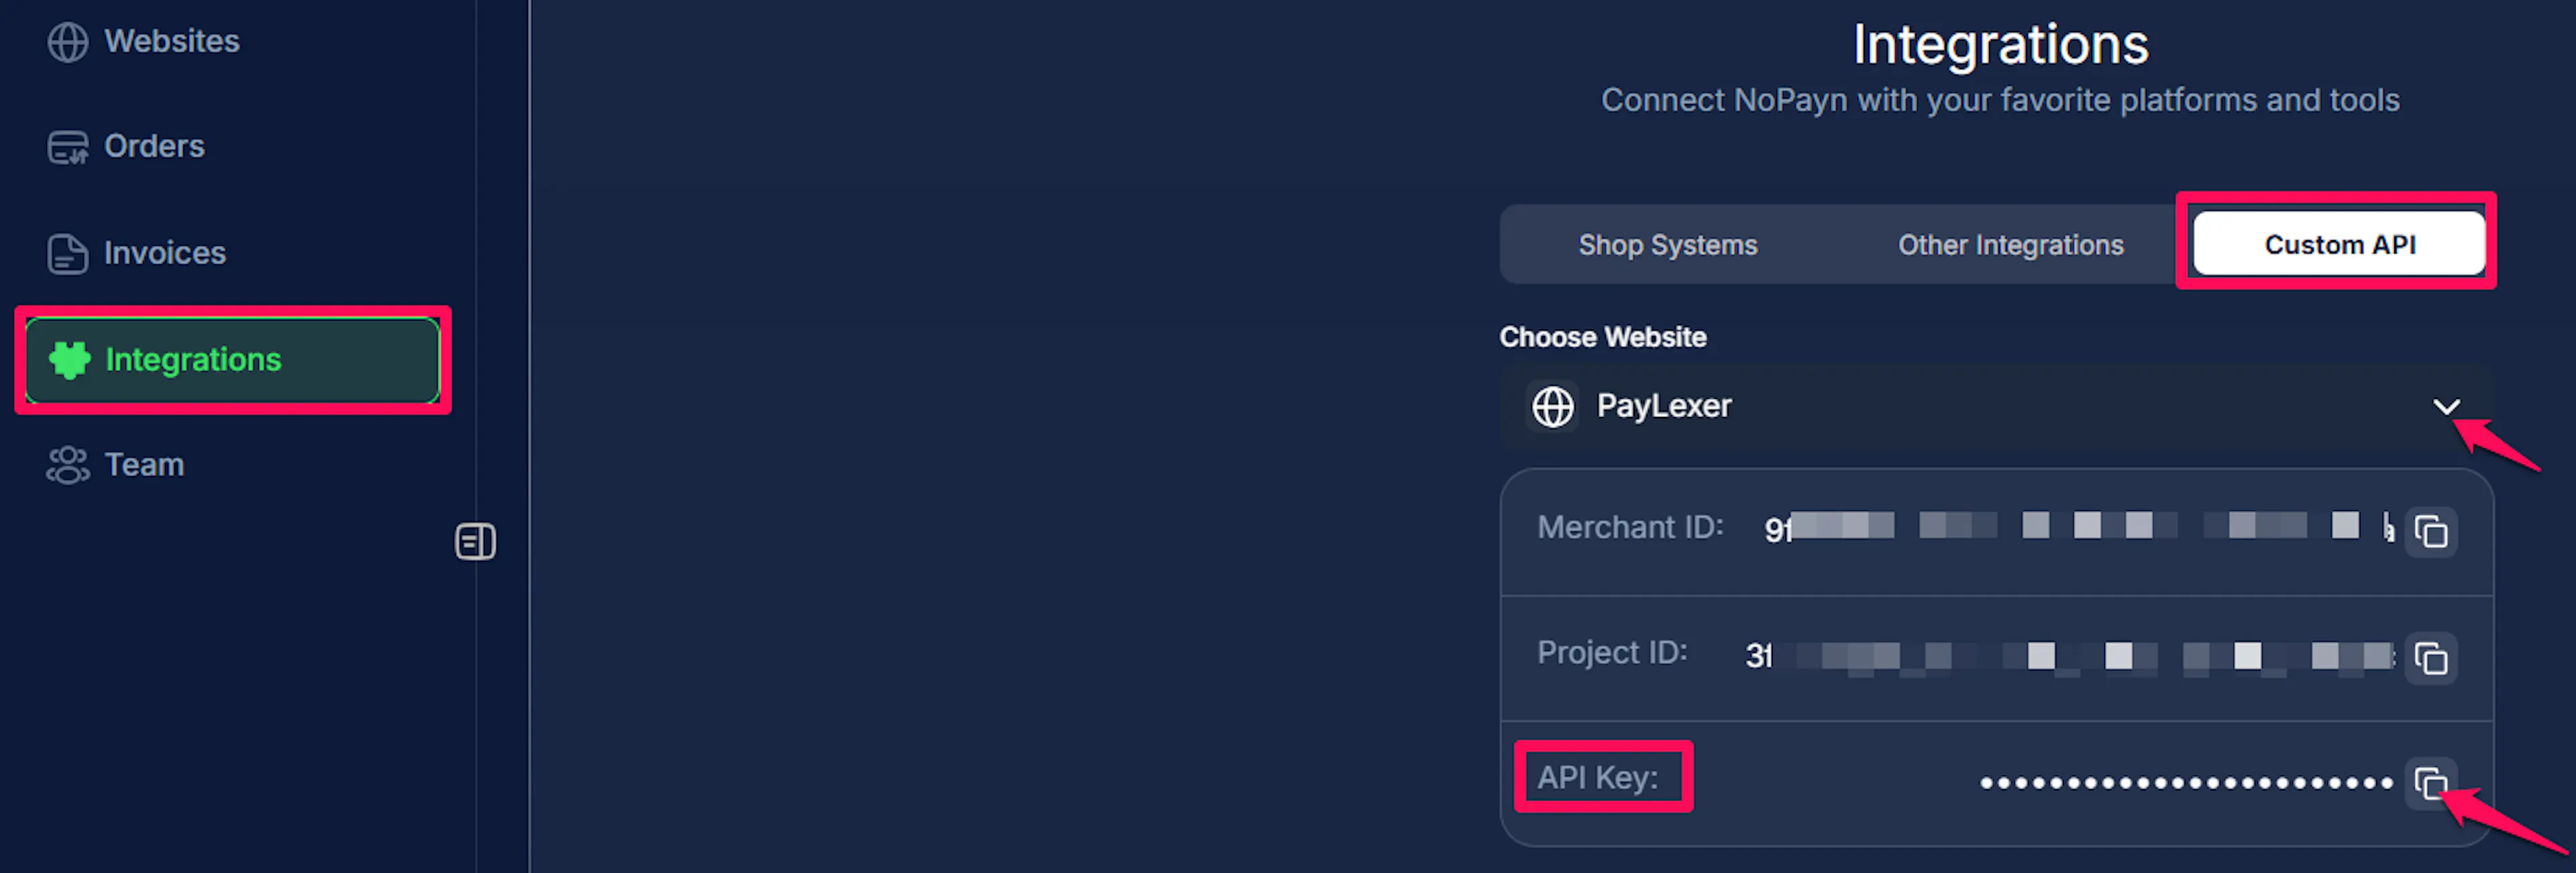
Treat the API Key like a password. It authenticates every request Cost+ processes on your behalf, including charges and refunds.
Adding Credentials to PayLexer
Open PayLexer Dashboard
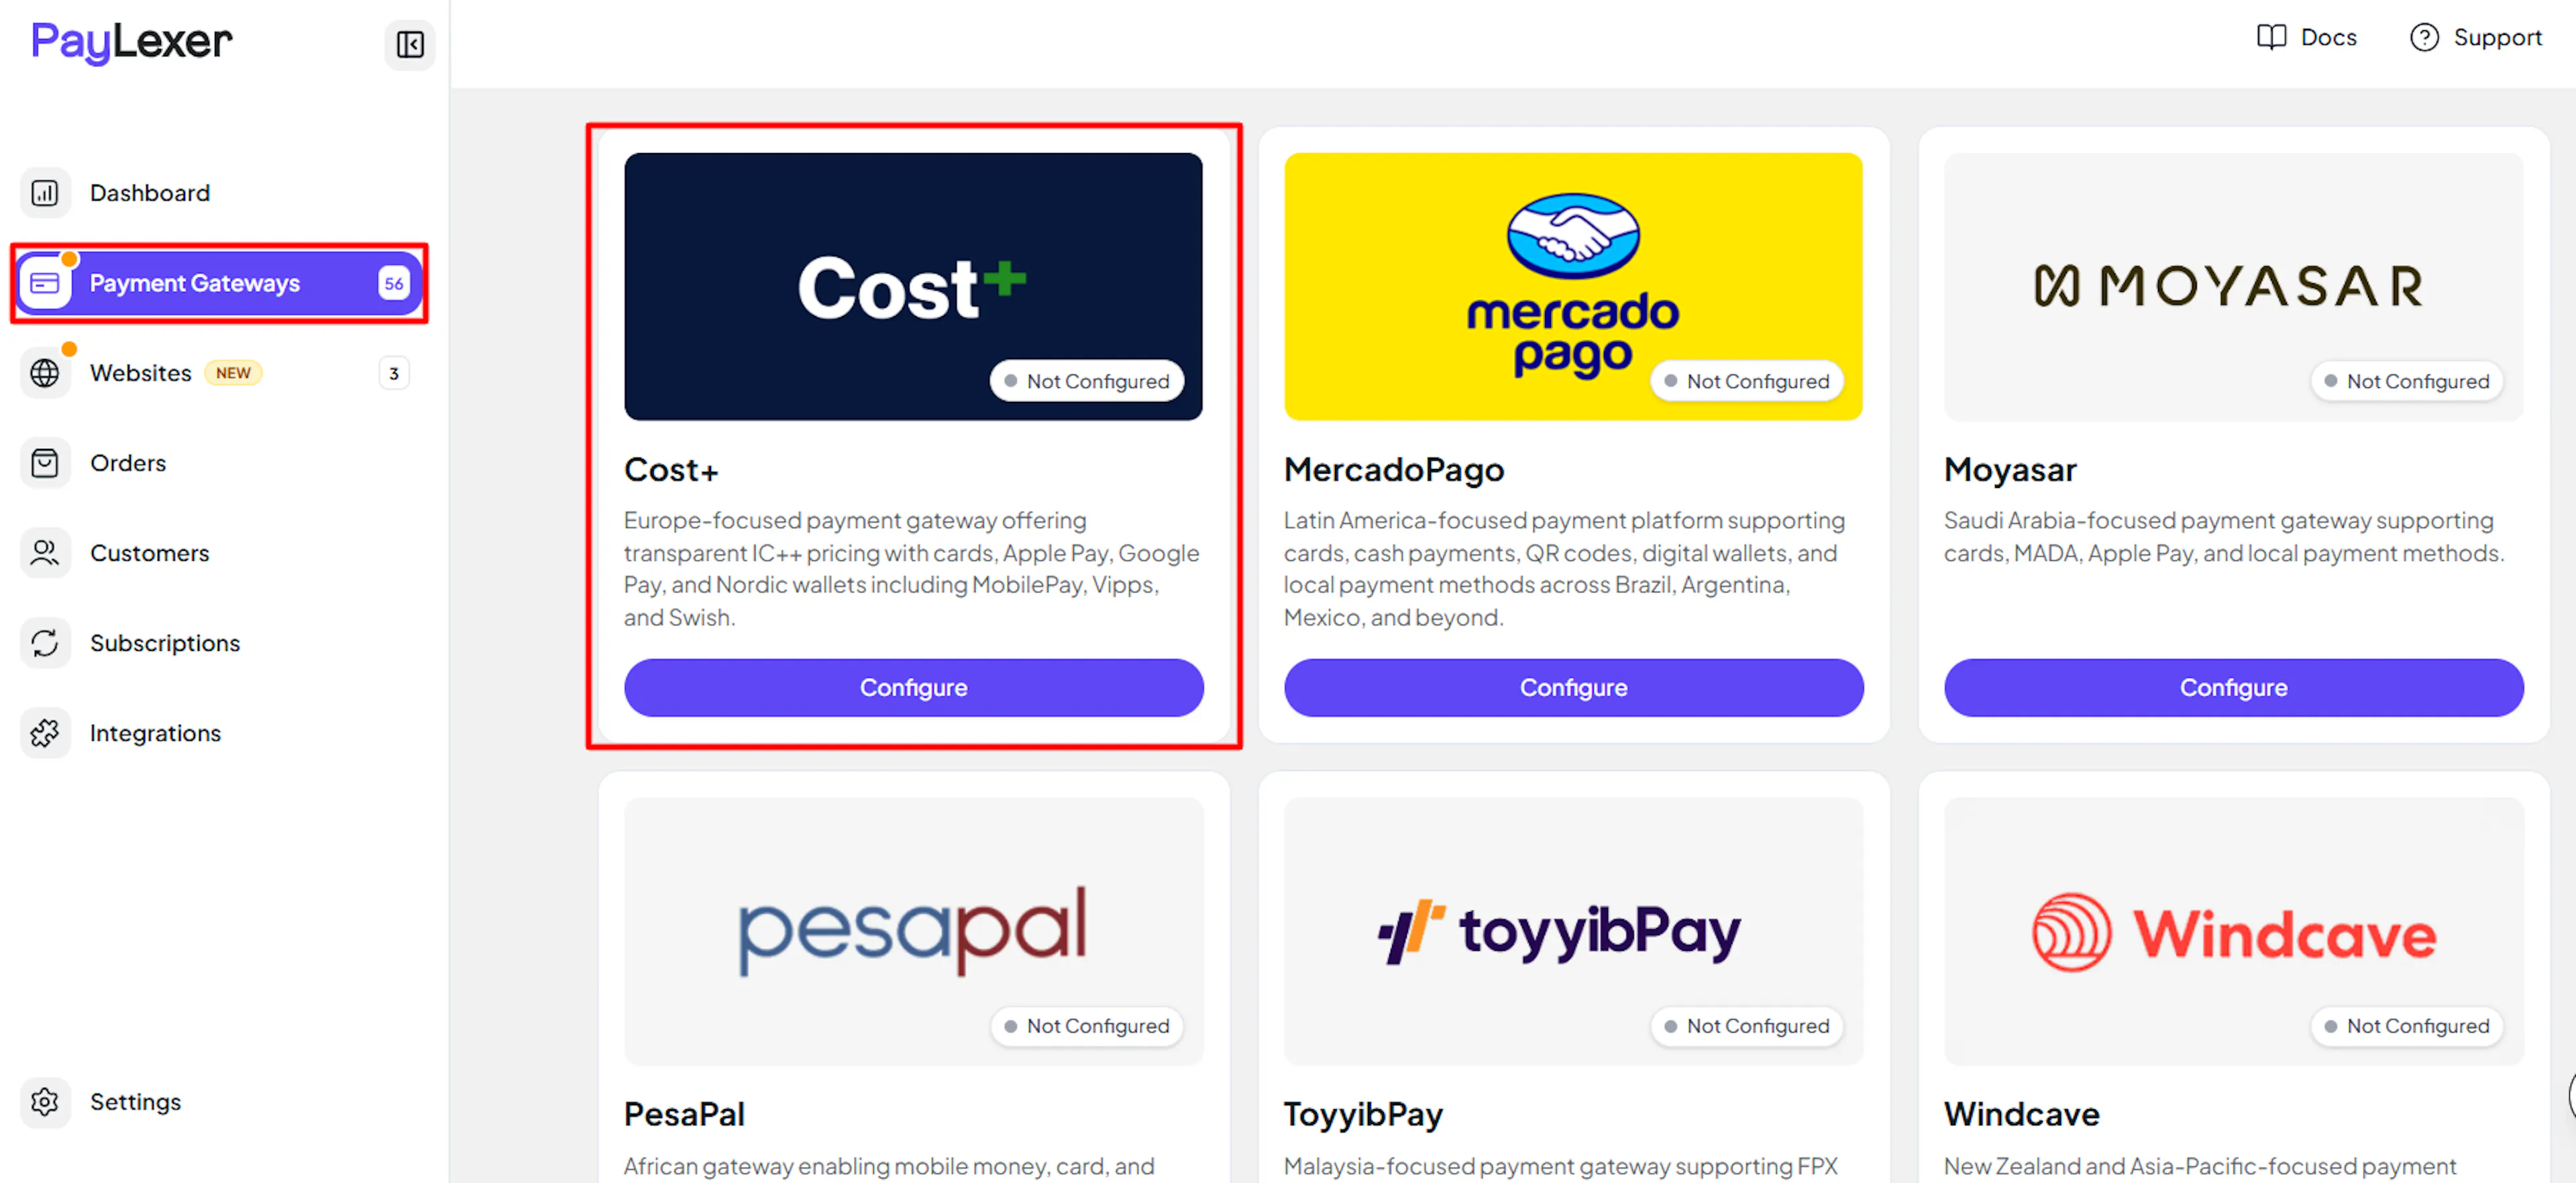
Log in to your PayLexer dashboard and navigate to Payment Gateways -> Cost+.
Enter your credentials
Paste the API Key you copied from Cost+.
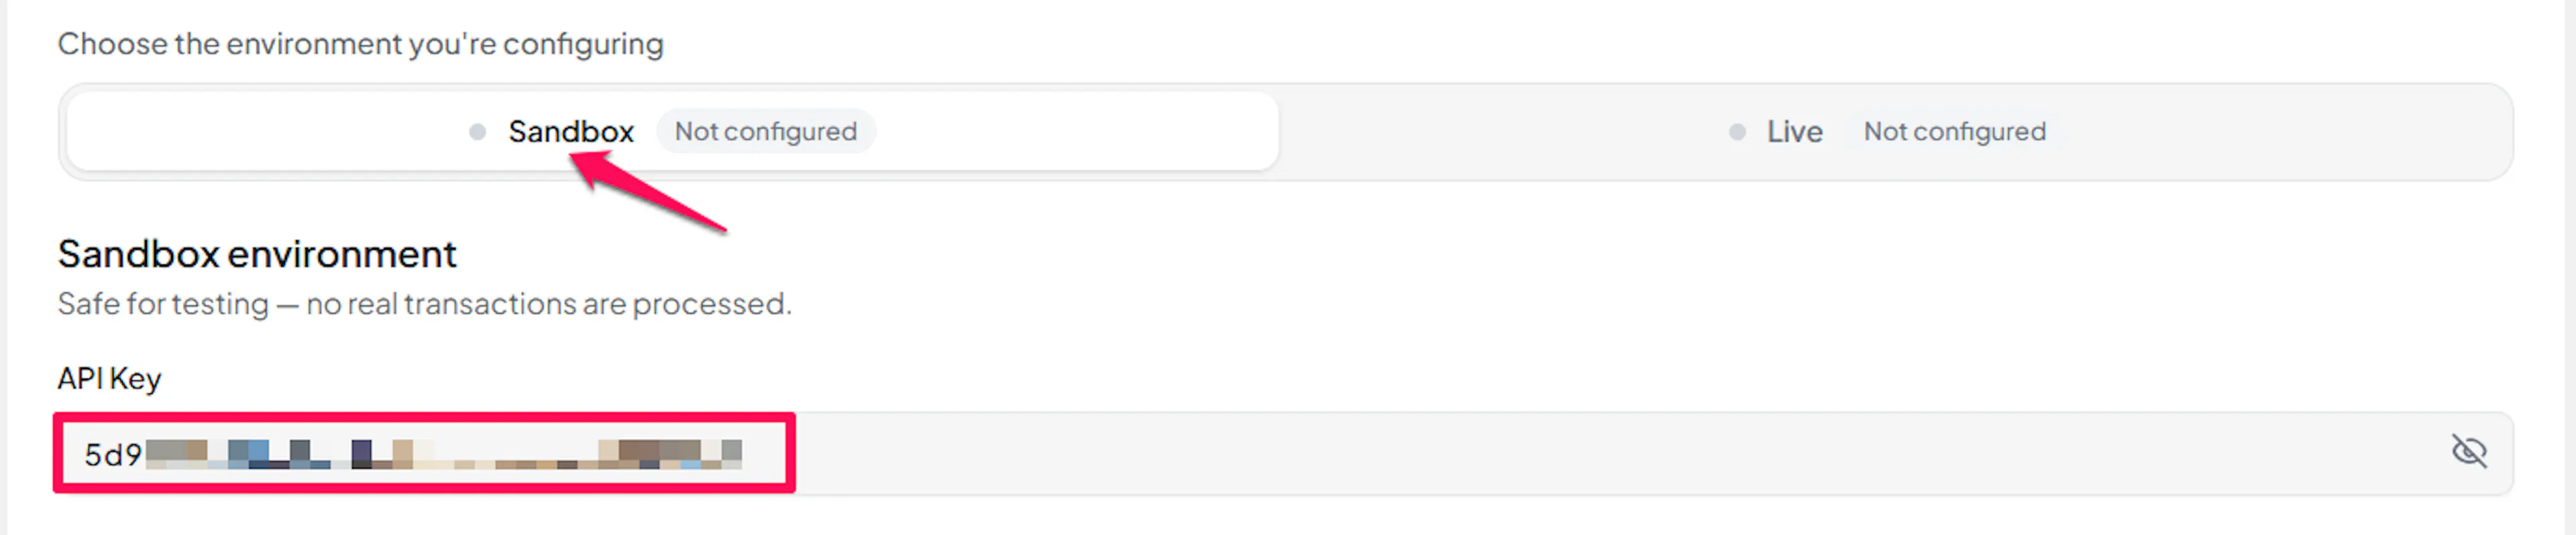

Understanding Live/Production and Sandbox Settings:
| Environment | Purpose |
|---|---|
| Live / Production (Mandatory) | Used for real transactions. Cannot be empty, even when testing. |
| Test / Sandbox (Optional) | Used for testing only. No real money is processed. |
How PayLexer selects credentials:
- Debug/Test mode ON → Test credentials are used
- Debug/Test mode OFF → Live credentials are used
Test and save
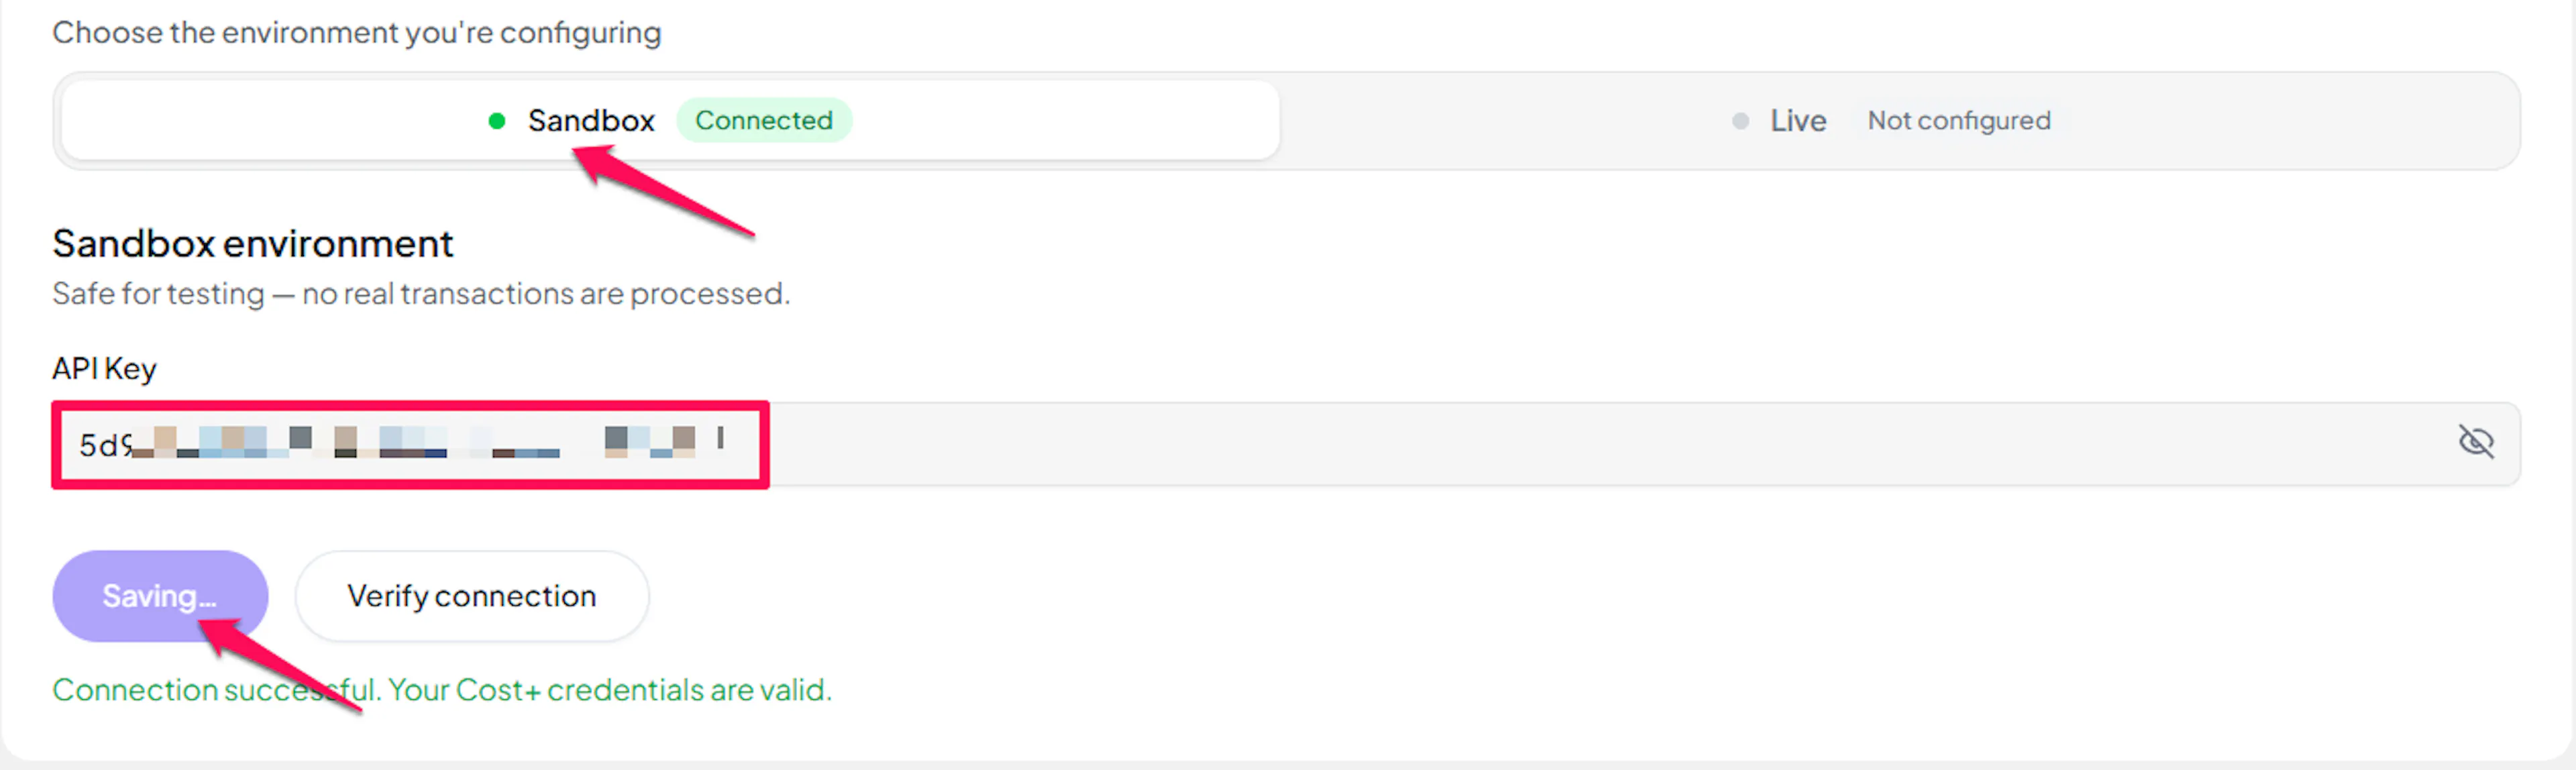
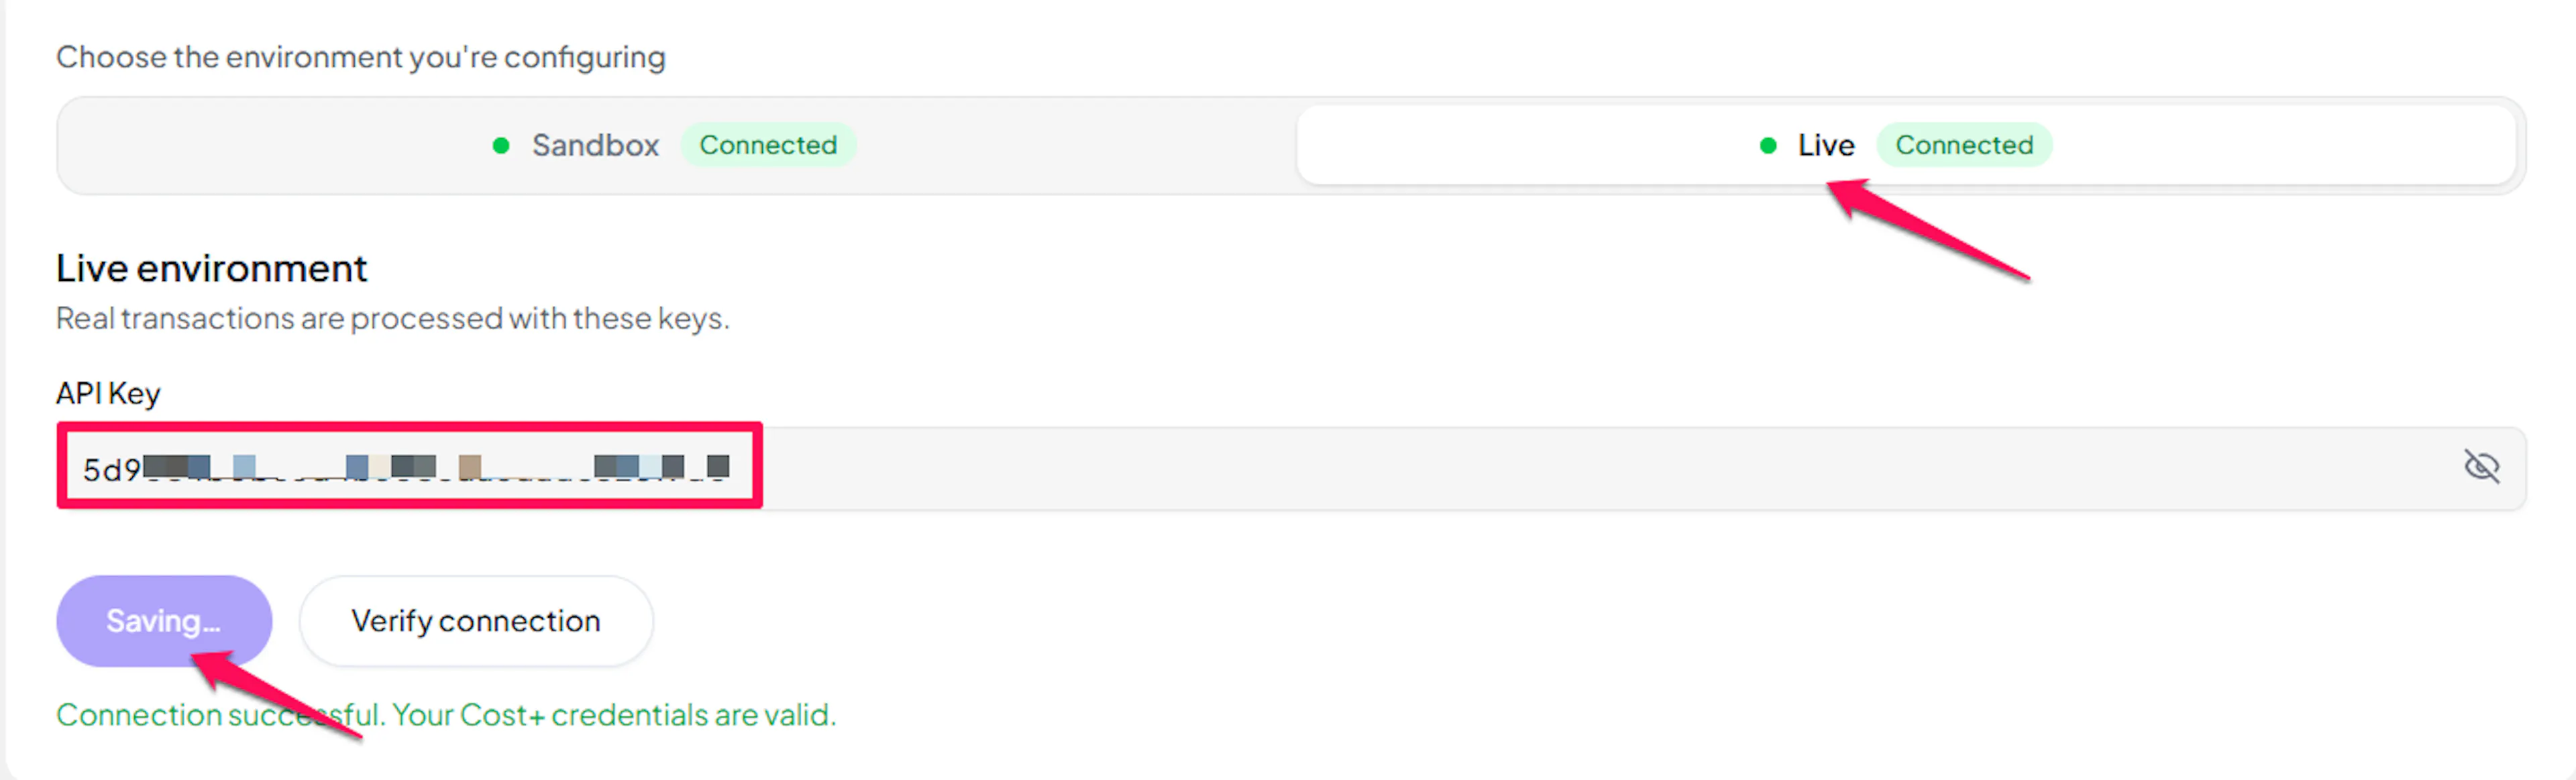
Click Save to save your configuration and verify your credentials. Click Verify Connection to test the connection.
Webhooks (Automatic)
Cost+'s payment notifications are automatic. PayLexer registers a unique notification URL every time it creates a checkout session, so there is nothing to copy, paste, or configure in the Cost+ Merchant Portal, for either your sandbox or your live website.
Benefits of Webhooks:
- Instant payment status updates
- Automatic order reconciliation
- Accurate failure and cancellation records
How PayLexer handles the notification:
- Cost+ sends no signature, HMAC, or secret with its notification, so PayLexer never relies on it alone
- Before any order is updated, PayLexer independently checks the payment's status directly with Cost+ and confirms it actually changed, for that order
- A reported change that PayLexer cannot independently confirm is discarded instead of being applied
- Cancelled payments are recorded as cancelled, kept distinct from failed or expired payments
- If a notification never arrives, PayLexer automatically re-checks any payment left unresolved for too long, so a missed notification does not leave an order stuck pending
Cost+ does not send a notification when a refund completes. Instead, PayLexer automatically checks Cost+ for refund status roughly every 30 minutes and updates your orders accordingly. This applies whether the refund was created through PayLexer or directly in the Cost+ Merchant Portal.
Integrate Cost+ to Your Website
If you have already added and configured your site, you can enable Cost+ in your existing setup.
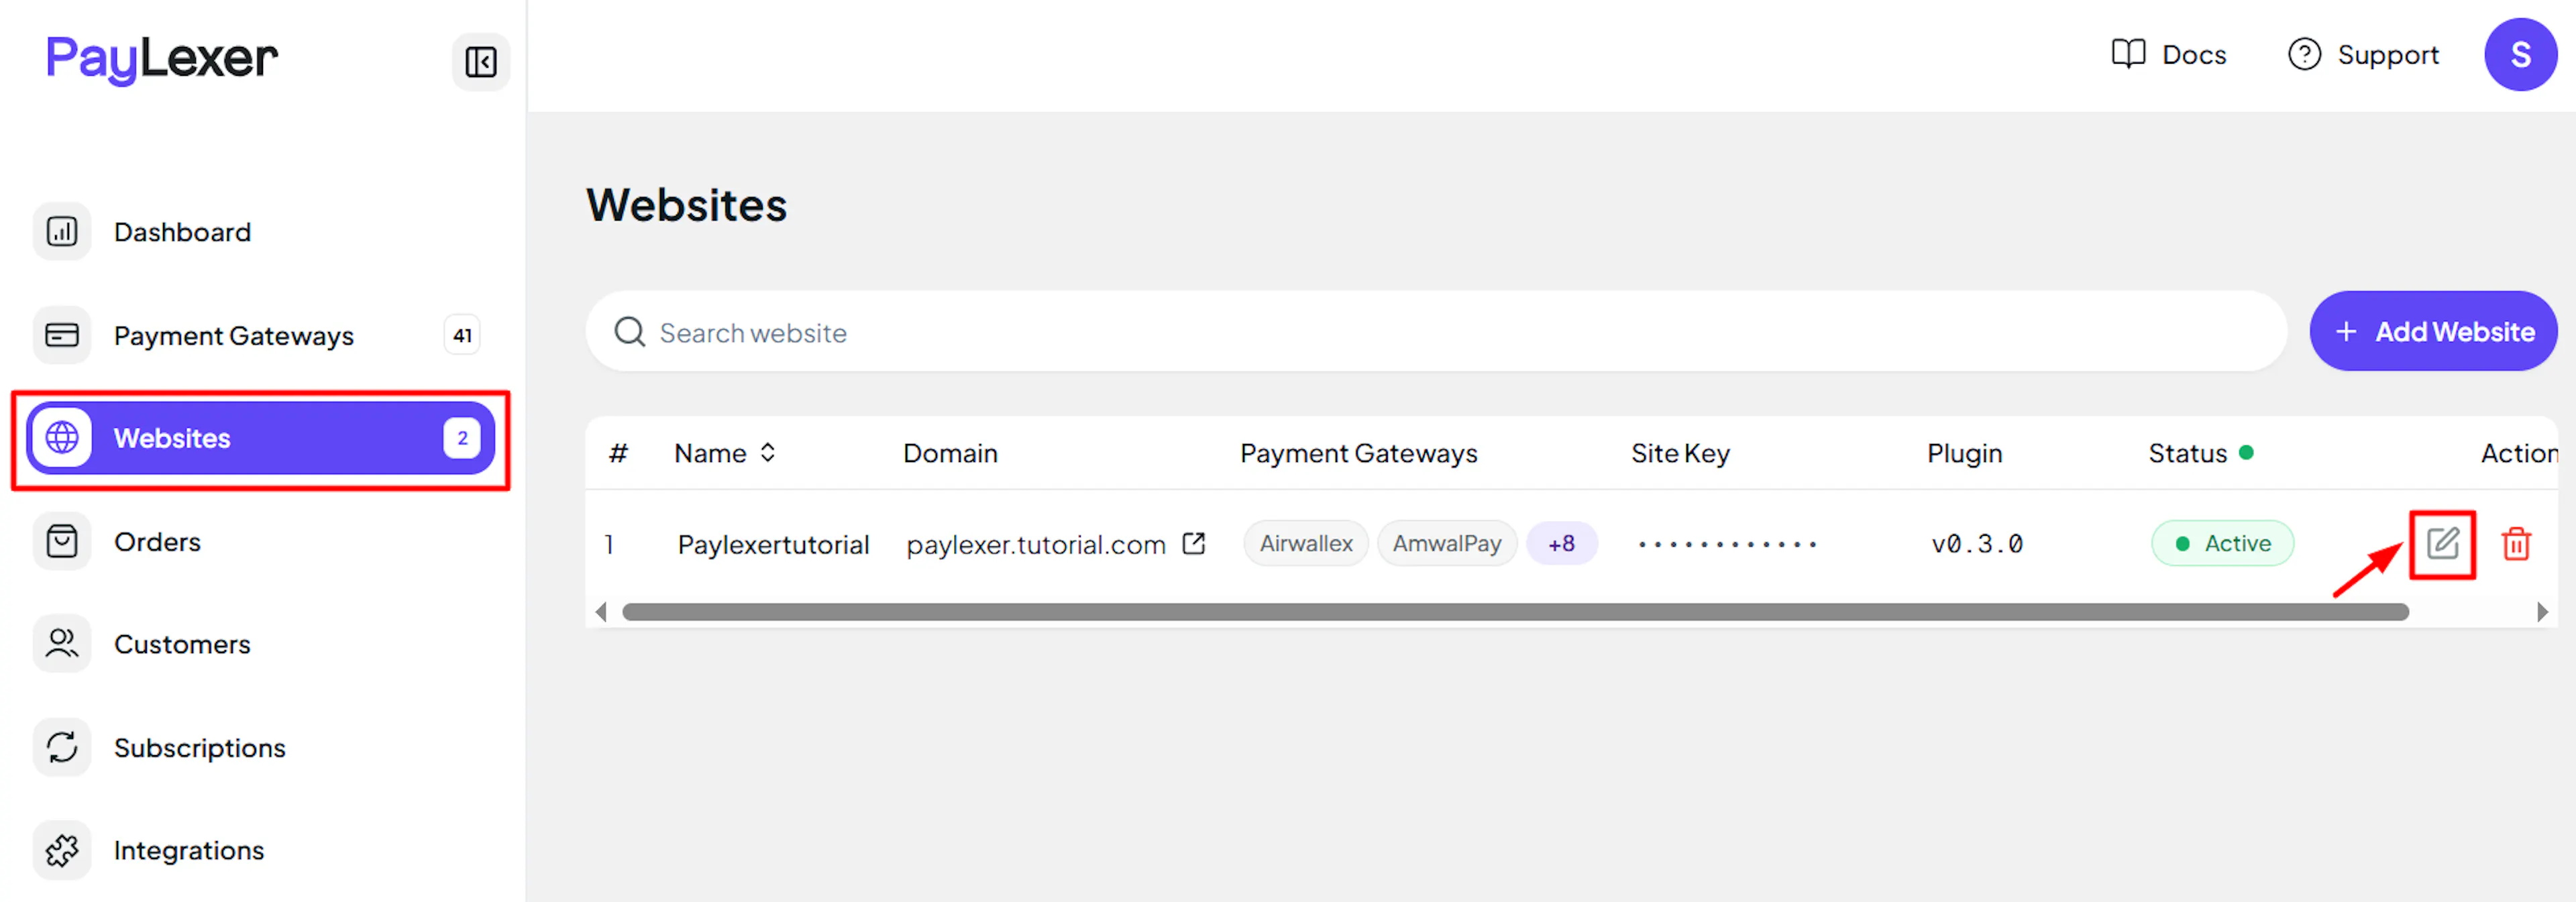
Go to Websites
Navigate to Websites in your PayLexer dashboard.
Edit your website
Click the Edit Icon of your added website.
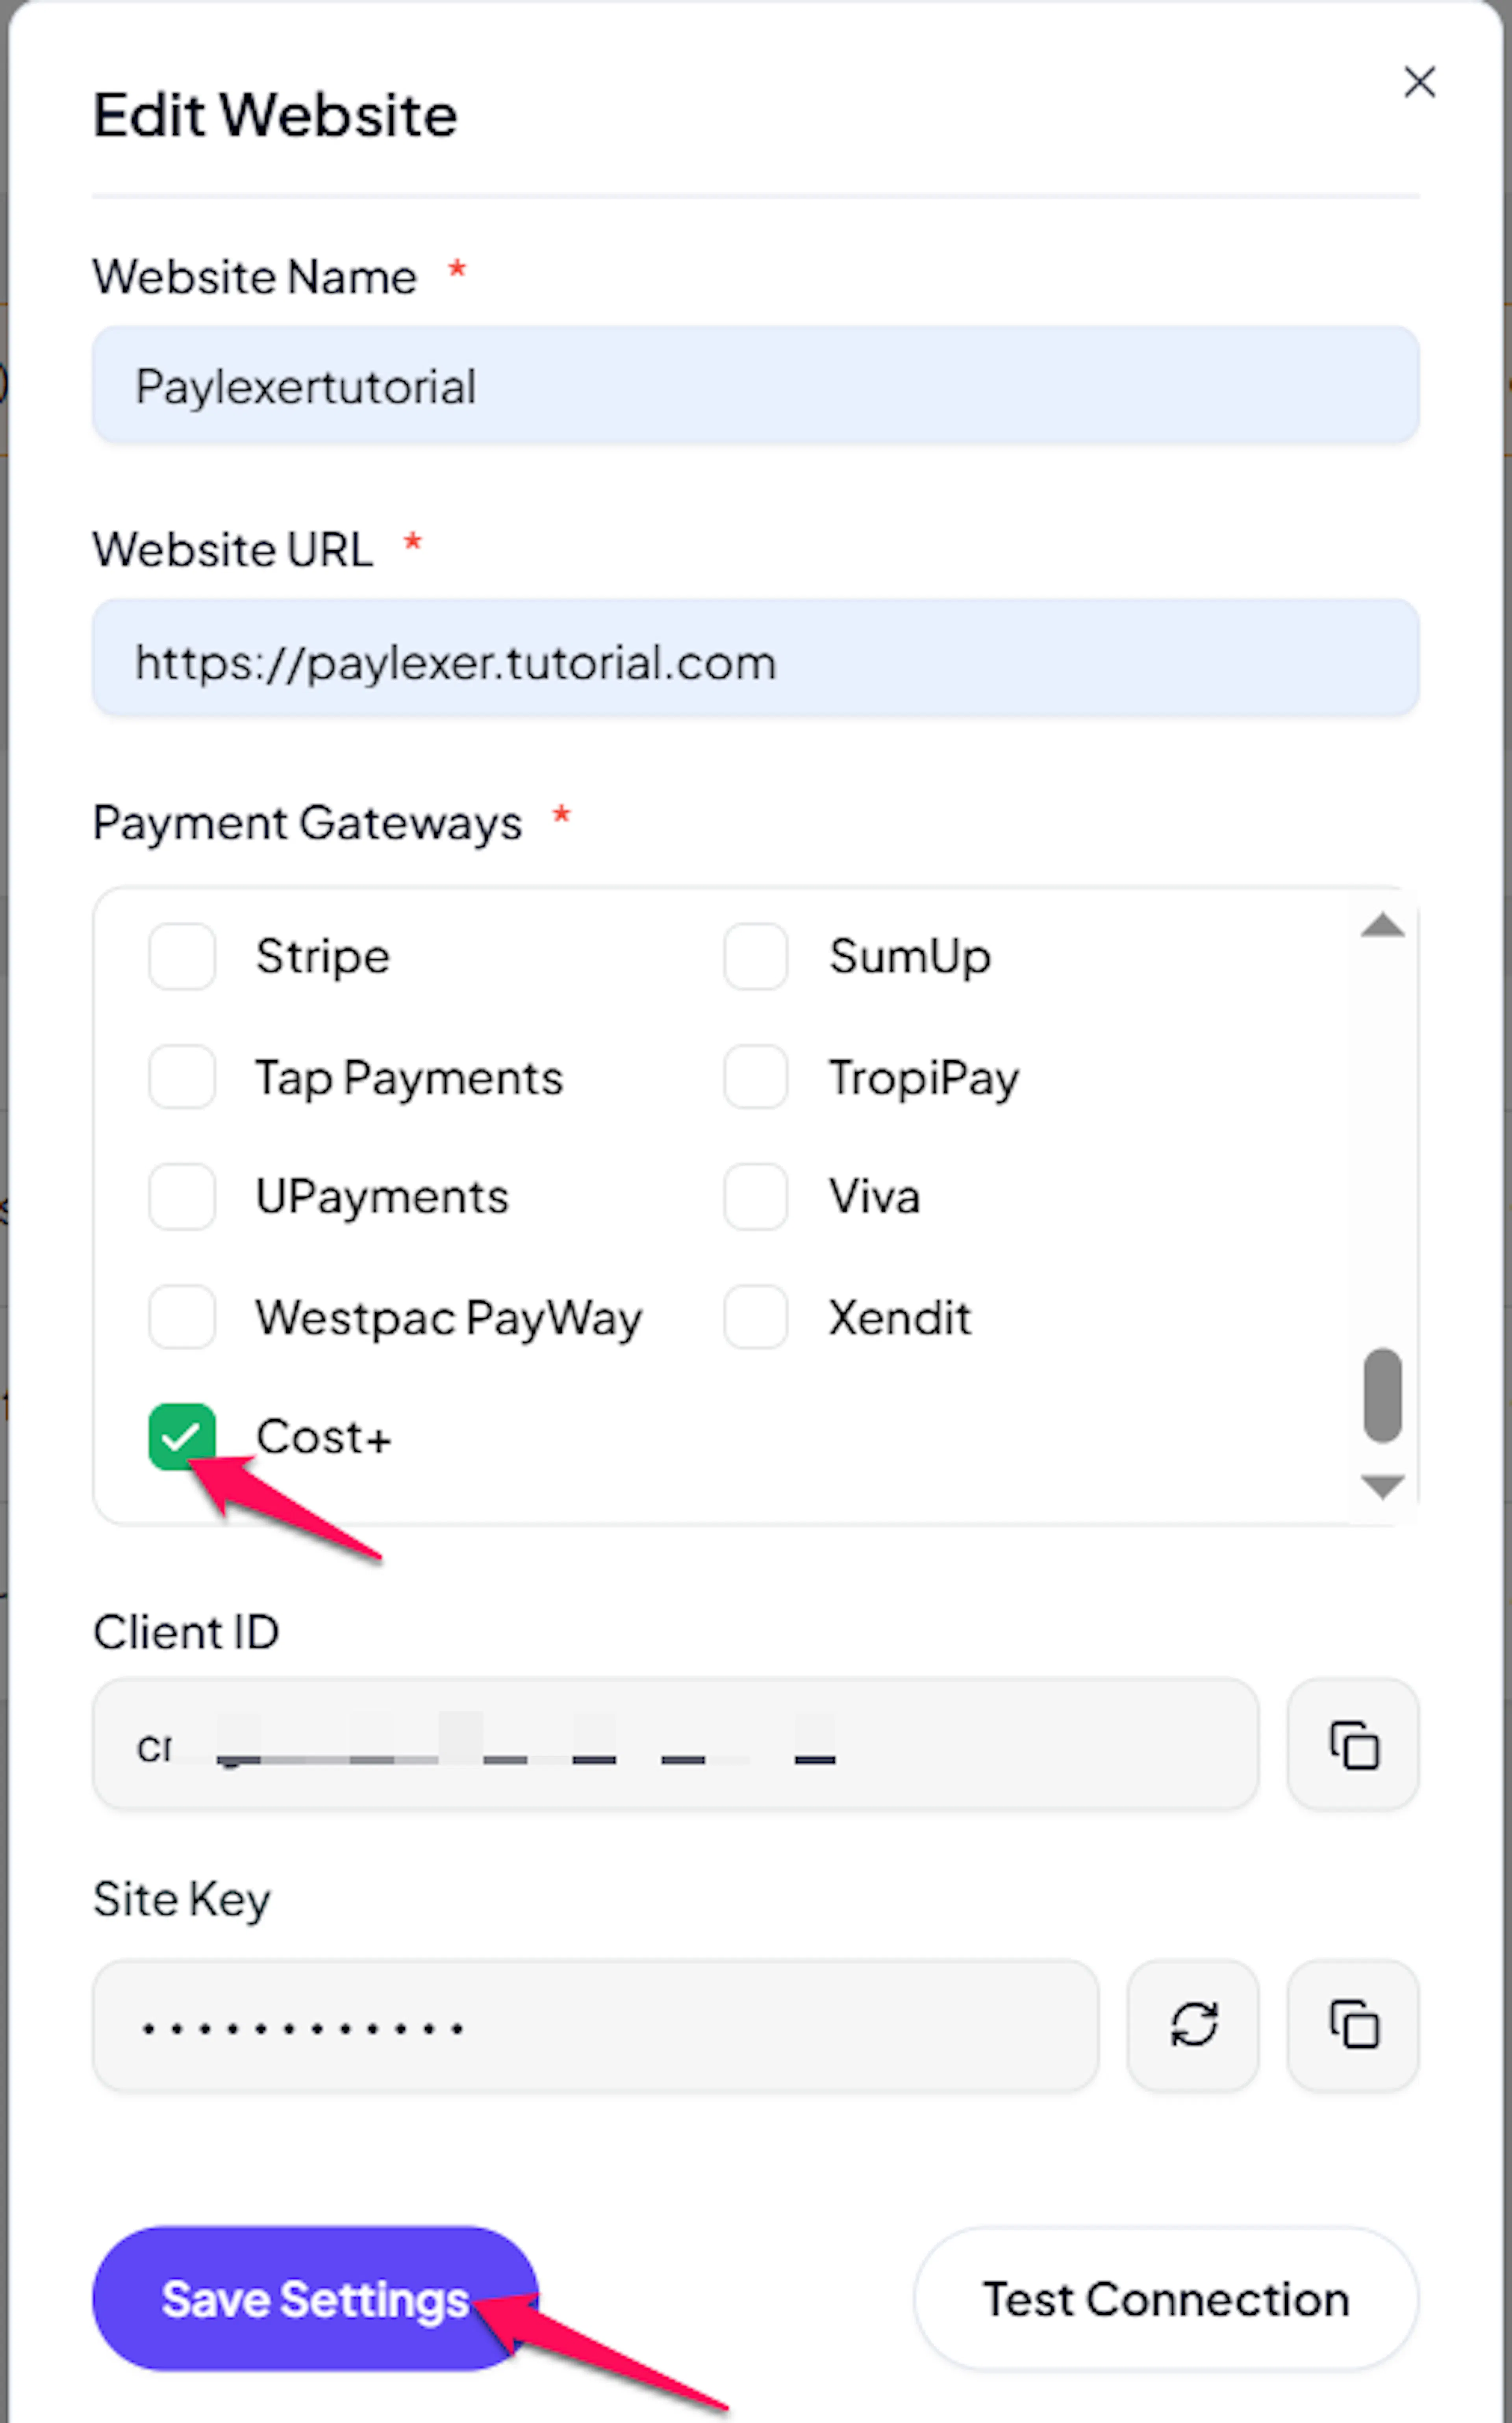
Enable Cost+
Click the checkbox to enable Cost+ for the website.
If you haven't added a website yet, Continue to Add Your Website →
Troubleshooting
Best Practices
- Test in sandbox before enabling production. Complete a full payment with sandbox credentials, and confirm the order updates in PayLexer, before switching to live.
- Keep your API Key confidential, and contact Cost+ to rotate it if you suspect exposure.
- Enable the currencies you plan to charge in for your live website in the Cost+ Merchant Portal before going live, since a new live website starts with none enabled.
- Remember that a payment attempt cannot be cancelled once the shopper reaches Cost+, so tell your support team not to expect a cancel action mid-flow.
- Expect a short delay before a refund appears in PayLexer, since Cost+ sends no refund notification and PayLexer checks periodically instead.
- Use a different gateway for any recurring billing, since Cost+ handles one-time payments only.
FAQs
Still Have Questions?
- Cost+ Support: Cost+ Contact Support
- PayLexer Support: Contact Support