Revolut
Connect Revolut to PayLexer to accept card payments and digital wallet transactions across Europe and beyond.
Revolut is a European digital banking and payments platform used by millions of businesses and consumers worldwide. It provides card payment acceptance, multi-currency accounts, and payment processing for merchants operating in Europe and global markets.
-
Supported Regions (Merchant Accounts): European Economic Area (EEA), United Kingdom, United States, and other supported markets - view full list
-
Supported Currencies: 30+ currencies including EUR, GBP, USD, PLN, CHF, and more
Supported Features
-
One-time payments
-
Refunds
-
Real-time payment status updates
-
Card payments (Visa, Mastercard)
-
Revolut Pay
-
Multi-currency support
Before You Start
Make sure you have:
-
Revolut Business Account – Don't have one? Sign up for Revolut Business →
-
PayLexer Account – Required to configure the integration. Create your account →
-
A website where you want to integrate
Looking for a different payment processor? View all supported gateways →
Configuring Revolut
You need an API Key from Revolut Business for this integration.
Getting API Credentials
Log in to Revolut Business
Log in to your Revolut Business Dashboard.
Navigate to APIs
Go to Settings Icon
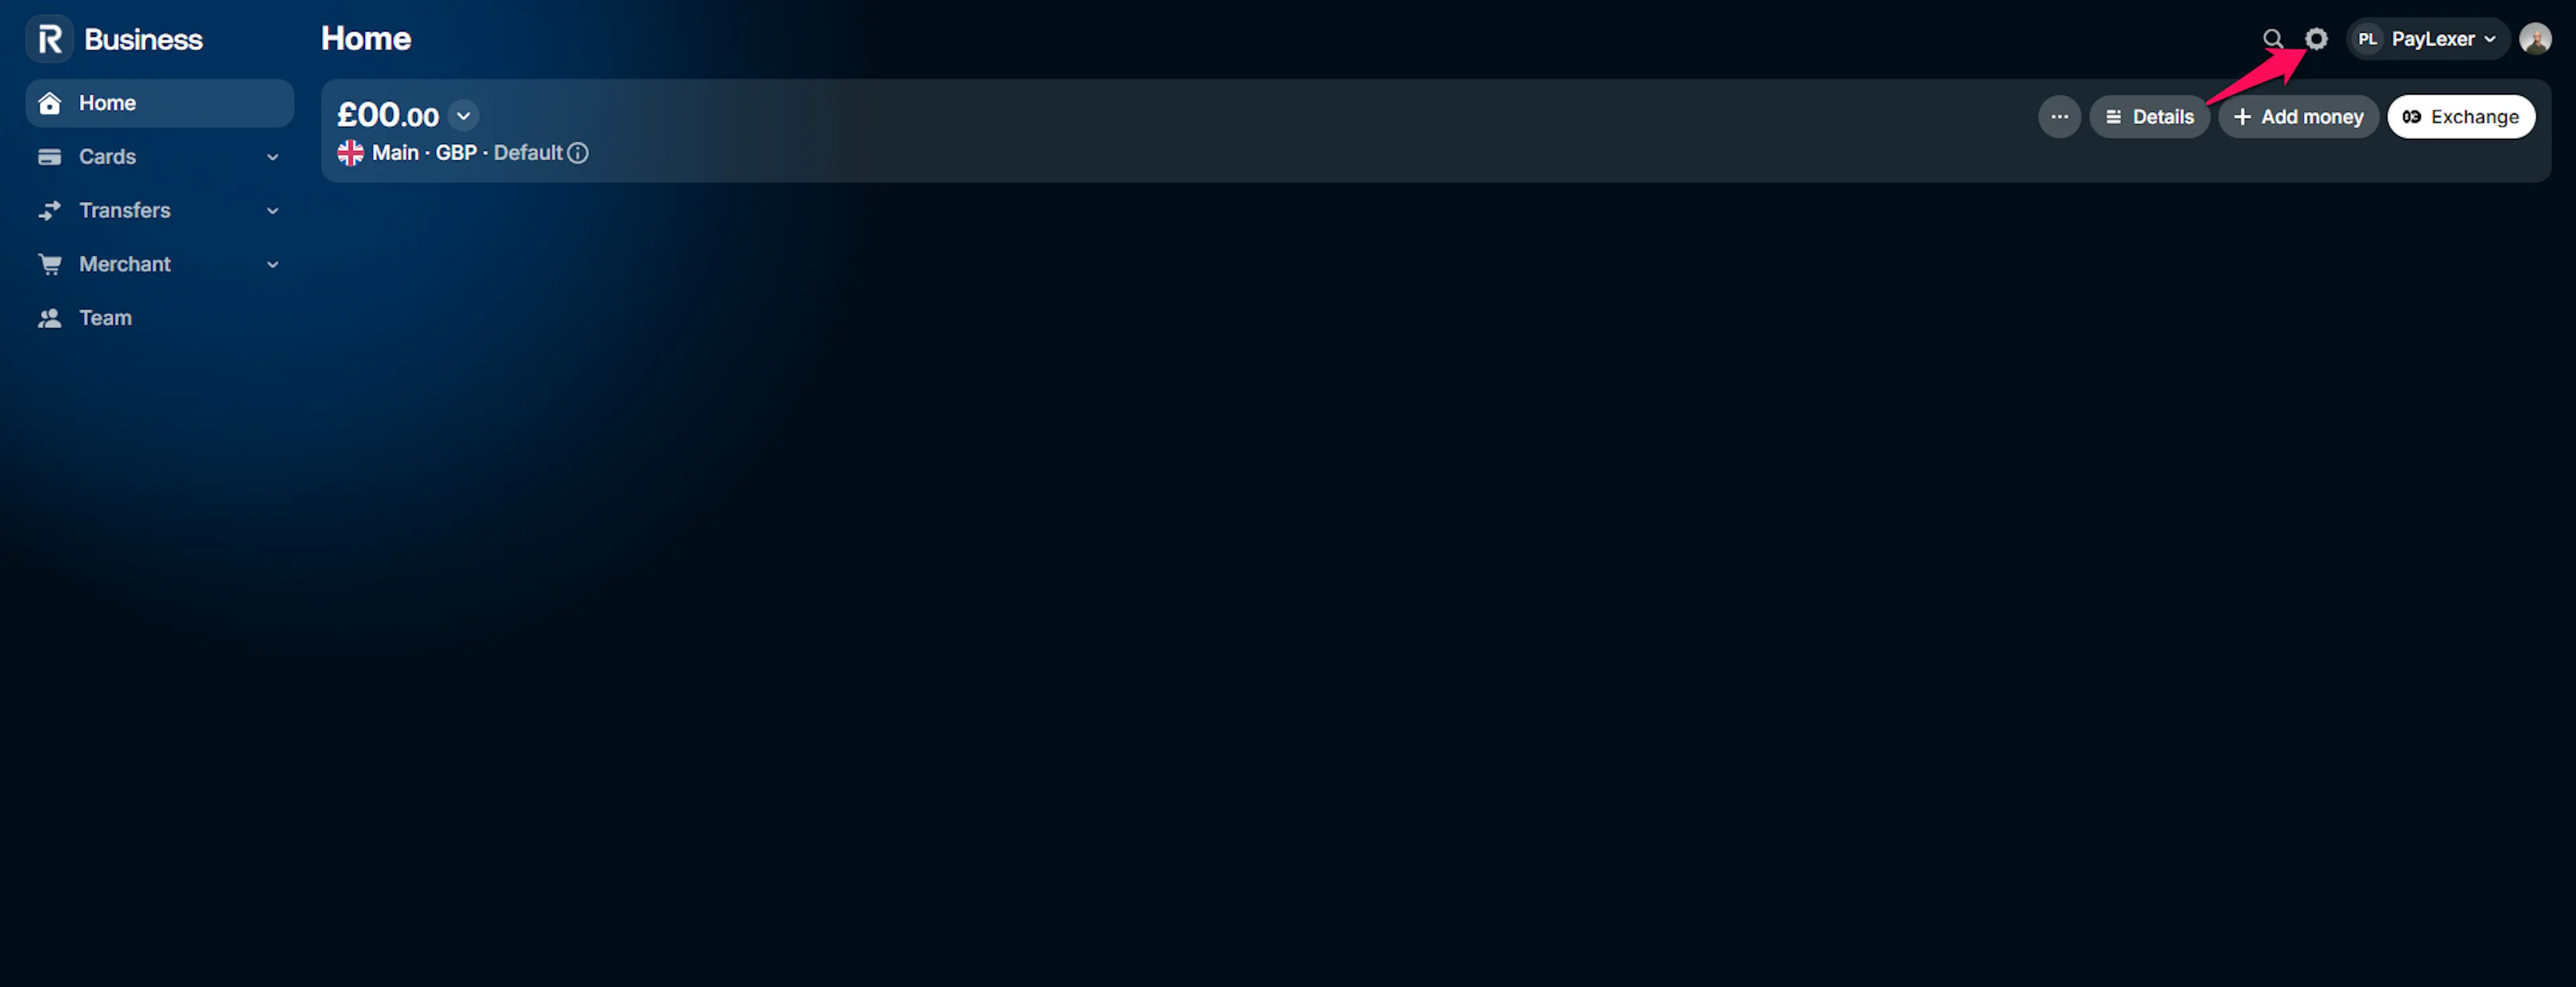
Generate and copy your API Key
Then go to APIs → Merchant APIs, copy API secret keyand API public key.
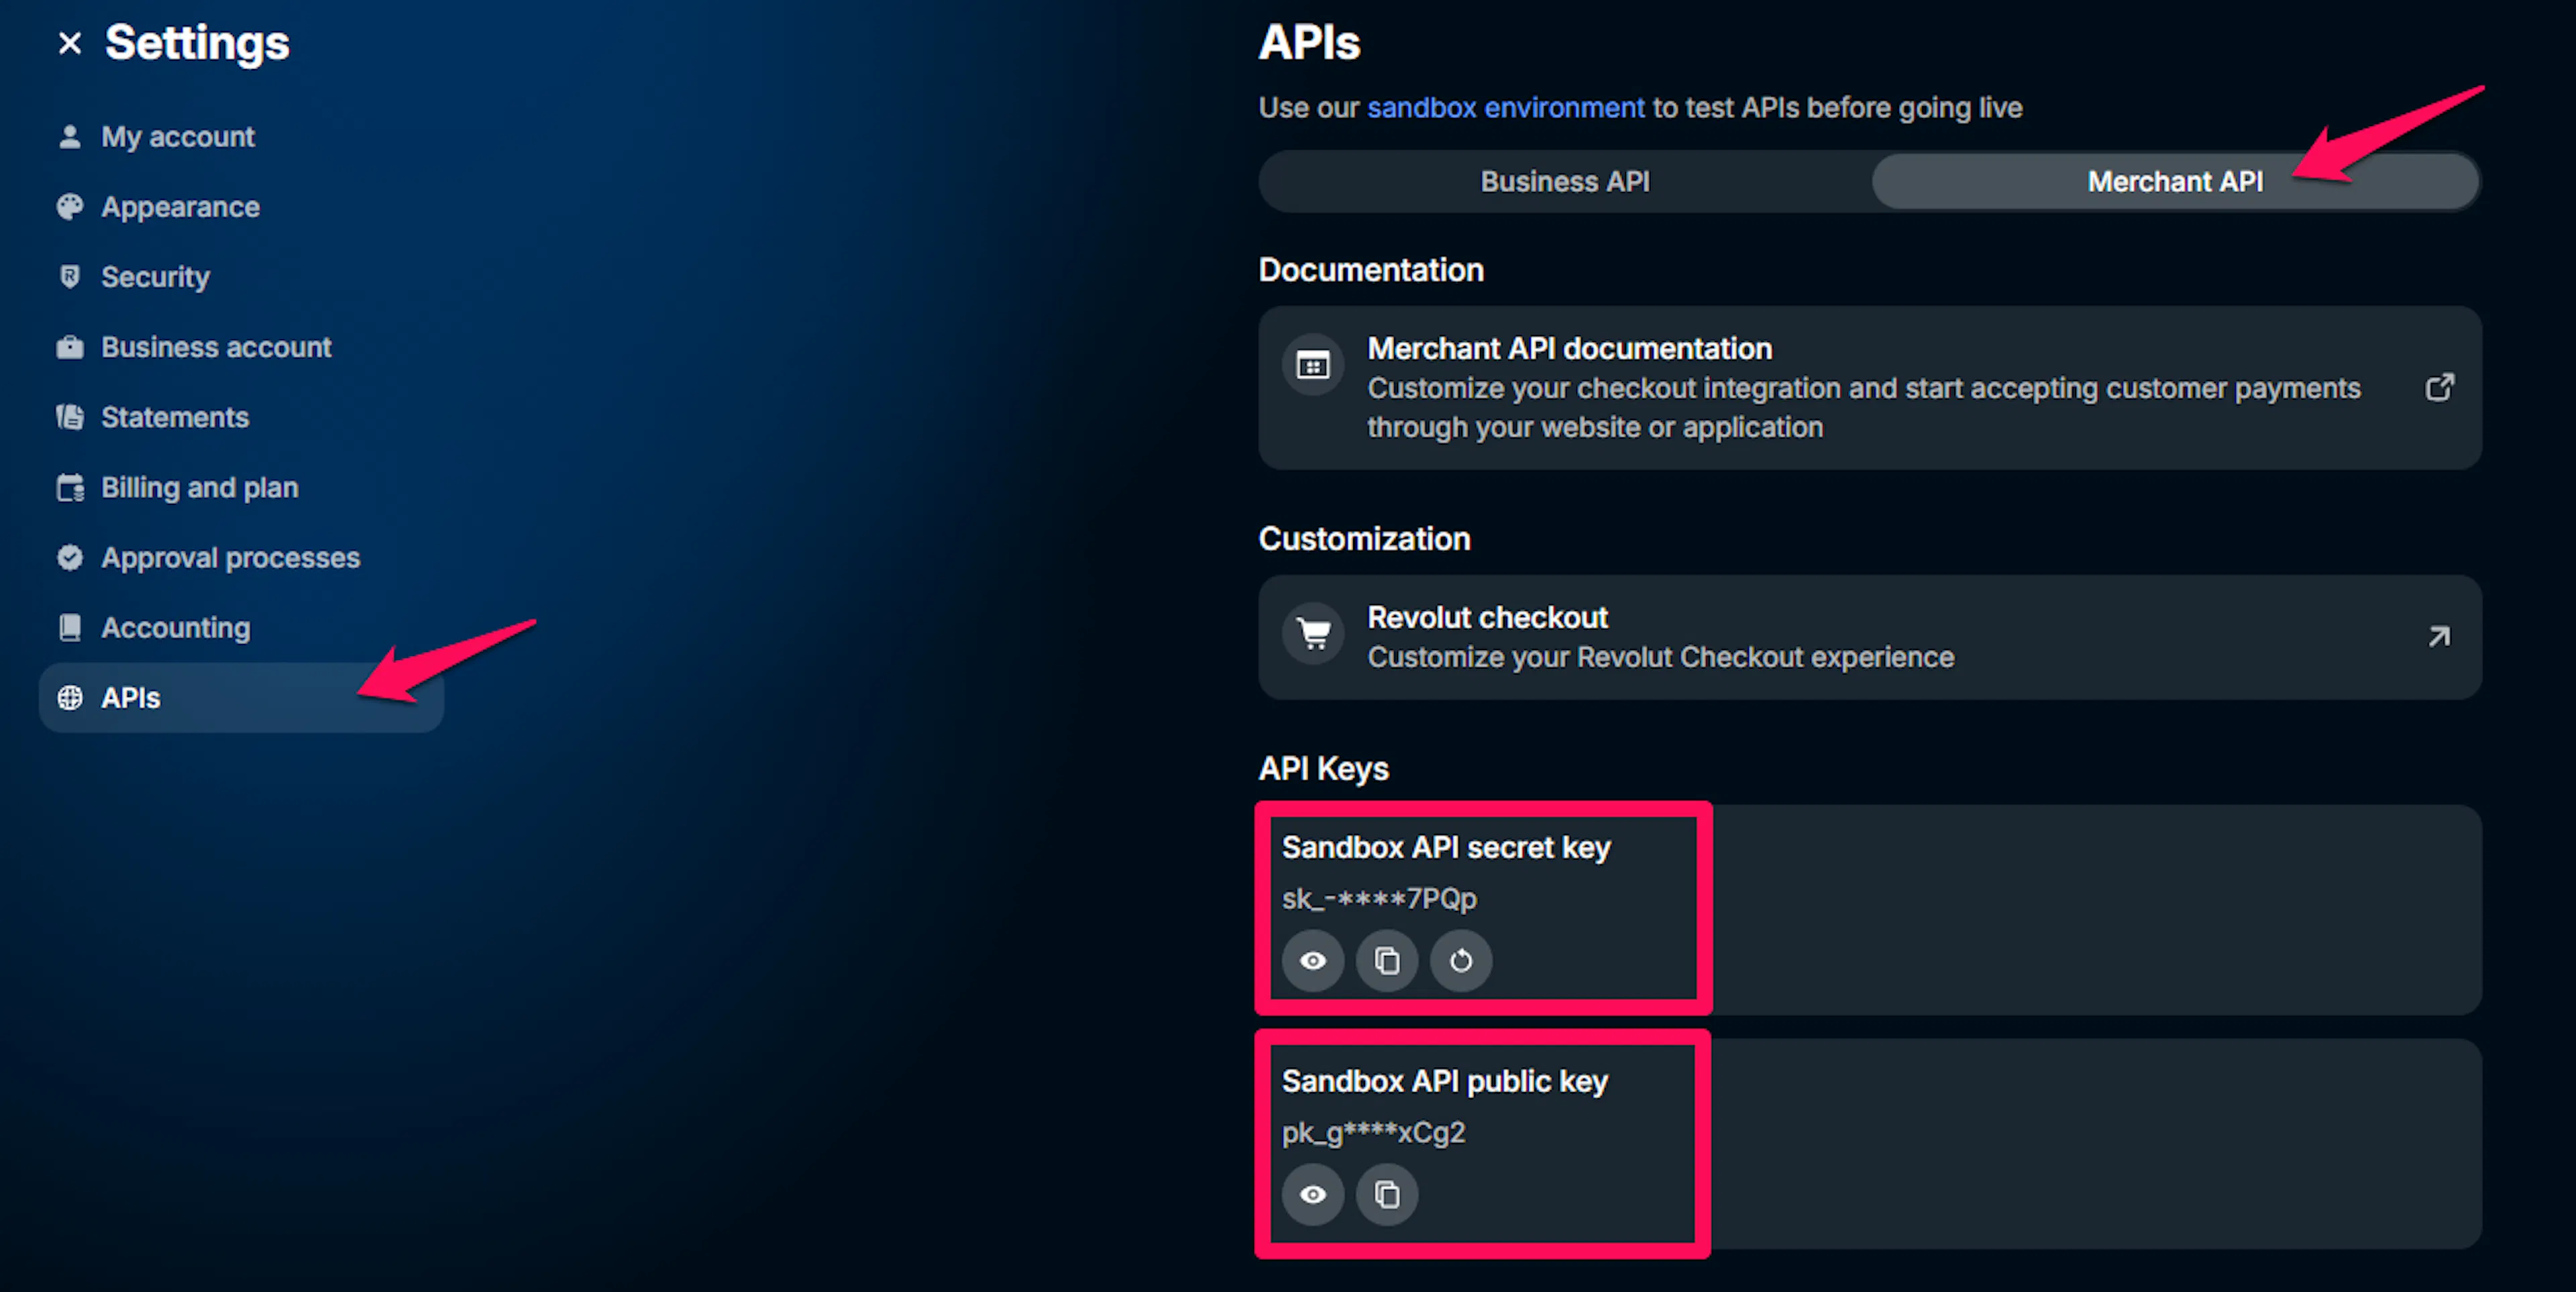
Revolut provides separate API keys for Sandbox and Production environments. Use Sandbox for testing and Production for live transactions.
Adding Credentials to PayLexer
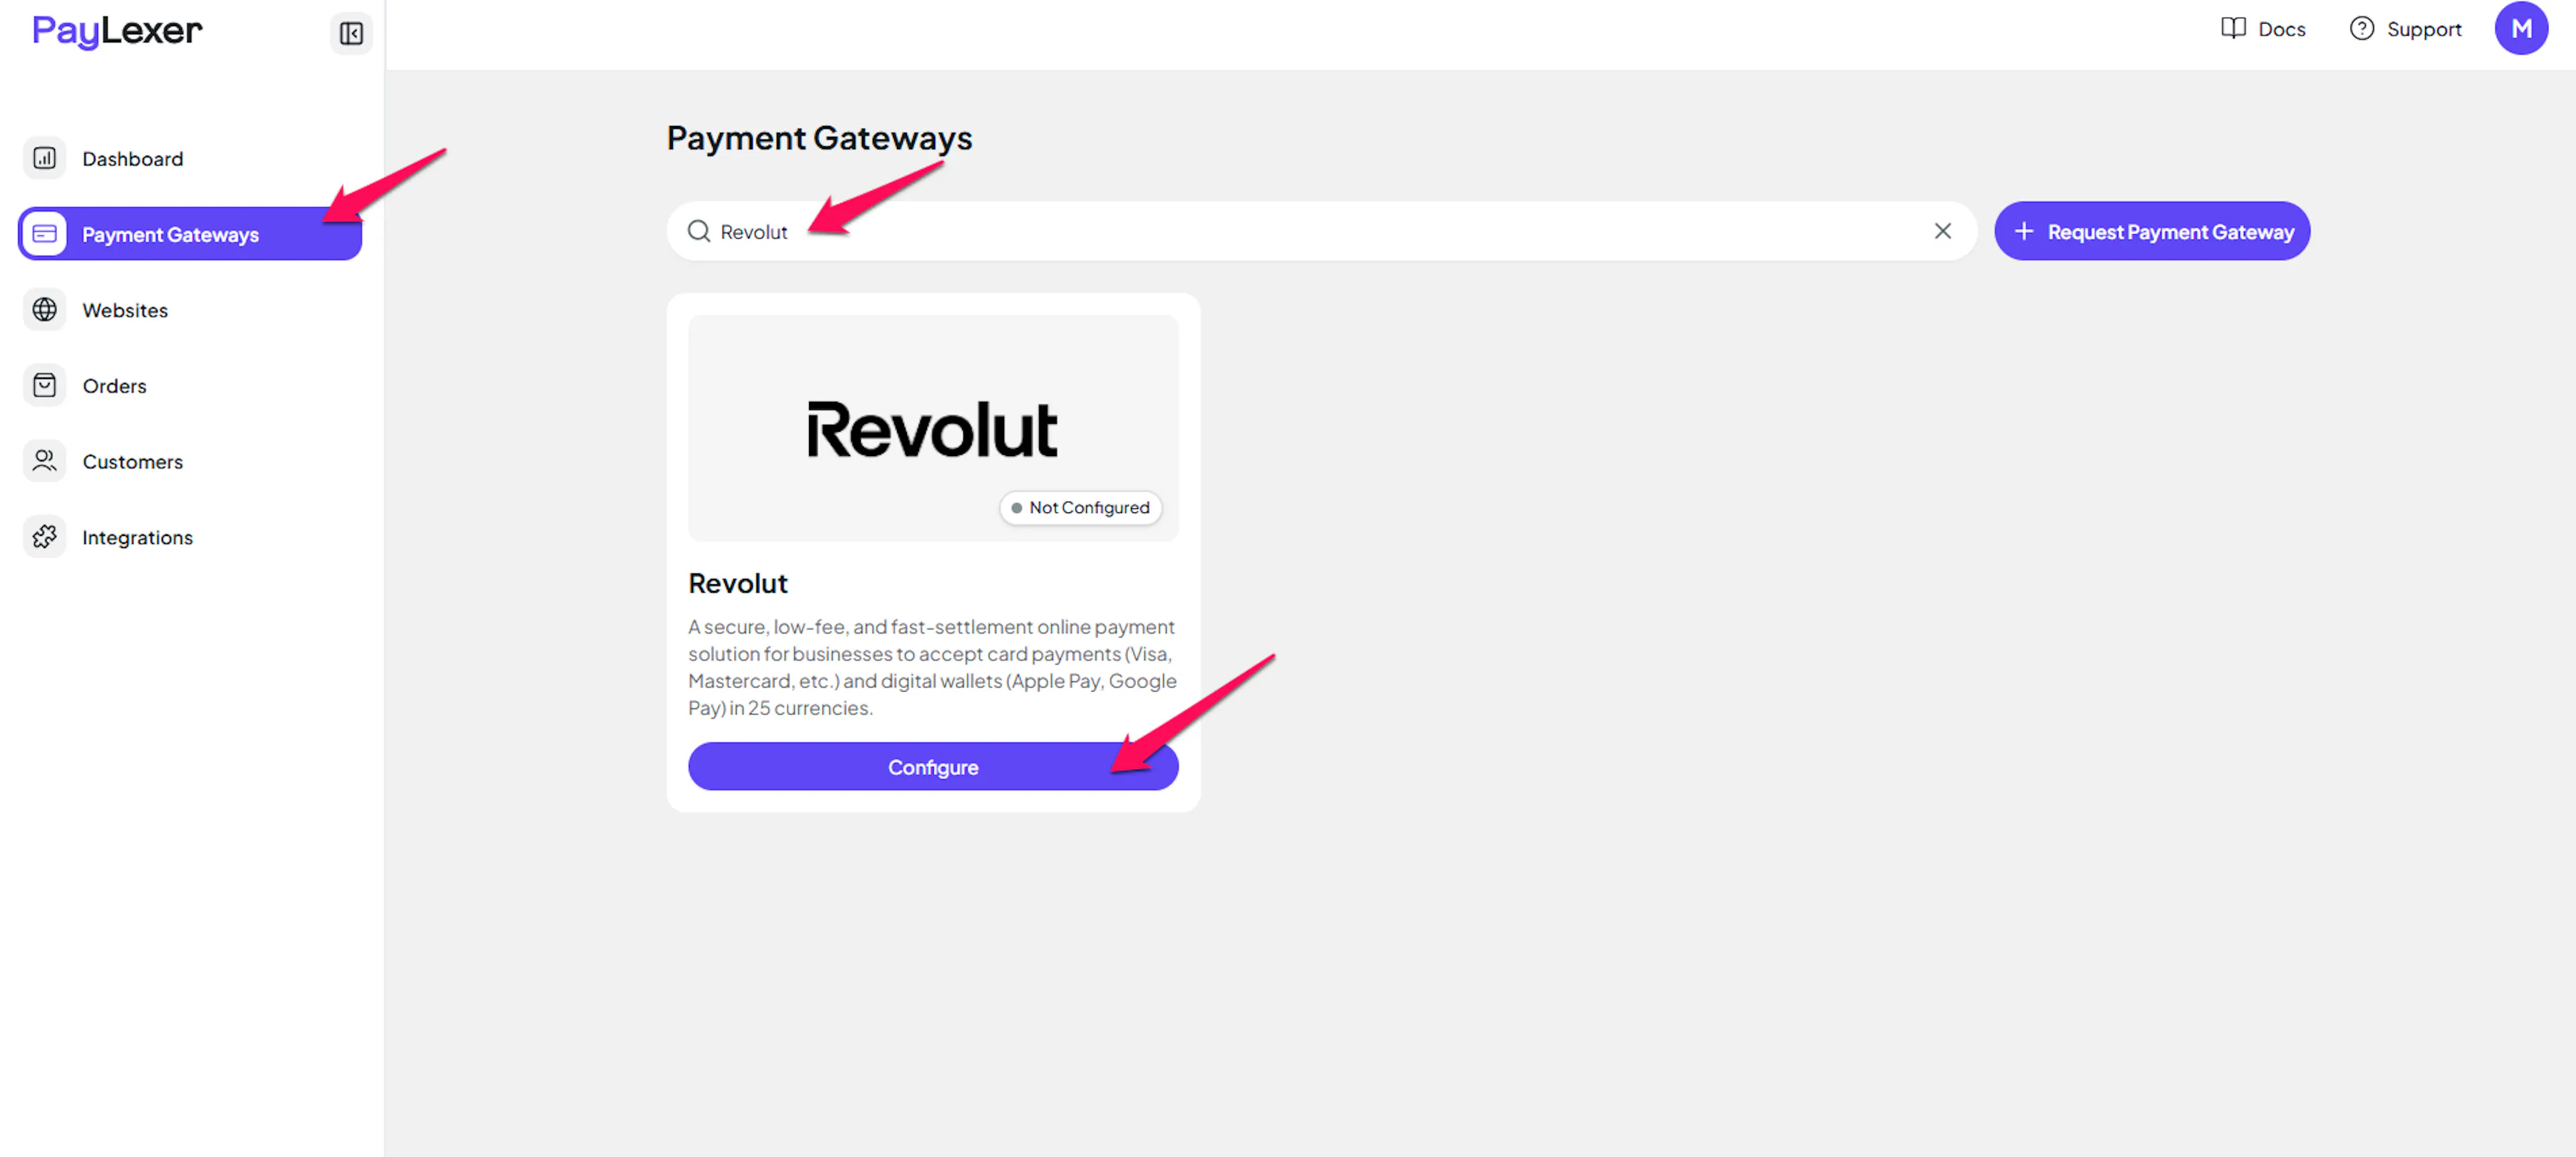
Open PayLexer Dashboard
Log in to your PayLexer dashboard and navigate to Payment Gateways → Revolut.
Enter your credentials
Paste the API Key you copied from Revolut and click on Get Secret/ Update Secret.
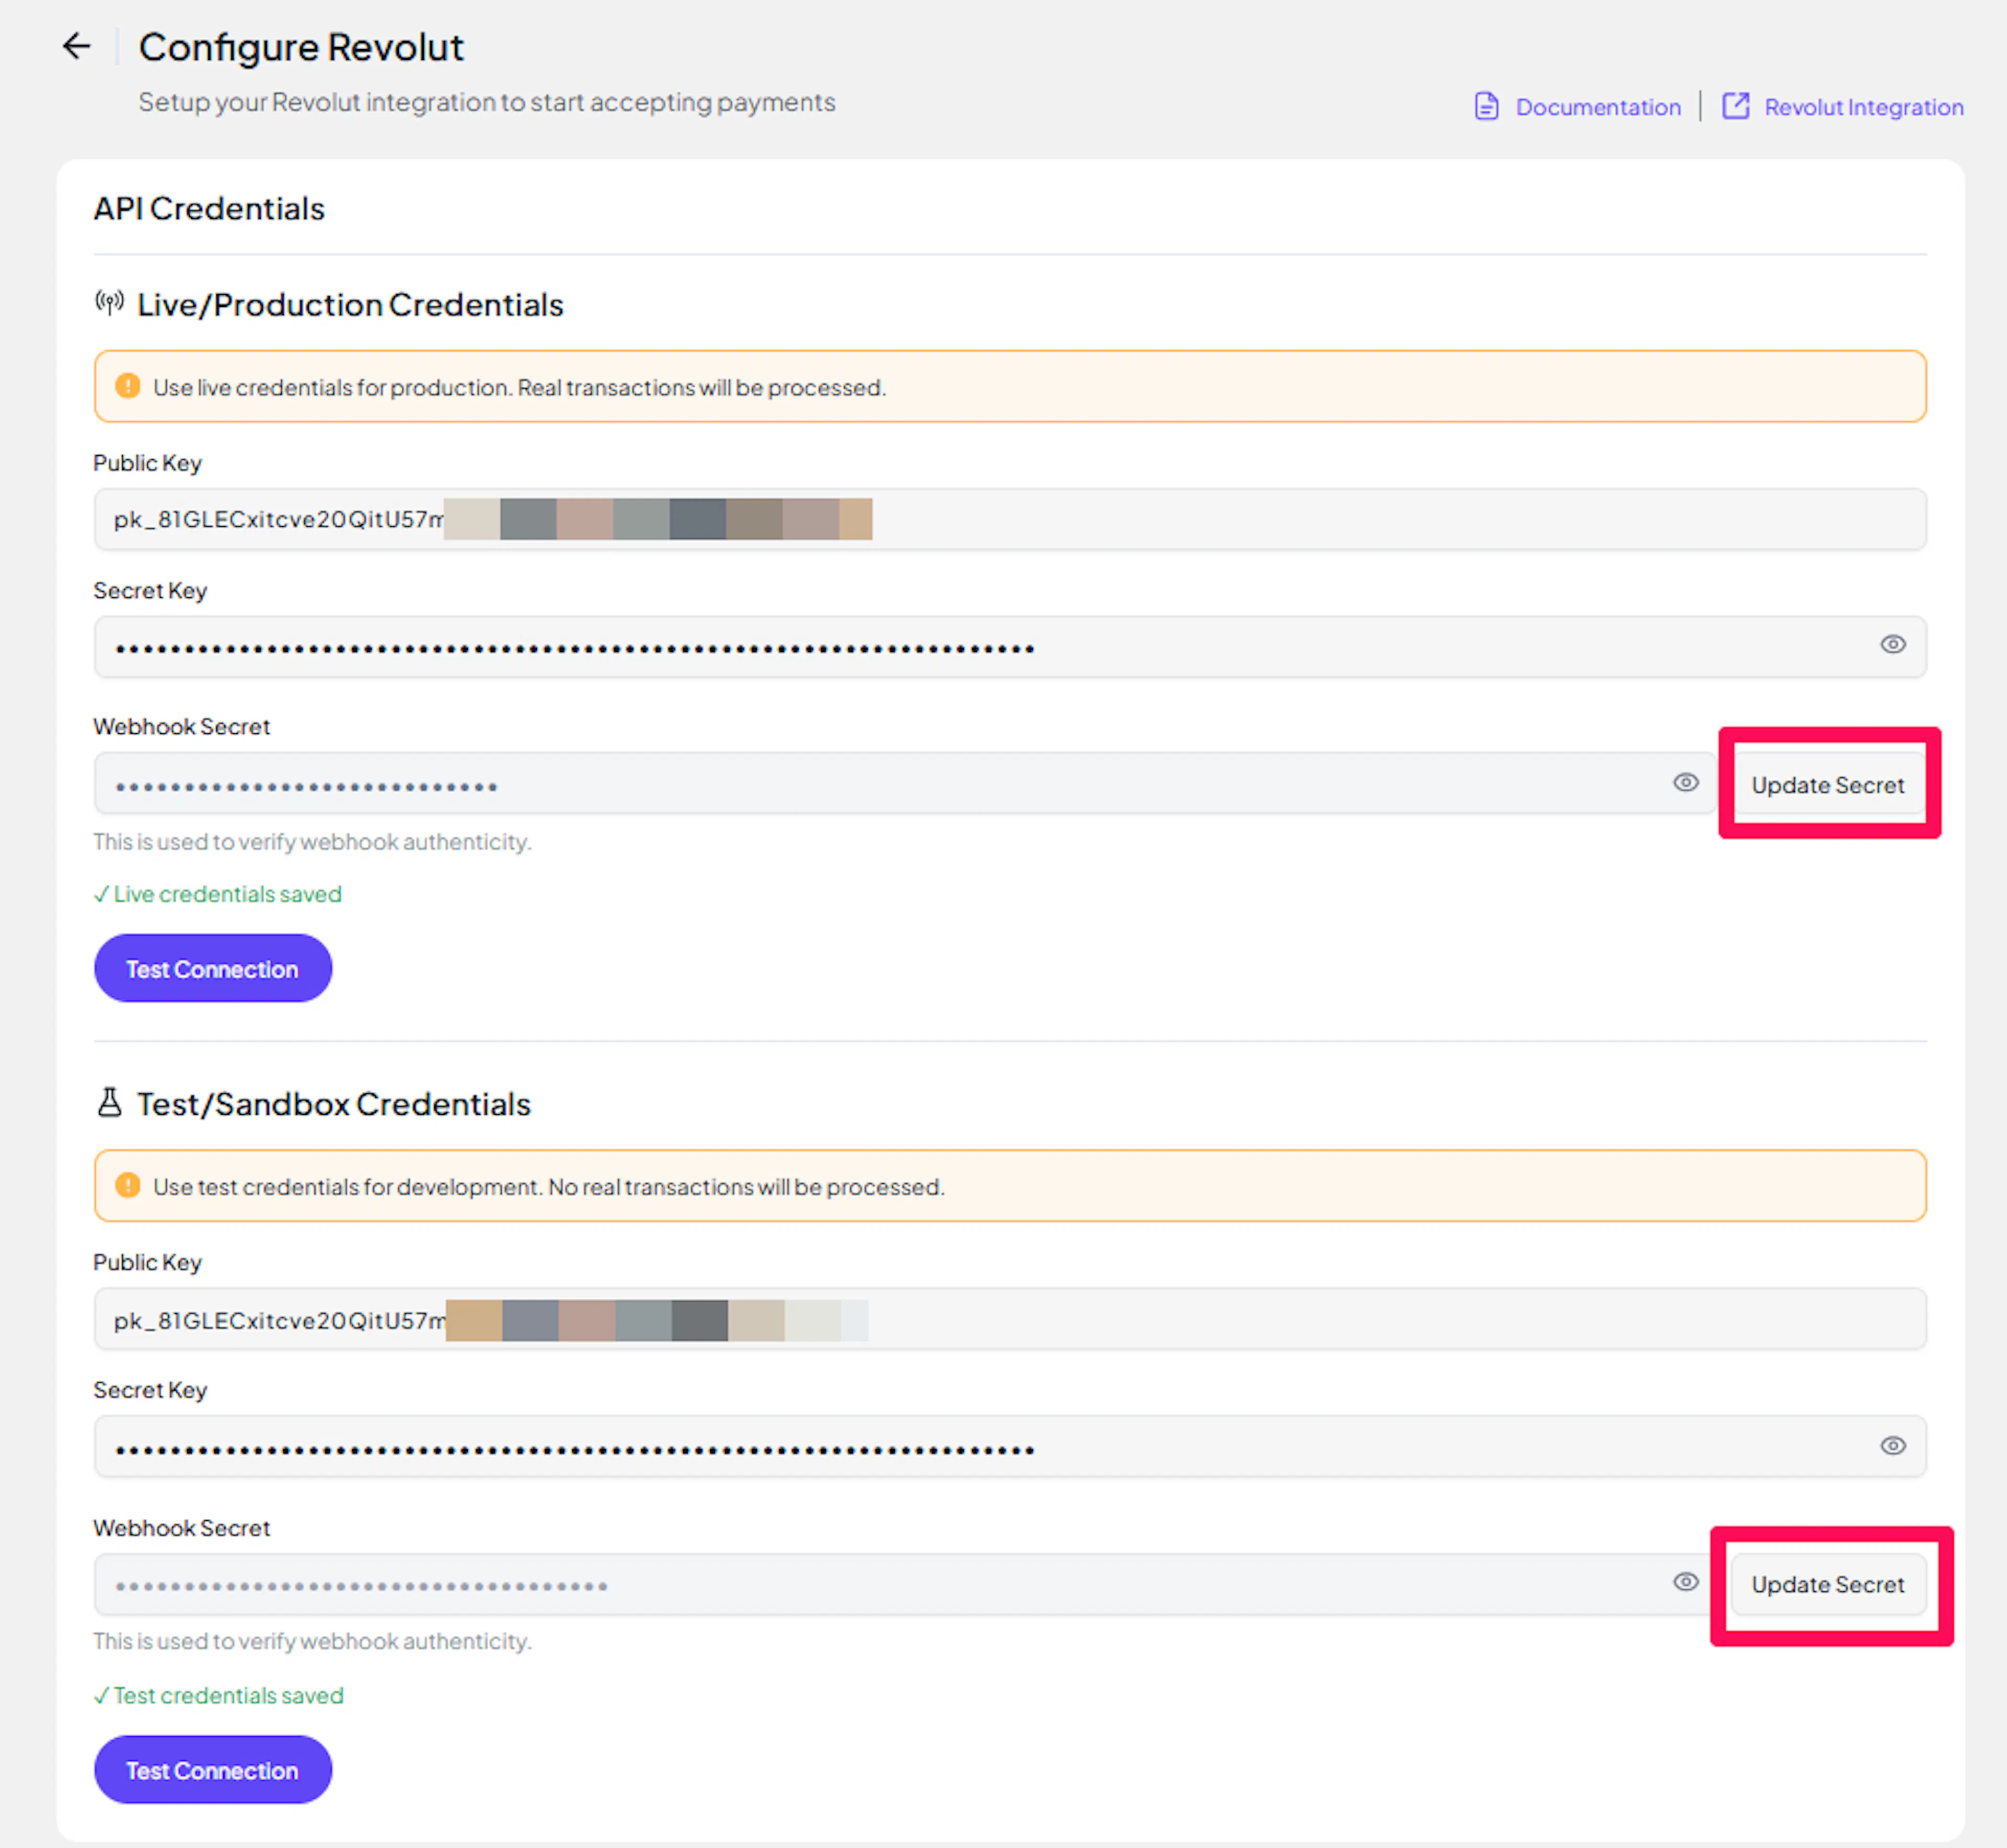
Understanding Live/Production and Sandbox Settings:
| Environment | Purpose |
|---|---|
| Live / Production (Mandatory) | Used for real transactions. Cannot be empty, even when testing. |
| Test / Sandbox (Optional) | Used for testing only. No real money is processed. |
How PayLexer selects credentials:
-
Debug/Test mode ON → Test credentials are used
-
Debug/Test mode OFF → Live credentials are used
Test and save
Click Test Connection to verify your credentials, then click Save Configuration.
Understanding Webhooks
Webhooks are Revolut's notification mechanism for real-time payment updates.
Benefits of Webhooks
-
Instant payment status updates
-
Automatic refund processing
-
Real-time payment event notifications
-
Payment dispute notifications
How Webhooks Work
Revolut sends webhook notifications to notify your system about events such as:
-
Order completed
-
Order authorized
-
Payment failed
-
Payment declined
-
Order refunded
Revolut uses webhook secrets for verification. PayLexer automatically handles this when you click "Get Webhook".
Webhook Secrets are environment-specific (separate for Sandbox and Production). This is why the field is in the API Credentials section alongside your Public Key and Secret Key.
Integrate Revolut to Your Website
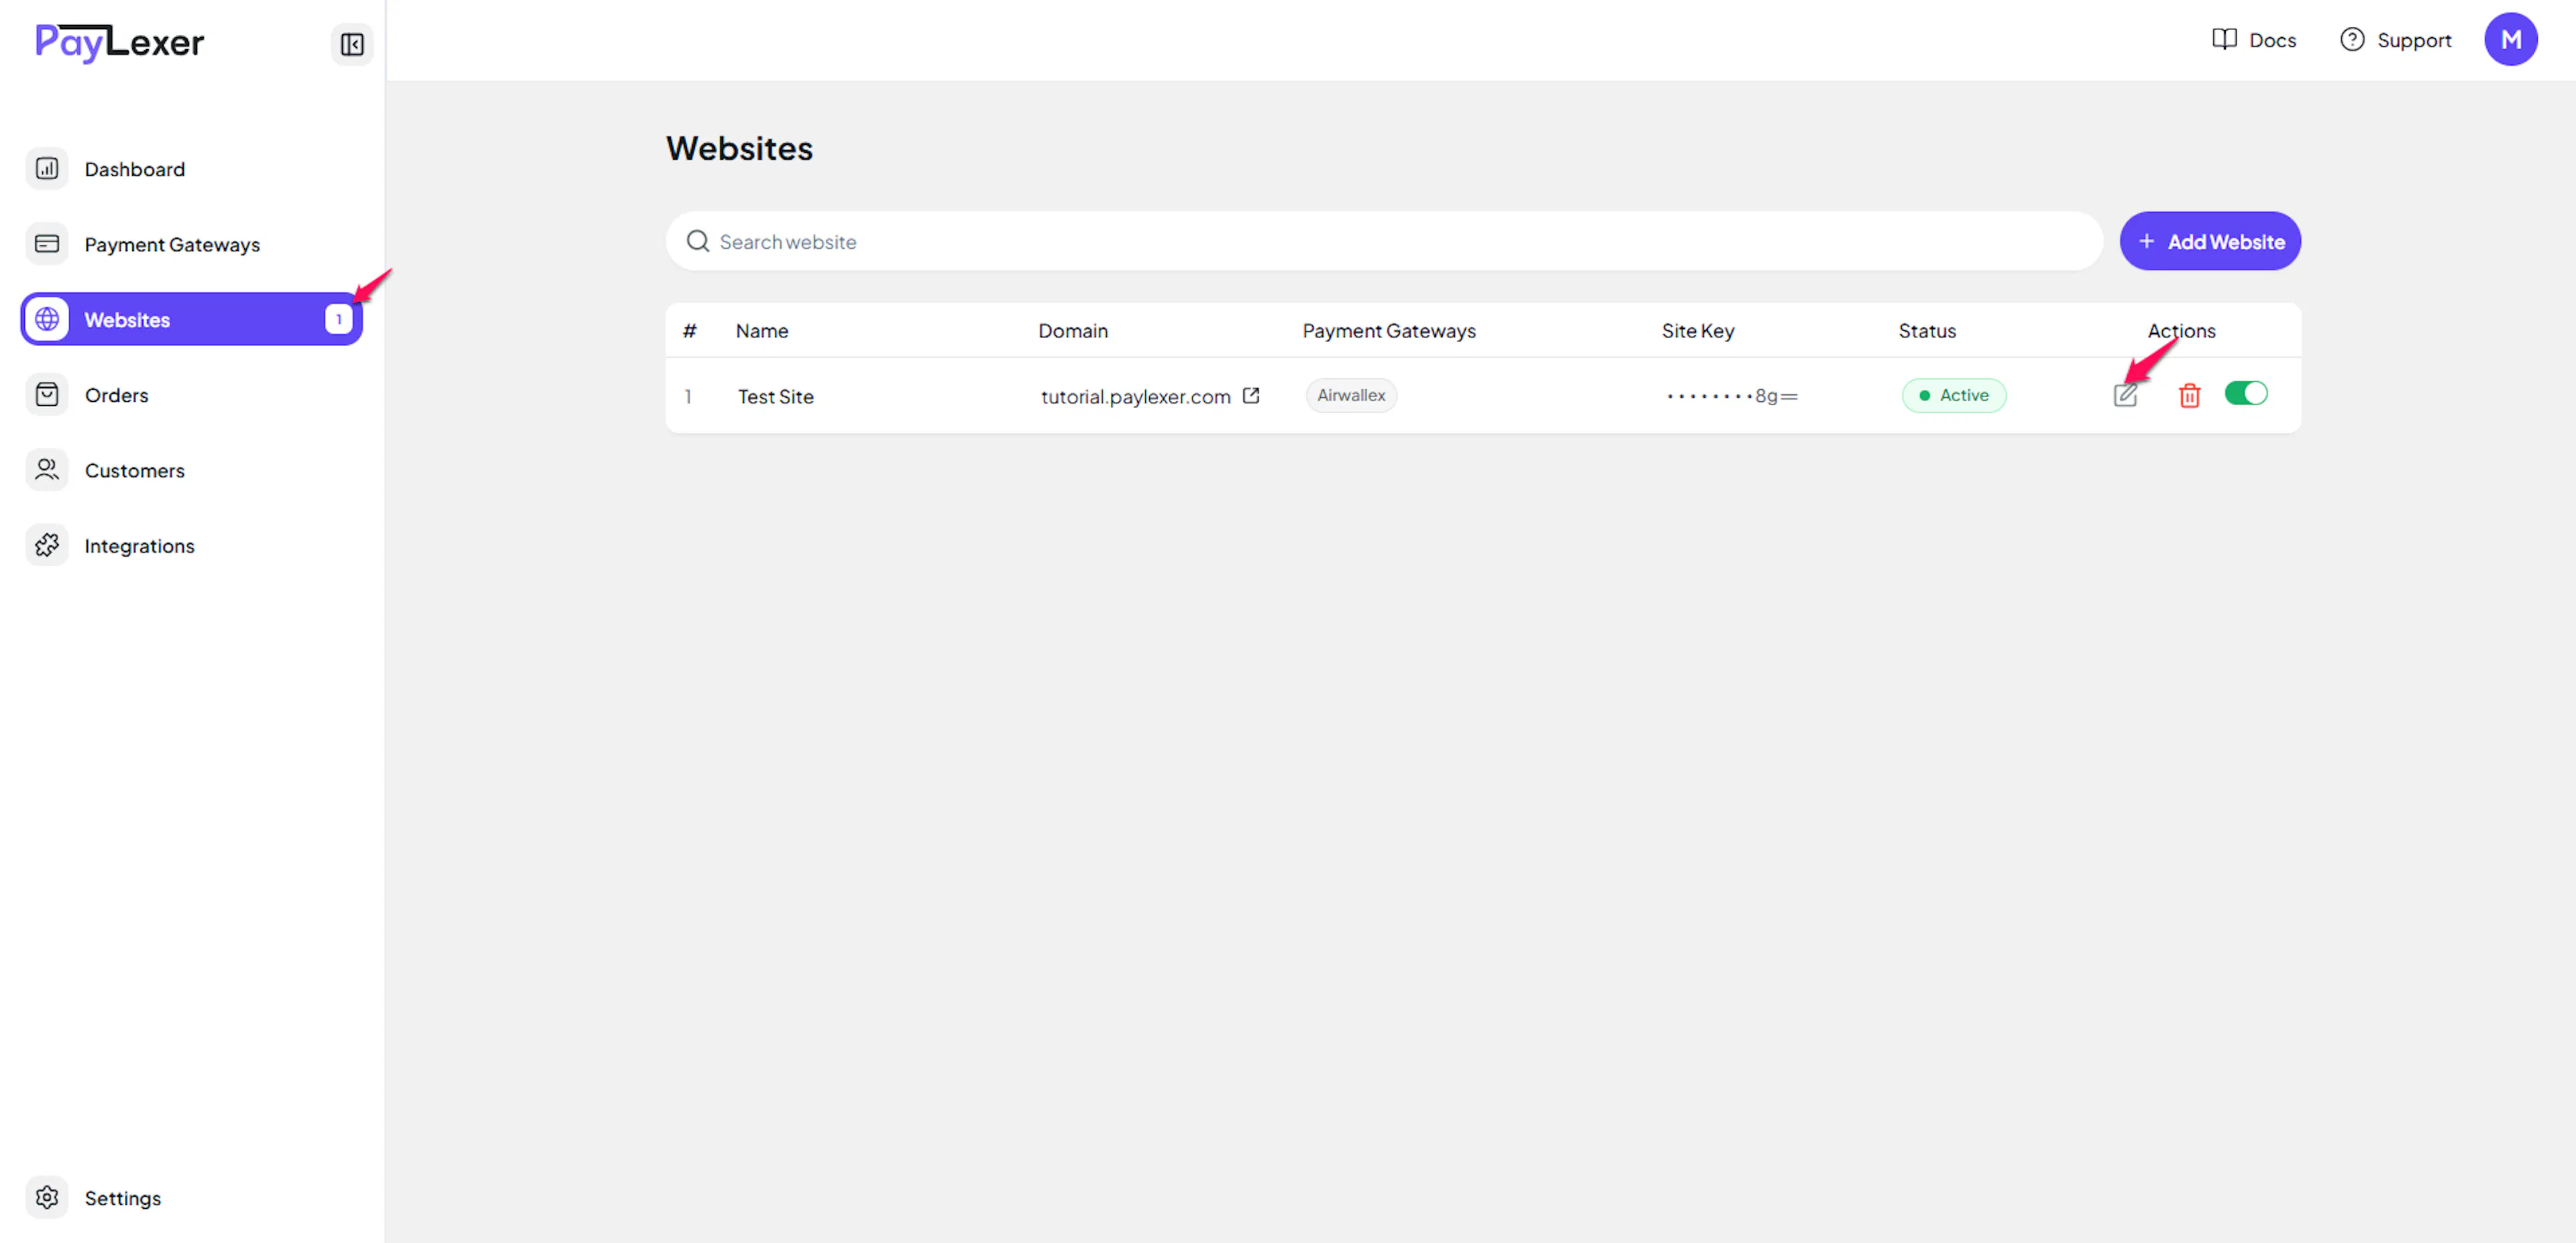
Go to Websites
Navigate to Websites in your PayLexer dashboard.
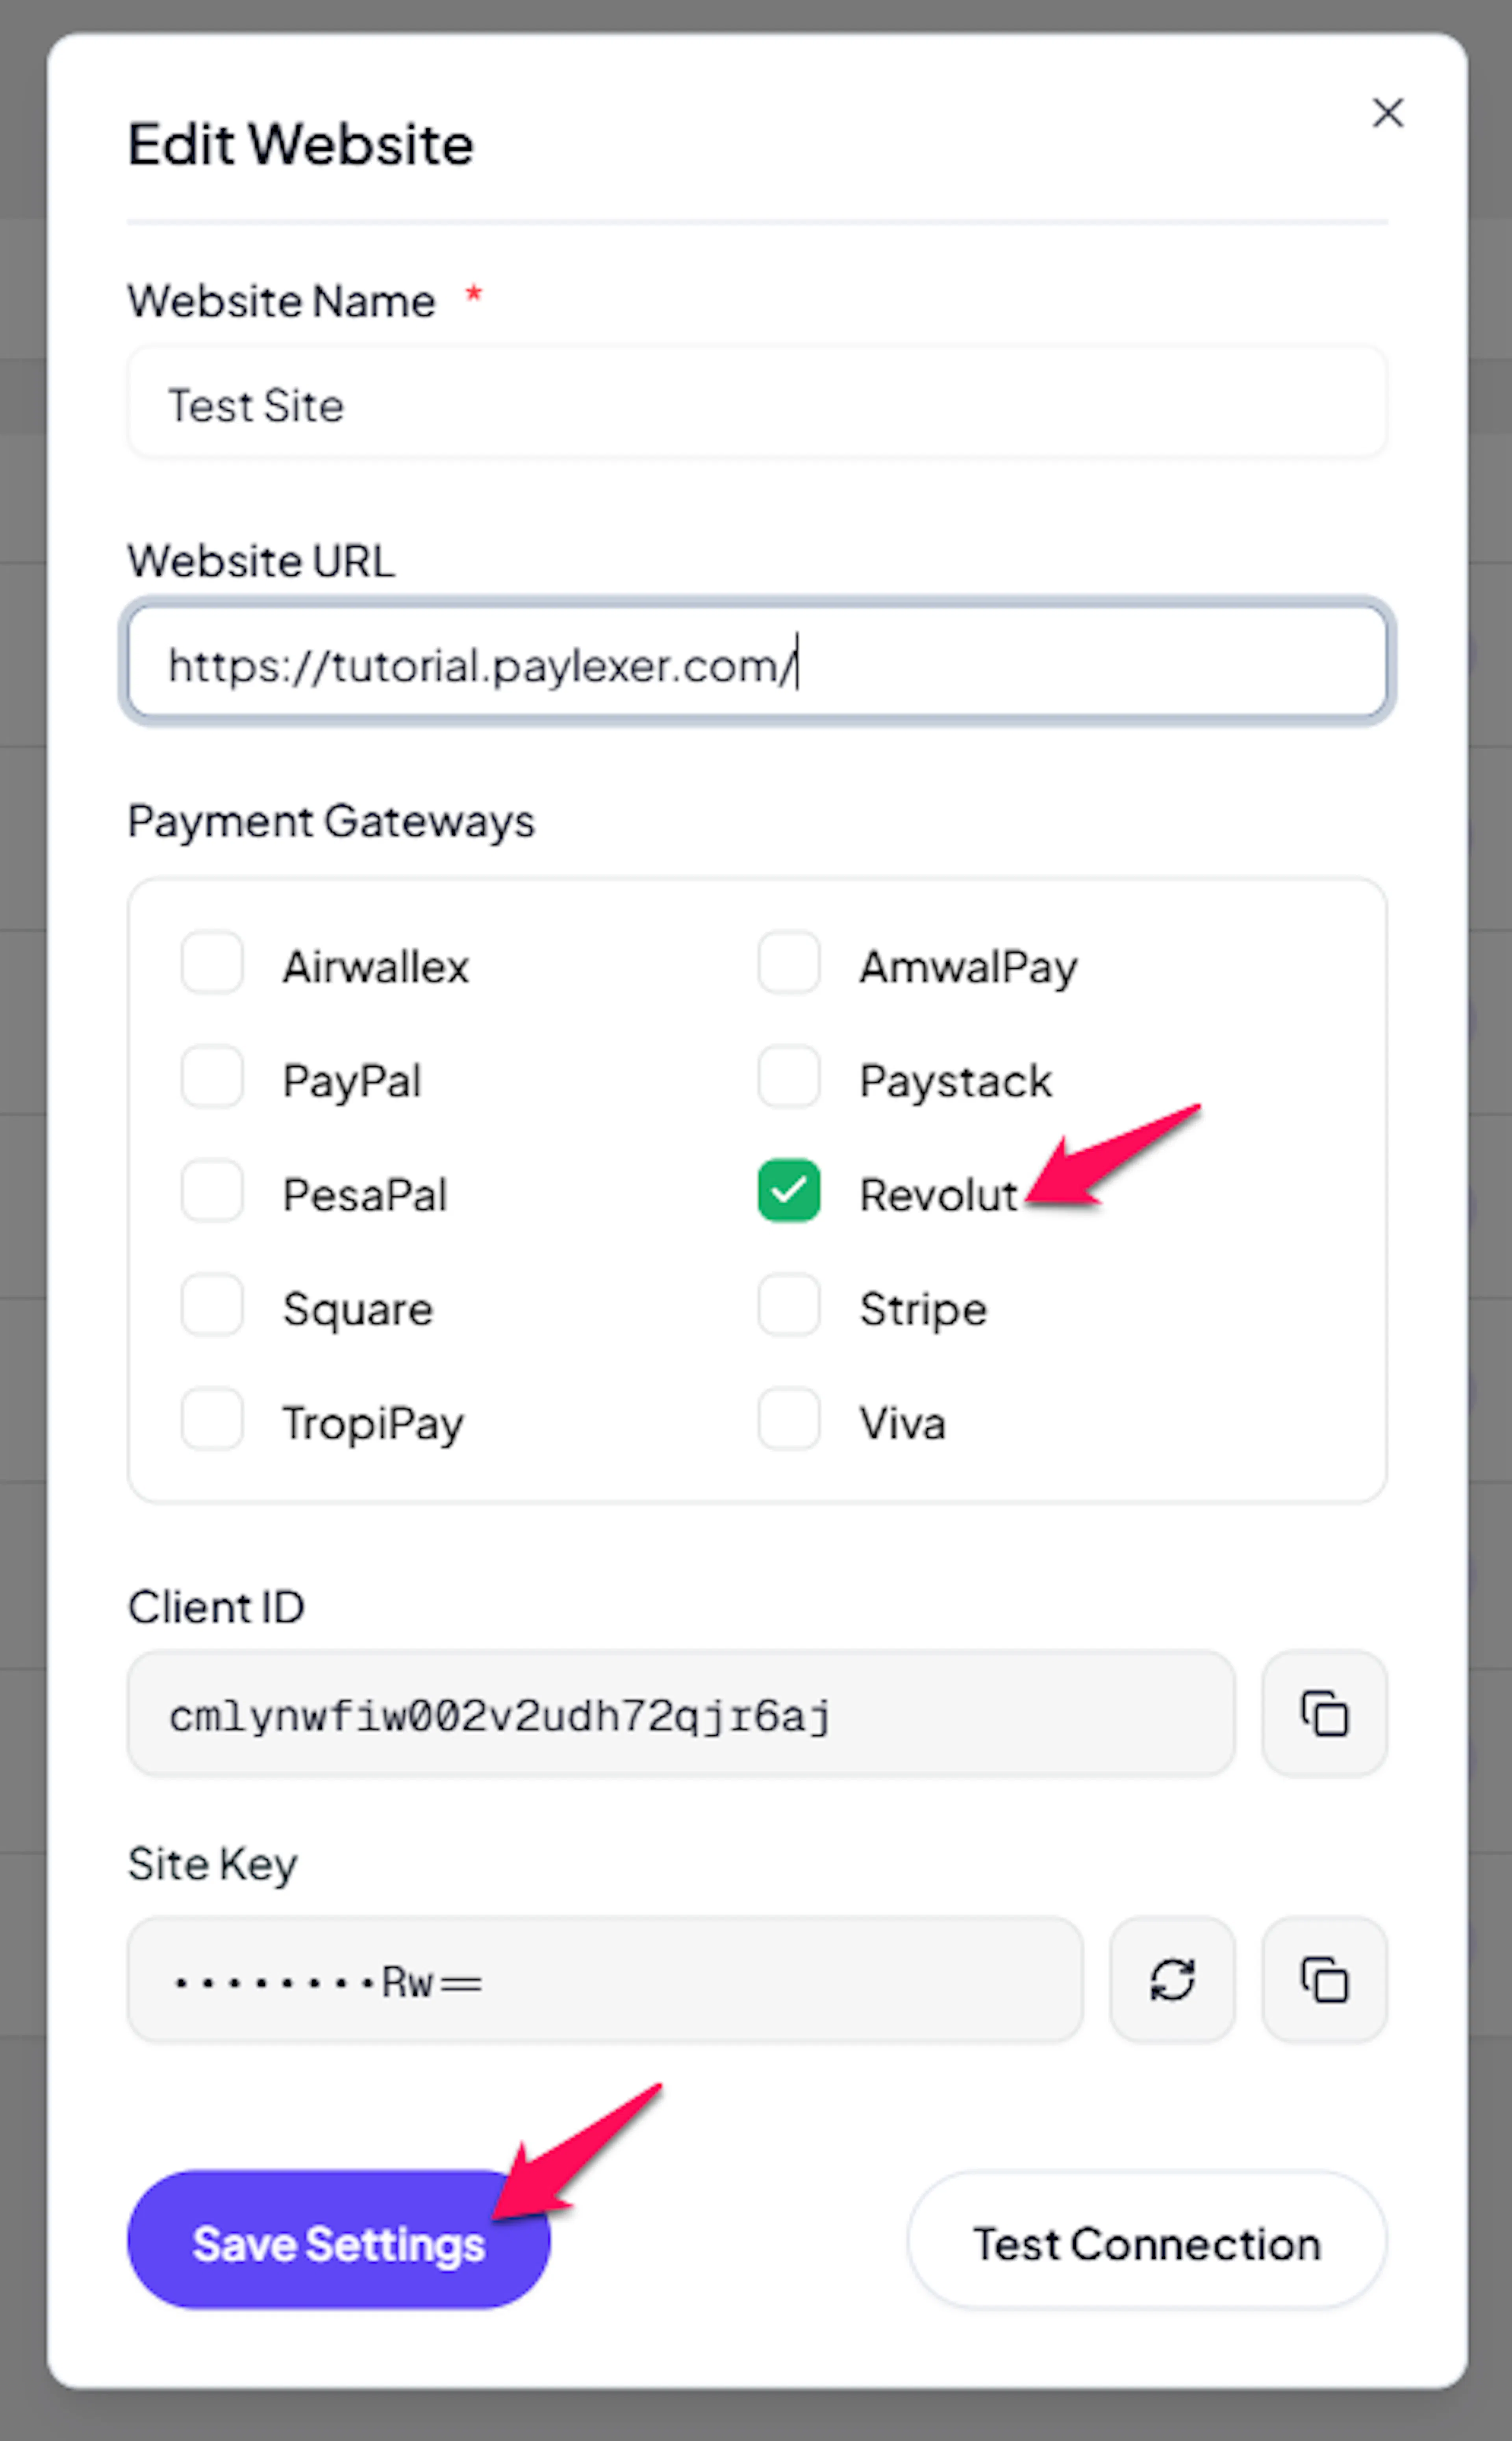
Edit your website
Click the Edit Icon of your added website.
Enable Revolut
Click the checkbox to enable Revolut for the website.
If you haven't added a website yet, Continue to Add Your Website →
Troubleshooting
Best Practices
-
Test in Sandbox before enabling Production mode
-
Validate the first live transaction
-
Keep API Key secure - treat it like a password
-
Use separate Sandbox and Production credentials
FAQs
Still Have Questions?
-
Revolut Support: Revolut Business Help
-
PayLexer Support: Contact Support