

HitPay
Connect HitPay to PayLexer to accept cards, PayNow, e-wallets, and local payment methods across Southeast Asia and beyond.
HitPay is a Singapore-based payment gateway that processes payments through a secure, hosted checkout page. Through PayLexer, HitPay supports one-time payments, subscriptions with free trials, and refunds - with coverage across Southeast Asia and major global currencies.
- Supported Regions (Merchant Accounts): Singapore (primary), select global markets
- Supported Currencies: SGD, MYR, USD, EUR, GBP, AUD, HKD, NZD, CAD, INR, IDR, PHP, THB
Supported Features
- Cards, PayNow, e-wallets, and local payment methods via HitPay's hosted checkout
- Subscriptions and recurring billing supported through PayLexer
- Free trial periods supported for subscription plans
- Refunds supported through PayLexer
- Test and Live environments via separate portals
Before You Start
Make sure you have:
- HitPay Account - Don't have one? Sign up for HitPay →
- PayLexer Account - Required to configure the integration. Create your account →
- A website where you want to integrate
Looking for a different payment processor? View all supported gateways →
Configuring HitPay
You need an API Key and Event Webhook Salt from HitPay for this integration. HitPay uses separate portals for sandbox and live environments - the steps below use the sandbox portal as an example. Repeat using your live portal, which follows the same layout.
Getting API Credentials
Copy your API Key
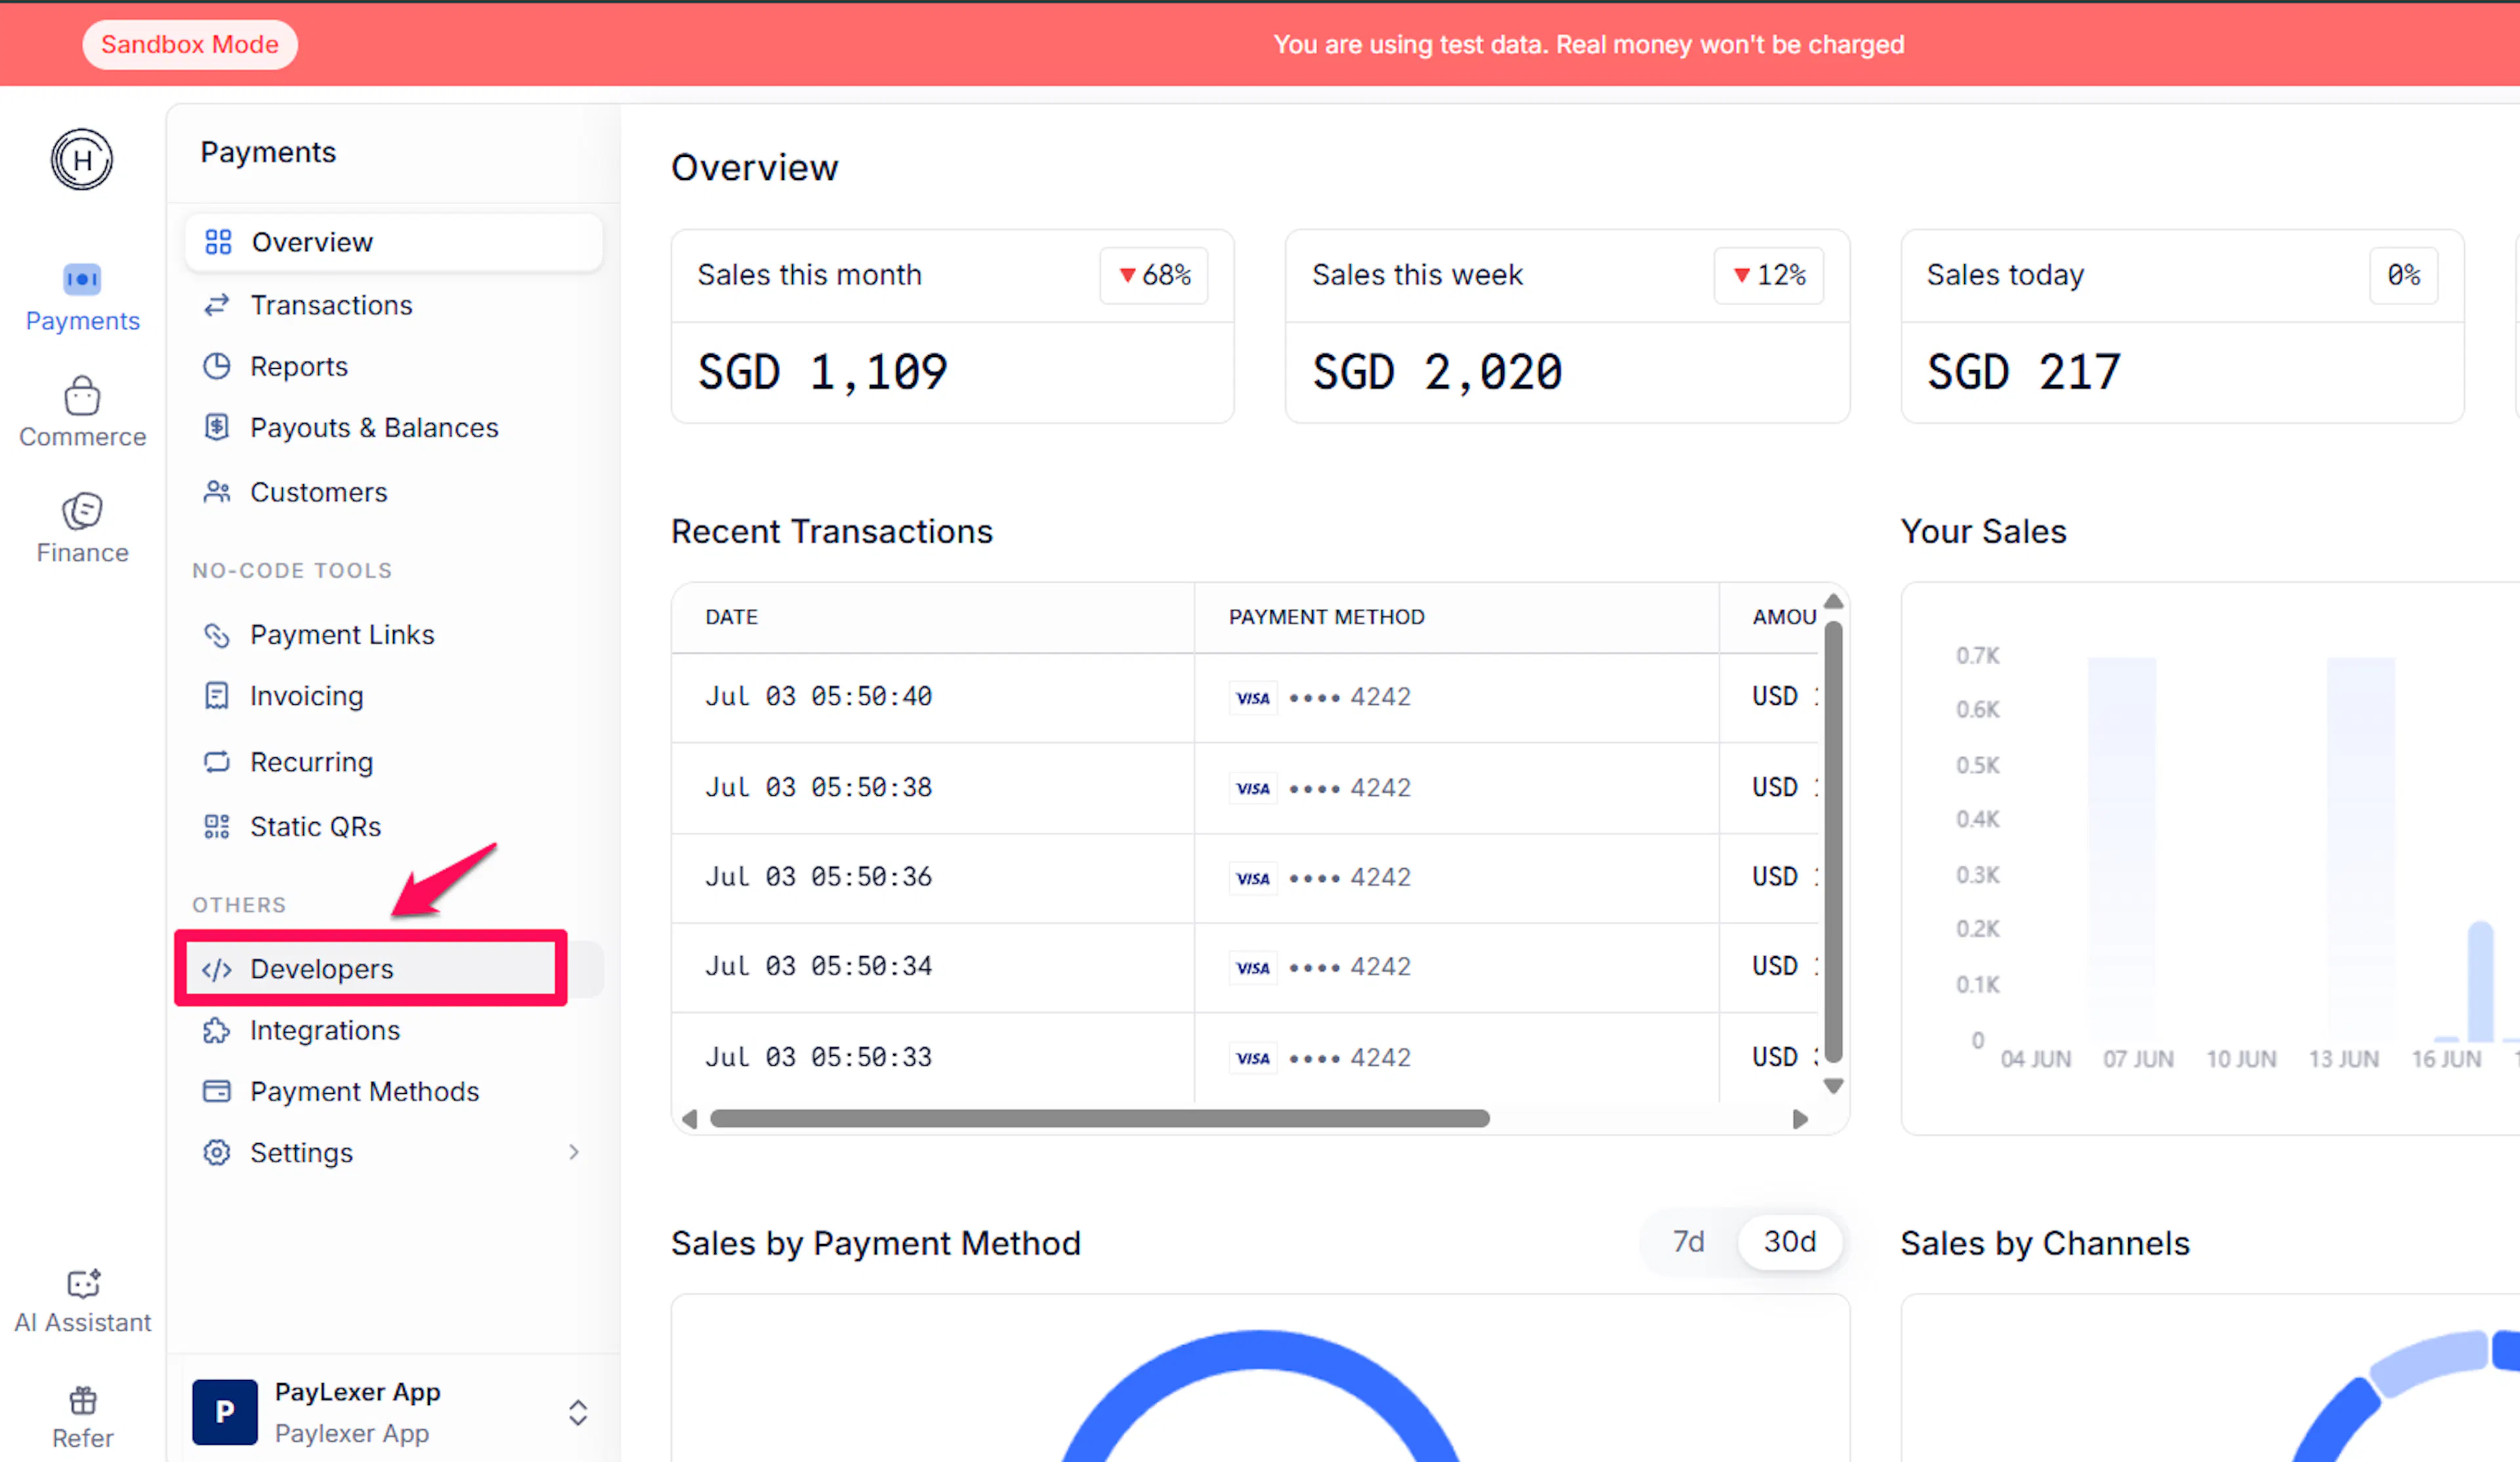
Log in to your HitPay portal and navigate to Developers. Select the API Keys tab and click on Generate.
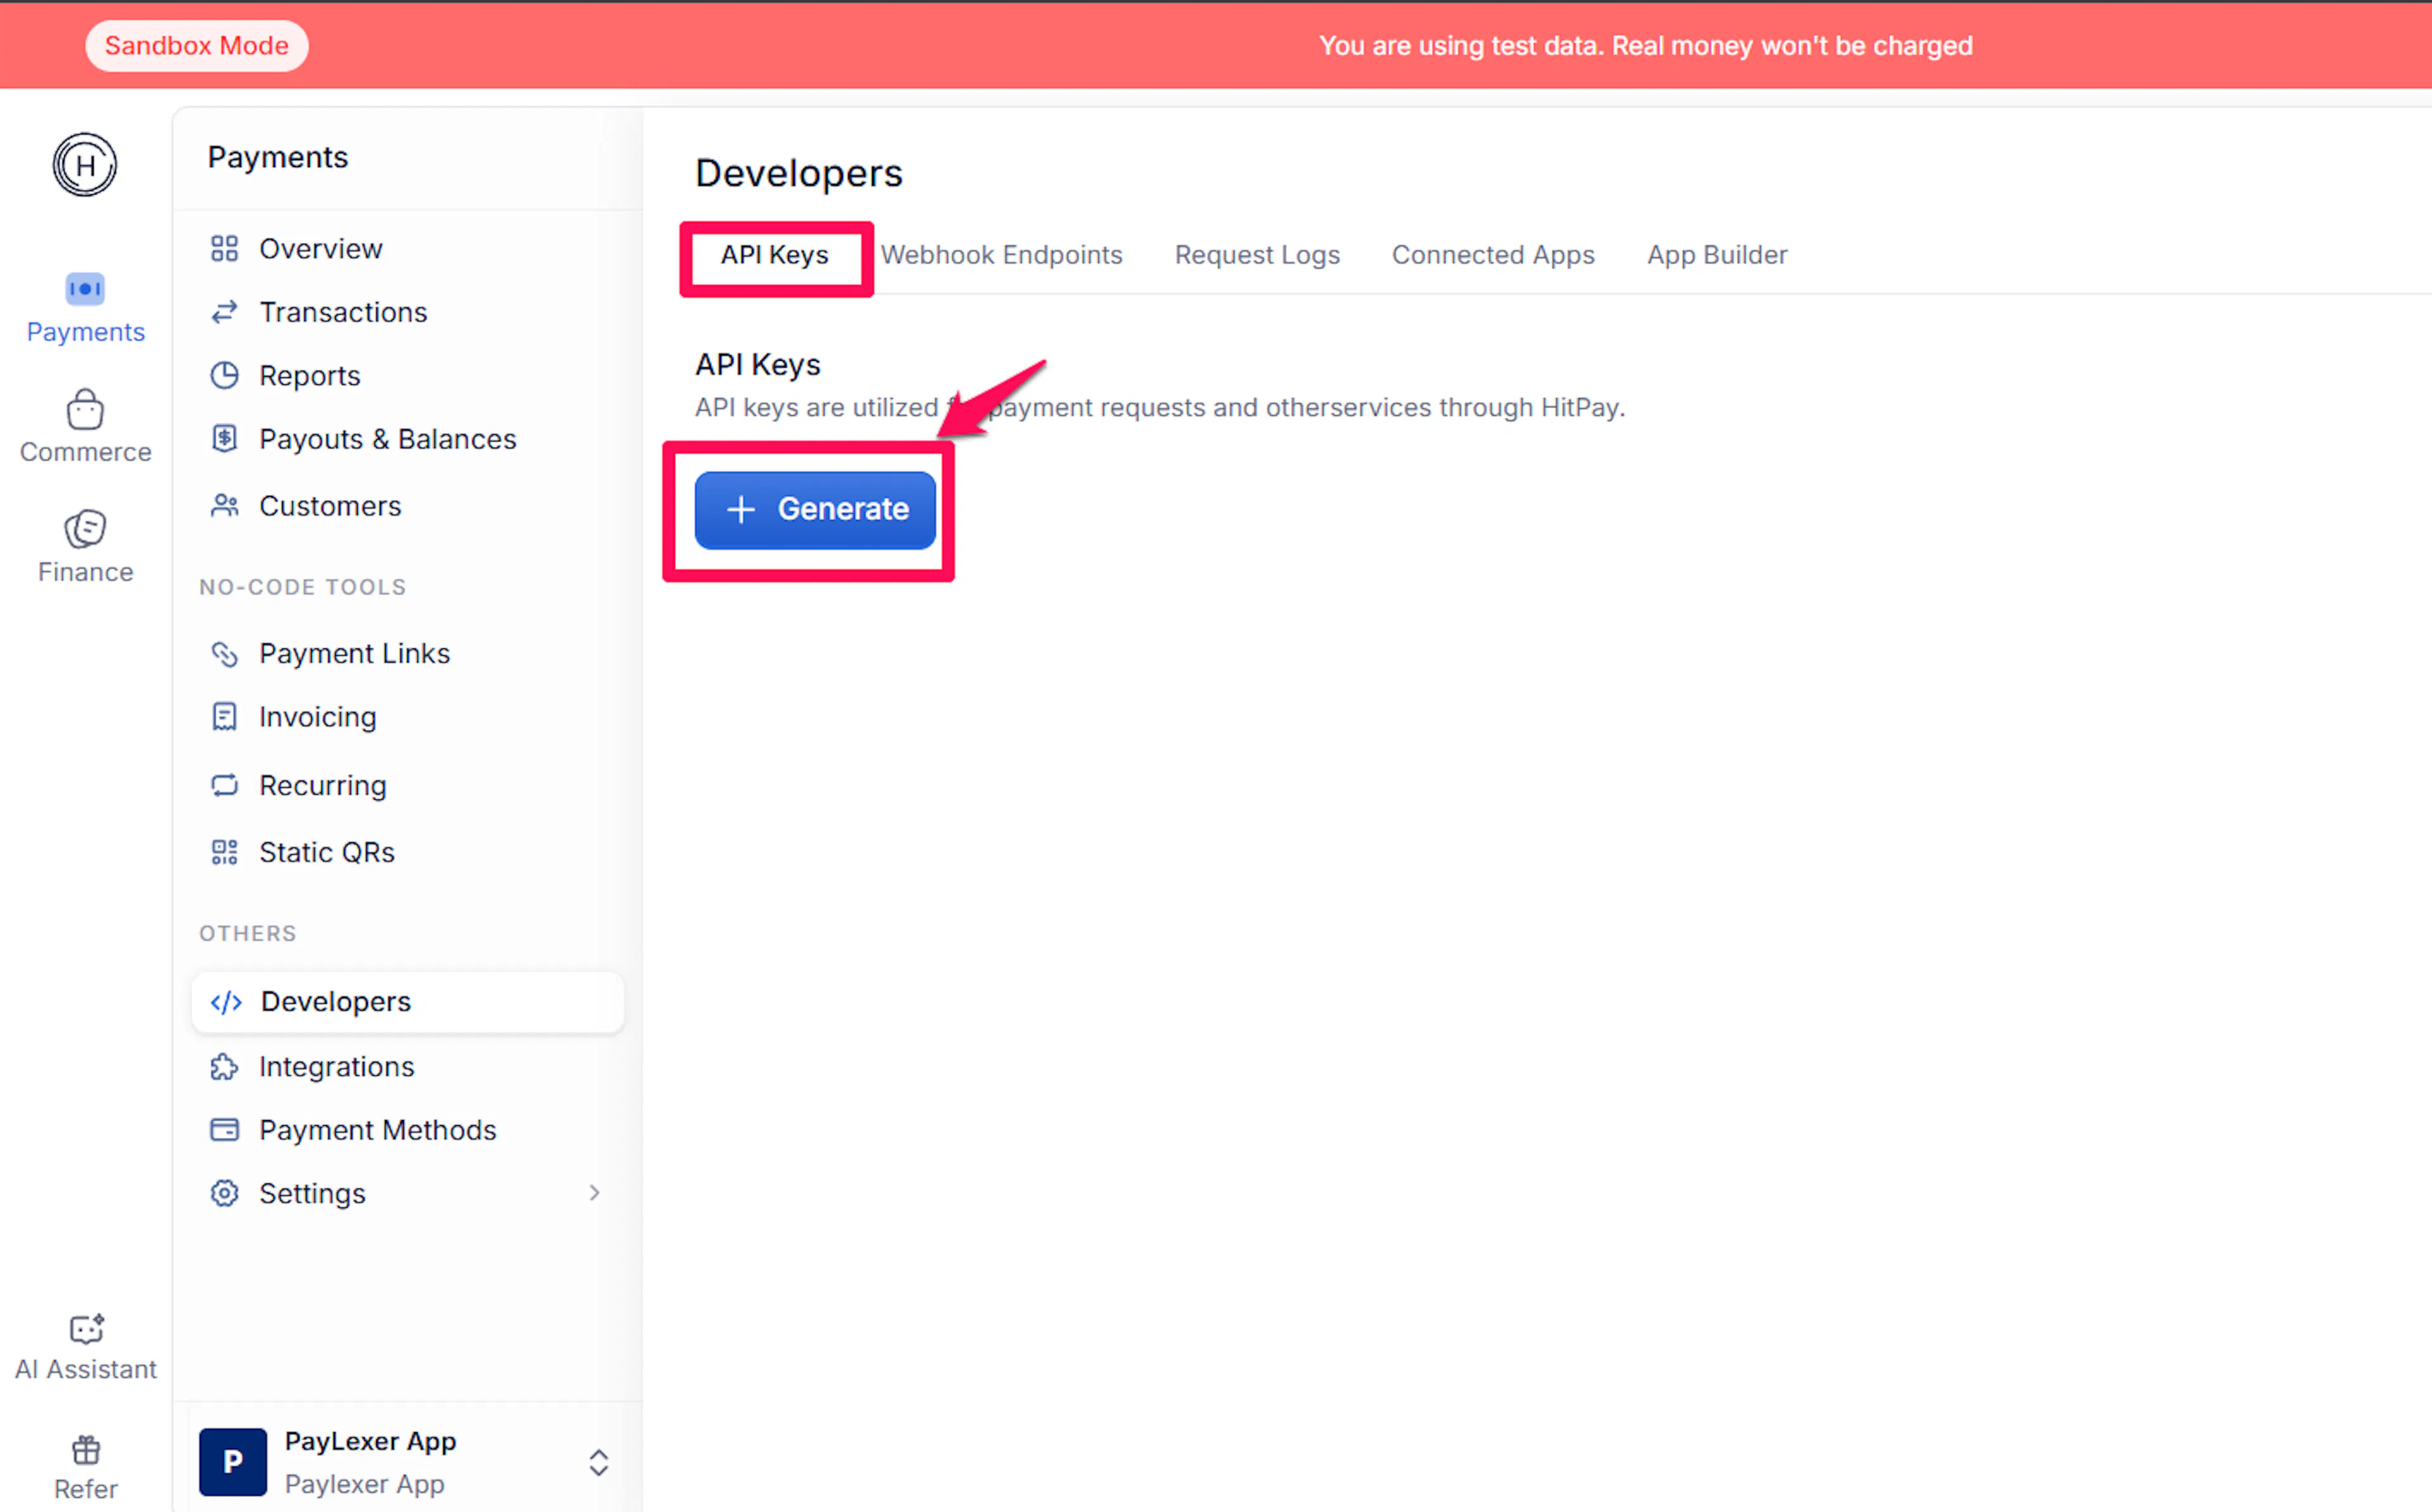
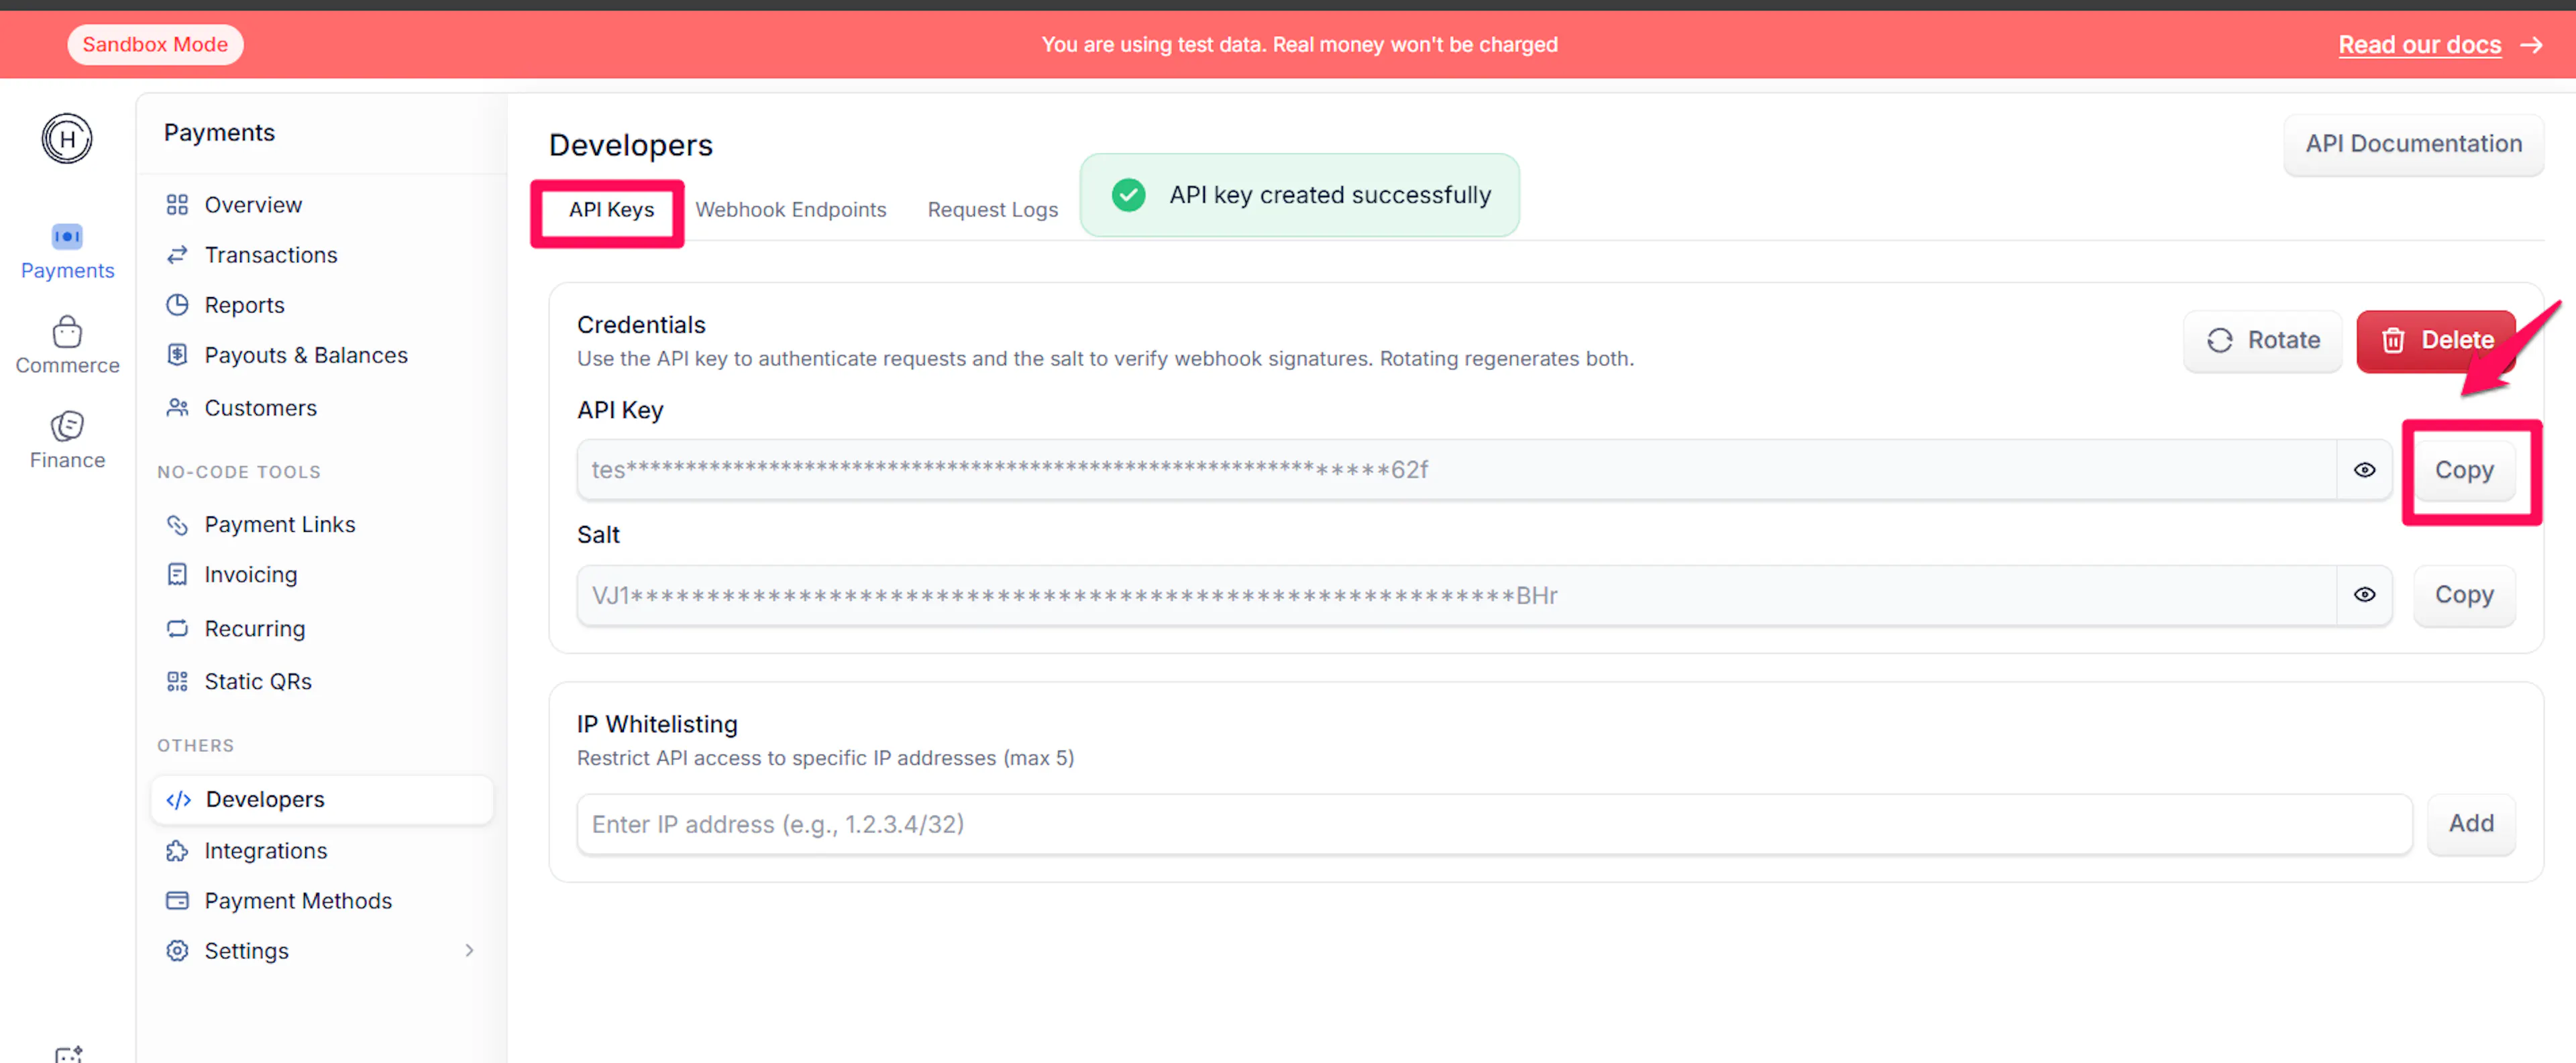
Under the Credentials card, copy your API Key.
Find your webhook URL in PayLexer
Log in to your PayLexer dashboard and navigate to Payment Gateways → HitPay and click Configure.
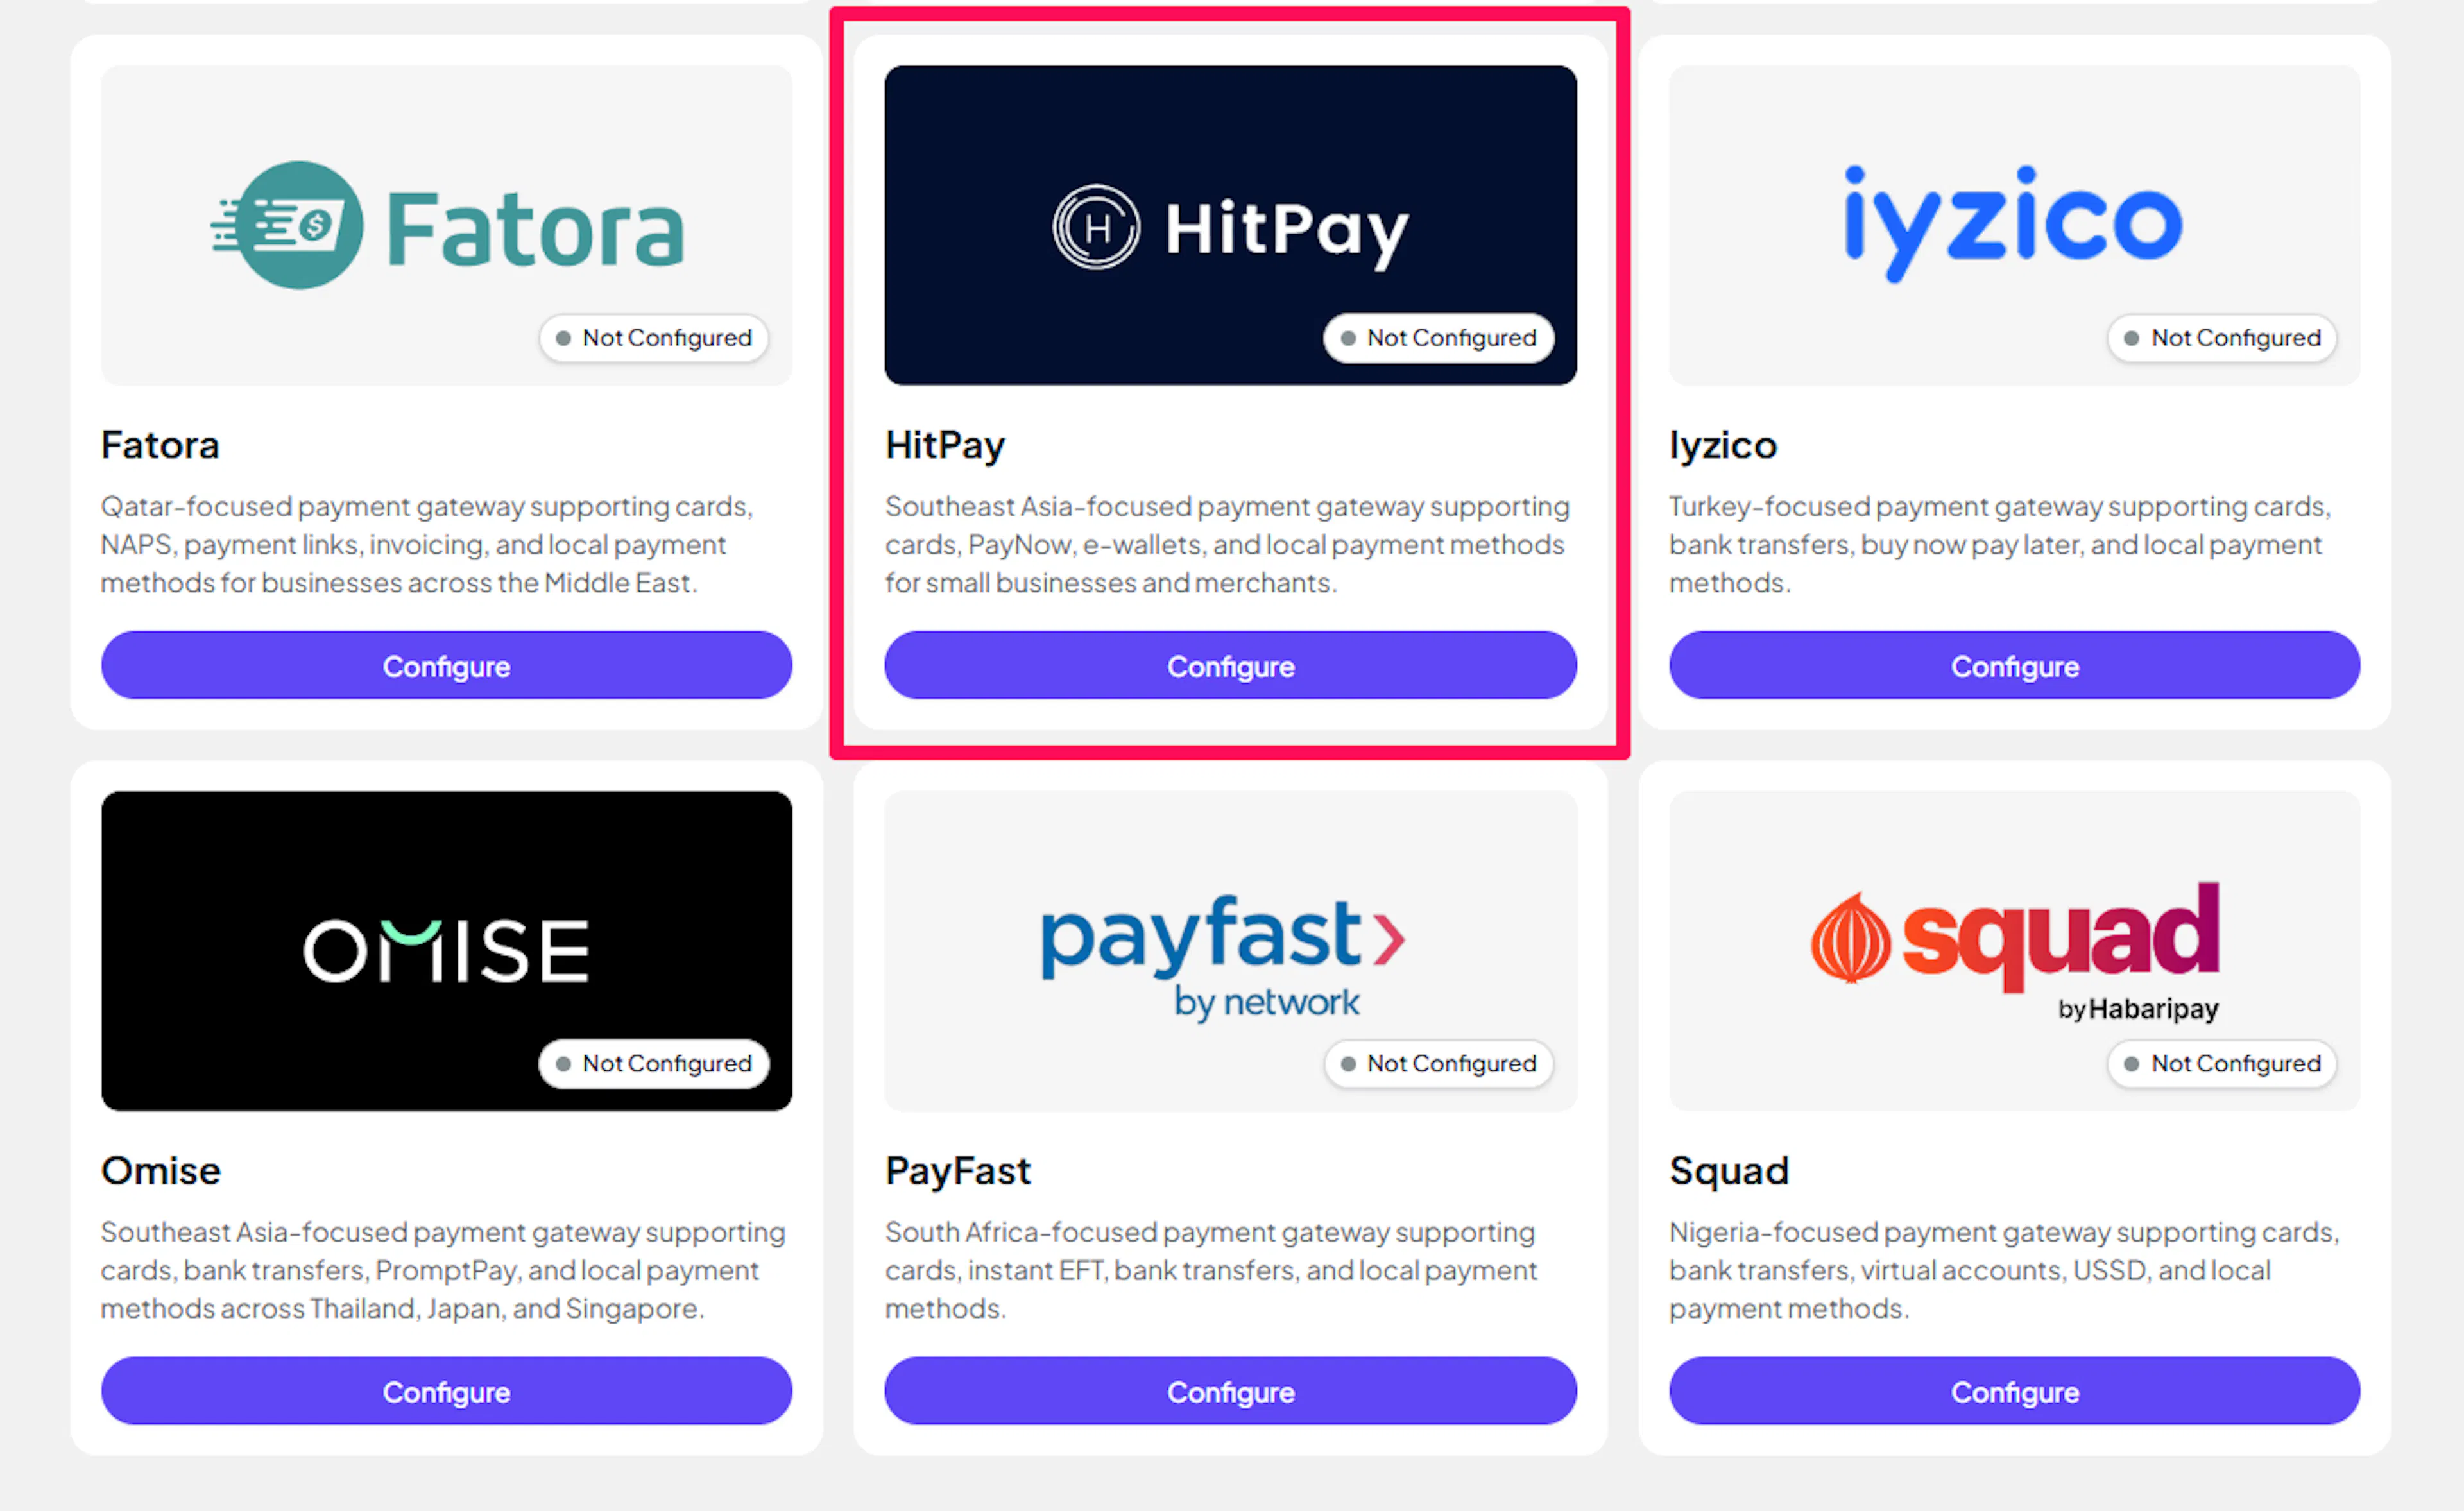
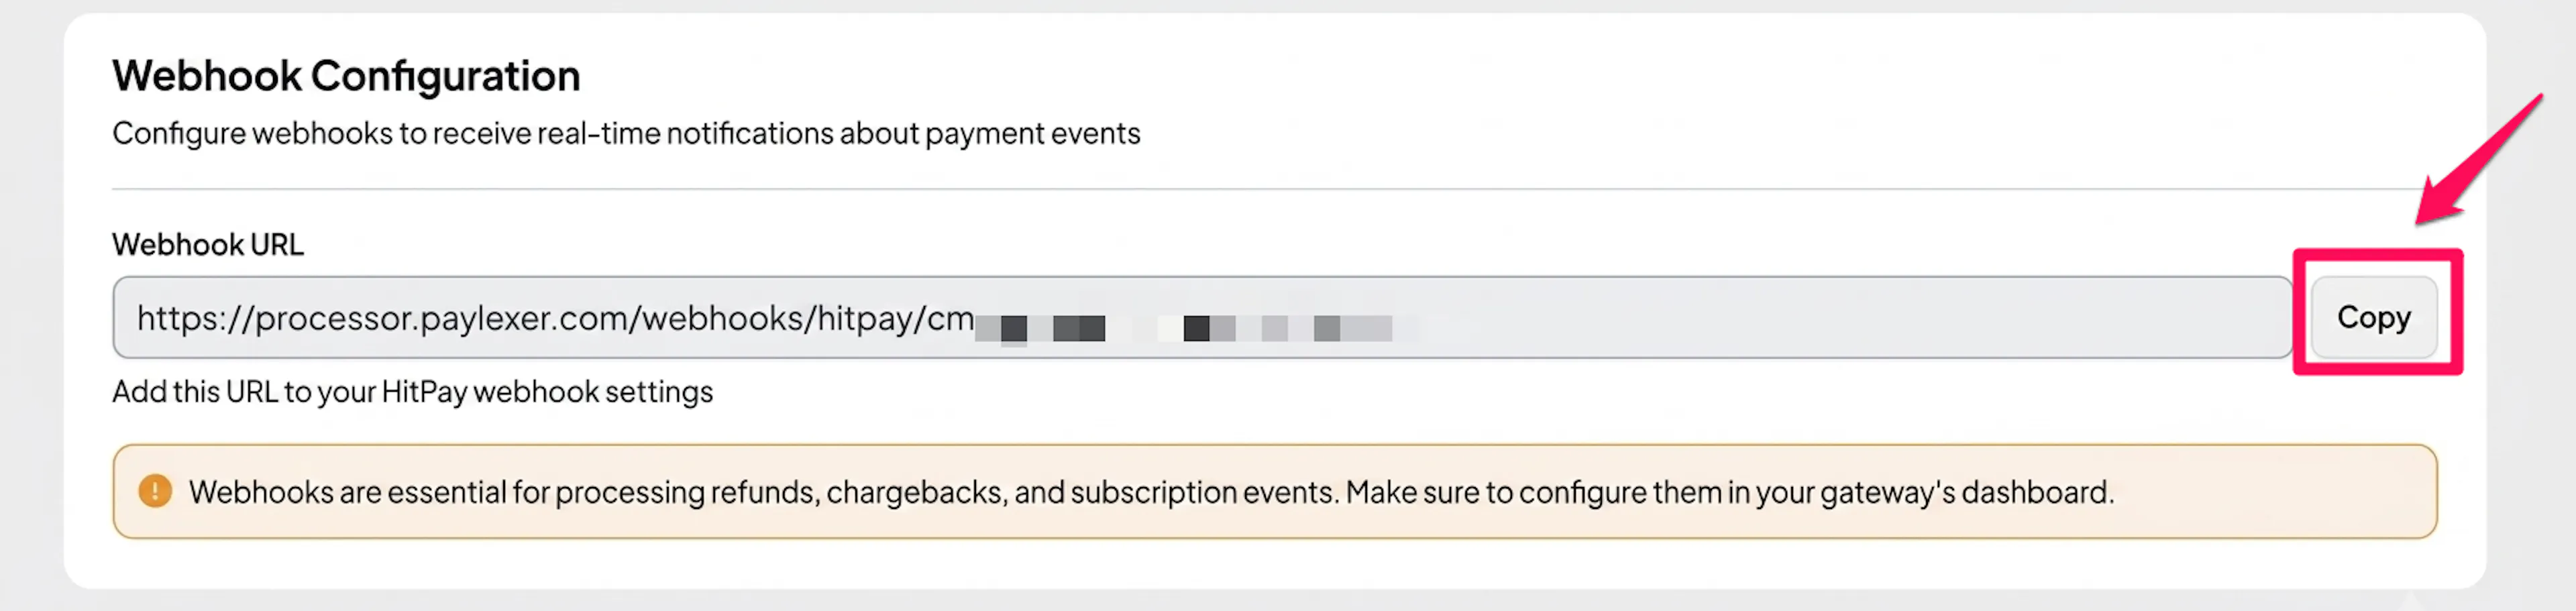
Copy the Webhook URL shown on the page - you will need it in the next step.
Create an Event Webhook in HitPay
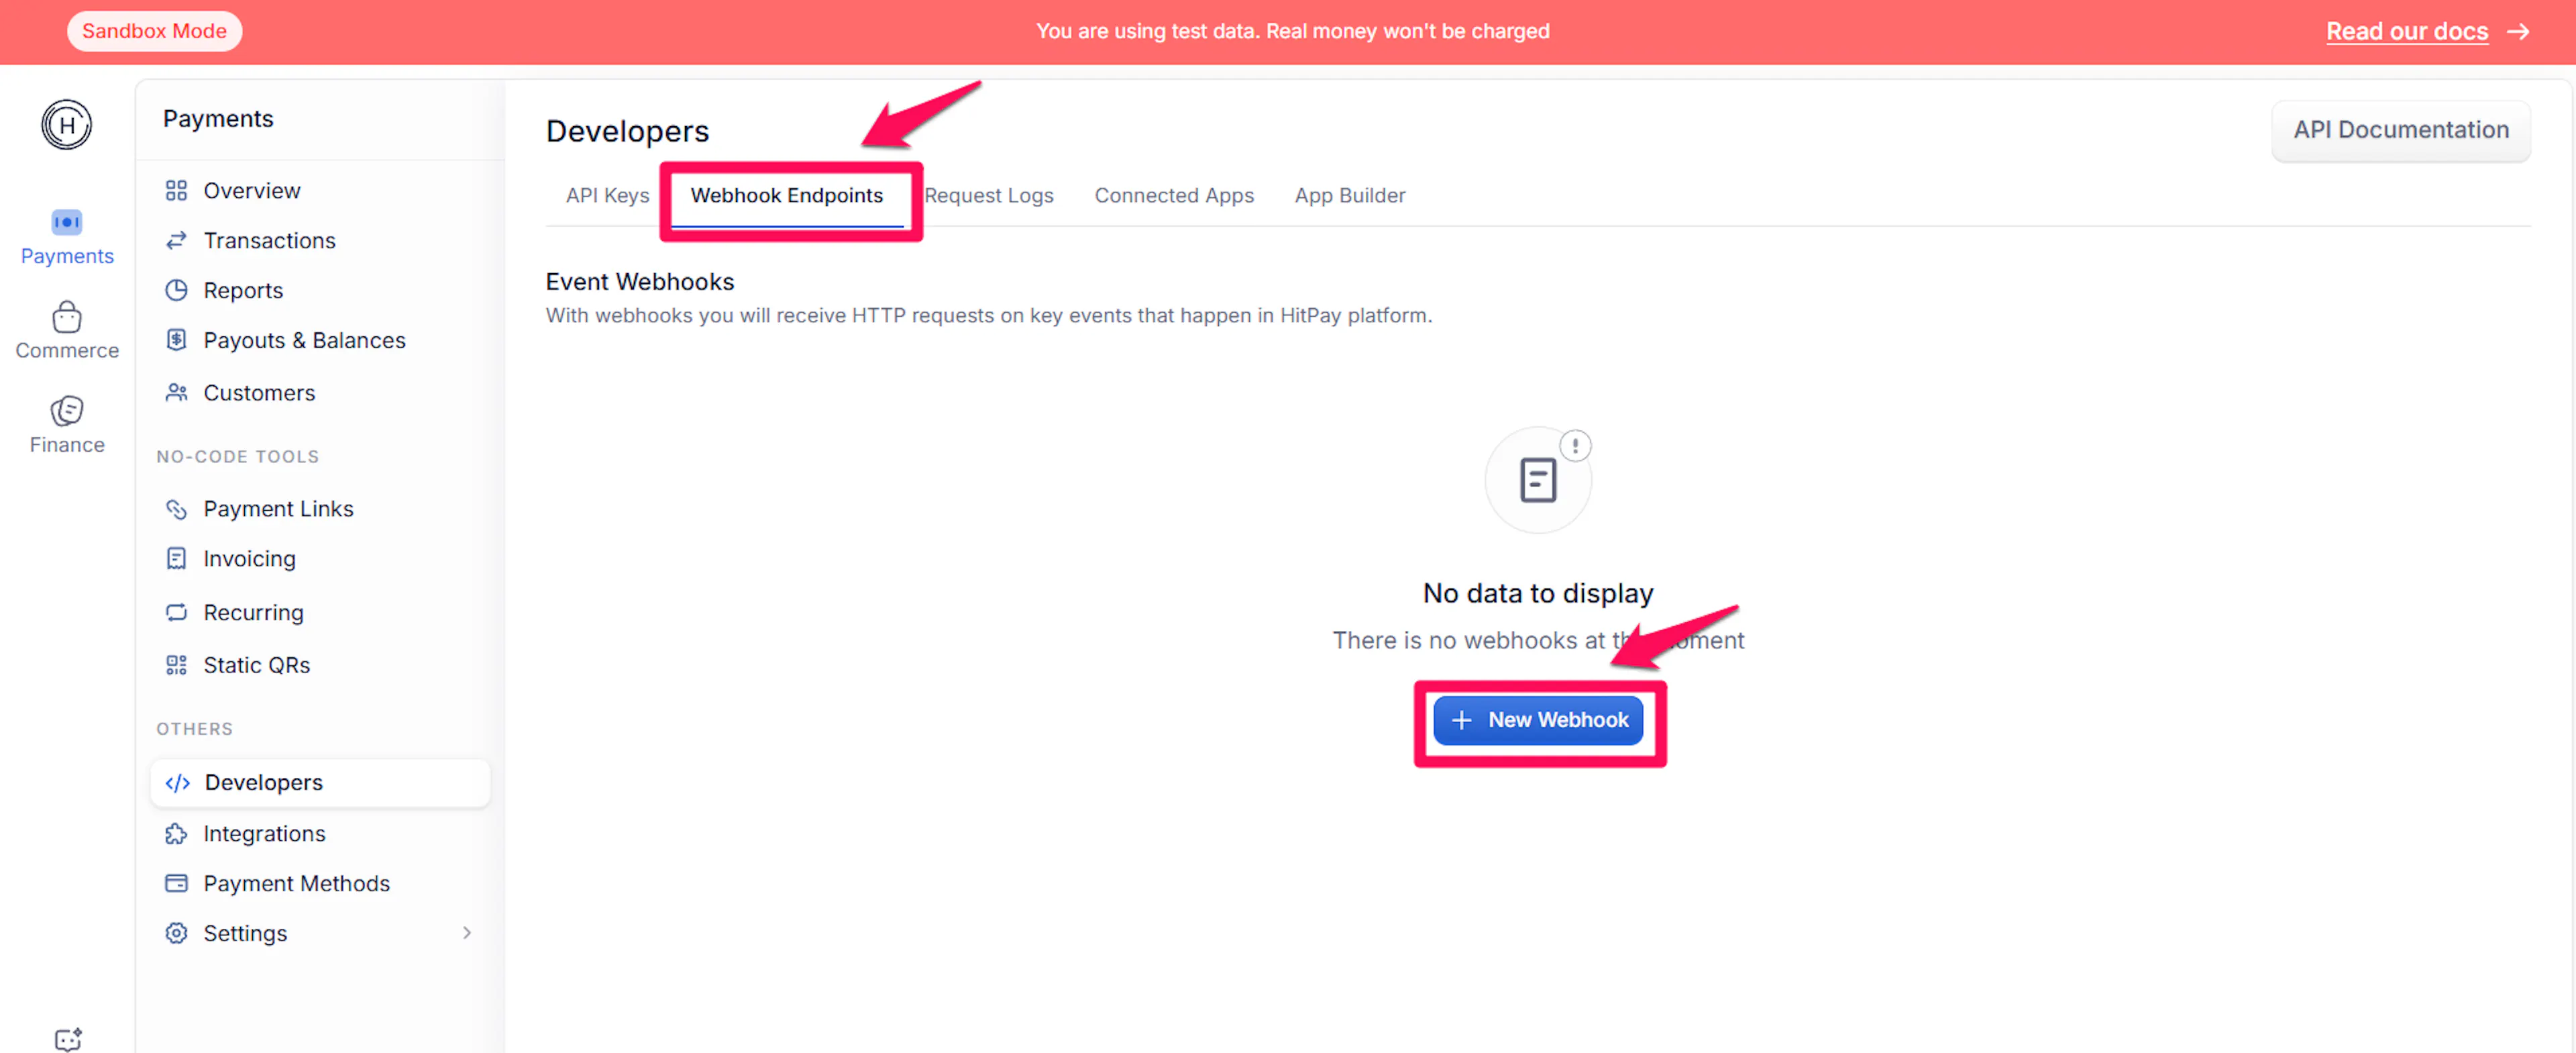
Back in your HitPay portal, go to Developers and select the Webhook Endpoints tab. Click New Webhook.
In the modal that opens:
- Webhook Name - enter a descriptive name, for example "PayLexer"
- Webhook URL - paste the Webhook URL you copied from PayLexer
- Events - select all charge events and all recurring billing events
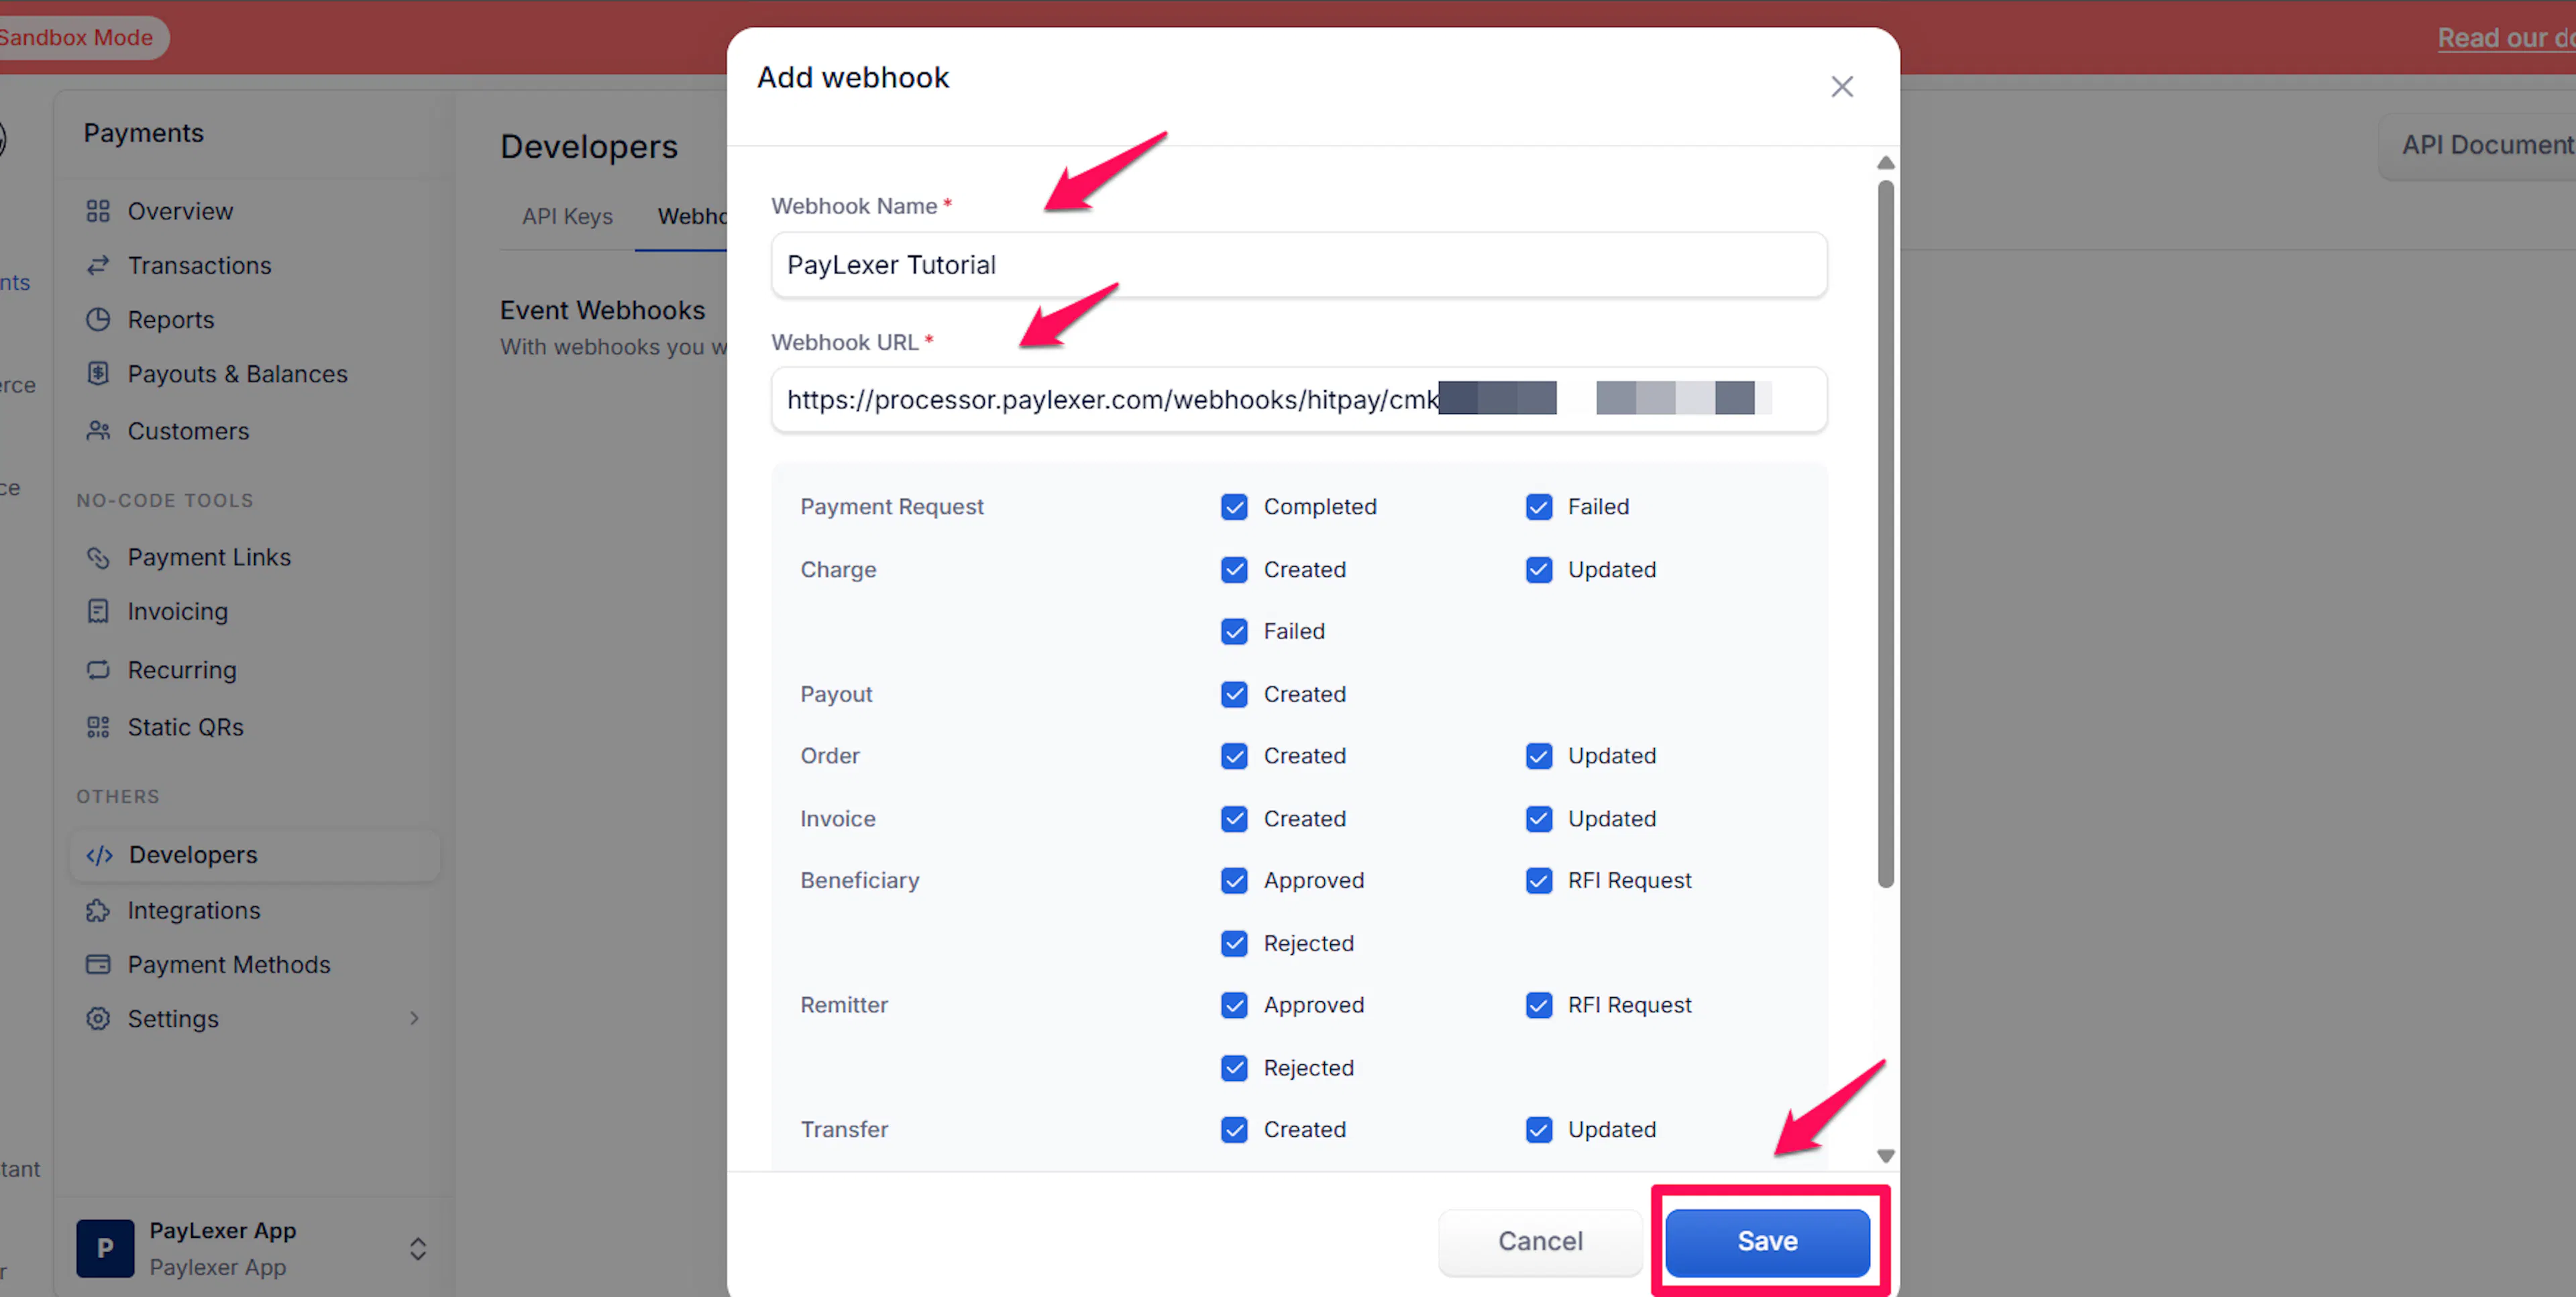
Save the webhook.
Copy your Event Webhook Salt
After the webhook is created, click on the webhook row in the Webhook Endpoints tab to open its details.
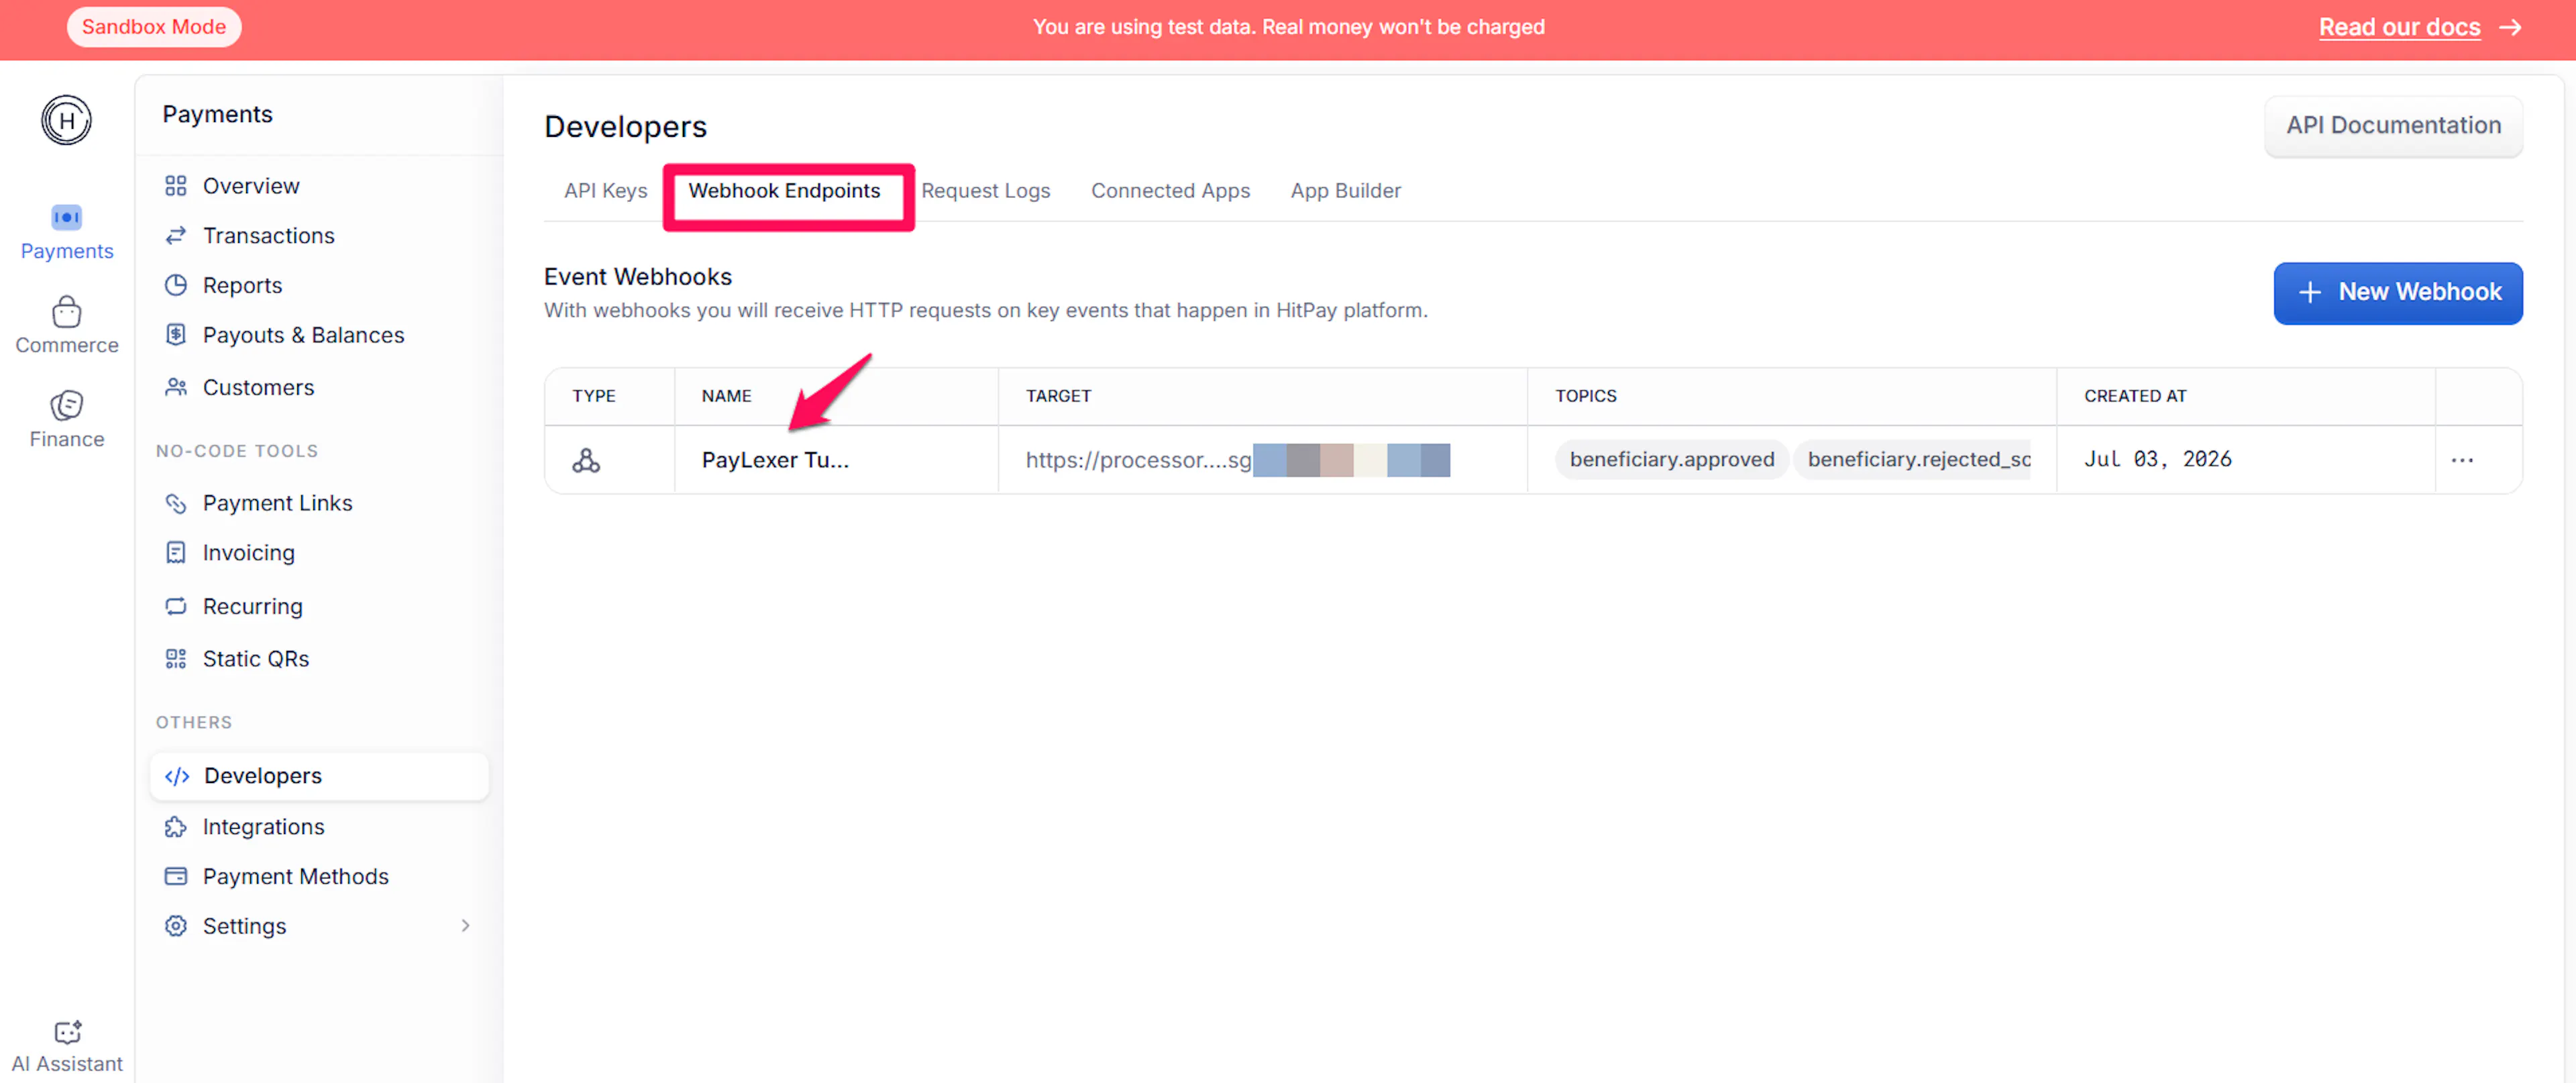
Copy the Salt shown - this is your Event Webhook Salt for PayLexer.
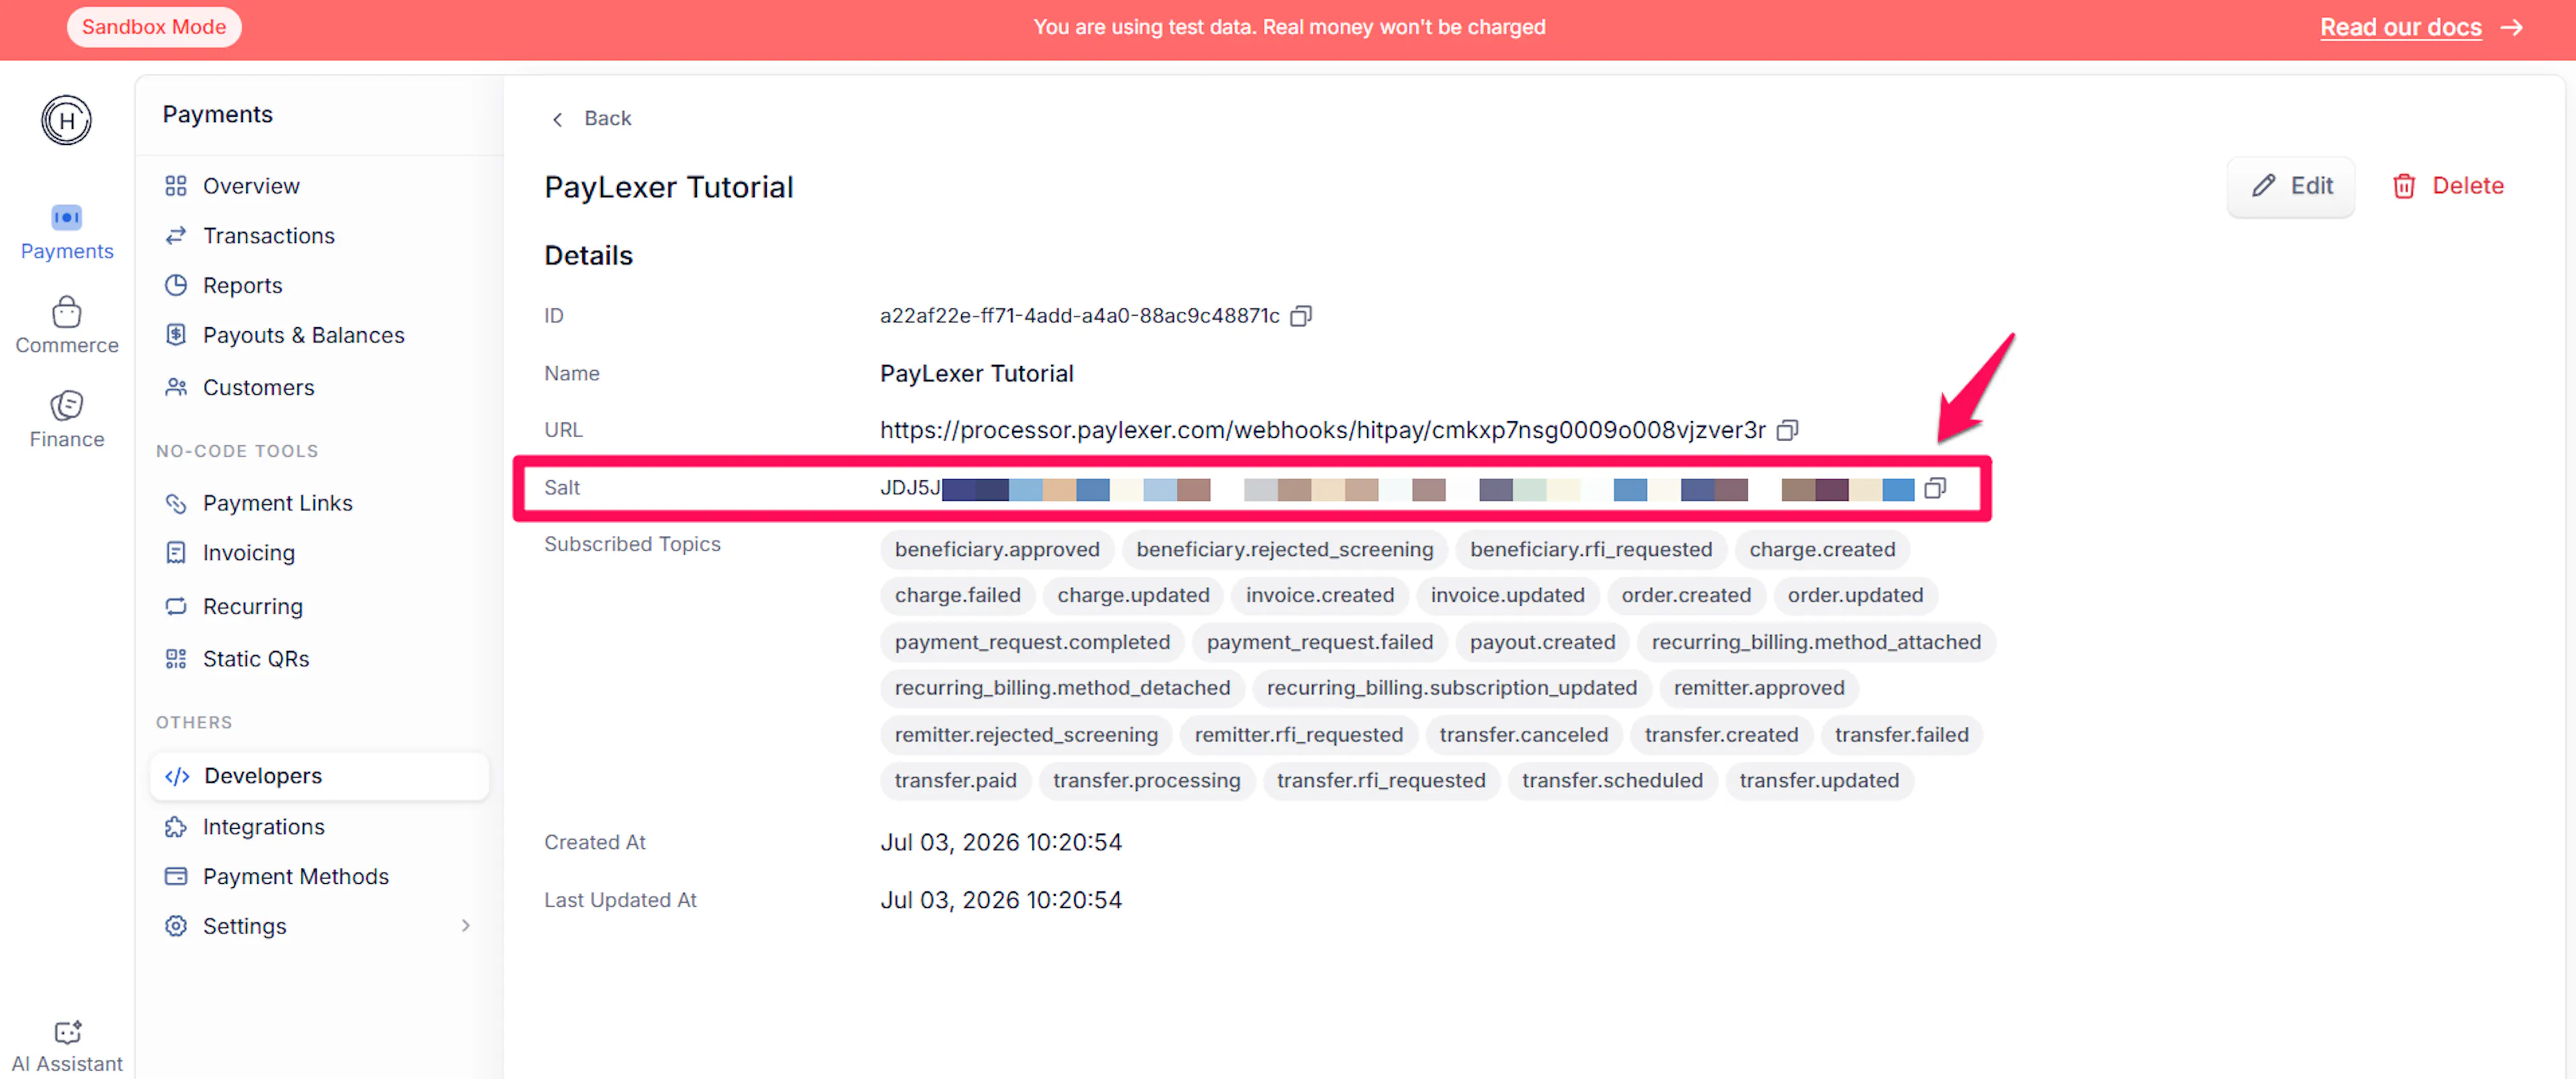
Keep this Salt secure. If you delete and recreate the webhook in HitPay, a new Salt is generated - update it in PayLexer immediately to restore webhook delivery.
Repeat the steps above for the other environment (sandbox or live) to get a second set of credentials.
Adding Credentials to PayLexer
Open PayLexer Dashboard
Log in to your PayLexer dashboard and navigate to Payment Gateways → HitPay.
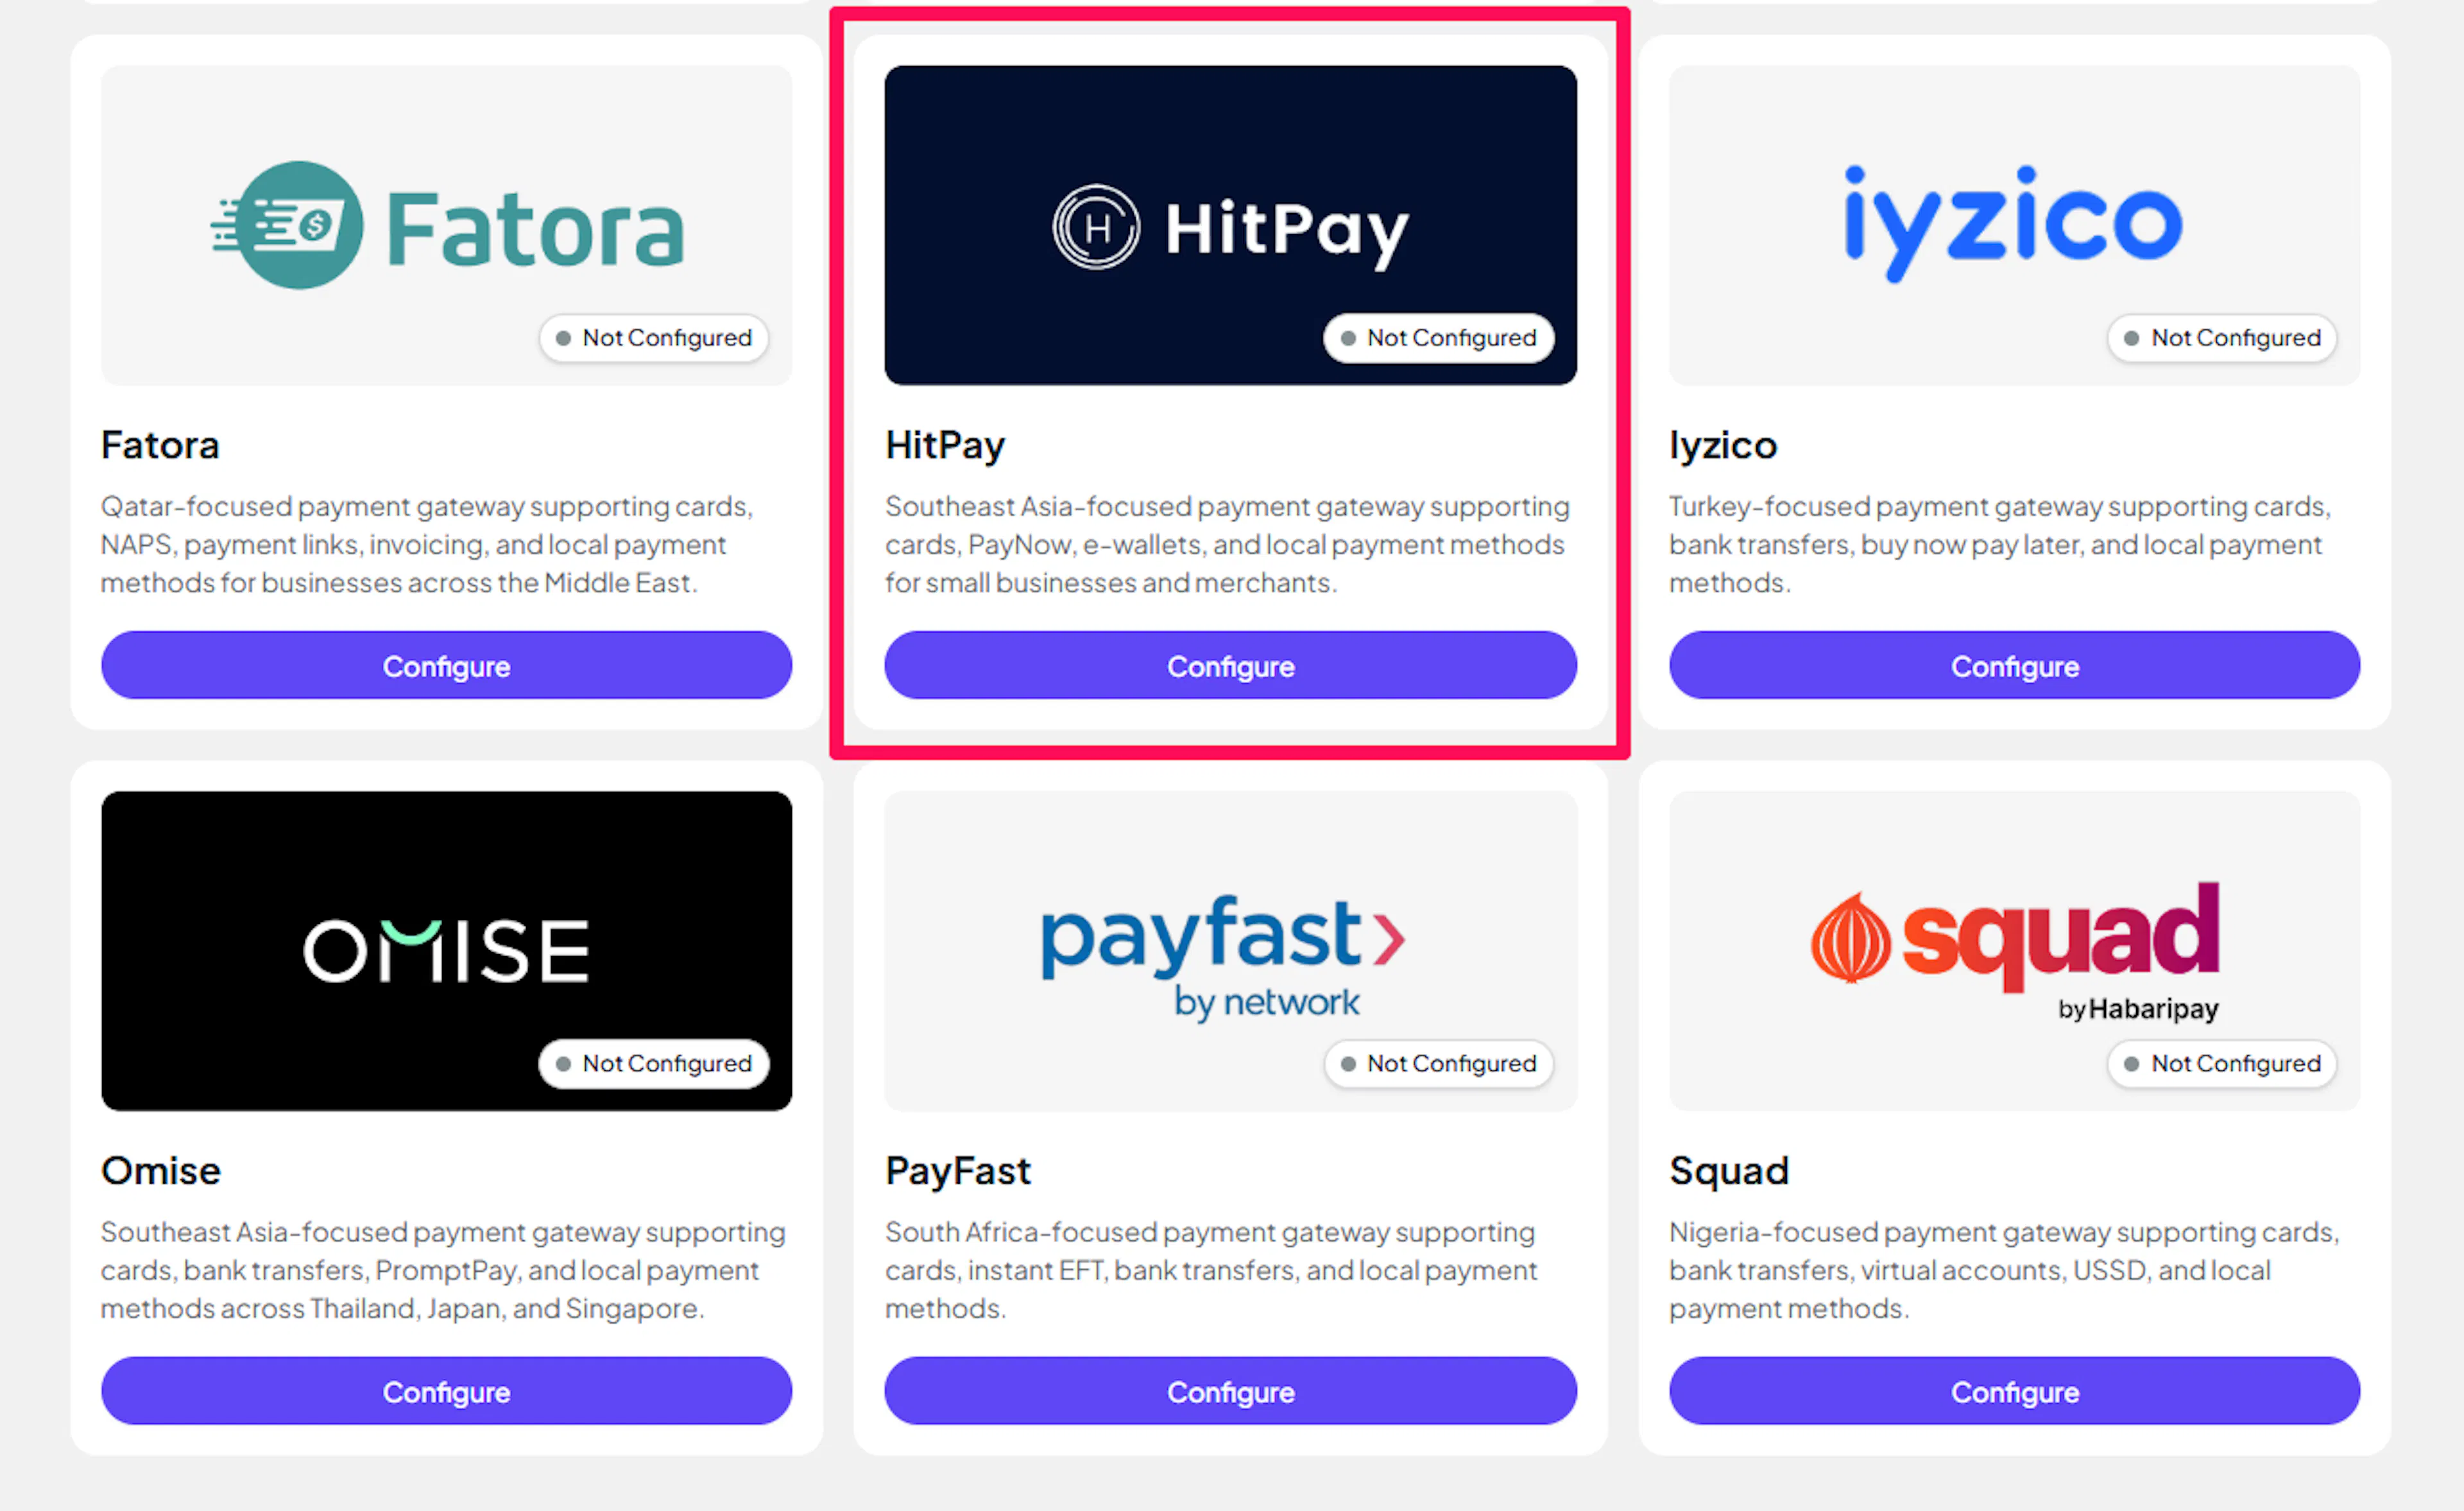
Enter your credentials
Paste your Live and Test credentials into the respective fields:
- API Key - the API Key from your HitPay live account
- Event Webhook Salt - the Salt from your HitPay live webhook
- API Key (Test) - the API Key from your HitPay sandbox account
- Event Webhook Salt (Test) - the Salt from your HitPay sandbox webhook
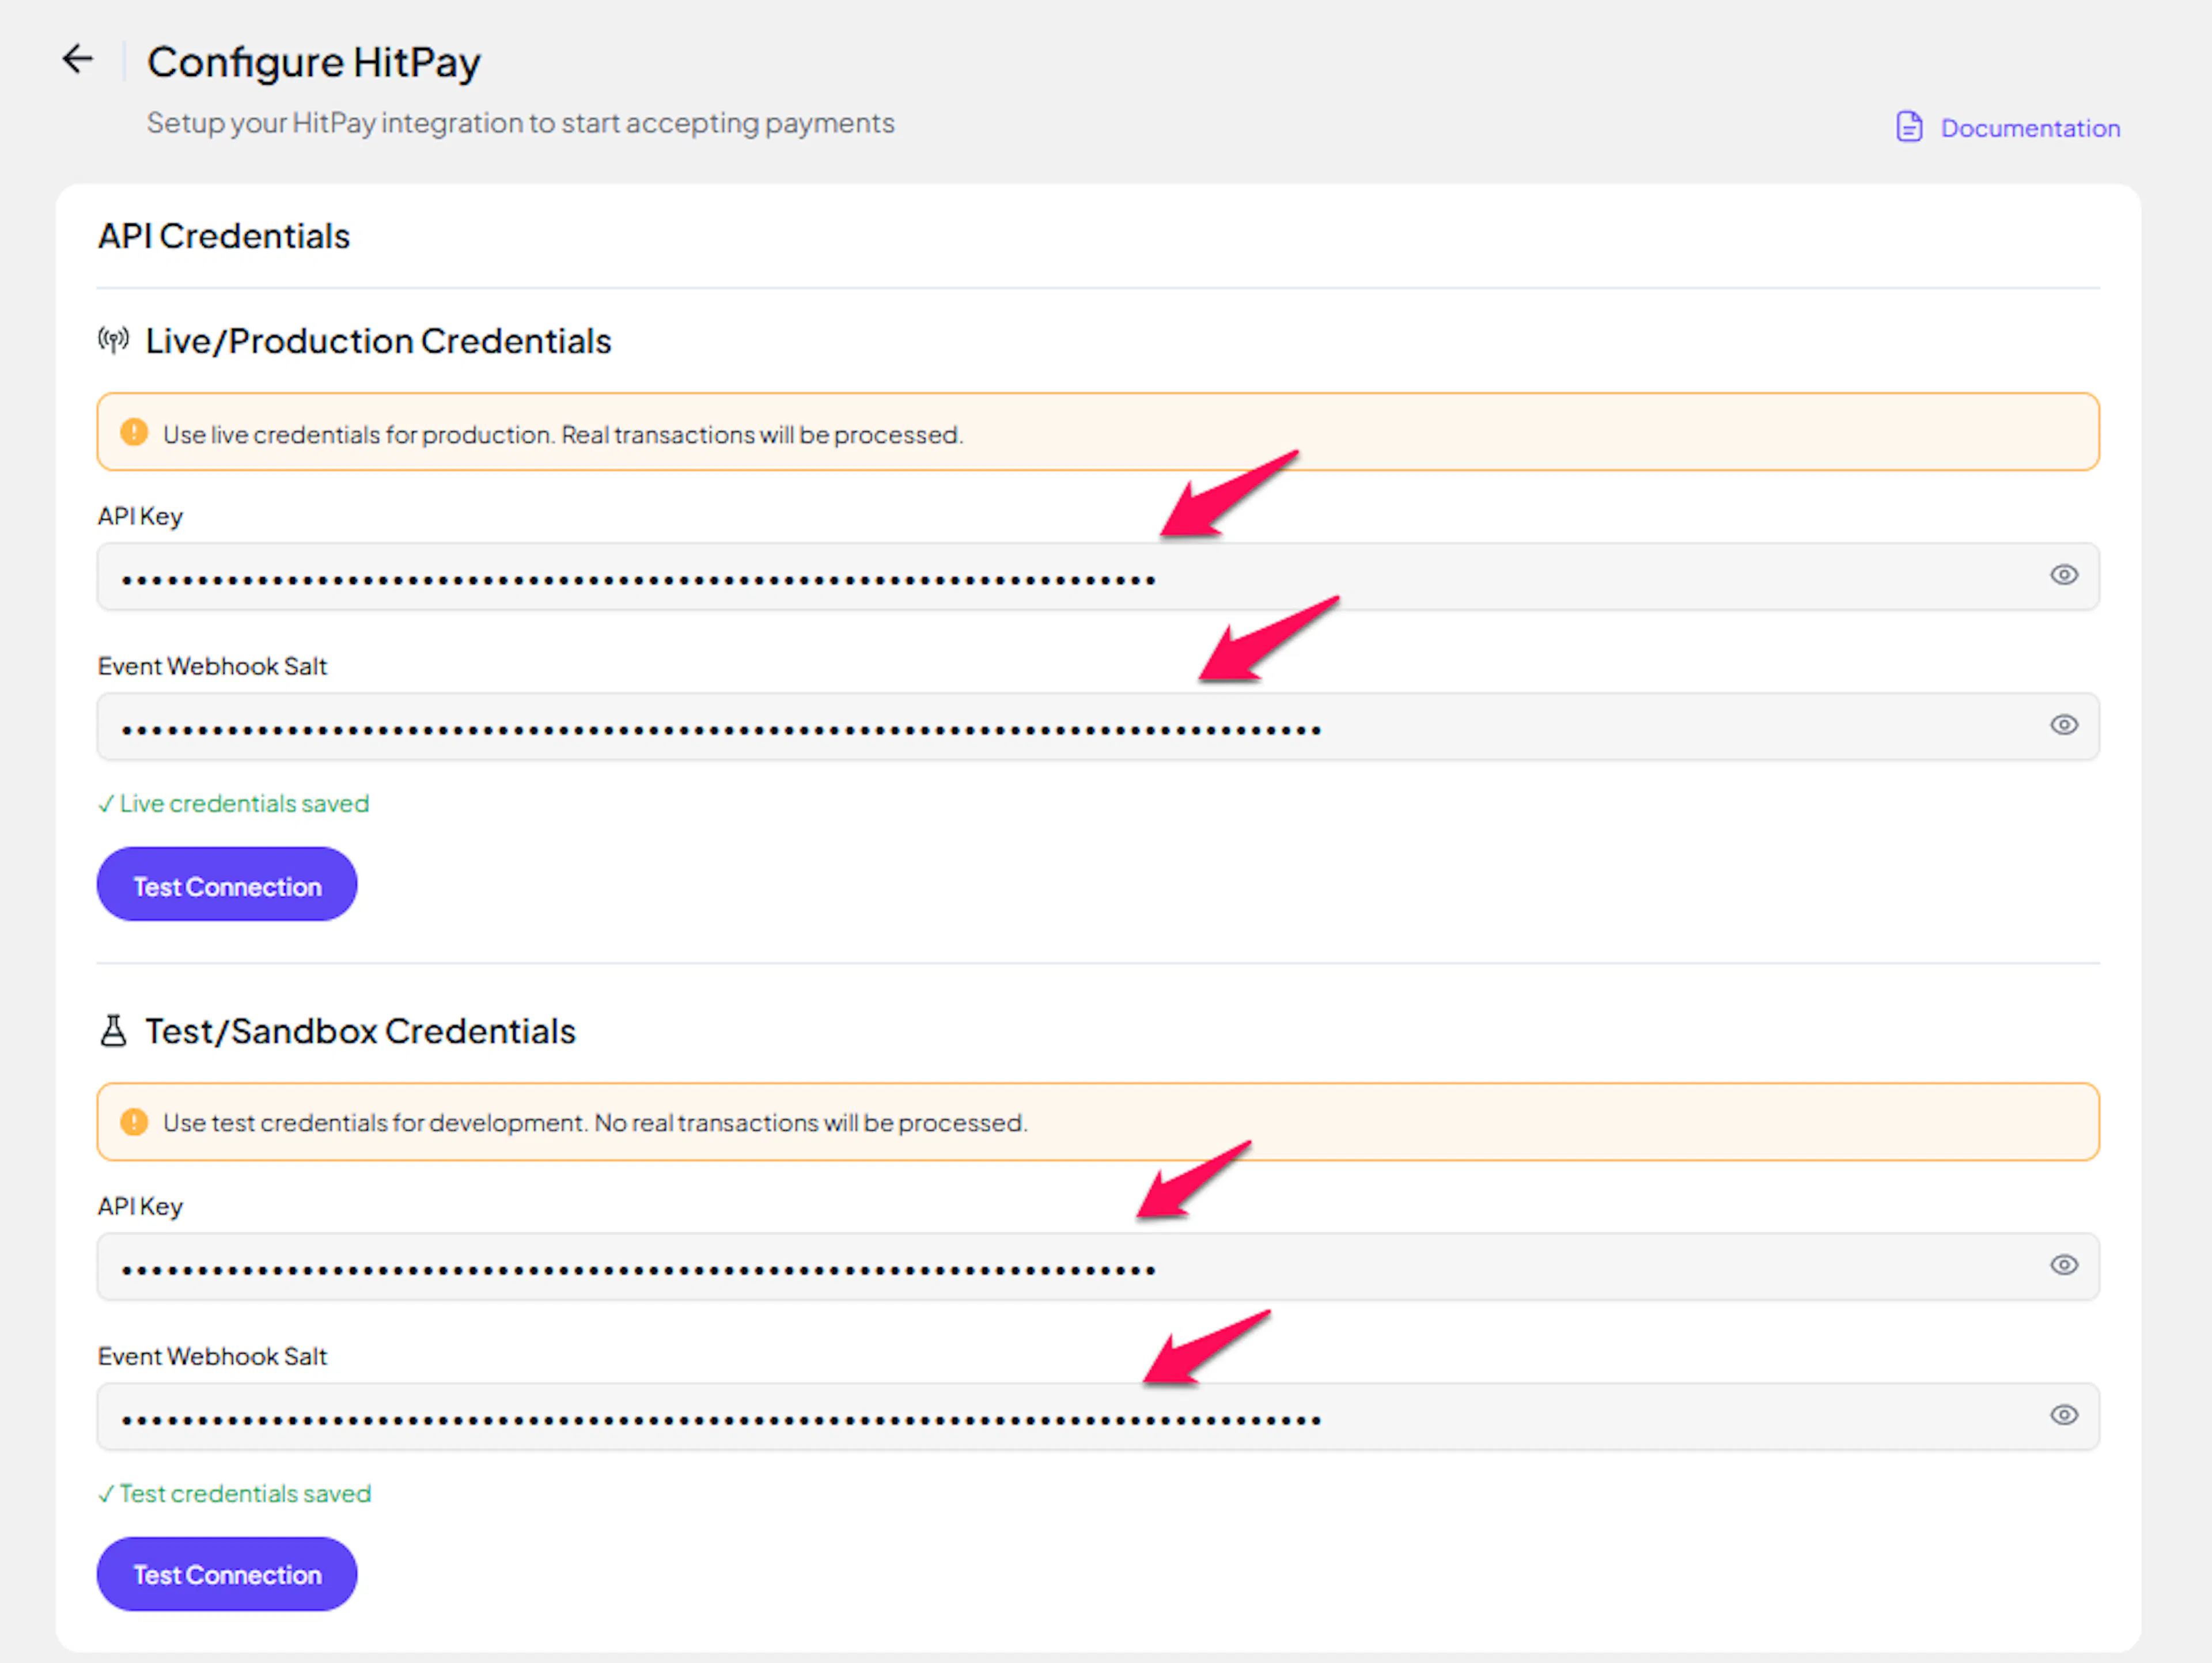
Understanding Live/Production and Sandbox Settings:
| Environment | Purpose |
|---|---|
| Live / Production (Mandatory) | Used for real transactions. Cannot be empty, even when testing. |
| Test / Sandbox (Optional) | Used for testing only. No real money is processed. |
How PayLexer selects credentials:
- Debug/Test mode ON → Test credentials are used
- Debug/Test mode OFF → Live credentials are used
Save your configuration
Click Save. PayLexer validates the credentials against HitPay's API and shows Connected if both environments authenticate successfully.
Credentials saved. You can now enable HitPay on any of your websites.
Webhooks
HitPay sends payment and subscription event notifications to PayLexer via the Event Webhook you registered above.
- PayLexer validates every incoming webhook using the Event Webhook Salt and the
Hitpay-Signatureheader - events with invalid signatures are rejected automatically - Refunds are delivered via webhook when a charge is updated with a refunded amount - no separate setup is needed
- Subscription lifecycle events (card attached, billing cycle charged, plan cancelled) arrive via recurring billing webhooks through the same endpoint
Integrate HitPay to Your Website
If you have already added and configured your site, you can enable HitPay in your existing setup.
Go to Websites
Navigate to Websites in your PayLexer dashboard.
Edit your website
Click the Edit Icon of your added website.
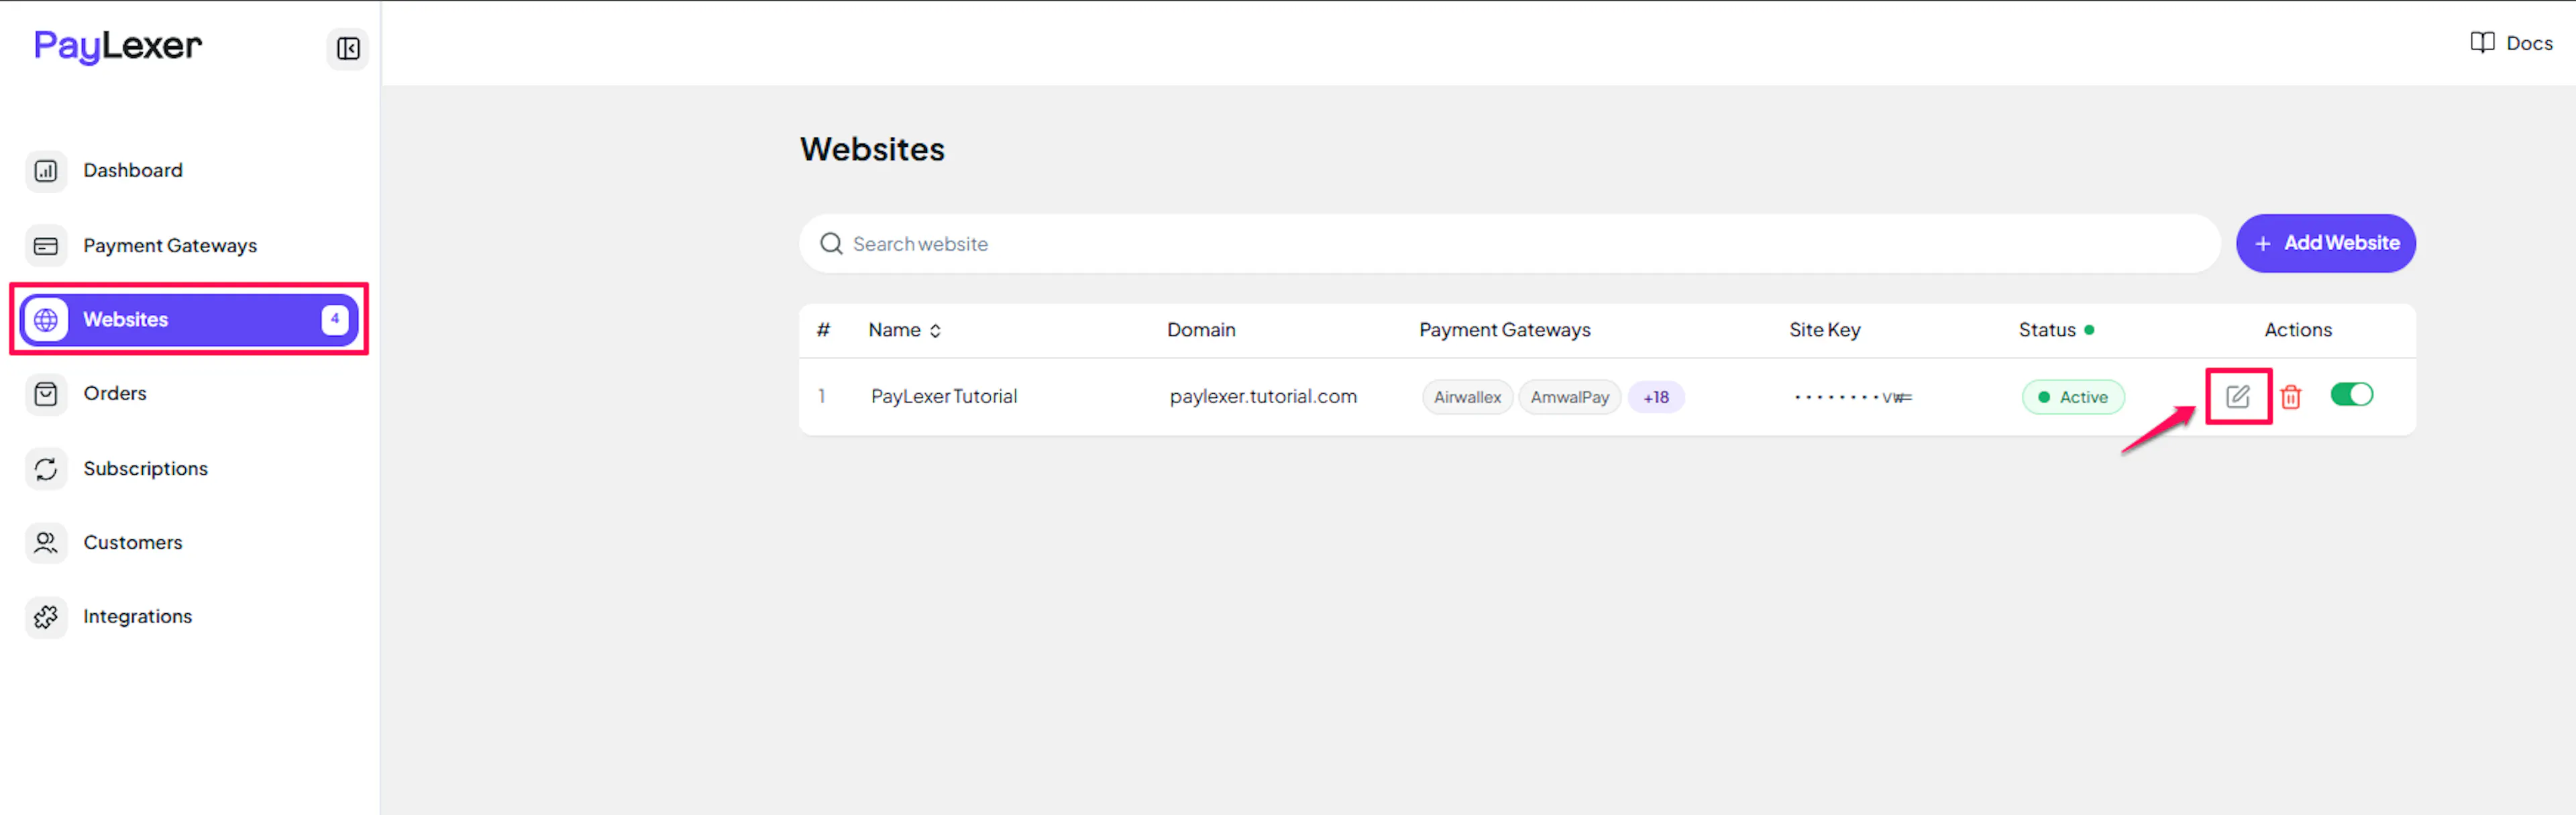
Enable HitPay
Click the checkbox to enable HitPay for the website.
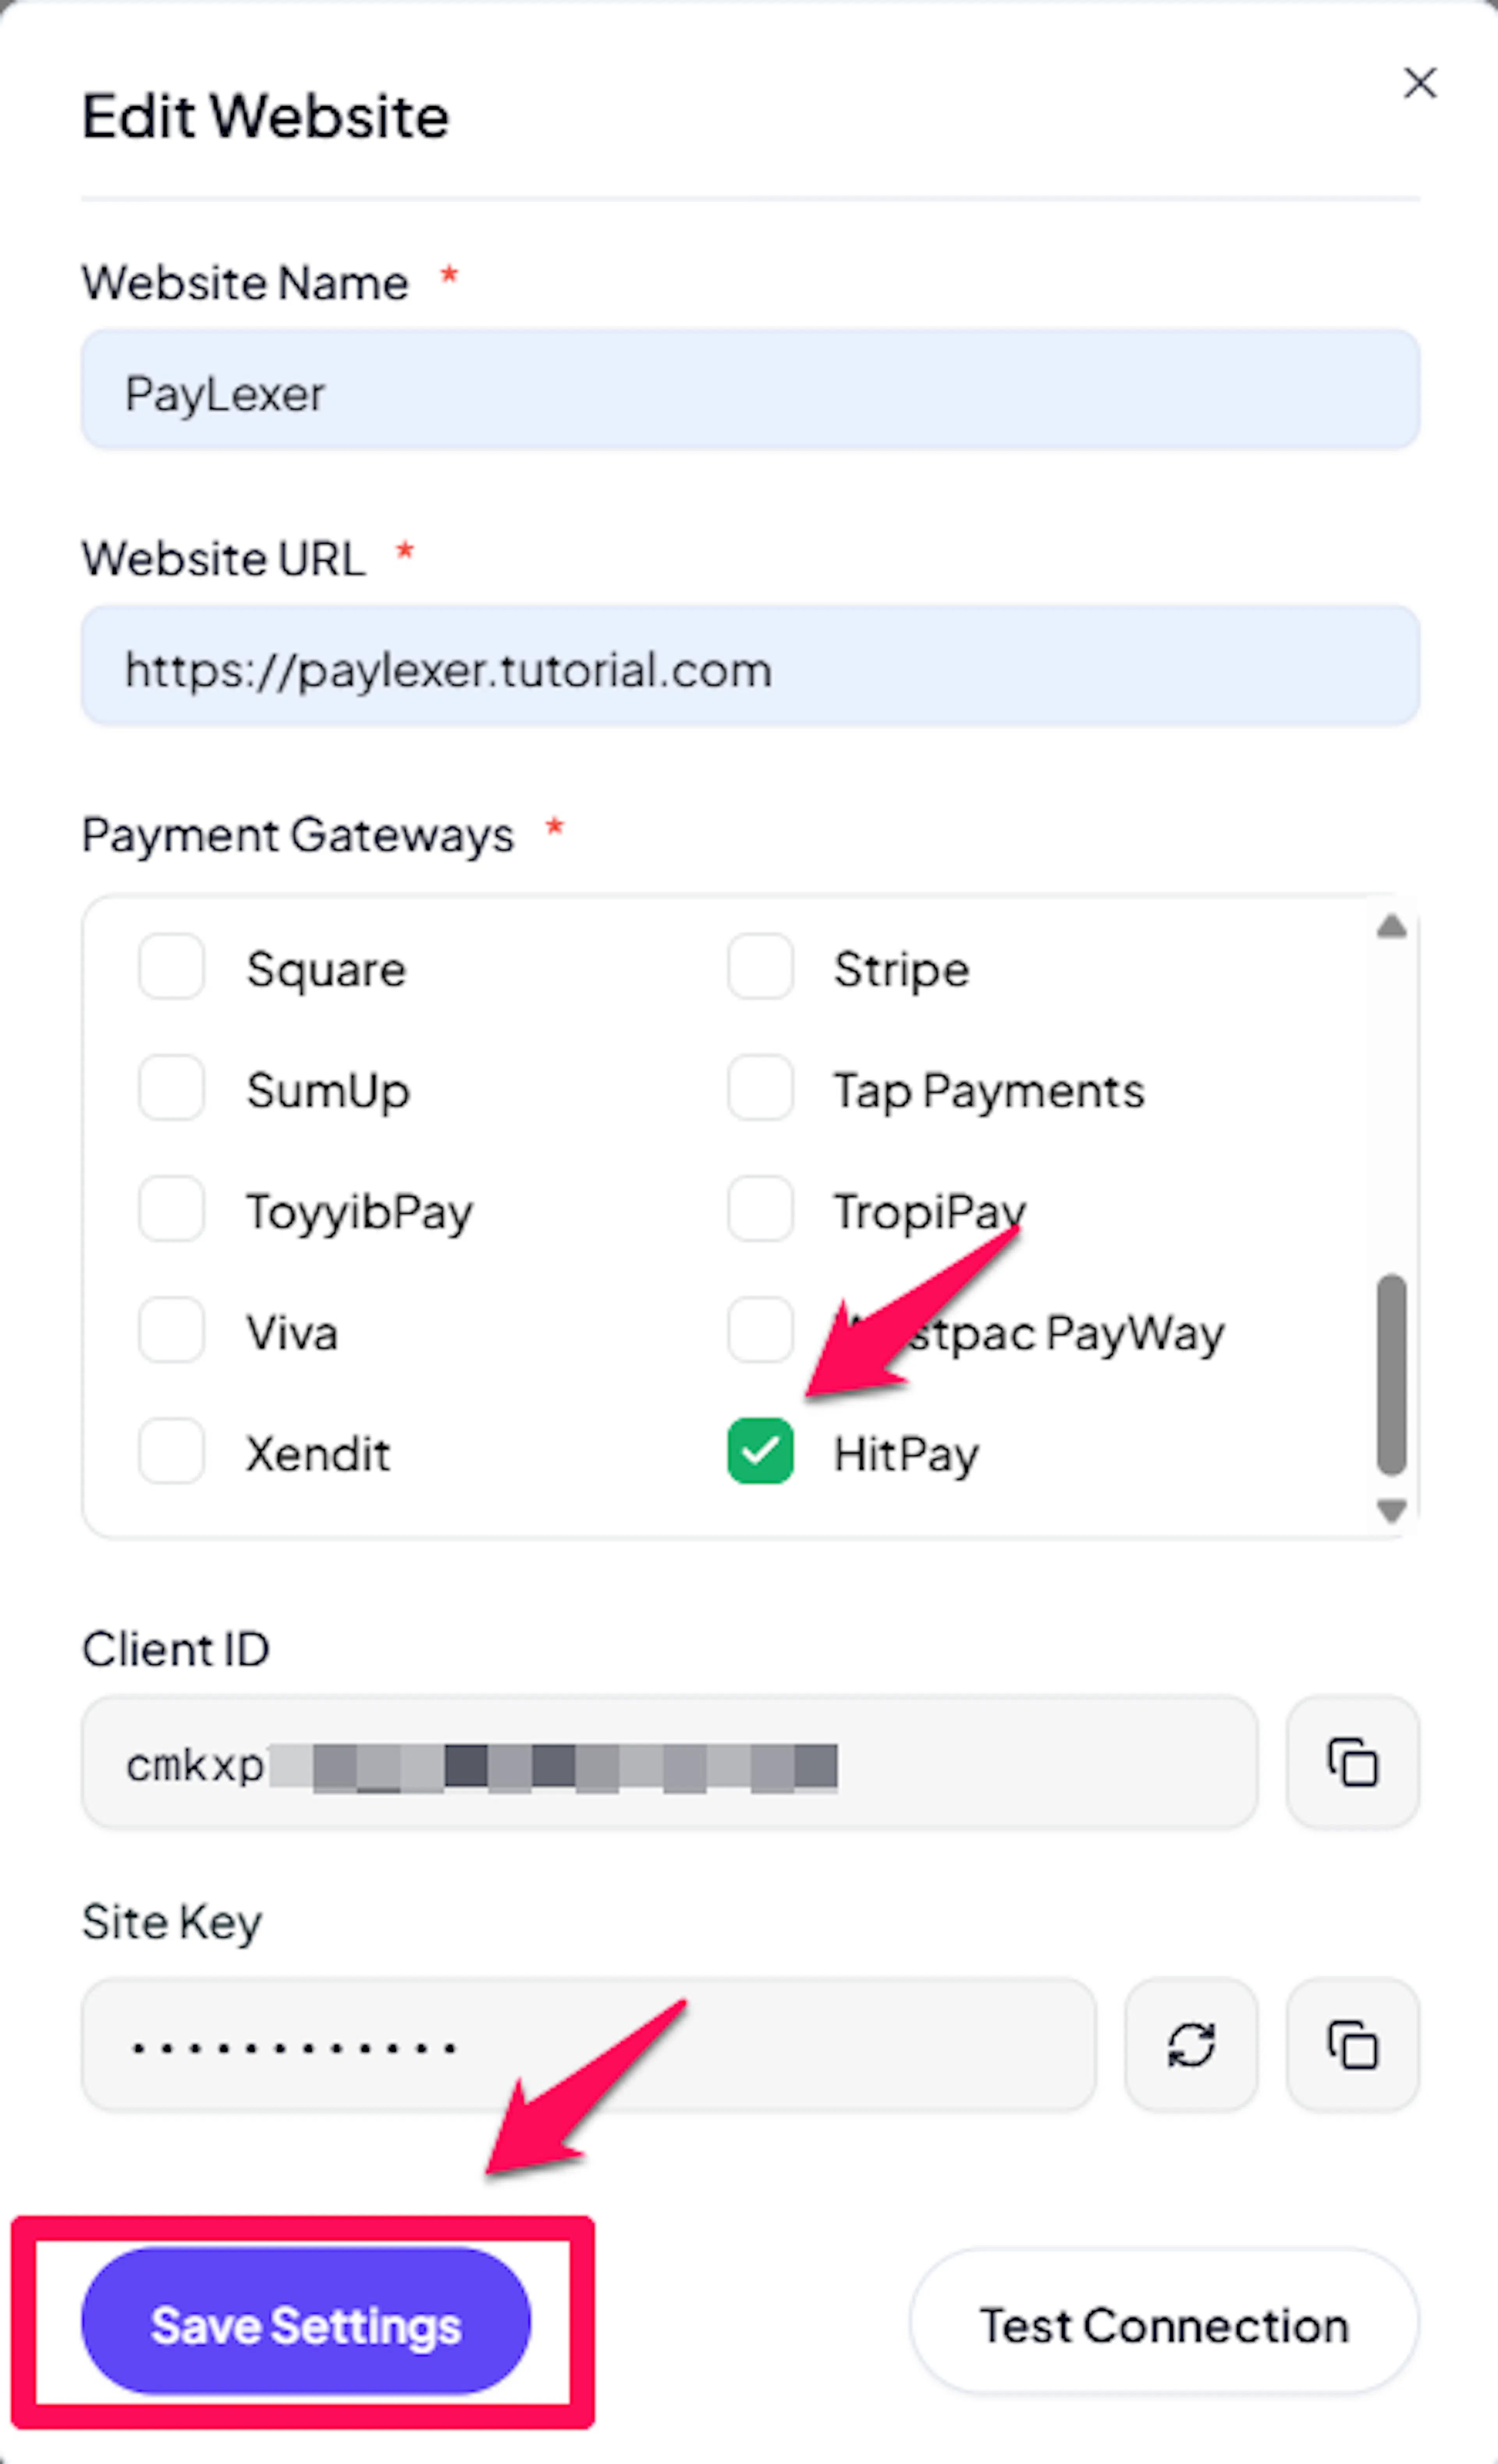
HitPay is now active for this website. Run a test transaction before switching off Debug/Test mode.
If you haven't added a website yet, Continue to Add Your Website →
Troubleshooting
Best Practices
- Run at least one full test transaction using your sandbox credentials and Debug/Test mode before going live. The sandbox portal (dashboard.sandbox.hit-pay.com) and live portal (dashboard.hit-pay.com) are isolated - test transactions do not affect live data.
- Create a dedicated webhook in HitPay named "PayLexer" so it is easy to identify and manage separately from other integrations.
- Keep your Event Webhook Salt confidential. If you recreate the webhook in HitPay, the Salt changes - update PayLexer immediately to avoid broken webhook delivery.
- If you use subscriptions, confirm the recurring billing events are selected in your HitPay webhook. Without them, subscription activations and renewals will not be reflected in PayLexer.
- Confirm the checkout currency is one of HitPay's 13 supported currencies before enabling the gateway. Unsupported currencies will prevent HitPay from appearing at checkout.
FAQs
Still Have Questions?
- HitPay Support: HitPay Help Center
- PayLexer Support: Contact Support
For HitPay API references and advanced configuration, see the HitPay developer documentation.