

QuickPay
Connect QuickPay to PayLexer to accept card payments through a Nordic hosted checkout page, with signed webhook callbacks and a polling fallback, across Denmark, Sweden, and Norway.
QuickPay is a Danish payment service provider headquartered in Aarhus, founded in 2004 and now part of the pan-European Unzer group. It processes payments for tens of thousands of webshops and gives merchants a hosted checkout page for card payments backed by multiple local Nordic acquirers.
- Supported Regions (Merchant Accounts): Denmark, Sweden, and Norway - view full list
- Supported Currencies: DKK, EUR, USD, GBP, SEK, and NOK
Supported Features
- Card payments through a QuickPay-hosted Payment Window (Link)
- Signed webhook callbacks that verify every payment update before your order status changes
- An automatic polling fallback that rechecks payment status if a webhook is ever delayed or lost
- Full and partial refunds, tracked directly against the original payment
- Credential testing from the PayLexer dashboard, with no risk to your QuickPay account
- Separate sandbox and live environments for safe testing
QuickPay does not support subscription billing through PayLexer currently.
Before You Start
Make sure you have:
- QuickPay Account – Don't have one? Sign up for QuickPay →
- PayLexer Account – Required to configure the integration. Create your account →
- A website where you want to integrate
Looking for a different payment processor? View all supported gateways →
Configuring QuickPay
You need an API Key and a Private Key (Checksum) from QuickPay for this integration.
Getting API Credentials
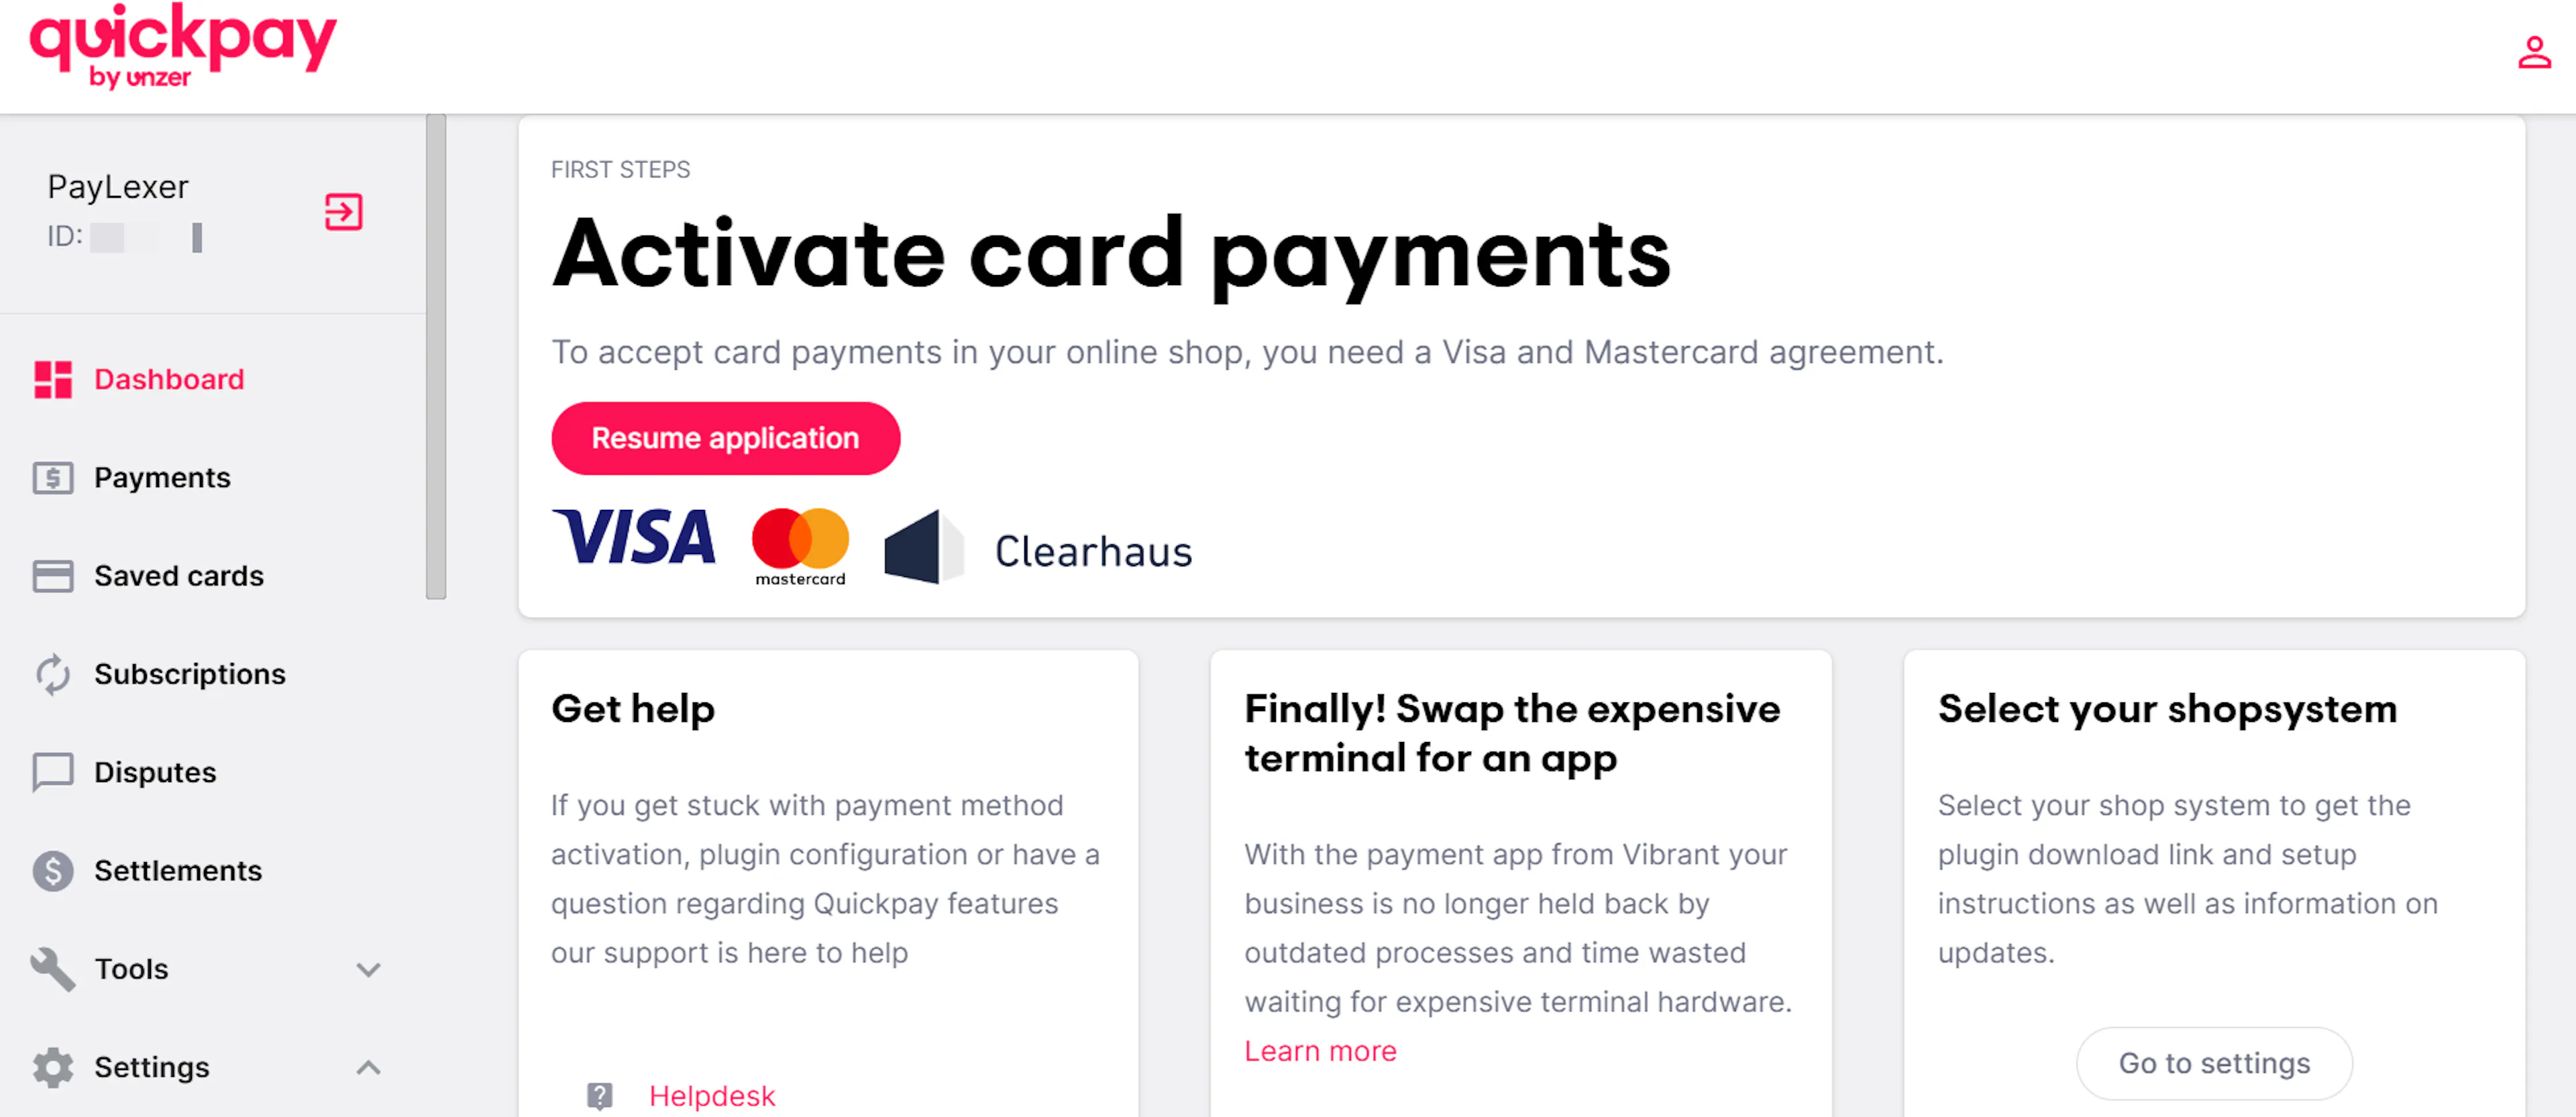
Log in to the Quickpay Manager
Sign in to the Quickpay Manager and open the merchant you want to connect to PayLexer.
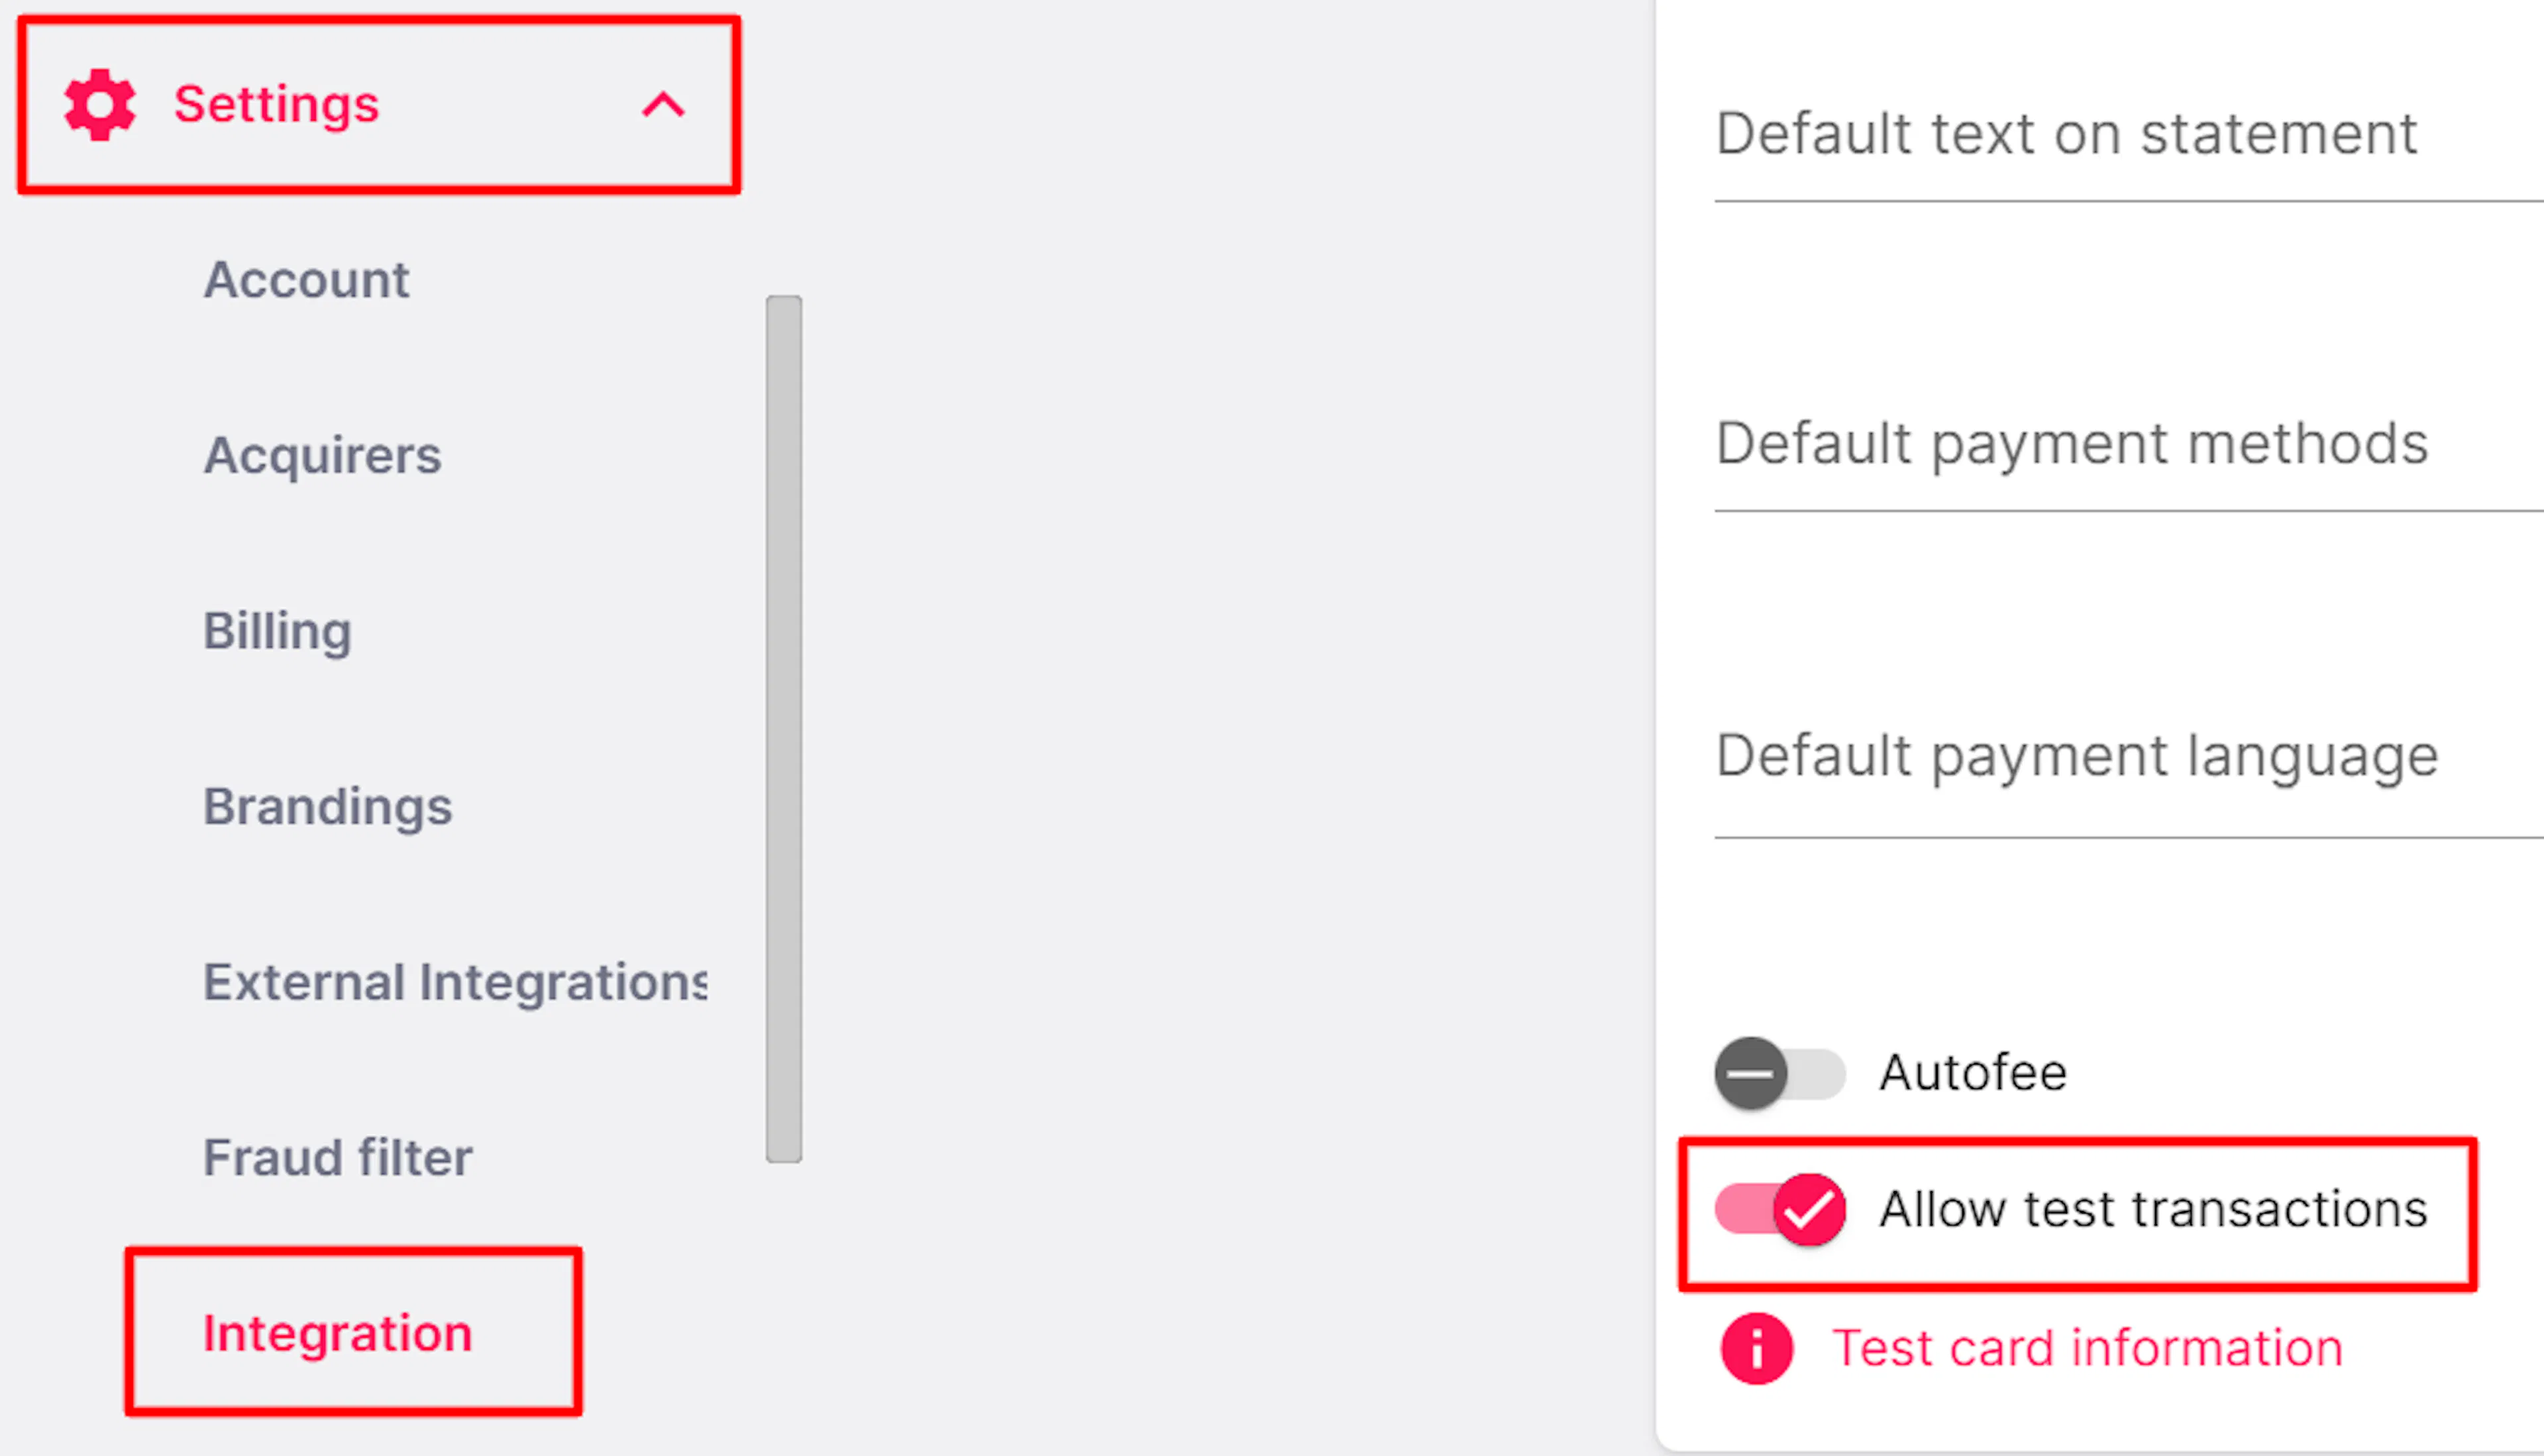
Turn on test transactions (first-time setup only)
Go to Settings → Integration and enable Allow test transactions.
Then go to Settings → Acquirers and activate an acquirer (for example Clearhaus). A new QuickPay account does not come with a usable test key until this one-time step is done.
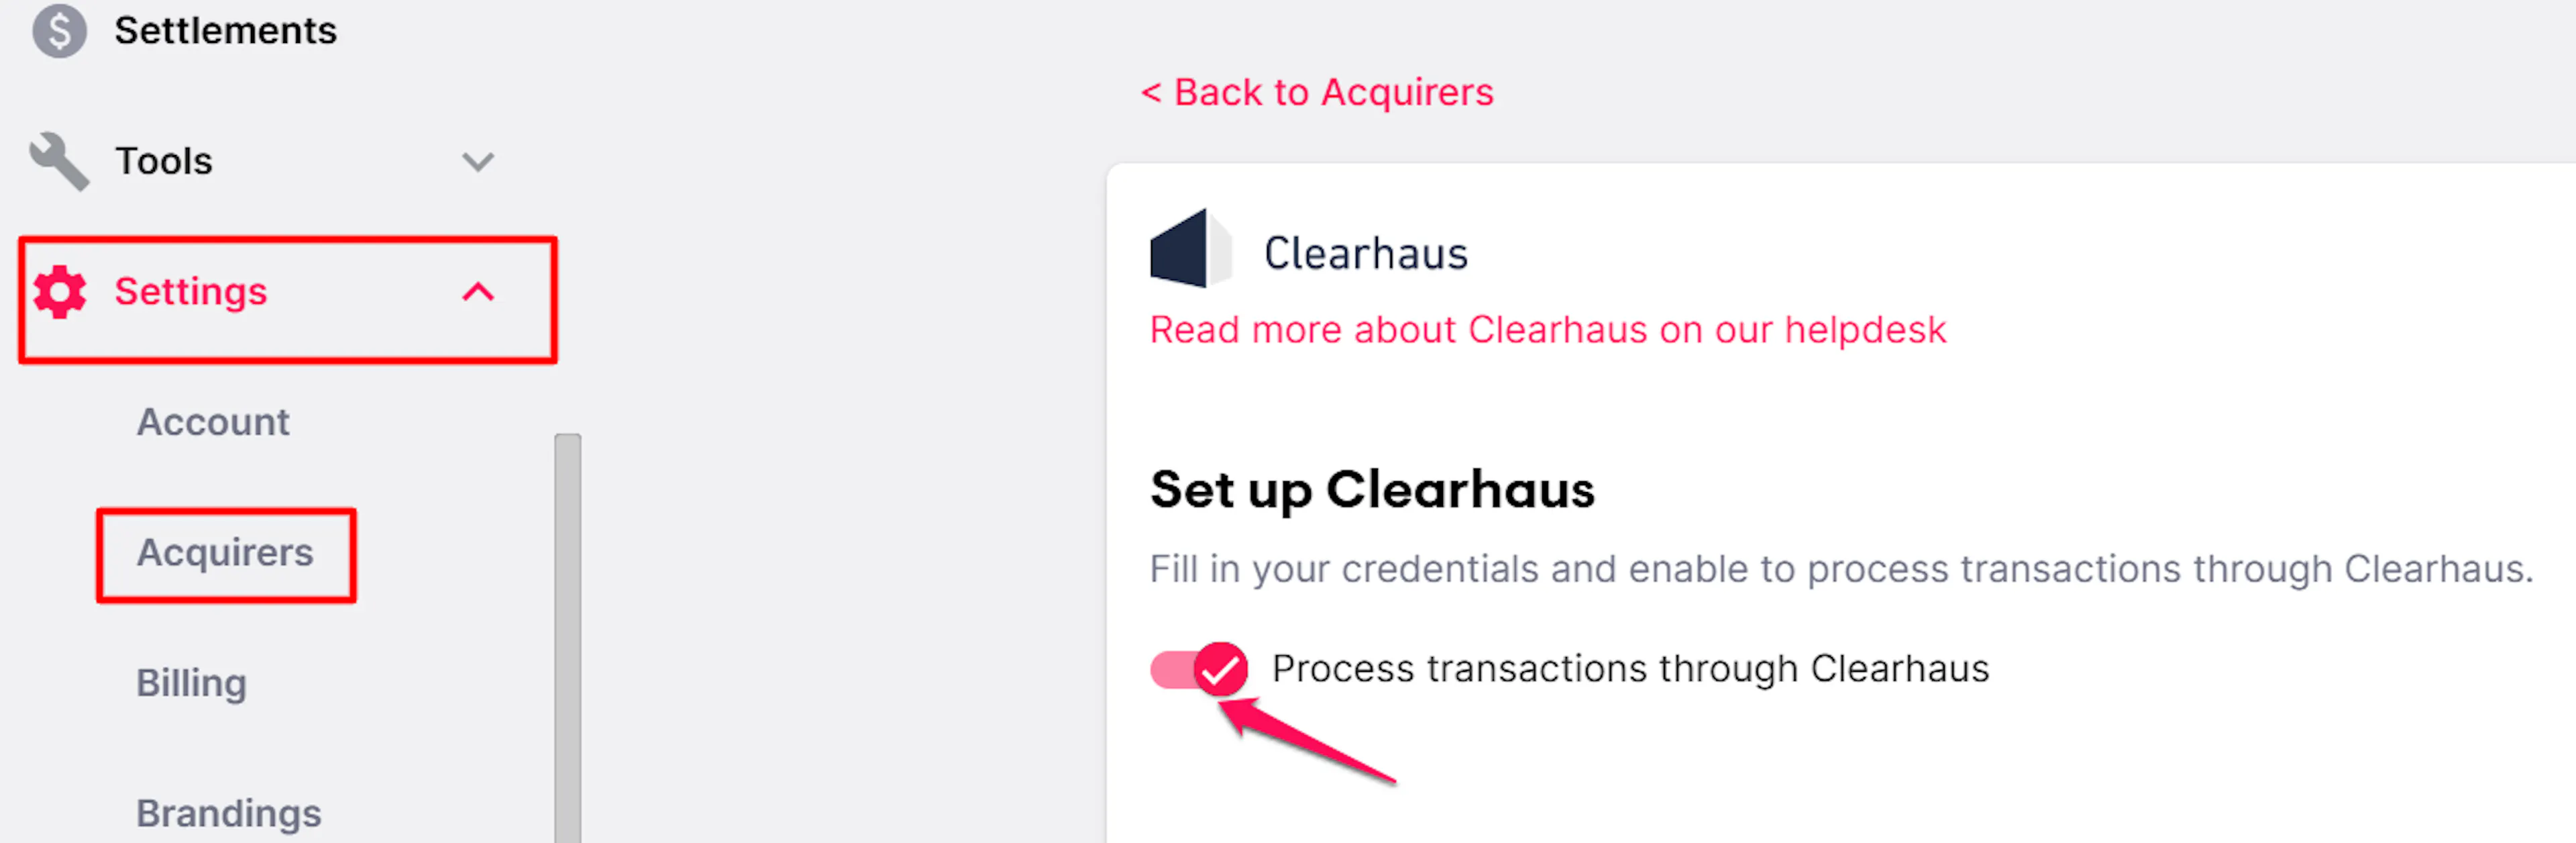
QuickPay uses the API Key to determine the payment mode. For testing, merchants typically use a separate test merchant in QuickPay Manager.
Copy your API Key
Still under Settings → Integration, find the API system user and copy its Agreement API Key.
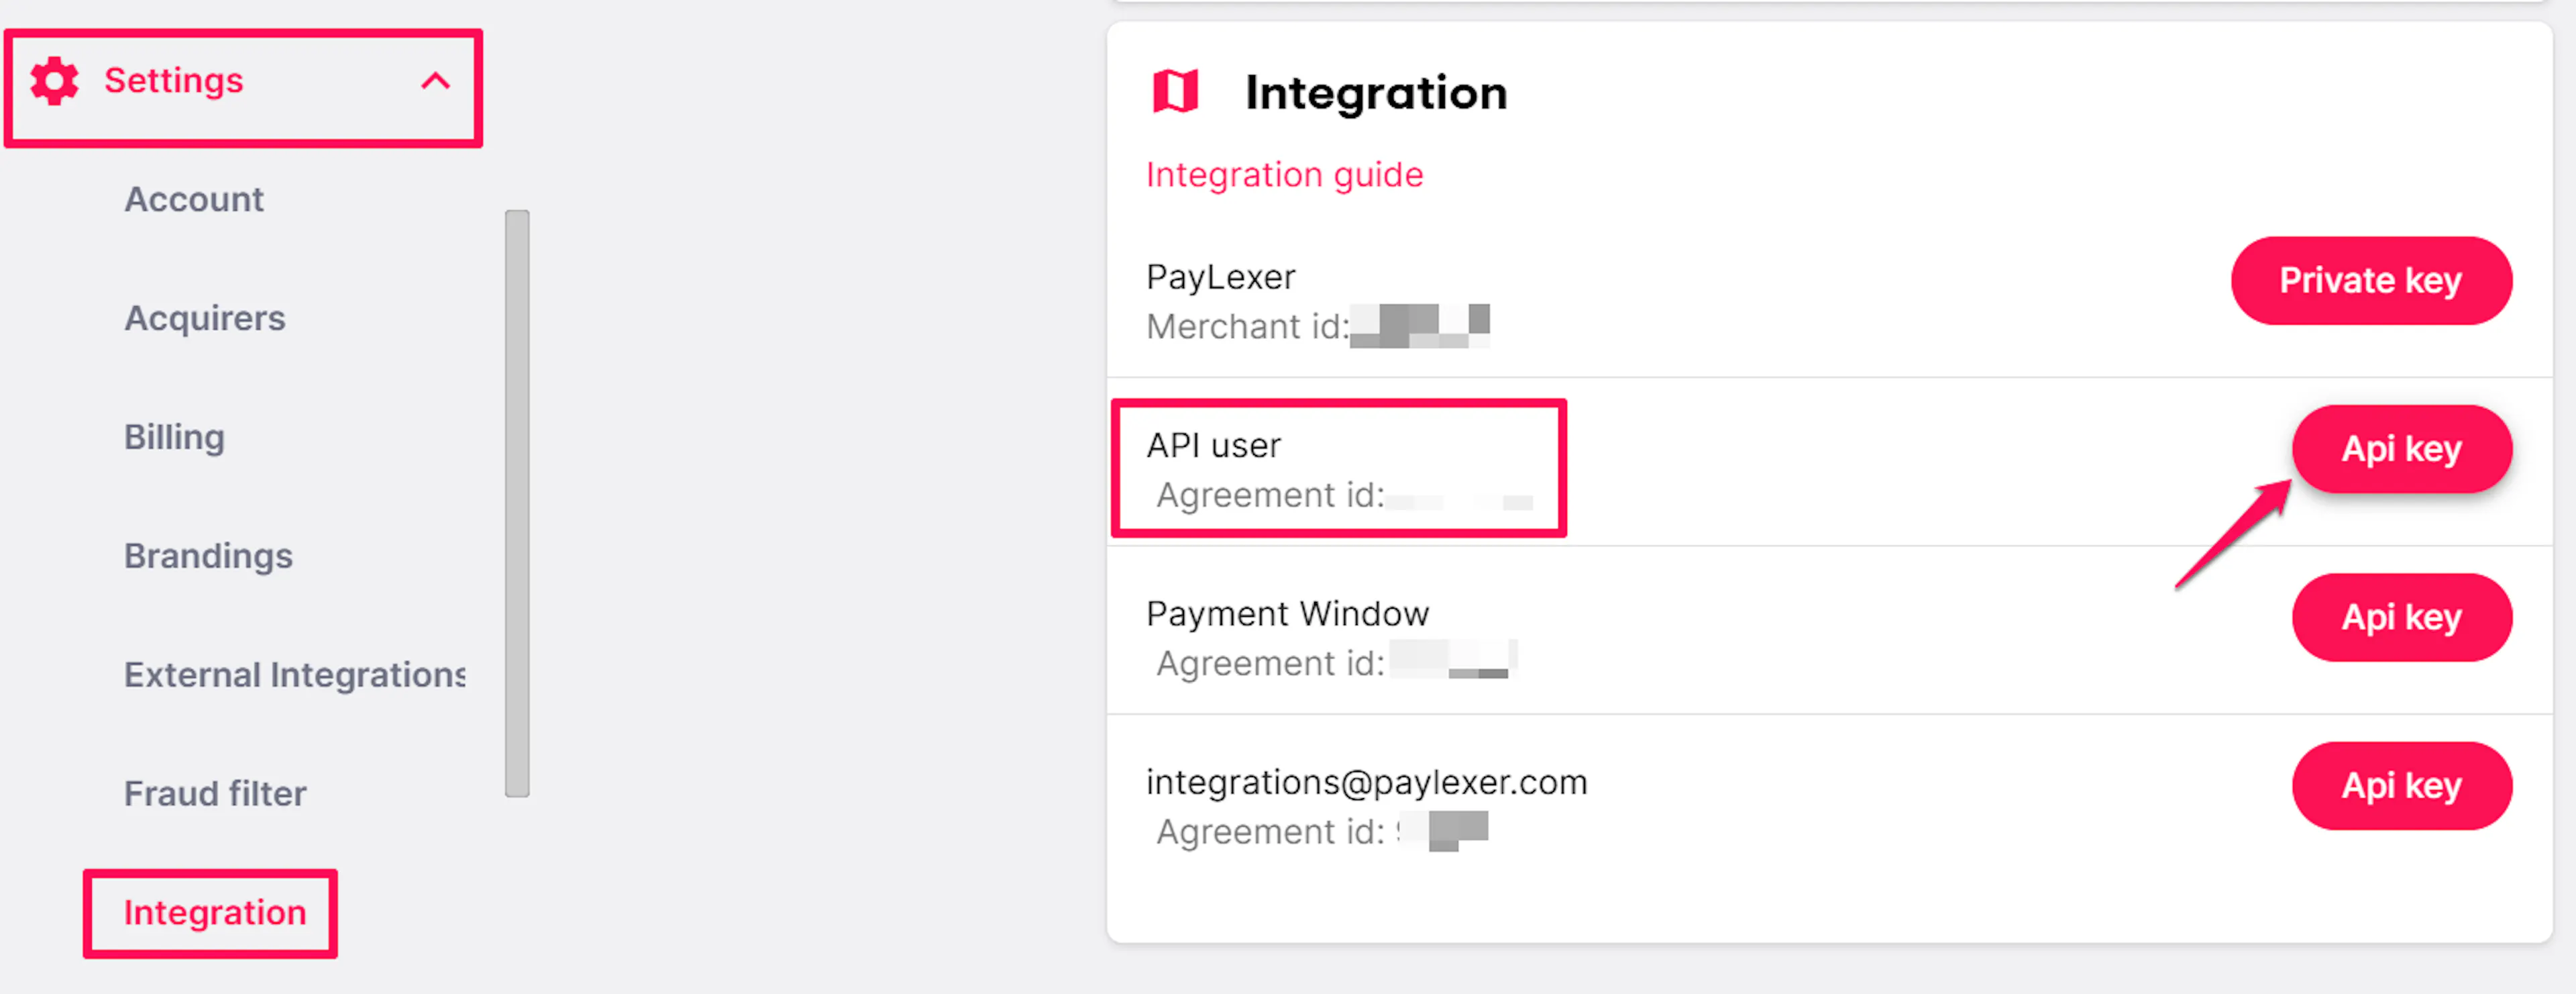
Copy your Private Key
On the same Settings → Integration page, copy the merchant's Private Key. You will paste this into PayLexer's webhook settings later.
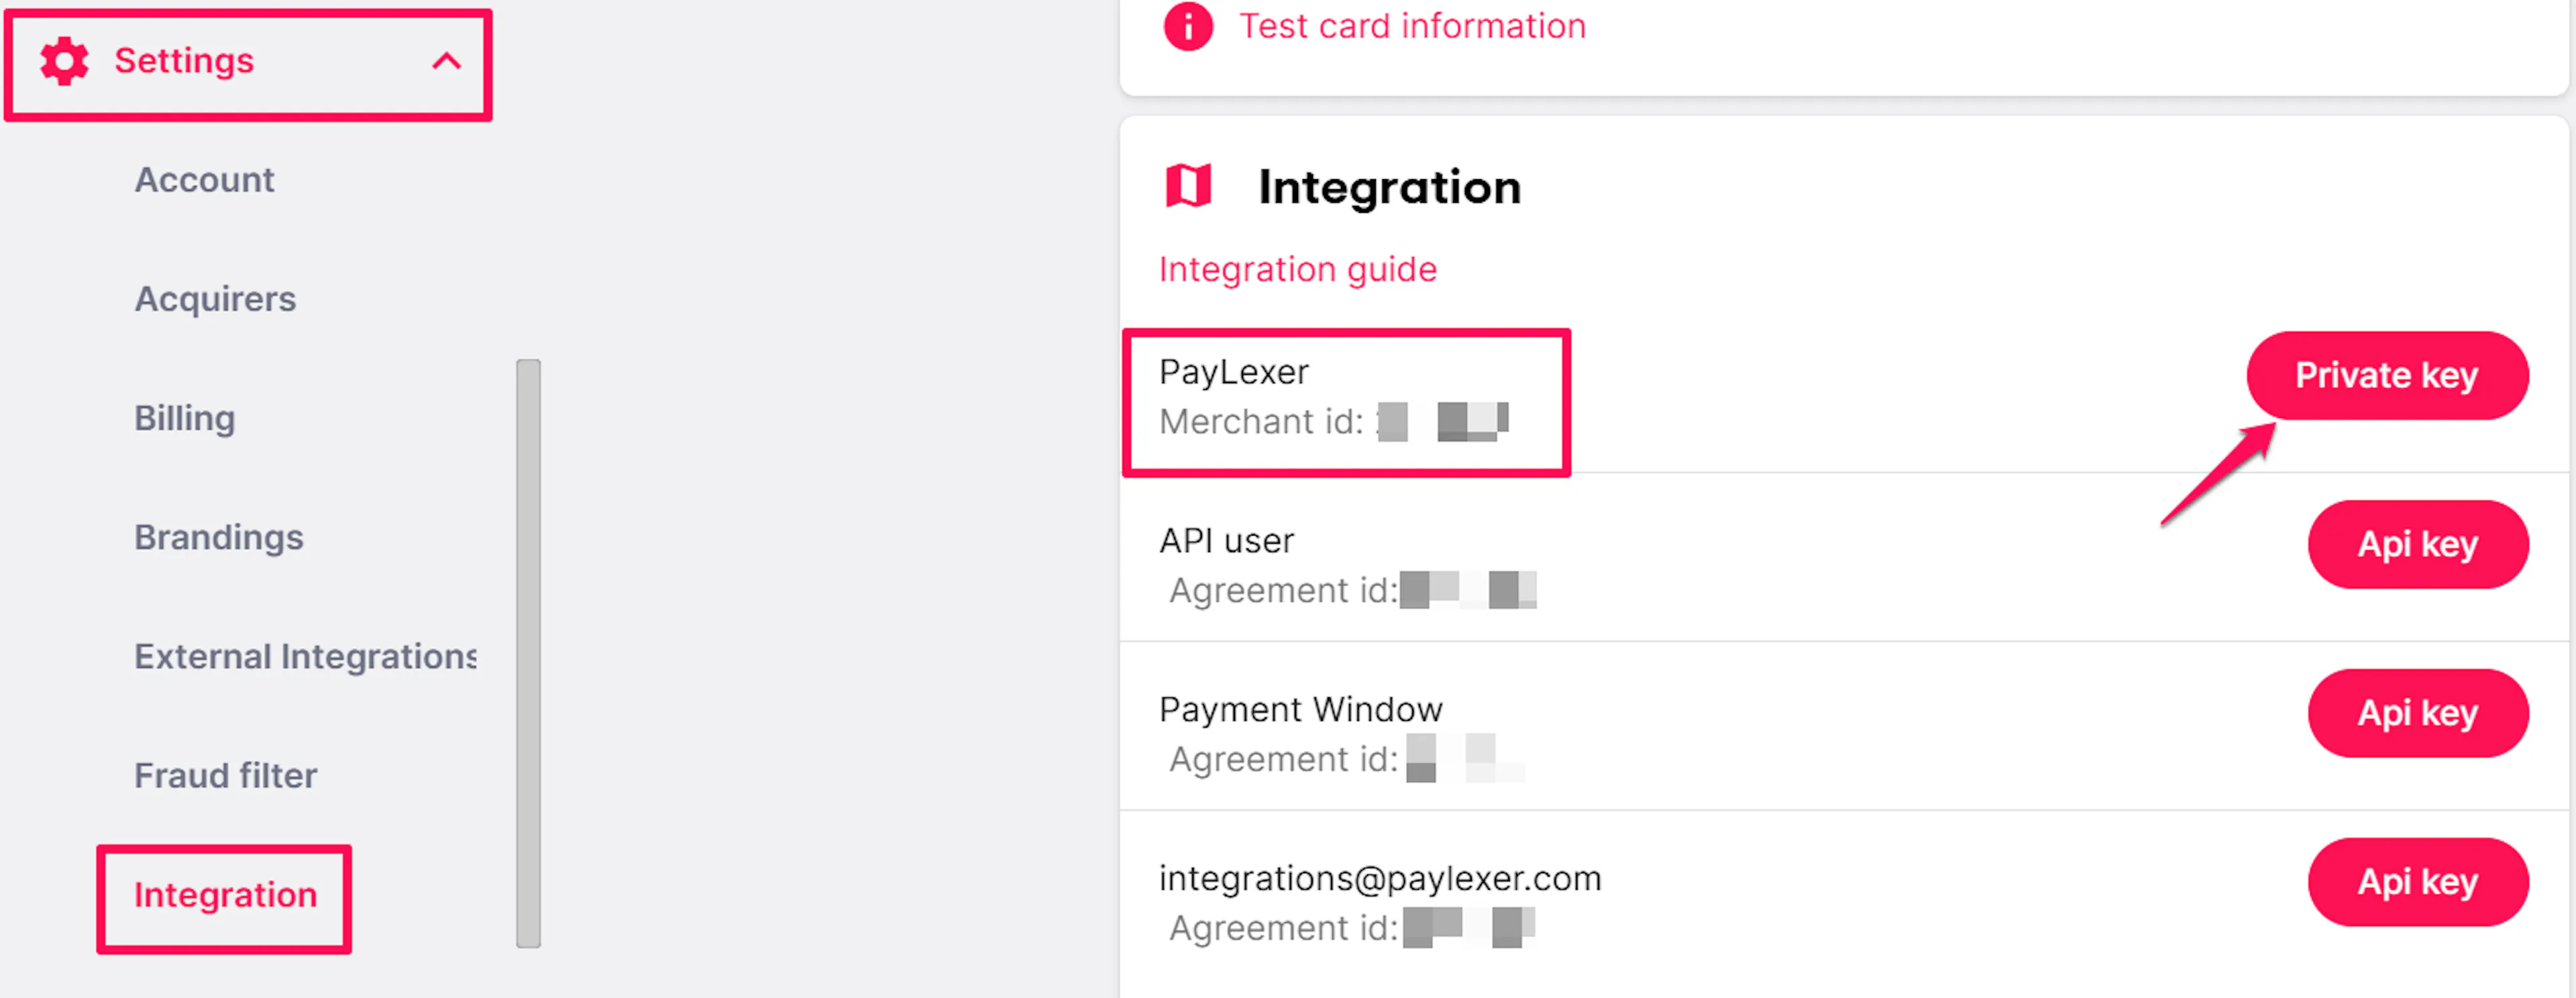
The Private Key verifies every callback QuickPay sends to PayLexer. Keep it as secret as your API Key.
Adding Credentials to PayLexer
Open PayLexer Dashboard
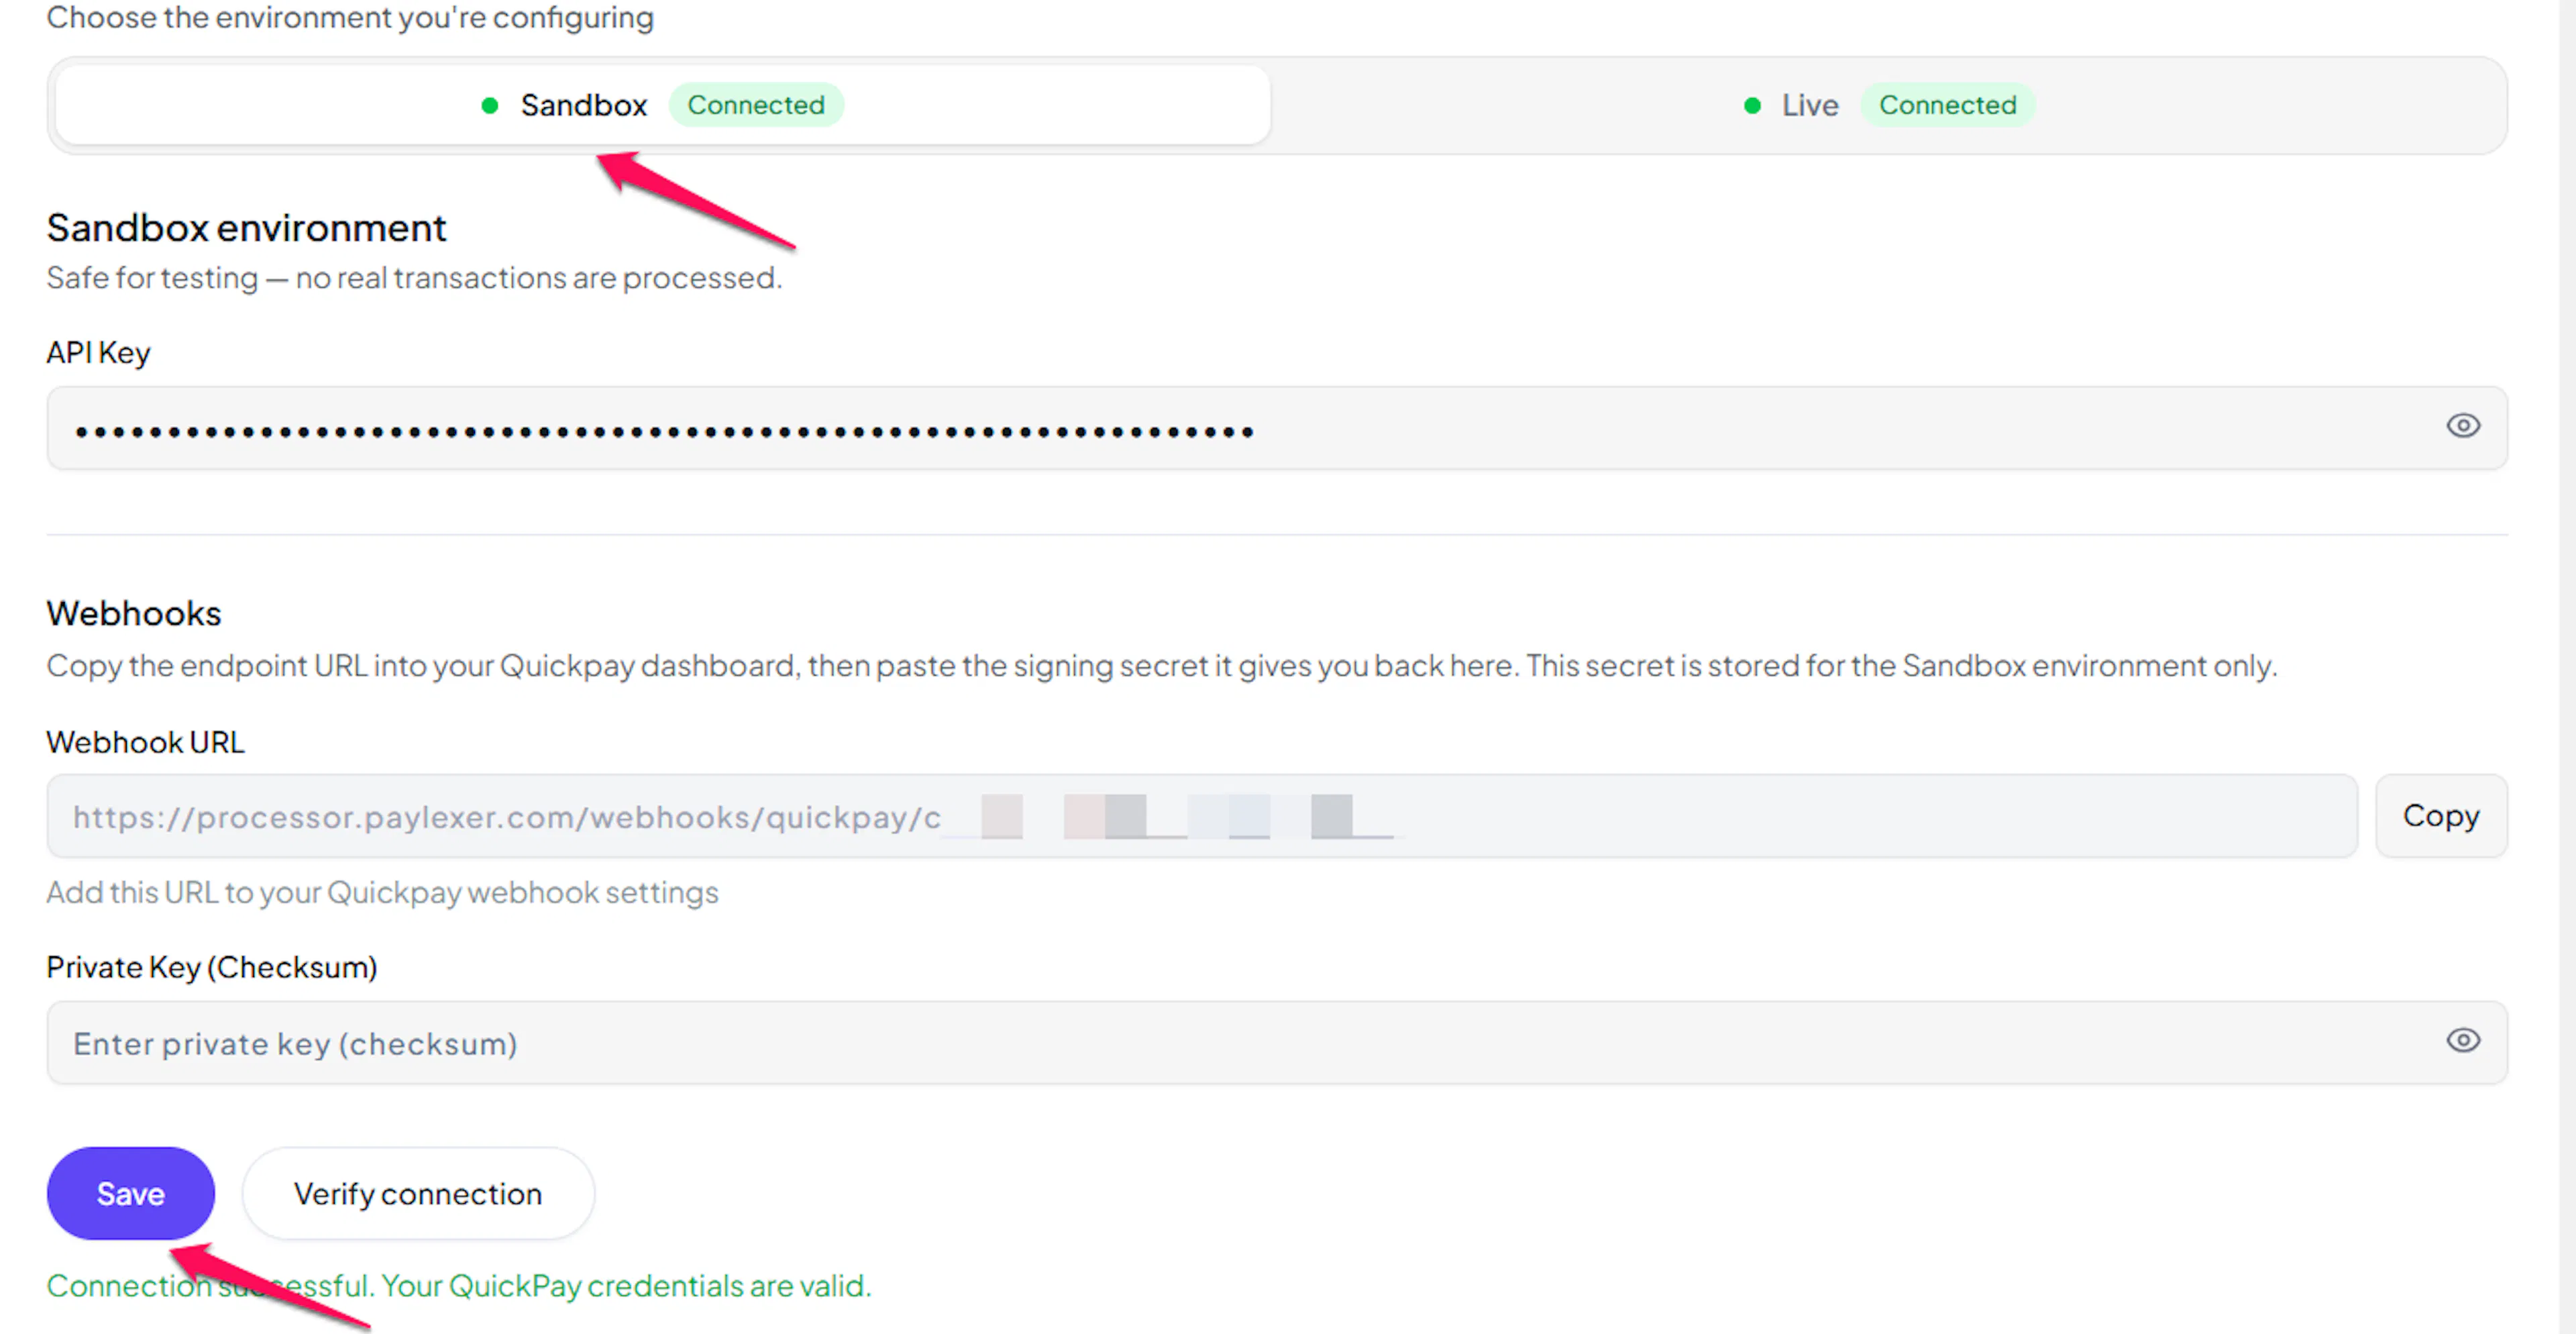
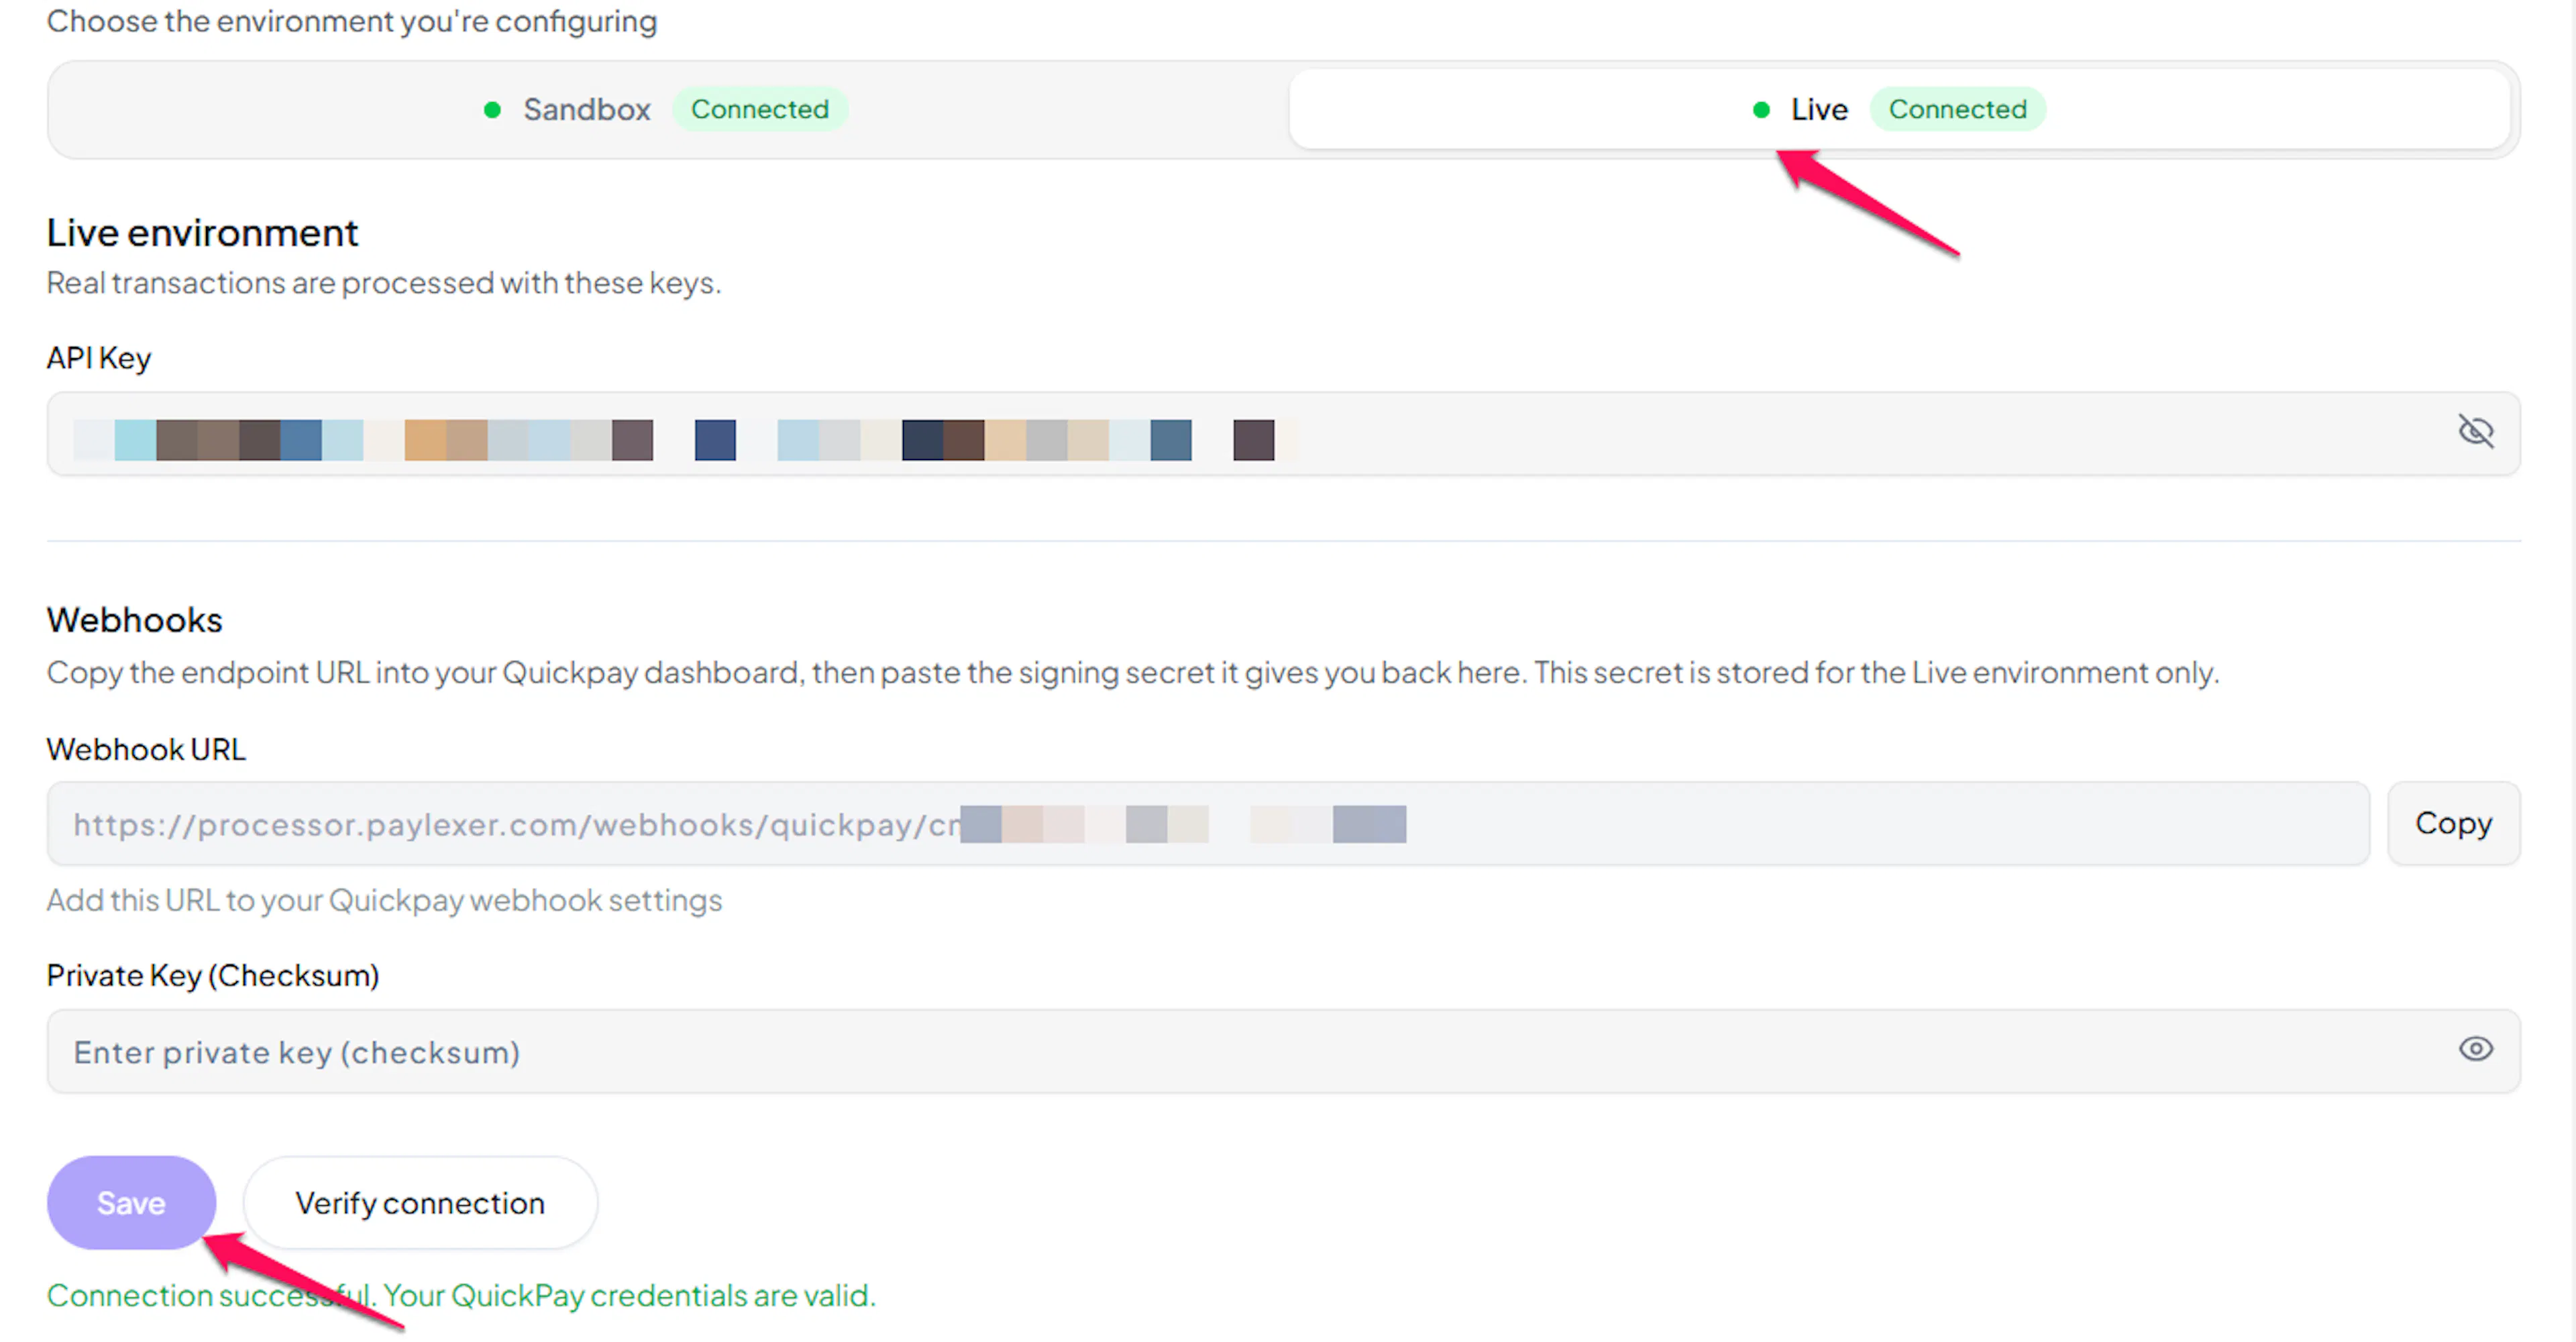
Log in to your PayLexer dashboard and navigate to Payment Gateways → QuickPay.
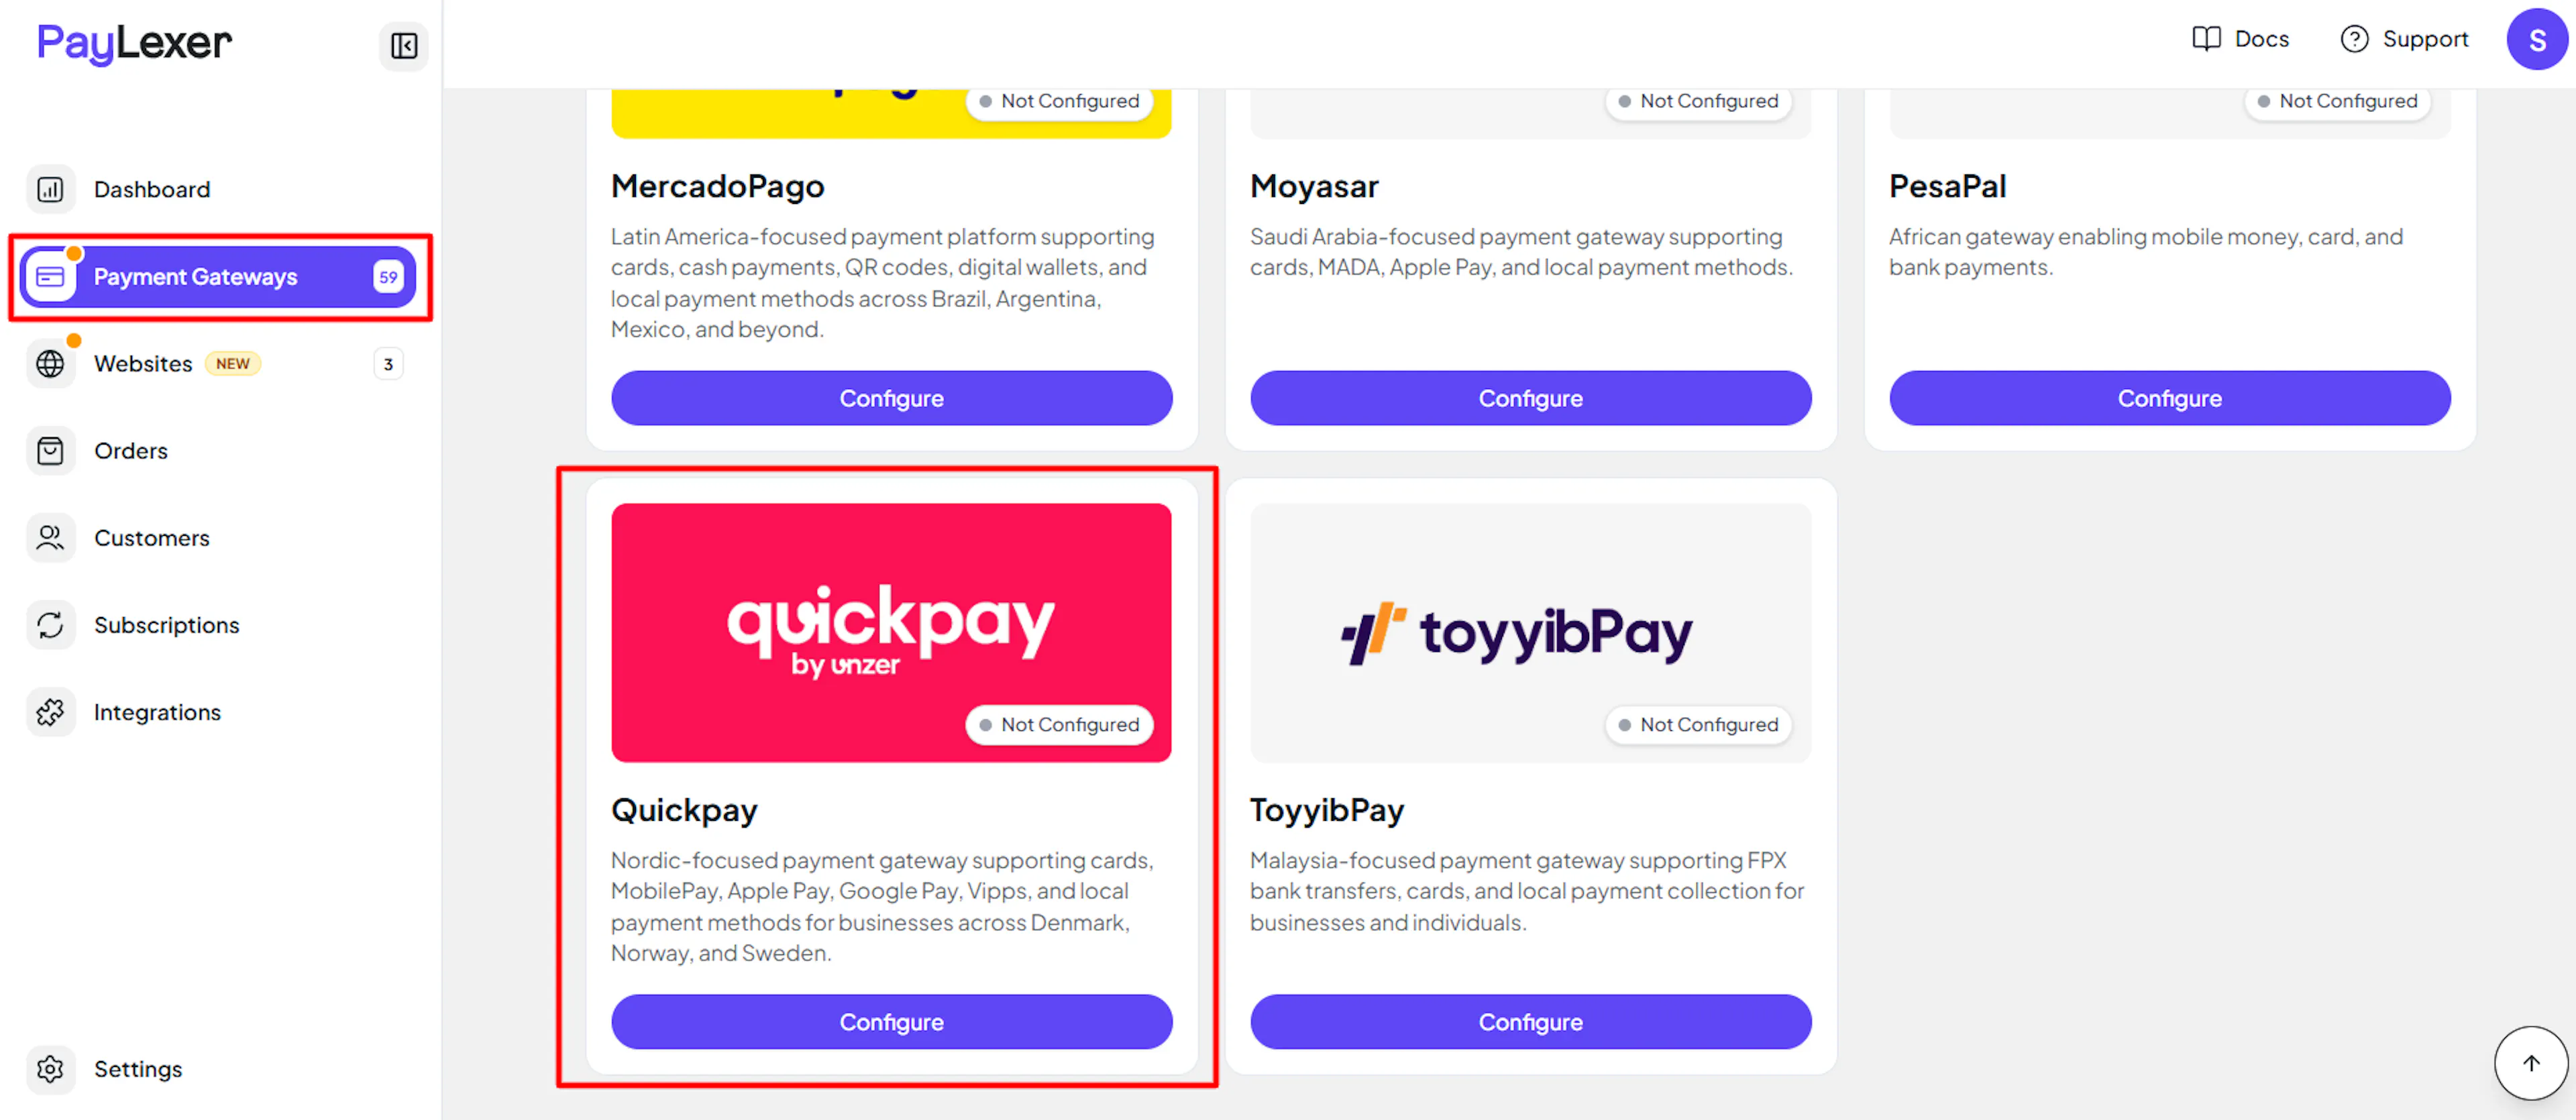
Enter your credentials
Paste the API Key you copied from QuickPay.
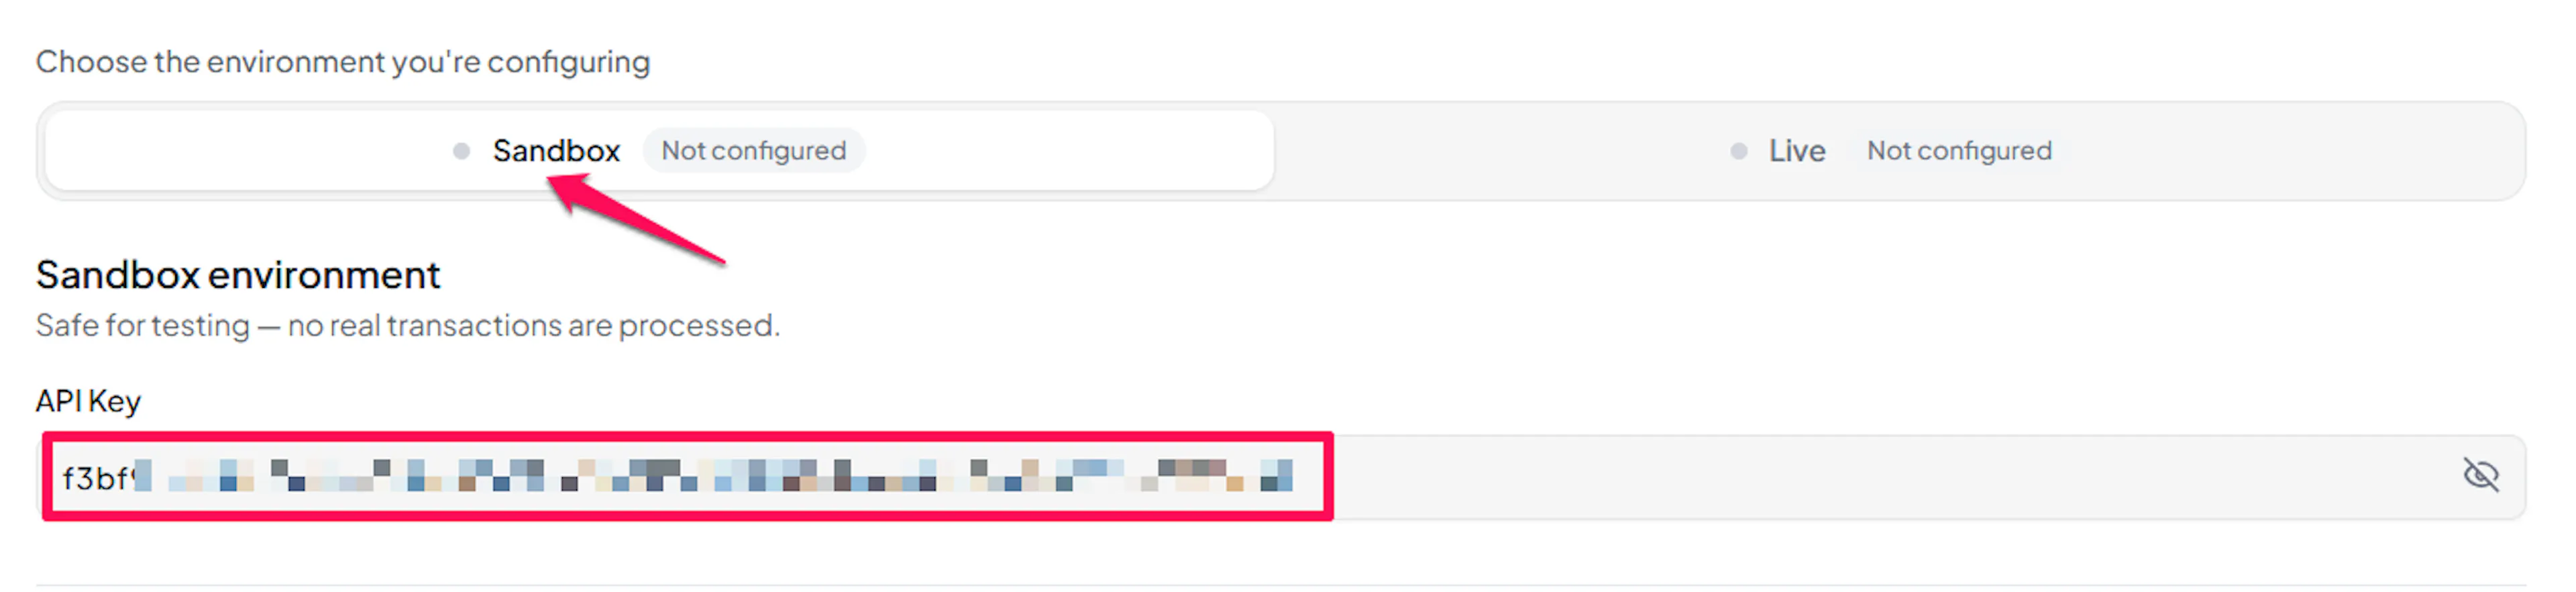
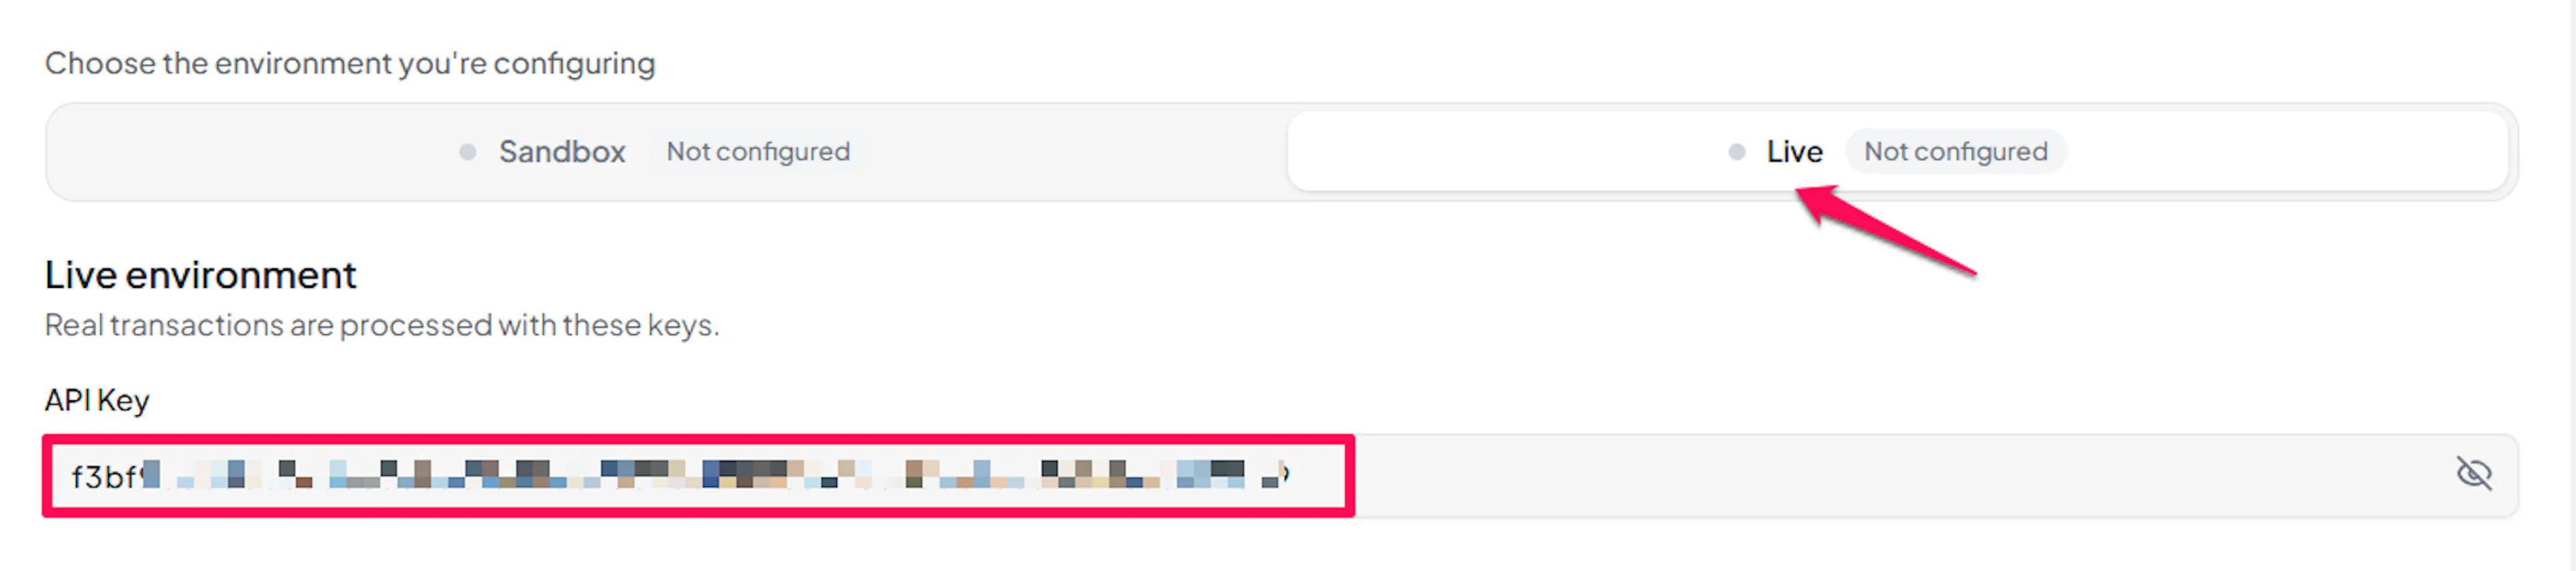
Understanding Live/Production and Sandbox Settings:
| Environment | Purpose |
|---|---|
| Live / Production (Mandatory) | Used for real transactions. Cannot be empty, even when testing. |
| Test / Sandbox (Optional) | Used for testing only. No real money is processed. |
How PayLexer selects credentials:
- Debug/Test mode ON → Test credentials are used
- Debug/Test mode OFF → Live credentials are used
Test and save
Click Save to save your configuration and verify your credentials. Click Verify Connection to test the connection.
Configuring Webhooks (Mandatory)
Webhooks enable real-time payment updates and significantly improve reliability.
Benefits of Webhooks:
- Instant payment status updates
- Automatic refund processing
- Dispute notifications
QuickPay does not require you to register a webhook URL in the Quickpay Manager. PayLexer generates the callback address itself and attaches it automatically every time it creates a payment Link, so there is nothing to copy from PayLexer into QuickPay. All you need to add is the Private Key (Checksum) you copied earlier, so PayLexer can verify that QuickPay itself signed each callback.
Open your QuickPay configuration
In PayLexer → Payment Gateways → QuickPay, go to the webhook credentials section.
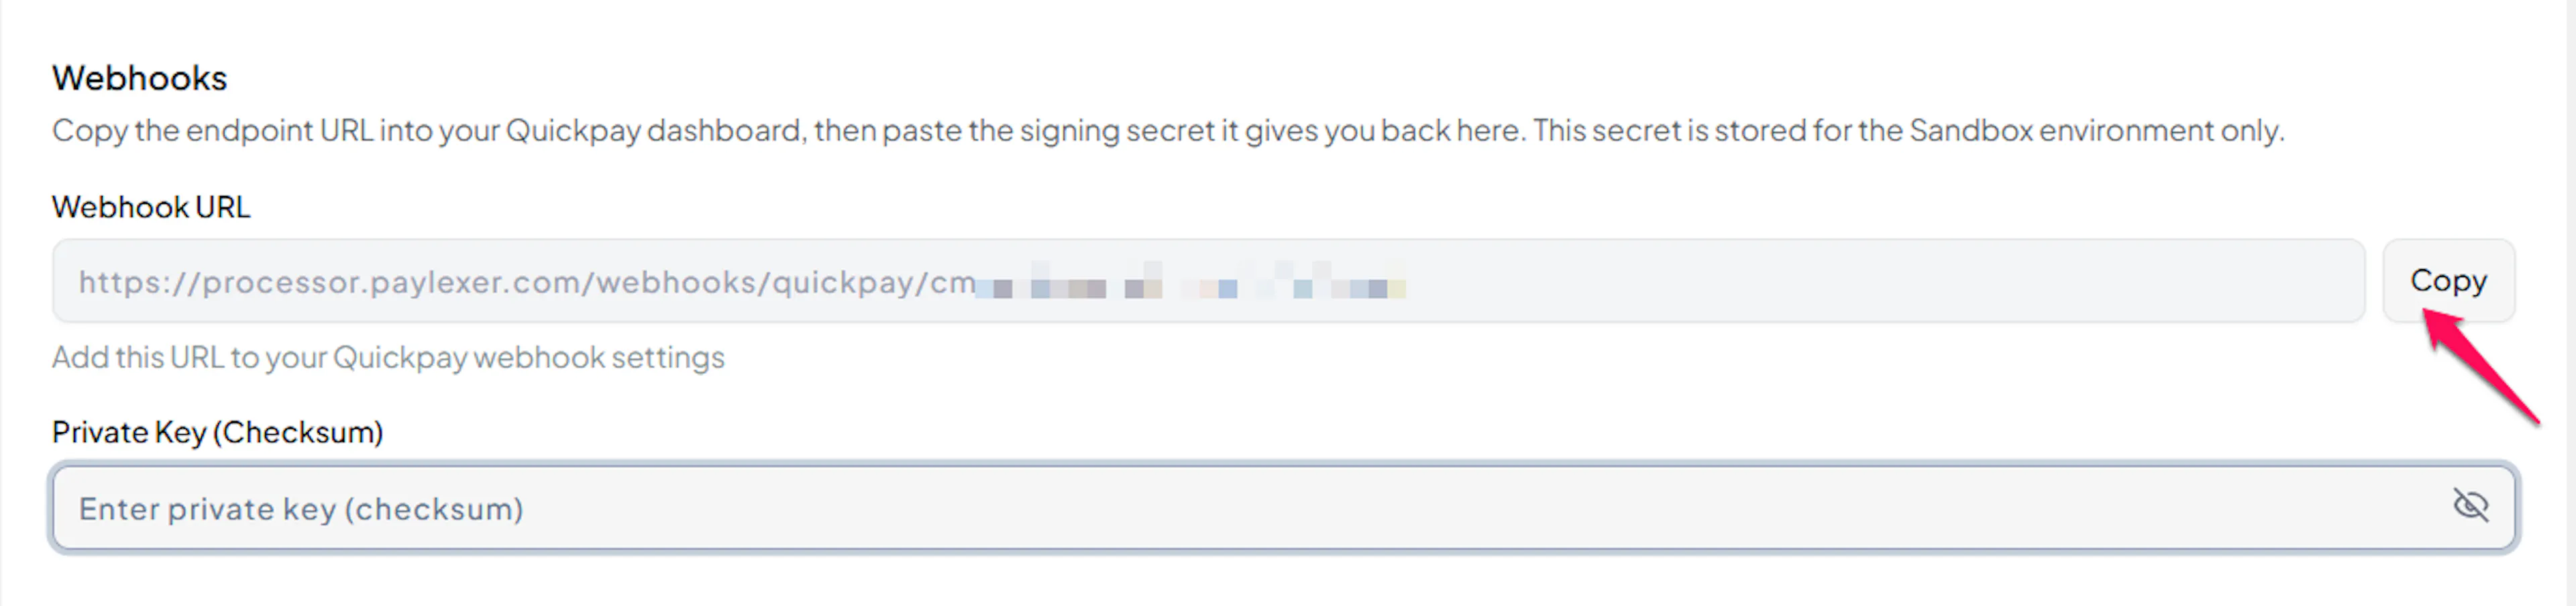
Copy your PayLexer Webhook URL
Copy the Webhook URL shown for your account.
Add it as the default Callback URL in Quickpay Manager
In the Quickpay Manager, go to Settings → Integration and paste the PayLexer webhook URL into the Callback URL field, then save.
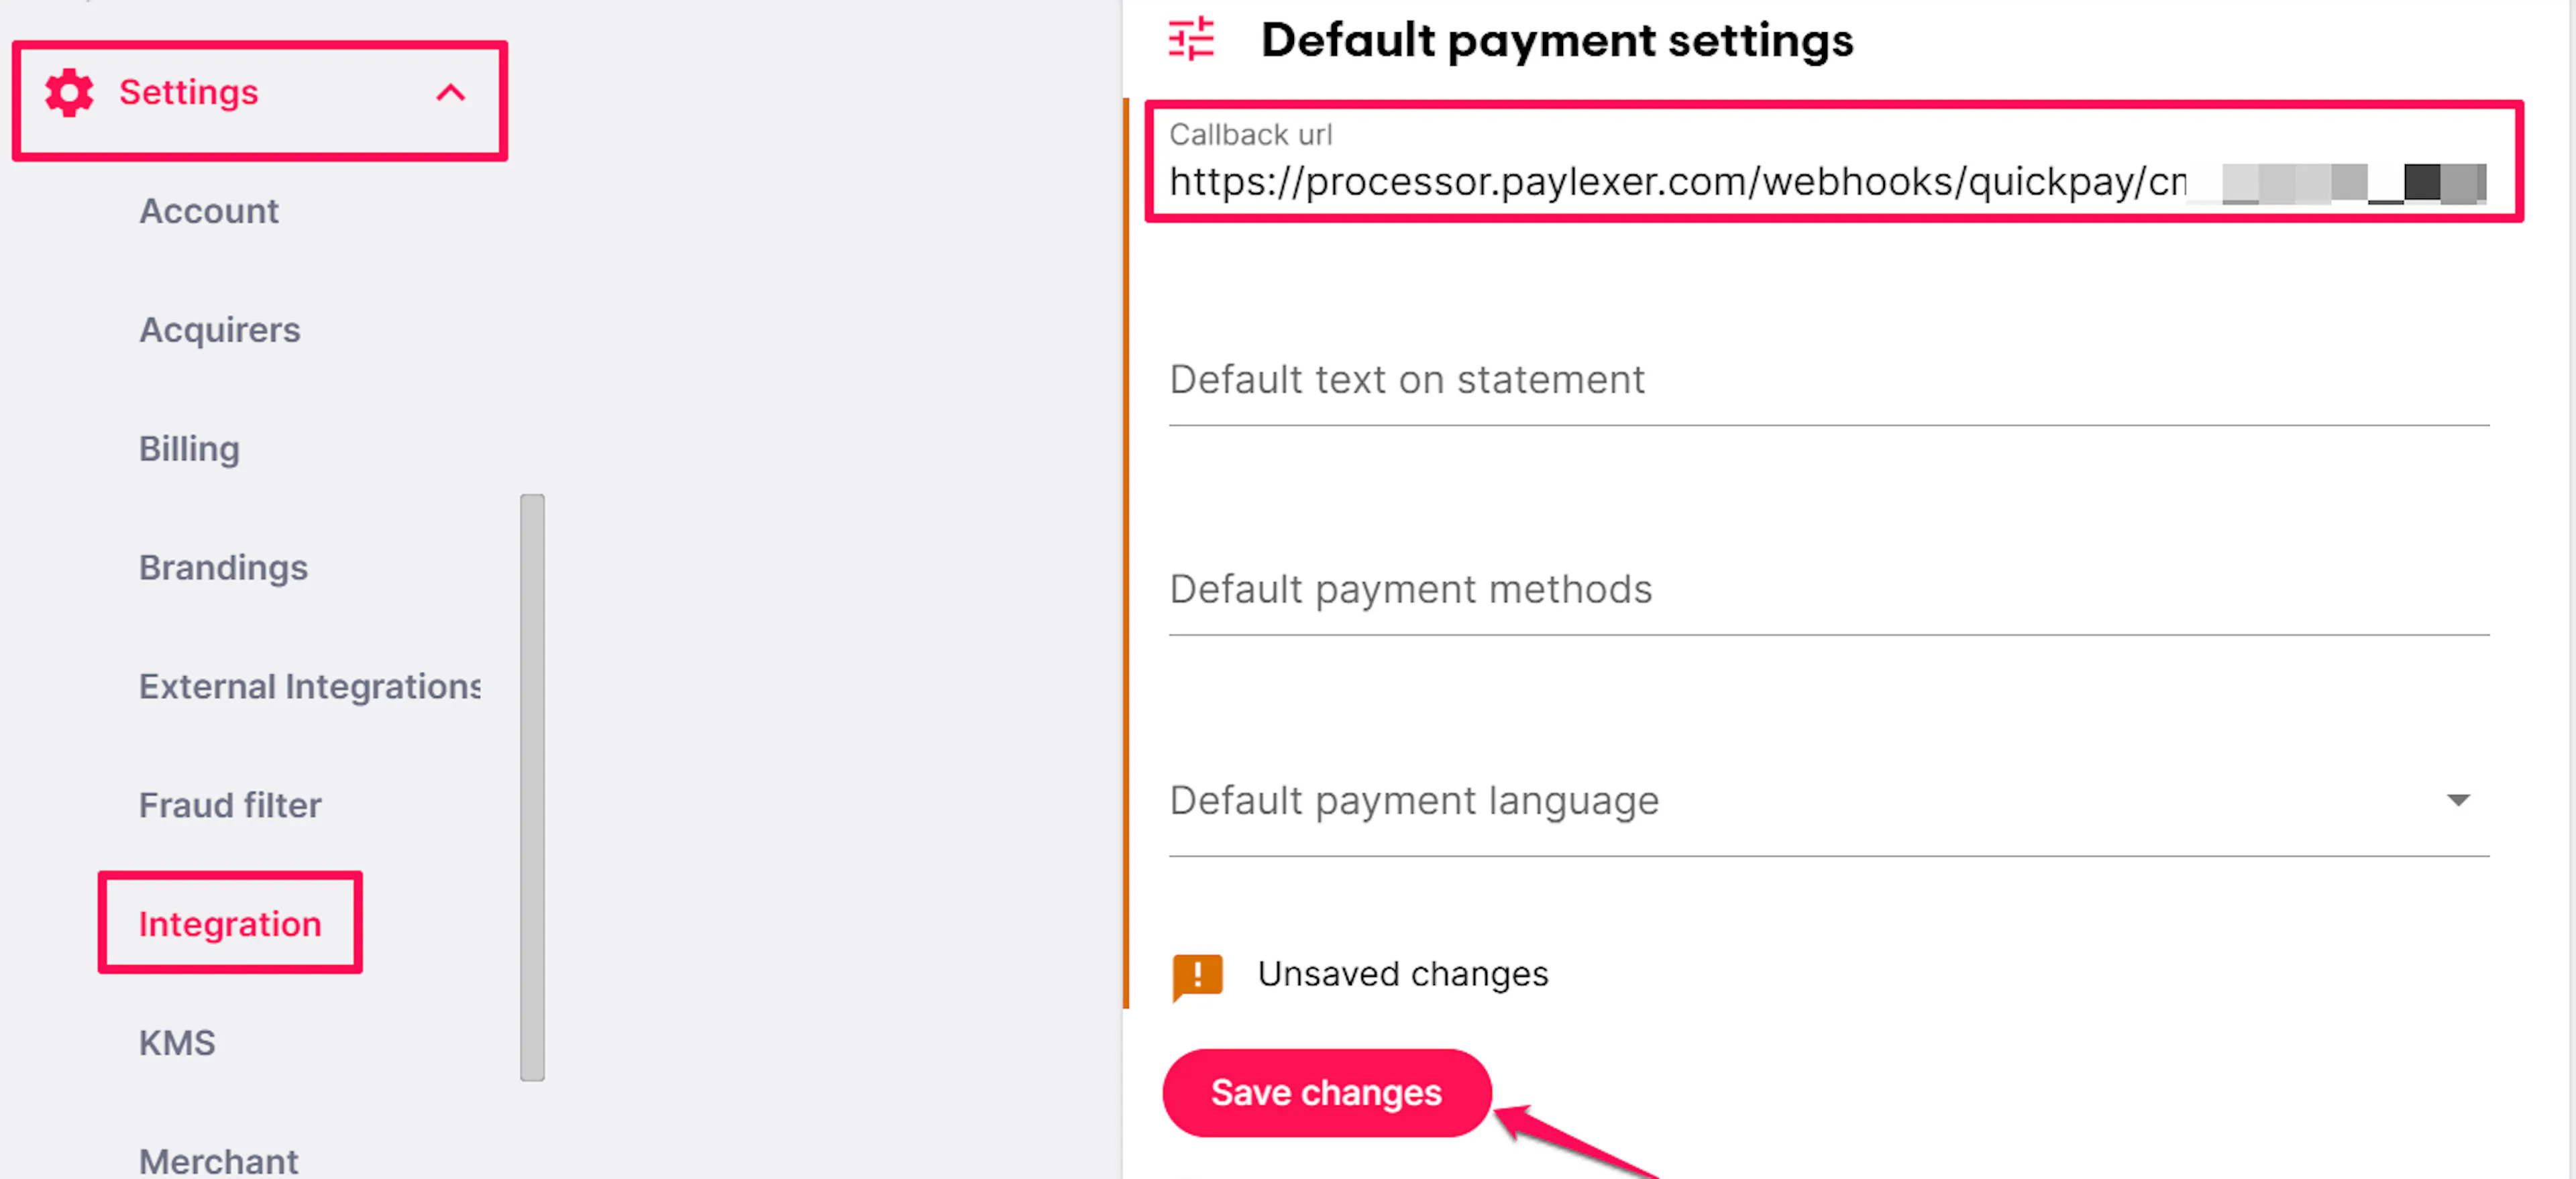
Without this, refunds issued through PayLexer or directly from the QuickPay Manager will not be reflected in PayLexer.
Add the Private Key (Checksum)
Paste the Private Key you copied from the Quickpay Manager into the Private Key (Checksum) field, then click Save Configuration.
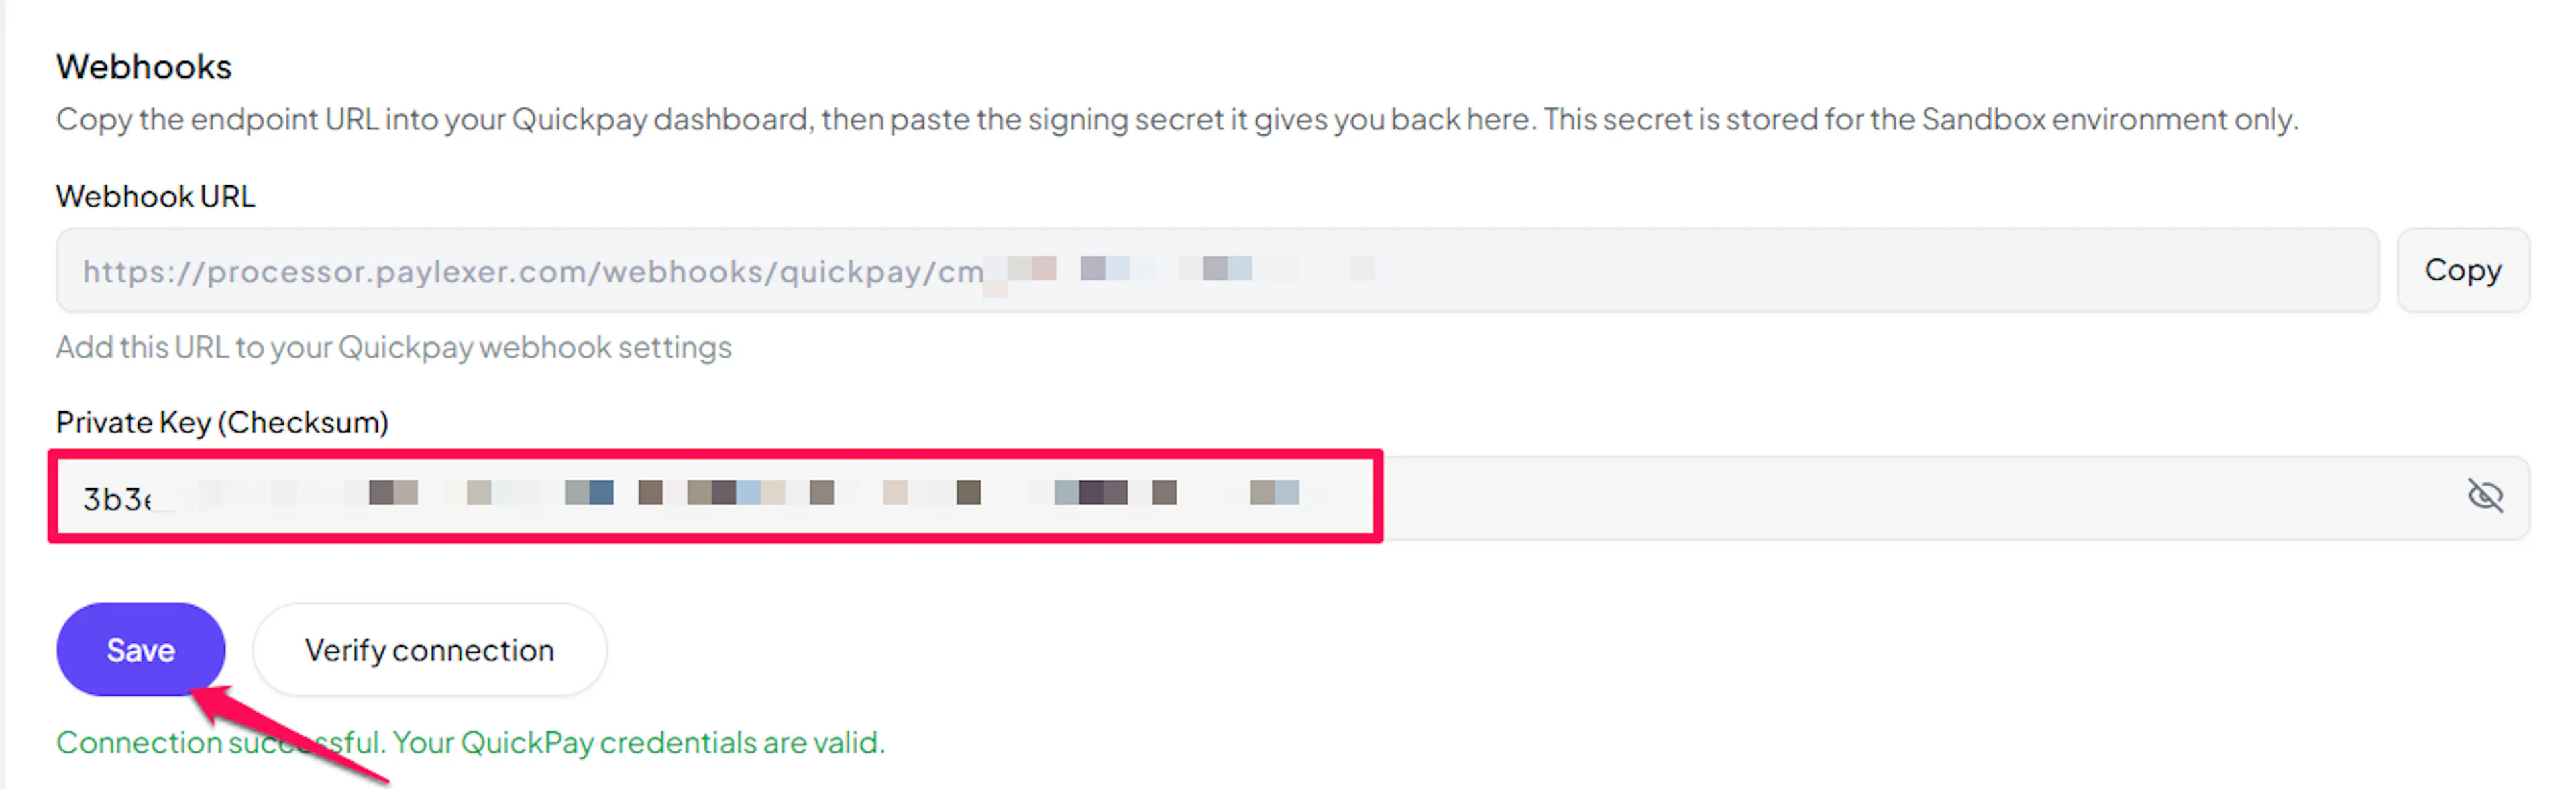
Every QuickPay callback is rejected unless its signature matches this key exactly. An order is only ever marked paid once that check passes.
If a signed callback is ever delayed or lost, PayLexer automatically rechecks the payment with QuickPay for up to 24 hours, so the order still completes without anyone needing to resend anything.
Integrate QuickPay to Your Website
If you have already added and configured your site, you can enable QuickPay in your existing setup.
Go to Websites
Navigate to Websites in your PayLexer dashboard.
Edit your website
Click the Edit Icon of your added website.
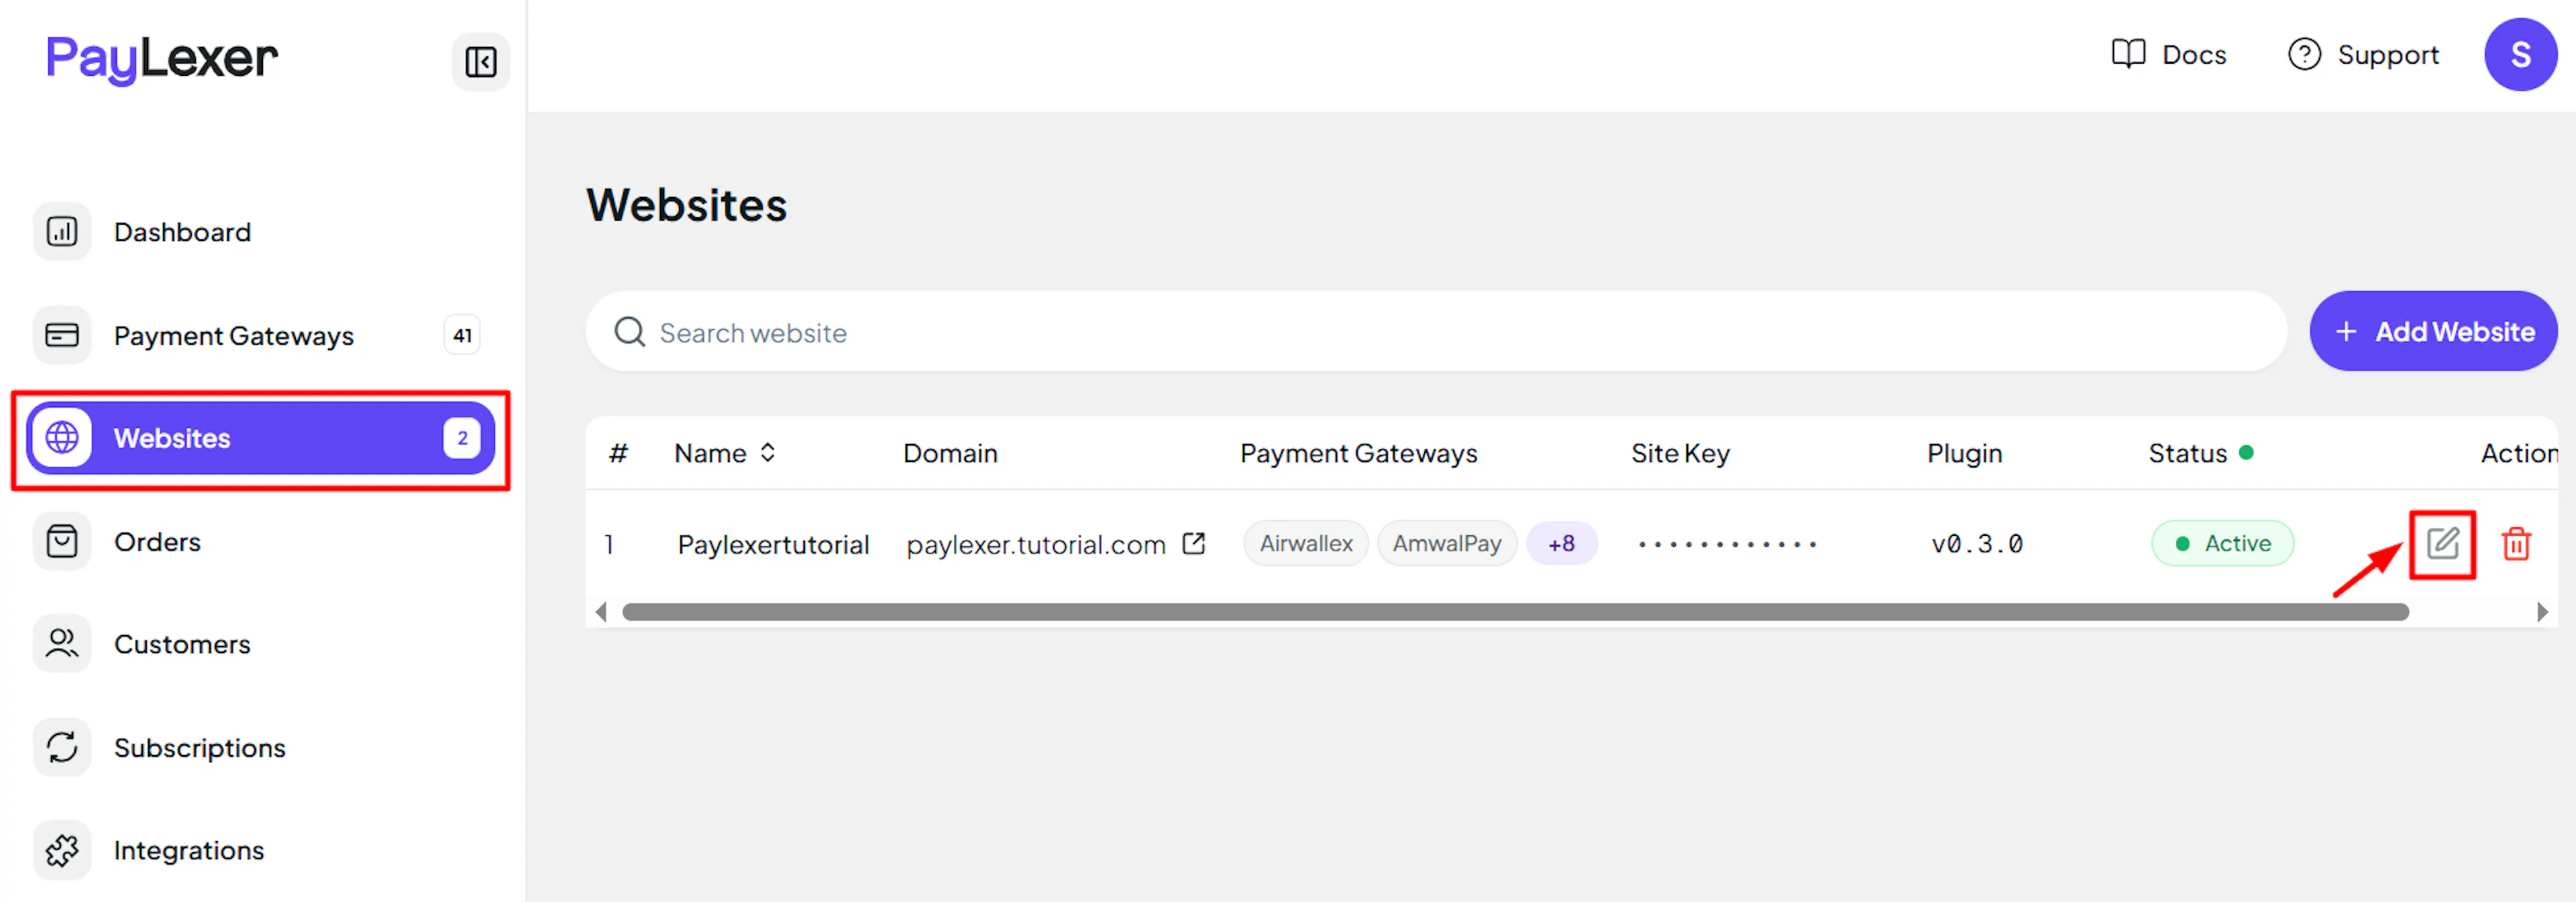
Enable QuickPay
Click the checkbox to enable QuickPay for the website.
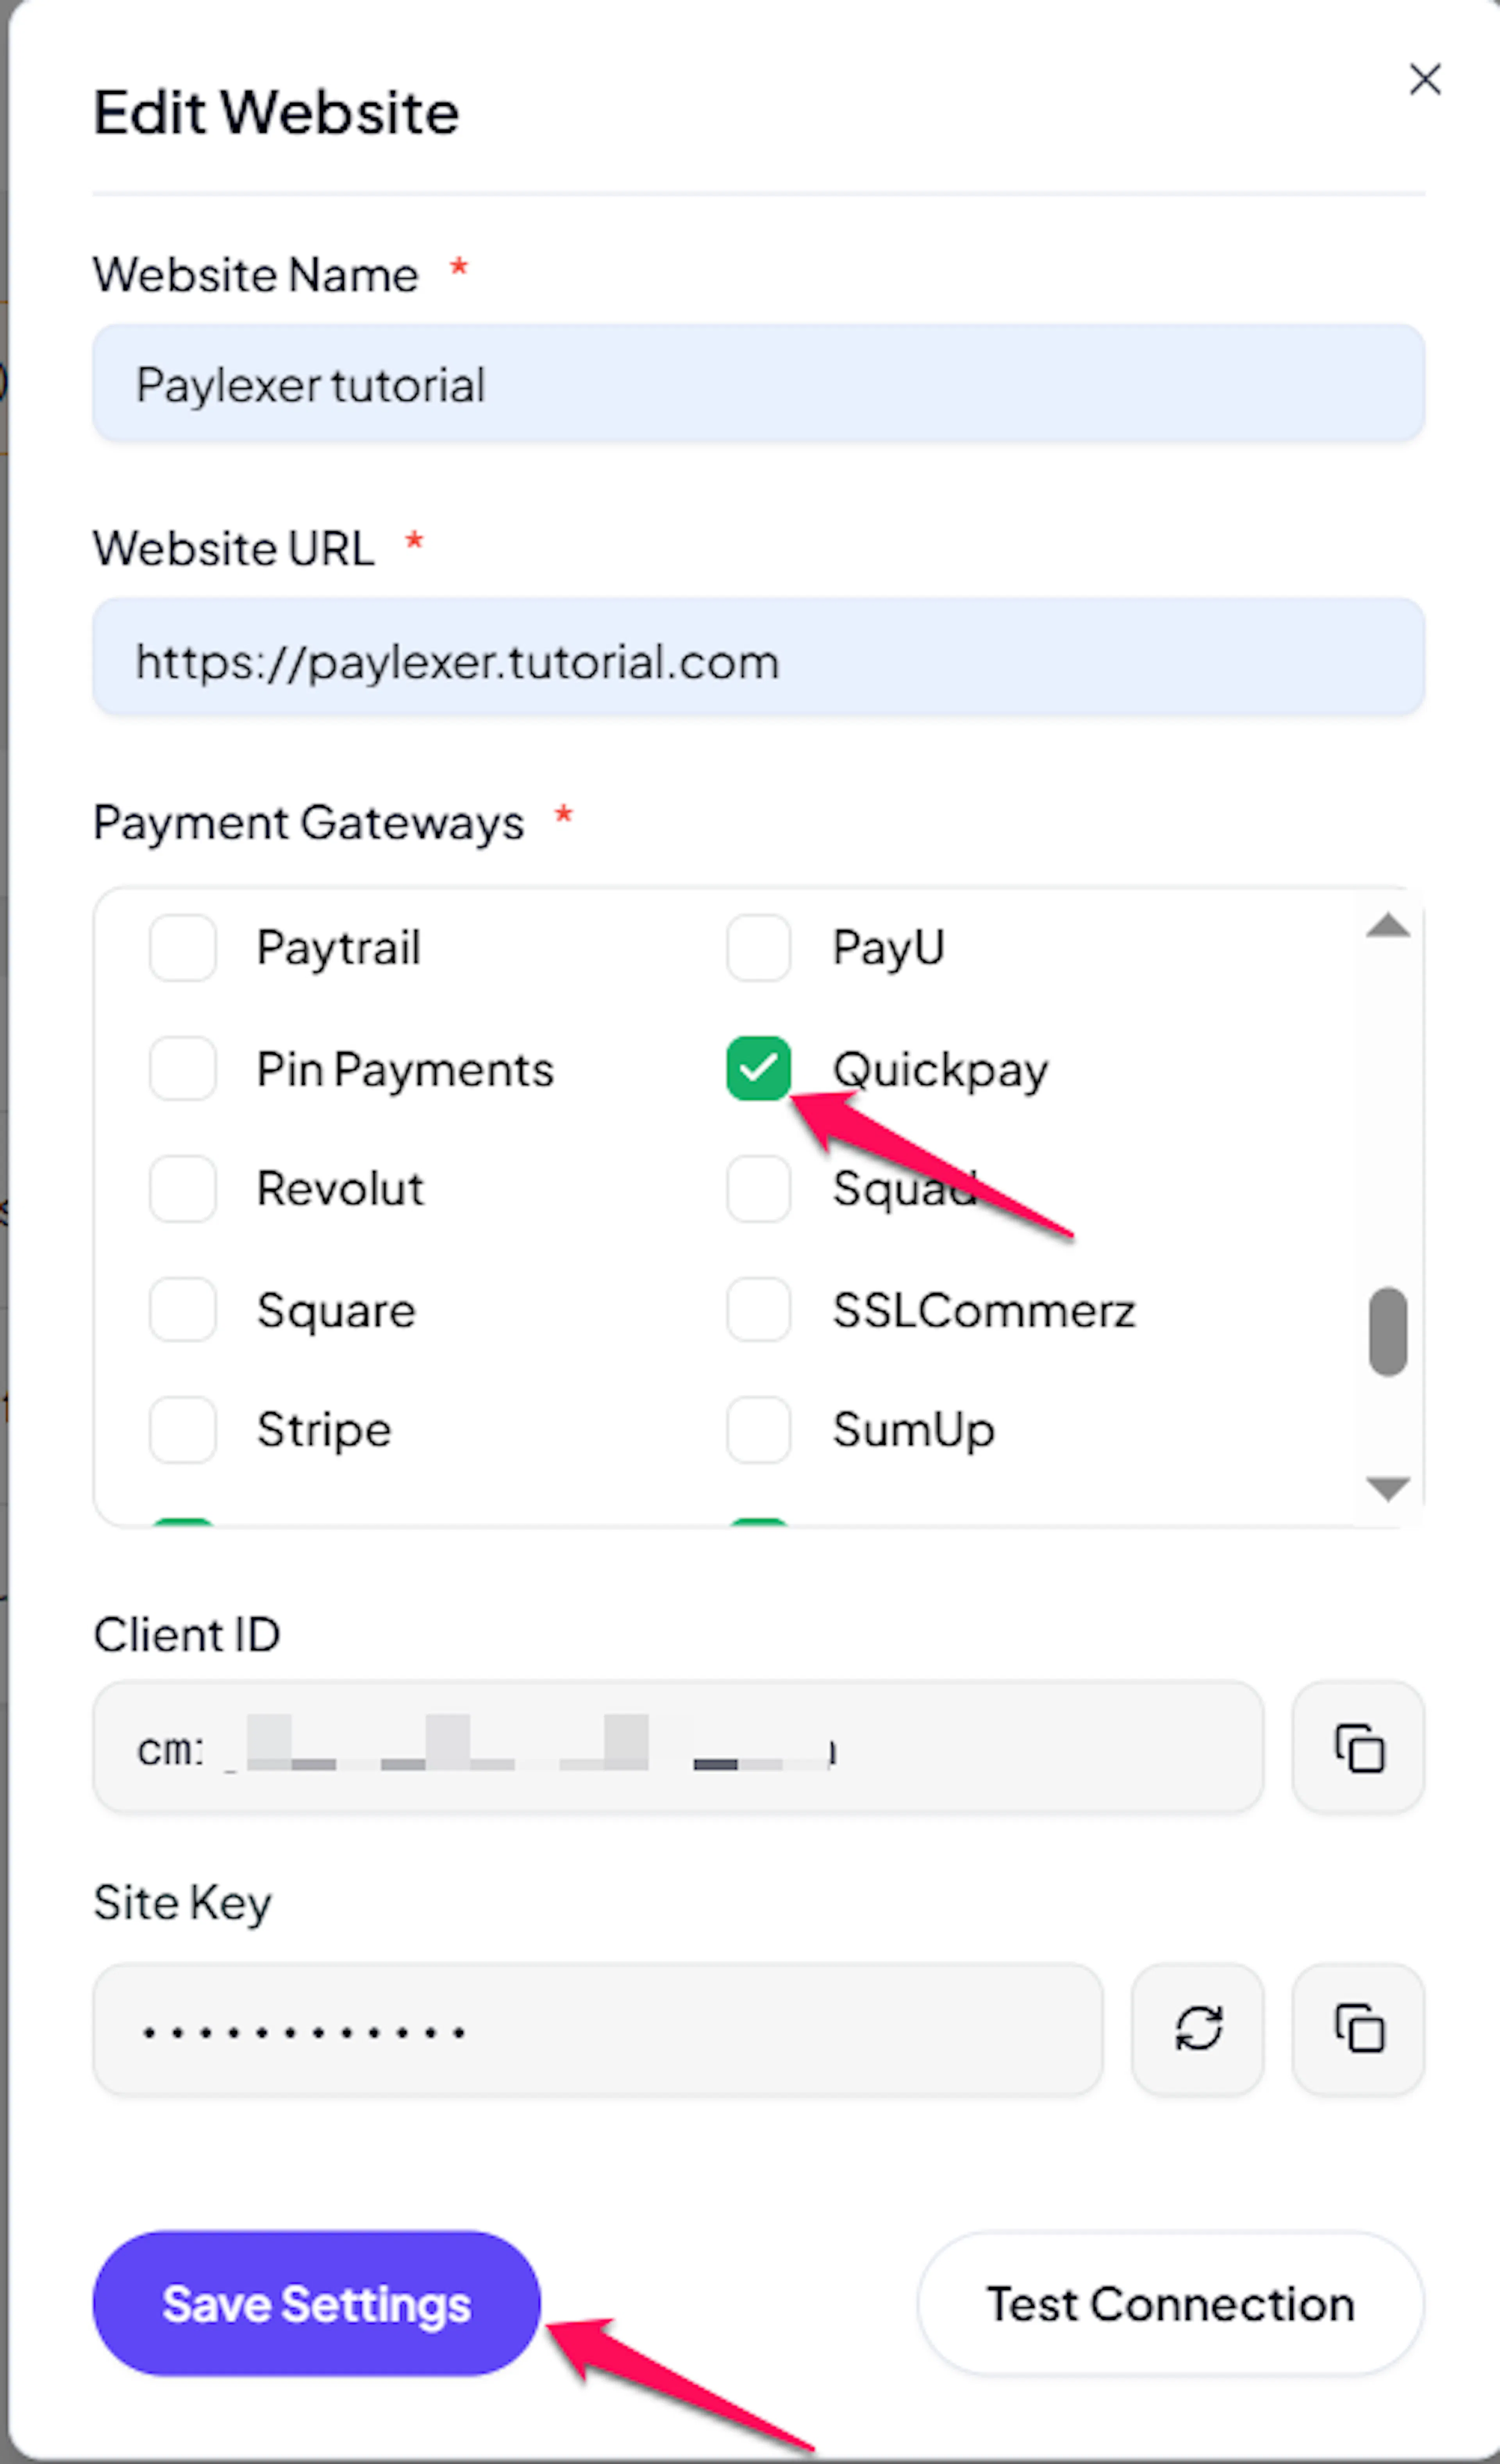
If you haven't added a website yet, Continue to Add Your Website →
Troubleshooting
Best Practices
- Test in sandbox before enabling production, using a merchant with test transactions and an acquirer activated
- Keep the API Key and Private Key confidential, and never place either in client-side code
- Use two separate merchants for test and live where possible, and make sure each merchant's API Key and Private Key end up in the matching PayLexer field
- Reconcile PayLexer Dashboard → Orders against the Quickpay Manager regularly
FAQs
Still Have Questions?
- QuickPay Support: QuickPay Helpdesk
- PayLexer Support: Contact Support