

Toss Payments
Connect Toss Payments to PayLexer to accept Korean card and easy-pay wallet payments in Korean won through Toss's own payment window.
Toss Payments is a South Korean payment gateway operated by Toss (Viva Republica), headquartered in Seoul. It lets merchants accept payments from Korean shoppers using domestic credit and debit cards and supported easy-pay wallets, including Toss Pay, Naver Pay and Samsung Pay. Shoppers complete their payments in Toss's payment window, so card details stay out of your store's checkout form.
- Supported Regions (Merchant Accounts): South Korea
- Supported Currencies: Korean Won (KRW)
Toss Payments appears at checkout only when the selected order currency is KRW.
Supported Features
- One-time payments through Toss's payment window using supported Korean cards and easy-pay wallets
- Full refunds through PayLexer or your store
- Refund synchronization from the Toss dashboard to PayLexer and your store through webhooks
- Real-time payment status updates through webhooks
- Separate test and live credentials for sandbox testing and production transactions
Before You Start
Make sure you have:
- Toss Payments Account – Don't have one? Sign up for Toss Payments →
- PayLexer Account – Required to configure the integration. Create your account →
- A website where you want to integrate
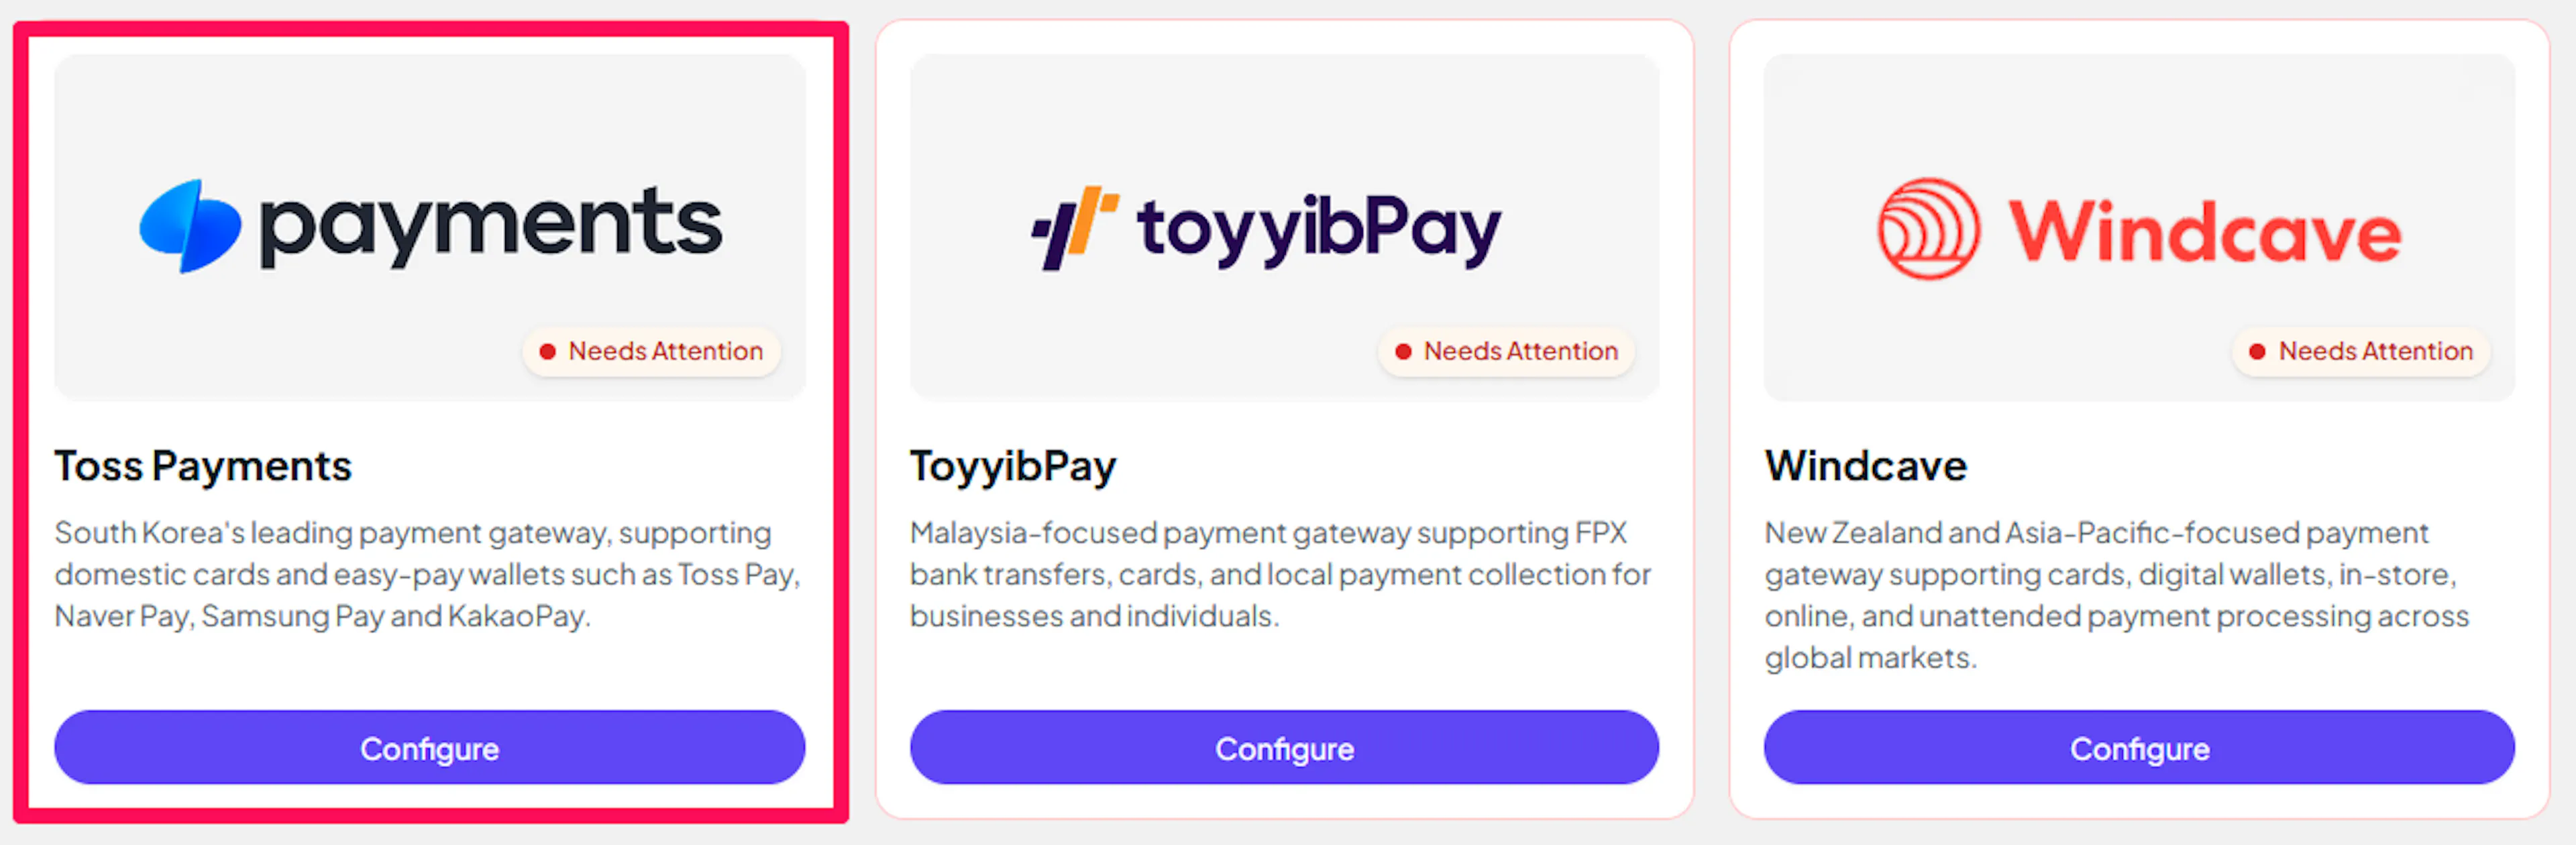
Looking for a different payment processor? View all supported gateways →
The Toss developer center provides test credentials straight away. Live credentials require Korean business registration and a settlement account, and are only issued once Toss approves your application.
Configuring Toss Payments
You need a Client Key and Secret Key from Toss Payments for this integration.
Getting API Credentials
Toss provides different key pairs for different integration types. PayLexer uses the API Individual Integration Key (API 개별 연동 키) pair.
The keys begin with:
- Test Client Key:
test_ck_ - Test Secret Key:
test_sk_ - Live Client Key:
live_ck_ - Live Secret Key:
live_sk_
Do not use the Order Form Type / Payment Window Type integration keys (주문서형, 결제창형 연동 키). These begin with test_gck_ / test_gsk_ or their live equivalents. They belong to a different integration type and do not work with PayLexer.
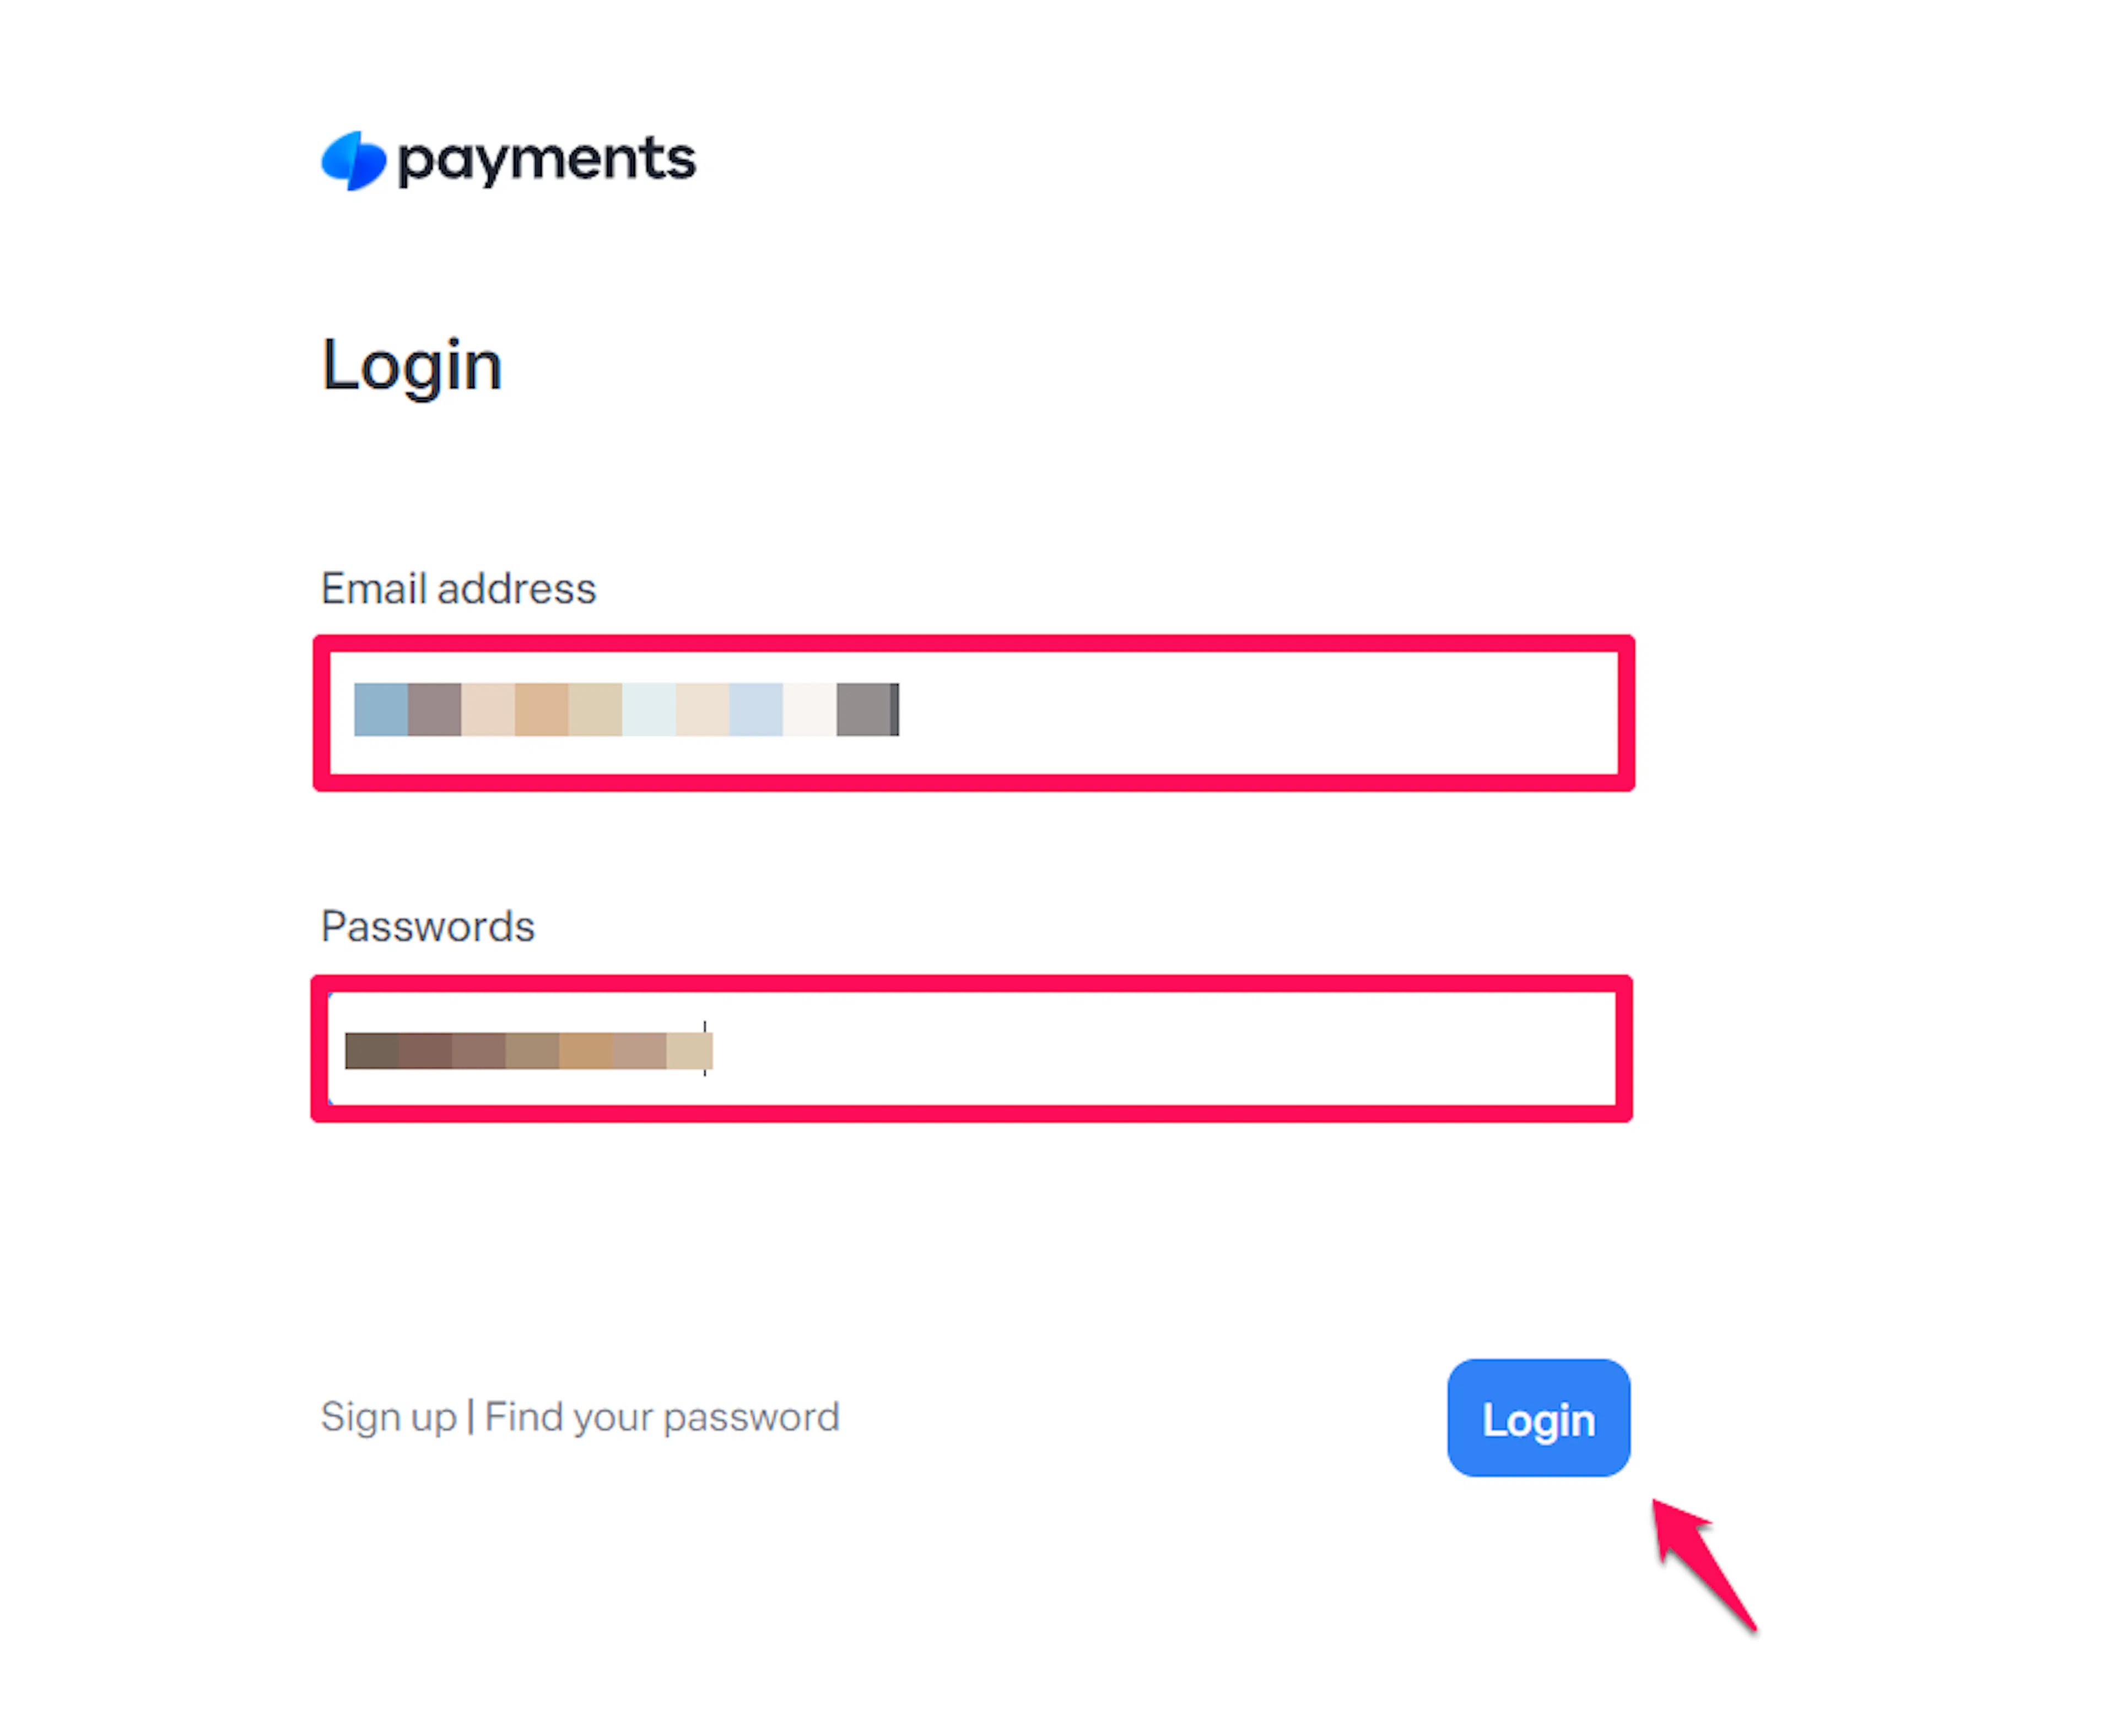
Log in to the Toss developer center
Open the Toss Payments developer center and sign in.
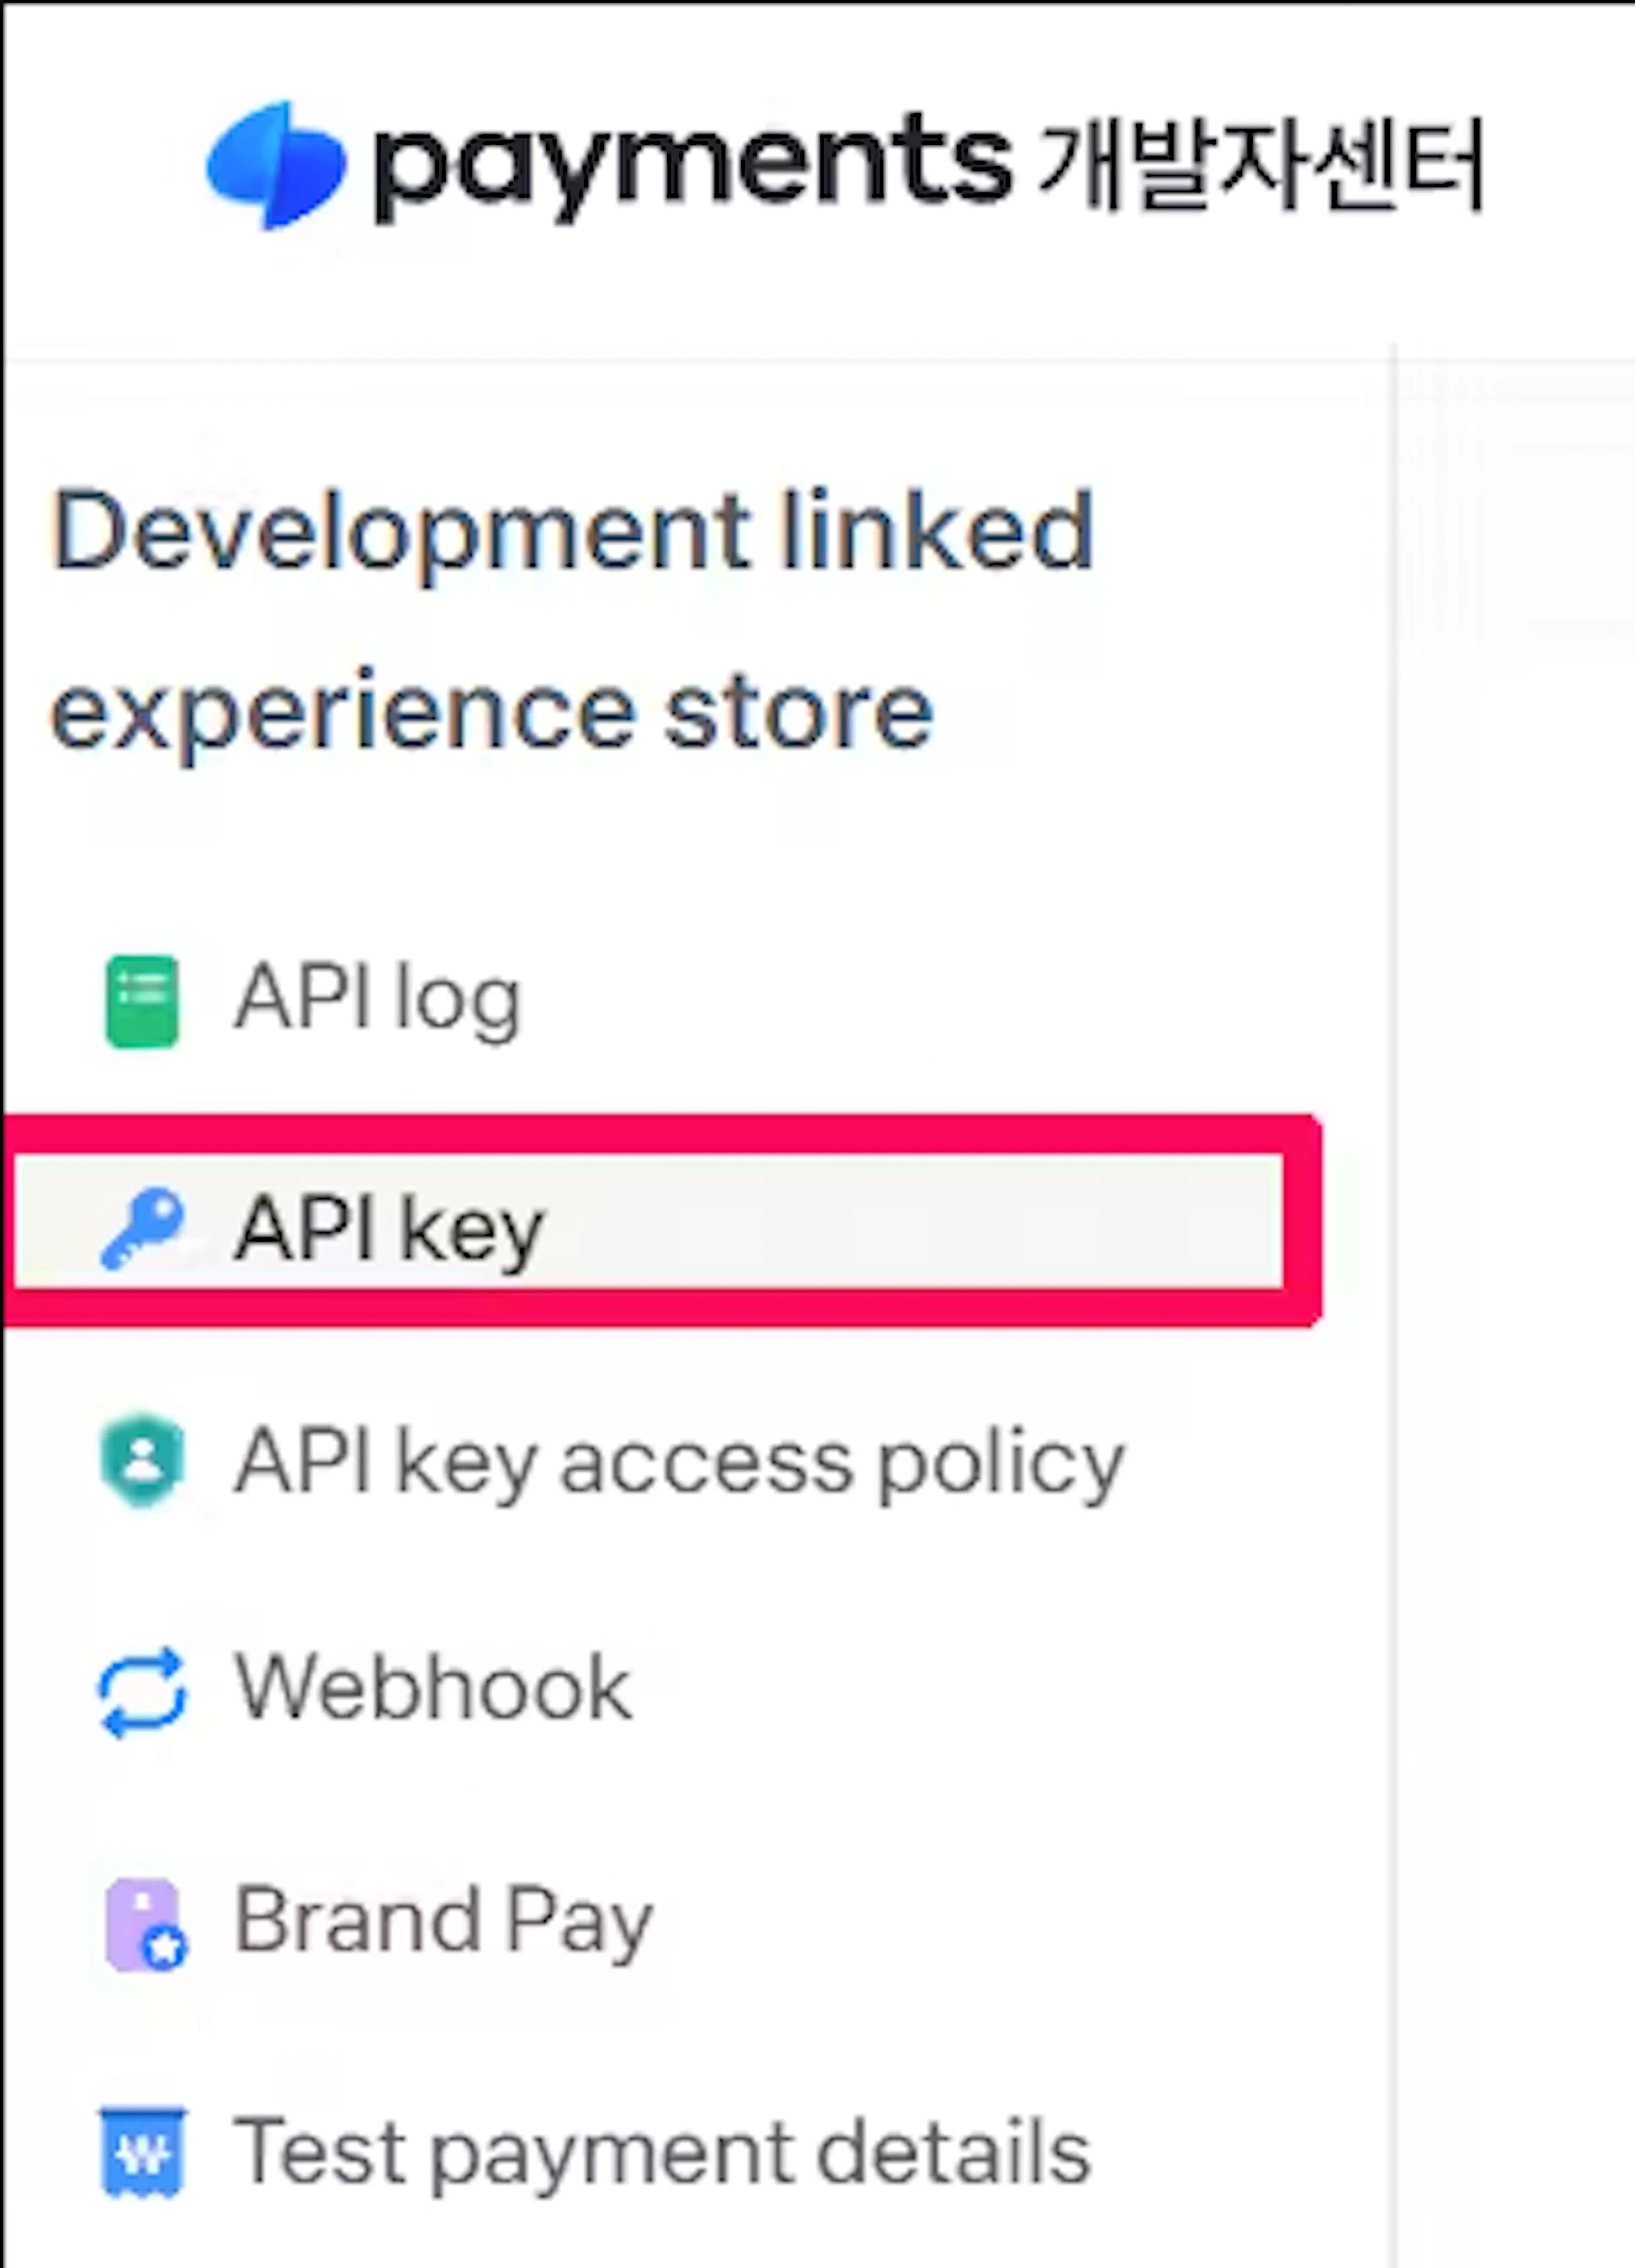
Open the API keys page
Go to API Keys, select the Test (테스트) or Live (라이브) tab, and locate the API Individual Integration Key (API 개별 연동 키) section.
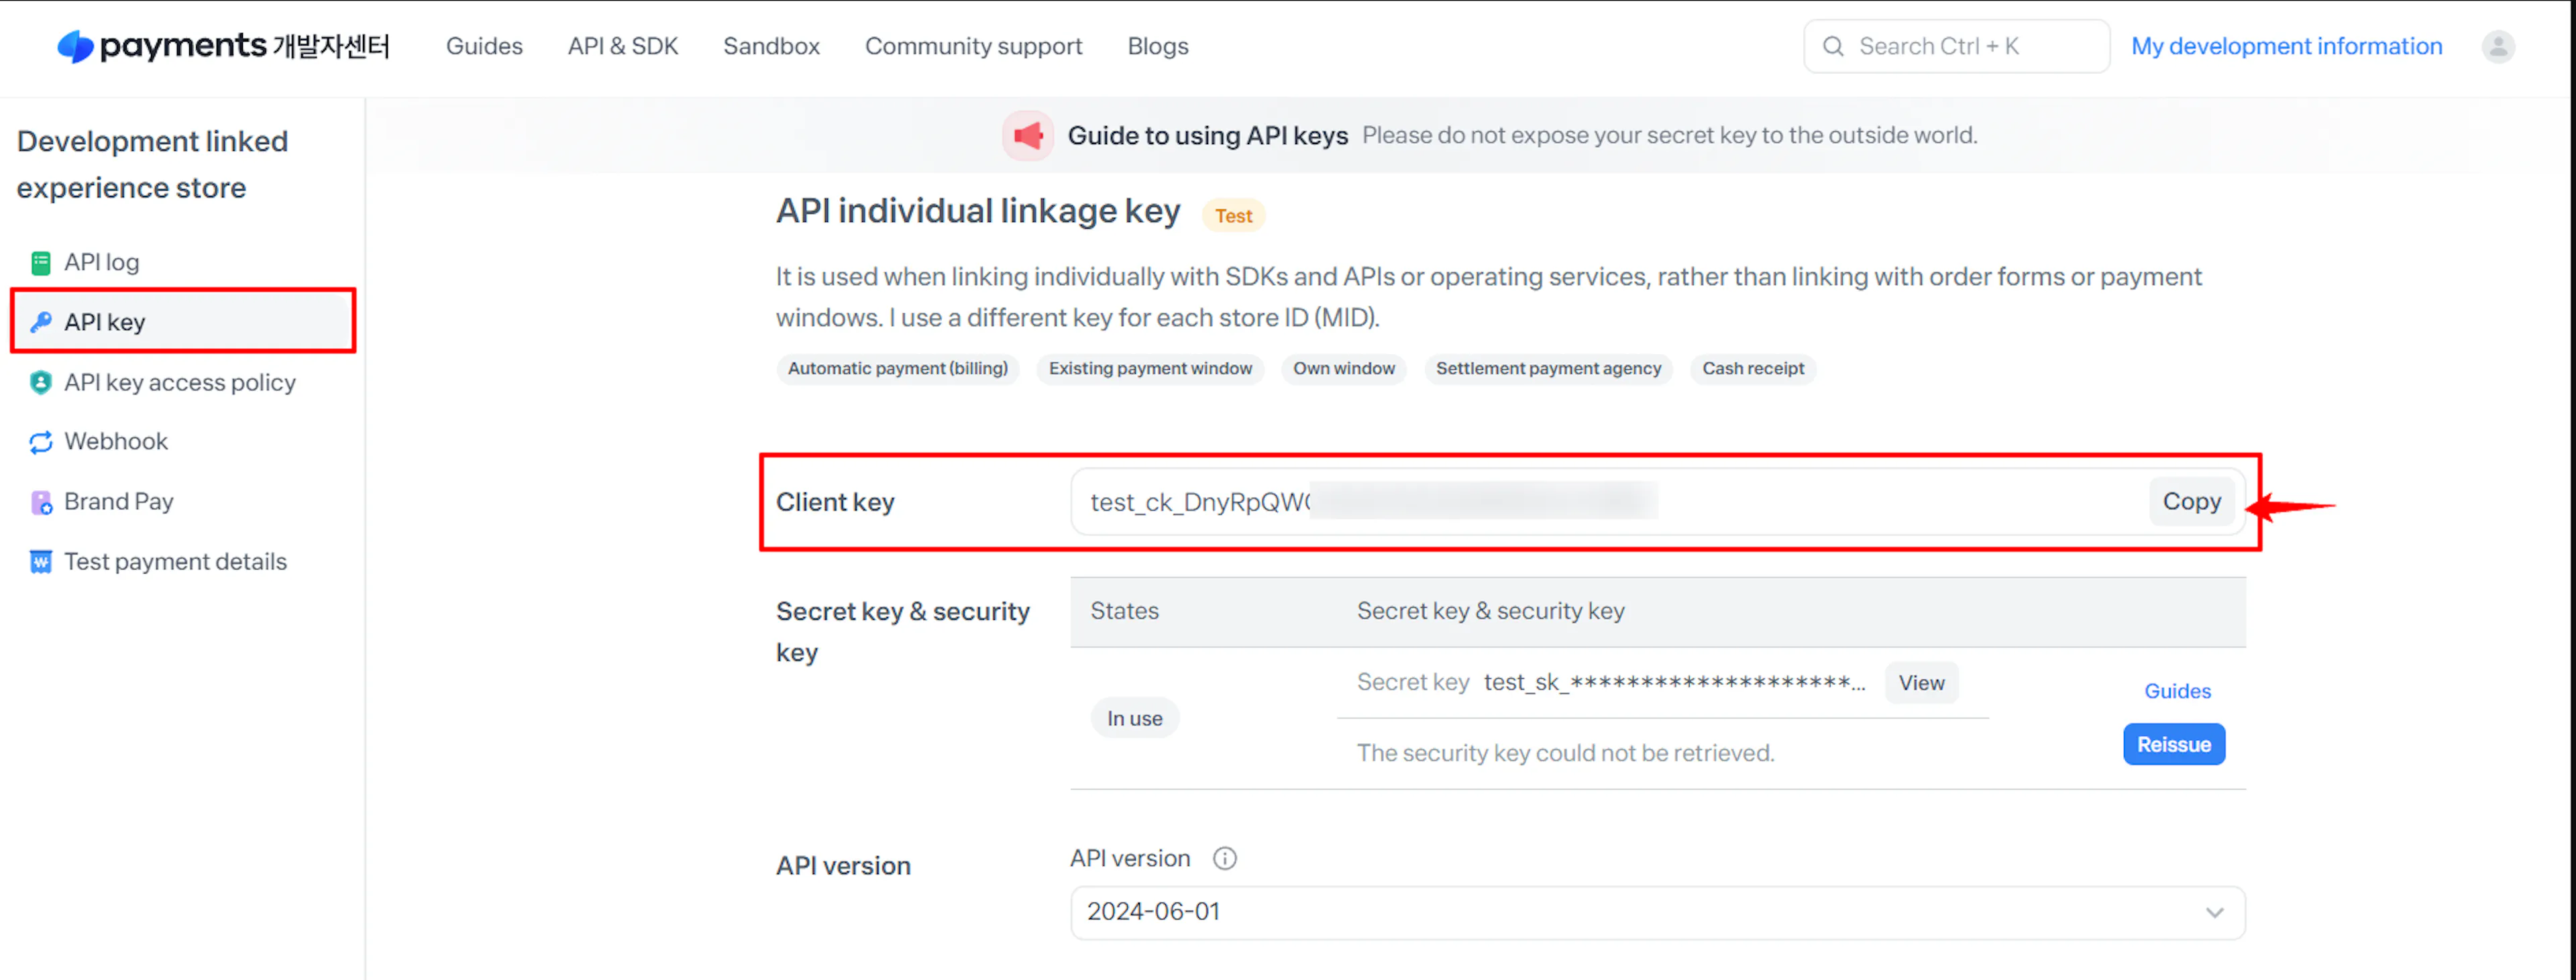
Copy your Client Key
Copy the Client Key shown in that section.
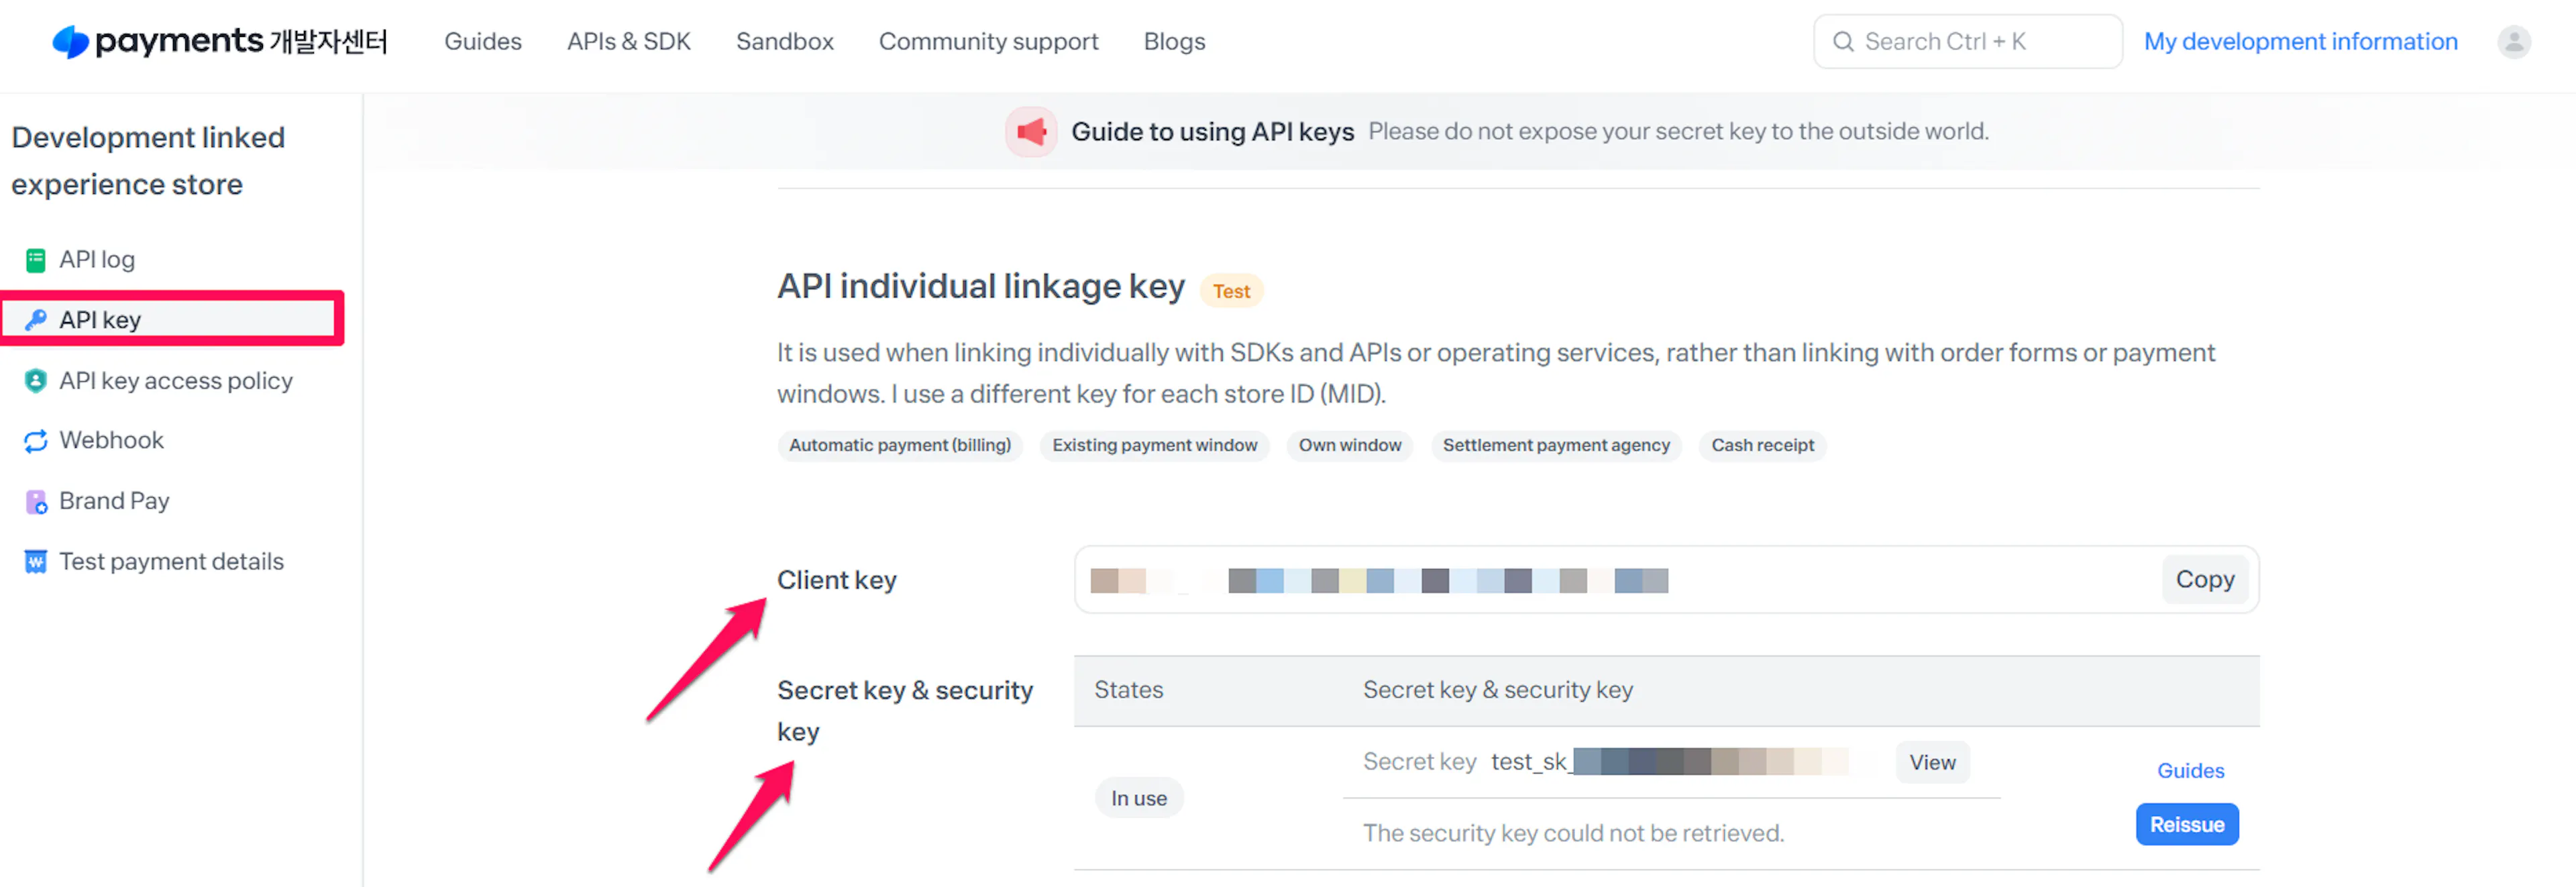
Reveal and copy your Secret Key
Under Secret Key & Security Key, reveal and copy the matching Secret Key. You do not need the Security Key for this integration.
Repeat for the other environment
Switch to the other tab and repeat steps 3 and 4. You now have one key pair for testing and one for live payments.
Adding Credentials to PayLexer
Open PayLexer Dashboard
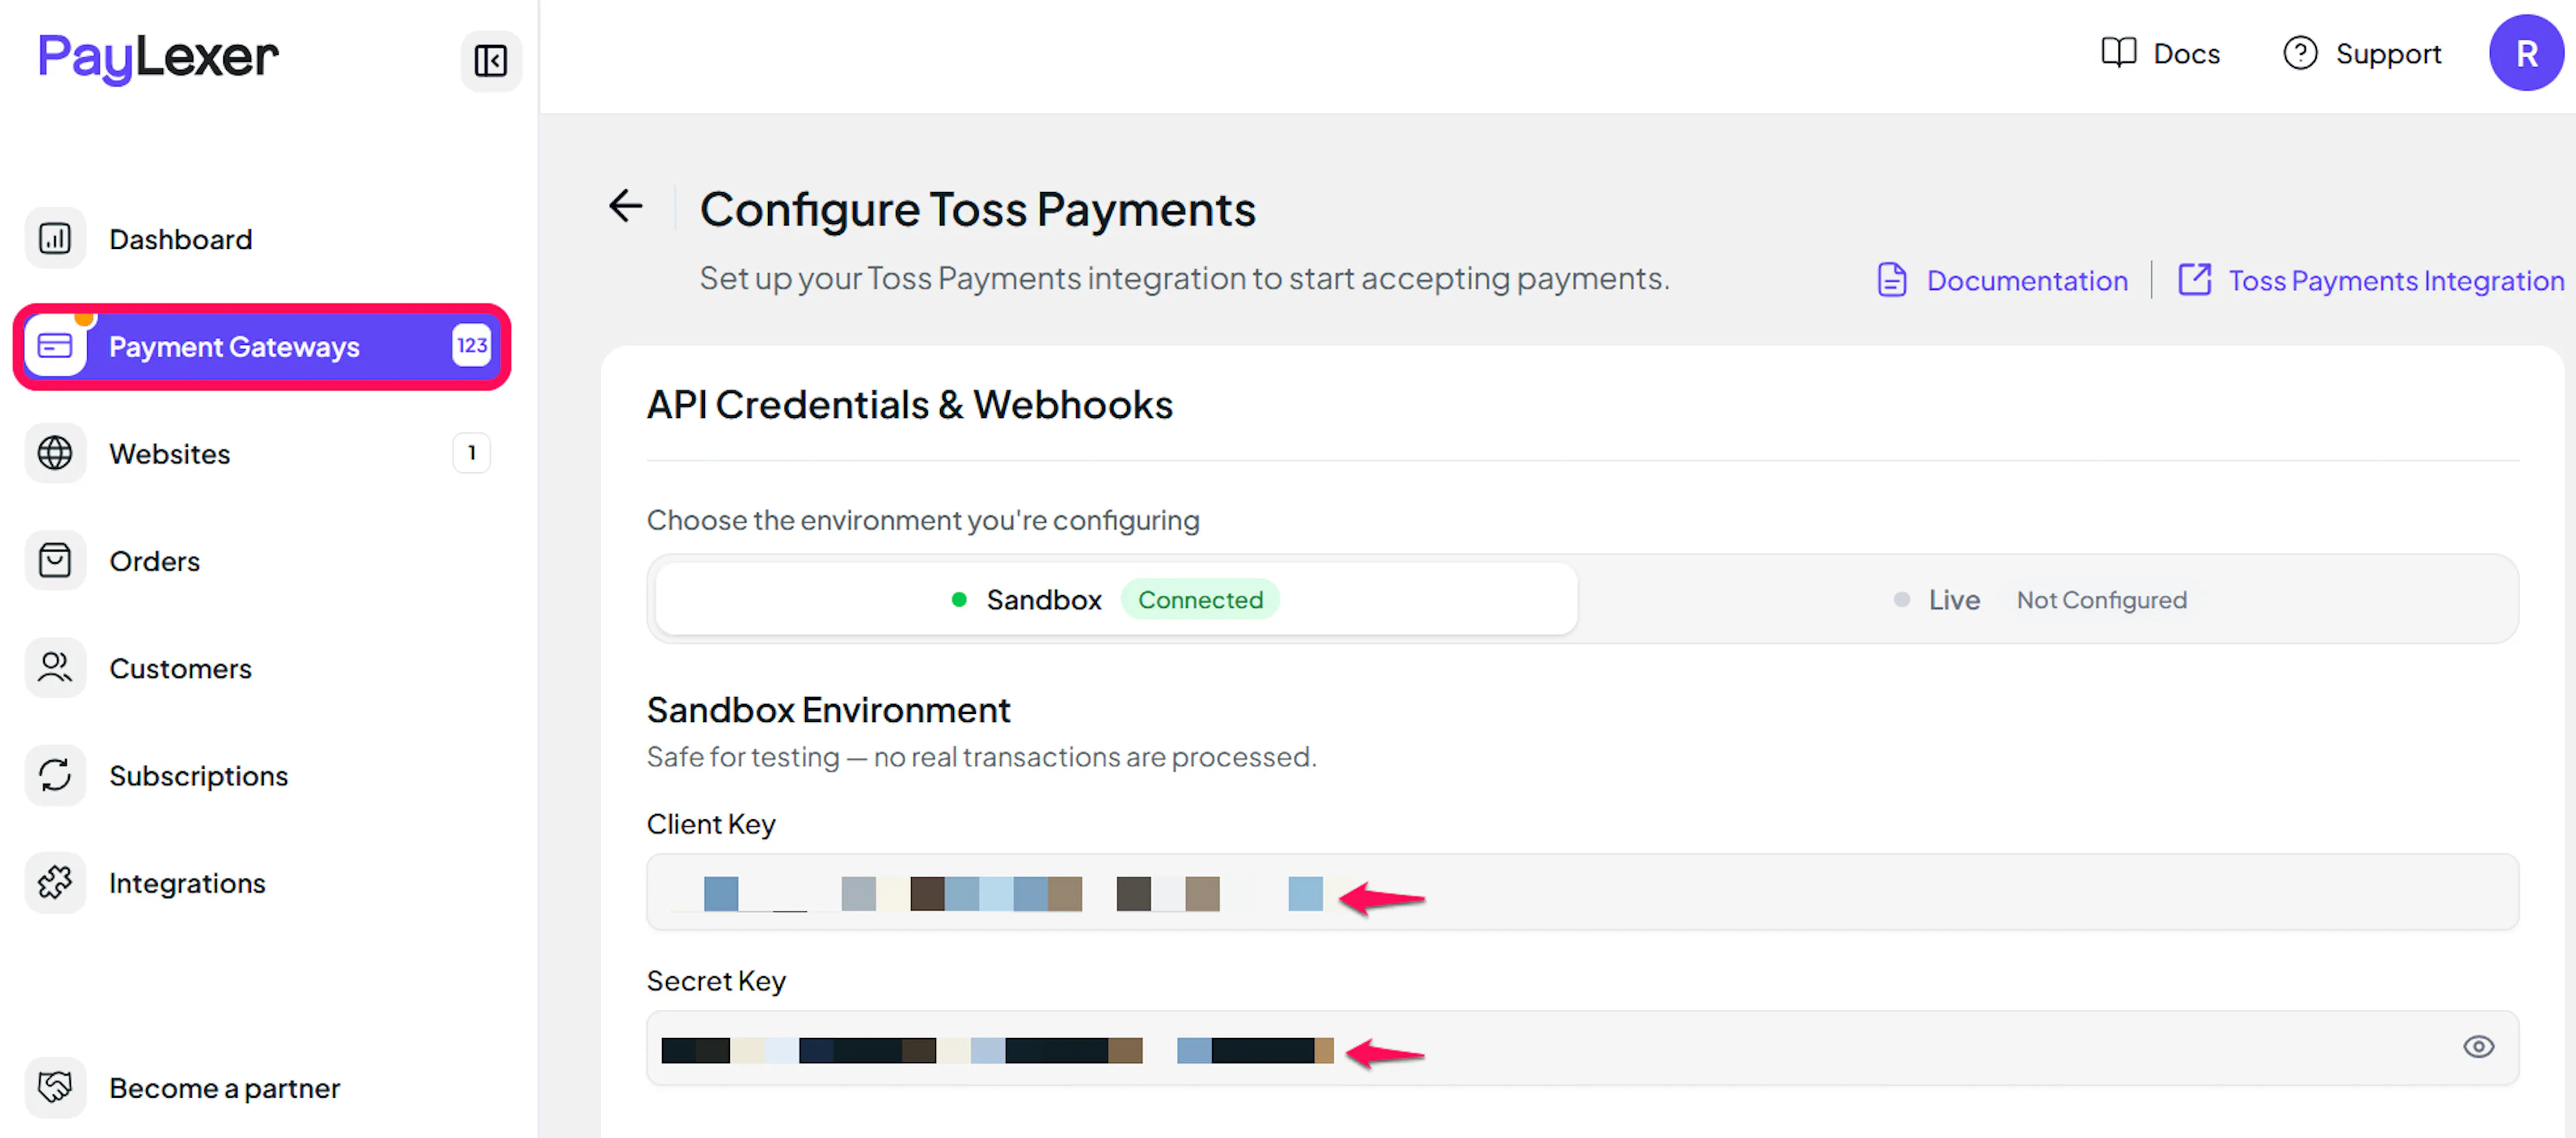
Log in to your PayLexer dashboard and navigate to Payment Gateways → Toss Payments.
Enter your credentials
Paste the Client Key and Secret Key you copied from Toss Payments into the matching environment:
- Live: your live Client Key (
live_ck_) and Secret Key (live_sk_) - Sandbox: your test Client Key (
test_ck_) and Secret Key (test_sk_)
Both keys in each environment must belong to the same Toss key pair.
Understanding Live/Production and Sandbox Settings:
| Environment | Purpose |
|---|---|
| Live / Production (Mandatory) | Used for real transactions. Cannot be empty, even when testing. |
| Test / Sandbox (Optional) | Used for testing only. No real money is processed. |
How PayLexer selects credentials:
- Debug/Test mode ON → Test credentials are used
- Debug/Test mode OFF → Live credentials are used
Test and save
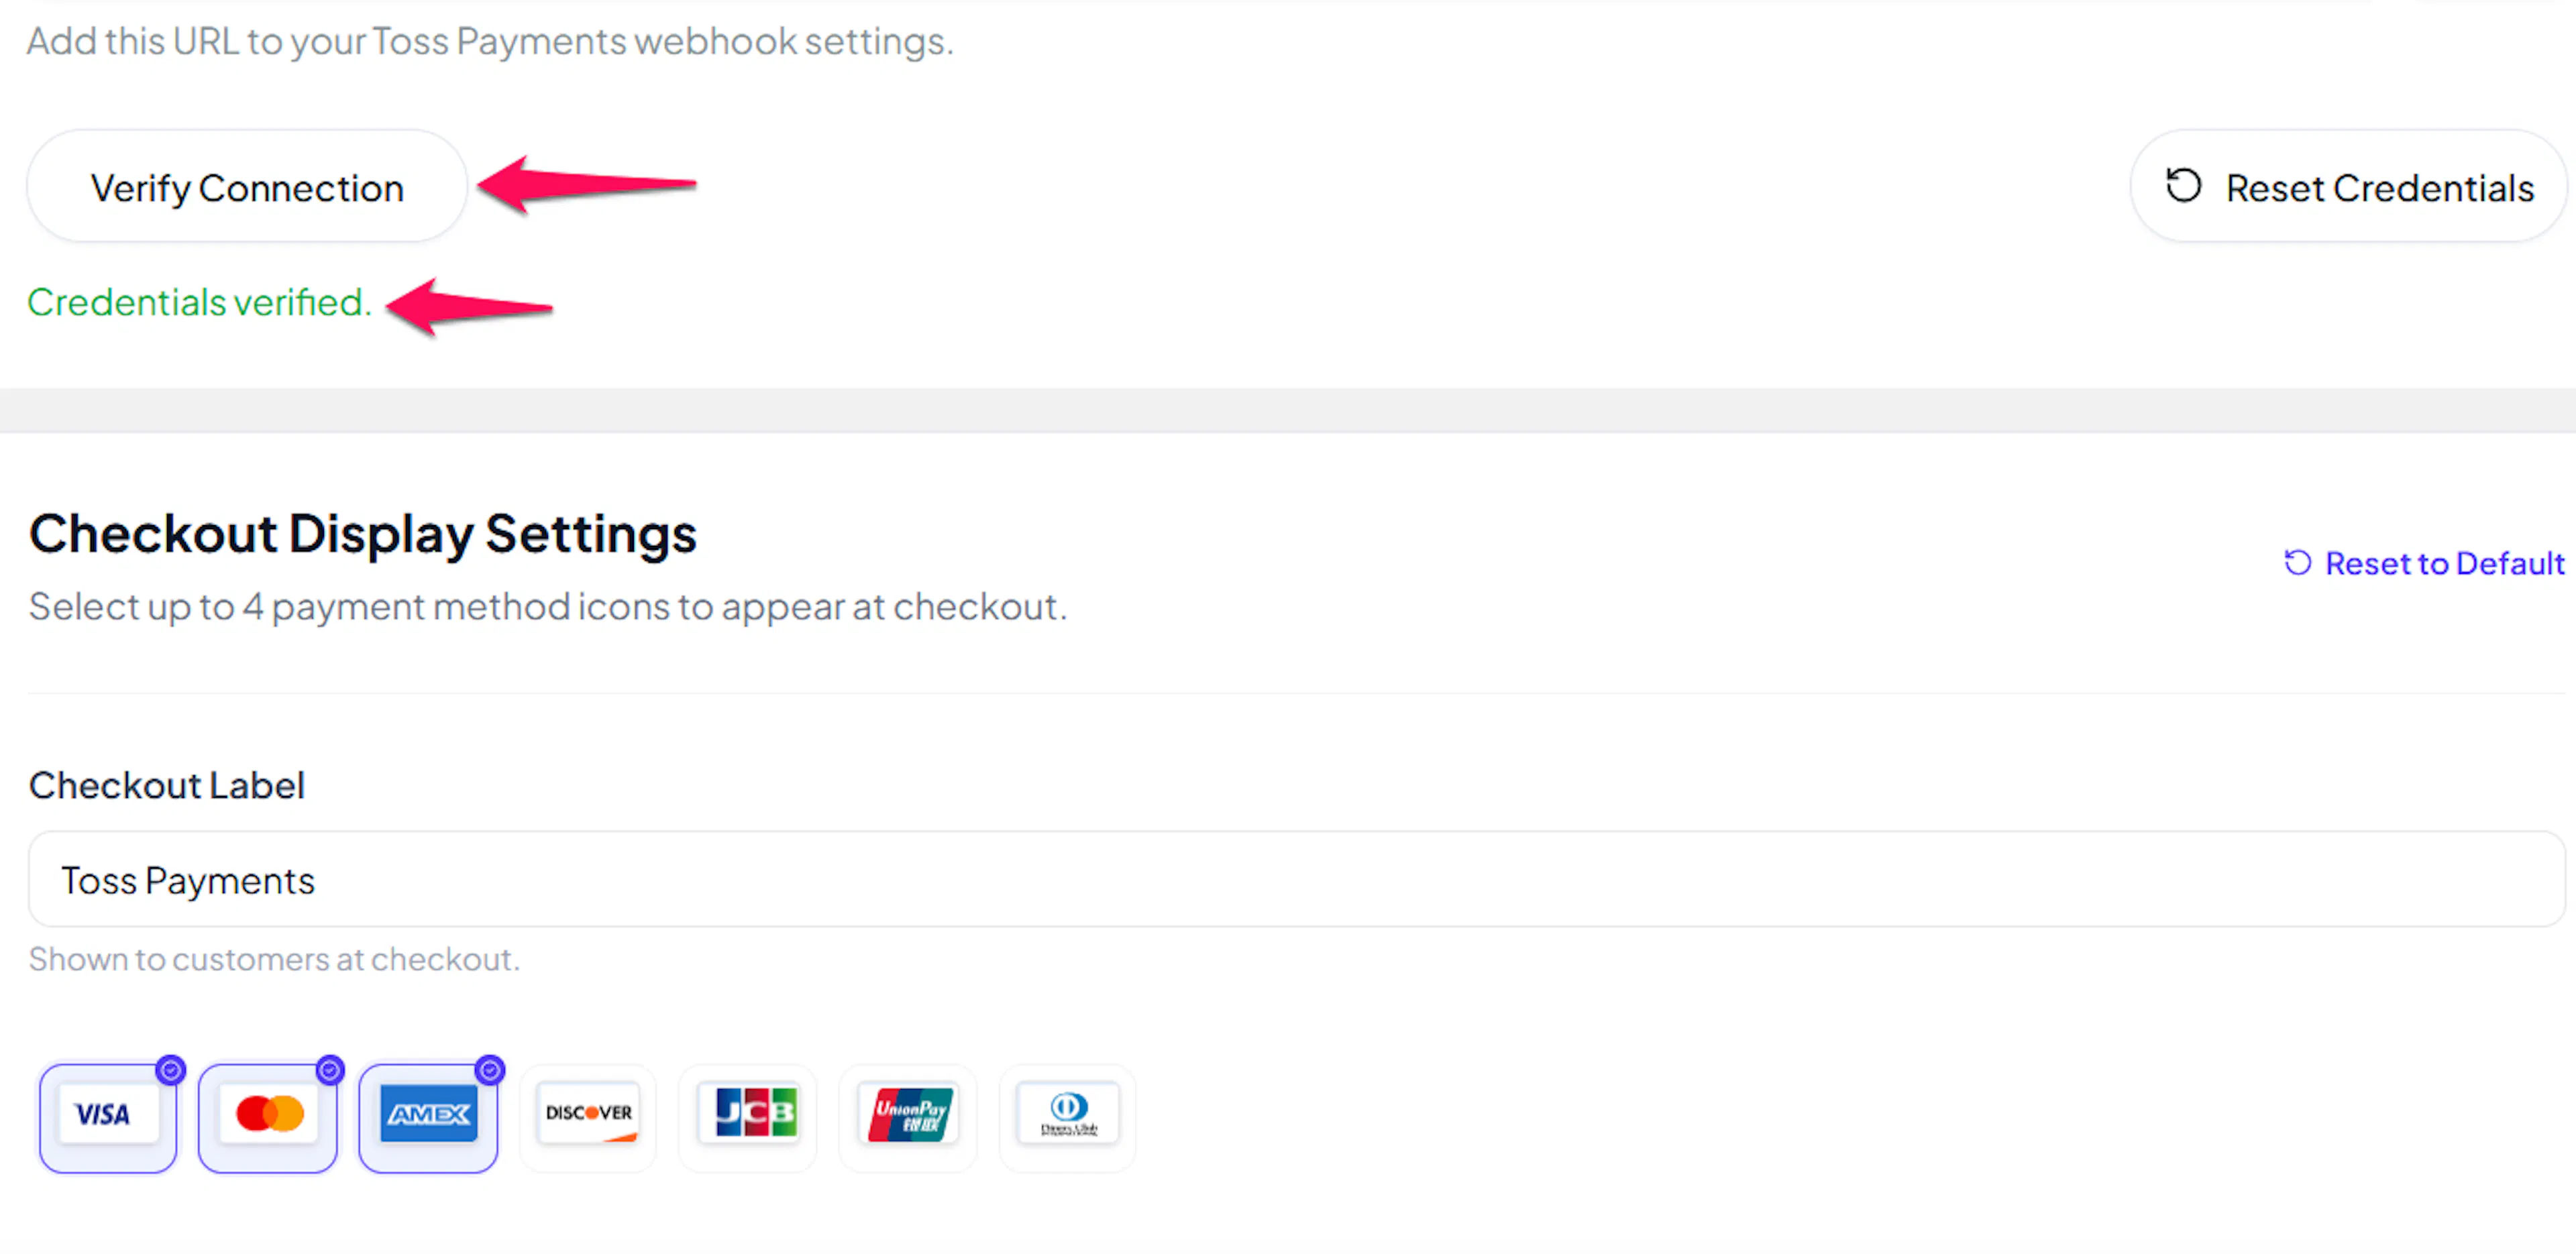
Click Save to save your configuration and verify your credentials. Click Verify Connection to test the connection.
Configuring Webhooks (Mandatory)
Webhooks enable real-time payment updates and significantly improve reliability.
Benefits of Webhooks:
- Instant payment status updates
- Automatic synchronization of refunds made in the Toss dashboard
- Consistent records across Toss, PayLexer and your store
Toss does not sign PAYMENT_STATUS_CHANGED notifications, so there is no webhook secret to copy. PayLexer confirms each notification with Toss before processing it.
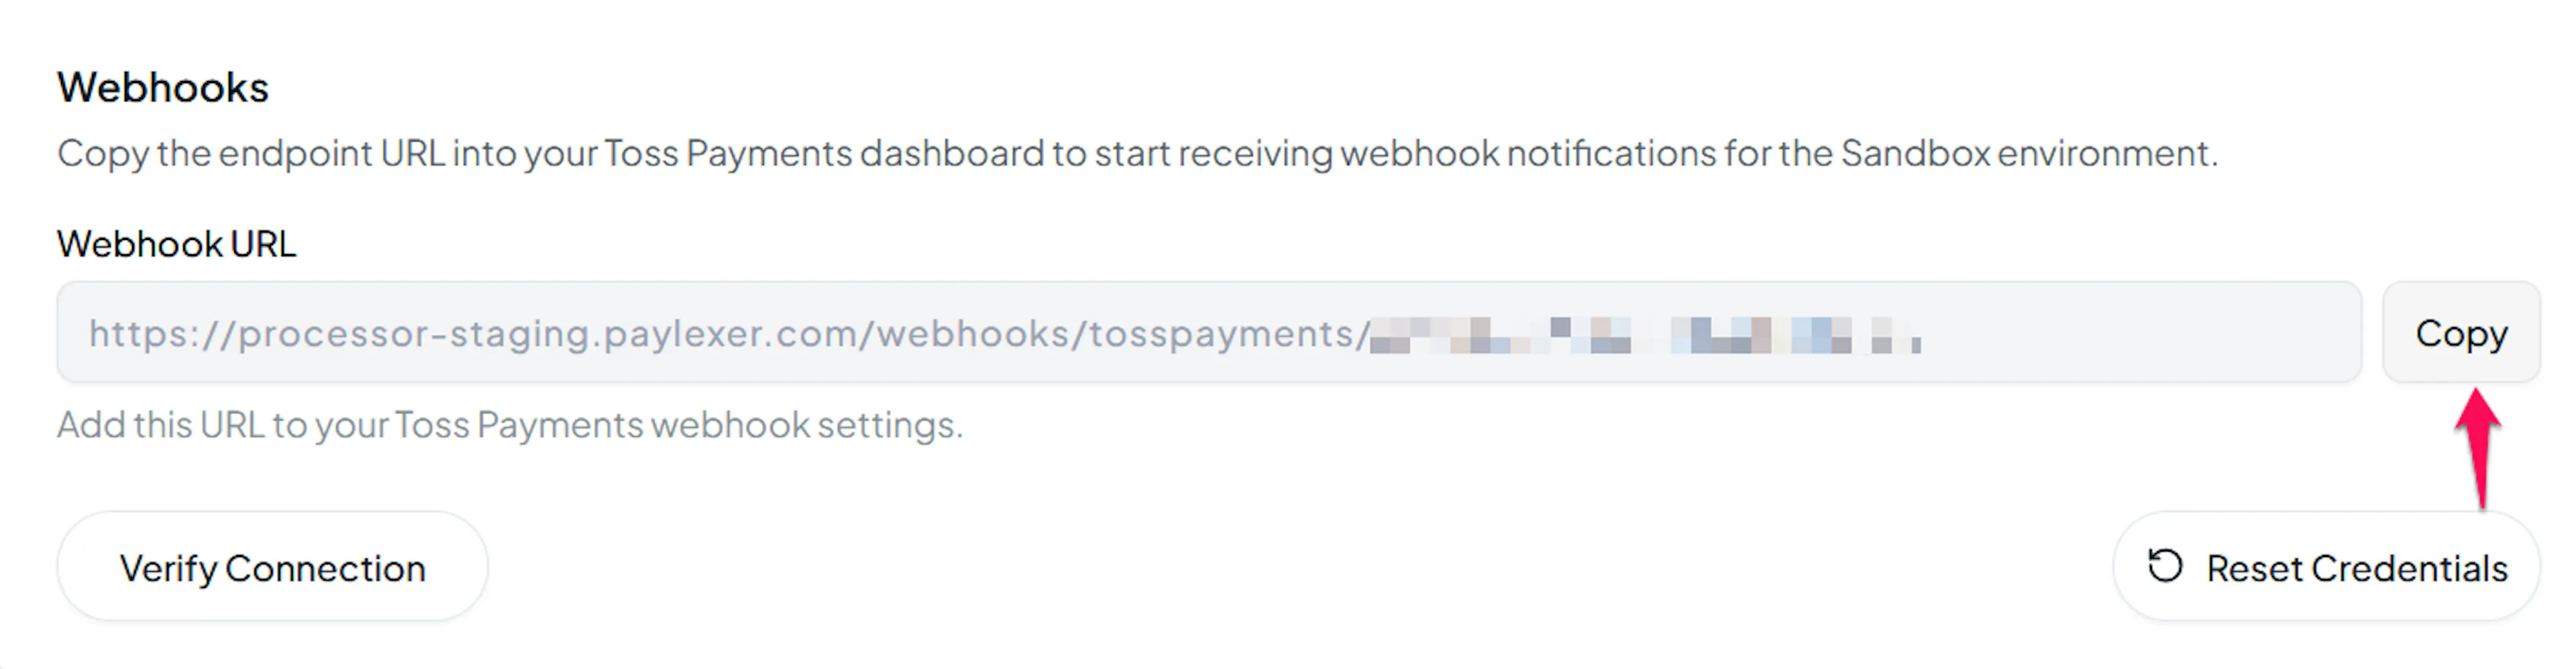
Copy your webhook URL from PayLexer
On the Payment Gateways → Toss Payments page, copy the Webhook URL shown by PayLexer.
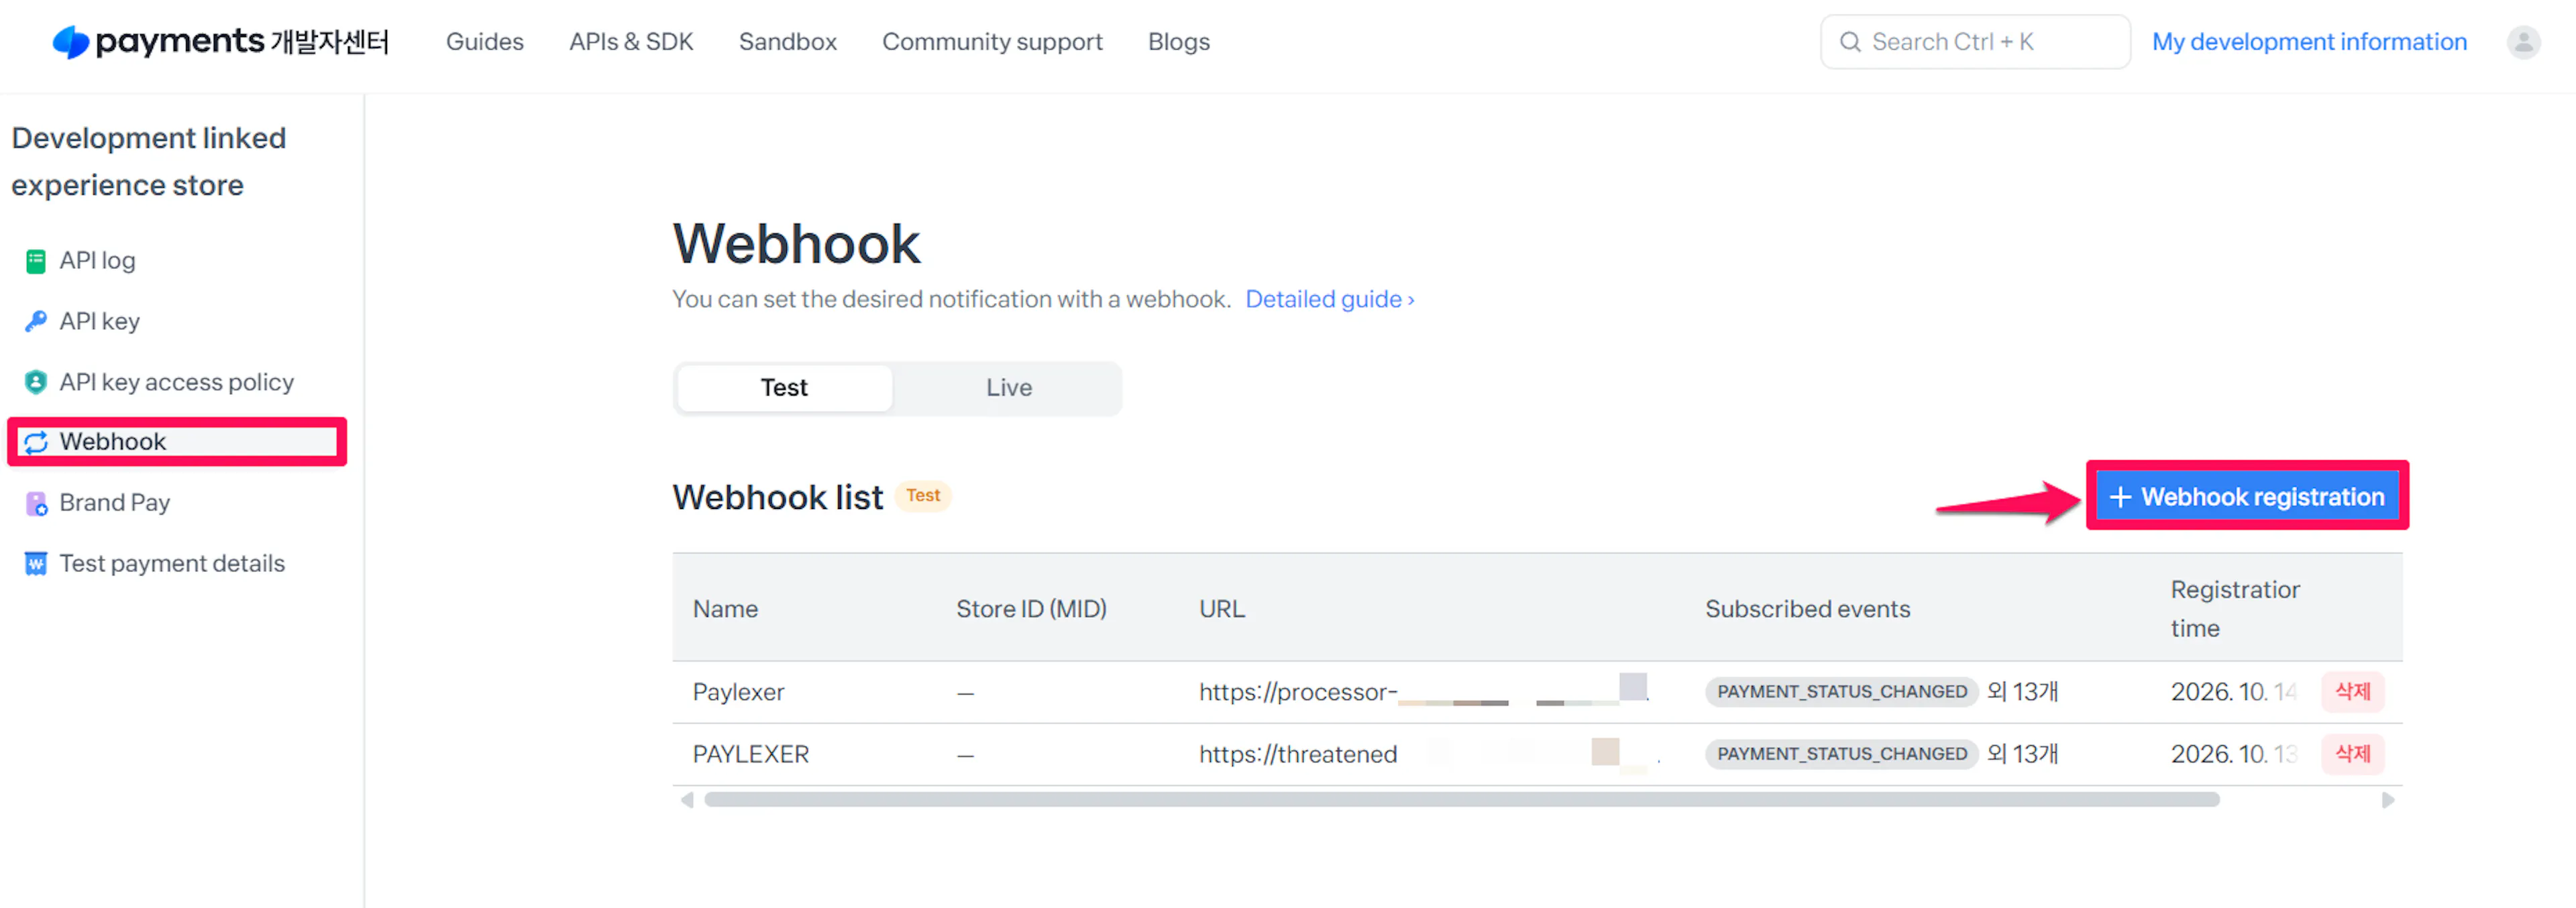
Open the Toss webhooks page
Open Webhooks in the Toss developer center and select Webhook Registration (웹훅 등록하기).
Register the PayLexer webhook
Enter a name such as PayLexer, paste the Webhook URL, and select the PAYMENT_STATUS_CHANGED event. If Toss asks for a store ID (MID), select the store your credentials belong to.
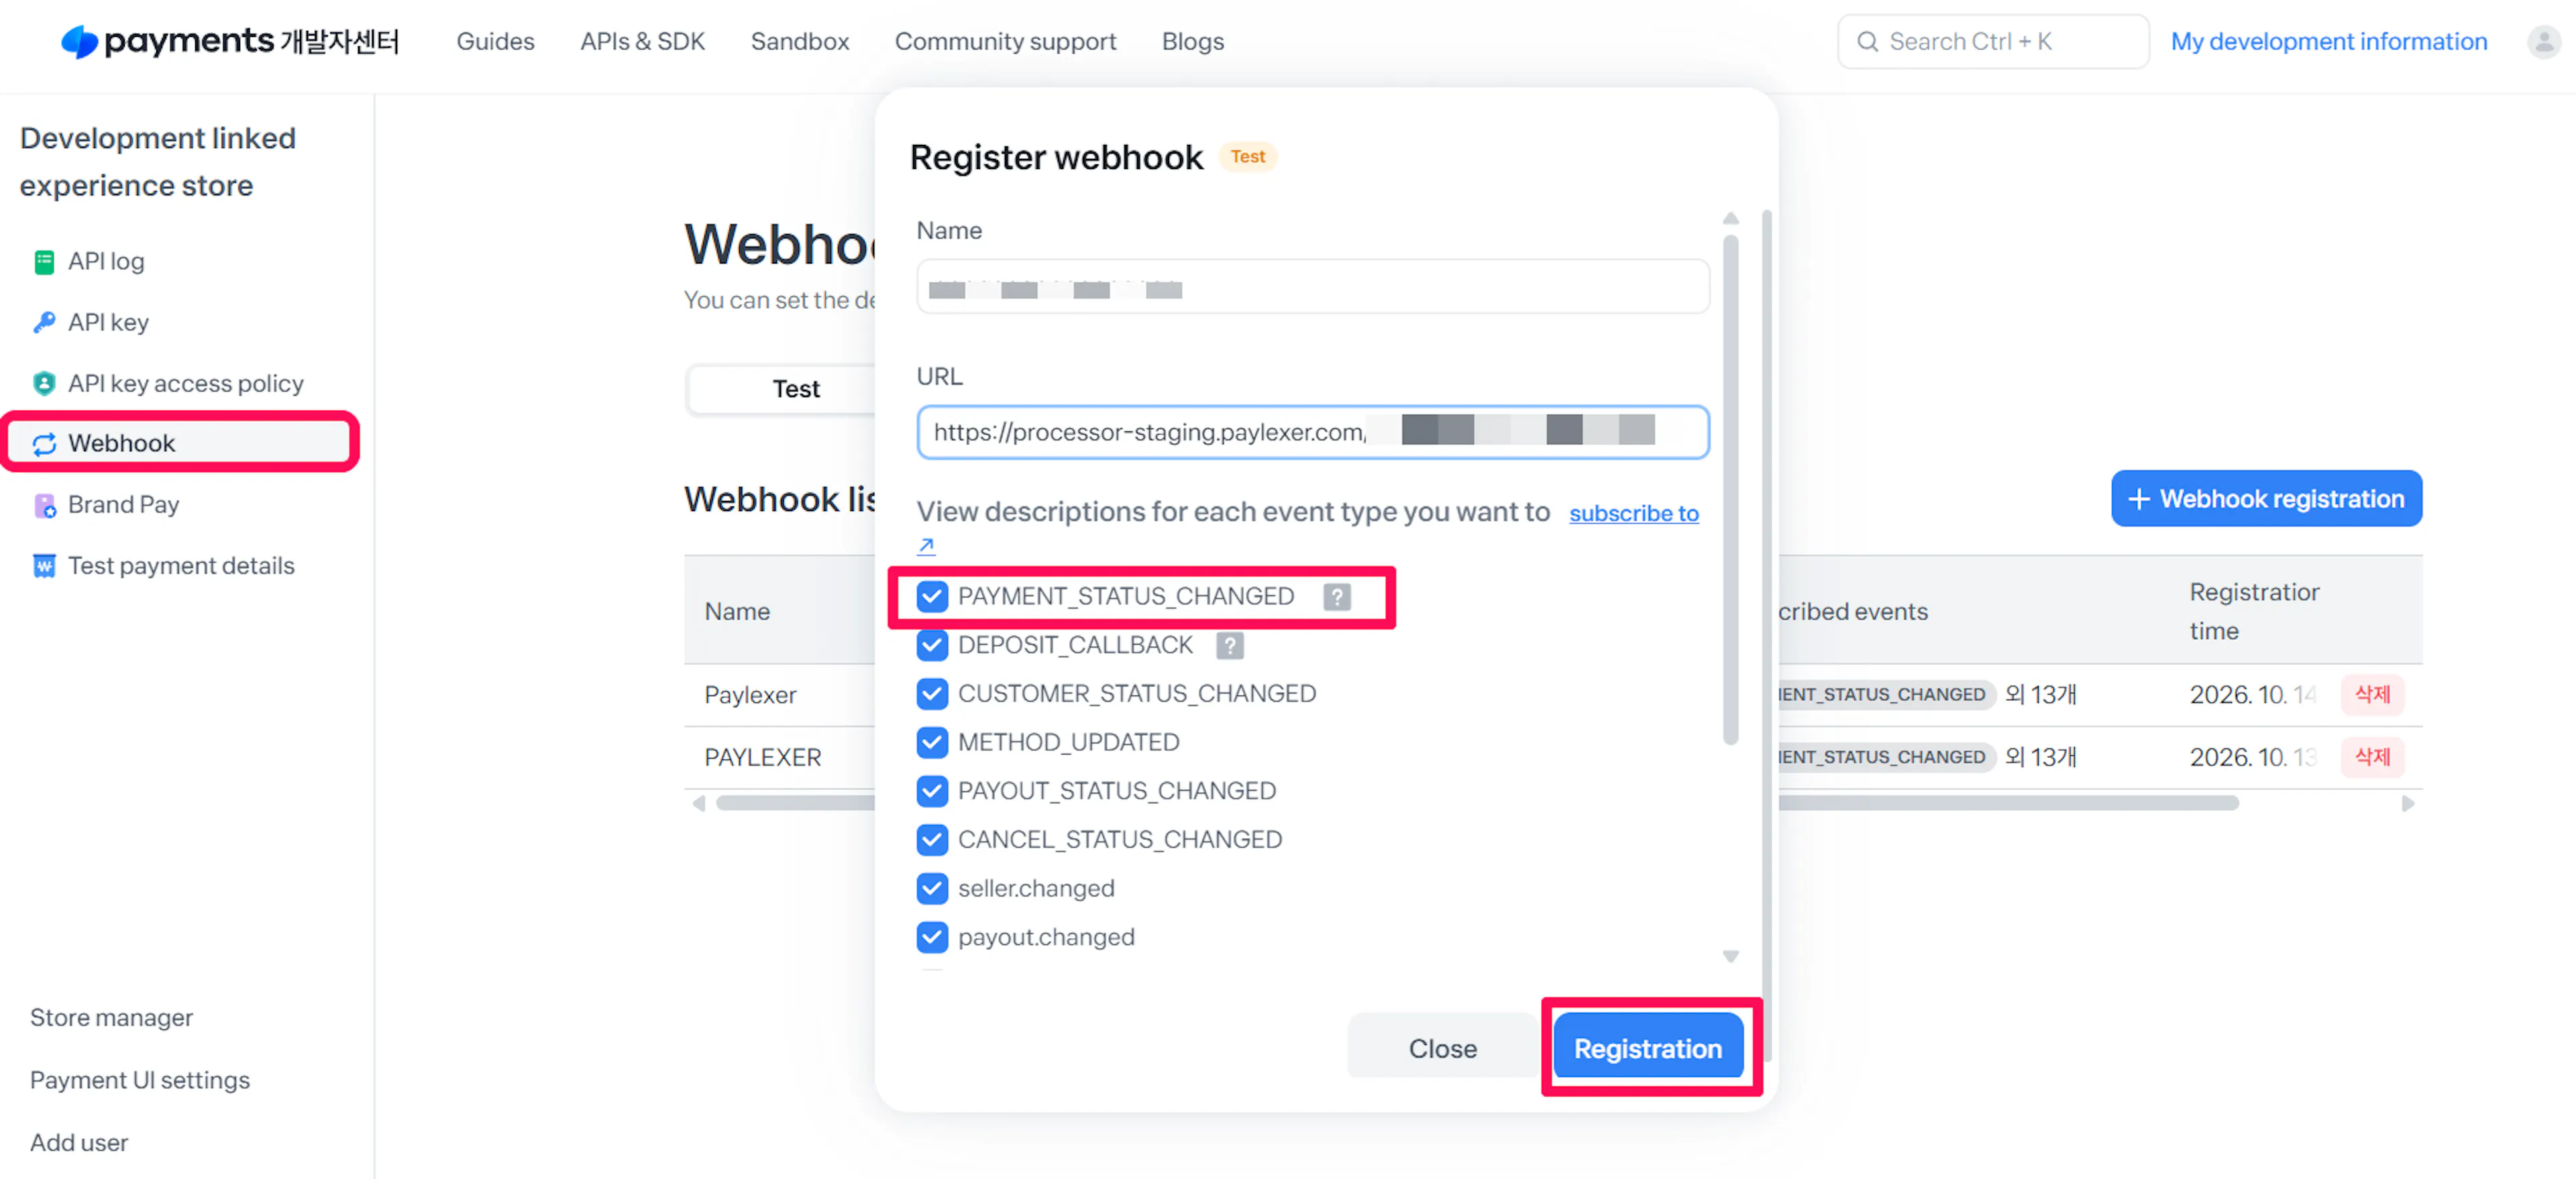
Save the webhook
Save the webhook. Webhooks are registered per store (MID), so repeat these steps for each store you use, including your live store when you go into production.
Integrate Toss Payments to Your Website
If you have already added and configured your site, you can enable Toss Payments in your existing setup.
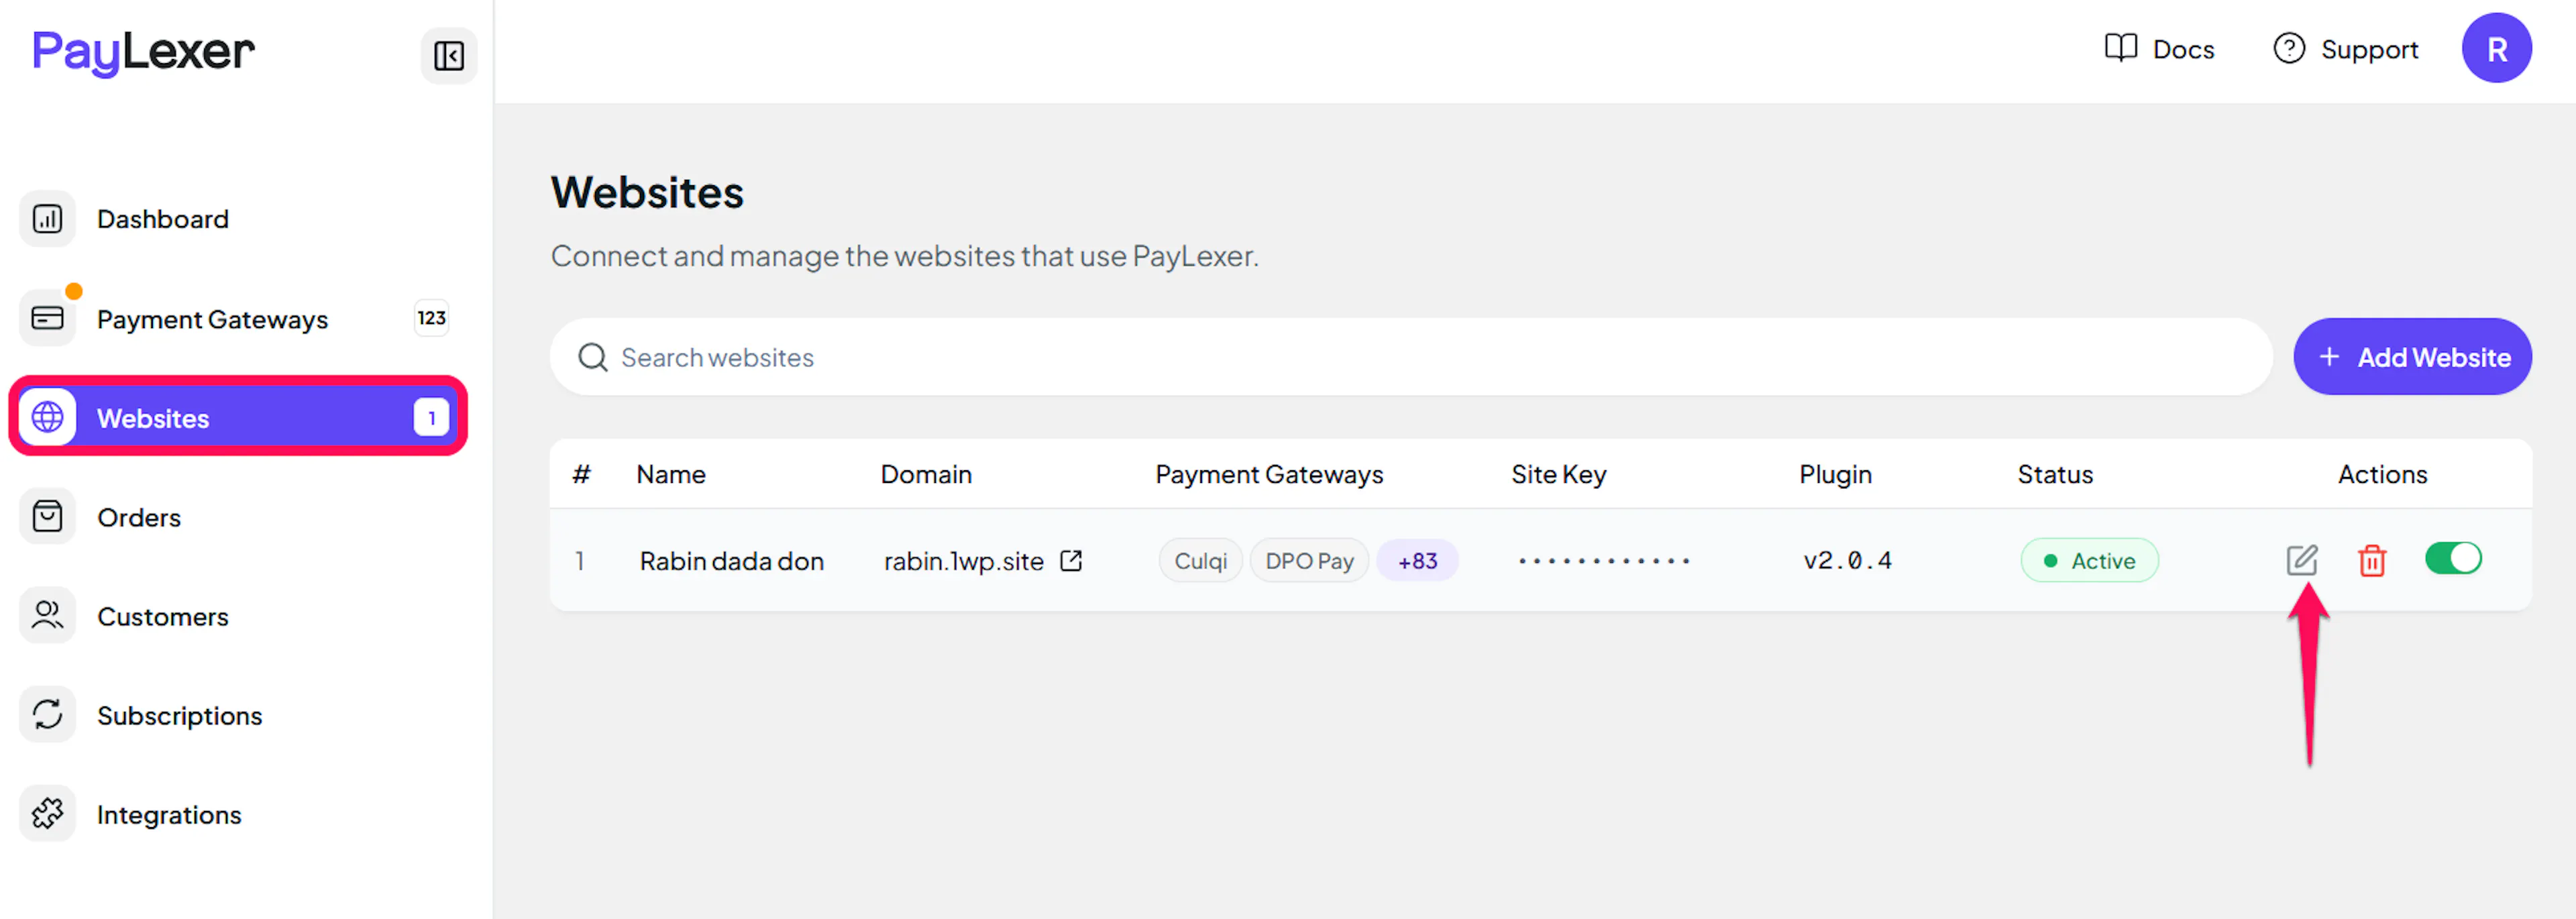
Go to Websites
Navigate to Websites in your PayLexer dashboard.
Edit your website
Click the Edit Icon of your added website.
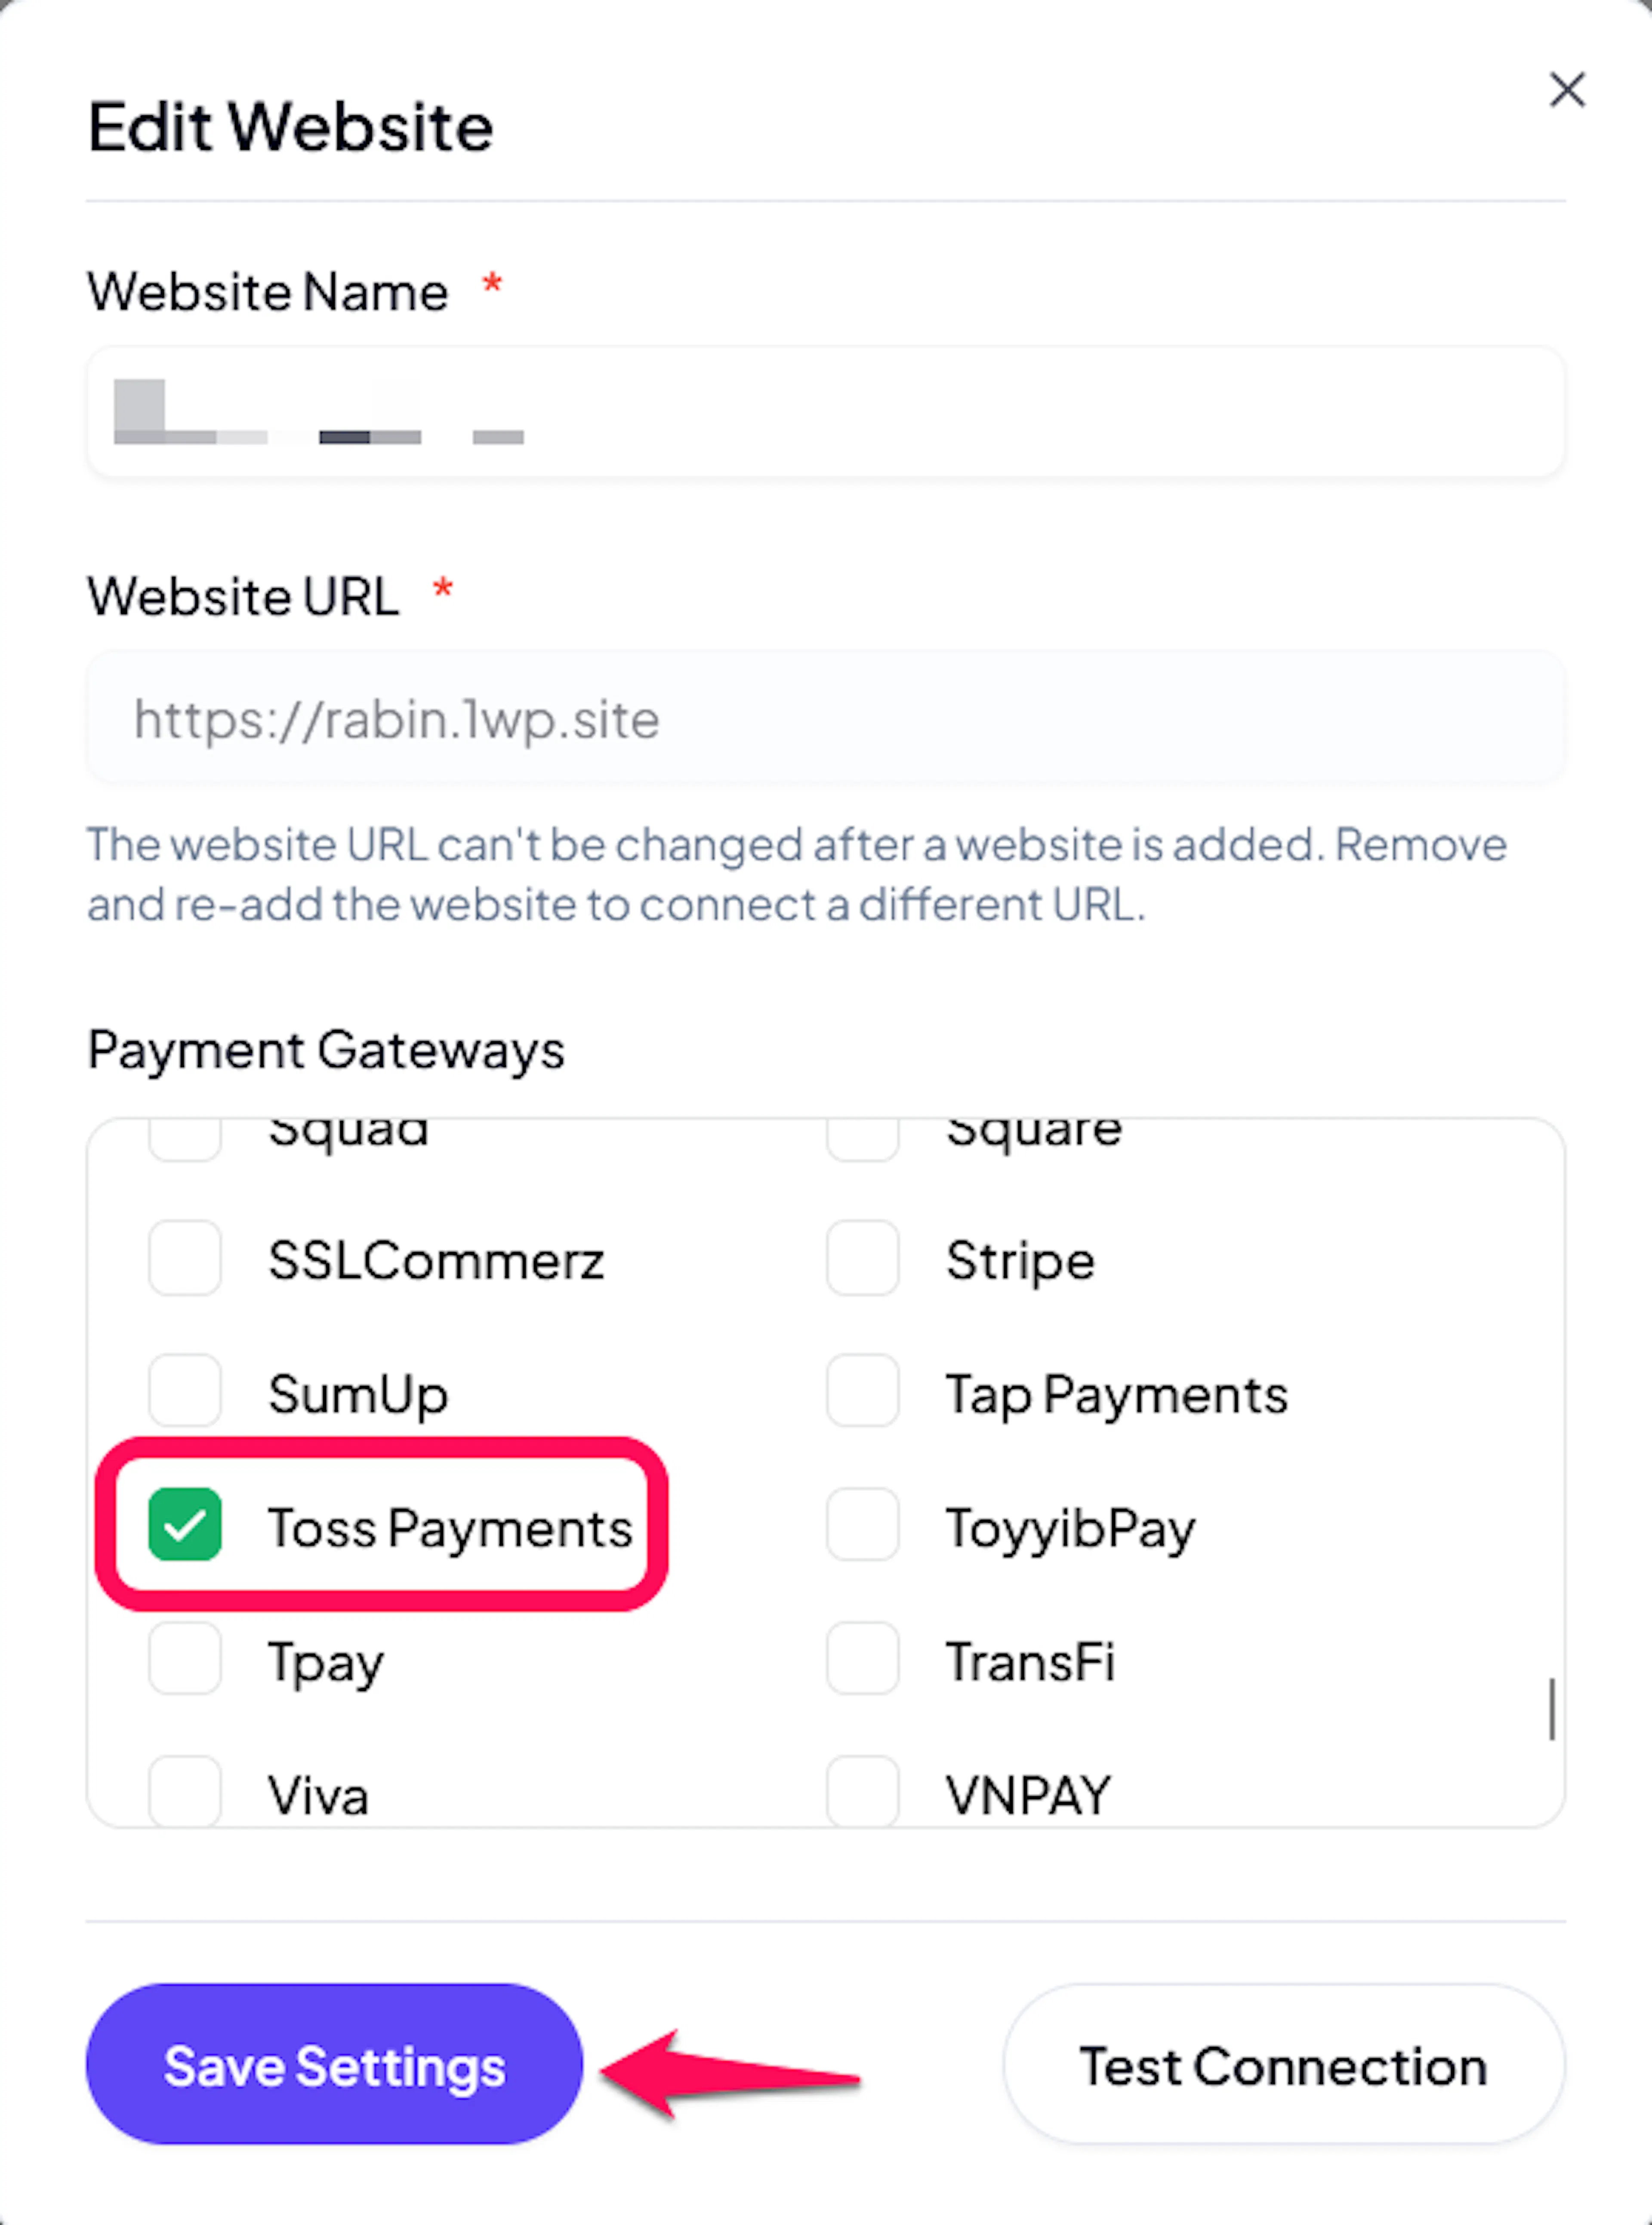
Enable Toss Payments
Click the checkbox to enable Toss Payments for the website, then save your changes.
If you haven't added a website yet, Continue to Add Your Website →
Troubleshooting
Best Practices
- Test in sandbox before enabling production payments
- Use the API Individual Integration Key pair, not keys meant for a different Toss integration type
- Register the PayLexer webhook for every Toss store (MID) you use
- Refund from PayLexer or your store rather than the Toss dashboard so transaction records stay in sync
- Let shoppers know that a card refund after capture takes 3 to 4 business days to reach their statement
FAQs
Still Have Questions?
- Toss Payments Support:
- Support Email: support@tosspayments.com
- Support Phone: 1544-7772 (Korea only)
- Documentation: Toss Payments Documentation
- PayLexer Support: Contact Support