

ChillPay
Connect ChillPay to PayLexer to accept card payments in Thailand through a secure hosted checkout page.
ChillPay is a Thai payment gateway operated by PraIn FinTech Co., Ltd. in Bangkok, settling funds into a Thai bank account. Shoppers pay on ChillPay's own hosted checkout page, so card details are entered on ChillPay's site and never reach PayLexer or your store. This integration accepts Visa, Mastercard, JCB and UnionPay cards, with the shopper confirming the payment through their bank's 3-D Secure screen.
- Supported Regions (Merchant Accounts): Thailand
- Supported Currencies: THB, USD, EUR, JPY, GBP, AUD, NZD, HKD, SGD, CHF, MYR, CNY
ChillPay needs two addresses set inside your ChillPay account before it will work with PayLexer. These cannot be sent automatically, so you have to paste them in yourself. See Configuring Webhooks below. Without them, shoppers are not returned to your store and orders never move out of pending.
Supported Features
- Hosted checkout that redirects shoppers to ChillPay's secure payment page
- Card payments in twelve currencies, including Thai baht
- 3-D Secure confirmation through the shopper's own bank
- A separate sandbox environment for testing
- Signed notifications for payments, refunds and cancellations
- Full refunds requested directly from PayLexer
ChillPay also offers QR PromptPay, mobile and internet banking, e-wallets, counter bill payment and installments. This integration covers card payments only, because ChillPay requires a single payment method to be chosen for each transaction rather than letting the shopper pick on its page.
Before You Start
Make sure you have:
- ChillPay Account – Don't have one? Sign up for ChillPay →
- PayLexer Account – Required to configure the integration. Create your account →
- A website where you want to integrate
Looking for a different payment processor? View all supported gateways →
A sandbox account is self-service and available straight away. Going live requires ChillPay to approve your business documents: a company certificate issued within the last six months, identification for every authorised director, a shareholder list, and a Thai bank passbook. Individuals can trial without commercial registration but must supply it before production is activated.
Configuring ChillPay
You need a Merchant Code, API Key and MD5 Secret Key from ChillPay for this integration.
Getting API Credentials
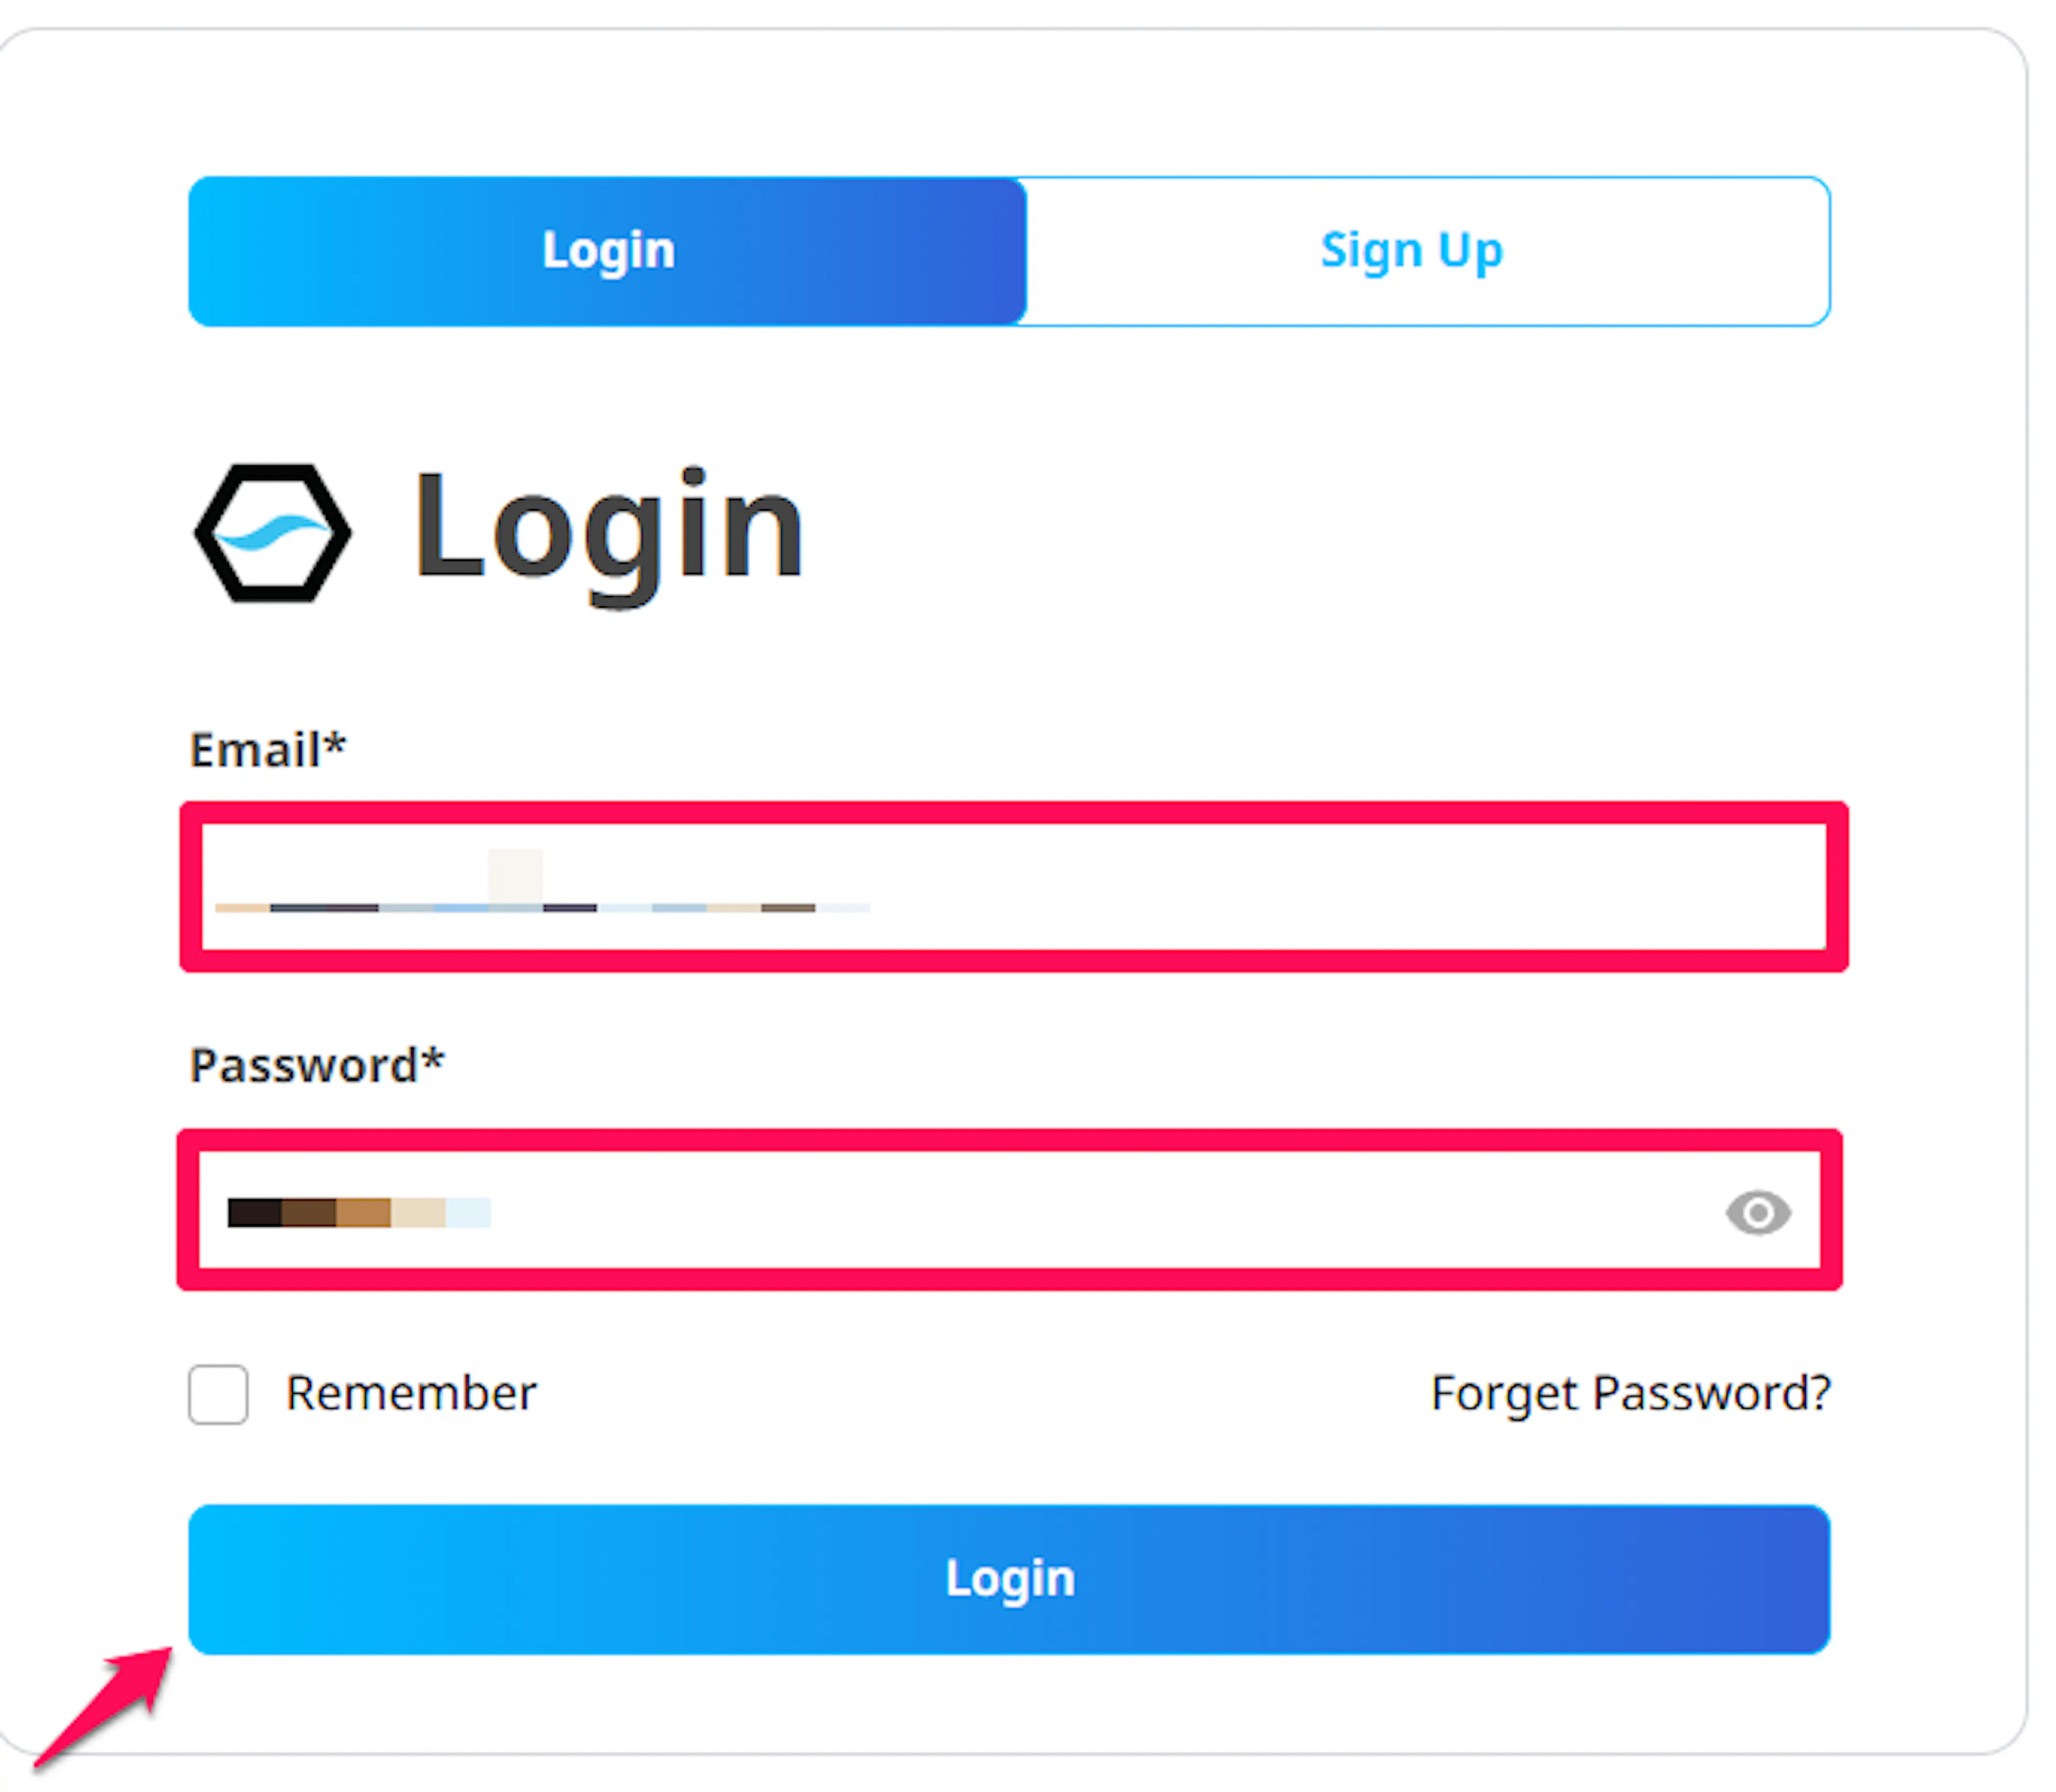
Log in to the ChillPay console
Go to the ChillPay console and sign in with your merchant account.
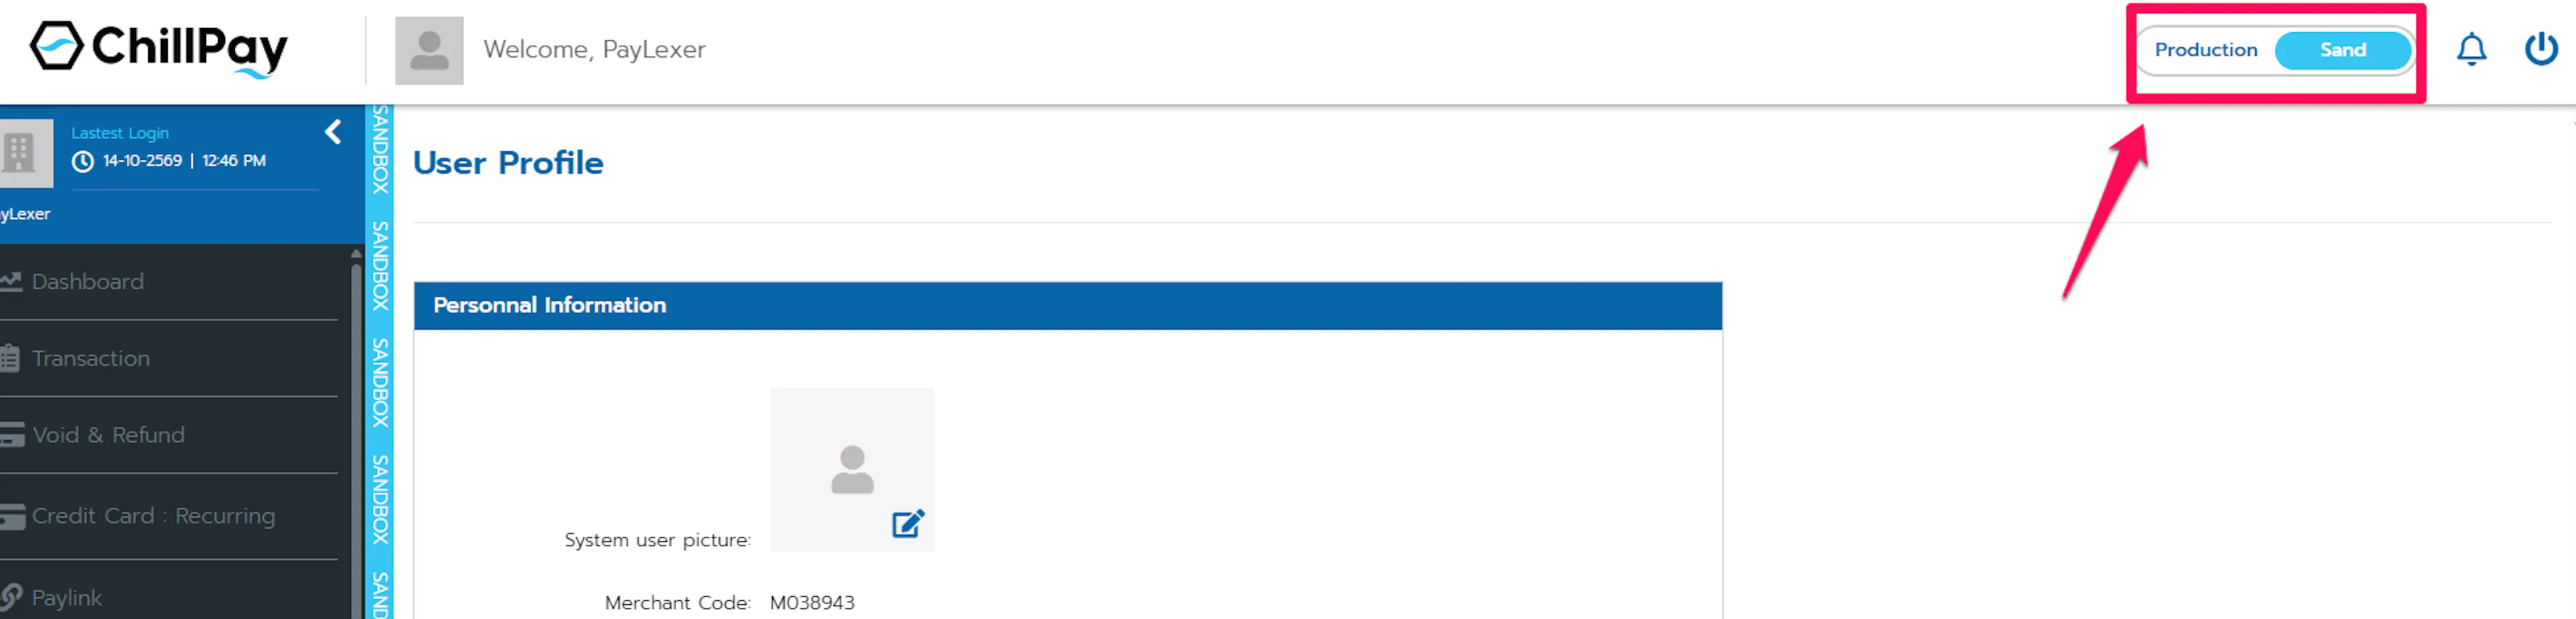
Choose Sandbox or Production
Use the Production / Sandbox switch at the top right of the console. Credentials are different for each, so make sure the correct one is selected before you copy anything.
Open the API settings
In the left menu, go to Setting → API. This page holds all three values you need.
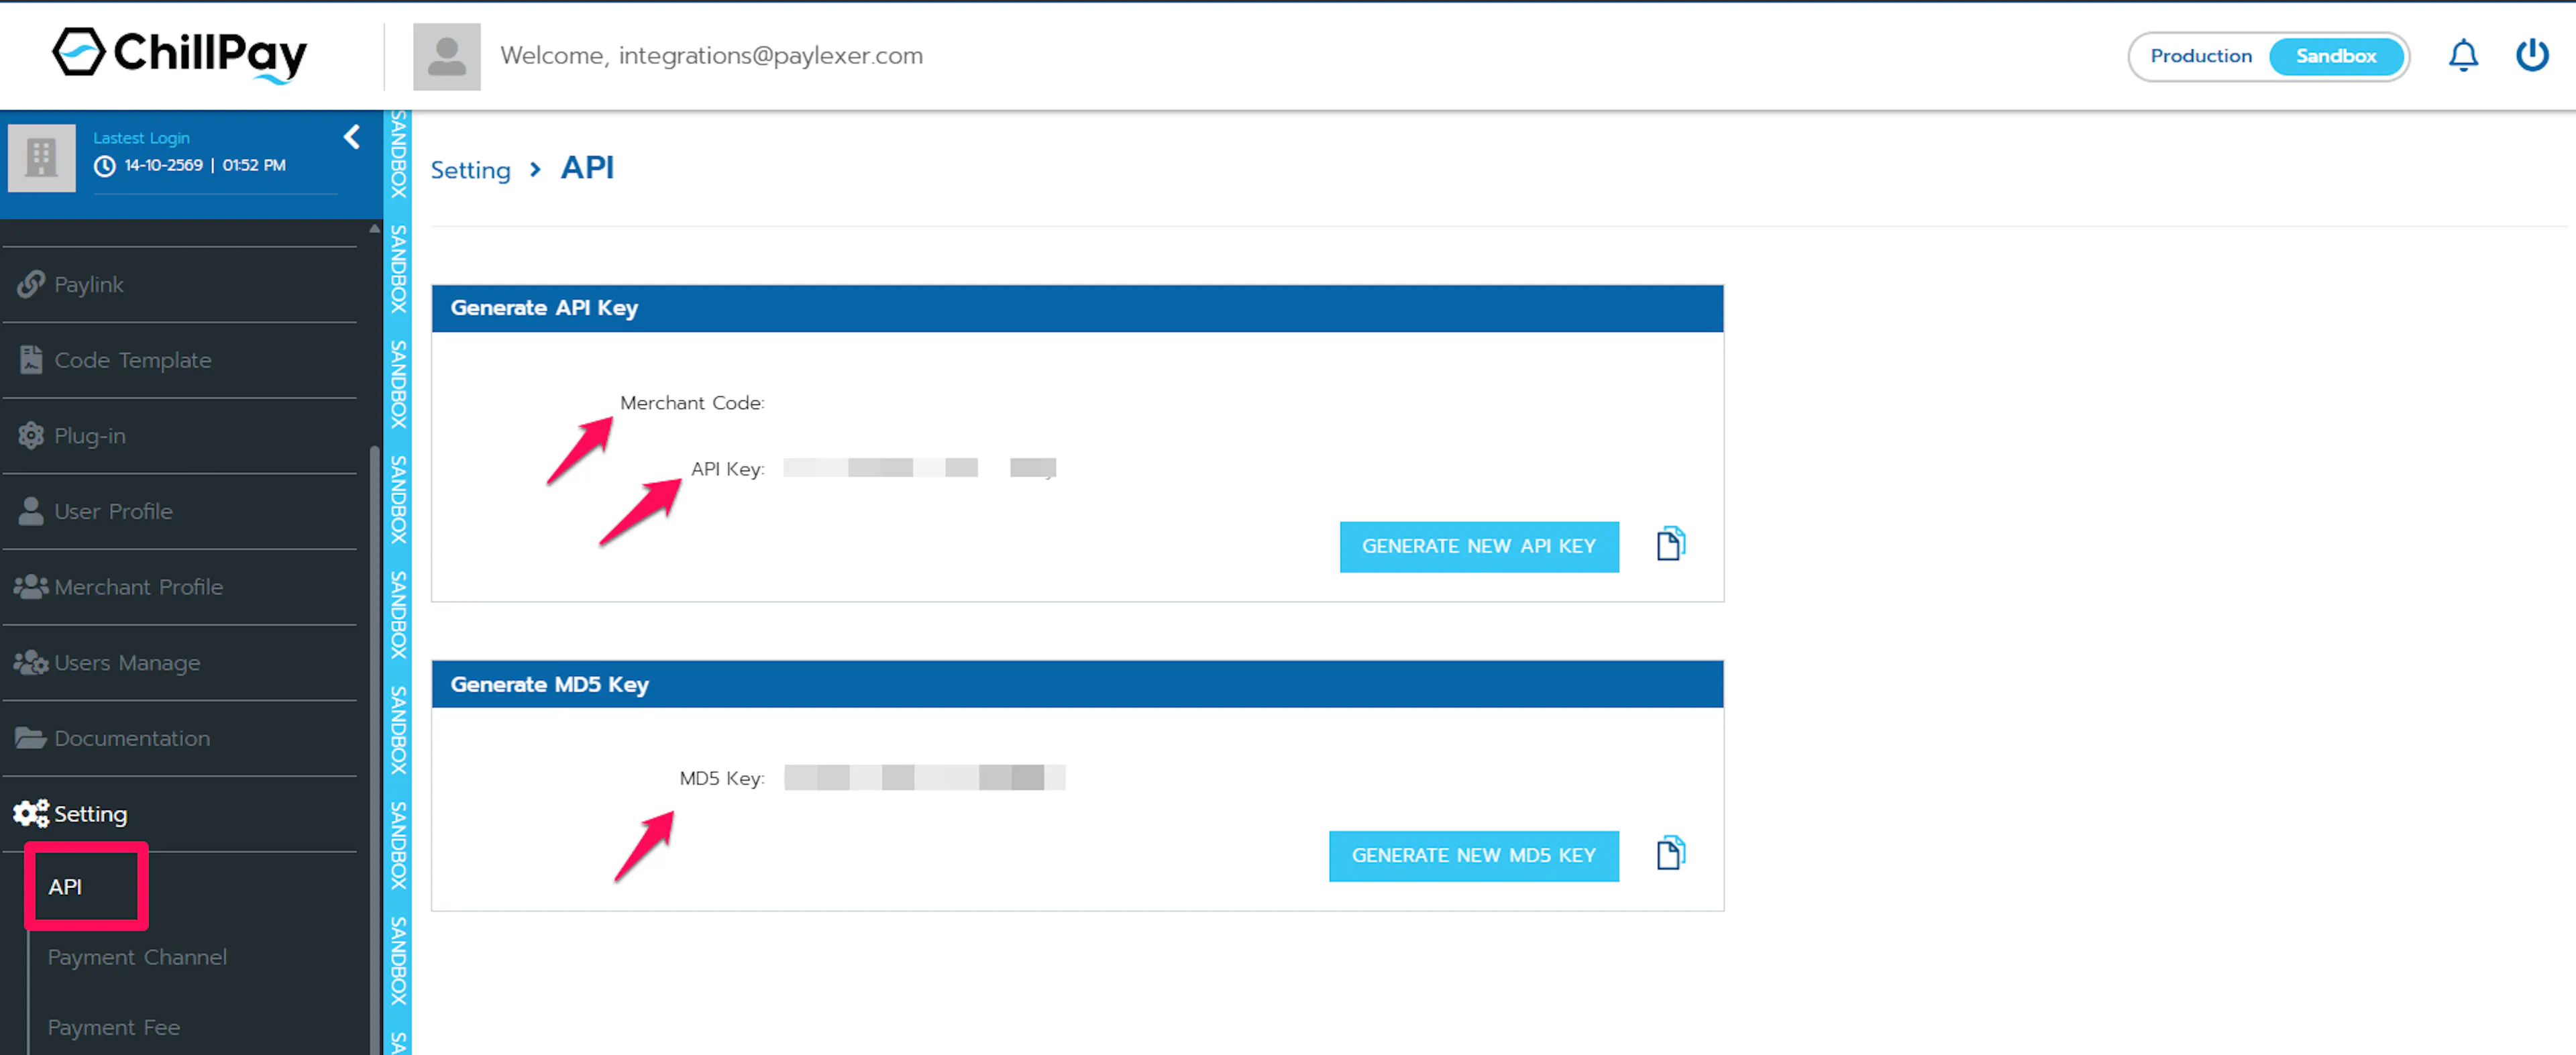
Copy your credentials
Copy the Merchant Code shown at the top of the page. Then use Generate API Key and Generate MD5 Key to create the API Key and MD5 Secret Key, and copy each one.
Generating a new key replaces the old one immediately. If you generate a new API Key or MD5 Secret Key for an account already connected to PayLexer, update it in PayLexer straight away or payments will start failing.
Repeat for the other environment
Switch the Production / Sandbox toggle to the other environment and repeat steps 3 and 4. You now have one set of credentials for live payments and one for testing.
Adding Credentials to PayLexer
Open PayLexer Dashboard
Log in to your PayLexer dashboard and navigate to Payment Gateways → ChillPay.
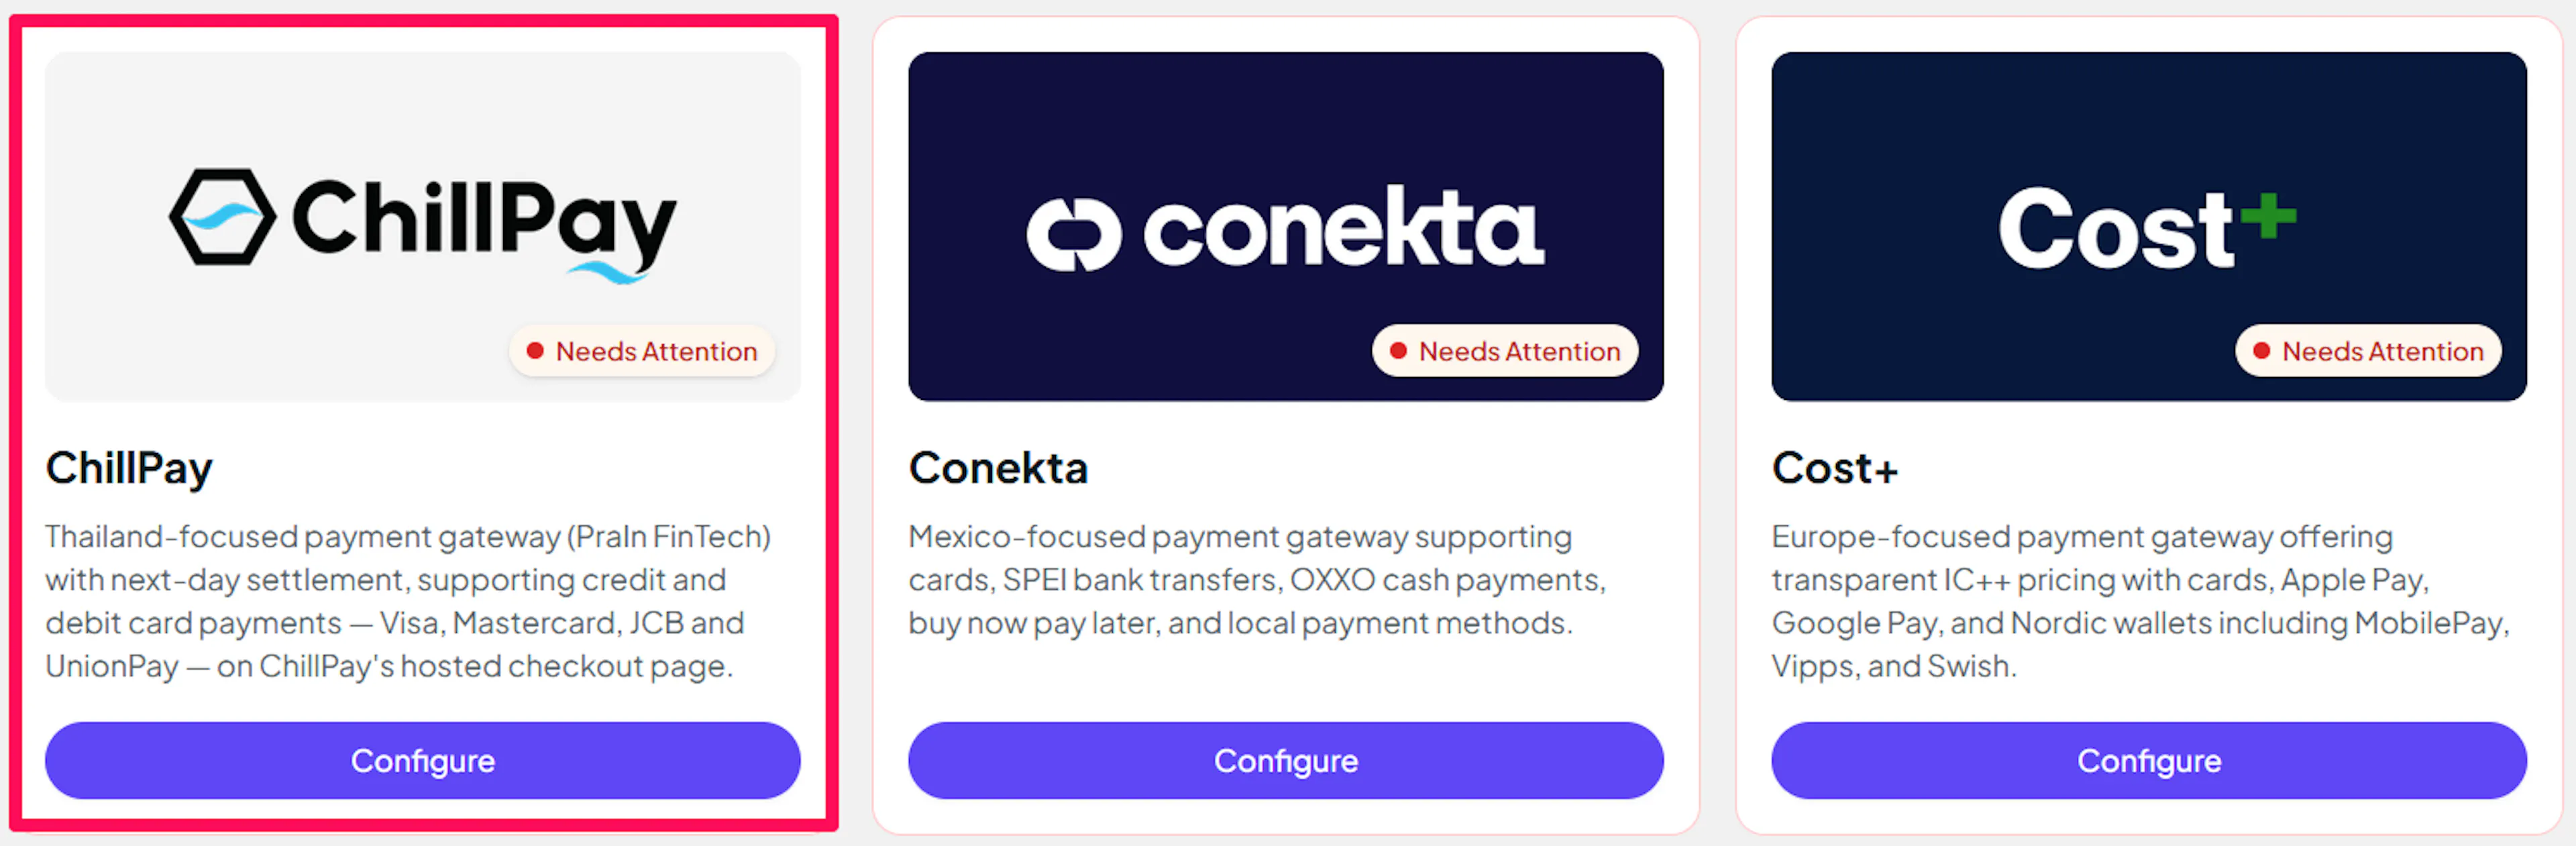
Enter your credentials
Paste the Merchant Code, API Key and MD5 Secret Key you copied from ChillPay into the corresponding fields. Production credentials go in the Live fields and sandbox credentials go in the Test fields.
Leave Route No (default 1) empty unless ChillPay has issued you more than one Route No. A Route No is only needed when you run several websites from a single ChillPay account.
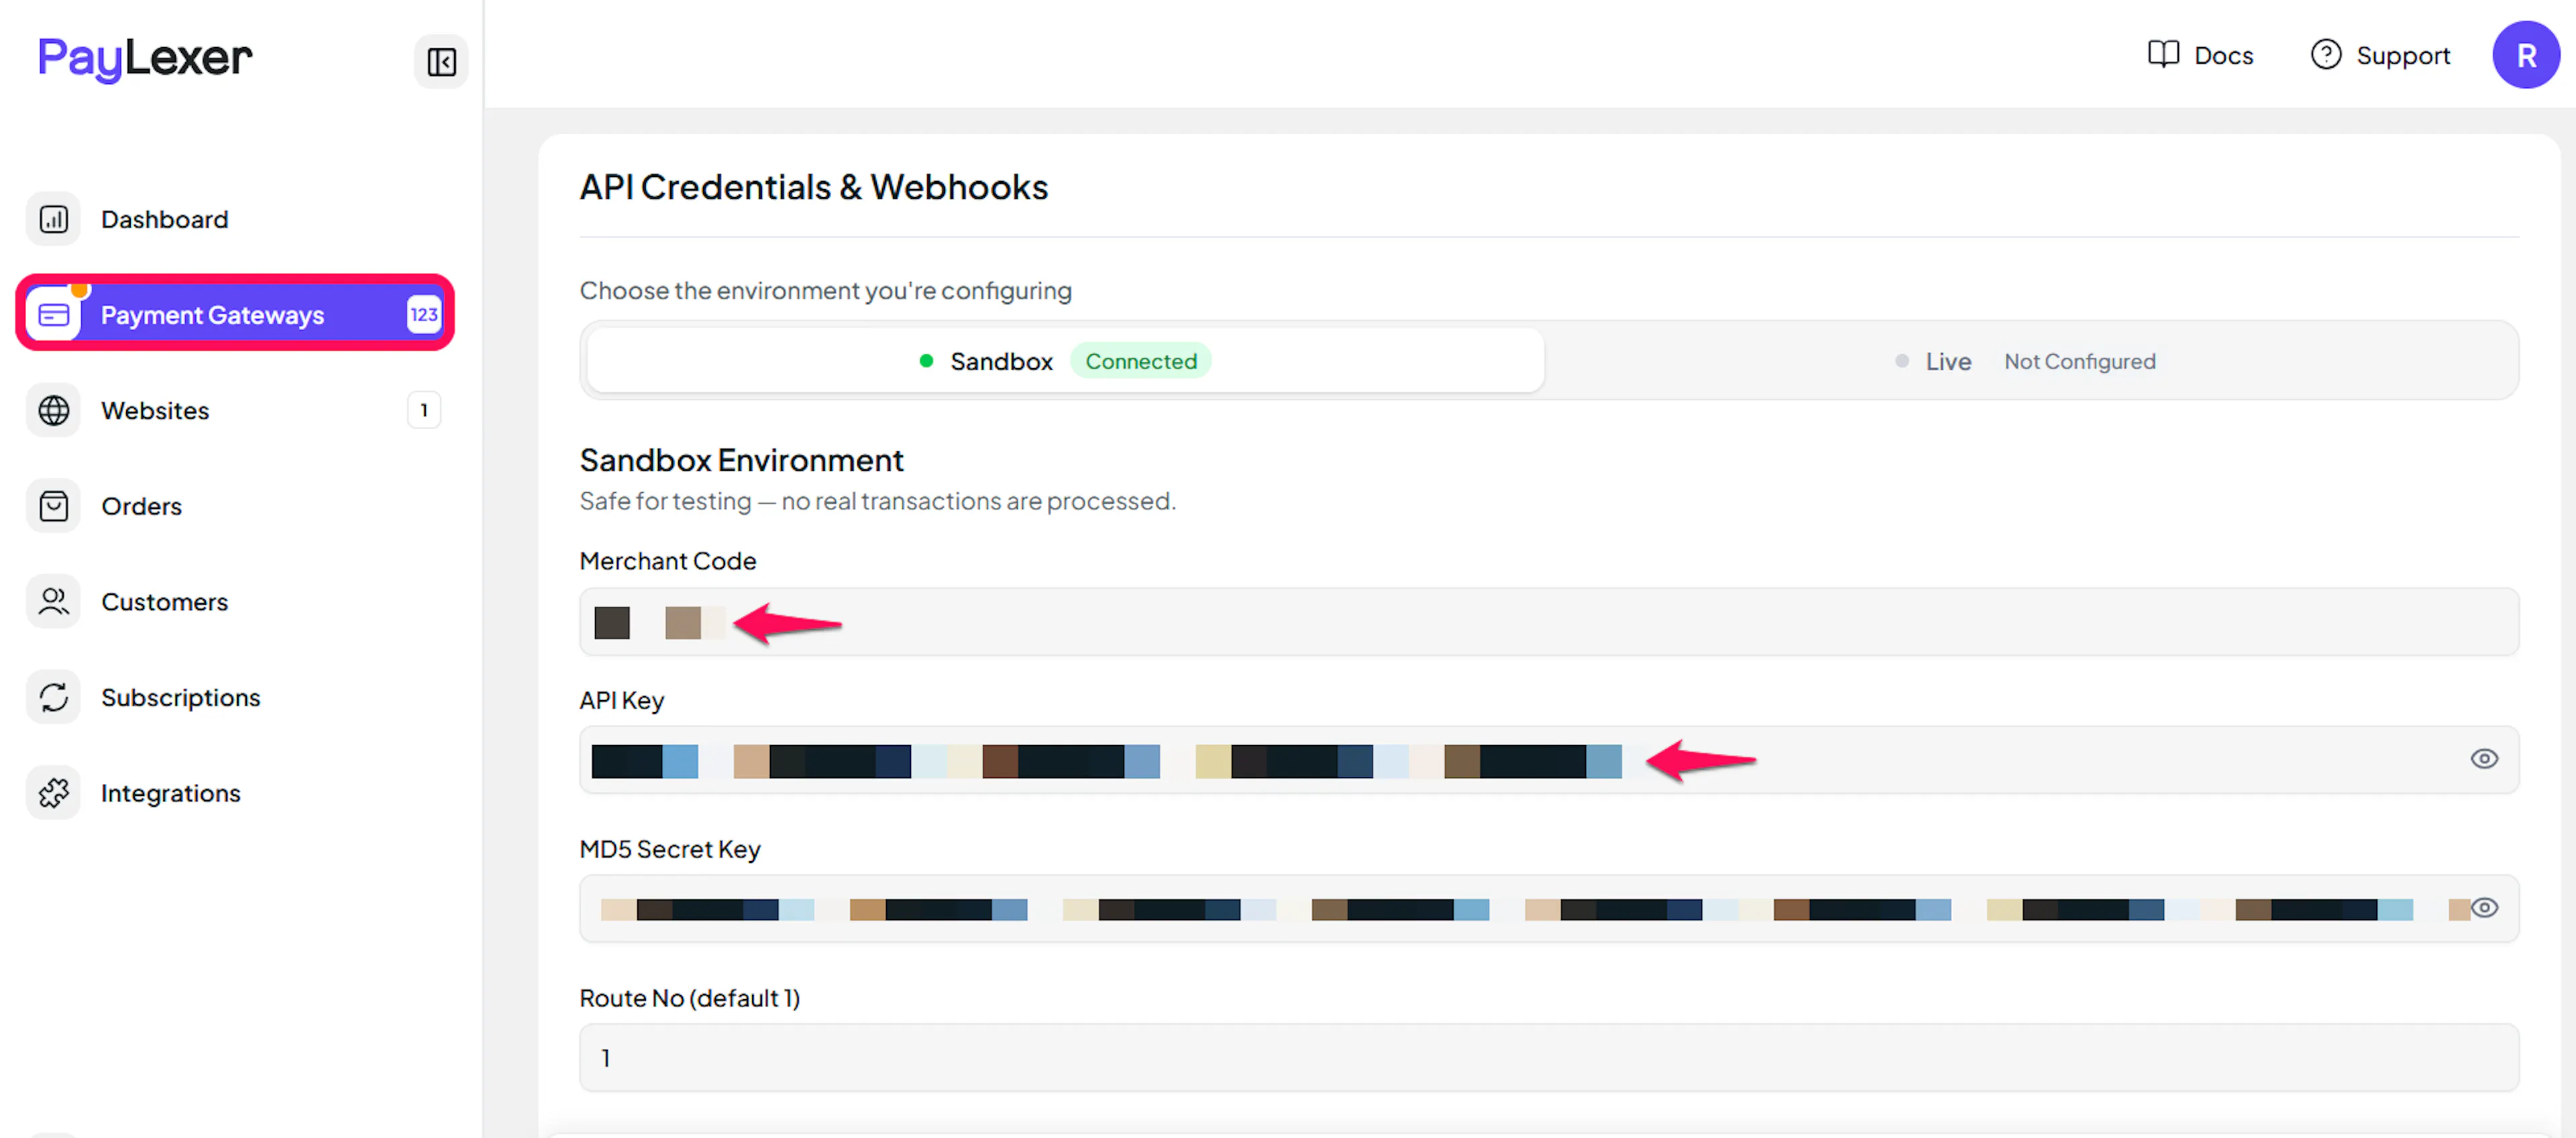
Understanding Live/Production and Sandbox Settings:
| Environment | Purpose |
|---|---|
| Live / Production (Mandatory) | Used for real transactions. Cannot be empty, even when testing. |
| Test / Sandbox (Optional) | Used for testing only. No real money is processed. |
How PayLexer selects credentials:
- Debug/Test mode ON → Test credentials are used
- Debug/Test mode OFF → Live credentials are used
Test and save
Click Save to save your configuration and verify your credentials. Click Verify Connection to test the connection.
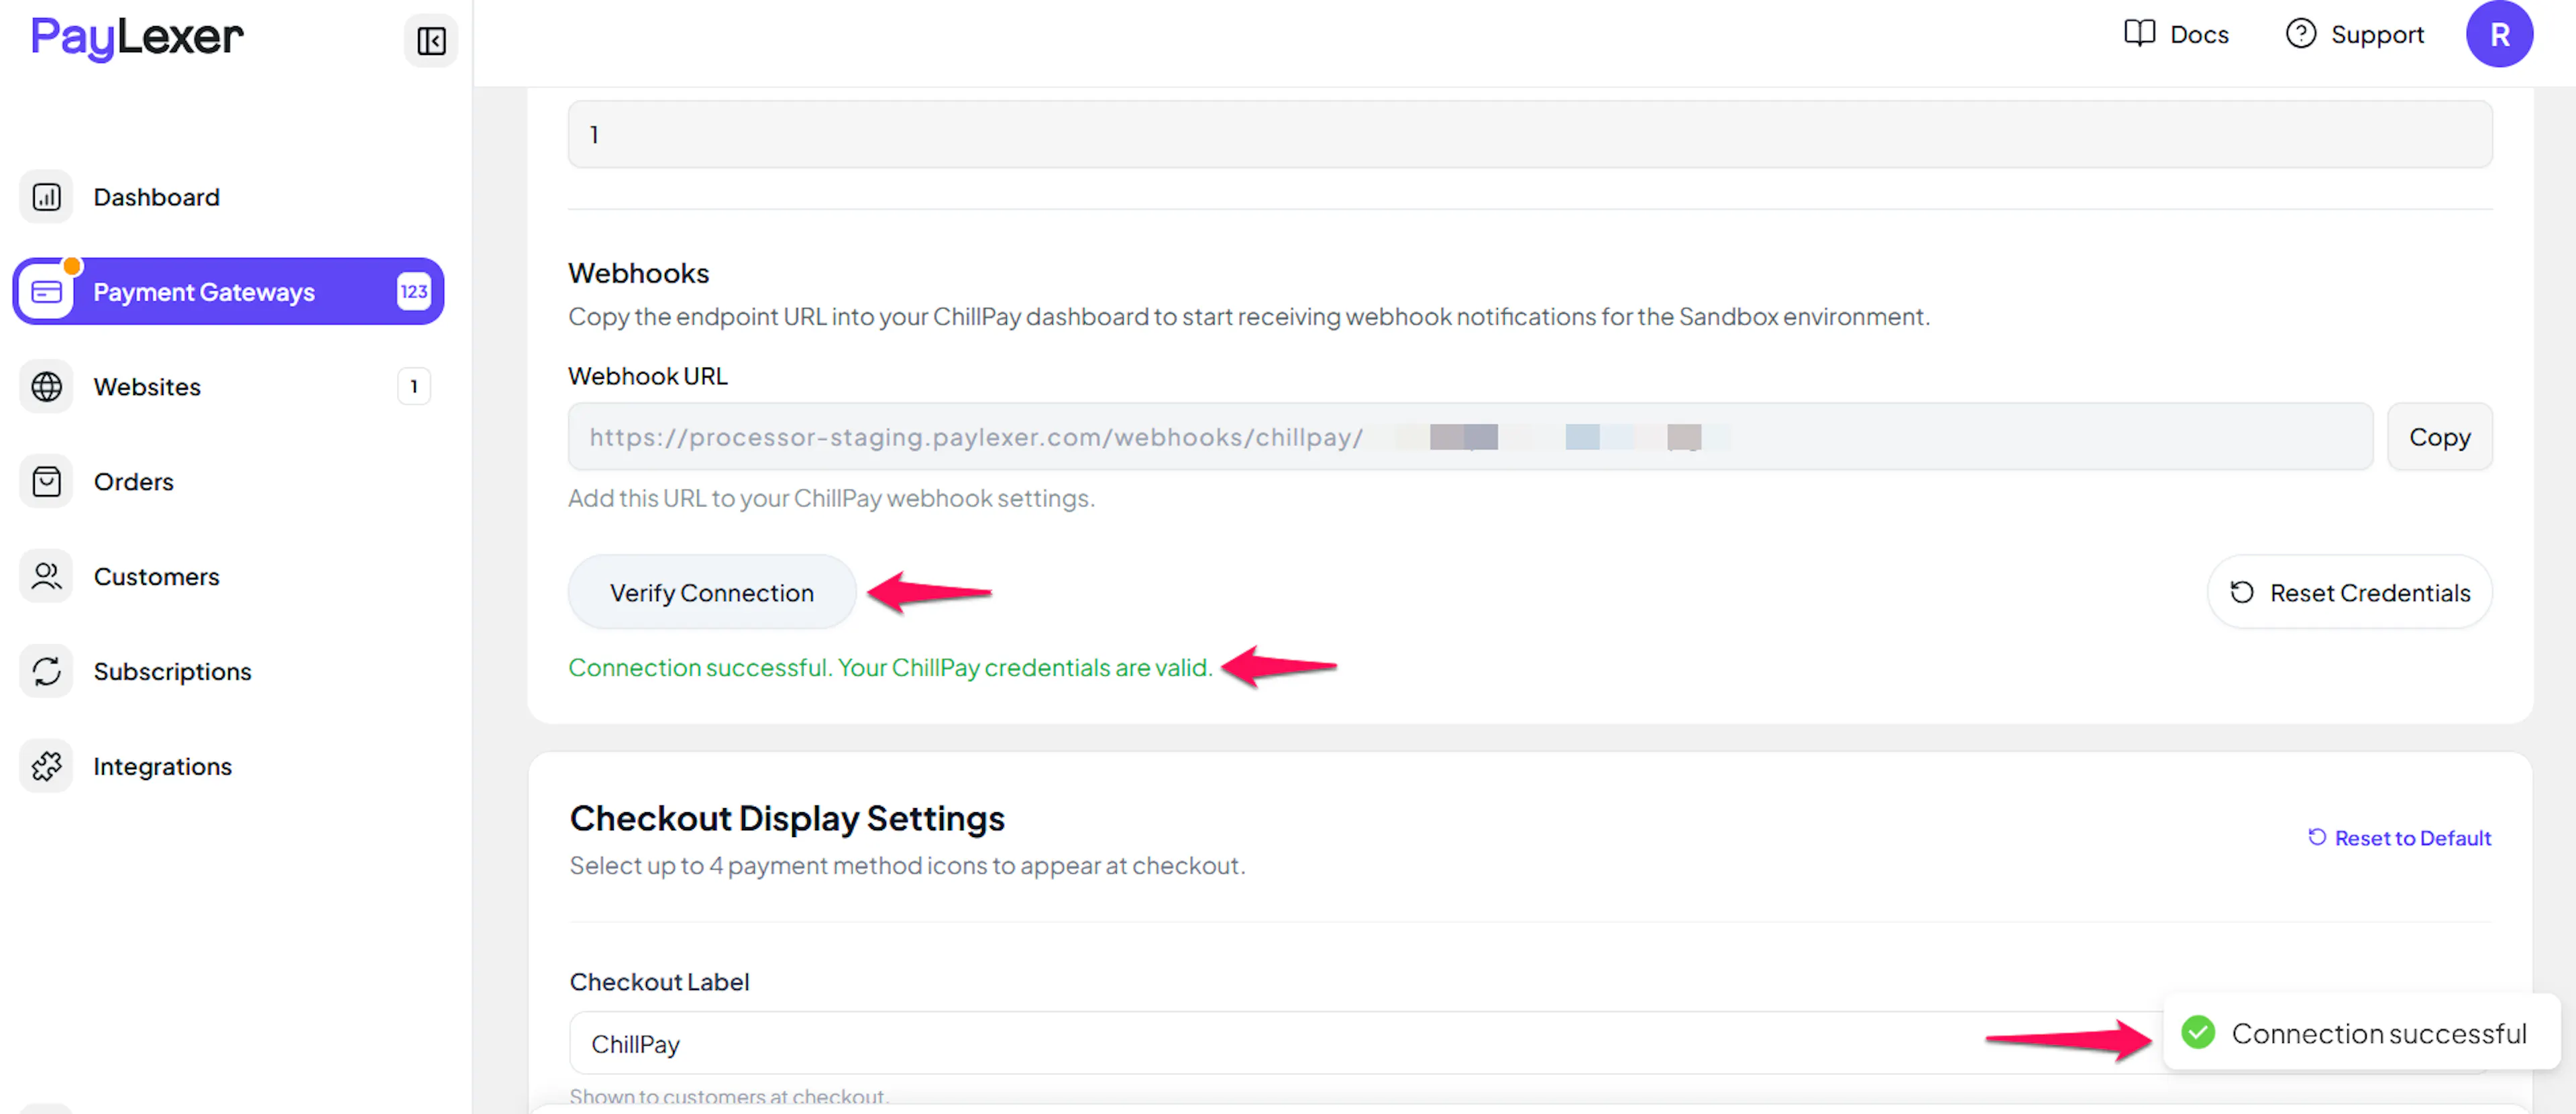
Verifying creates one unused transaction in your ChillPay account. It is never shown to a shopper and expires by itself after about half an hour. ChillPay only checks credentials when a payment is opened, so this is the only way to confirm they work.
Configuring Webhooks (Mandatory)
Webhooks enable real-time payment updates and significantly improve reliability.
Benefits of Webhooks:
- Instant payment status updates
- Automatic refund processing
ChillPay uses two addresses, and both are set inside the ChillPay console rather than sent by PayLexer. URL Result returns the shopper to your store, and URL Background tells PayLexer the payment succeeded. If either one is missing, checkout does not complete properly.
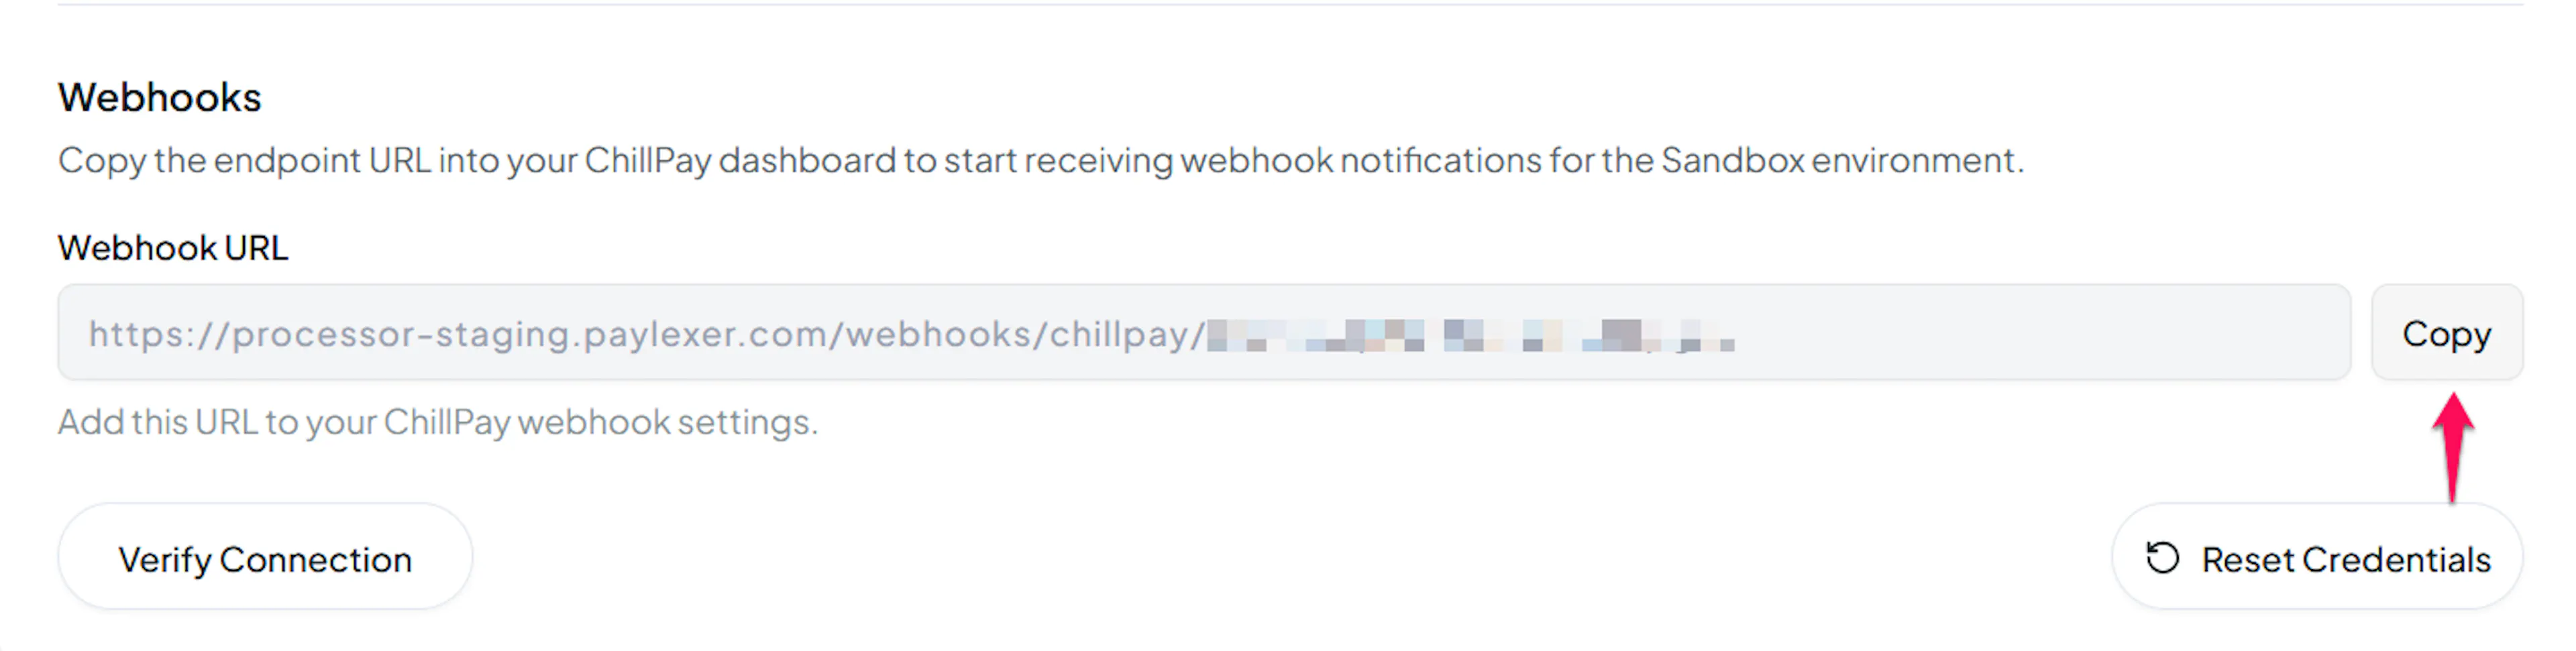
Copy your webhook URL from PayLexer
In your PayLexer dashboard, open Payment Gateways → ChillPay and copy the Webhook URL shown in the Webhooks section.
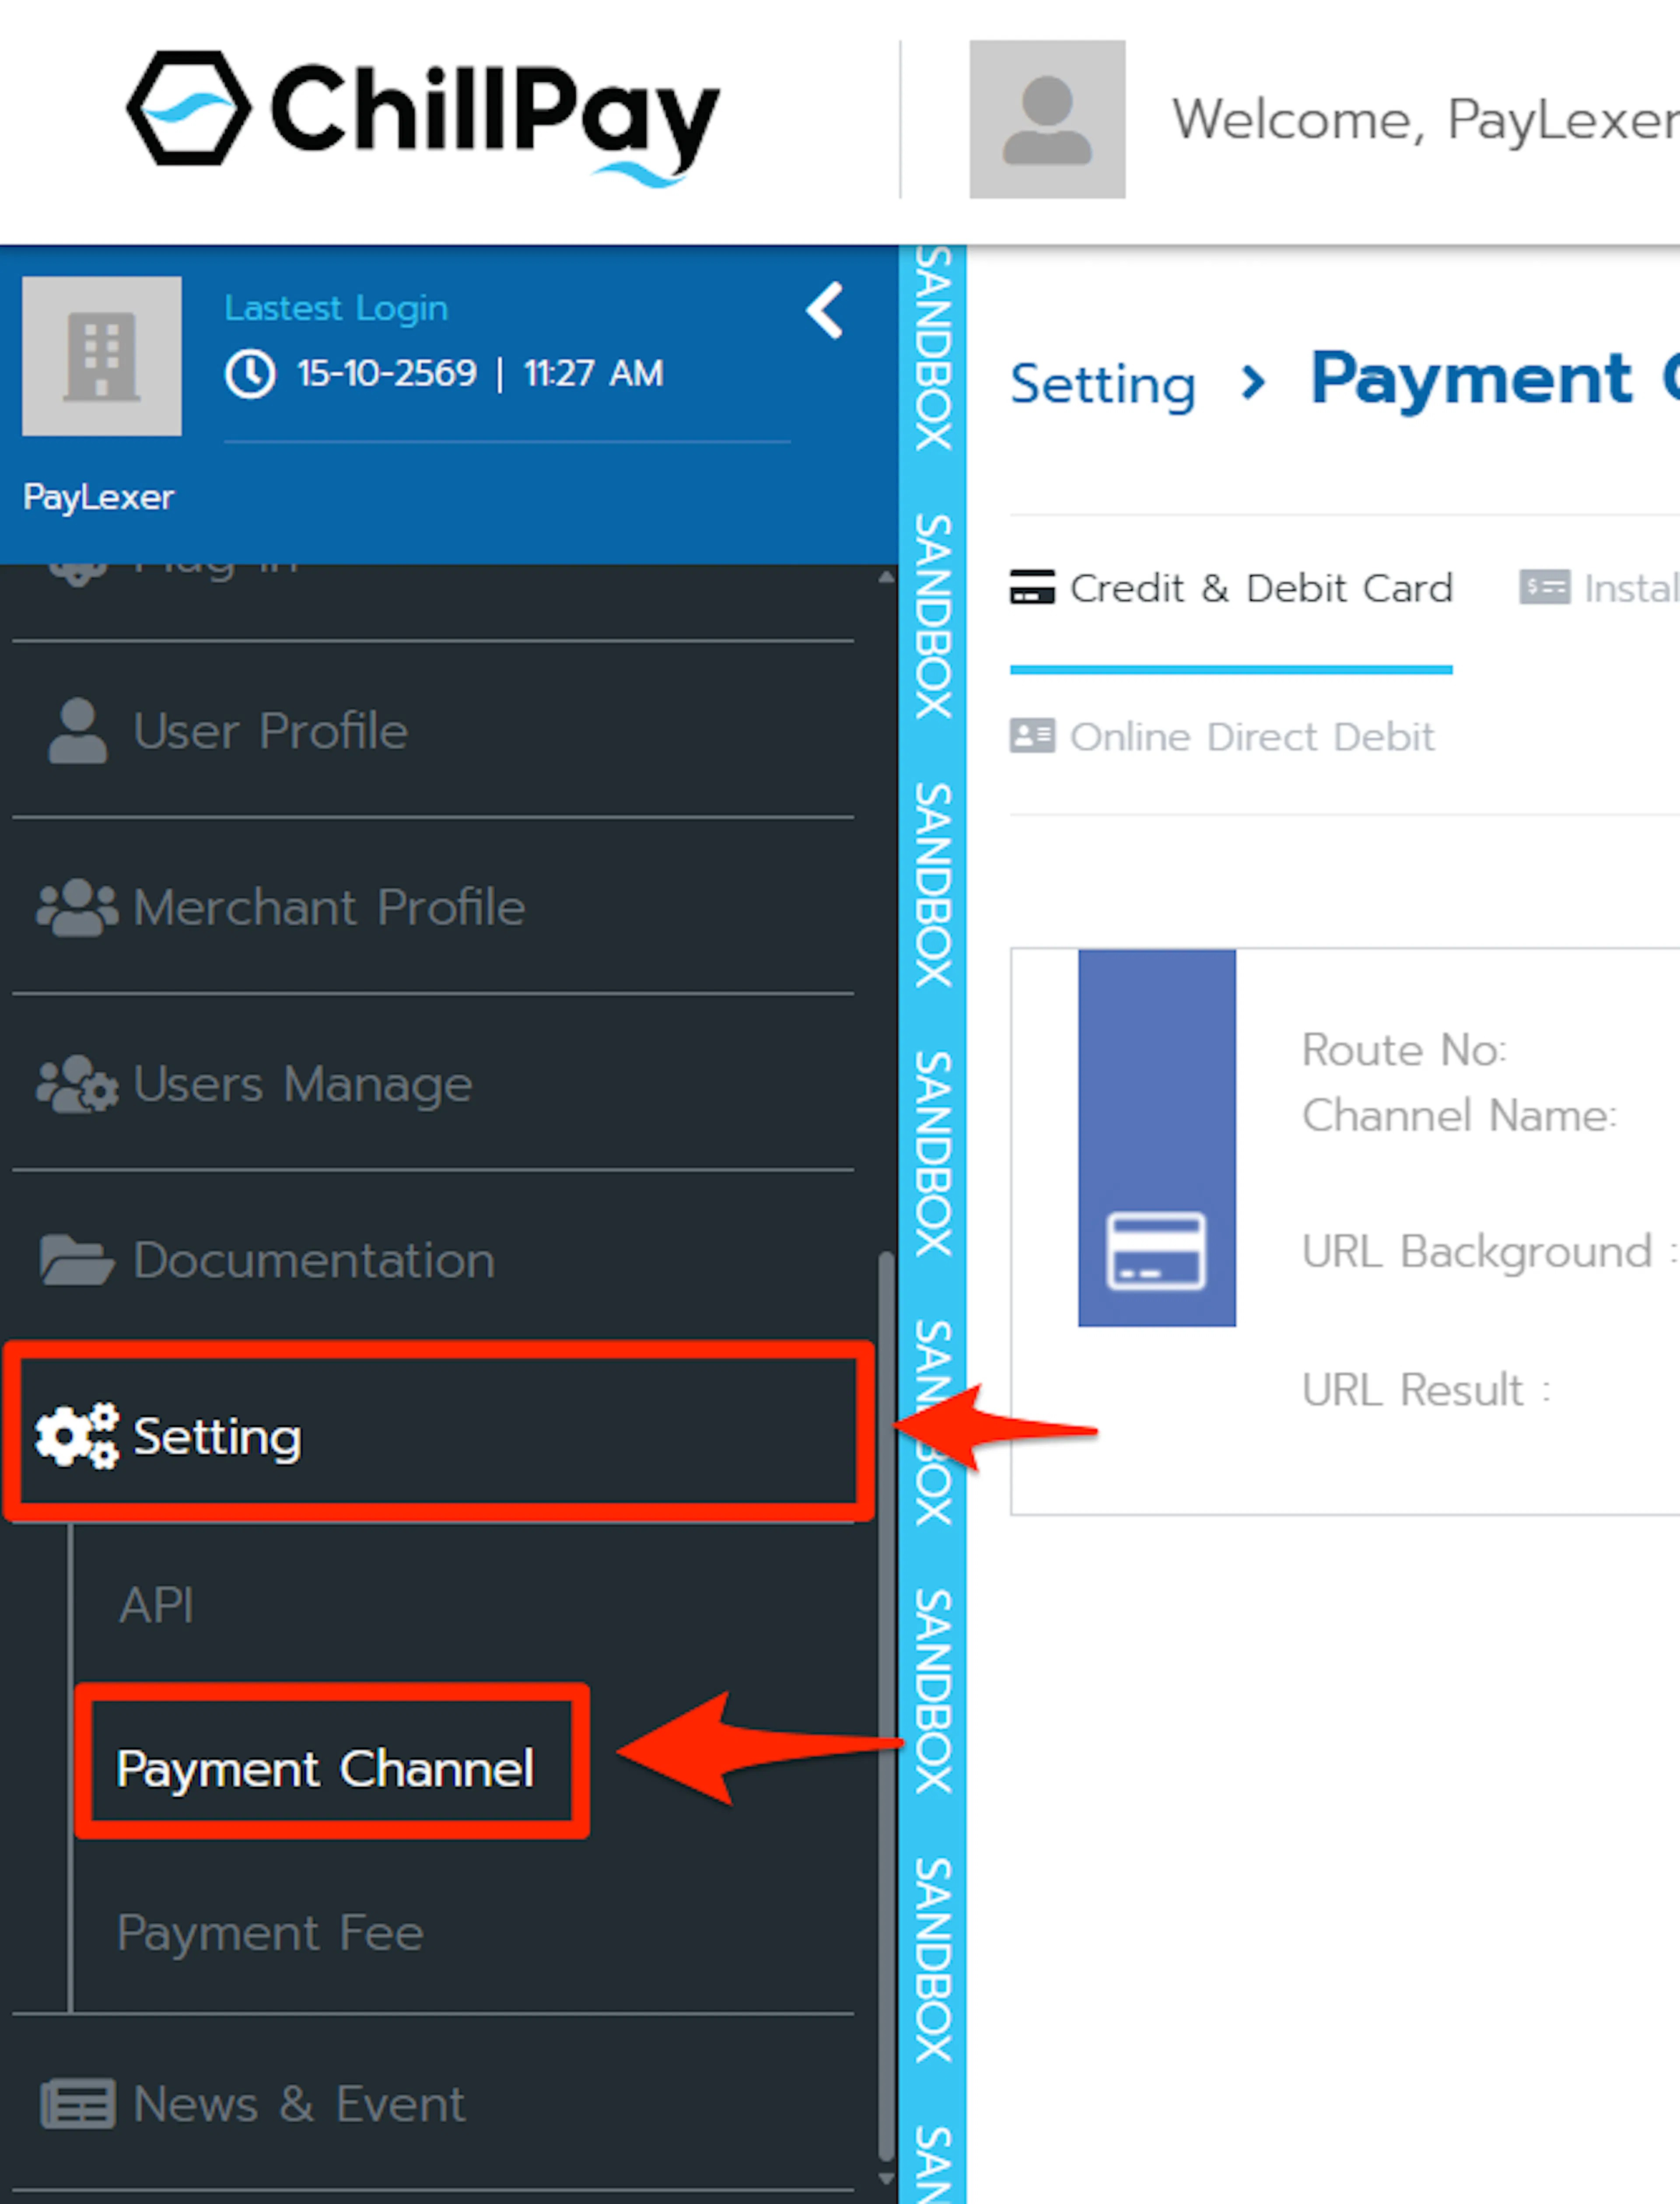
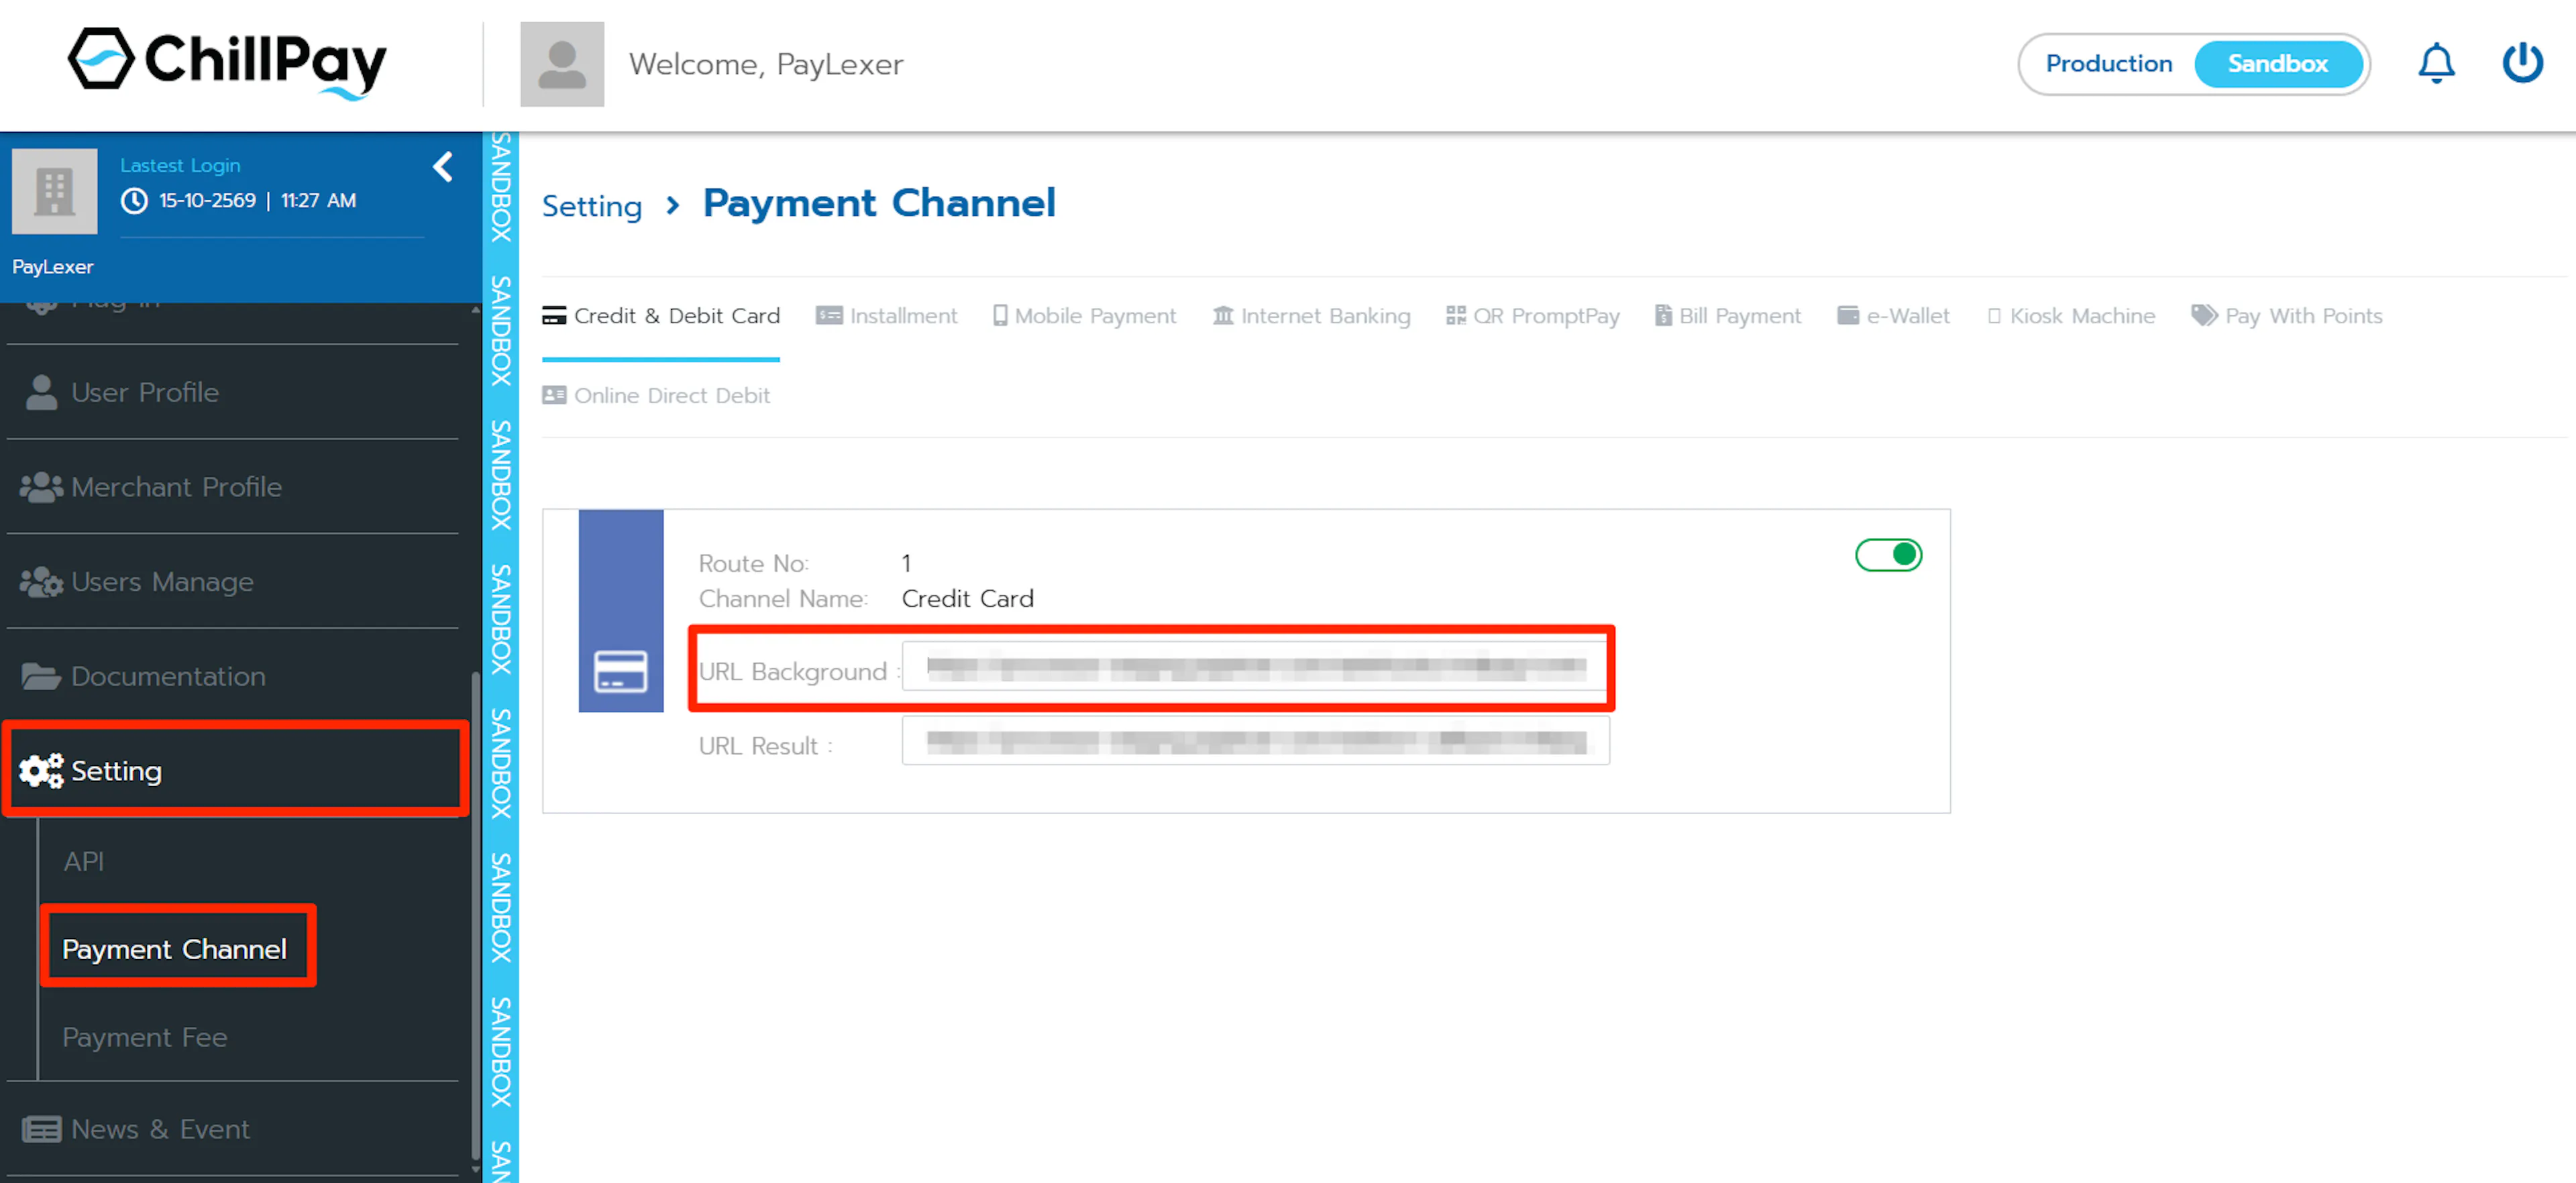
Open the payment channel settings
In the ChillPay console, go to Setting → Payment Channel and select the Route No you are using (Route No 1 unless ChillPay issued you another).
Set URL Background
Paste the Webhook URL you copied from PayLexer into the URL Background field. This is the address ChillPay notifies directly when a payment, refund or cancellation completes.
Set URL Result
Build the URL Result from your Webhook URL. Keep everything up to and including the domain, then replace the rest with /redirect-callback/chillpay. This is where ChillPay sends the shopper's browser after they pay.
For example, if your Webhook URL is https://api.example.com/webhooks/chillpay/abc123, your URL Result is https://api.example.com/redirect-callback/chillpay.
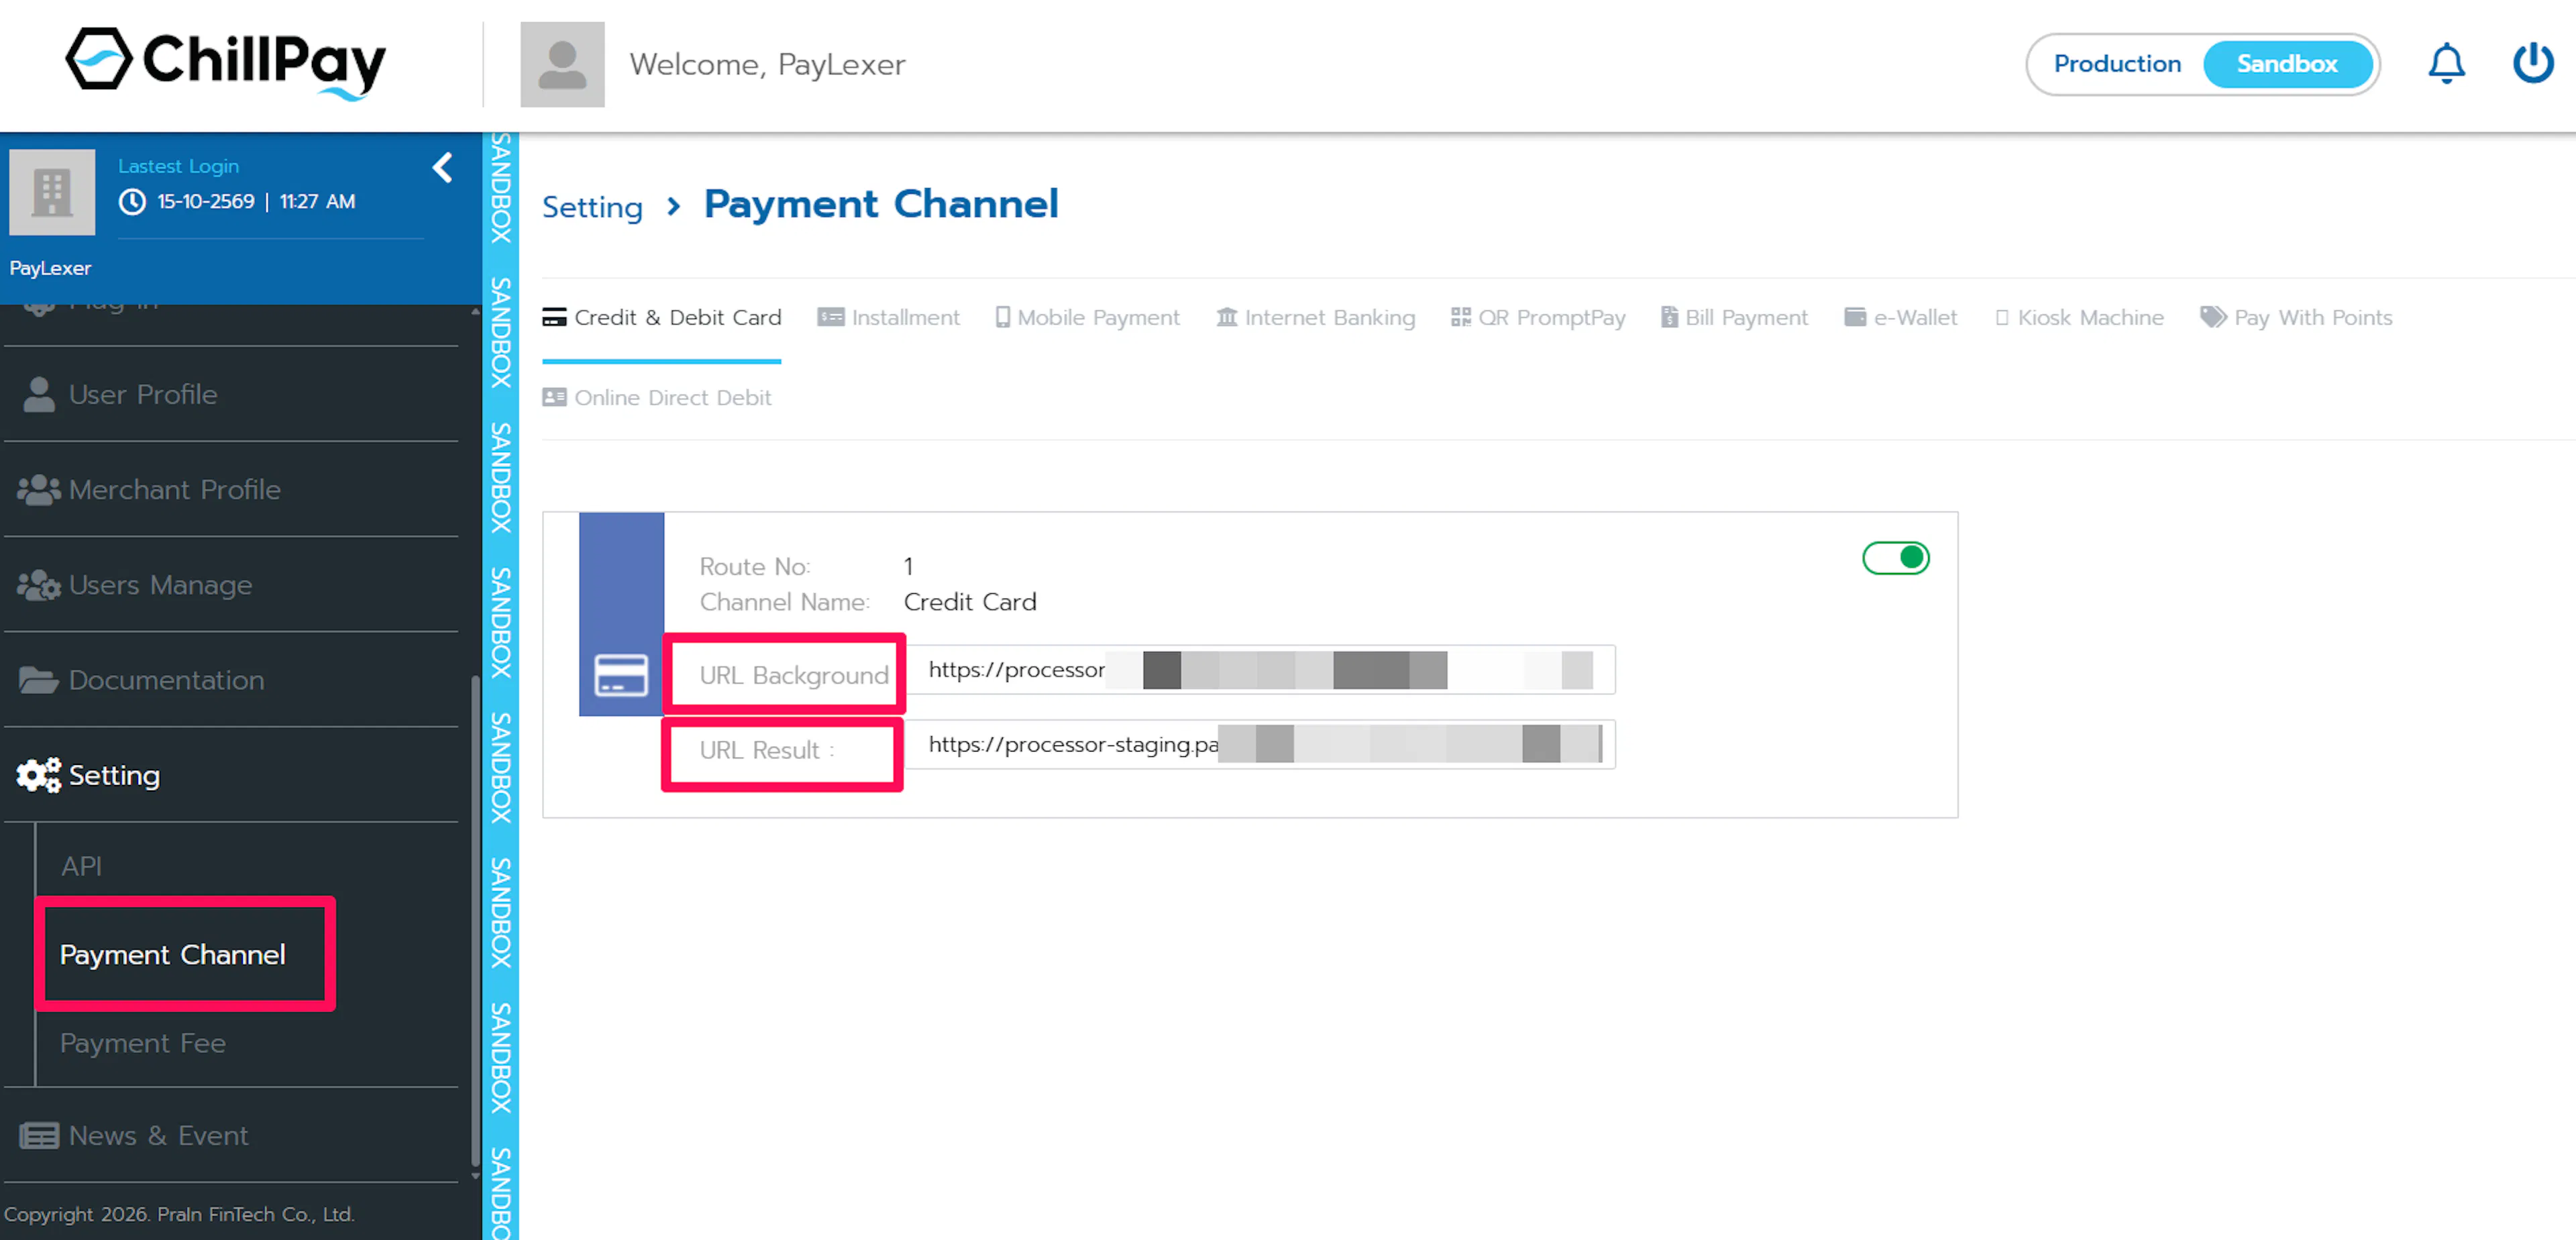
Type this carefully. A mistyped URL Result fails silently from the shopper's side, and they simply land on a ChillPay error page instead of your store.
Save and test
Save the settings in ChillPay, then place a test payment. The order should move to paid in PayLexer as soon as ChillPay confirms the payment.
Repeat for the other environment
Switch the Production / Sandbox toggle in the ChillPay console and repeat steps 2 to 5. Sandbox and production each keep their own URL Result and URL Background.
Integrate ChillPay to Your Website
If you have already added and configured your site, you can enable ChillPay in your existing setup.
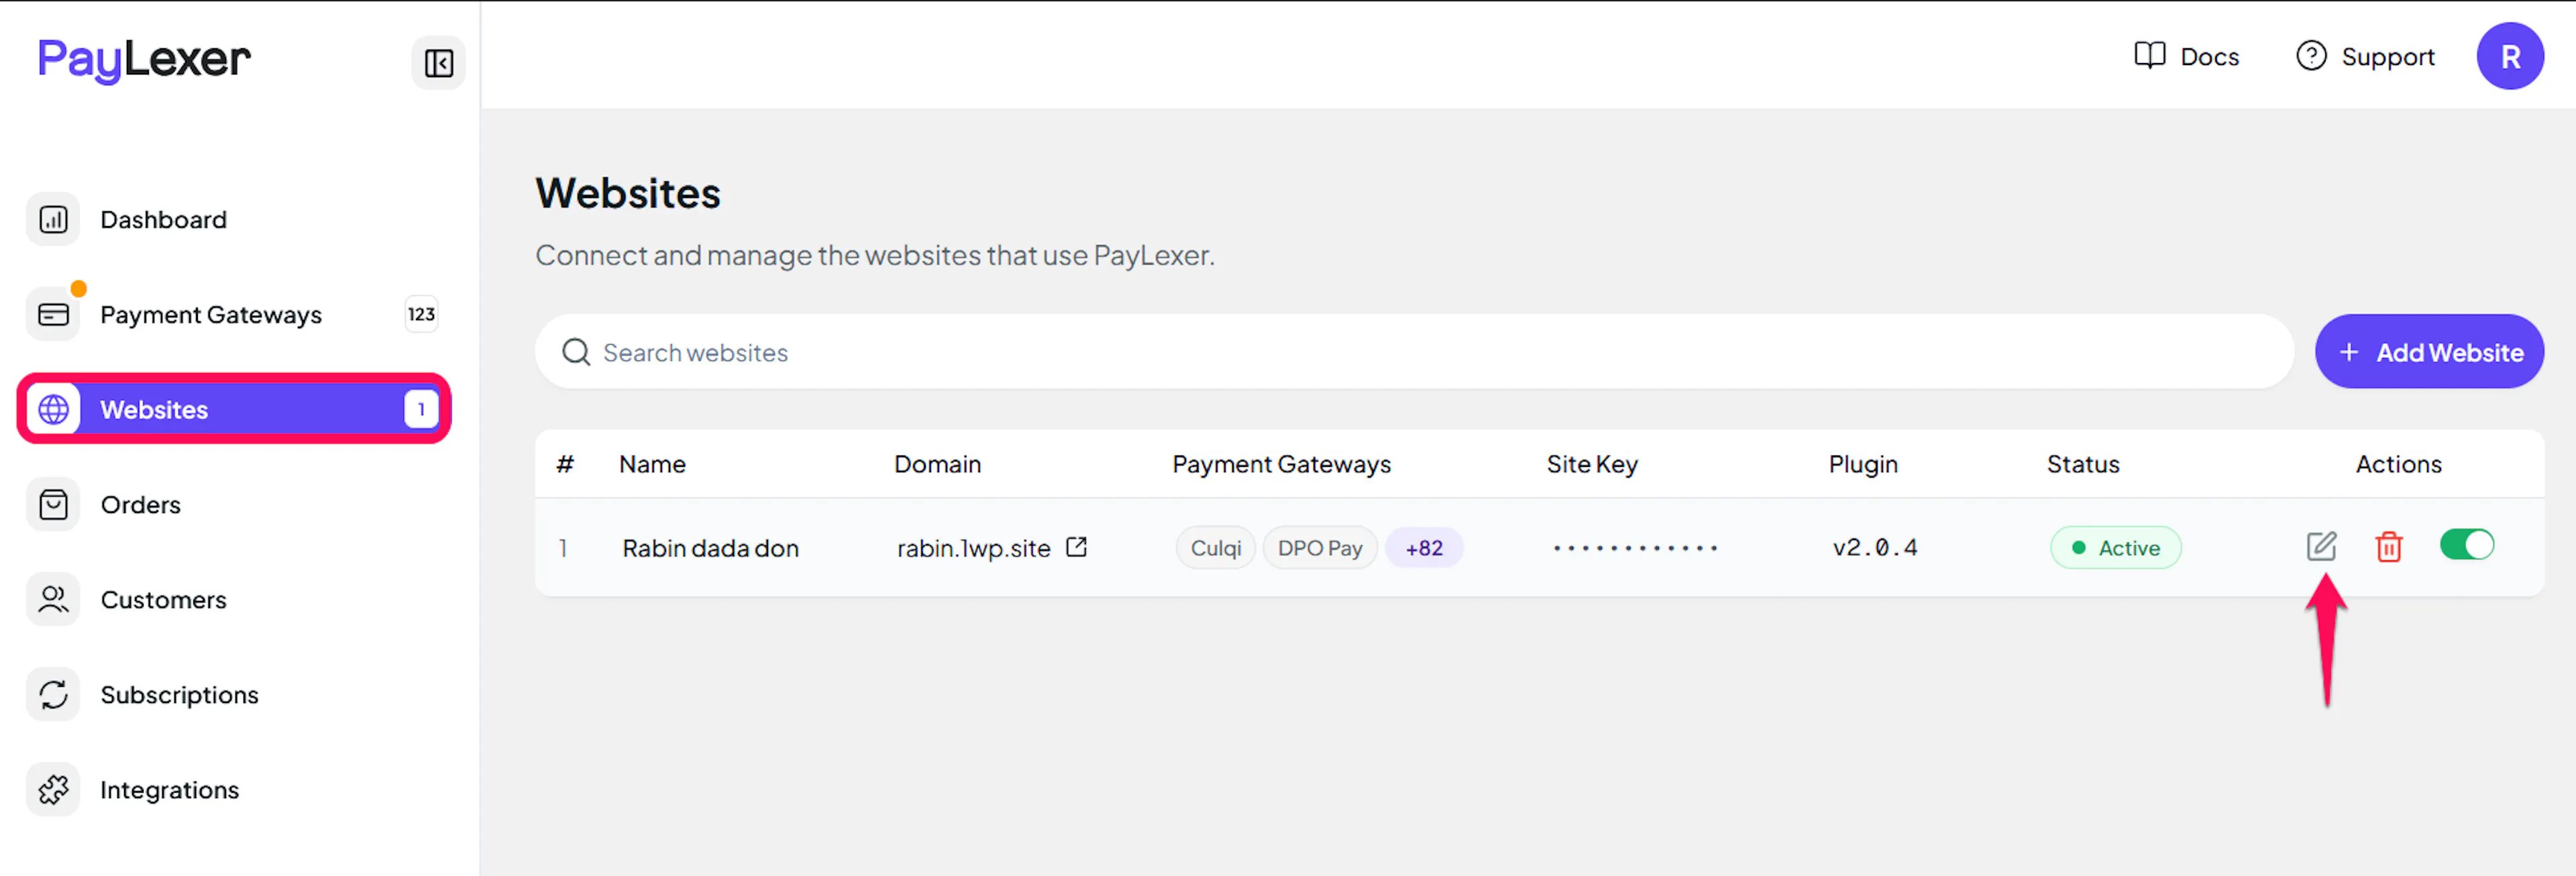
Go to Websites
Navigate to Websites in your PayLexer dashboard.
Edit your website
Click the Edit Icon of your added website.
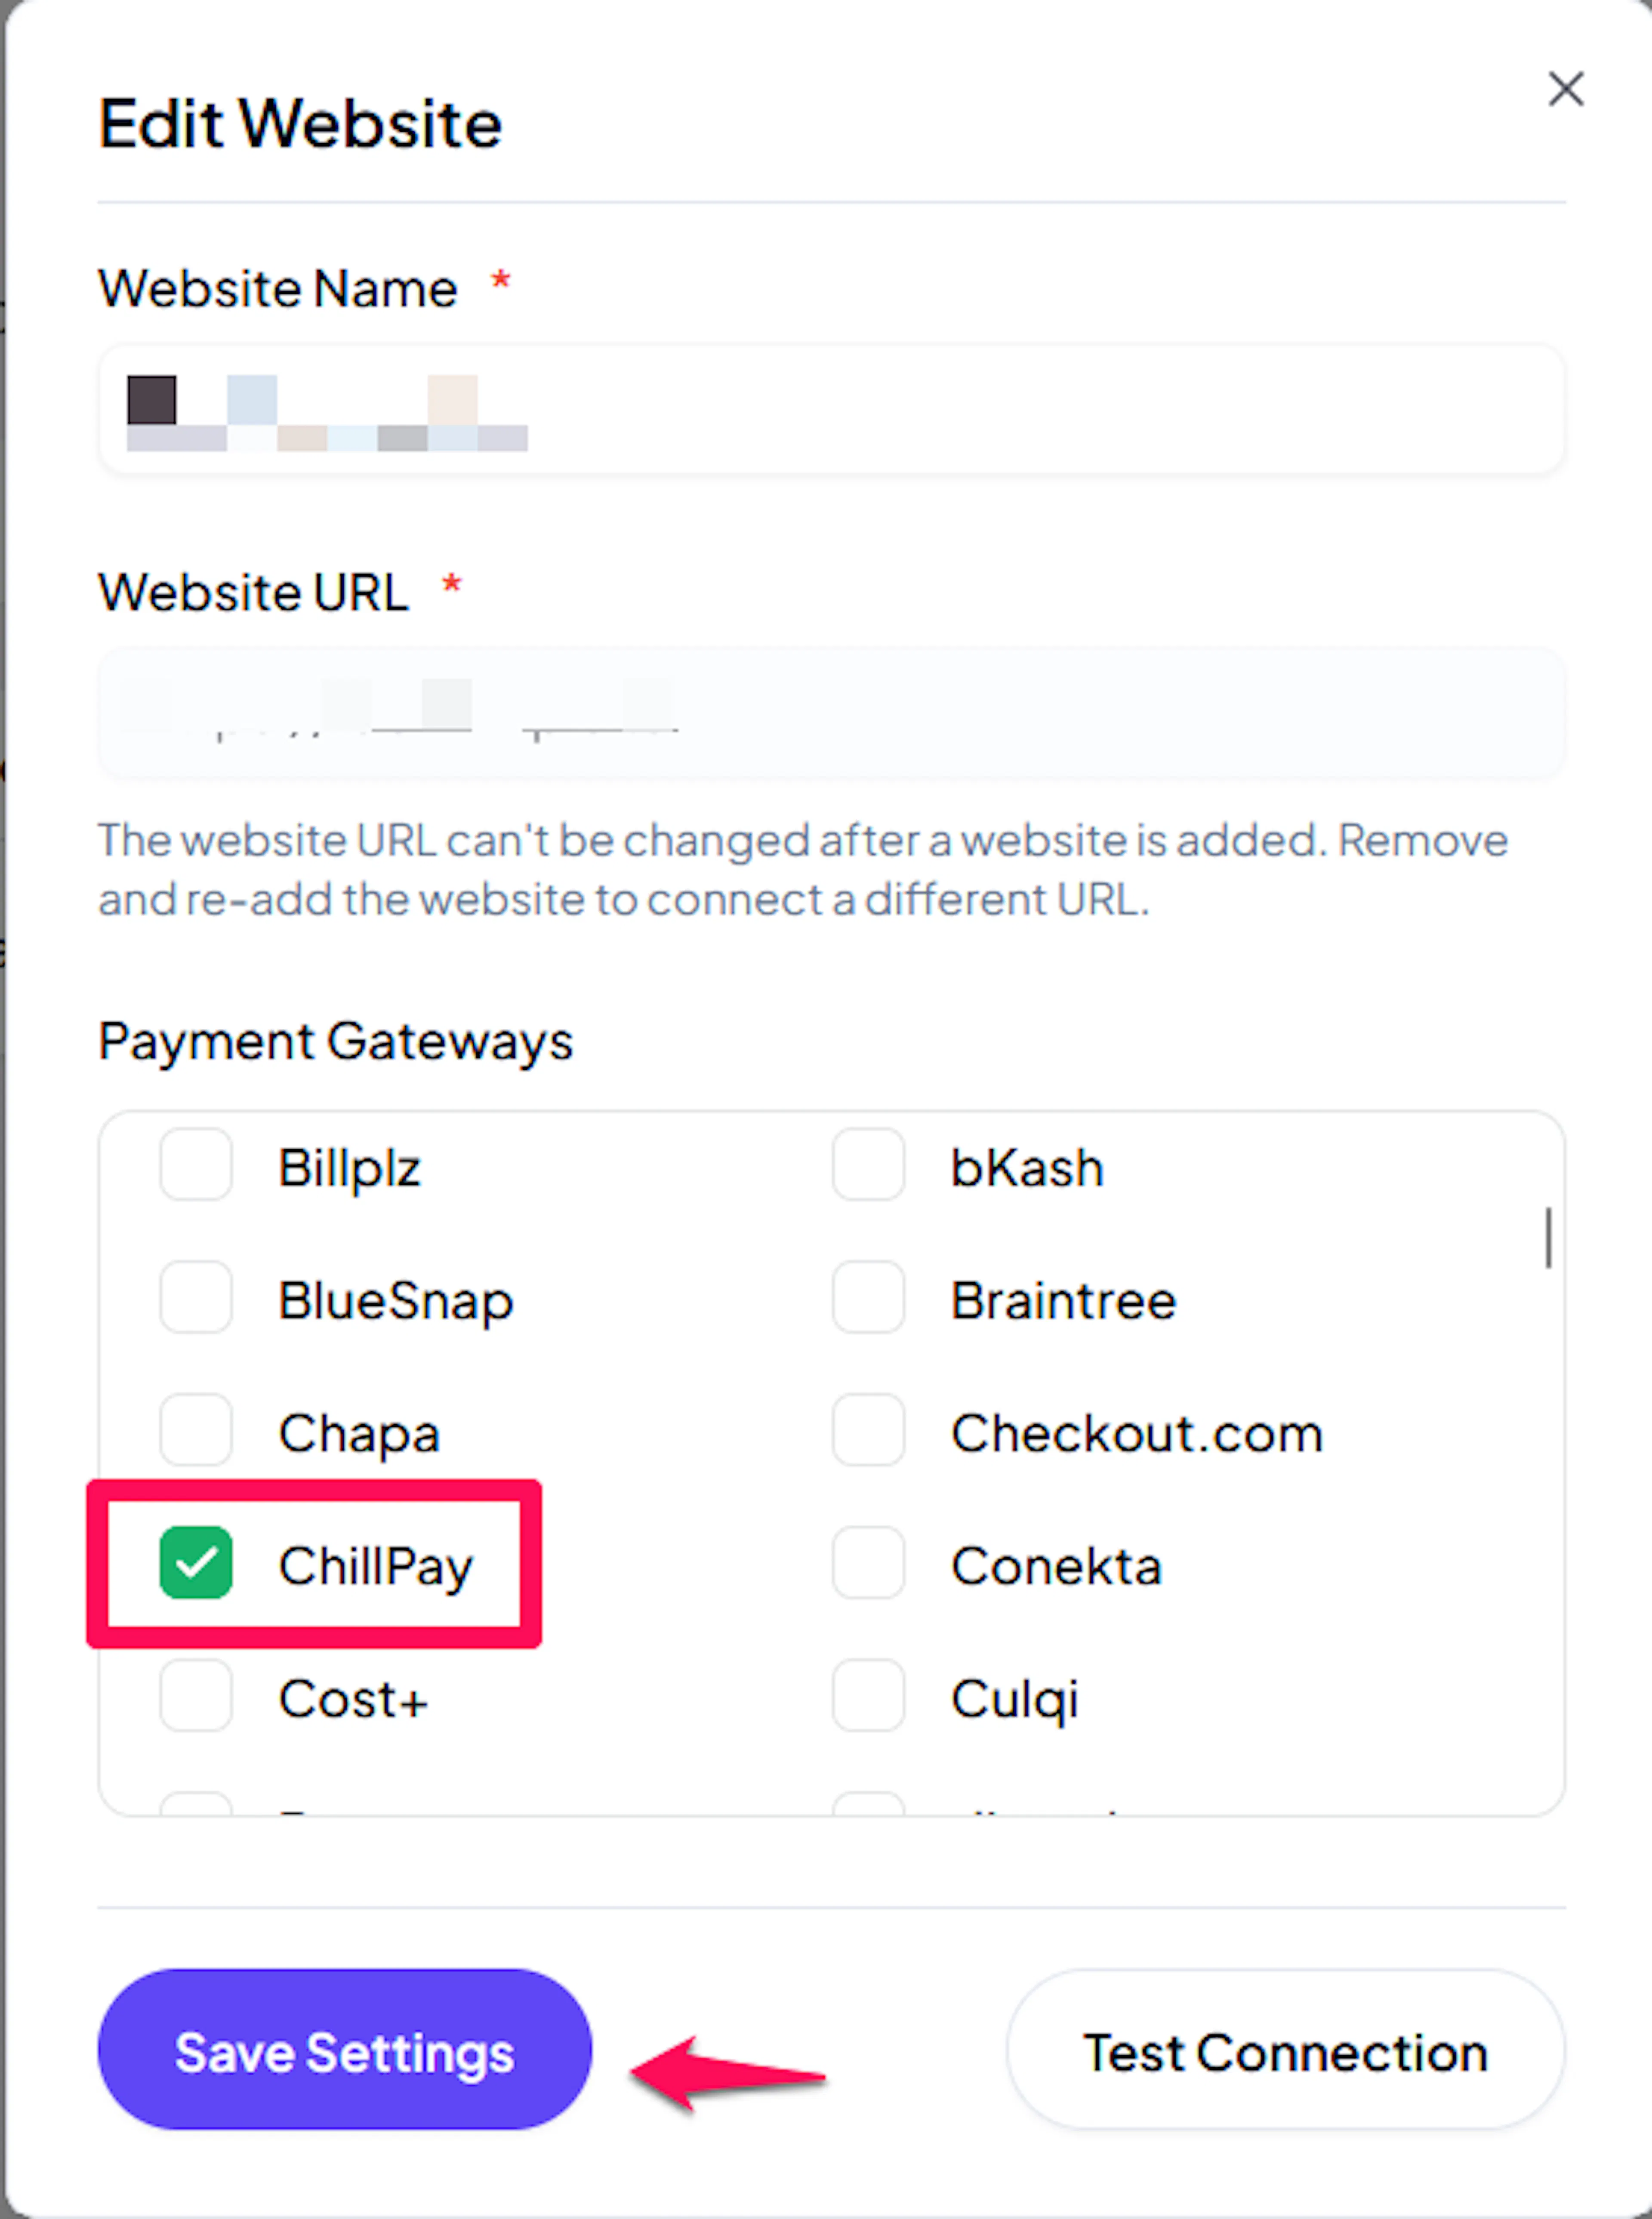
Enable ChillPay
Click the checkbox to enable ChillPay for the website.
If you haven't added a website yet, Continue to Add Your Website →
Troubleshooting
Best Practices
- Test in sandbox before enabling production, and place at least one full payment and one refund
- Set both URL Result and URL Background in sandbox and production before your first real payment, not after
- Keep your MD5 Secret Key private, because it both signs your requests and proves ChillPay's messages are genuine
- Avoid regenerating the API Key or MD5 Secret Key on a live account unless you can update PayLexer immediately
- Refund from PayLexer rather than the ChillPay console so your order records stay accurate
- Check that the currency you charge in is one of the twelve ChillPay accepts
FAQs
Still Have Questions?
- ChillPay Support:
- Support Email: customersupport@chillpay.co
- Support Phone: +66 2-107-7788
- Documentation: ChillPay Documentation
- PayLexer Support: Contact Support