

Klarna
Accept buy now, pay later payments through Klarna's hosted checkout. Supports 15 currencies across Europe, North America, and Oceania with full and partial refunds.
Klarna is a buy now, pay later payment provider. Shoppers are redirected to Klarna's own hosted checkout page, where they choose how to pay - in instalments, in 30 days, or immediately. Klarna runs the approval decision, pays the merchant up front, and takes on the credit risk. PayLexer handles payment creation, signed notification verification, refund processing, and automatic re-checks for any unresolved orders.
- Supported Currencies: AUD, CAD, CHF, CZK, DKK, EUR, GBP, HUF, MXN, NOK, NZD, PLN, RON, SEK, USD
Klarna is available in 26 countries. Each currency maps to a specific country or countries - Klarna will decline a payment if the shopper's country does not match the currency being charged. Merchants selling in EUR must ensure the shopper's billing country uses the euro.
Supported Features
- Hosted checkout - shoppers pay on Klarna's secure page and choose their preferred pay later option
- Full and partial refunds, confirmed immediately
- Signed payment notifications handled automatically by PayLexer
Before You Start
Make sure you have:
- Klarna Merchant Account - Don't have one? Get started with Klarna →
- PayLexer Account - Required to configure the integration. Create your account →
- A website where you want to integrate
Klarna credentials only work in the region your Klarna account was registered in. Select the correct region when entering credentials in PayLexer.
Looking for a different payment processor? View all supported gateways →
Configuring Klarna
You need an API Username, API Password, and Region from Klarna for this integration.
Getting API Credentials
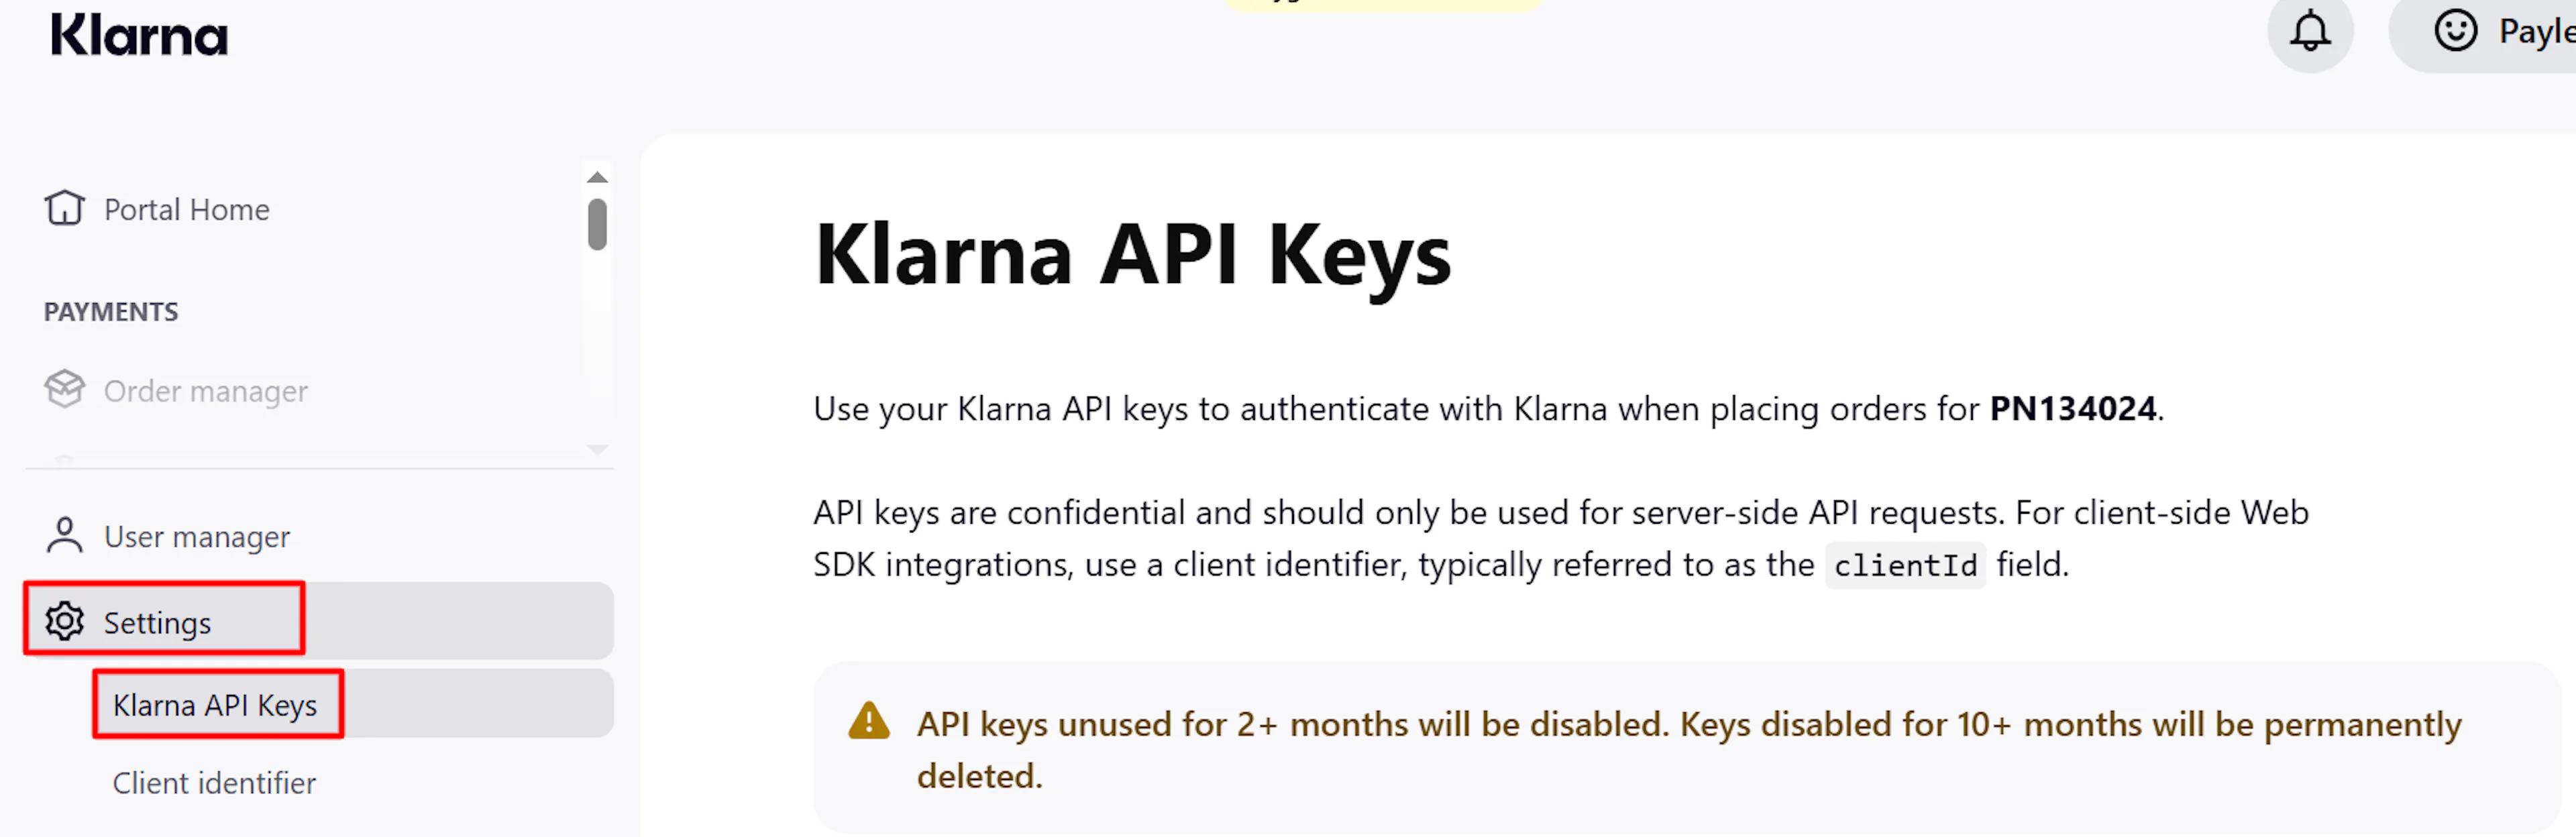
Open Klarna API Keys
Log in to your Klarna Merchant Portal. Navigate to Settings → Klarna API Keys.
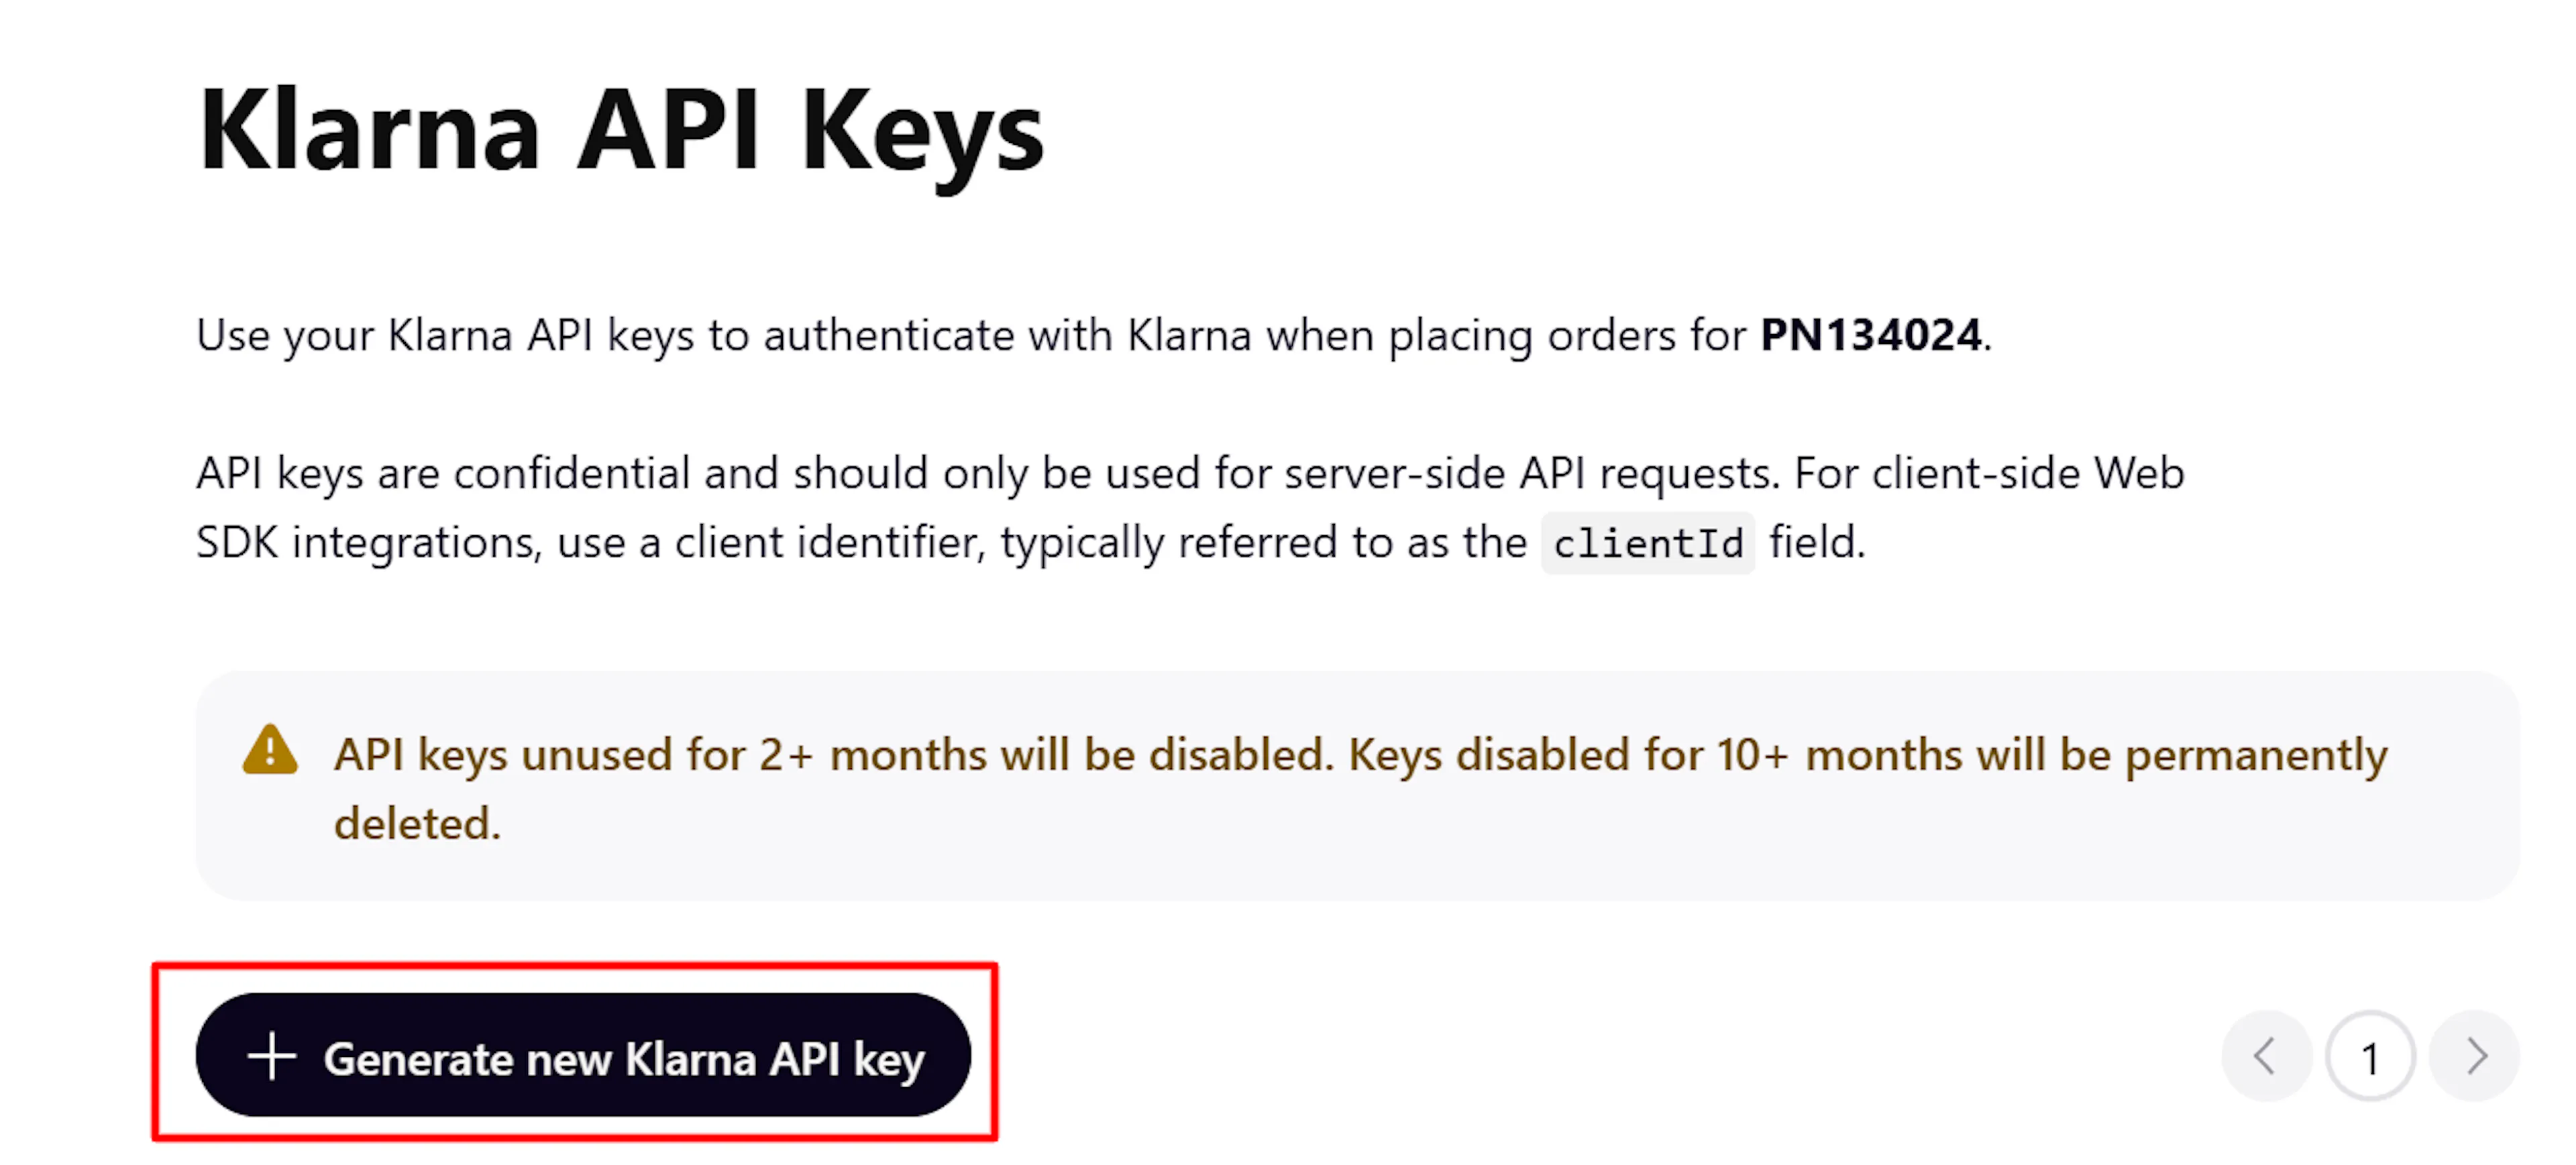
Generate a new API key
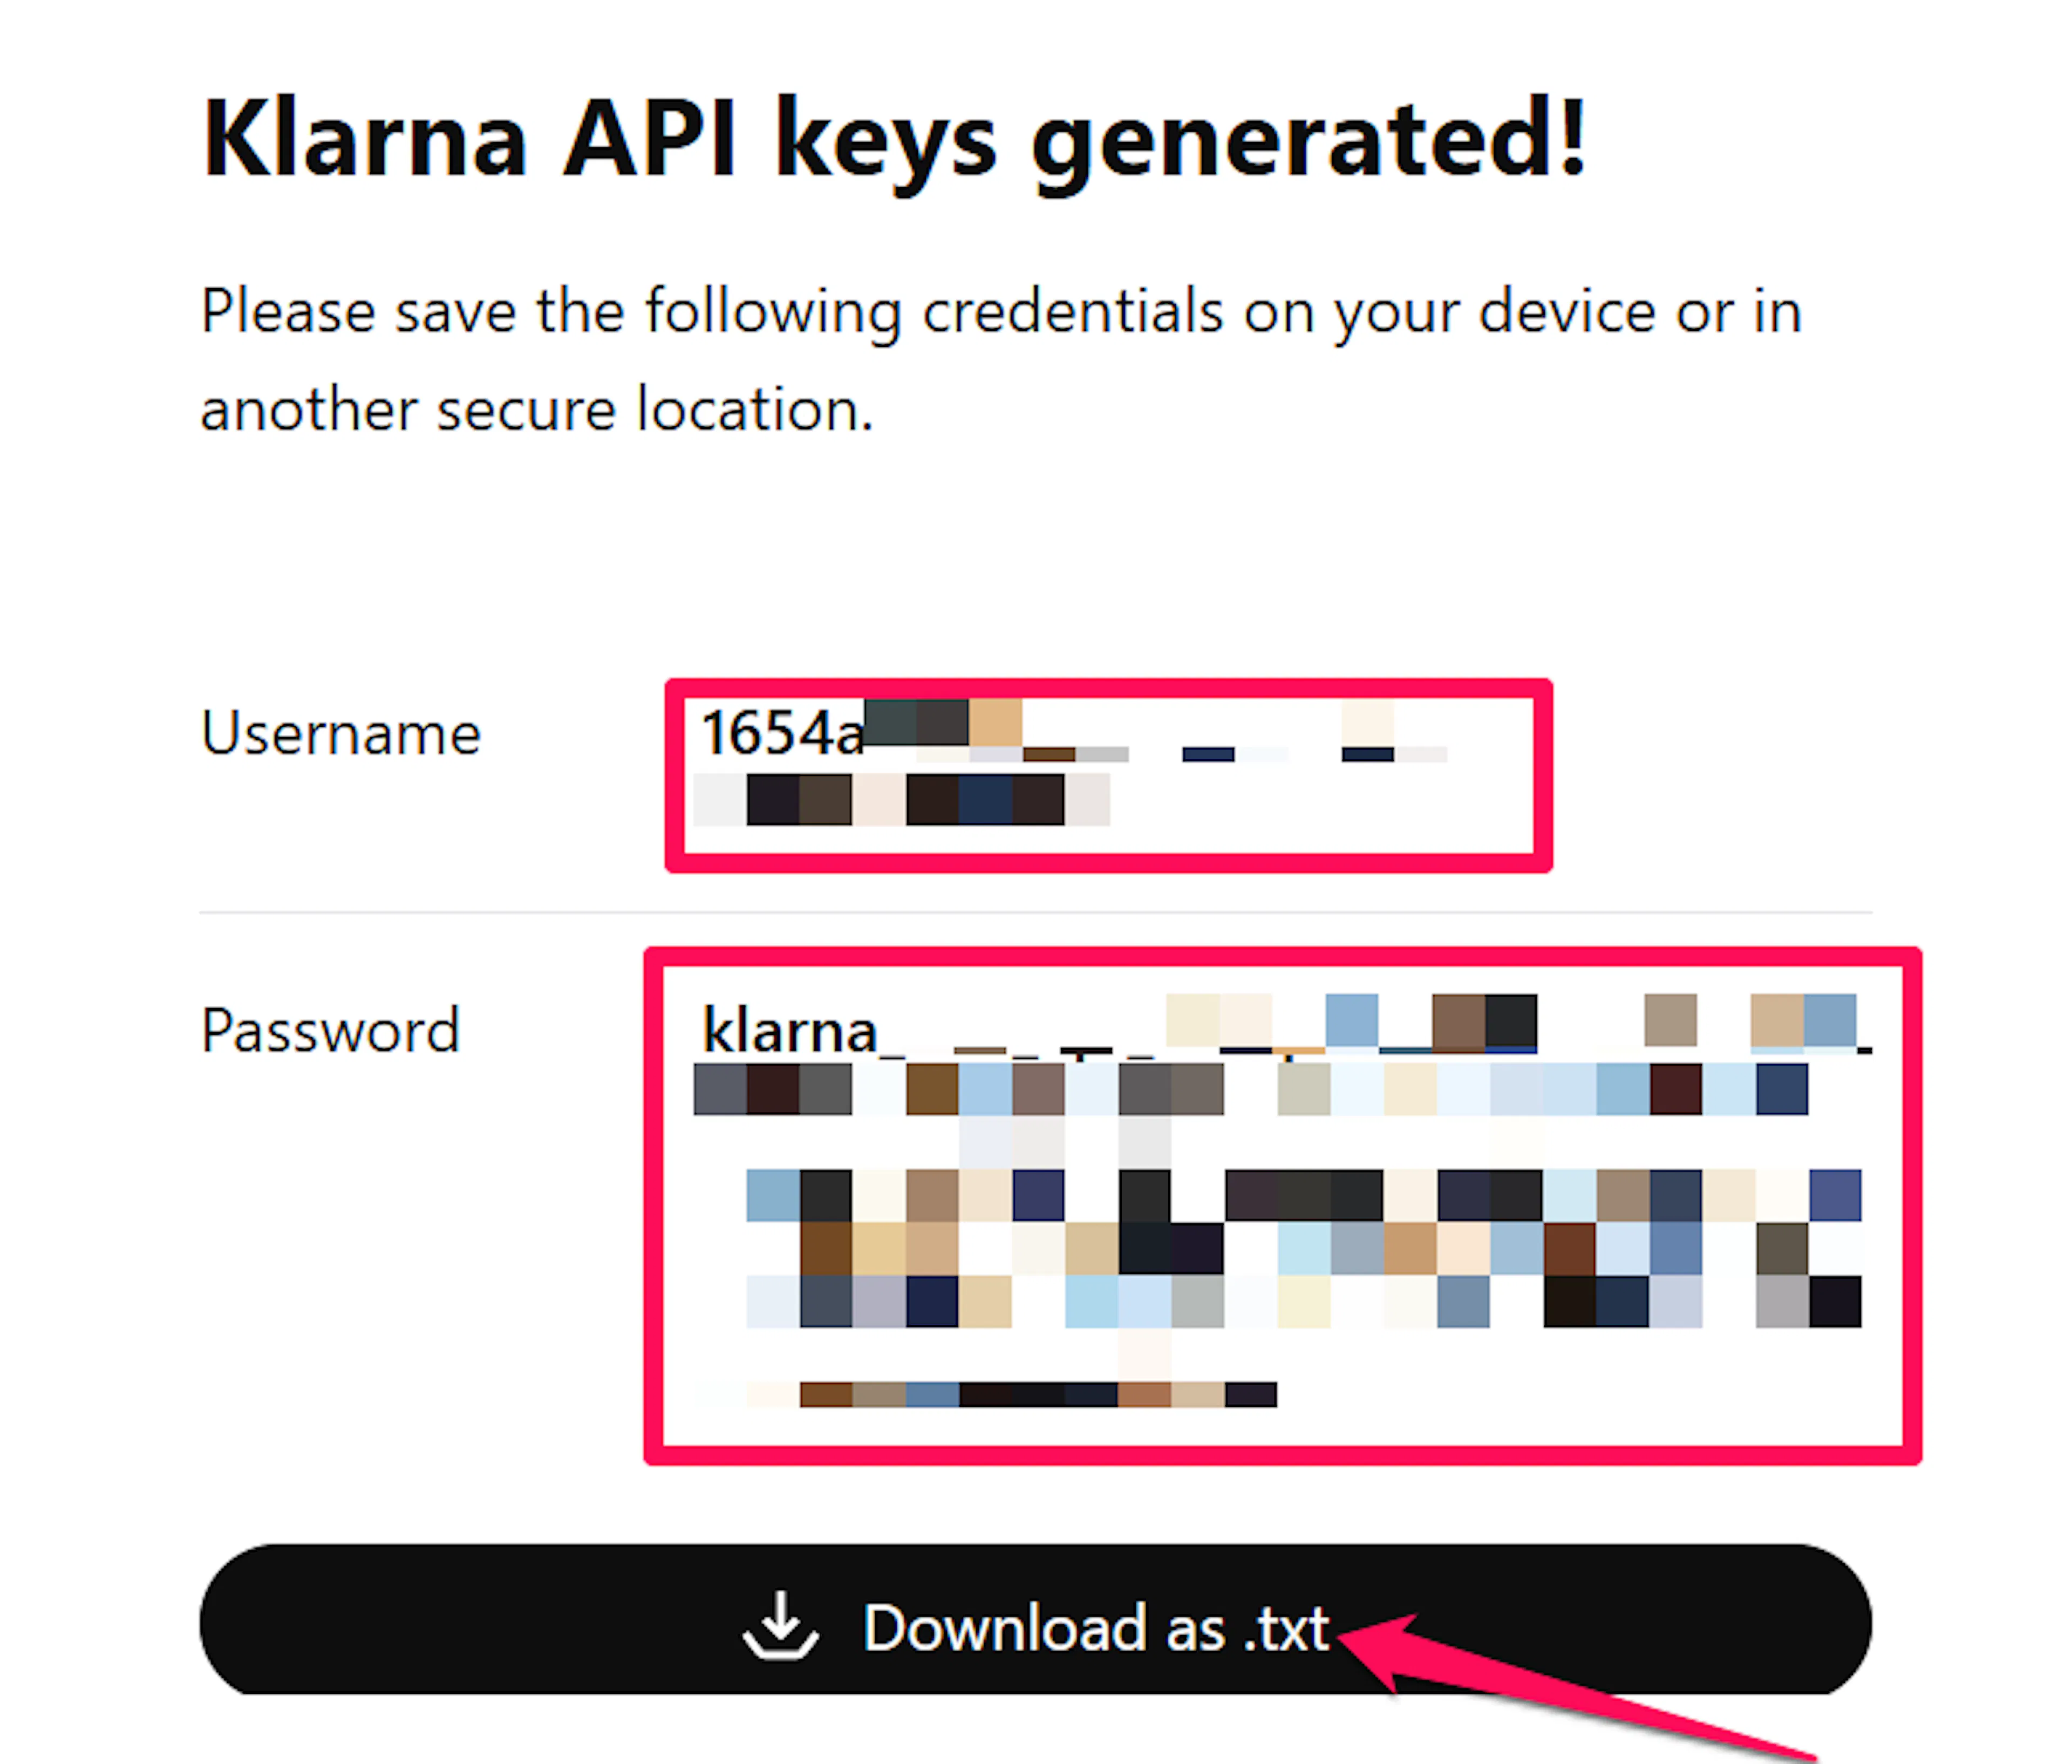
Click Generate new API key. A dialog appears showing your Username (a UUID) and Password (klarna_live_api_... or klarna_test_api_...).
The API Password is shown only once and disappears when you close this dialog. Copy and store it somewhere secure before closing. If you lose it, you must generate a new key, which invalidates the previous one.
Copy both the Username and Password and save them securely. You can optionally download them as a .txt file using the dialog's download button.
Adding Credentials to PayLexer
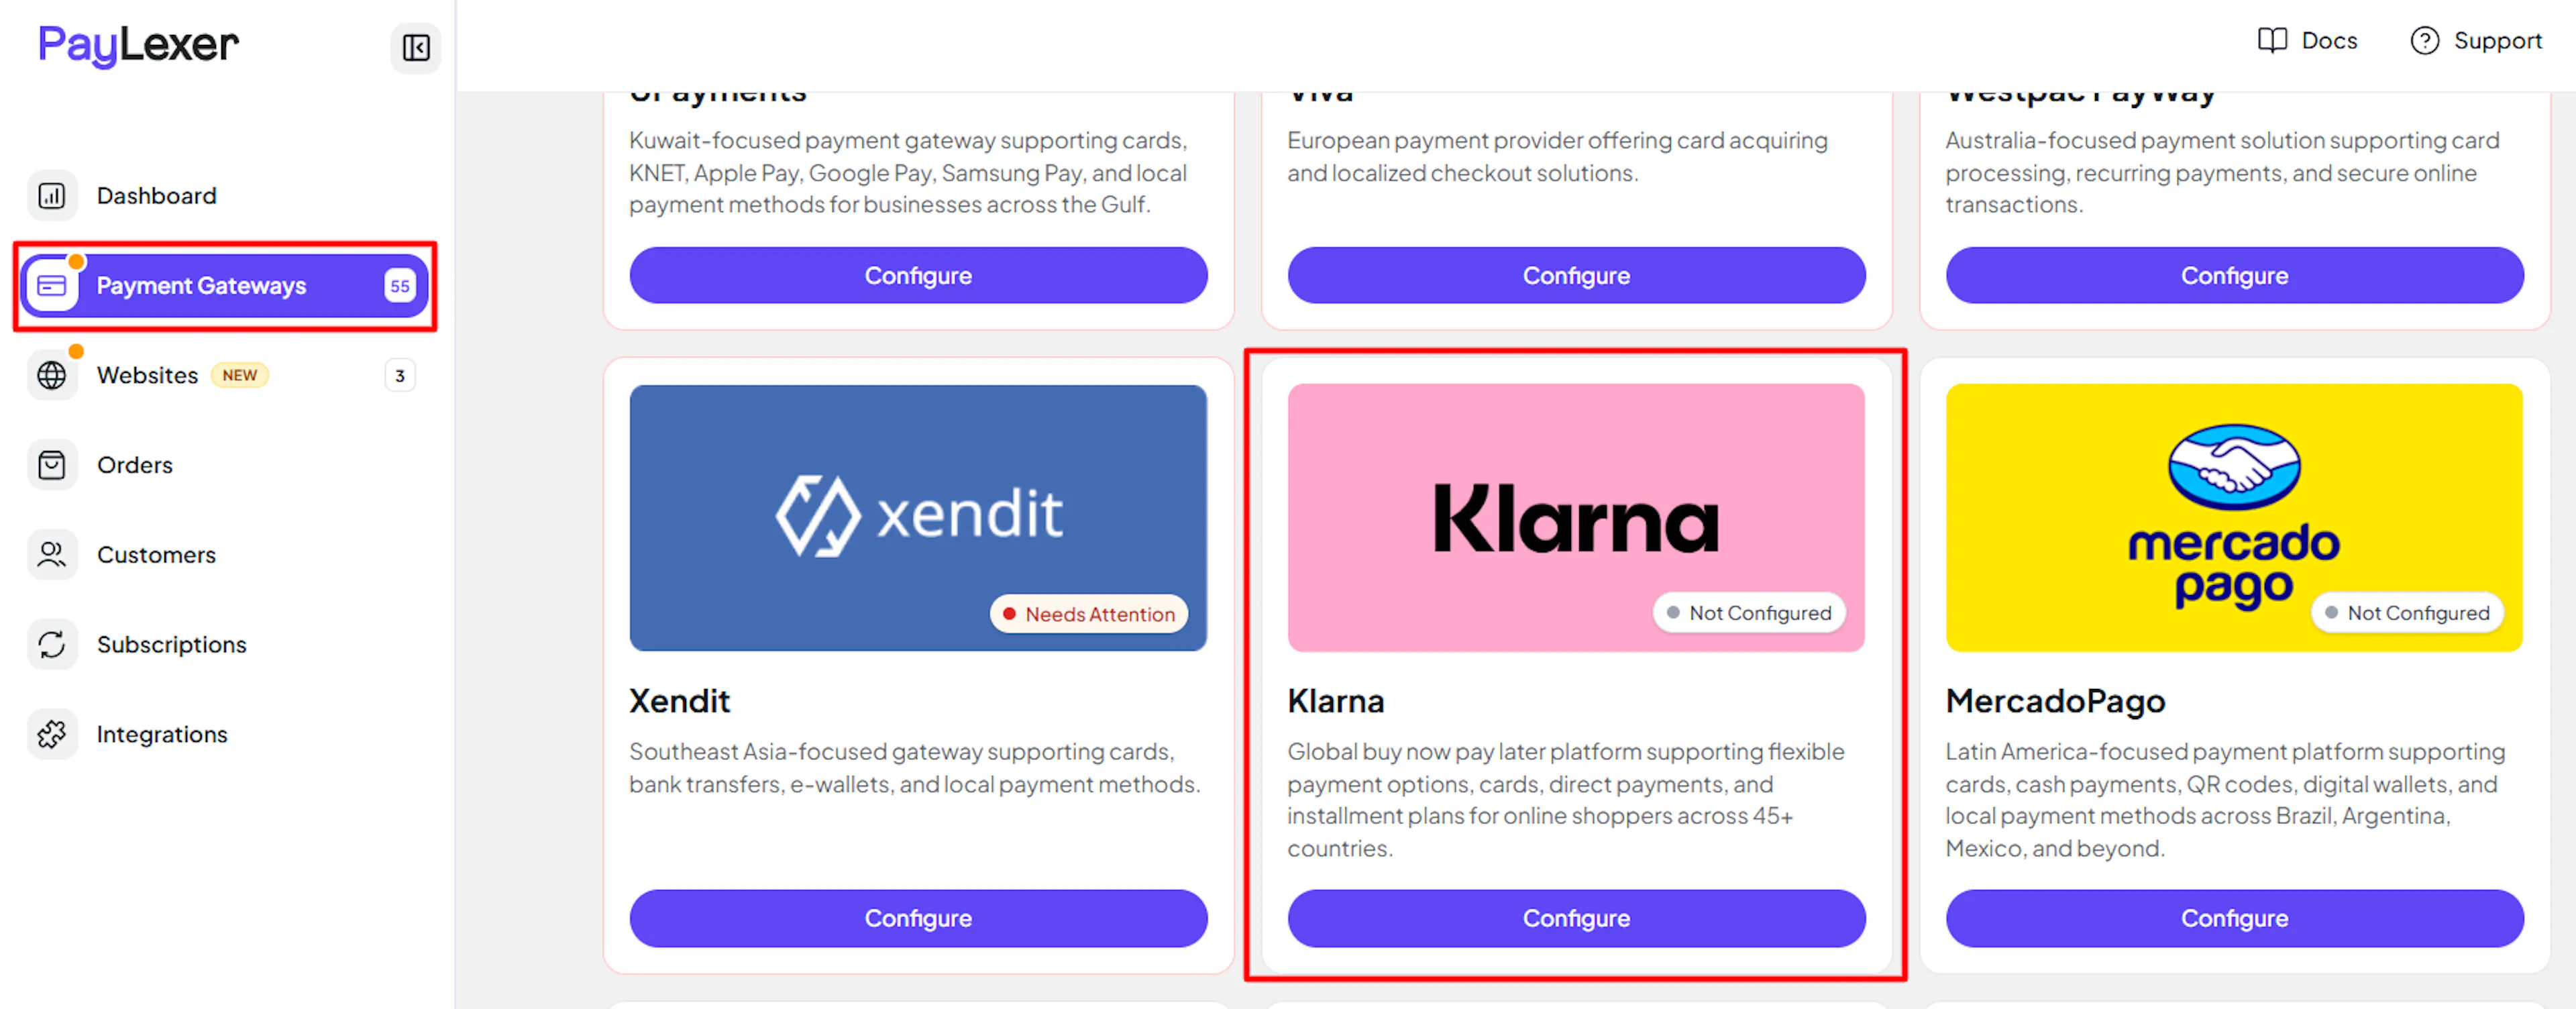
Open PayLexer Dashboard
Log in to your PayLexer dashboard and navigate to Payment Gateways → Klarna.
Enter your credentials
Paste the API Username and API Password you copied from Klarna into the corresponding fields. Then select your Region:
| Region | Select when |
|---|---|
| Europe | Your Klarna account is registered in a European country |
| North America | Your Klarna account is registered in the US or Canada |
| Australia and Oceania | Your Klarna account is registered in Australia or New Zealand |
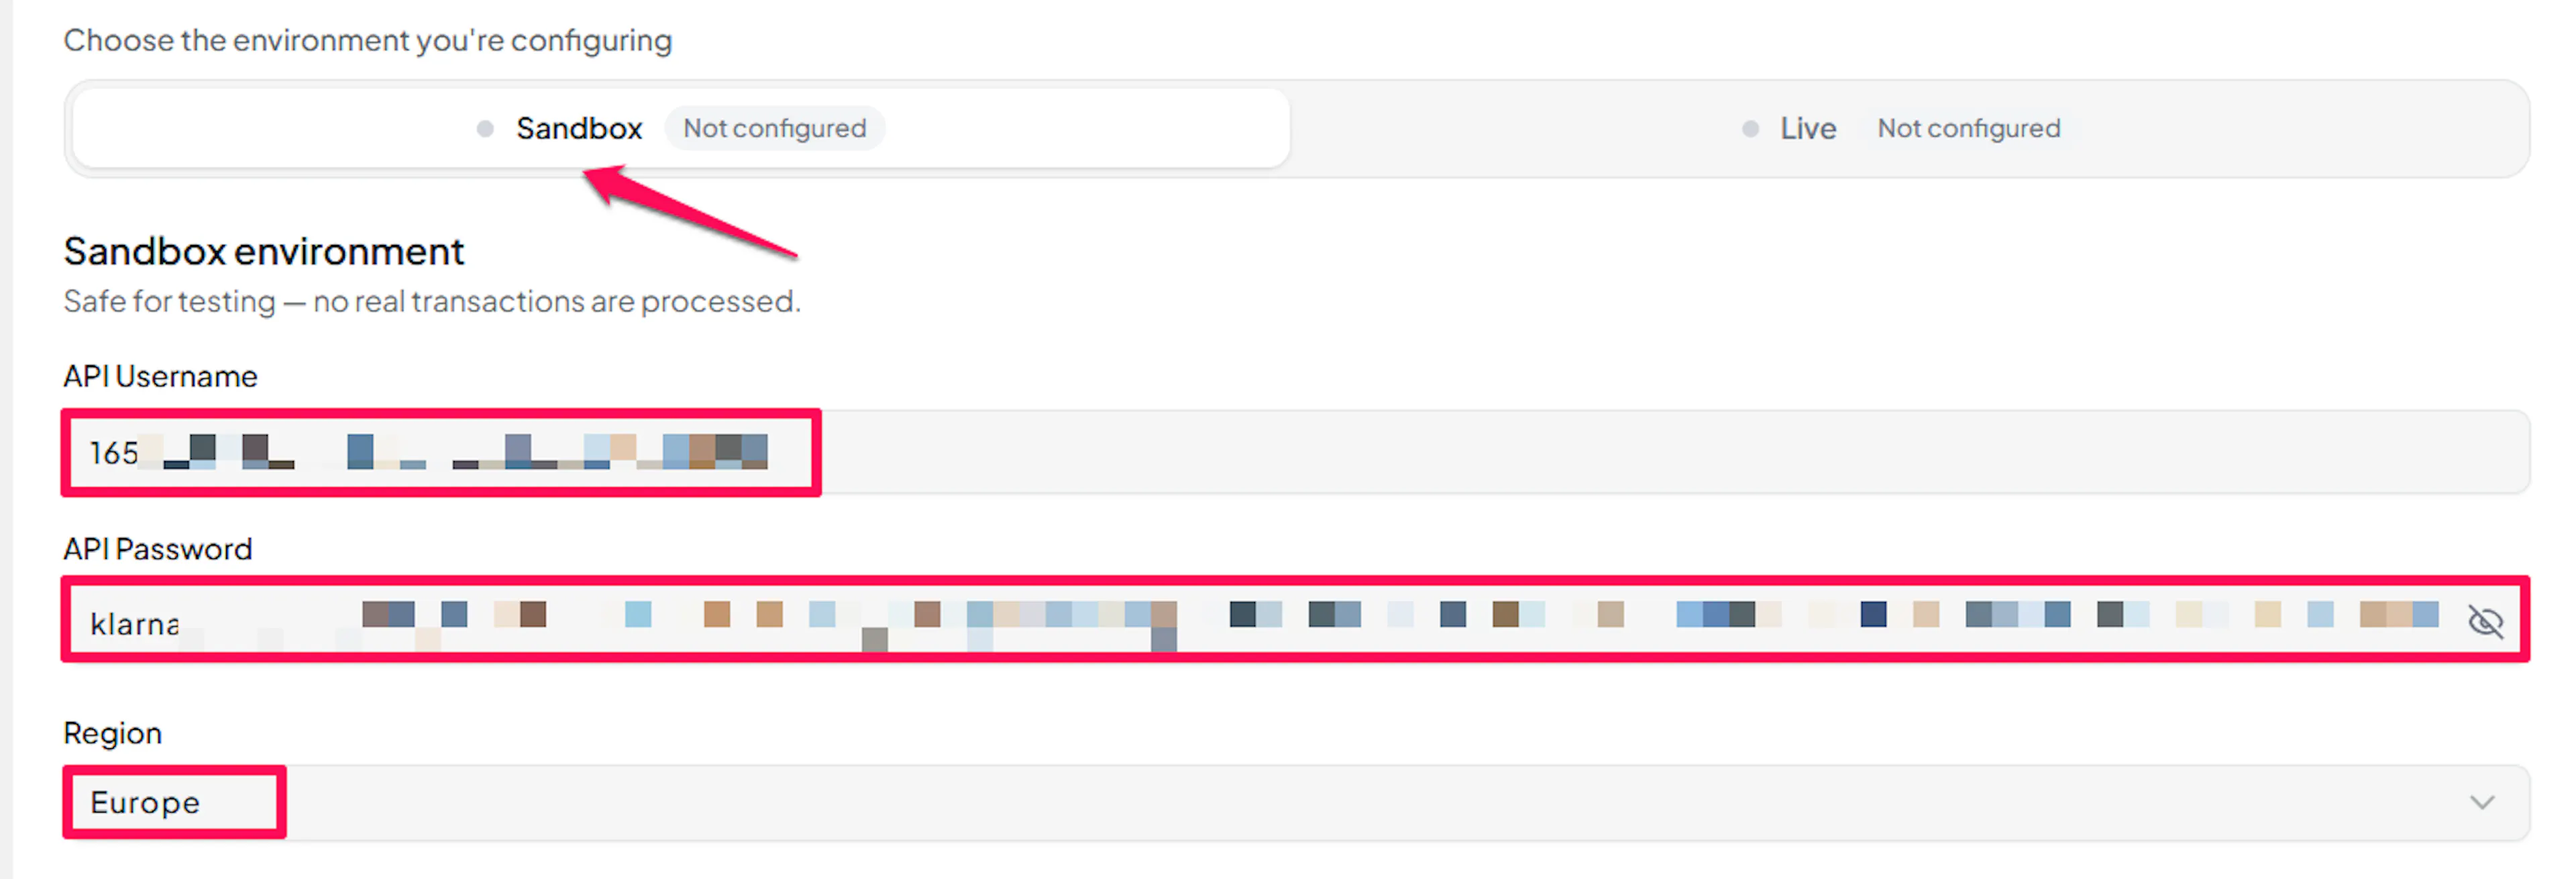
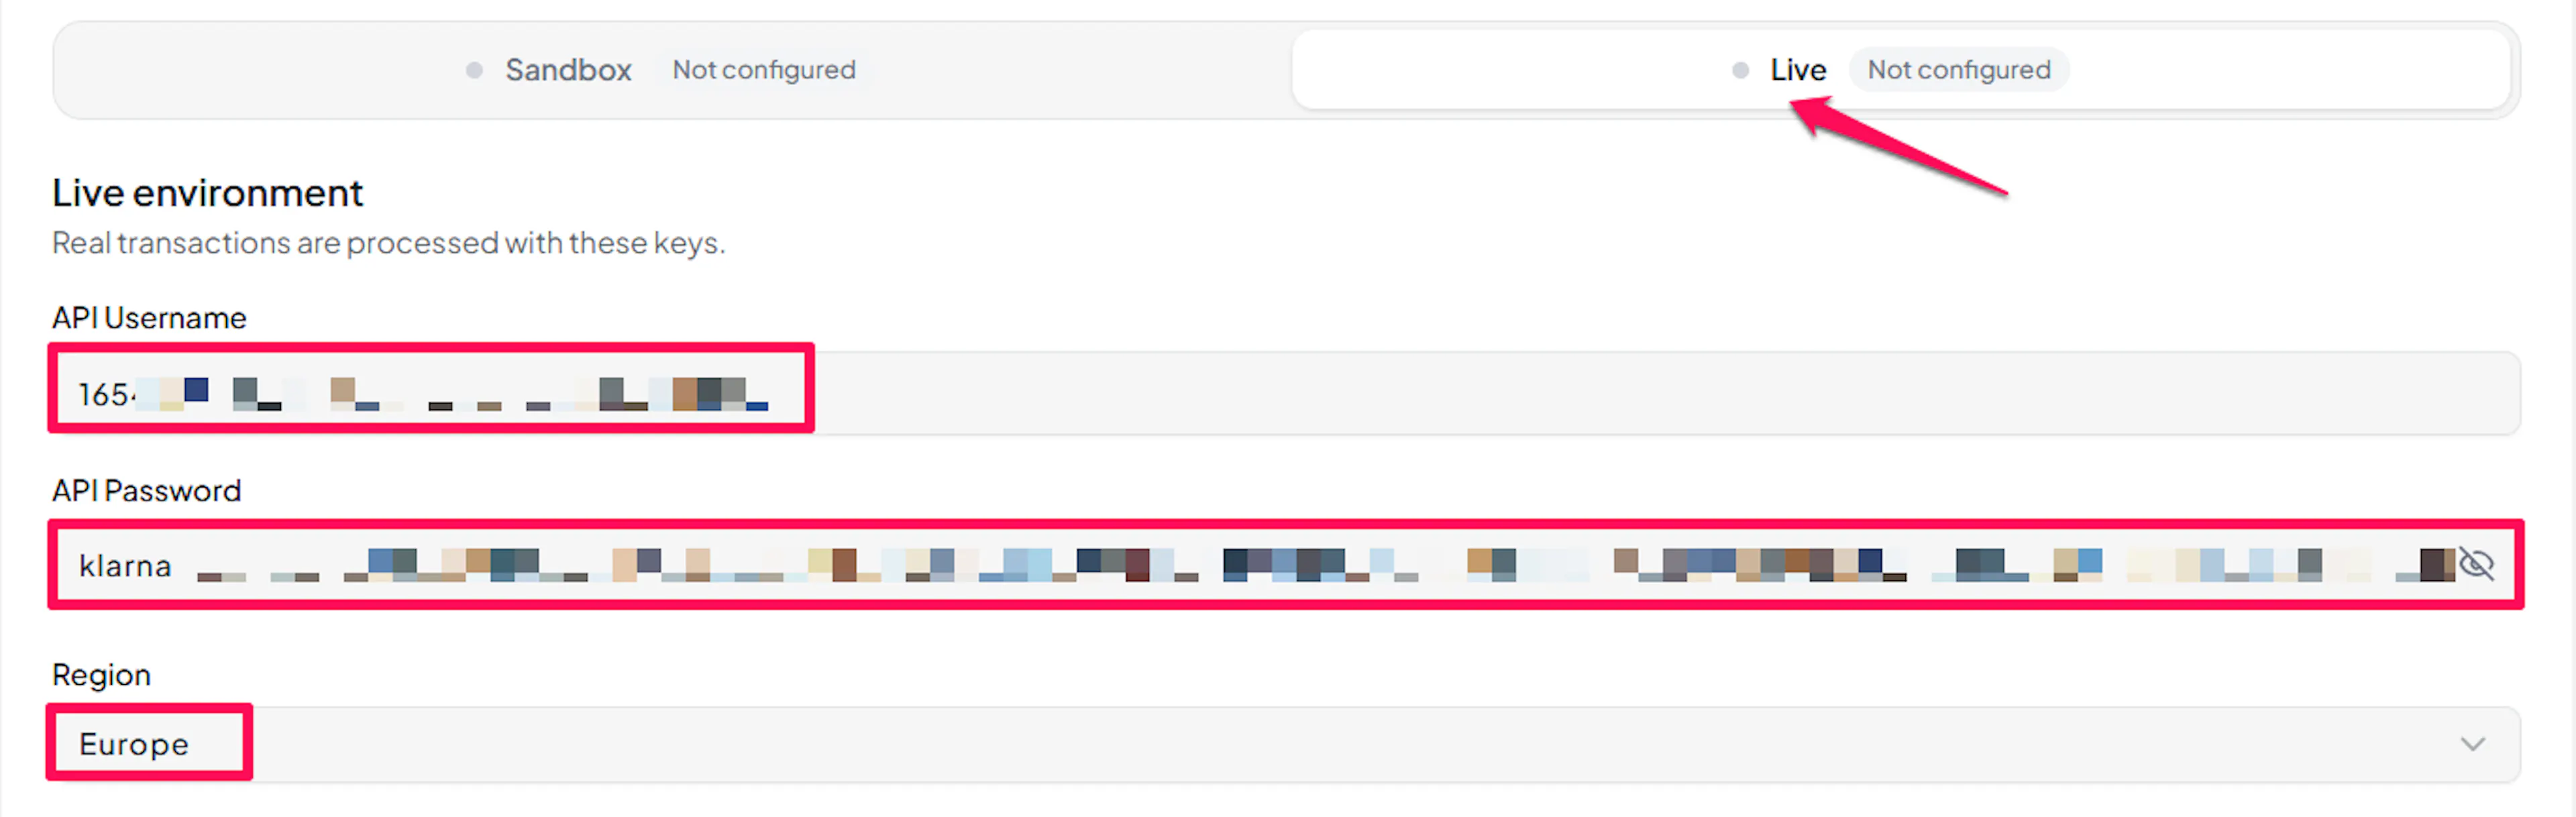
Klarna credentials are region-specific. Select the region where your Klarna account is registered. If unsure, check your region in the Klarna Merchant Portal.
Understanding Live/Production and Sandbox Settings:
| Environment | Purpose |
|---|---|
| Live / Production | Used for real transactions. |
| Test / Sandbox | Used for testing only. No real money is processed. |
How PayLexer selects credentials:
- Debug/Test mode ON → Test credentials are used
- Debug/Test mode OFF → Live credentials are used
Klarna issues separate API keys for test and live environments. Generate a key in the Klarna playground portal for testing and a separate key in the live portal for production.
Test and save
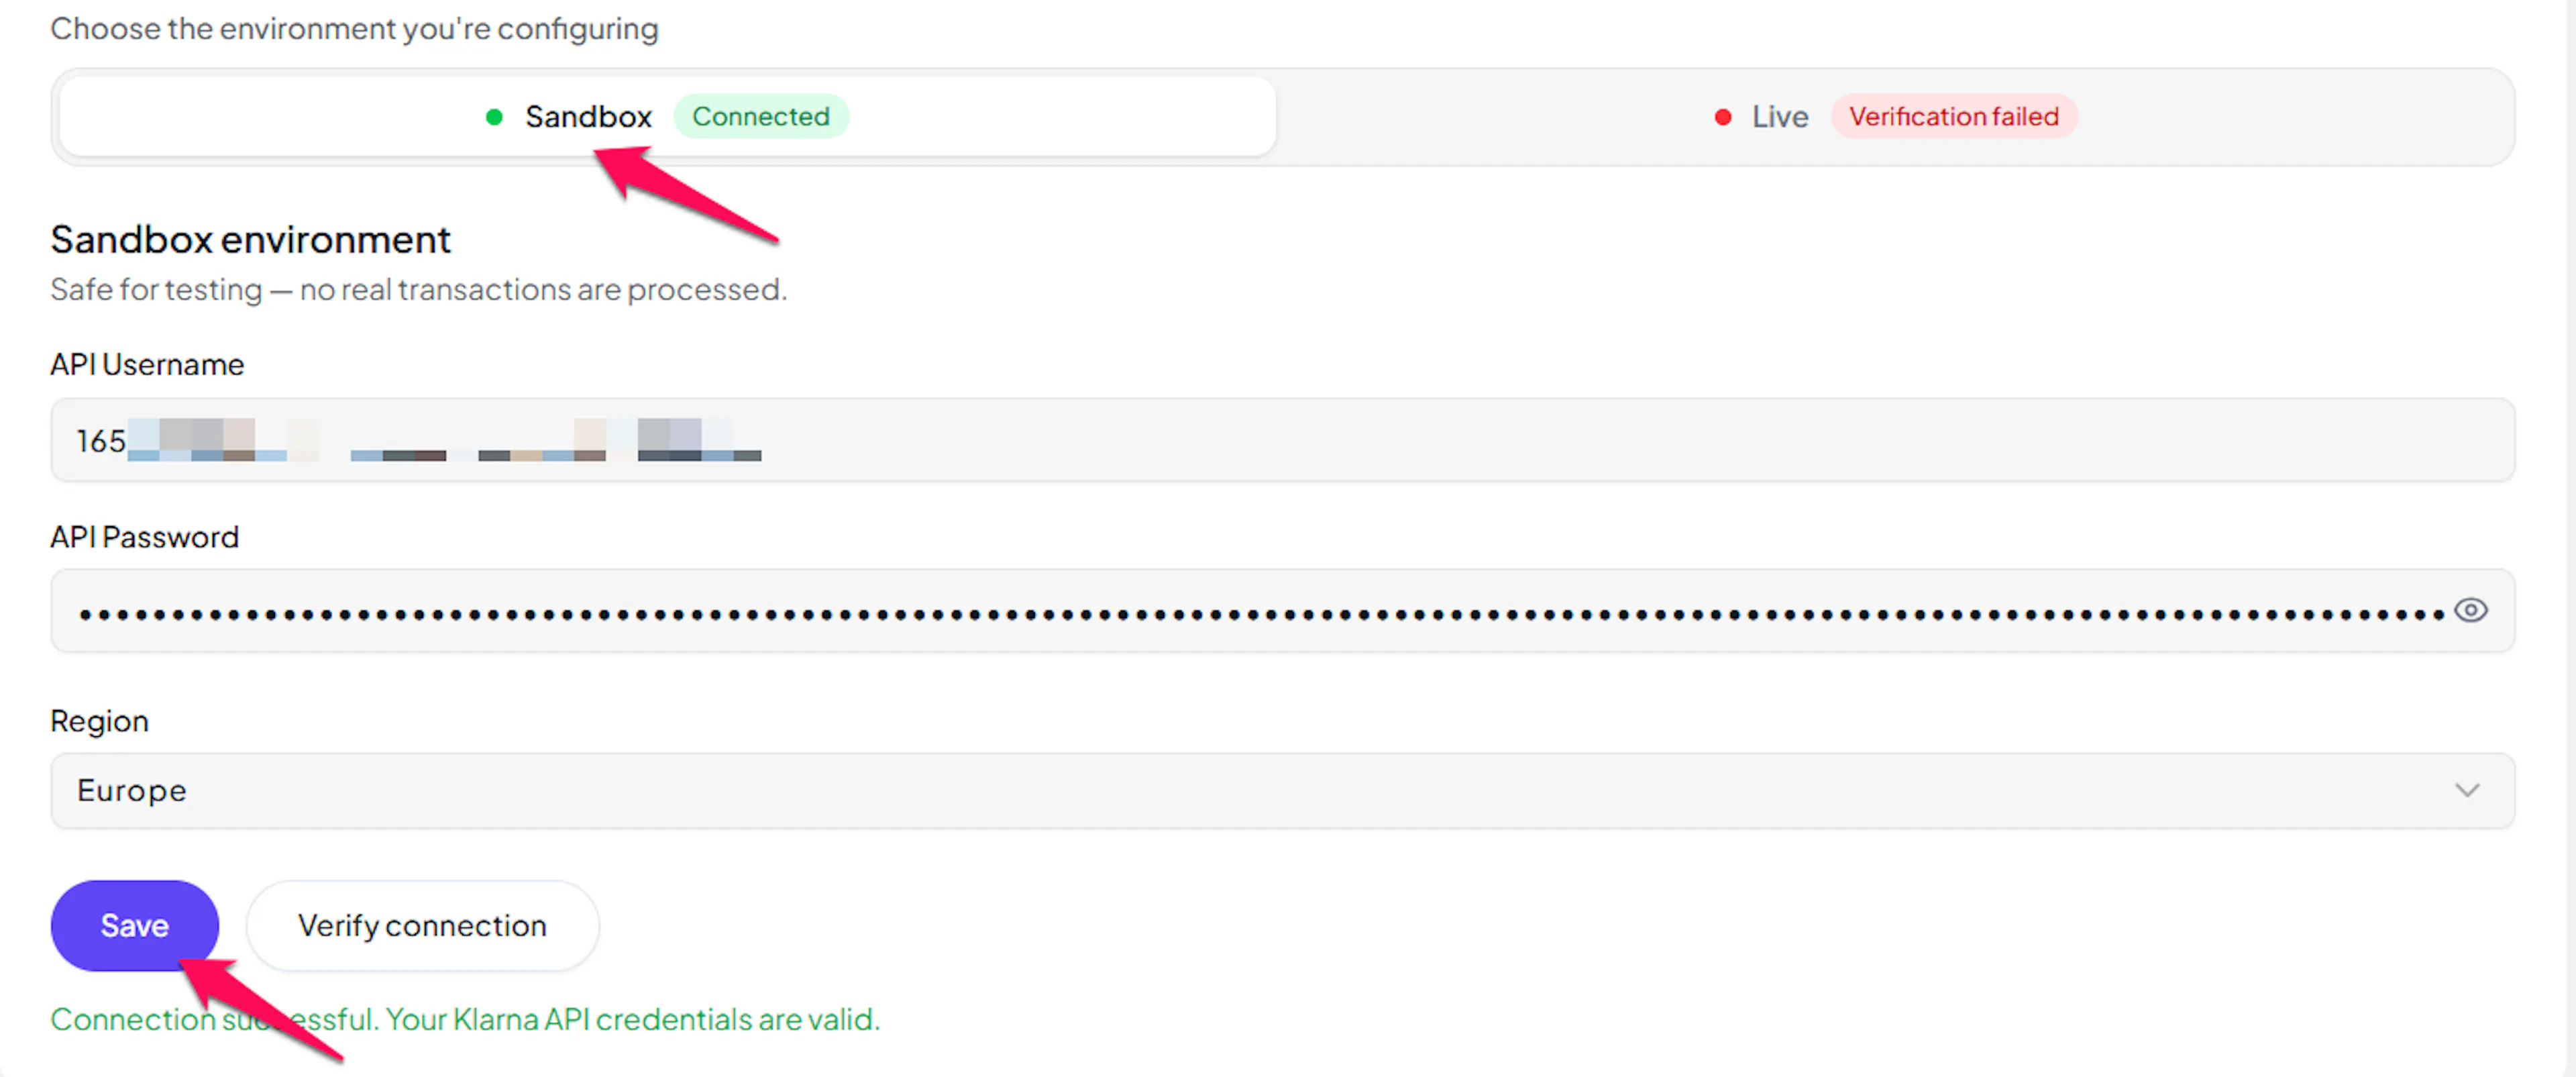
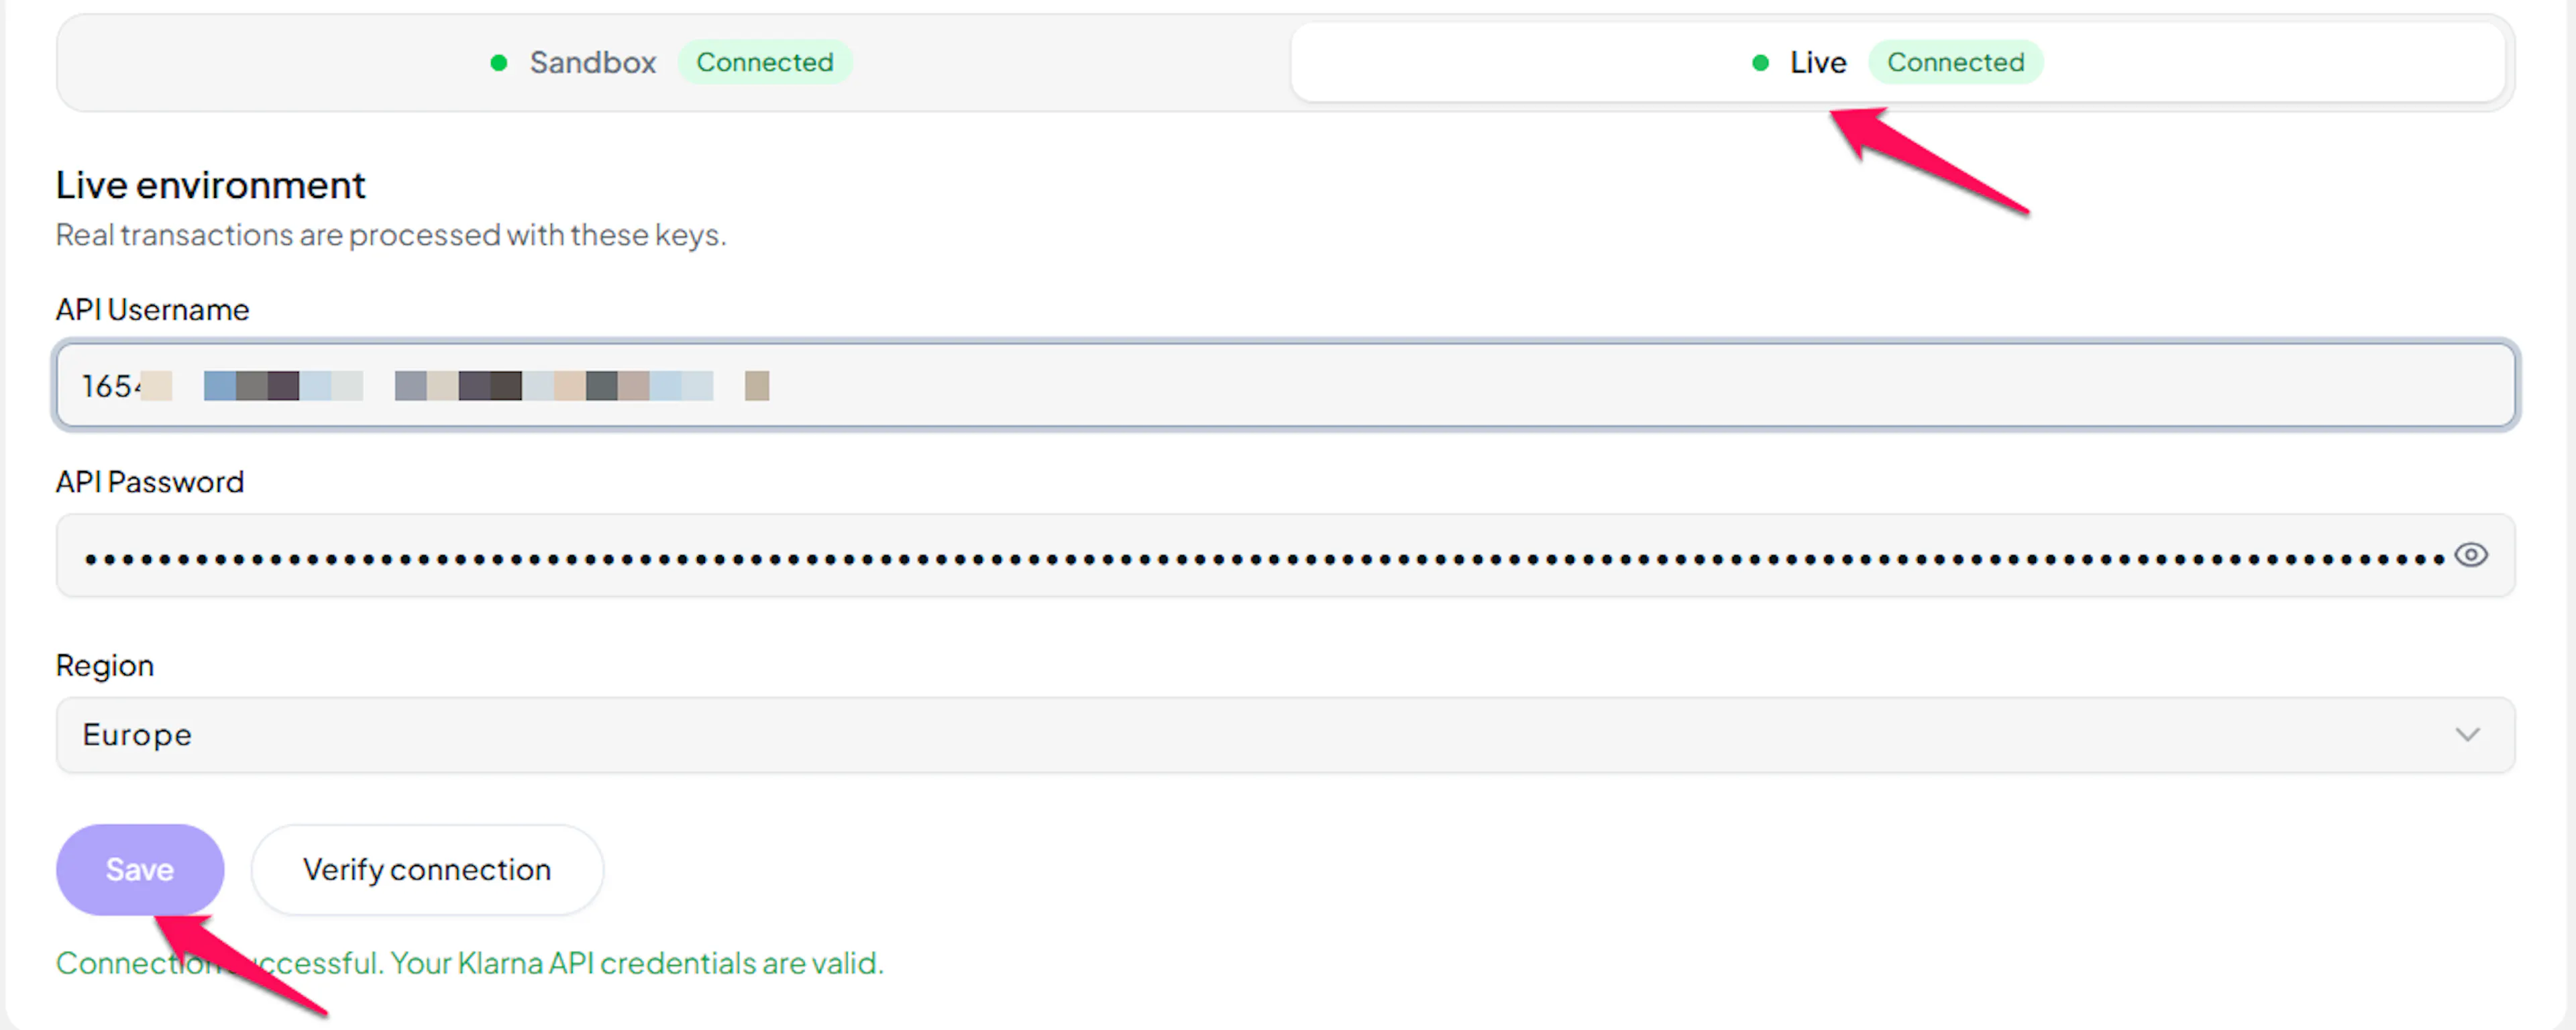
Click Save to save your configuration and verify your credentials. Click Verify Connection to test the connection.
Webhooks
PayLexer registers a payment notification URL with Klarna automatically inside every payment request. No webhook URL setup is required in the Klarna Merchant Portal.
Integrate Klarna to Your Website
If you have already added and configured your site, you can enable Klarna in your existing setup.
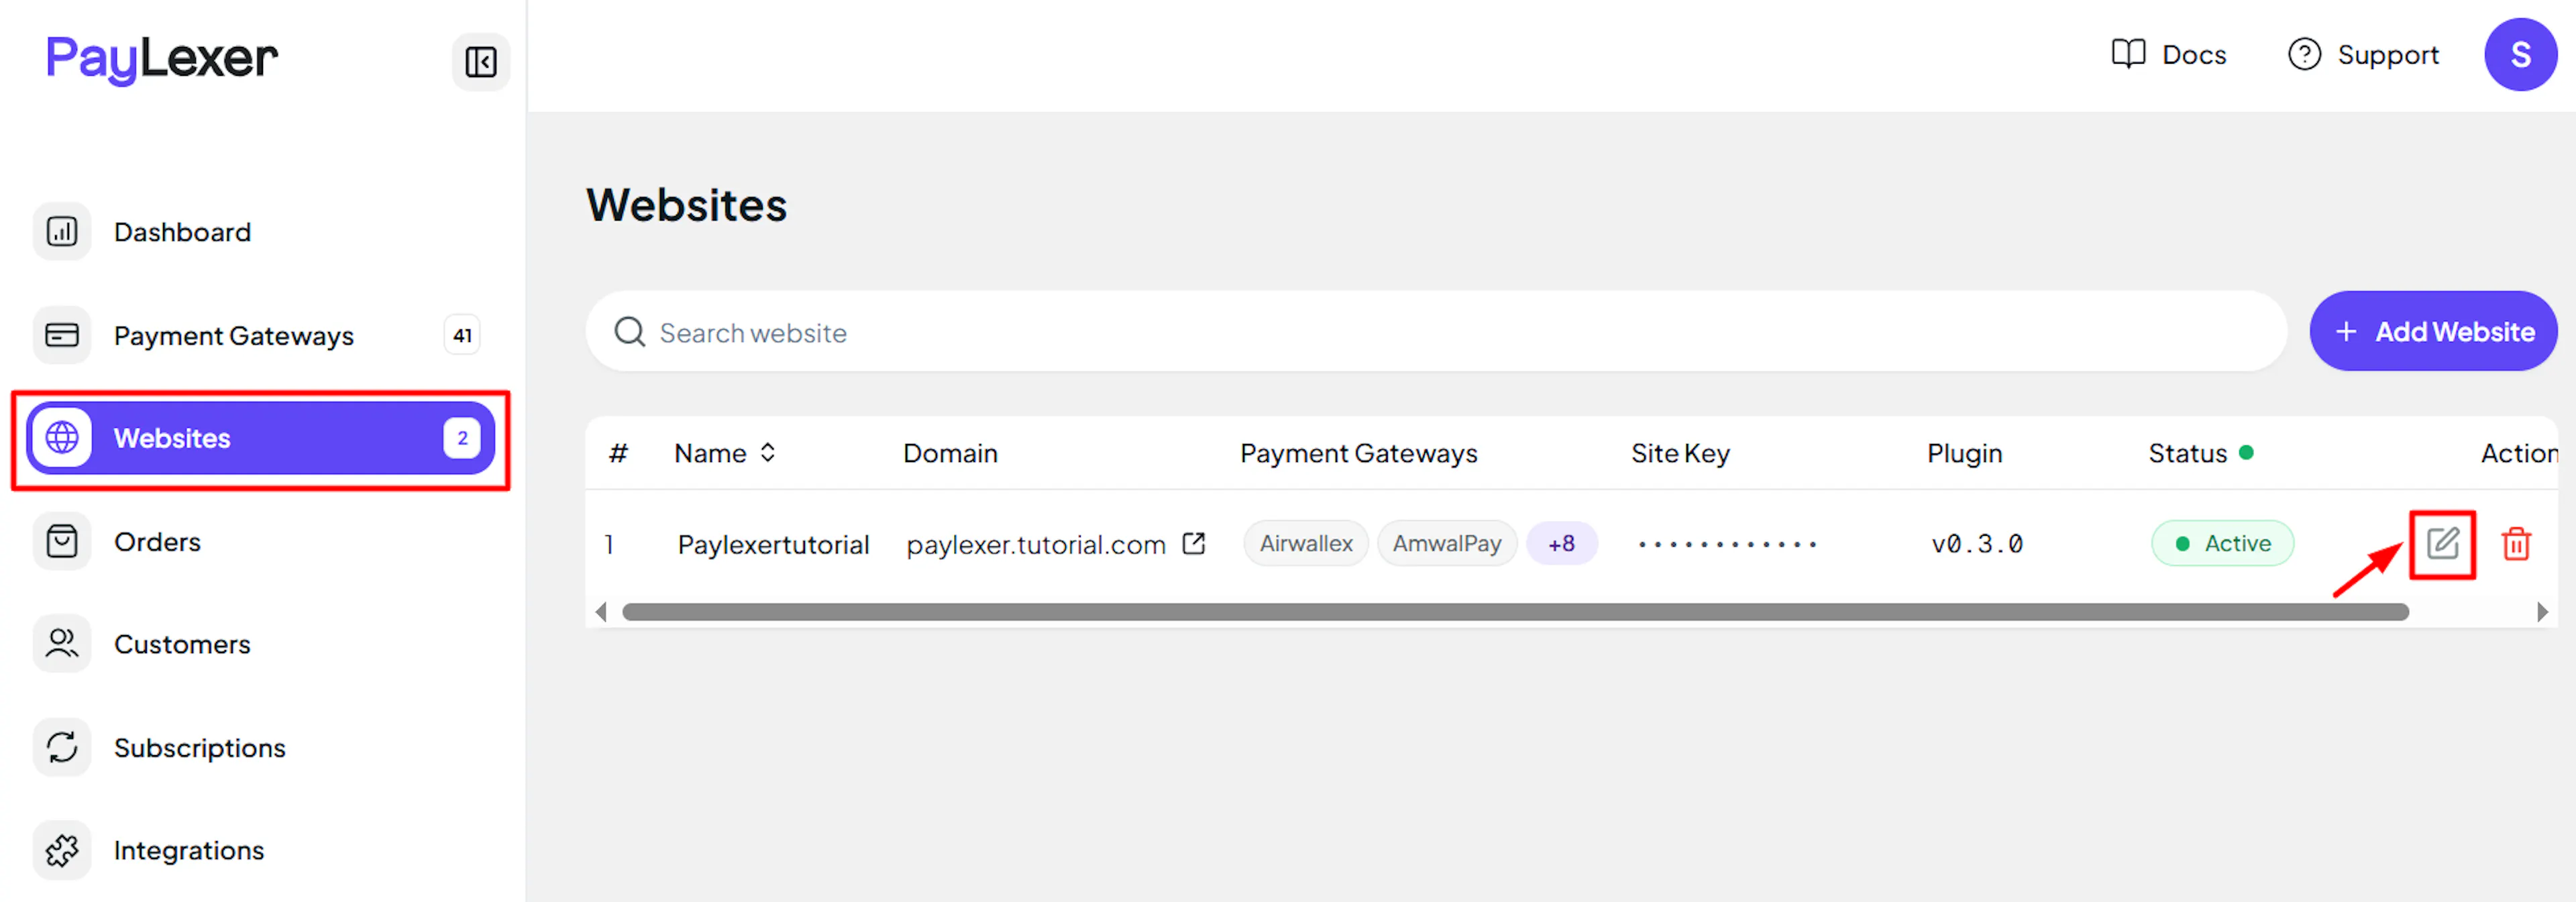
Go to Websites
Navigate to Websites in your PayLexer dashboard.
Edit your website
Click the Edit Icon of your added website.
Enable Klarna
Click the checkbox to enable Klarna for the website.
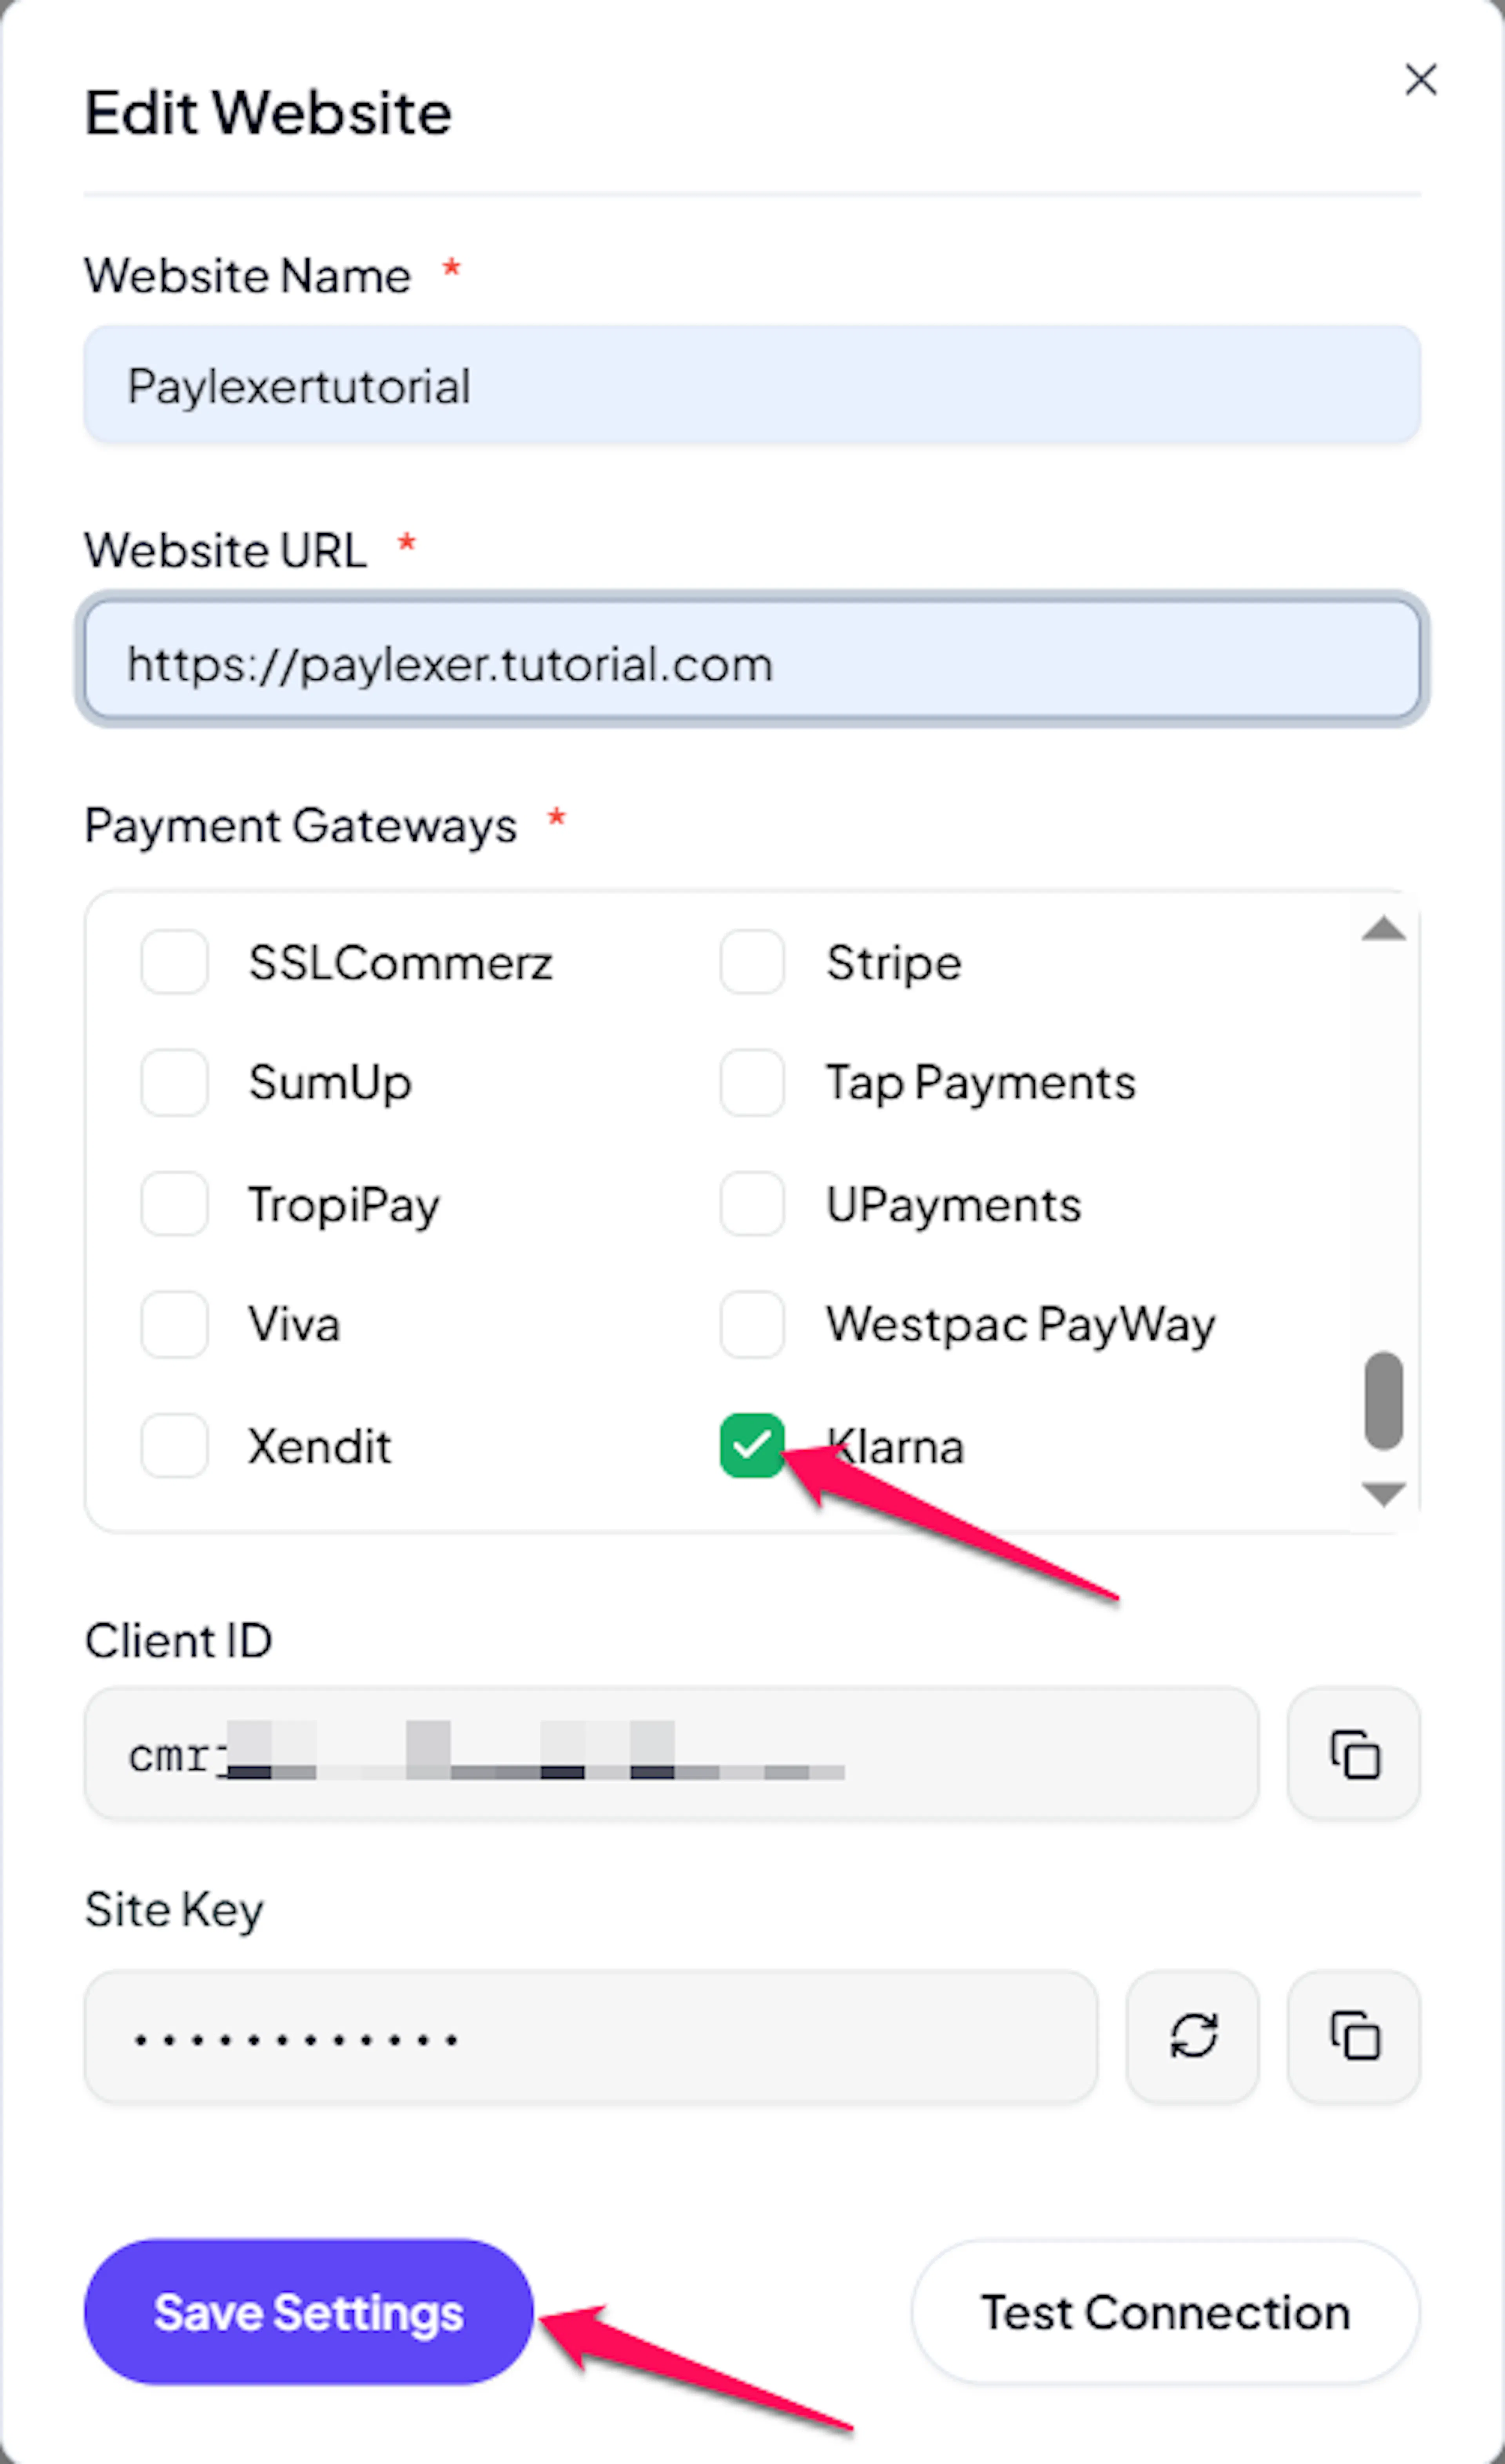
Klarna is now active for this website. Complete a test purchase in test mode before switching to live.
If you haven't added a website yet, Continue to Add Your Website →
Troubleshooting
Best Practices
- Test in sandbox mode before enabling live. Use Klarna playground credentials (
klarna_test_api_...) to run a complete checkout and verify the full payment flow. - Keep your API Password confidential.
- Select the correct region when setting up credentials. A wrong region selection means every payment will fail authentication - there is no auto-detection.
- Klarna's payment method options (pay in installments, pay in 30 days, pay now) depend on what is enabled on your merchant account for each country. Contact Klarna if specific pay-later options are not appearing for shoppers.
FAQs
Still Have Questions?
- Klarna Support:Klarna Merchant Support
- PayLexer Support: Contact Support