

Openpay
Connect Openpay to PayLexer to accept card payments, OXXO cash vouchers, and SPEI bank transfers across Mexico and Colombia, with native gateway-managed subscriptions and one-click webhook registration.
Openpay is BBVA's payment gateway for Mexico and Colombia, built around how shoppers in Latin America actually pay: cards, cash payments at OXXO stores, and direct SPEI bank transfers. It also has true native subscriptions - once a shopper subscribes, Openpay itself charges the card on every billing cycle, so PayLexer never has to trigger a renewal payment.
- Supported Regions (Merchant Accounts): Mexico, Colombia
- Supported Currencies: MXN, USD (Mexico region), COP (Colombia region)
Openpay is region-specific: a Mexico account settles MXN or USD, and a Colombia account settles COP only. Mexico and Colombia are separate Openpay accounts - a merchant selling in both configures each region's credentials separately.
Supported Features
- Embedded card checkout where shoppers enter their card in a PayLexer-hosted form that tokenizes it directly with Openpay, so card numbers never touch PayLexer's servers
- Automatic 3-D Secure handling for Mexican cards, completed in a secure popup window with no full-page redirect
- OXXO cash voucher payments for Mexican shoppers who prefer to pay in cash at a convenience store
- SPEI bank transfer payments for Mexican shoppers who prefer to pay by direct bank transfer
- Native subscriptions where Openpay itself charges the shopper's card on every billing cycle, so PayLexer never has to trigger a renewal charge
- Full and partial refunds processed directly through Openpay for card payments
- One-click webhook registration that connects your PayLexer webhook URL with Openpay automatically, with no manual setup in Openpay's own dashboard
- Automatic payment status verification that checks directly with Openpay before trusting any webhook notification
Before You Start
Make sure you have:
- Openpay Account – Don't have one? Sign up for Openpay →
- PayLexer Account – Required to configure the integration. Create your account →
- A website where you want to integrate
Looking for a different payment processor? View all supported gateways →
Configuring Openpay
You need a Merchant ID, Private Key, Public Key, and Region from Openpay for this integration.
Getting API Credentials
Open the Openpay Dashboard
Log in to your Openpay Dashboard. Sandbox and live are fully separate Openpay accounts, so make sure you are logged in to the one that matches the credentials you need.
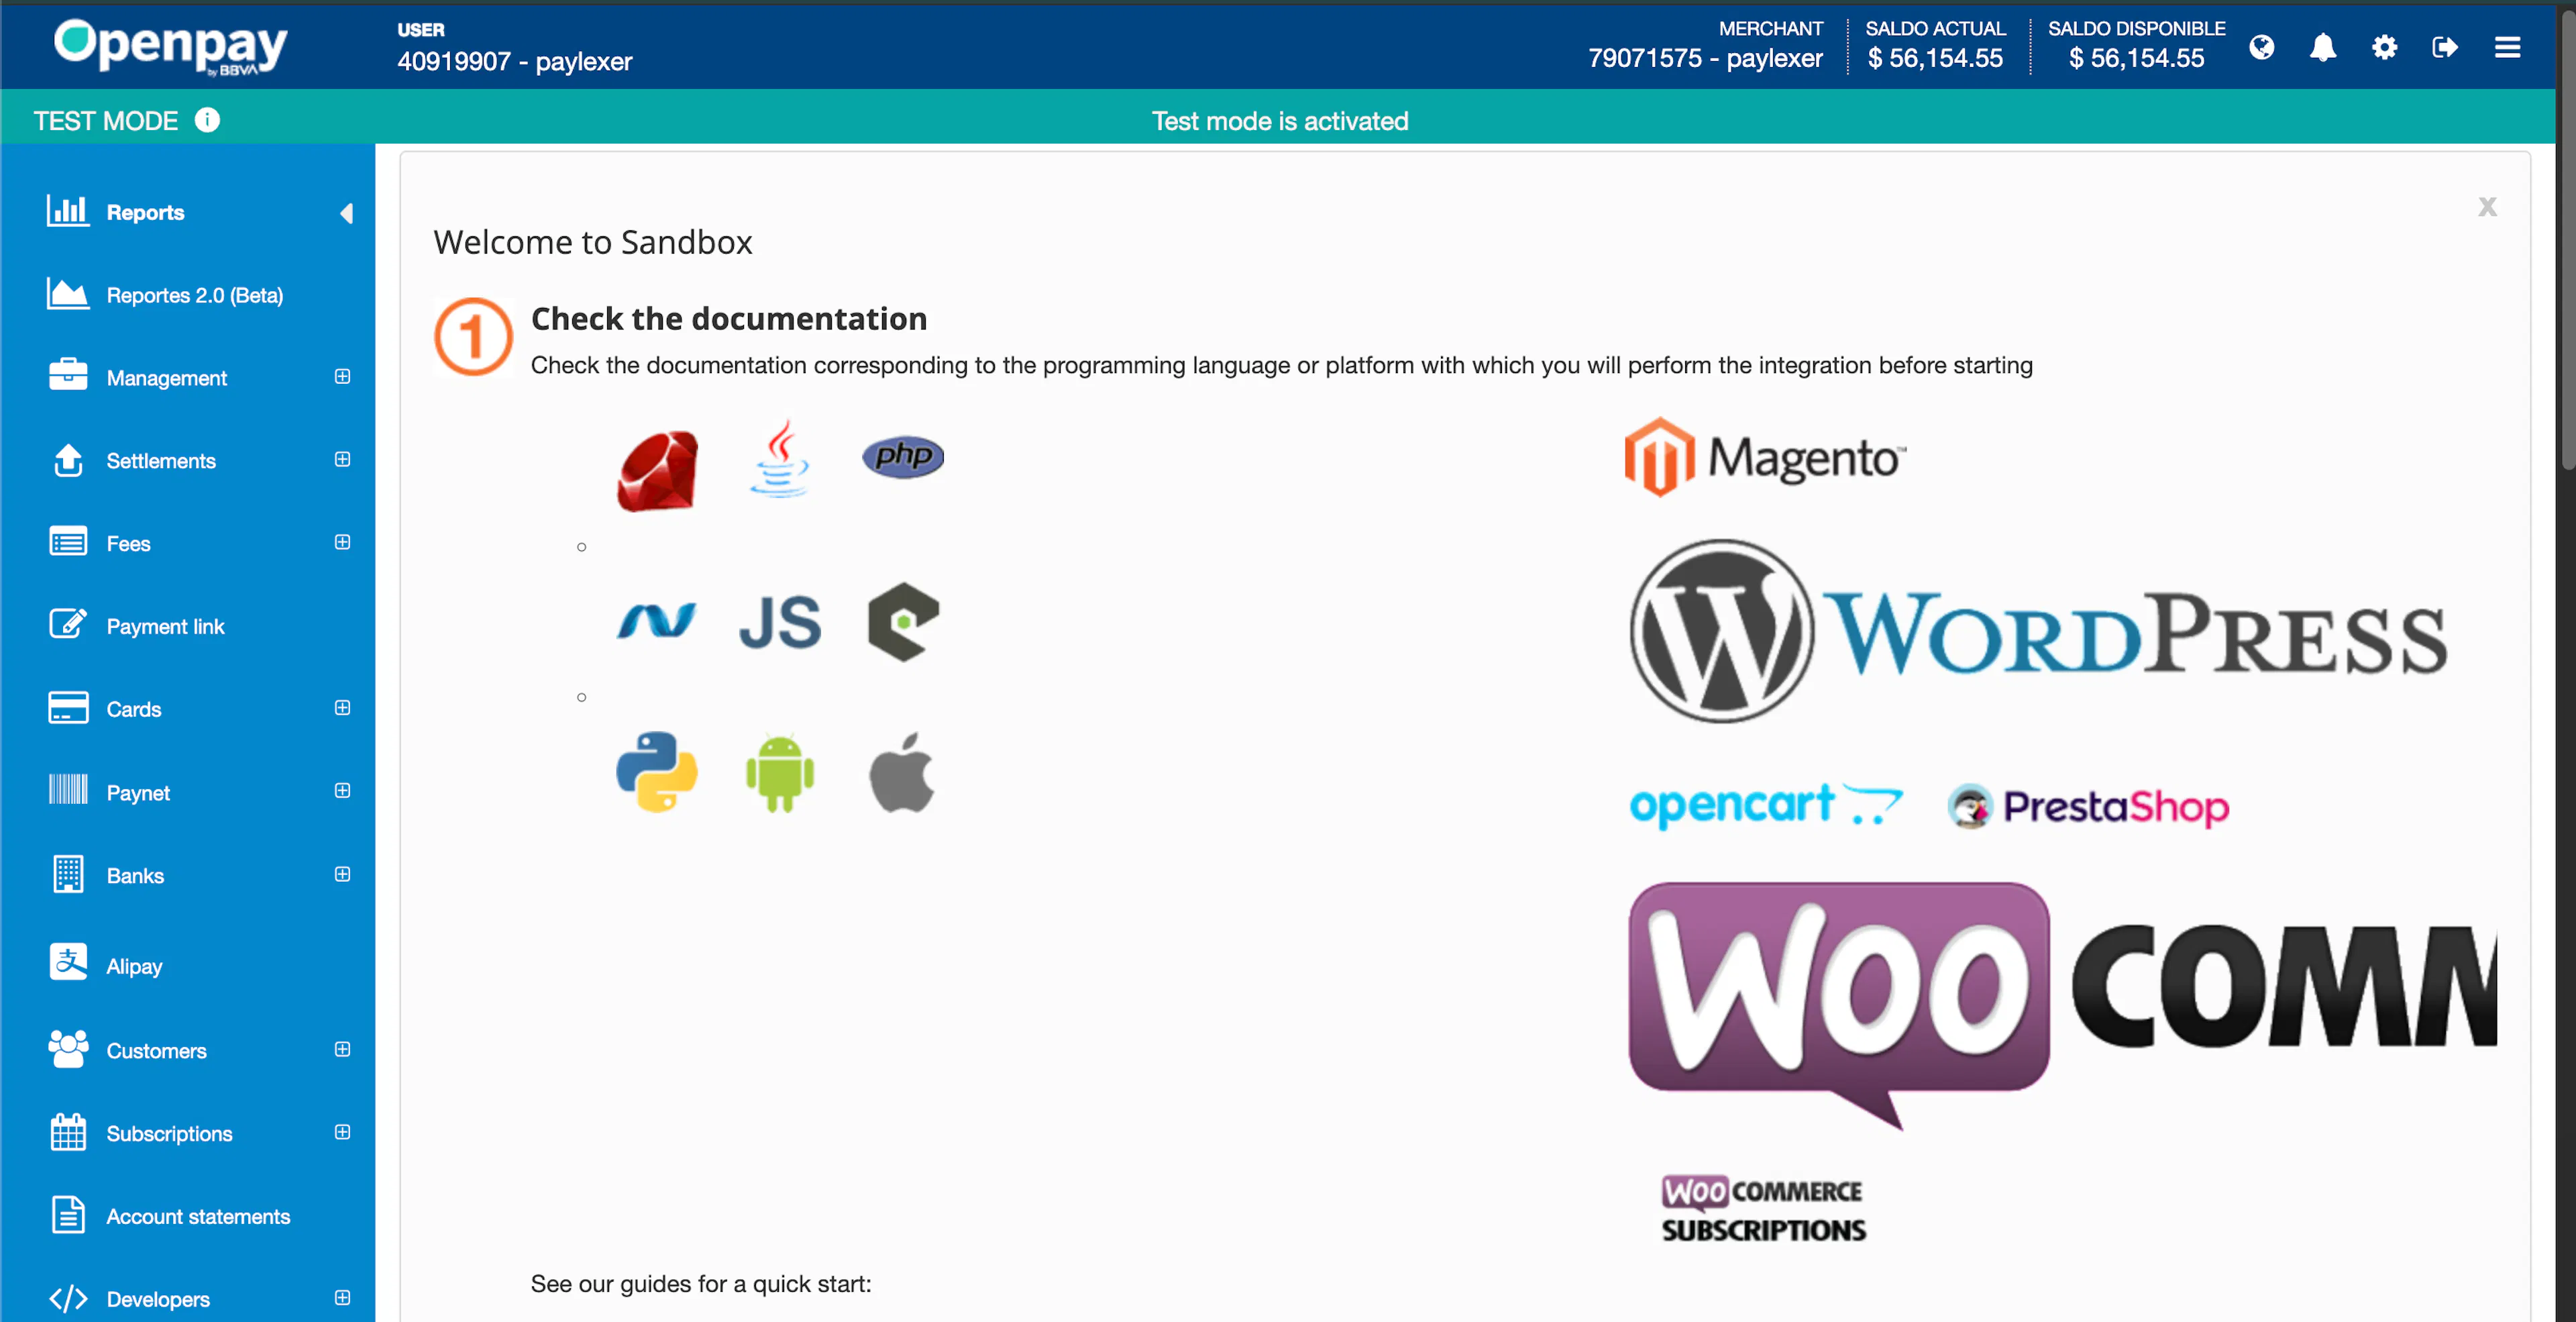
Confirm your region
Mexico and Colombia are separate Openpay accounts. Use the account that matches the region you want to sell in - this is also the value you'll enter as Region in PayLexer (mx or co).
Copy your Merchant ID, Private Key, and Public Key
Your Merchant ID and Public Key appear on your Openpay Dashboard homepage. Your Private Key is listed alongside them under your API keys.
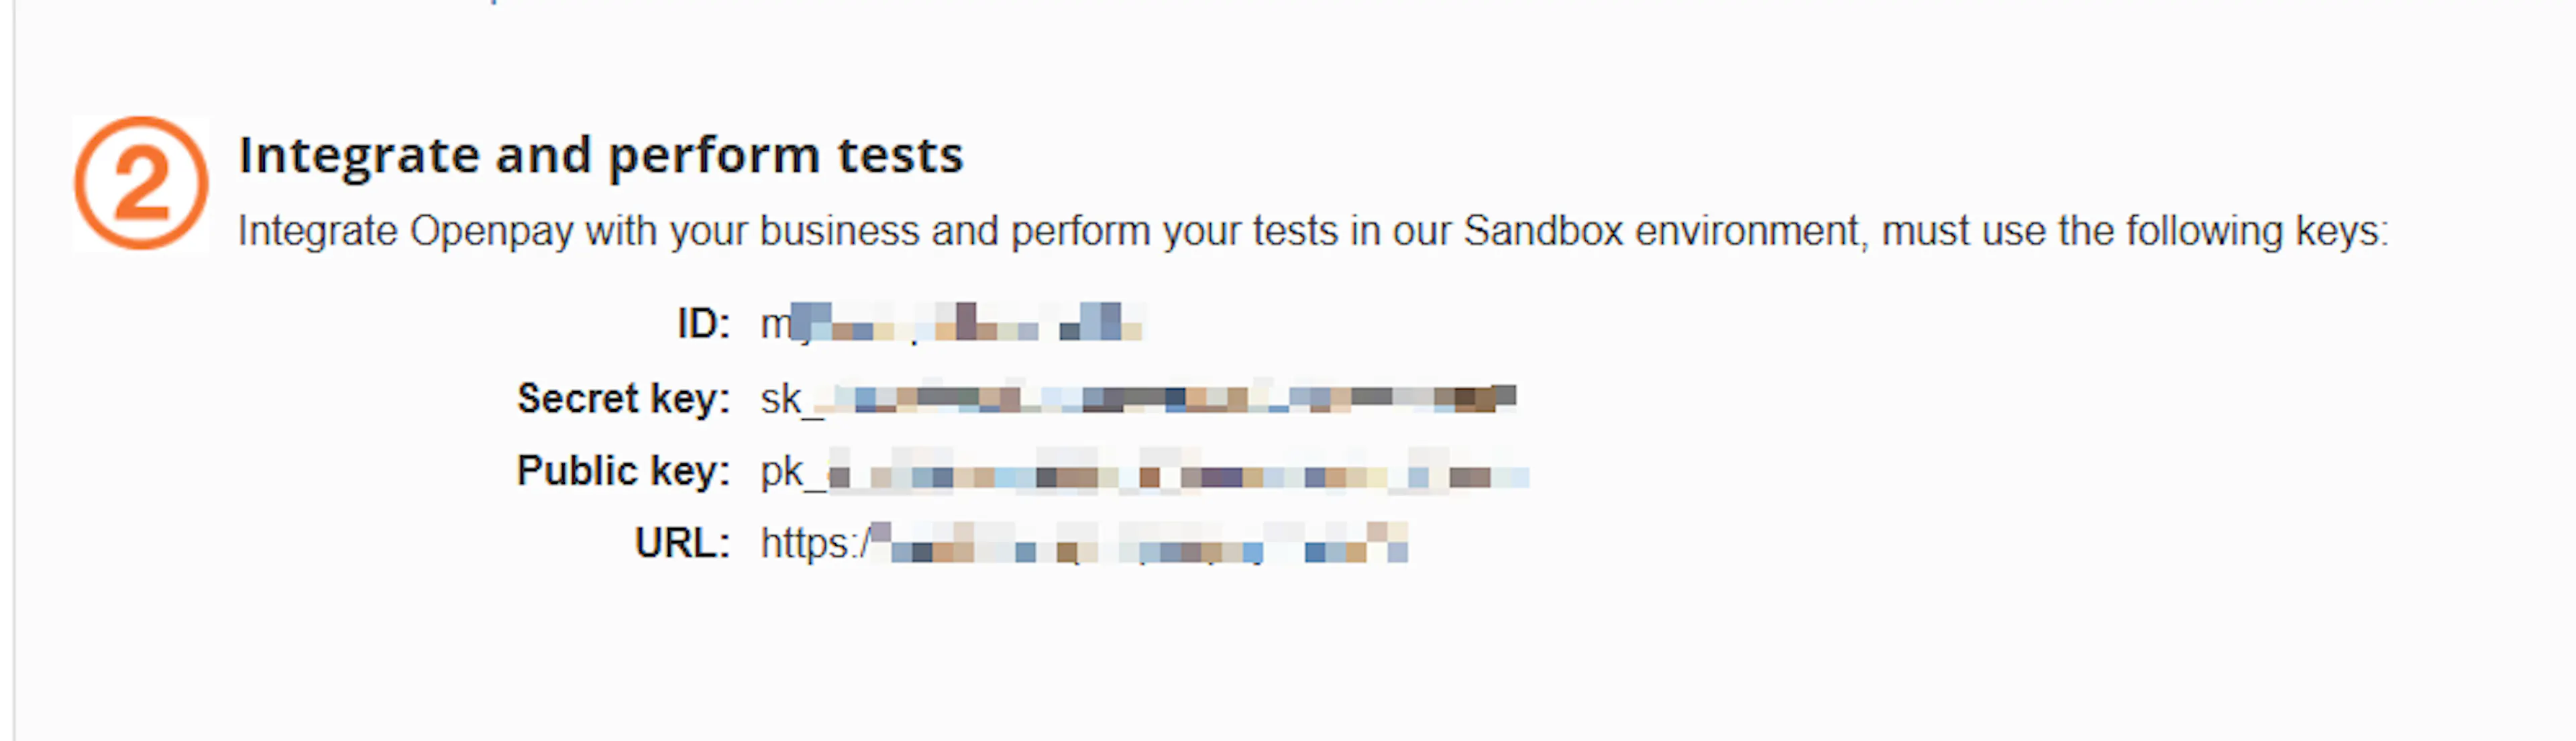
The Public Key is optional in PayLexer, but strongly recommended: without it, card payments fall back to Openpay's hosted card-capture page instead of the embedded checkout form, and subscriptions cannot be created.
Adding Credentials to PayLexer
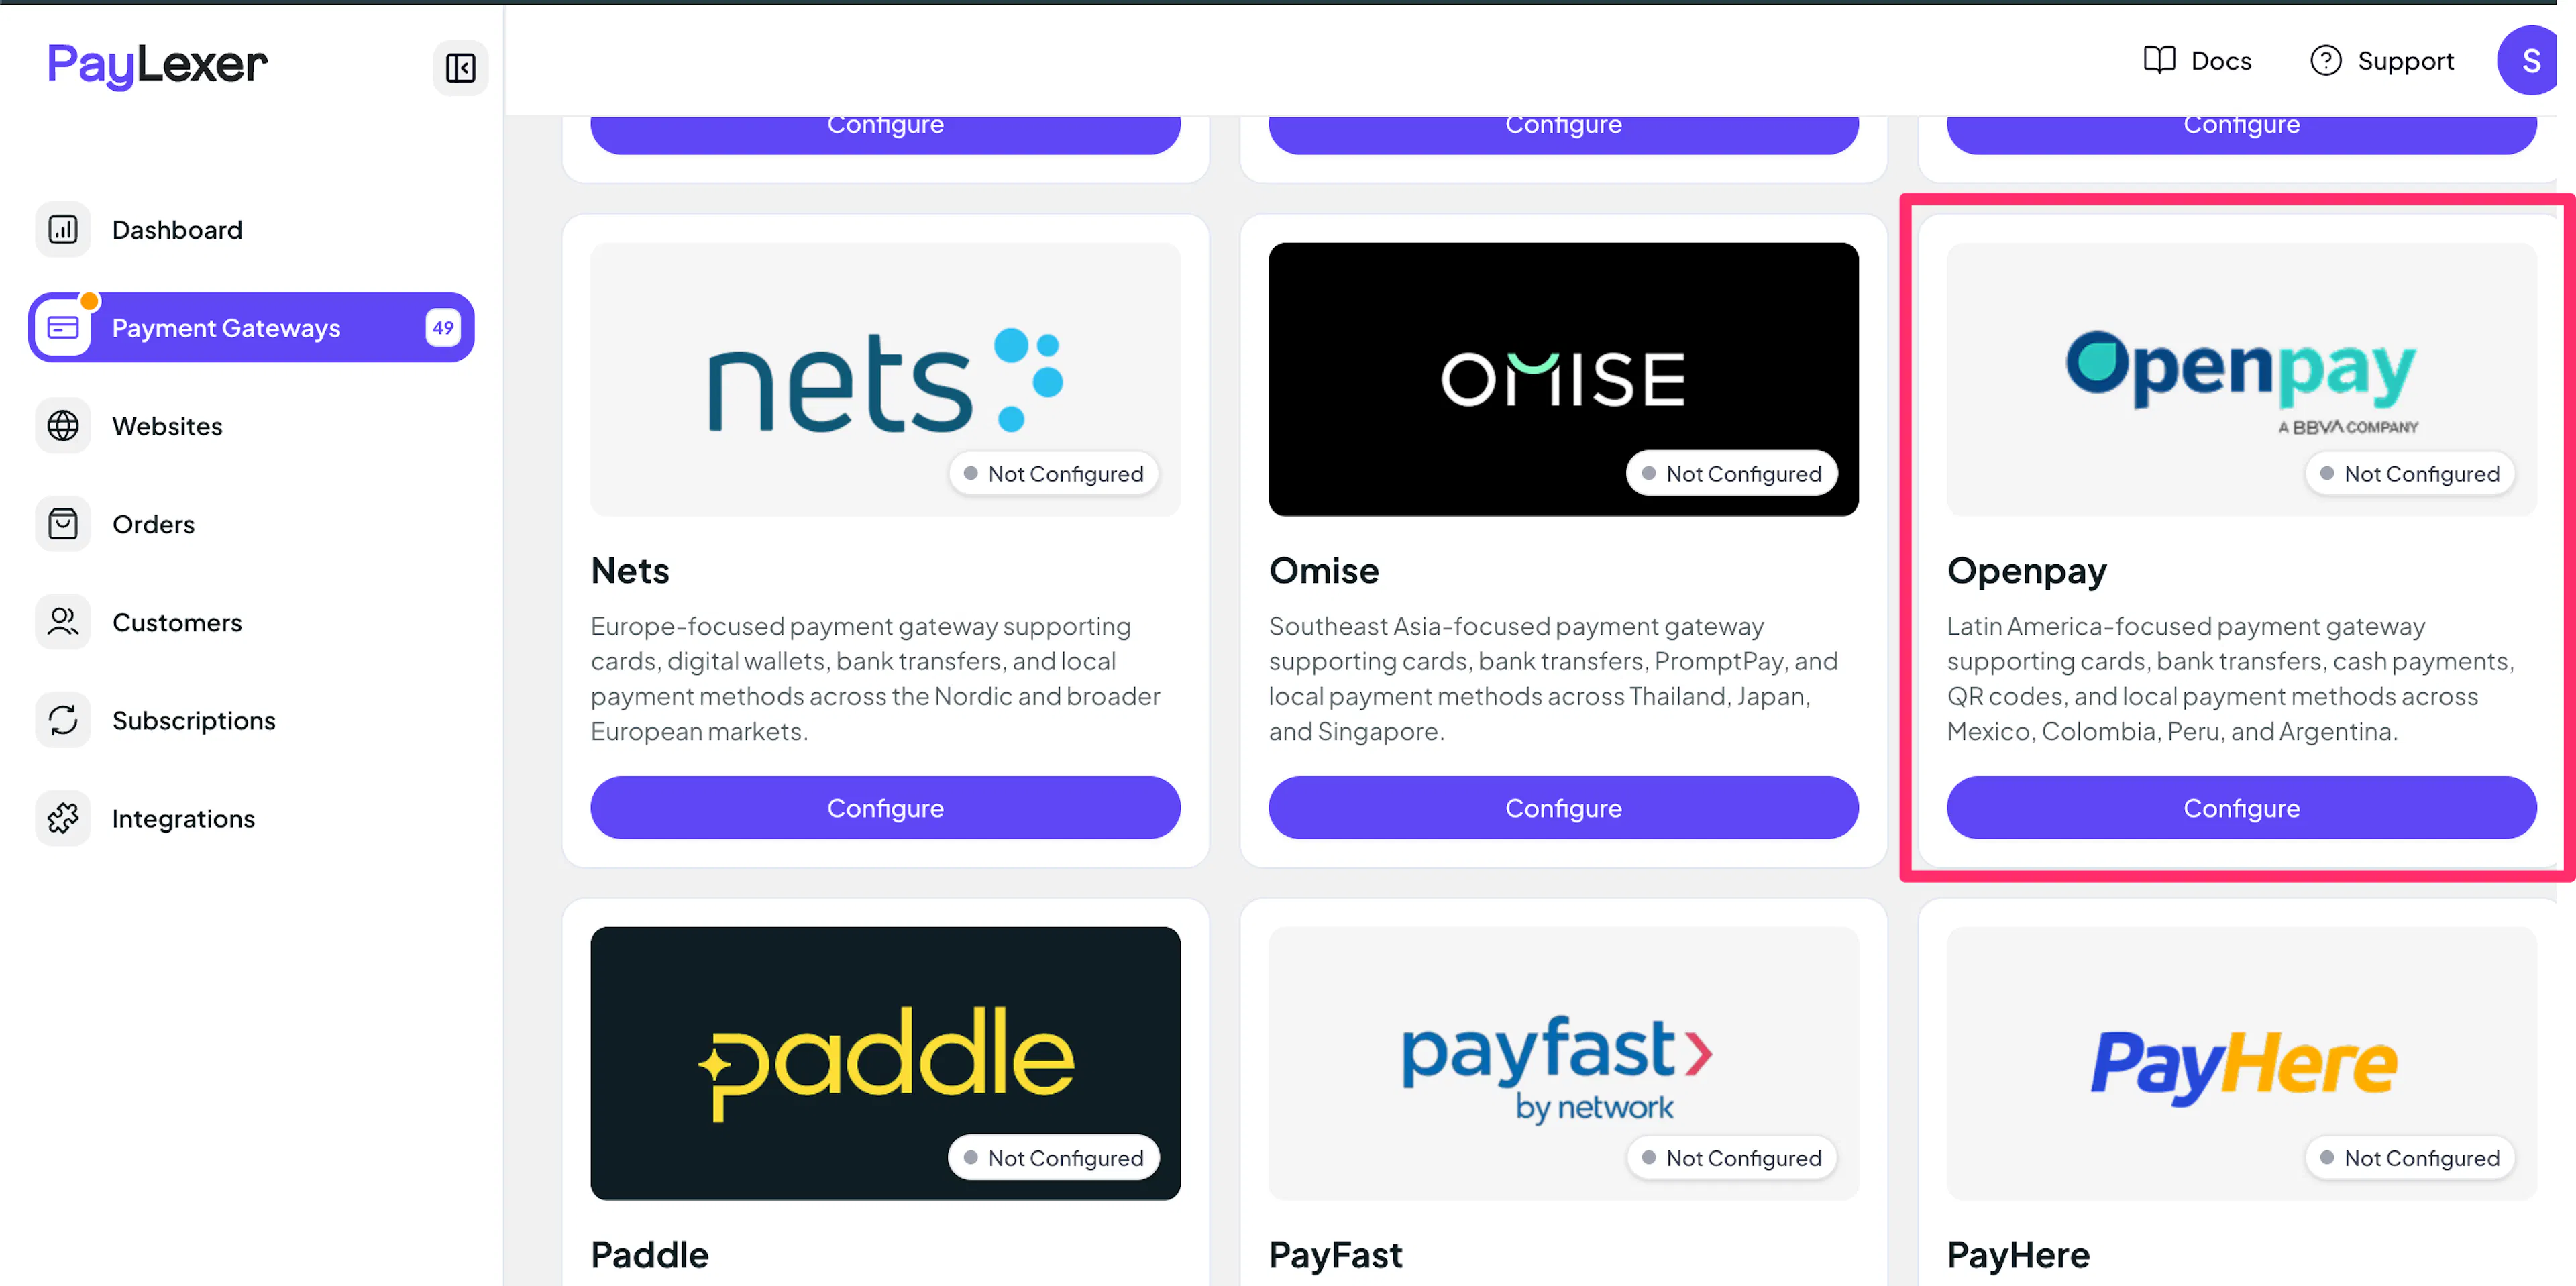
Open PayLexer Dashboard
Log in to your PayLexer dashboard and navigate to Payment Gateways → Openpay.
Enter your credentials
Paste the Merchant ID, Private Key, Public Key, and Region you copied from Openpay.
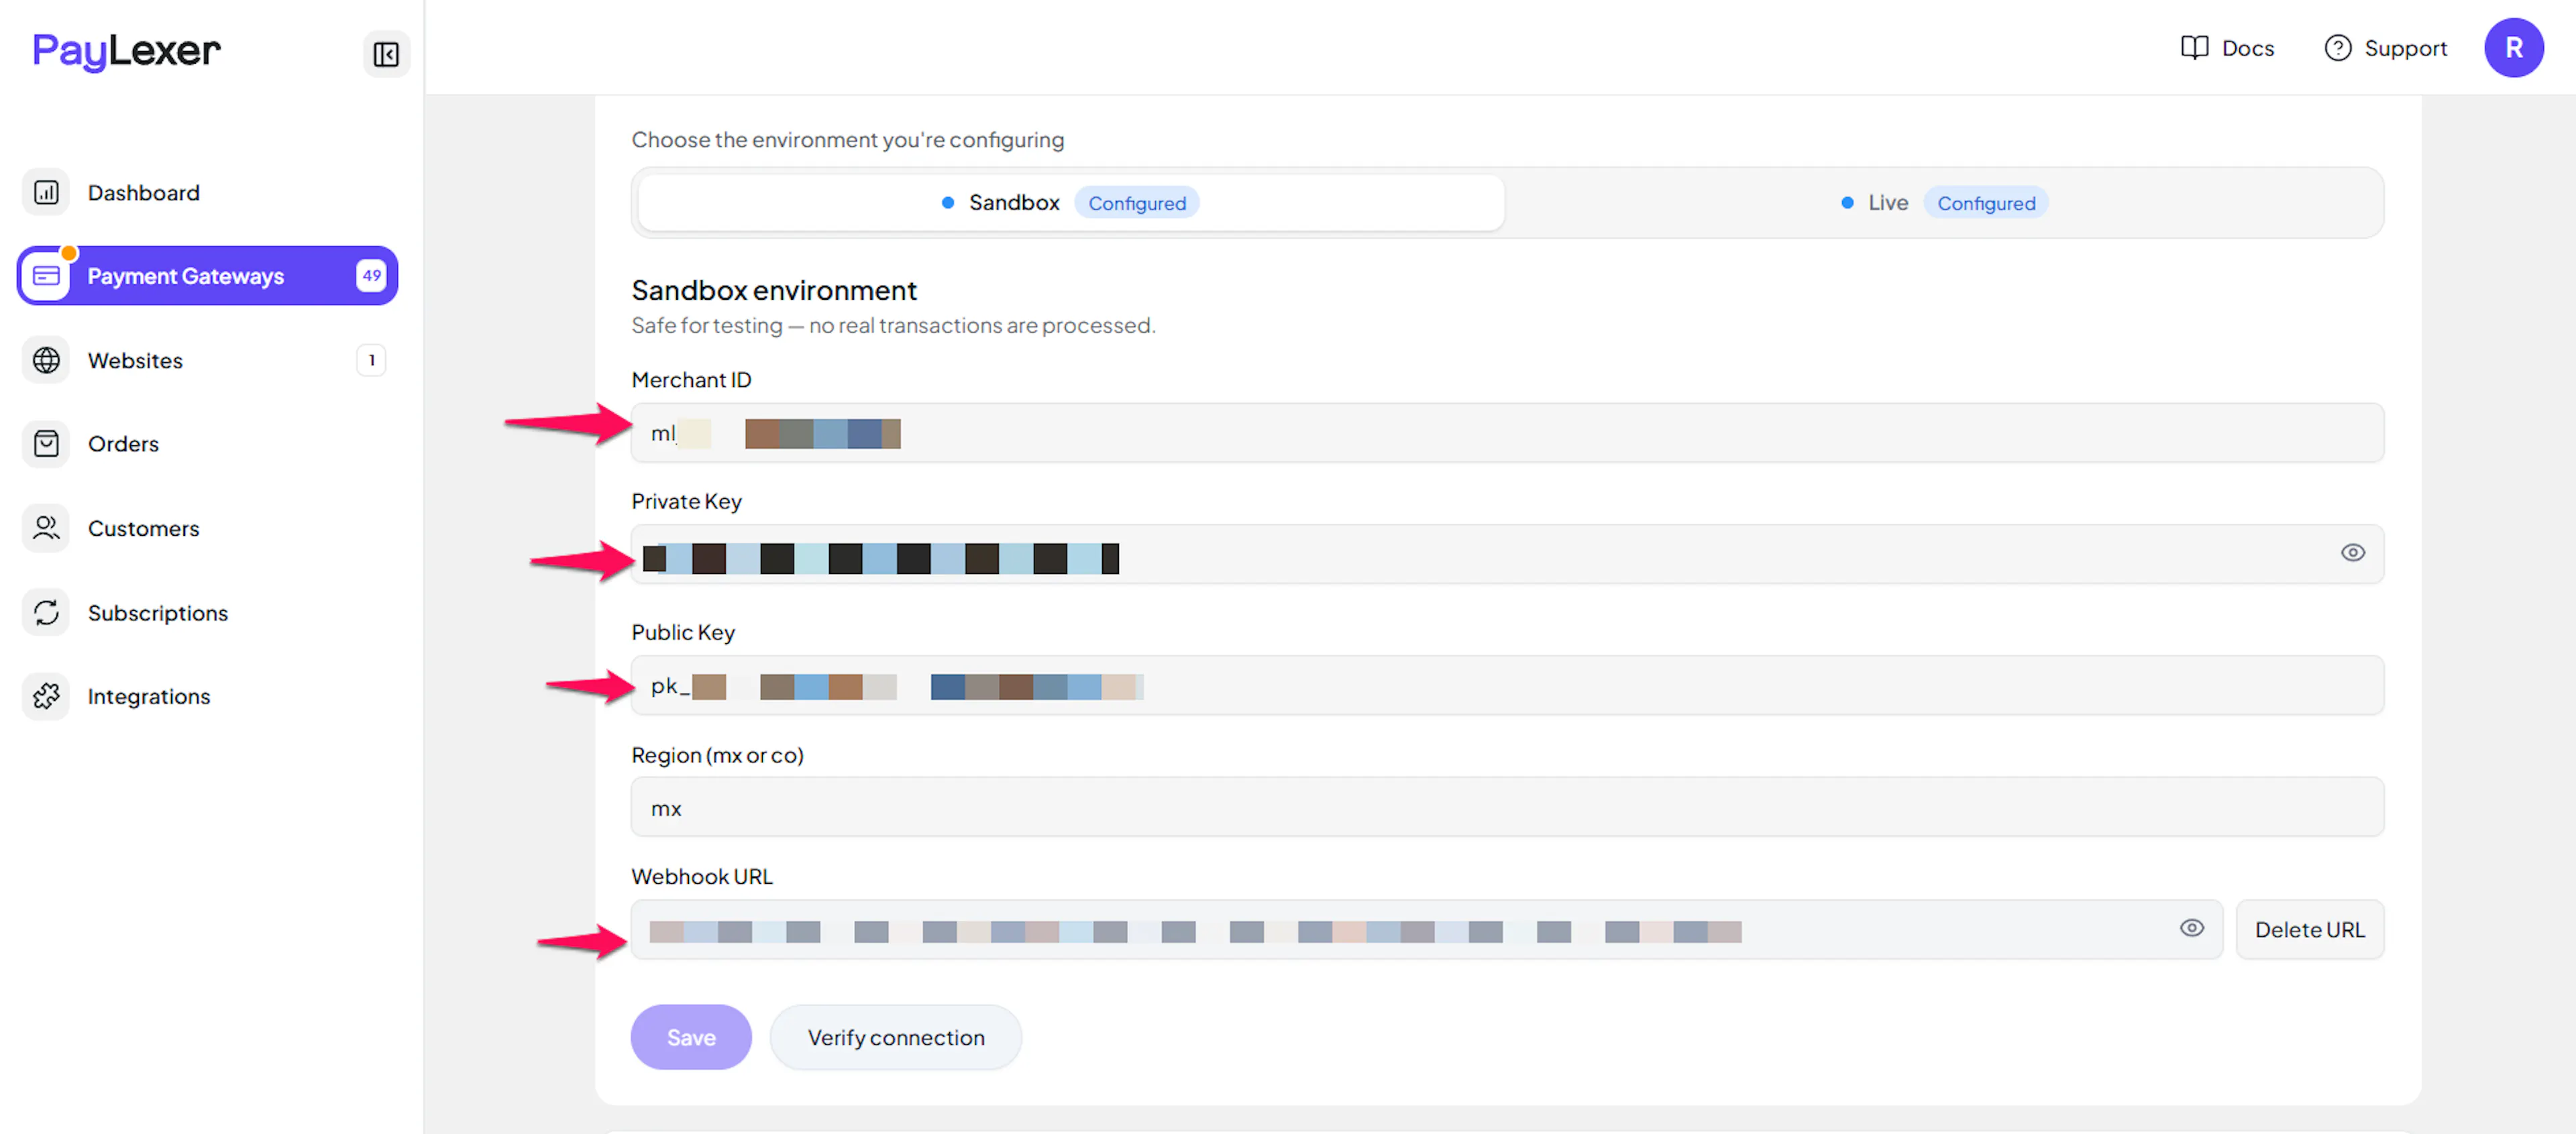
Understanding Live/Production and Sandbox Settings:
| Environment | Purpose |
|---|---|
| Live / Production (Mandatory) | Used for real transactions. Cannot be empty, even when testing. |
| Test / Sandbox (Optional) | Used for testing only. No real money is processed. |
How PayLexer selects credentials:
- Debug/Test mode ON → Test credentials are used
- Debug/Test mode OFF → Live credentials are used
Test and save
Click Save to save your configuration and verify your credentials. Click Verify Connection to test the connection.
Configuring Webhooks (Mandatory)
Webhooks enable real-time payment updates and significantly improve reliability.
Benefits of Webhooks:
- Instant payment status updates
- Automatic subscription renewal tracking
- Automatic refund and chargeback notifications
Unlike most gateways, you don't need to copy a URL into Openpay's own dashboard yourself - PayLexer registers the webhook with Openpay's API for you.
Save your credentials first
Enter and save your Merchant ID and Private Key on the Openpay configuration screen, as described above. Webhook registration needs valid credentials to call Openpay's API.
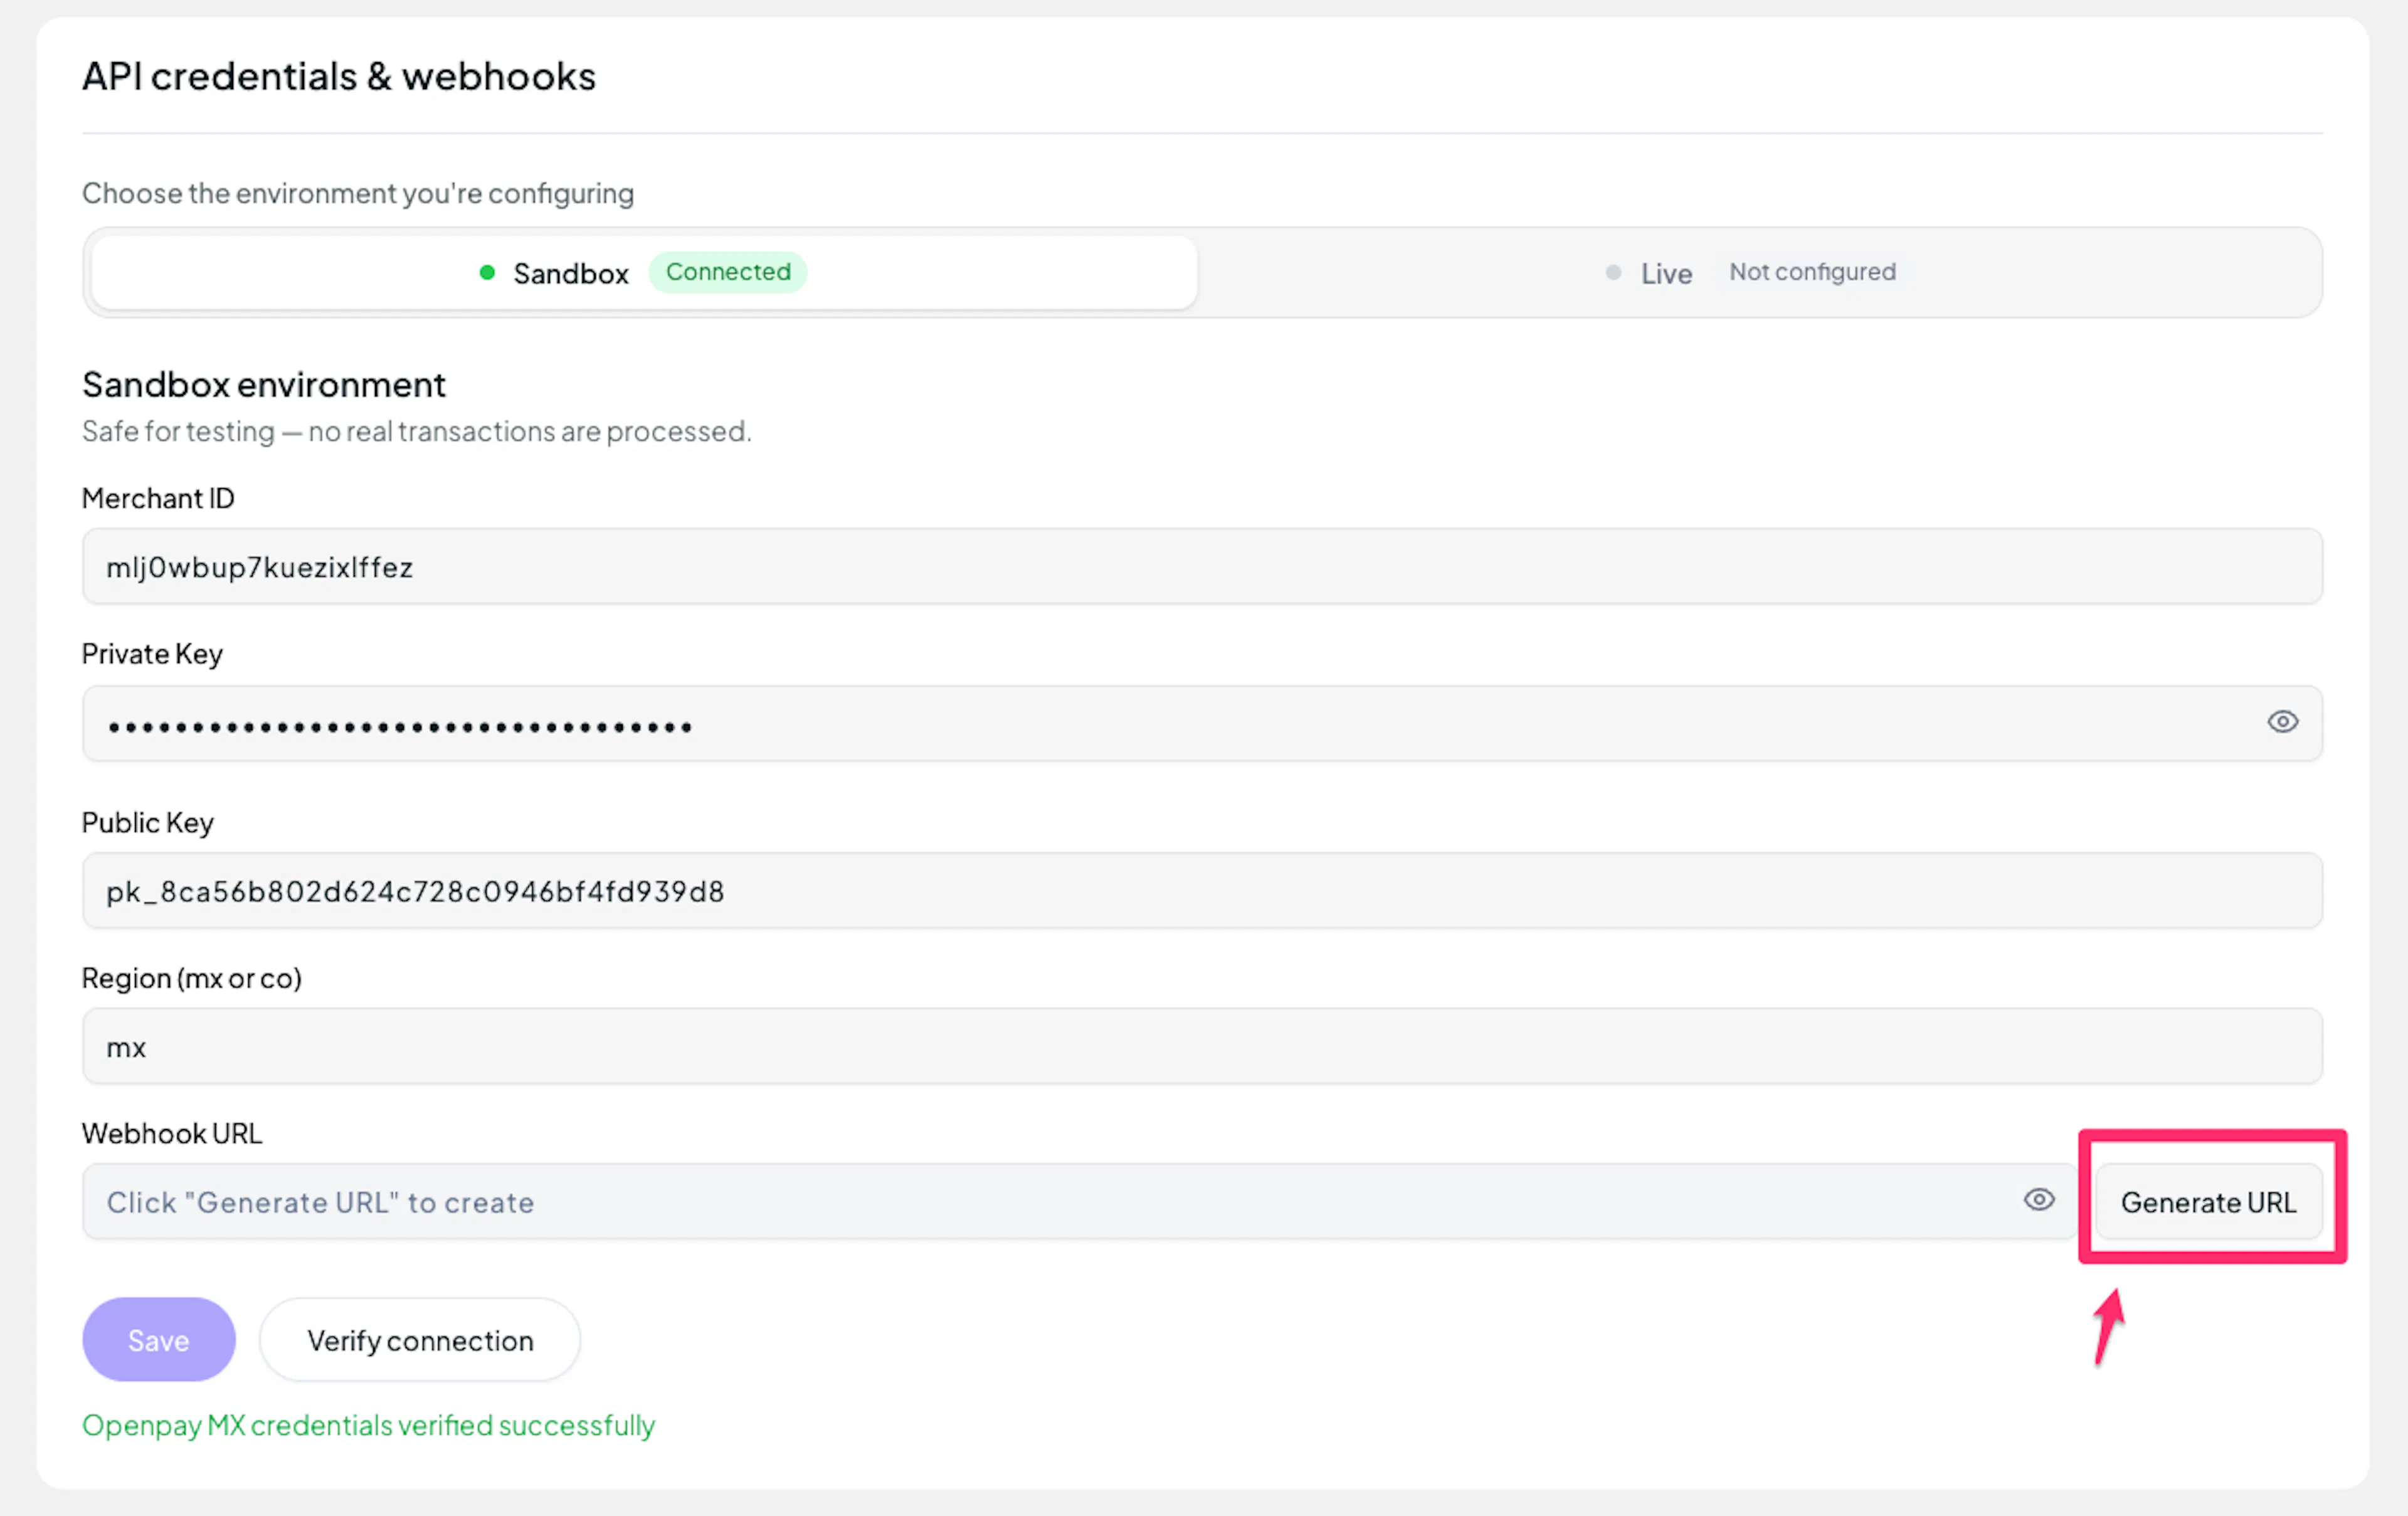
Generate the webhook
Click Generate URL next to the Webhook URL field. PayLexer registers a new webhook with Openpay automatically and fills in the field, which is read-only.
Save the configuration
Click Save Configuration to persist the registered webhook.
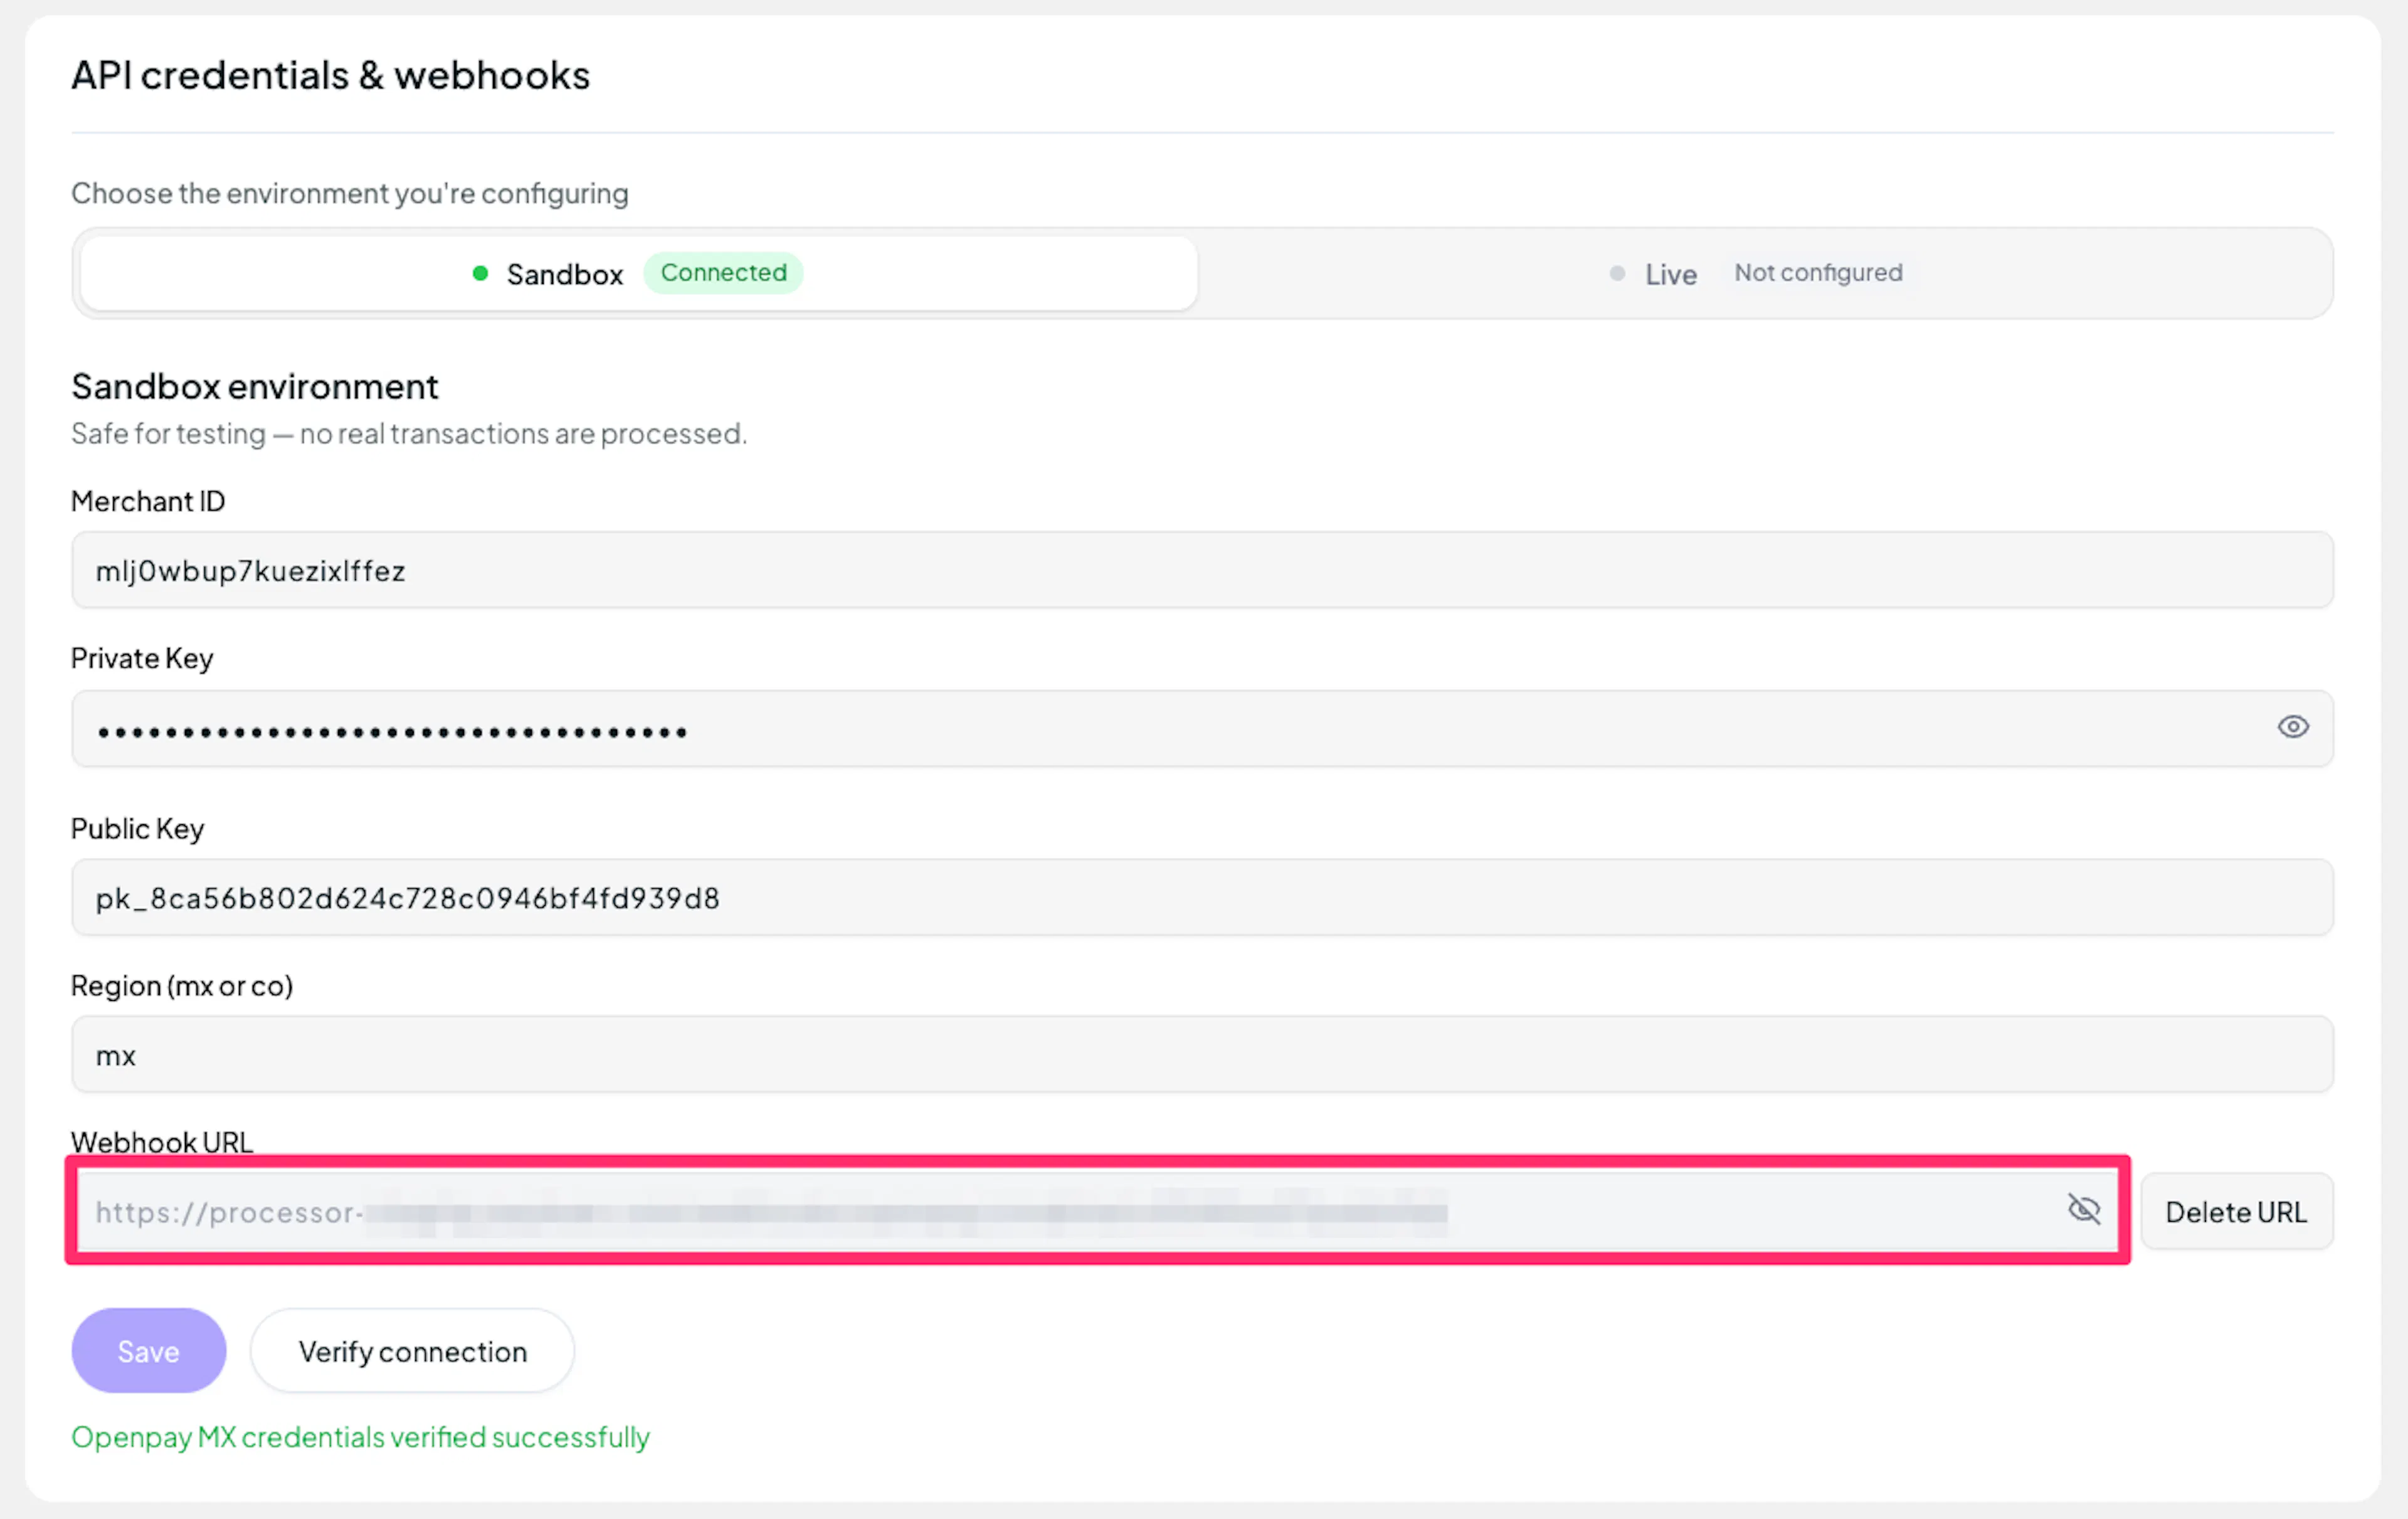
Once generated, the button changes to Delete URL. Clicking it removes the webhook from Openpay and clears the field, so you can generate a fresh one at any time.
Openpay's webhook notifications carry no cryptographic signature. To stay safe against spoofed or replayed notifications, PayLexer always checks directly with Openpay's API to confirm a payment's real status before trusting a webhook and updating your order.
Integrate Openpay to Your Website
If you have already added and configured your site, you can enable Openpay in your existing setup.
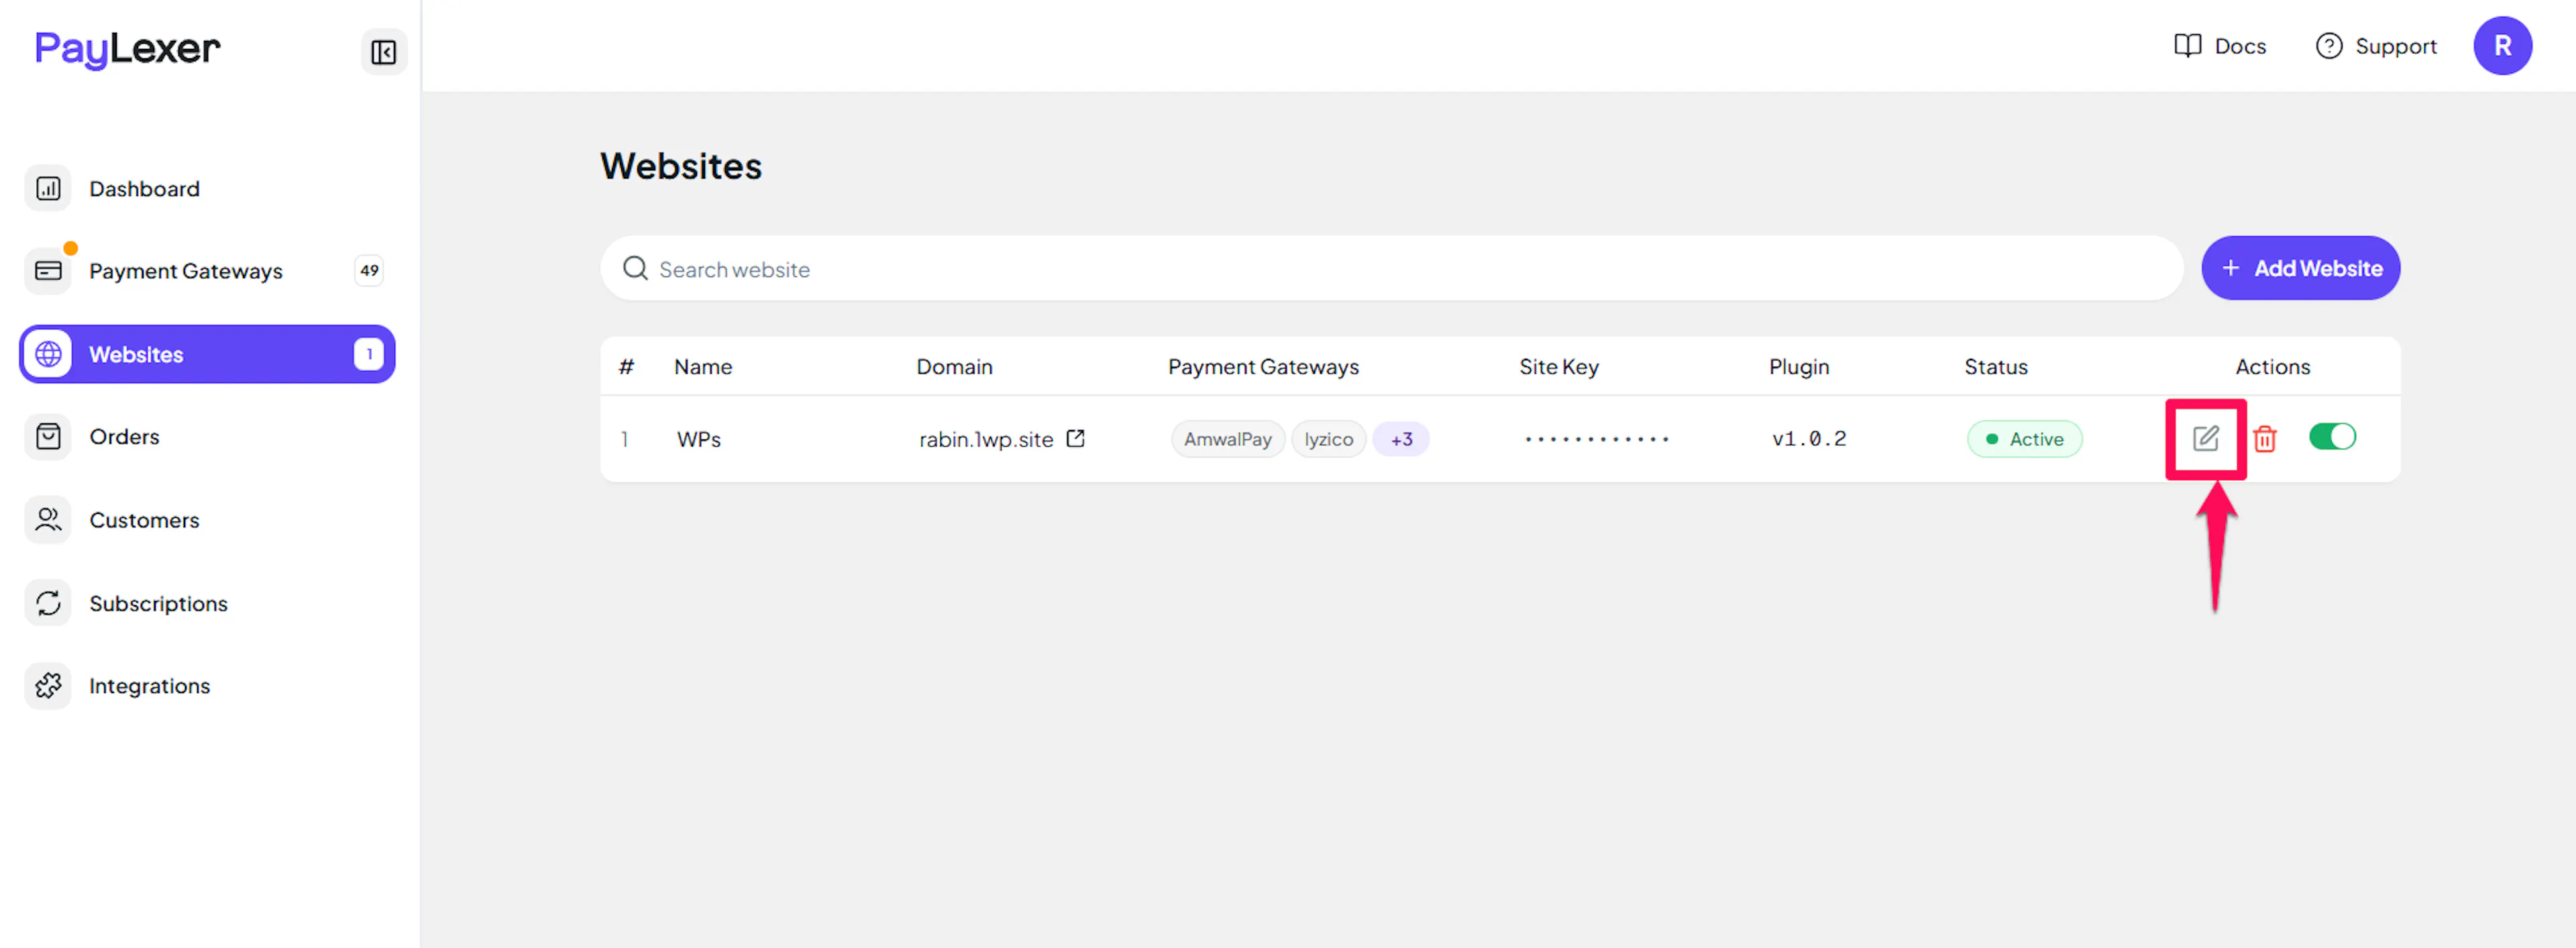
Go to Websites
Navigate to Websites in your PayLexer dashboard.
Edit your website
Click the Edit Icon of your added website.
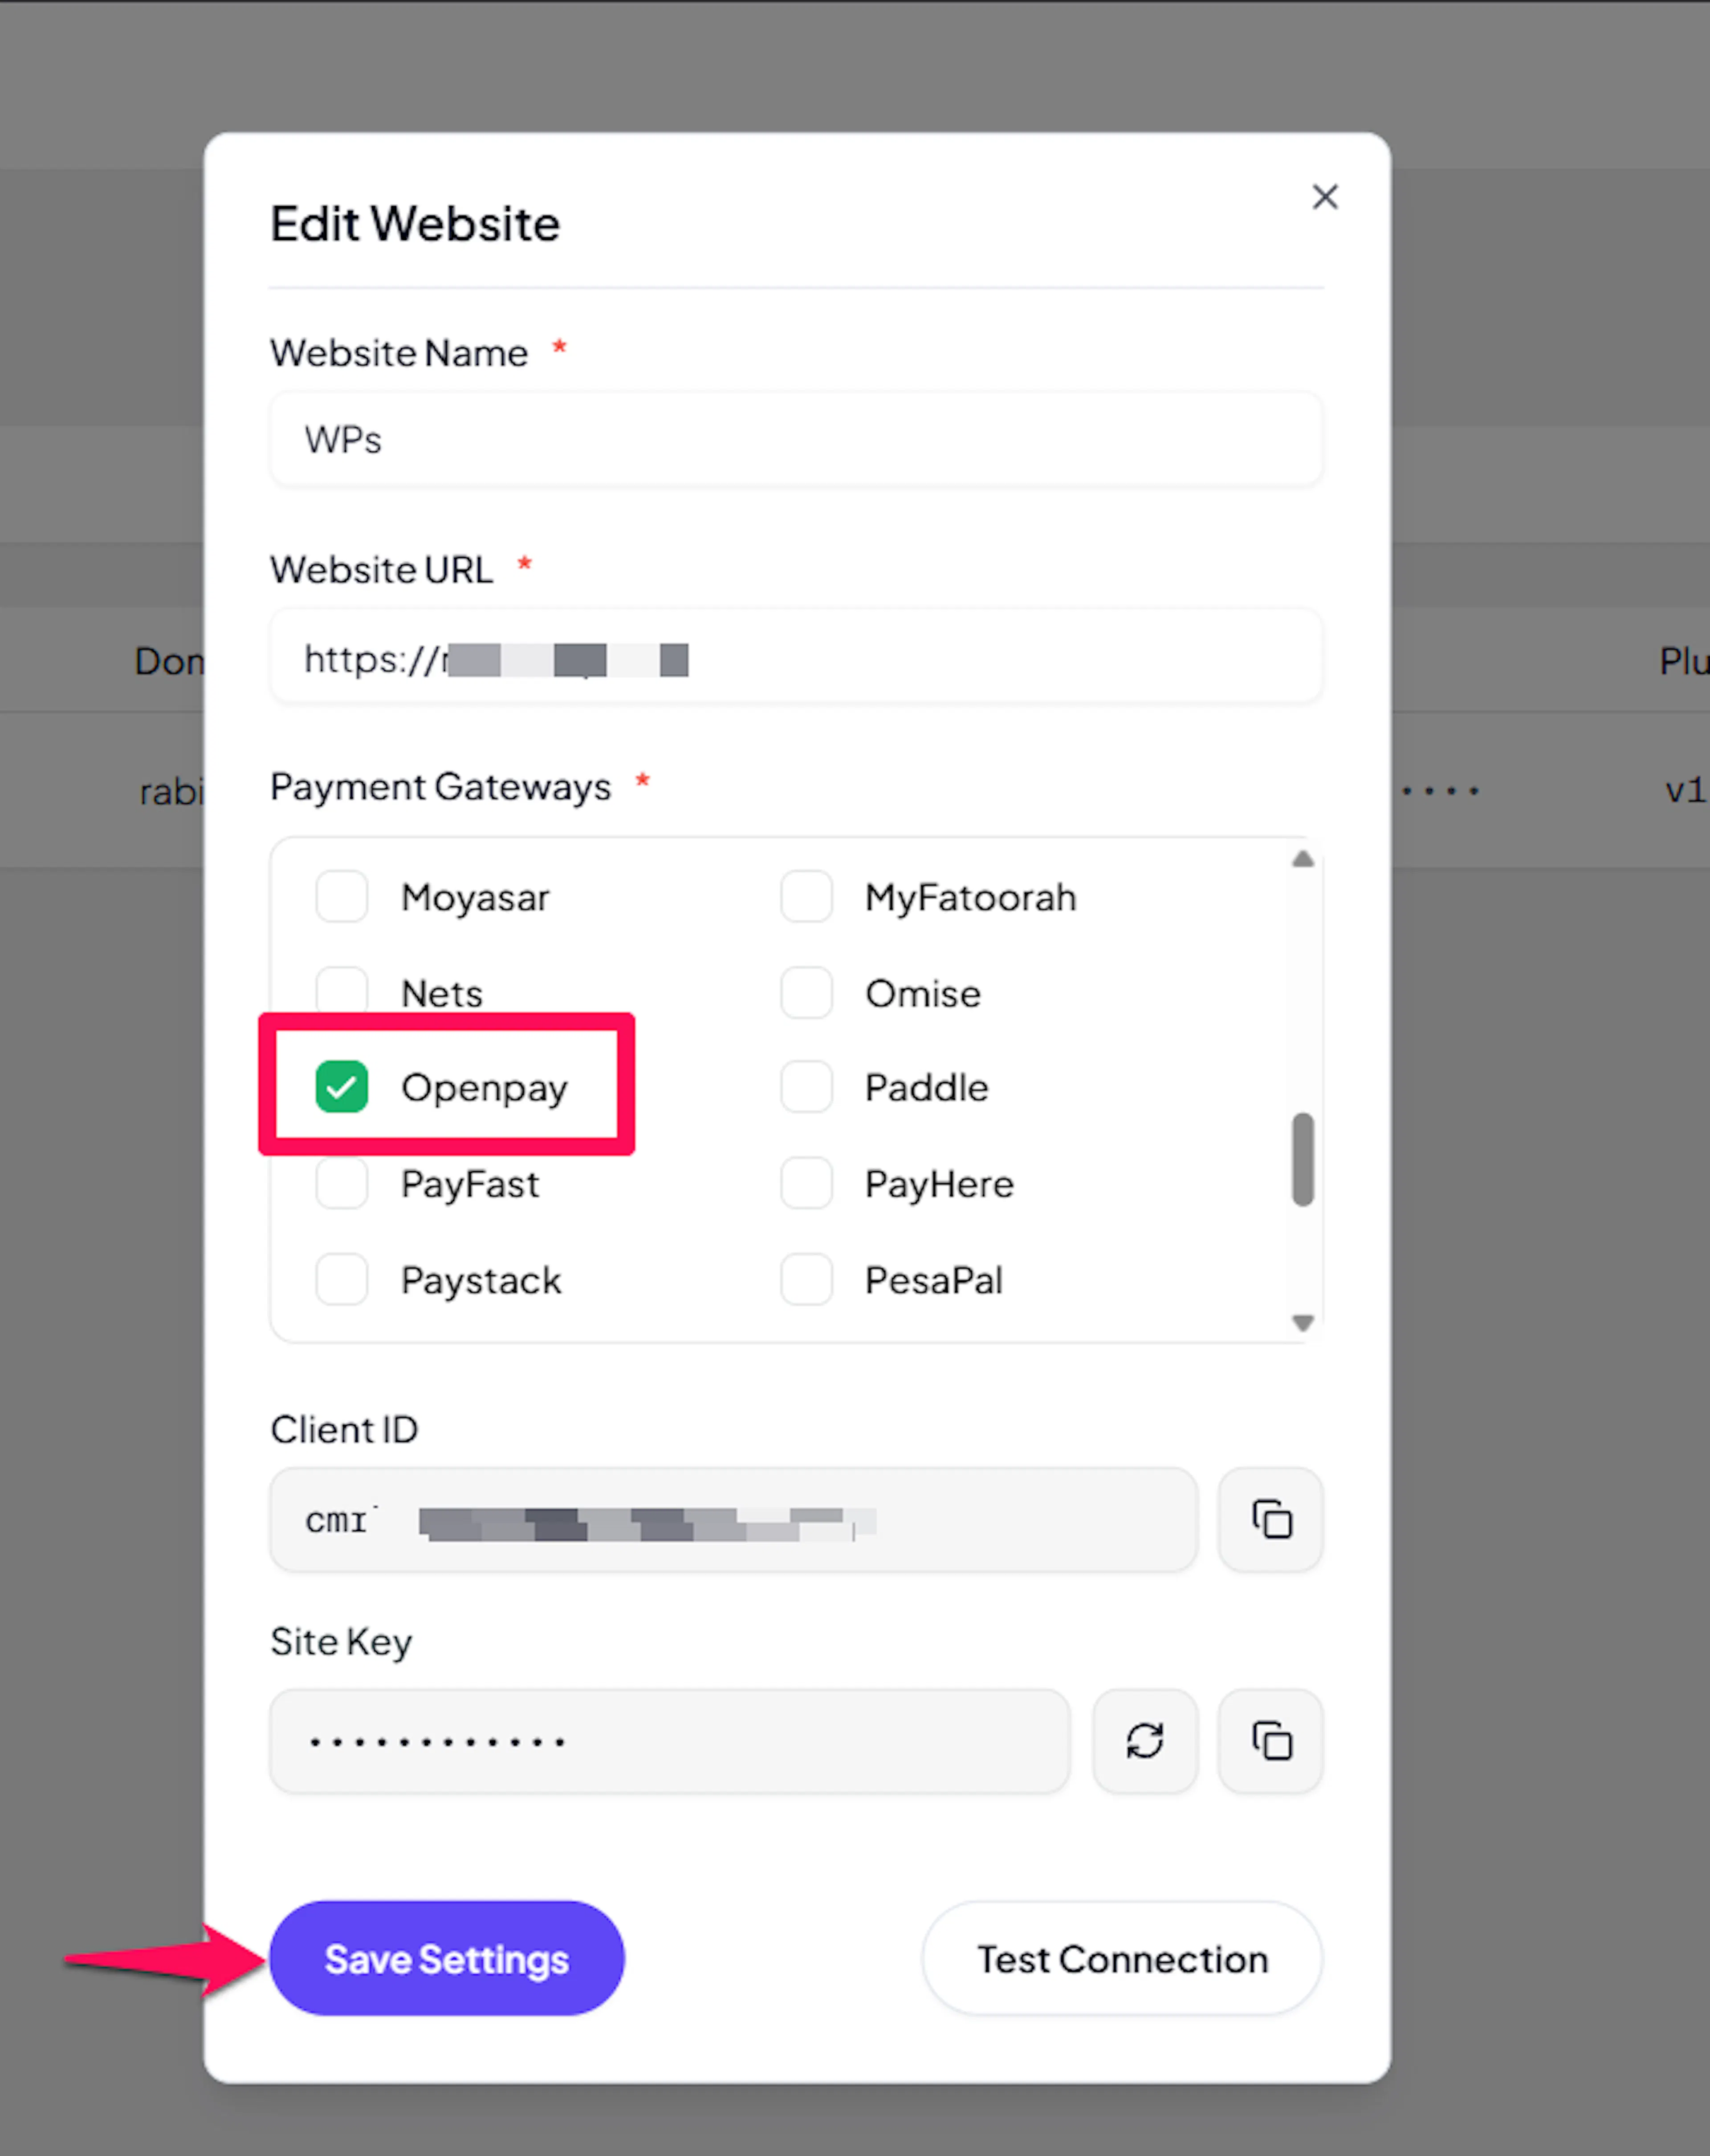
Enable Openpay
Click the checkbox to enable Openpay for the website.
If you haven't added a website yet, Continue to Add Your Website →
Troubleshooting
Best Practices
- Test in sandbox before enabling production. Use Test credentials to complete a full card payment, and if you sell subscriptions, a full subscription signup, before switching to live.
- Configure a Public Key alongside your Merchant ID and Private Key. Without it, card payments fall back to Openpay's hosted checkout page and subscriptions cannot be created.
- Remember Mexico and Colombia are separate Openpay accounts - use the credentials and Region setting that match each account.
- A cart that mixes a subscription product with a regular one-time product isn't supported - the shopper needs to check out separately for each.
- Keep your Private Key confidential. It authenticates every request PayLexer makes to Openpay on your behalf.
FAQs
Still Have Questions?
- Openpay Support: Openpay Help Center
- PayLexer Support: Contact Support