

Rapyd
Connect Rapyd to PayLexer to accept card, bank, and wallet payments across 100+ countries, with hosted checkout, refunds, and gateway-scheduled subscriptions.
Rapyd is a London-headquartered global fintech platform that lets you accept payments across a very wide range of countries and local payment methods through a single connection. Alongside international cards it reaches bank transfers, e-wallets, and cash-based methods, and shoppers pay on Rapyd's own hosted checkout page so card details never touch your site.
- Supported Regions (Merchant Accounts): 100+ countries across the Americas, Europe, Middle East, Africa, and Asia-Pacific - view full list
- Supported Currencies: USD, EUR, GBP, SGD, AUD, CAD, JPY, HKD, NZD, CHF, MXN, BRL, INR, AED, SAR, ZAR, PHP, THB, MYR, IDR - view full list
The payment methods Rapyd shows at checkout depend on the country and currency of the order and on what your Rapyd account has activated. If a currency has no method enabled for its country, checkout is rejected - use a currency your account supports.
Supported Features
- Hosted checkout page - shoppers are redirected to Rapyd to pay, then returned to your site
- Card payments, bank transfers, e-wallets, and cash-based methods (varies by country)
- Full and partial refunds
- Gateway-scheduled subscriptions - Rapyd bills each cycle automatically on its due date
- Signed webhooks for real-time payment, refund, and subscription updates
- Sandbox (test) mode for end-to-end testing before going live
Before You Start
Make sure you have:
- Rapyd Account – Don't have one? Sign up for Rapyd →
- PayLexer Account – Required to configure the integration. Create your account →
- A website where you want to integrate
Rapyd's sandbox is available immediately for building and testing. Going live requires completing Rapyd's KYB (Know Your Business) review with business documents, which Rapyd must approve before you can process real payments.
Looking for a different payment processor? View all supported gateways →
Configuring Rapyd
You need an Access Key and a Secret Key from Rapyd for this integration. Rapyd signs every request - and verifies every webhook - with this same key pair, so there is no separate webhook secret to store.
Getting API Credentials
Open the Rapyd Client Portal
Log in to the Rapyd Client Portal.
Copy the Access Key and Secret Key
Go to Developers -> API access control (API keys), then copy the Access Key and the Secret Key for the selected environment.

Your Secret Key is shown once and never shared with anyone. Treat it like a password.
Switching to Live
Complete Account Activation (KYB)
Complete the required KYB (Know Your Business) review and wait for your account to be approved by Rapyd.
Toggle the Dashboard to Live Mode
Once your account activation is approved, the Sandbox toggle becomes available in the Rapyd Client Portal.
Locate the Sandbox toggle and turn it off to switch the dashboard to Production Mode.
Adding Credentials to PayLexer
Open PayLexer Dashboard
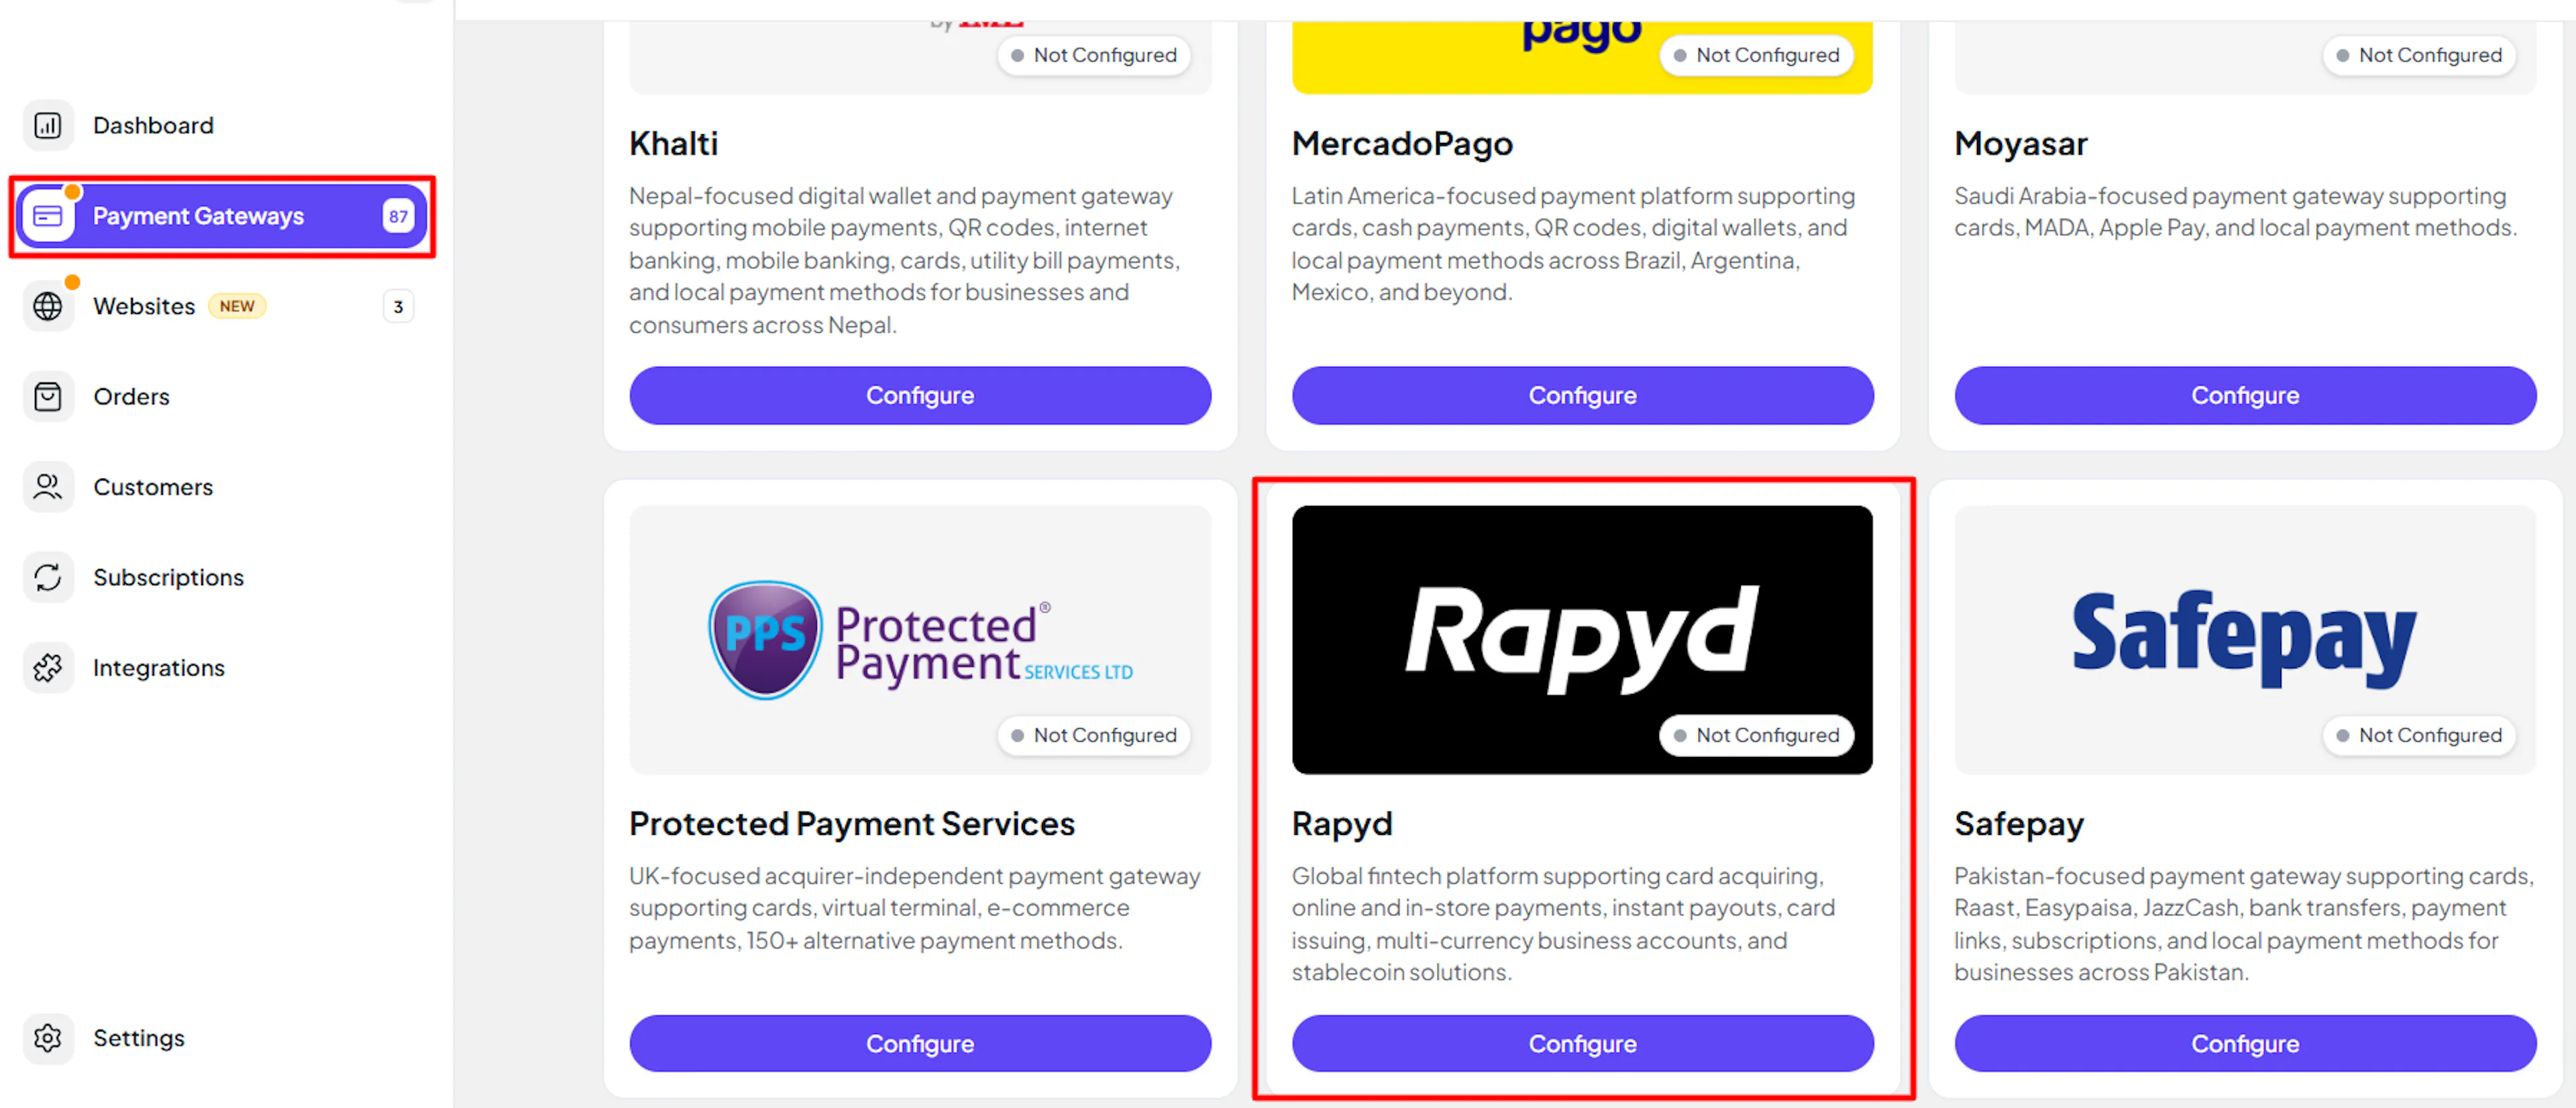
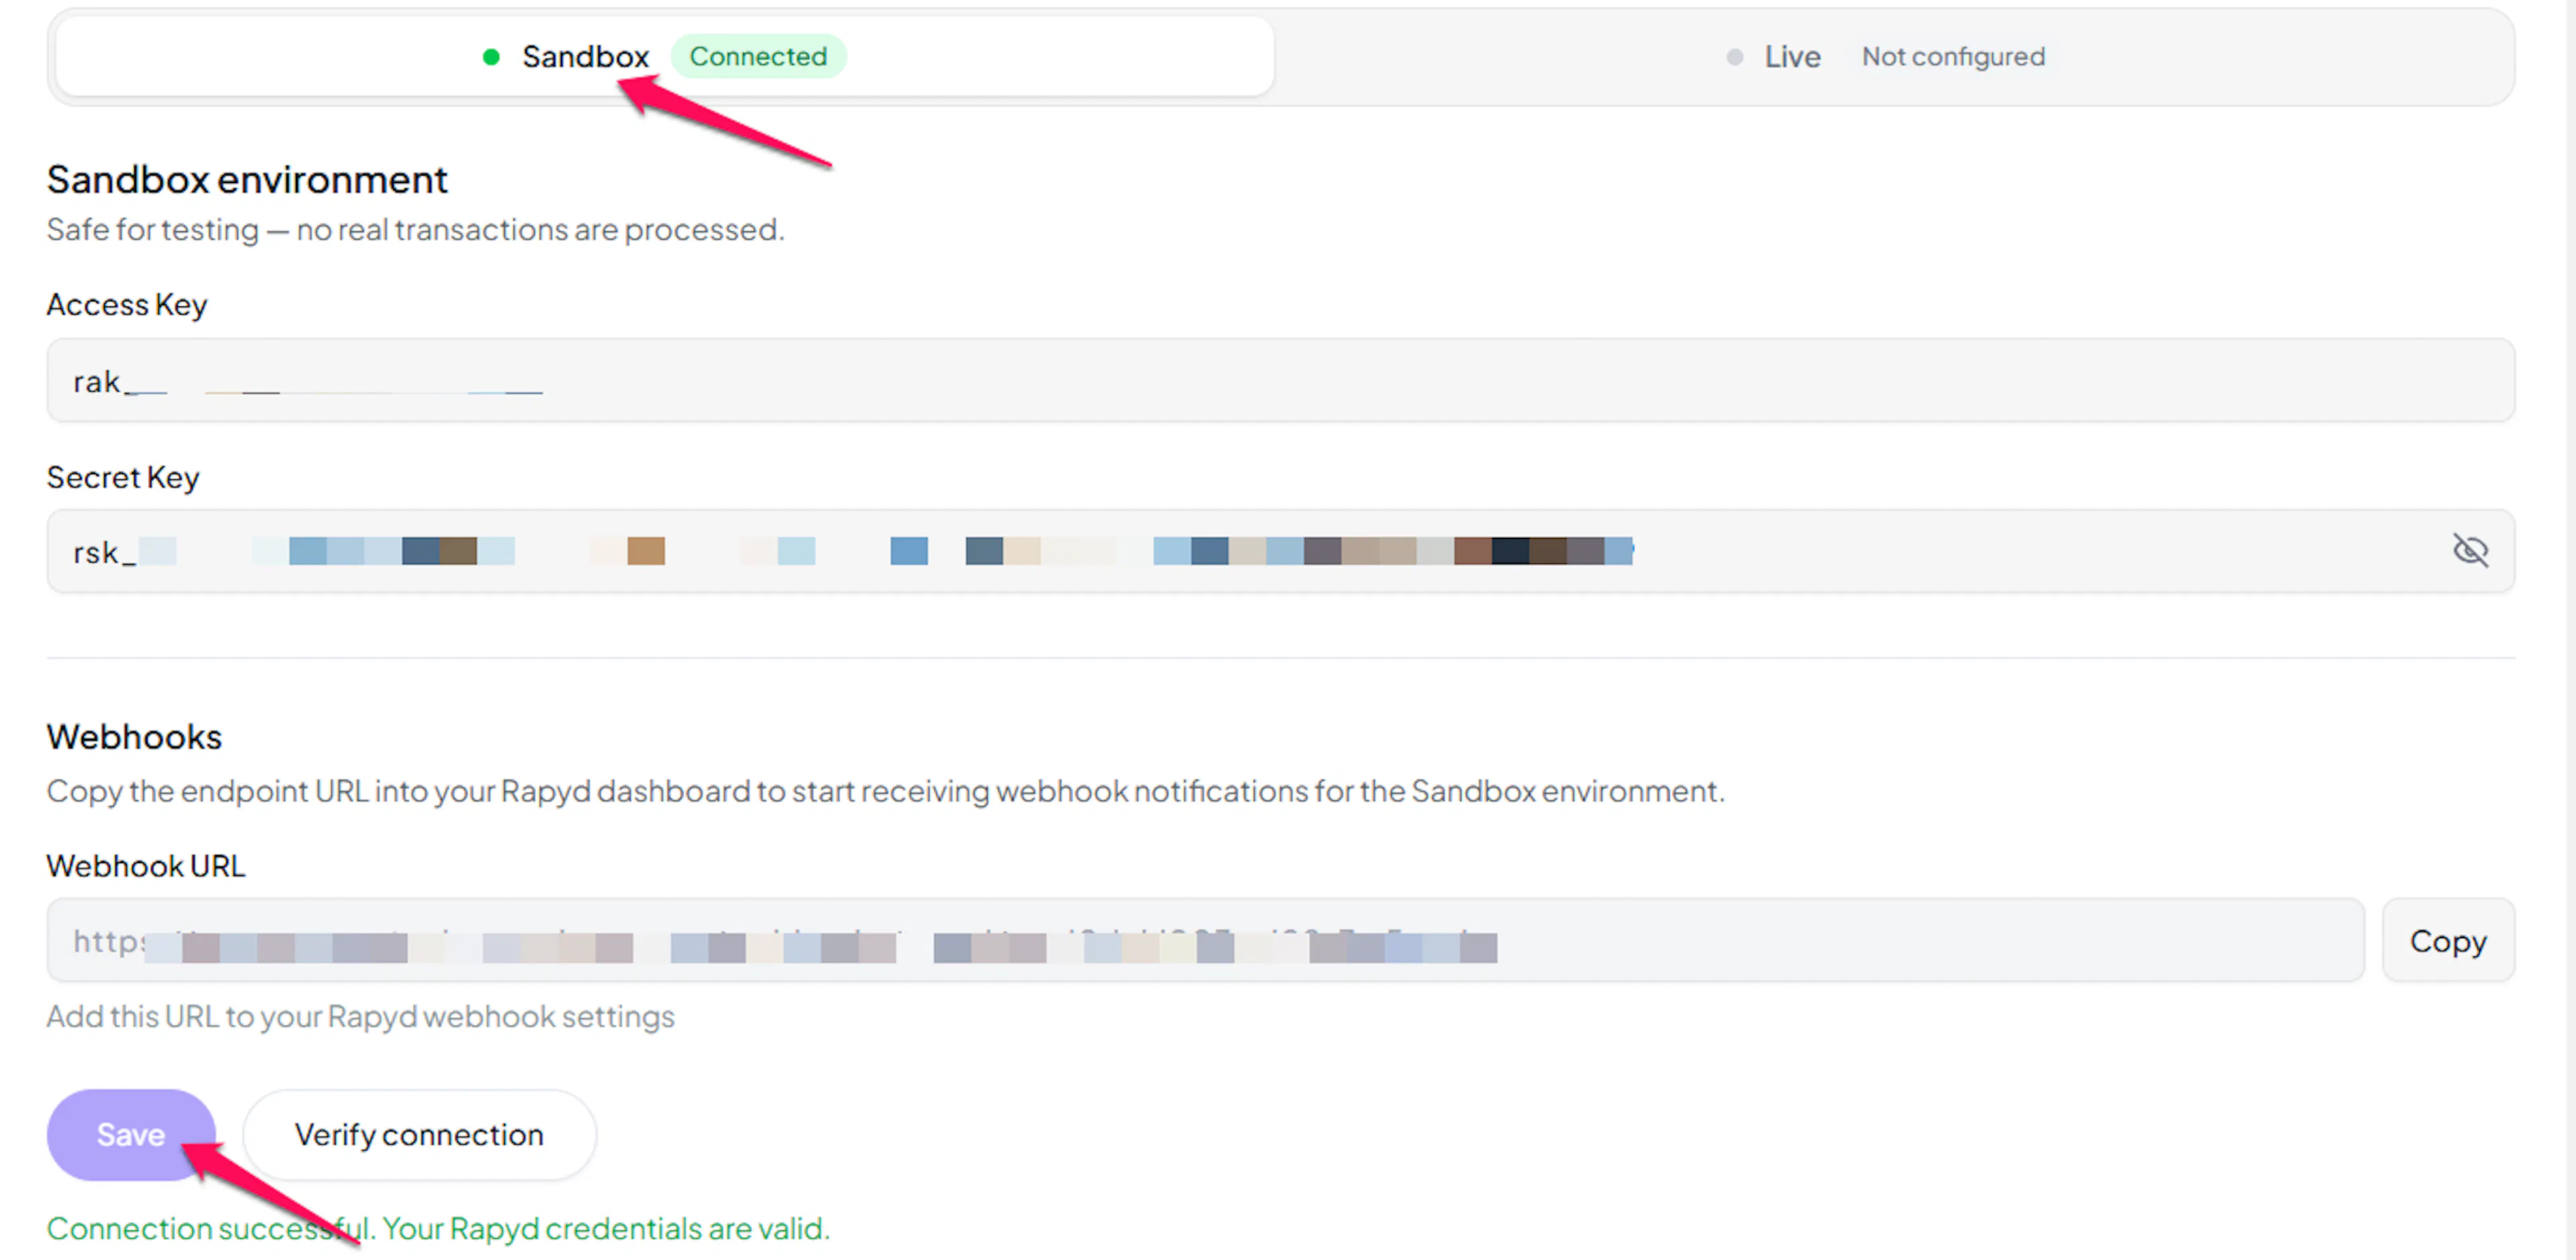
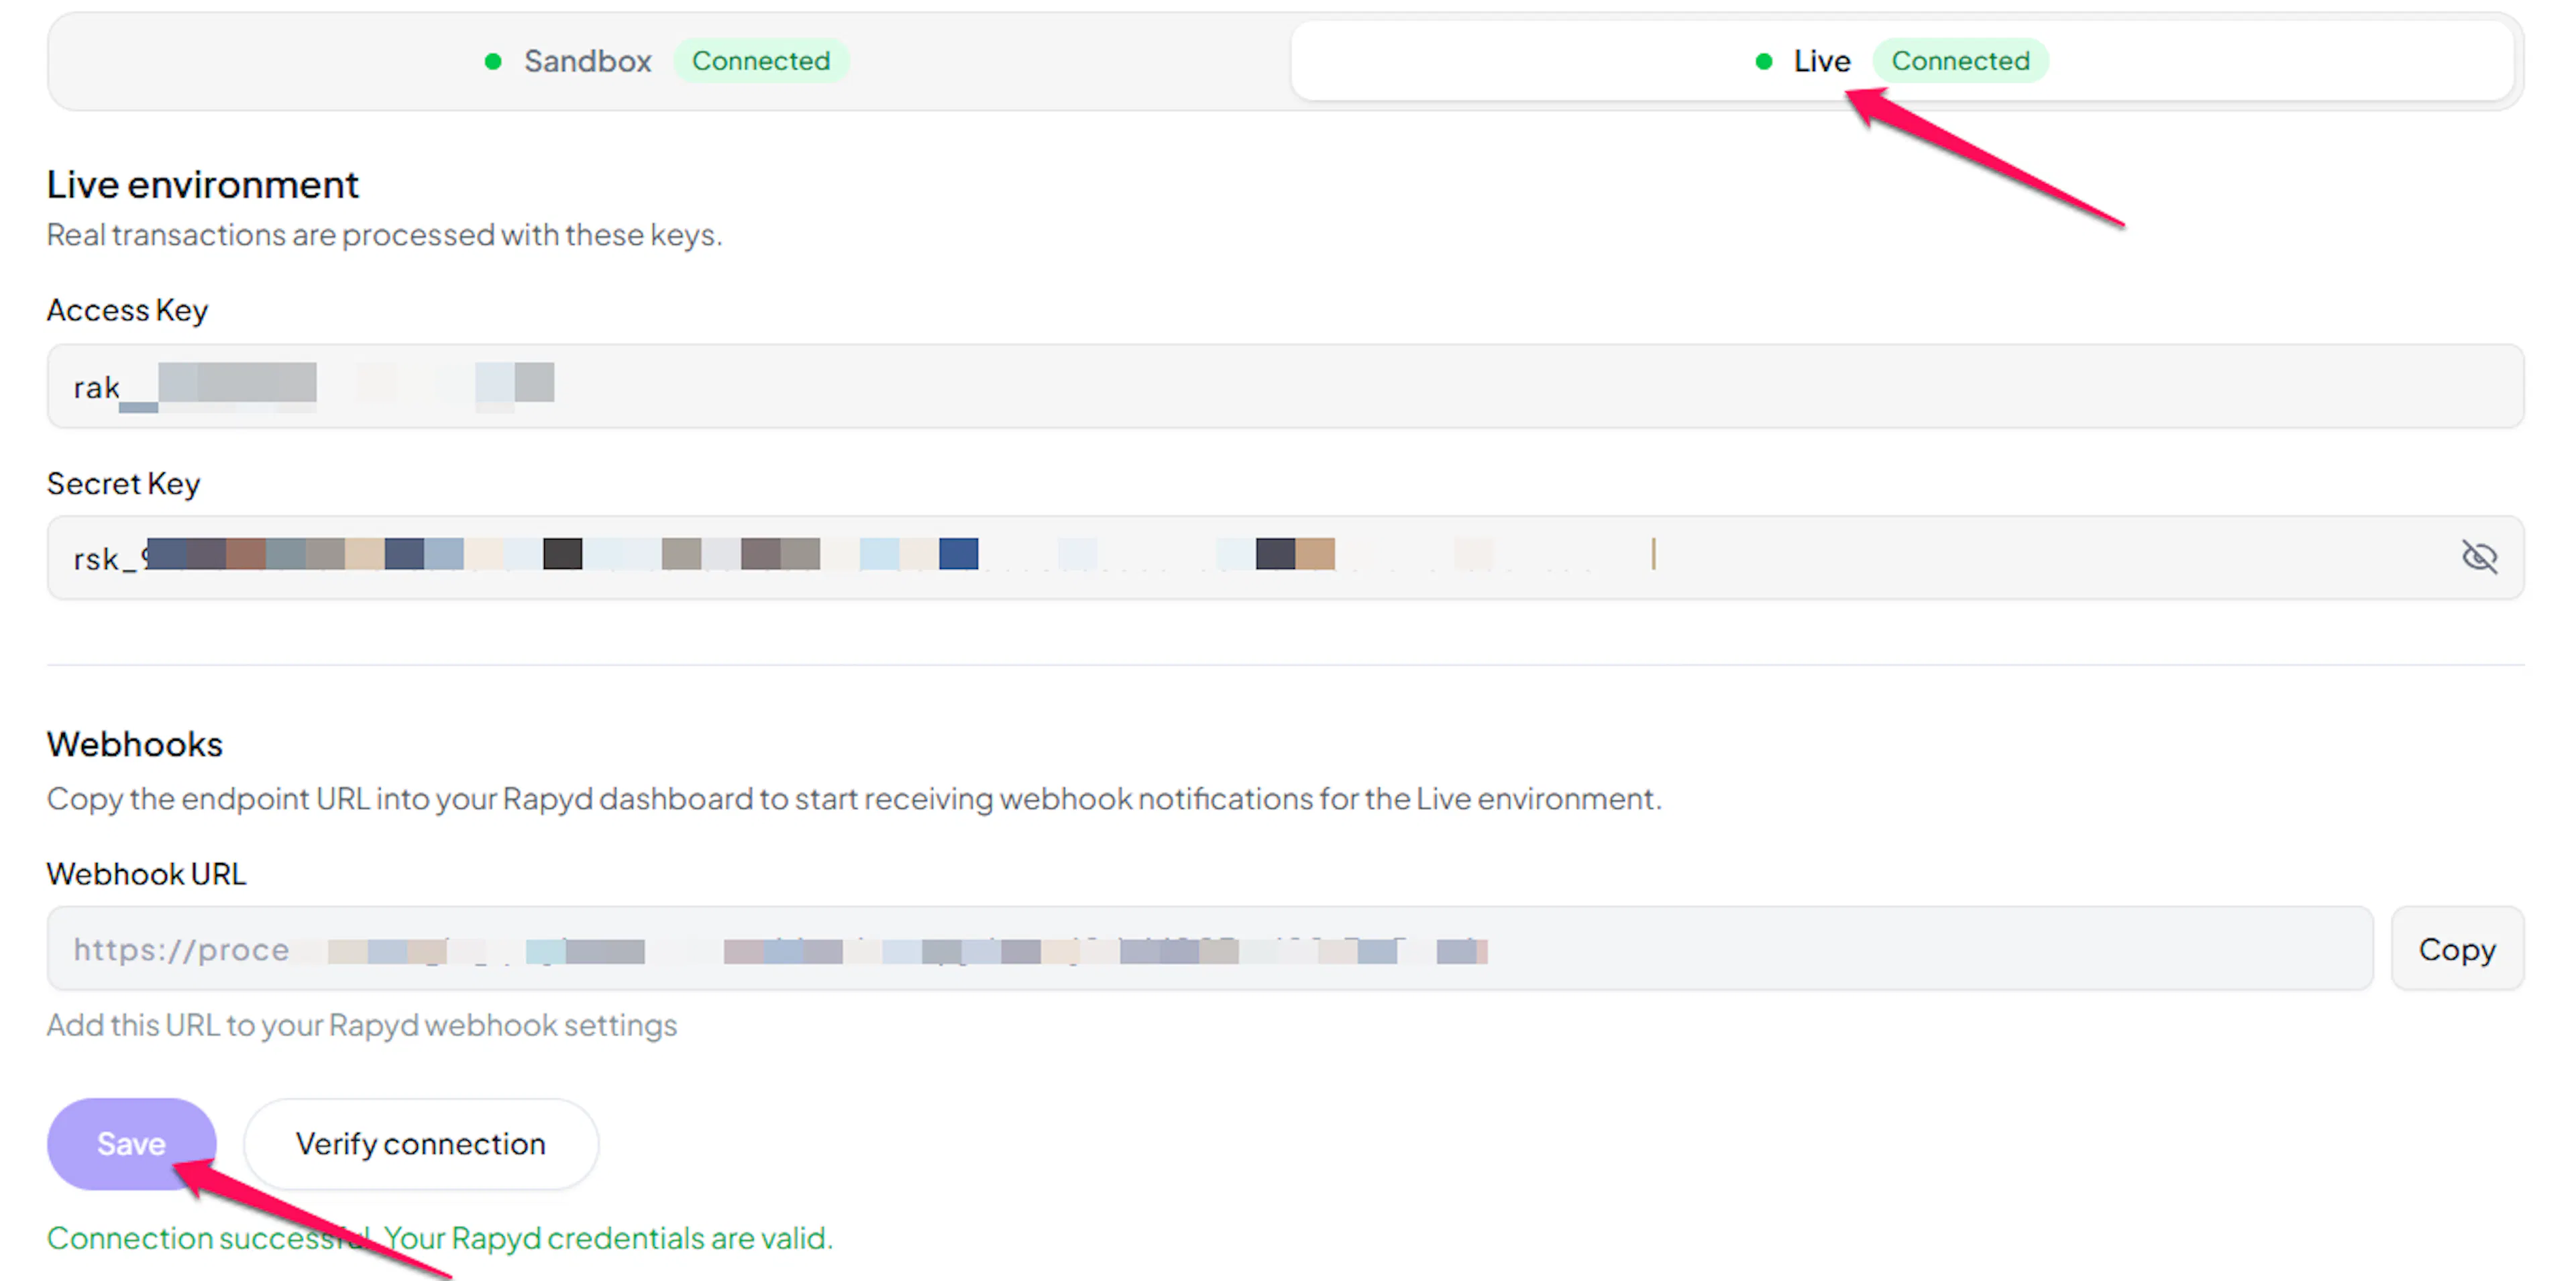
Log in to your PayLexer dashboard and navigate to Payment Gateways -> Rapyd.
Enter your credentials
Paste the Access Key and Secret Key you copied from Rapyd into the corresponding fields.
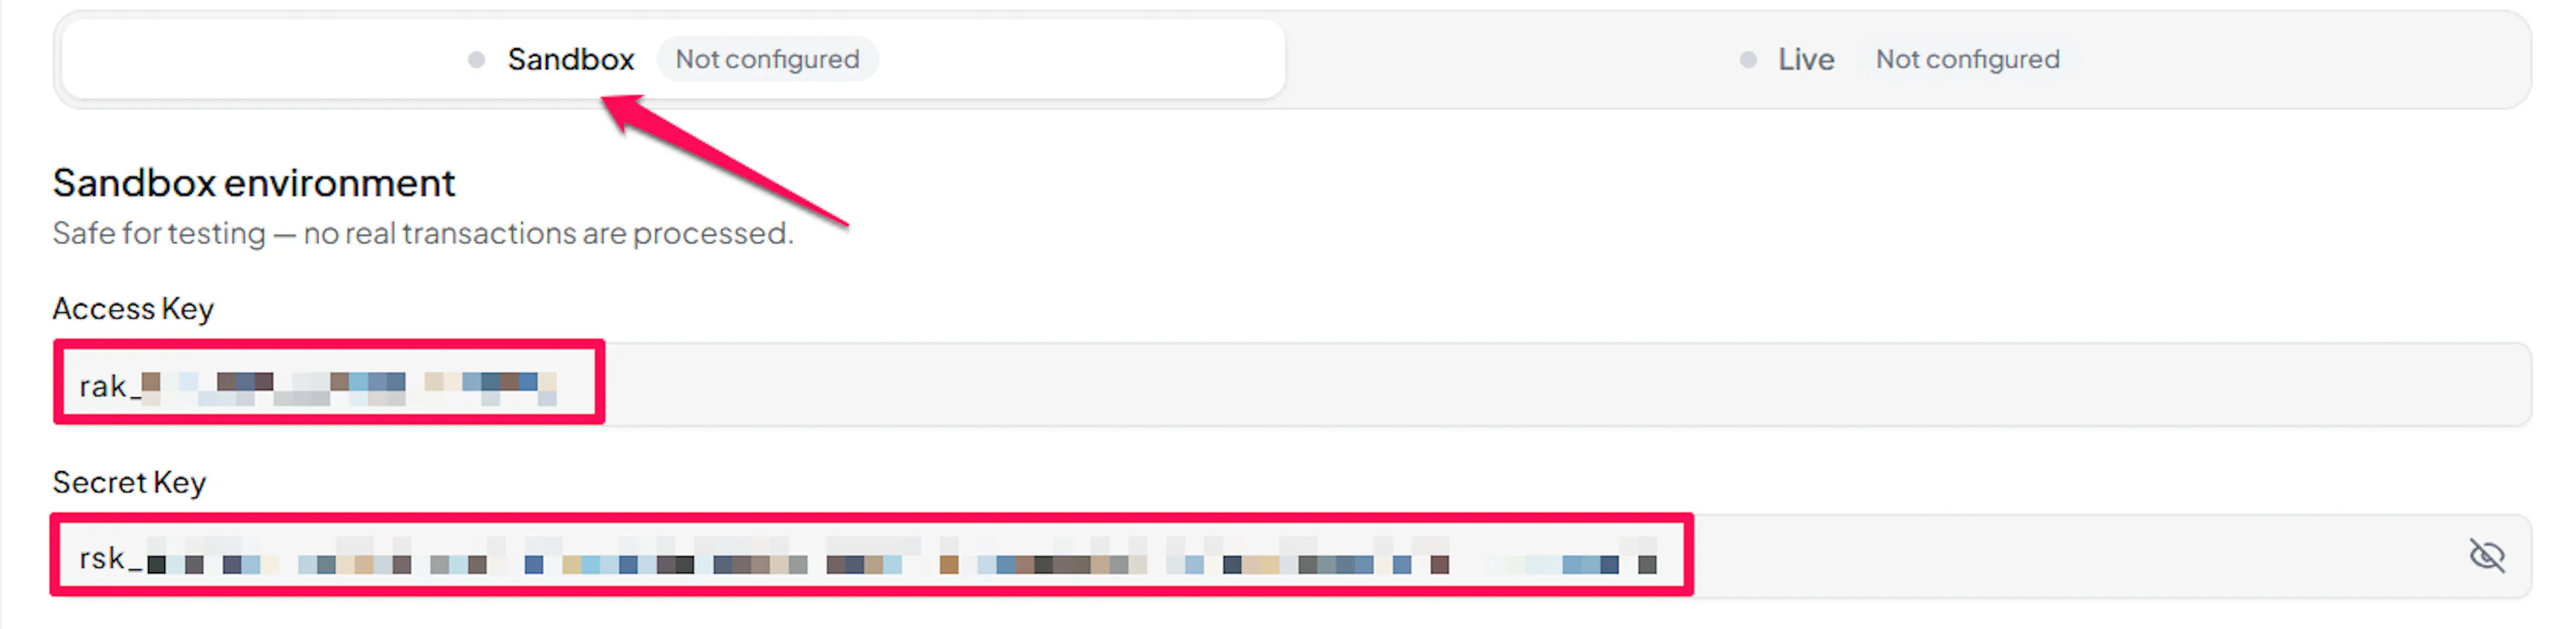
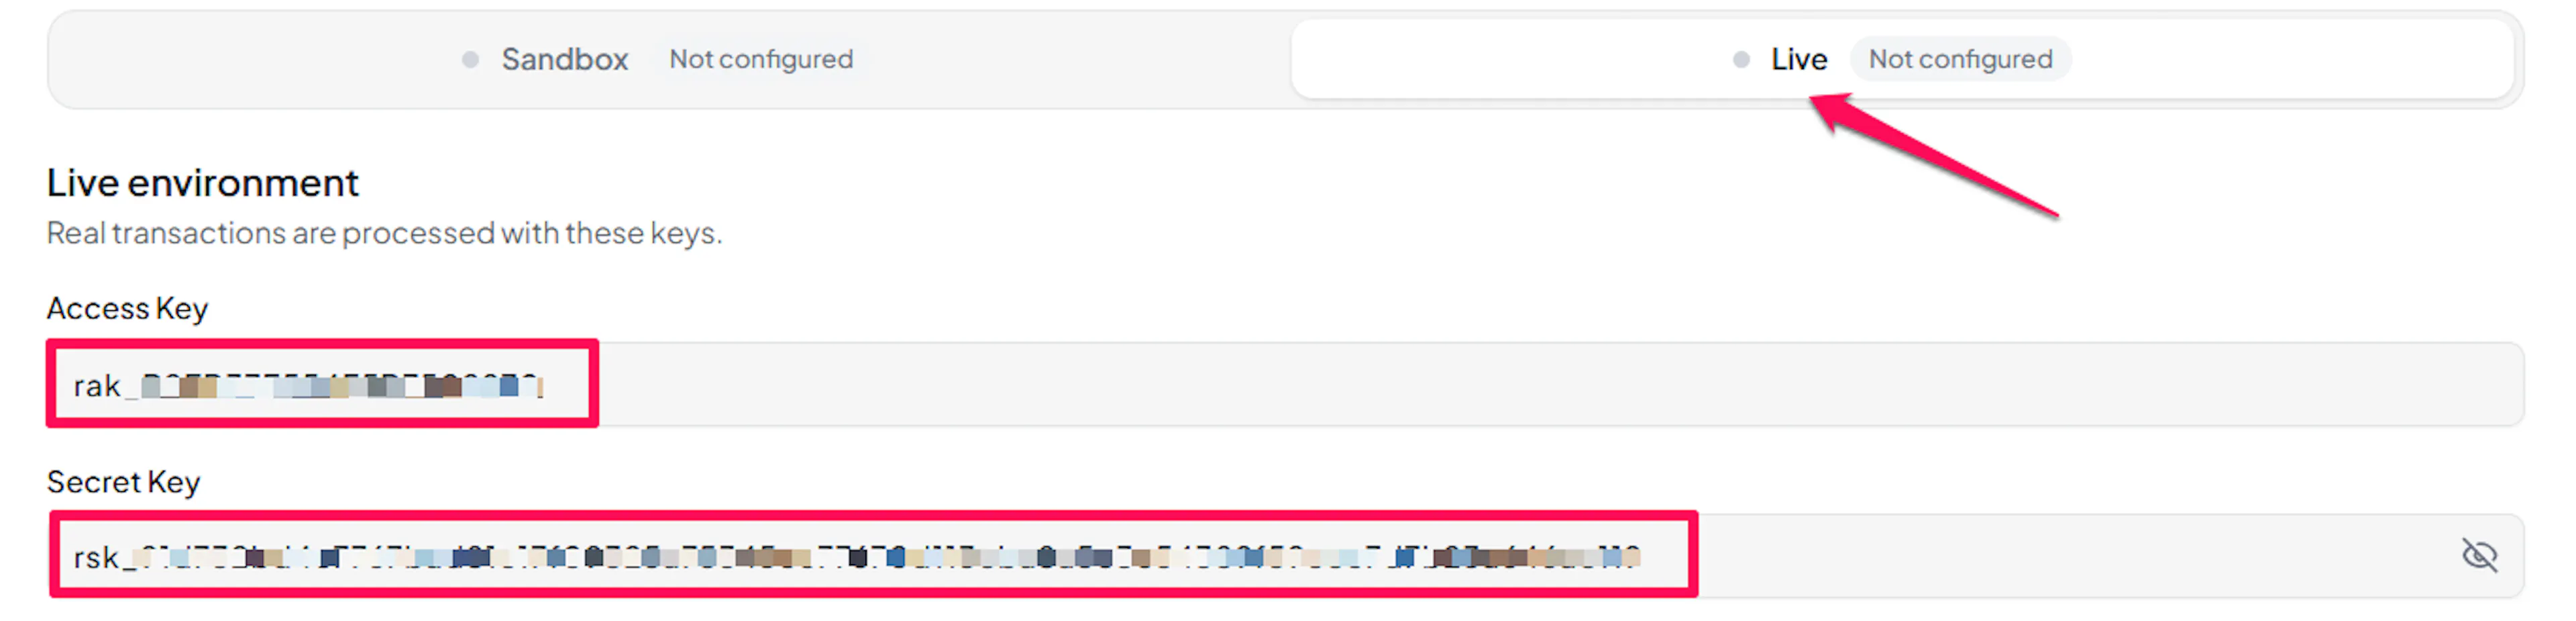
Understanding Live/Production and Sandbox Settings:
| Environment | Purpose |
|---|---|
| Live / Production | Used for real transactions. |
| Test / Sandbox | Used for testing only. No real money is processed. |
How PayLexer selects credentials:
- Debug/Test mode ON → Test credentials are used
- Debug/Test mode OFF → Live credentials are used
Test and save
Click Save to save your configuration and verify your credentials. Click Verify Connection to test the connection.
Configuring Webhooks (Mandatory)
Webhooks enable real-time payment updates and significantly improve reliability.
Benefits of Webhooks:
- Instant payment status updates
- Automatic refund processing
- Subscription renewal and status notifications
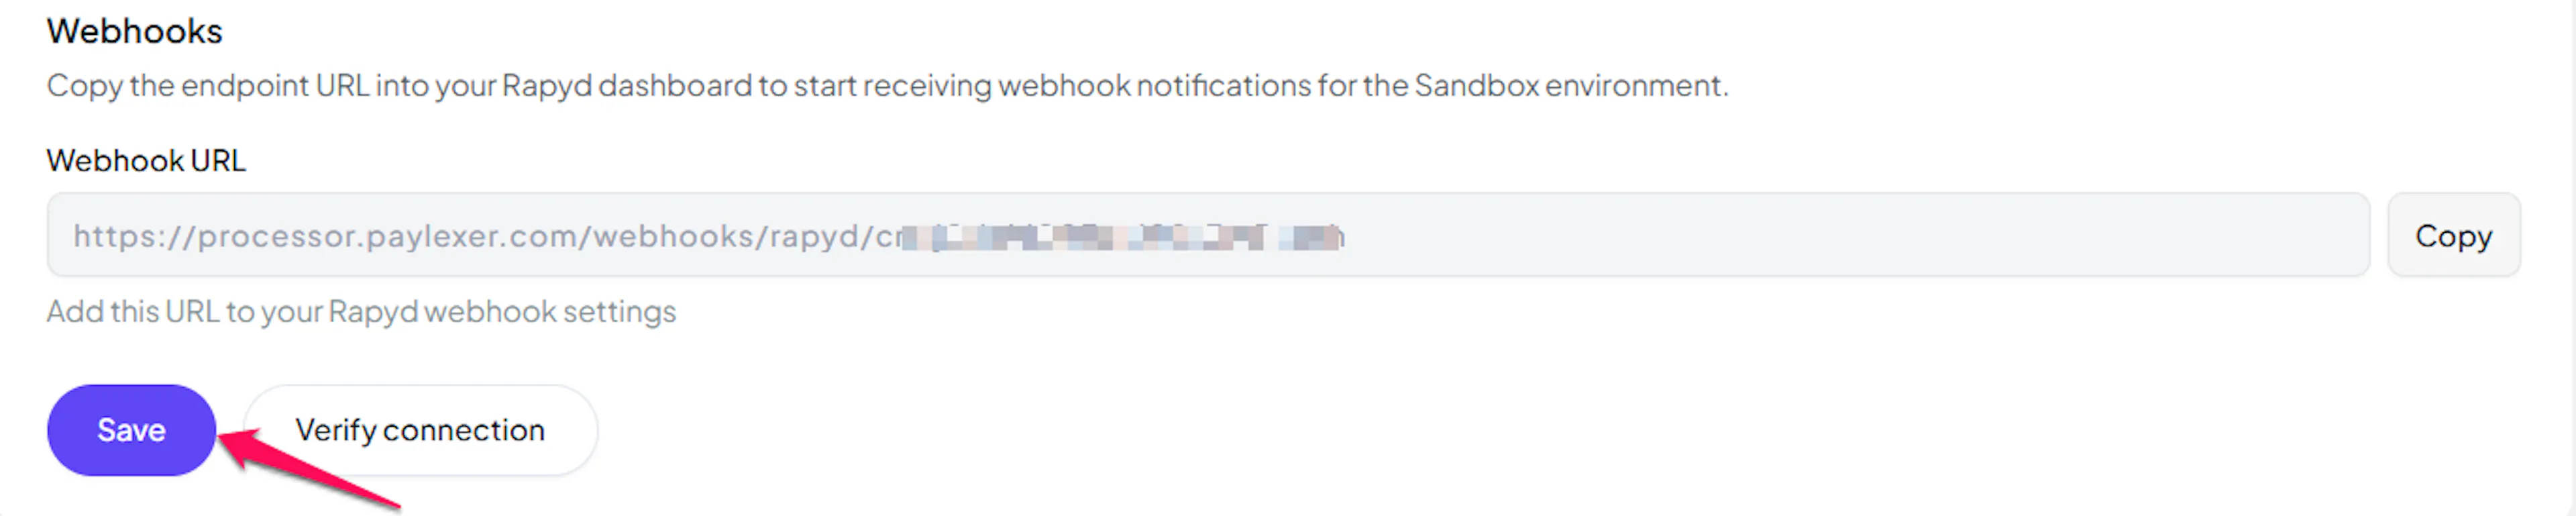
Copy your PayLexer webhook URL
In Payment Gateways -> Rapyd, copy the Webhook URL that PayLexer generates for your account.

Add the webhook in Rapyd
In the Rapyd Client Portal, go to Developers -> Webhooks -> Management, add a new webhook, and paste the PayLexer Webhook URL.
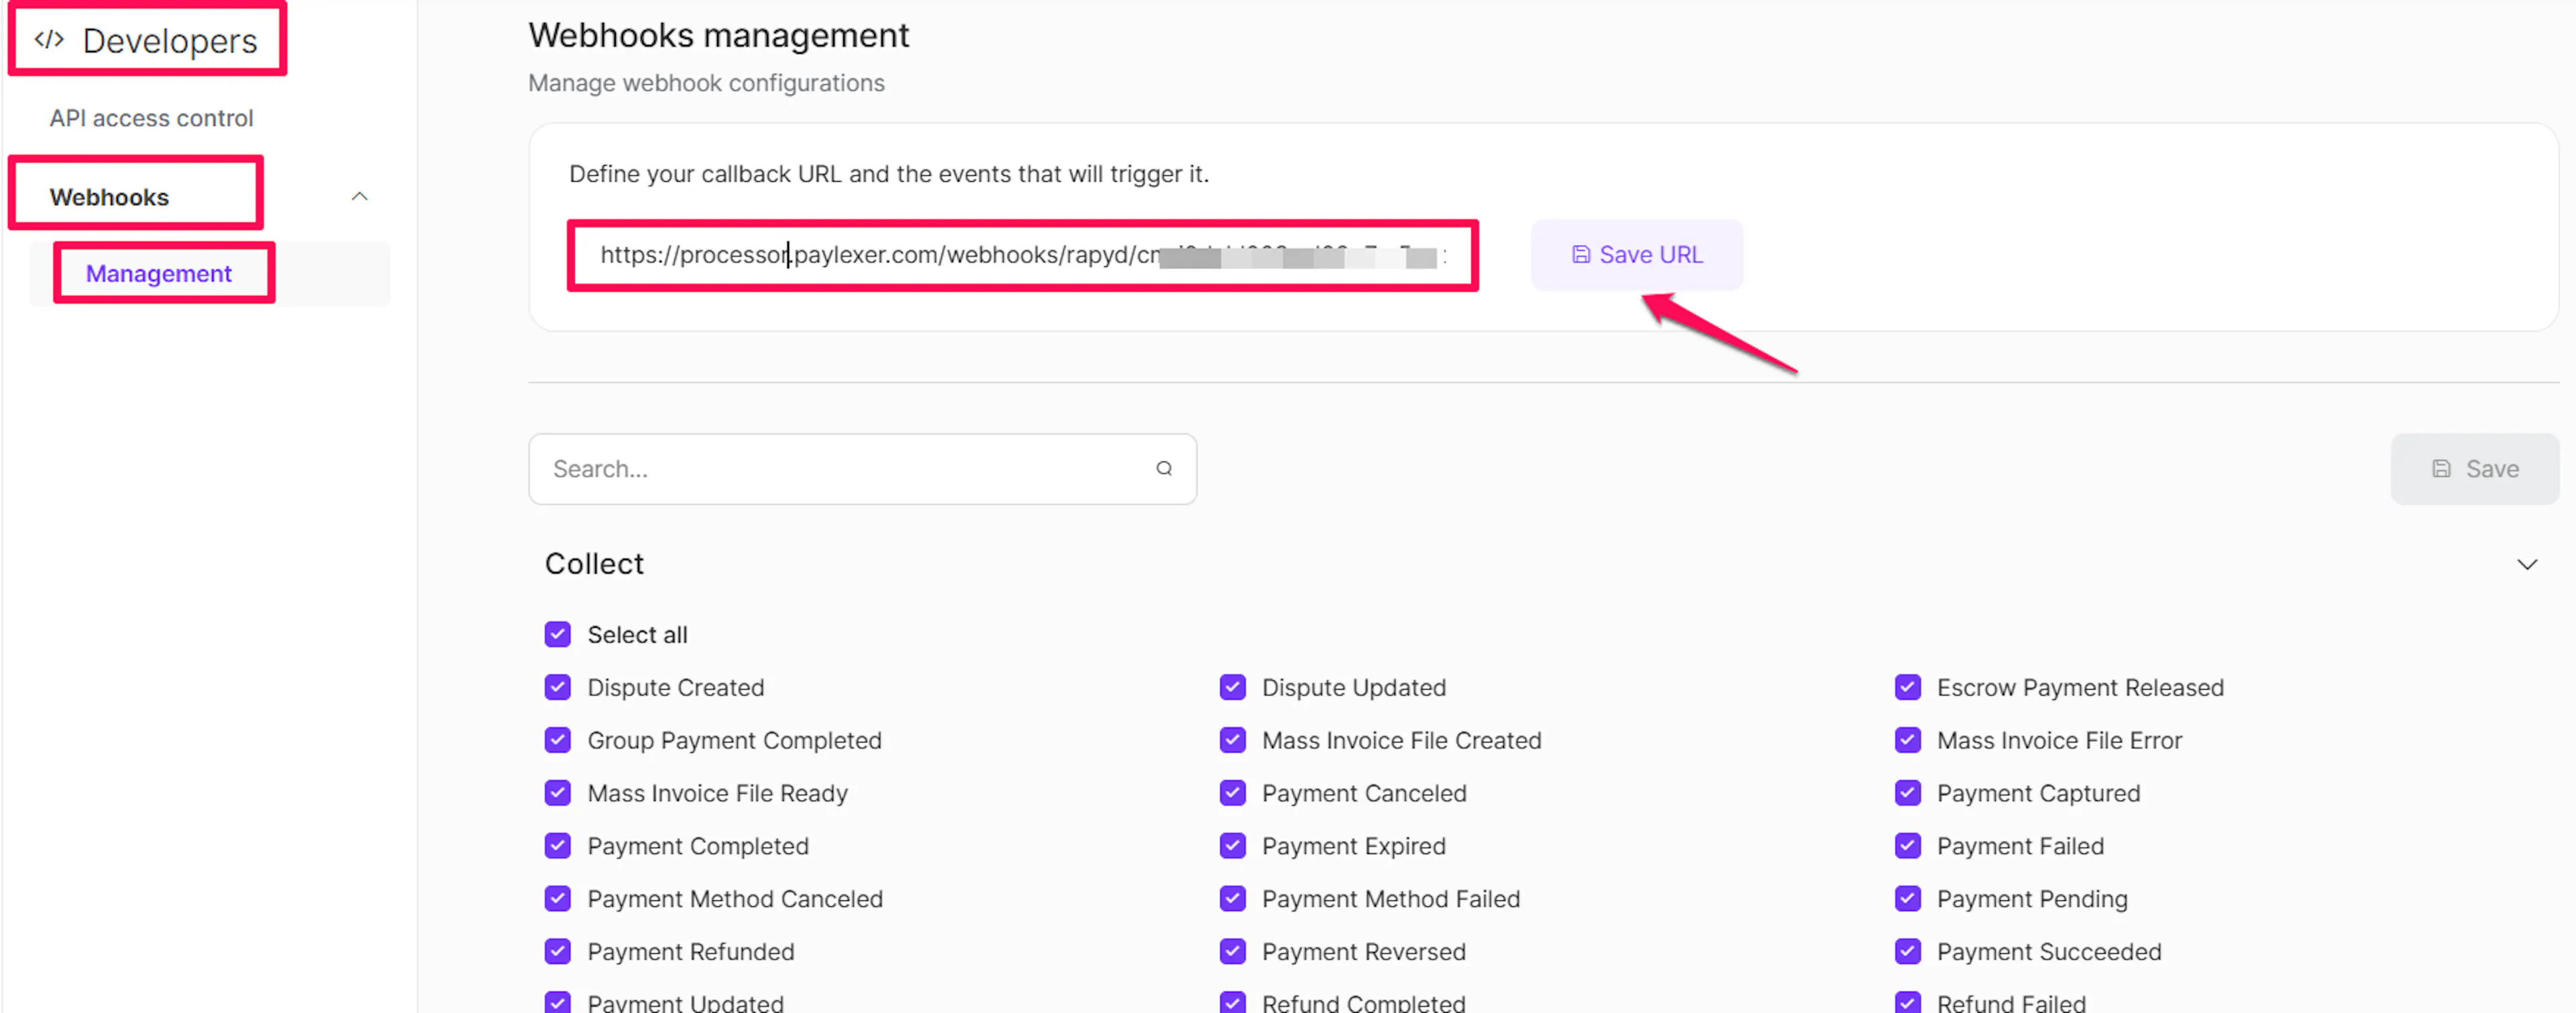
Subscribe to the required events
Under Collect, enable at least:
- Payment Completed, Payment Failed, Payment Canceled, Payment Expired
- Refund Completed (and Refund Failed)
For subscriptions, also expand Customers and enable the Customer Subscription events (Canceled, Past Due, Unpaid, Updated) and the Invoice Payment events (Succeeded, Failed).
Save the webhook
Click Save.
Rapyd signs each webhook with your account's Access Key and Secret Key, so there is no separate webhook secret to paste into PayLexer - the keys you already added verify every webhook. Make sure the webhook URL in Rapyd matches your PayLexer URL exactly.
Integrate Rapyd to Your Website
If you have already added and configured your site, you can enable Rapyd in your existing setup.
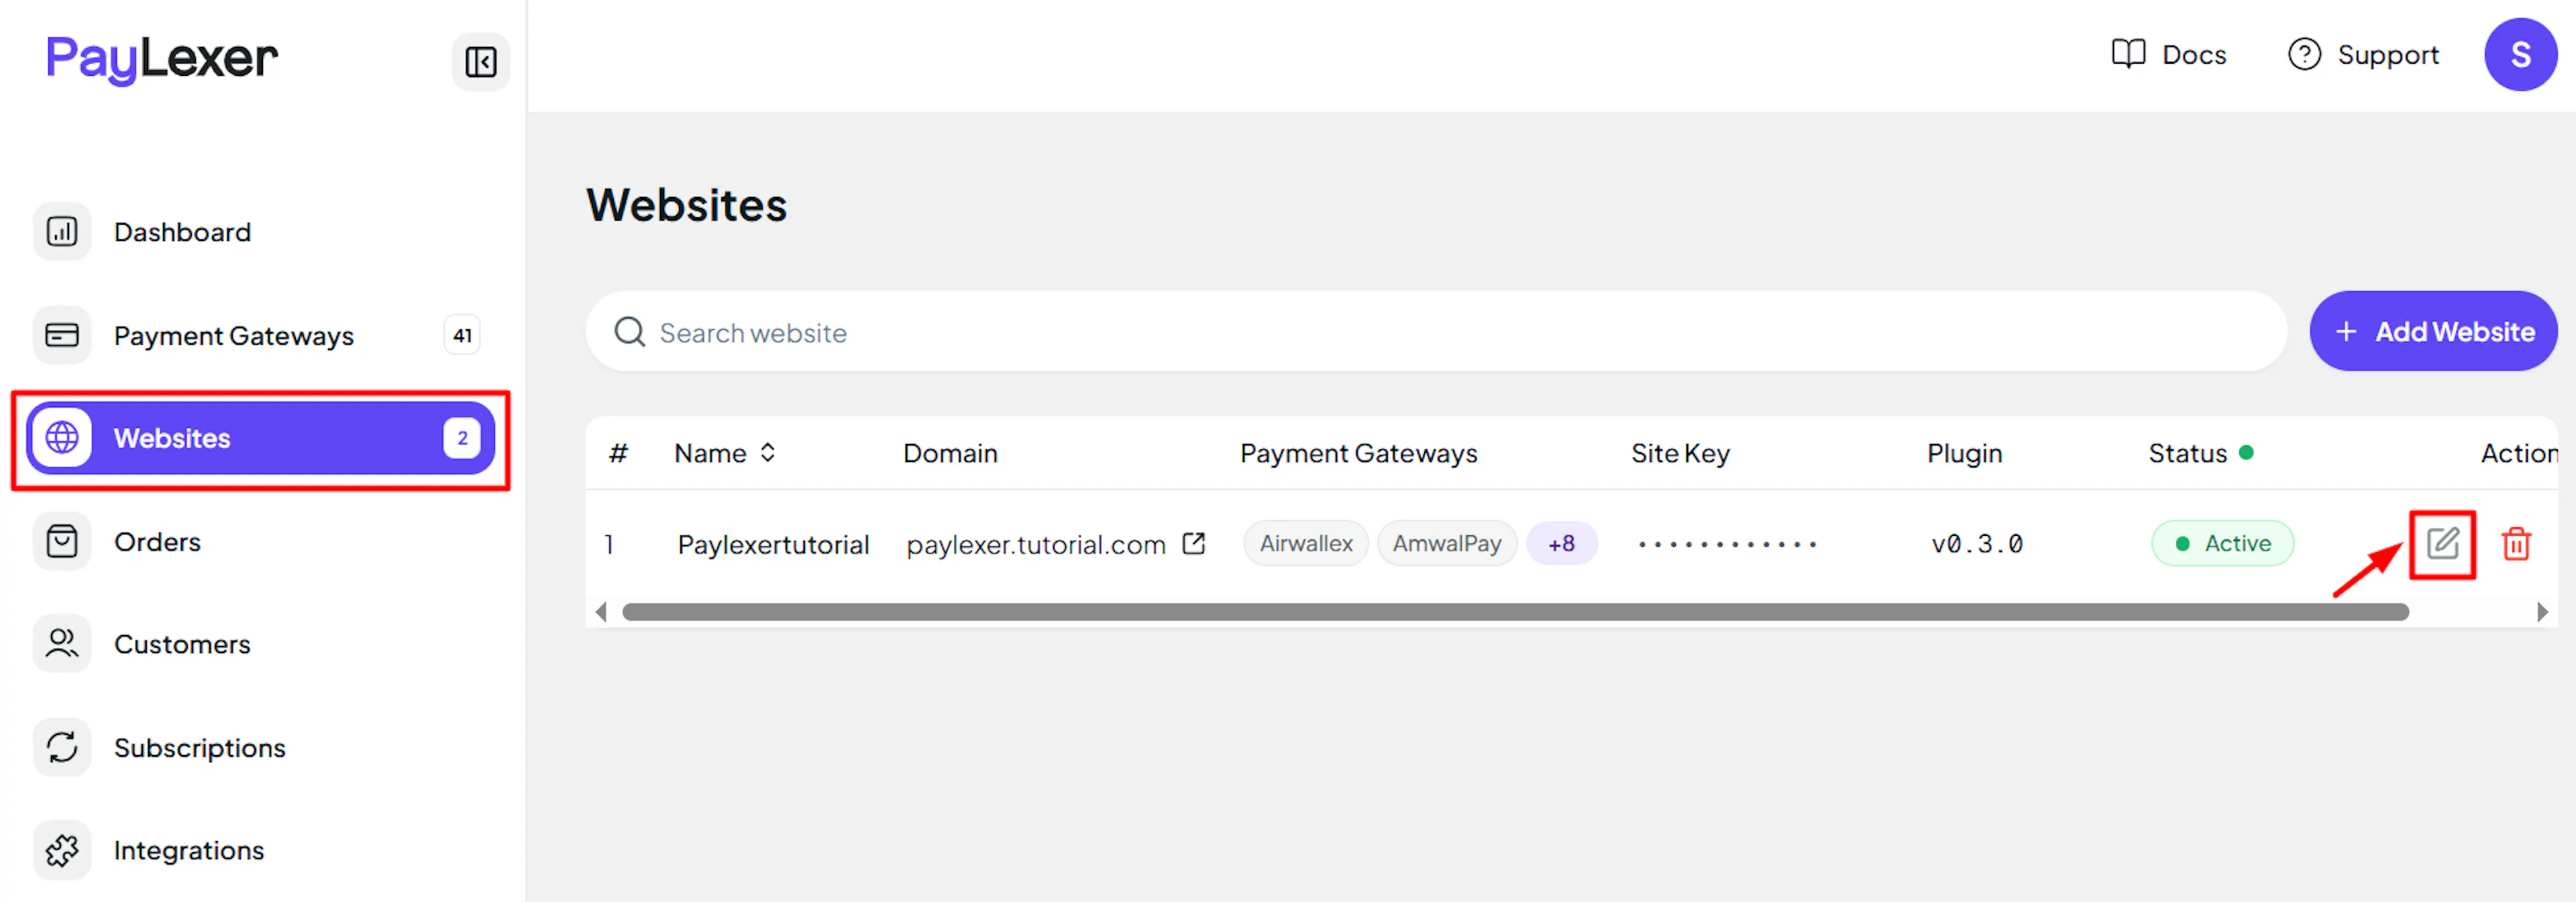
Go to Websites
Navigate to Websites in your PayLexer dashboard.
Edit your website
Click the Edit Icon of your added website.
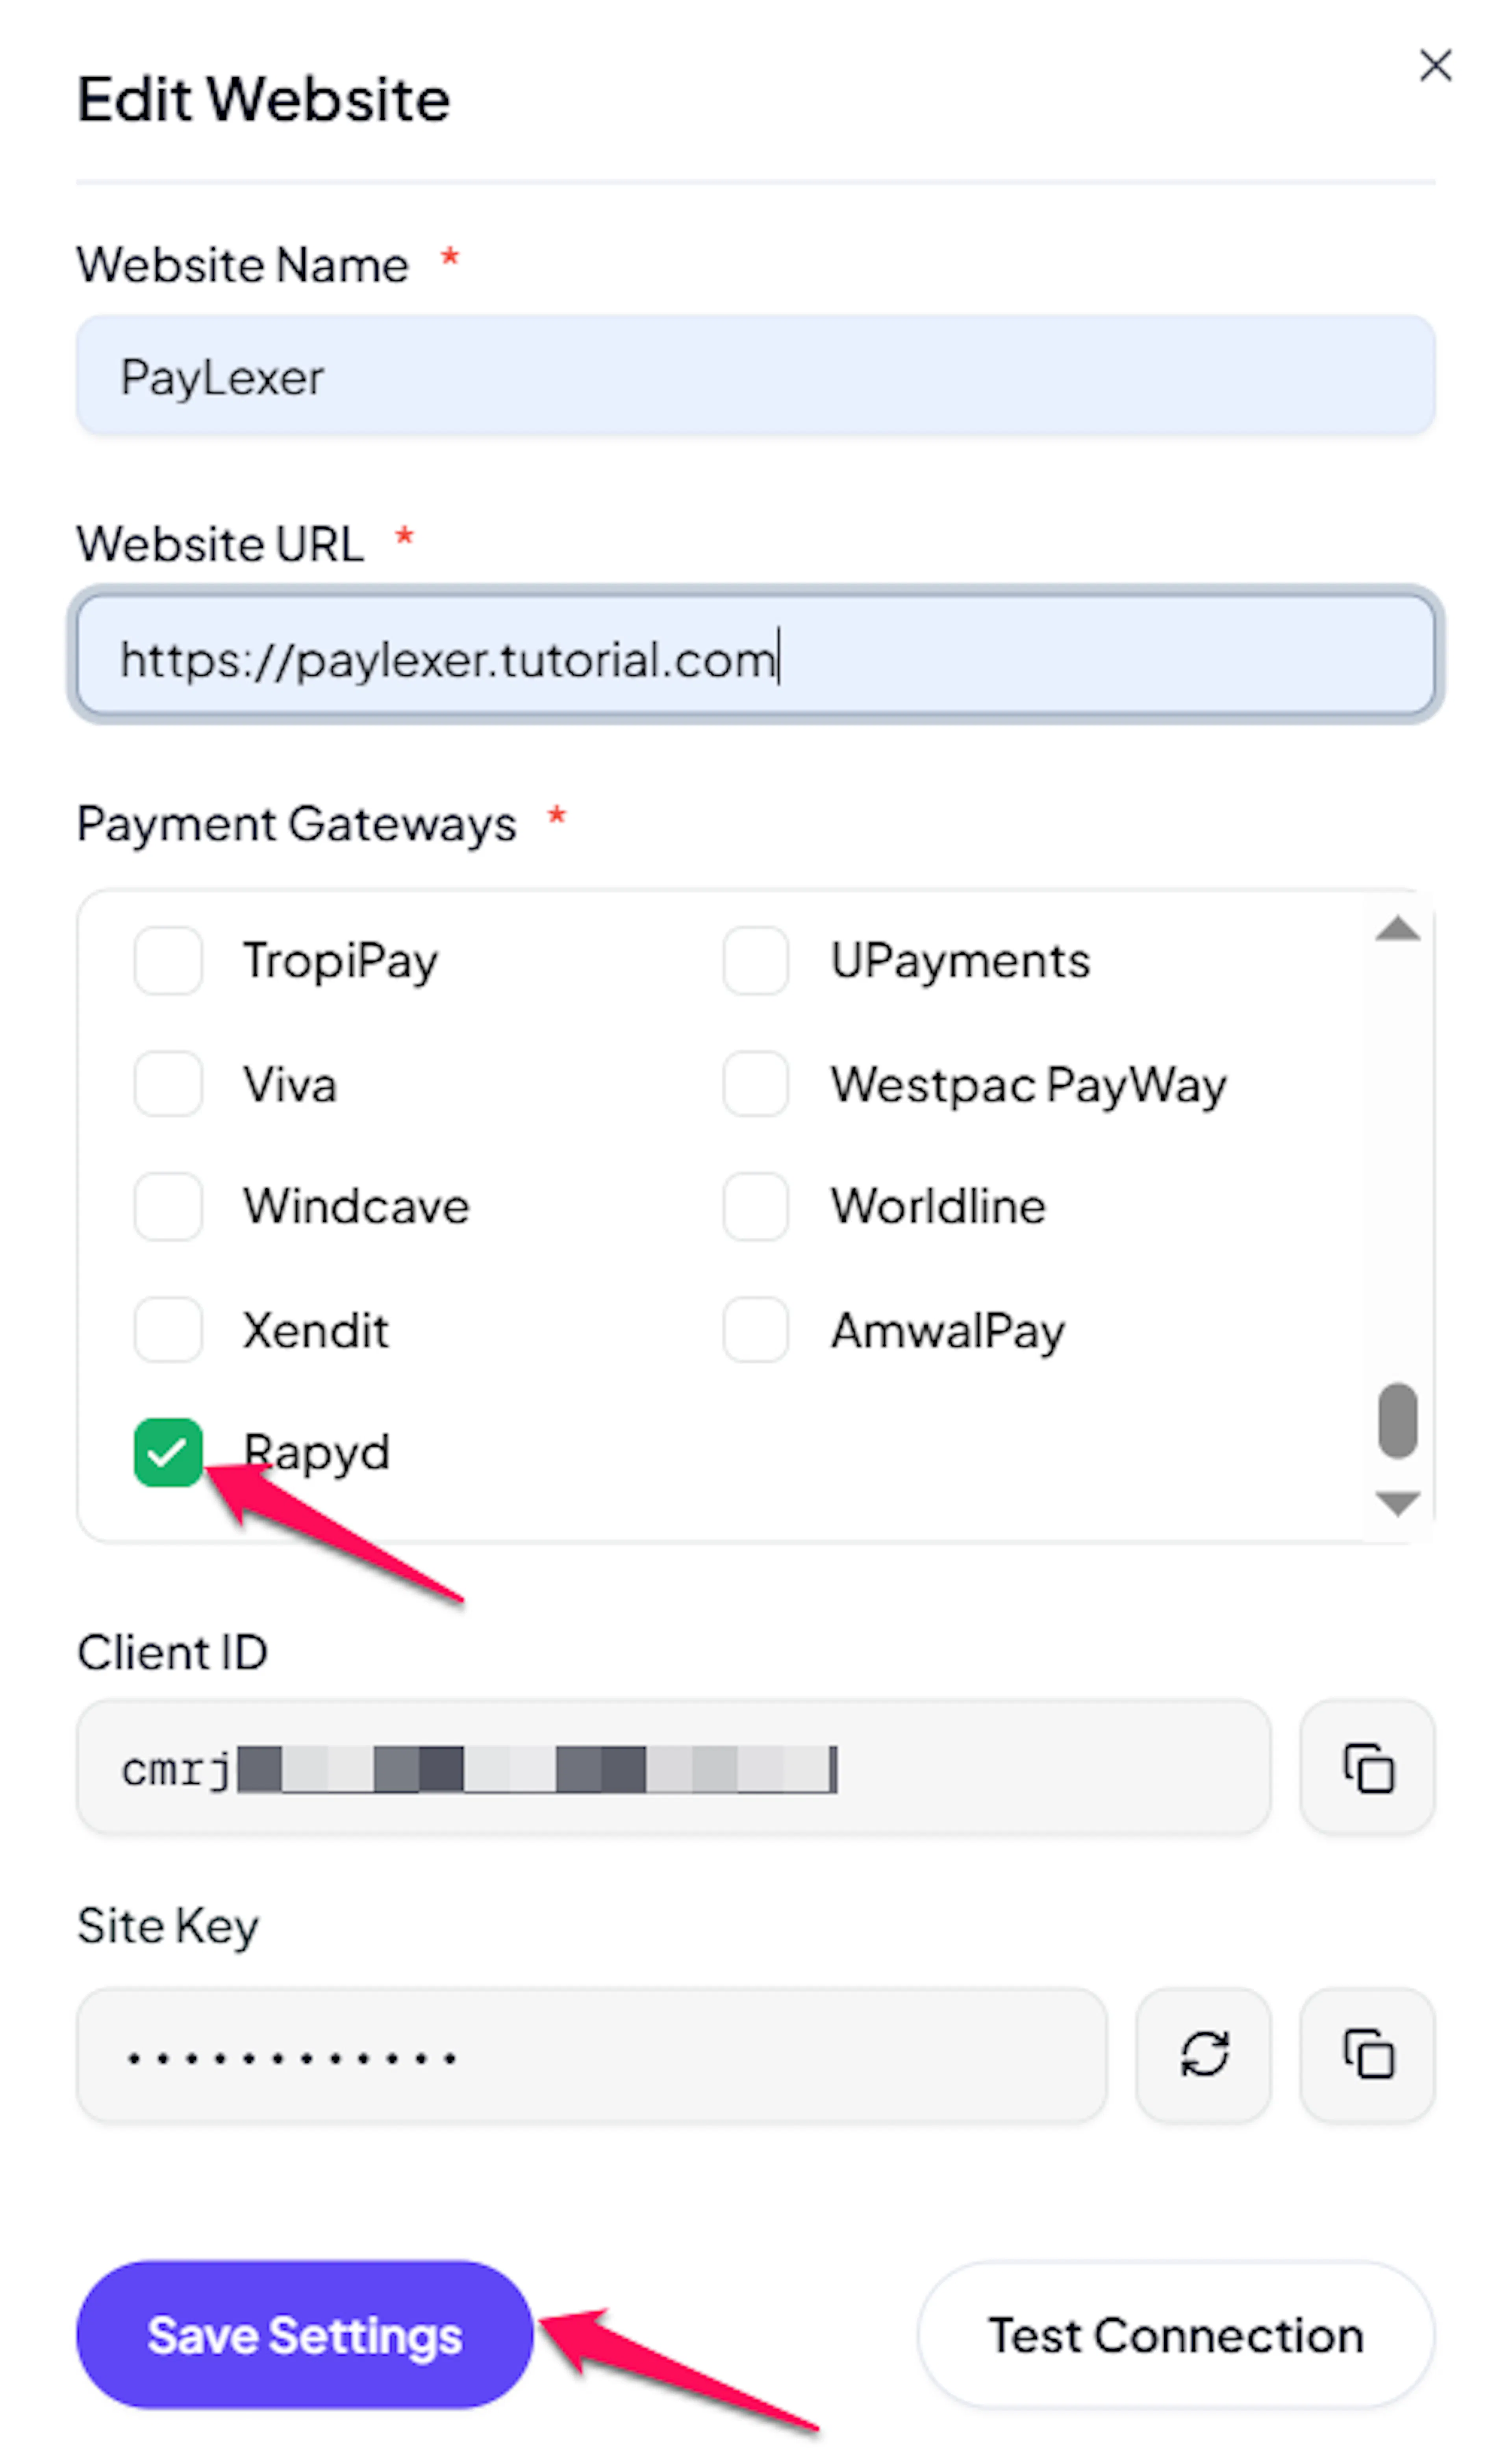
Enable Rapyd
Click the checkbox to enable Rapyd for the website.
If you haven't added a website yet, Continue to Add Your Website →
Troubleshooting
Best Practices
- Test in sandbox before enabling production - complete a full checkout and refund with Test keys first.
- Enable webhooks and keep the Rapyd webhook URL exactly matching your PayLexer URL.
- Complete Rapyd's KYB early, since live activation depends on its approval.
- Use a currency your Rapyd account has active payment methods for.
FAQs
Still Have Questions?
- Rapyd Support: Rapyd Help Center
- PayLexer Support: Contact Support