DPO (Direct Pay Online)
Connect DPO to PayLexer to accept card payments, mobile money, bank transfers, and more across African markets.
DPO (Direct Pay Online), also known as Network International Payment Solutions, is an Africa-based payment technology company providing payment infrastructure for businesses across Africa.
It supports card payments, mobile money, bank transfers, and digital wallets for businesses operating in African markets.
-
Supported Regions (Merchant Accounts): Kenya, Tanzania, Uganda, Rwanda, Zambia, Malawi, South Africa, Botswana, Ghana, Nigeria, and other African countries
-
Supported Currencies: ZAR, USD, KES, TZS, UGX and GHS.
This guide walks you through connecting DPO to PayLexer, configuring API credentials, and testing transactions before going live.
Supported Features
-
One-time payments - Accept single-transaction payments from customers.
-
Refunds - Process full or partial refunds directly through PayLexer.
-
Real-time payment status updates - Receive instant payment confirmations via notification URLs.
-
Multiple payment methods - Cards, mobile money, bank transfers, and USSD.
-
Multi-currency support - Transact in local and international currencies.
-
QR code payments - Accept M-Visa QR code payments.
Before You Start
Make sure you have:
-
DPO Business Account - Don't have an account? Sign up for DPO →
-
PayLexer Account - Required to configure the integration. Create your account →
-
A website where you want to integrate DPO
Looking for a different payment processor? View all supported gateways →
Configuring DPO
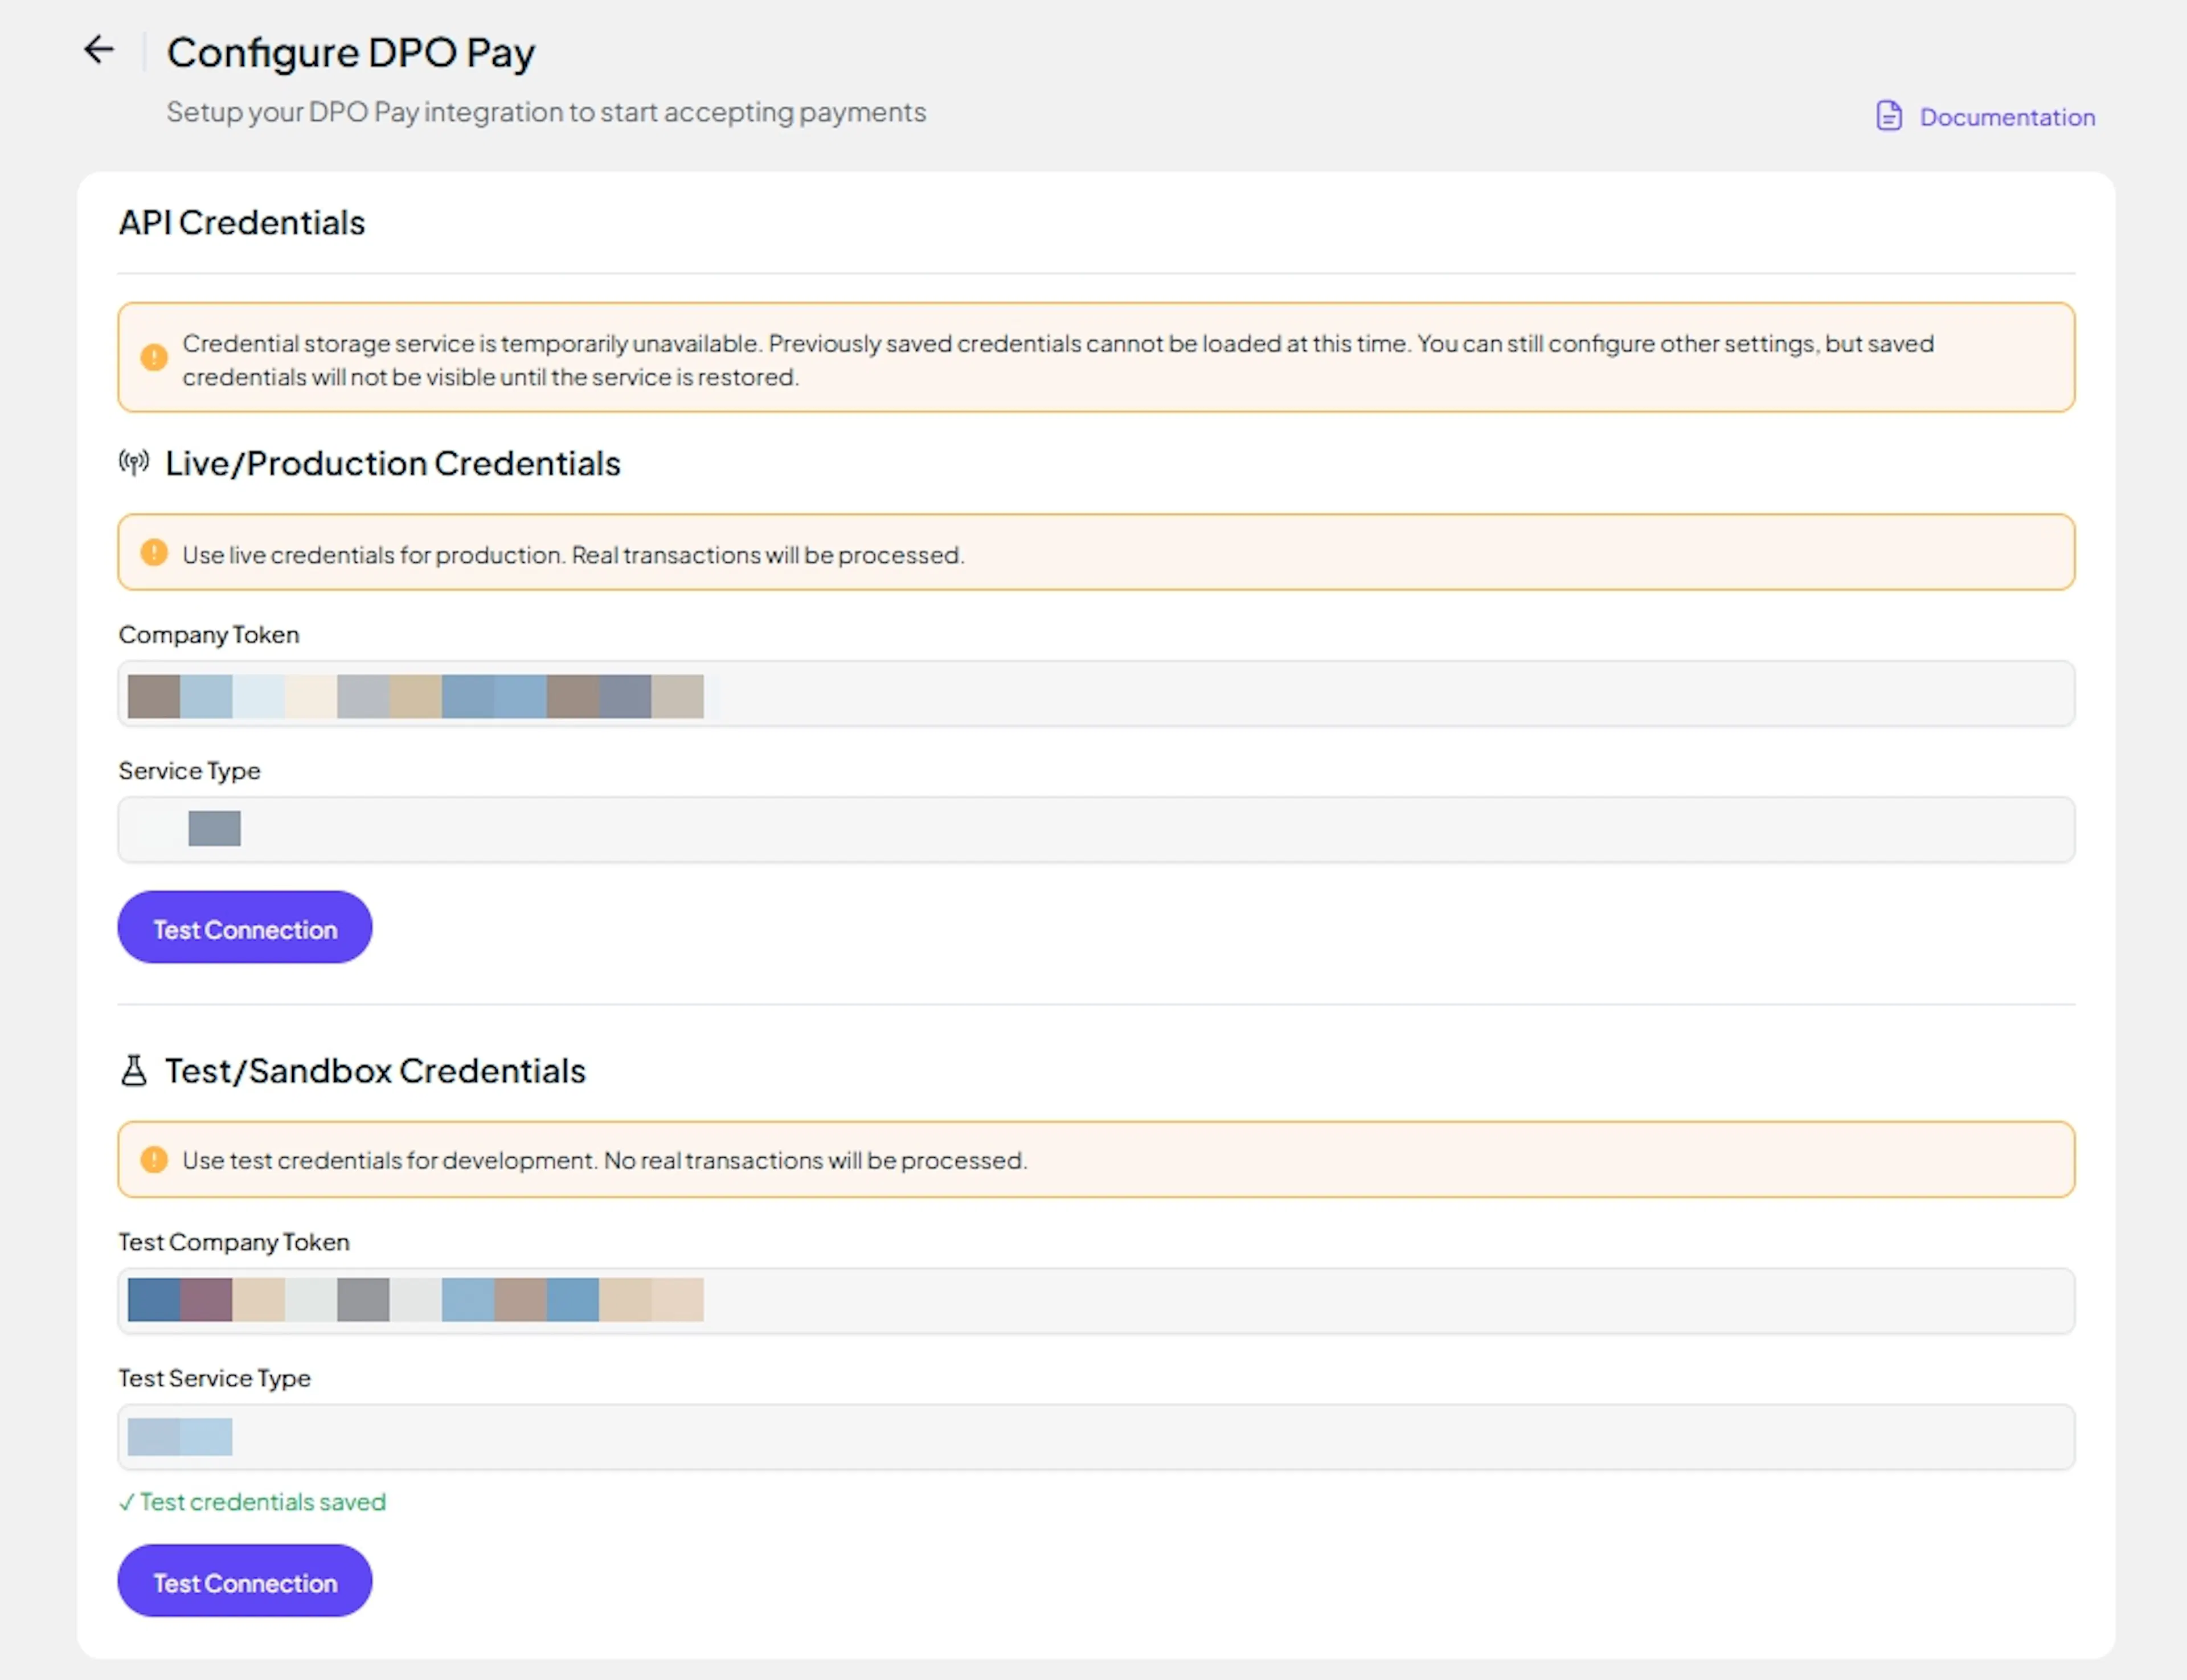
You need a Company Token from DPO for this integration.
Getting API Credentials
Log in to your DPO Portal
Go to Settings or API Settings in your DPO account.
Copy your credentials
Copy the following values:
-
Company Token - Your unique account identifier
-
Service Type - Must be a numerical value
DPO provides separate Company Tokens and Service Types for Test and Live environments. Request credentials for both environments to enable full testing.
Adding Credentials to PayLexer
Open DPO in PayLexer
Log in to your PayLexer dashboard, navigate to Payment Gateways, and click on DPO.
Enter your credentials
Add the Company Token and Service Type you copied from your DPO portal.
Understanding Live/Production and Sandbox Settings:
| Environment | Purpose |
|---|---|
| Live / Production (Mandatory) | Used for real transactions. Cannot be empty, even when testing. |
| Test / Sandbox (Optional) | Used for testing only. No real money is processed. |
How PayLexer selects credentials:
-
Debug/Test mode ON → Test credentials are used
-
Debug/Test mode OFF → Live credentials are used
Test and save
Click Test Connection to verify your credentials, then click Save Configuration.
Understanding Payment Notifications
DPO supports payment notifications through notification URLs. When a payment is created, you can specify a notification URL where DPO sends payment status updates.
How Payment Notifications Work
Payment link is created
A payment link is created with your notification URL included.
Customer completes payment
The customer completes payment on DPO's hosted page.
DPO sends notification
DPO sends a notification to your URL before redirecting the customer.
Payment status is updated
Payment status is updated instantly and the order is updated in your platform.
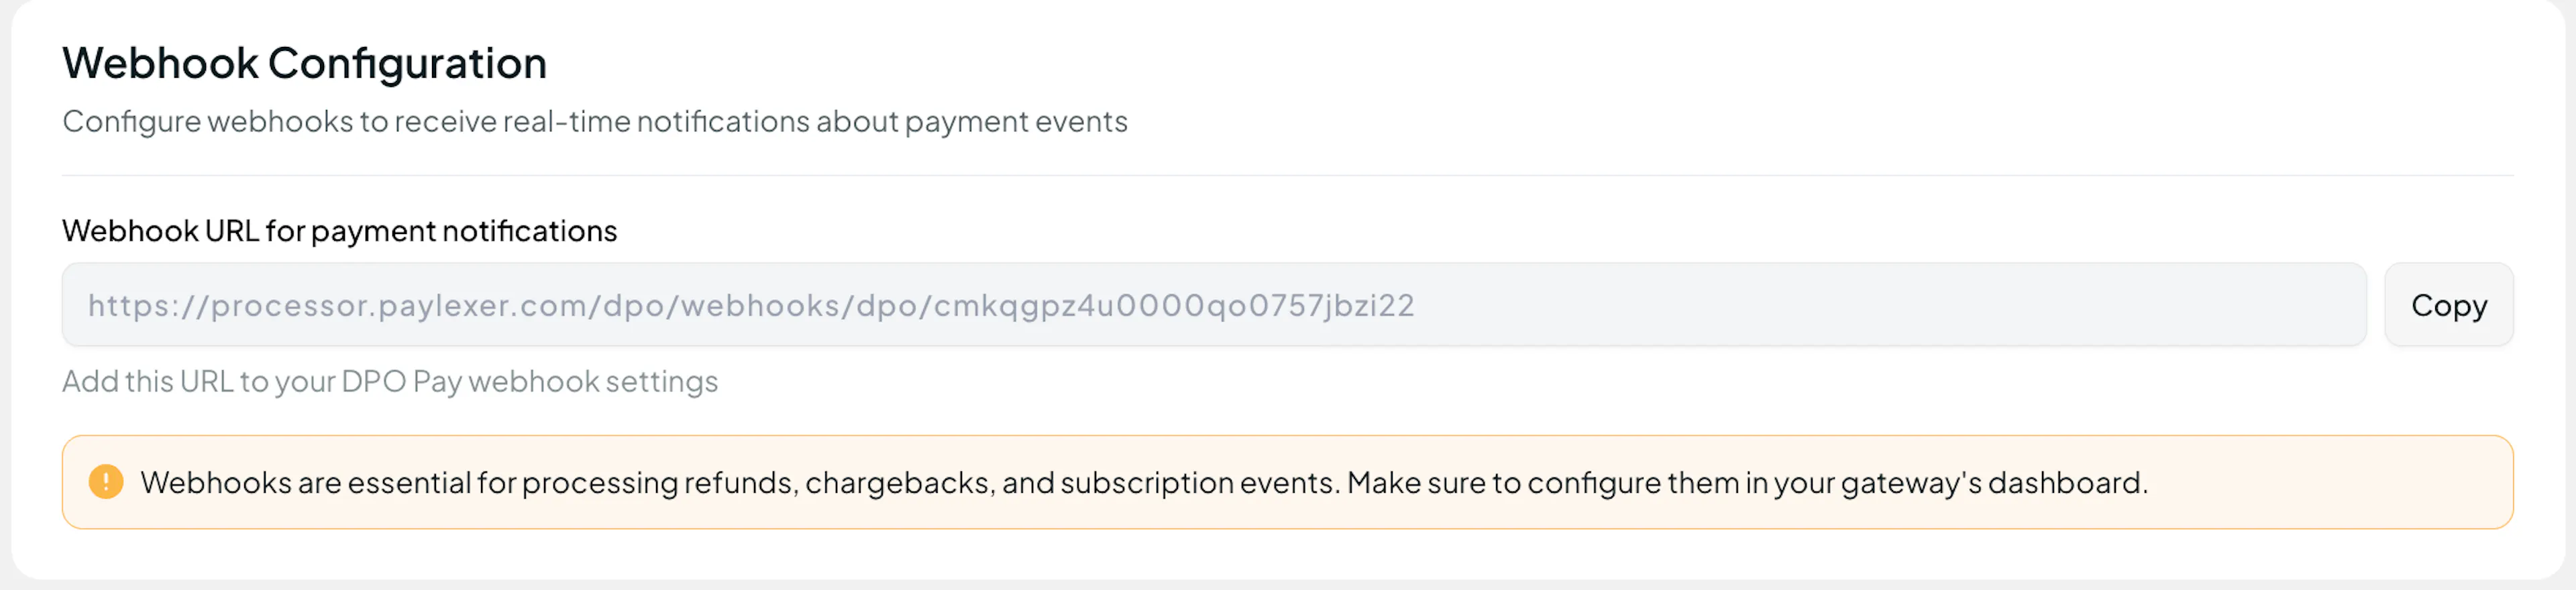
PayLexer automatically handles notification URL configuration for each transaction - no manual setup required.
Integrate DPO to Your Website
If you have already added and configured your site, you can enable DPO in your existing setup.
To add DPO to an existing site:
-
Navigate to Websites
-
Click the Edit icon on your website

- Check the checkbox to enable DPO
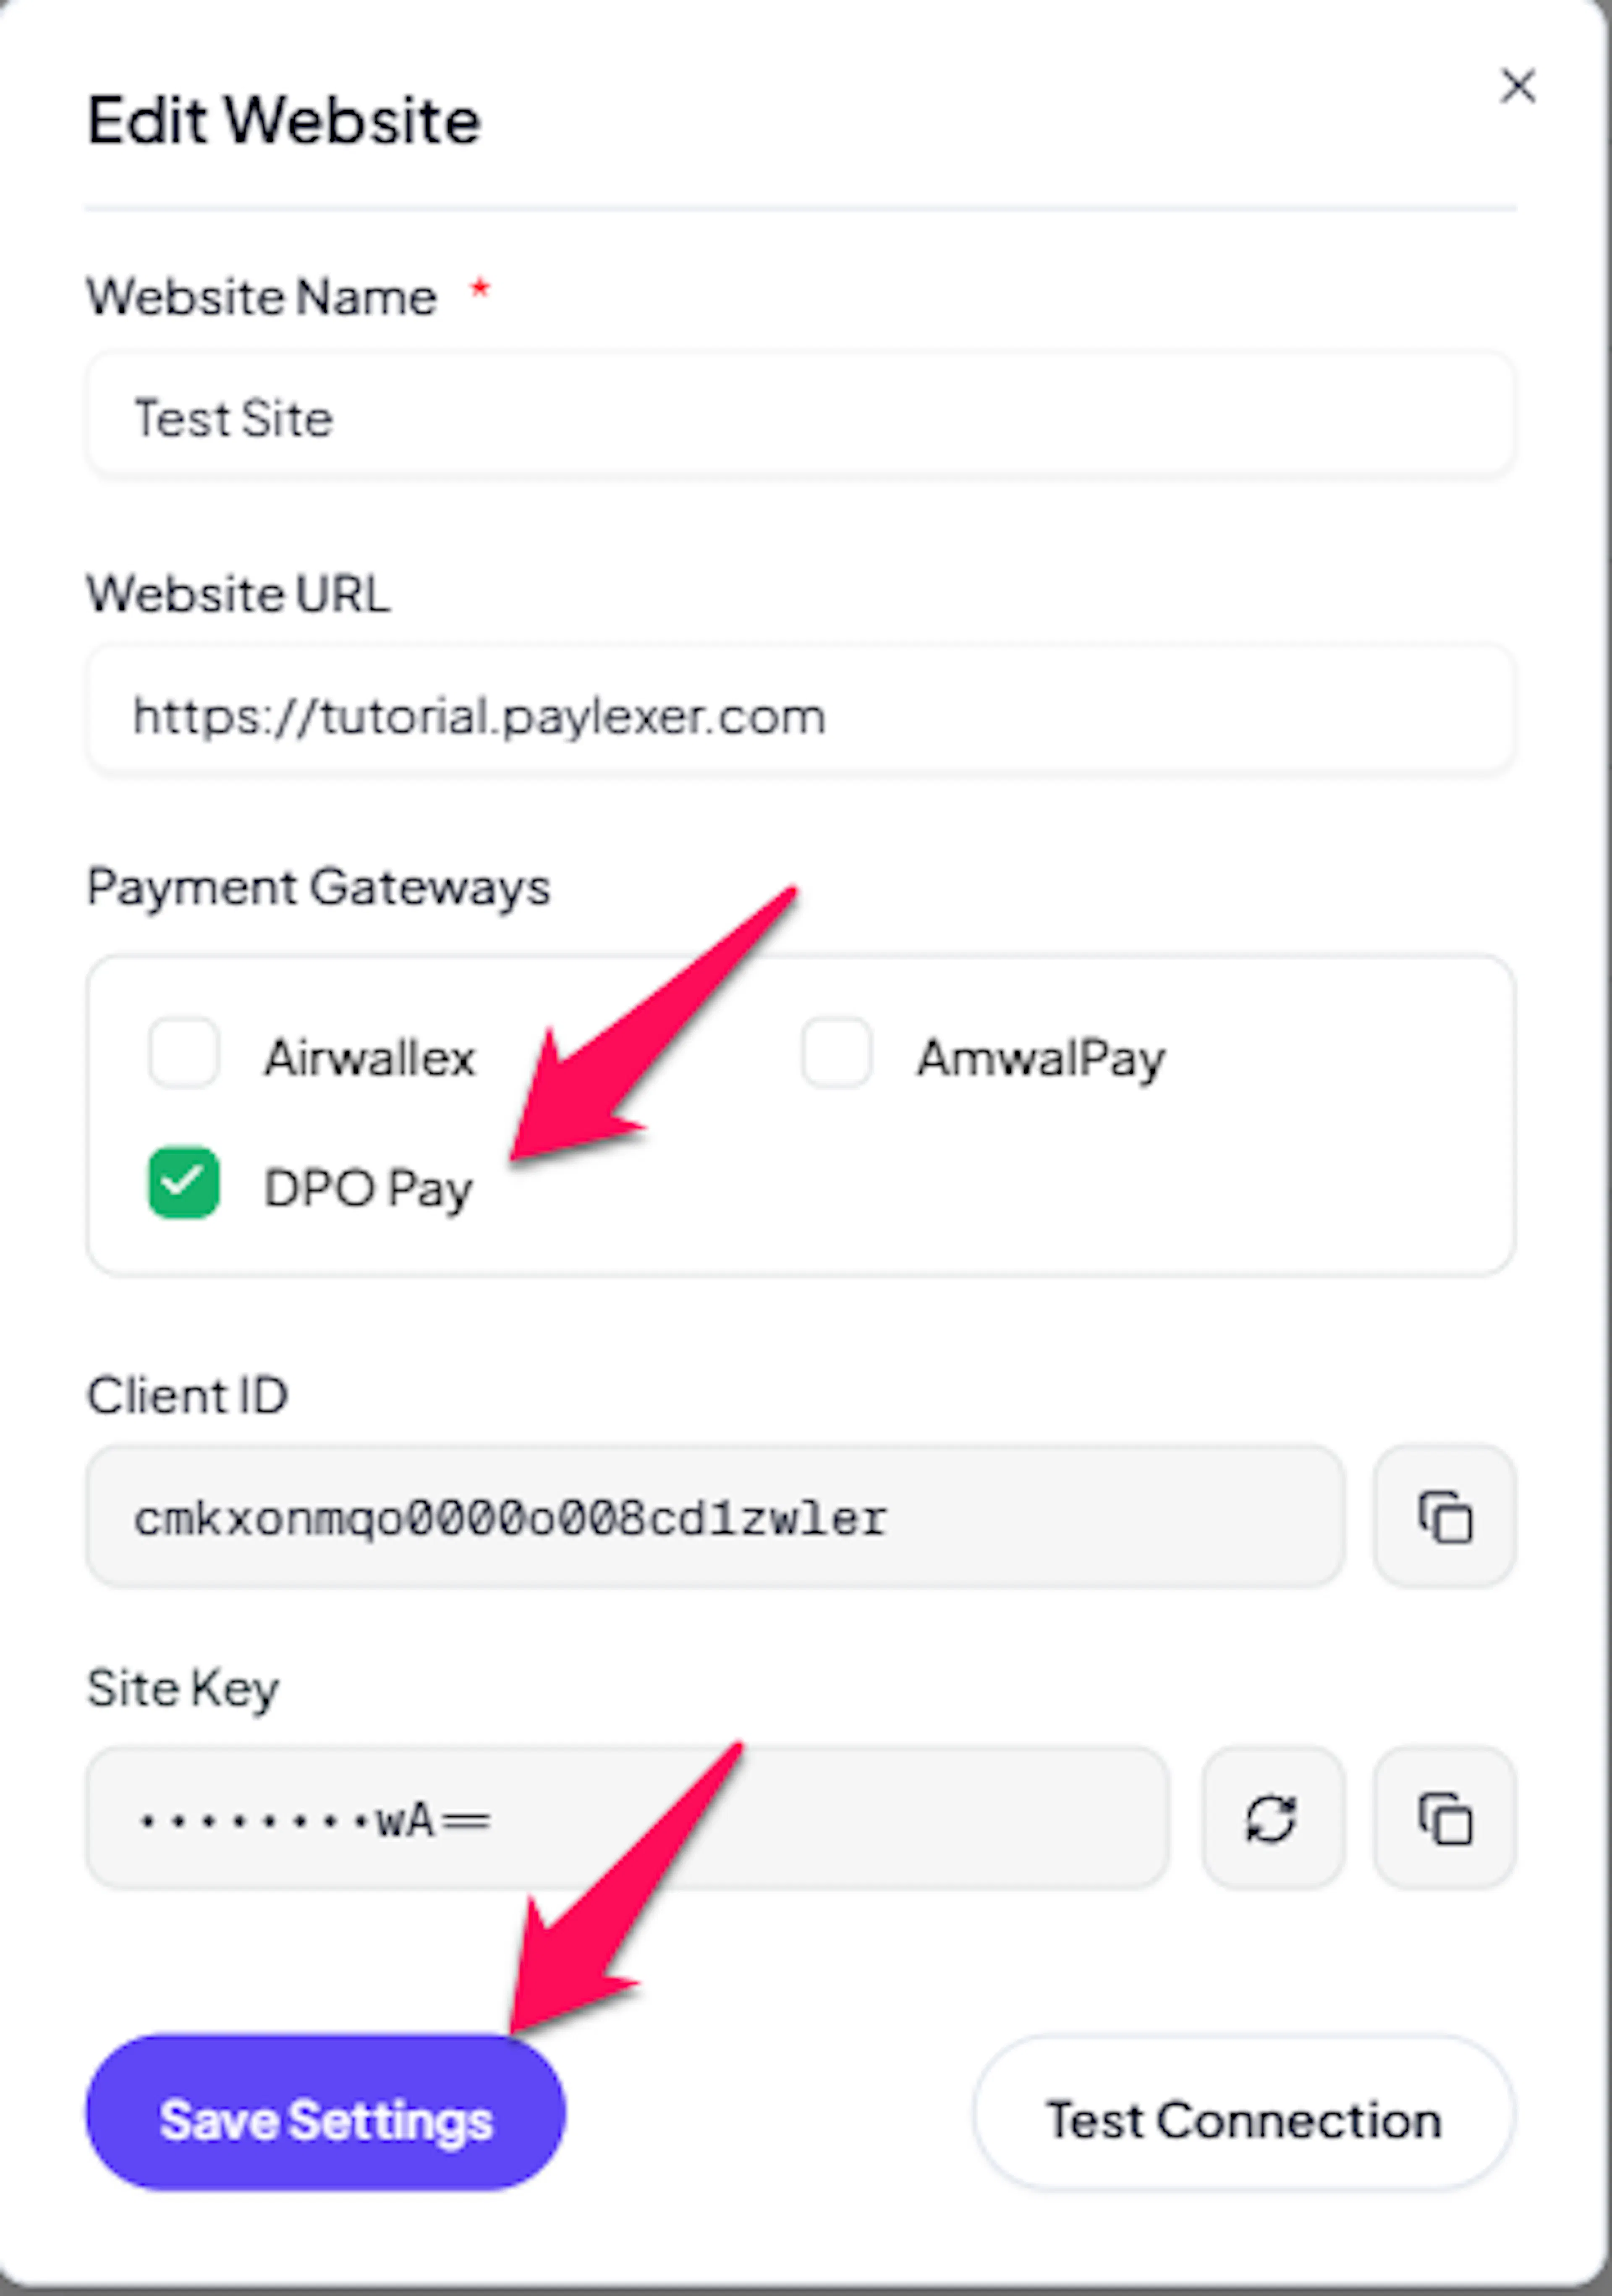
If you haven't added a website yet, follow the guide below to add your site and configure a payment gateway.
This guide shows you how to add your website details in PayLexer, get your Client ID and Site Key, choose your platform integration, and complete the connection.
Troubleshooting
Best Practices
-
Test in Test mode before enabling Live mode
-
Validate the first live transaction after switching to Live
-
Monitor the gateway dashboard for failed payments
-
Keep API credentials secure and never share them publicly
-
Use separate Test and Live credentials
-
During testing: ensure Debug/Test mode is enabled, use only DPO Test credentials, and save Test credentials in PayLexer - not just Live credentials