Adyen
Connect Adyen to PayLexer to accept cards, wallets, and local payment methods worldwide through an embedded checkout with full refund support.
Adyen is a global payment platform supporting cards, local payment methods, and omnichannel commerce. Through PayLexer, Adyen renders an embedded checkout (Adyen Web Drop-in) directly on your website - shoppers complete payment without being redirected to an external page. The integration supports one-time payments, refunds, and separate Test and Live environments so you can validate the full payment flow before going live.
-
Supported Regions (Merchant Accounts): Global - Europe, North America, Asia-Pacific, Latin America, Middle East, and Africa
-
Supported Currencies: 100+ currencies including USD, EUR, GBP, AUD, AED, SAR, INR, JPY, and BRL - view full list
Supported Features
-
Card, wallet, and local payment methods via Adyen's embedded Web Drop-in checkout
-
Full and partial refunds, synced to PayLexer automatically via webhooks
-
Test and Live environments with isolated credentials
-
Real-time payment status updates through Adyen webhooks
-
One-time payments only - subscriptions are not supported through PayLexer for Adyen
Before You Start
Make sure you have:
-
Adyen Account – Don't have one? Sign up for an Adyen test account →
-
PayLexer Account – Required to configure the integration. Create your account →
-
A website where you want to integrate
Looking for a different payment processor? View all supported gateways →
Configuring Adyen
You need a Merchant Account, API Key, Client Key, Live Endpoint URL Prefix, and HMAC Key from Adyen for this integration:
Adyen has separate Customer Areas for each environment: the Test Customer Area and the Live Customer Area. Credentials from one environment do not work in the other.
Getting API Credentials
The retrieval flow is identical in both the Test and Live Customer Areas - only the URL differs. Repeat these steps for each environment.
Note your Merchant Account
Log in to your Adyen Customer Area. Your Merchant Account code is shown in the account selector at the top of the page (for example, YourCompanyECOM). Copy it exactly as displayed - it is case-sensitive.

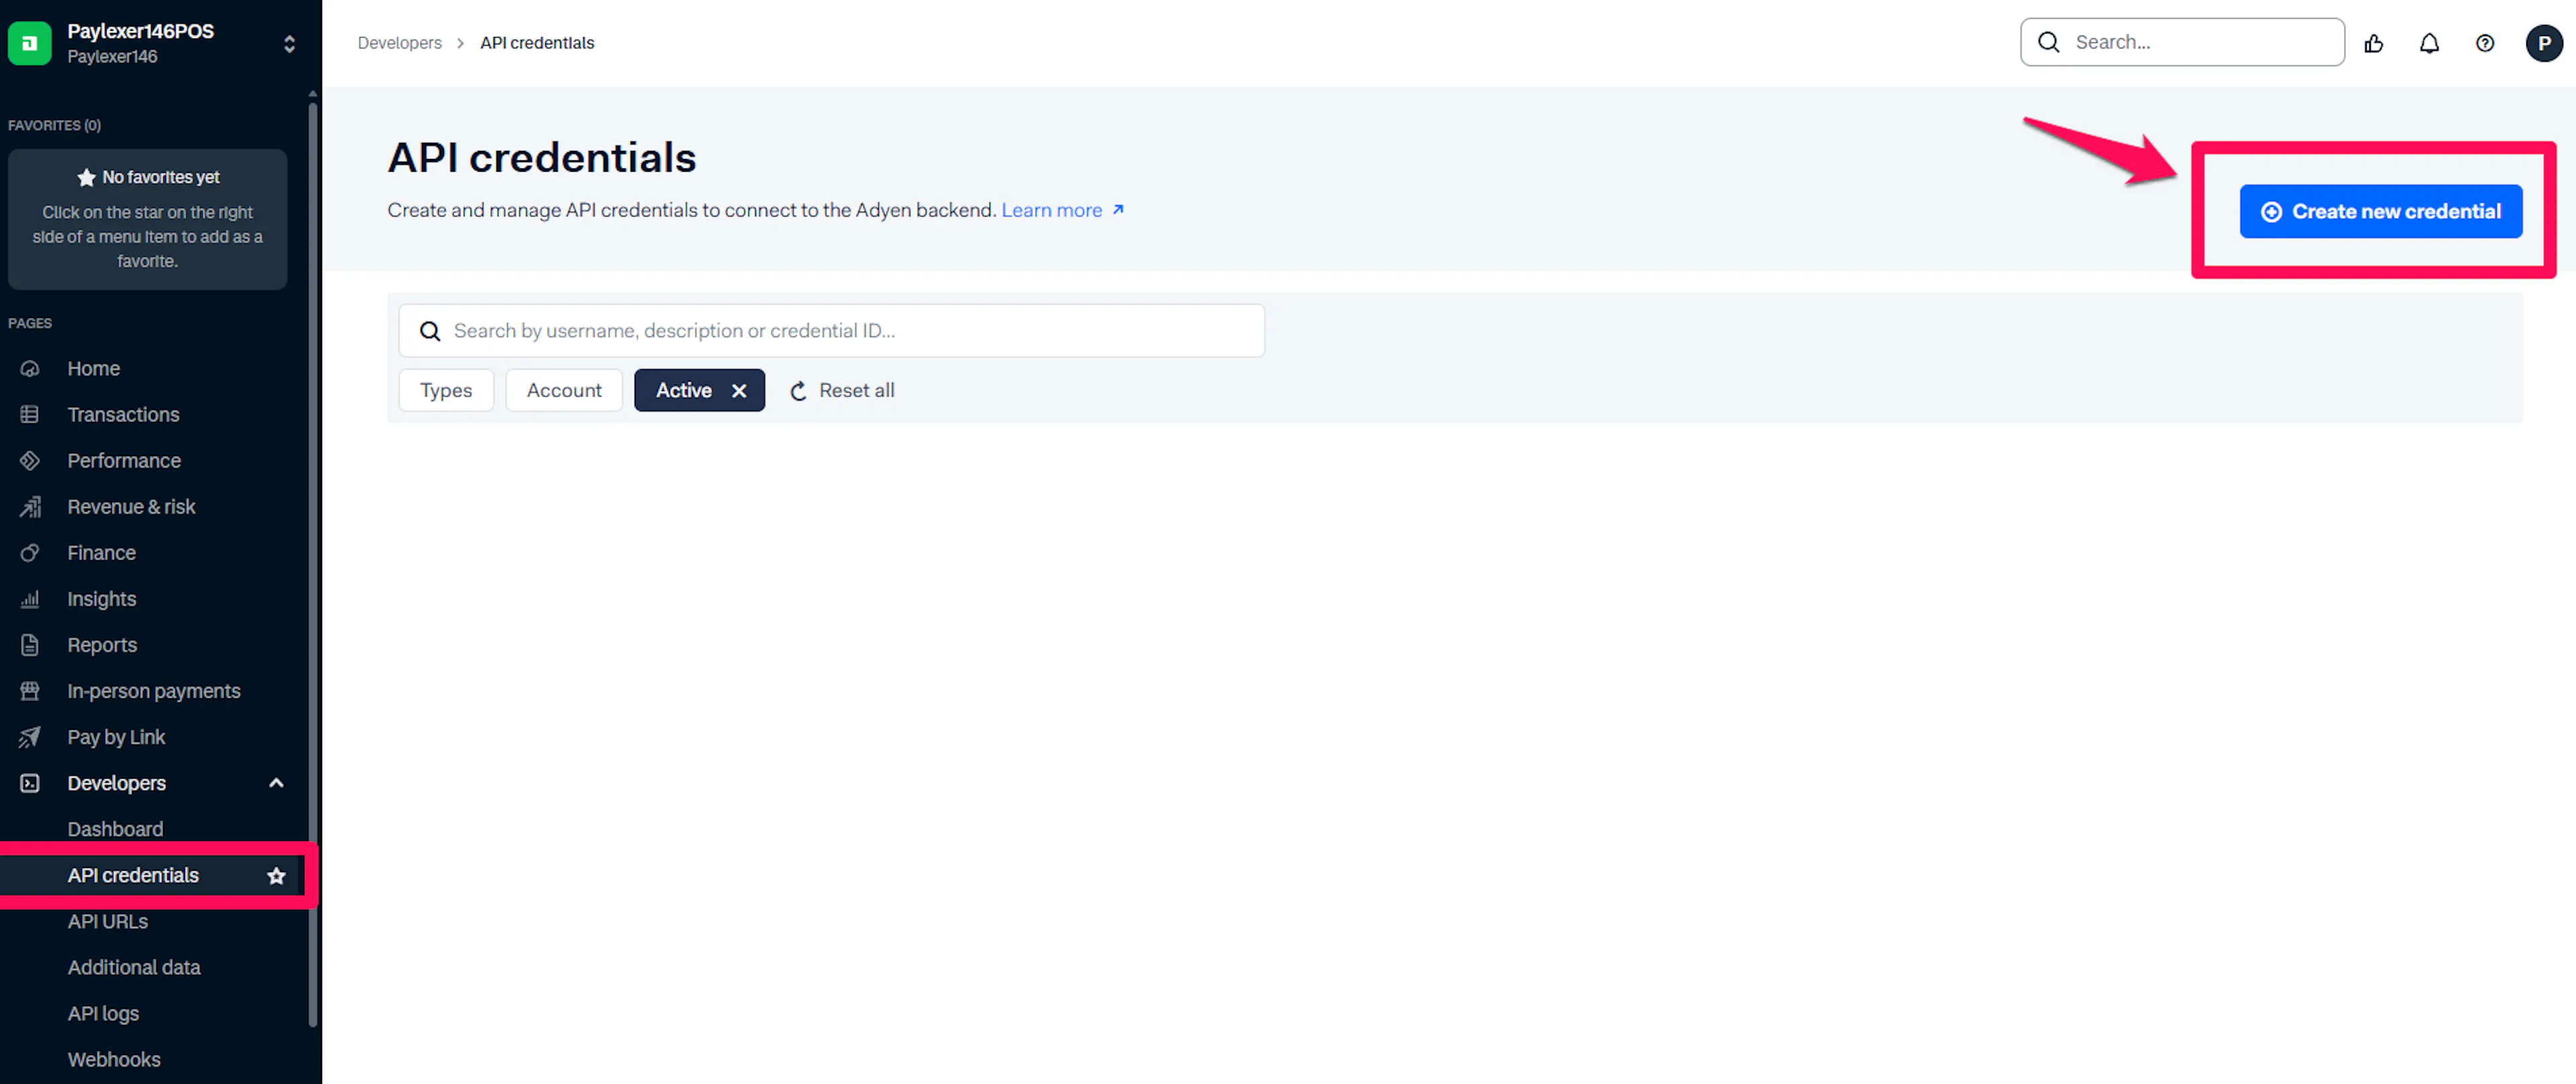
Open API credentials
Go to Developers → API credentials and select your web service user credential. If you don't have one yet, click Create new credential and choose Web service user.
Generate and copy your API Key
Under Server settings → Authentication, select the API key tab, click Generate API key, copy the value, then click Save changes.
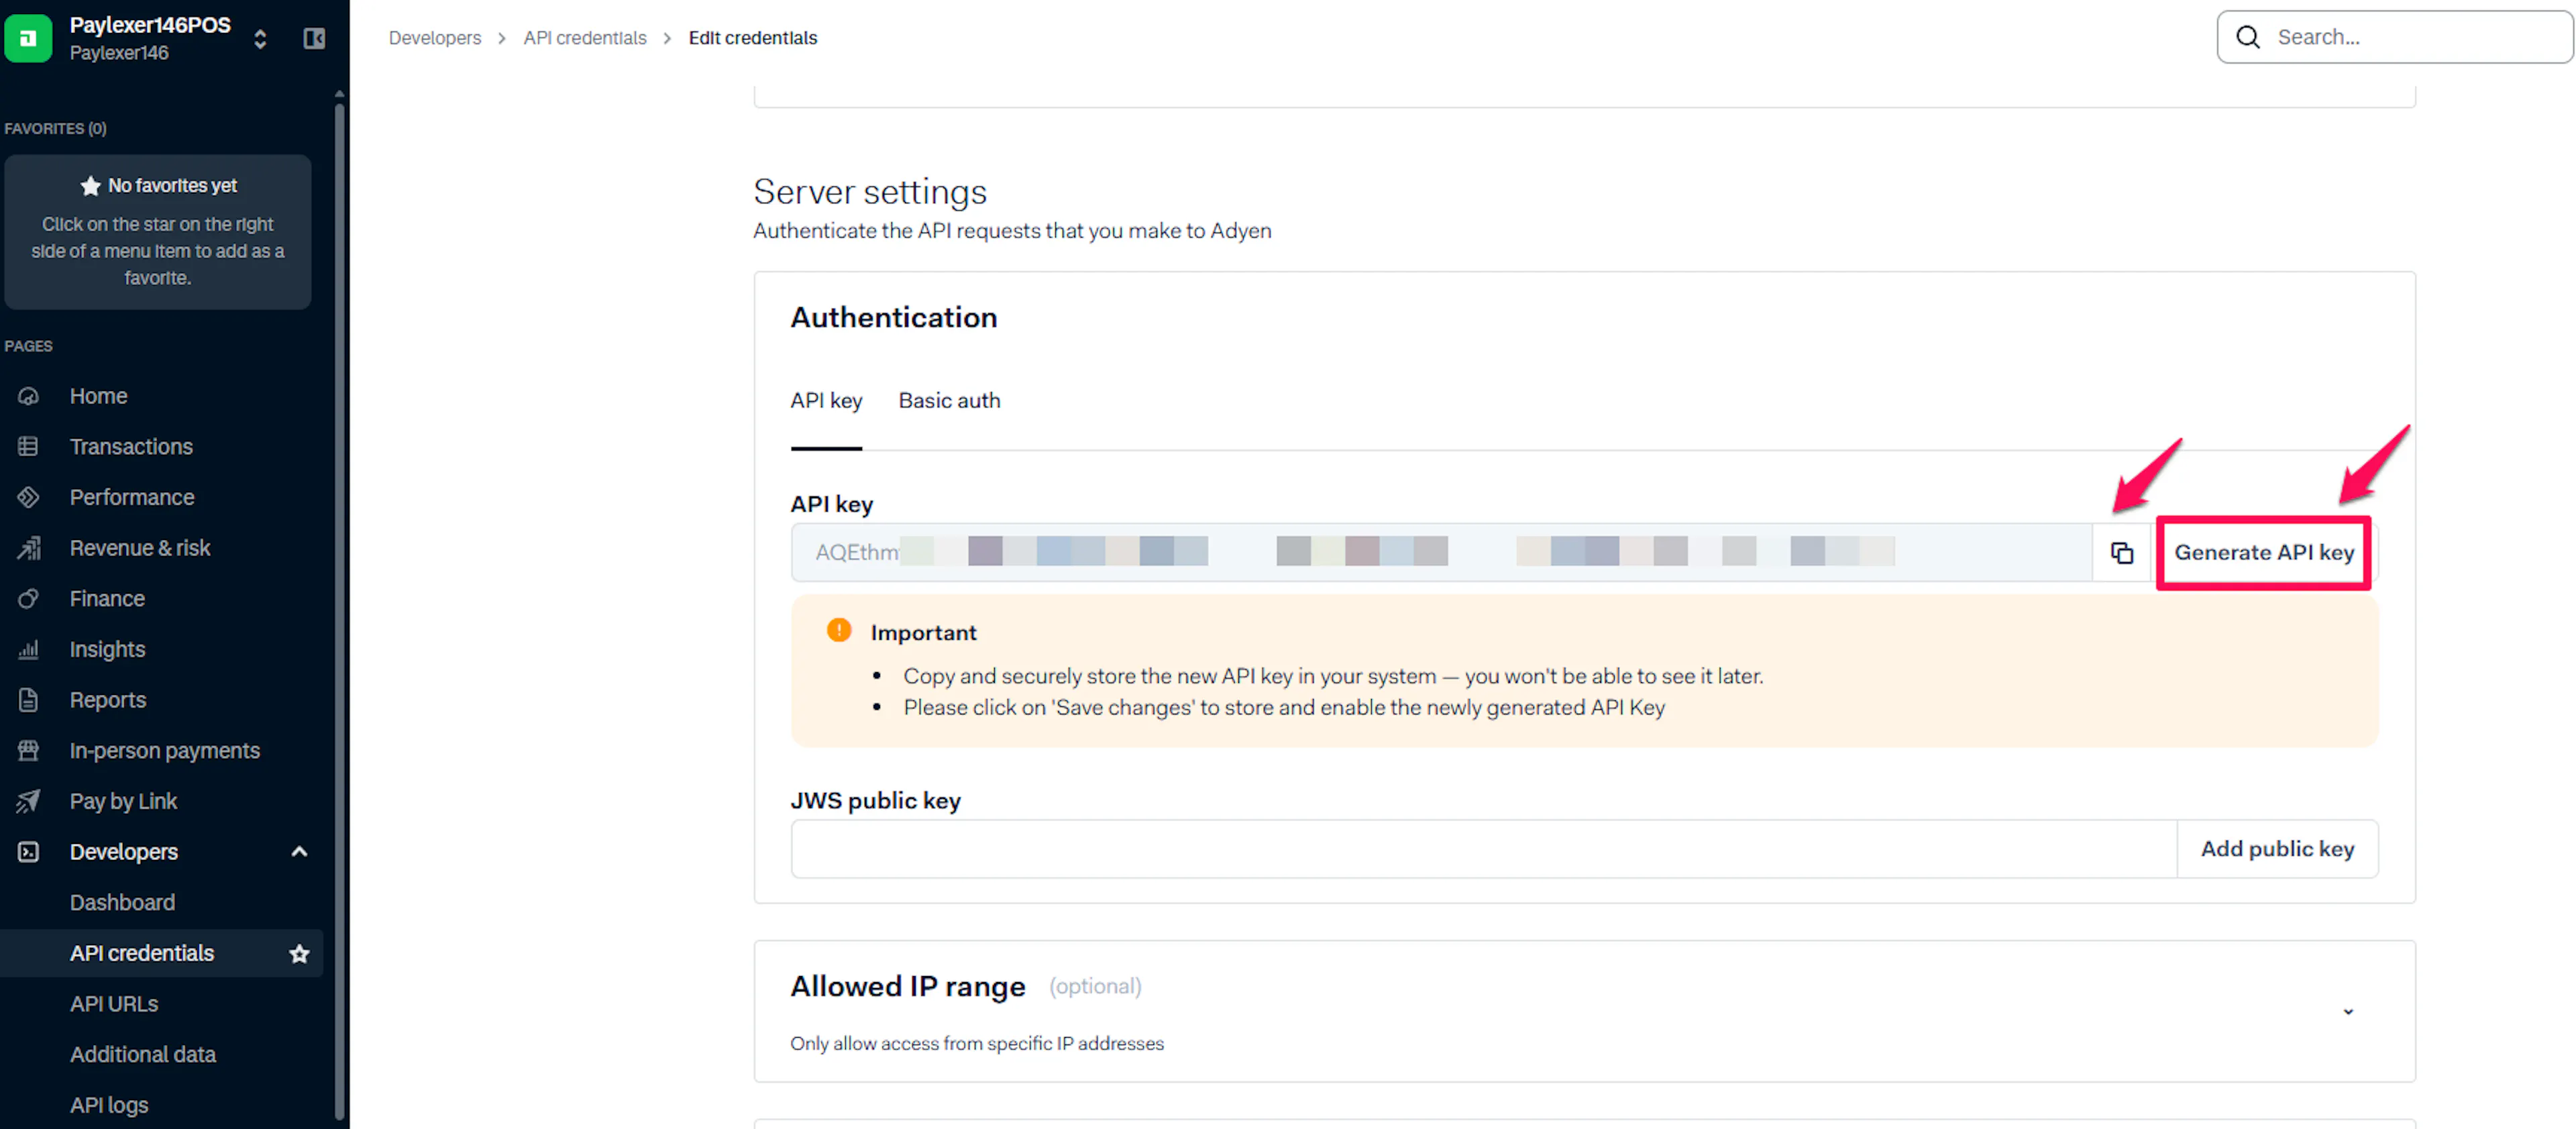
The API Key is shown only when it is generated. Paste it into PayLexer immediately, or store it in a secure password manager. If you lose it, generate a new one and update PayLexer.
Generate your Client Key and add allowed origins
Under Client settings → Authentication, select the Client key tab and click Generate client key. Copy the value.
Under Add allowed origins, enter the PayLexer payment processor domain https://processor.paylexer.com and click Add, then Save changes. PayLexer renders the Adyen checkout from this domain, not from your website's domain.
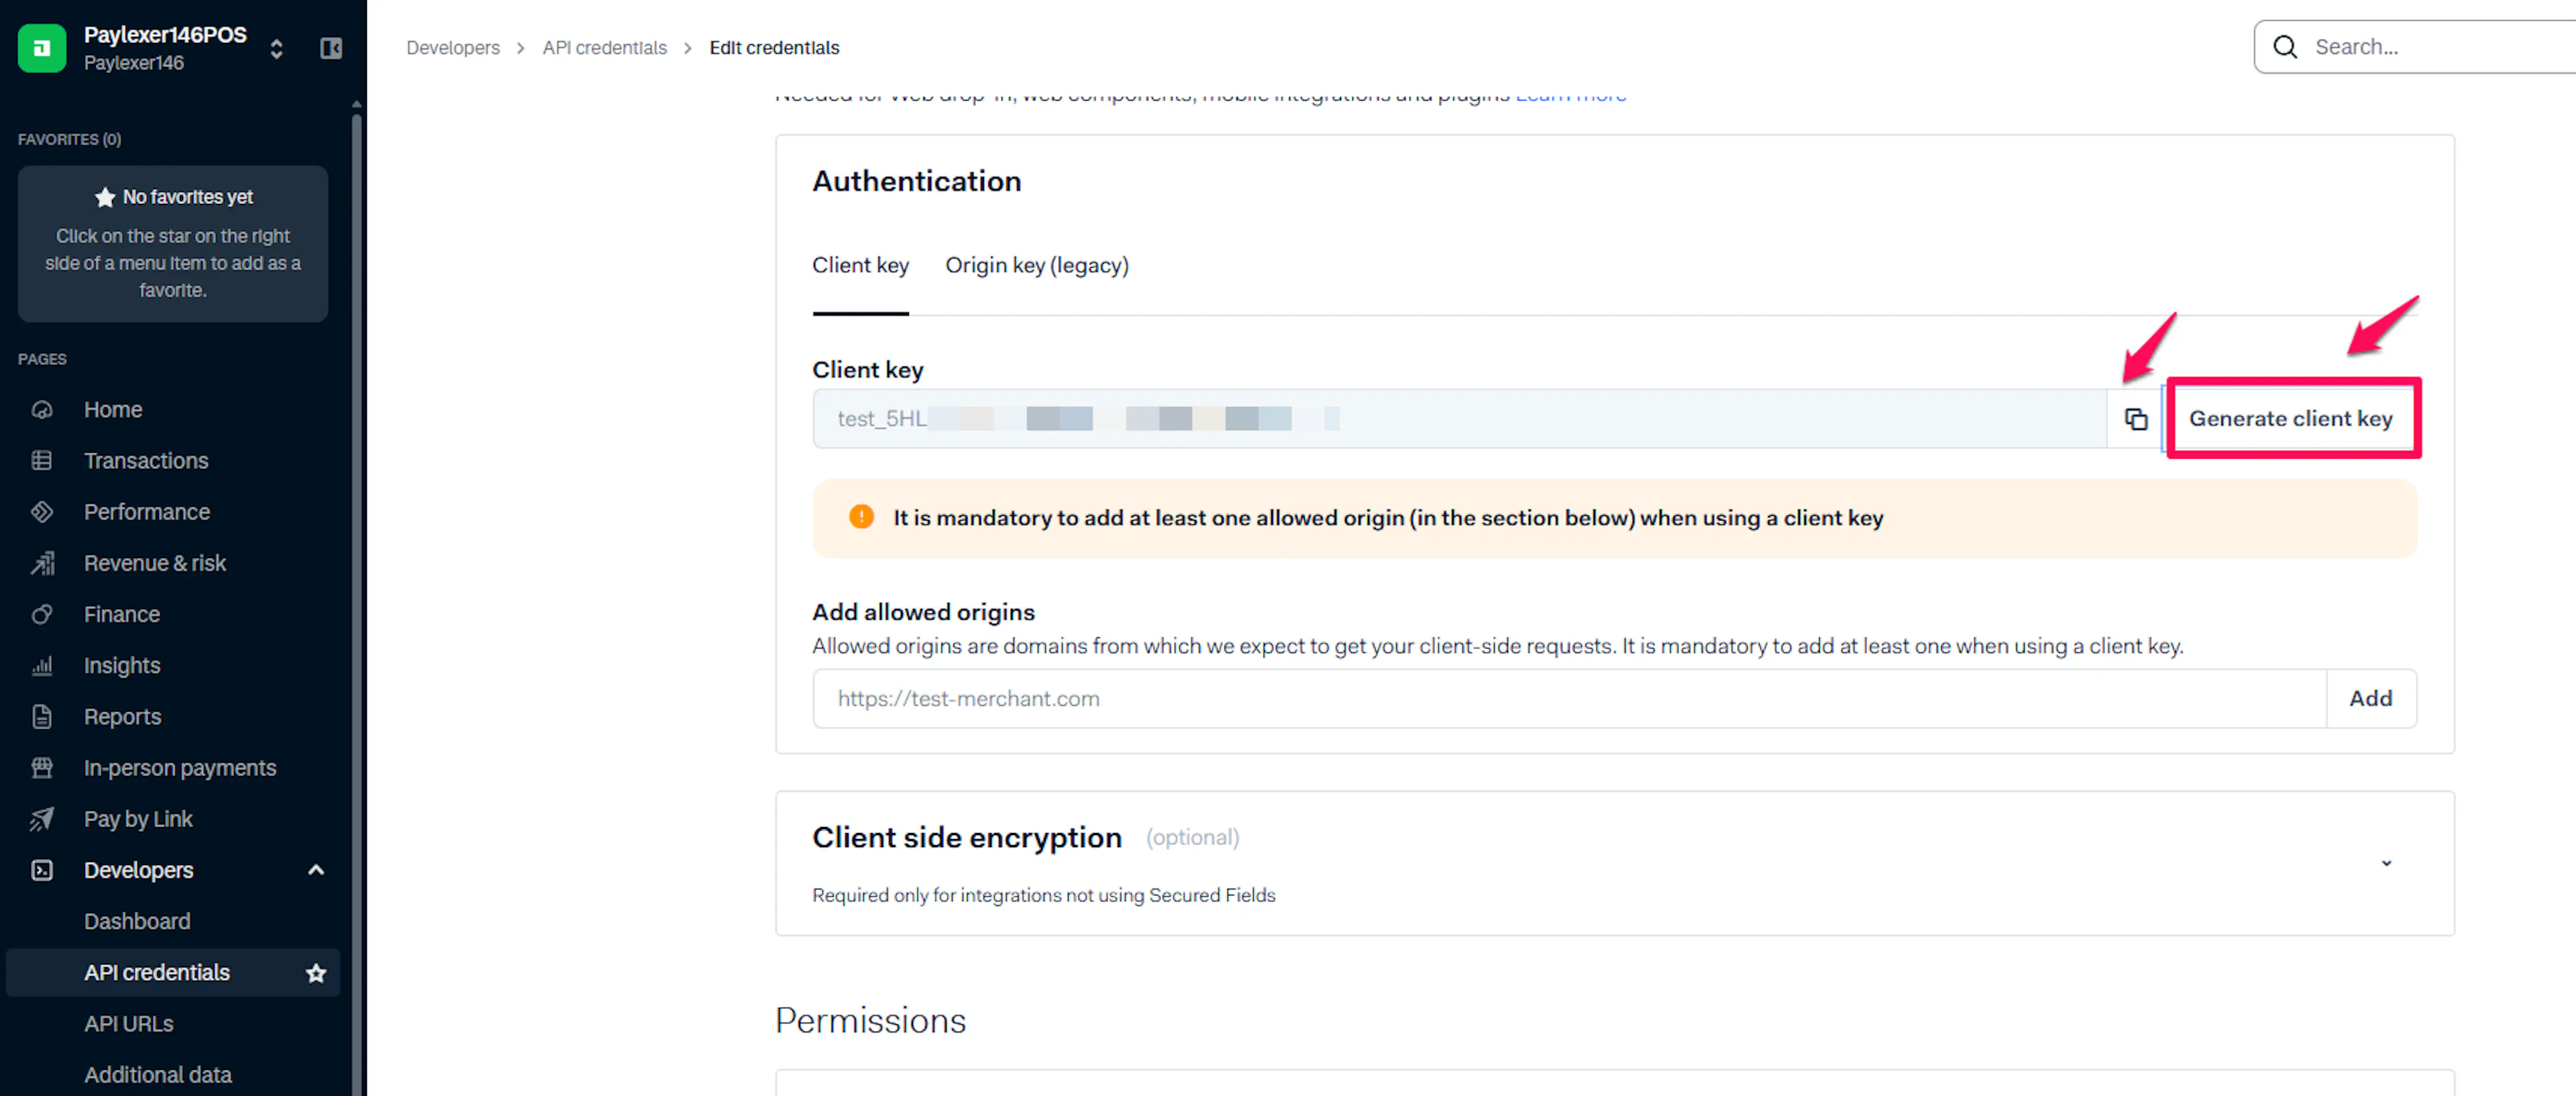
The Client Key is a public, browser-safe key used to render the embedded checkout. The checkout will not load on domains that are not in your allowed origins list.
Copy your Live Endpoint URL Prefix (Live only)
In the Live Customer Area, go to Developers → API URLs and copy your live endpoint URL prefix (for example, 1797a841fbb37ca7-YourCompany). This is not needed for the Test environment.
Adding Credentials to PayLexer
Open PayLexer Dashboard
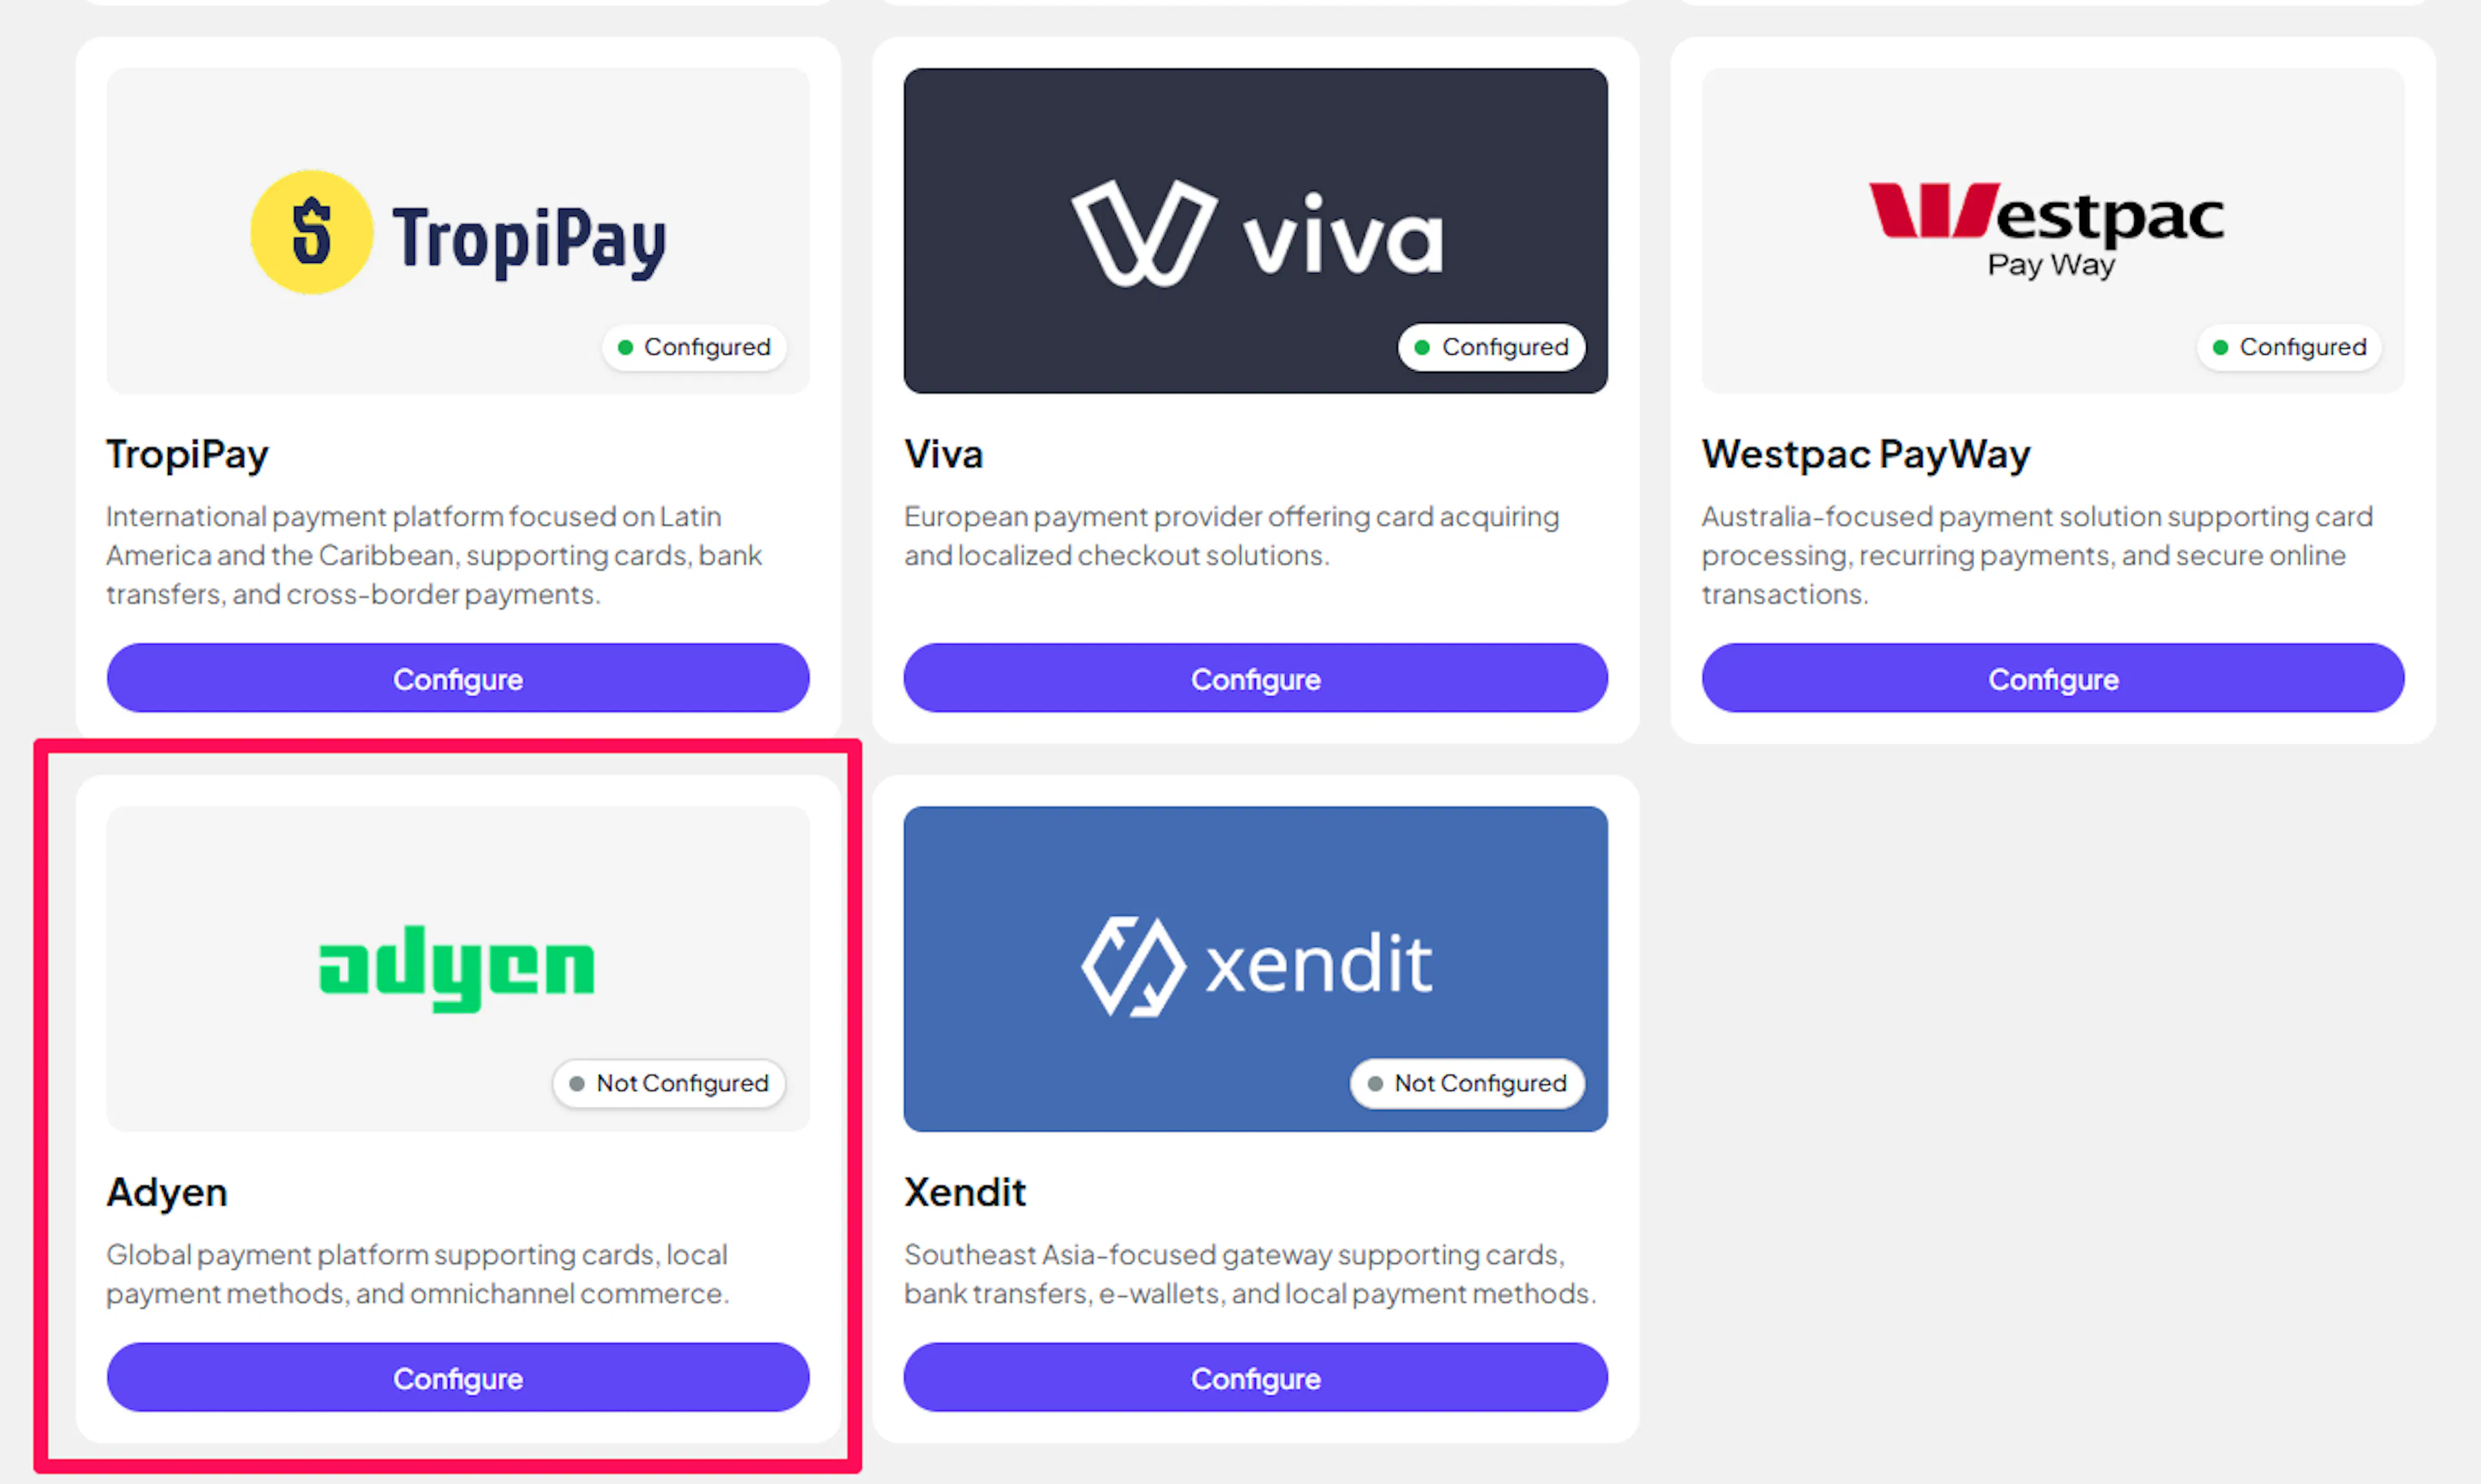
Log in to your PayLexer dashboard and navigate to Payment Gateways → Adyen.
Enter your credentials
Paste your Live and Test credentials into the respective fields:
-
Merchant Account (Live and Test) - your merchant account code from each Customer Area
-
API Key (Live and Test) - the API key generated in each Customer Area
-
Client Key (Live and Test) - the client key generated in each Customer Area
-
Live Endpoint URL Prefix (Live only) - from Developers → API URLs in the Live Customer Area
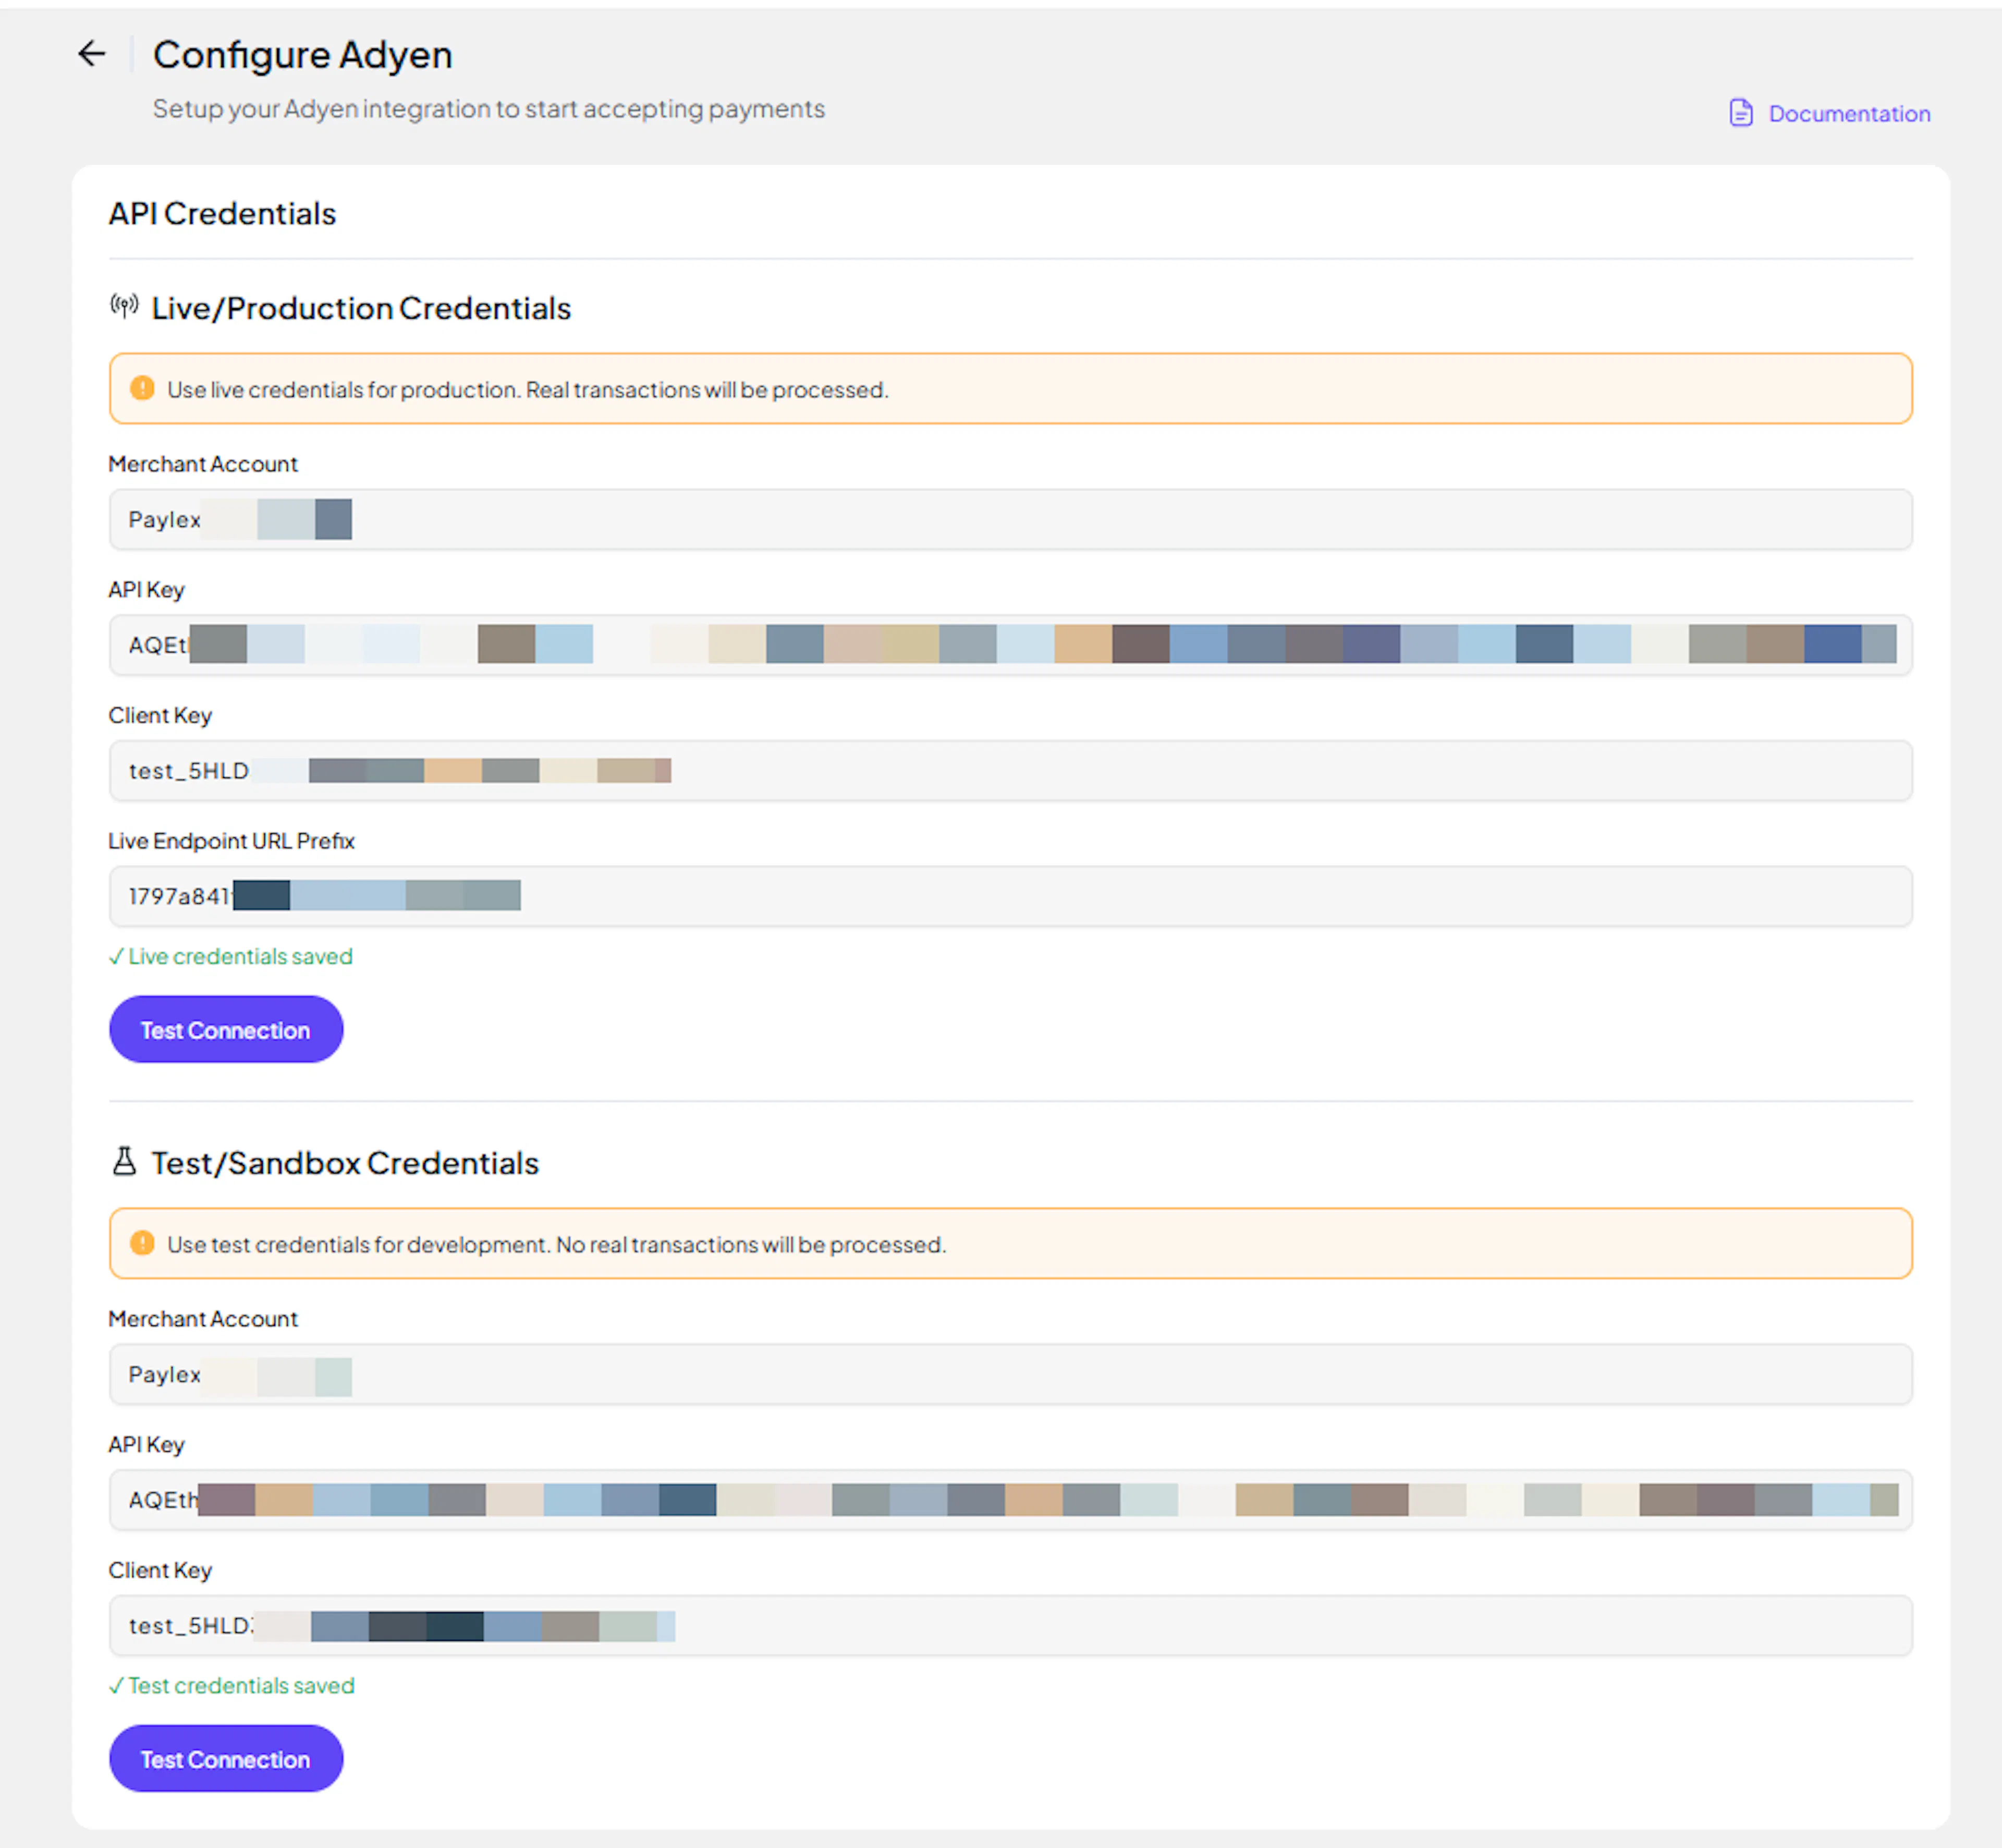
Understanding Live/Production and Sandbox Settings:
| Environment | Purpose |
|---|---|
| Live / Production (Mandatory) | Used for real transactions. Cannot be empty, even when testing. |
| Test / Sandbox (Optional) | Used for testing only. No real money is processed. |
How PayLexer selects credentials:
-
Debug/Test mode ON → Test credentials are used
-
Debug/Test mode OFF → Live credentials are used
Test and save
Click Test Connection to verify your credentials, then click Save Configuration.
Credentials saved. Next, configure webhooks - they are mandatory for Adyen.
Configuring Webhooks (Mandatory)
Webhooks enable real-time payment updates and significantly improve reliability.
Benefits of Webhooks:
-
Instant payment status updates
-
Automatic refund processing
-
Reliable order confirmation for every payment
Webhooks are mandatory for Adyen. PayLexer relies on Adyen's webhook notifications to confirm payments and sync refunds - without a webhook, orders will never be marked as paid.
Copy the webhook URL from PayLexer
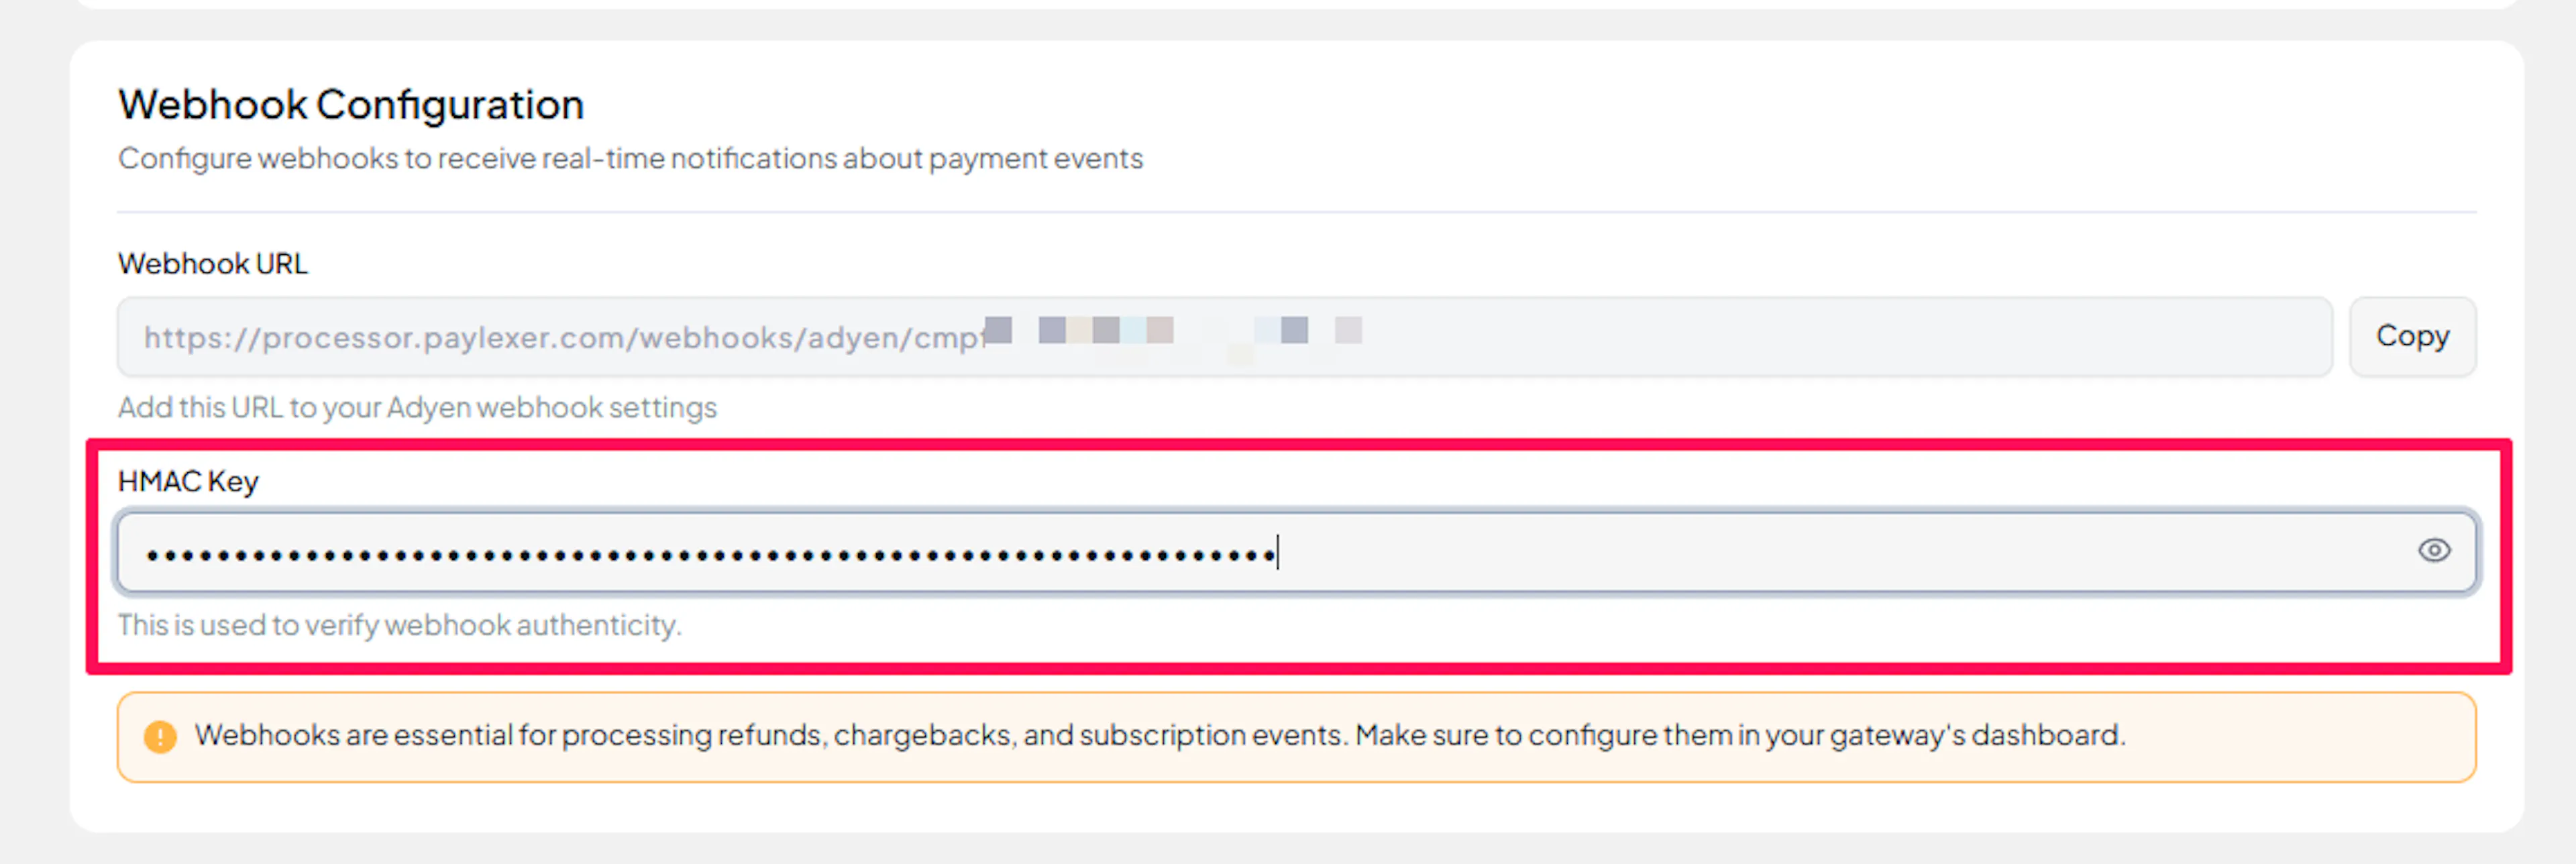
On the Payment Gateways → Adyen page in PayLexer, copy the Webhook URL displayed for your account.

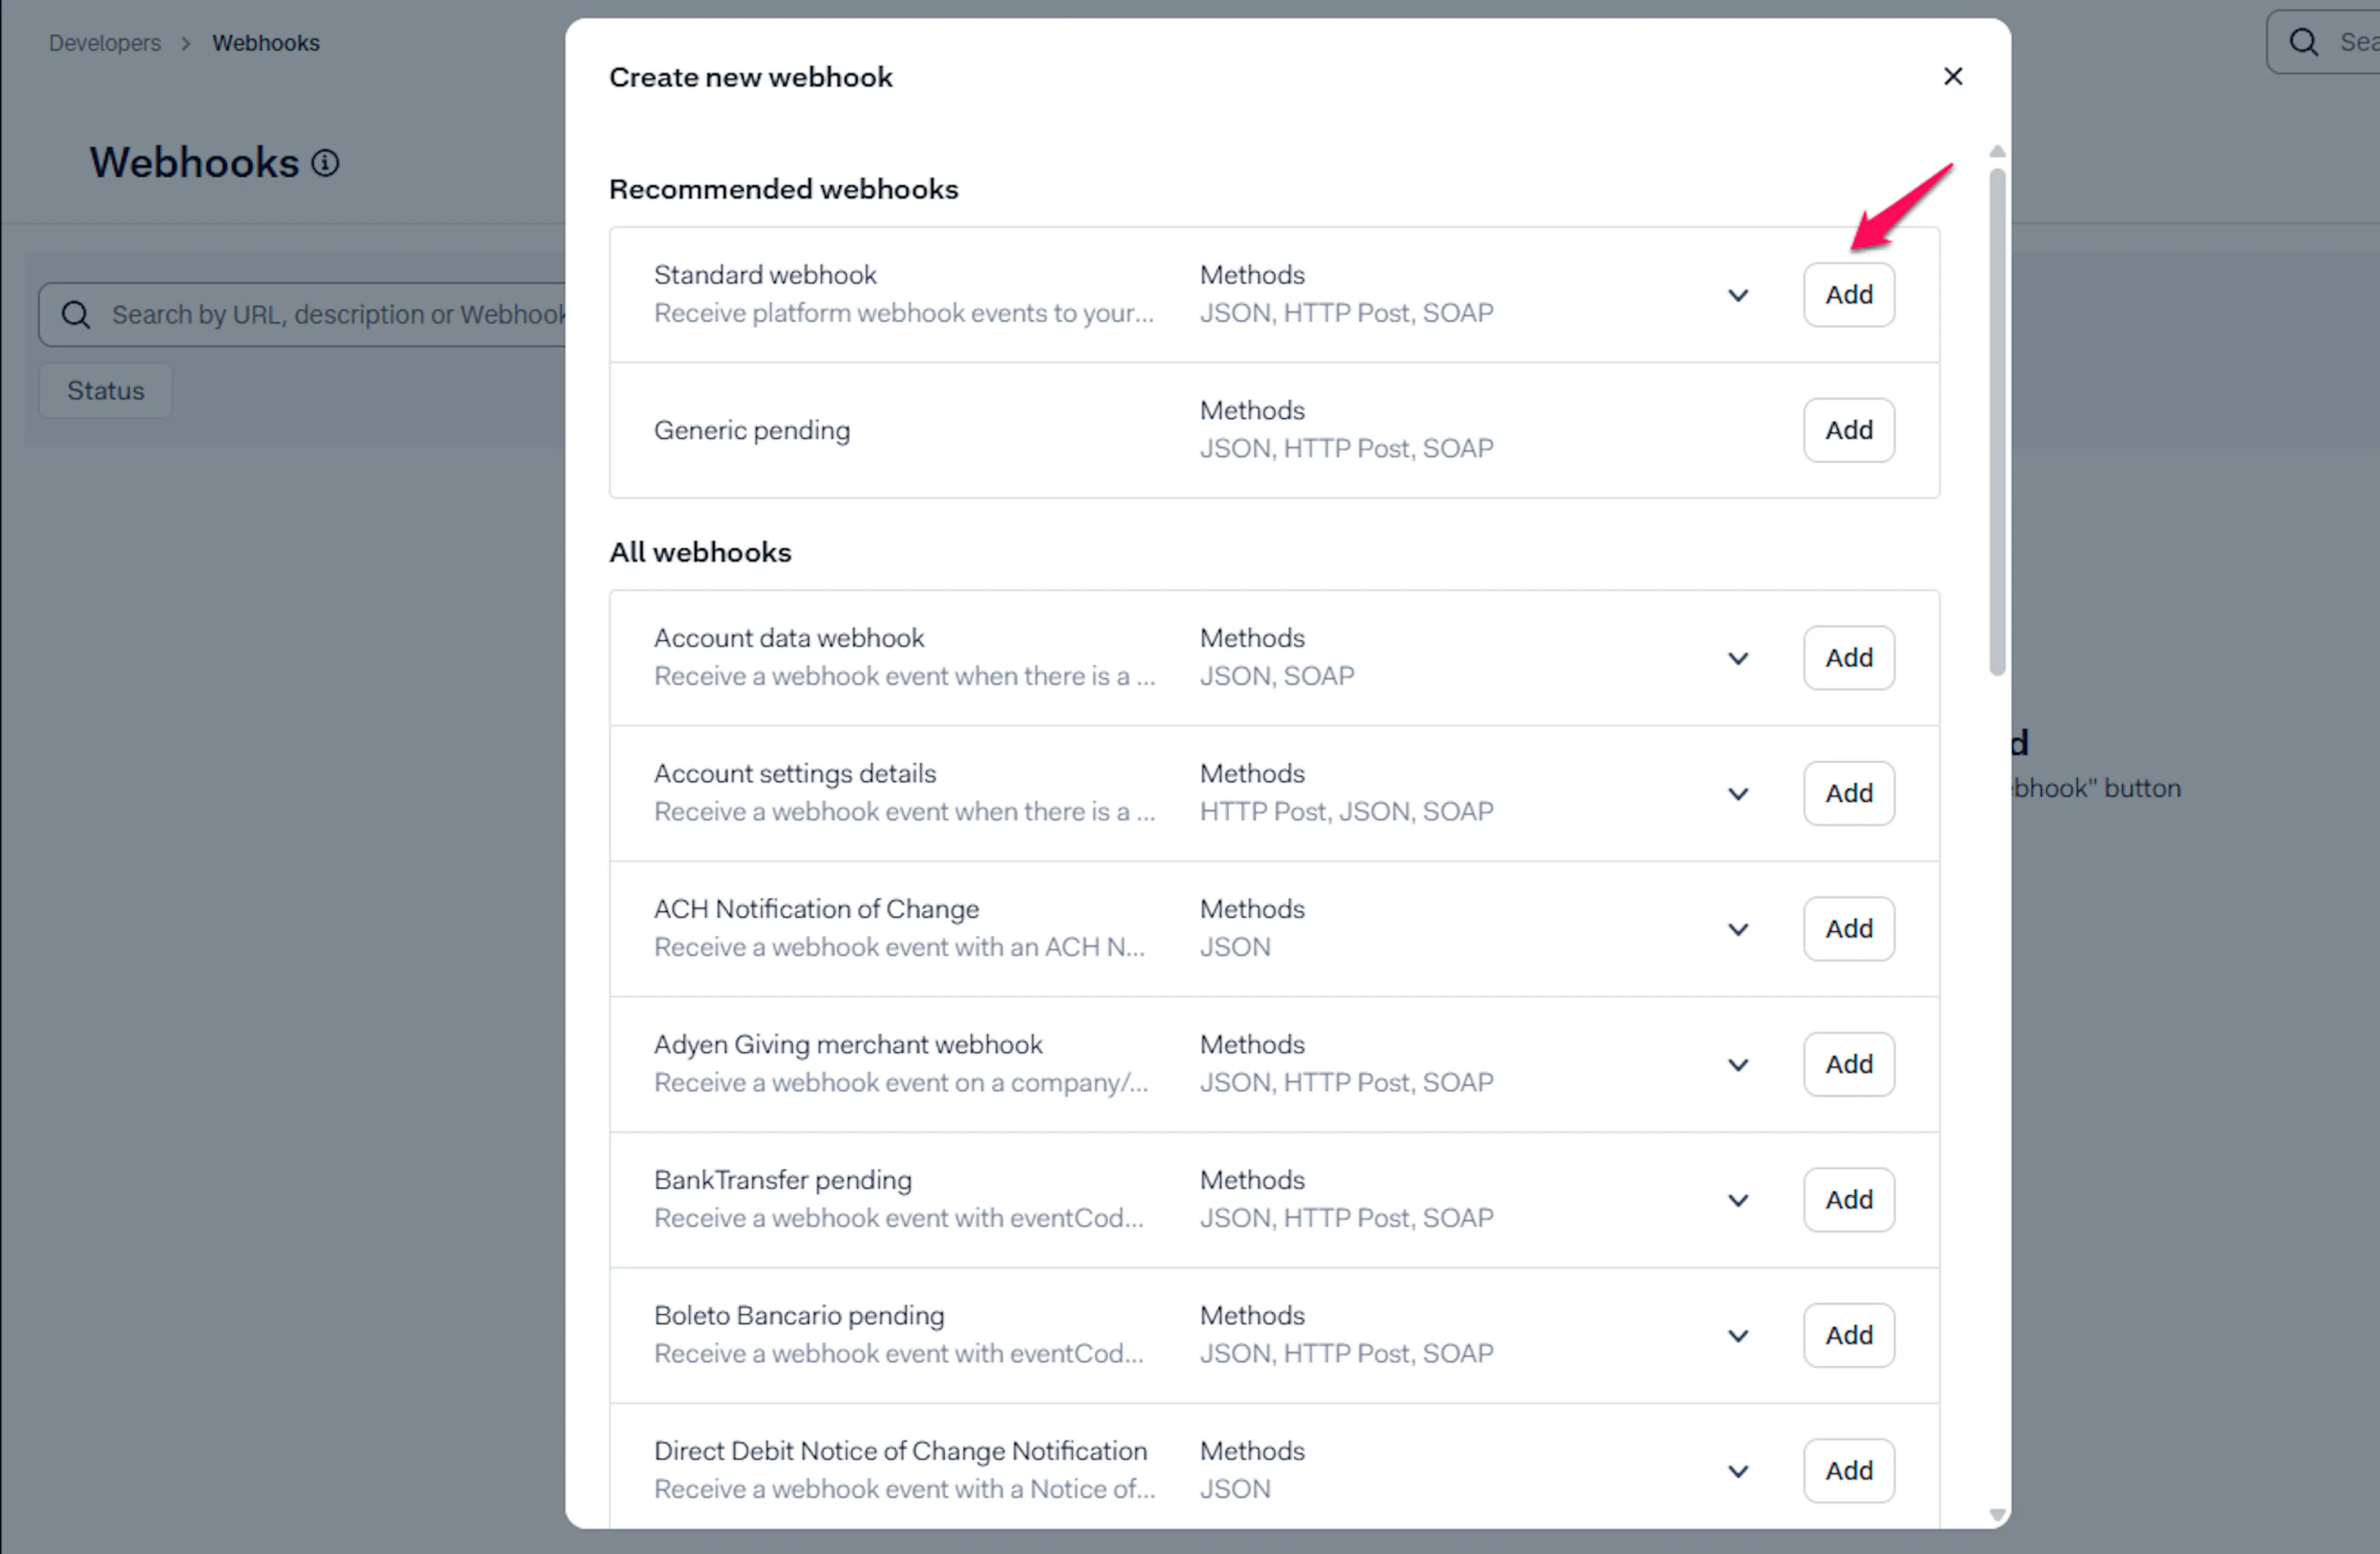
Create a Standard webhook in Adyen
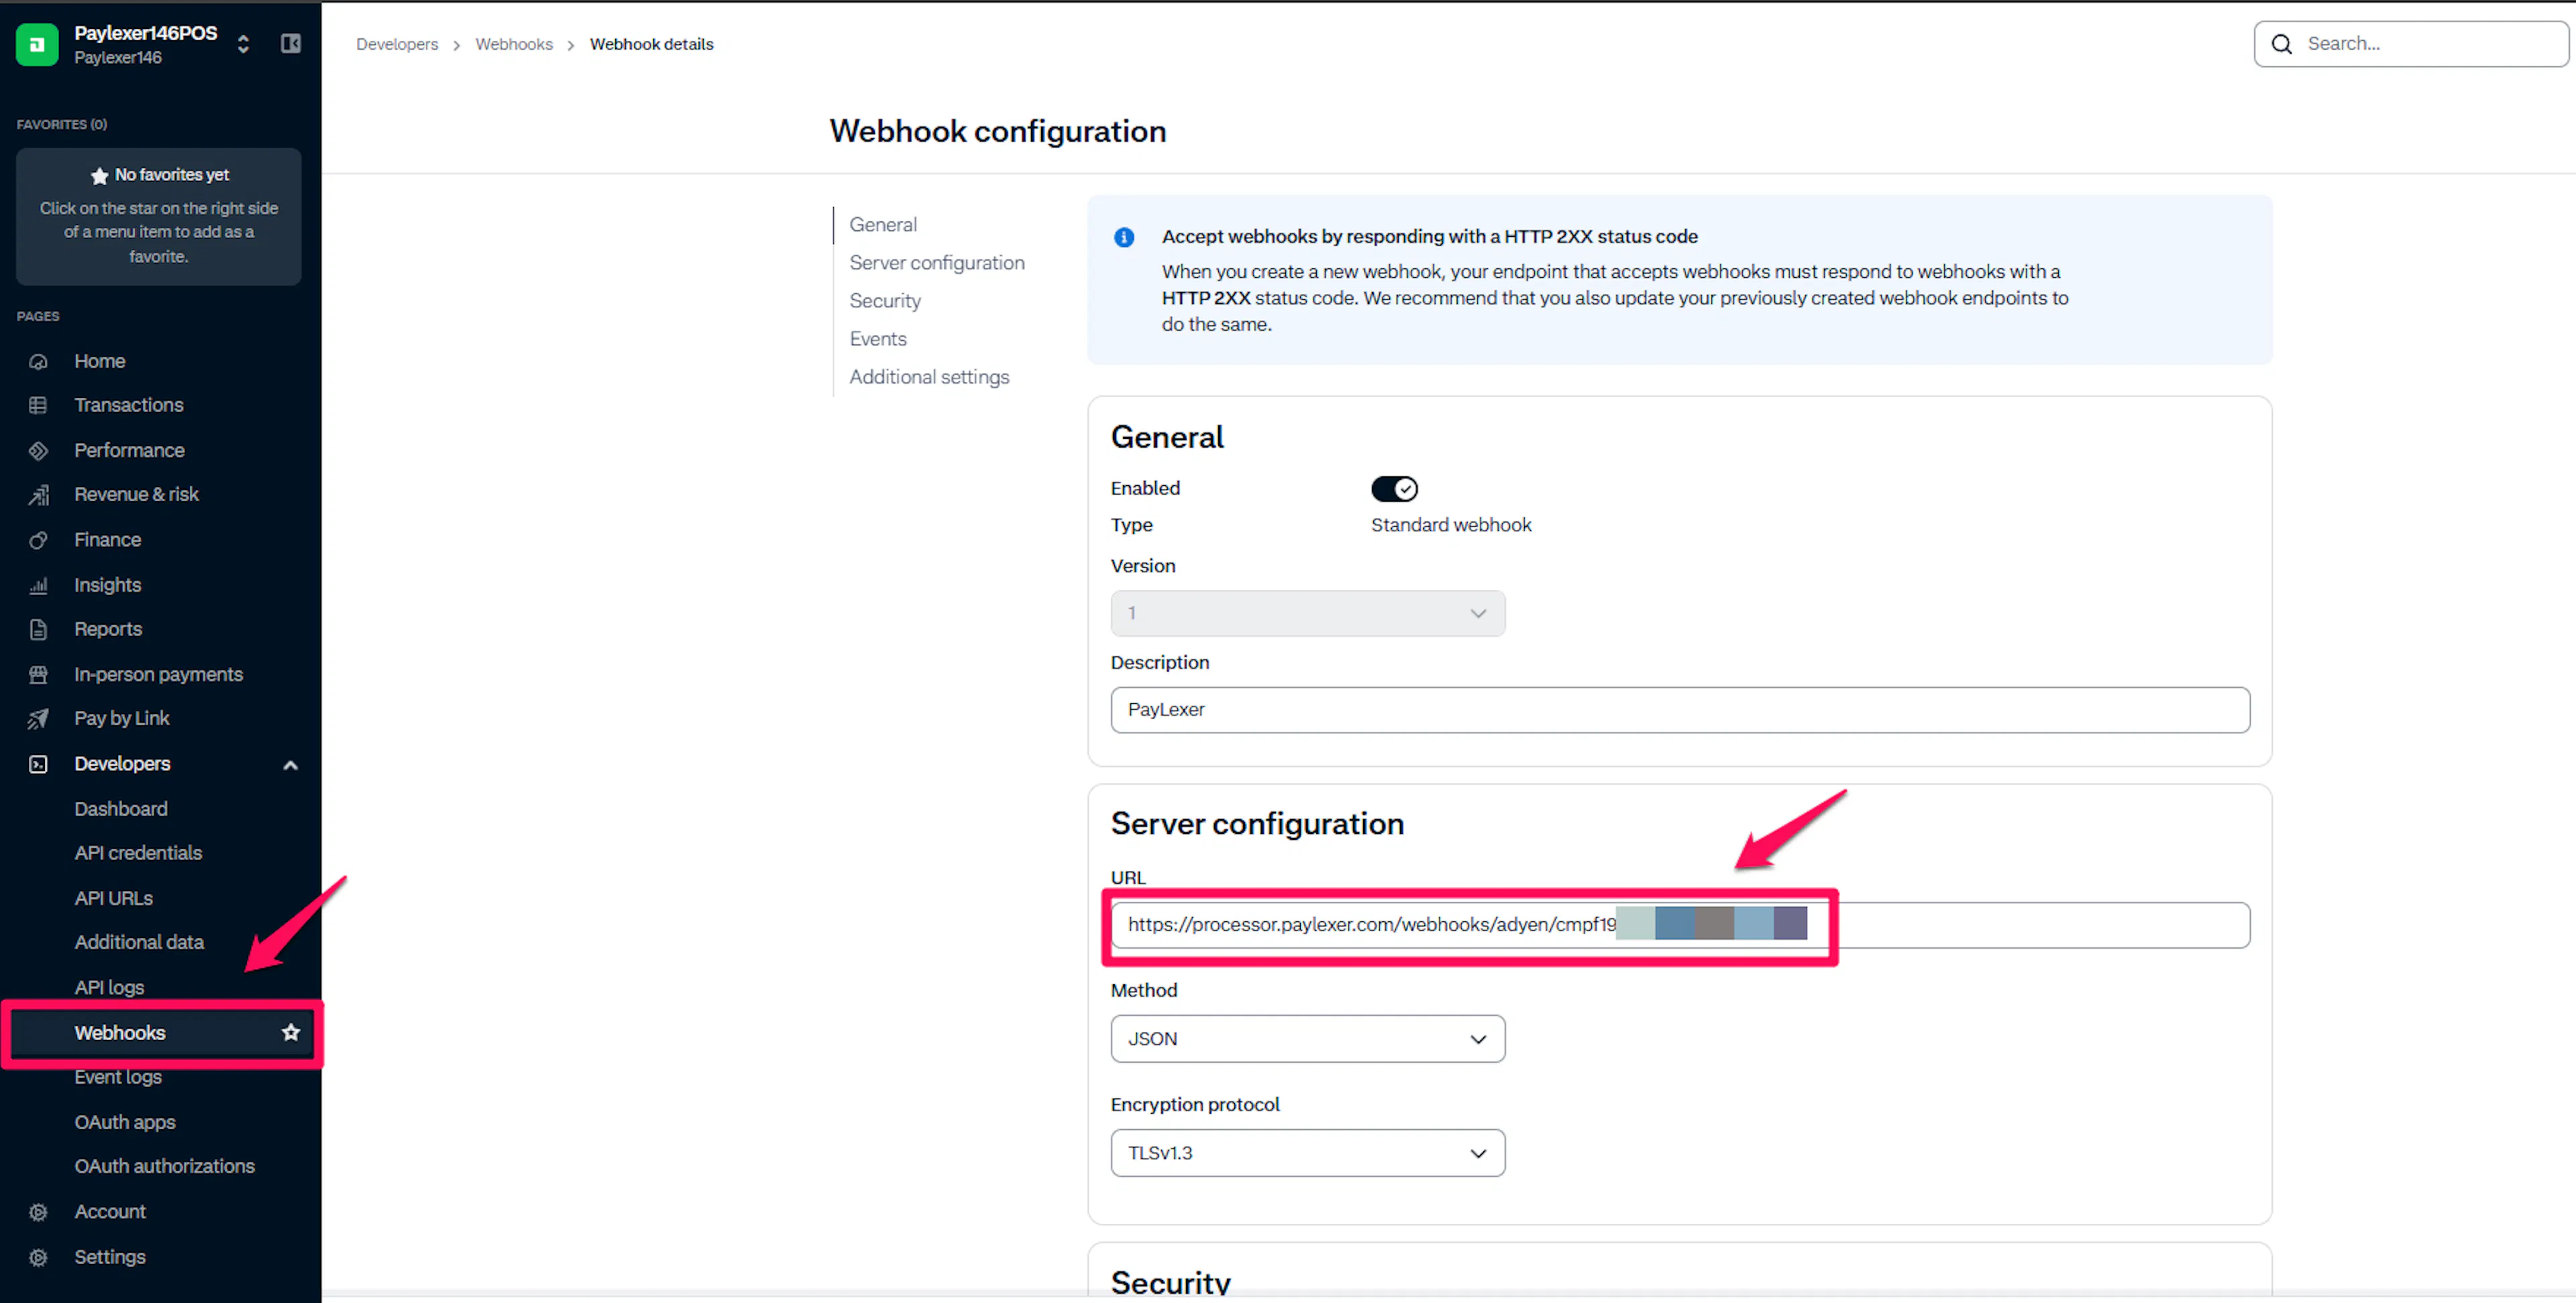
In your Adyen Customer Area, go to Developers → Webhooks, click + Webhook, and choose Standard webhook.
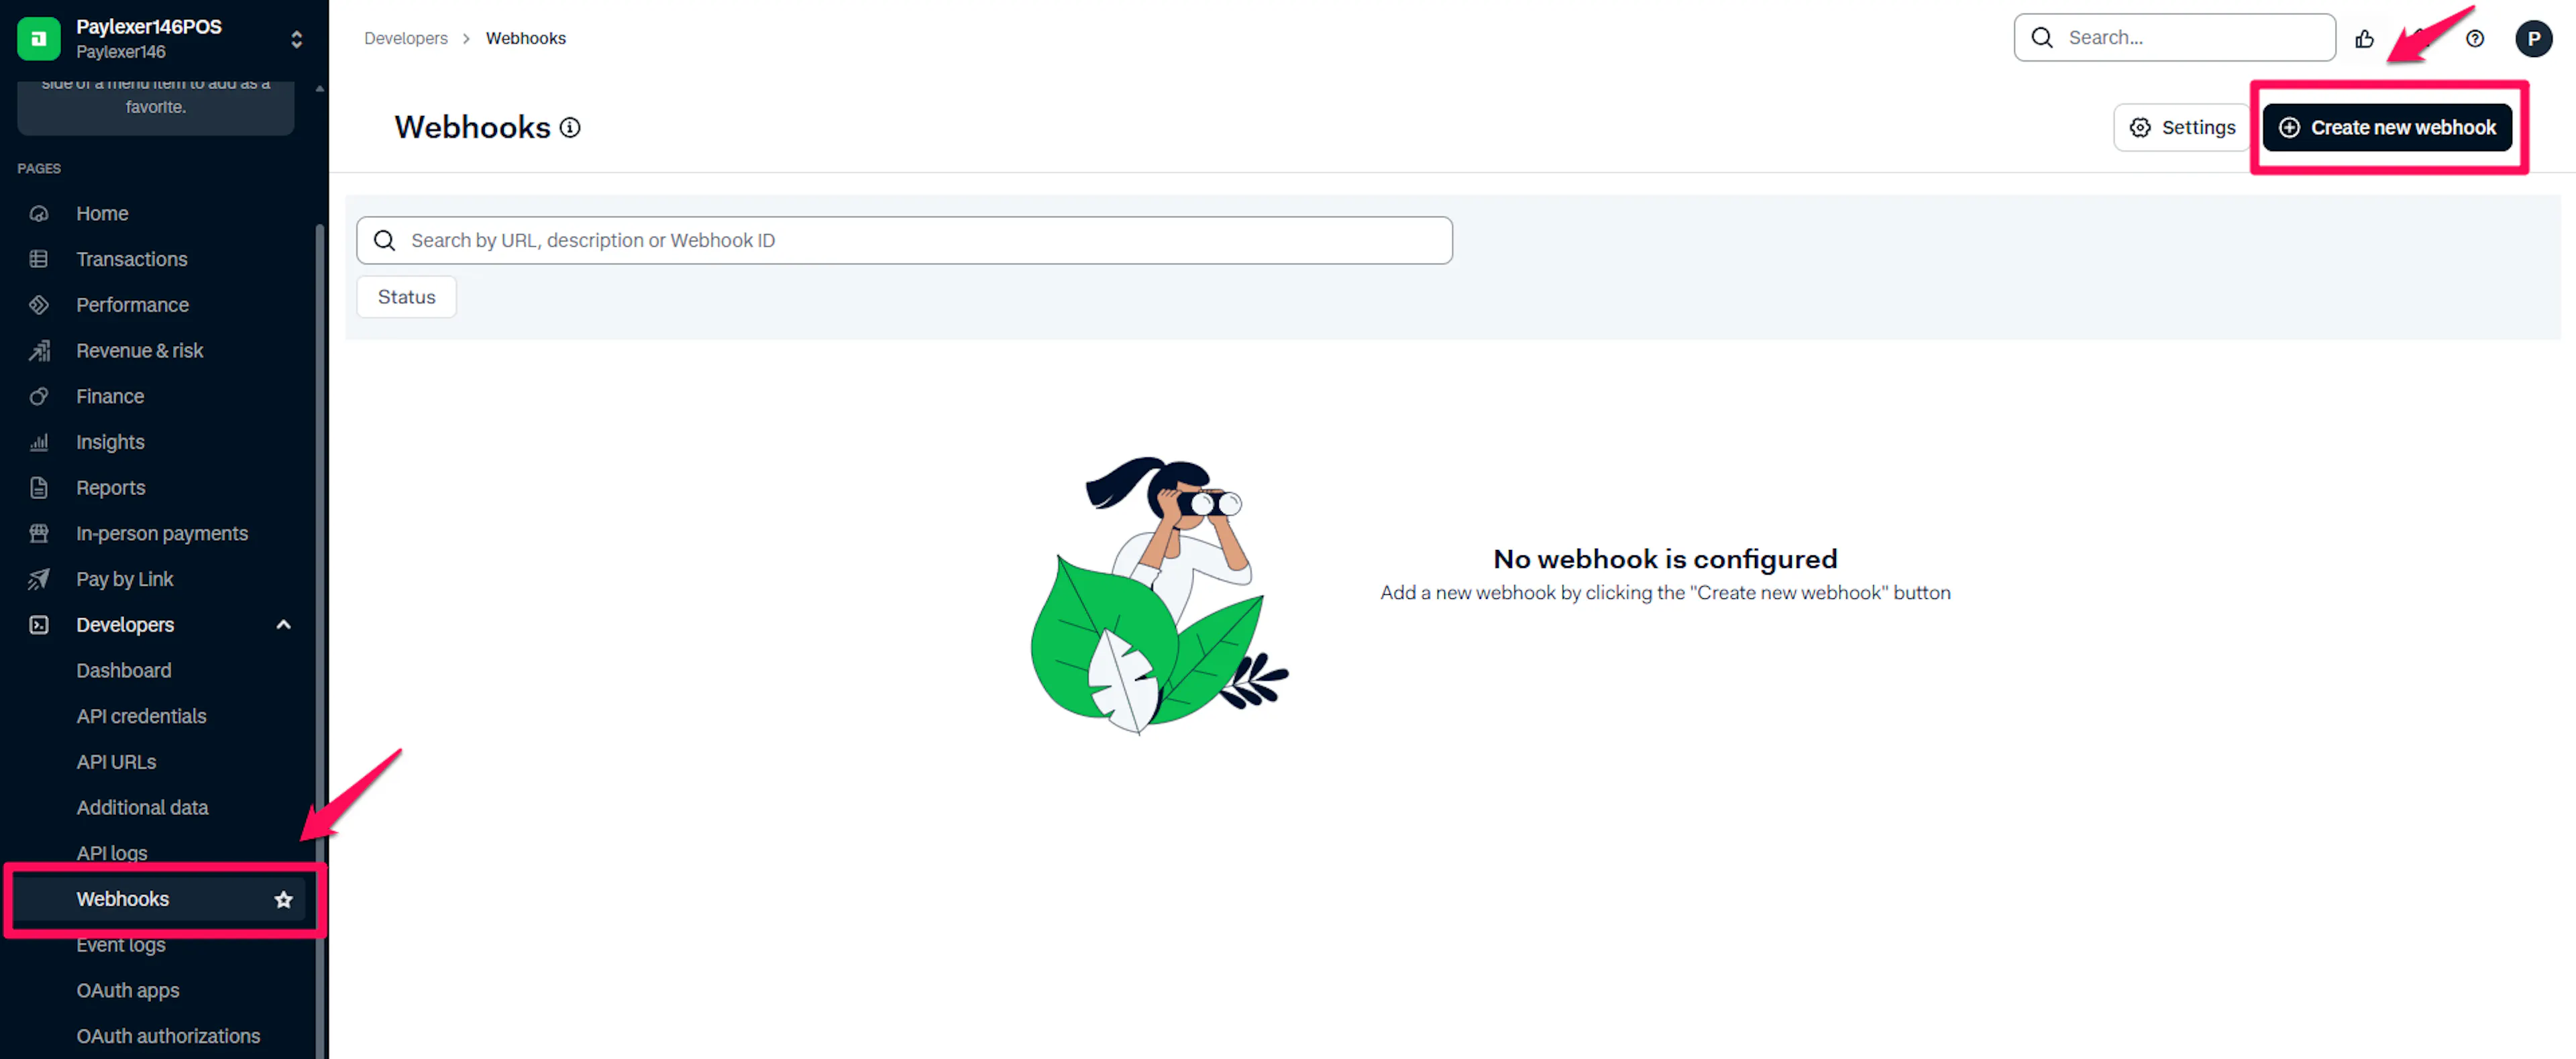
Under Server configuration, paste the webhook URL you copied from PayLexer.
Generate and copy the HMAC Key
In the webhook's Security settings, click Generate HMAC key and copy the value, then save the webhook.
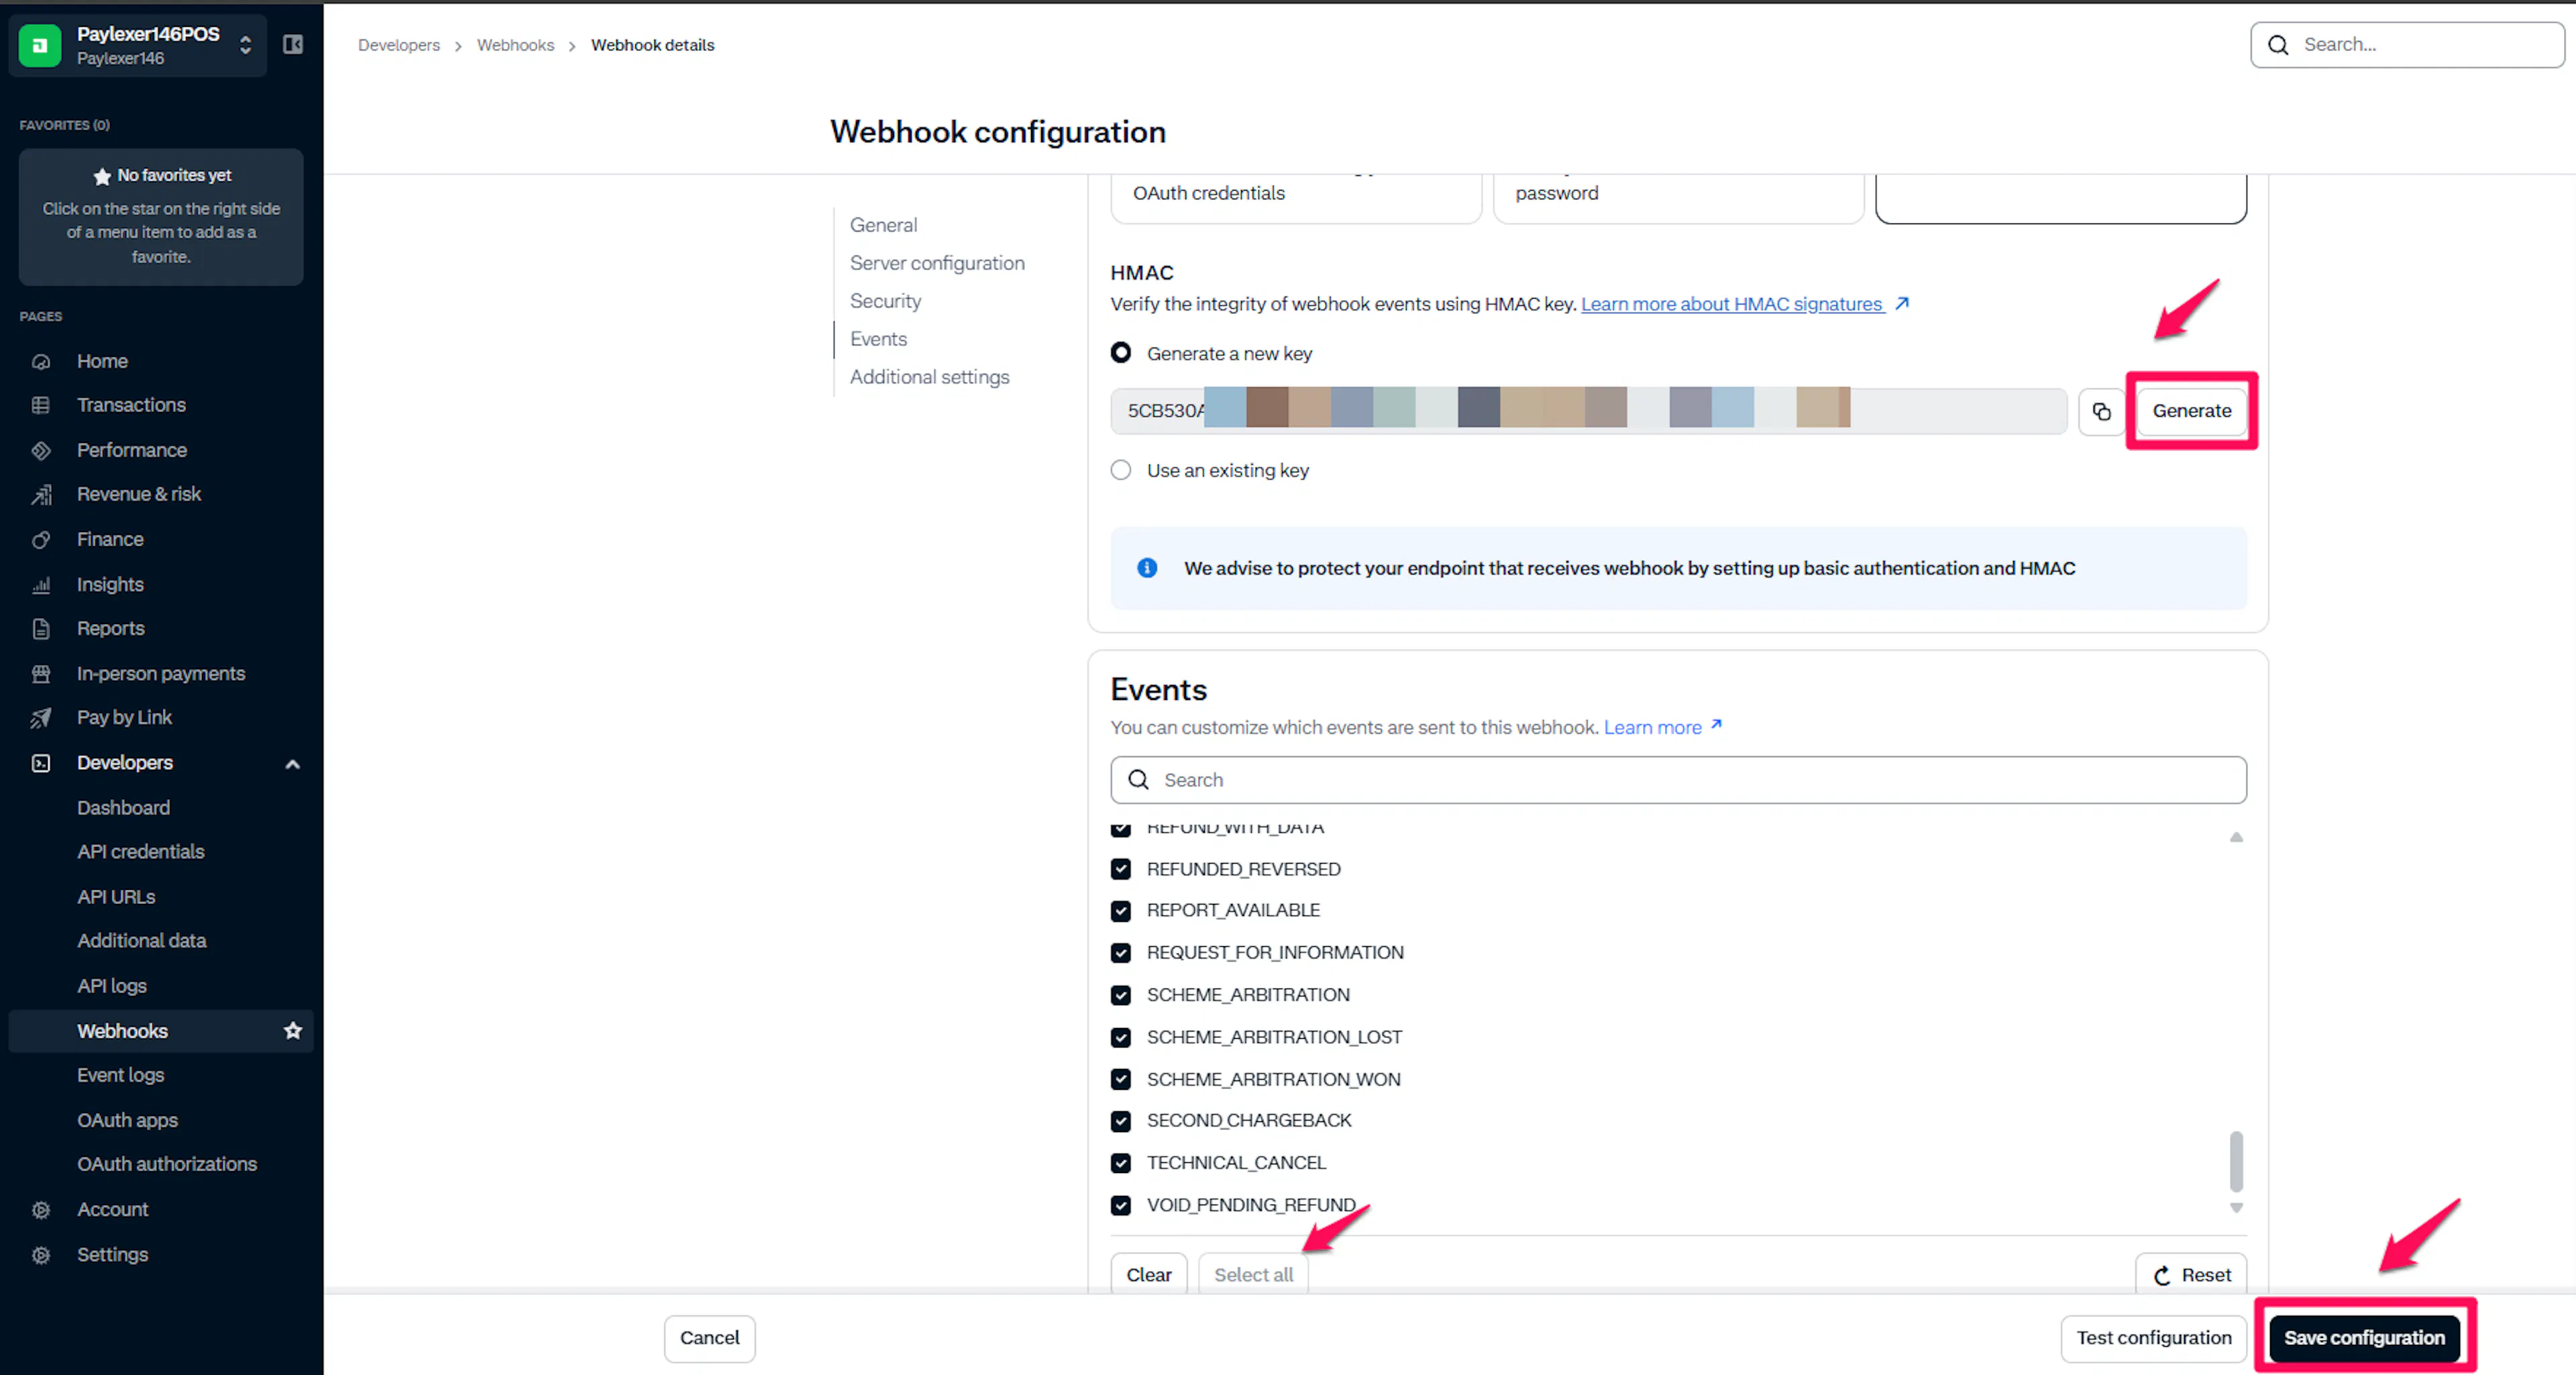
The Test and Live Customer Areas issue different HMAC keys. When you switch from test to live, generate a new HMAC key in the Live Customer Area webhook and update PayLexer with the new value.
Add the HMAC Key to PayLexer
Back in PayLexer, paste the value into the HMAC Key field on the Adyen configuration page and click Save.
Test the webhook
In the Adyen Customer Area, open your webhook and use Test configuration to send a test notification. A successful test confirms Adyen can reach PayLexer.
Webhook configured. Payment and refund events will now sync to PayLexer automatically.
Integrate Adyen to Your Website
If you have already added and configured your site, you can enable Adyen in your existing setup.
Go to Websites
Navigate to Websites in your PayLexer dashboard.
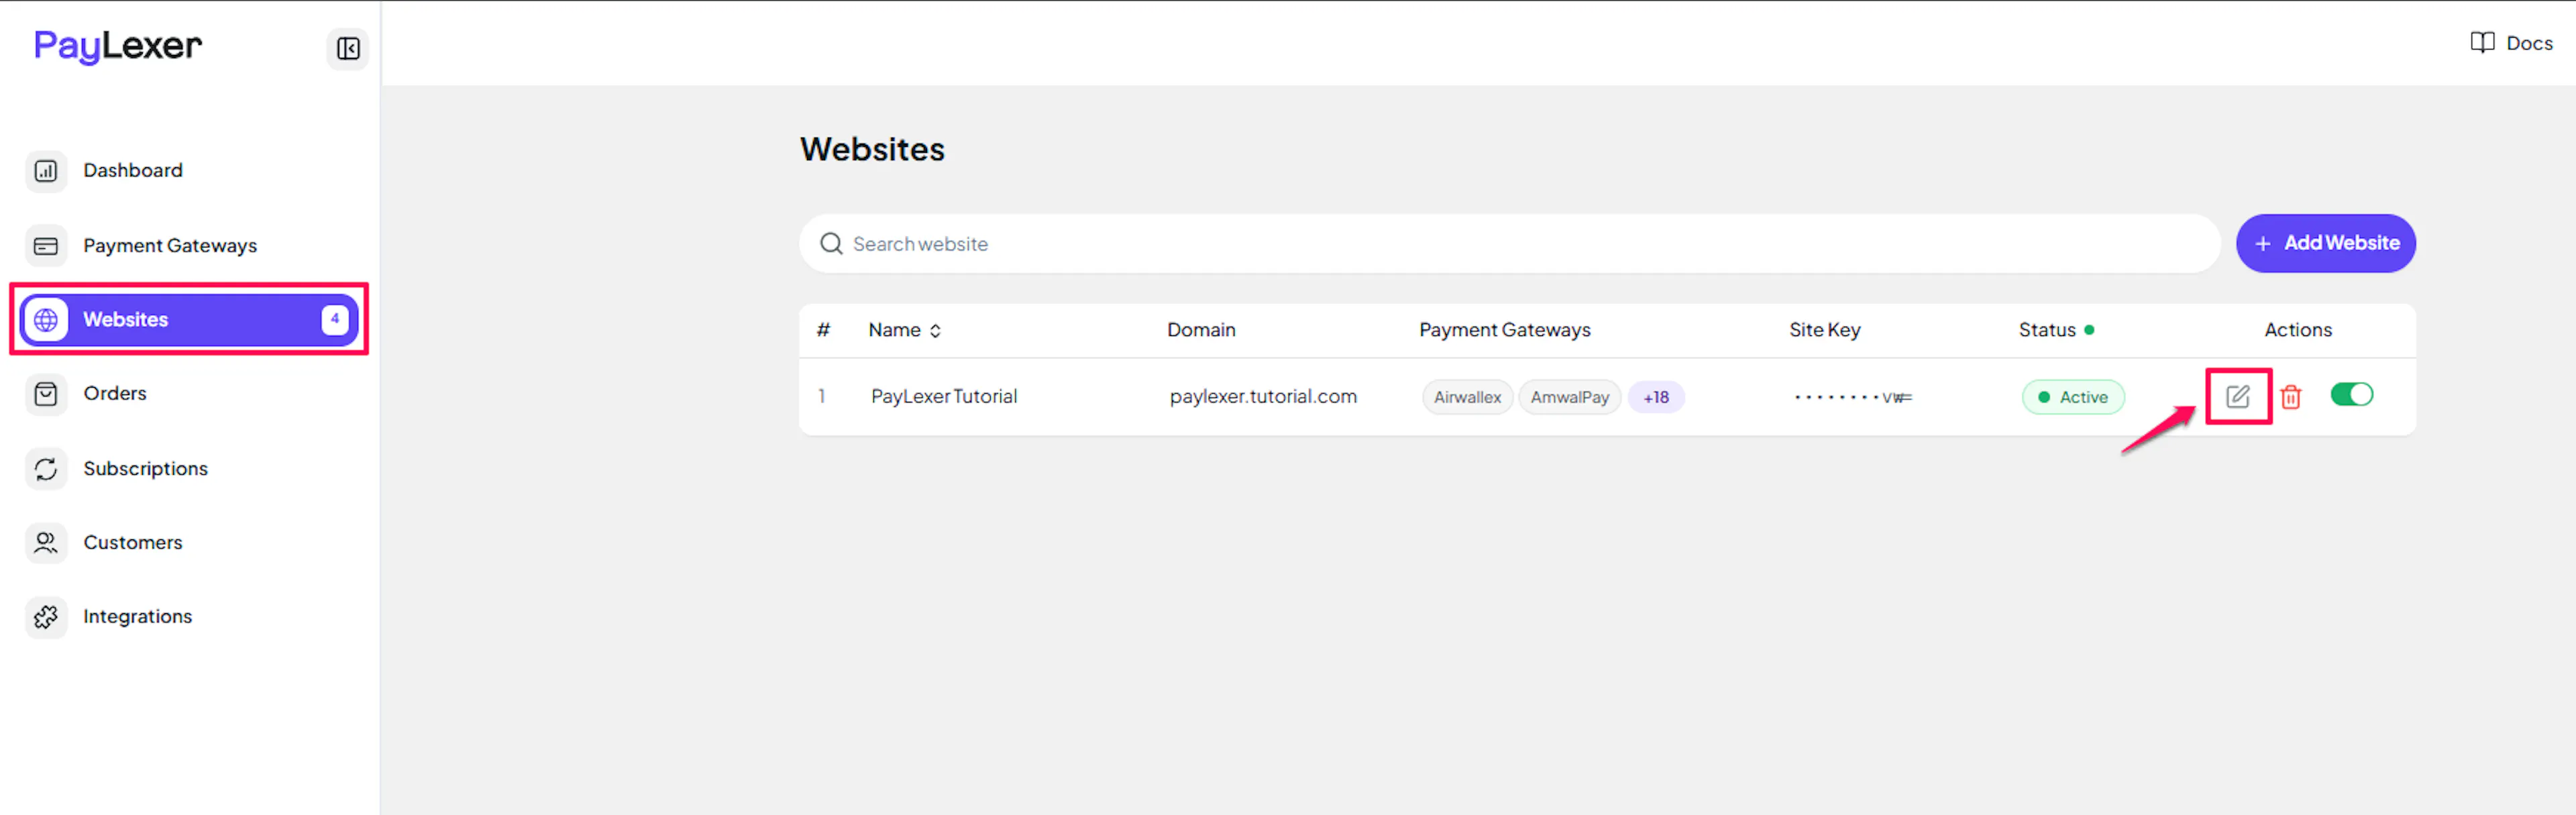
Edit your website
Click the Edit Icon of your added website.
Enable Adyen
Click the checkbox to enable Adyen for the website.
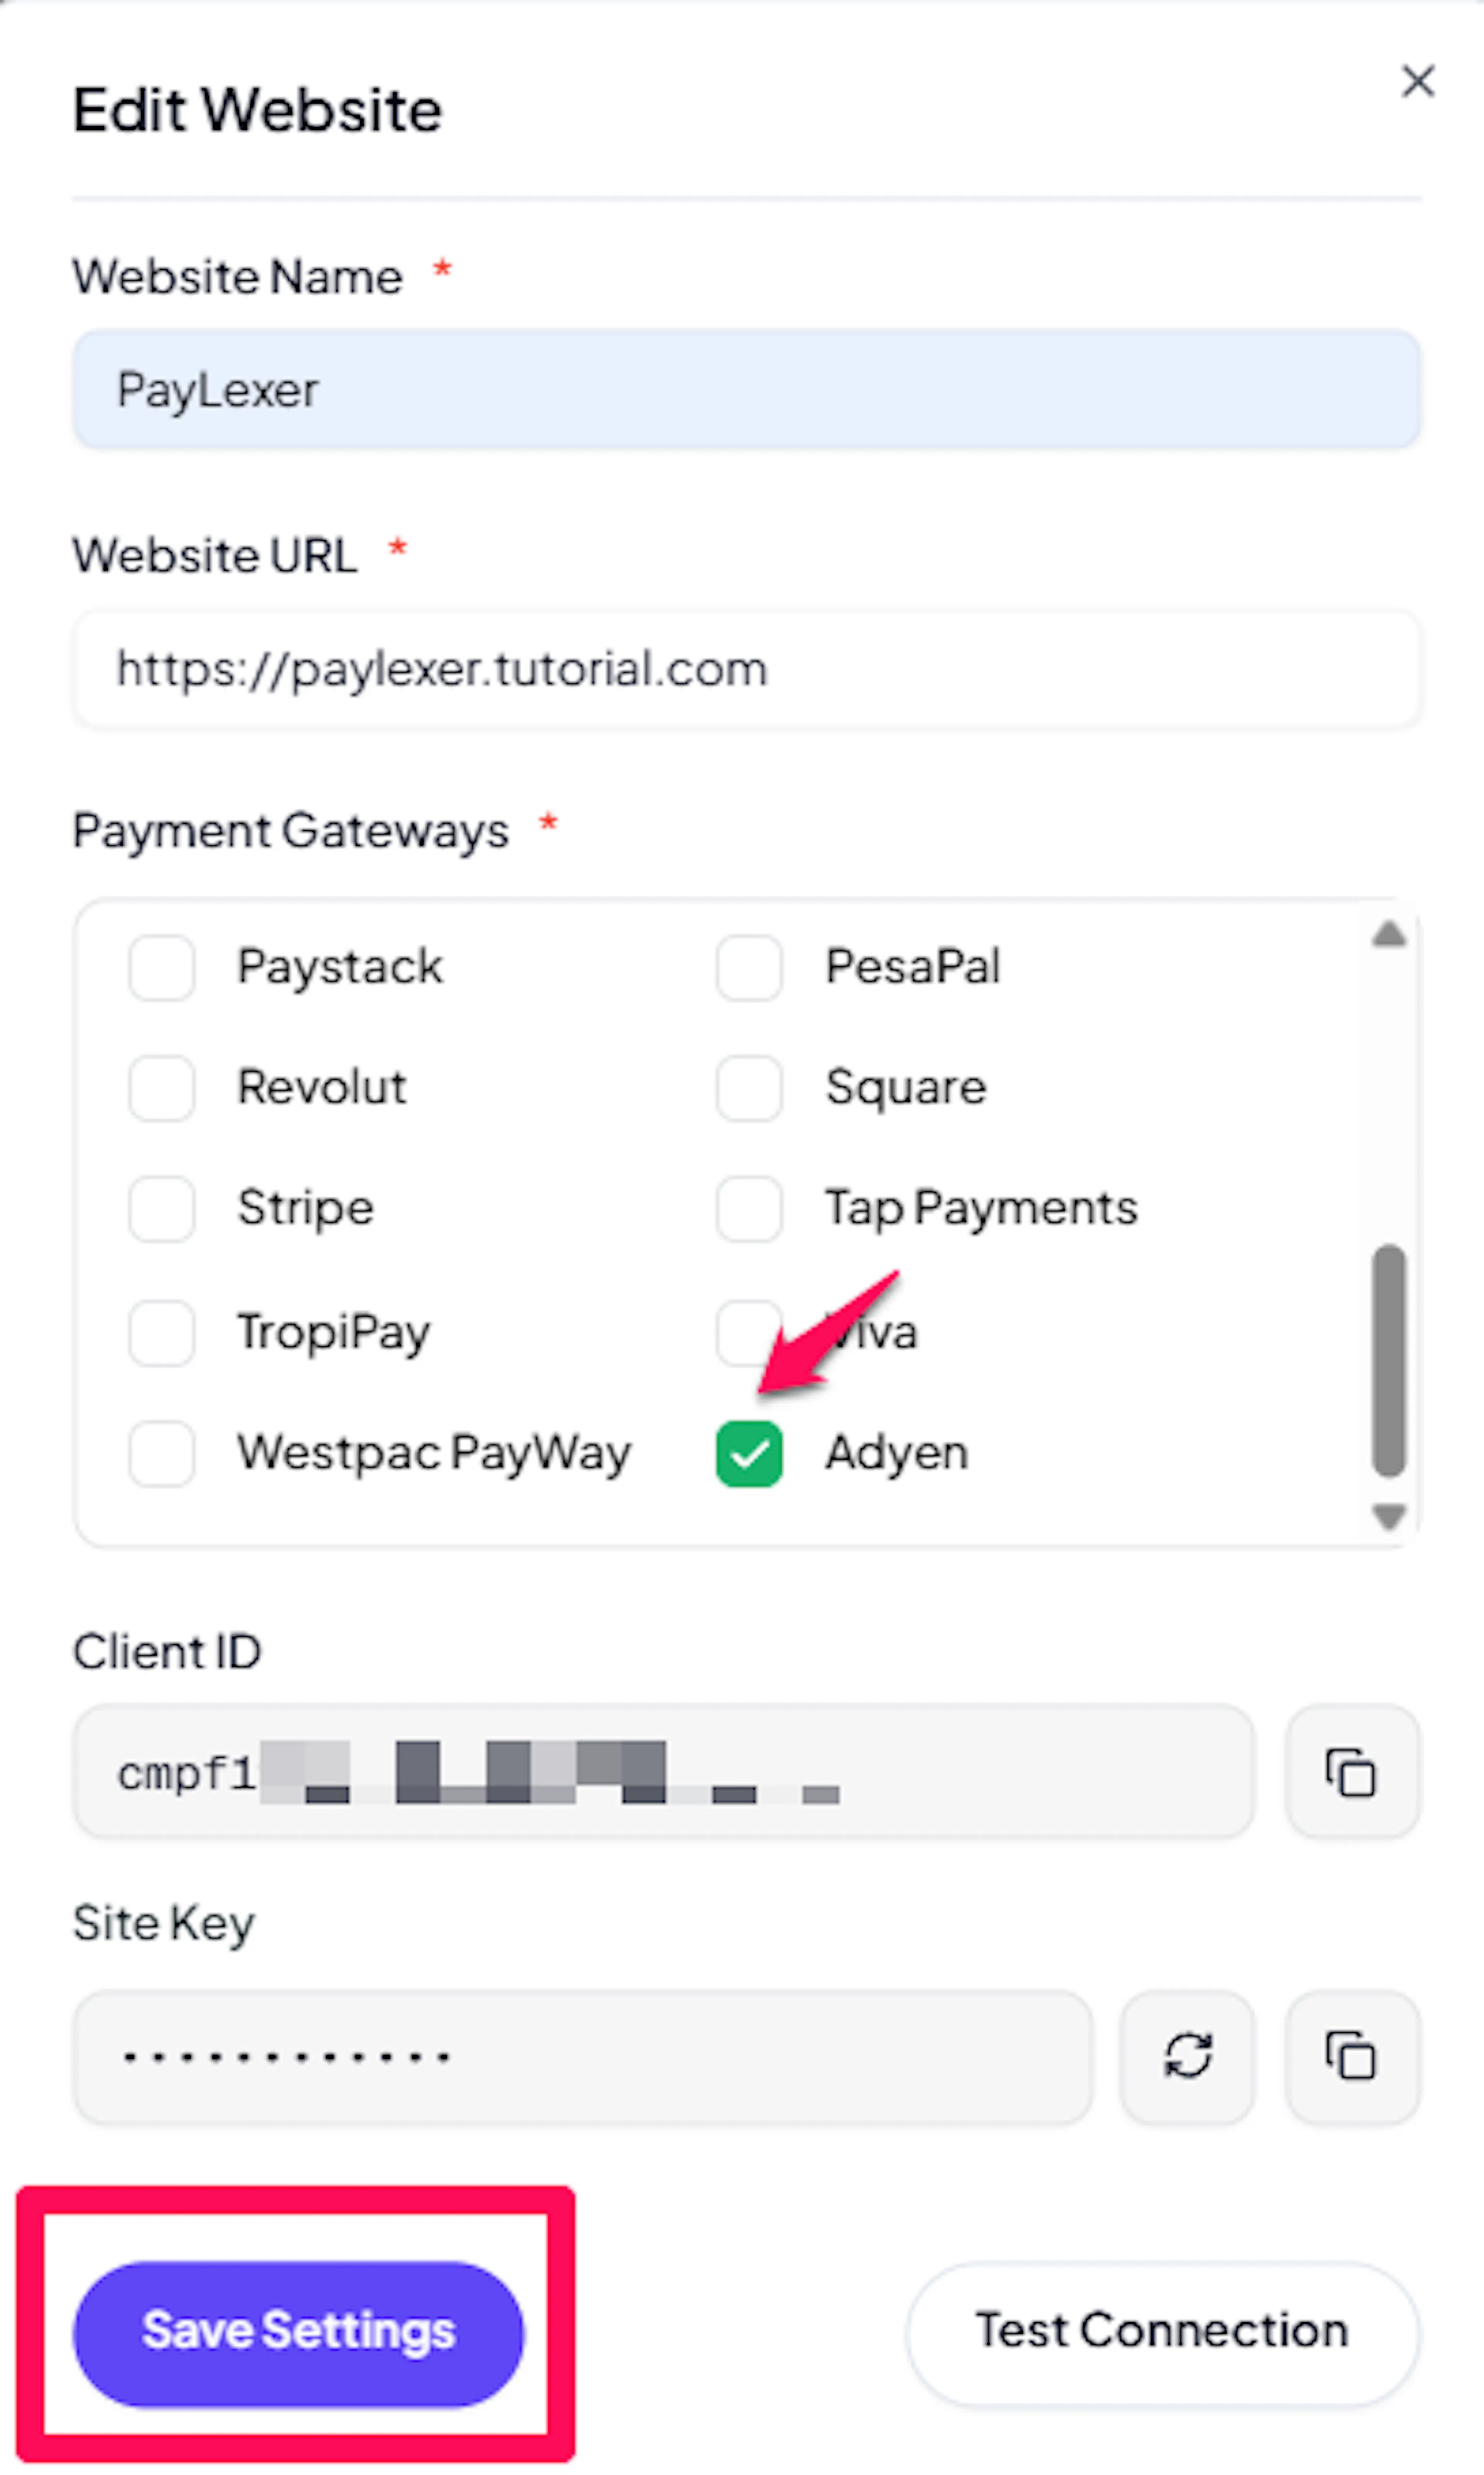
Adyen is now active for this website. Run a test transaction before switching off Debug/Test mode.
If you haven't added a website yet, Continue to Add Your Website →
Refunds
Refunds are supported for Adyen and sync to PayLexer automatically.
-
Issue full or partial refunds from your Adyen Customer Area (find the payment under Transactions → Payments and select Refund).
-
When Adyen processes the refund, it sends a webhook to PayLexer, which marks the order as Refunded and updates your connected platform automatically.
-
Adyen processes refunds asynchronously - allow some time for the status to update after issuing the refund.
Troubleshooting
-
Confirm the API Key was copied from the matching environment - Test Customer Area keys only work for Test, Live keys only for Live.
-
Confirm the Merchant Account code is spelled exactly as shown in the Customer Area, including capitalisation.
-
The API key is shown only when generated. If you missed it, generate a new one under Developers → API credentials and update PayLexer.
-
Make sure there are no leading or trailing spaces in the pasted values.
-
Live credentials must be filled in even when you are only testing - PayLexer requires the Live environment to be configured.
-
Confirm the Live Endpoint URL Prefix is filled in. It is required for Live and is found under Developers → API URLs in the Live Customer Area.
-
Live credentials are completely separate from test credentials - confirm the Live Merchant Account, API Key, and Client Key all come from the Live Customer Area.
-
Confirm
https://processor.paylexer.comis added to Allowed origins for the Live client key.
-
Adyen payment confirmation depends entirely on webhooks. Confirm a Standard webhook is configured in the Customer Area and points to the webhook URL shown in PayLexer.
-
Confirm the HMAC Key in PayLexer matches the one generated for that webhook. A mismatched key causes notifications to be rejected.
-
Remember that Test and Live HMAC keys are different - after going live, generate a new HMAC key in the Live Customer Area and update PayLexer.
-
Check webhook delivery attempts under Developers → Webhooks in the Customer Area for errors.
-
Confirm the Client Key is correct for the active environment.
-
Confirm
https://processor.paylexer.comis listed under Allowed origins for the client key in Developers → API credentials. -
Clear any platform-level cache (WooCommerce, EDD, FluentCart, WP Travel Engine) after enabling the gateway.
-
Refund status syncs through the same webhook as payments - confirm your webhook and HMAC Key are configured correctly.
-
Adyen processes refunds asynchronously. Allow some time after issuing the refund before the status updates.
-
Check the refund's webhook delivery under Developers → Webhooks in the Customer Area.
-
Confirm Adyen is Enabled under Websites → Edit for the site in question.
-
Confirm the customer's checkout currency is supported by your Adyen merchant account.
-
Clear any platform-level cache after enabling the gateway.
Best Practices
-
Run at least one full test transaction before switching Debug/Test mode off. Use your platform's Test Mode toggle together with your Test credentials and Adyen's test card numbers.
-
Configure the webhook and HMAC Key before taking any payments - Adyen orders are confirmed only through webhooks.
-
Keep your API Key and HMAC Key masked at all times. Never paste them into chat, email, or a support ticket. The Client Key is browser-safe, but restrict it with allowed origins.
-
When you go live, generate fresh credentials in the Live Customer Area - including a new HMAC key for the live webhook - and update PayLexer.
-
Confirm the checkout currency is enabled on your Adyen merchant account. Adyen rejects charges in currencies your account is not configured for.
FAQs
Live credentials are mandatory to save the configuration. Test credentials are optional but highly recommended so you can safely test payments before going live. Remember that each environment has its own Customer Area and its own set of credentials.
Check the Debug Mode setting in your platform. When Debug Mode is ON, PayLexer uses your Test credentials. When OFF, it uses Live credentials.
Sign up on the Adyen website to get free access to a test Customer Area. Live accounts require completing Adyen's onboarding and KYC review.
Yes. Unlike redirect-based gateways, Adyen payment confirmation depends entirely on webhook notifications. Without a configured webhook and matching HMAC Key, orders will never be marked as paid in PayLexer.
The payment still completes on Adyen's side, but the order stays Pending in PayLexer until a webhook arrives. Adyen retries failed webhook deliveries automatically. Check webhook delivery attempts under Developers → Webhooks in the Adyen Customer Area to troubleshoot.
Yes. Issue full or partial refunds from the Adyen Customer Area, and PayLexer automatically marks the order as Refunded and updates your connected platform once Adyen's refund webhook arrives.
No. PayLexer's Adyen integration covers one-time payments only. If you need recurring billing, see the Supported Payment Gateways page for gateways that support subscriptions.
No. Adyen's checkout is embedded directly on your website - the shopper enters payment details in a secure form rendered on your page. Some payment methods (like certain bank redirects or 3D Secure challenges) may briefly redirect the shopper and return them automatically.
Adyen's live API uses a URL that is unique to your company (for example, 1797a841fbb37ca7-YourCompany). PayLexer needs this prefix to reach Adyen's live endpoints. Find it in the Live Customer Area under Developers → API URLs. It is not needed for the Test environment.
Over 100 currencies, covering all major and most regional currencies. See the Adyen currency codes documentation for the full list. Your Adyen merchant account must be enabled for the currency you charge in.
Transactions appear in three places: your platform's booking or order pages, PayLexer Dashboard → Orders, and the Adyen Customer Area under Transactions → Payments. All three show the same transactions with different IDs.
Still Have Questions?
-
Adyen Support: Adyen Help Center
-
PayLexer Support: Contact Support
For Adyen API references and advanced configuration, see the Adyen documentation.