

UPayments
Connect UPayments to PayLexer to accept KNET, cards, Apple Pay, Samsung Pay, and Google Pay for Kuwait-based businesses through a hosted checkout page with automatic payment verification.
UPayments is a Kuwait-based payment gateway regulated by the Central Bank of Kuwait, giving shoppers a single place to pay with KNET (Kuwait's national debit network), international cards, and mobile wallets. PayLexer connects to UPayments' hosted checkout page, so a shopper is redirected to UPayments' own payment page, pays however they prefer, and returns to your site with the order already updated.
- Supported Regions (Merchant Accounts): Kuwait
- Supported Currencies: KWD, SAR, USD, BHD, EUR, OMR, QAR, AED, GBP, JOD - view full list
Every UPayments account starts on Kuwaiti Dinar (KWD) only. UPayments must switch on multi-currency for your specific merchant account before you can charge in any of the other currencies above - contact UPayments support to request it.
Supported Features
- Hosted checkout page for KNET, cards, Apple Pay, Samsung Pay, and Google Pay - shoppers pay on UPayments' own secure page, so no card details are ever typed on your own pages
- Independent payment confirmation - every reported success is re-checked directly with UPayments before an order is marked paid, and an unconfirmed success is discarded rather than applied
- Full and partial refunds issued directly from PayLexer
- Automatic refund reconciliation - PayLexer periodically checks UPayments for refund updates, including refunds issued directly in the UPayments merchant portal, so your orders stay accurate even without a refund notification
- Credential validation on save, so you find out immediately whether UPayments accepts your API Key
Recurring subscriptions are not supported for UPayments. This integration handles one-time payments only, with no sign-up fee or free trial option. There is also no way to cancel a payment attempt once the shopper has been sent to UPayments' page - they must complete, abandon, or let it expire.
Refunds are not supported in the UPayments sandbox environment. Refund testing is only available with live/production credentials. If you try to refund a payment in sandbox mode, the refund will fail because this is a gateway limitation.
Before You Start
Make sure you have:
- UPayments Account – Don't have one? Click here to set up a merchant account. Live credentials require identity verification (KYC); sandbox access is issued alongside your application.
- PayLexer Account – Required to configure the integration. Create your account →
- A website where you want to integrate
Looking for a different payment processor? View all supported gateways →
Configuring UPayments
You need an API Key from UPayments for this integration.
Getting API Credentials
Log in to the UPayments Merchant Portal
Log in to your UPayments merchant portal (live), or Click here to get the test credentials.
Find your API Key
Open the Payment Gateway section of your dashboard and go to the Gateway Details Page to copy your API Key. Your sandbox and live accounts each have their own separate key.
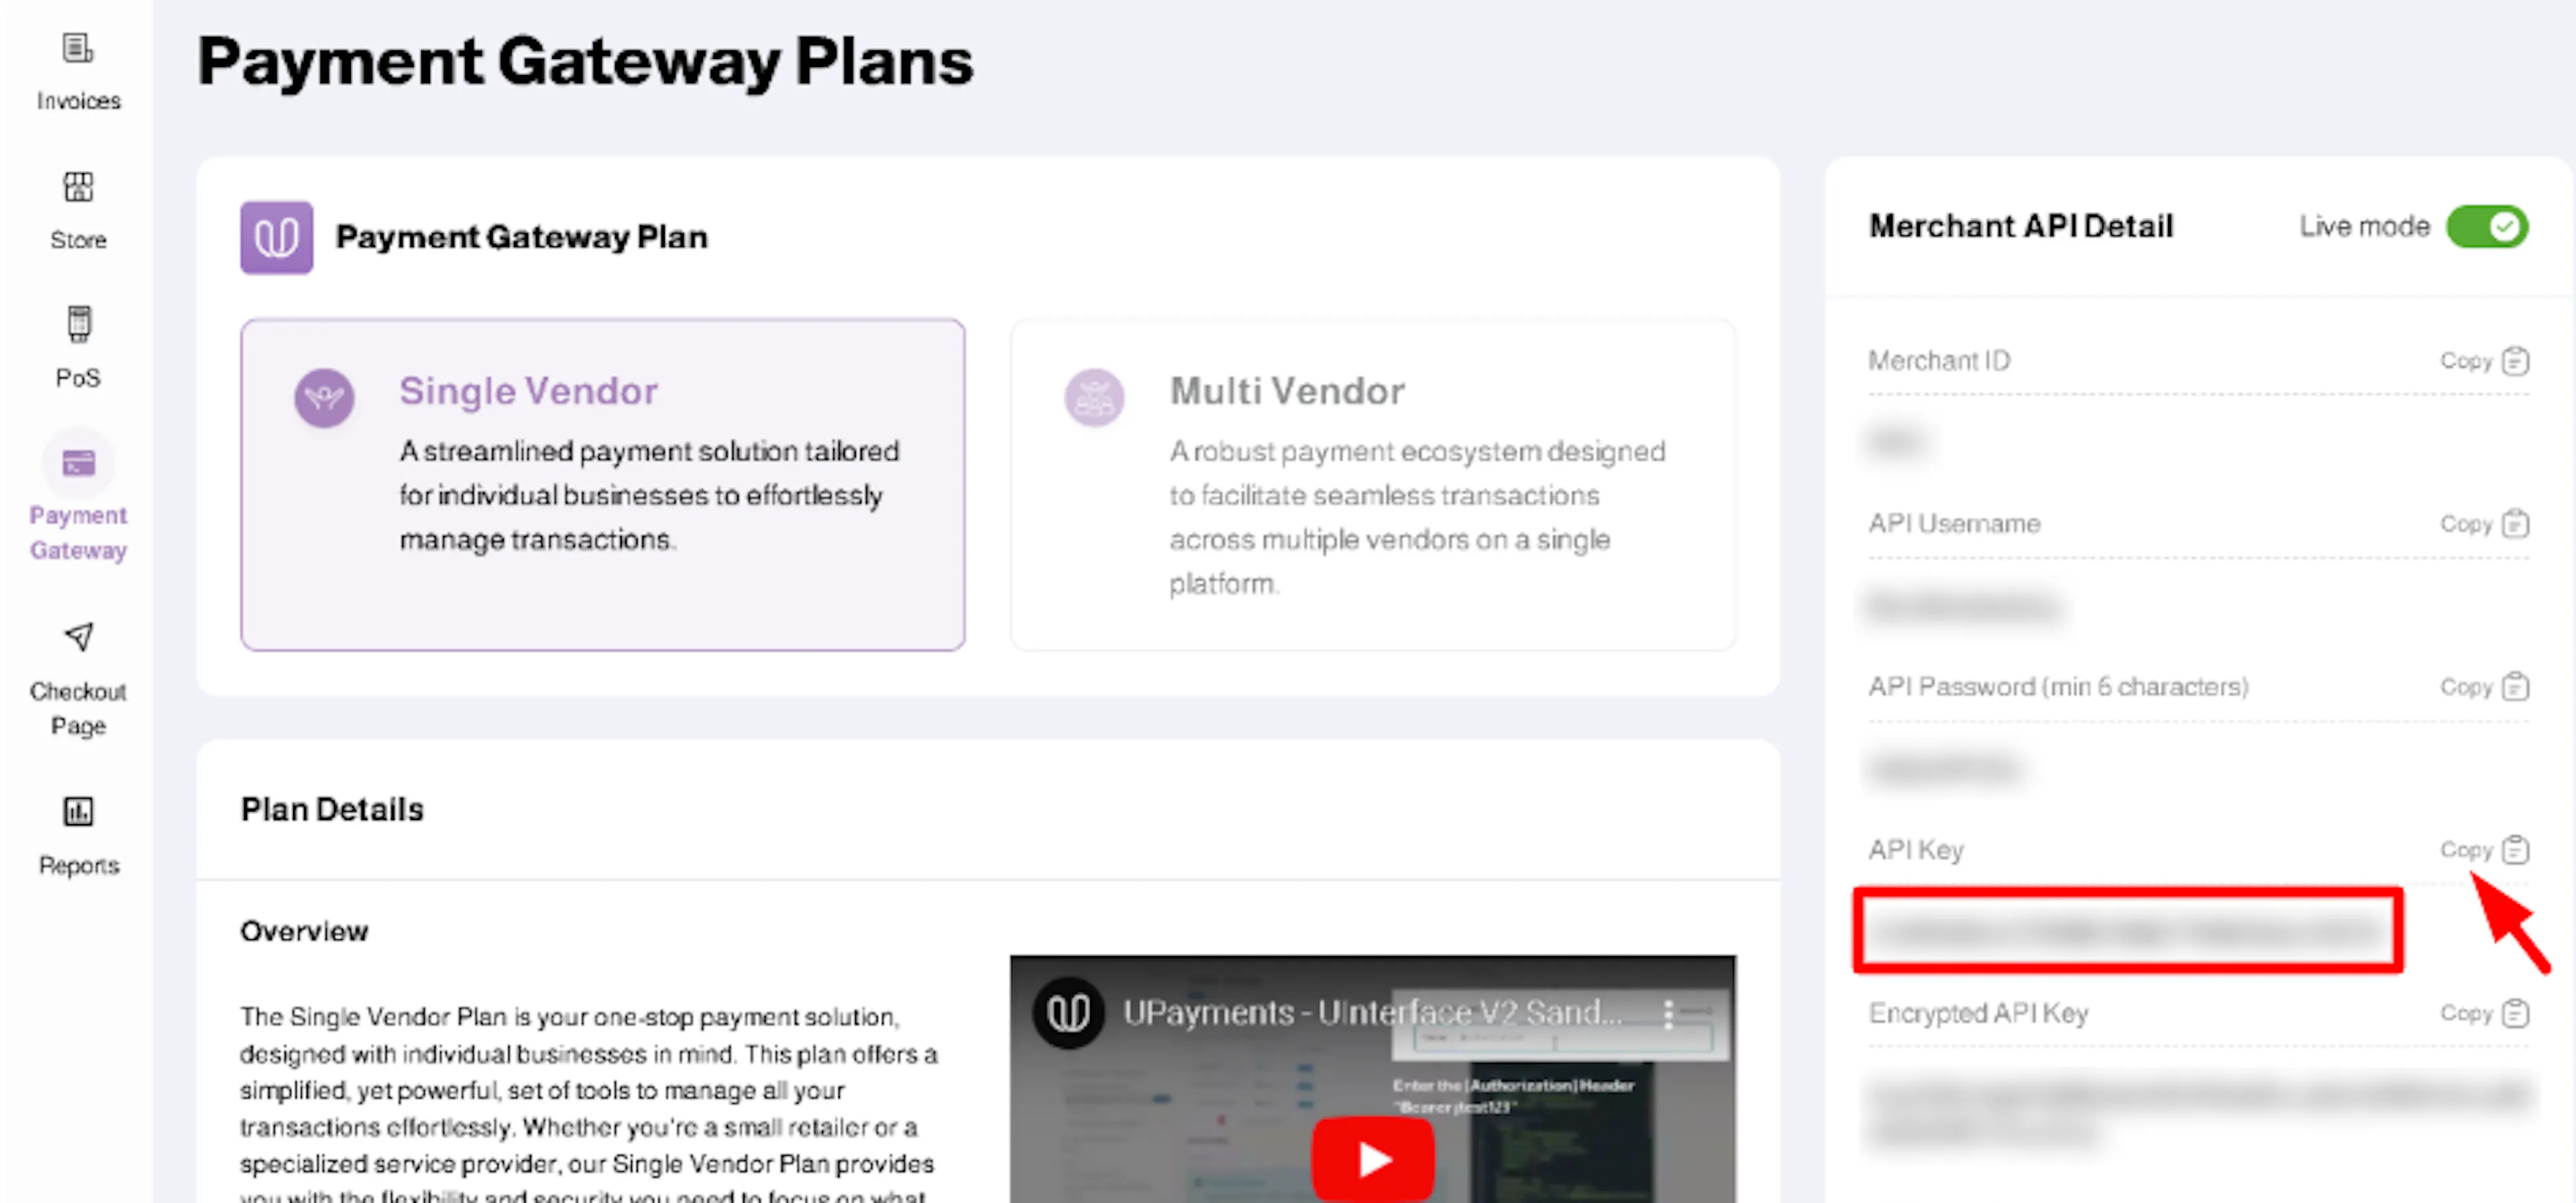
Treat the API Key like a password. It authenticates every request UPayments processes on your behalf, including charges and refunds.
Adding Credentials to PayLexer
Open PayLexer Dashboard
Log in to your PayLexer dashboard and navigate to Payment Gateways -> UPayments.
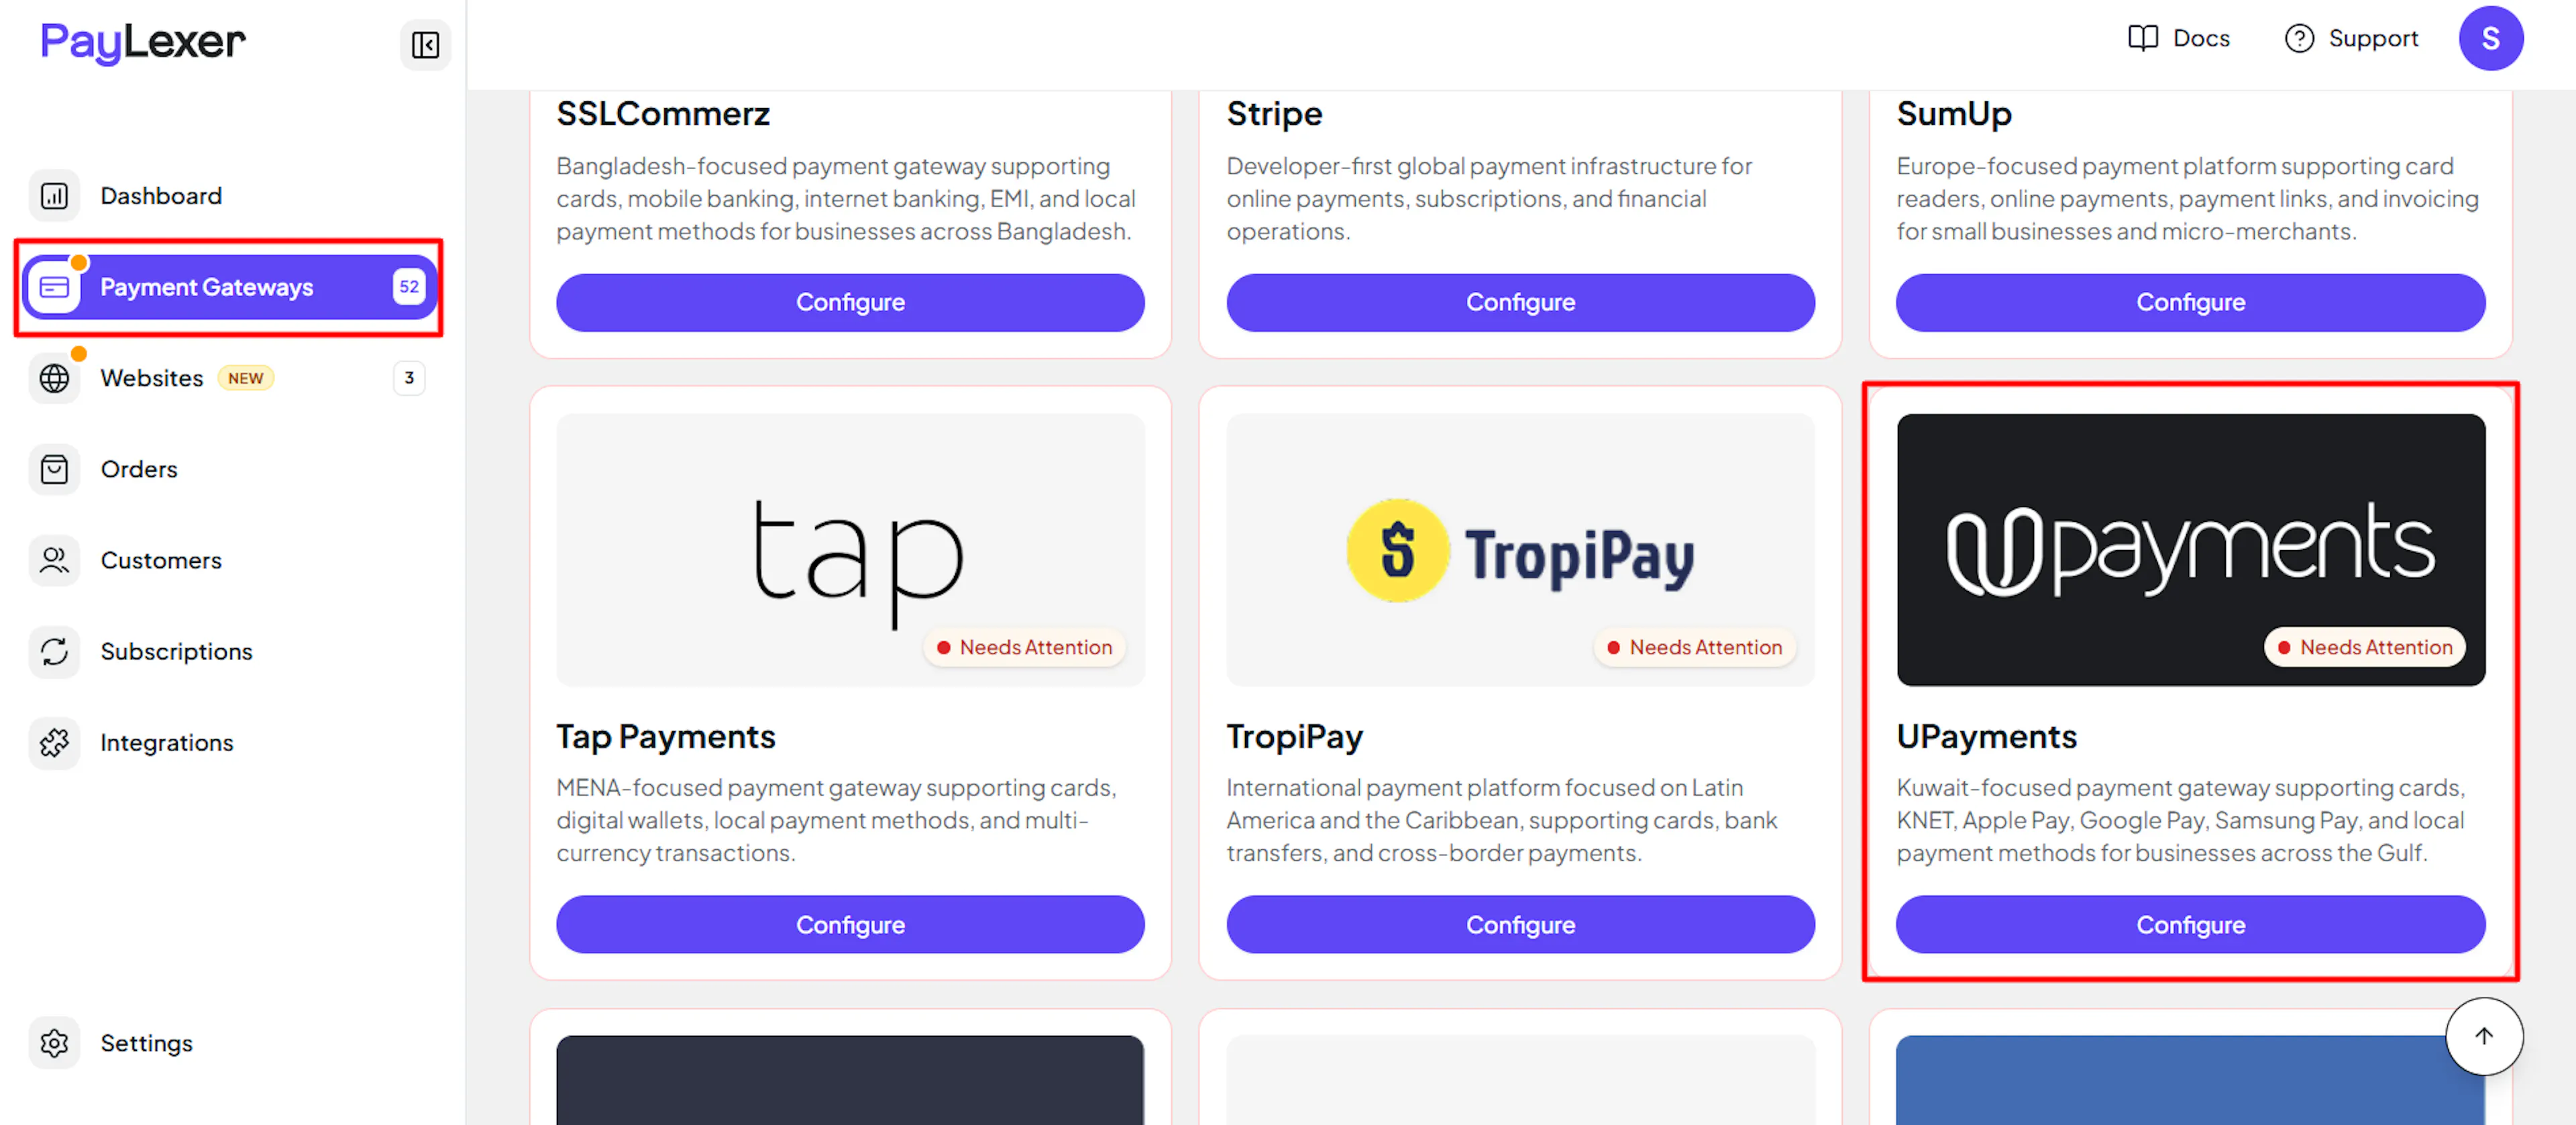
Enter your credentials
Paste the API Key you copied from UPayments.
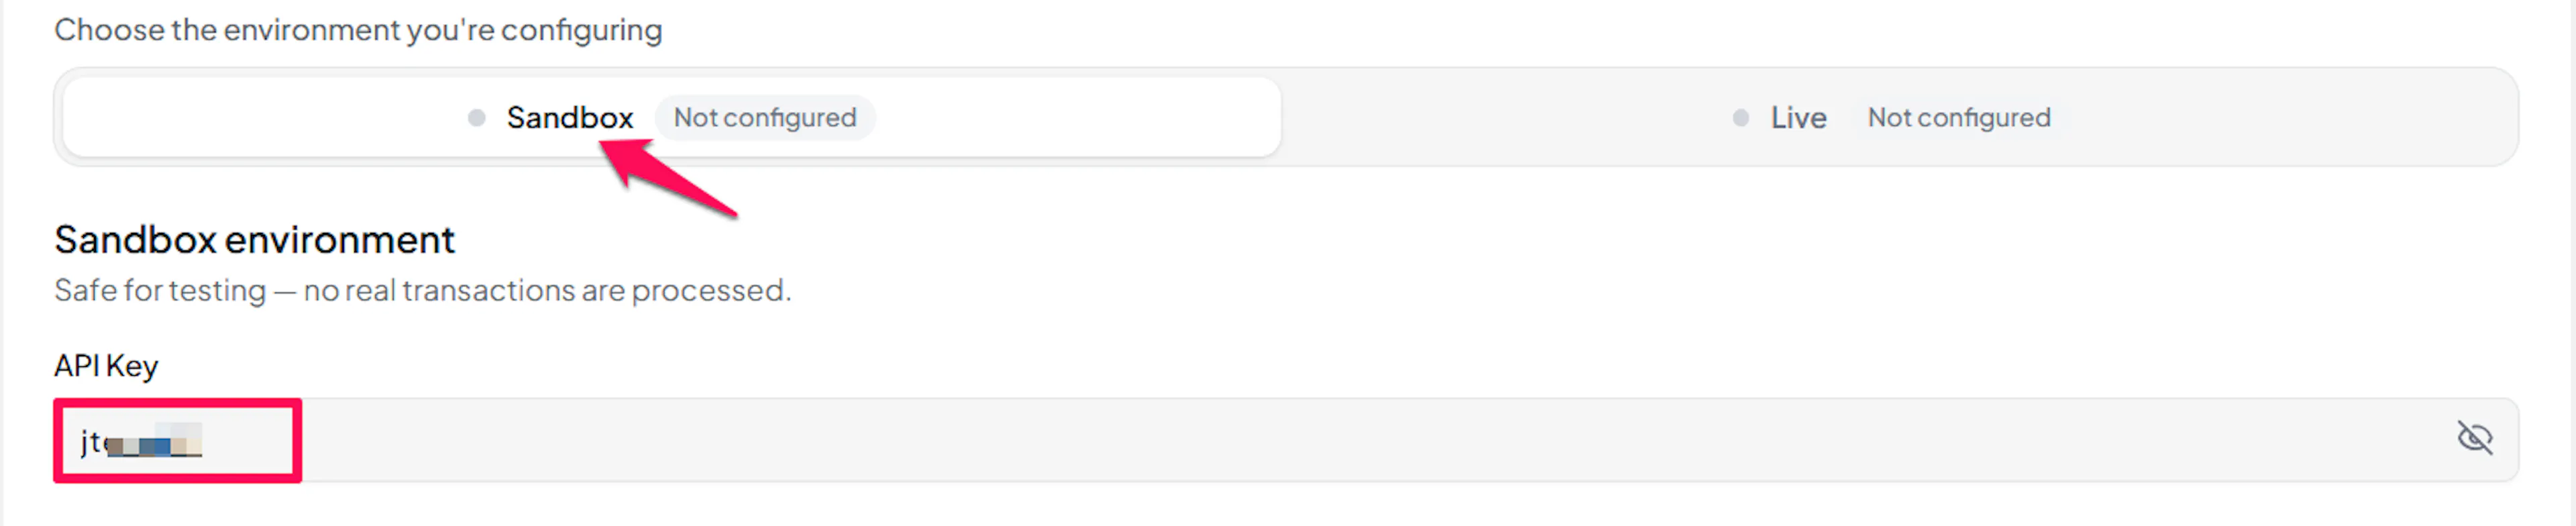
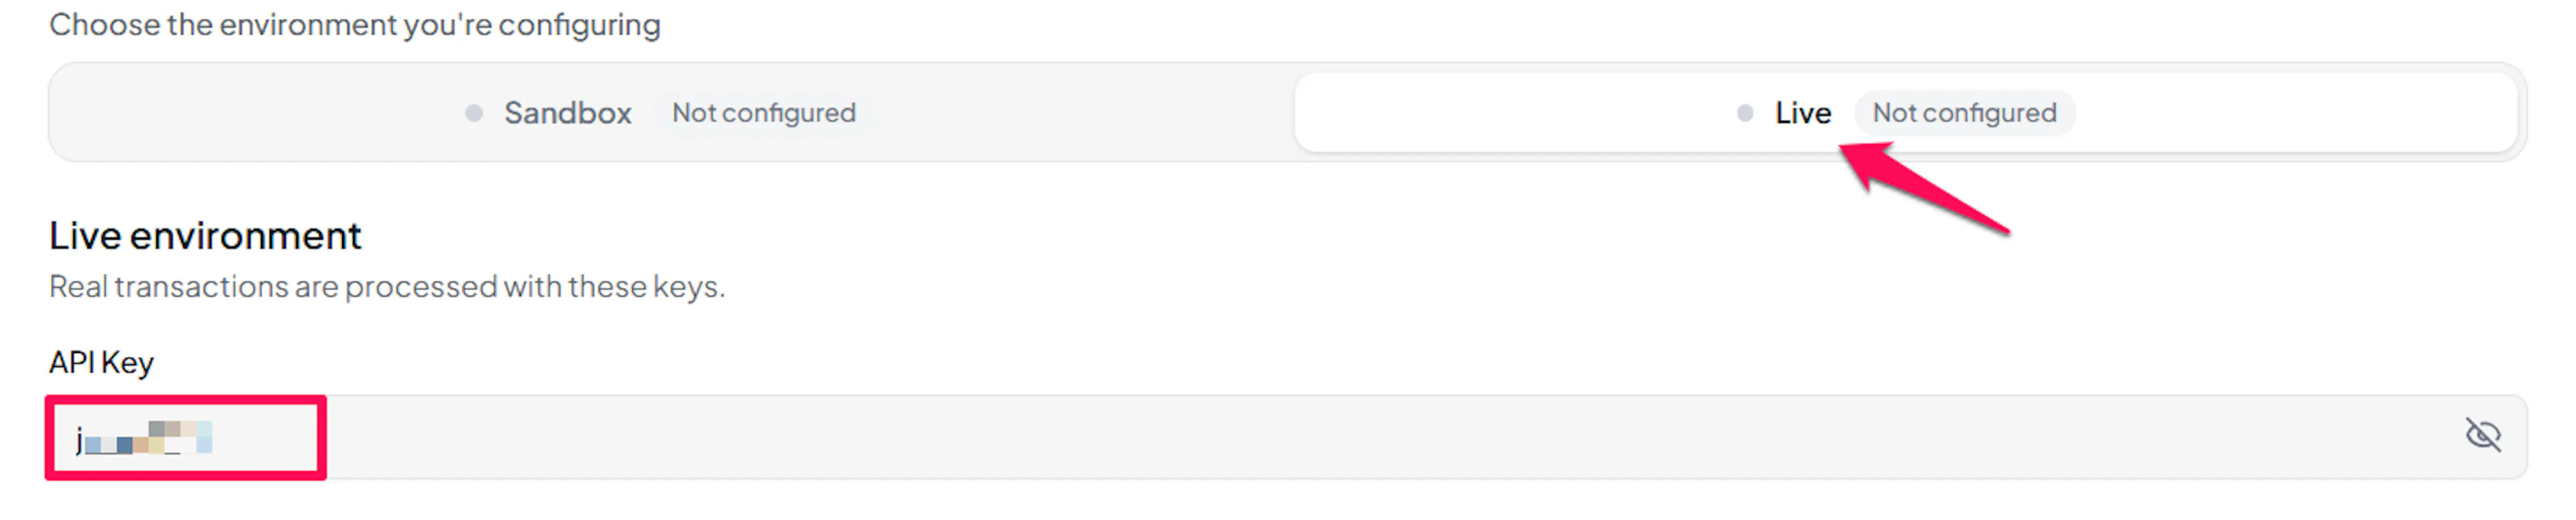
Understanding Live/Production and Sandbox Settings:
| Environment | Purpose |
|---|---|
| Live / Production (Mandatory) | Used for real transactions. Cannot be empty, even when testing. |
| Test / Sandbox (Optional) | Used for testing only. No real money is processed. |
How PayLexer selects credentials:
- Debug/Test mode ON → Test credentials are used
- Debug/Test mode OFF → Live credentials are used
Test and save
Click Save to save your configuration and verify your credentials. Click Verify Connection to test the connection.
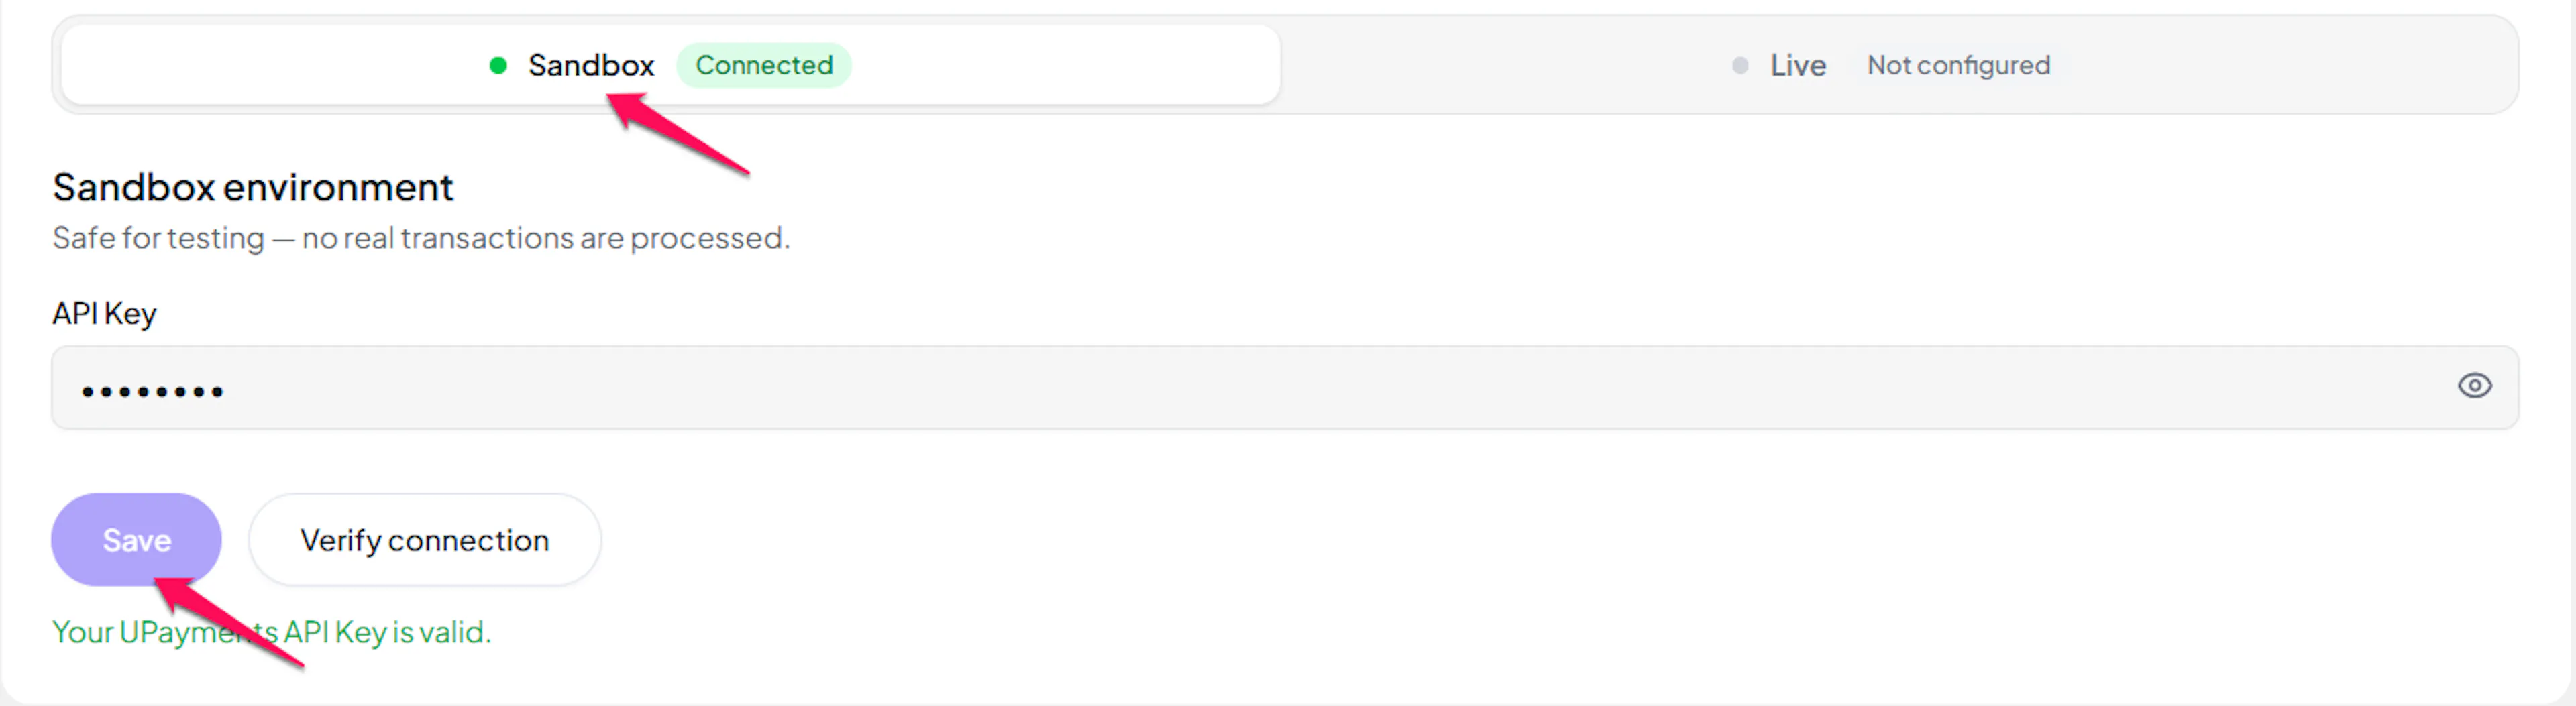
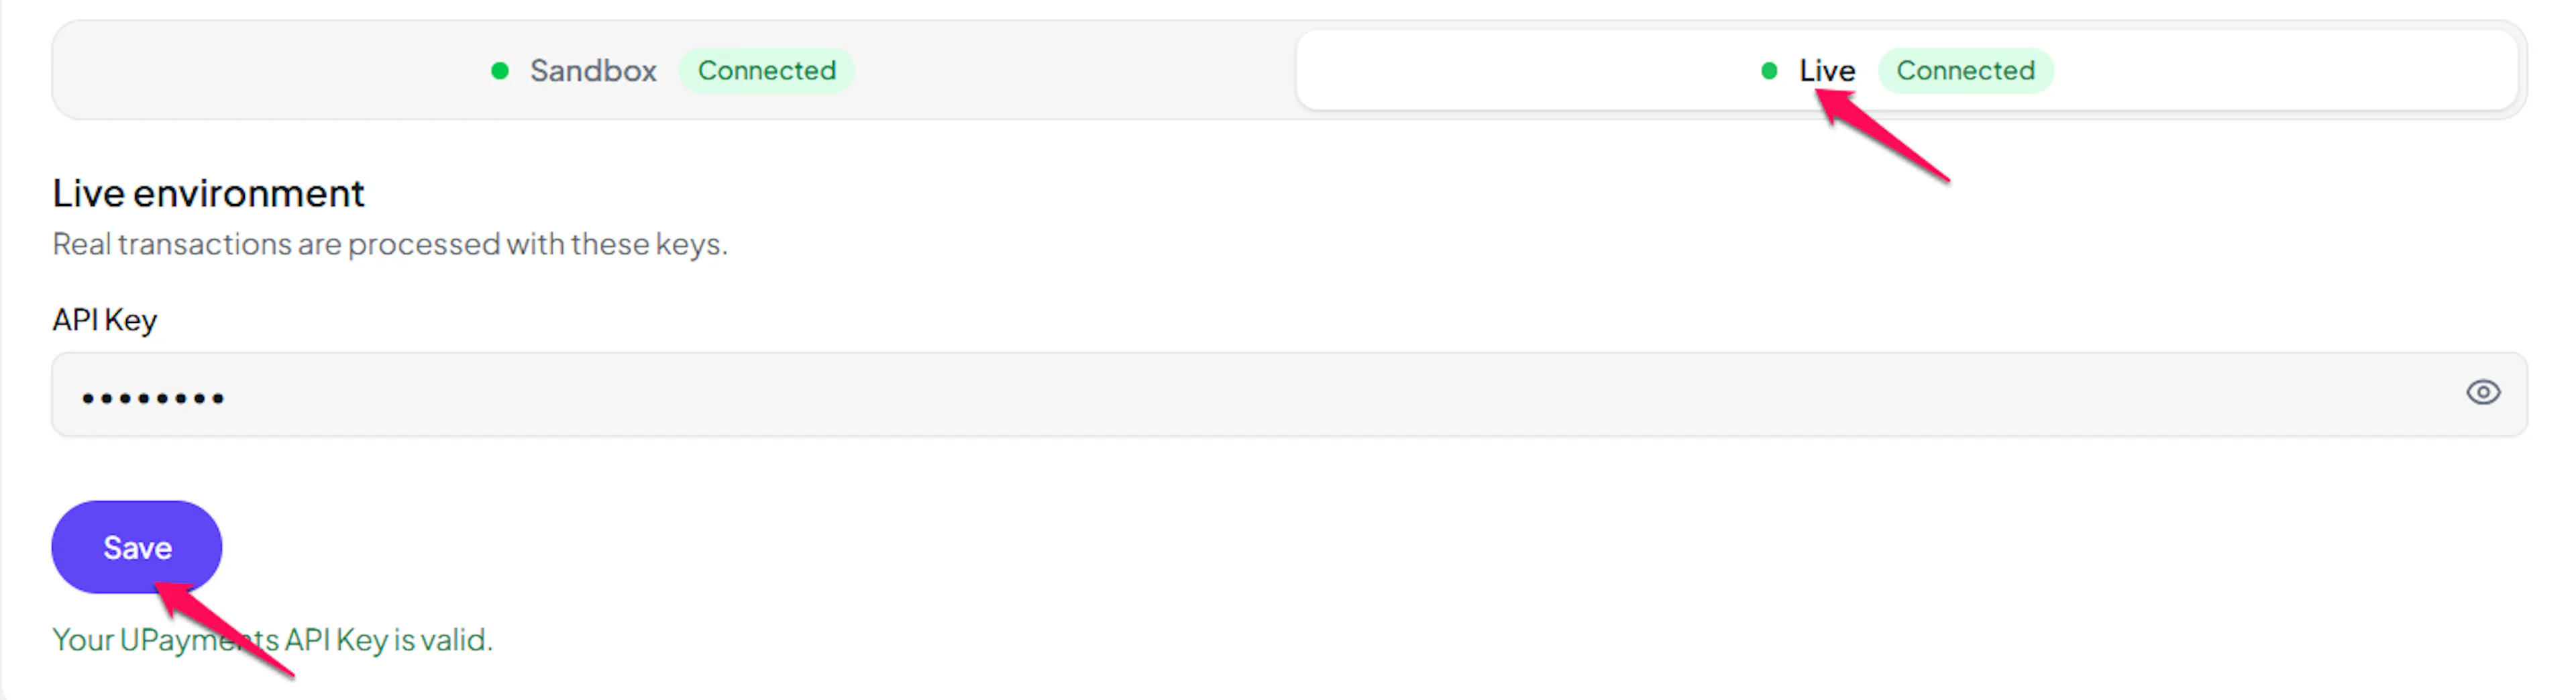
Test Connection only confirms the key is real - not that it's in the right field. A sandbox key pasted into the Live field (or a live key pasted into Test) can still show as "valid", because UPayments' own check doesn't appear to catch this. A swapped key won't surface a problem until a real transaction fails. Double-check that your Test key came from your sandbox account and your Live key from your live account.
Webhooks (Automatic)
UPayments' payment notifications are automatic. PayLexer registers a unique notification URL every time it creates a checkout session, so there is nothing to copy, paste, or configure in the UPayments merchant portal, for either your sandbox or your live account.
Benefits of Webhooks:
- Instant payment status updates
- Automatic order reconciliation
- Accurate failure and cancellation records
How PayLexer handles the notification:
- UPayments sends no signature, HMAC, or secret with its notification, so PayLexer never relies on it alone
- Before any order is marked paid, PayLexer independently checks the payment's status directly with UPayments and confirms it actually succeeded, for that order
- A reported success that PayLexer cannot independently confirm is discarded instead of marking the order paid
- Failed, cancelled, and abandoned payments are recorded as exactly that, and never mark the order paid
UPayments does not send a notification when a refund completes. Instead, PayLexer automatically checks UPayments for refund status roughly every hour and updates your orders accordingly, including refunds issued directly in the UPayments merchant portal rather than through PayLexer. Expect a delay of up to a few hours before a portal-issued refund shows up in PayLexer.
Integrate UPayments to Your Website
If you have already added and configured your site, you can enable UPayments in your existing setup.
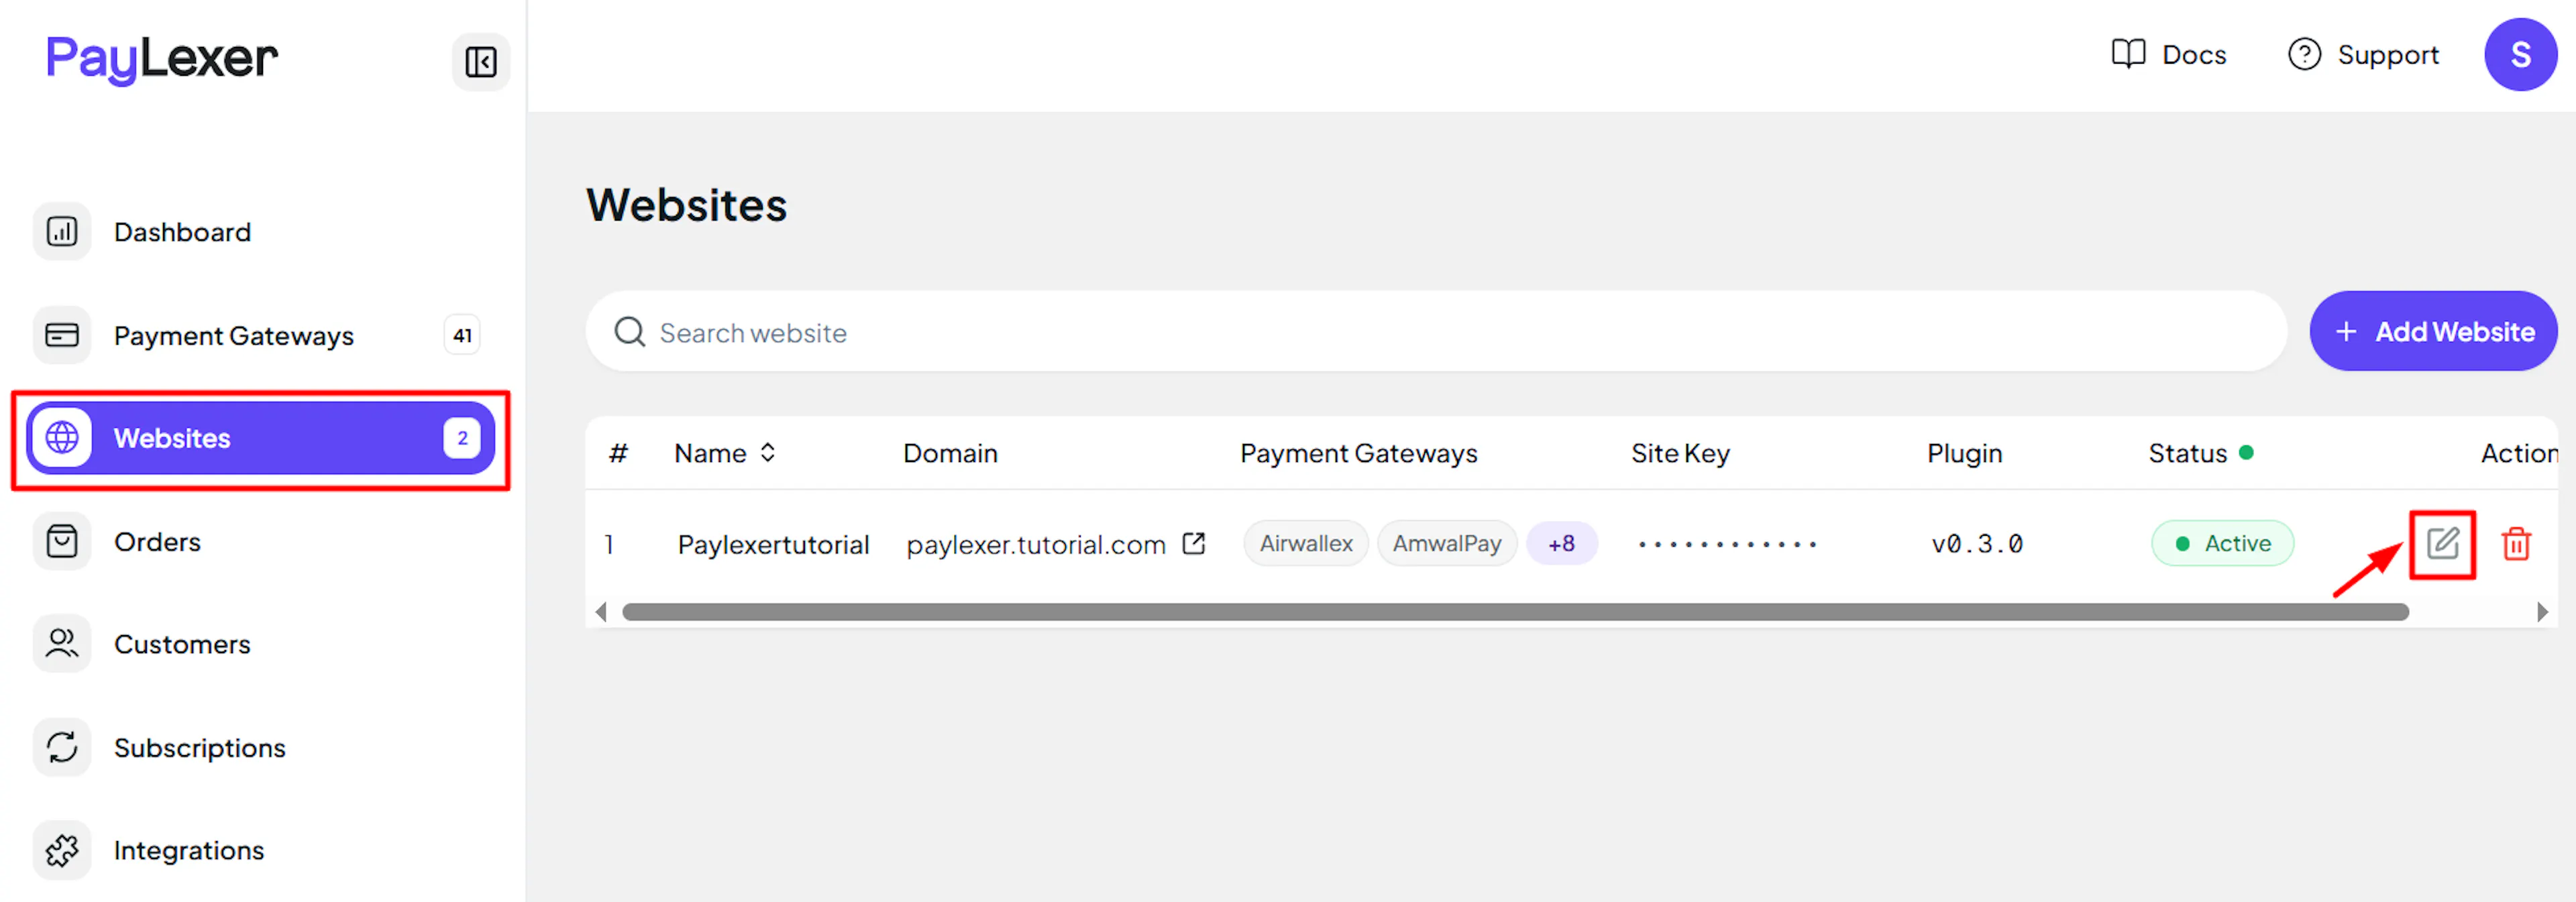
Go to Websites
Navigate to Websites in your PayLexer dashboard.
Edit your website
Click the Edit Icon of your added website.
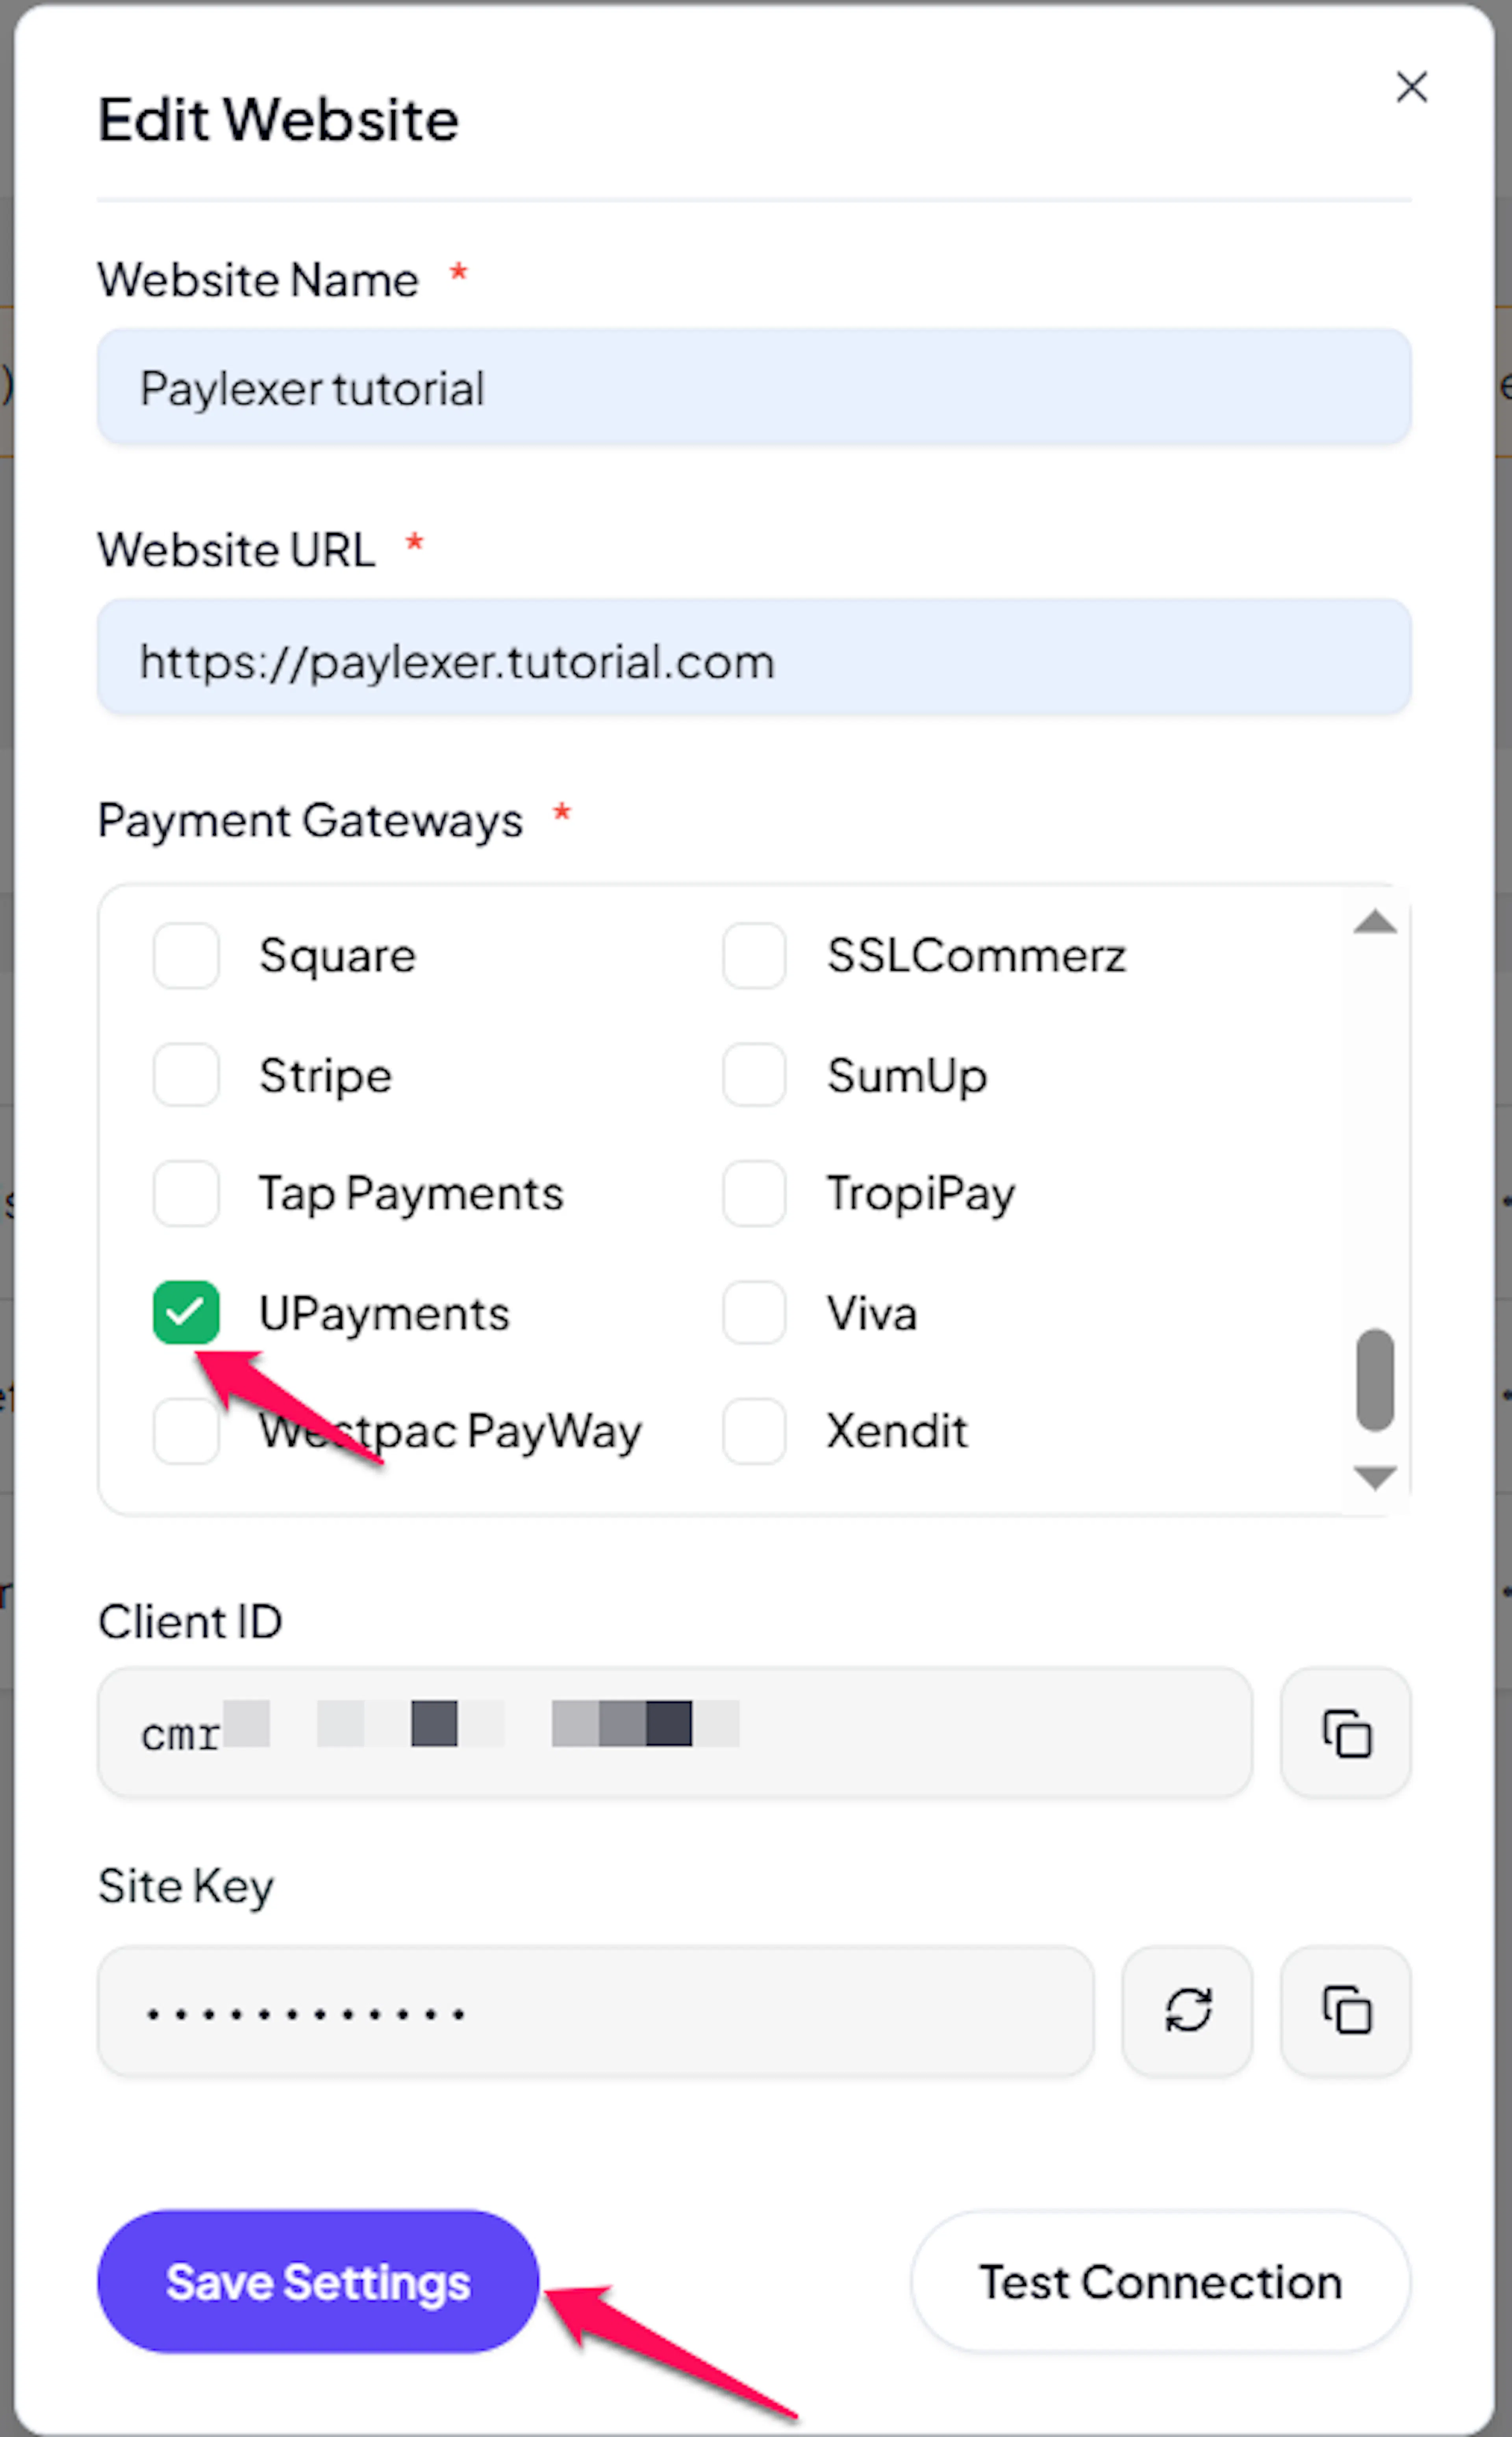
Enable UPayments
Click the checkbox to enable UPayments for the website.
If you haven't added a website yet, Continue to Add Your Website →
Troubleshooting
Best Practices
- Test in sandbox before enabling production. Complete a full KNET or card payment with sandbox credentials, and confirm the order updates in PayLexer, before switching to live.
- Keep your API Key confidential, and contact UPayments to rotate it if you suspect exposure.
- Confirm multi-currency is activated on your UPayments account before relying on any currency other than KWD, since an account without it enabled may reject or mishandle non-KWD charges.
- Remember that a payment attempt cannot be cancelled once the shopper reaches UPayments, so tell your support team not to expect a cancel action mid-flow.
- Expect a delay of up to a few hours before a refund issued directly in the UPayments portal appears in PayLexer, since UPayments sends no refund notification.
- Use a different gateway for any recurring billing, since UPayments handles one-time payments only.
FAQs
Still Have Questions?
- UPayments Support: UPayments Support
- PayLexer Support: Contact Support