

Cielo
Connect Cielo to PayLexer to accept credit cards, Pix and Boleto in Brazilian reais, run card subscriptions that Cielo bills, and process full or partial refunds.
Cielo is one of Brazil's largest card acquirers, headquartered in Barueri, São Paulo. Its API E-commerce lets online merchants take credit cards alongside Brazil's most popular local payment methods, Pix and Boleto, and run recurring billing that Cielo schedules and charges itself.
- Supported Regions (Merchant Accounts): Brazil
- Supported Currencies: BRL
Supported Features
- Embedded checkout pop-up on your site, with no redirect to a Cielo page
- Full and partial refunds, including several partial refunds on one payment
- Card subscriptions billed by Cielo on every due date (monthly, every two months, quarterly, every six months or yearly)
Before You Start
Make sure you have:
- Cielo Account – Don't have one? Sign up for Cielo API E-commerce →
- PayLexer Account – Required to configure the integration. Create your account →
- A website where you want to integrate
Looking for a different payment processor? View all supported gateways →
Configuring Cielo
You need a Merchant ID, Merchant Key, Client ID (Silent Order Post) and Client Secret (Silent Order Post) from Cielo for this integration.
The Merchant ID and Merchant Key authorize every payment, refund and subscription. The Silent Order Post Client ID and Client Secret let the checkout send card details directly to Cielo, so card numbers never pass through your site or PayLexer.
Getting API Credentials
Log in to the Cielo website
Log in to Minha Conta Cielo on the Cielo website with your EC number. If you have several establishments, go to Meus estabelecimentos and open your API E-commerce one.
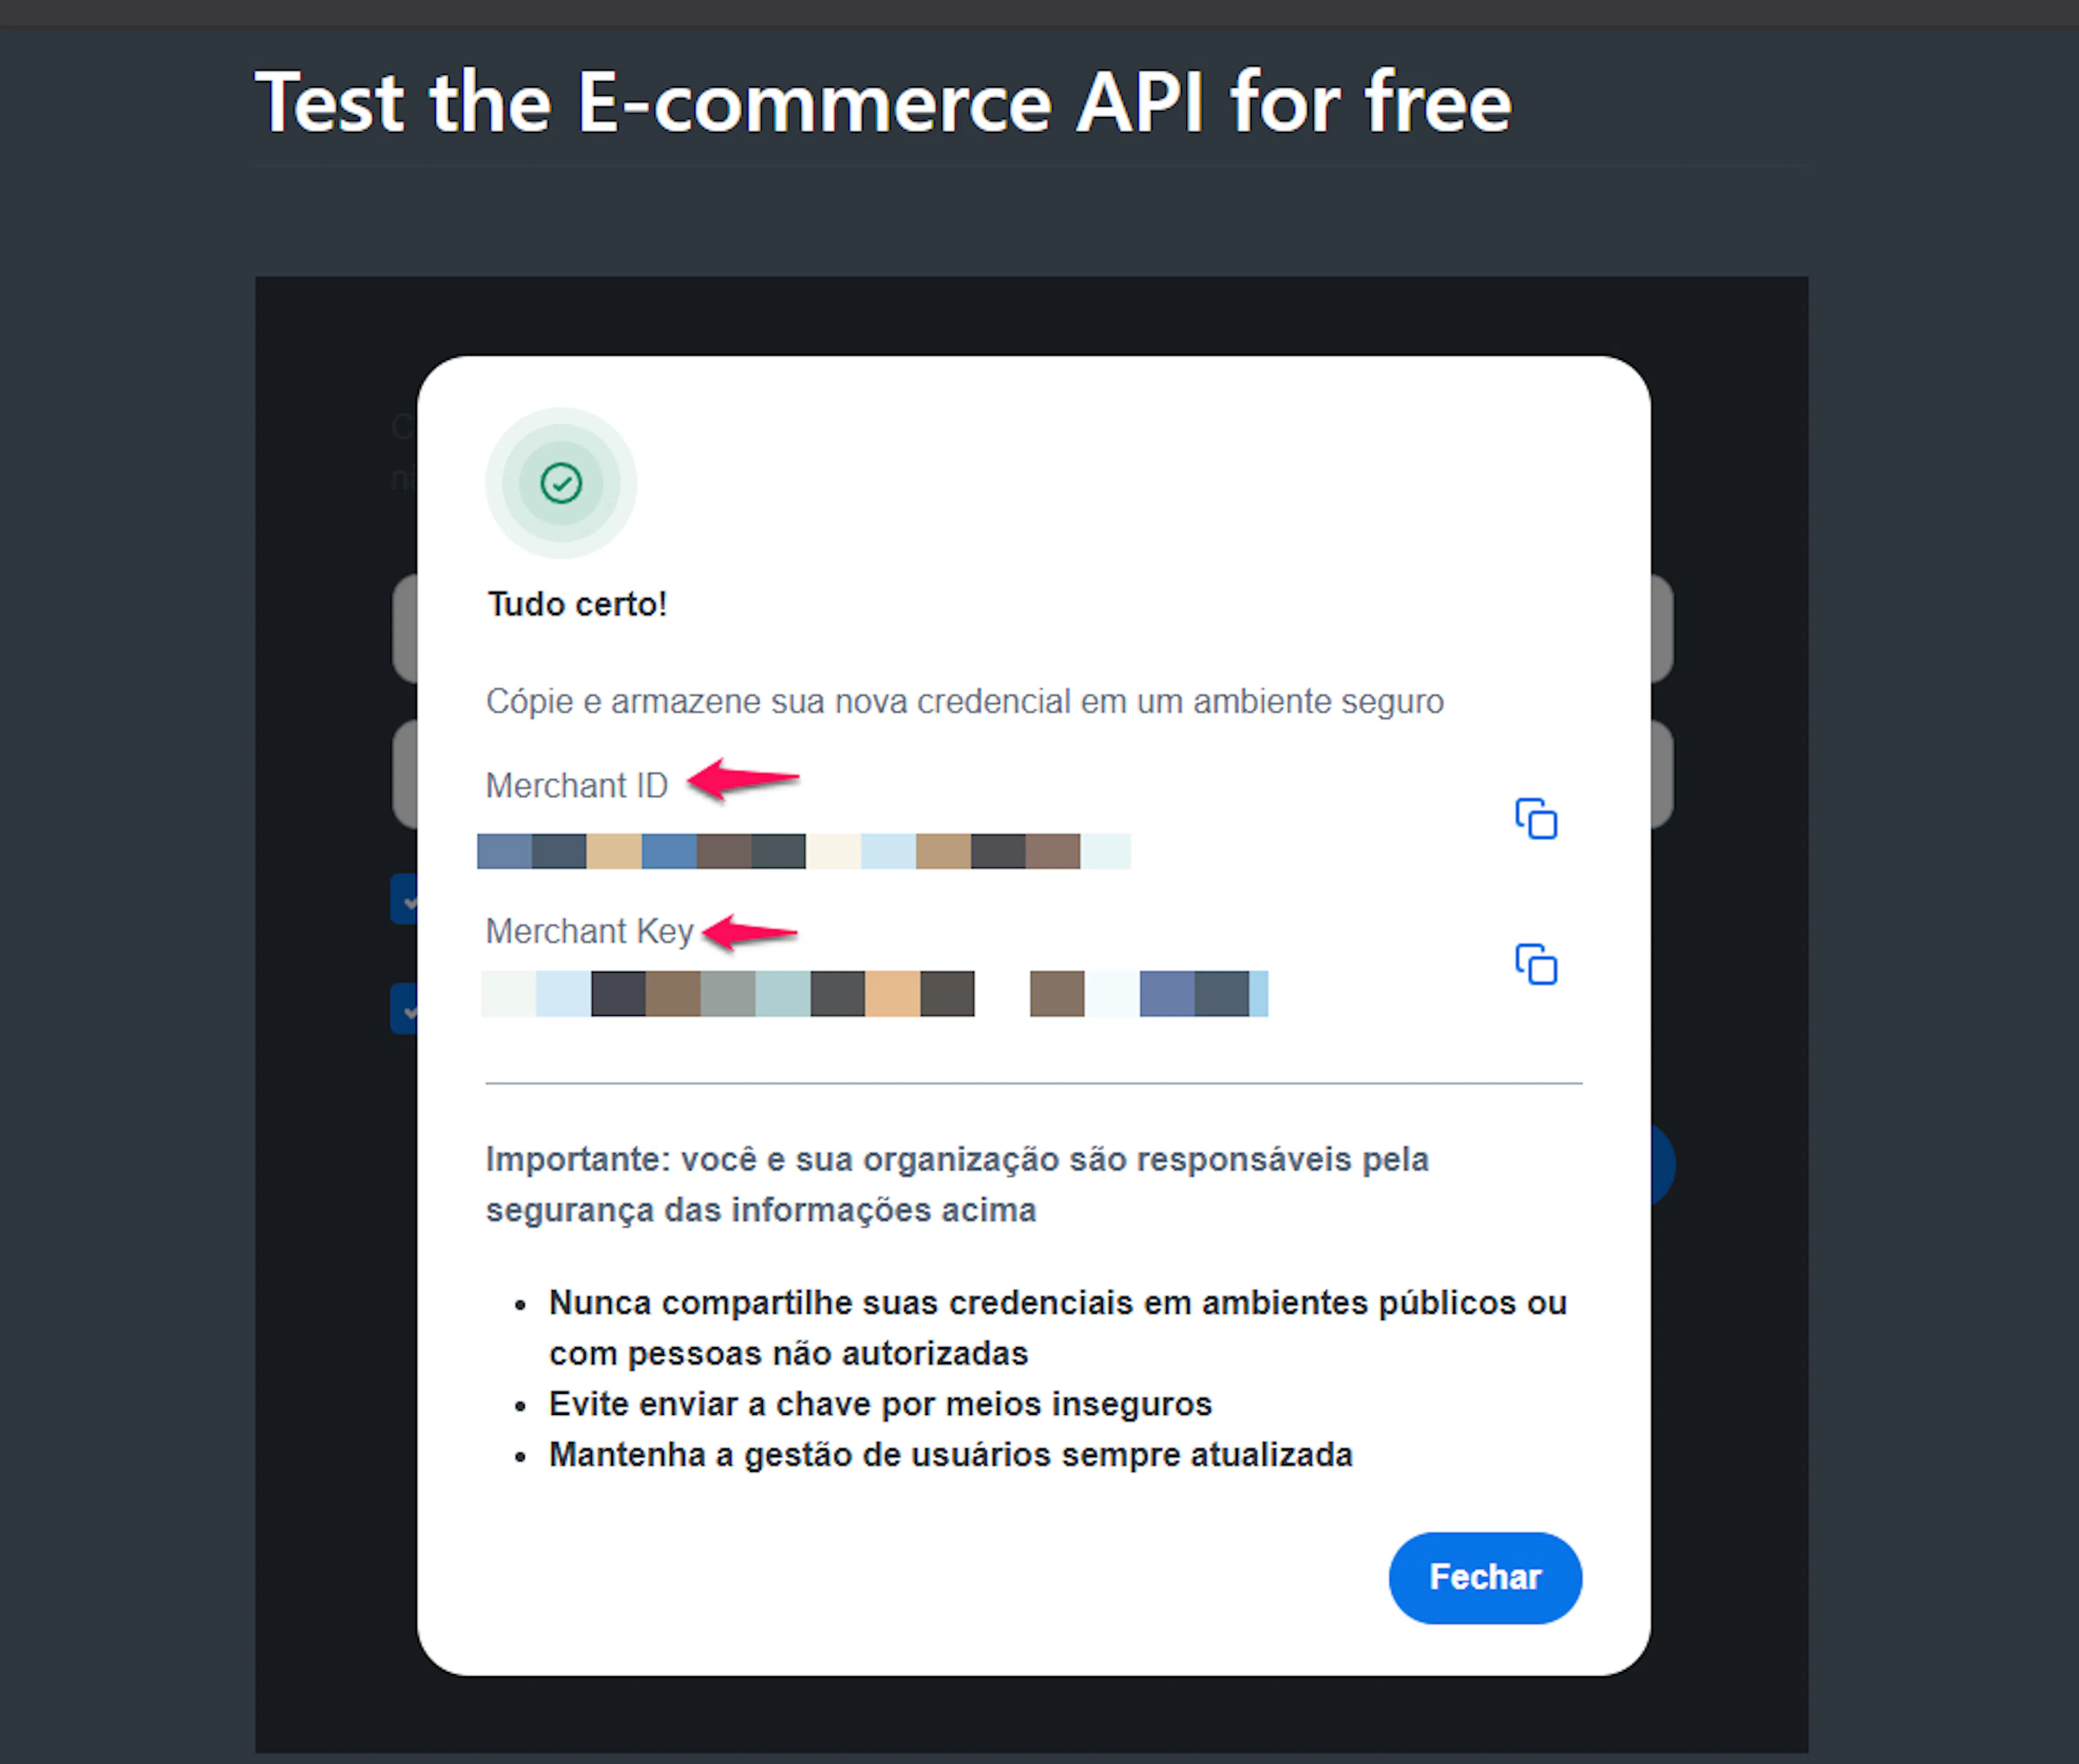
Copy the Merchant ID and Merchant Key
Go to E-commerce → Gerenciamento de Credenciais → Credencial API, click Visualizar and enter the security token Cielo sends you.
Copy the MerchantId (Merchant ID) and MerchantKey (Merchant Key).
Get the Silent Order Post credentials
Go to E-commerce → Credenciais → Credenciais funcionalidades, click Gerar credencial and select Silent Order Post. Confirm with the security token.
Copy the Client ID and Client Secret. Only Administrador or Analista users can generate them.
Using sandbox?
- Fill in the Cielo sandbox form to get your sandbox MerchantId and MerchantKey. Sandbox and live credentials never work across environments.
- For the Client ID and Client Secret, email cieloecommerce@cielo.com.br with your sandbox Merchant ID and ask Cielo to enable Silent Order Post and Boleto.
- To test while you wait, use the full credential set on Cielo's Silent Order Post page. Use all four values together.
Adding Credentials to PayLexer
Open PayLexer Dashboard
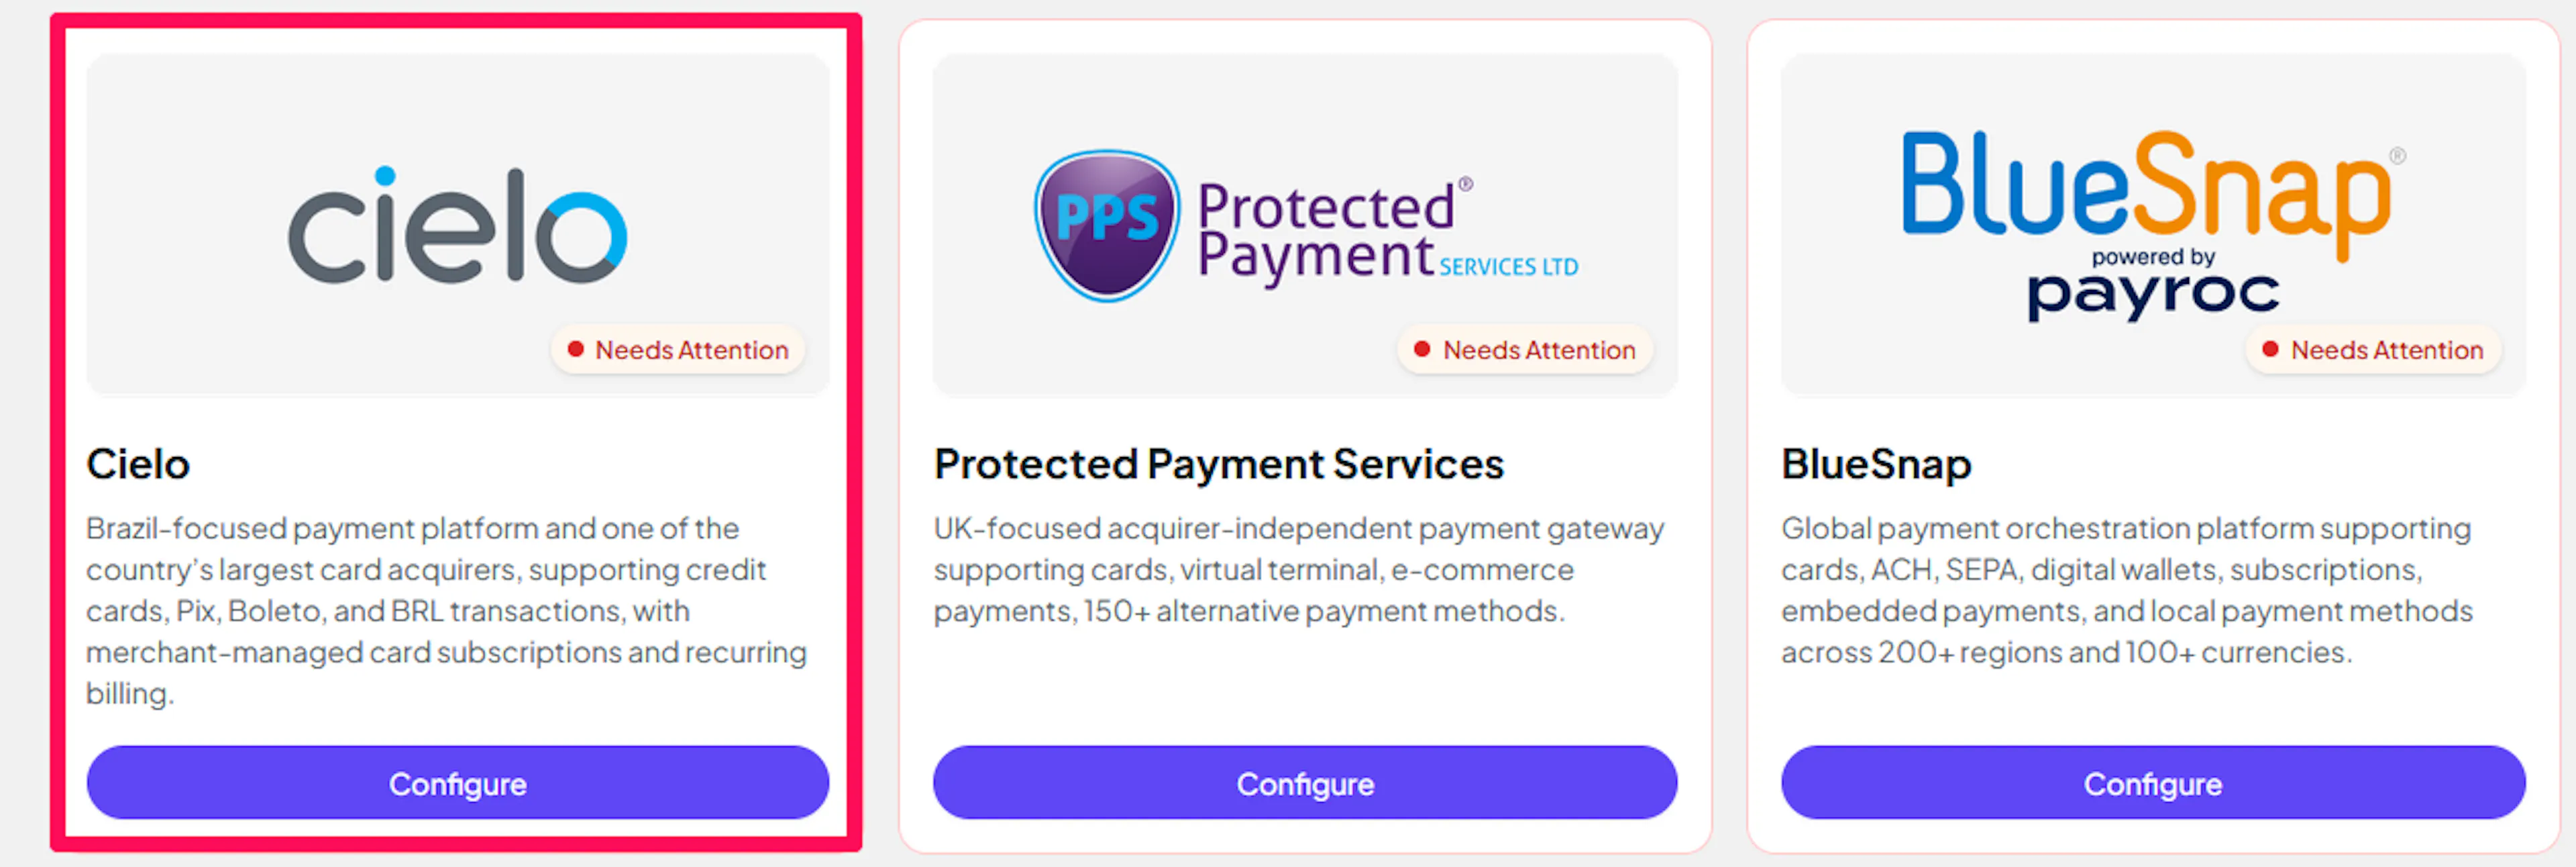
Log in to your PayLexer dashboard and go to Payment Gateways, find Cielo and click Configure.
Enter your credentials
Paste the Merchant ID, Merchant Key, Client ID (Silent Order Post) and Client Secret (Silent Order Post) you copied from Cielo into the corresponding fields on the Sandbox or Live tab.
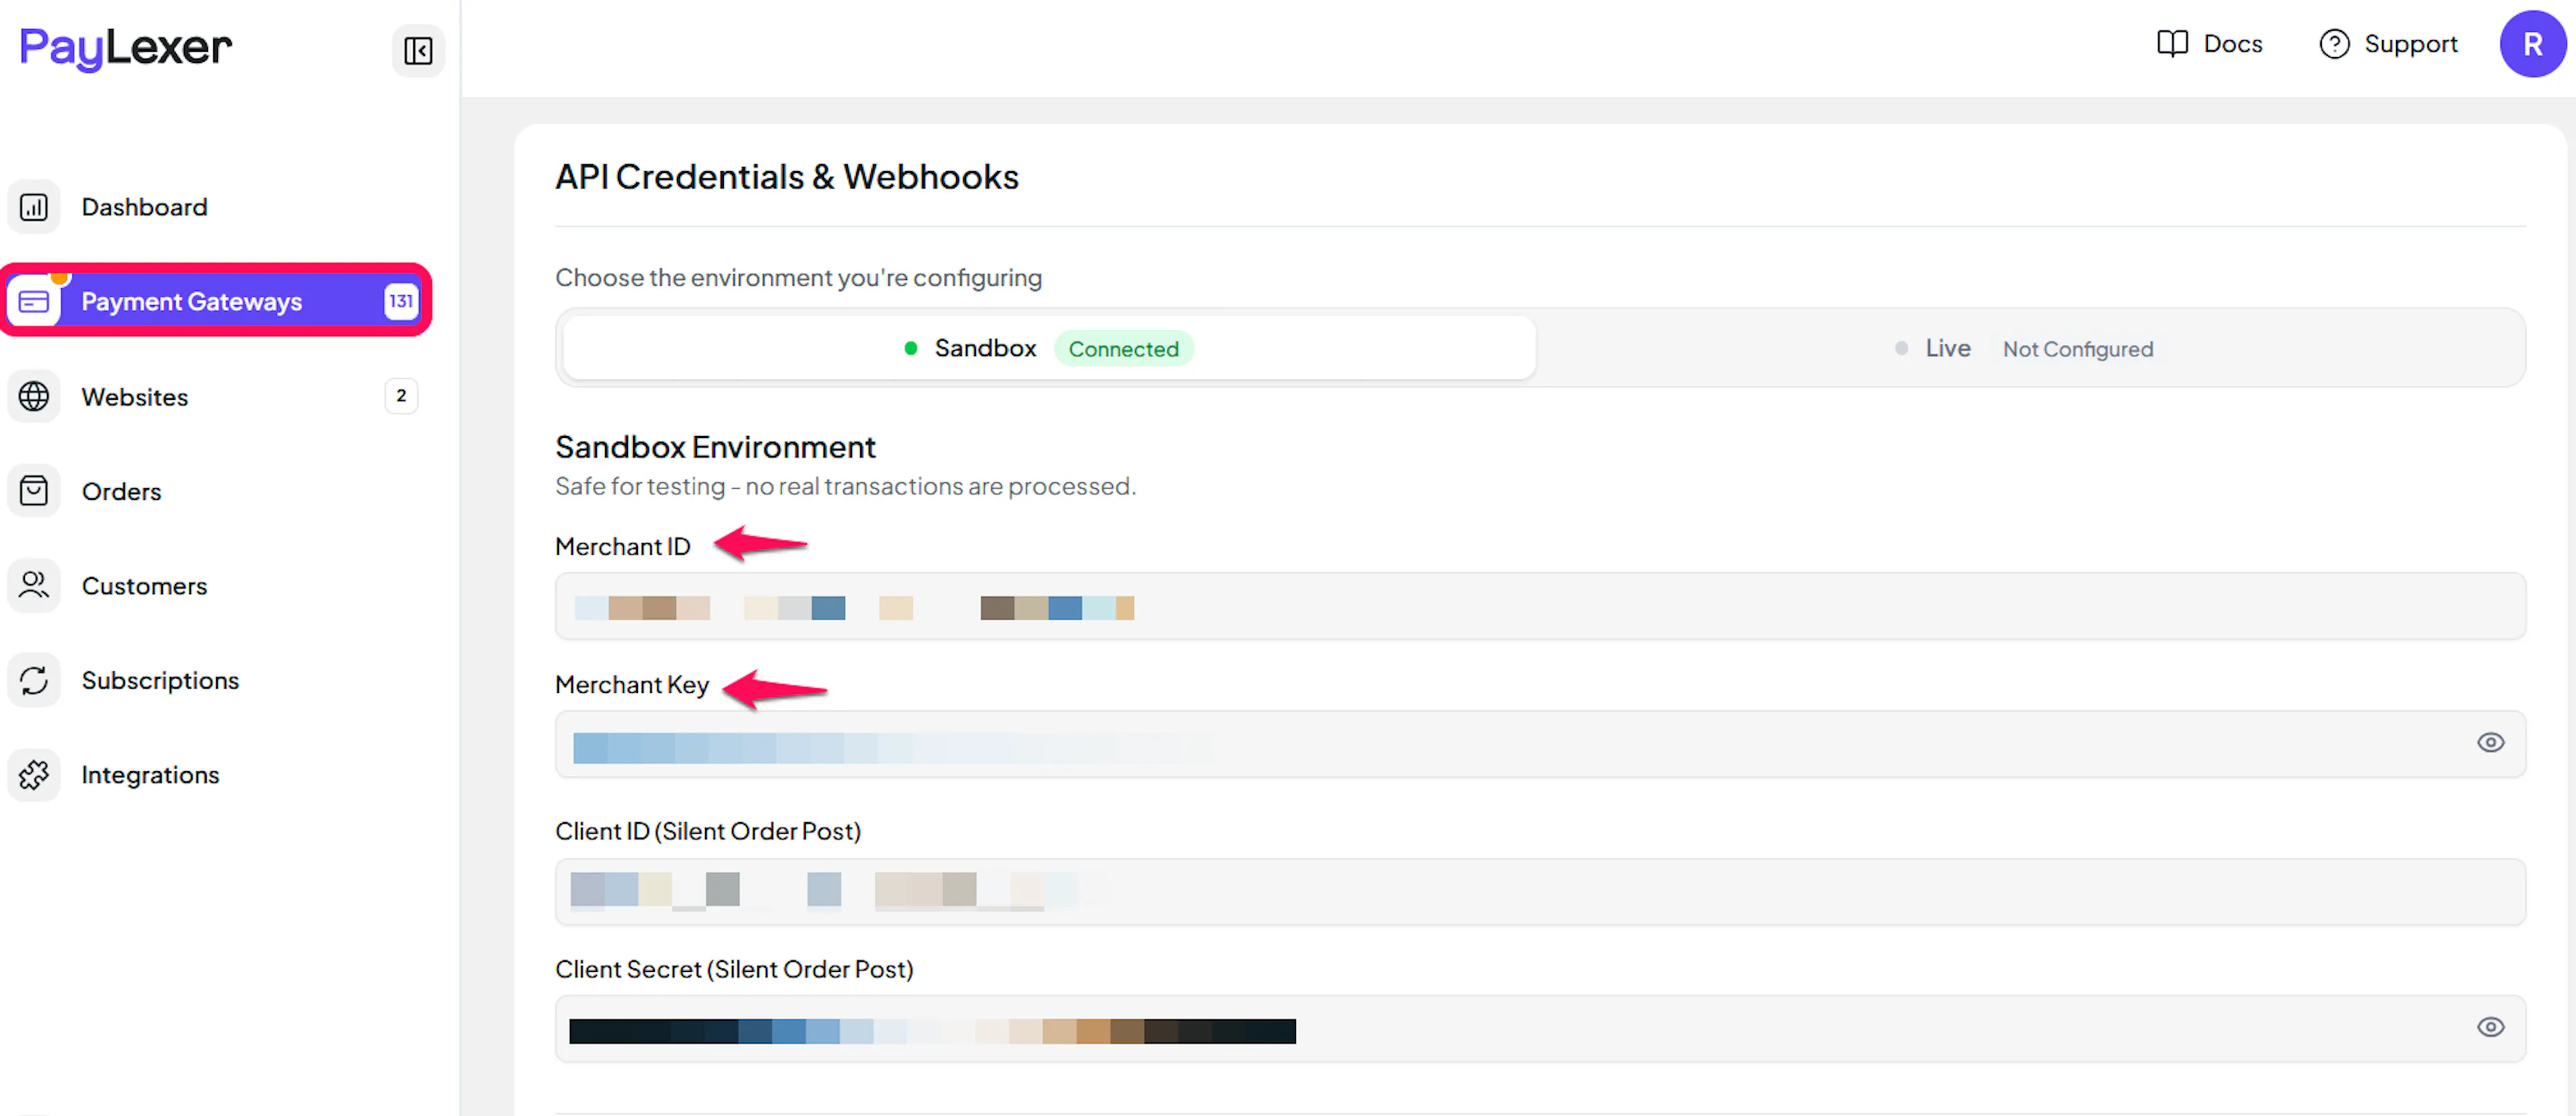
Understanding Live/Production and Sandbox Settings:
| Environment | Purpose |
|---|---|
| Live / Production | Used for real transactions. |
| Test / Sandbox | Used for testing only. No real money is processed. |
How PayLexer selects credentials:
- Debug/Test mode ON → Test credentials are used
- Debug/Test mode OFF → Live credentials are used
Verify and save
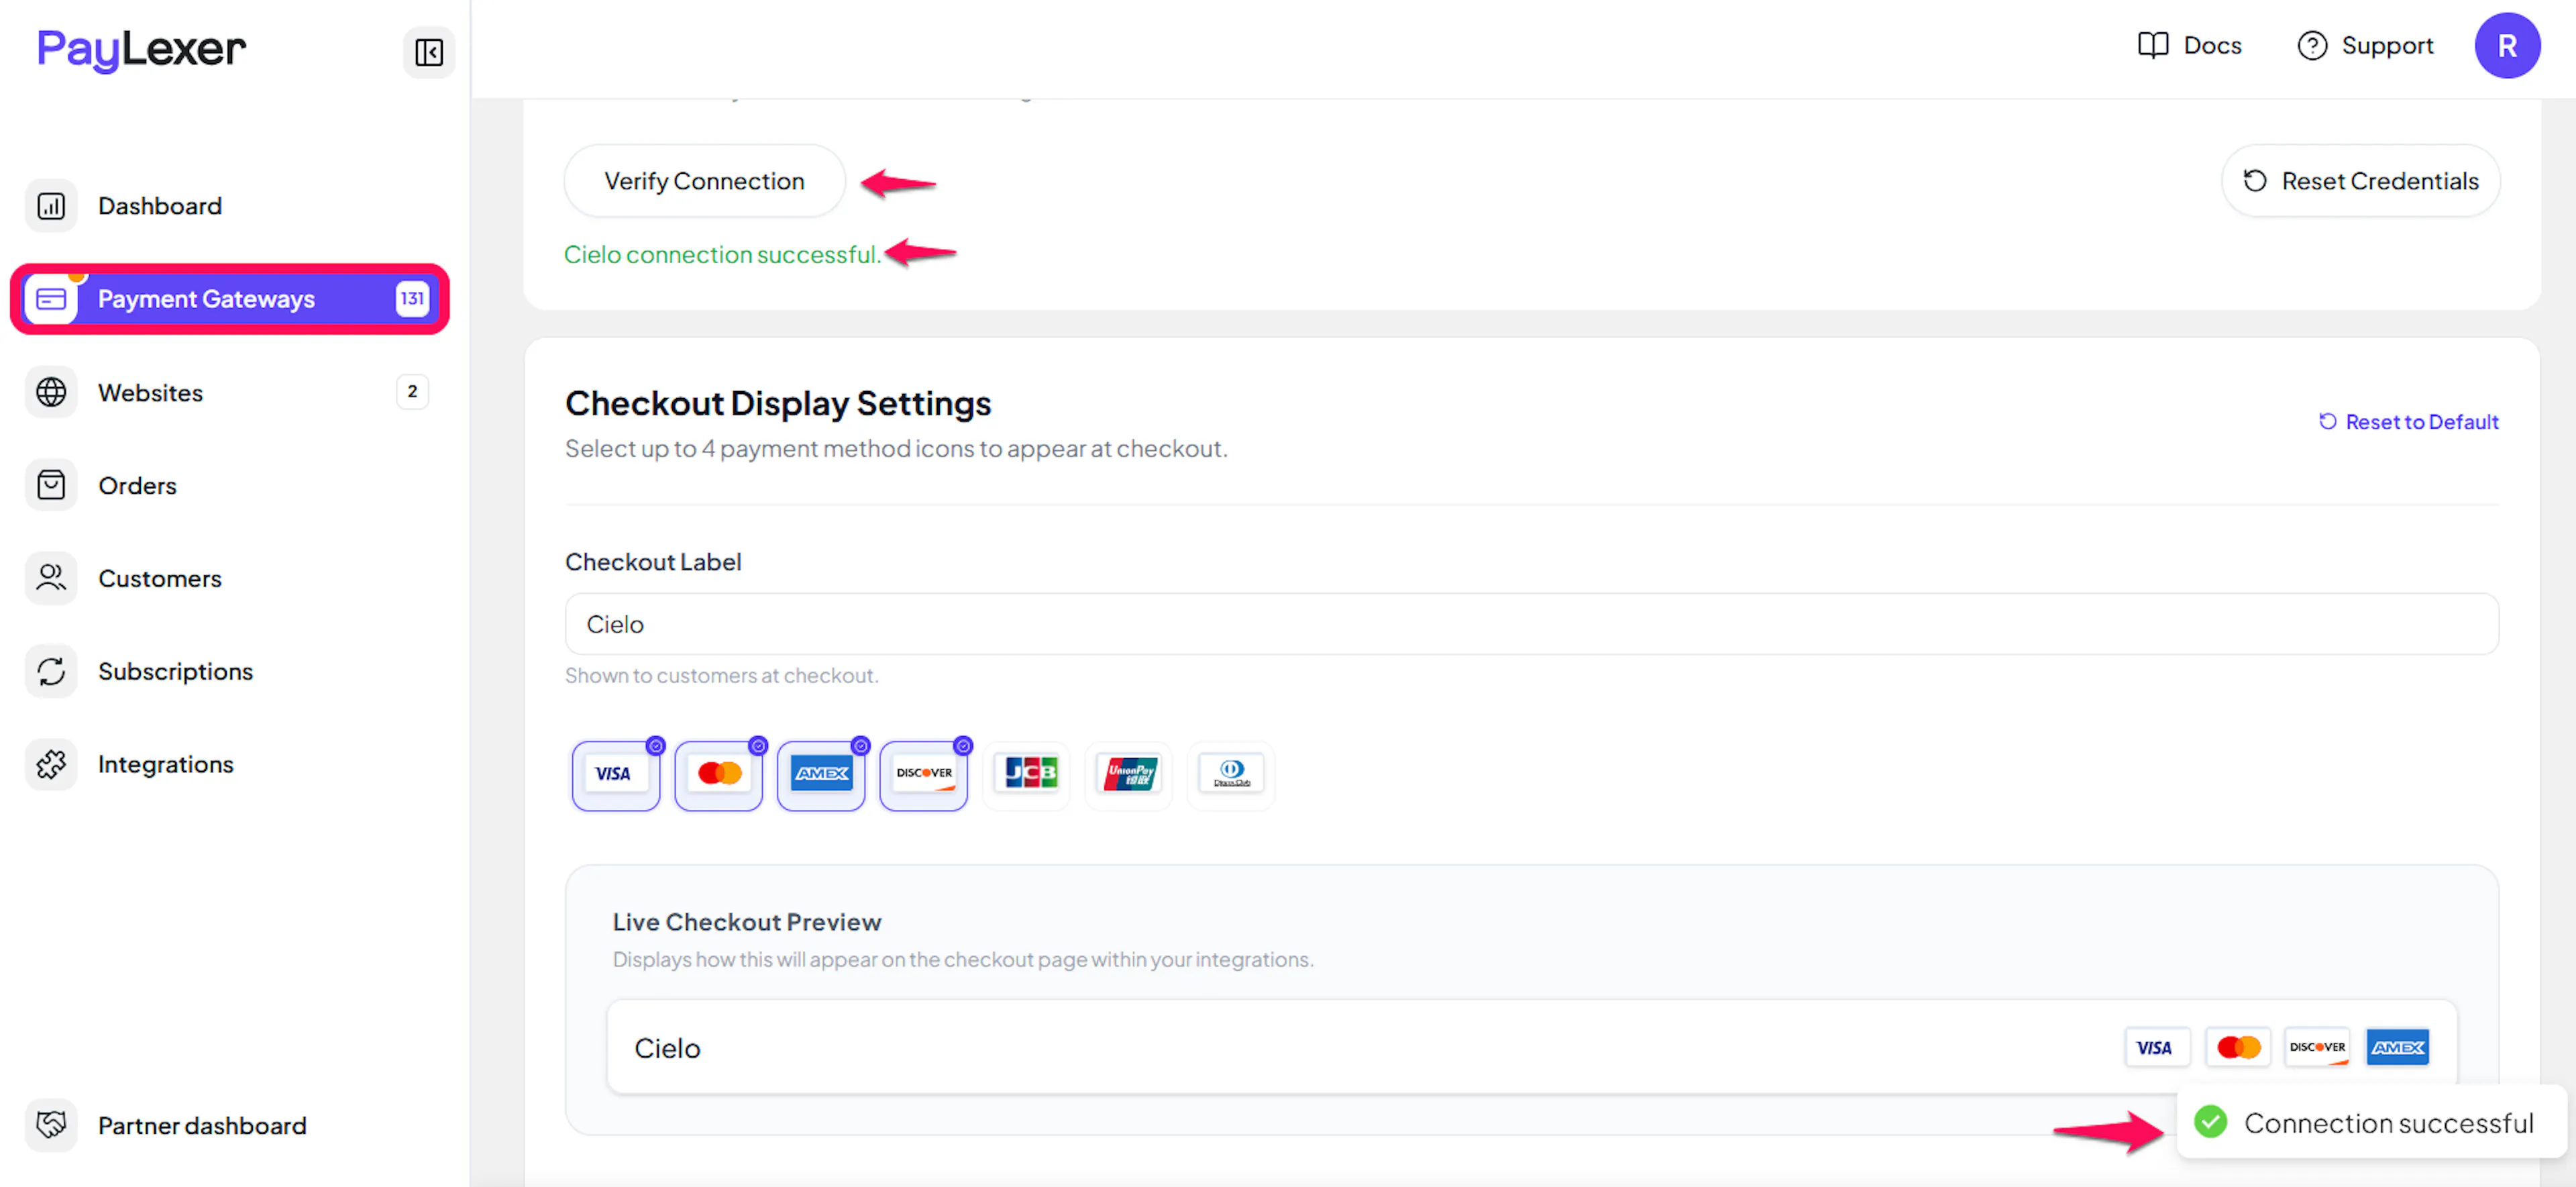
Click Verify Connection to check your credentials with Cielo, then click Save Changes.
PayLexer checks both pairs separately and tells you which one is wrong: the Merchant ID and Merchant Key, or the Silent Order Post Client ID and Client Secret.
Configuring Webhooks
Webhooks enable real-time payment updates and significantly improve reliability.
Benefits of Webhooks:
- Instant payment status updates
- Automatic refund processing
- Pix and Boleto orders complete as soon as Cielo confirms the payment
Cielo calls these notifications Post de Notificação. Cielo does not sign them, so PayLexer never trusts a notification as sent: it re-reads every payment from Cielo with your own credentials before updating an order.
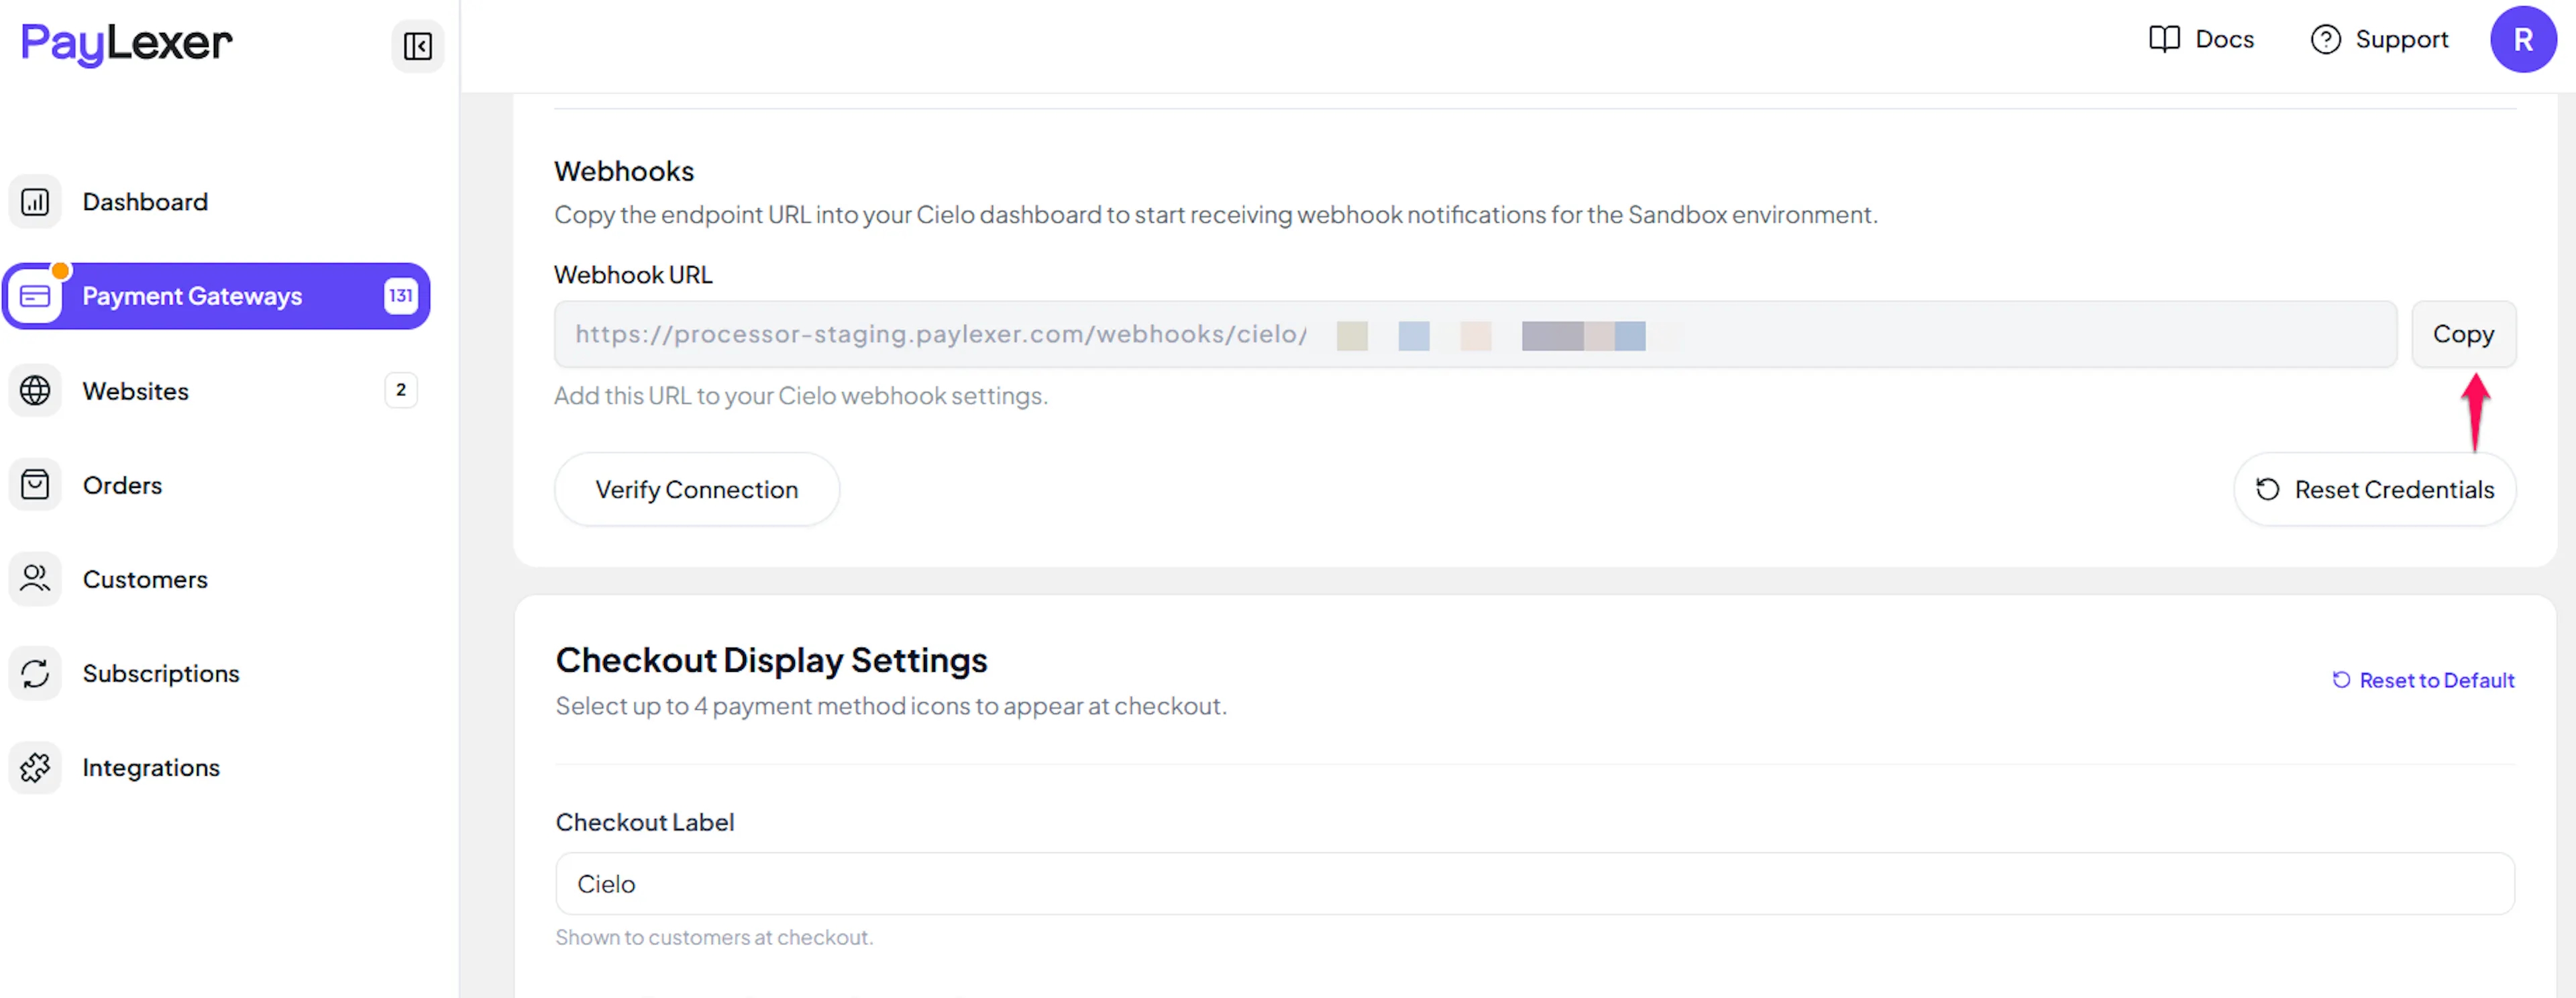
Copy your webhook URL from PayLexer
On the Cielo configuration page in PayLexer, copy the Webhook URL shown in the read-only field. The same URL works for sandbox and live.
Register the URL with Cielo
On the Cielo website, select your establishment, click E-commerce, open Gestão API E-commerce, then go to Configurações → URL de notificações.
Paste the webhook URL, click Marcar/desmarcar todos to select every event, and click Salvar alterações. Cielo tests the URL straight away, then asks you to confirm the change in the Cielo Gestão app. You do not need to add any custom headers.
Confirm it works
Make a test card payment. The order in PayLexer is marked paid immediately, and Cielo's notification for it arrives within a few minutes.
Integrate Cielo to Your Website
If you have already added and configured your site, you can enable Cielo in your existing setup.
Go to Websites
Navigate to Websites in your PayLexer dashboard.
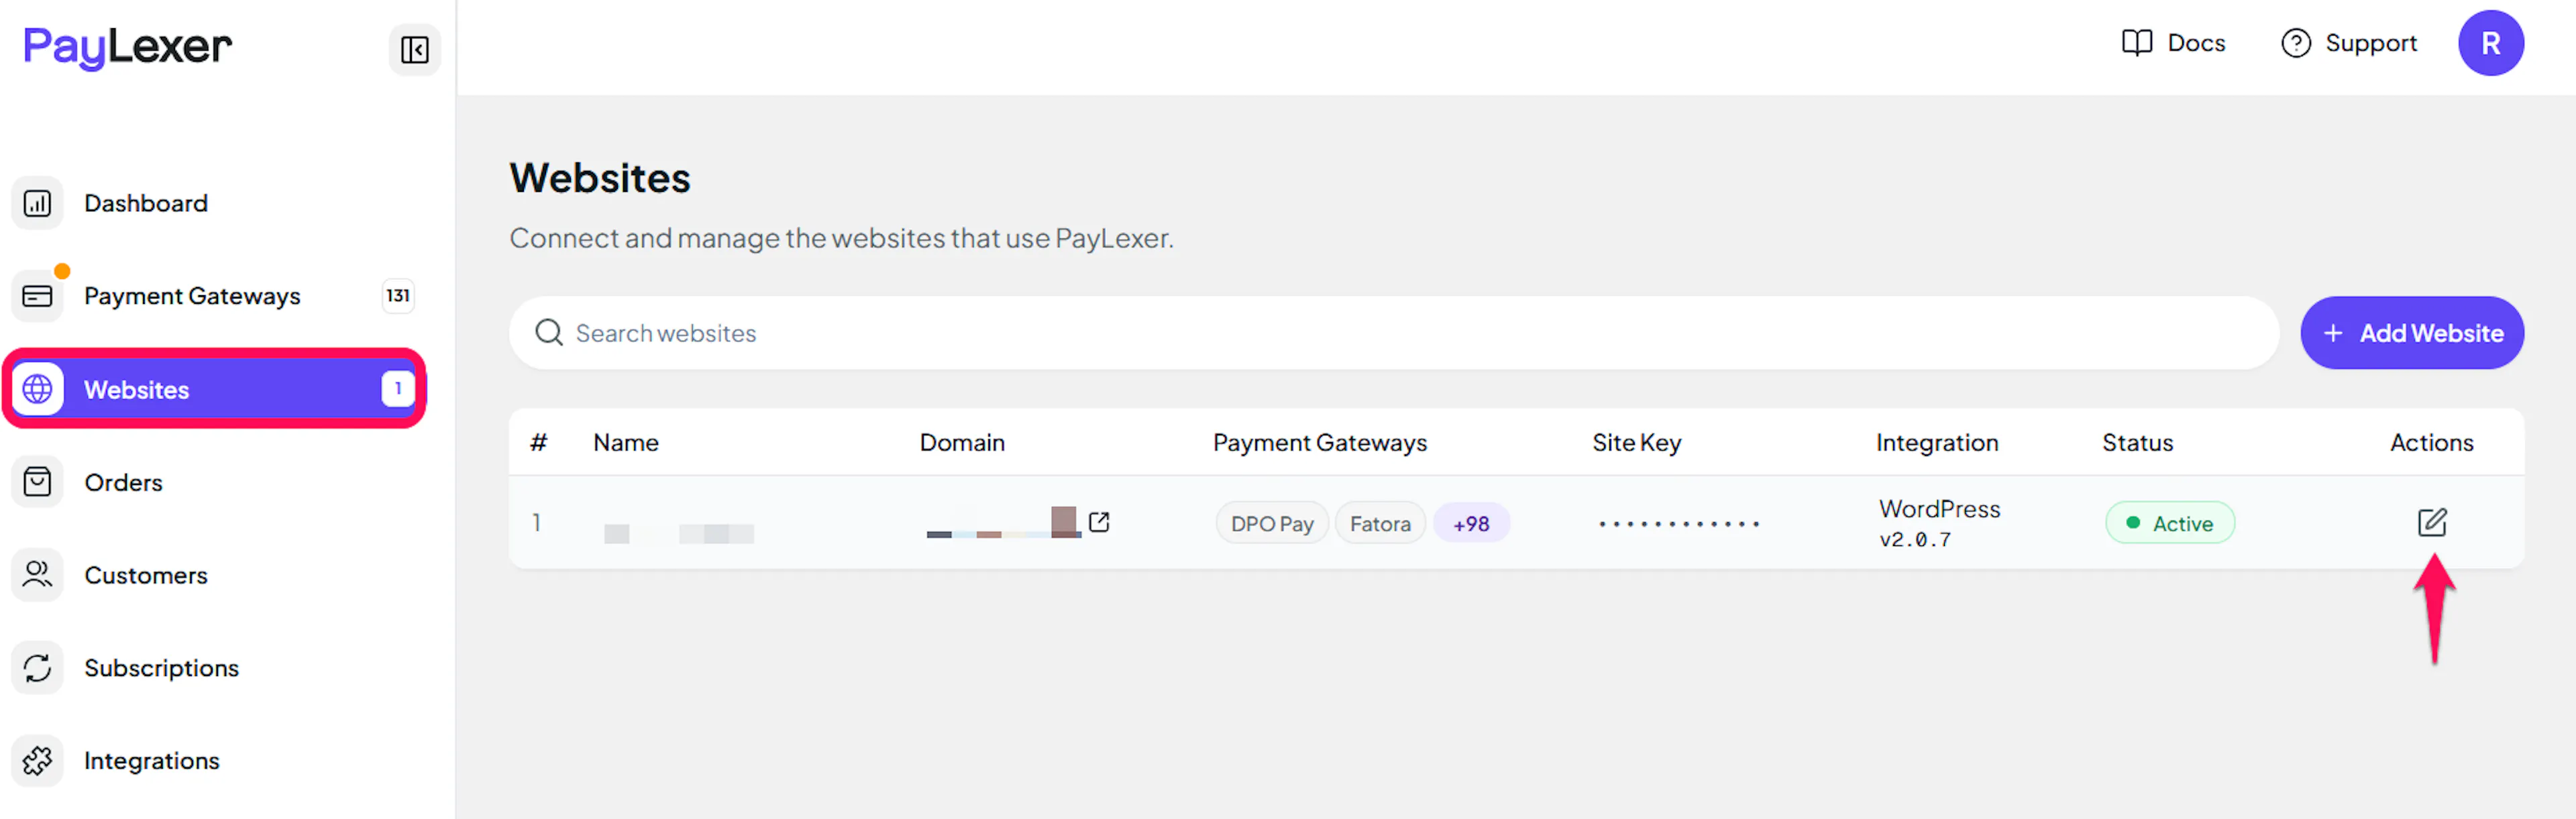
Open your website
Click the pen icon at the end of the website row to open its page.
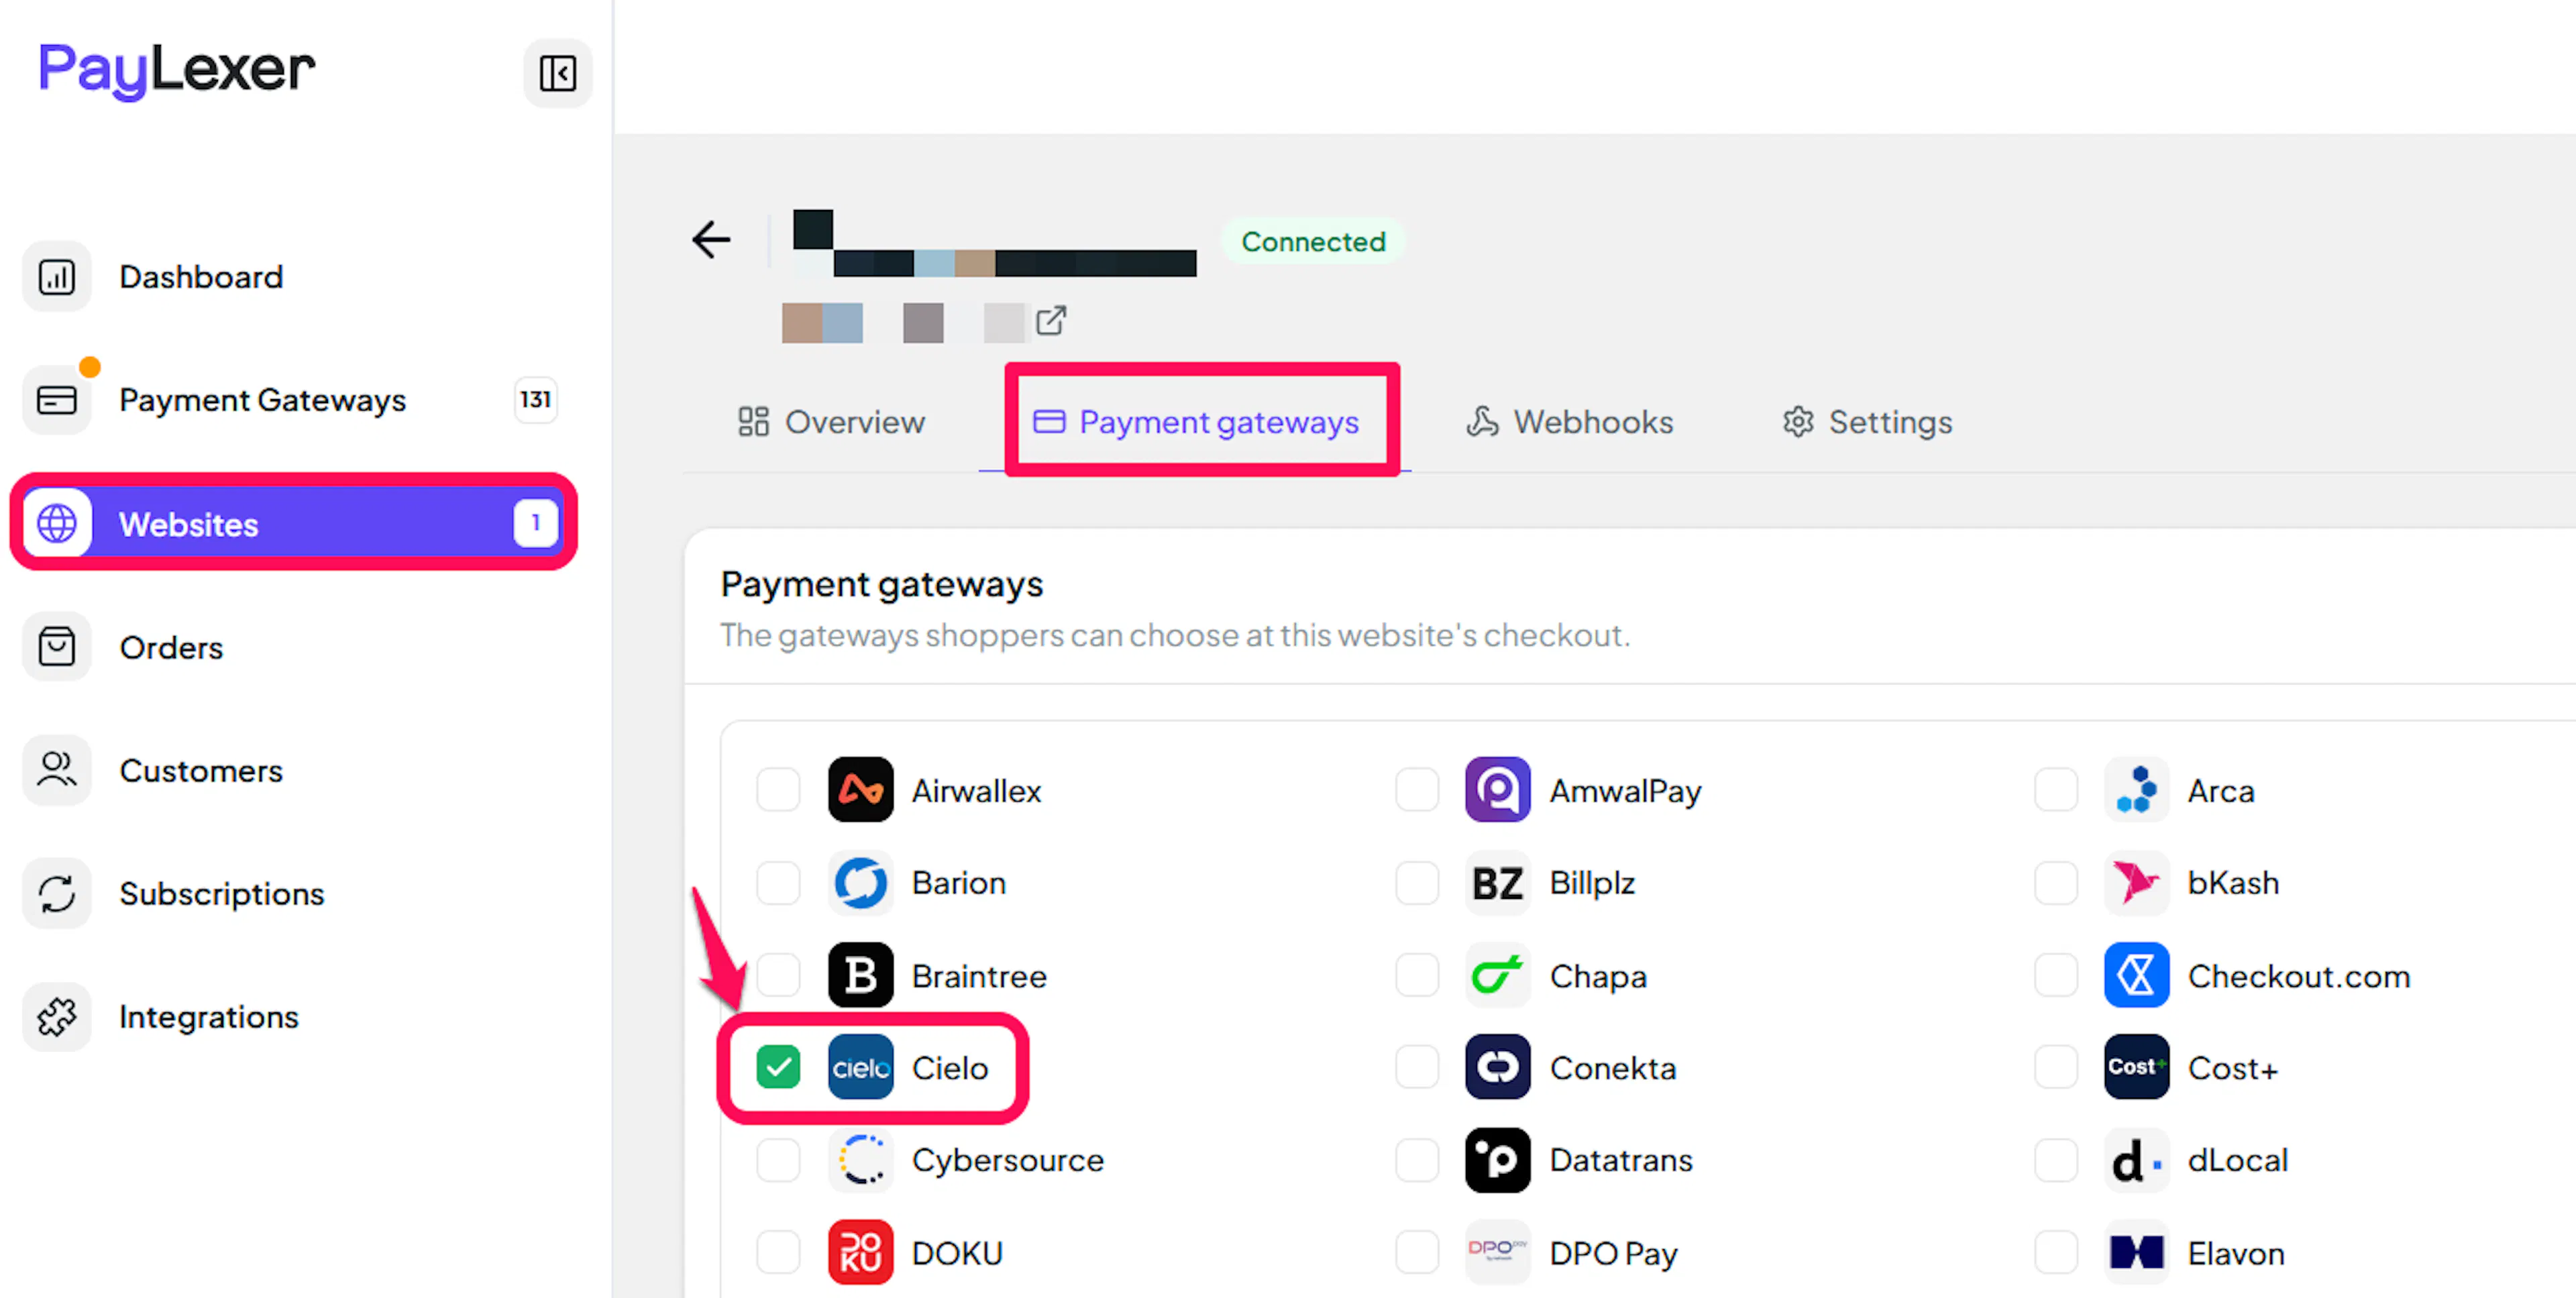
Enable Cielo
Open the Payment gateways tab, tick the checkbox for Cielo, then click Save gateways.
If you haven't added a website yet, Continue to Add Your Website →
Troubleshooting
Best Practices
- Test in sandbox before enabling production. Use a test card number ending in 1, such as
4551 8700 0000 0001, with any future expiry date and any CVV. A card ending in 2 is declined. - Register the webhook URL in both sandbox and live so Pix and Boleto orders complete the moment Cielo confirms them.
- Manage subscriptions from PayLexer rather than from Cielo's portal, so both systems always agree.
- Copy your Merchant Key and Client Secret somewhere safe as soon as Cielo shows them.
FAQs
Still Have Questions?
- Cielo Support:
- Support Site: Cielo E-commerce Support
- Support Email: cieloecommerce@cielo.com.br
- PayLexer Support: Contact Support