

9Pay
Connect 9Pay to PayLexer to accept Vietnamese wallets, domestic and international cards, bank transfers, QR, installments, and buy-now-pay-later through a hosted payment page.
9Pay is a Vietnamese payment provider licensed by the State Bank of Vietnam as an intermediary payment service for e-wallet, payment gateway, and collection and disbursement services. It gives shoppers a single hosted payment page covering the methods Vietnamese buyers actually use, including the 9Pay and ZaloPay wallets, domestic ATM cards, international cards, direct bank transfer, QR payments, Apple Pay, Google Pay, credit-card installments, and buy-now-pay-later. PayLexer redirects the shopper to 9Pay's own secure page, so card details are never typed on your site.
- Supported Regions (Merchant Accounts): Vietnam
- Supported Currencies: VND, USD, EUR, GBP, CNY, JPY
VND is 9Pay’s primary settlement currency. USD, EUR, GBP, CNY, and JPY are supported in PayLexer, but availability depends on your 9Pay merchant account. Confirm non-VND currencies with 9Pay before going live to avoid checkout errors.
Recurring subscriptions are not supported for 9Pay. This integration handles one-time payments only.
Supported Features
- Hosted payment page - the shopper is redirected to 9Pay to pay, then returned to your site, so no card details are ever entered on your own pages
- Vietnamese payment methods including the 9Pay and ZaloPay wallets, domestic ATM cards, international cards, bank transfer, QR payments, Apple Pay, Google Pay, credit-card installments, and buy-now-pay-later
- Full and partial refunds issued from PayLexer, confirmed by 9Pay once the refund settles
- Real-time payment and refund notifications from 9Pay.
- Automatic 30-minute safety-net re-check for both payments and refunds, so a delayed or missing notification never leaves an order stranded
- Fully separate sandbox and production environments, each with its own 9Pay account, portal, and credentials
Before You Start
Make sure you have:
- 9Pay Merchant Account – 9Pay does not offer self-serve signup. Credentials are issued by 9Pay's onboarding team, and onboarding assumes a Vietnamese business registration. Contact 9Pay to get started →
- PayLexer Account – Required to configure the integration. Create your account →
- A website where you want to integrate
Looking for a different payment processor? View all supported gateways →
Configuring 9Pay
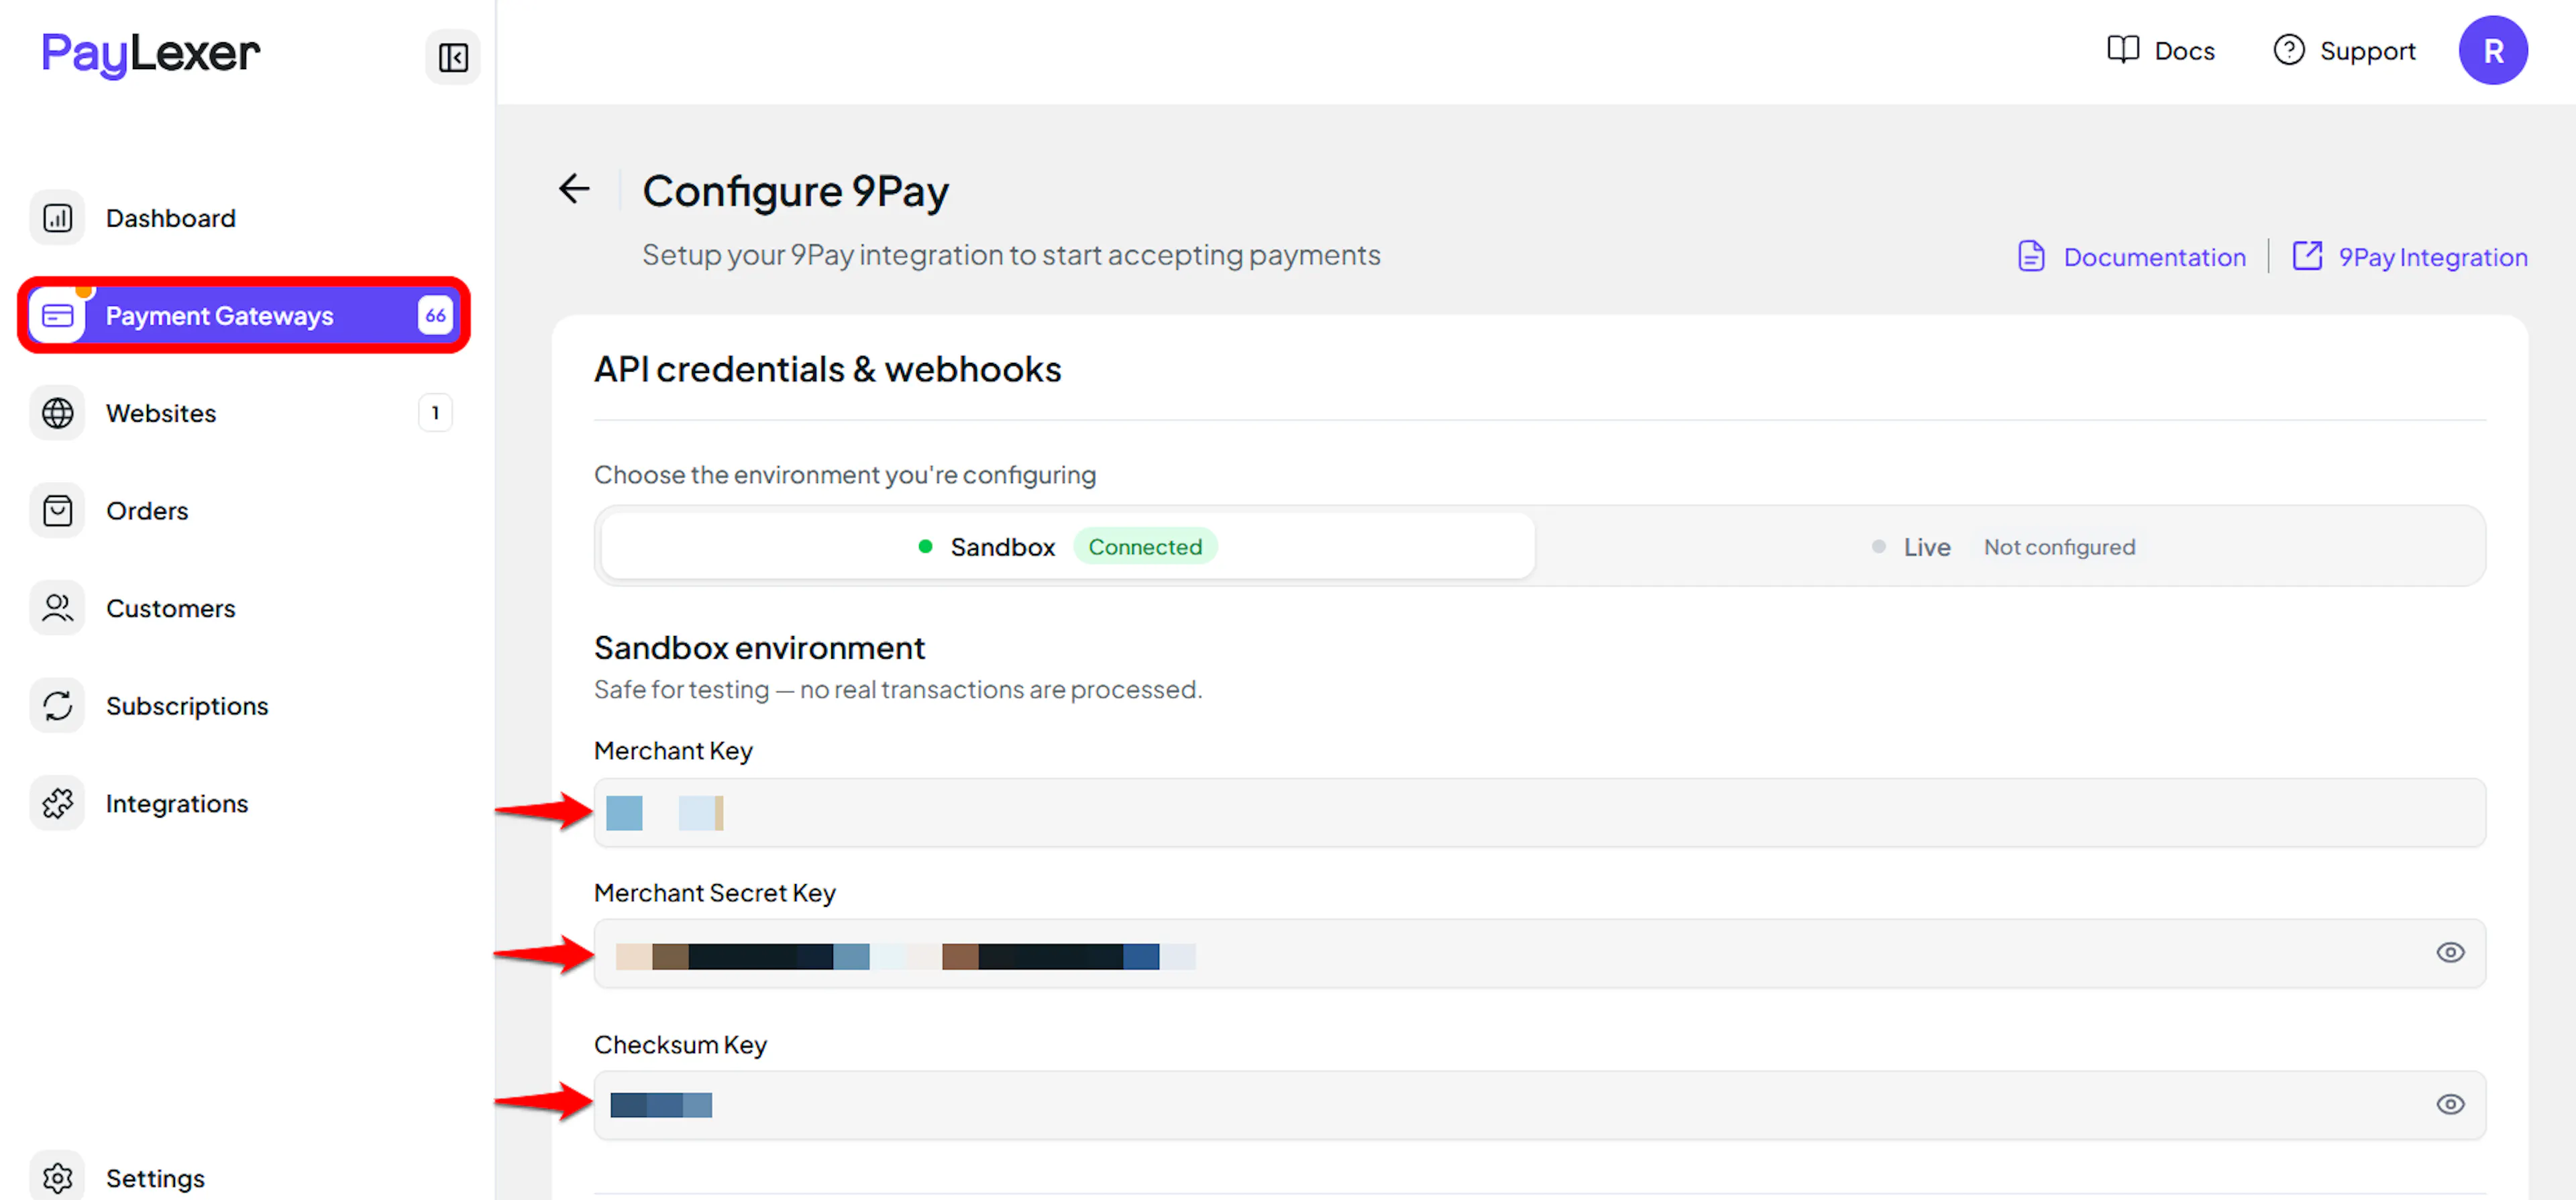
You need a Merchant Key, Merchant Secret Key, and Checksum Key from 9Pay for this integration. All three are issued by 9Pay, and each does a different job, so they are not interchangeable.
Getting API Credentials
Request a merchant account from 9Pay
9Pay has no self-serve registration. Submit a business enquiry through 9Pay business cooperation, or contact 9Pay directly by email at hotro@9pay.vn.
9Pay's onboarding team will discuss which payment methods suit your business and guide you through verification. Onboarding assumes a Vietnamese business registration.
Ask for sandbox credentials first
Request a sandbox account so you can test before taking real money. 9Pay's sandbox and production systems are entirely separate - different servers, different merchant portals, and different credentials.
- Sandbox portal: sand-business.9pay.vn
- Production portal: business.9pay.vn
Sandbox credentials will never work against production and vice versa, so it is not possible to accidentally take a real payment with test keys.
Collect your three keys
9Pay issues three separate values for each environment. Copy all three exactly as provided, with no leading or trailing spaces:
| Key | What it does |
|---|---|
| Merchant Key | Identifies your account to 9Pay. Not secret. |
| Merchant Secret Key | Signs the requests PayLexer sends to 9Pay, proving they genuinely come from you. |
| Checksum Key | Verifies the payment results 9Pay sends back, proving they genuinely come from 9Pay. |
The Merchant Secret Key and Checksum Key serve different purposes. A wrong secret key causes PayLexer requests to fail, while a wrong checksum key makes 9Pay responses fail verification. Confirm each key with 9Pay before entering them.
Request production keys when you are ready
Once your sandbox testing passes, ask 9Pay to activate your production account and issue a second set of all three keys. Keep the two sets clearly labelled.
Adding Credentials to PayLexer
Open PayLexer Dashboard
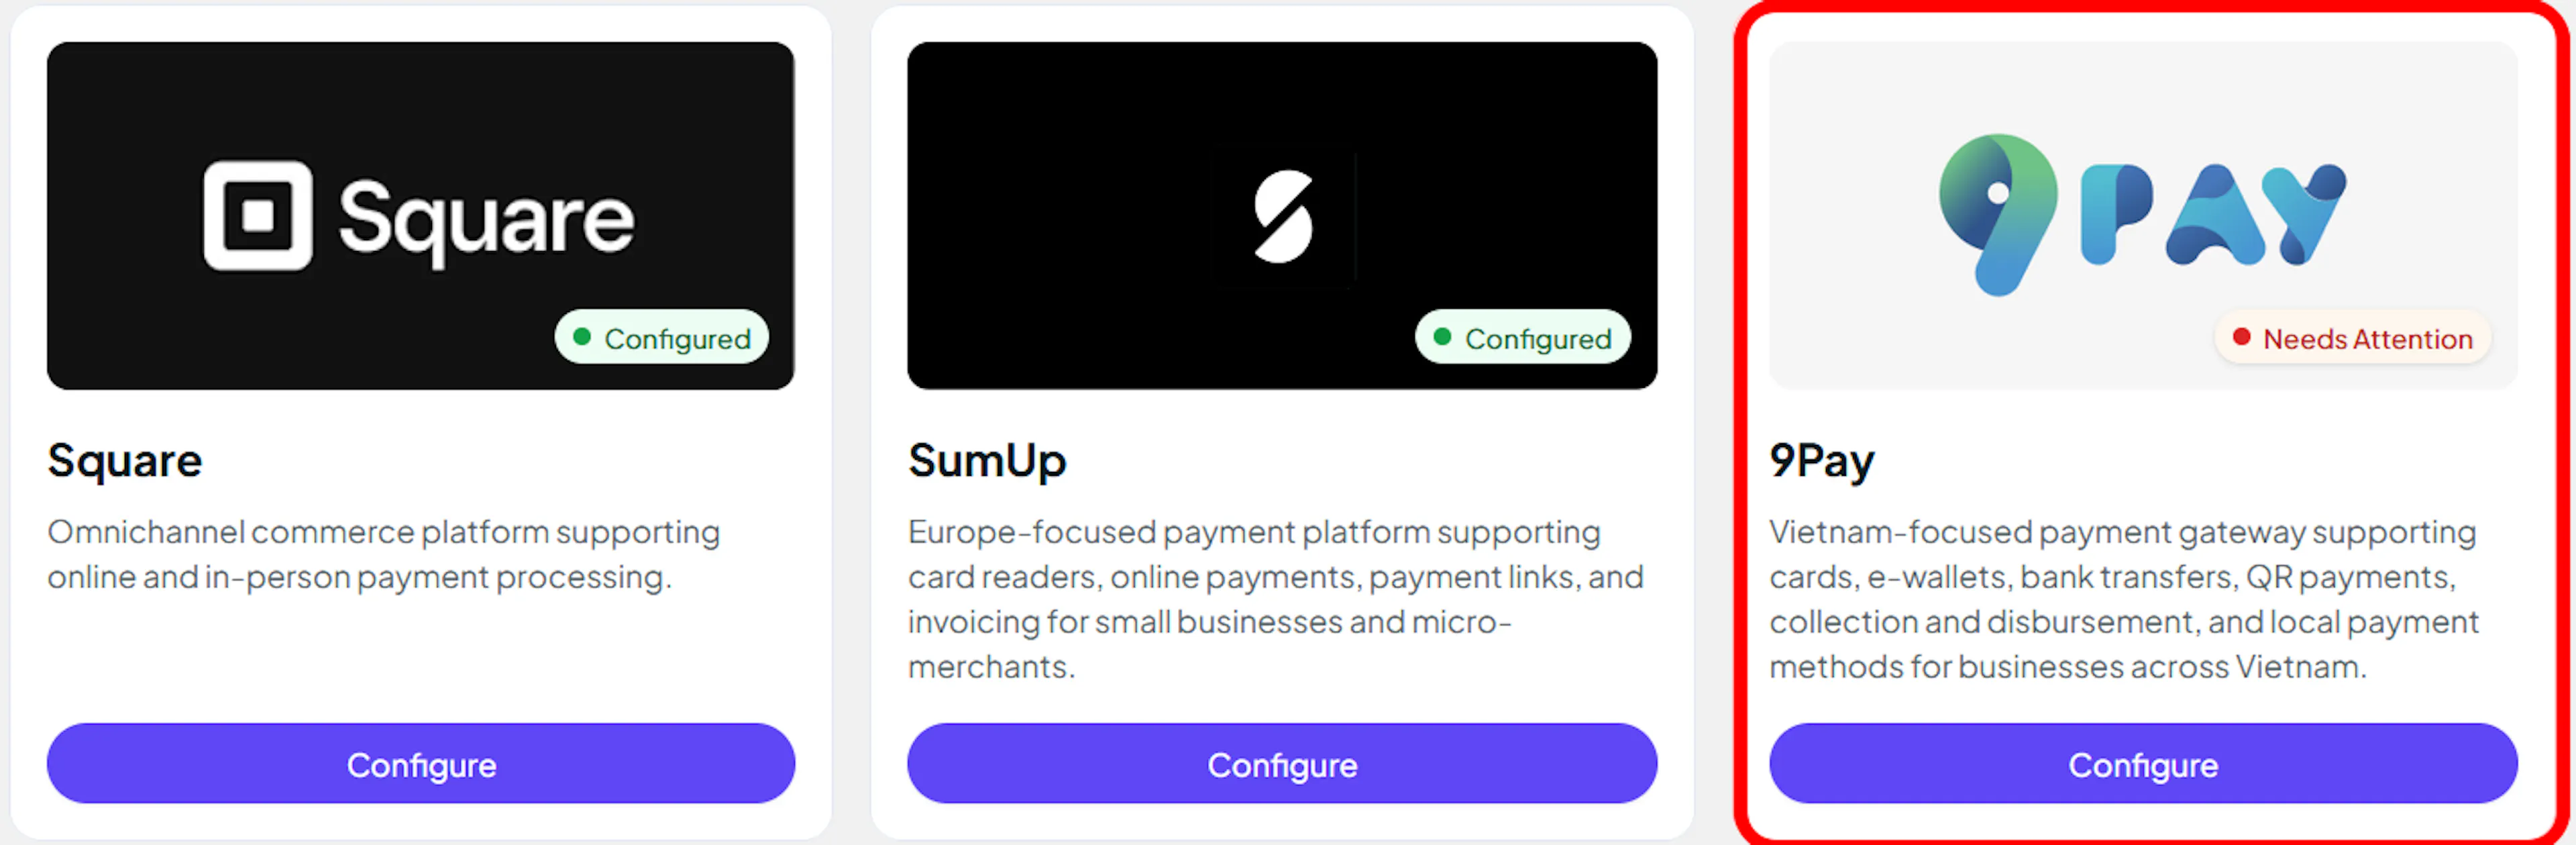
Log in to your PayLexer dashboard and navigate to Payment Gateways → 9Pay.
Enter your credentials
Paste the Merchant Key, Merchant Secret Key, and Checksum Key you received from 9Pay into the corresponding fields. Use your sandbox keys in the Test fields and your production keys in the Live fields.
Understanding Live/Production and Sandbox Settings:
| Environment | Purpose |
|---|---|
| Live / Production (Mandatory) | Used for real transactions. Cannot be empty, even when testing. |
| Test / Sandbox (Optional) | Used for testing only. No real money is processed. |
How PayLexer selects credentials:
- Debug/Test mode ON → Test credentials are used
- Debug/Test mode OFF → Live credentials are used
Test and save
Click Save to save your configuration and verify your credentials. Click Verify Connection to test the connection.
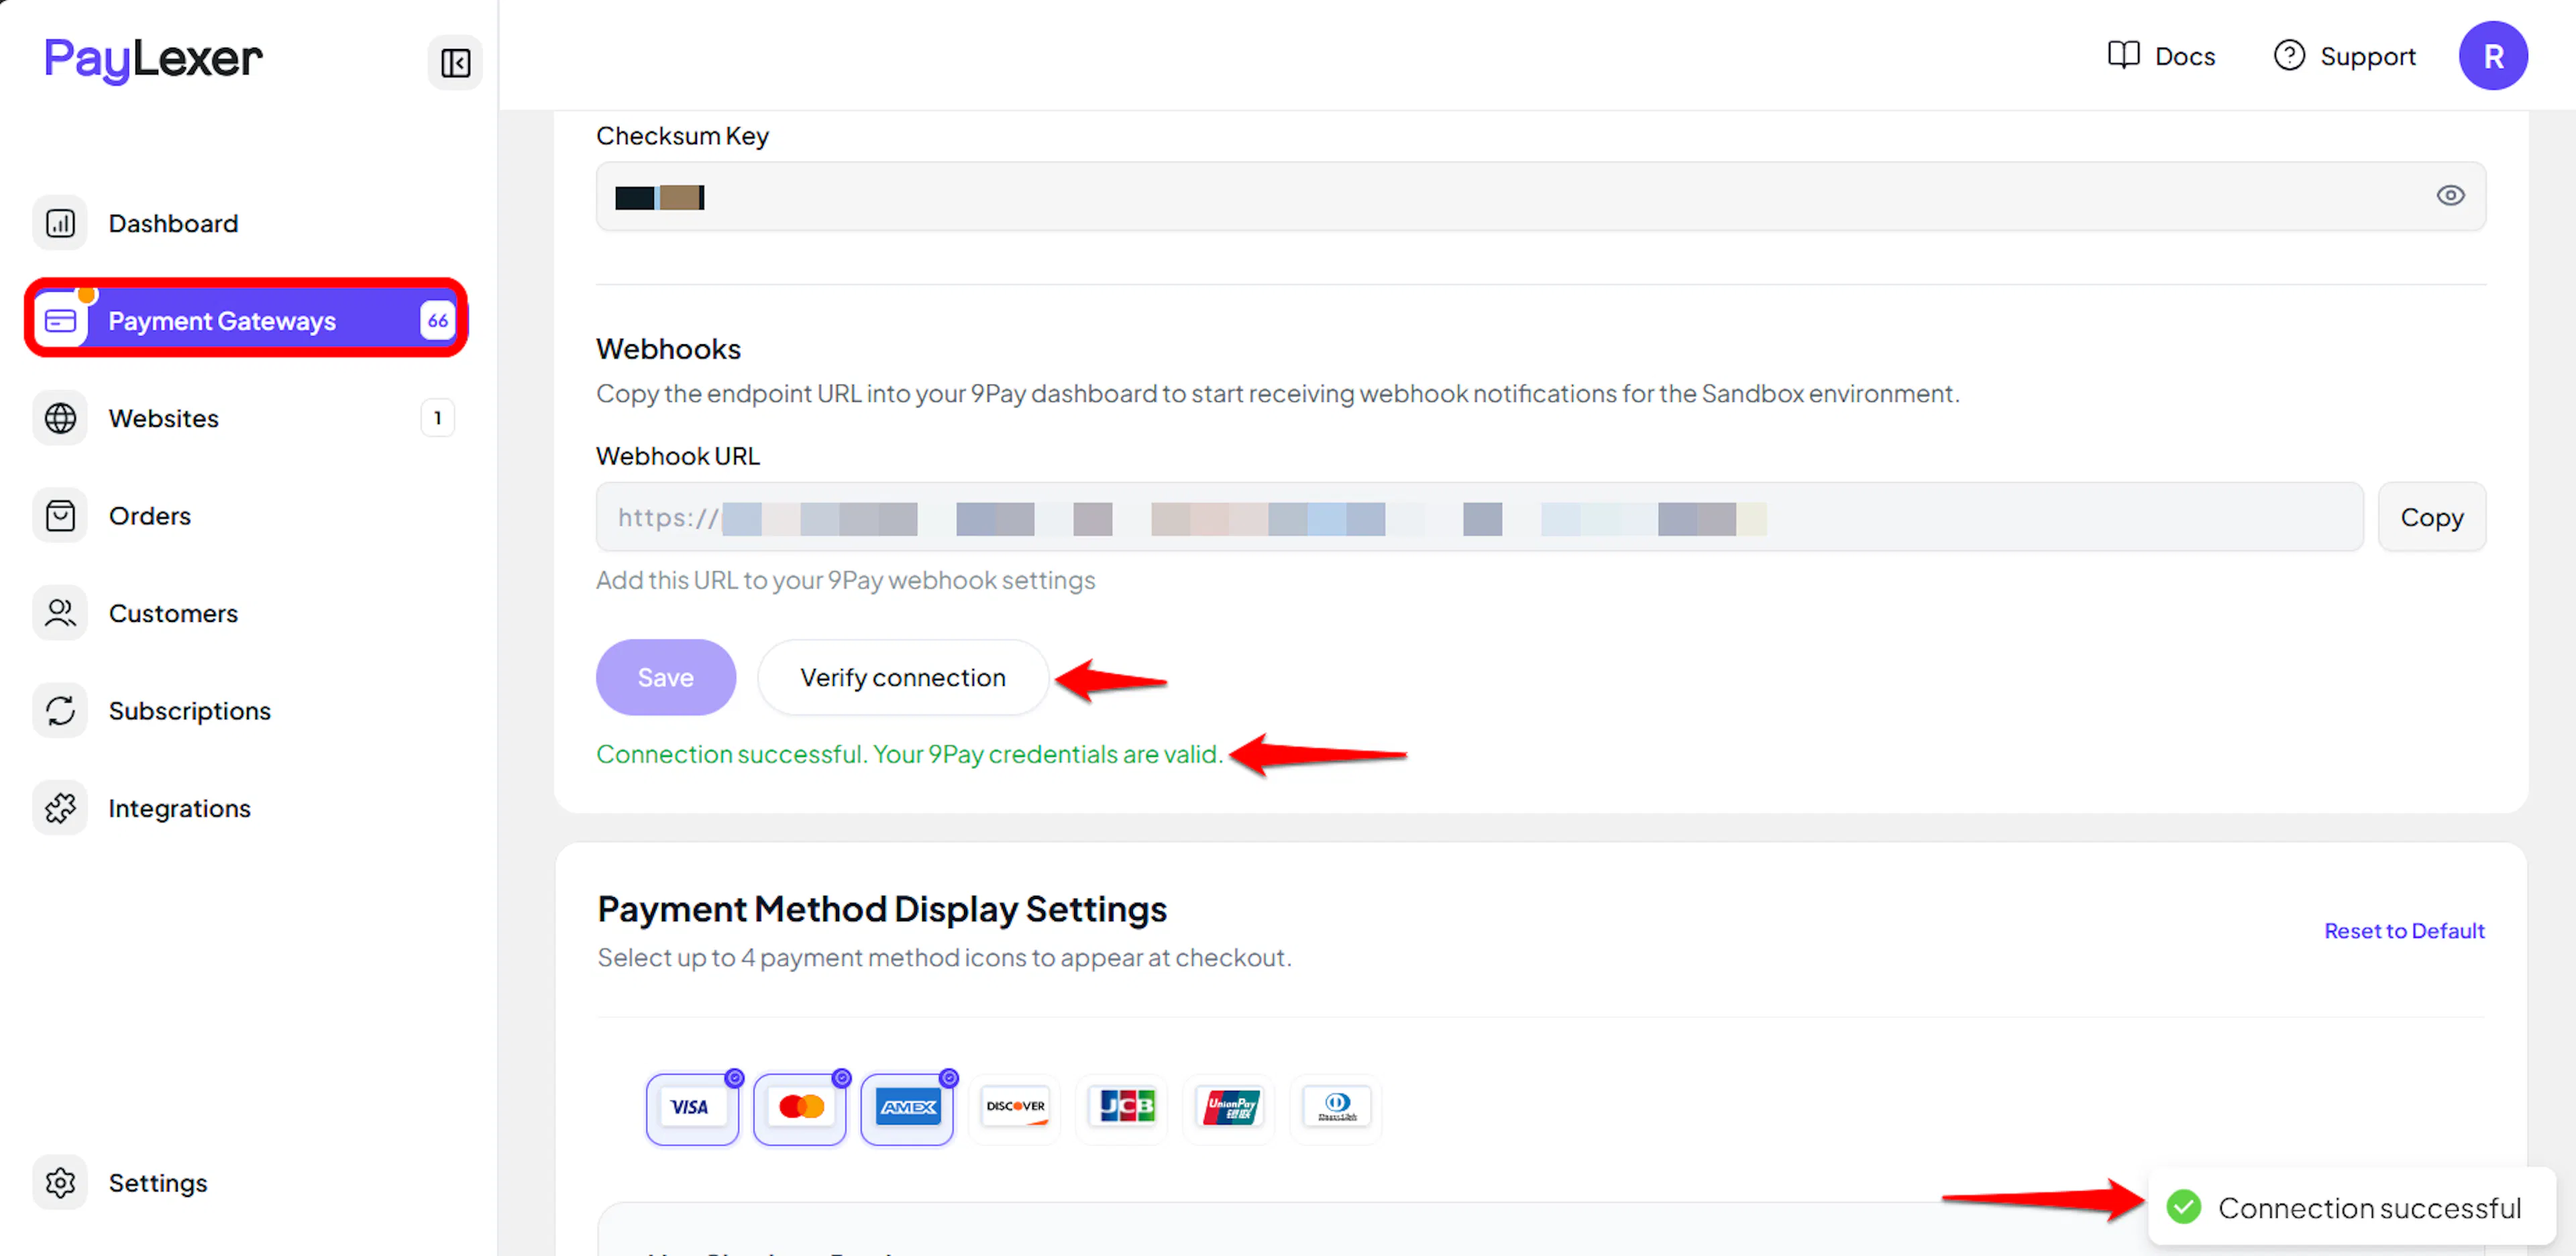
Credentials saved. Continue to the Webhooks section below before enabling 9Pay on your website.
Configuring Webhooks
Webhooks enable real-time payment updates and significantly improve reliability.
Benefits of Webhooks:
- Instant payment status updates
- Automatic refund processing
- Faster confirmation than waiting on a scheduled status check
Copy your PayLexer webhook URL
In PayLexer → Payment Gateways → 9Pay, copy the Webhook URL shown for your account. This is your payment IPN URL.
Send IPN URL to 9Pay
9Pay's merchant portal does not expose a self-serve IPN field. Send URL to your 9Pay account manager, or email them to hotro@9pay.vn.
Register them separately for your sandbox account and for your production account, since the two environments are entirely independent.
Confirm registration before going live
Ask 9Pay to confirm both URLs are registered against the correct environment, then run a sandbox payment and check the order updates in PayLexer.
If an IPN is delayed or lost, PayLexer re-checks unresolved 9Pay payments and refunds about every 30 minutes. Registering the URLs enables near-instant confirmation.
Integrate 9Pay to Your Website
If you have already added and configured your site, you can enable 9Pay in your existing setup.
Go to Websites
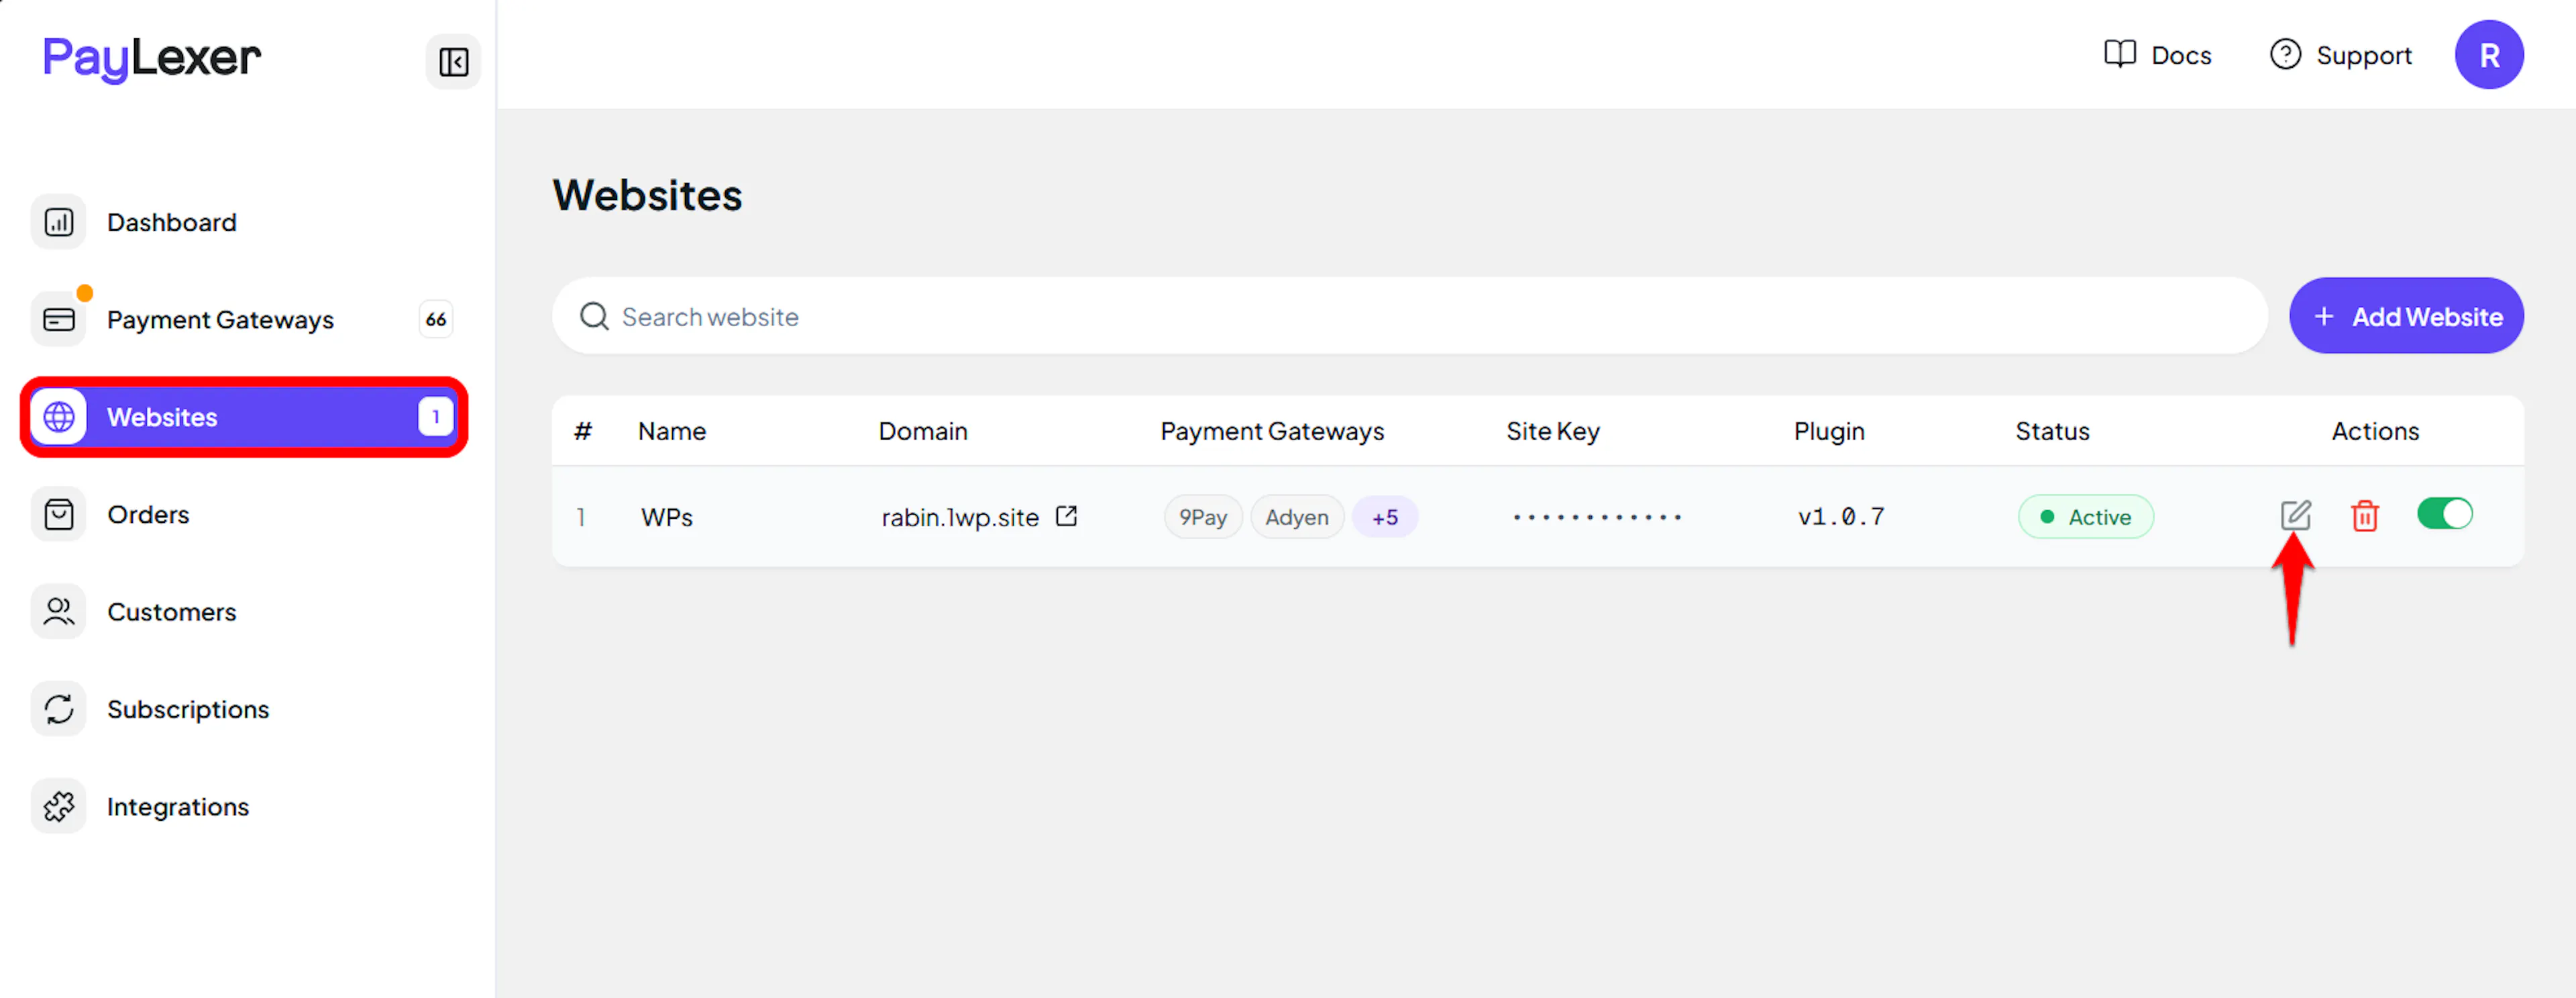
Navigate to Websites in your PayLexer dashboard.
Edit your website
Click the Edit Icon of your added website.
Enable 9Pay
Click the checkbox to enable 9Pay for the website.
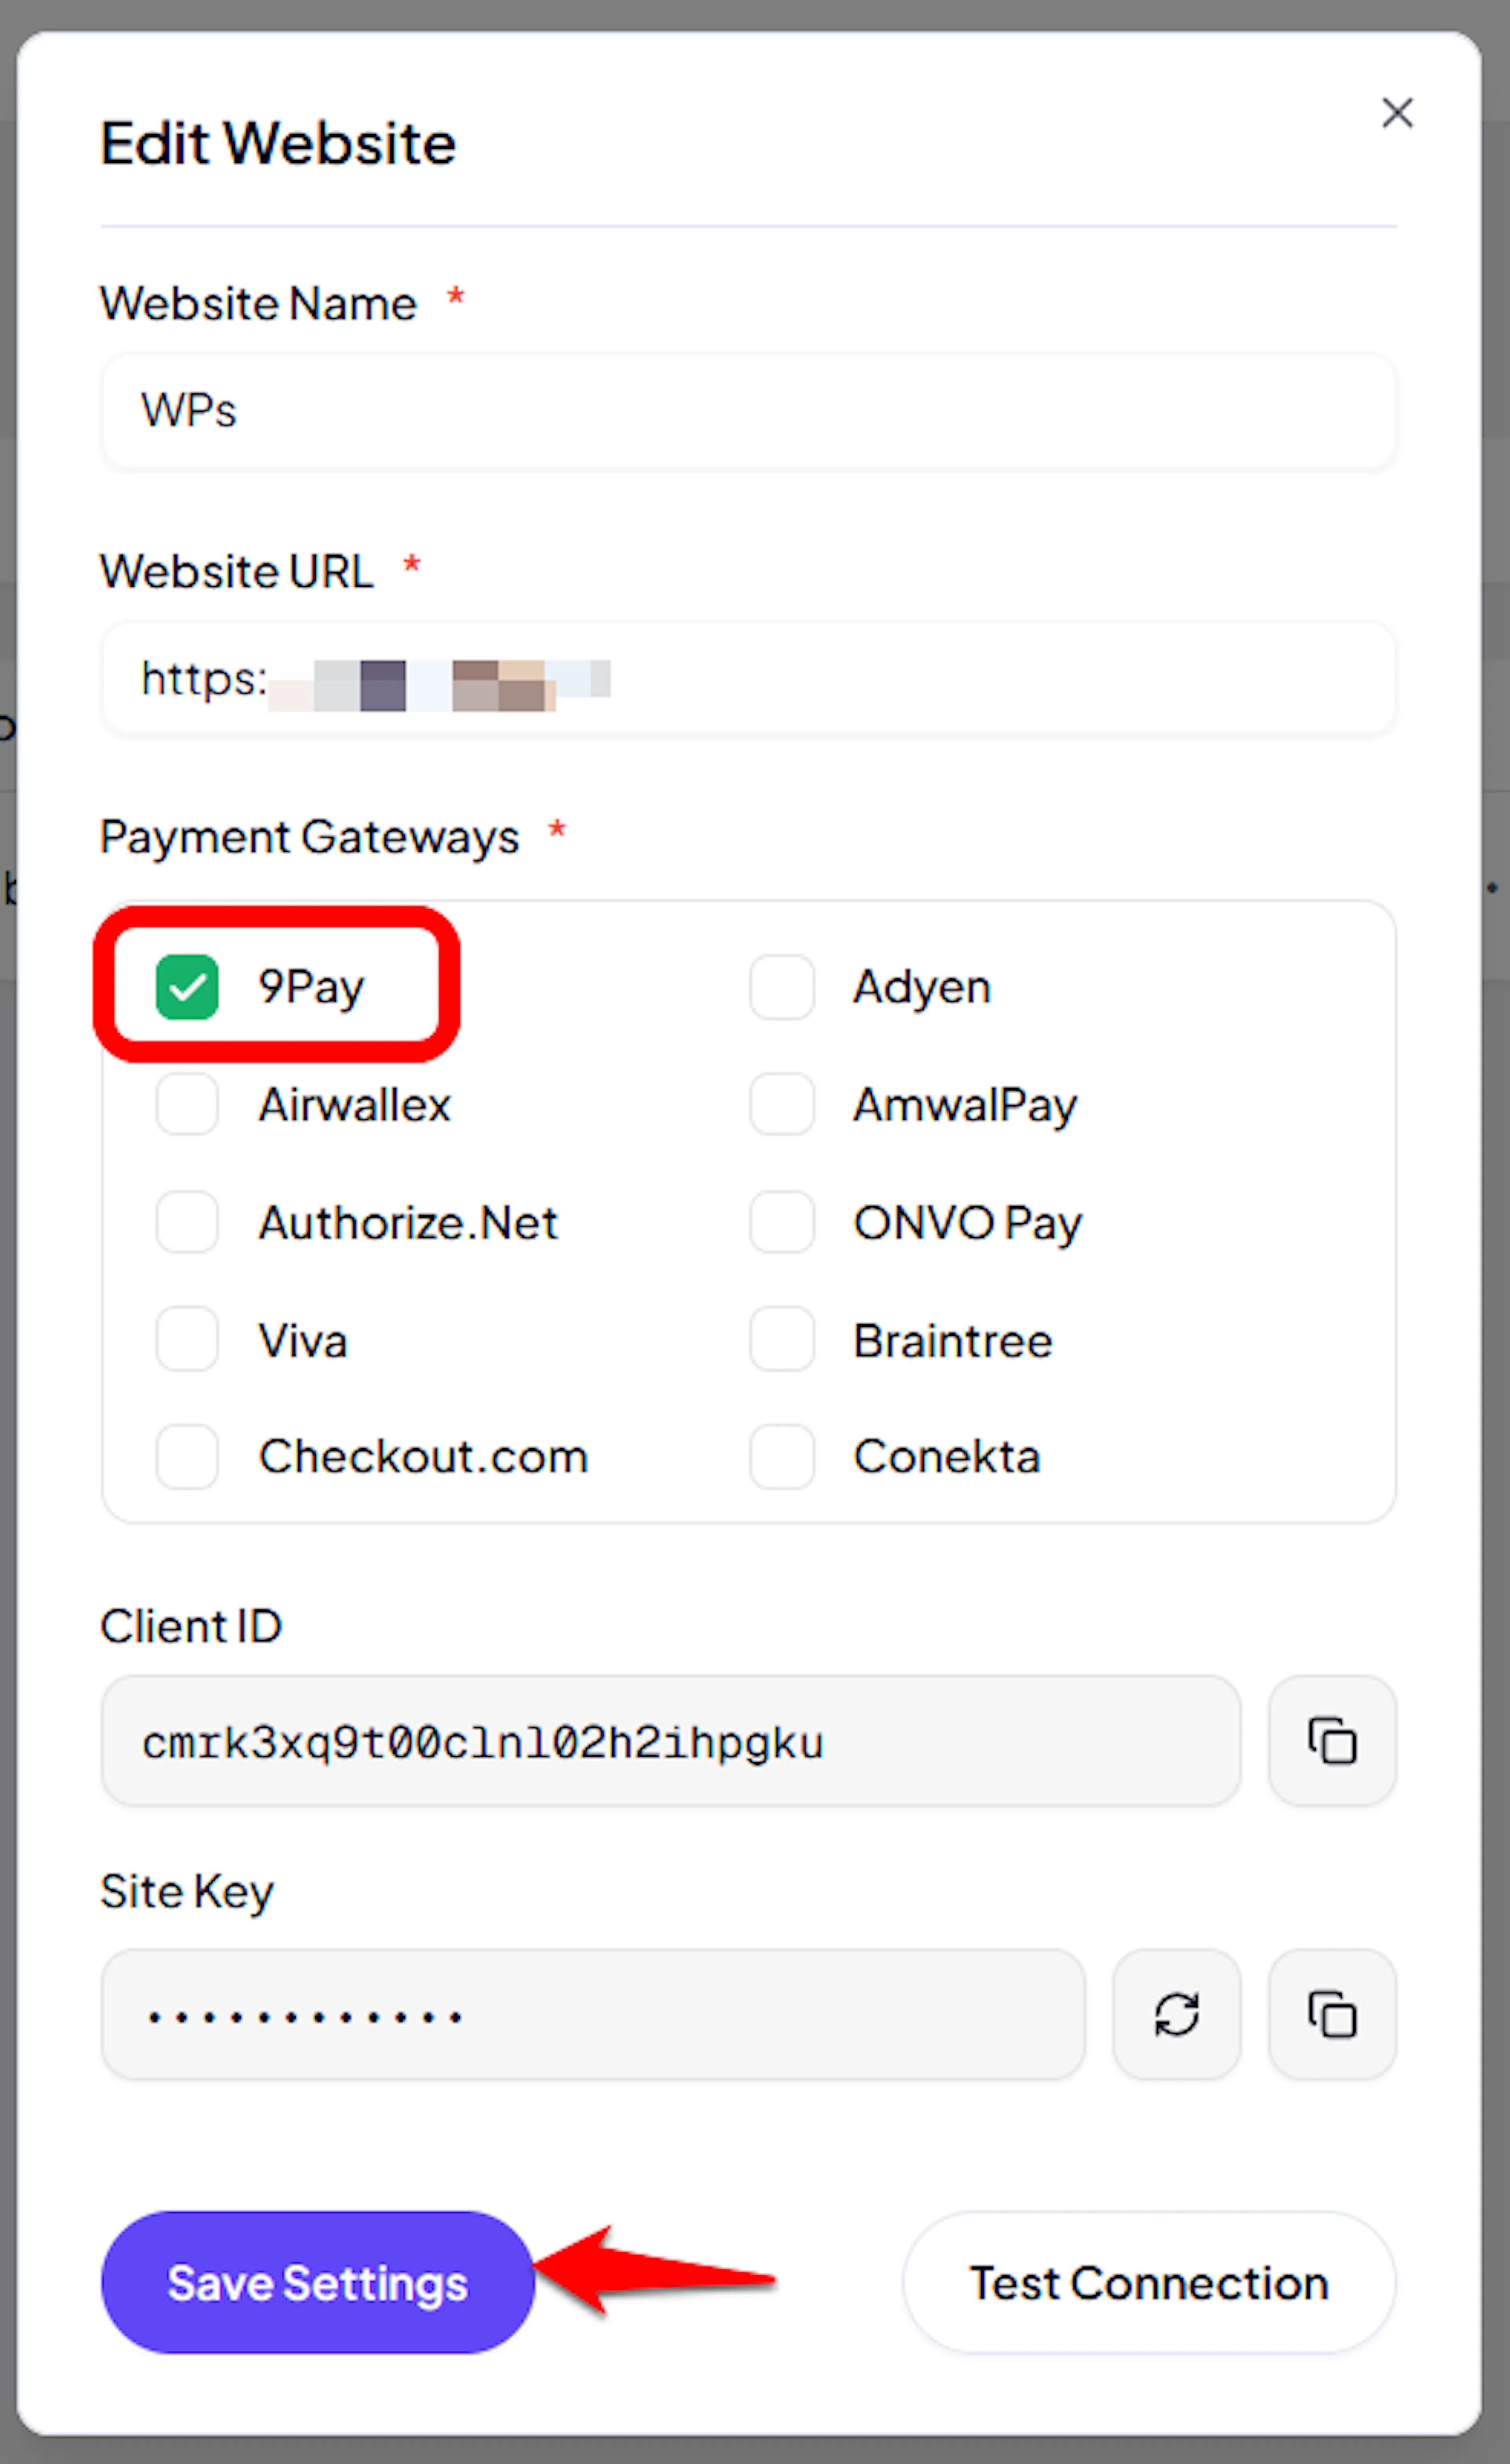
9Pay is now active for this website. Run a test transaction before switching off Debug/Test mode.
If you haven't added a website yet, Continue to Add Your Website →
Troubleshooting
Best Practices
- Test in sandbox before enabling production. Ask 9Pay for sandbox keys, complete a full payment with 9Pay's published test cards, and confirm the order updates in PayLexer before switching to live.
- Register both IPN URLs with 9Pay, for both environments, as soon as you configure the gateway. Without them every order waits on a scheduled check instead of confirming instantly.
- Label your two credential sets carefully. Sandbox and production keys look alike, and pasting one into the wrong environment is the most common cause of a failed connection.
- Keep the Merchant Secret Key and Checksum Key confidential, and ask 9Pay to reissue them if you suspect either has been exposed.
- Keep VND payments within 9Pay's 10,000 to 200,000,000 VND range so shoppers are not rejected at the payment page.
- Confirm any non-VND currency with 9Pay before enabling it on a live website.
FAQs
Still Have Questions?
- 9Pay Support:
- Support Email: hotro@9pay.vn
- Developer Documentation: 9Pay Developer Portal
- PayLexer Support: Contact Support