

PAY.JP
Connect PAY.JP to PayLexer to accept card payments in Japanese Yen through a PAY.JP-hosted checkout page.
PAY.JP is a Japan-focused card payment gateway that lets merchants accept Visa, Mastercard, and other major cards from Japanese shoppers, with every transaction settled directly in Japanese Yen. It provides a hosted checkout page, so your store never handles raw card details directly.
- Supported Regions (Merchant Accounts): Japan
- Supported Currencies: Japanese Yen (JPY)
This gateway appears in checkout only when the selected currency is Japanese Yen (JPY)
Supported Features
- Hosted checkout page for one-time card payments in Japanese Yen
- Full and partial refunds on completed payments
- Real-time payment notifications through webhooks
- Separate sandbox and live credentials, so test payments never touch real money
Before You Start
Make sure you have:
- PAY.JP Account – Don't have one? Sign up for PAY.JP →
- PayLexer Account – Required to configure the integration. Create your account →
- A website where you want to integrate
Looking for a different payment processor? View all supported gateways →
Configuring PAY.JP
You need a Secret Key from PAY.JP for this integration.
Getting API Credentials
PAY.JP issues two key types per environment: A public key and a private (secret) key. PayLexer only needs the secret key.
PayLexer’s integration uses PAY.JP’s v2 API. Check the badge next to the PAY.JP logo in the top-left of your dashboard. If it shows anything other than v2 mode, click Switch version first.
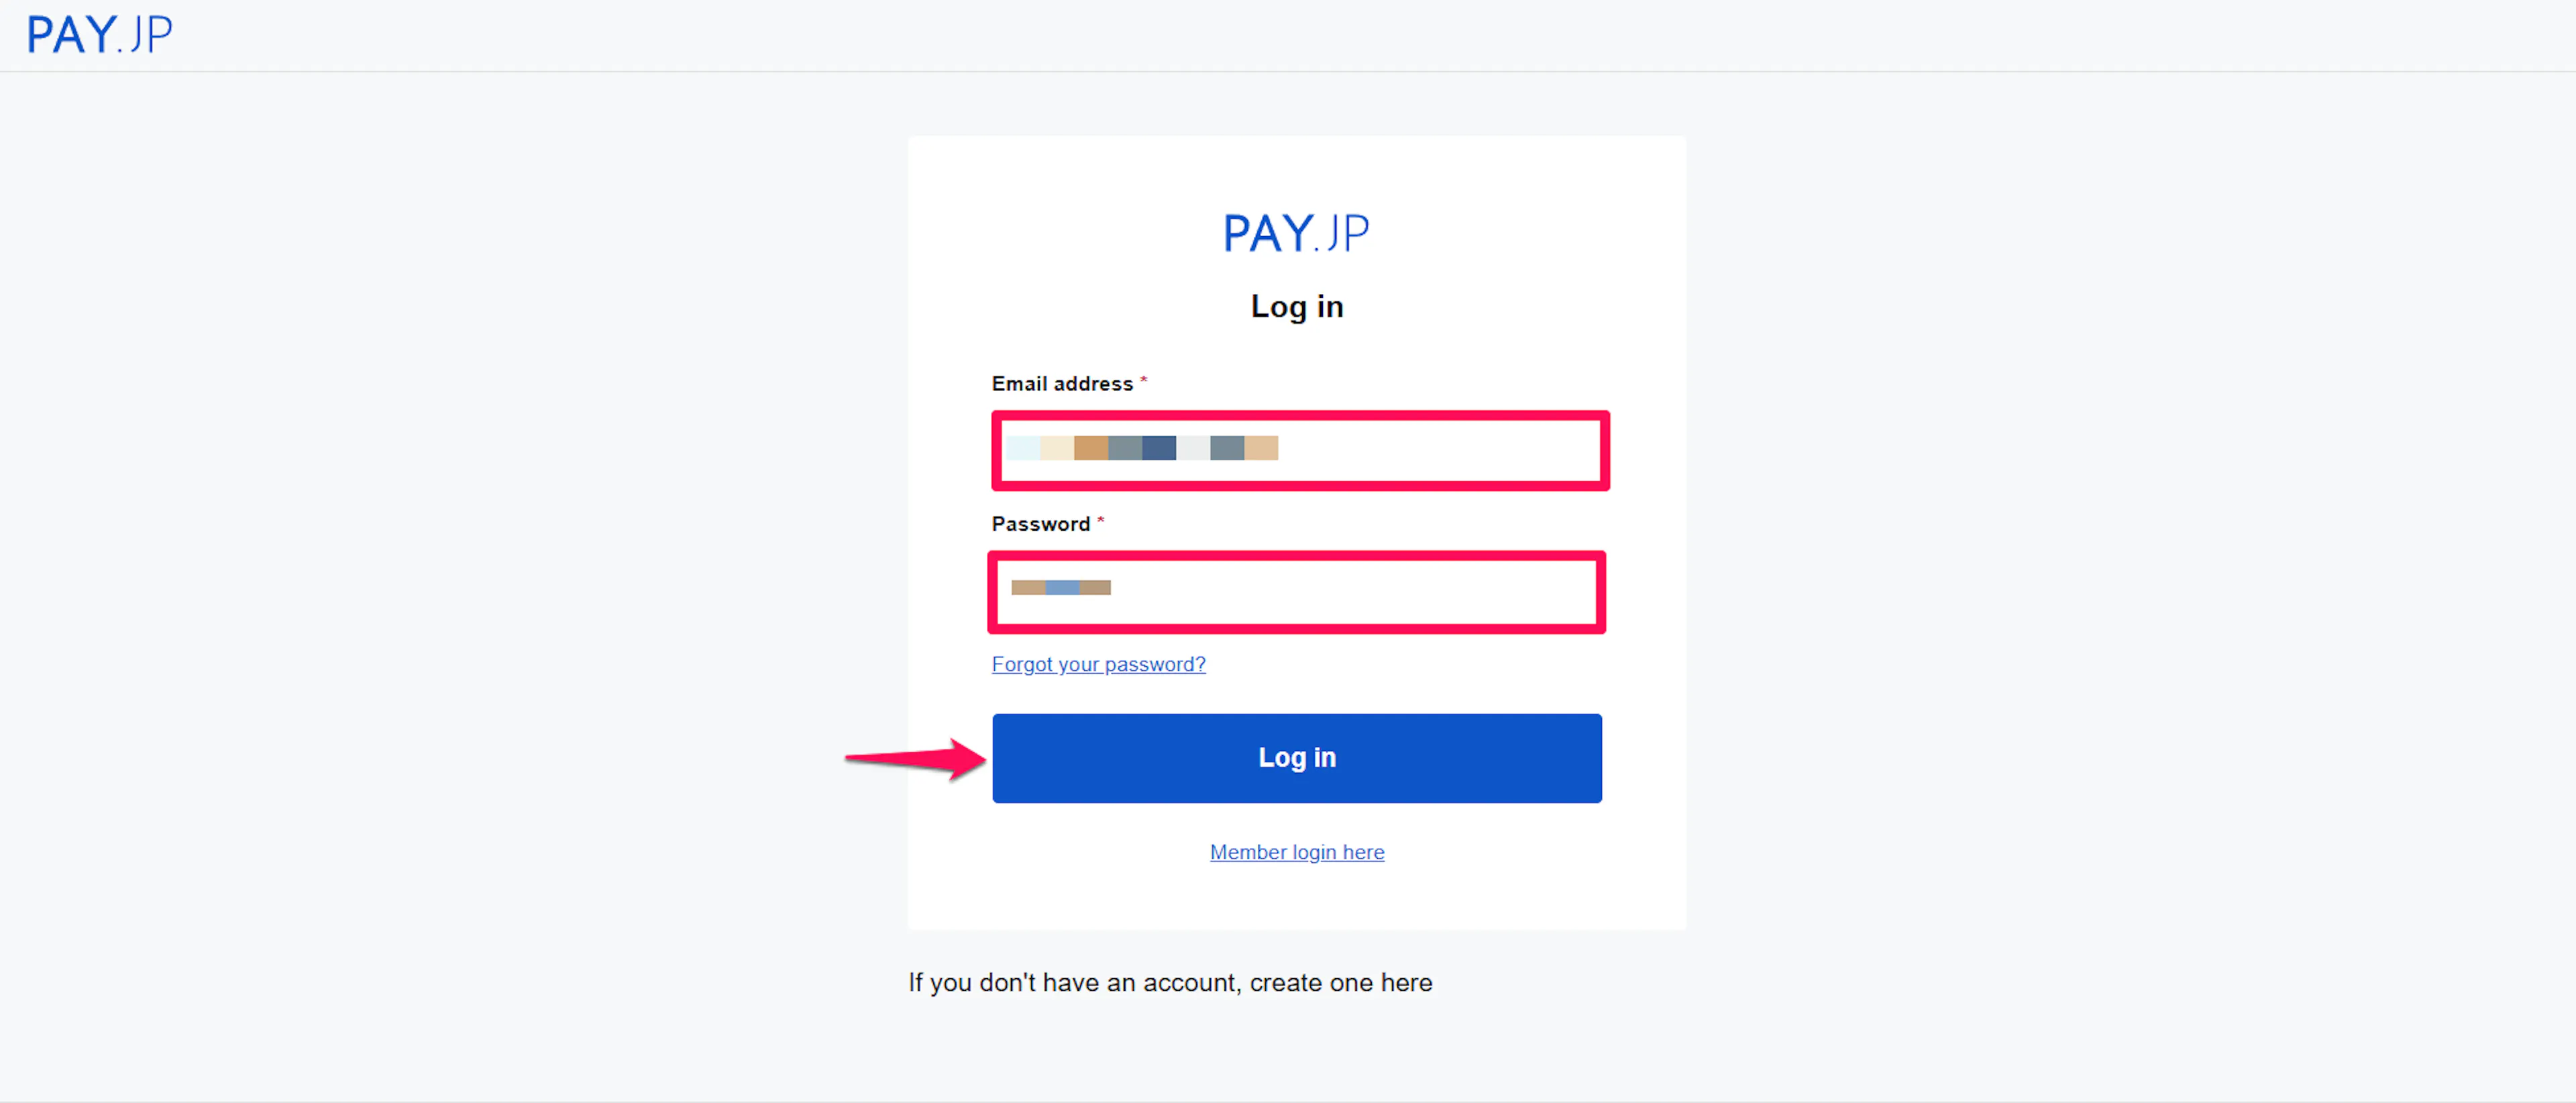
Log in to your PAY.JP dashboard
Go to your PAY.JP dashboard and sign in.
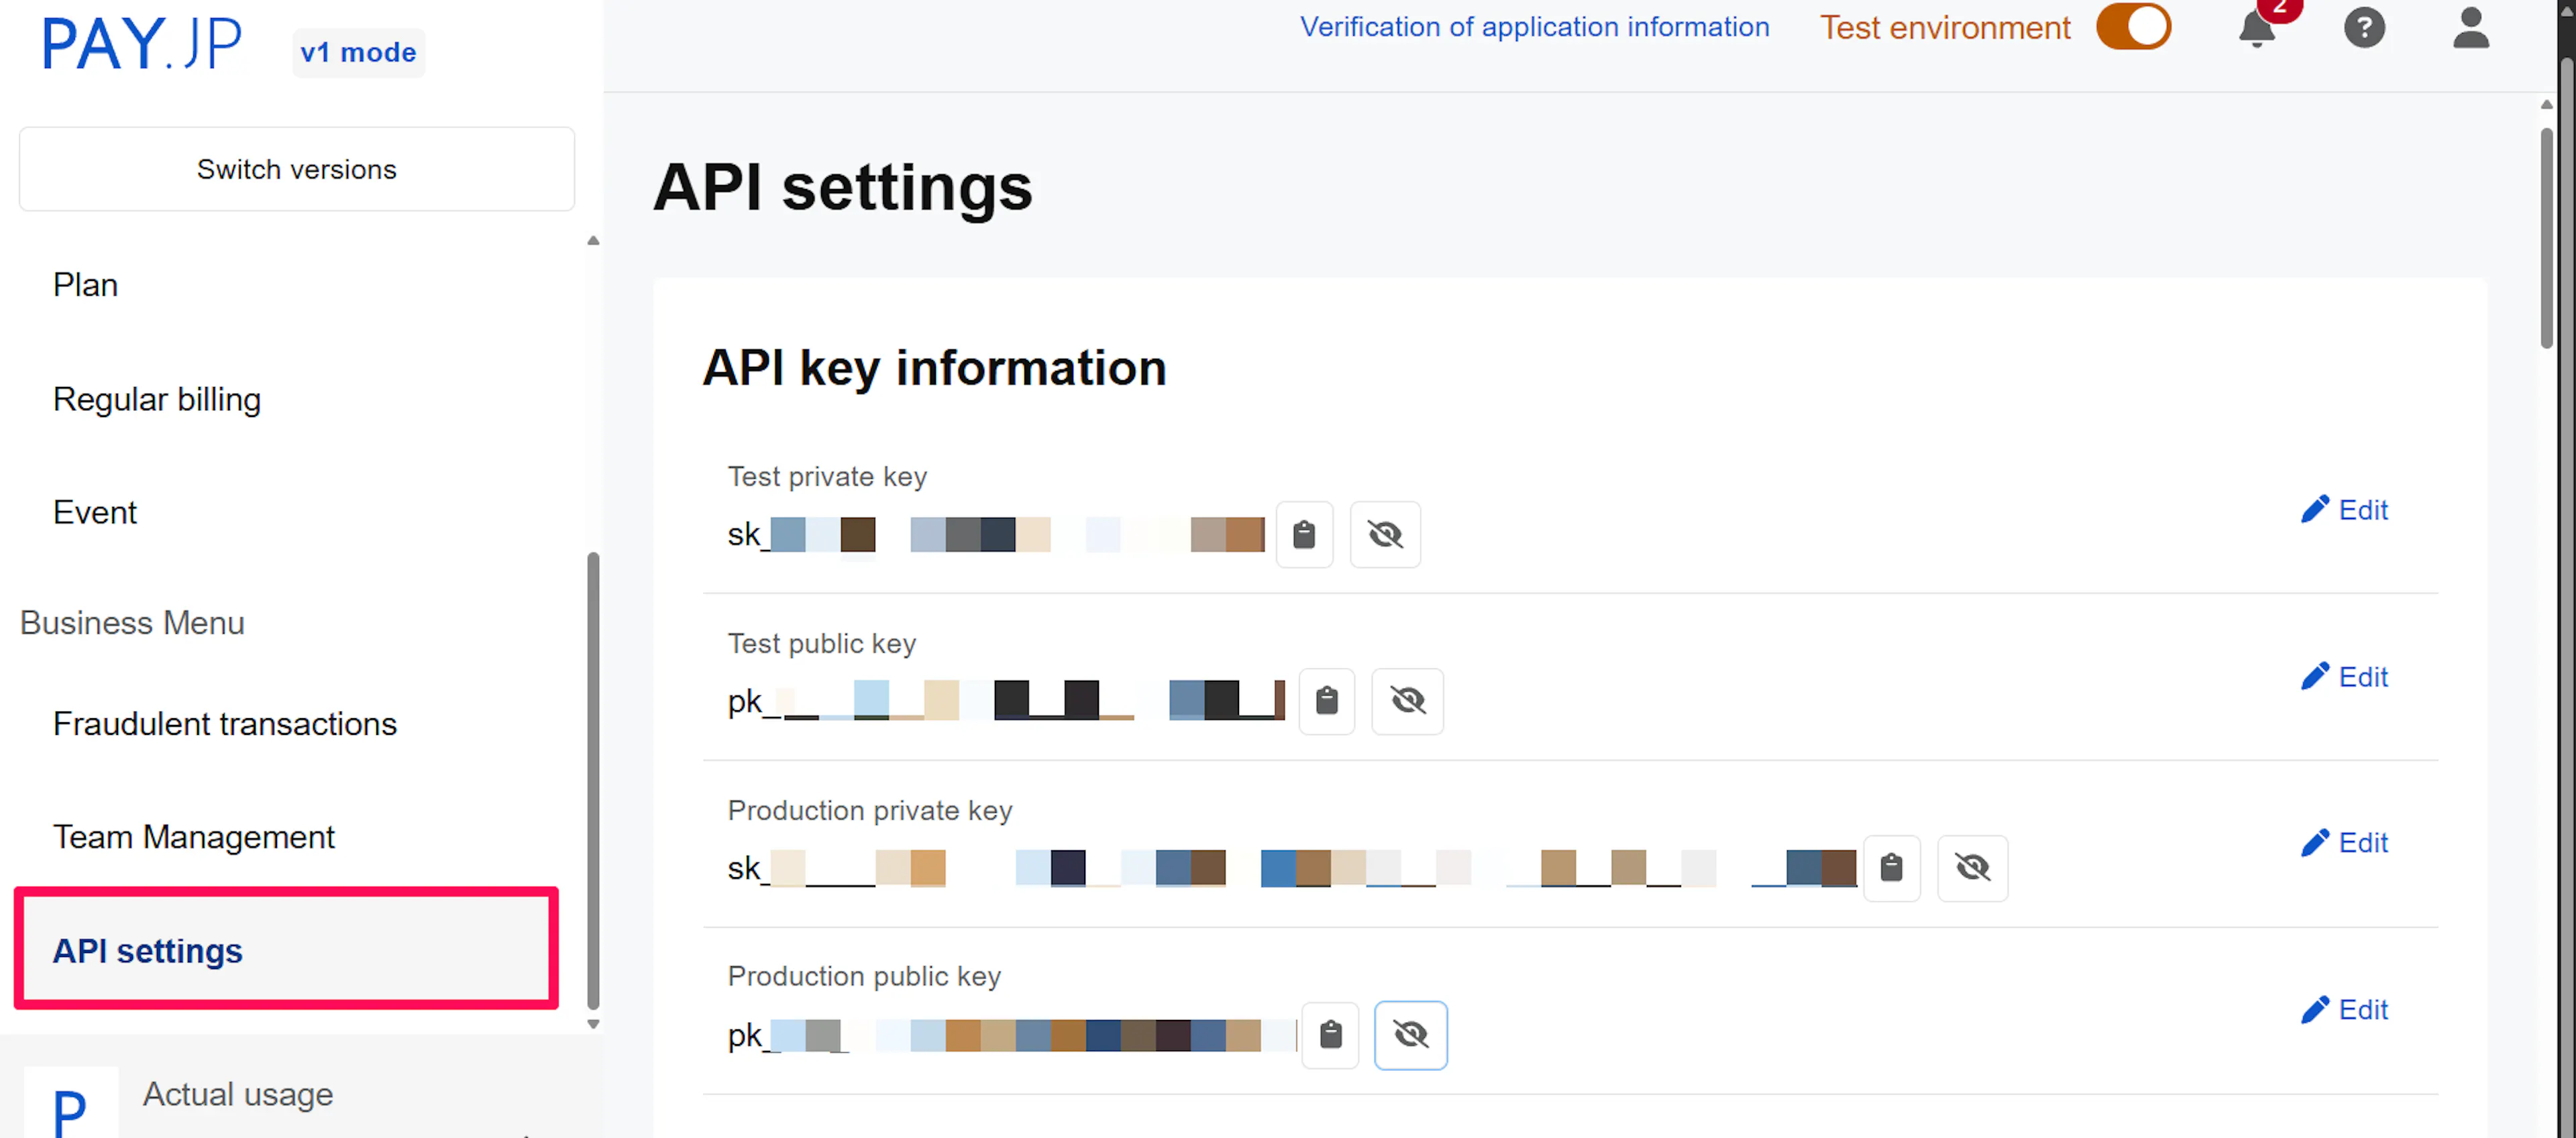
Open API settings
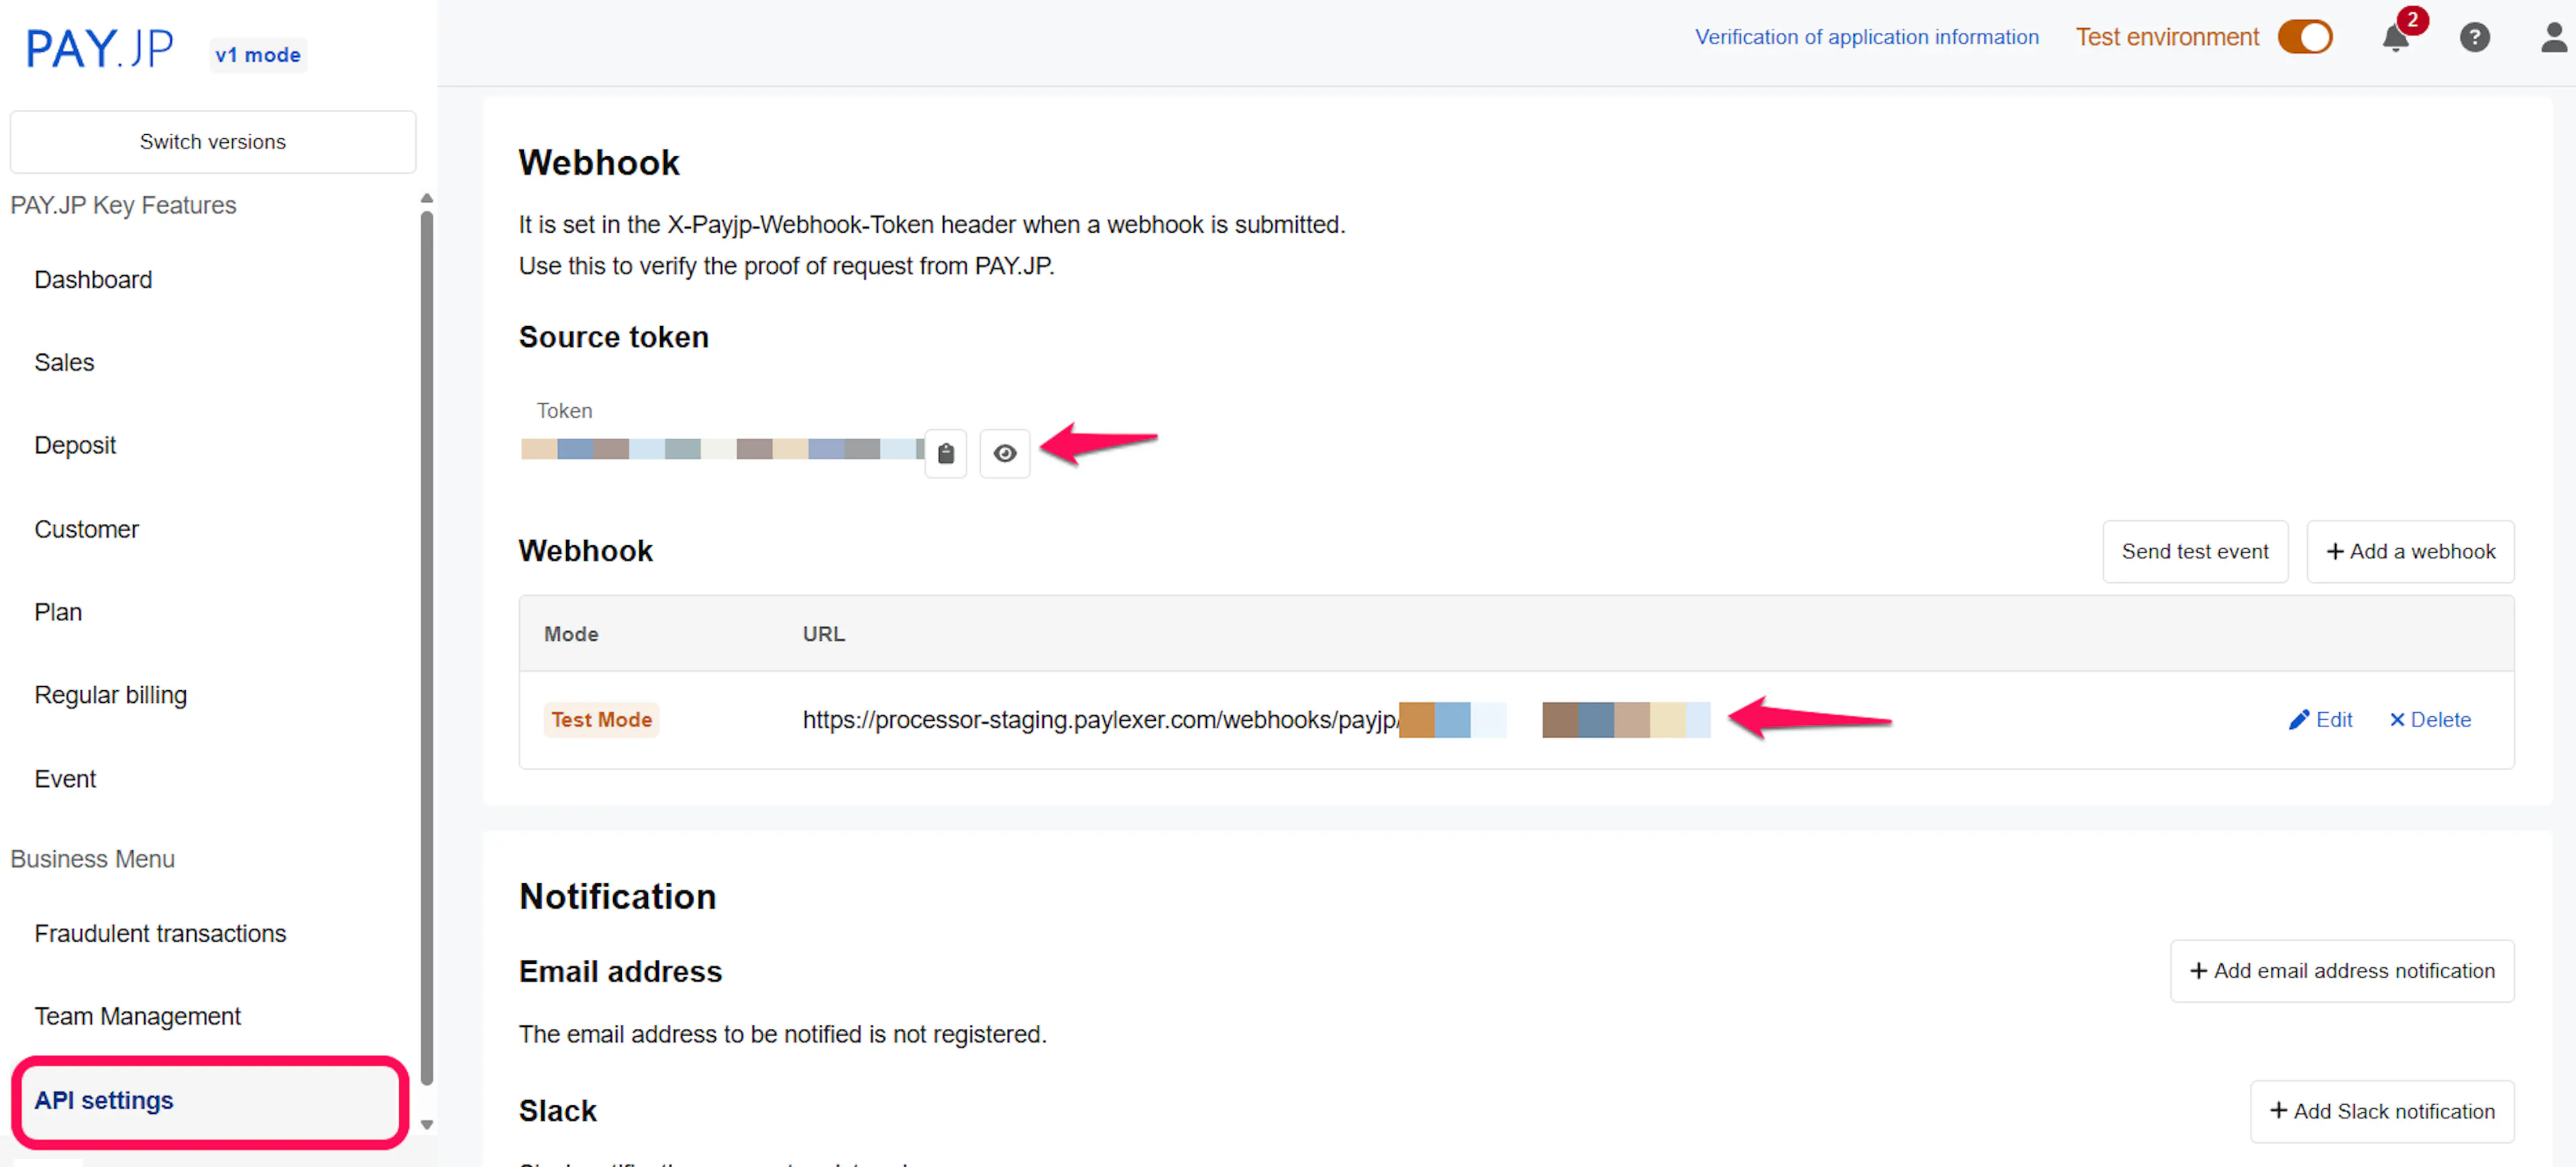
In the sidebar, under Business Menu, click API settings.
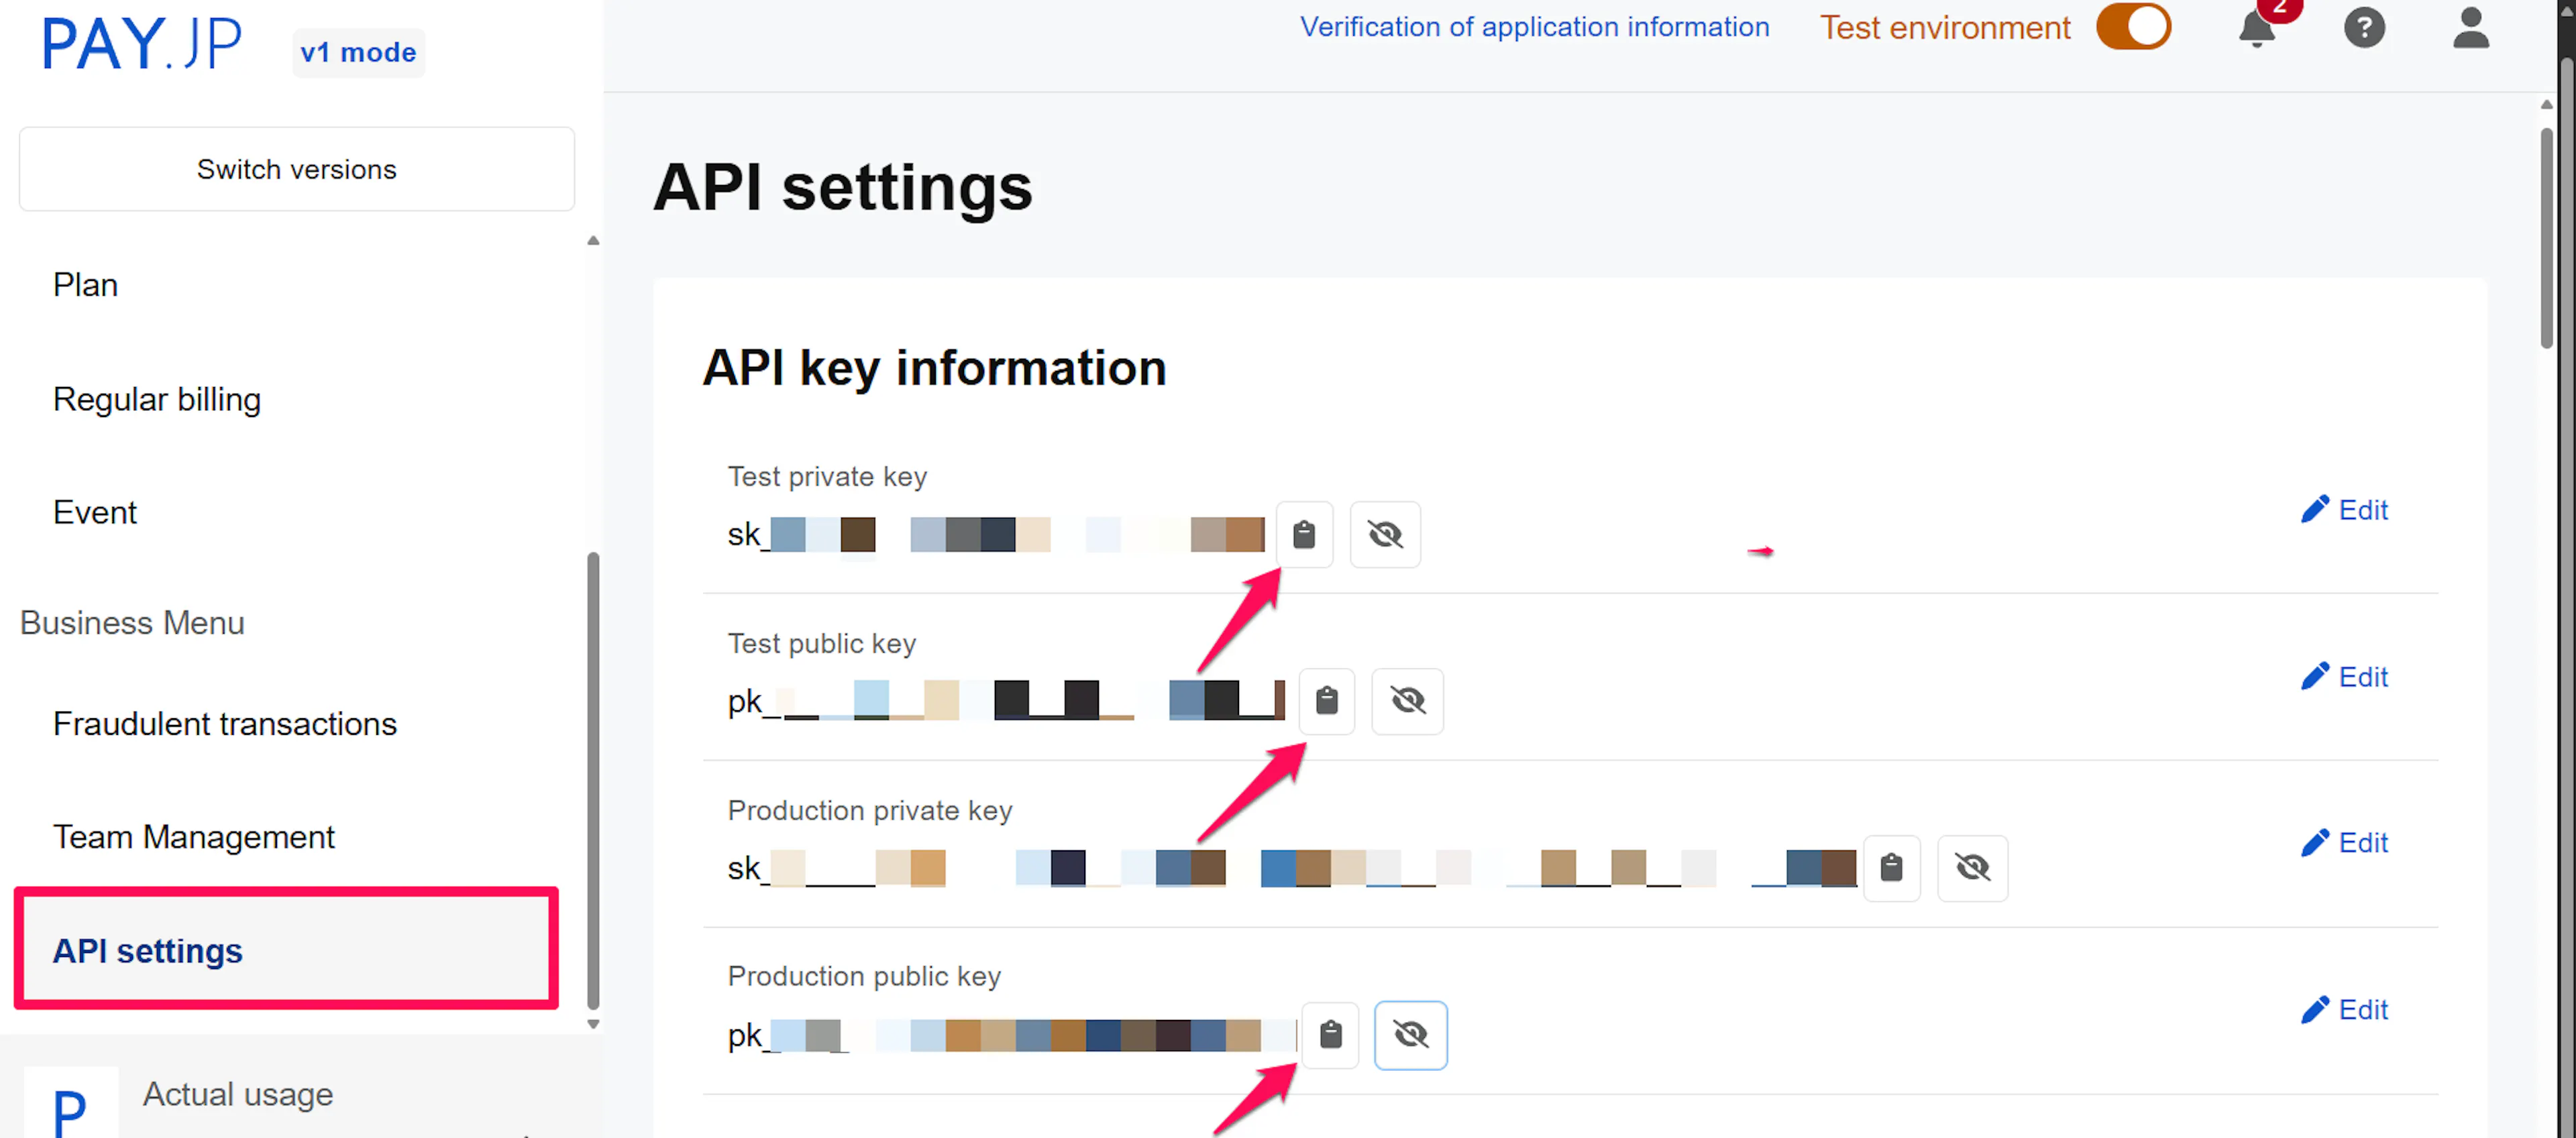
Copy your secret key
Under API key information, copy the Test private key for sandbox testing or The real secret key for live payments. Use the eye icon to reveal a key or the copy icon to copy it directly.
The test private key is available immediately. The real secret key becomes available only after your PAY.JP production application is approved following card-network review.
Adding Credentials to PayLexer
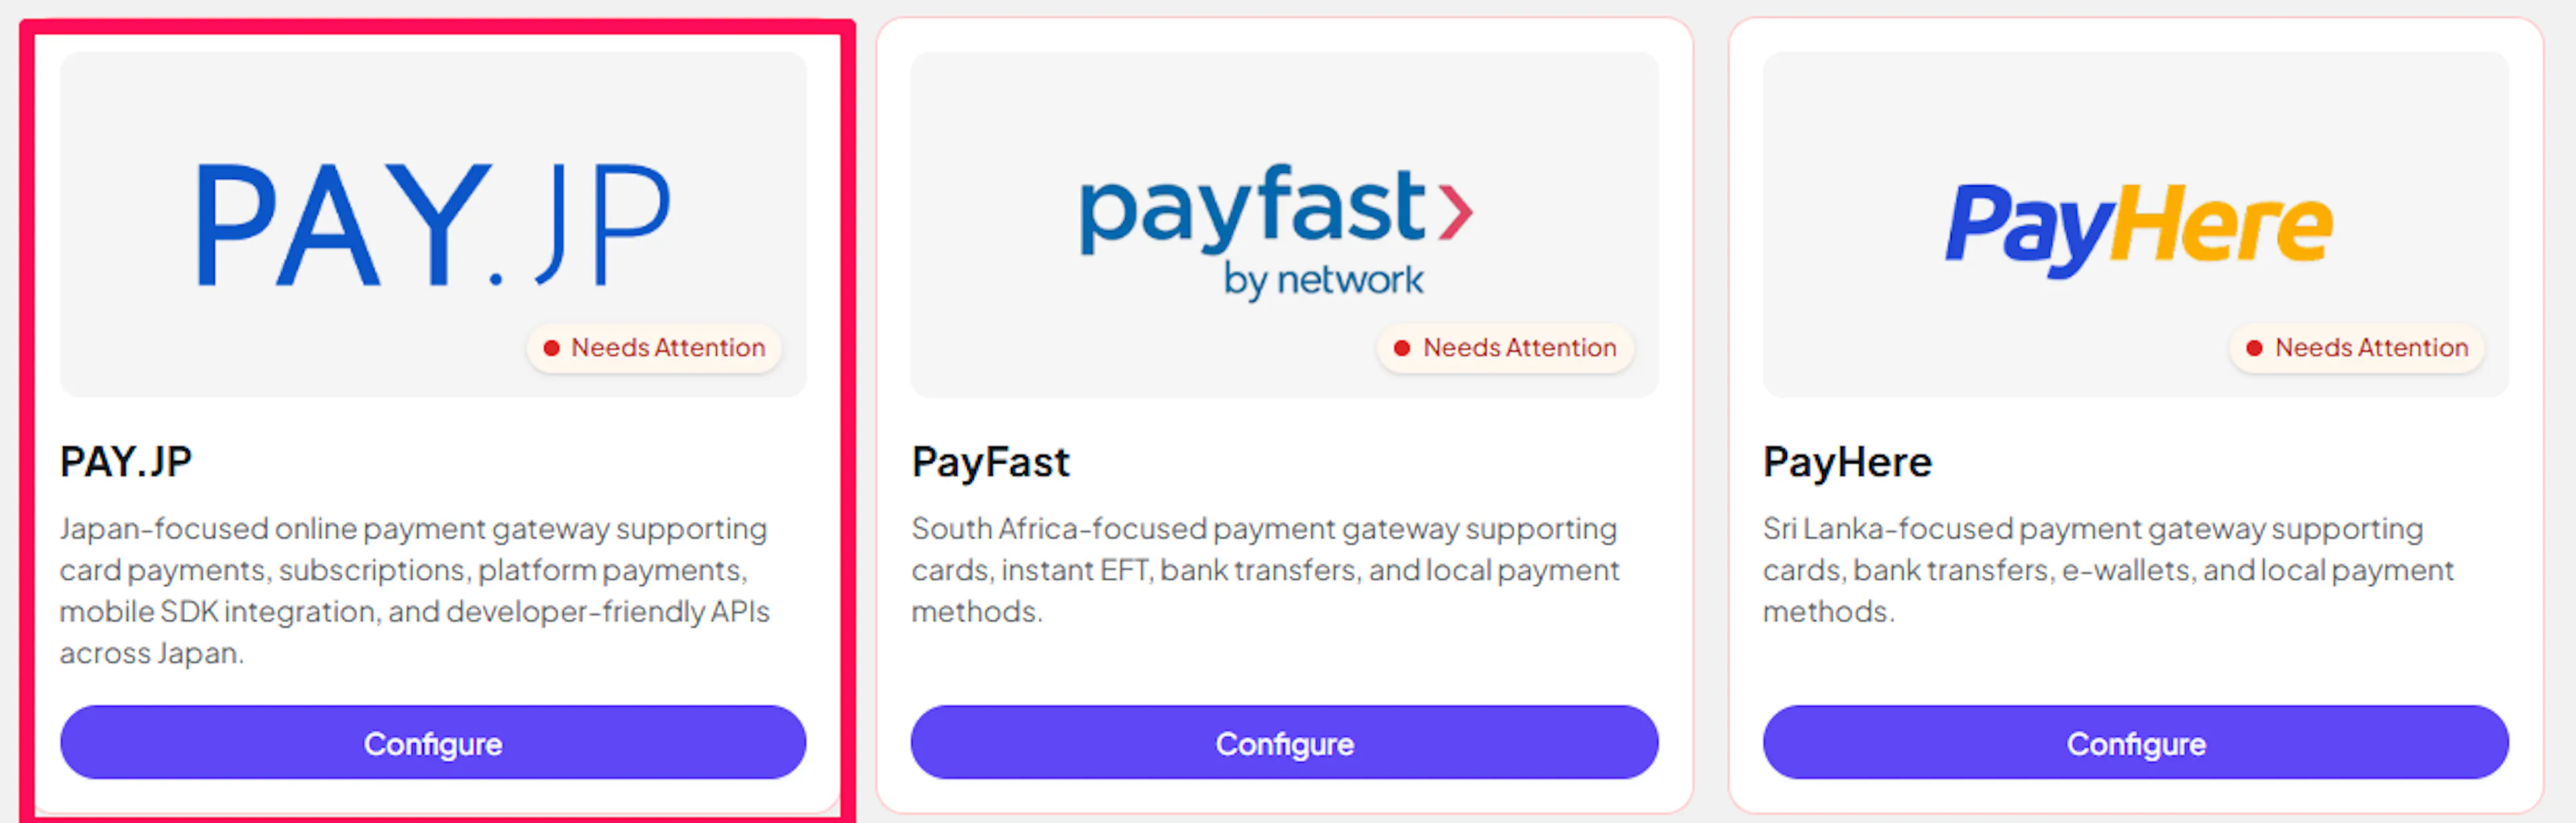
Open PayLexer Dashboard
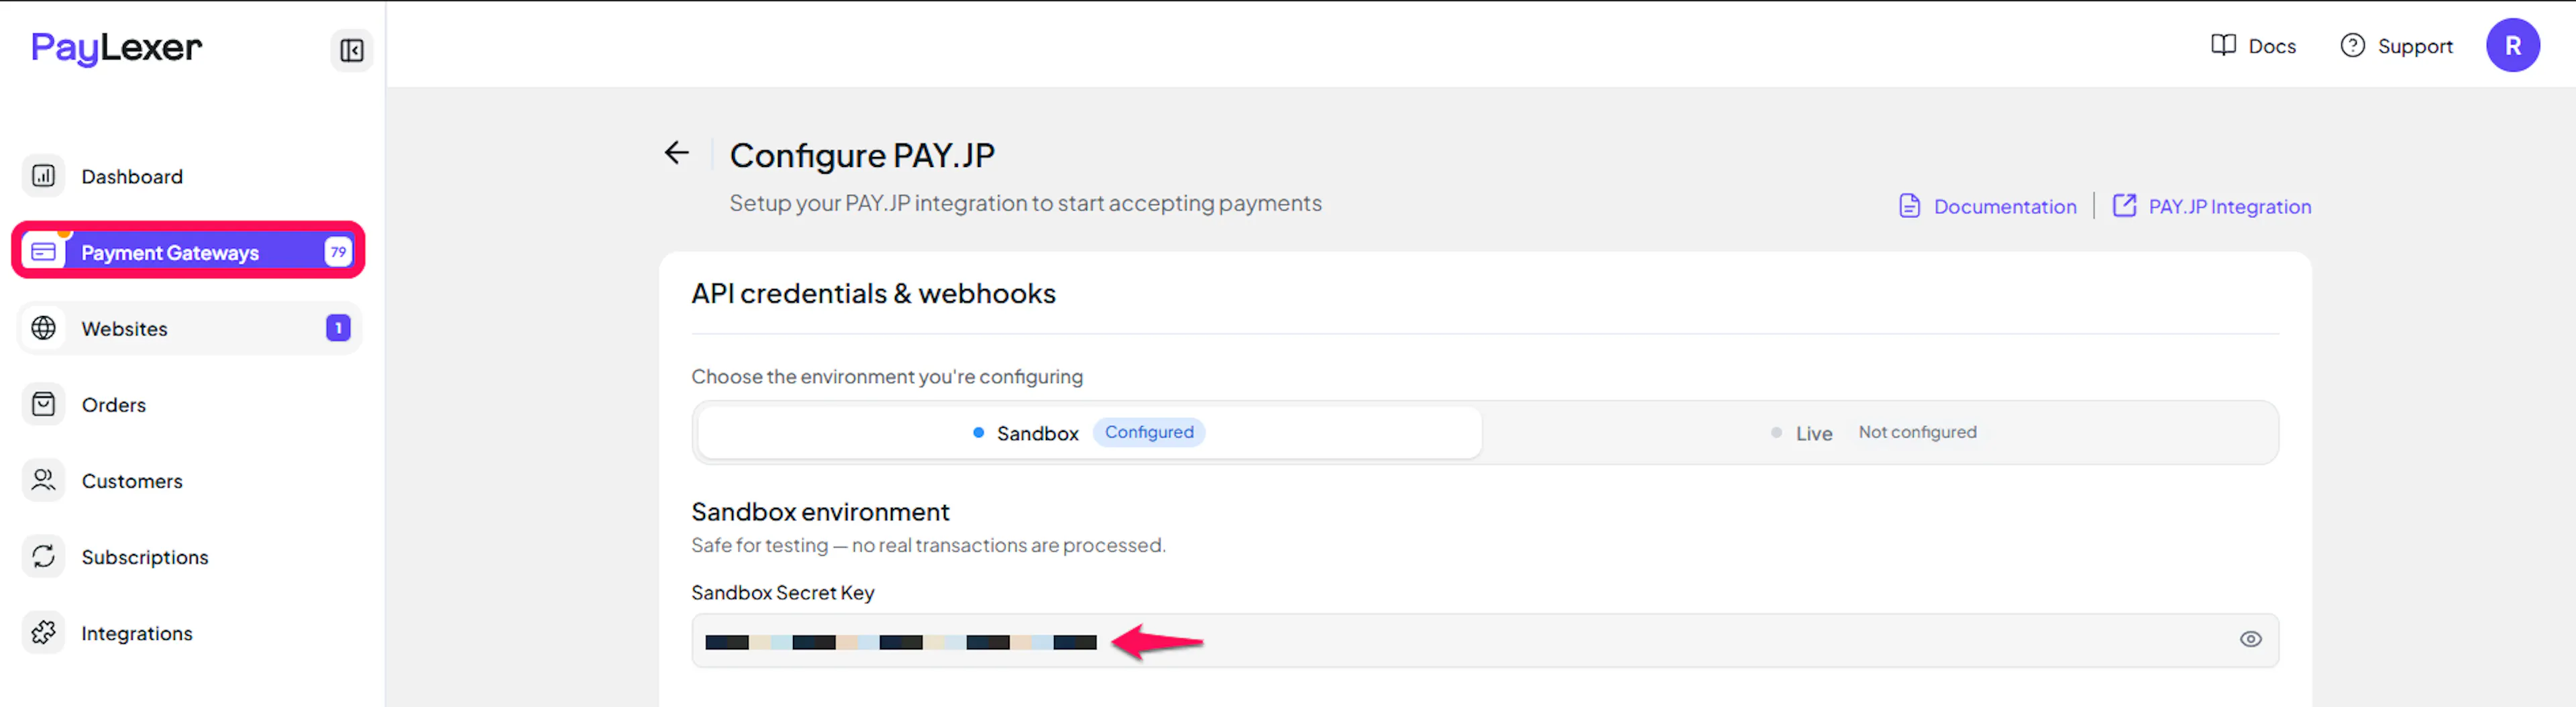
Log in to your PayLexer dashboard, go to Payment Gateways, and click Configure on the PAY.JP card.
Enter your credentials
On the Configure PAY.JP page, switch between the Live and Sandbox tabs to enter each environment's key. Paste your Live Secret Key under the Live tab and your Sandbox Secret Key under the Sandbox tab.
Save
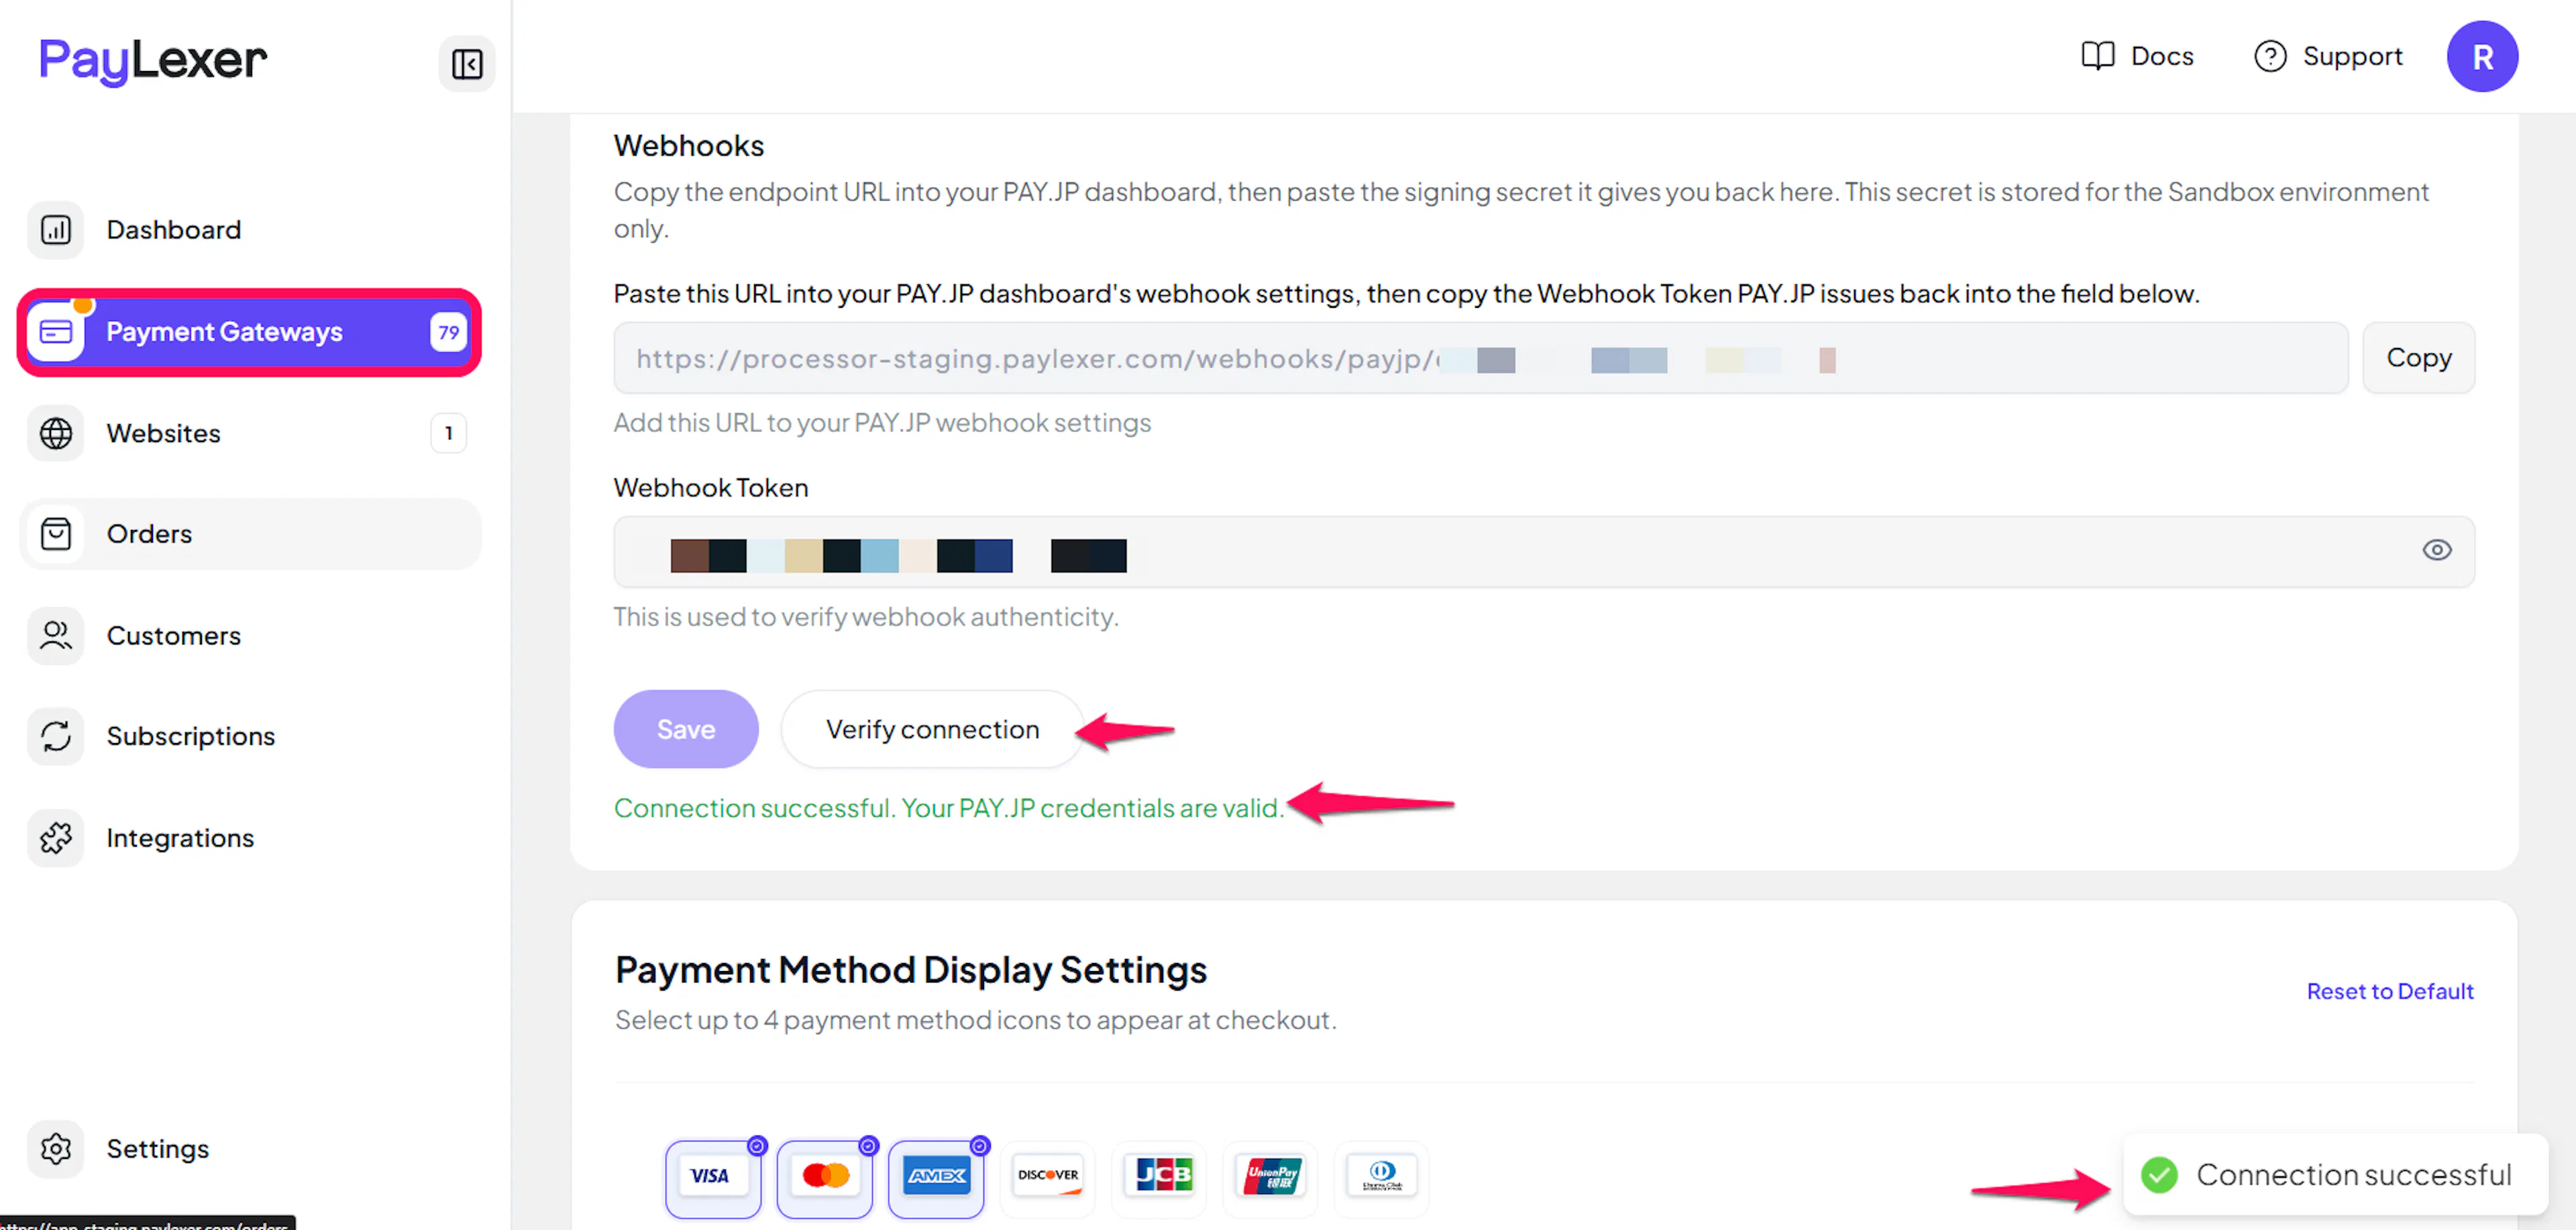
Click Save. This saves your credentials and automatically tests the connection for you. Once saved, a Verify connection button appears if you want to re-test later without re-saving.
Configuring Webhooks (Mandatory)
Webhooks enable real-time payment updates and significantly improve reliability.
Benefits of Webhooks:
- Instant payment status updates
- Automatic refund processing
- Dispute notifications
Copy your PayLexer webhook URL
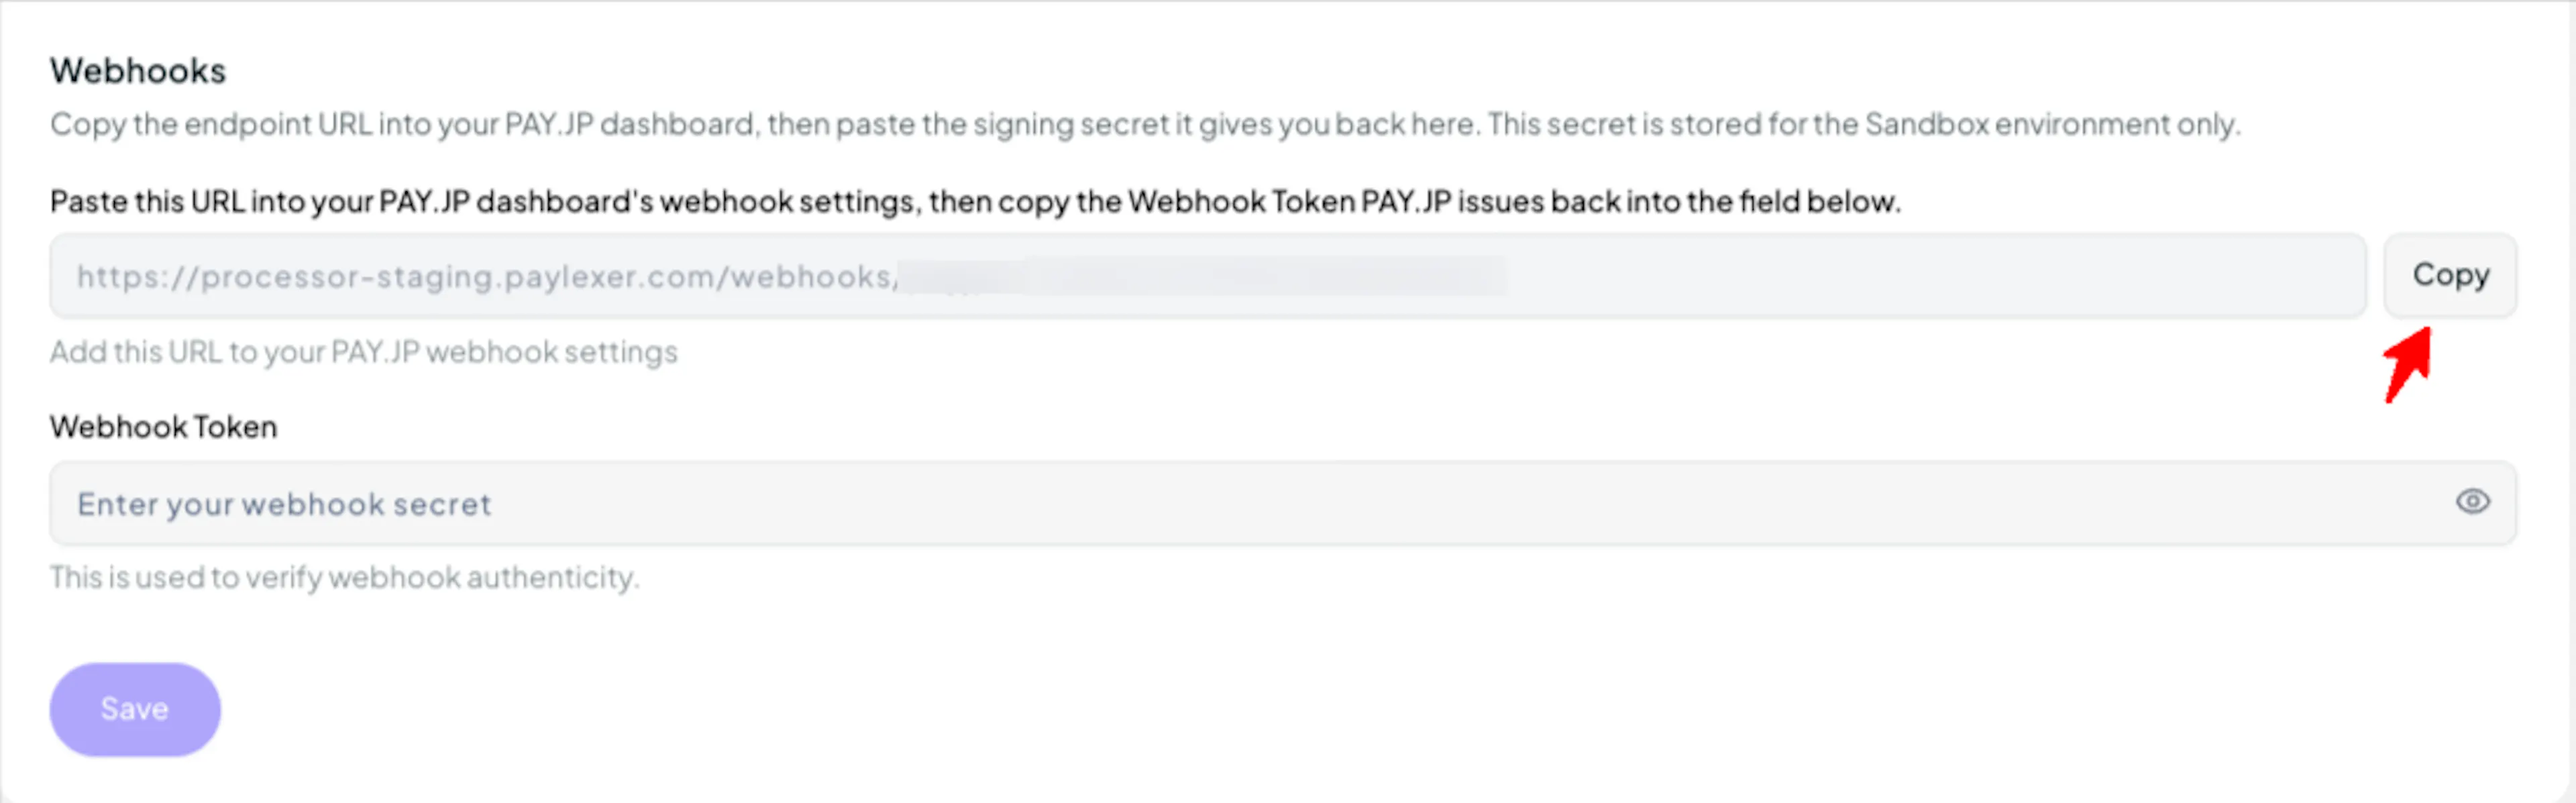
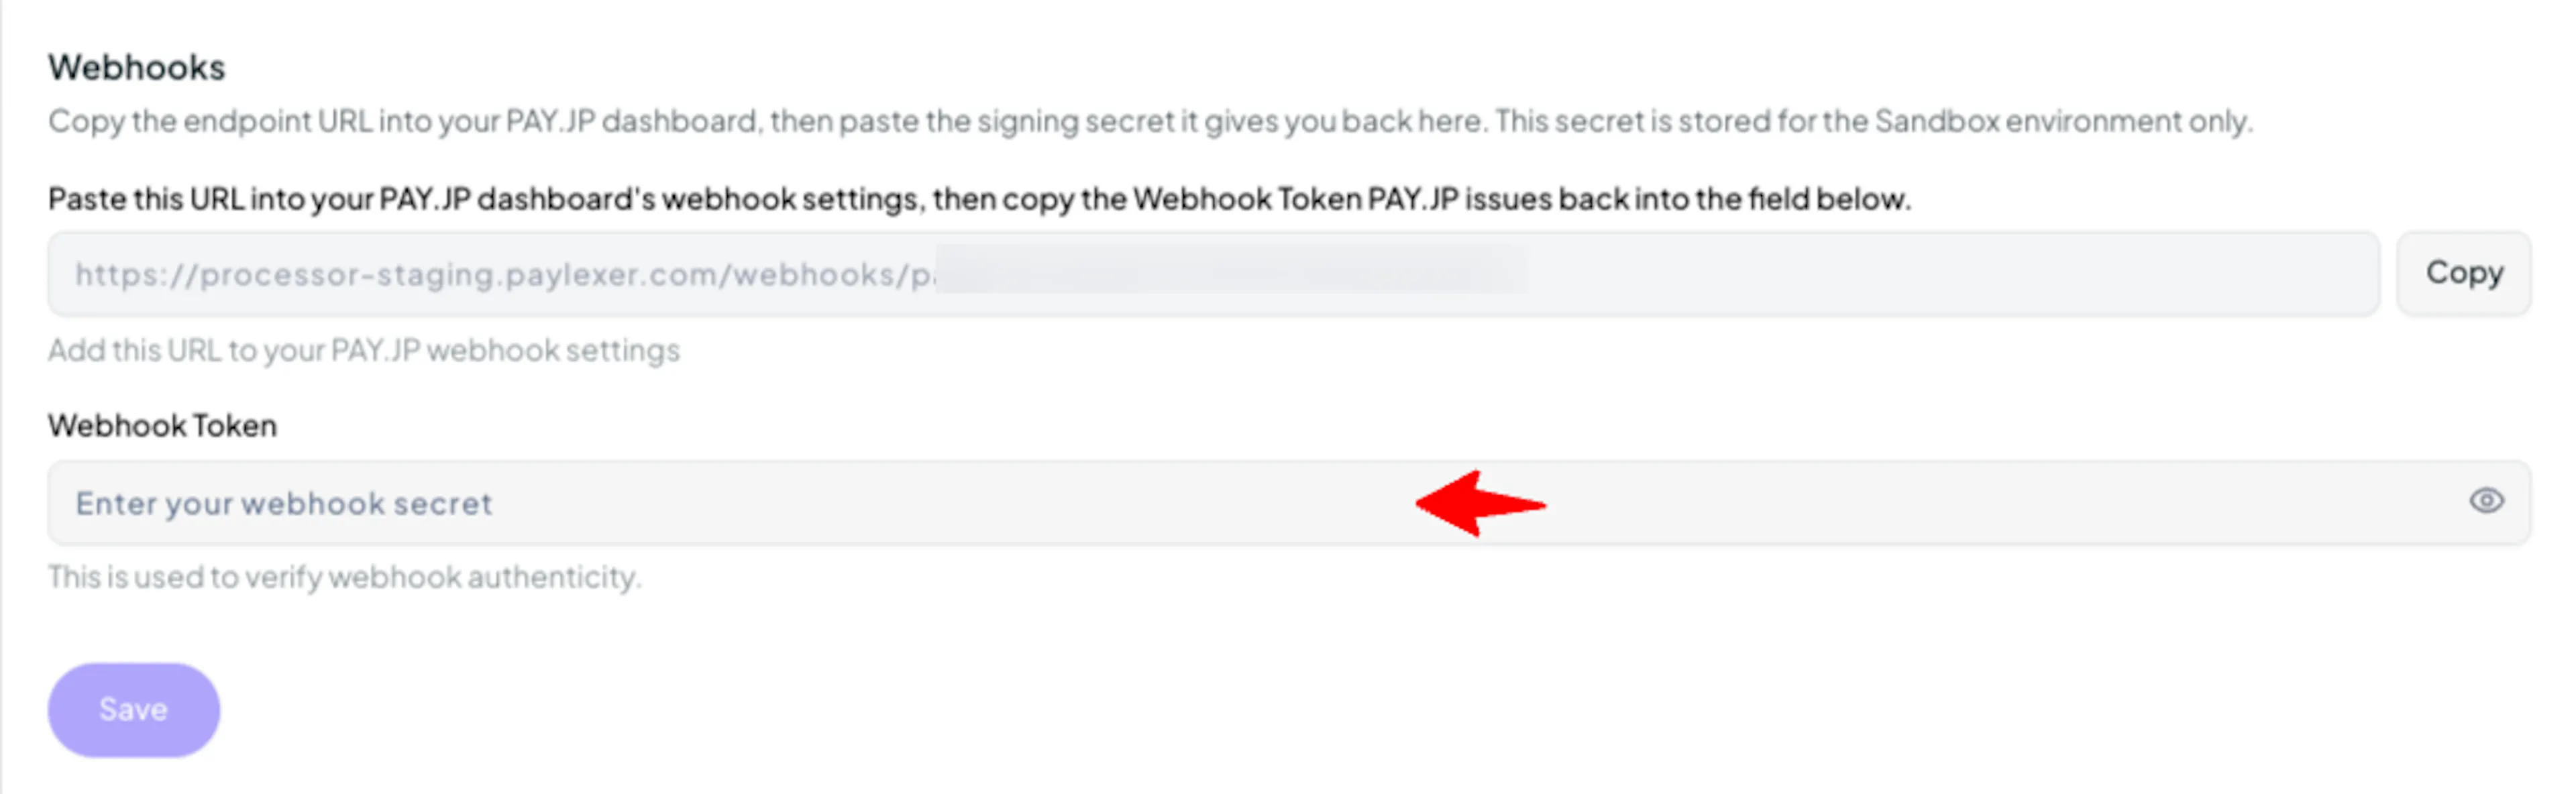
On the Configure PAY.JP page in your PayLexer dashboard, find the read-only webhook URL field and click Copy.
Add it in PAY.JP
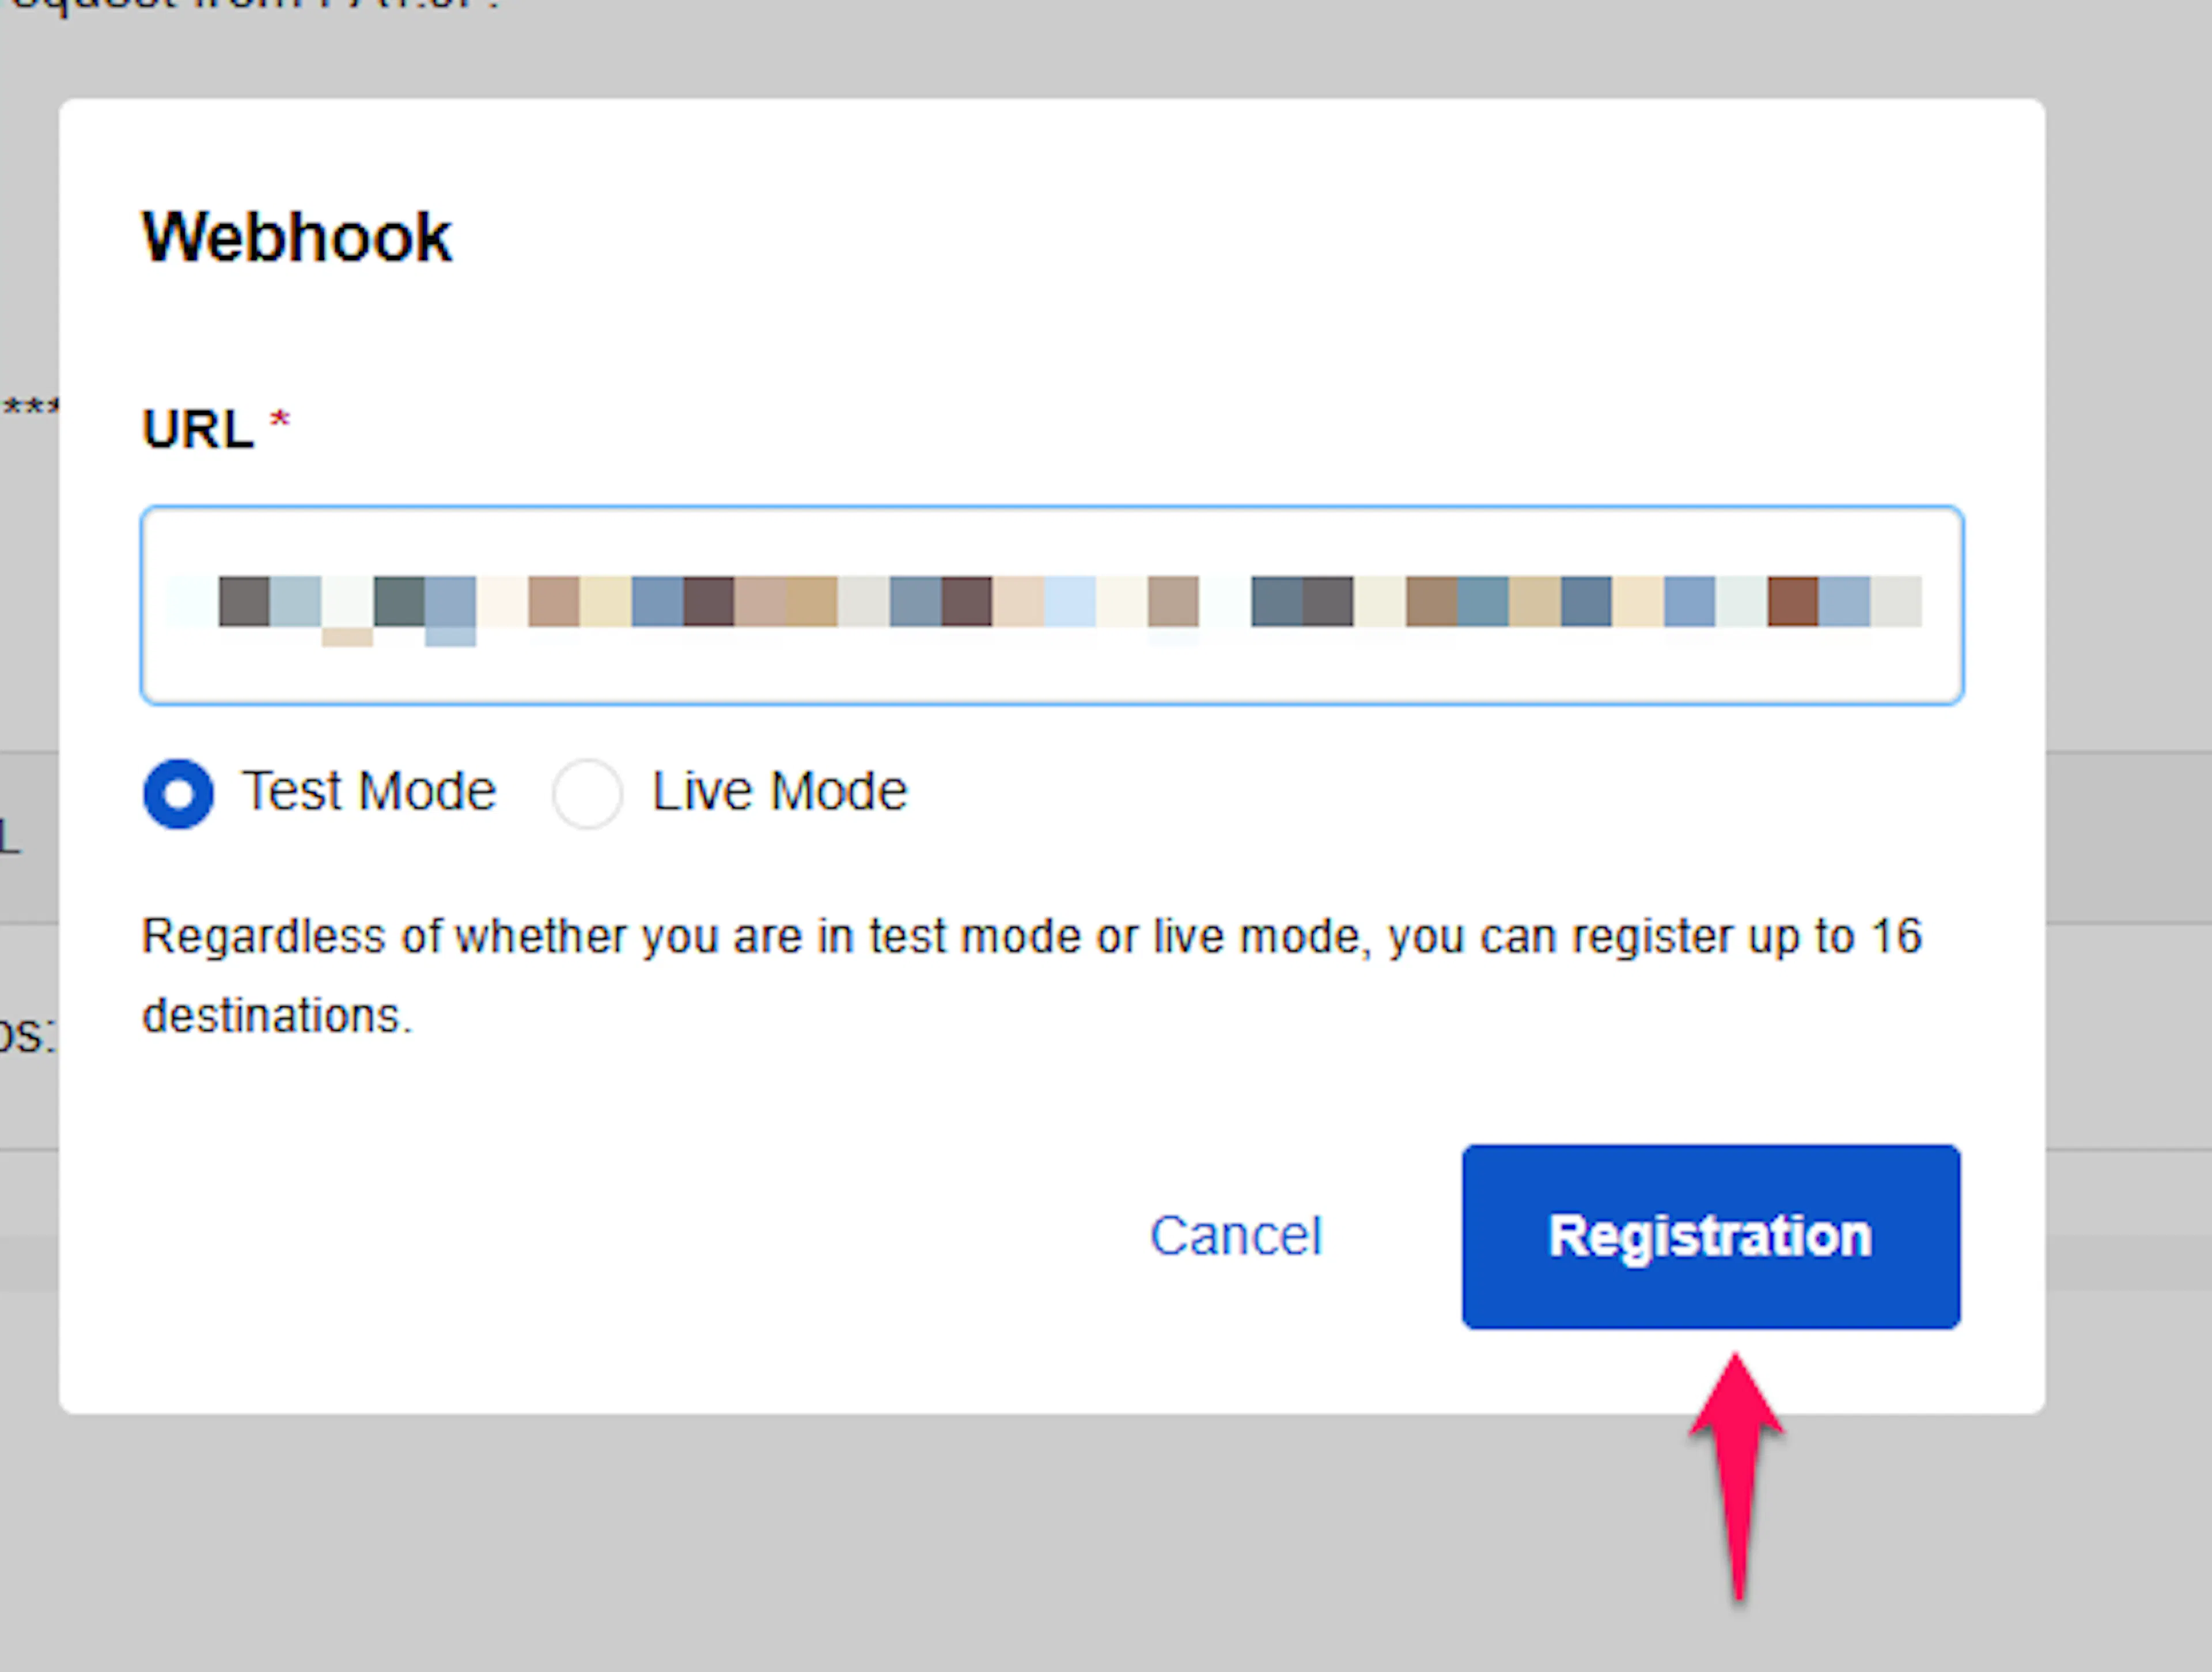
On the same API settings page in your PAY.JP dashboard, find the webhook section and click + Add Webhook.
Paste PayLexer's webhook URL as the destination and set the mode to match the credentials you're configuring (test or live).
Copy the Source token into PayLexer
On the API settings page, copy the Source token value. PAY.JP sends this token in the X-Payjp-Webhook-Token header with every webhook.
Paste it into PayLexer’s Webhook Token field, then click Save.
PAY.JP verifies webhook notifications with this shared token rather than a cryptographic signature. PayLexer checks the token on every notification before trusting it.
Integrate PAY.JP to Your Website
If you have already added and configured your site, you can enable PAY.JP in your existing setup.
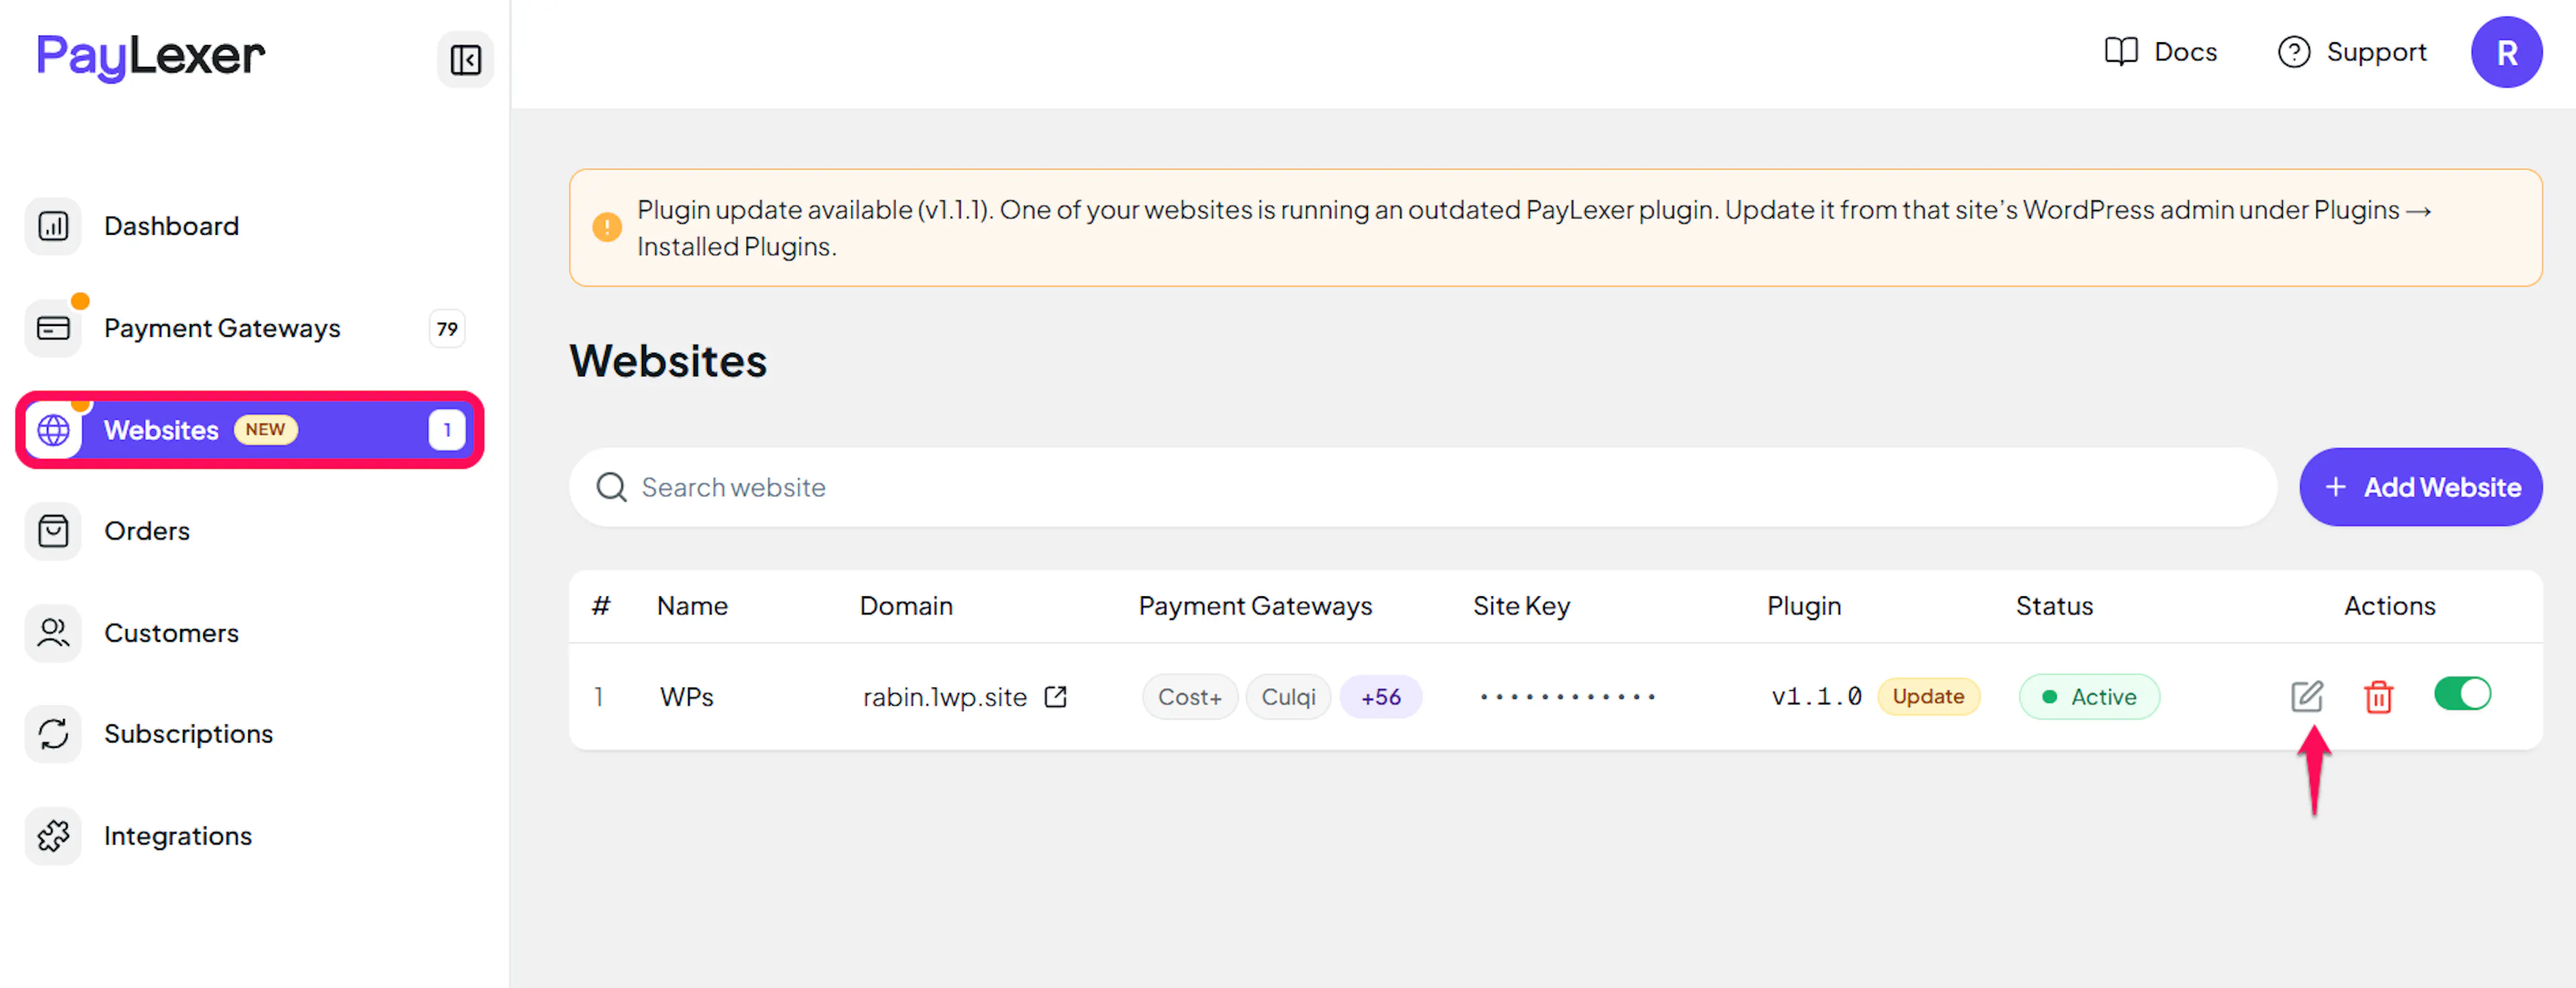
Go to Websites
Navigate to Websites in your PayLexer dashboard.
Edit your website
Click the Edit Icon of your added website.
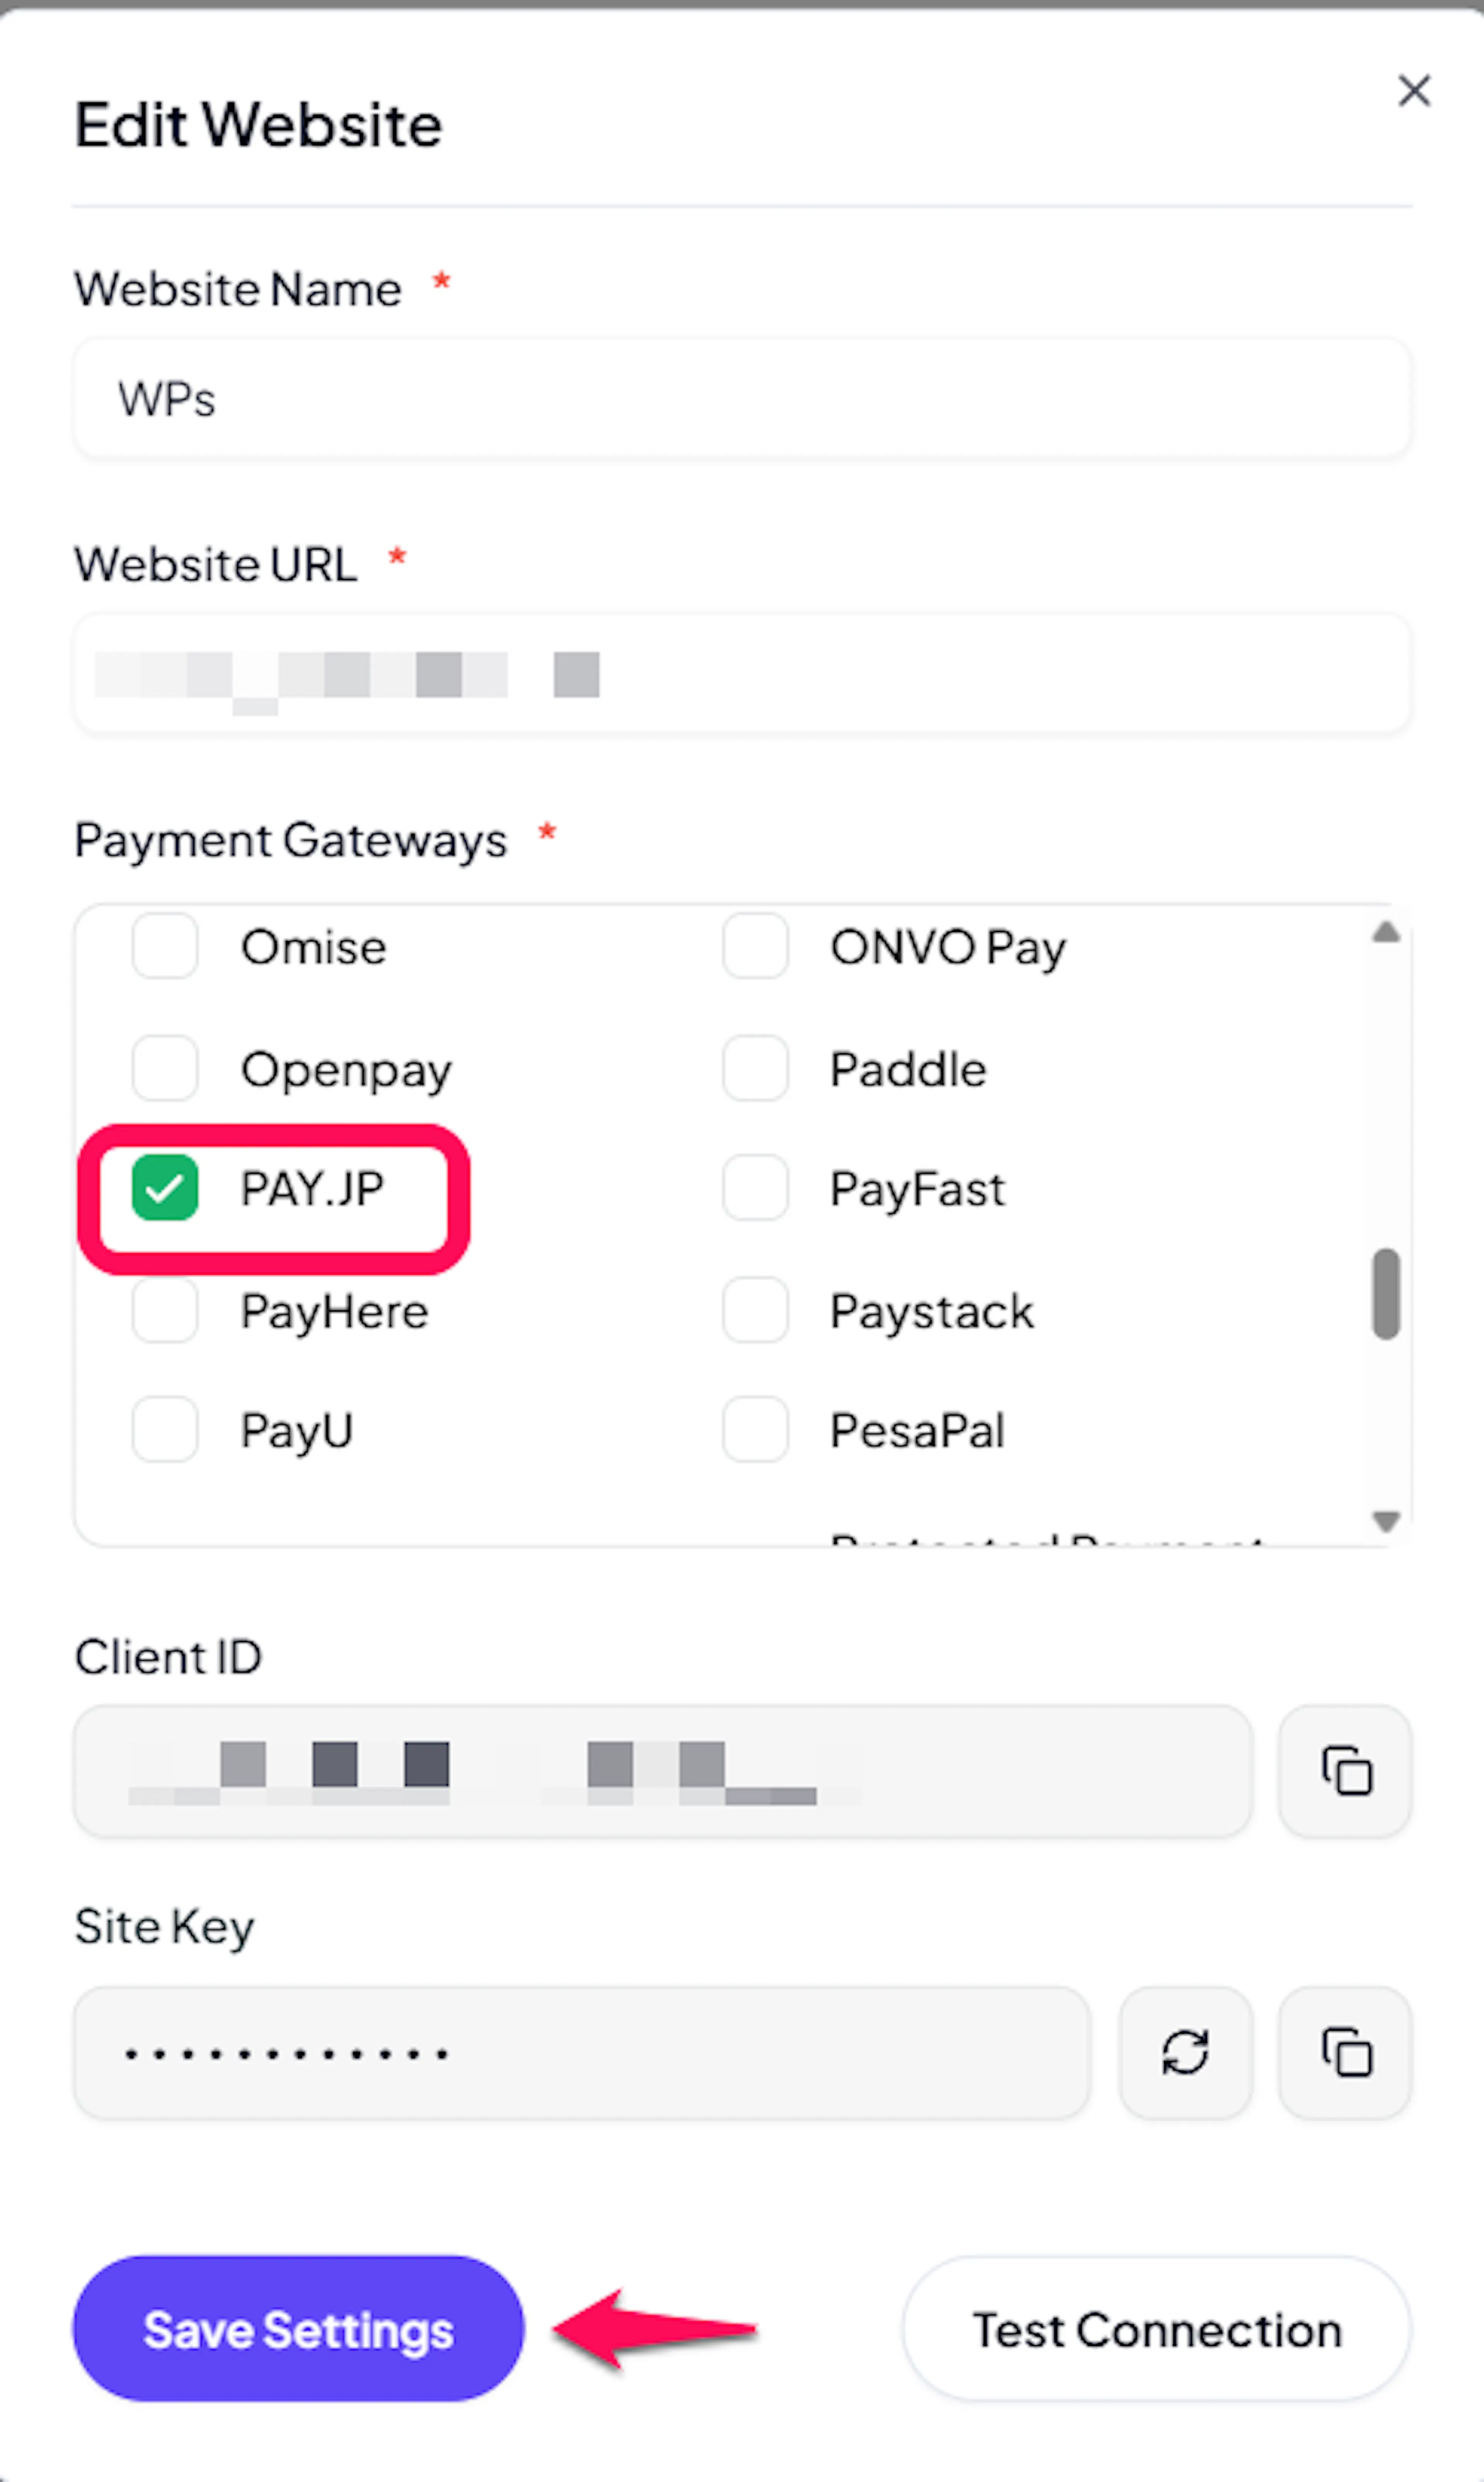
Enable PAY.JP
Click the checkbox to enable PAY.JP for the website.
If you haven't added a website yet, Continue to Add Your Website →
Troubleshooting
Best Practices
- Test in sandbox before enabling production
- Enable webhooks so payment status updates are instant instead of delayed
- Keep your order currency set to Japanese Yen - PAY.JP does not appear at checkout for any other currency
- Store both Live and Test Secret Keys so you can safely test before going live
FAQs
Still Have Questions?
- PAY.JP Support: PAY.JP Help Center
- PayLexer Support: Contact Support
For API details and advanced configuration, see the PAY.JP developer documentation.