

Tilled
Connect Tilled to PayLexer to accept card payments through secure embedded fields on your own checkout page, with native gateway-scheduled subscriptions, signed webhooks, and full or partial refunds.
Tilled is a PayFac-as-a-Service platform built for the United States and Canada, offering payment processing, merchant onboarding, recurring billing, and in-person payments under one account. Shoppers enter their card directly in secure fields embedded on PayLexer's own checkout page - there is no redirect to a separate Tilled page - and the raw card number never reaches PayLexer's own servers. Subscriptions are billed by Tilled's own scheduler: once a subscription is created, Tilled raises and charges every renewal itself without PayLexer needing to trigger it.
- Supported Regions (Merchant Accounts): United States and Canada
- Supported Currencies: USD, CAD
Supported Features
- Card payments entered directly in secure fields embedded on PayLexer's own checkout page, with no redirect
- True recurring subscriptions, billed and rescheduled by Tilled itself on every due date
- Free trials and one-time sign-up fees at enrollment
- Subscriptions can be paused, resumed, or cancelled - either immediately or at the end of the period already paid for
- Full and partial refunds, with a payment that has not yet settled voided automatically instead of refunded
- Weekly, monthly, or yearly billing cycles (daily billing is not available)
- Signed webhook notifications confirm every payment, refund, and subscription event
Before You Start
Make sure you have:
- Tilled Account – Don't have one? Sign up for Tilled →
- PayLexer Account – Required to configure the integration. Create your account →
- A website where you want to integrate
Looking for a different payment processor? View all supported gateways →
Configuring Tilled
You need a Secret Key, Publishable Key, and Merchant Account ID from Tilled for this integration.
Getting API Credentials
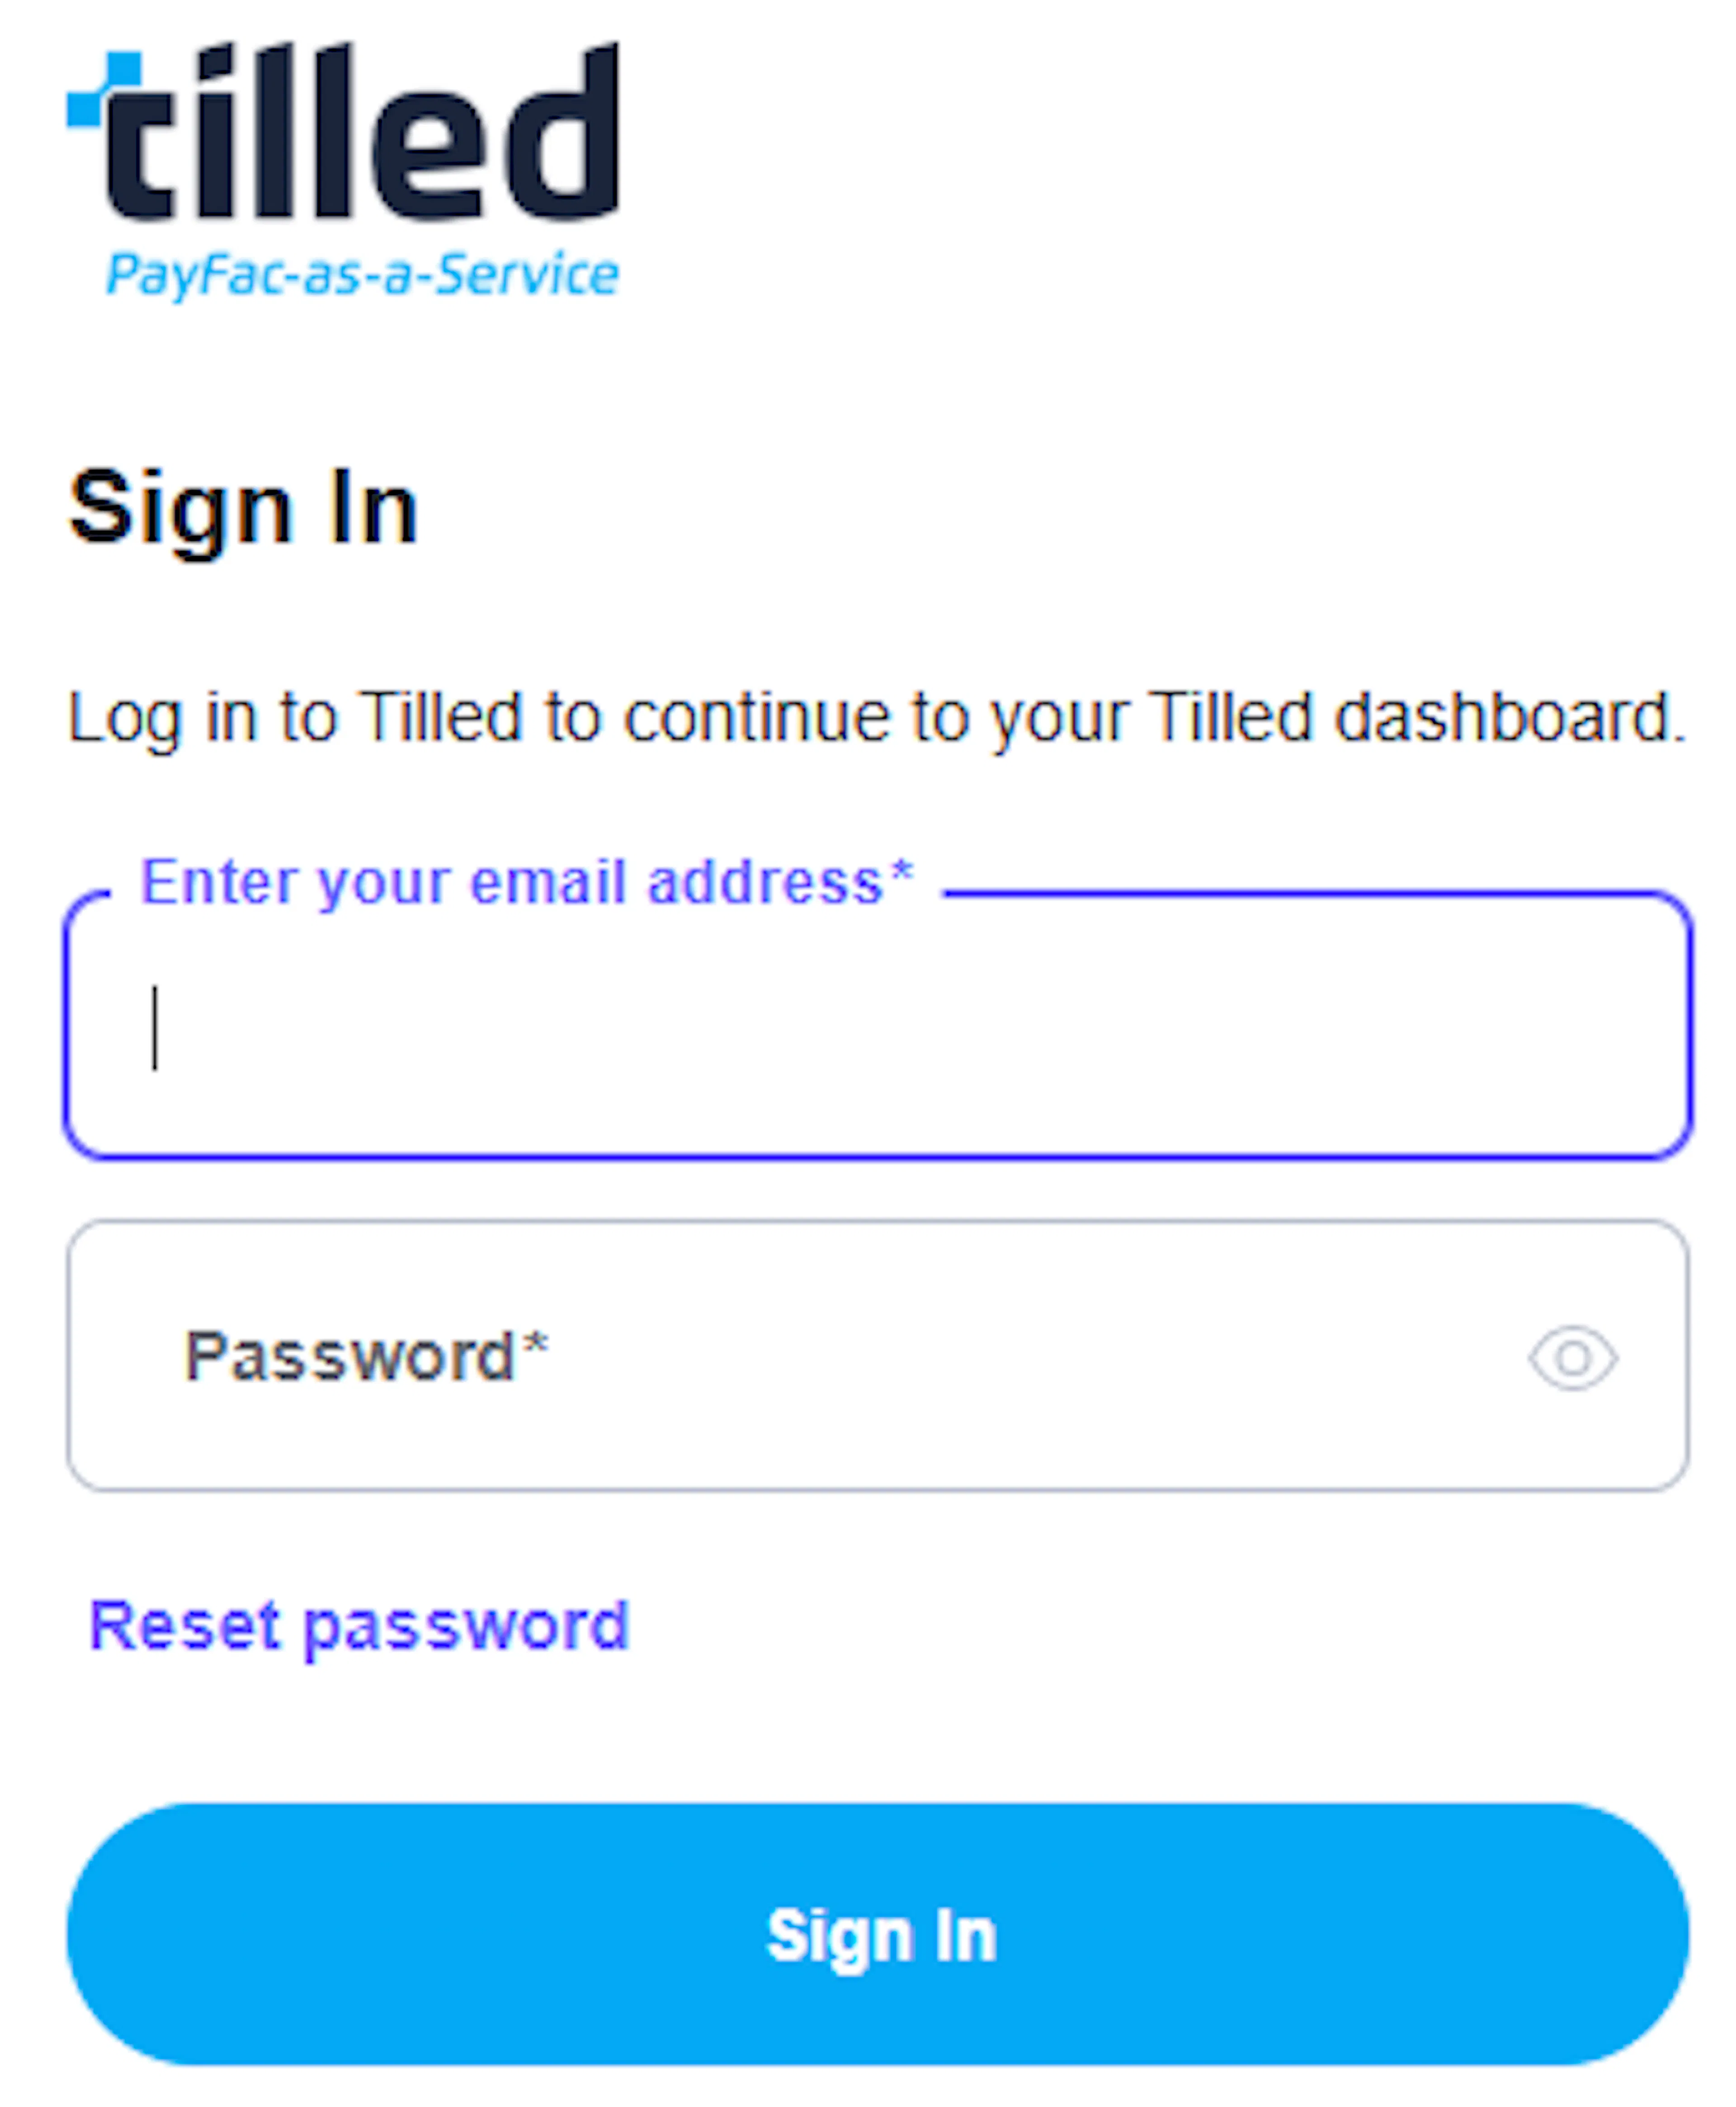
Log in to your Tilled Dashboard
Sign in to the Sandbox Dashboard for test credentials, or the Live Dashboard for production credentials. Sandbox and Live are separate Tilled accounts with separate credentials - one never works in place of the other.
Generate your Secret Key
Go to Developer → API Keys and click Generate API Key. Enter a Key Name, select Secret Key as the type, choose the required scopes, and click Generate. Copy the generated Secret Key (sk_...).
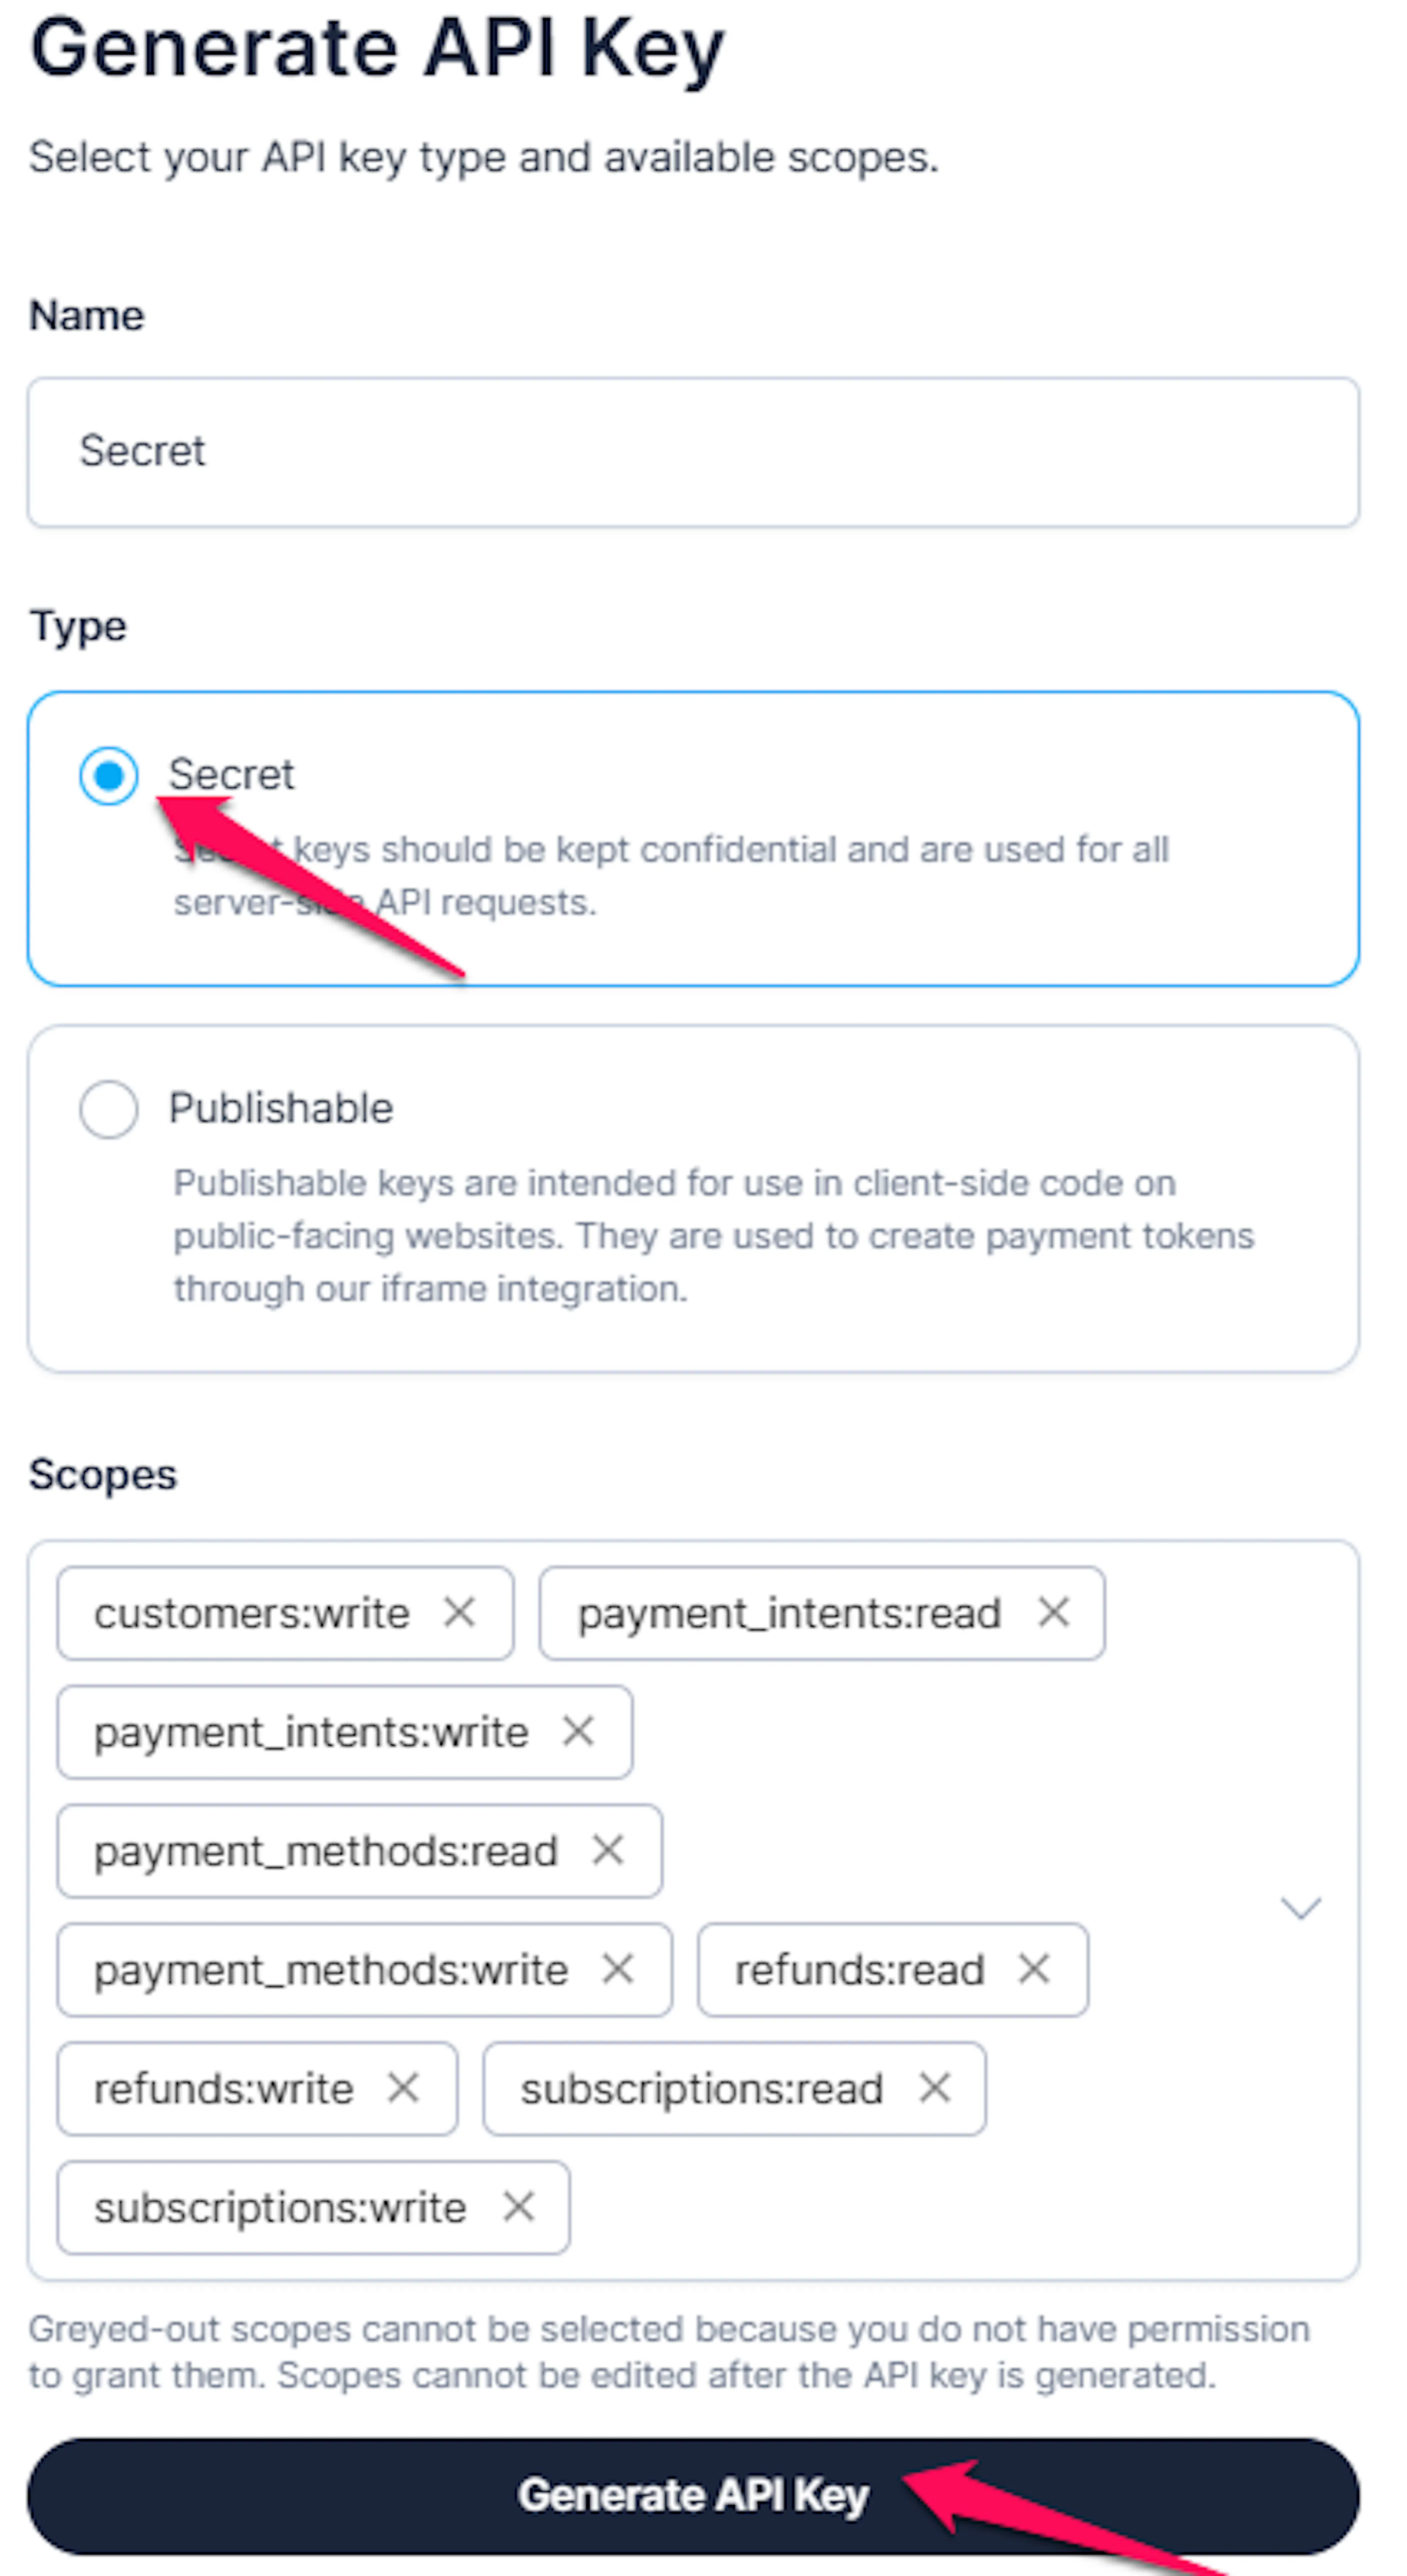
Keep the Secret Key private - never put it in frontend code or logs. It authenticates every request PayLexer makes on your behalf. Tilled shows the full key only once, so copy it before leaving the page.
Generate your Publishable Key
Click Generate API Key again. Enter a Key Name, select Publishable Key as the type, and click Generate. Copy the generated Publishable Key (pk_...).
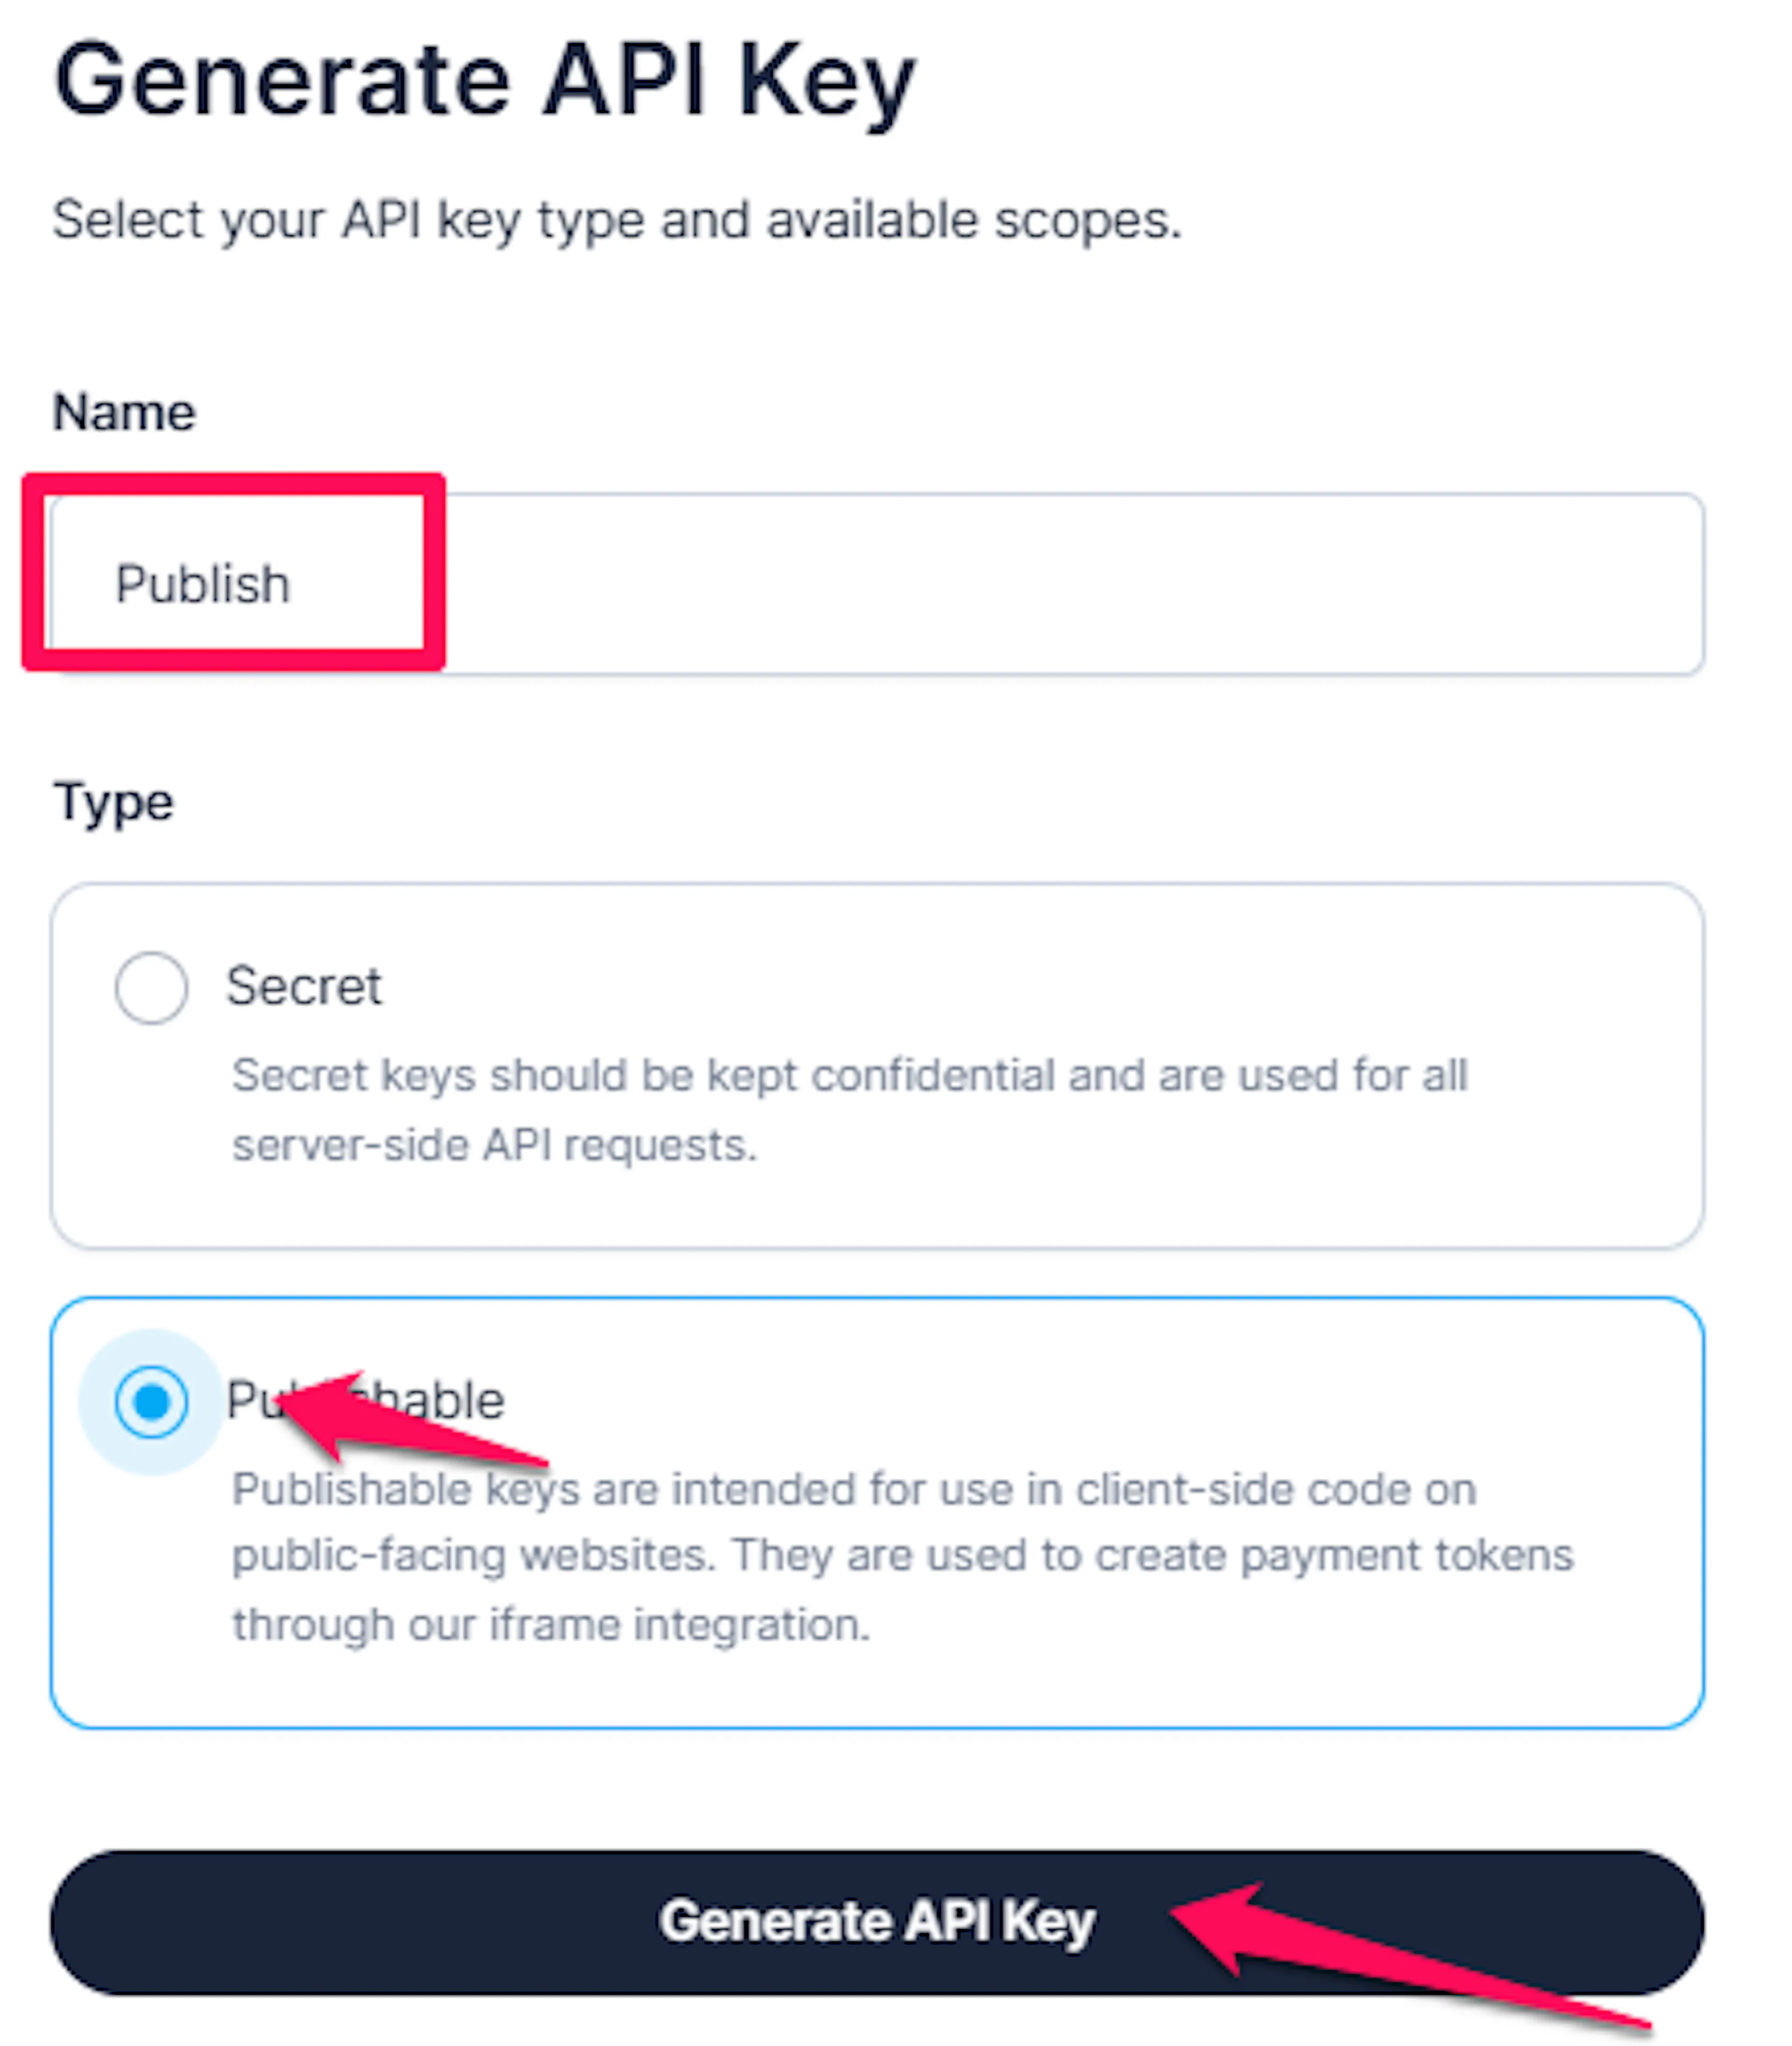
The Publishable Key is safe to expose - it only ever reaches the shopper's browser, where it powers the secure card fields. It needs no scopes.
Copy your Merchant Account ID
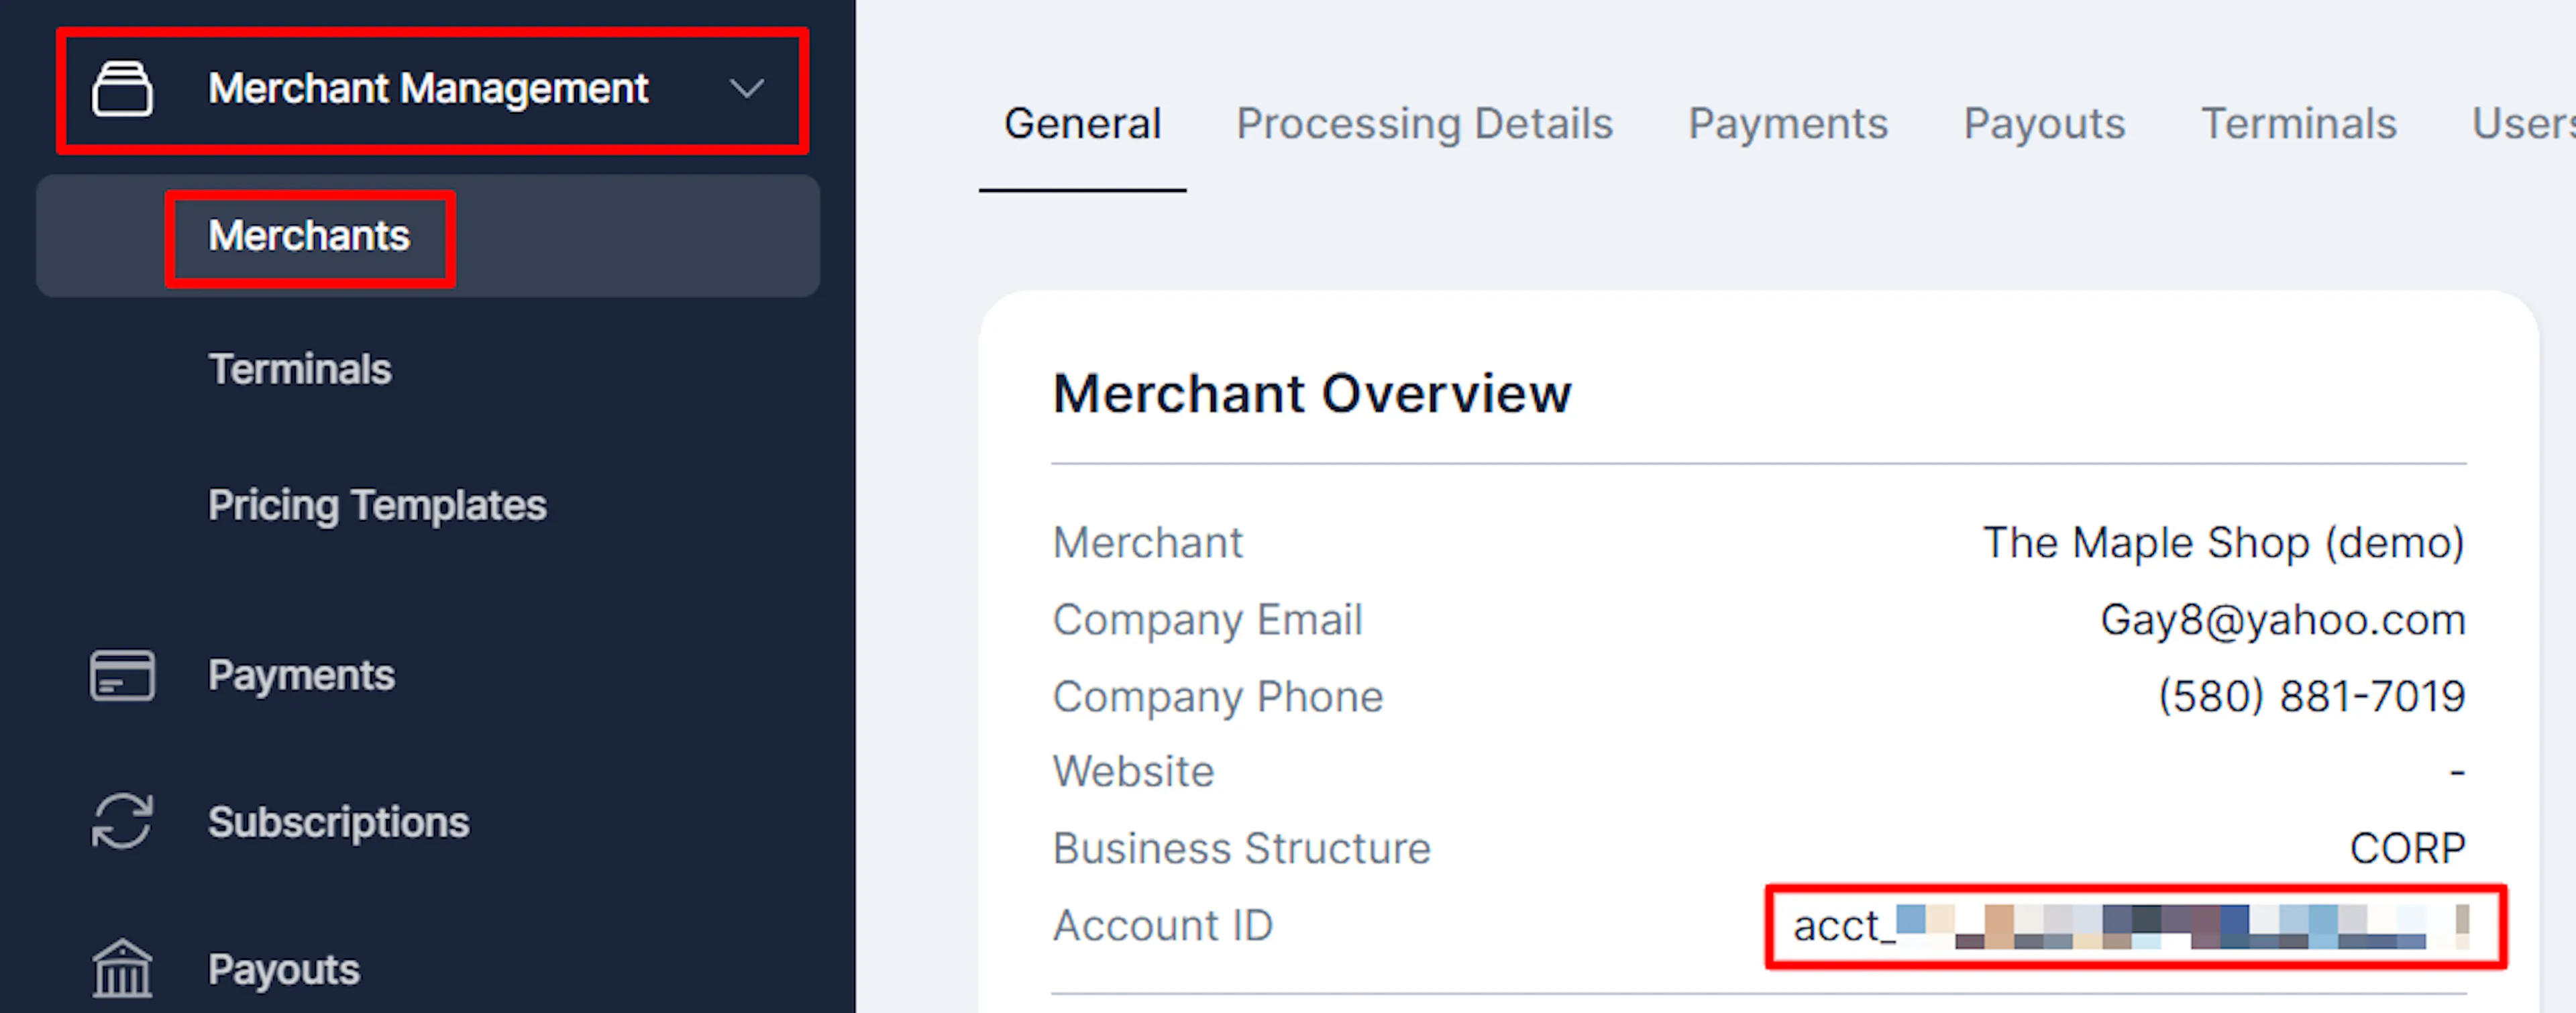
Your Merchant Account ID (acct_...) identifies the specific merchant sub-account these keys act on. Go to Merchant Management → Merchants, select the merchant you want to use, and copy the Account ID (acct_...) for the MID.
Adding Credentials to PayLexer
Open PayLexer Dashboard
Log in to your PayLexer dashboard and navigate to Payment Gateways → Tilled.
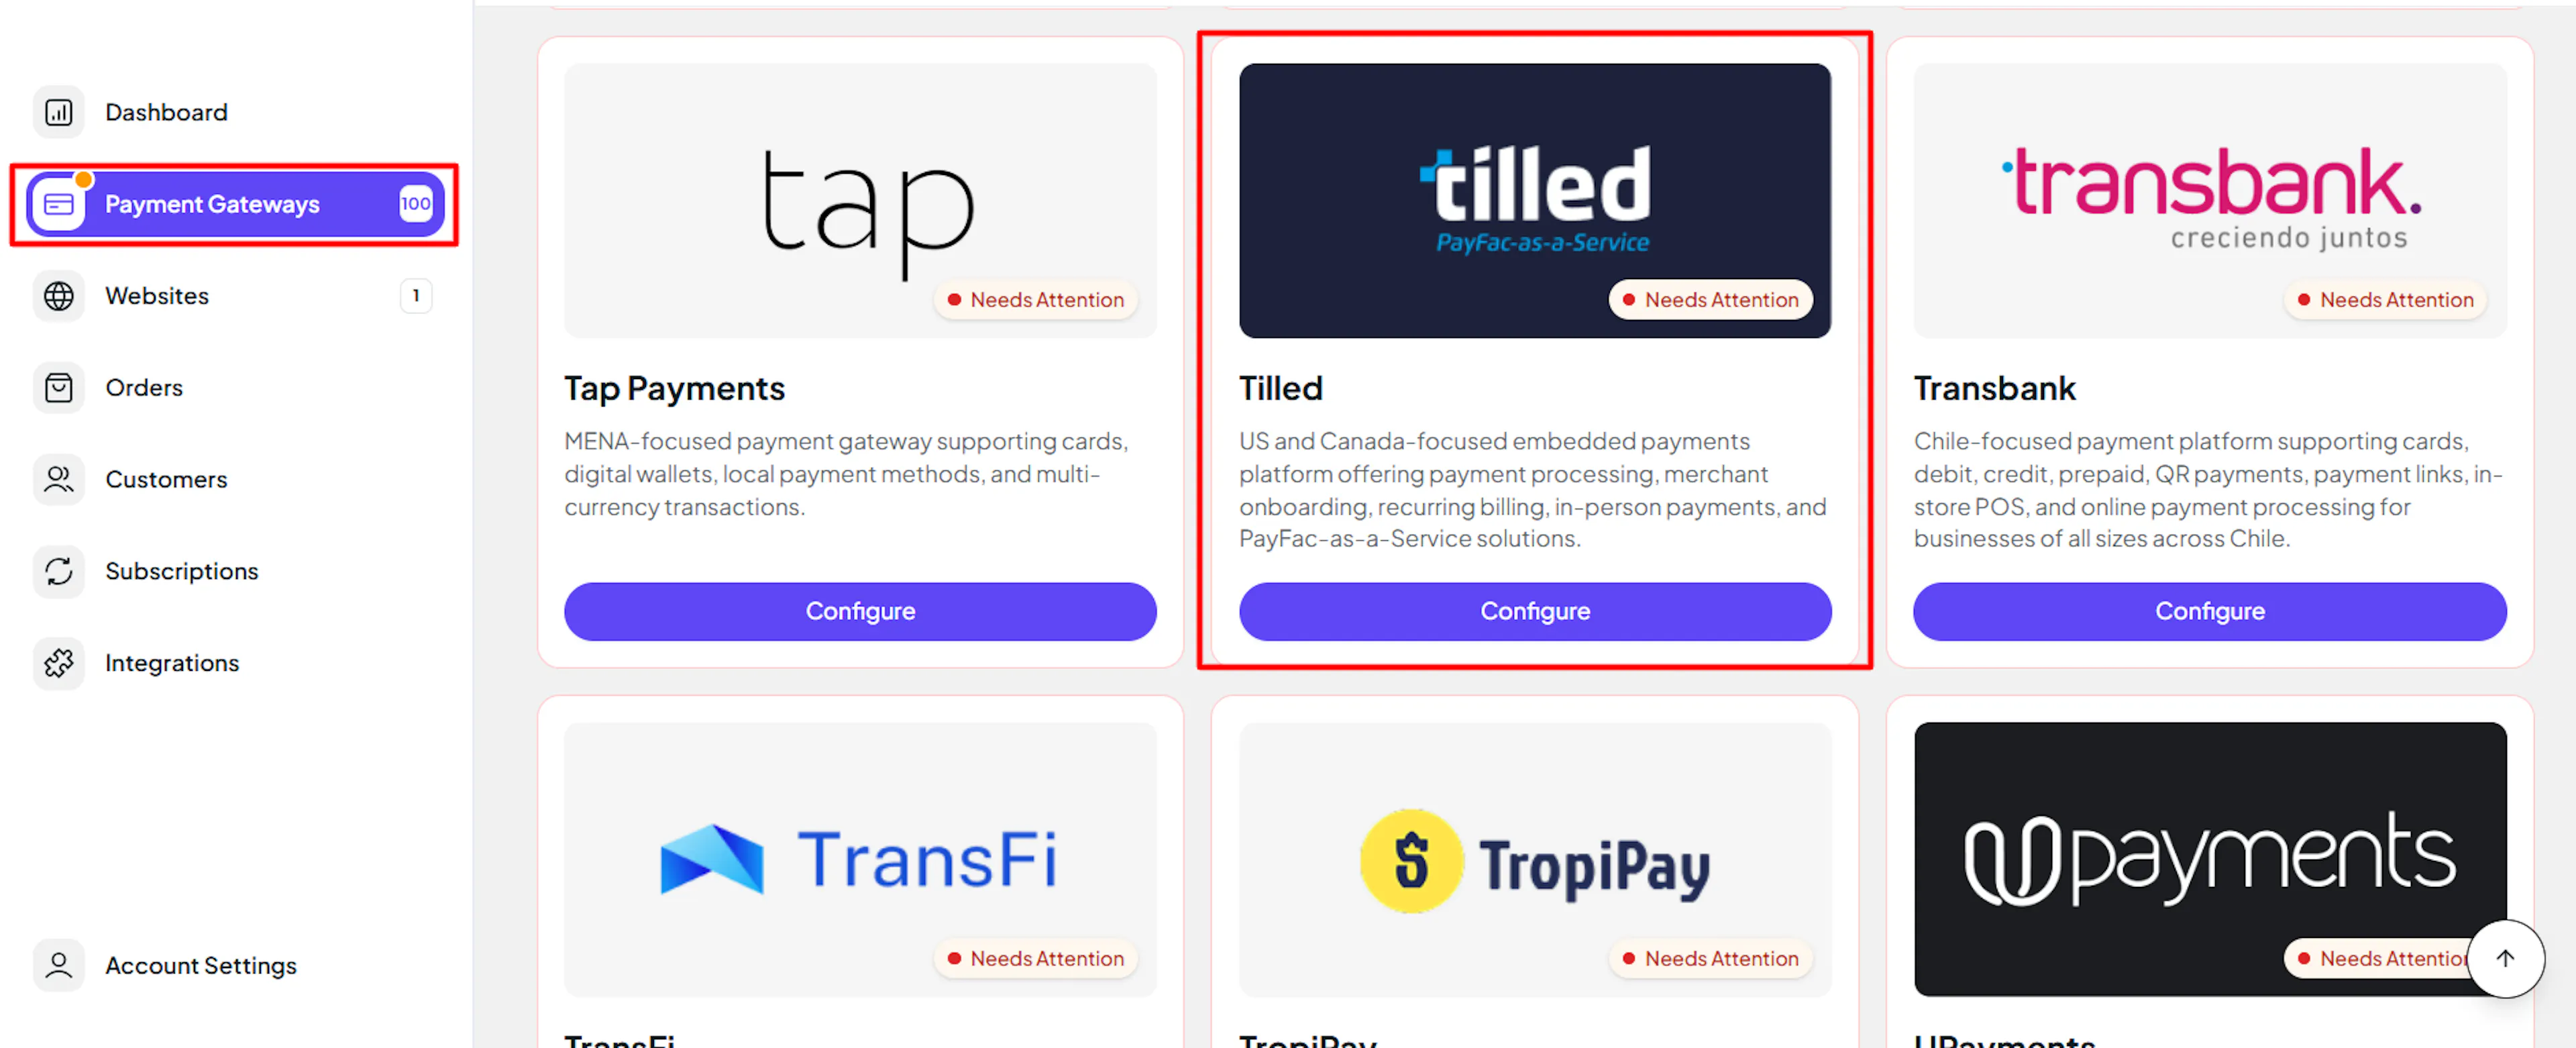
Enter your credentials
Paste the Secret Key, Publishable Key, and Merchant Account ID you copied from Tilled into the corresponding fields.
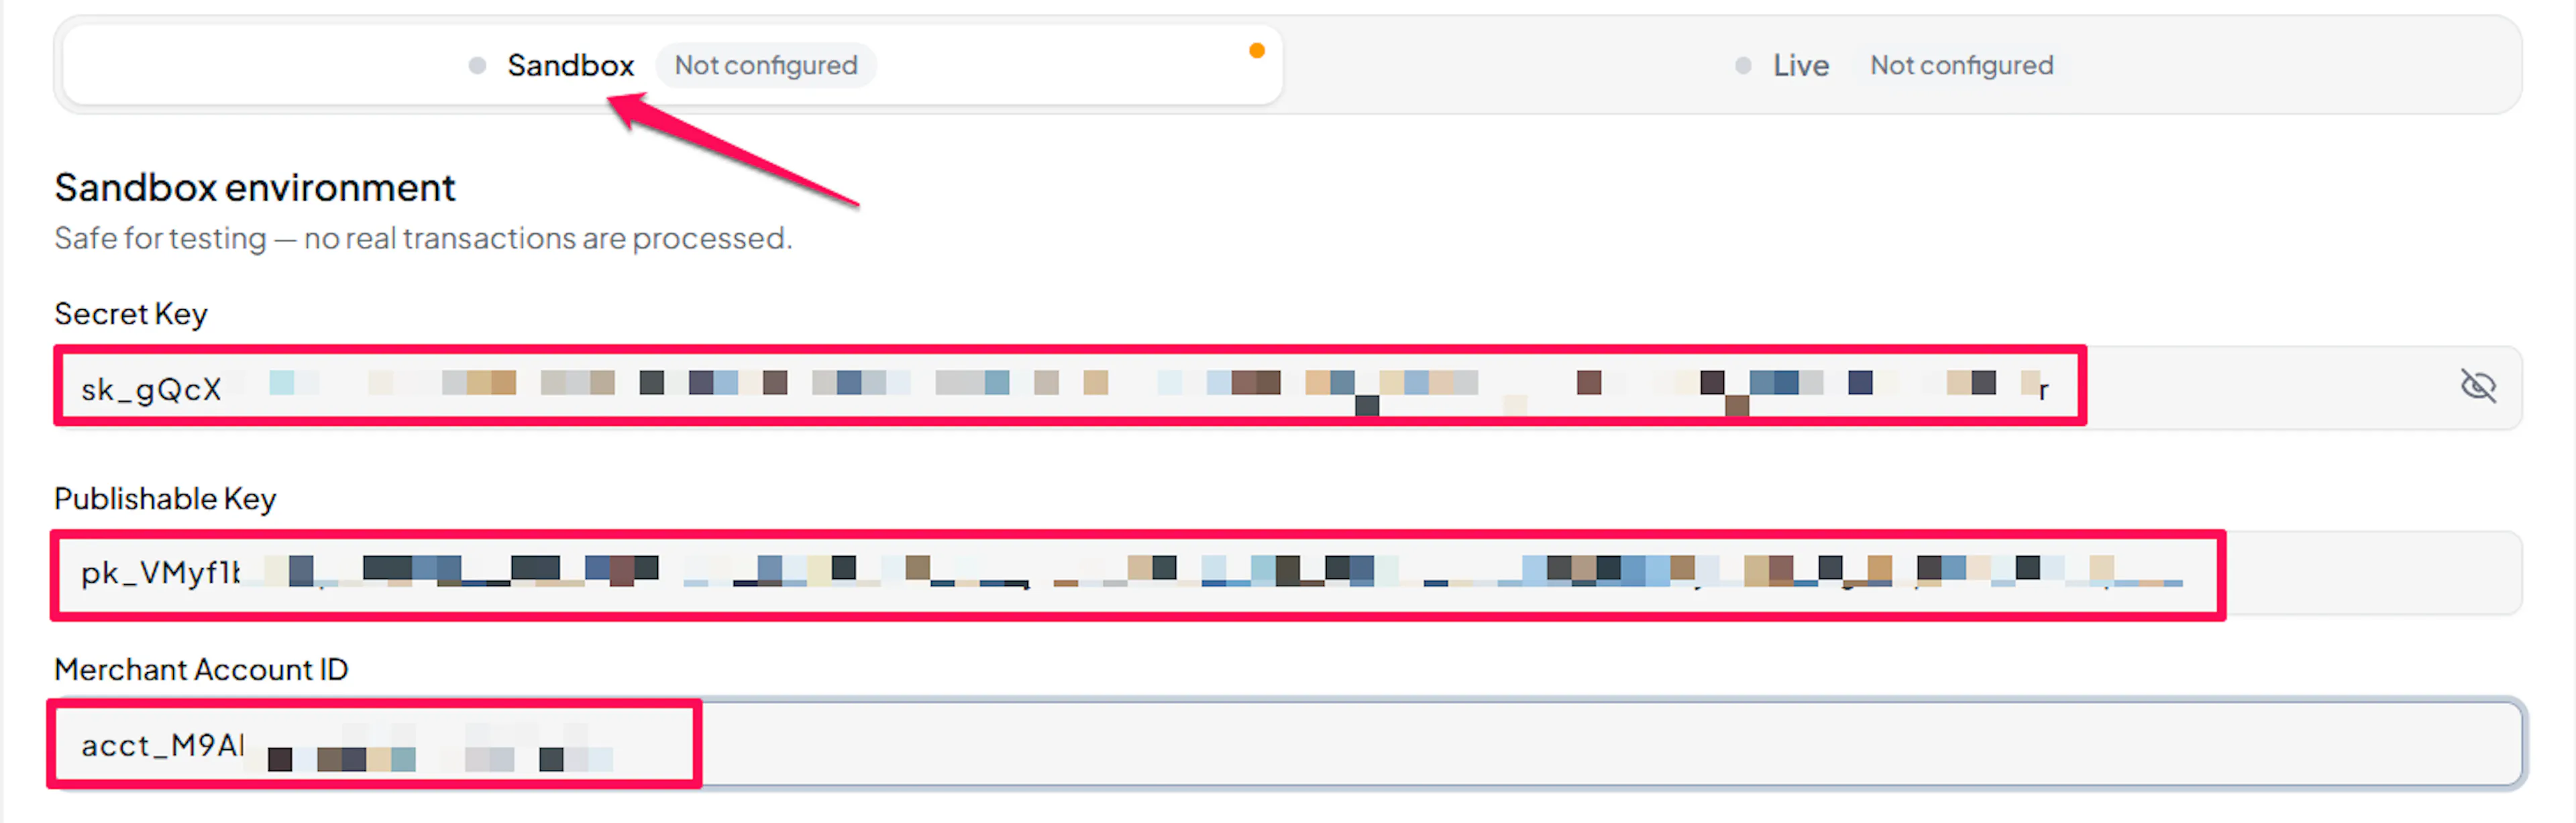
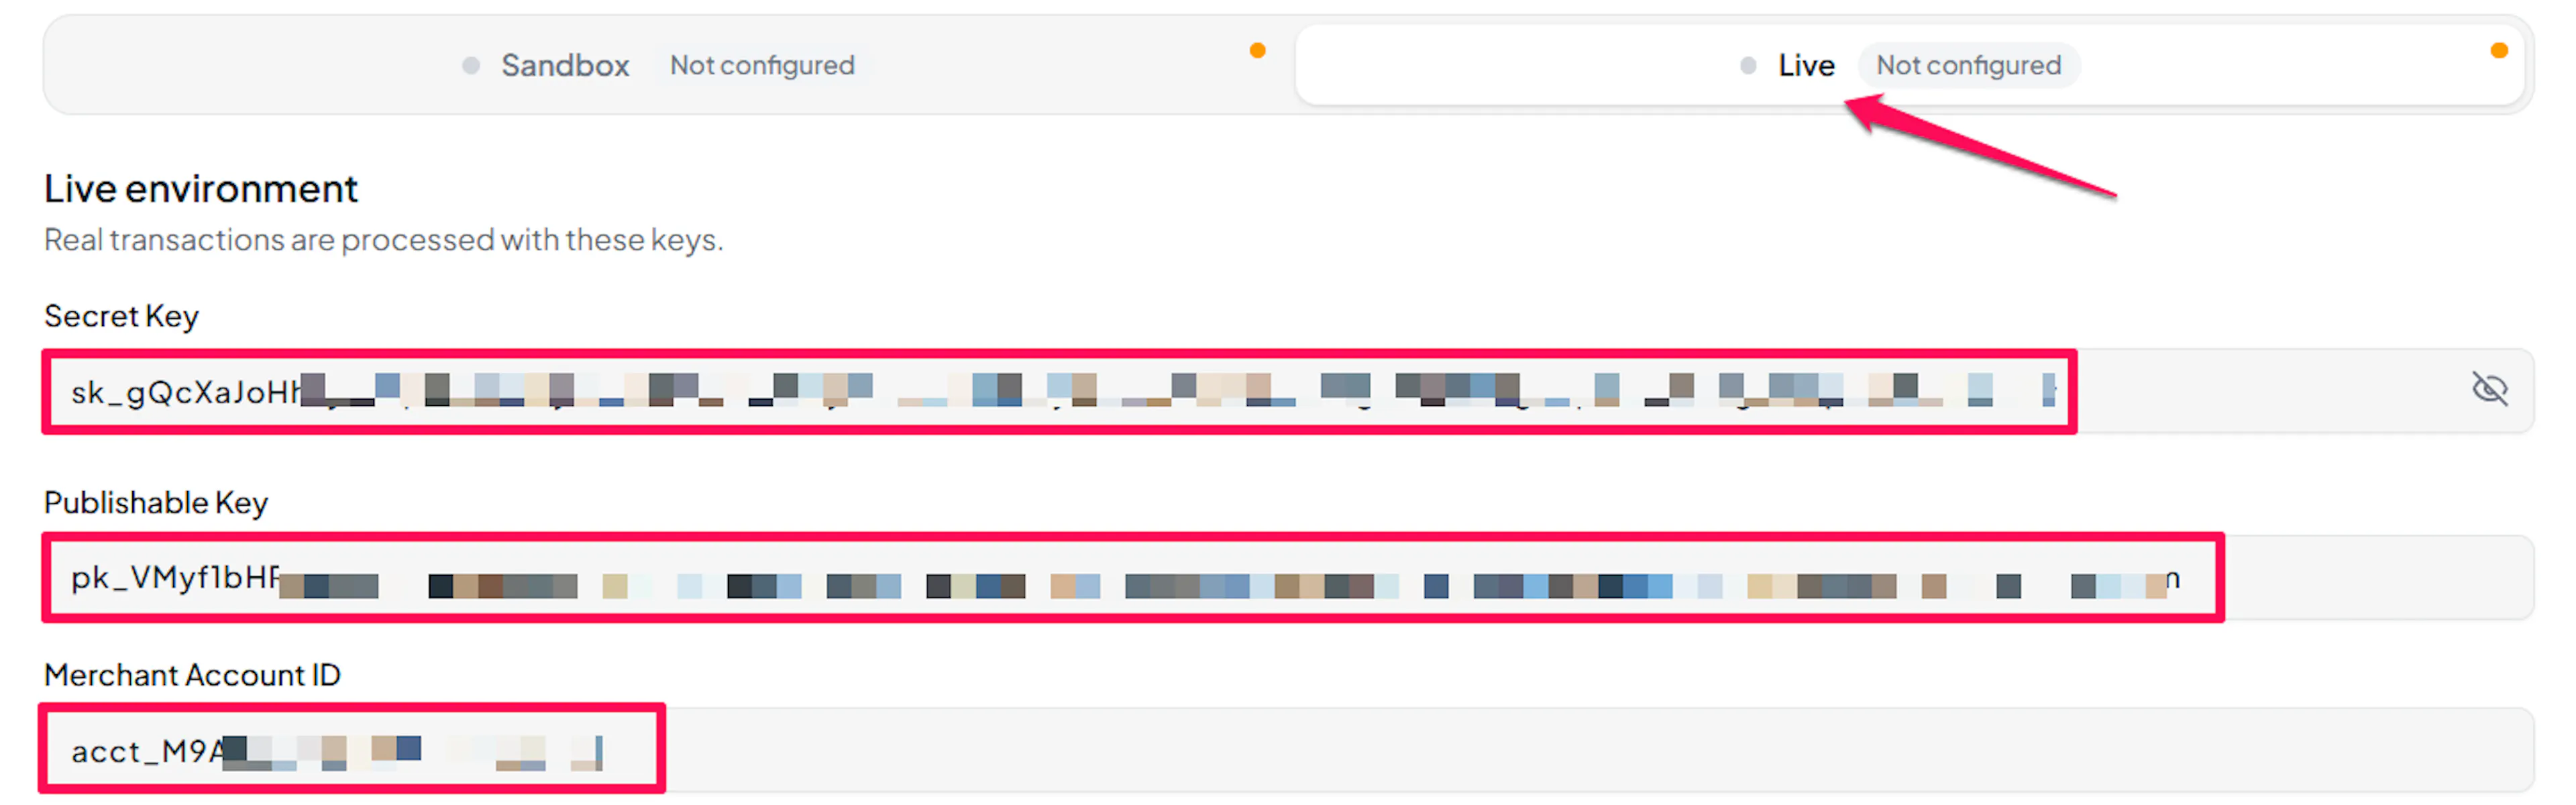
Understanding Live/Production and Sandbox Settings:
| Environment | Purpose |
|---|---|
| Live / Production | Used for real transactions. |
| Test / Sandbox | Used for testing only. No real money is processed. |
How PayLexer selects credentials:
- Debug/Test mode ON → Test credentials are used
- Debug/Test mode OFF → Live credentials are used
Sandbox and Live credentials come from two entirely separate Tilled accounts and are never interchangeable. An invalid key and a valid key pointed at the wrong Merchant Account ID fail for different reasons, so Verify Connection reports the two distinctly.
Configuring Webhooks (Mandatory)
Webhooks enable real-time payment updates and significantly improve reliability.
Benefits of Webhooks:
- Instant payment status updates
- Automatic refund status updates
- Subscription renewal and cancellation updates
Tilled has no dedicated "renewal" notification - a renewal simply arrives as an ordinary successful payment, and only the webhook tells PayLexer it belongs to a subscription. Without webhooks configured, subscription renewals charged by Tilled will not be reflected on the matching PayLexer order.
Copy your PayLexer webhook URL
In PayLexer → Payment Gateways → Tilled, copy the Webhook URL shown for your account.

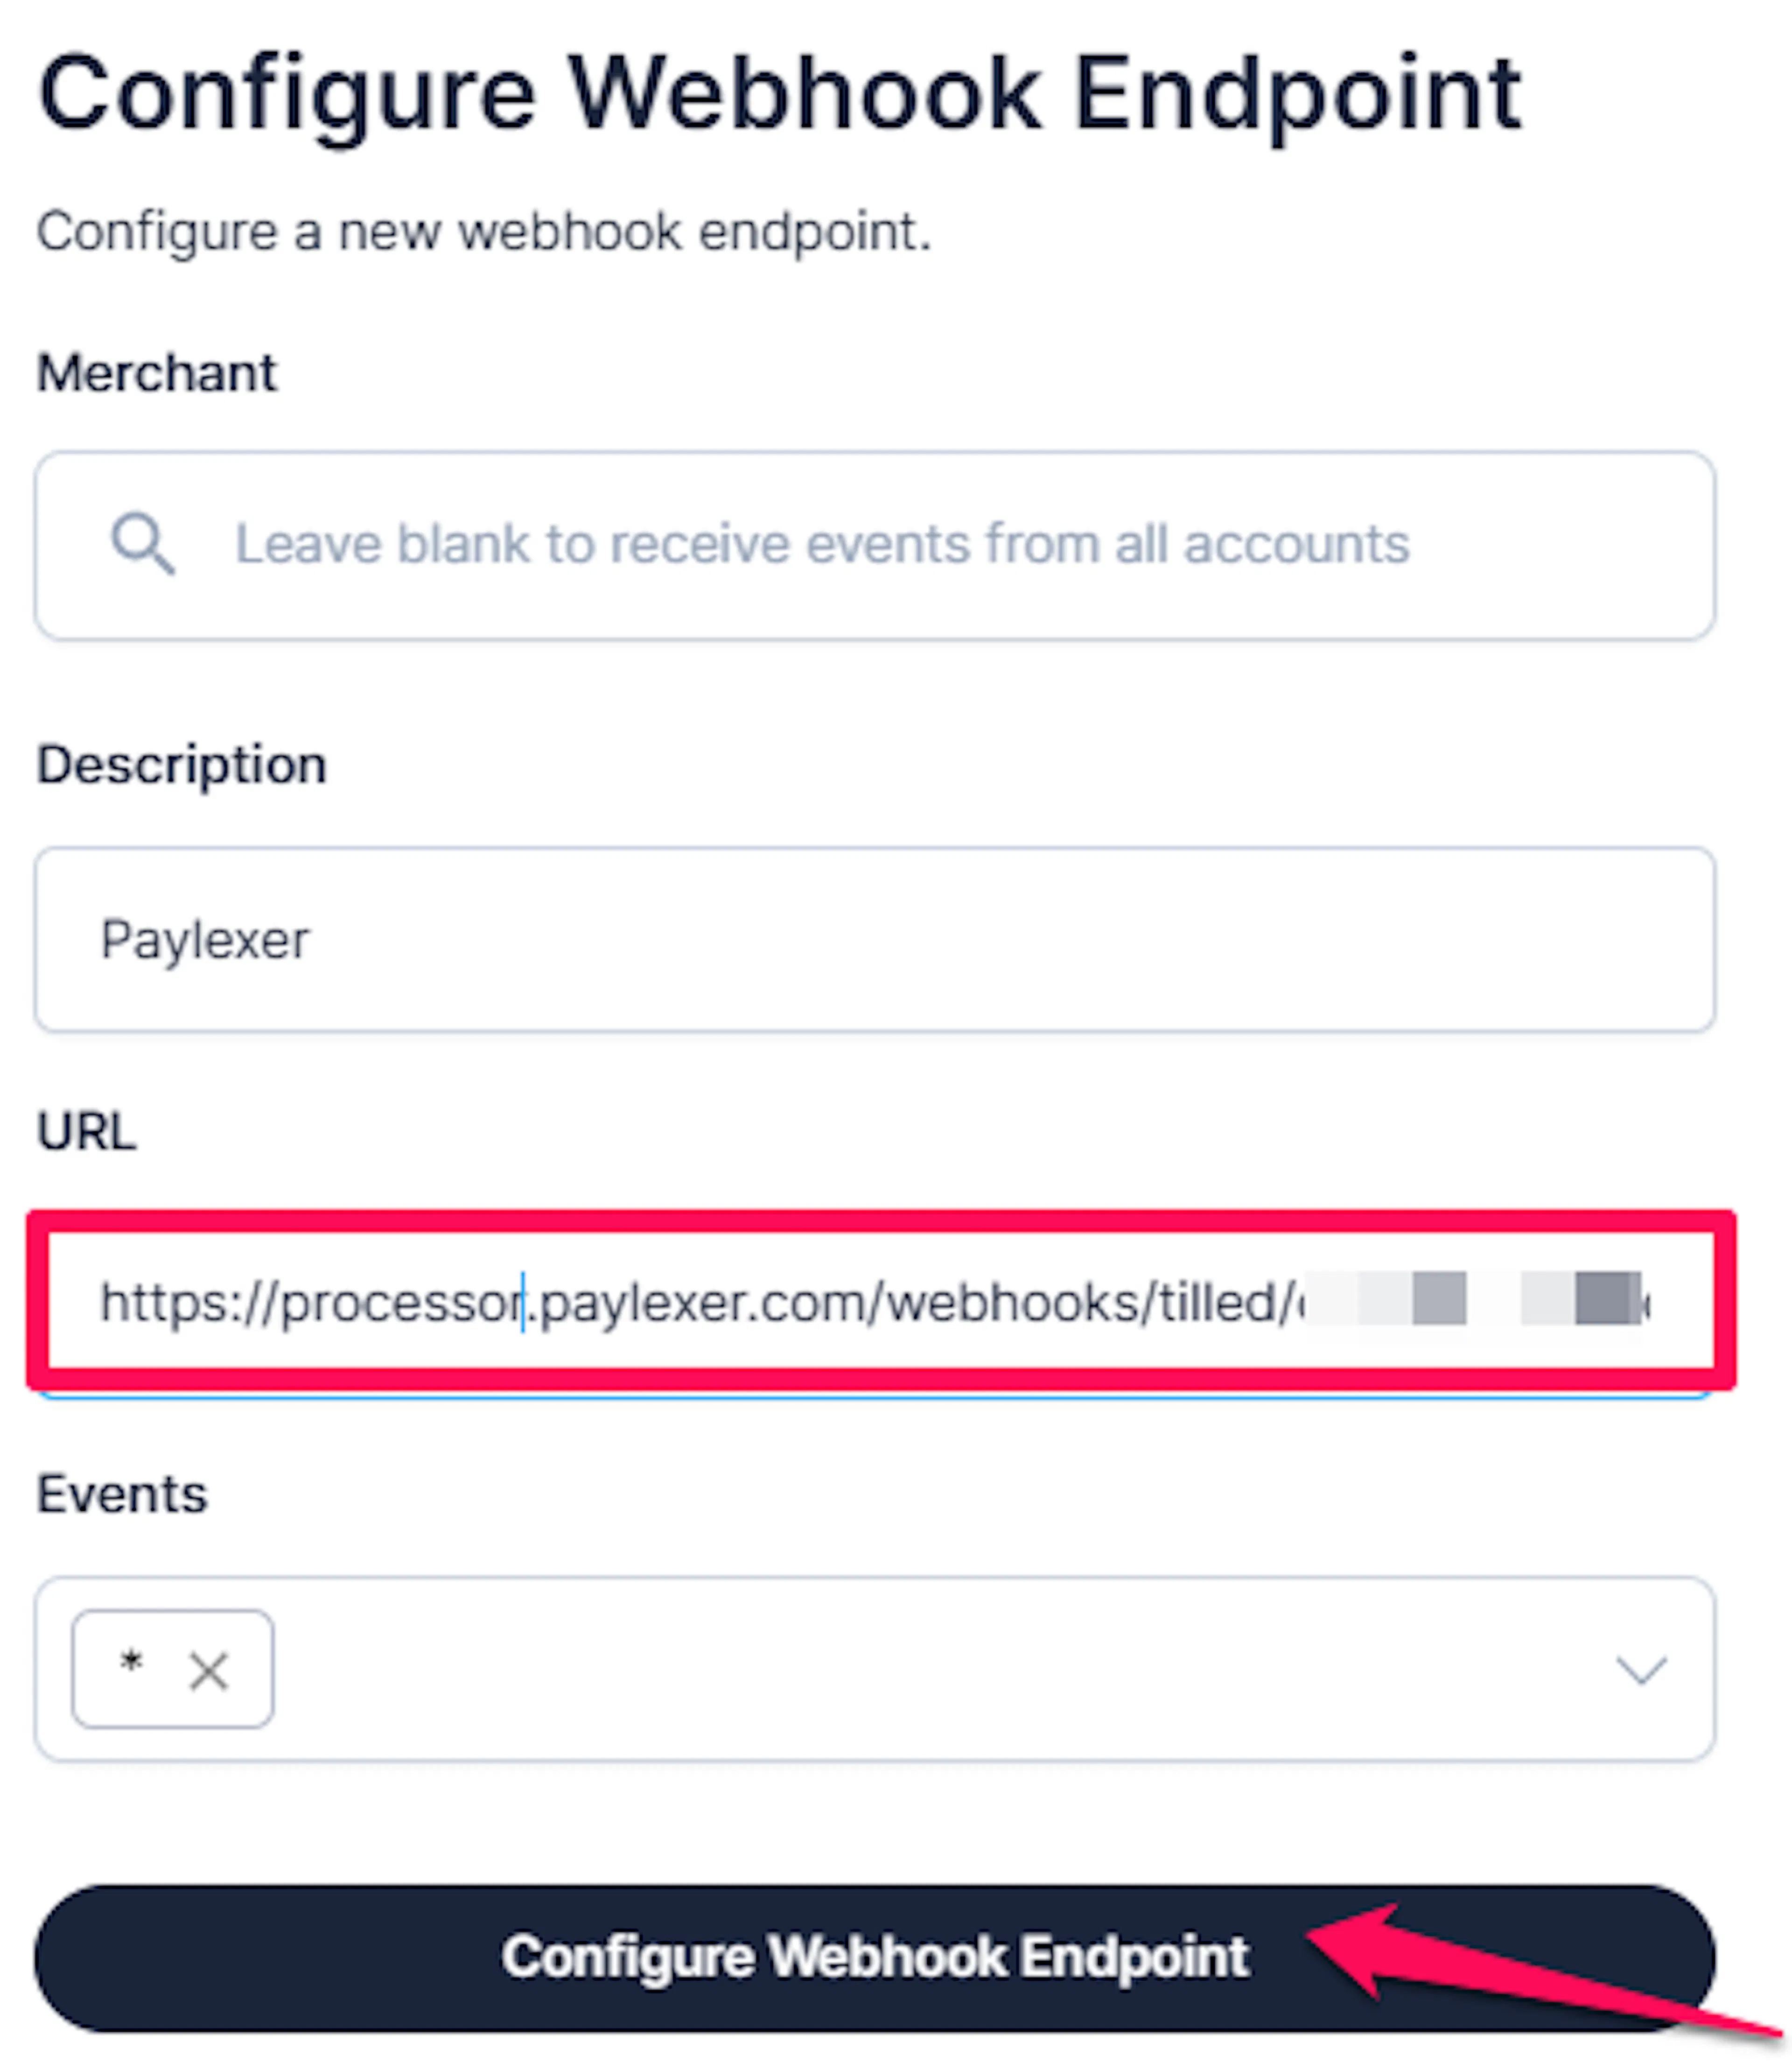
Add the endpoint in Tilled
In your Tilled Dashboard, go to Developers → Webhooks, add a new endpoint, and paste in the PayLexer webhook URL you copied.
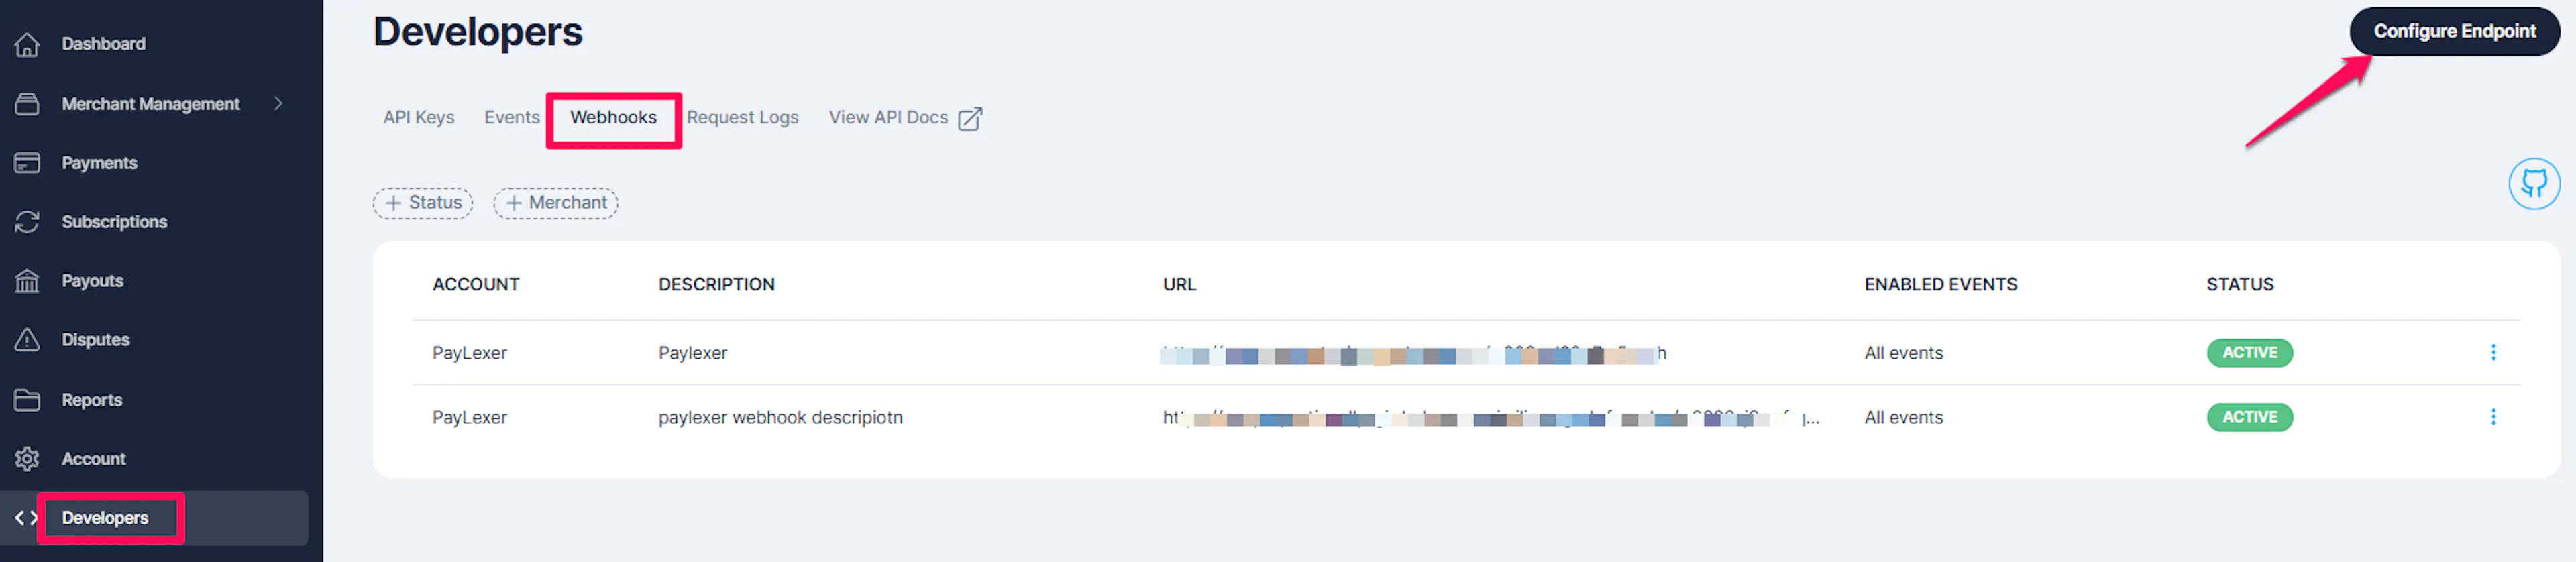
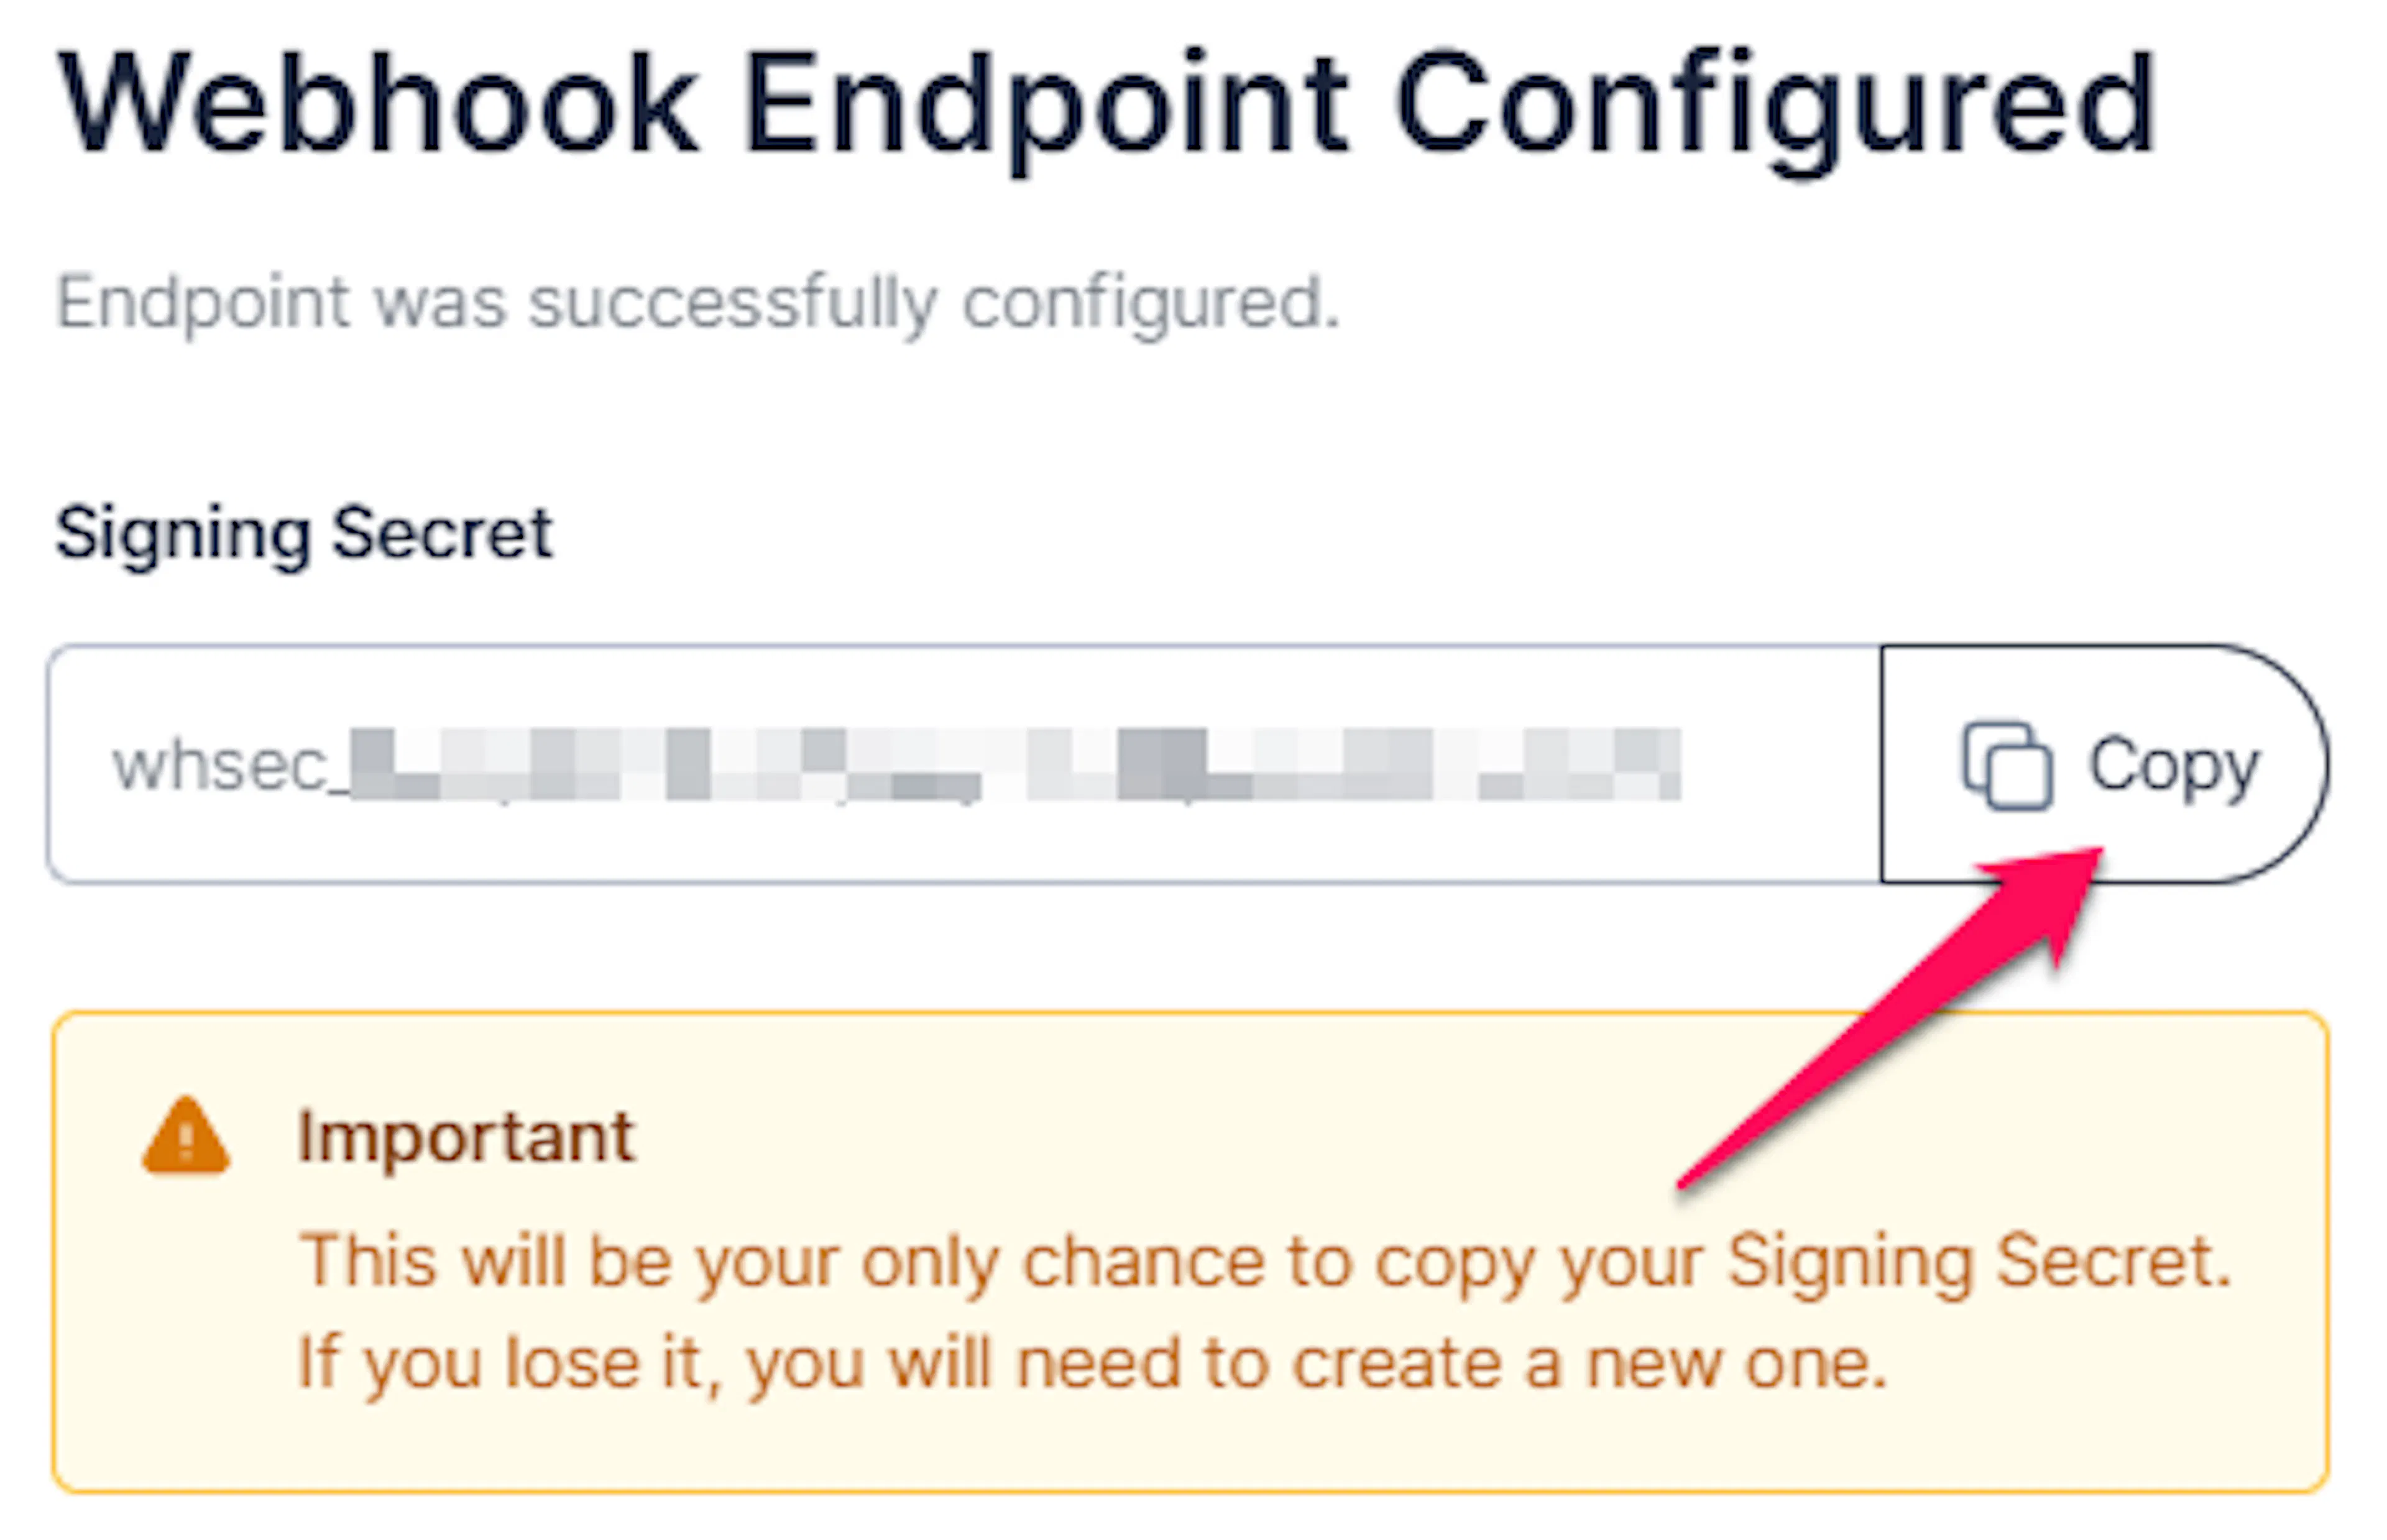
Copy the Webhook Signing Secret
Tilled generates a signing secret for the endpoint you just created. Copy it - this is what proves a notification genuinely came from Tilled.
Add the Webhook Signing Secret to PayLexer
Paste the value into the Webhook Signing Secret field in PayLexer for the matching environment.
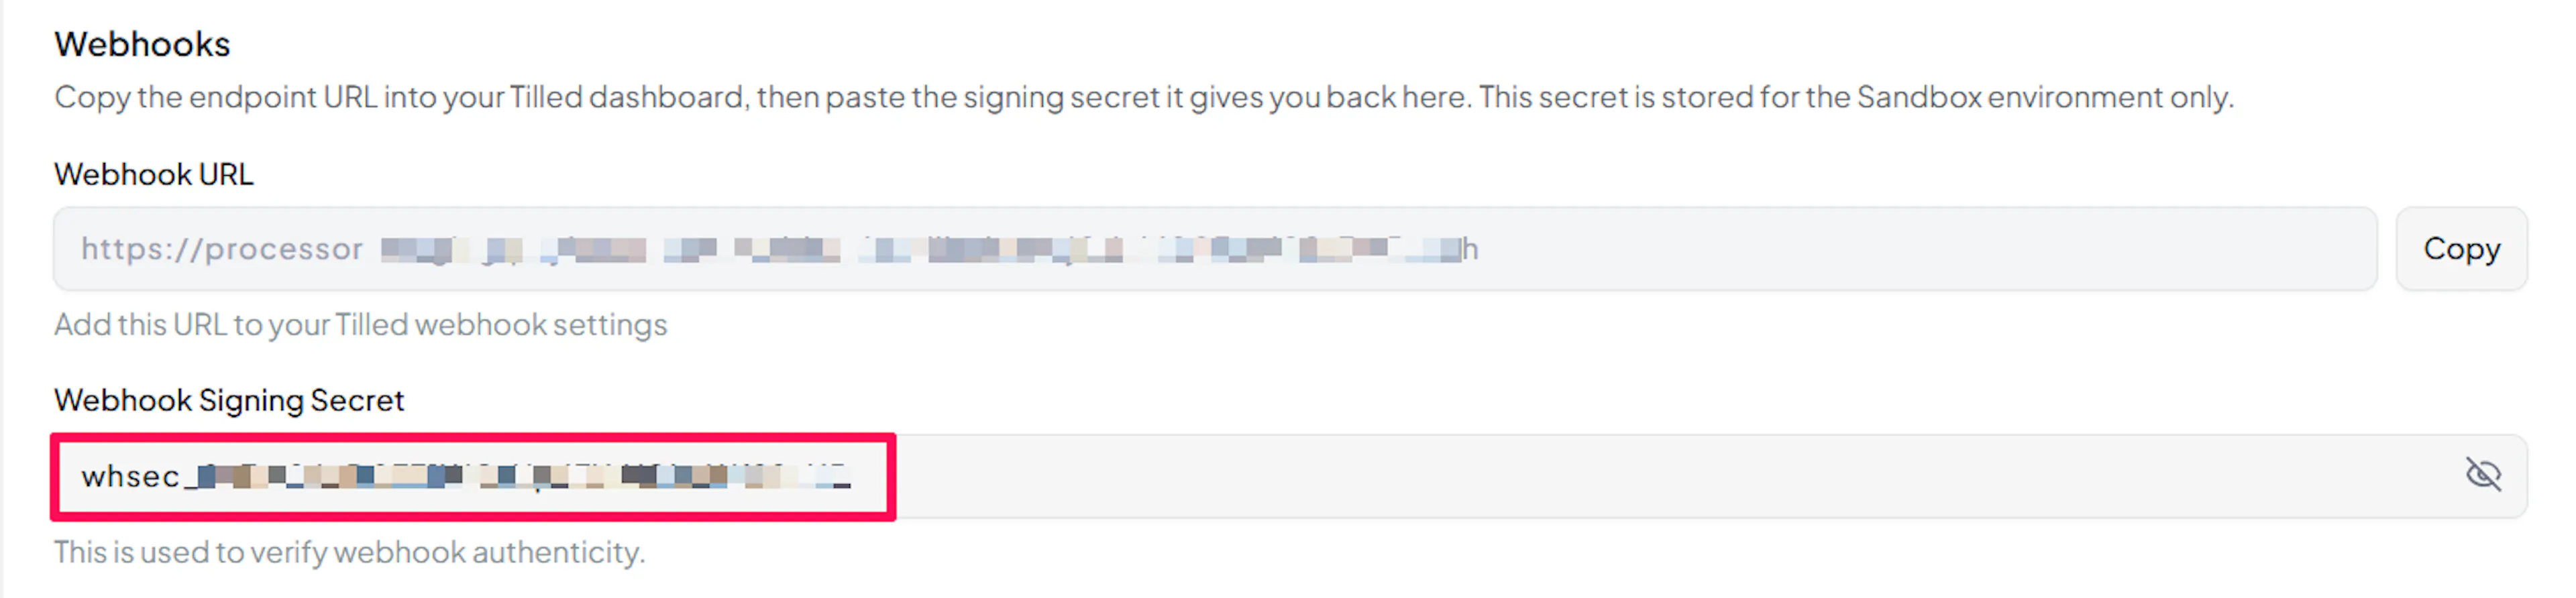
Sandbox and Live webhooks are configured separately, with separate signing secrets, because they belong to separate Tilled accounts.
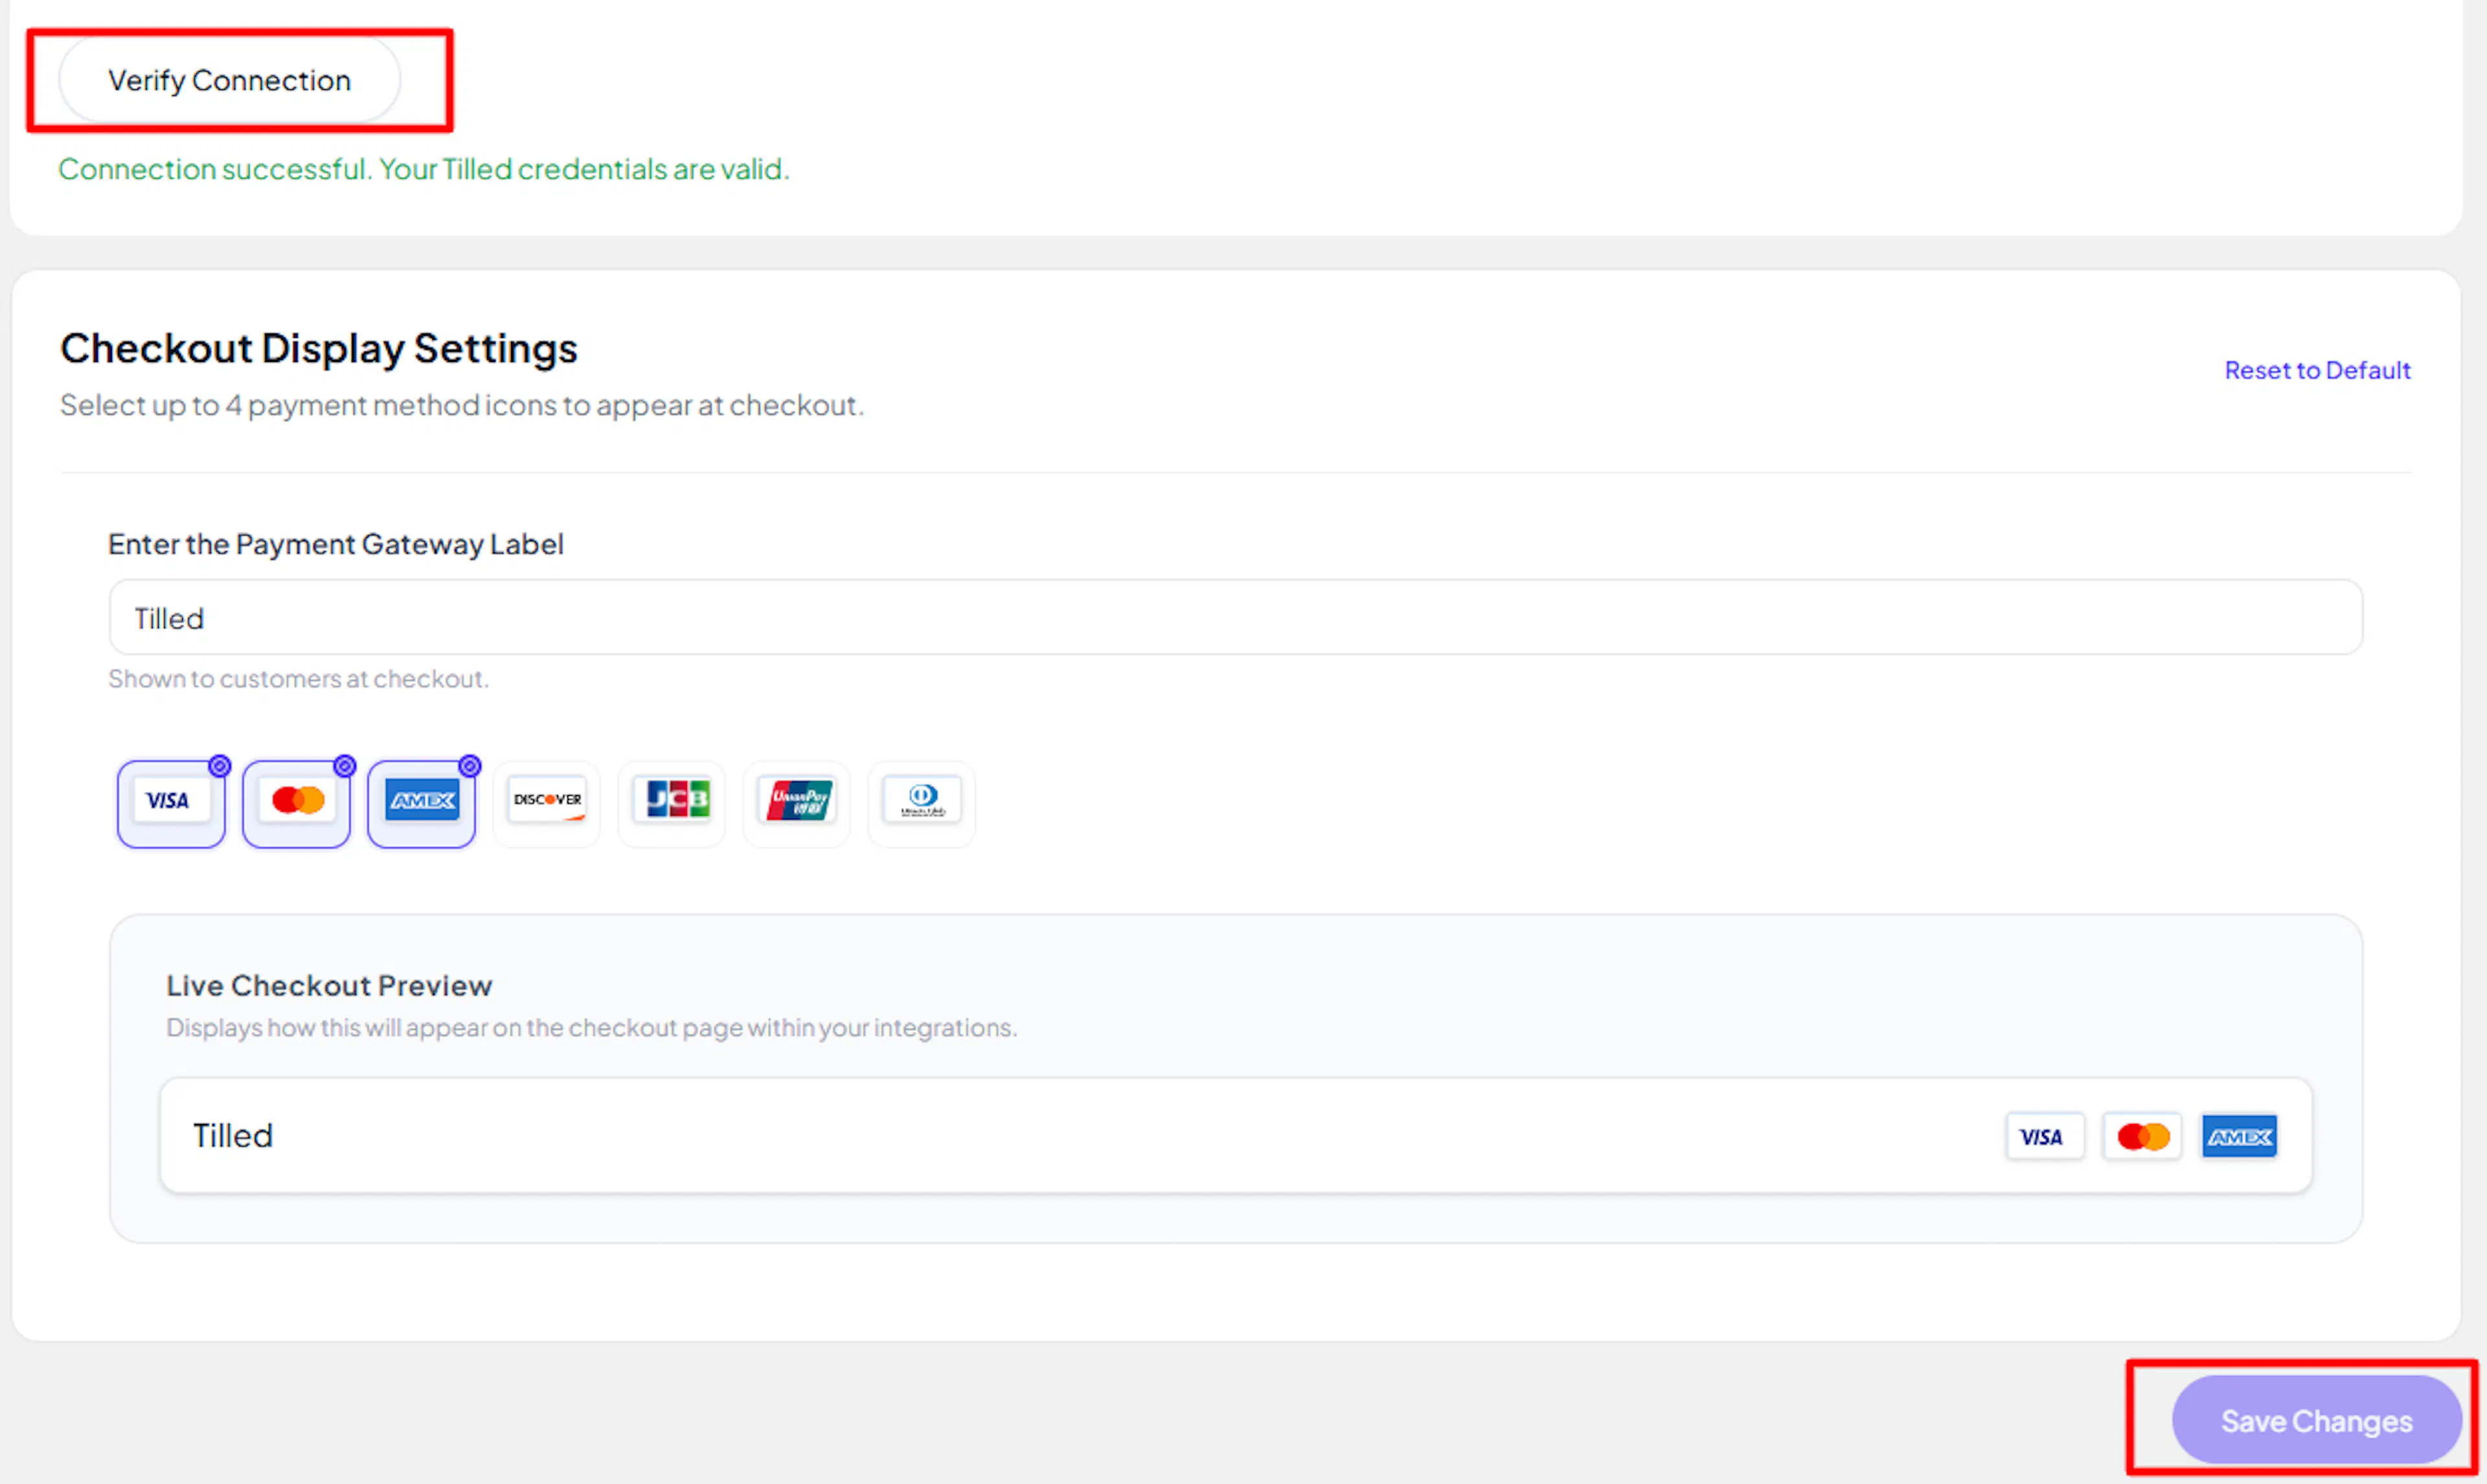
Test and Save
Click Save to save your configuration and verify your credentials. Click Verify Connection to test the connection.
Integrate Tilled to Your Website
If you have already added and configured your site, you can enable Tilled in your existing setup.
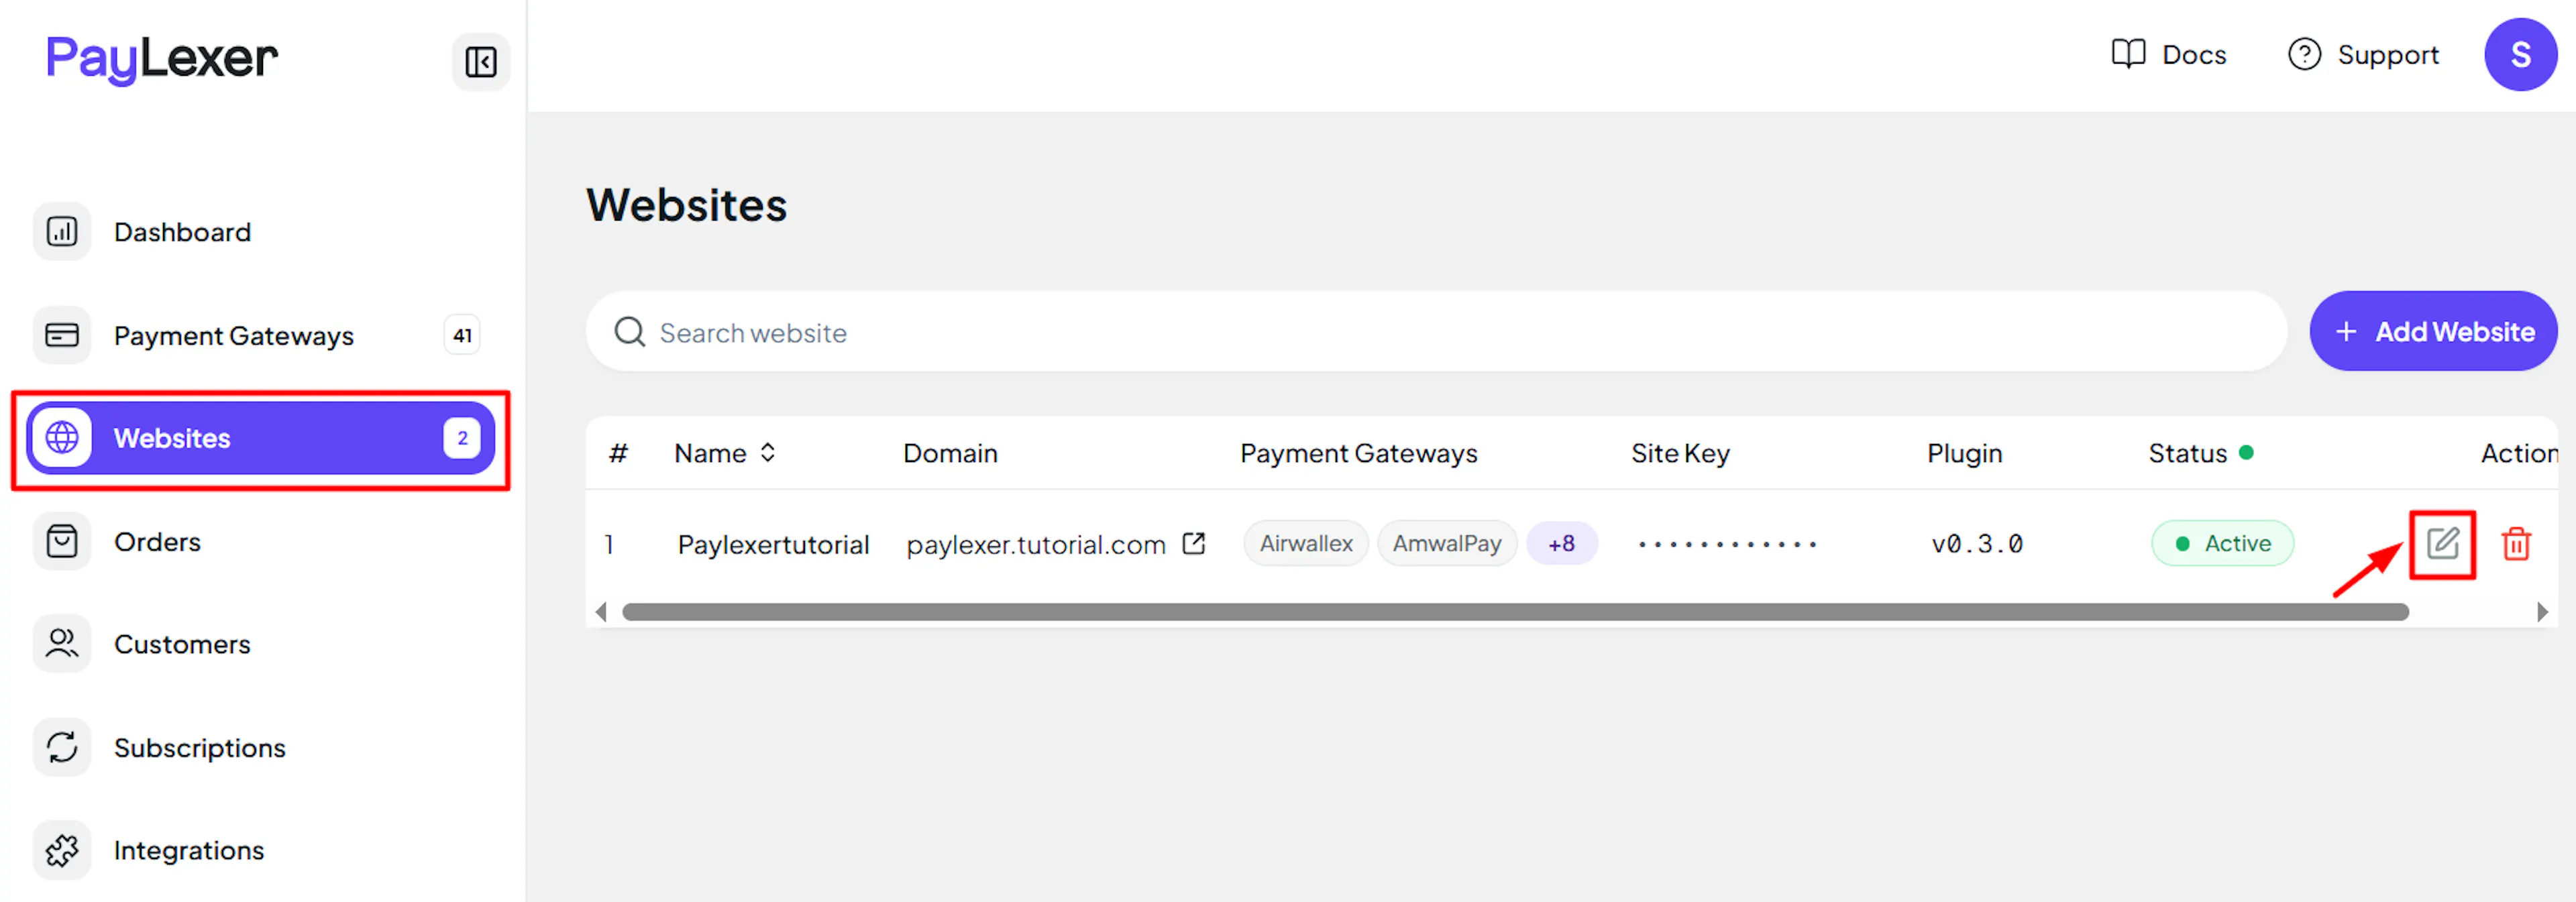
Go to Websites
Navigate to Websites in your PayLexer dashboard.
Edit your website
Click the Edit Icon of your added website.
Enable Tilled
Click the checkbox to enable Tilled for the website.
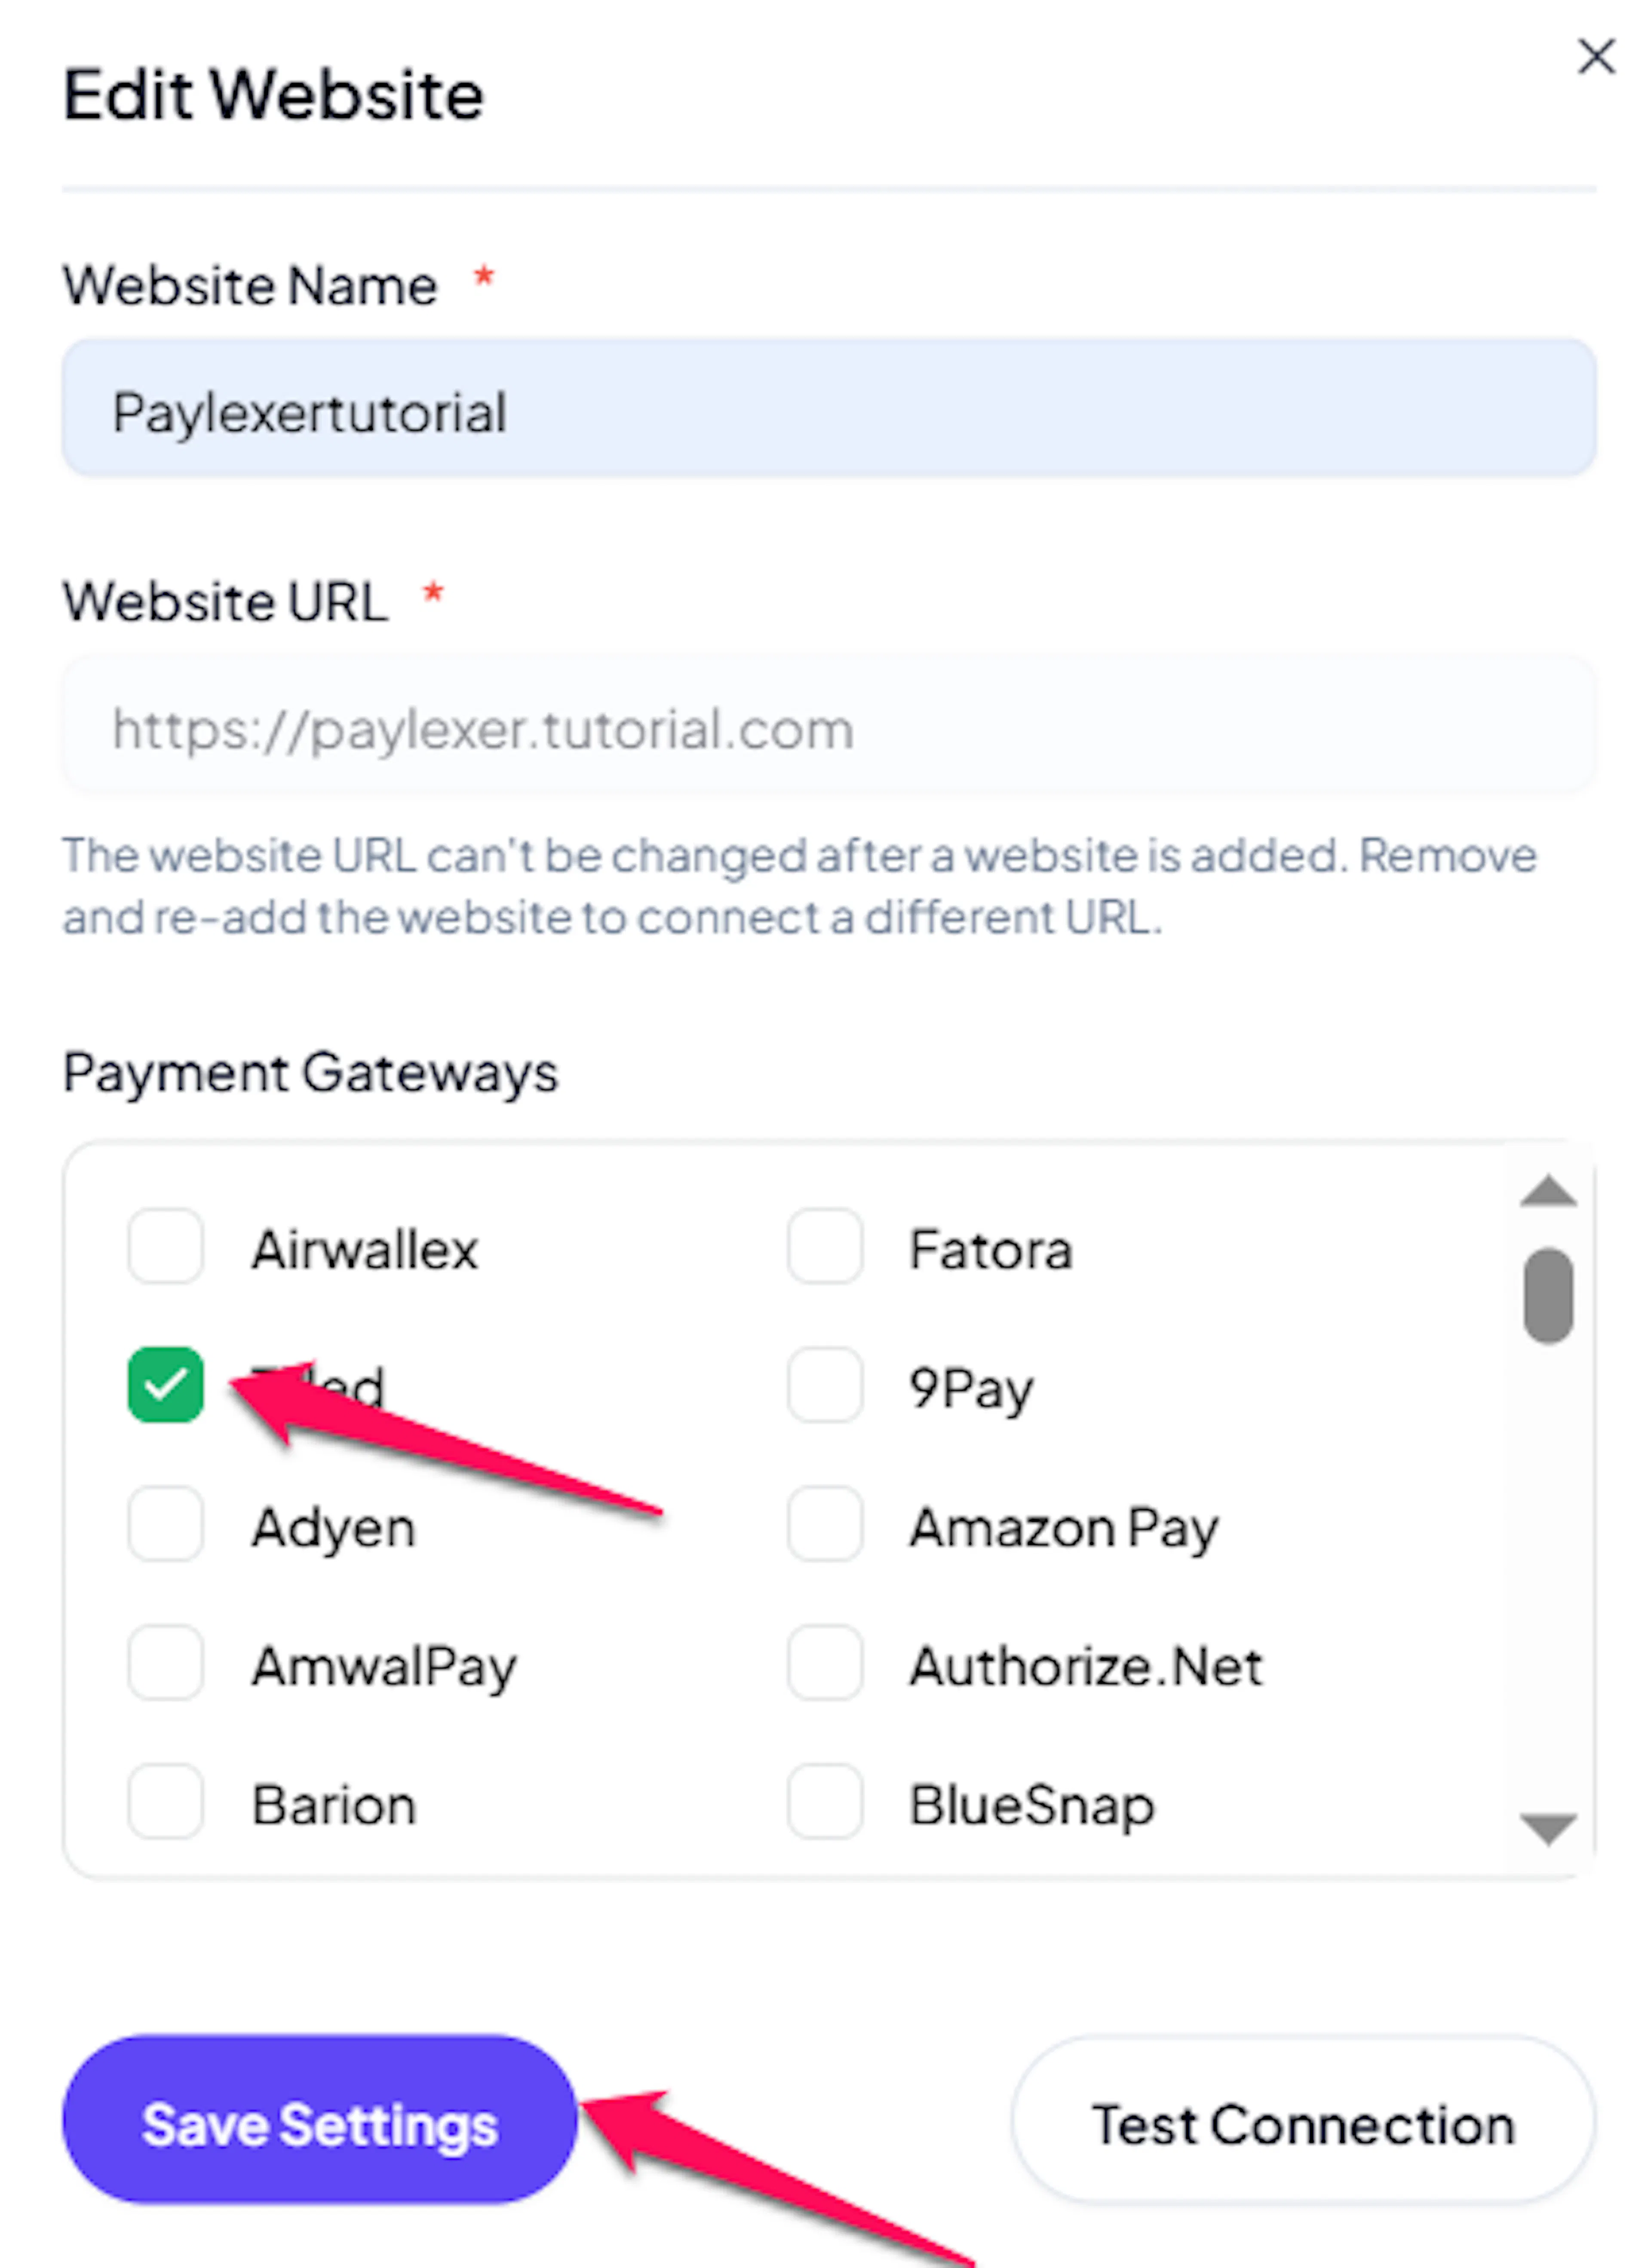
If you haven't added a website yet, Continue to Add Your Website →
Troubleshooting
Best Practices
- Test in sandbox before enabling production.
- Configure webhooks in both Sandbox and Live before going live - subscription renewals depend entirely on them.
- Keep Sandbox and Live credentials from their separate Tilled accounts and never mix one with the other's Merchant Account ID.
- If you sell subscriptions, buy one in sandbox first and confirm a renewal arrives correctly before switching to live credentials.
- Remember Tilled only bills weekly, monthly, or yearly - a daily plan is rejected before the shopper sees a card form.
- Keep your Secret Key and Webhook Signing Secret confidential, and rotate them if you suspect exposure.
FAQs
Still Have Questions?
- Tilled Support: Tilled Developer Docs
- PayLexer Support: Contact Support