

PayU
Connect PayU to PayLexer to accept cards, UPI, net banking, wallets, EMI, and other local Indian payment methods through a hosted checkout page with automatic payment status confirmation.
PayU is an India-focused payment gateway built for merchants selling to Indian shoppers. It supports cards, UPI, net banking, wallets, EMI, and other local payment methods, and PayLexer connects to PayU's hosted checkout page so shoppers enter payment details on PayU's secure page before returning to your site, with PayLexer automatically confirming the final outcome directly with PayU.
- Supported Regions (Merchant Accounts): India
- Supported Currencies: INR
This gateway appears in checkout only when the selected currency is INR.
Supported Features
- Hosted checkout page for cards, UPI, net banking, wallets, EMI, and other local Indian payment methods
- Automatic payment status polling that checks directly with PayU shortly after checkout, so orders resolve to the correct final state without manual follow-up
- Reliable payment status updates, safe against duplicate status checks
Before You Start
Make sure you have:
- PayU Account – Don't have one? Sign up for PayU →
- PayLexer Account – Required to configure the integration. Create your account →
- A website where you want to integrate
Looking for a different payment processor? View all supported gateways →
Configuring PayU
You need a Merchant Key and Salt from PayU for this integration.
Getting API Credentials
Open the PayU Dashboard
Log in to your PayU Dashboard.
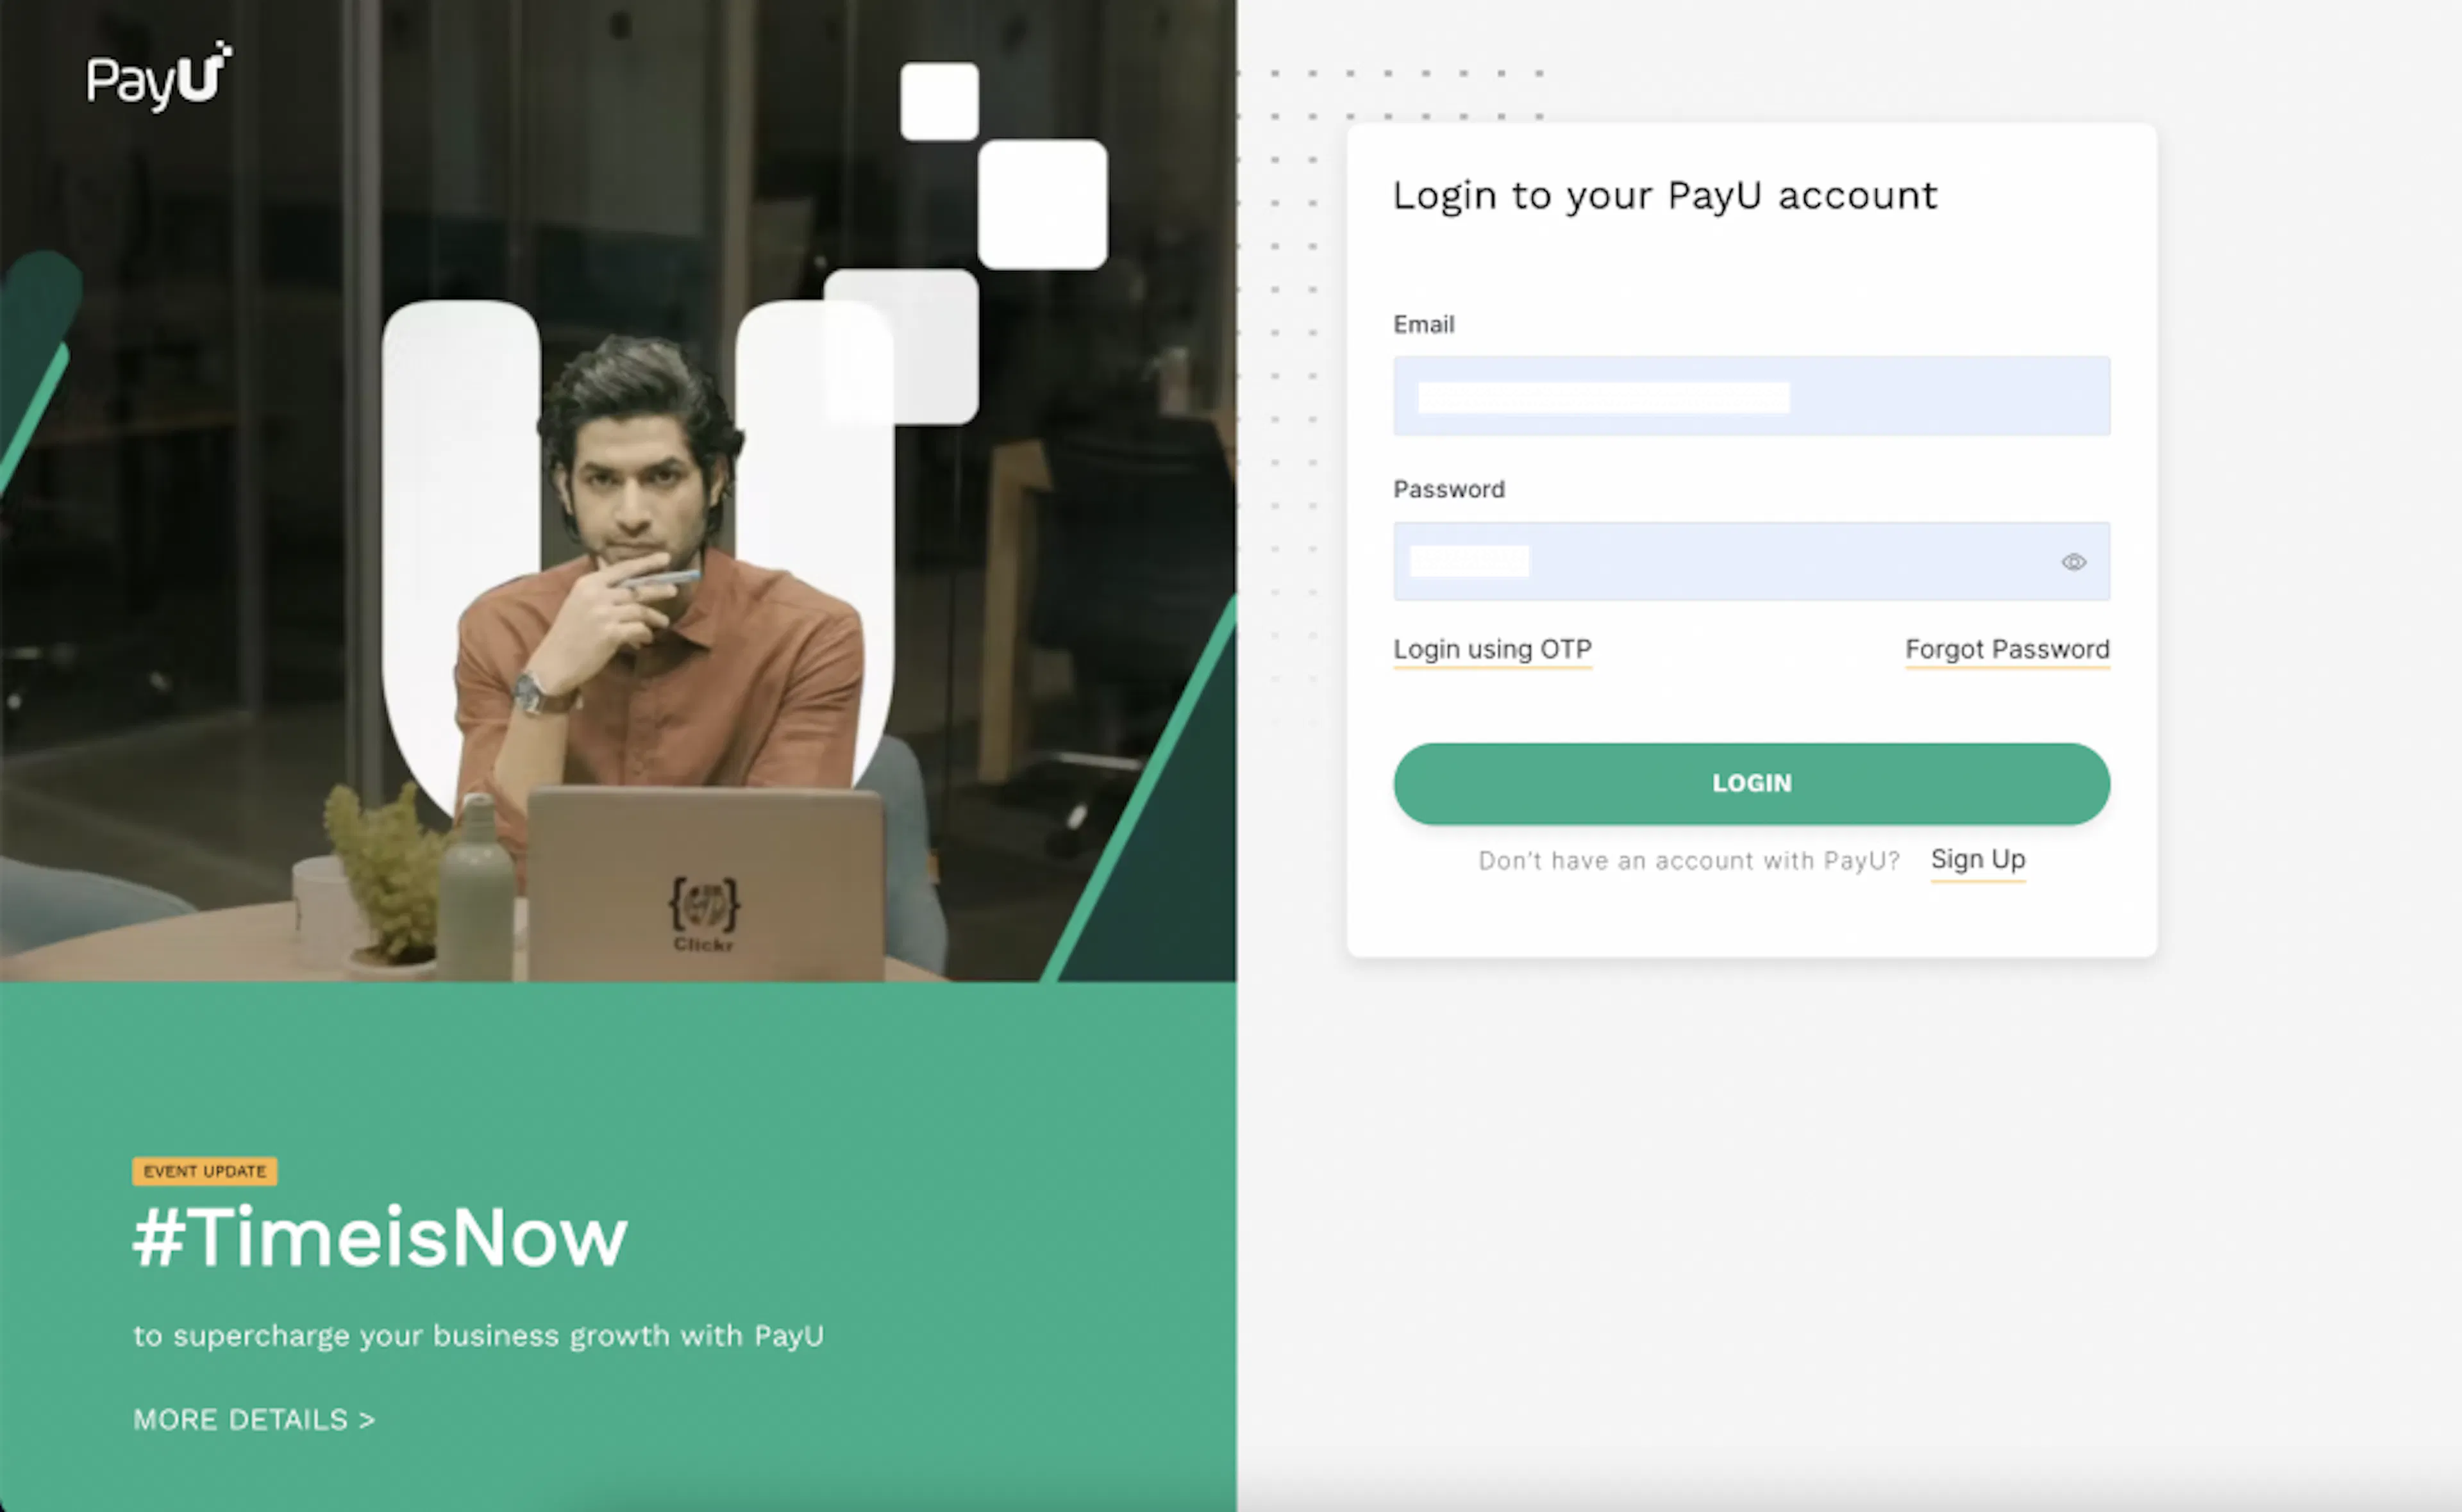
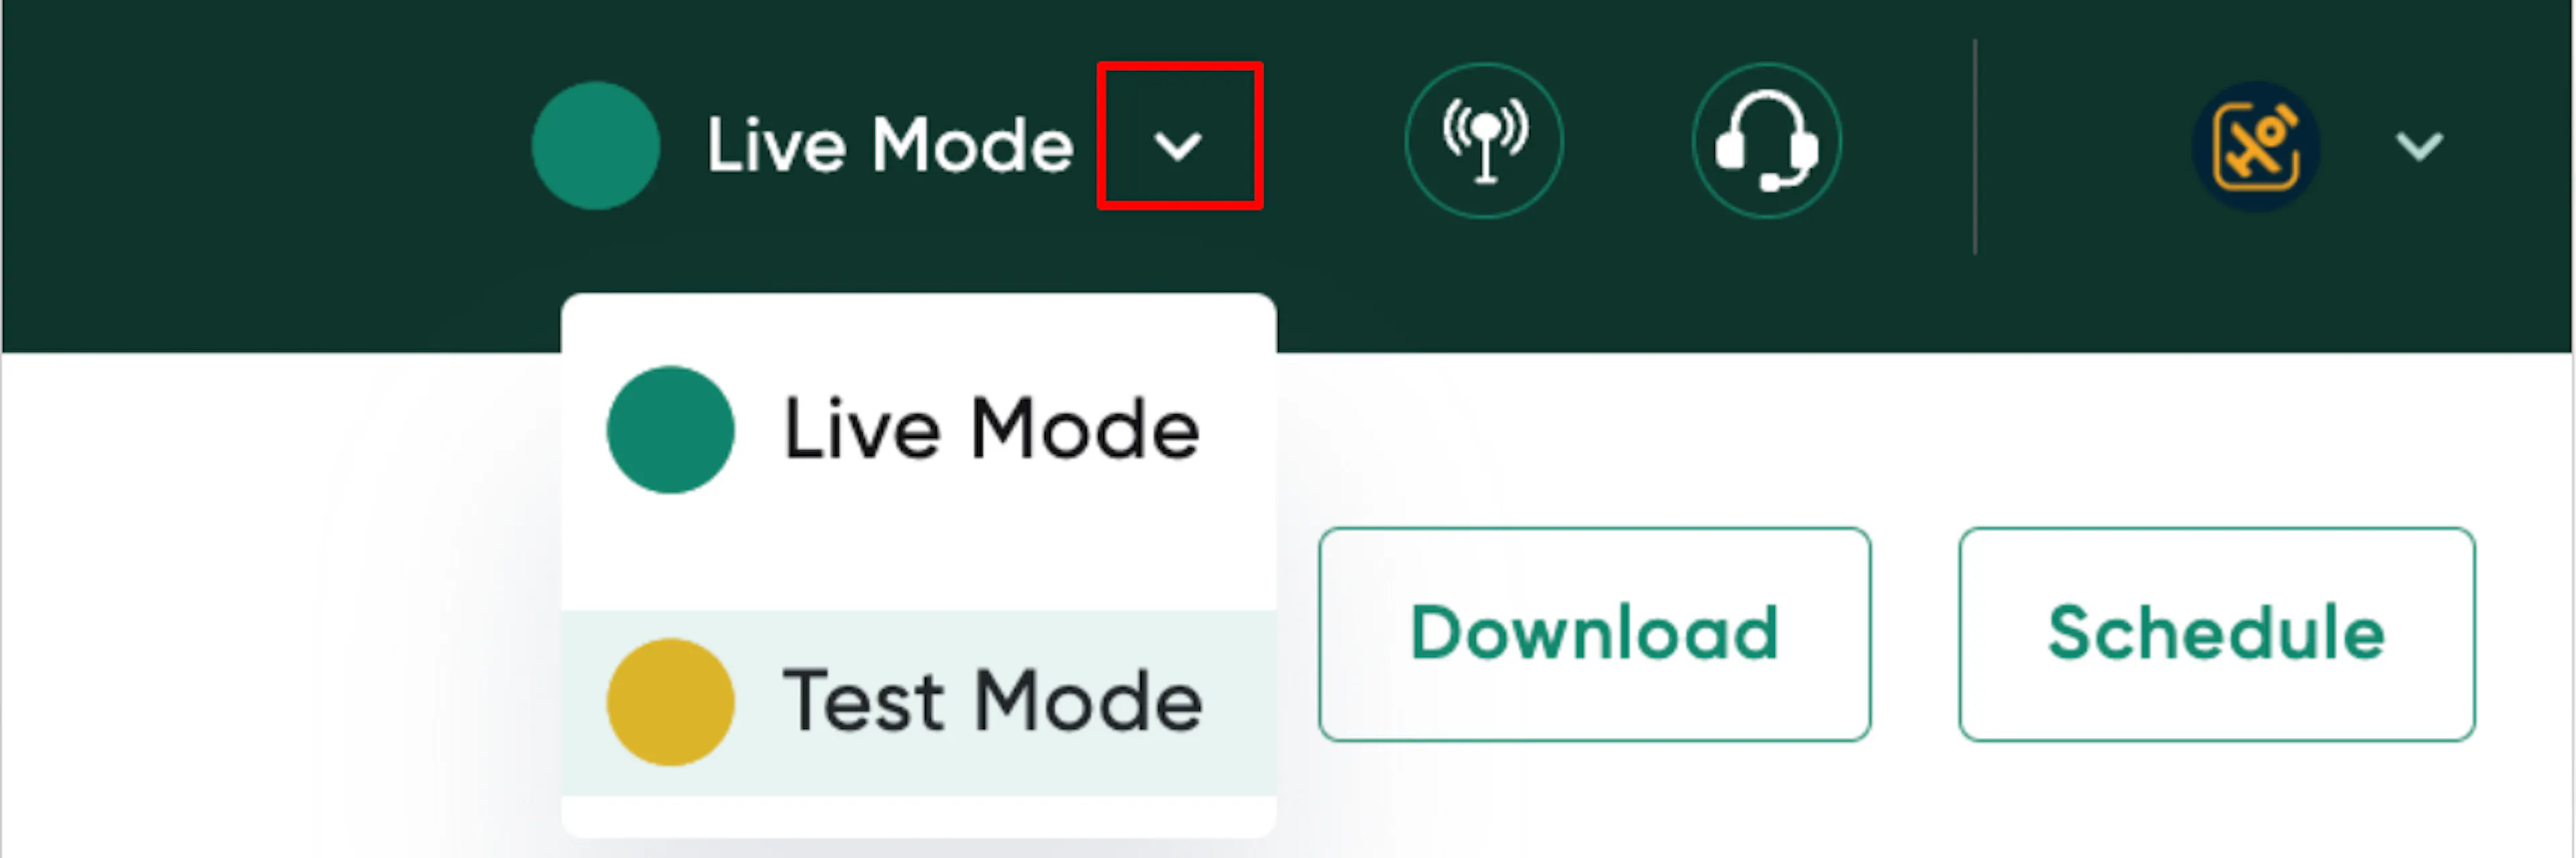
Switch to the environment you need
Use the toggle on the menu bar to switch to Live Mode for production credentials, or Test Mode for sandbox credentials.
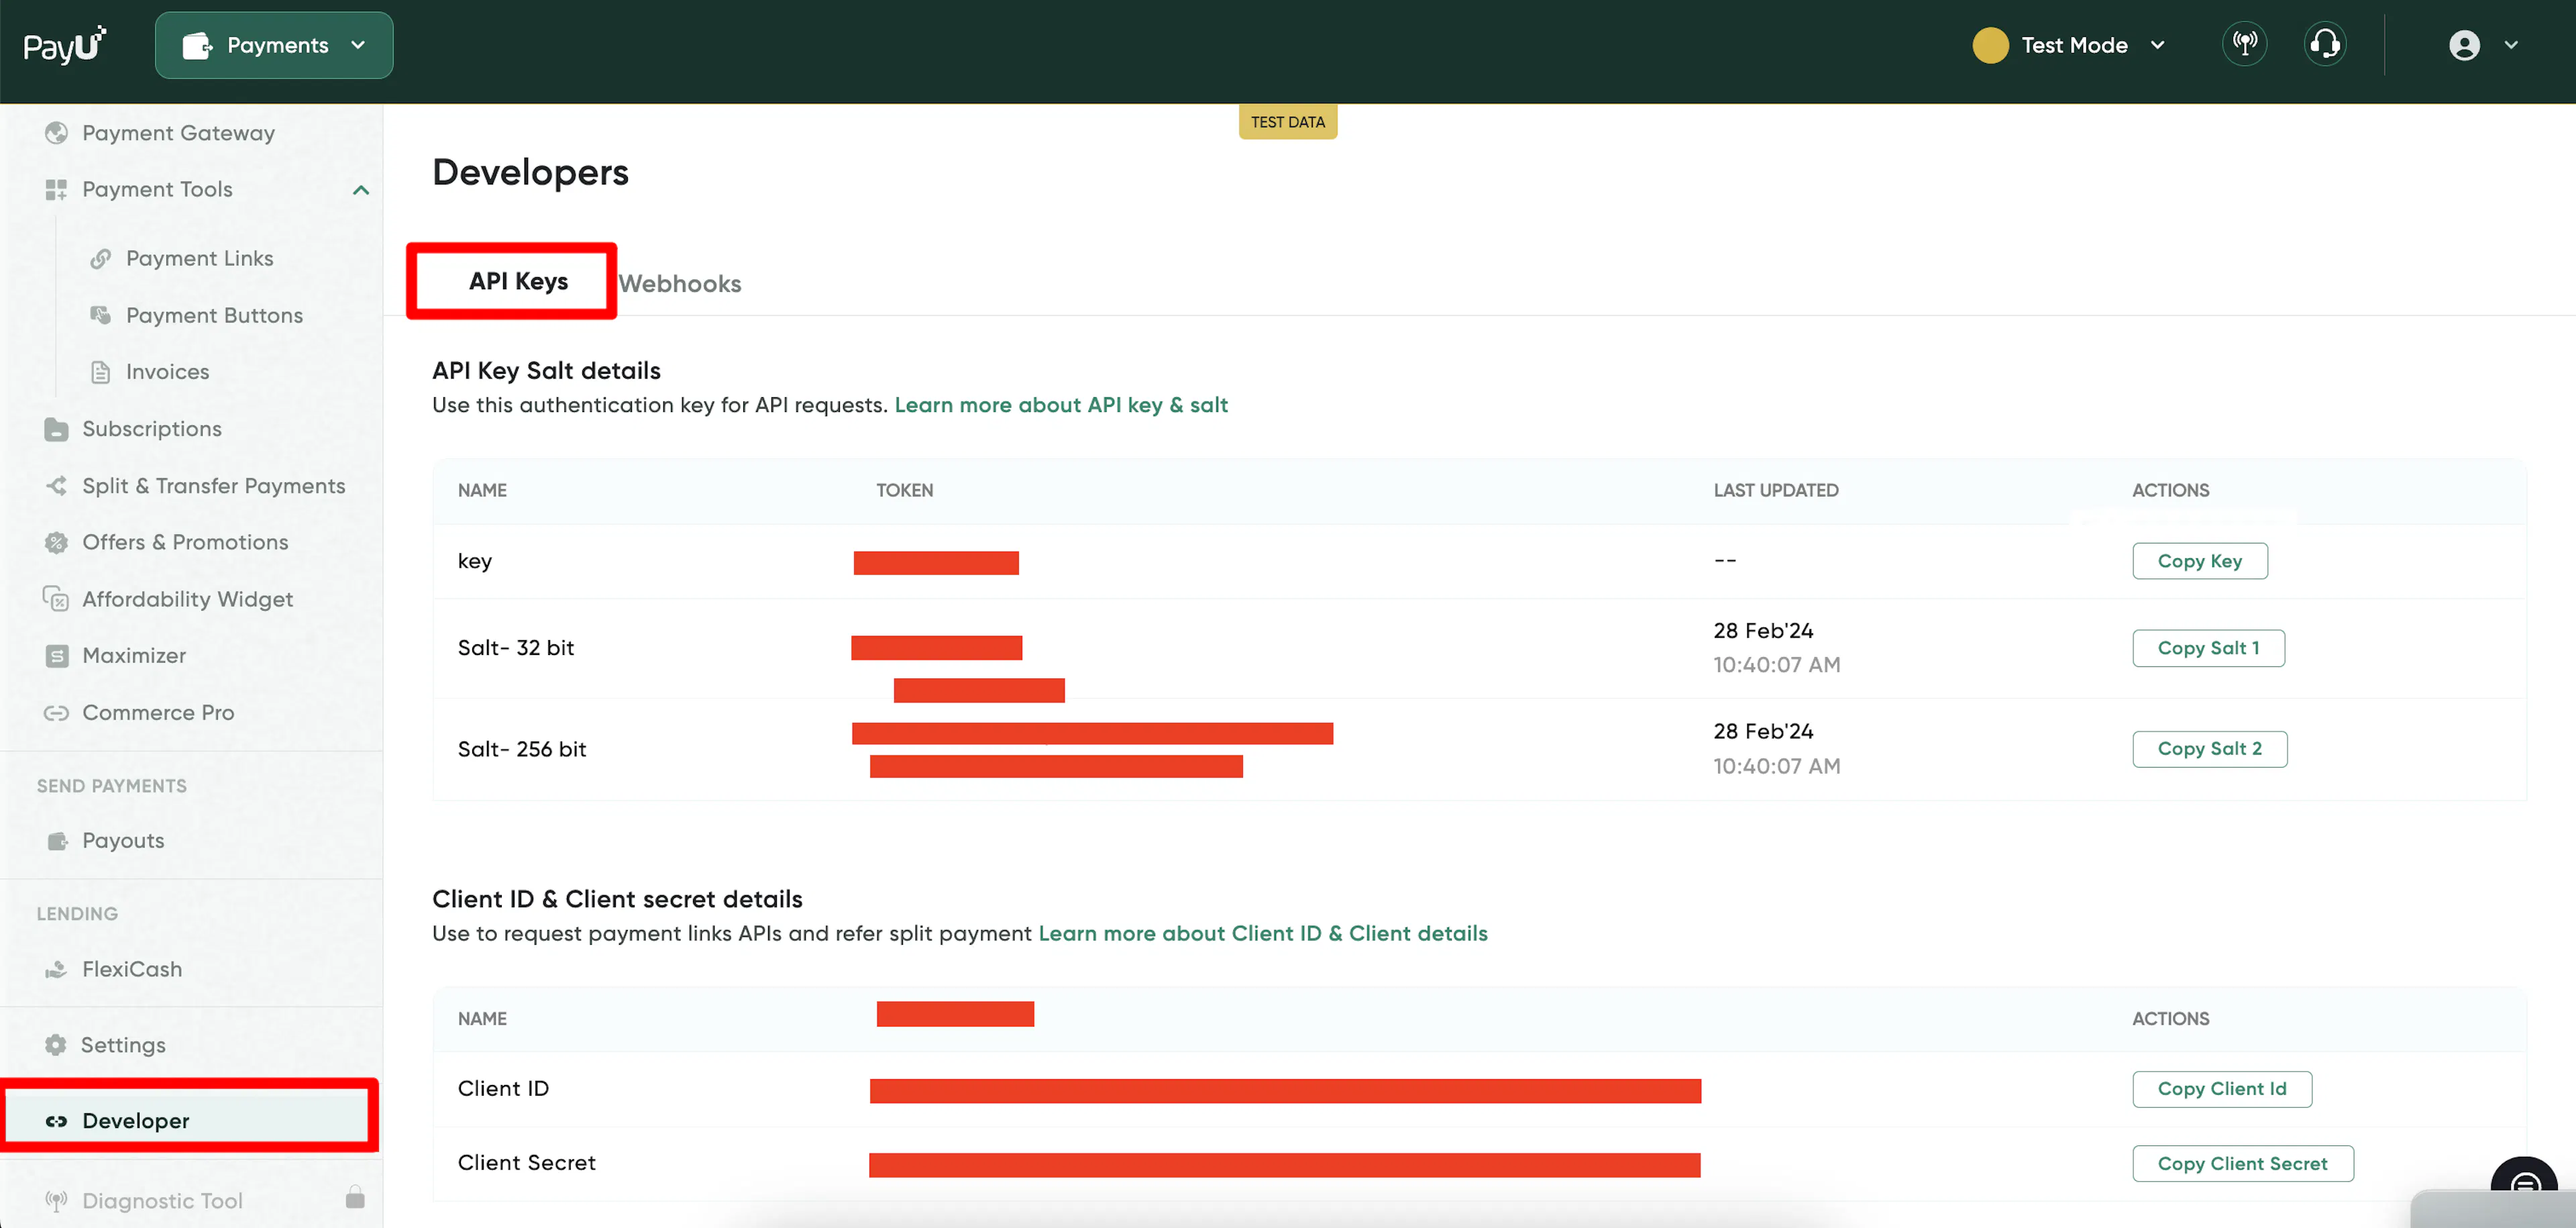
Open Developer settings
Select Developer from the left-hand menu, then open the API Details tab (Live Mode) or API Keys tab (Test Mode).
Copy your Key and Salt
Use the Copy Key and Copy Salt buttons to copy the Key and Salt-32 bit value. Repeat these steps for the other environment to collect both Live and Test credentials.
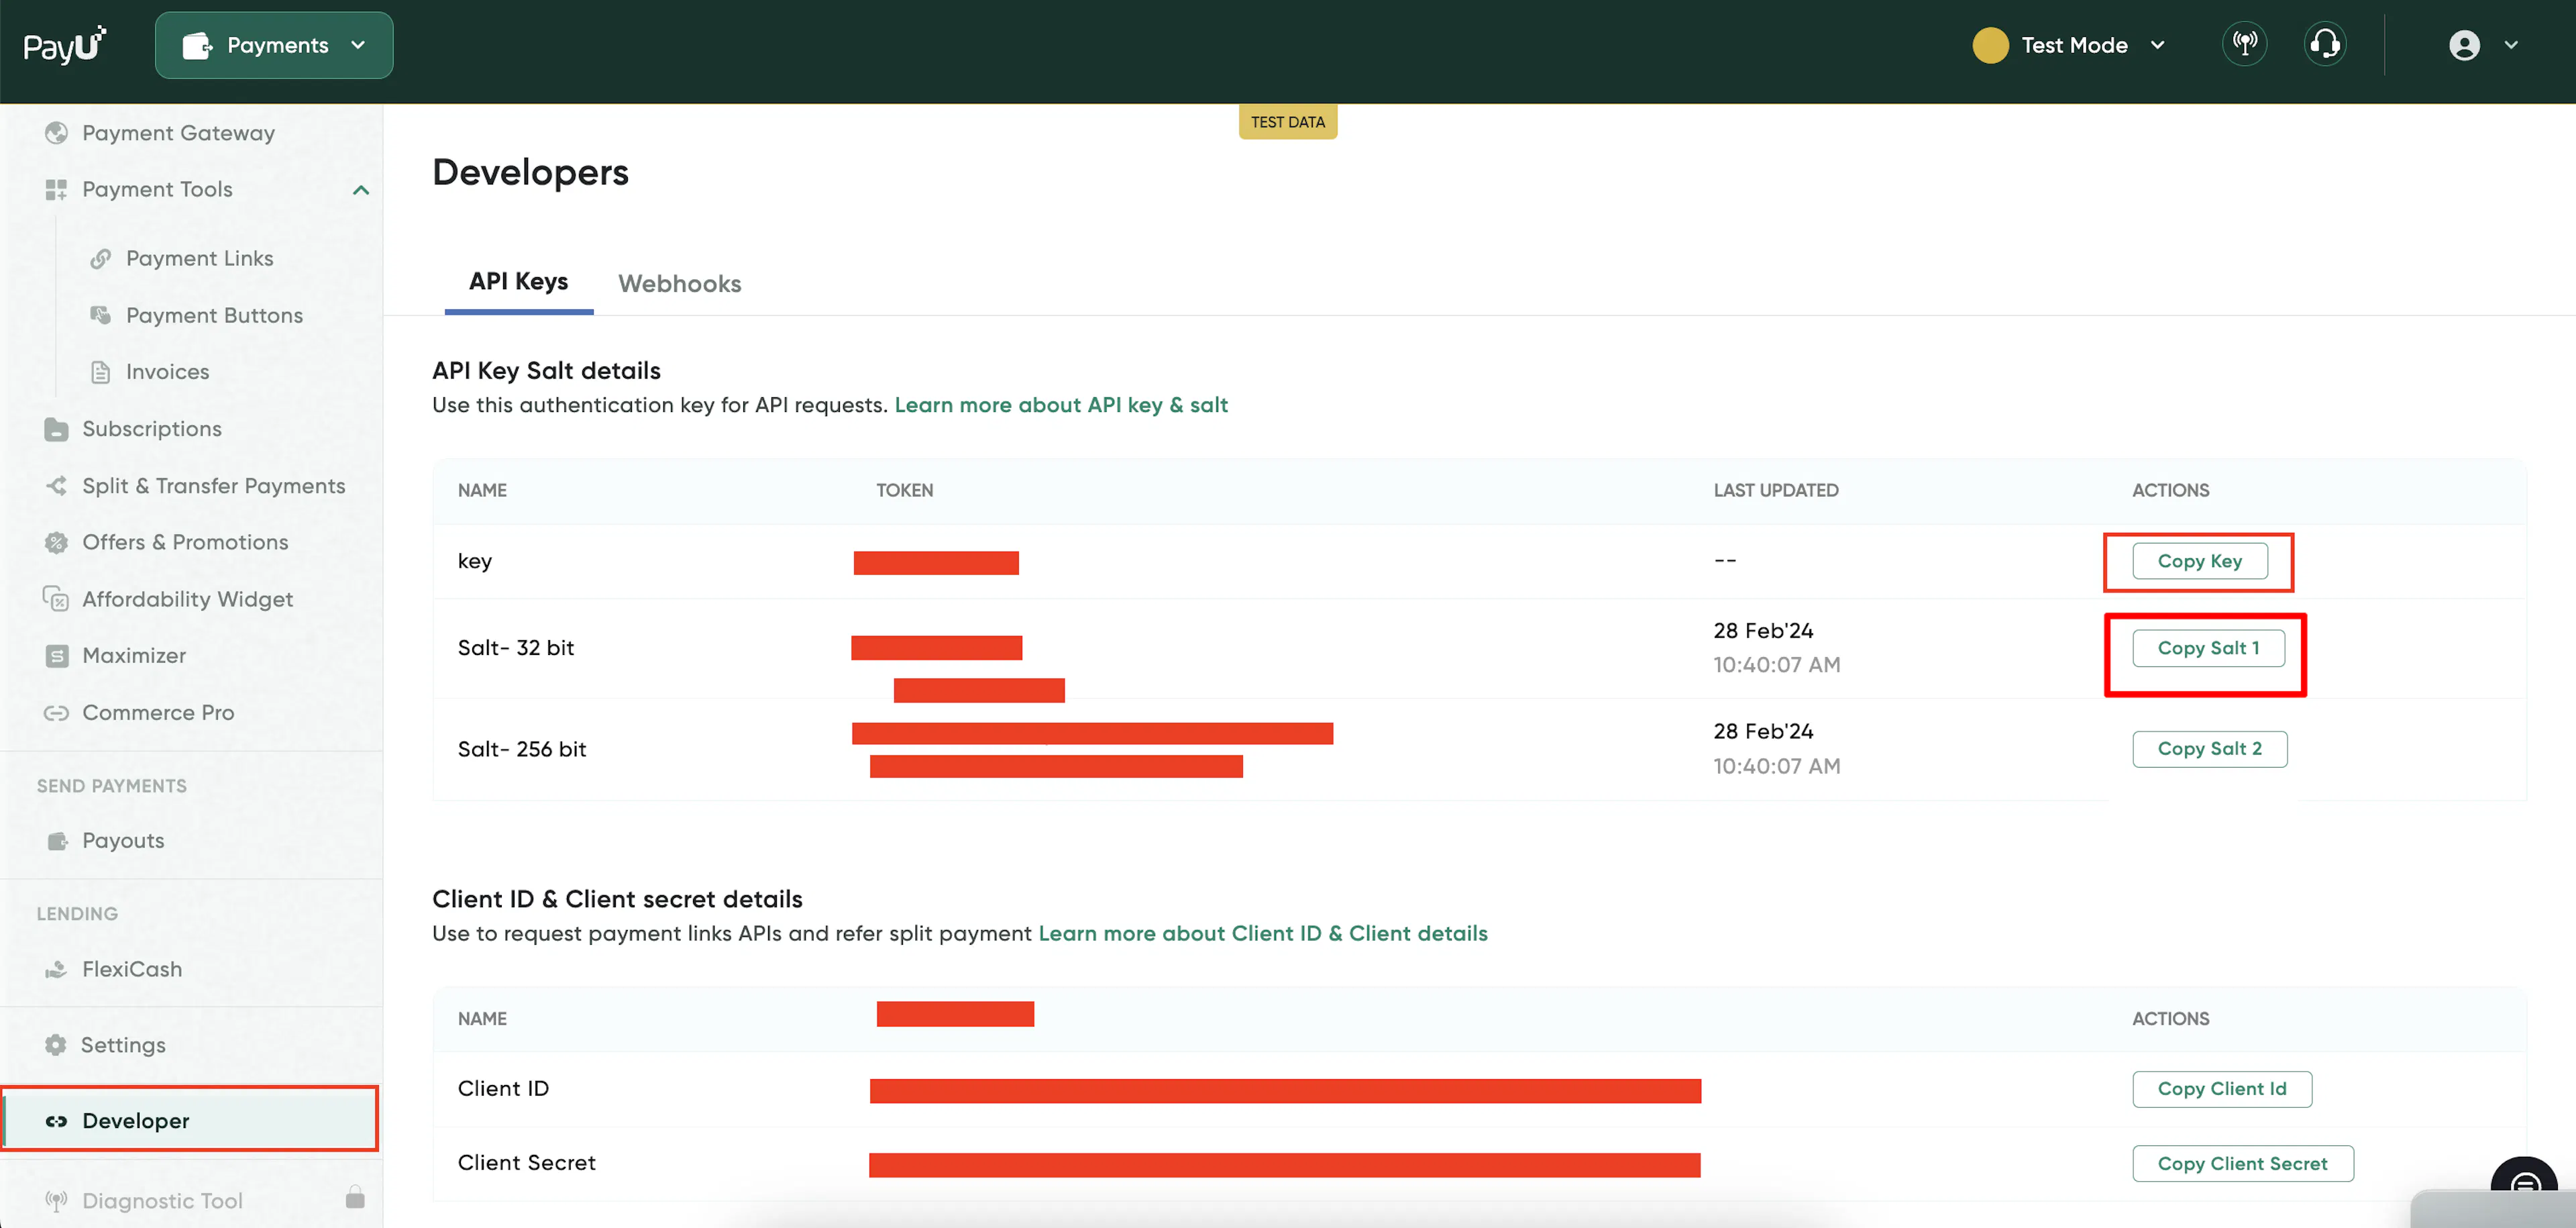
Test Key and Salt are available as soon as you sign up. Live Key and Salt only become visible once PayU has verified your account and website, which typically takes 1-2 business days.
Adding Credentials to PayLexer
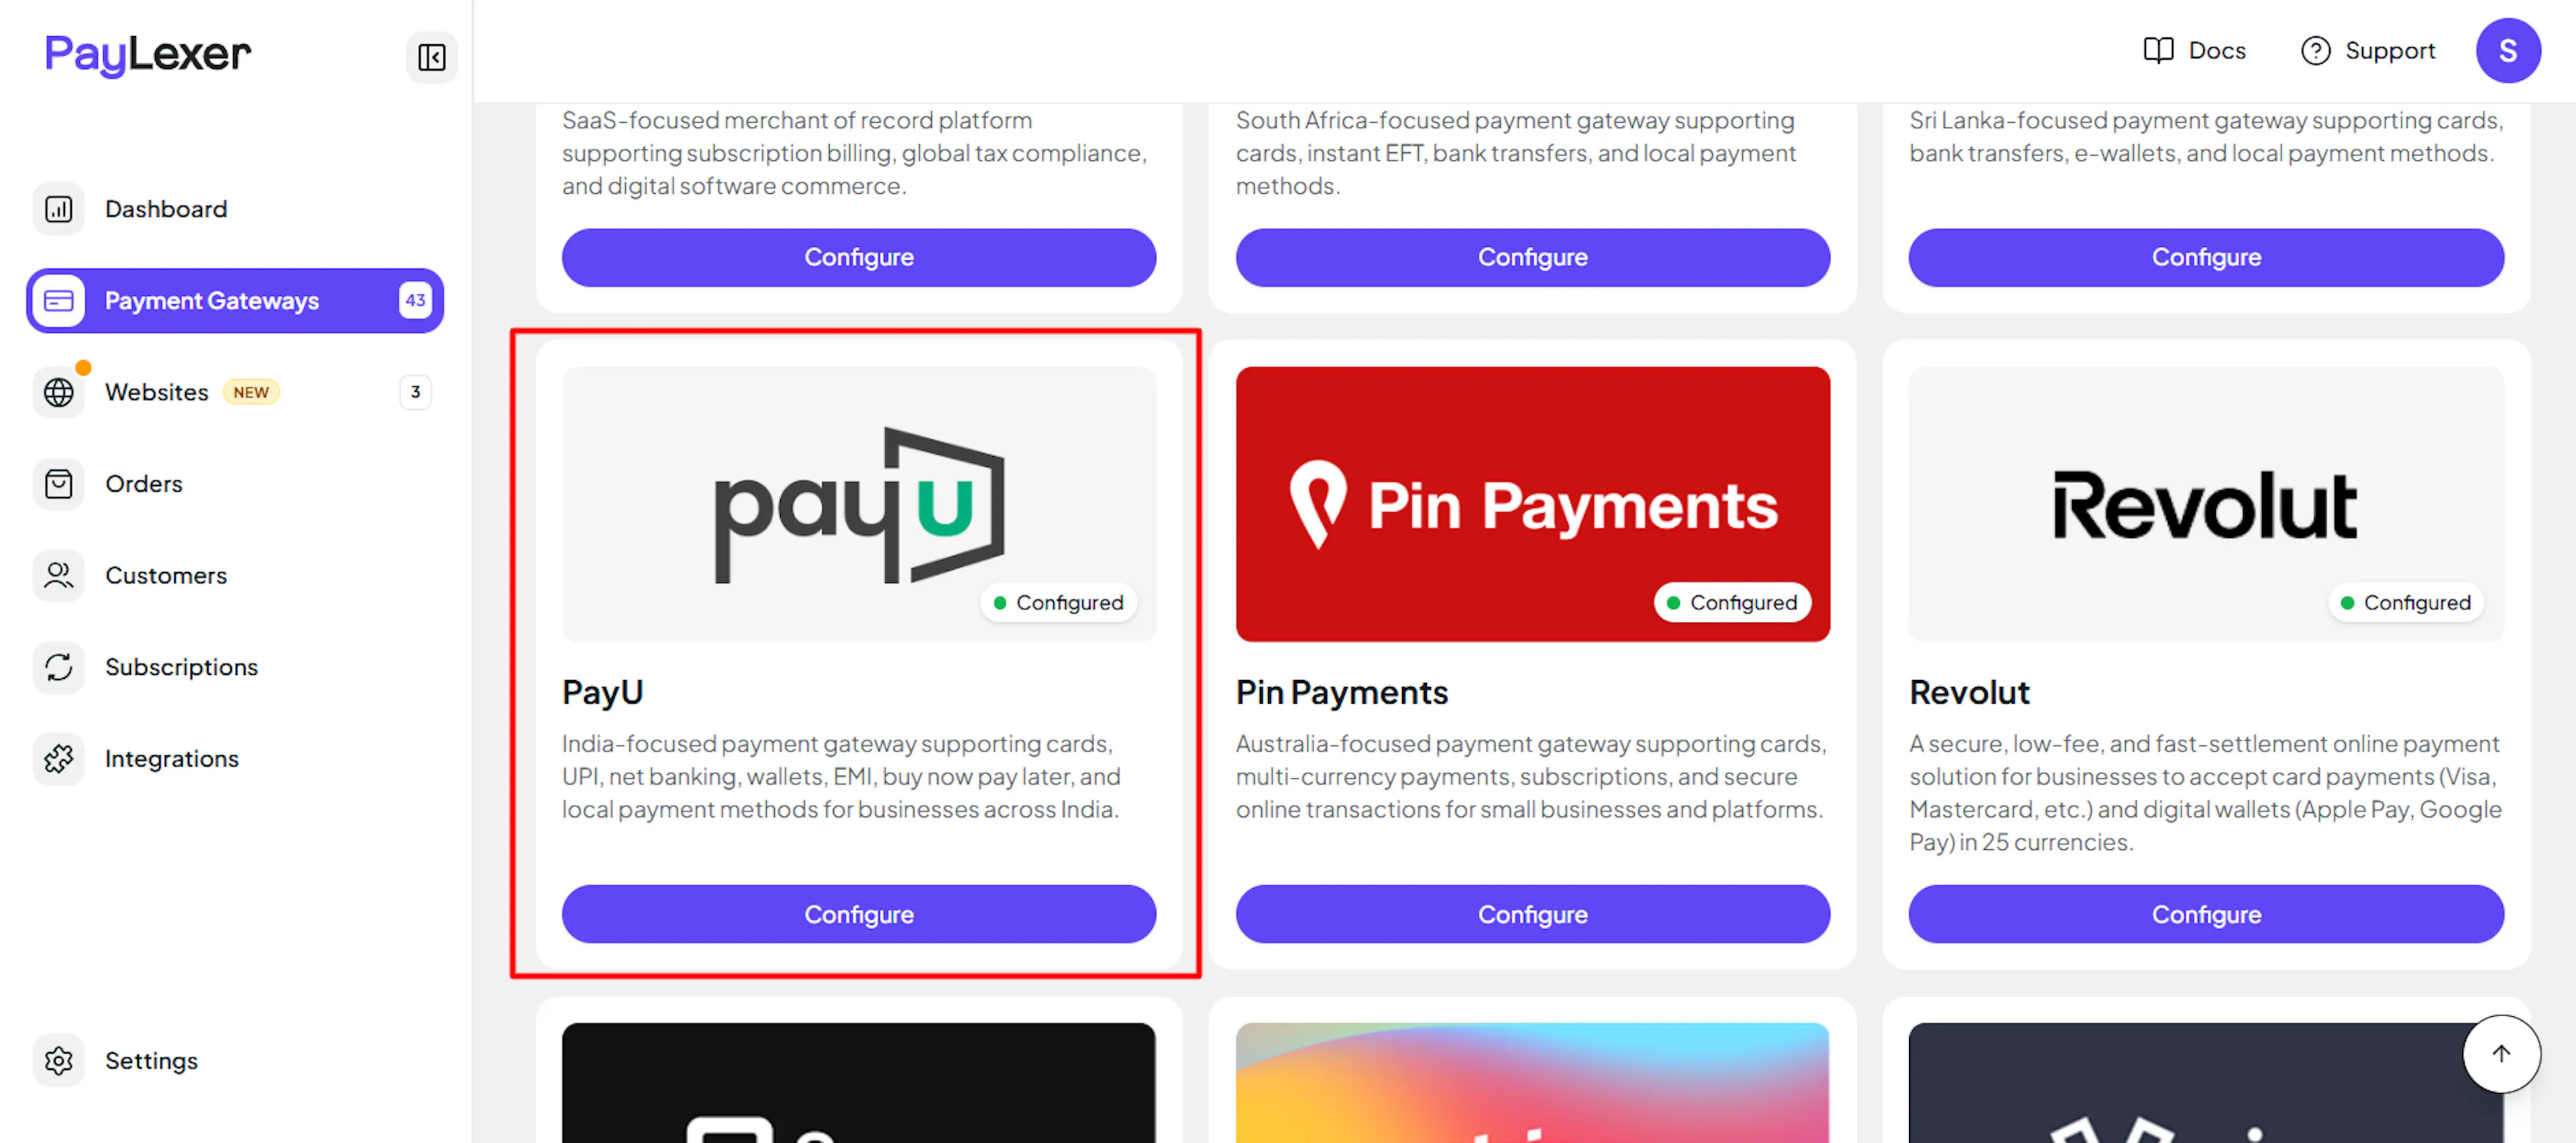
Open PayLexer Dashboard
Log in to your PayLexer dashboard and navigate to Payment Gateways -> PayU.
Enter your credentials
Paste the Merchant Key and Salt you copied from PayU.
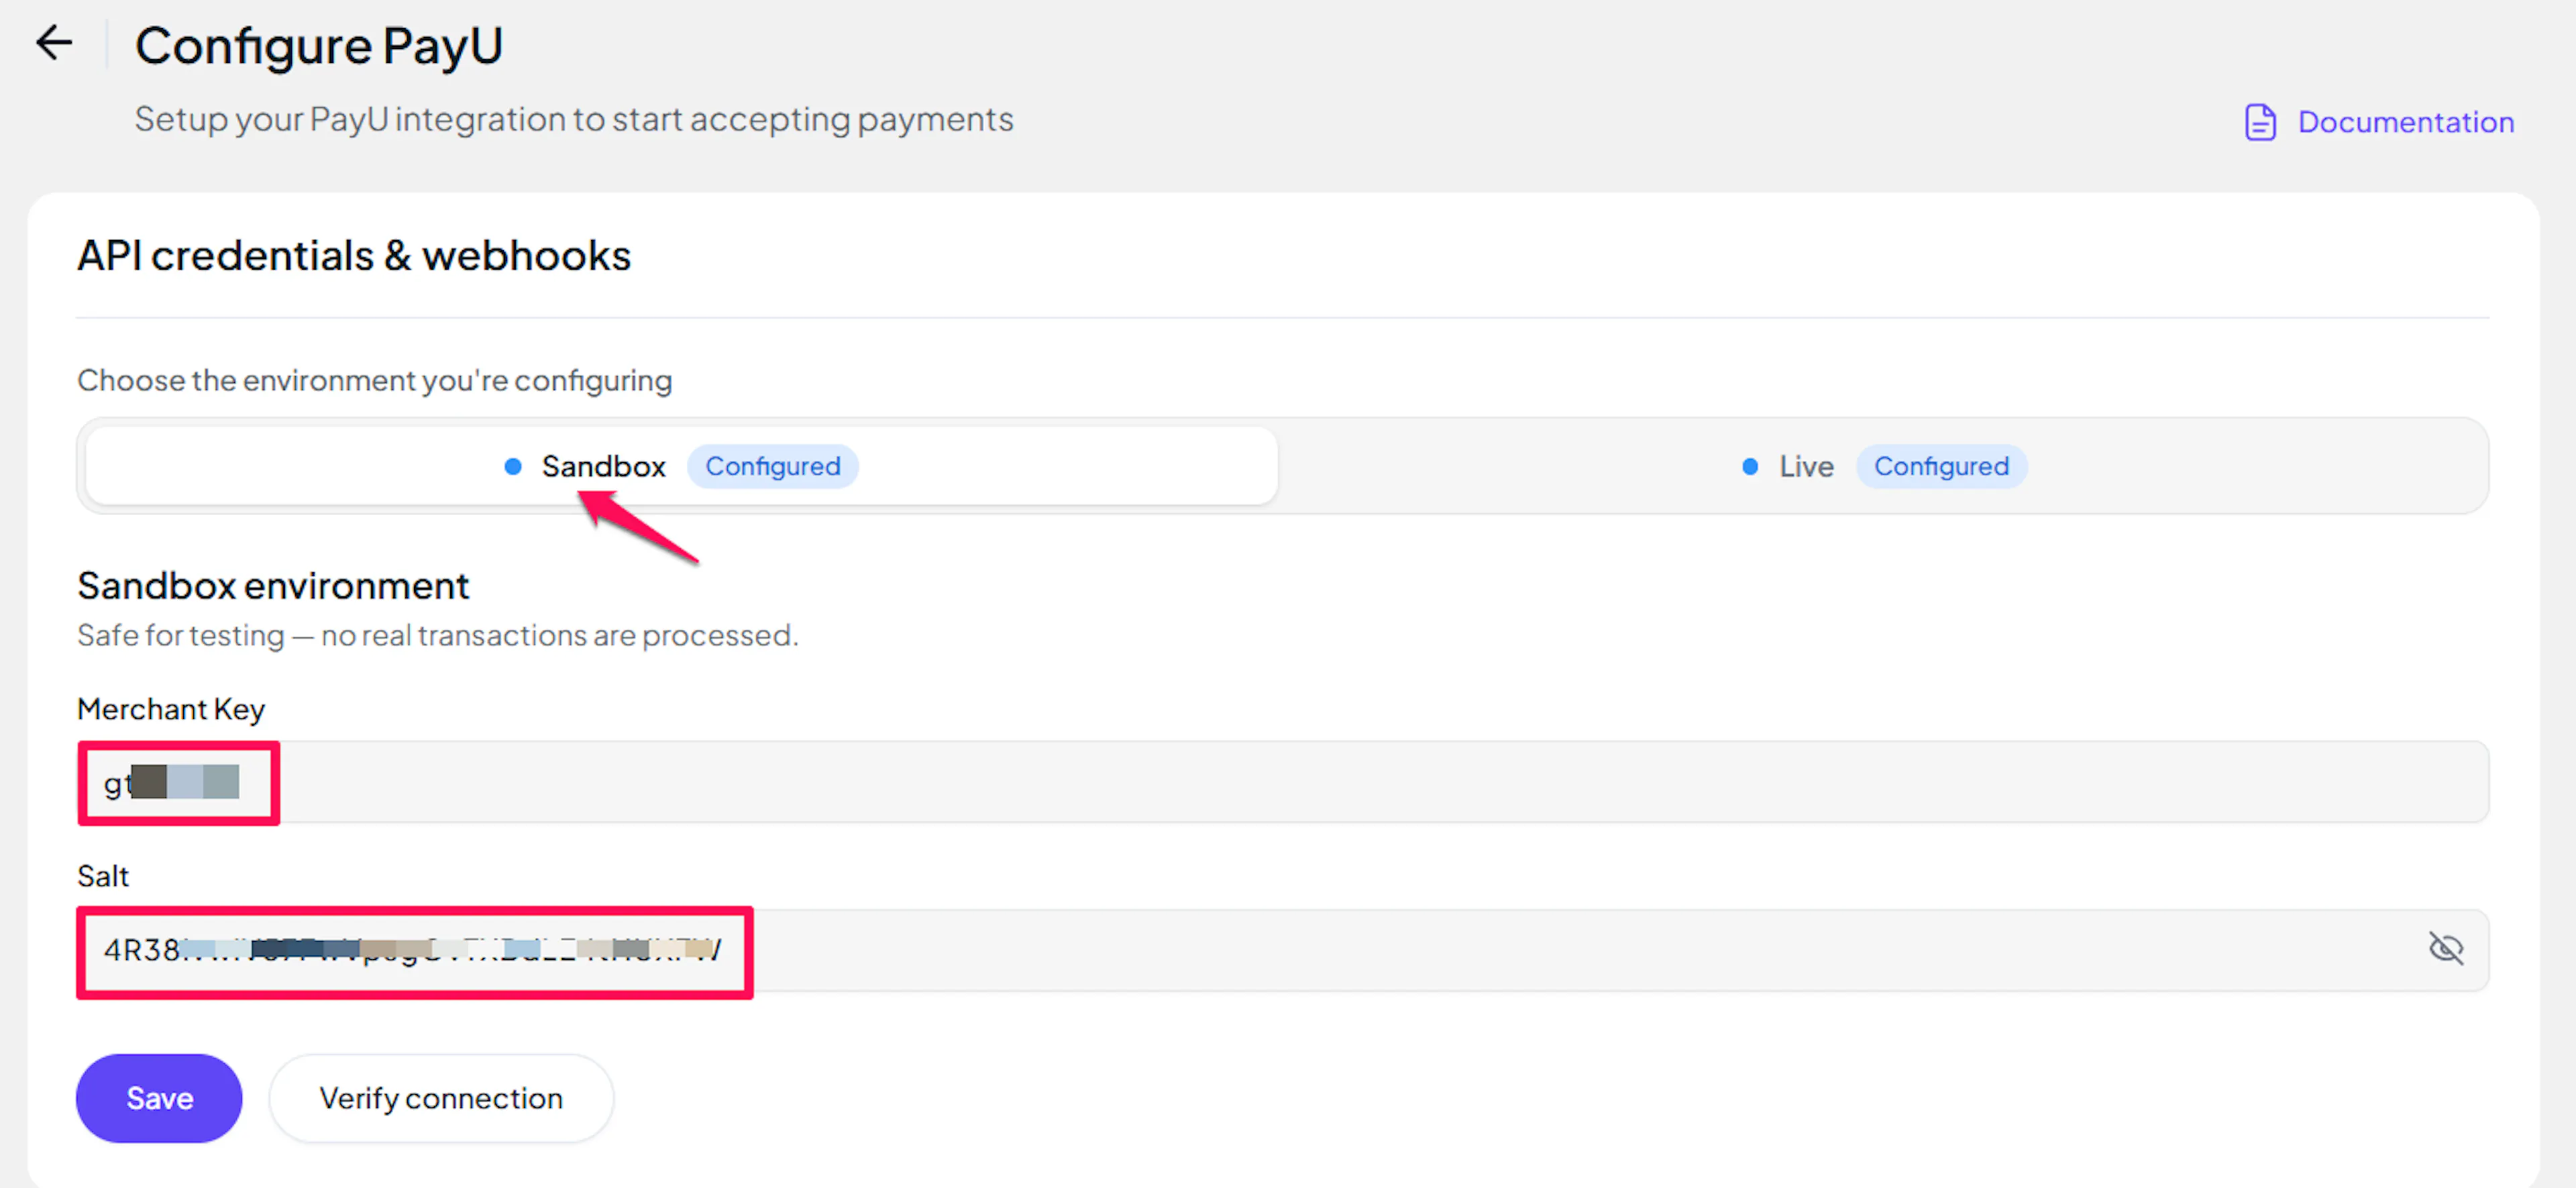
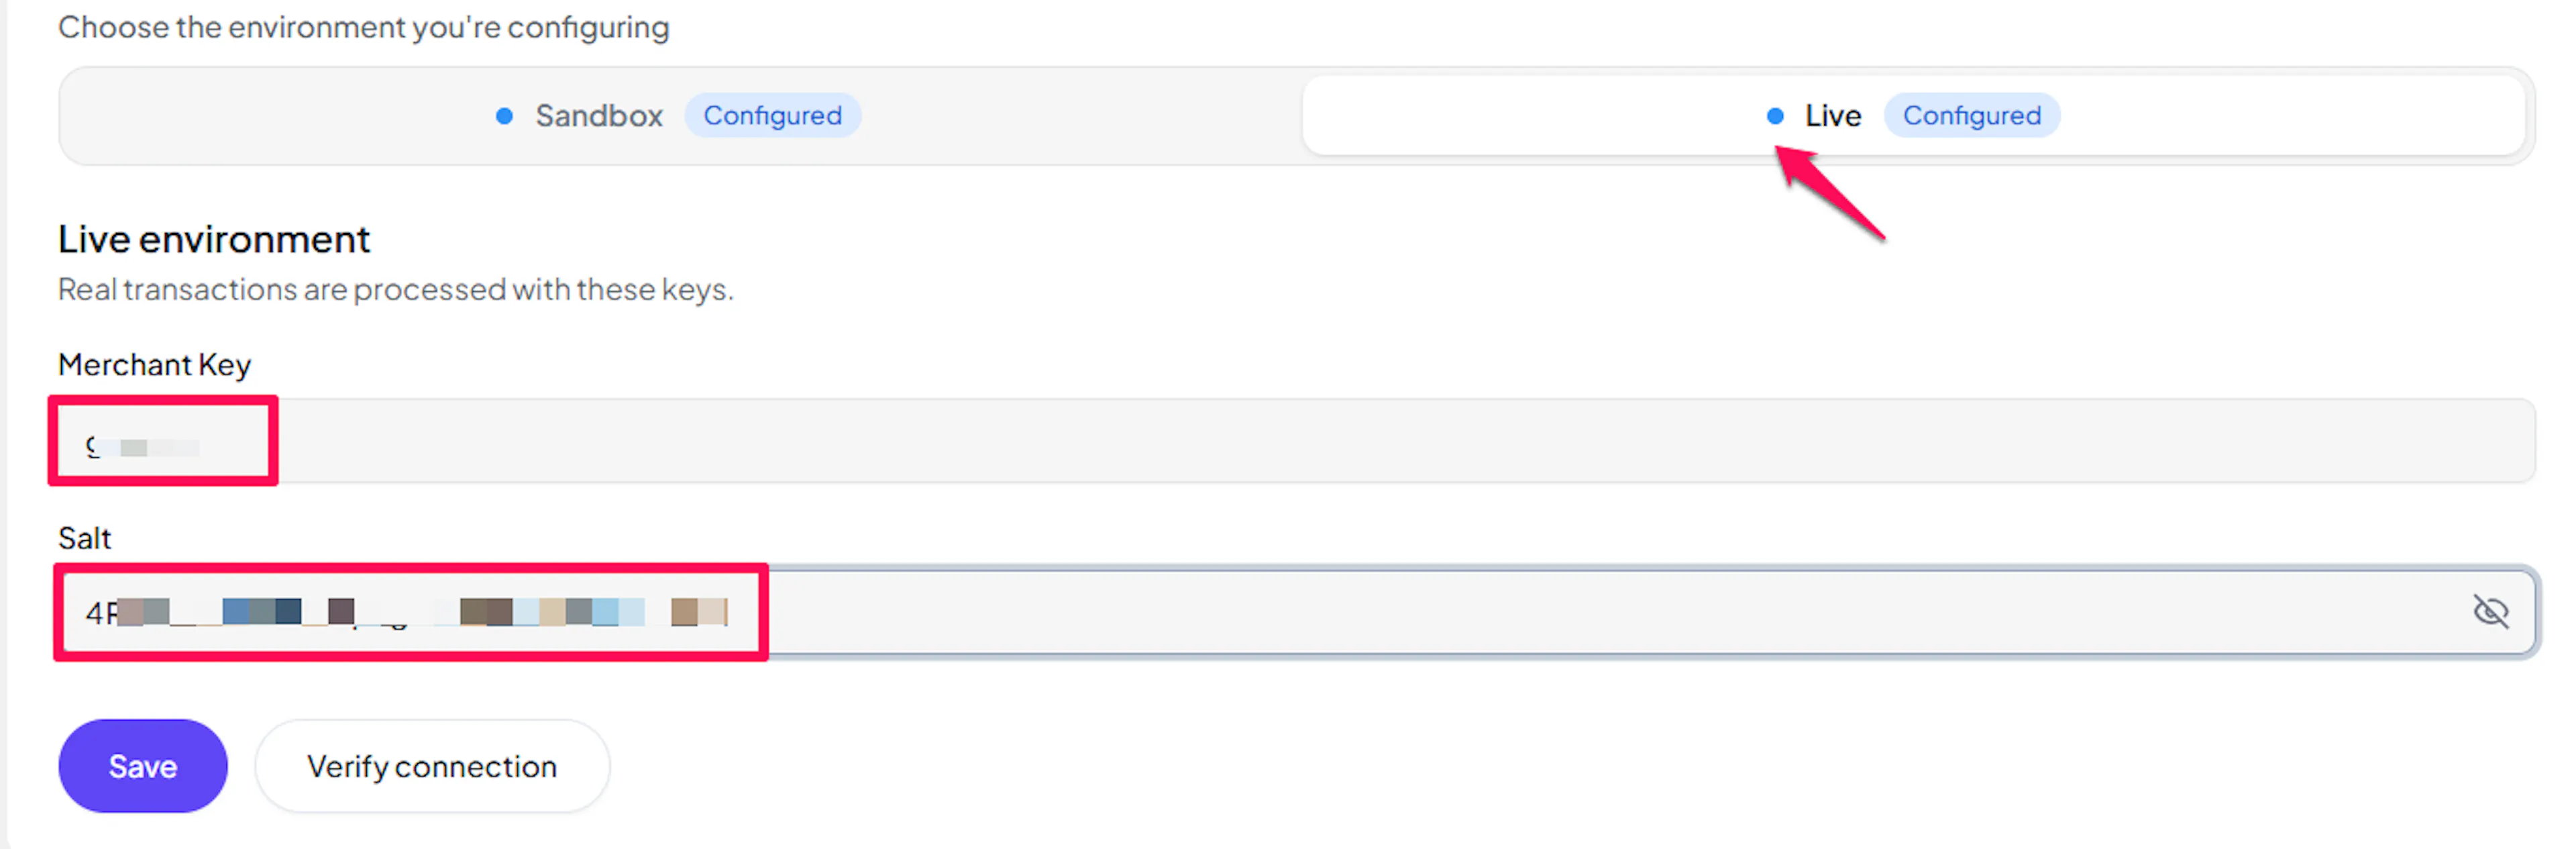
Understanding Live/Production and Sandbox Settings:
| Environment | Purpose |
|---|---|
| Live / Production (Mandatory) | Used for real transactions. Cannot be empty, even when testing. |
| Test / Sandbox (Optional) | Used for testing only. No real money is processed. |
How PayLexer selects credentials:
- Debug/Test mode ON → Test credentials are used
- Debug/Test mode OFF → Live credentials are used
Test and save
Click Test Connection to verify your credentials, then click Save Configuration.
PayU has no way to verify a Merchant Key and Salt ahead of time. Test Connection only confirms that both fields are filled in - your credentials are only proven correct the first time a real checkout is attempted.
Payment Confirmation
Payment status updates require no separate setup. PayLexer automatically checks the payment status directly with PayU shortly after checkout using the same Merchant Key and Salt you already entered above.
If a payment is still awaiting confirmation after checkout, PayLexer automatically re-checks its status with PayU shortly afterward, so the order still resolves to the correct final state.
Integrate PayU to Your Website
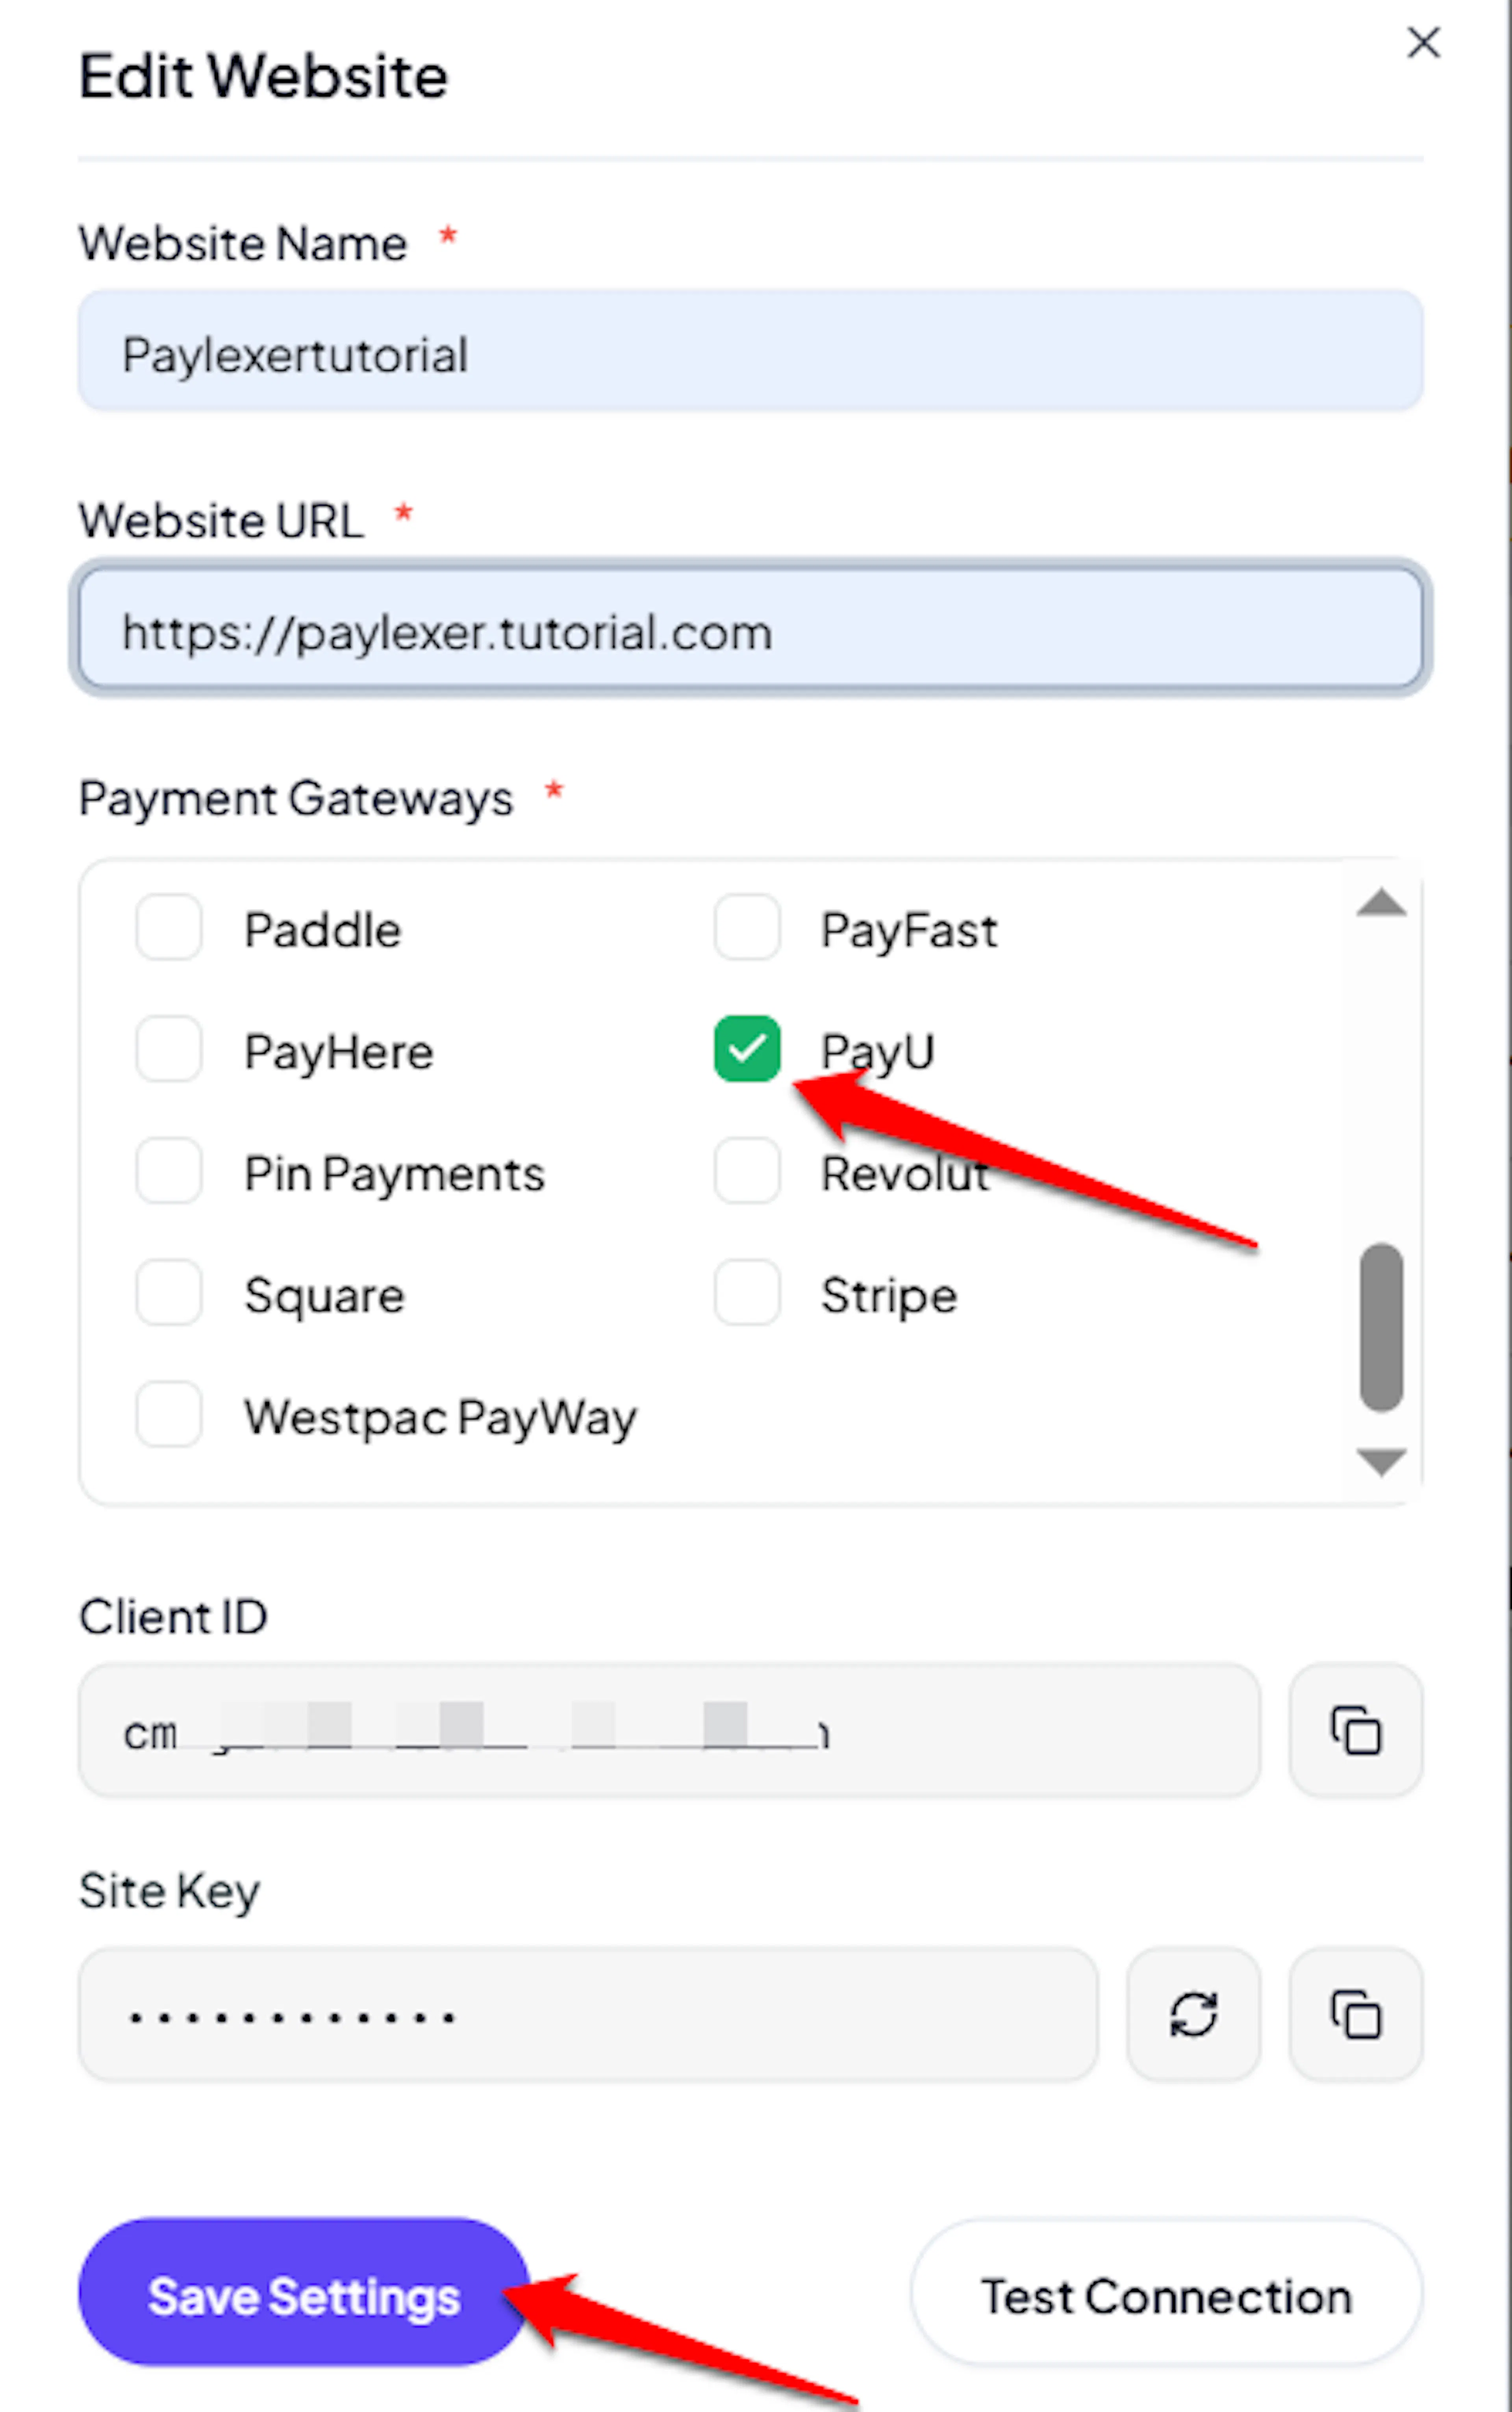
If you have already added and configured your site, you can enable PayU in your existing setup.
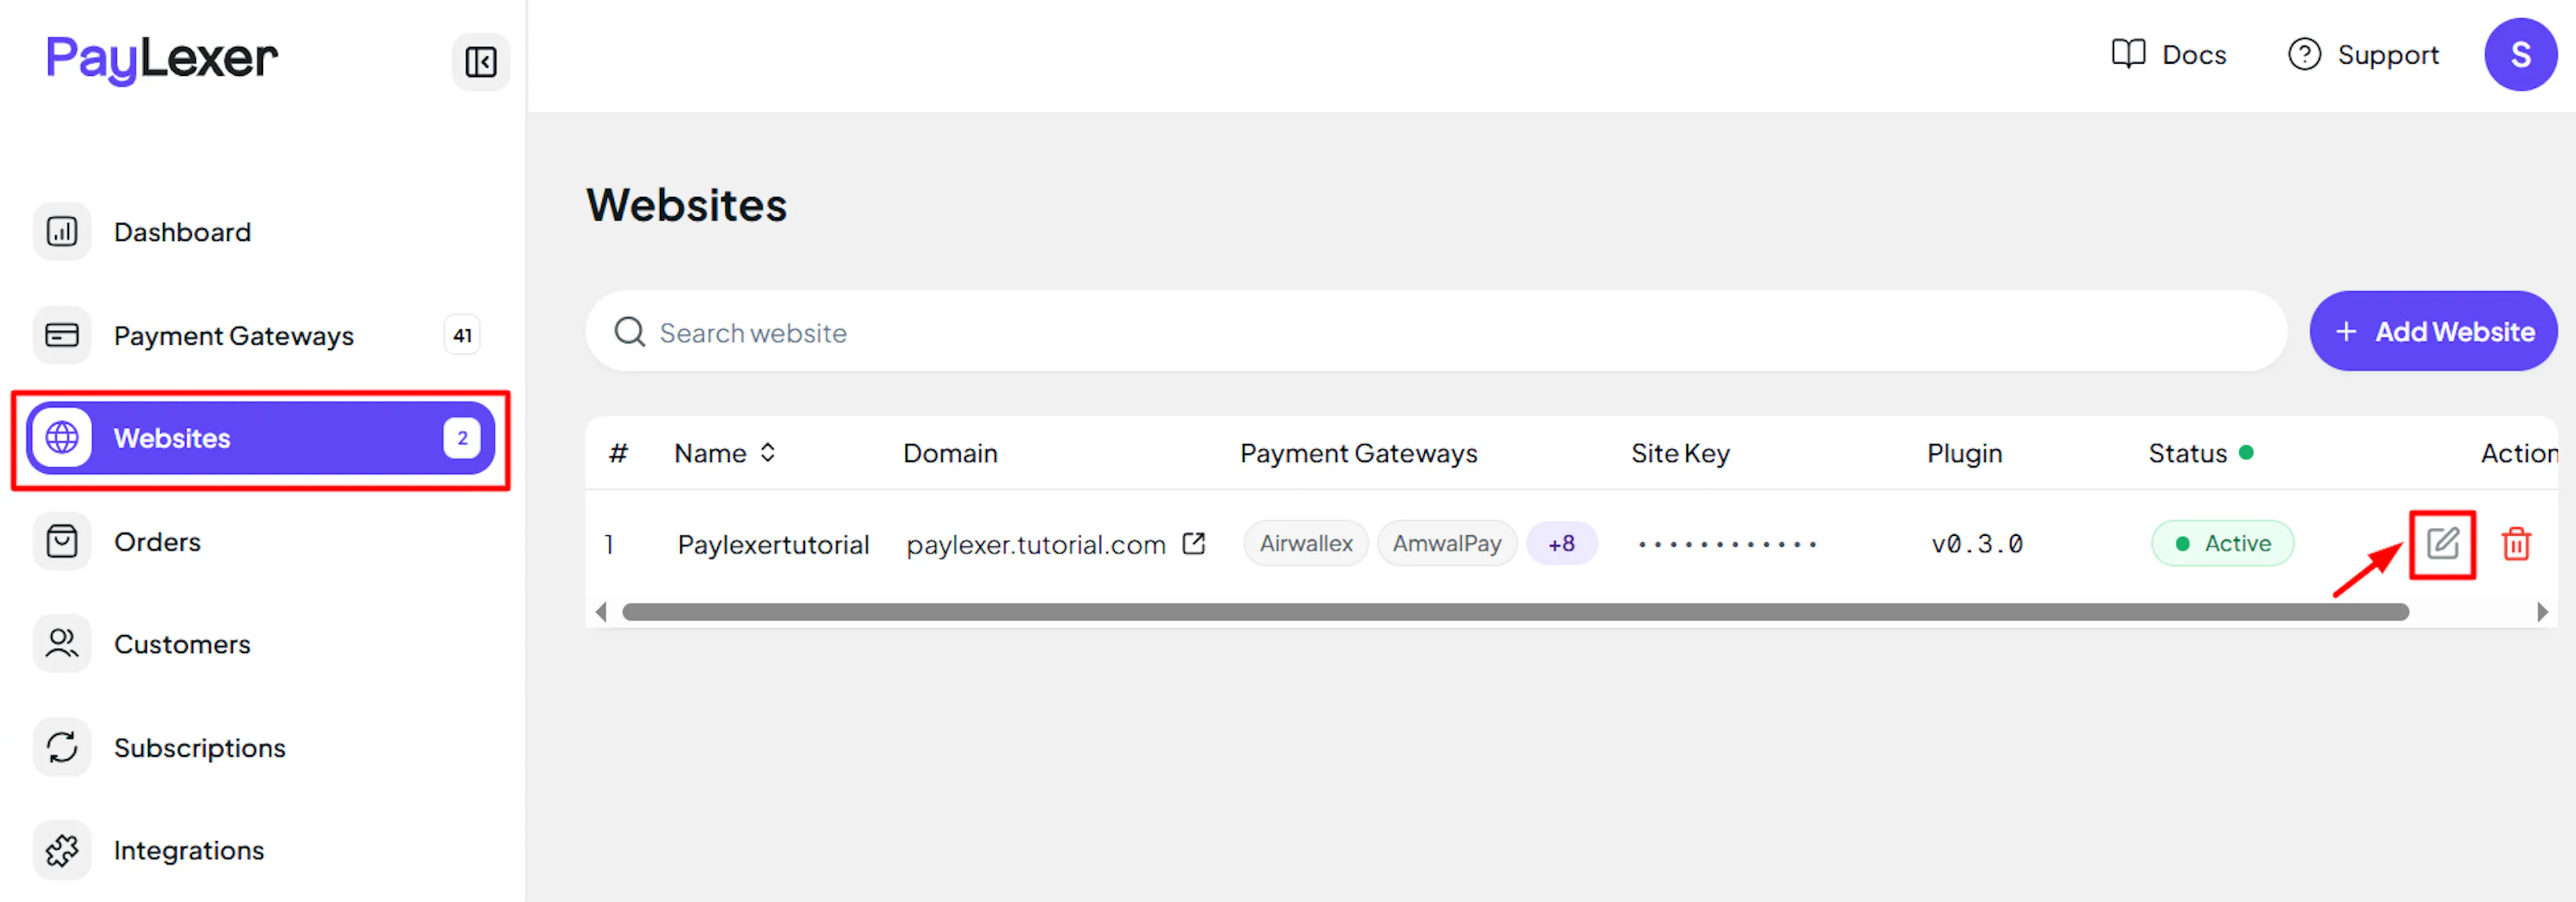
Go to Websites
Navigate to Websites in your PayLexer dashboard.
Edit your website
Click the Edit Icon of your added website.
Enable PayU
Click the checkbox to enable PayU for the website.
If you haven't added a website yet, Continue to Add Your Website →
Troubleshooting
Best Practices
- Test in sandbox before enabling production. Use Test Merchant Key and Salt to complete a full payment before switching to live.
- Keep your Merchant Key and Salt confidential. The same pair secures checkout, payment status verification, and account access, so rotate the Salt in the PayU Dashboard if you suspect exposure.
- Remember checkout only appears for shoppers paying in INR - PayU won't show for any other currency.
- Once a shopper reaches PayU's hosted checkout page, that specific payment attempt cannot be cancelled from PayLexer's side.
FAQs
Still Have Questions?
- PayU Support: PayU Help Center
- PayLexer Support: Contact Support