

NICEPAY
Accept payments in Indonesia through NICEPAY's hosted checkout. Supports all payment methods enabled in your NICEPAY account, including virtual accounts, cards, QRIS, and e-wallets.
NICEPAY is an Indonesian payment gateway that lets merchants accept payments through a secure hosted checkout page. Shoppers are redirected to NICEPAY's own payment page to complete their purchase using any method enabled in their NICEPAY account - no payment UI is needed on the merchant's store. NICEPAY handles payment collection, refund processing, and signed payment notifications natively.
- Supported Currencies: IDR
This gateway appears in checkout only when the selected currency is IDR.
Supported Features
- Hosted checkout - shoppers pay on NICEPAY's secure page using any payment method enabled in your NICEPAY account
- Full and partial refunds
- Signed payment notifications handled automatically by PayLexer
Before You Start
Make sure you have:
- NICEPAY Account - Don't have one? Sign up for NICEPAY →
- PayLexer Account - Required to configure the integration. Create your account →
- A website where you want to integrate
Looking for a different payment processor? View all supported gateways →
Configuring NICEPAY
You need a Merchant ID and a Merchant Key from NICEPAY for this integration.
Getting API Credentials
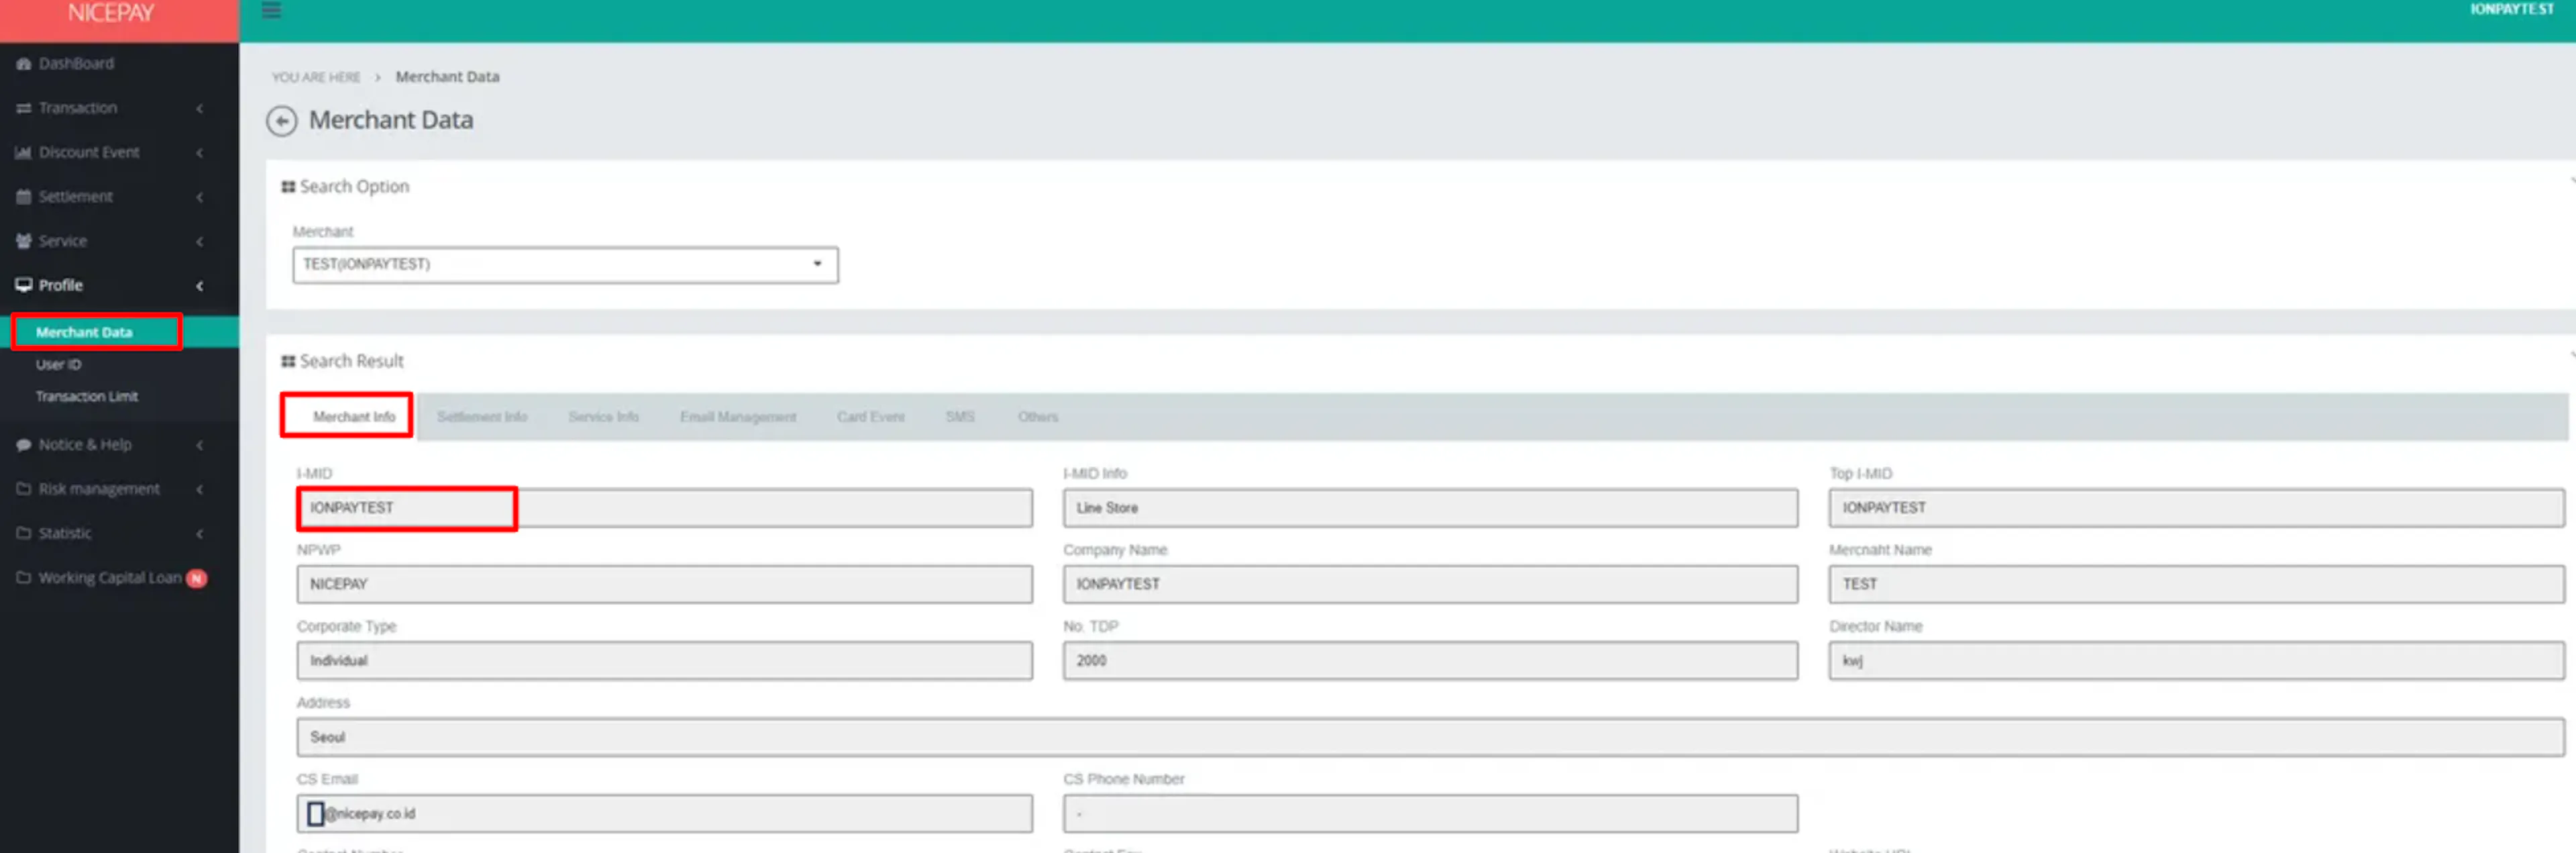
Find your Merchant ID
In the NICEPAY dashboard, navigate to Profile → Merchant Data. In the Merchant Info section, copy the value in the I-MID field. This is your Merchant ID.
Find your Merchant Key
On the same Profile → Merchant Data page, open the Others section. Copy the value in the M_Key field. This is your Merchant Key.
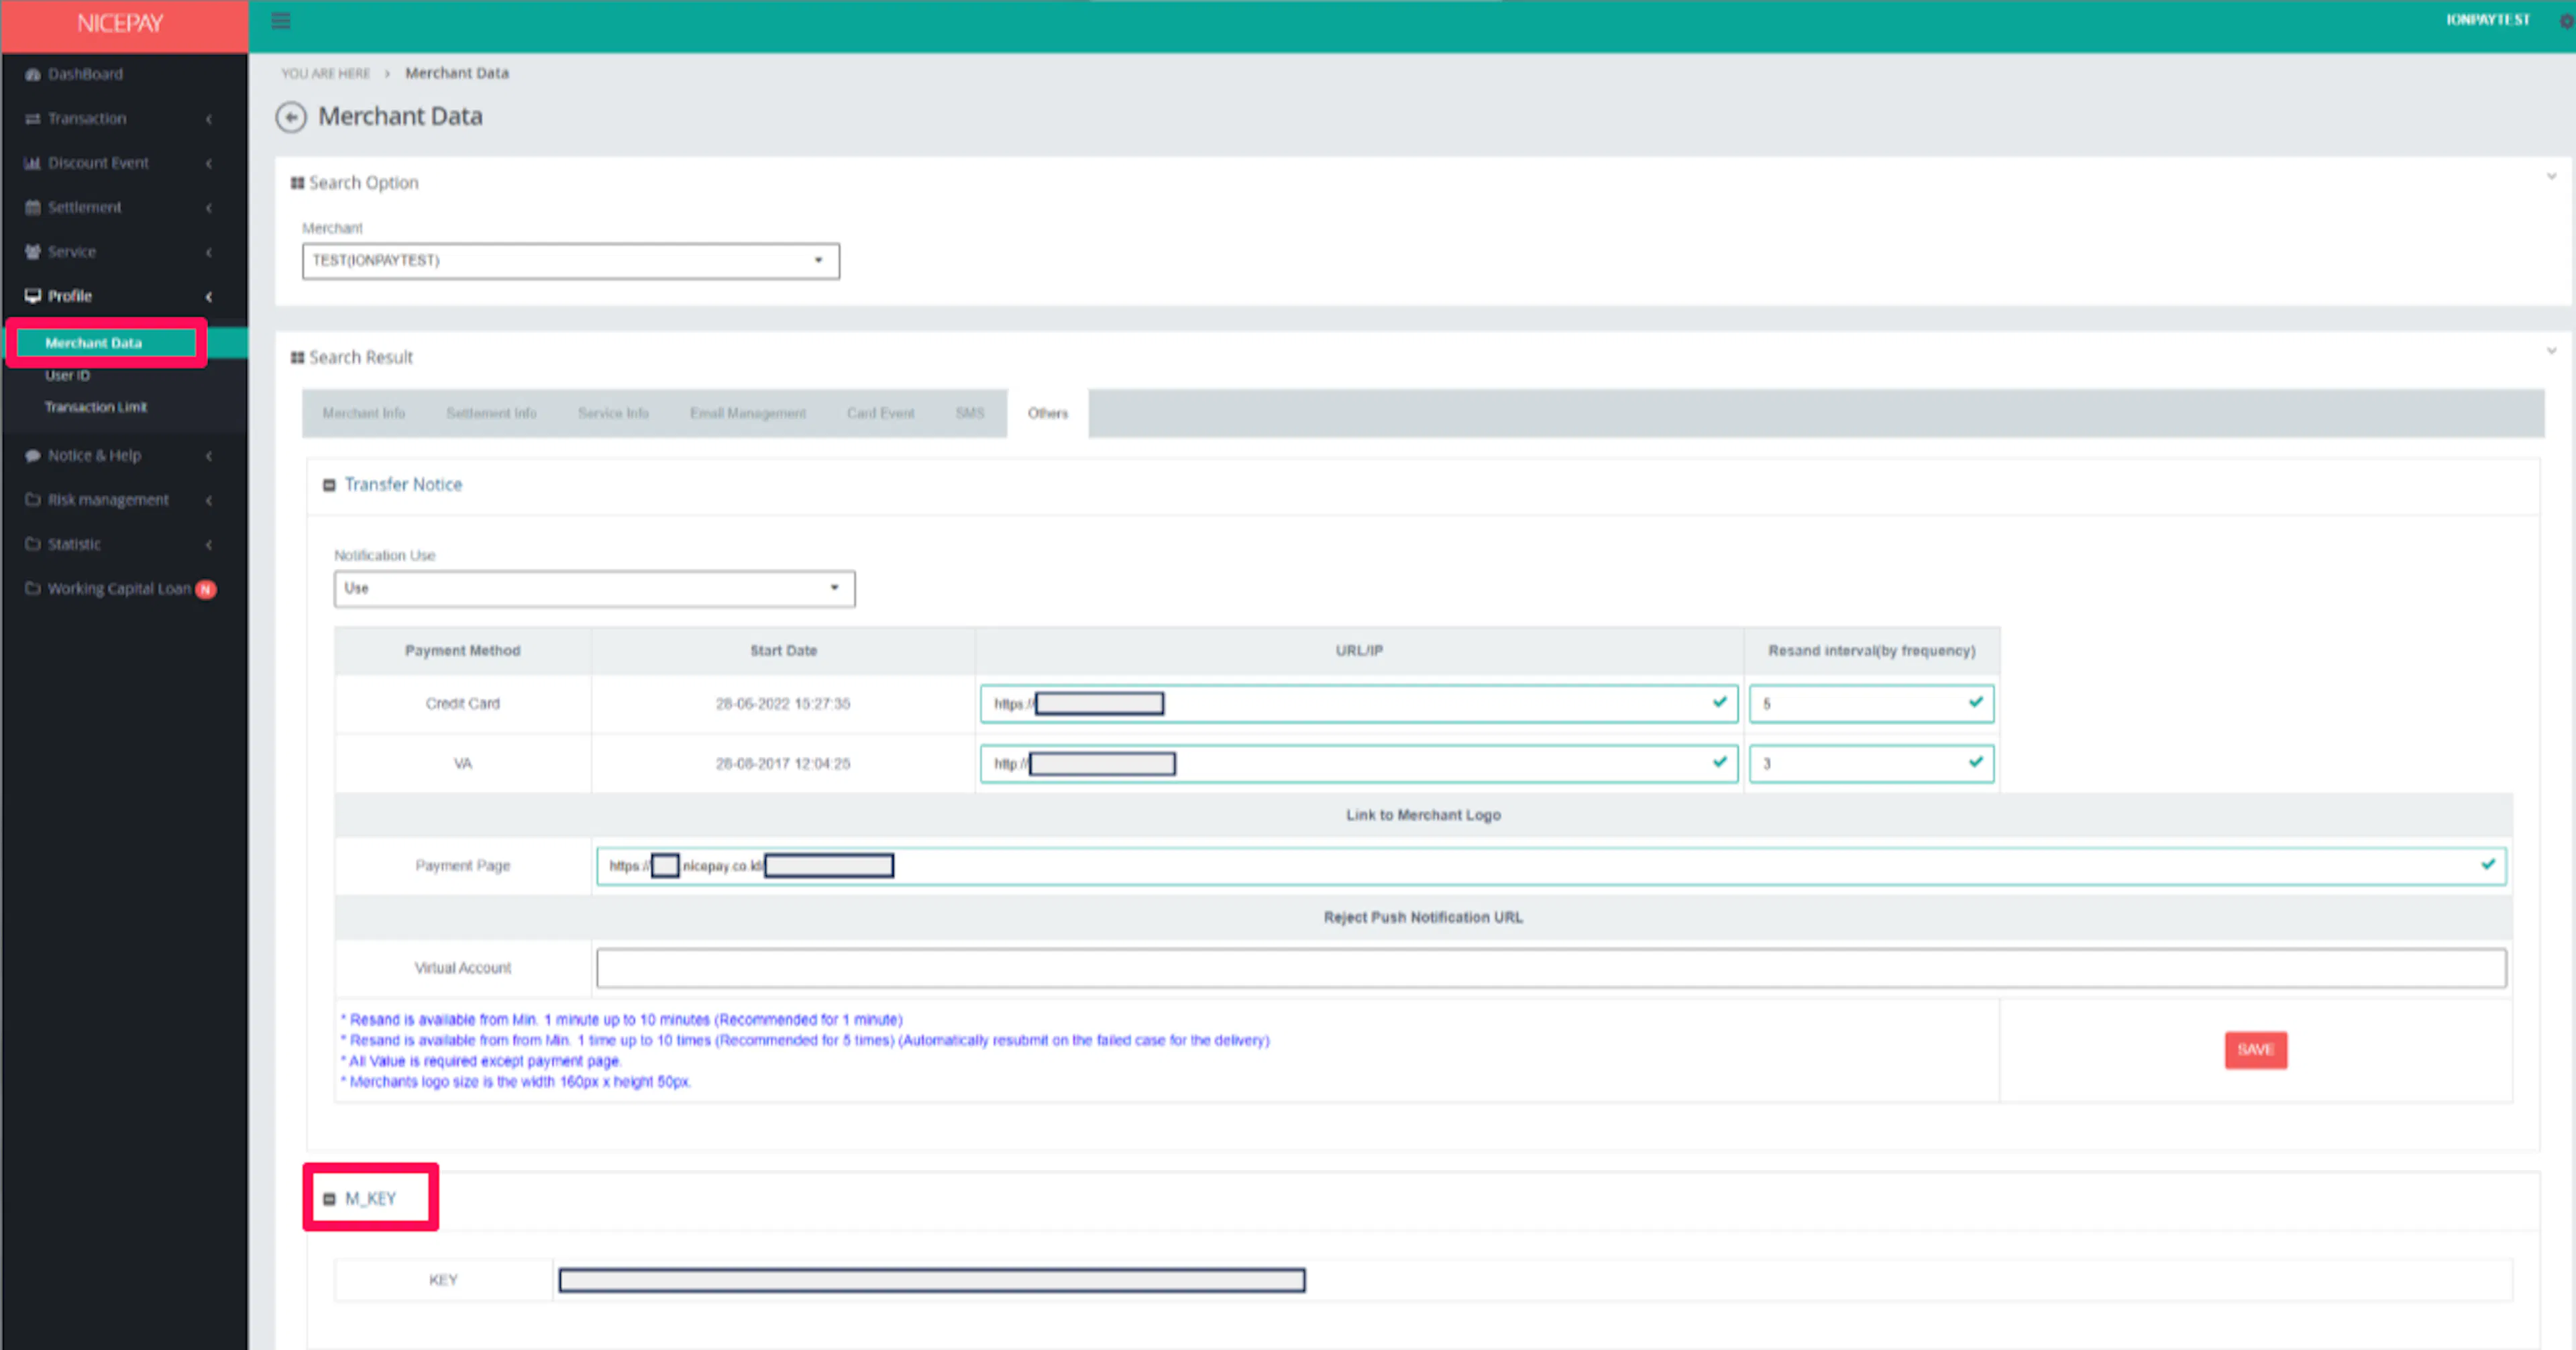
Keep your Merchant Key confidential. It signs every payment request and verifies every payment notification. Do not share it or expose it in client-side code.
Adding Credentials to PayLexer
Open PayLexer Dashboard
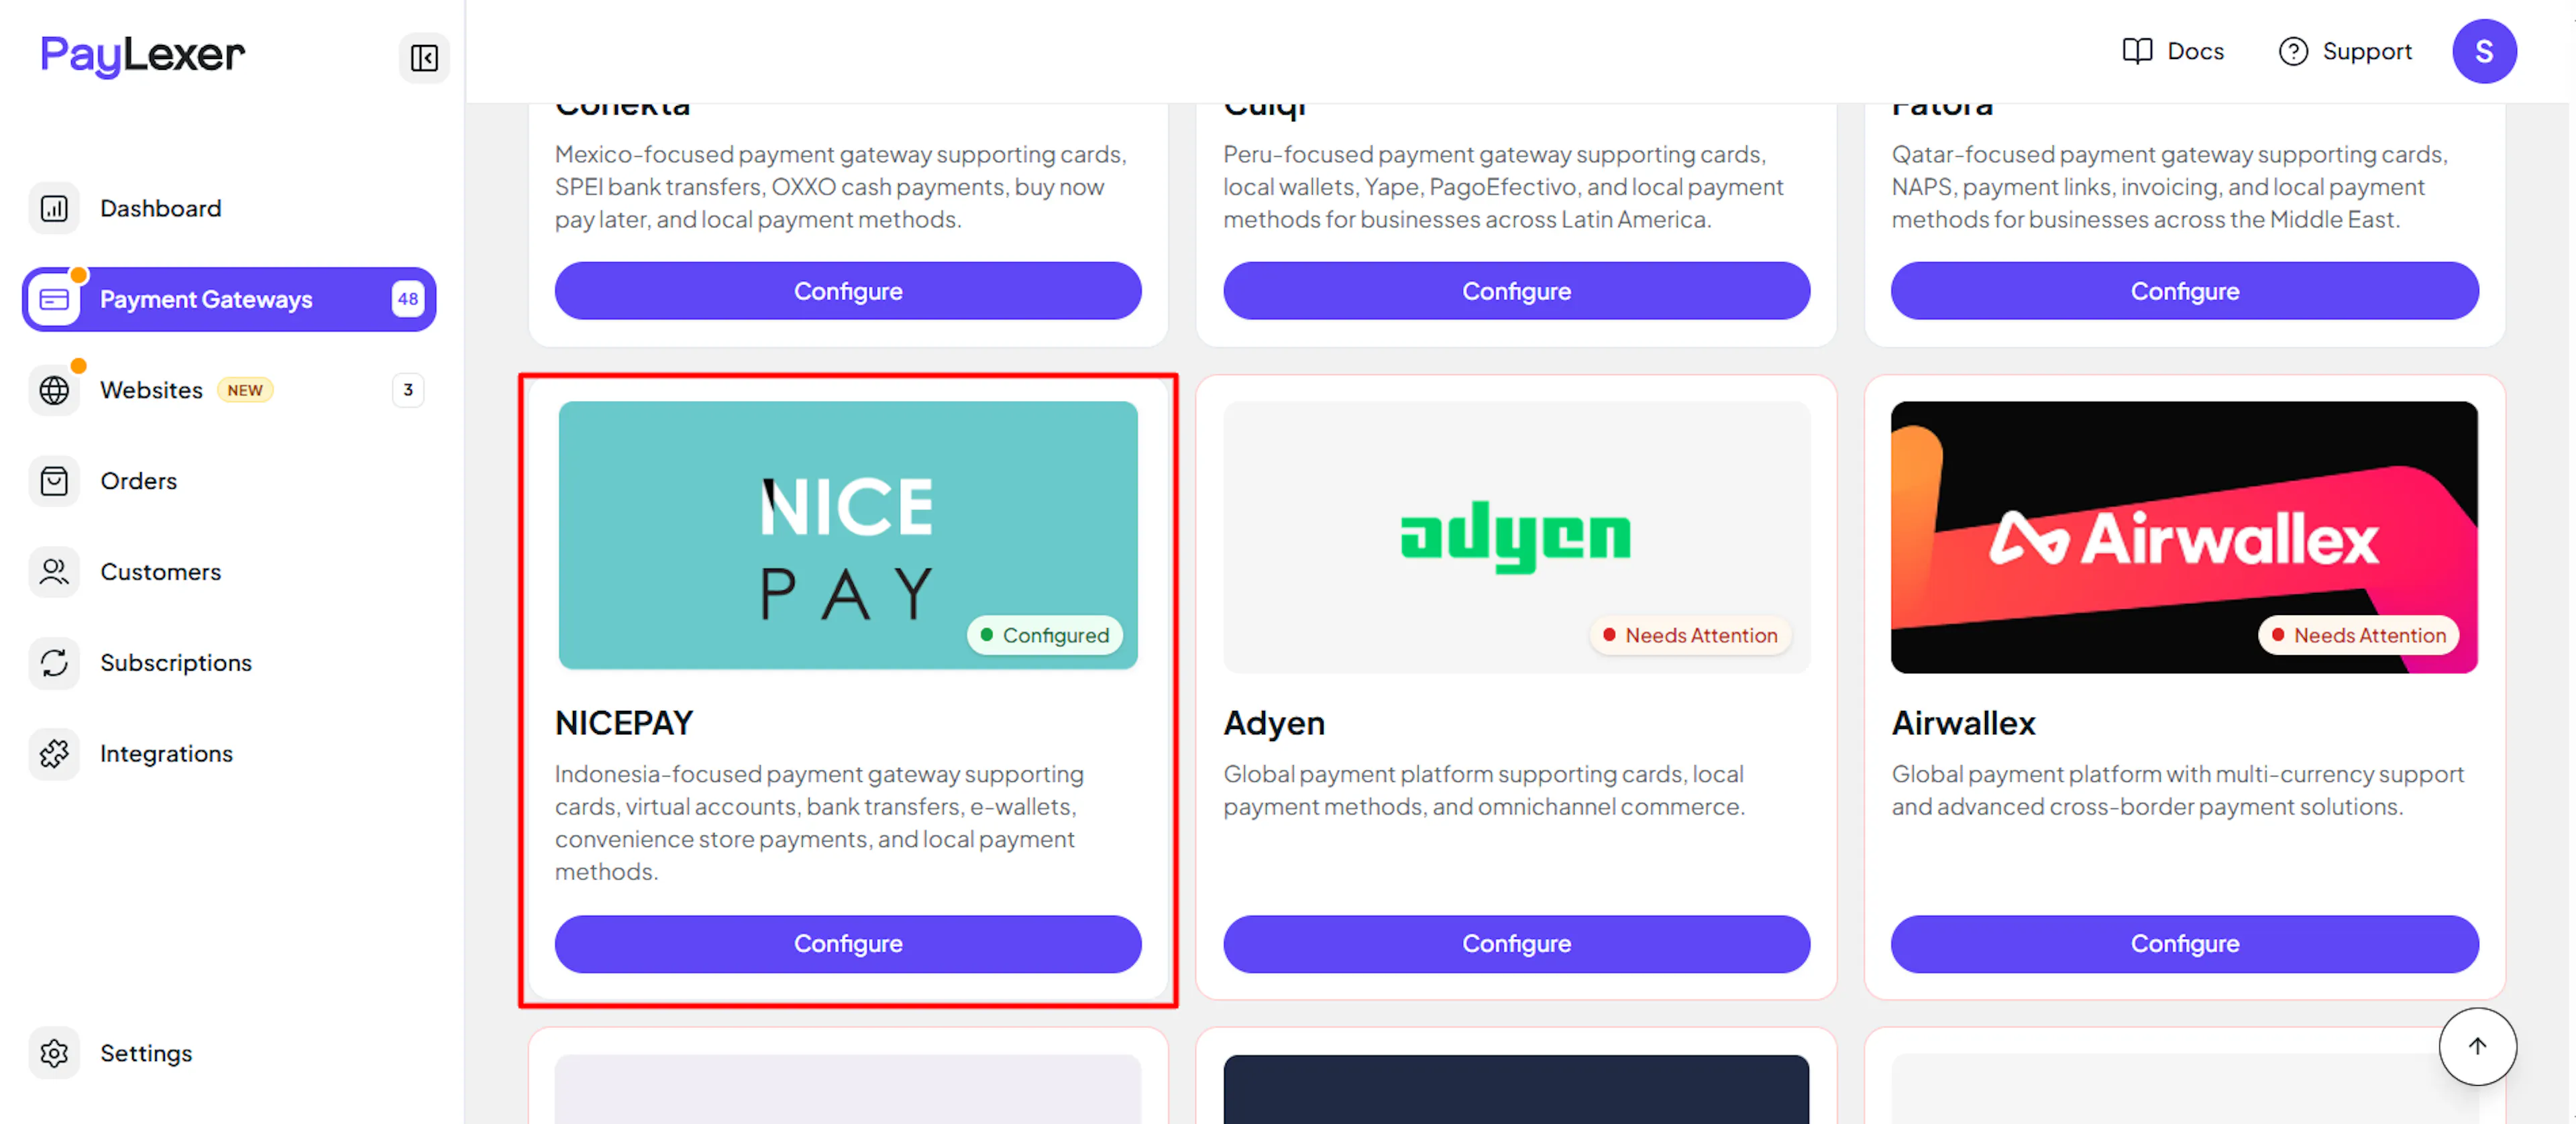
Log in to your PayLexer dashboard and navigate to Payment Gateways → NICEPAY.
Enter your credentials
Paste the Merchant ID and Merchant Key you copied from NICEPAY into the corresponding fields.
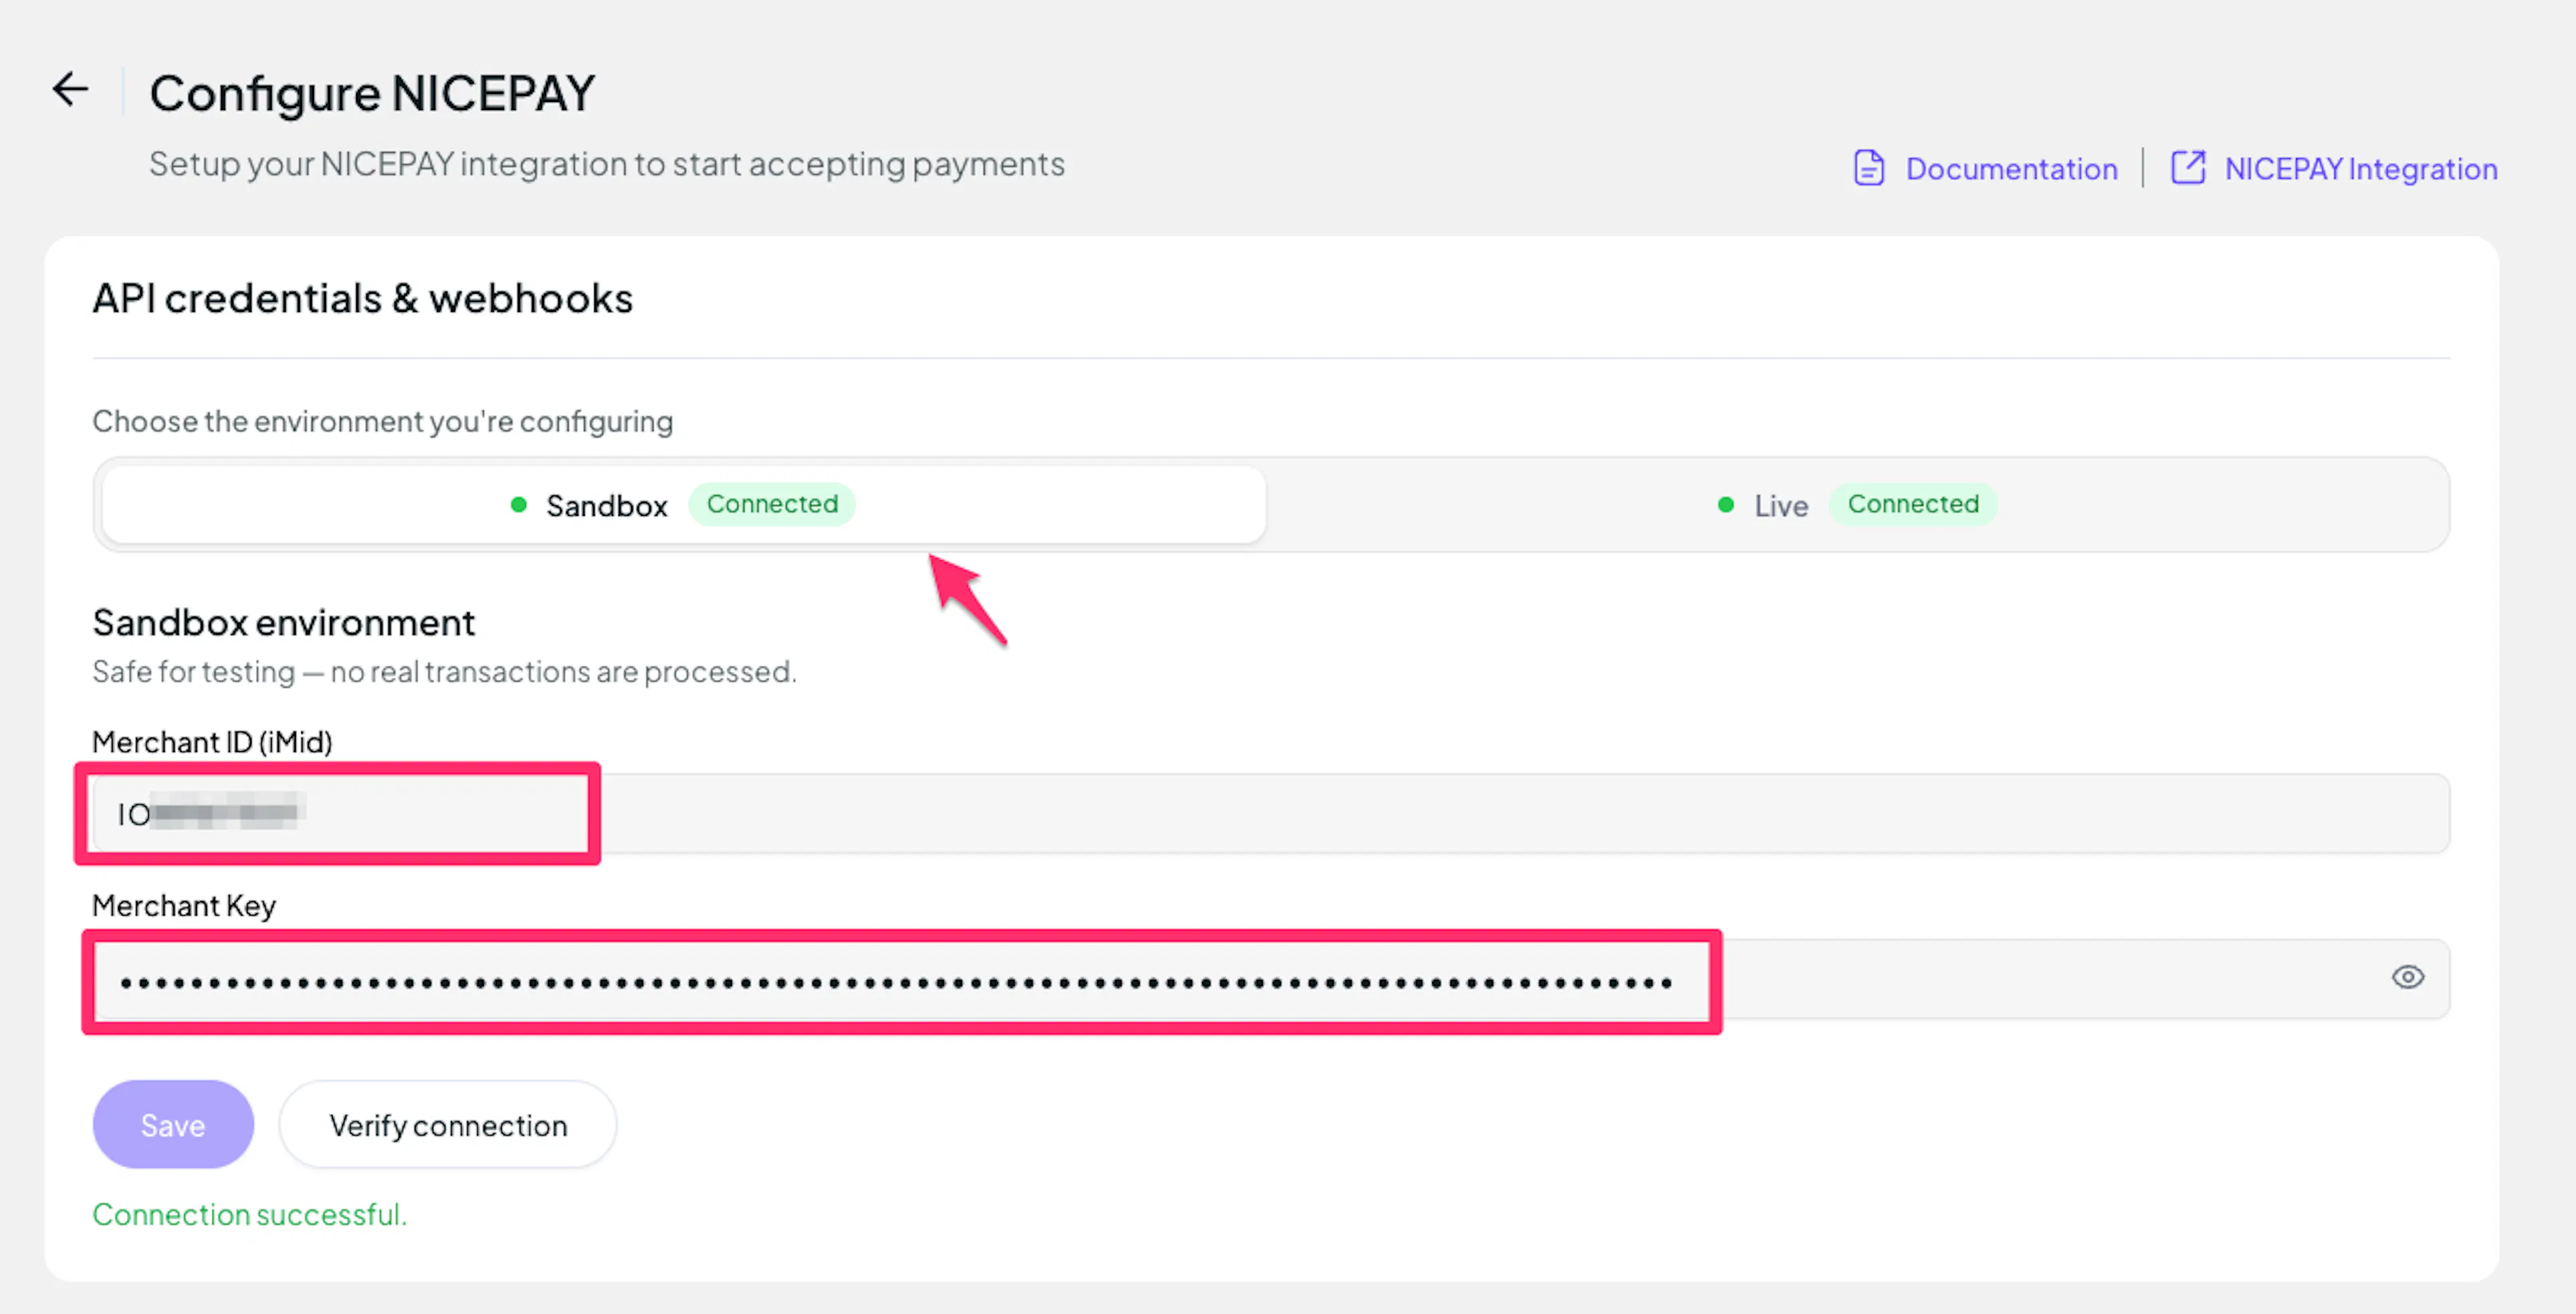
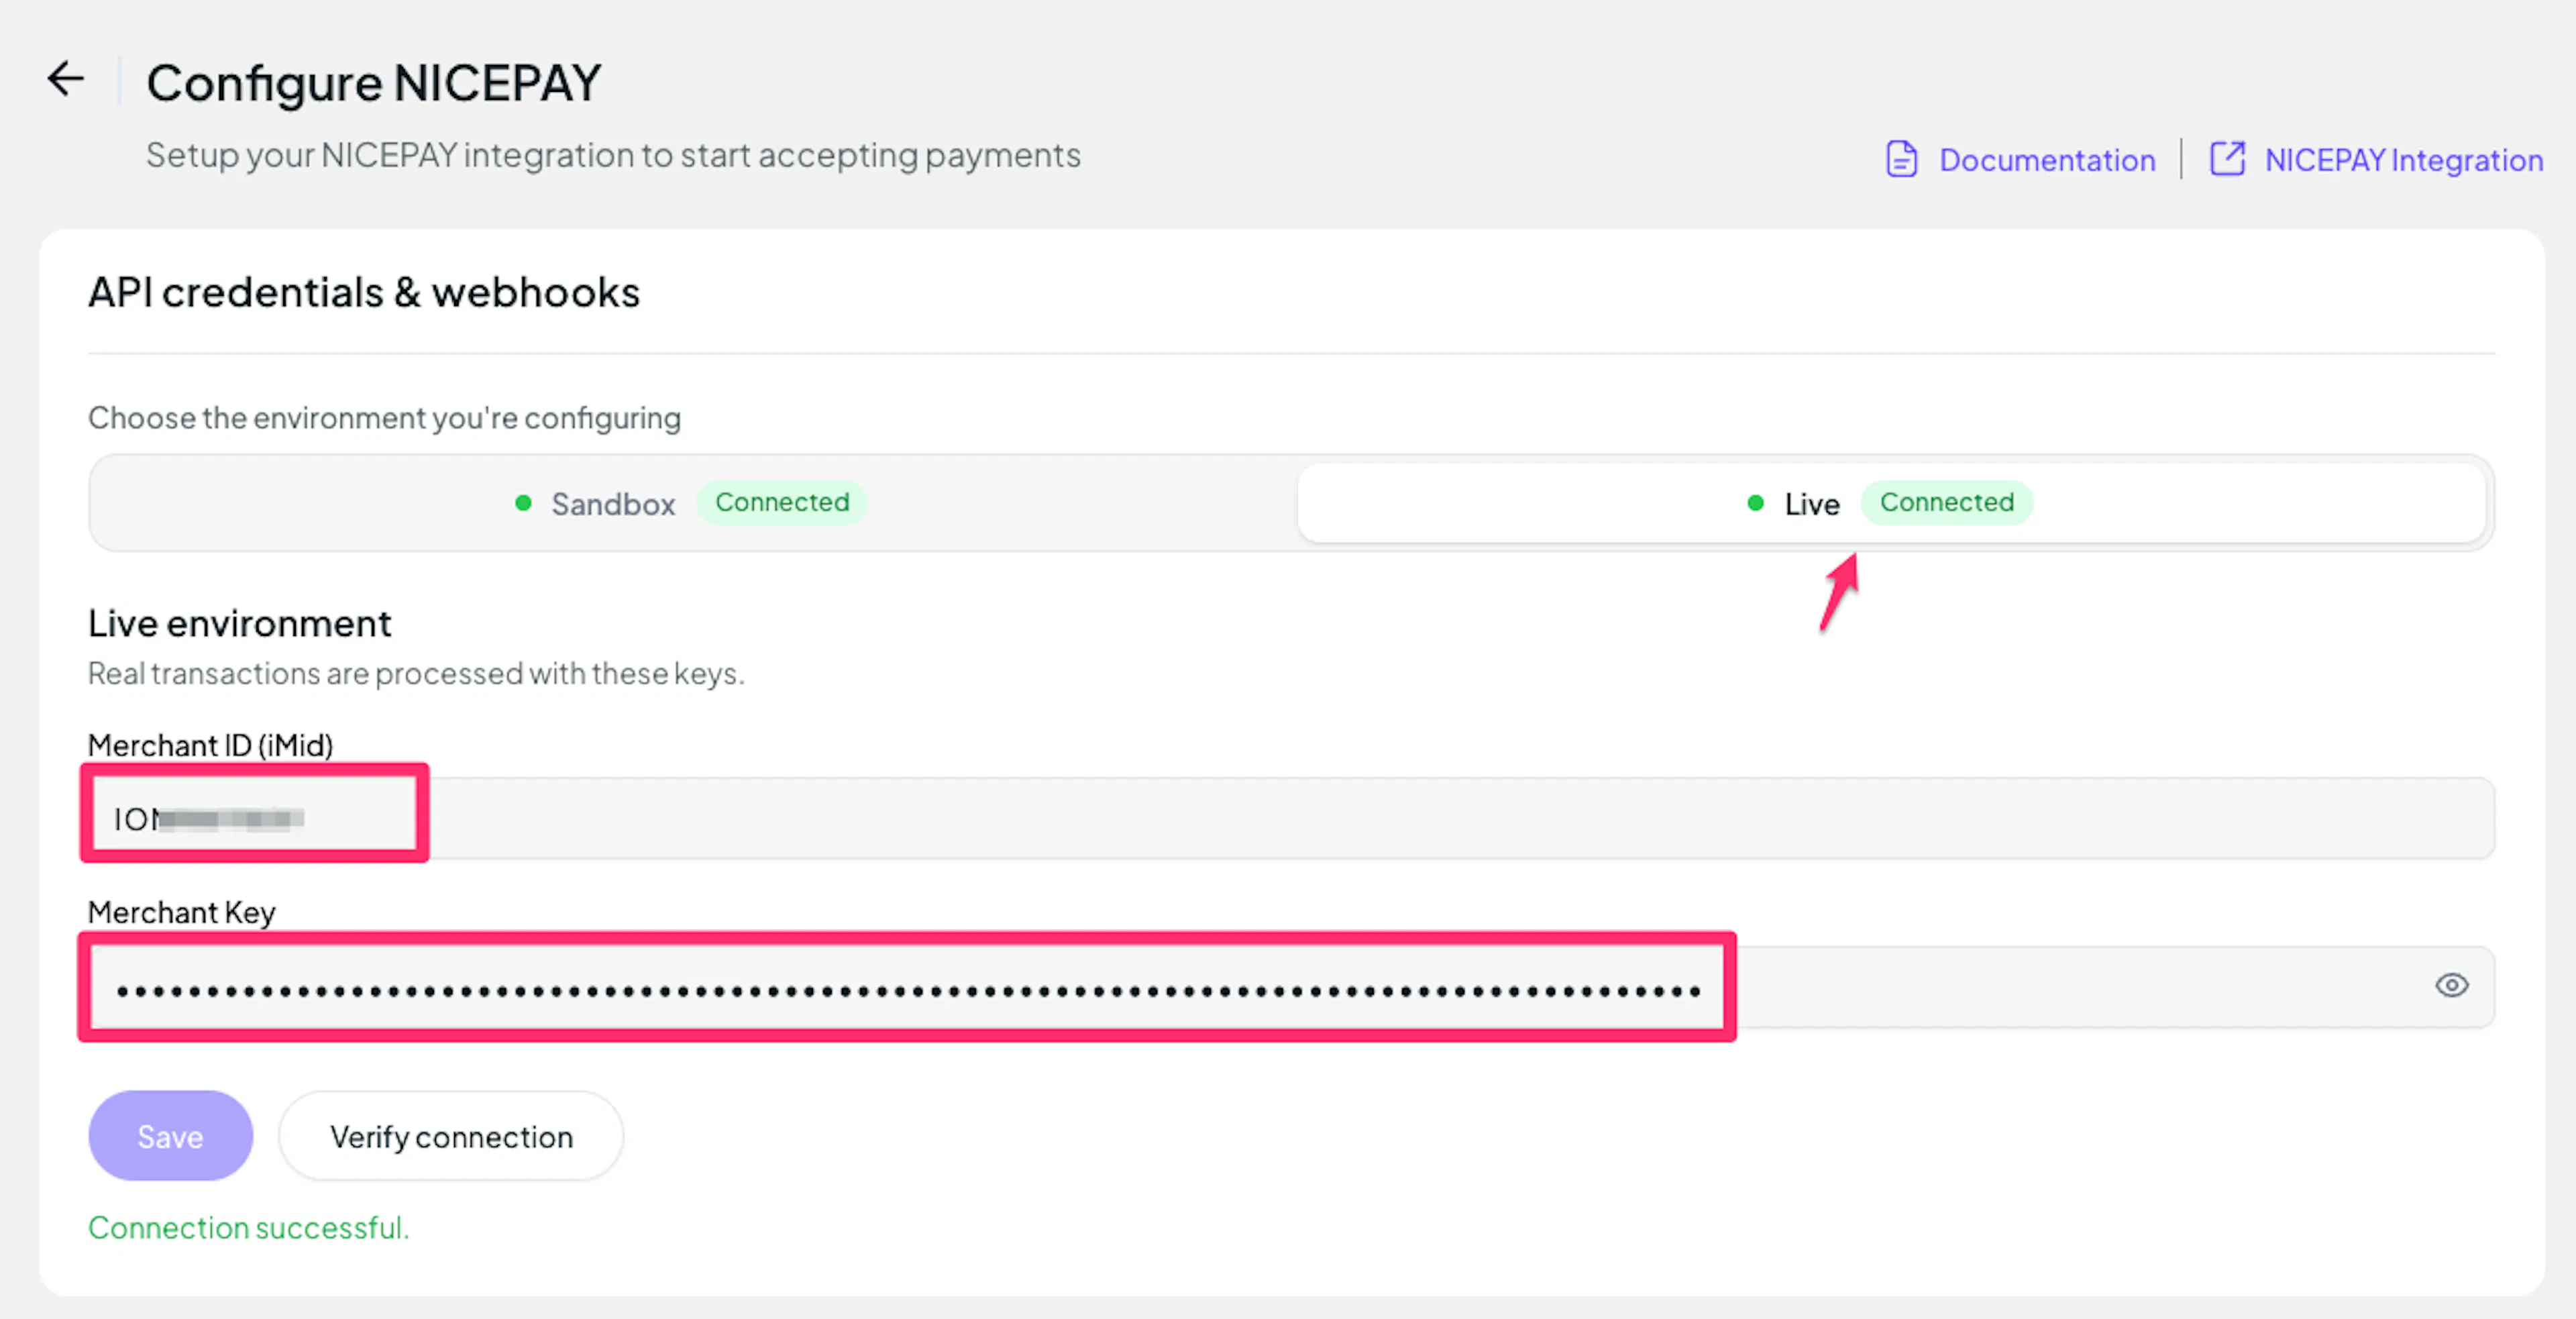
Understanding Live/Production and Sandbox Settings:
| Environment | Purpose |
|---|---|
| Live / Production (Mandatory) | Used for real transactions. Cannot be empty, even when testing. |
| Test / Sandbox (Optional) | Used for testing only. No real money is processed. |
How PayLexer selects credentials:
- Debug/Test mode ON → Test credentials are used
- Debug/Test mode OFF → Live credentials are used
Test and save
Click **Save ** to save your configuration and verify your credentials. Click Verify Connection to test the connection.
Webhooks
PayLexer registers the payment notification URL with NICEPAY automatically for every transaction. No webhook URL setup is required in the NICEPAY dashboard.
Integrate NICEPAY to Your Website
If you have already added and configured your site, you can enable NICEPAY in your existing setup.
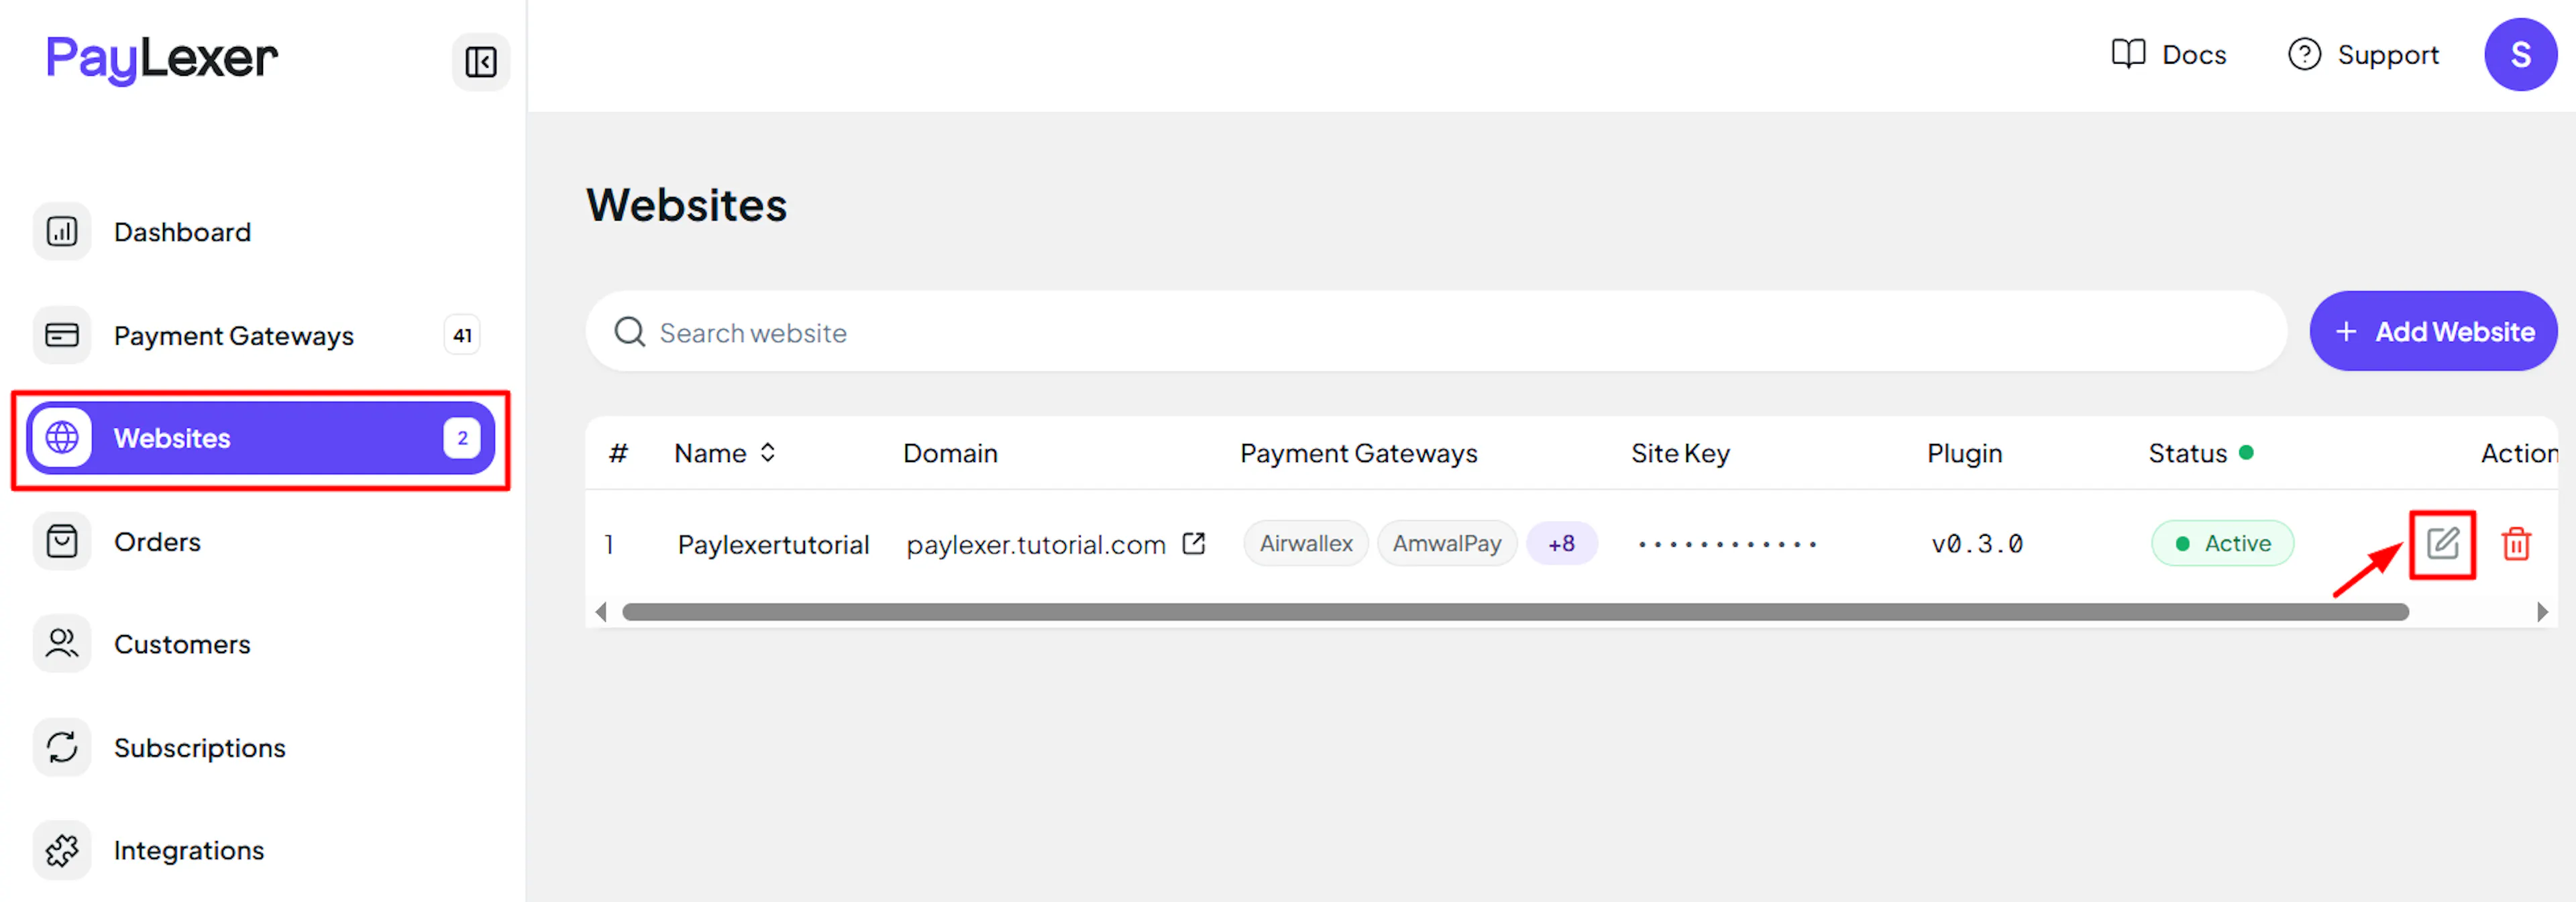
Go to Websites
Navigate to Websites in your PayLexer dashboard.
Edit your website
Click the Edit Icon of your added website.
Enable NICEPAY
Click the checkbox to enable NICEPAY for the website.
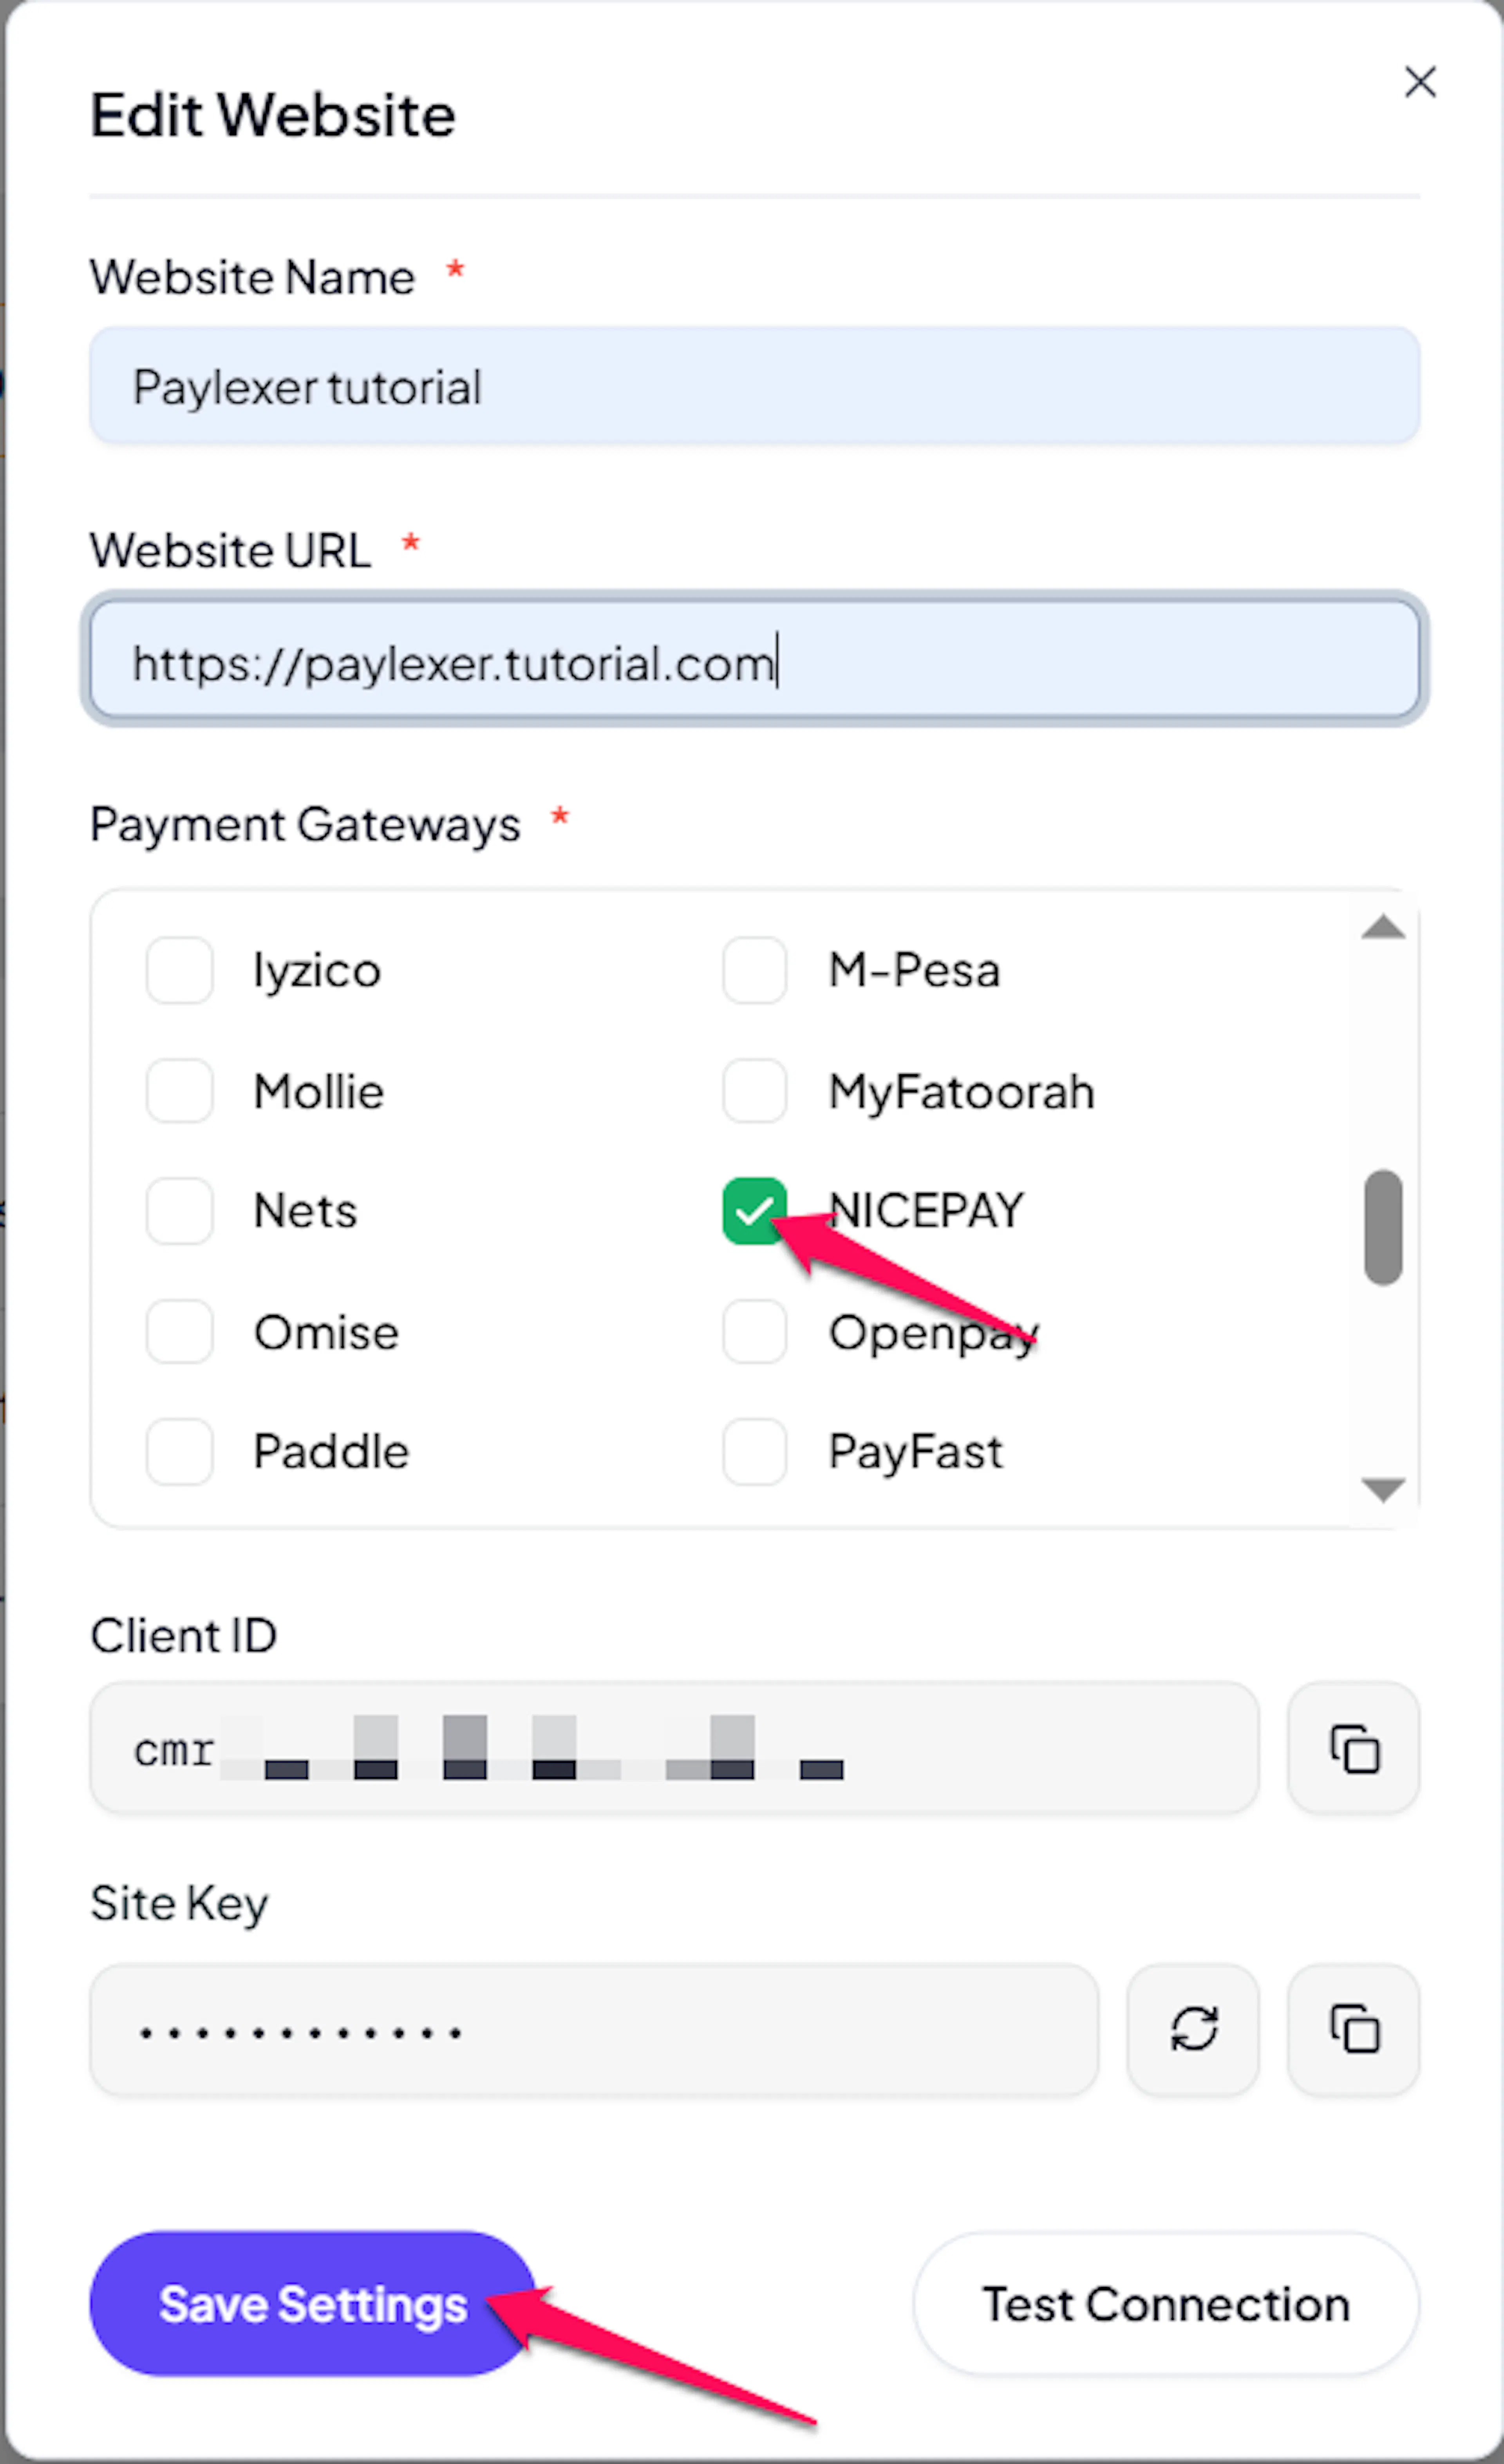
NICEPAY is now active for this website. Complete a test purchase in test mode before switching to live.
If you haven't added a website yet, Continue to Add Your Website →
Troubleshooting
Best Practices
- Test in sandbox mode before enabling live. Use your NICEPAY test credentials from
mms-labs.NICEPAY.co.idto run a complete checkout and verify the full payment flow. - Enable only the payment methods your customers actually need in the NICEPAY dashboard. All enabled methods appear on the NICEPAY checkout page - a focused list reduces checkout friction.
- Keep your Merchant Key confidential. It signs every payment request and verifies every notification - treat it like a password and store it only in PayLexer.
- Factor NICEPAY's service fee into your refund policy, as the fee is not returned when a payment is refunded.
FAQs
Still Have Questions?
- NICEPAY Support: NICEPAY Support
- PayLexer Support: Contact Support