

NMI
Connect NMI (Network Merchants Inc.) to PayLexer to accept card payments through a secure, tokenized card form embedded directly on your checkout page, with signed webhooks and full or partial refunds.
NMI (Network Merchants Inc.) is a US-focused, white-label payment gateway used by merchants and resellers across North America. Shoppers enter their card details in a secure, tokenized form embedded directly on the merchant's own checkout page - there is no redirect - and NMI confirms every payment and refund outcome immediately.
- Supported Regions (Merchant Accounts): United States - view full list
- Supported Currencies: USD - view full list
This gateway appears in checkout only when the selected currency is USD.
Supported Features
- Card payments through a secure, tokenized form embedded directly on the merchant's own checkout page, with no redirect
- Full and partial refunds
- Automatic protection against accidental double charges when a shopper's browser retries a payment
- Real-time payment and refund confirmation
Before You Start
Make sure you have:
- NMI Account – Don't have one? Sign up for NMI →
- PayLexer Account – Required to configure the integration. Create your account →
- A website where you want to integrate
Looking for a different payment processor? View all supported gateways →
Configuring NMI
You need a Merchant Key (api) and Merchant Key (tokenization) from NMI for this integration.
Getting API Credentials
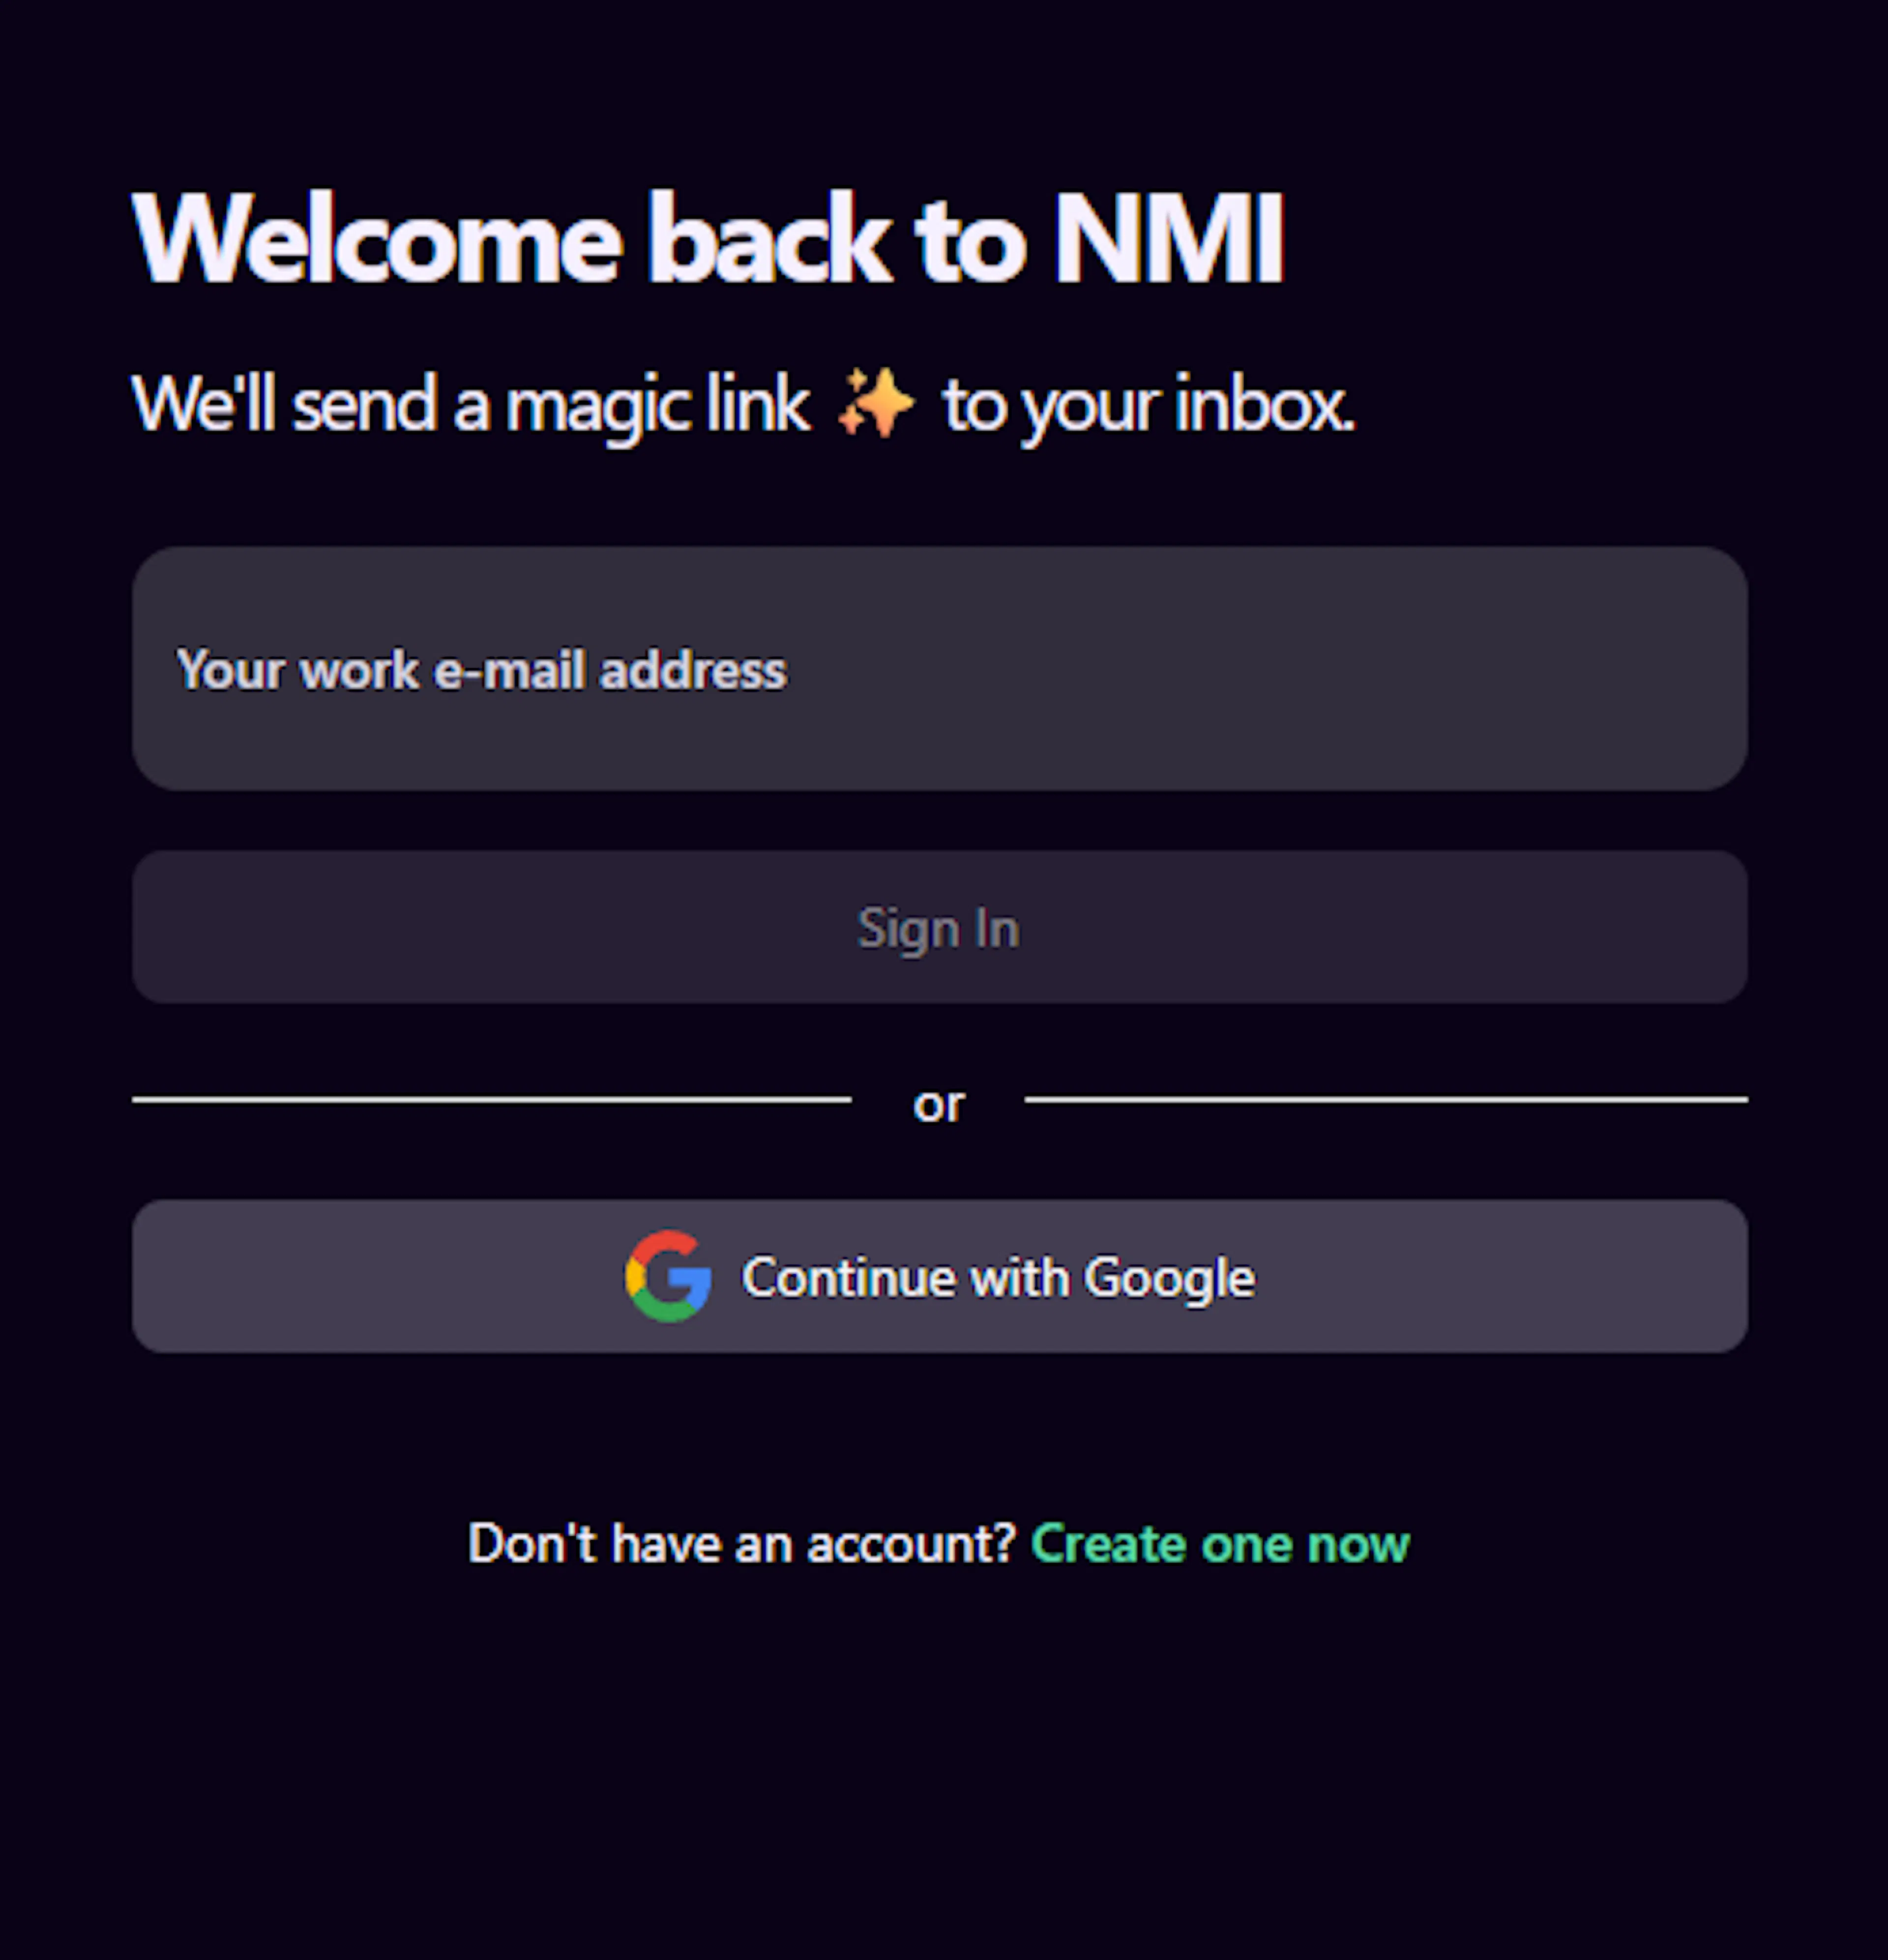
Log in to NMI
Sign in to your NMI merchant or reseller dashboard.
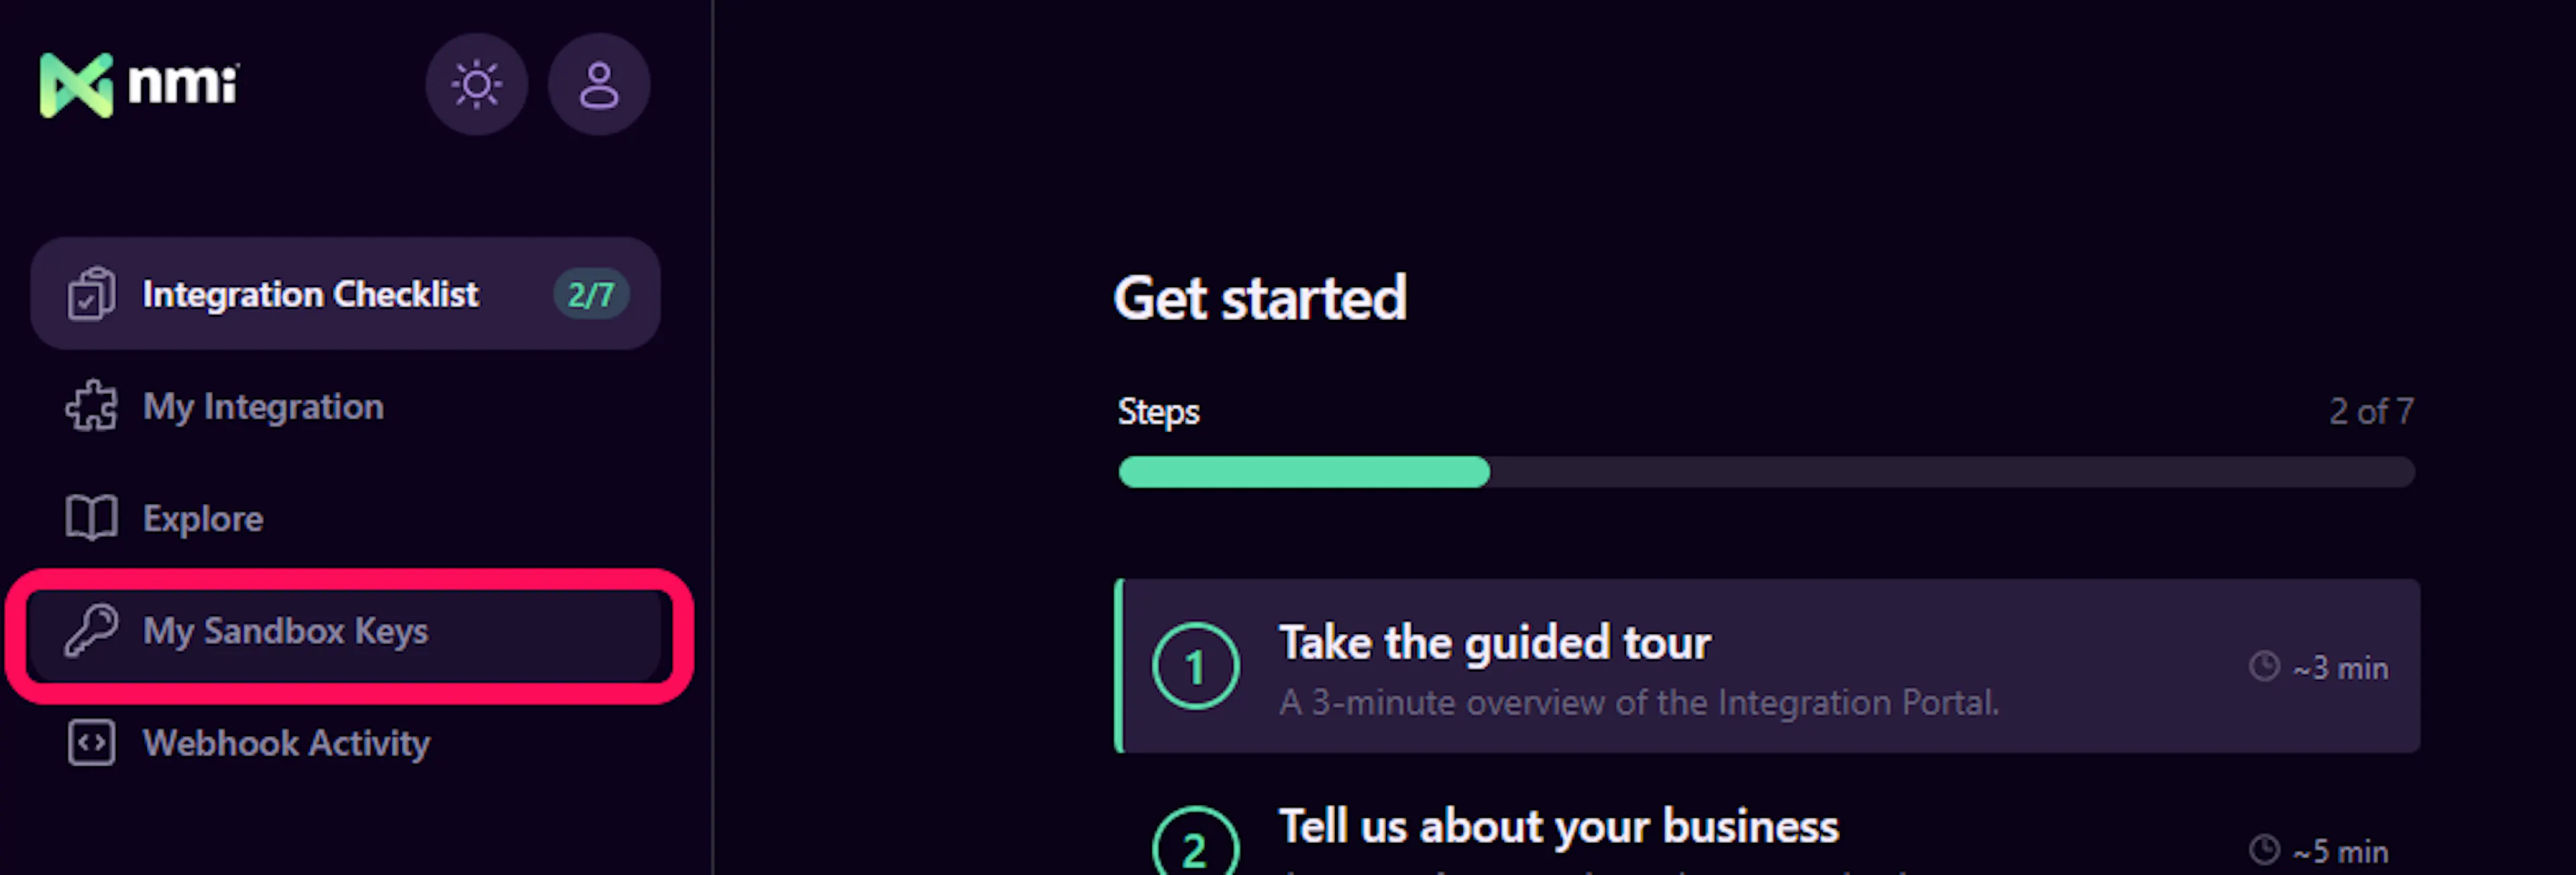
Open My Keys
Navigate to My Keys. This page lists your Merchant Keys in a table with Key, Permission, and Sensitivity columns.
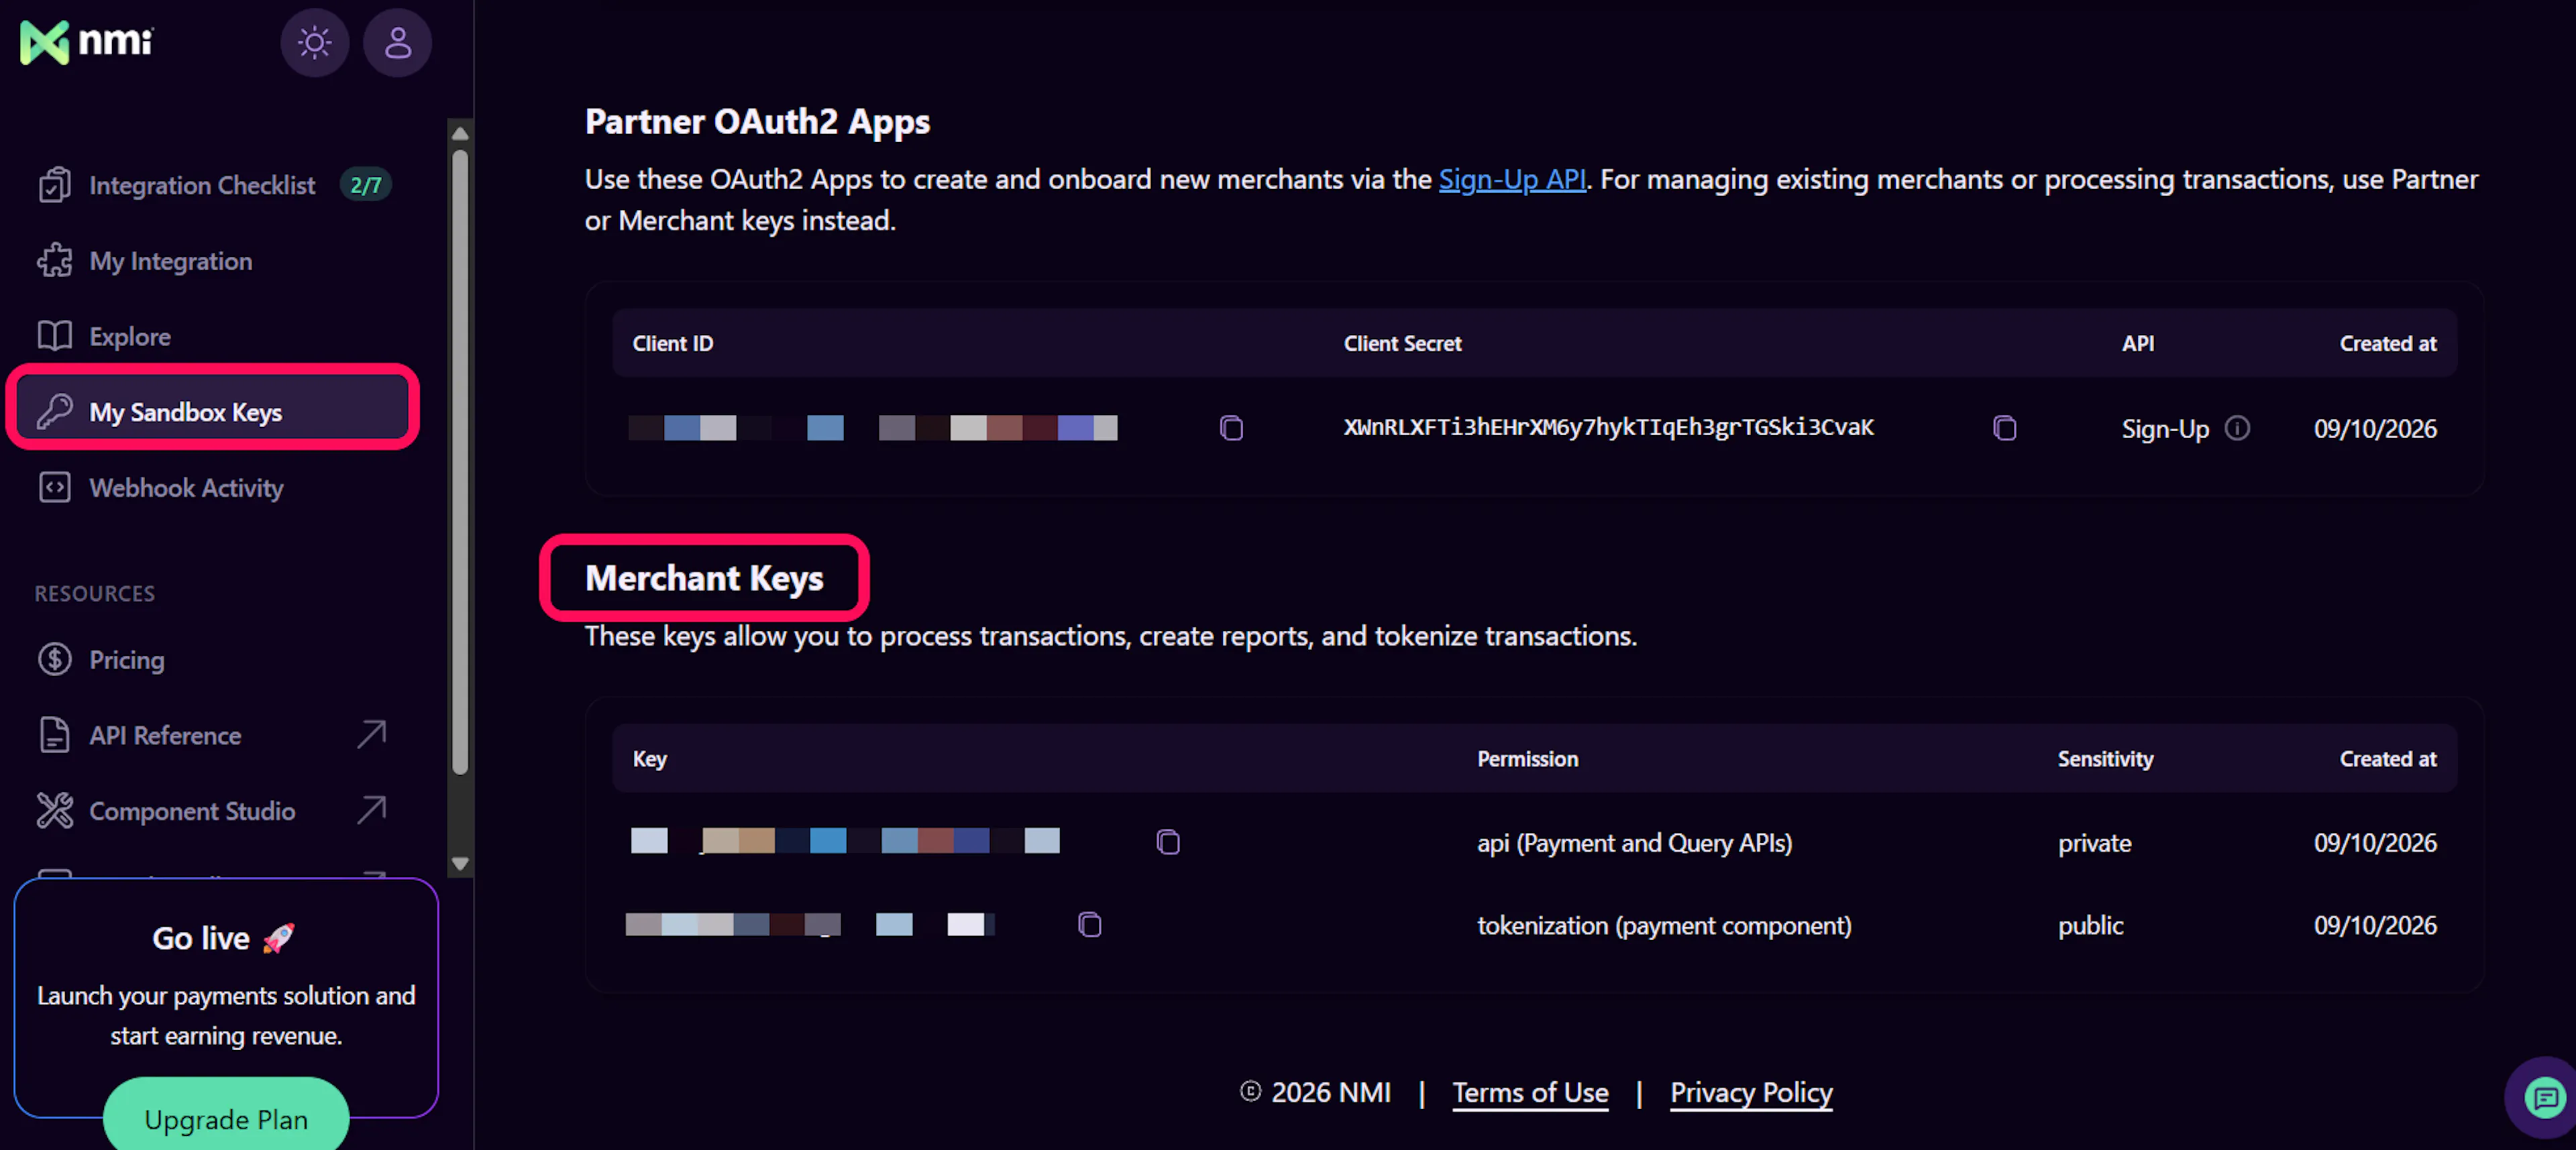
Copy the api Merchant Key
Find the row with Permission: api (Payment and Query APIs) and Sensitivity: Private, then copy its Key value. This authenticates every charge, refund, and status check - keep it secret.
Copy the tokenization Merchant Key
Find the row with Permission: tokenization (payment component) and Sensitivity: Public, then copy its Key value. This key is safe to expose in the browser - it only lets a card be tokenized, never charged.
Repeat both steps once for your Sandbox account and once for your Live account, so you end up with both sets of keys. NMI keeps Sandbox and Live as separate credentials.
Adding Credentials to PayLexer
Open PayLexer Dashboard
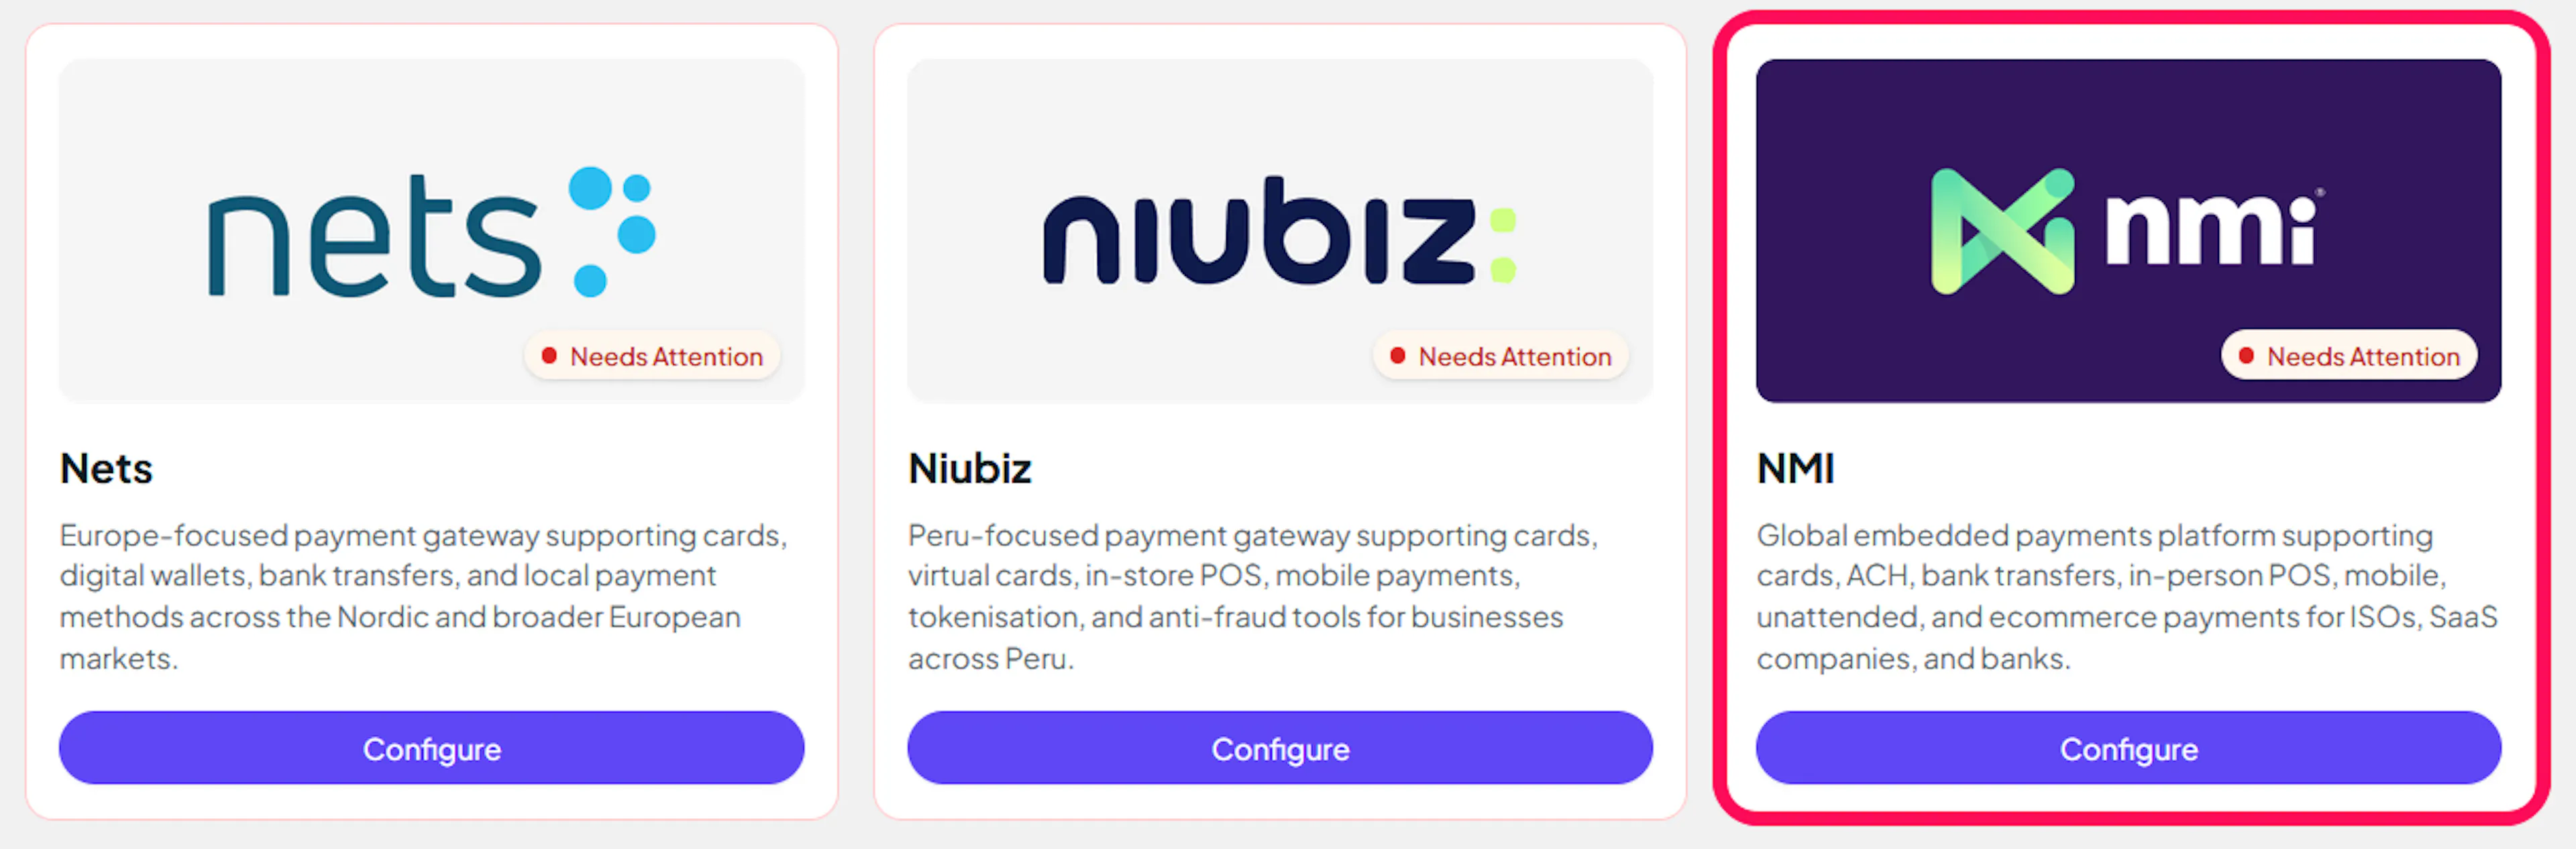
Log in to your PayLexer dashboard and navigate to Payment Gateways -> NMI.
Enter your credentials
Paste the api Merchant Key into the field labeled "Merchant Key - api (Payment and Query APIs)", and the tokenization Merchant Key into the field labeled "Merchant Key - tokenization (payment component)".
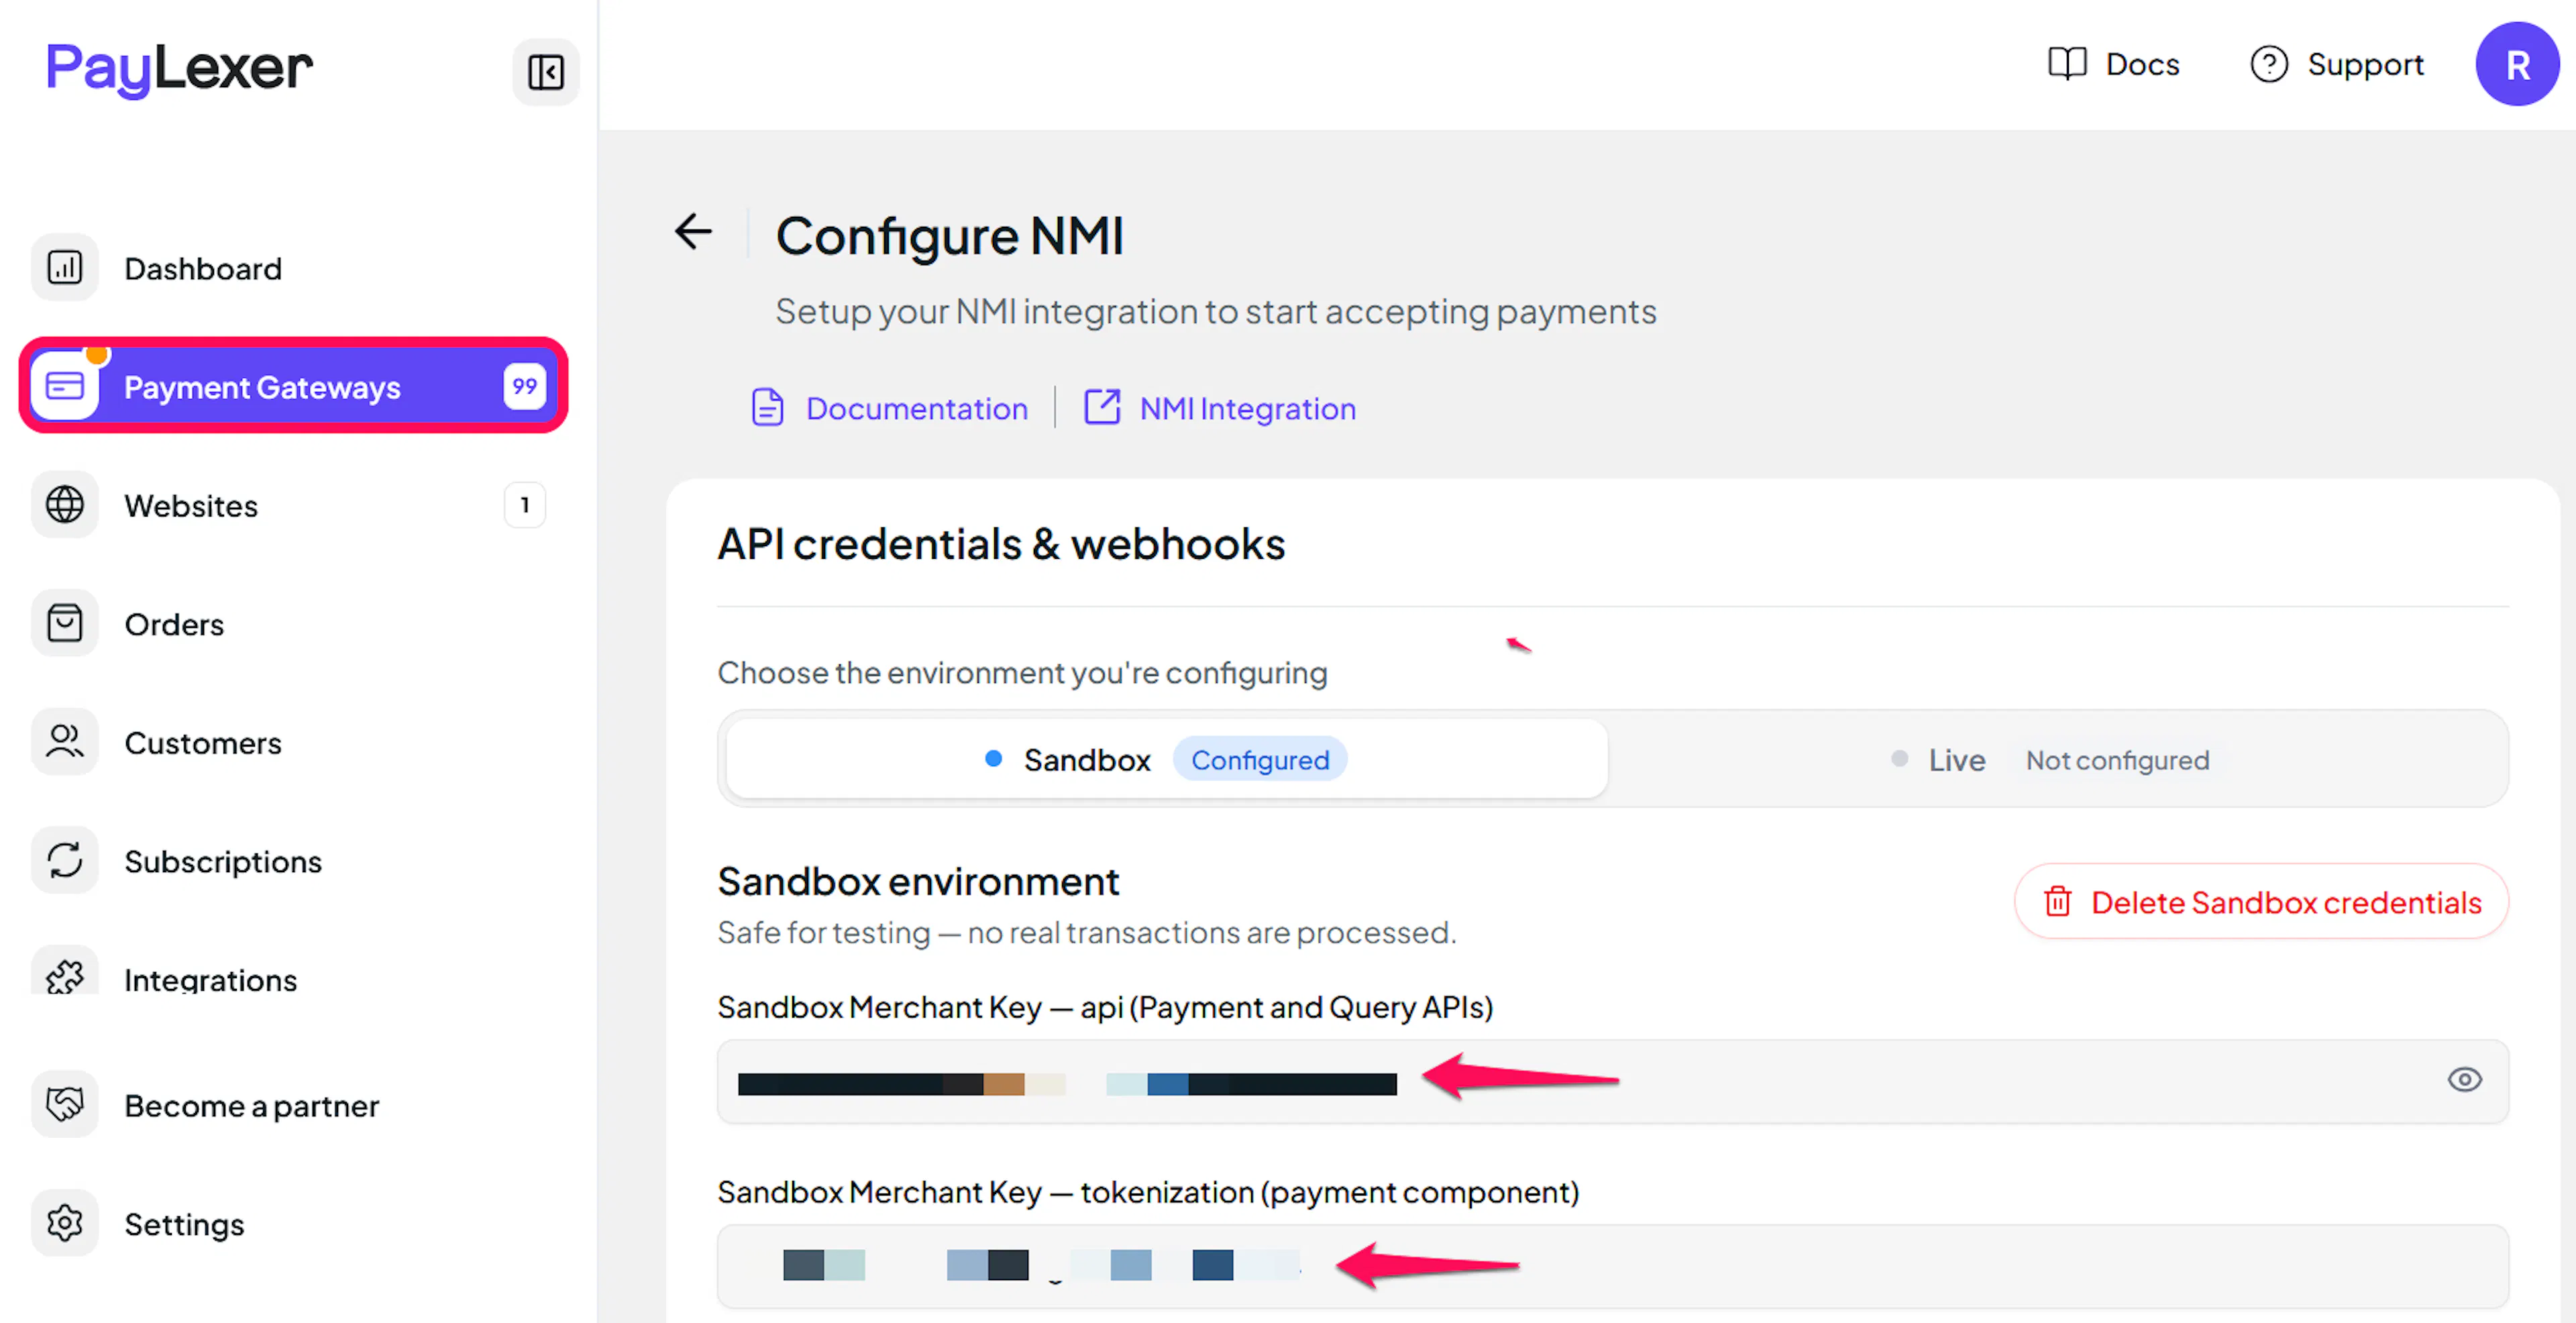
Understanding Live/Production and Sandbox Settings:
| Environment | Purpose |
|---|---|
| Live / Production | Used for real transactions. |
| Test / Sandbox | Used for testing only. No real money is processed. |
How PayLexer selects credentials:
- Debug/Test mode ON → Test credentials are used
- Debug/Test mode OFF → Live credentials are used
Test and save
Click Verify Connection to confirm your api Merchant Key is valid, then click Save to save your configuration.
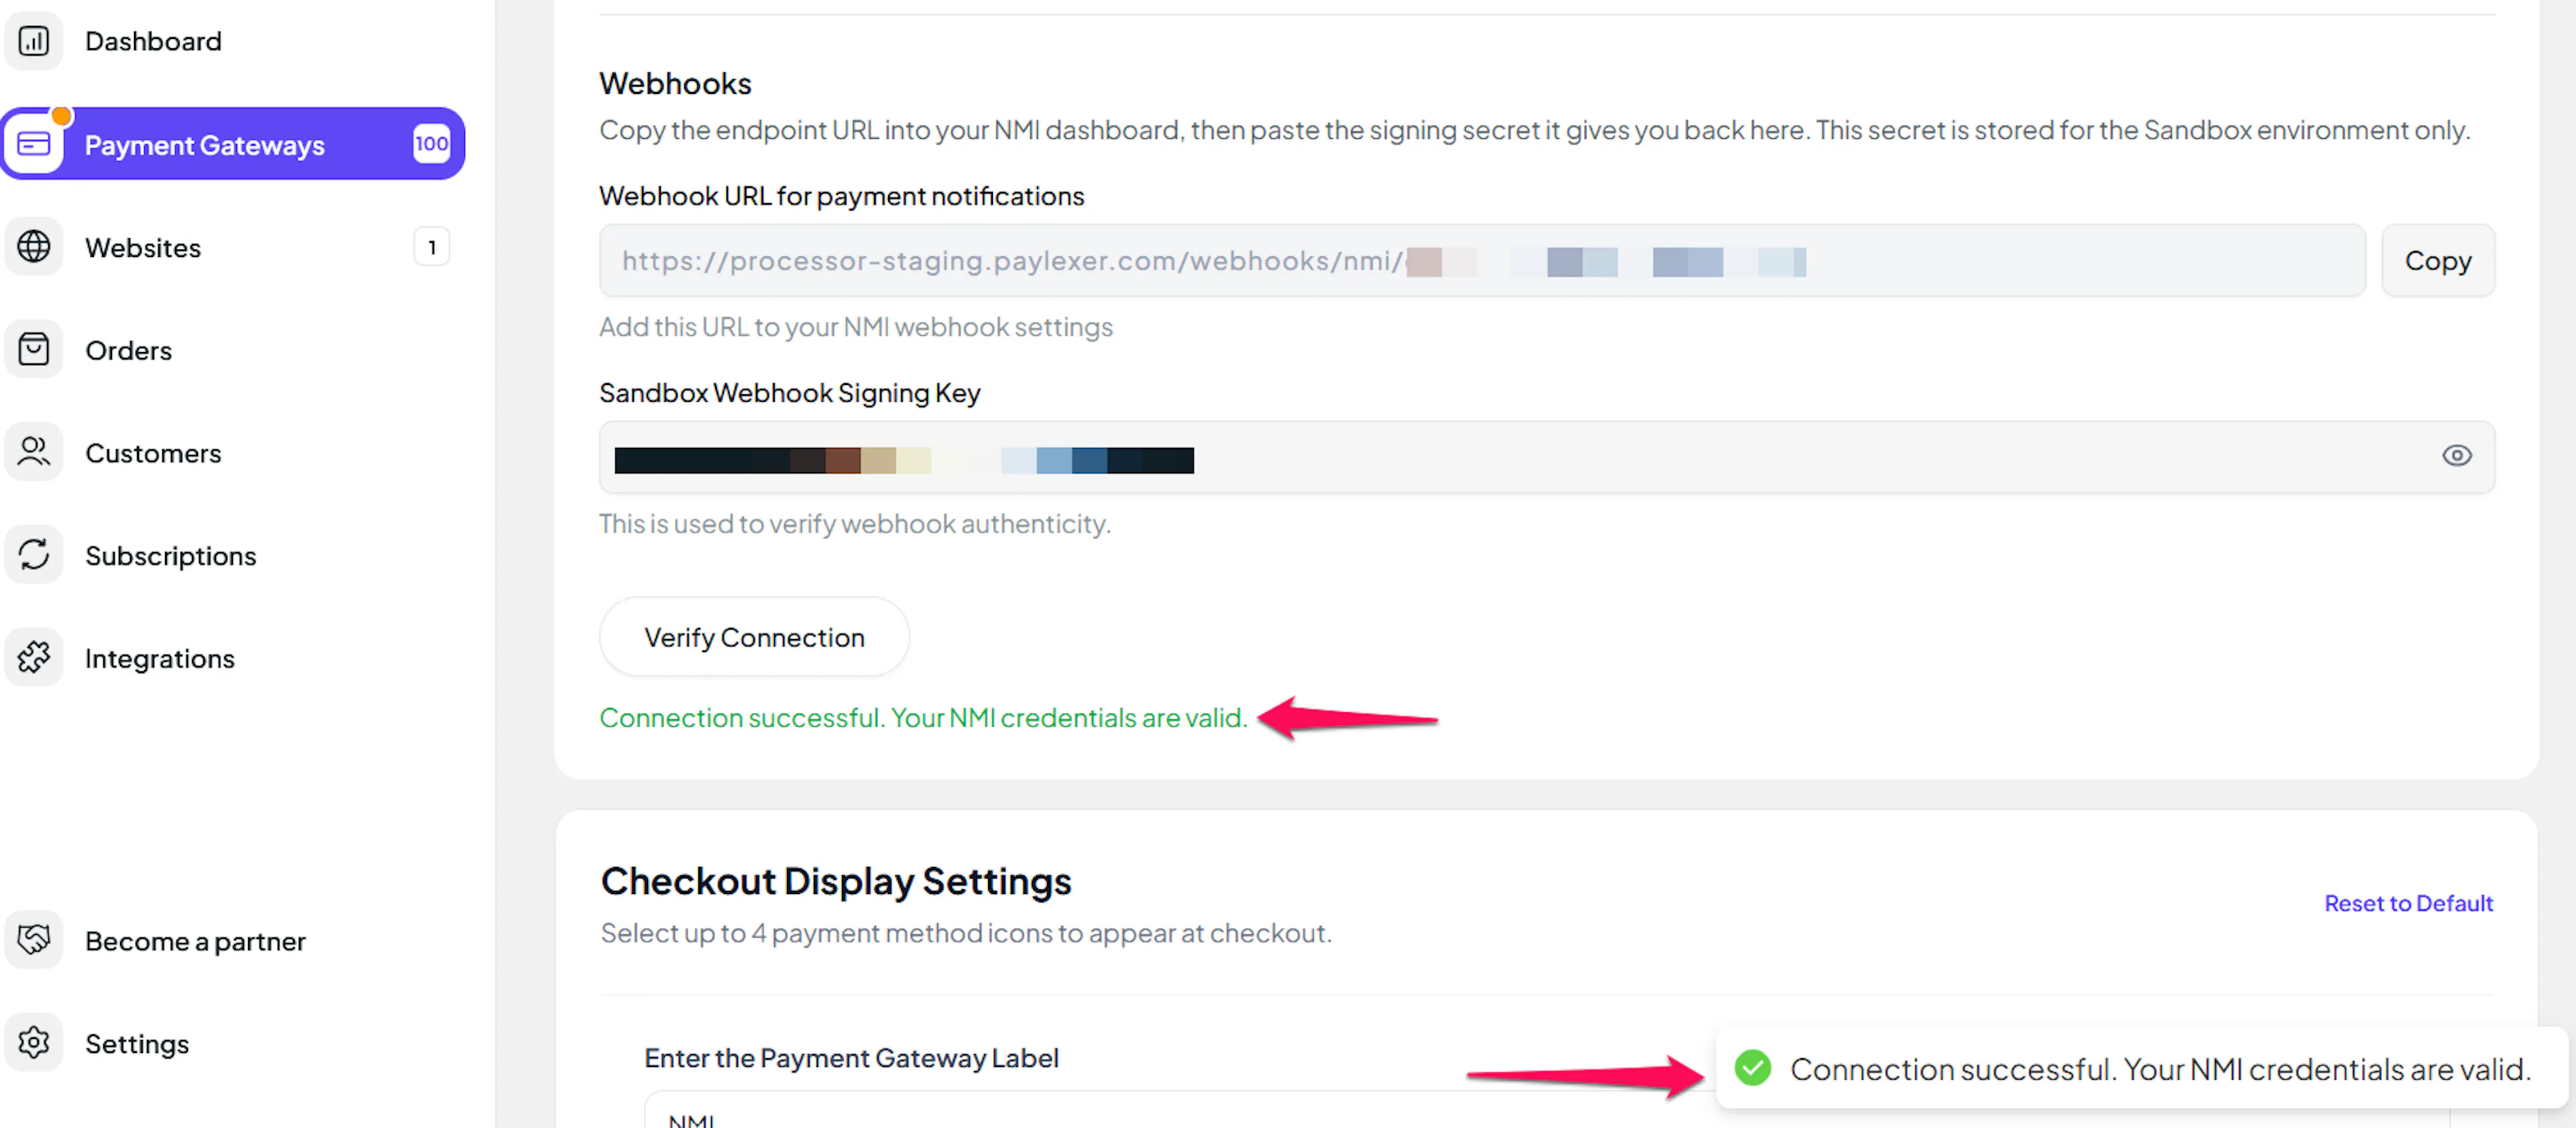
Configuring Webhooks (Mandatory)
Webhooks enable real-time payment and refund updates and significantly improve reliability.
Benefits of Webhooks:
- Instant payment status updates
- Automatic refund confirmation
- A record of every event NMI sends, independent of your storefront
NMI has no self-registration API - you register the endpoint once, by hand, in your own NMI dashboard.
Copy your PayLexer webhook URL
In PayLexer -> Payment Gateways -> NMI, copy the Webhook URL shown for your account.
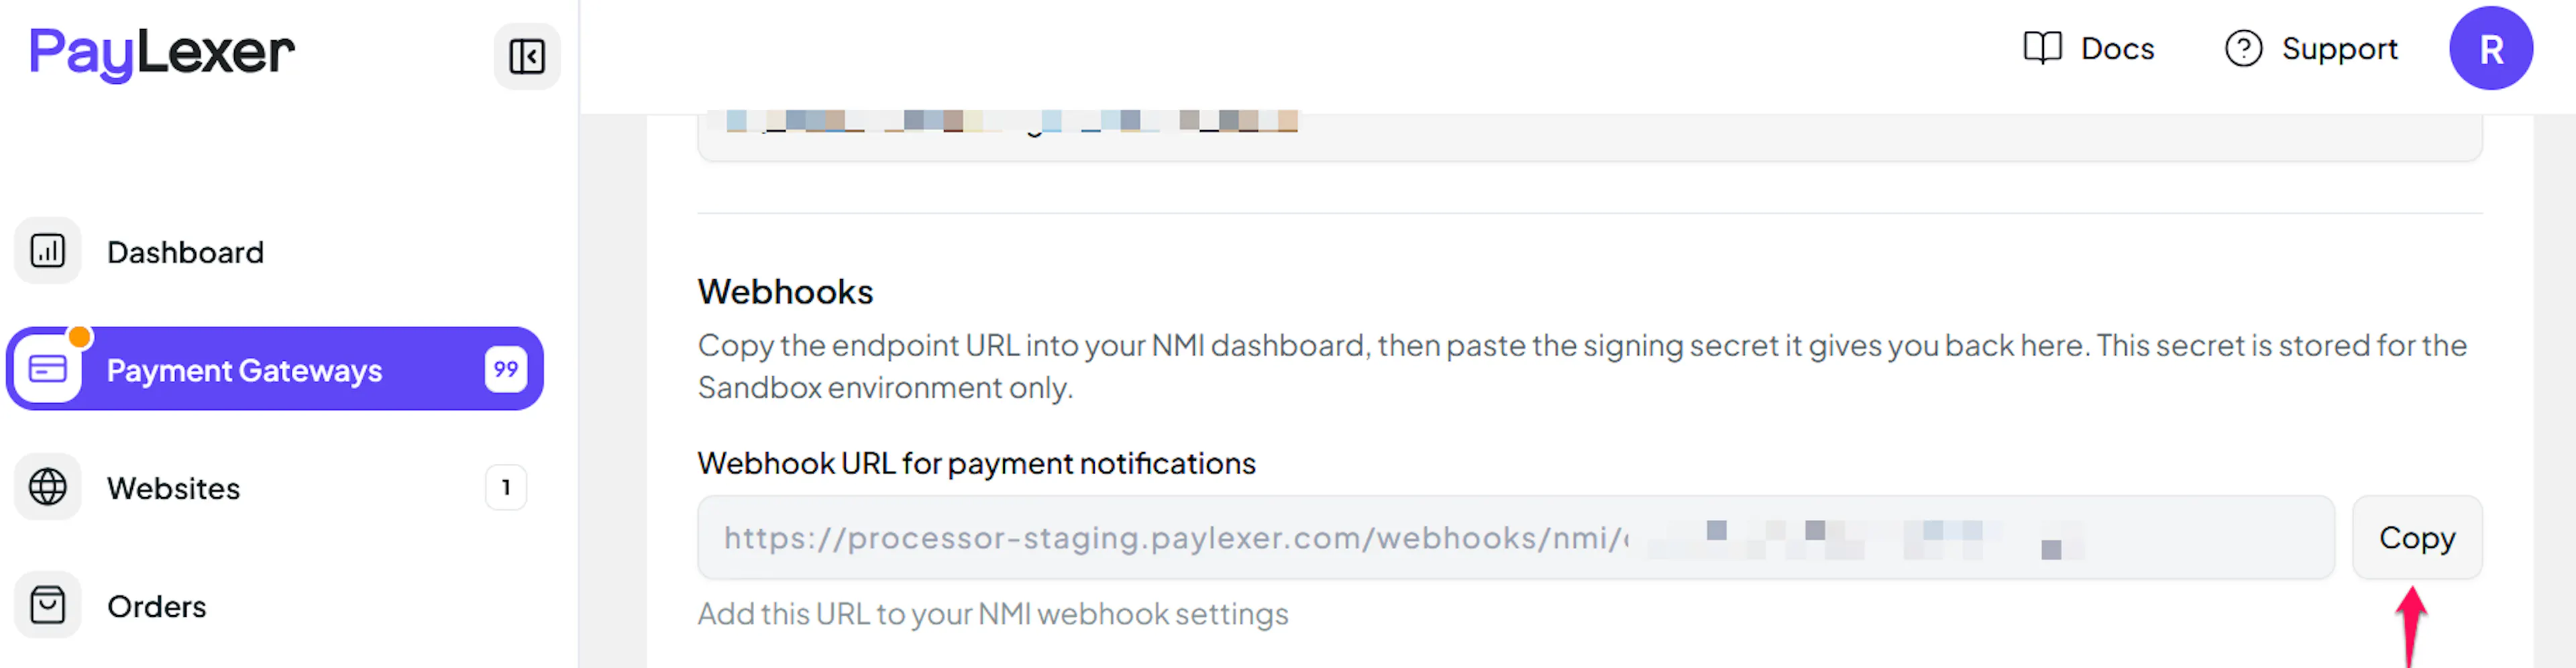
Register the webhook in NMI
In your NMI dashboard, go to Settings -> Webhooks and paste the PayLexer webhook URL as the endpoint.
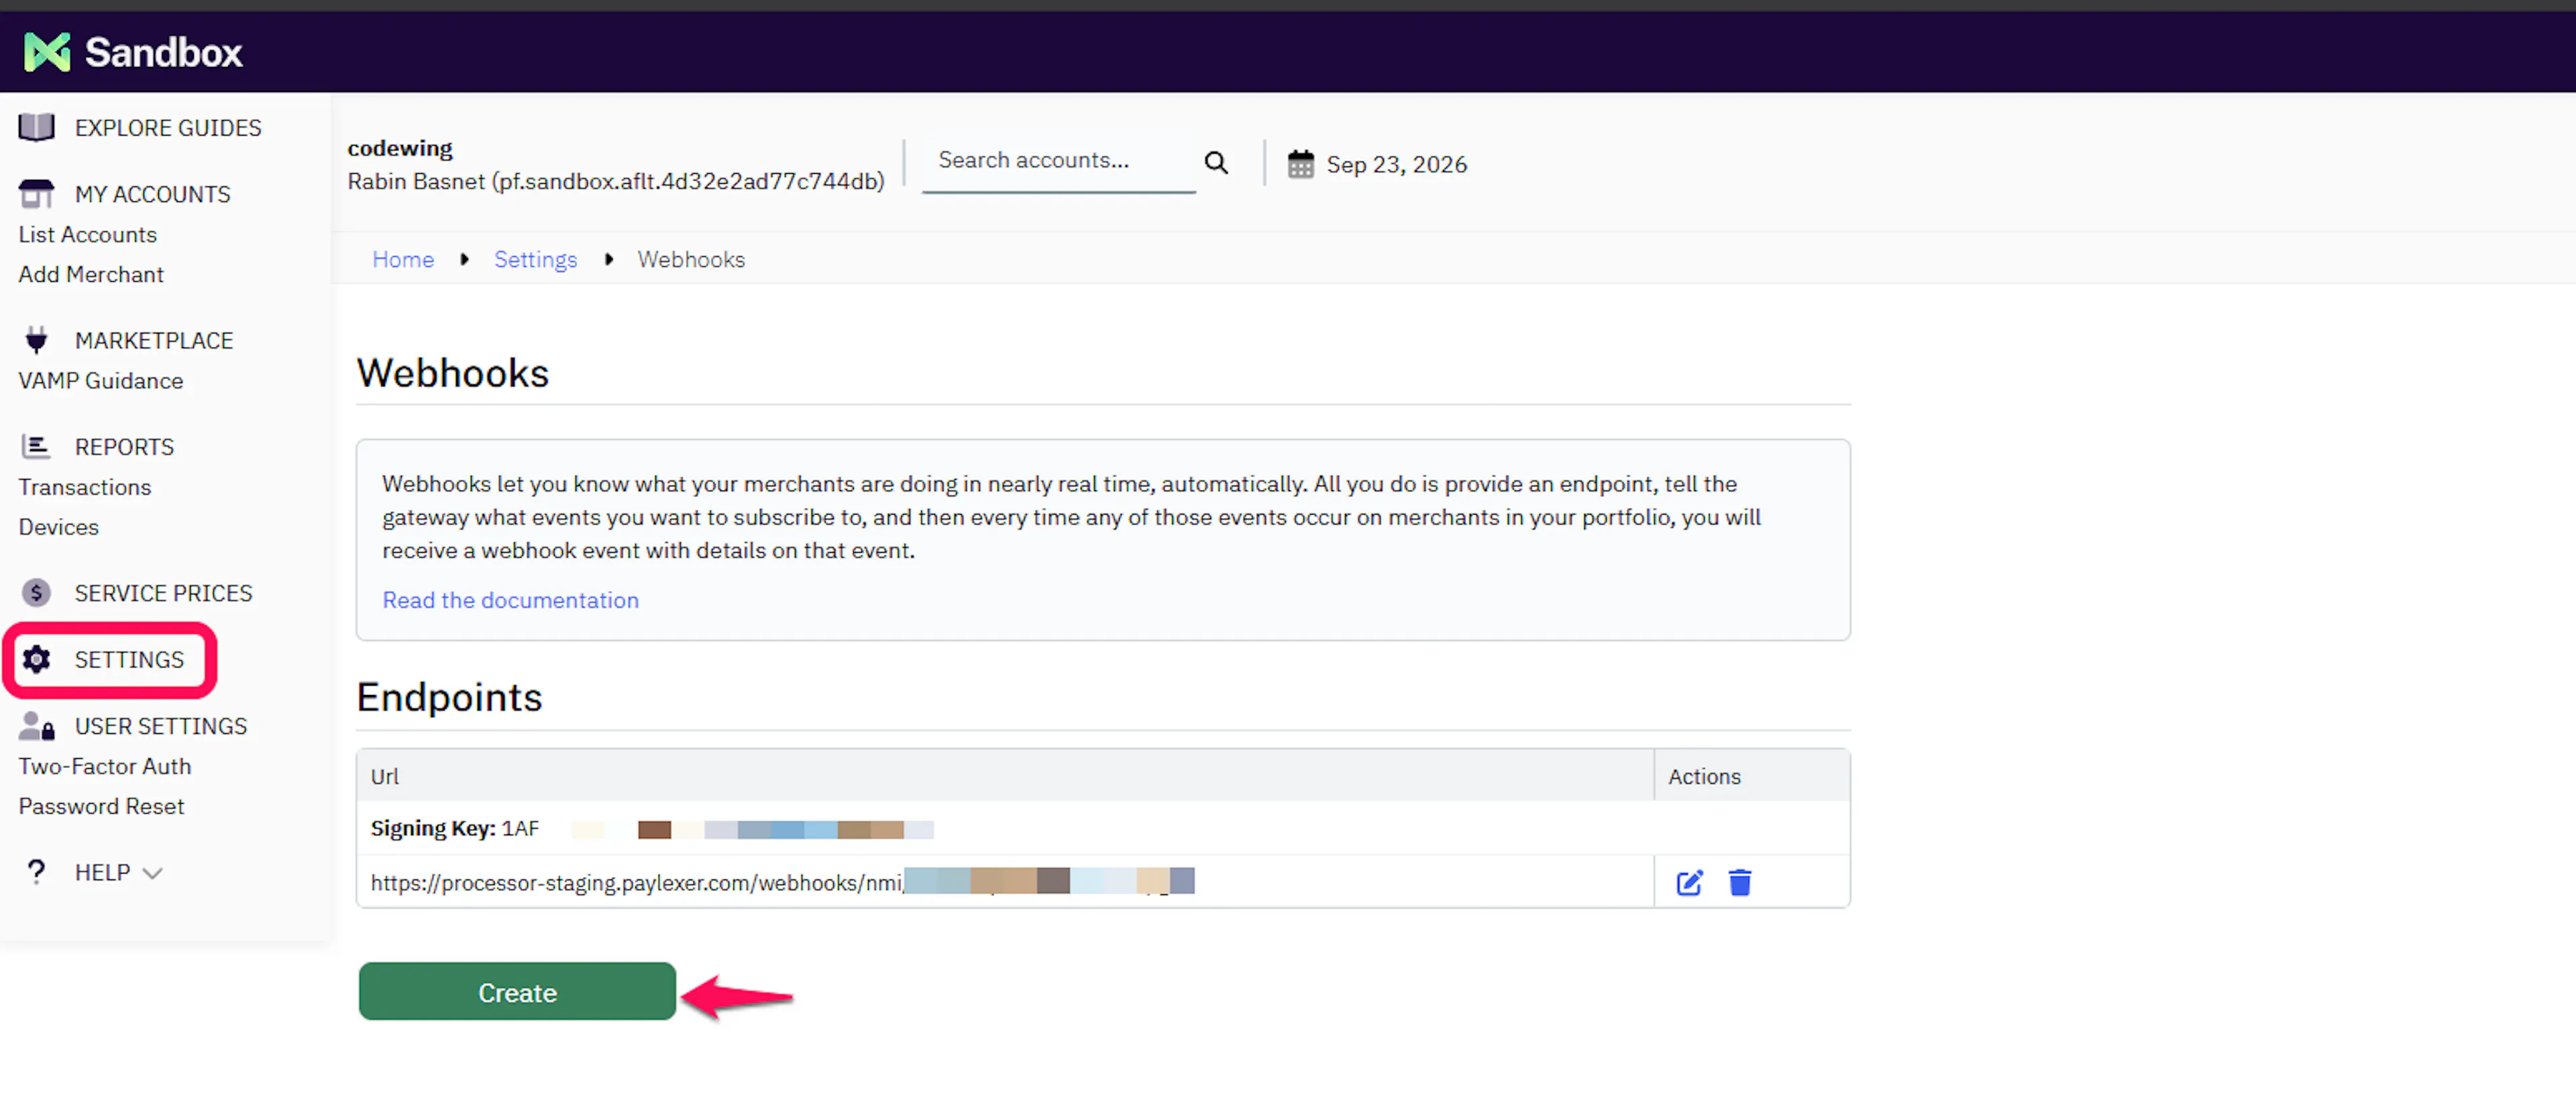
Add the Webhook Signing Key to PayLexer
Copy the signing key NMI generates for the webhook, then paste it into the Webhook Signing Key field in PayLexer (or Sandbox Webhook Signing Key for your test environment) and click Save.
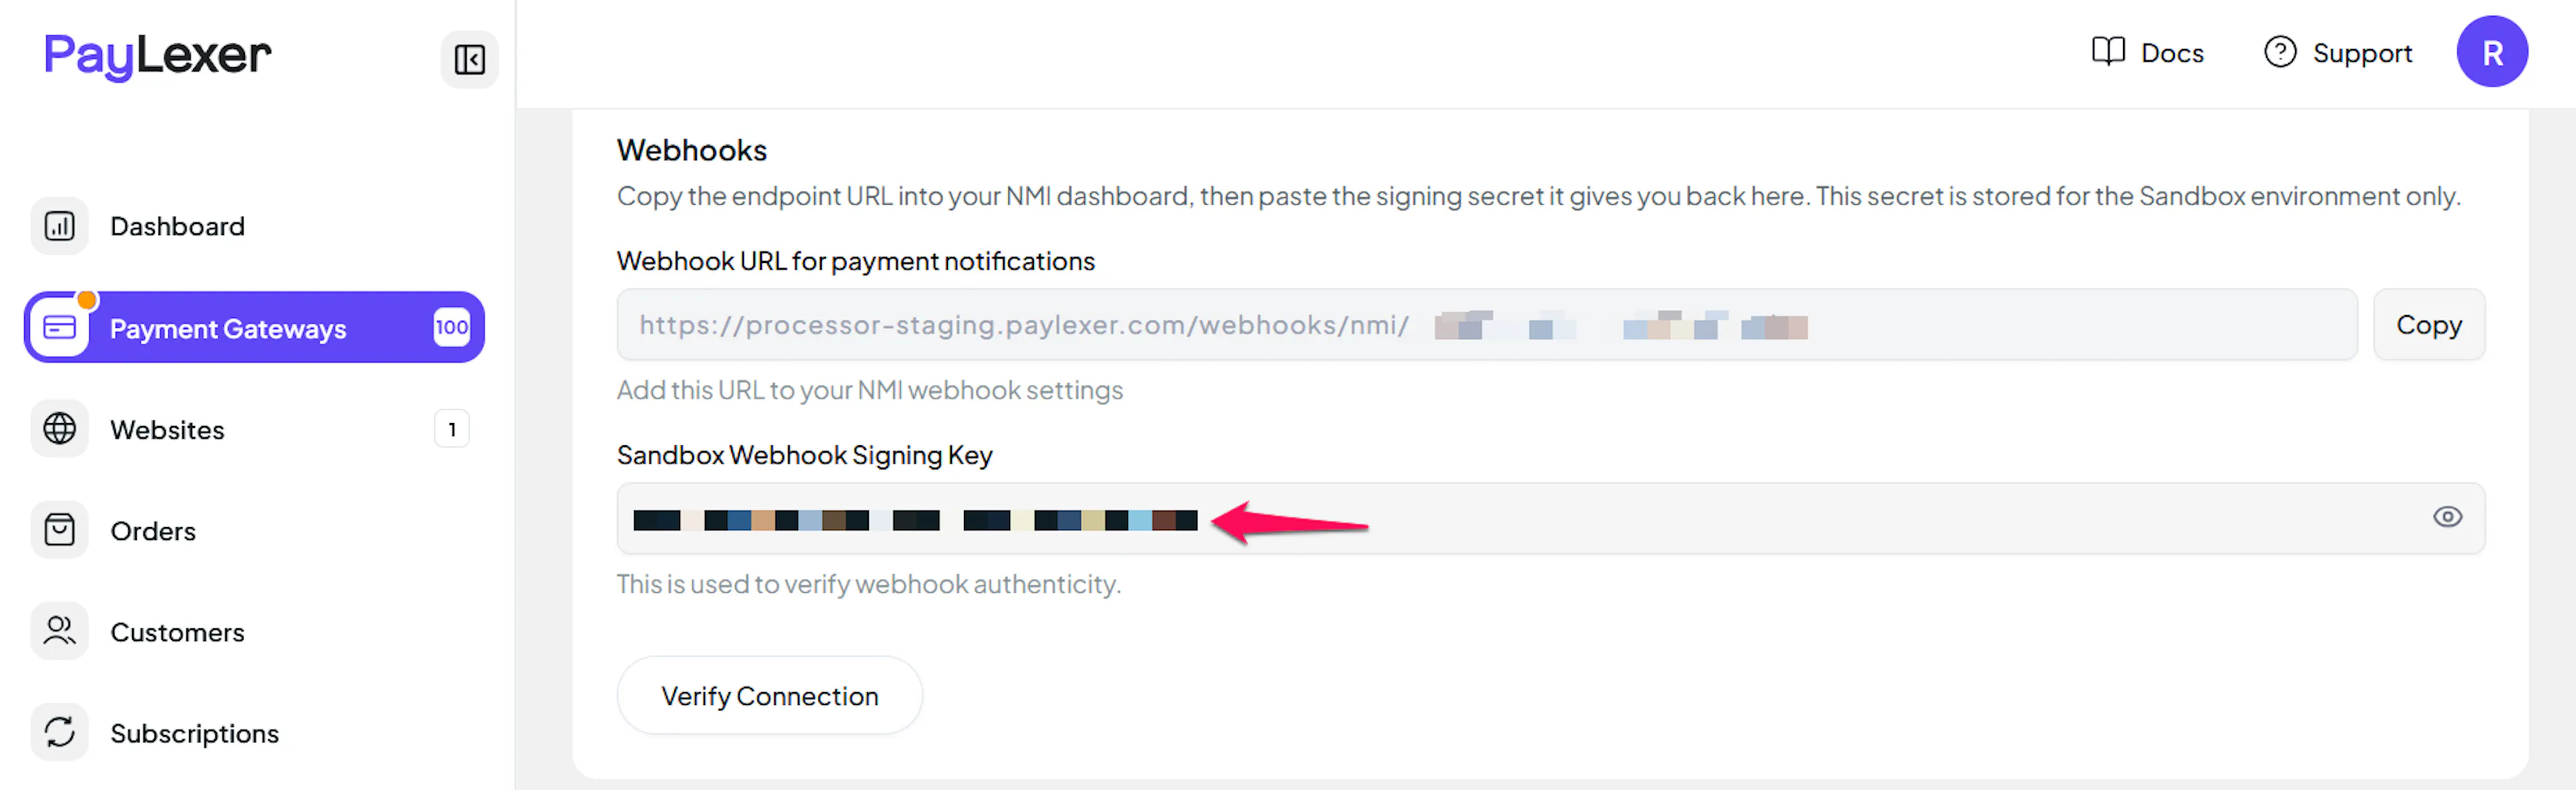
The Webhook Signing Key is separate from your api Merchant Key. Use the dedicated signing key from your NMI webhook settings, not your payment API key.
Integrate NMI to Your Website
If you have already added and configured your site, you can enable NMI in your existing setup.
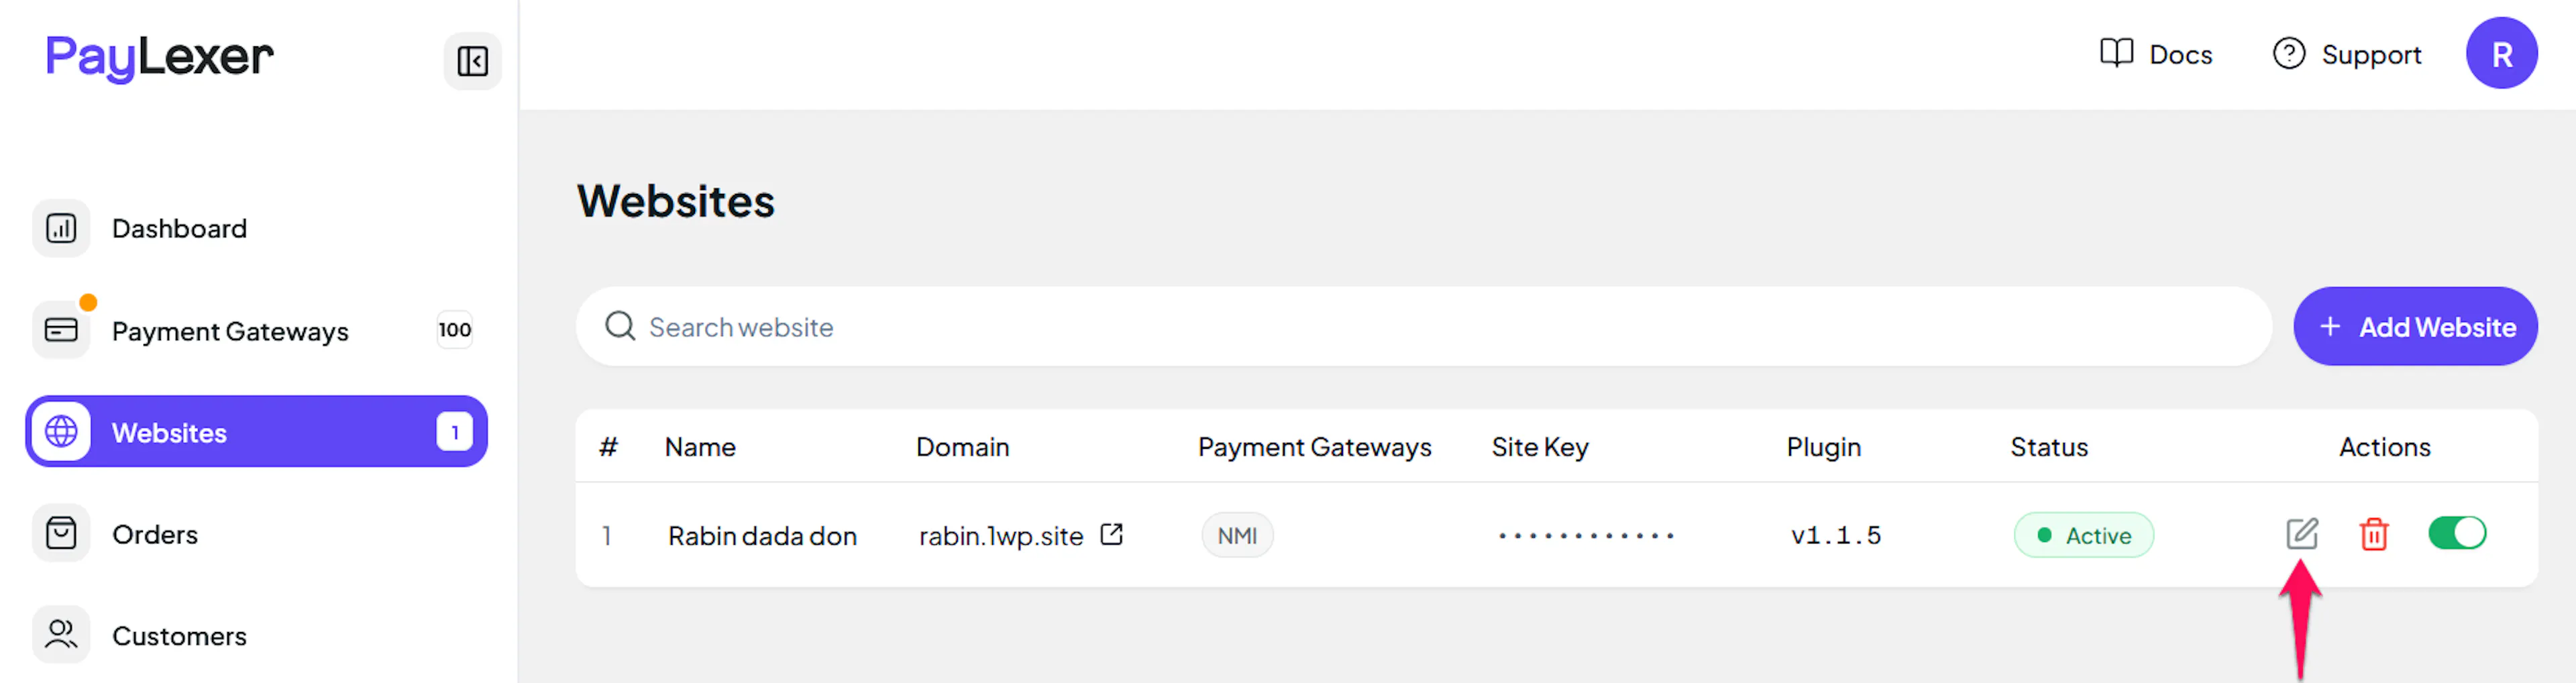
Go to Websites
Navigate to Websites in your PayLexer dashboard.
Edit your website
Click the Edit Icon of your added website.
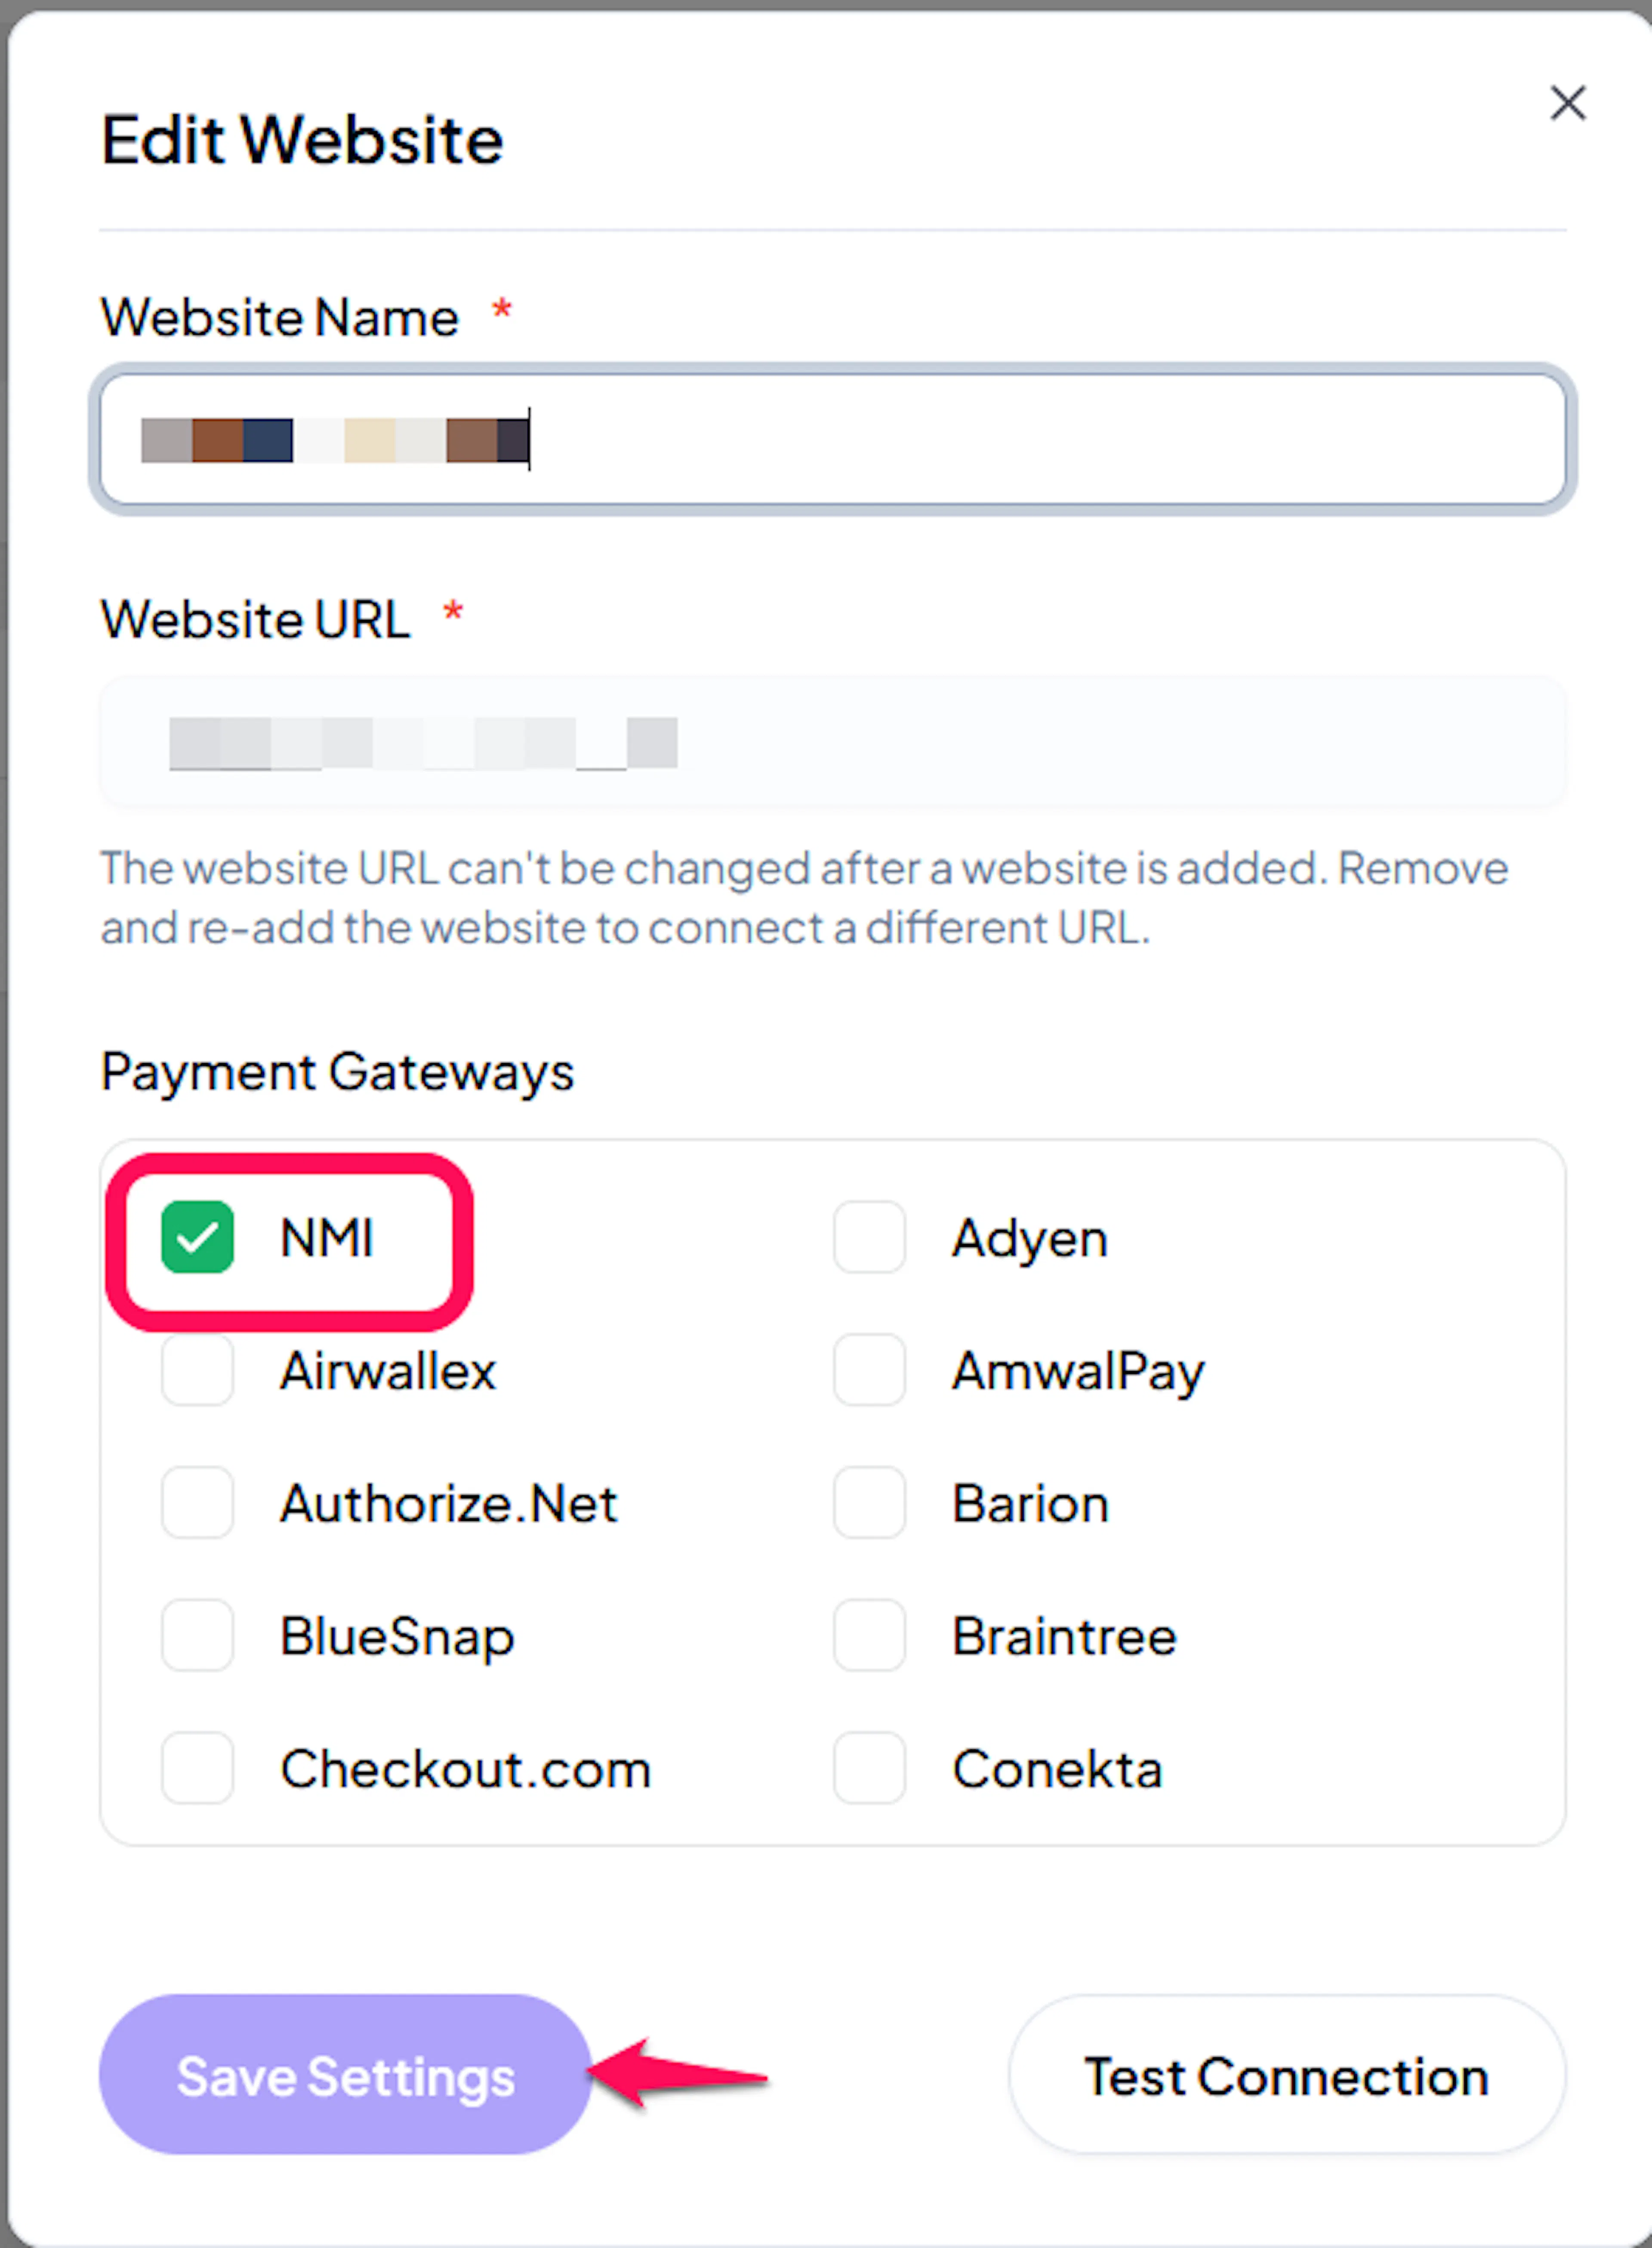
Enable NMI
Click the checkbox to enable NMI for the website.
If you haven't added a website yet, Continue to Add Your Website →
Troubleshooting
Best Practices
- Test in sandbox before enabling production.
- Configure webhooks so payment and refund updates sync in real time, even though PayLexer also confirms both directly from NMI's response.
- Keep your api Merchant Key and Webhook Signing Key confidential - only the tokenization key is safe to expose.
- Remember NMI only settles in USD when pricing orders you expect it to handle.
FAQs
Still Have Questions?
- NMI Support: NMI Website
- PayLexer Support: Contact Support