

Pay Hero
Connect Pay Hero to PayLexer to collect M-PESA payments in Kenya straight into your own till, paybill or bank account.
Pay Hero is a Kenyan M-PESA aggregator operated by Pay Hero Kenya, which collects takings directly into your own M-PESA till, paybill or bank account. It sits between your store and Safaricom, so you can accept M-PESA without building and certifying your own Daraja integration. Shoppers pay by entering their phone number at checkout and approving a prompt on their handset with their M-PESA PIN, so there is no card form and no redirect to another site.
- Supported Regions (Merchant Accounts): Kenya
- Supported Currencies: KES
This gateway appears in checkout only when the selected currency is KES.
Pay Hero has no sandbox. There is one account and one environment, so every payment is real money against your real till. Test with small amounts.
Supported Features
- One-time M-PESA payments through STK Push
- Collection into your own M-PESA till, paybill or bank account
- Shoppers stay on your checkout, with no redirect to an external payment page
- Automatic payment confirmation, with every confirmation independently verified against Pay Hero before an order is marked paid
- Automatic recovery of orders whose confirmation is delayed or lost
Refunds and subscriptions are not supported. Pay Hero has no refund API, so refunds must be handled manually through your M-PESA account and won't be recorded in PayLexer. Subscriptions aren't possible because M-PESA requires the payer's PIN for every transaction.
Before You Start
Make sure you have:
- Pay Hero Account – Don't have one? Sign up for Pay Hero →
- PayLexer Account – Required to configure the integration. Create your account →
- A website where you want to integrate
- A linked M-PESA till, paybill, or bank account in Pay Hero and a funded service wallet to cover transaction fees. Payment prompts stop working if the wallet runs out of funds.
Looking for a different payment processor? View all supported gateways →
Configuring Pay Hero
You need a Basic Authorization Token and a Channel ID from Pay Hero for this integration.
Getting API Credentials
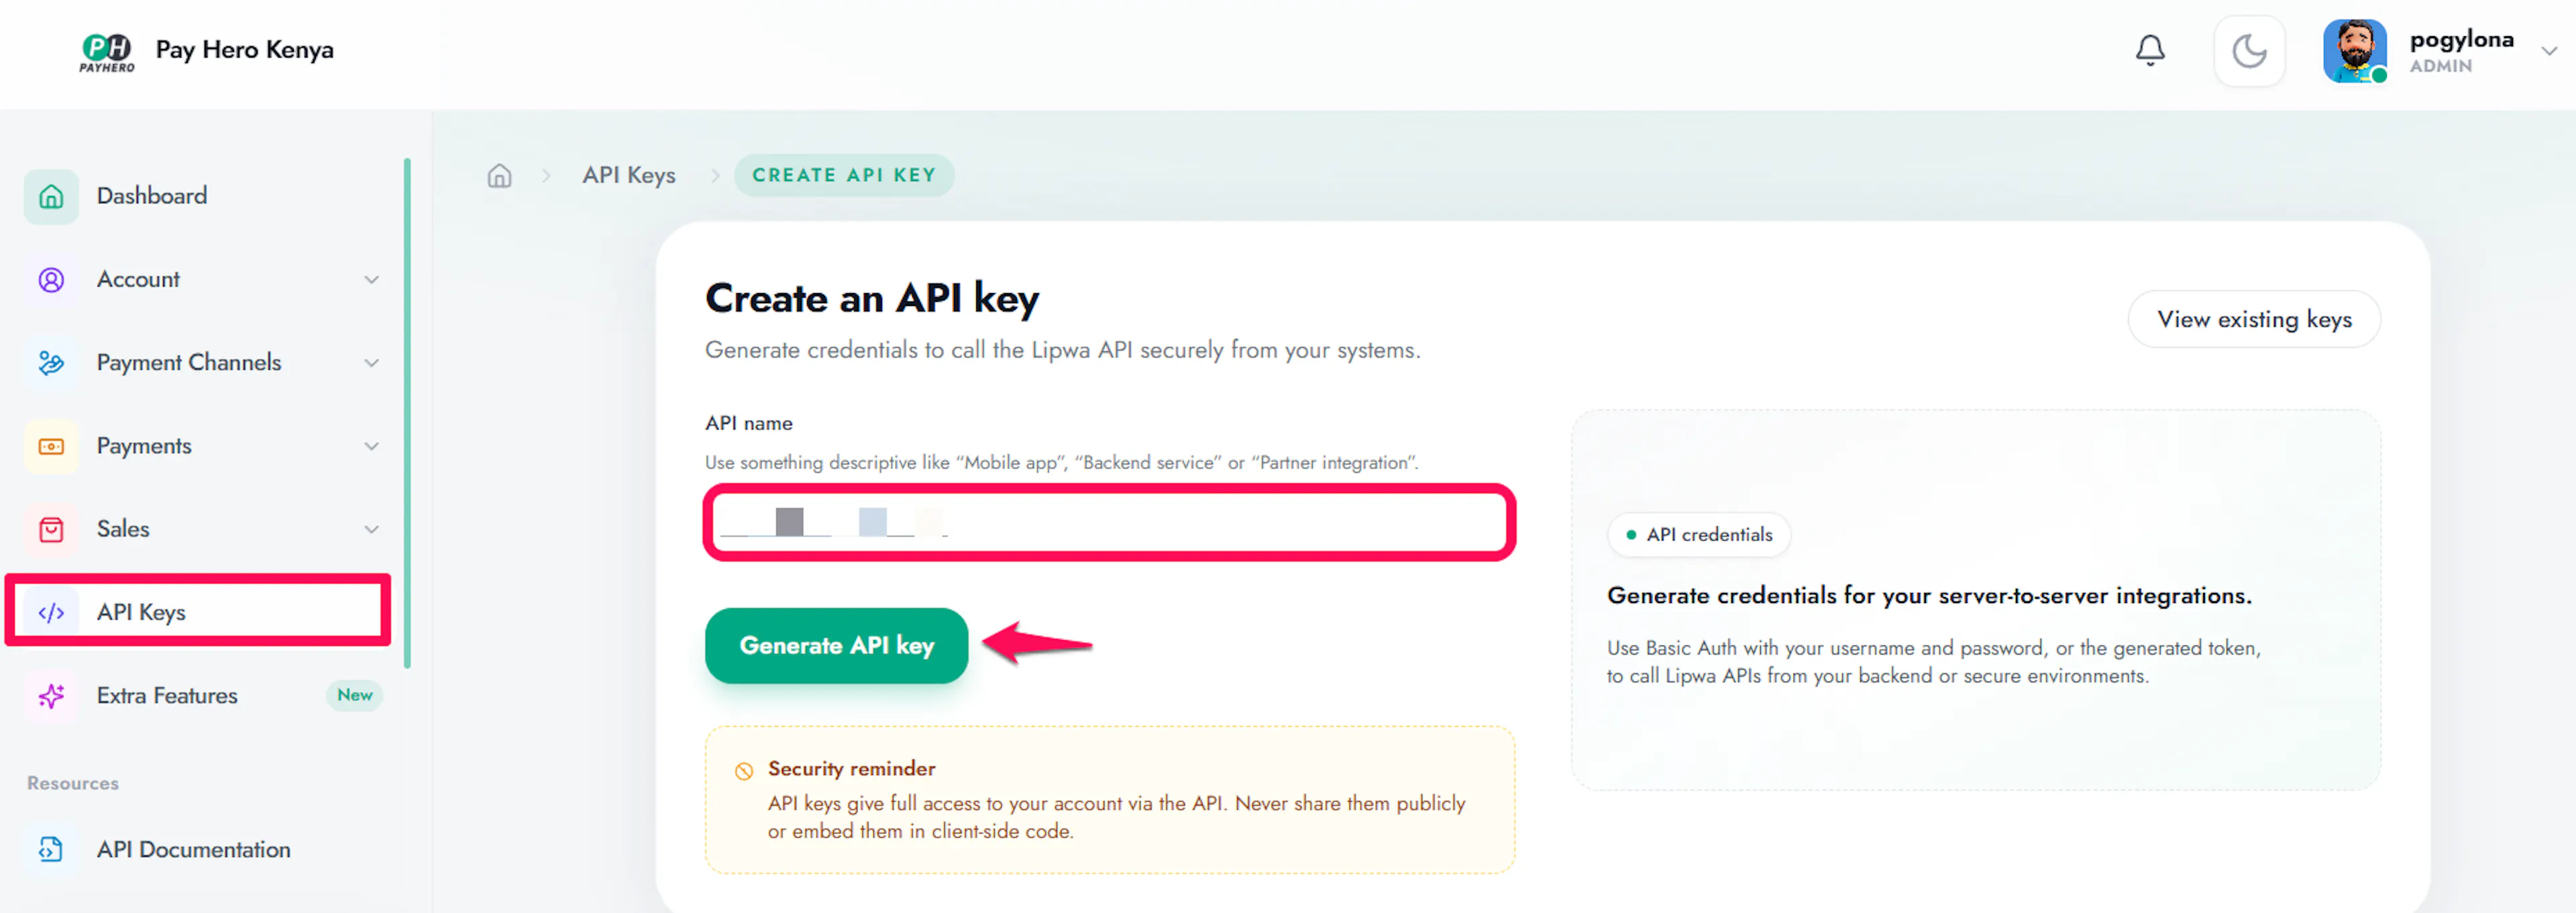
Open your API Keys page
Log in to Pay Hero and go to Profile → API Keys.
Create a new API key
Click + New API key, give it a name such as PayLexer, and create it.
Create a key specifically for PayLexer rather than reusing one from another application, so you can revoke it independently later.
Copy the Basic Authorization Token
On the confirmation screen, use the Copy button next to BASIC AUTH TOKEN.
This token is shown only once. Store it somewhere safe before leaving the page. Pay Hero cannot show it to you again, so you would have to create a new key.
Always use the Copy button. The token wraps across two lines on screen, and a copy made by hand that picks up the line break will fail with no clear error message.
You do not need the API username or password separately. They are already contained inside this token.
Copy your Channel ID
Go to Payment Channels → My Payment Channels and copy the id of the channel you want payments to land in.
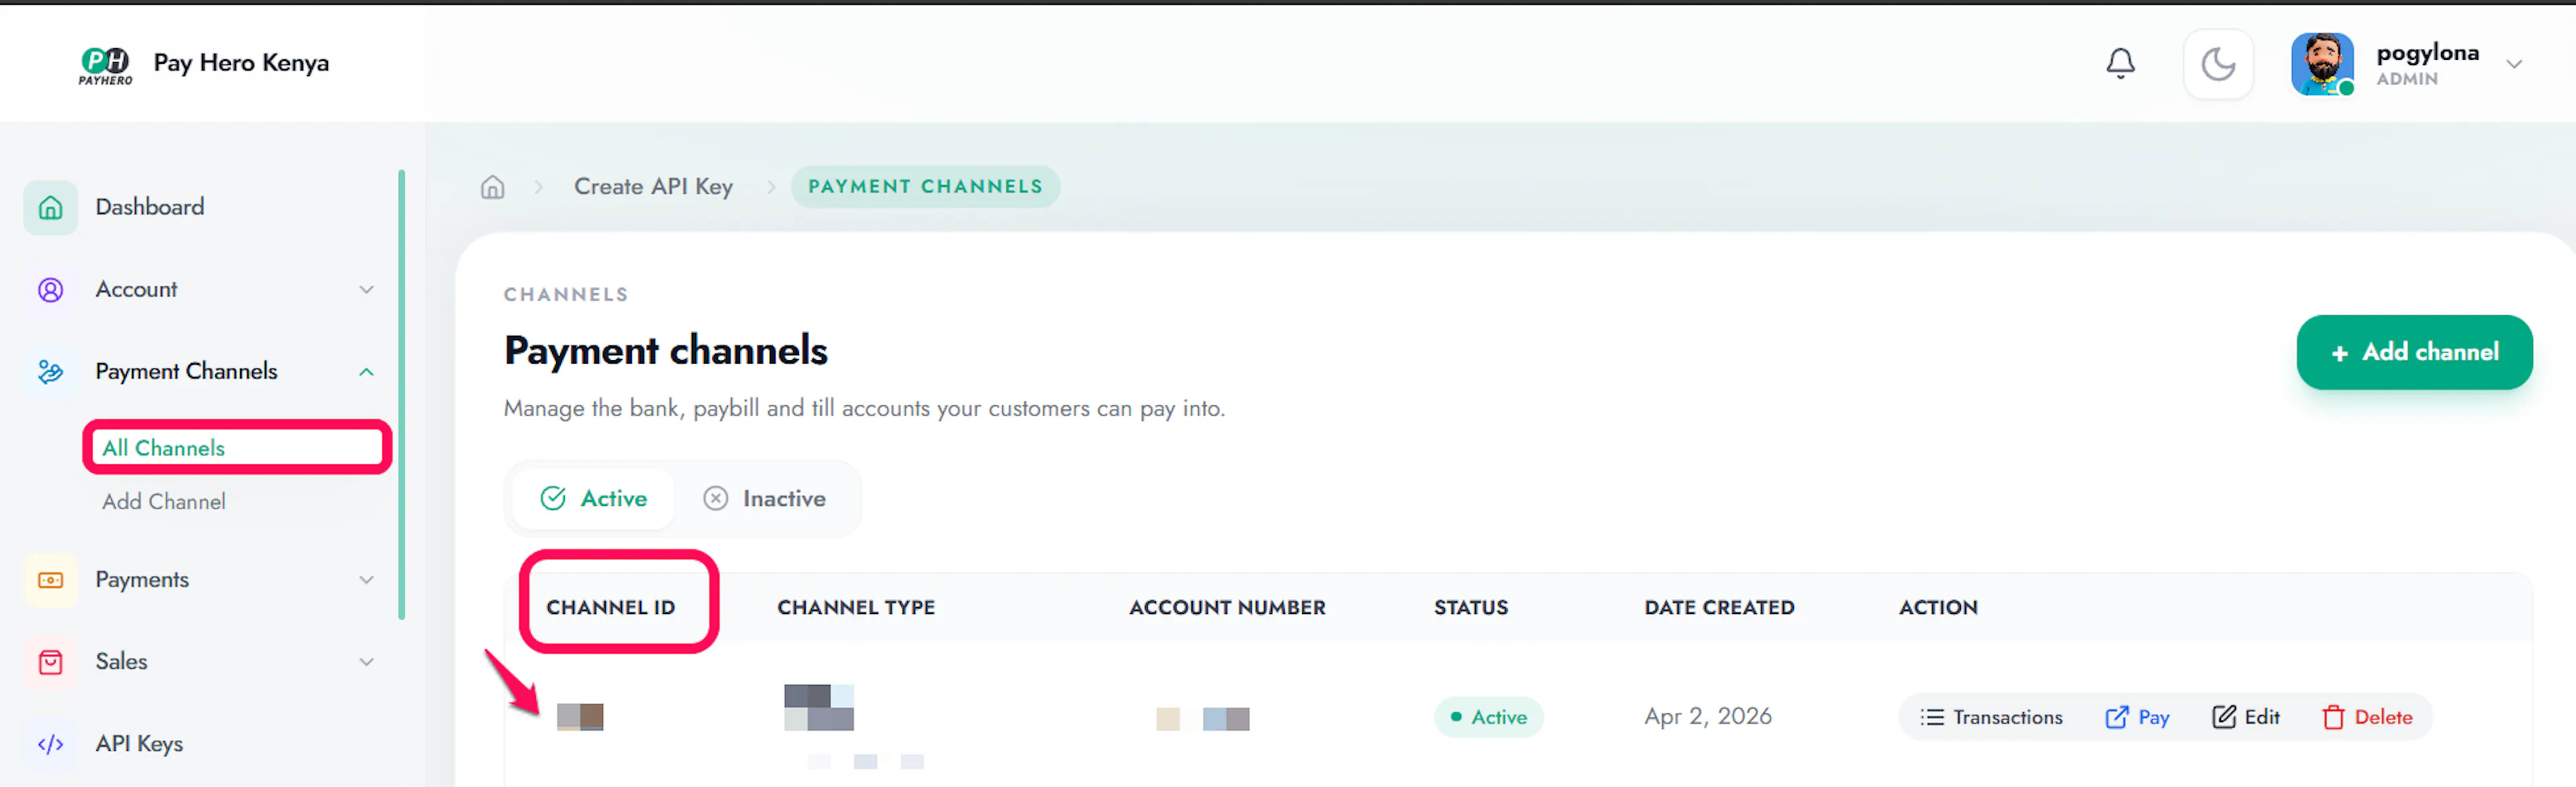
This is not the Account ID shown on the API Keys page. They are different numbers, and using the Account ID will stop payments from working.
Adding Credentials to PayLexer
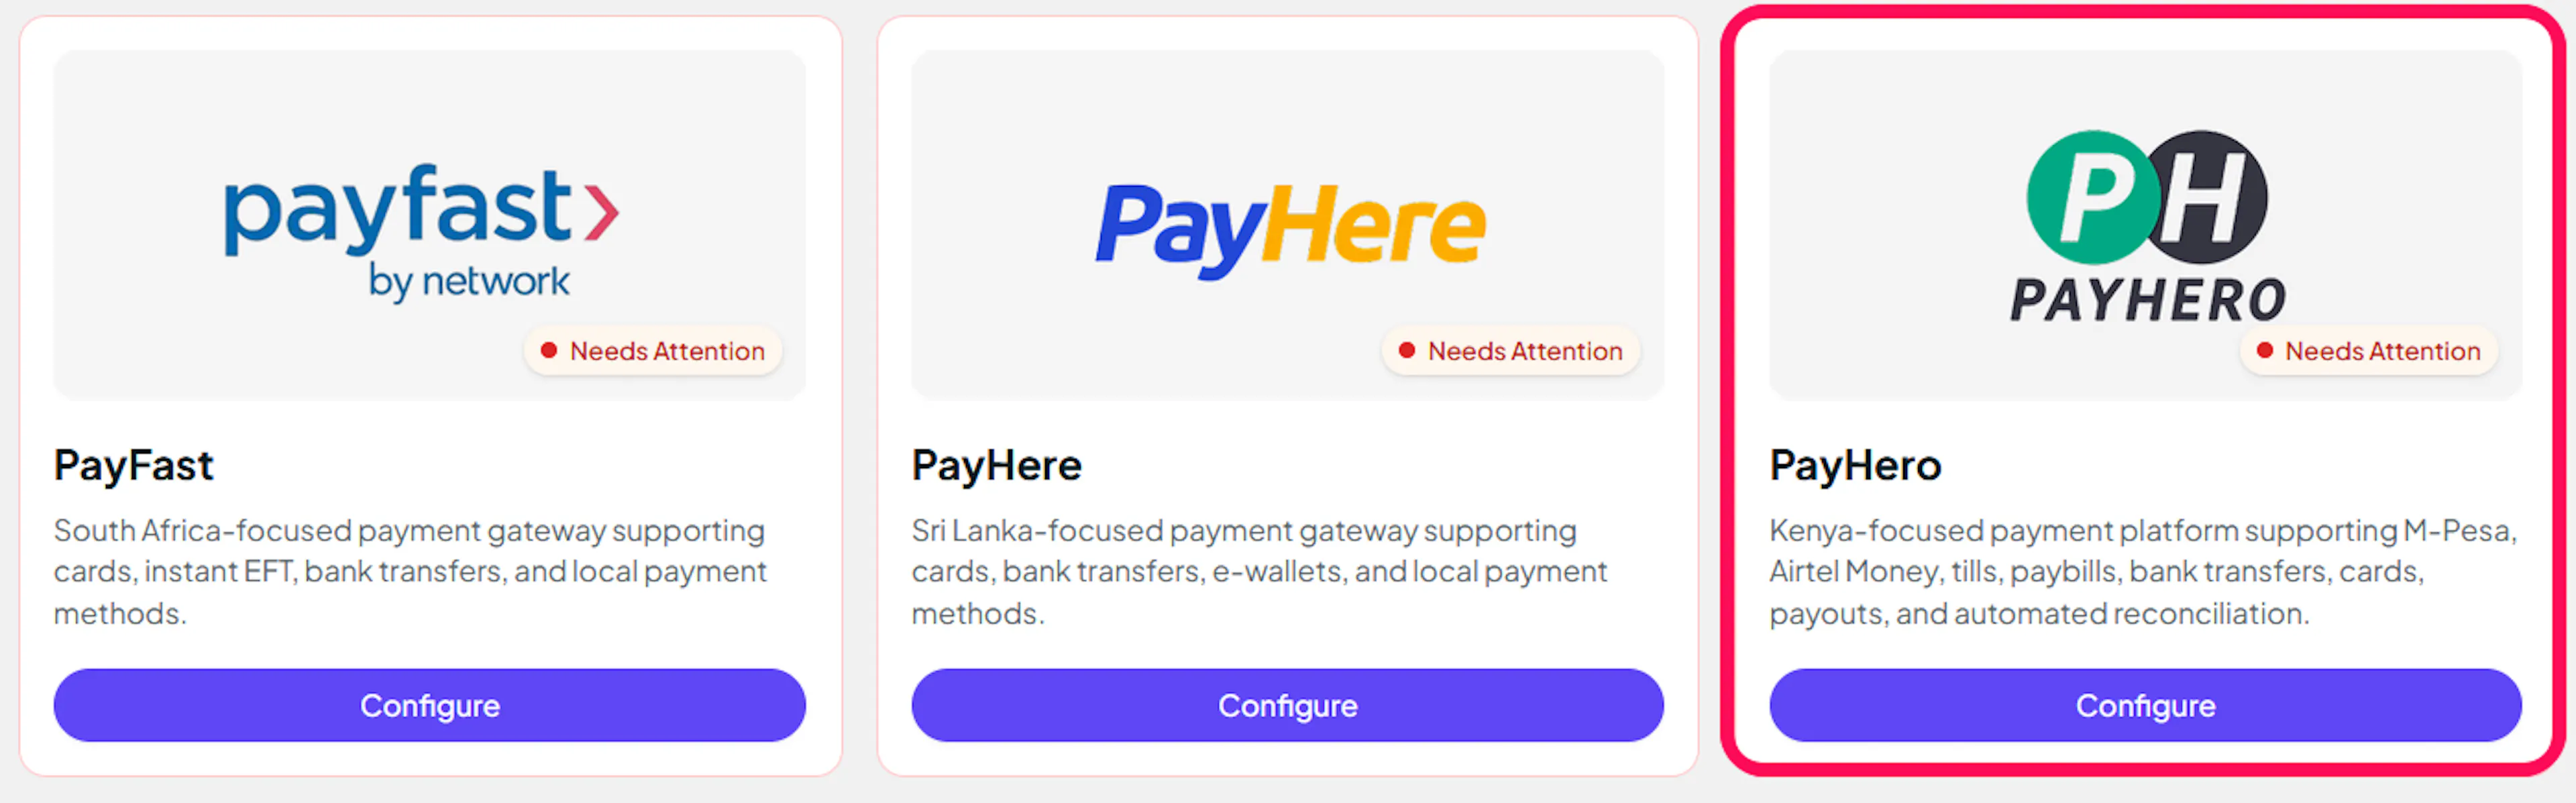
Open PayLexer Dashboard
Log in to your PayLexer dashboard and navigate to Payment Gateways → Pay Hero.
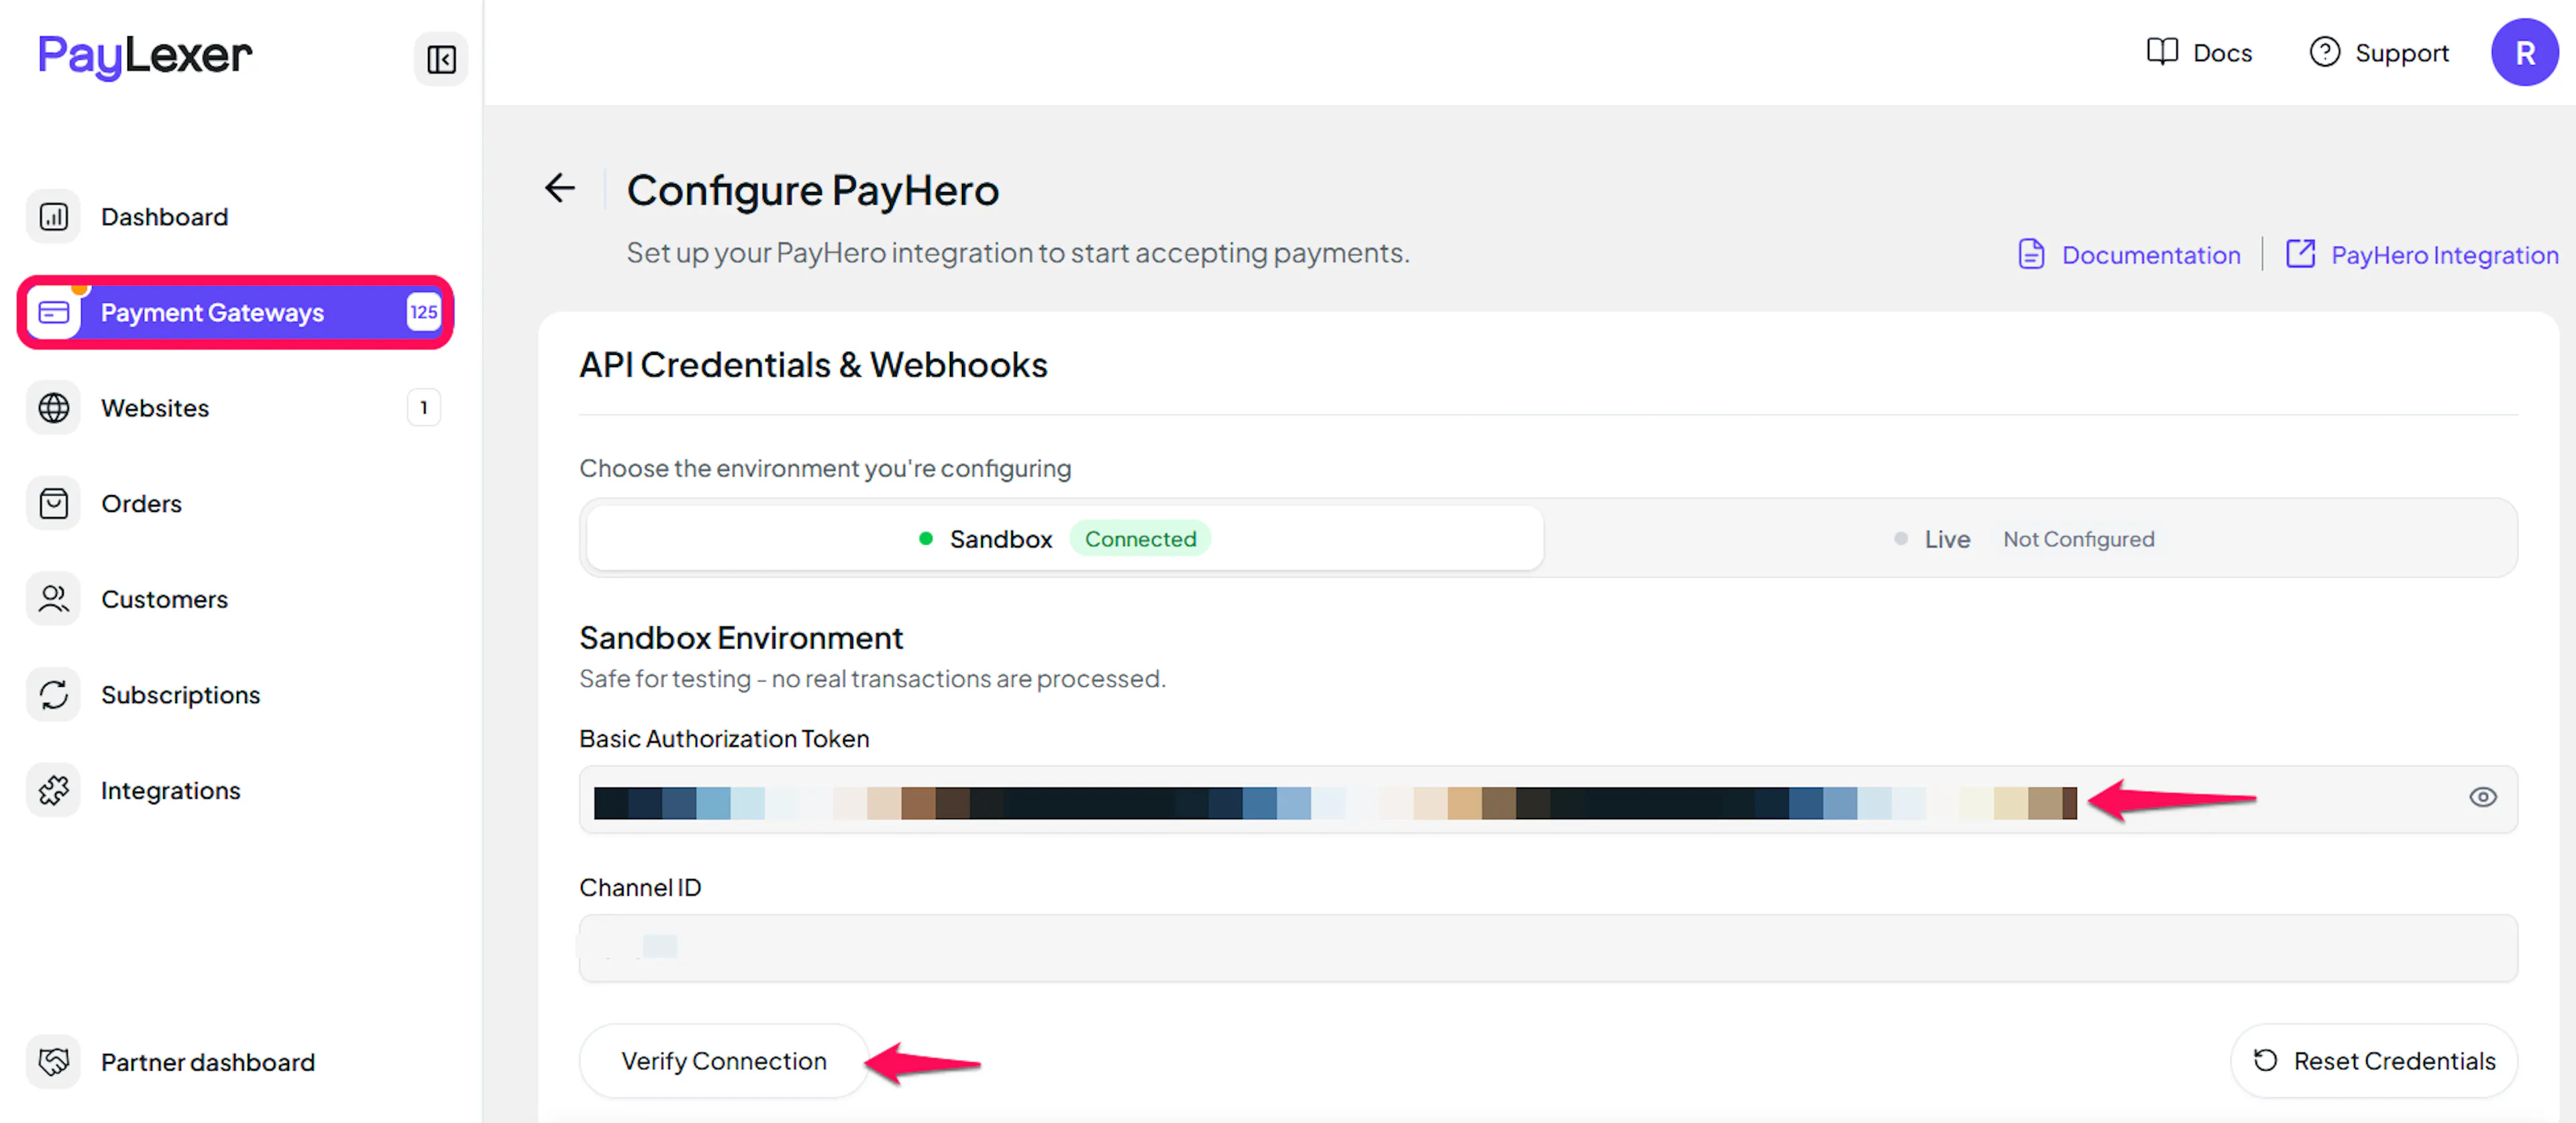
Enter your credentials
Paste the Basic Authorization Token and Channel ID you copied from Pay Hero into the corresponding fields.
Paste the token exactly as Pay Hero gave it to you. Do not re-encode it or remove any part of it.
Understanding Live/Production and Test Settings:
| Environment | Purpose |
|---|---|
| Live / Production (Mandatory) | Used for real transactions. Cannot be empty, even when testing. |
| Test / Sandbox (Optional) | Pay Hero has no sandbox, so this is a second live key. Real money is processed. |
How PayLexer selects credentials:
- Debug/Test mode ON → Test credentials are used
- Debug/Test mode OFF → Live credentials are used
Putting a key in the Test field does not make its payments free. It only tells PayLexer which key to use, so keep test amounts small.
Test and save
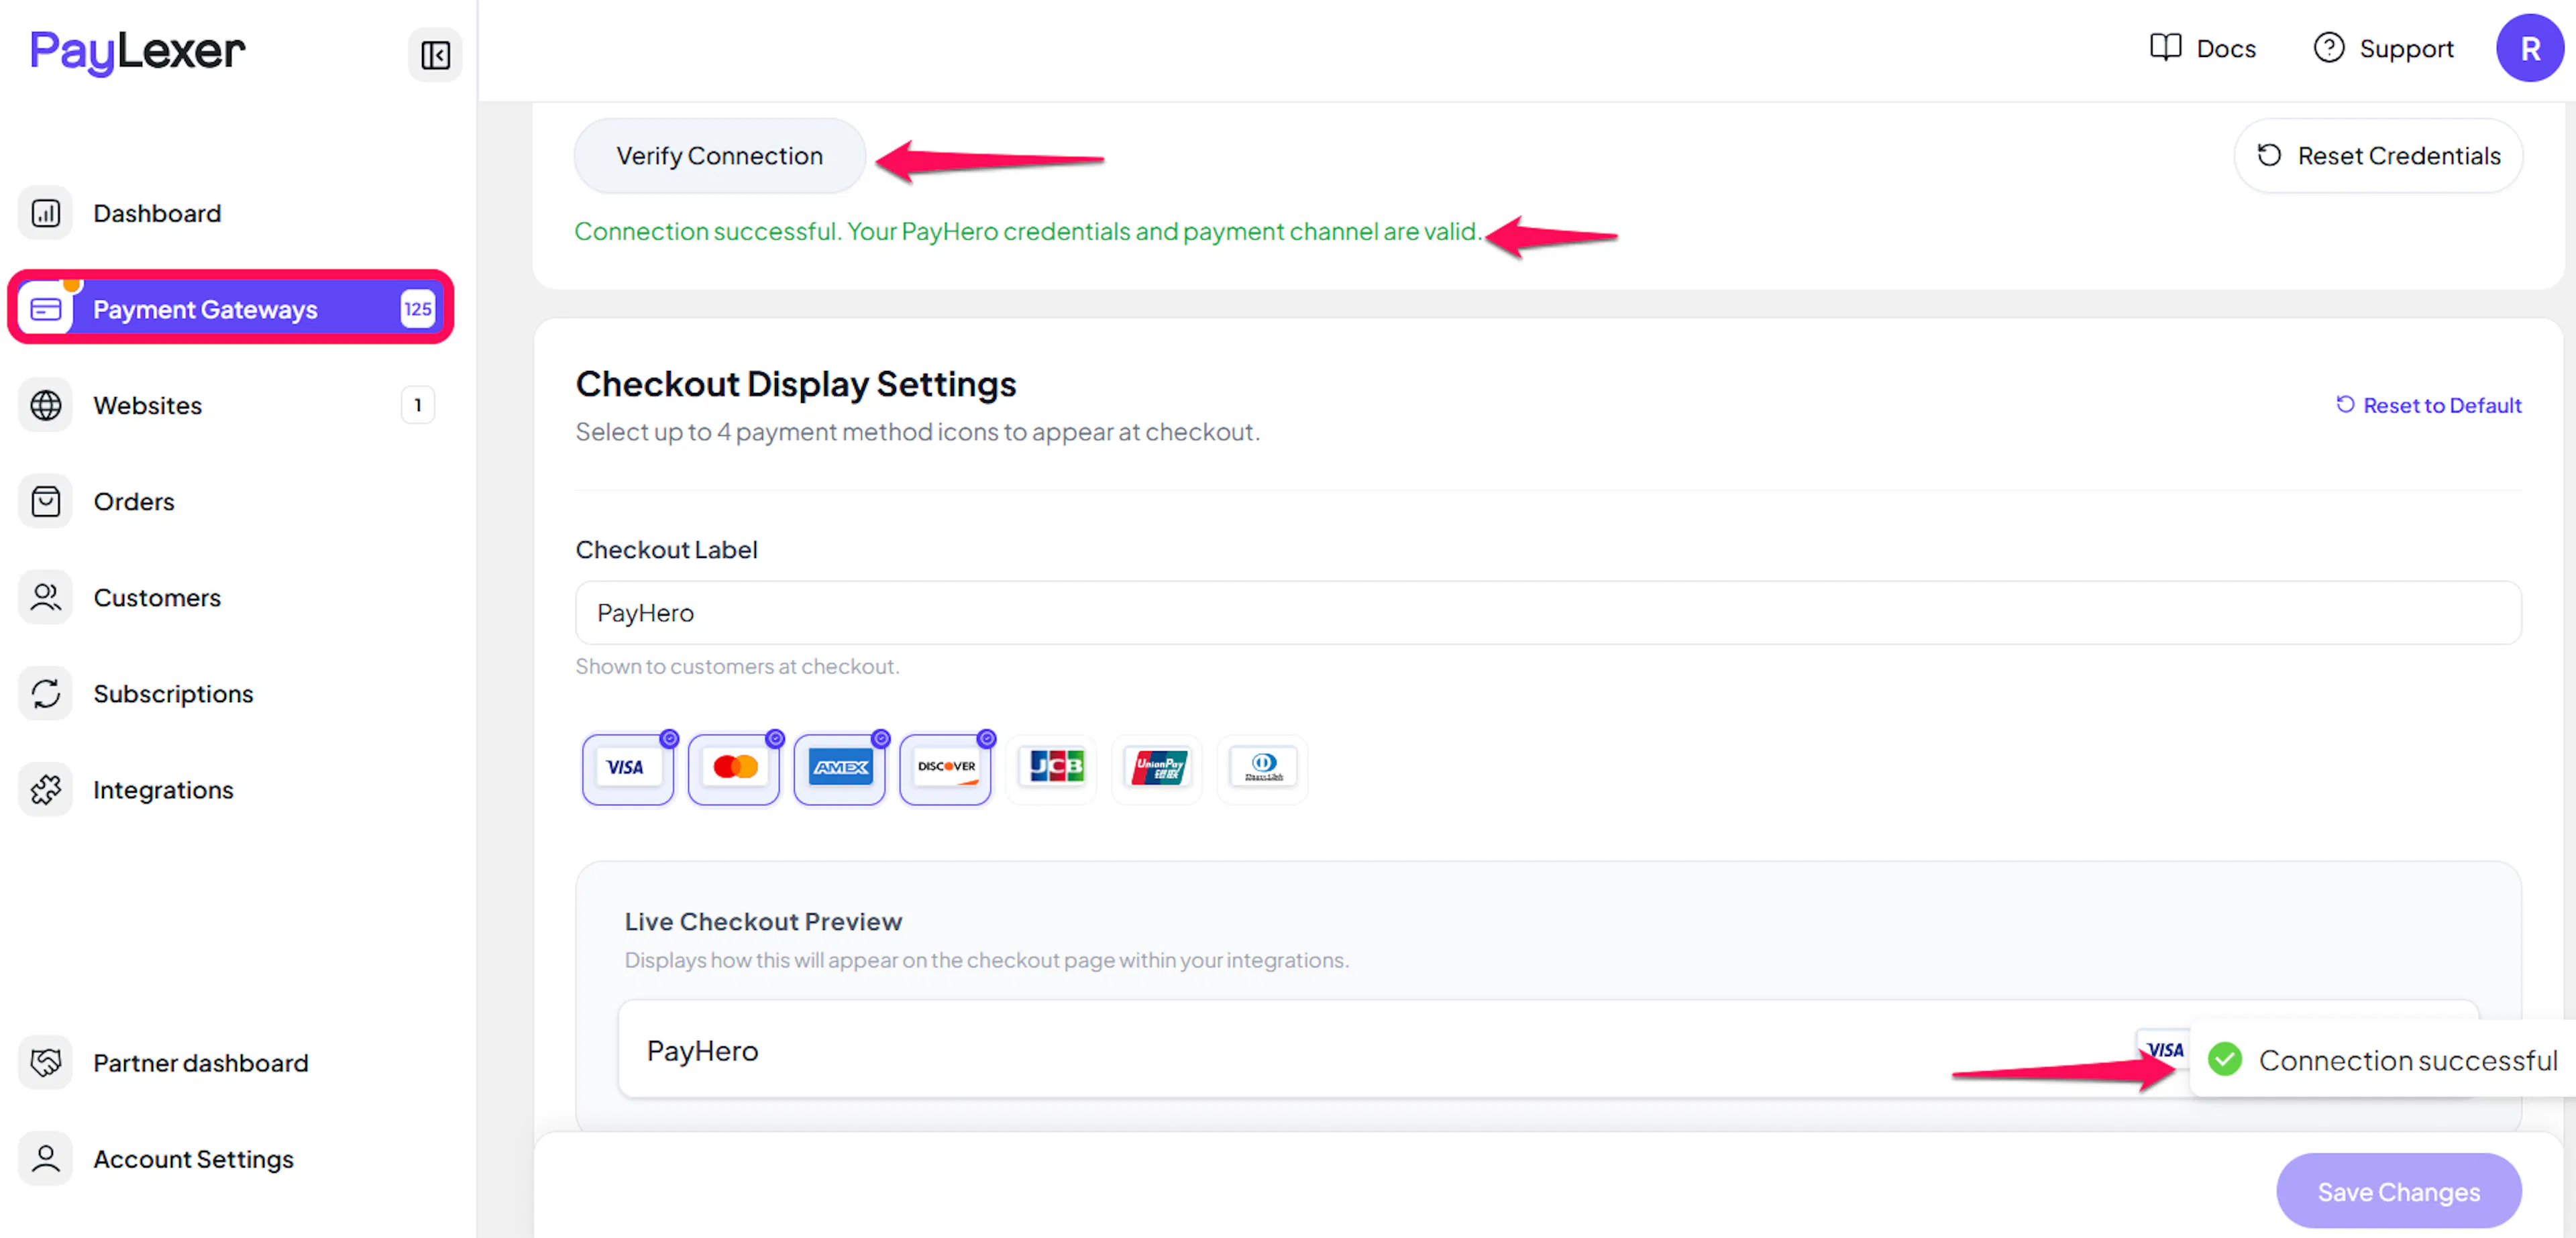
Click Save to save your configuration and verify your credentials. Click Verify Connection to test the connection.
PayLexer checks both your token and your Channel ID here, so a mistyped Channel ID is caught now rather than by a customer at checkout.
Webhooks (No Setup Required)
Pay Hero sends payment confirmations automatically, and PayLexer registers the address for them with every transaction it creates. There is nothing for you to copy, paste or configure, and there is no webhook secret to store.
What this means for you:
- Payment status updates arrive in real time, with no setup
- Nothing breaks if you change your website address later
- There is no webhook configuration page in Pay Hero to keep in step with PayLexer
Pay Hero does not sign its confirmations, so PayLexer never takes one at face value. Every confirmation is checked back against Pay Hero's own records before an order is marked paid, and anything that cannot be confirmed is left pending and re-checked automatically rather than being treated as a payment.
Integrate Pay Hero to Your Website
If you have already added and configured your site, you can enable Pay Hero in your existing setup.
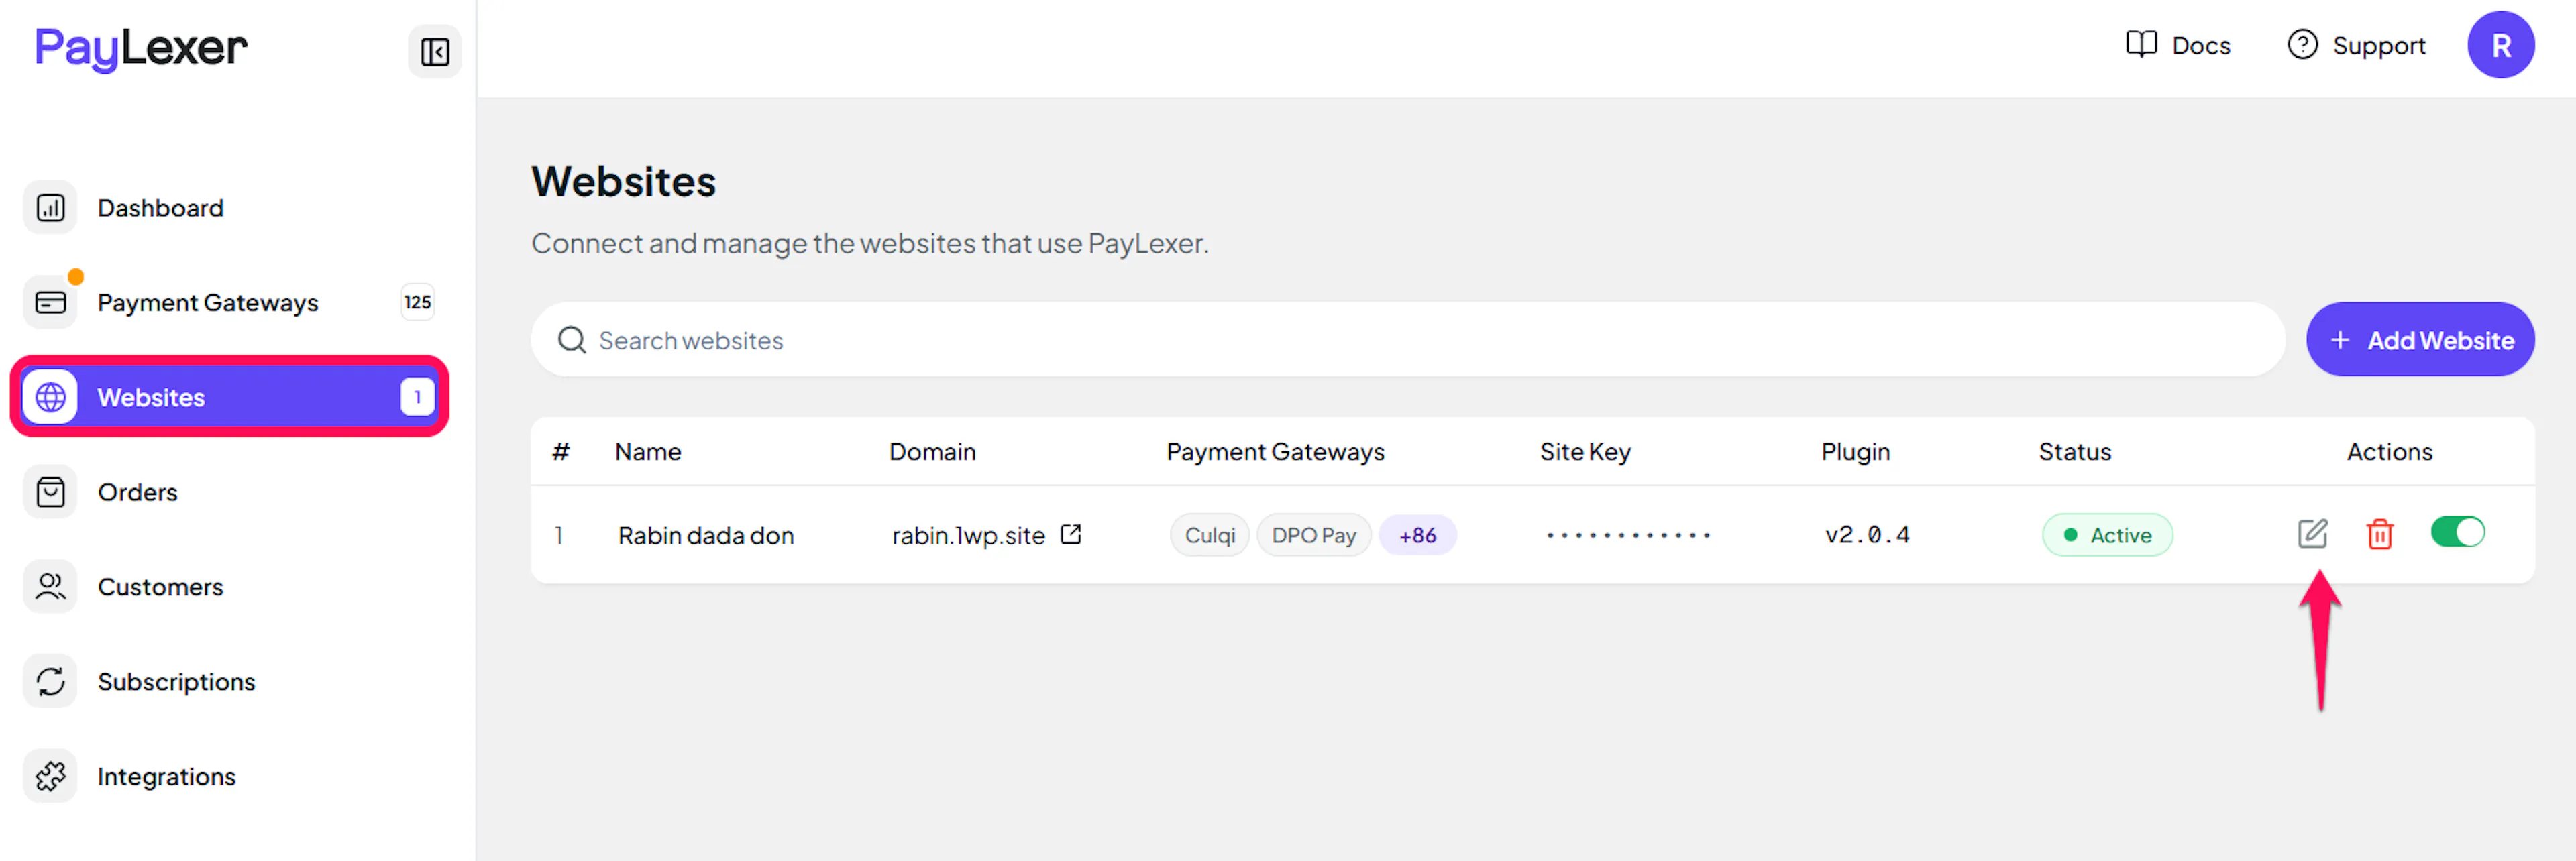
Go to Websites
Navigate to Websites in your PayLexer dashboard.
Edit your website
Click the Edit Icon of your added website.
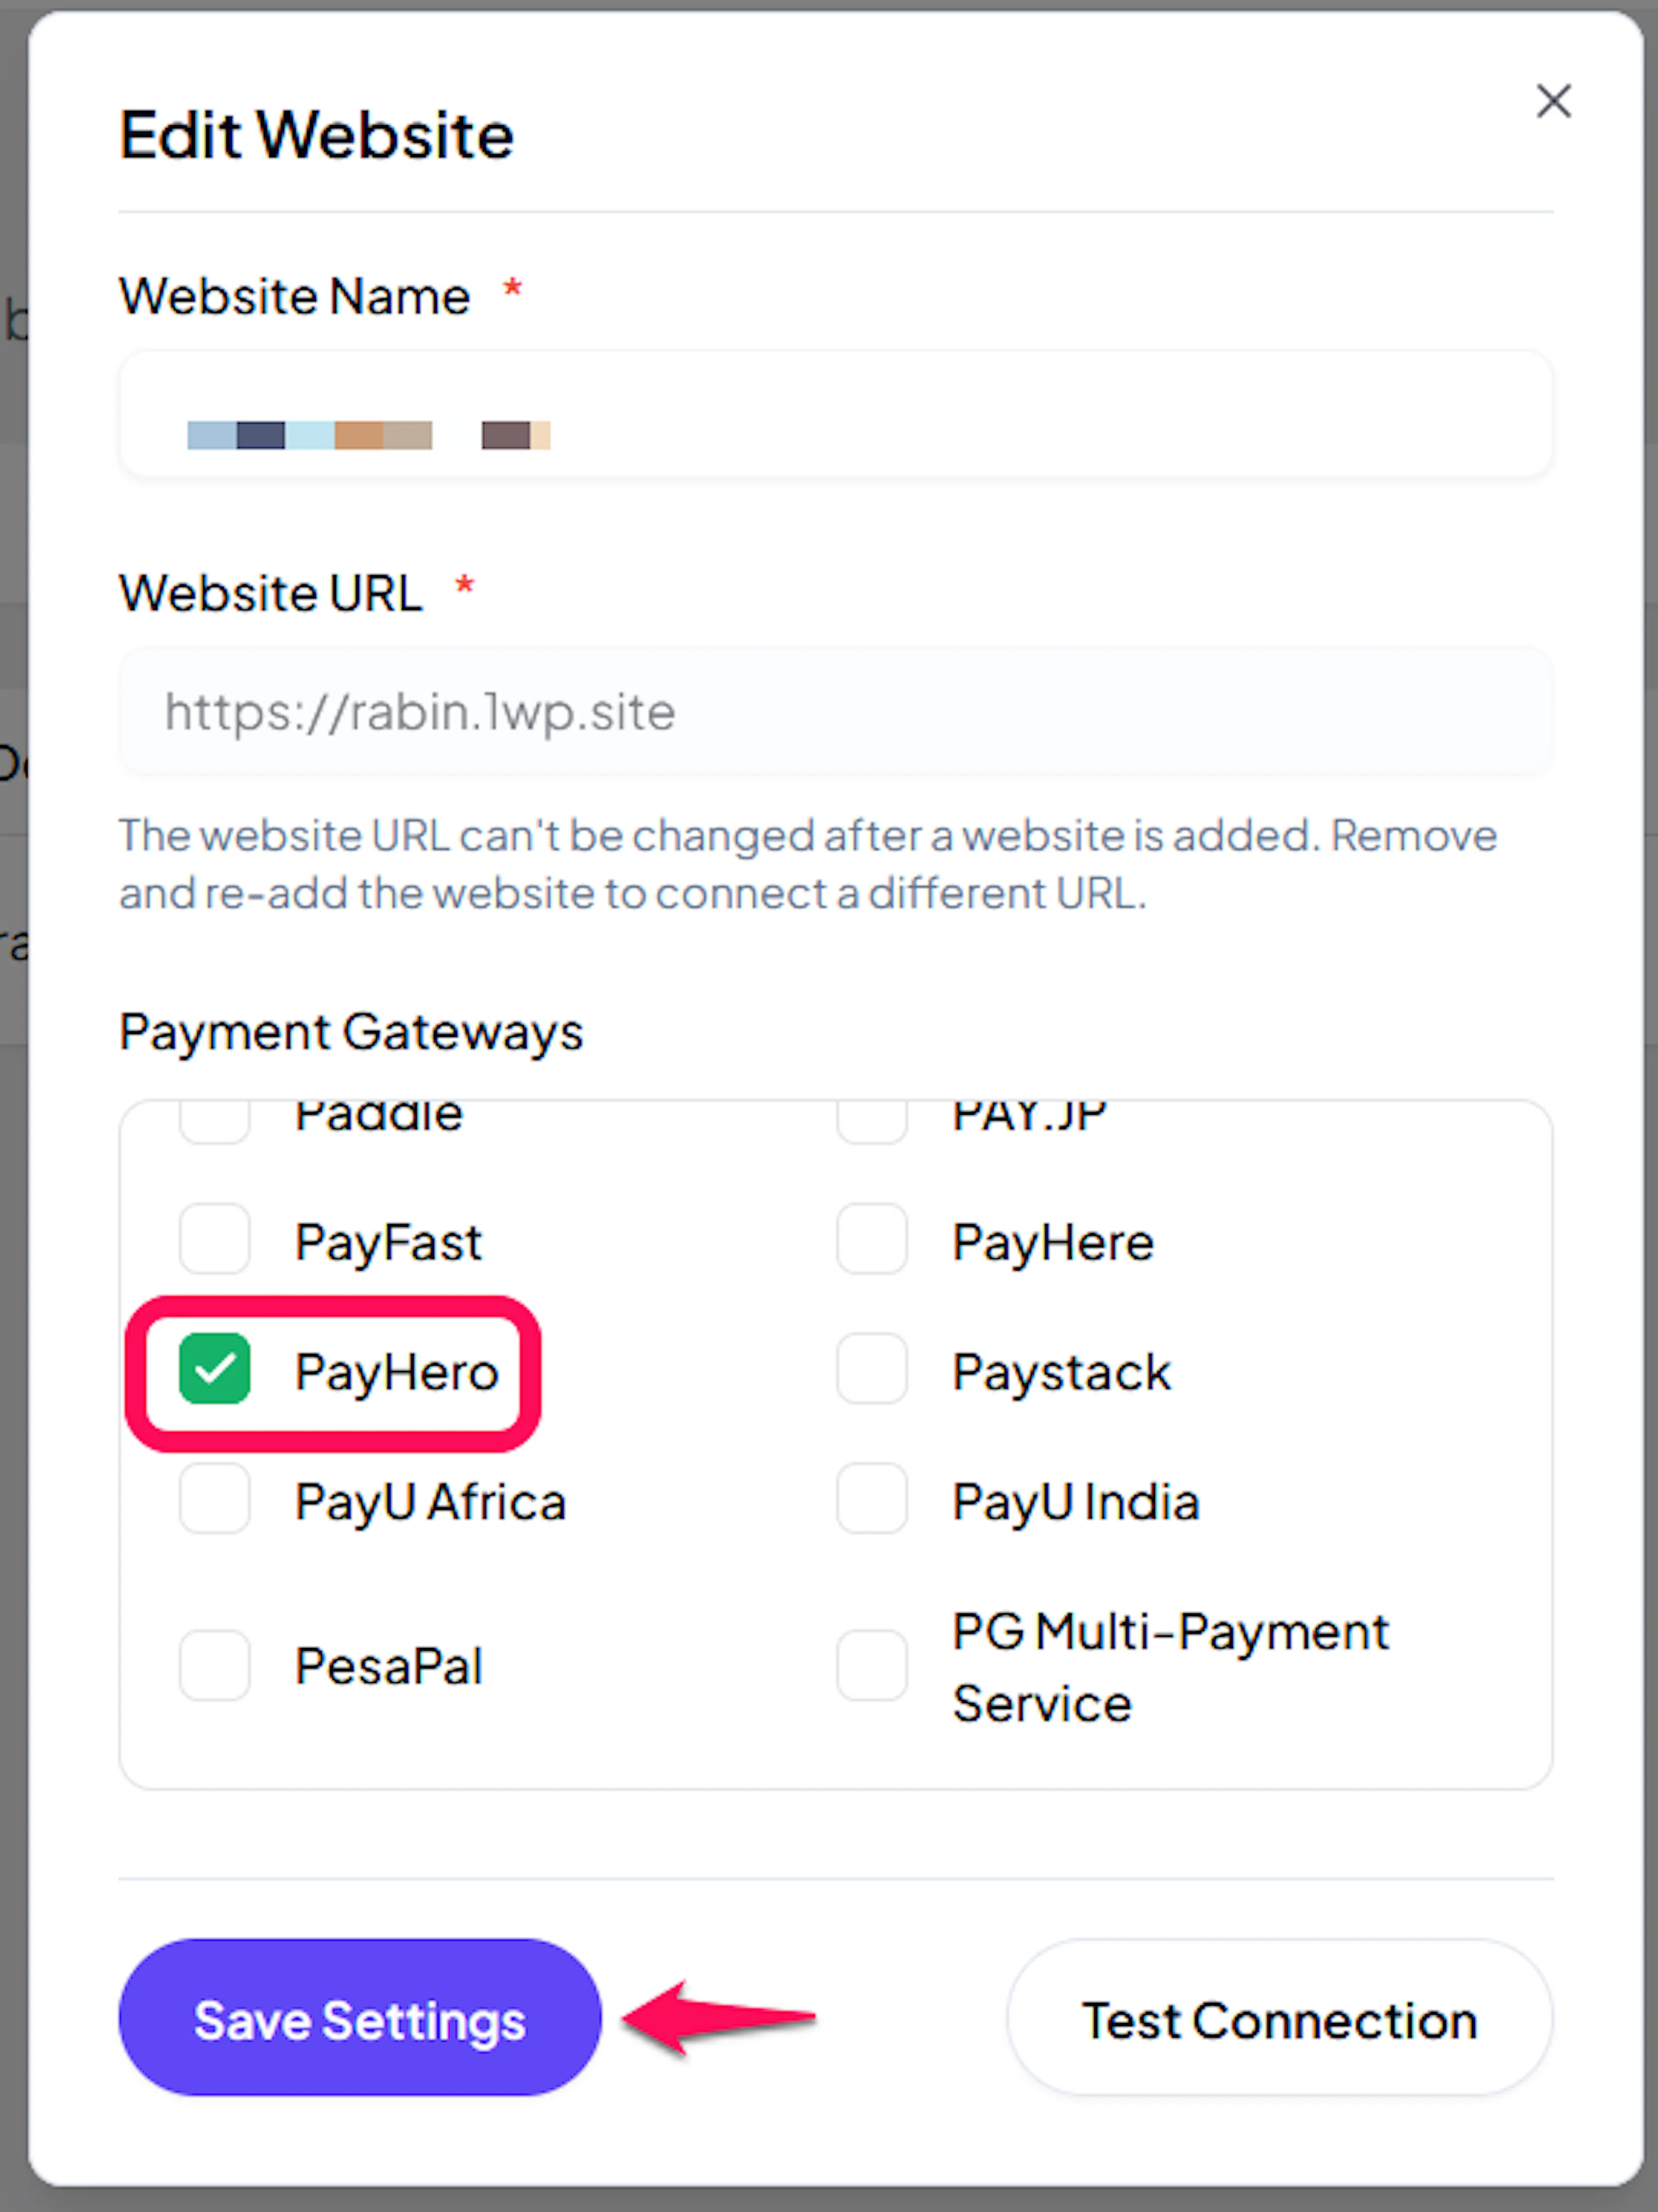
Enable Pay Hero
Click the checkbox to enable Pay Hero for the website.
If you haven't added a website yet, Continue to Add Your Website →
Troubleshooting
Best Practices
- Test with a small real payment before enabling Pay Hero for customers. Pay Hero has no sandbox, so a 1 KES payment to your own number is the safest first test
- Keep your service wallet funded. An empty wallet silently stops payment prompts from being delivered
- Create a dedicated API key for PayLexer so you can revoke it without affecting your other applications
- Store the Basic Authorization Token in a password manager as soon as it is shown. Pay Hero will not show it again
- Avoid repeated failed prompts to the same number while testing. Pay Hero treats them as abuse and can block the number for 24 hours or restrict your whole account
- Ask customers to keep their phone to hand at checkout. The M-PESA prompt expires after about a minute
FAQs
Still Have Questions?
- Pay Hero Support: Contact Support
- PayLexer Support: Contact Support