

Chargily Pay
Connect Chargily Pay to PayLexer to accept EDAHABIA and CIB card payments in Algeria through a hosted checkout page with HMAC-signed webhook confirmation.
Chargily Pay is an Algeria-headquartered fintech built to bring local card payments online for Algerian merchants. It supports EDAHABIA (Algérie Poste) and CIB (SATIM) cards, and PayLexer connects to Chargily's hosted checkout page so shoppers enter payment details on Chargily's secure page before returning to your site, with an HMAC-signed webhook confirming the final outcome.
- Supported Regions (Merchant Accounts): Algeria
- Supported Currencies: DZD (Algerian Dinar)
This gateway appears in checkout only when the selected currency is DZD.
Supported Features
- Hosted checkout page for EDAHABIA and CIB card payments
- Signed webhook confirmation (HMAC-SHA256) for real-time payment status updates
- Automatic checkout expiry handling for abandoned or stale payment attempts
- Direct link from every PayLexer order to the matching transaction in the Chargily dashboard
Before You Start
Make sure you have:
- Chargily Pay Account – Don't have one? Sign up for Chargily Pay →
- PayLexer Account – Required to configure the integration. Create your account →
- A website where you want to integrate
Looking for a different payment processor? View all supported gateways →
Configuring Chargily Pay
You need a Public API Key and a Secret API Key from Chargily Pay for this integration.
Getting API Credentials
Create or log in to your Chargily account
Register with your email (and confirm the verification link), or sign in with Google or GitHub. New accounts start automatically in Test Mode.
Open the Developers Corner
In the Chargily Pay dashboard, go to your Application and open Developers Corner.
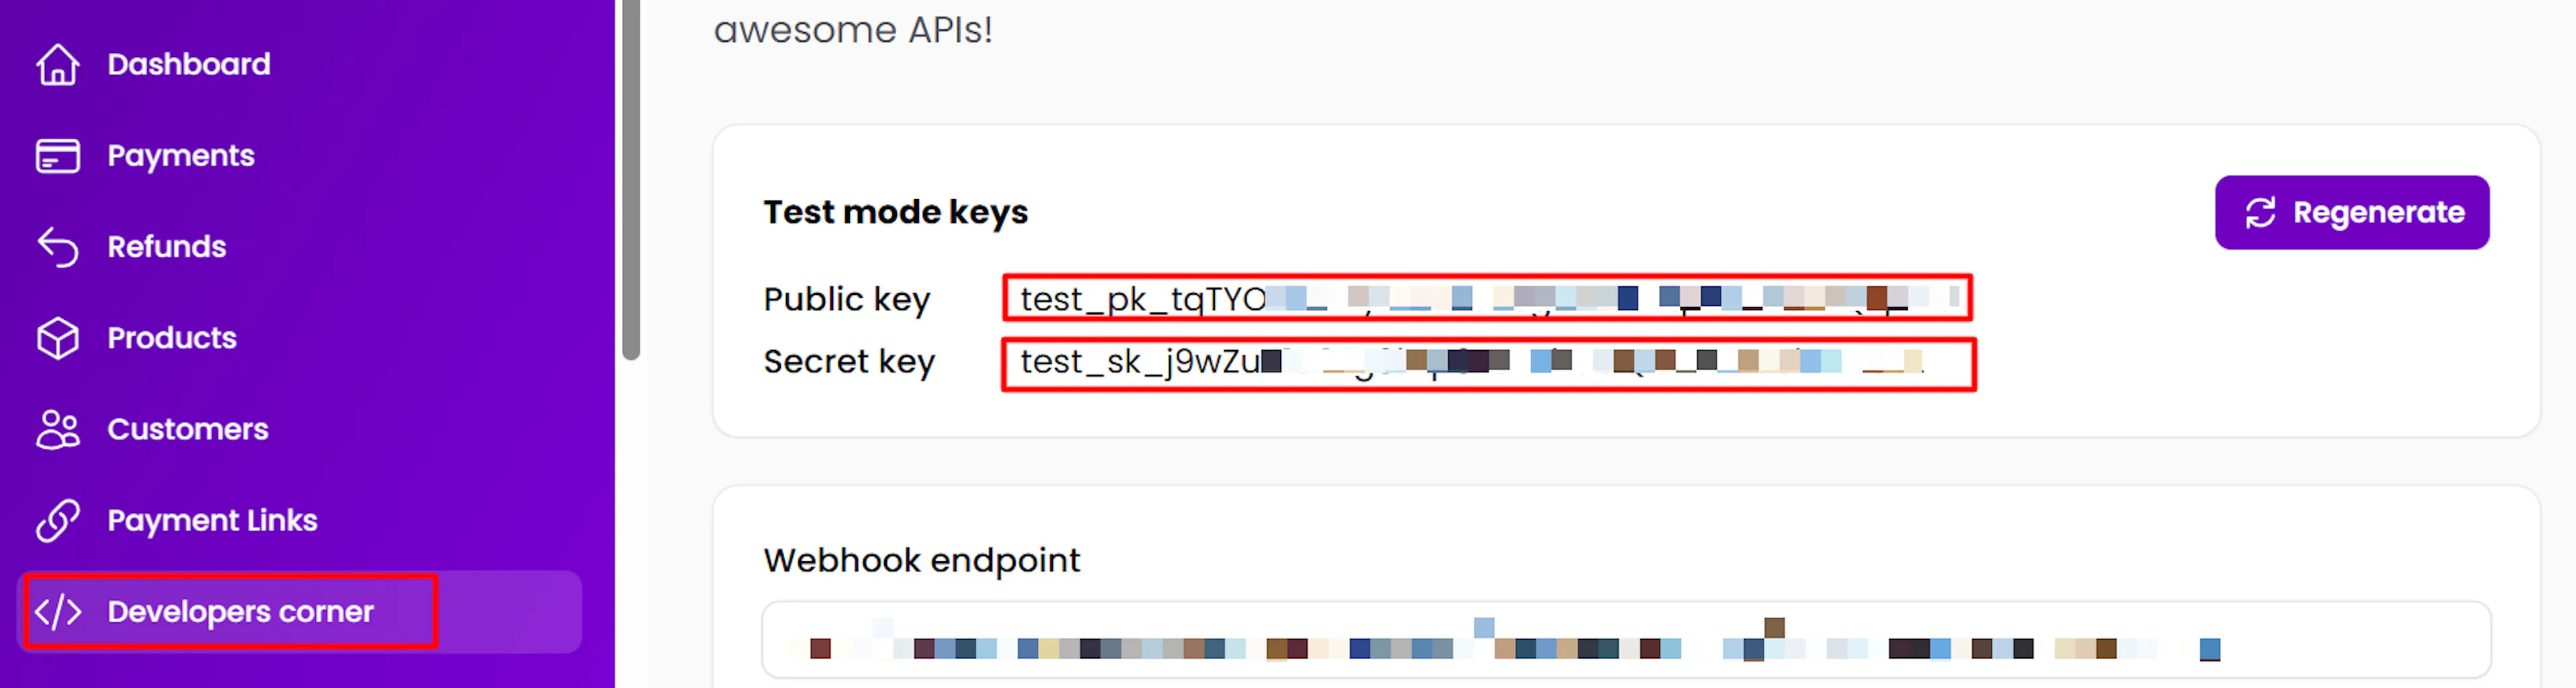
Copy your API keys
Copy the Public Key and Secret Key shown for the current mode (Test or Live). Switch the mode toggle to view the keys for the other environment.
Never share your Secret Key in public places, client-side code, or mobile app builds.
To accept real payments, verify your User Account and your Application in Chargily Pay. Until your Application is verified, Live checkout pages show a message saying it is not yet verified.
Adding Credentials to PayLexer
Open PayLexer Dashboard
Log in to your PayLexer dashboard and navigate to Payment Gateways → Chargily Pay.
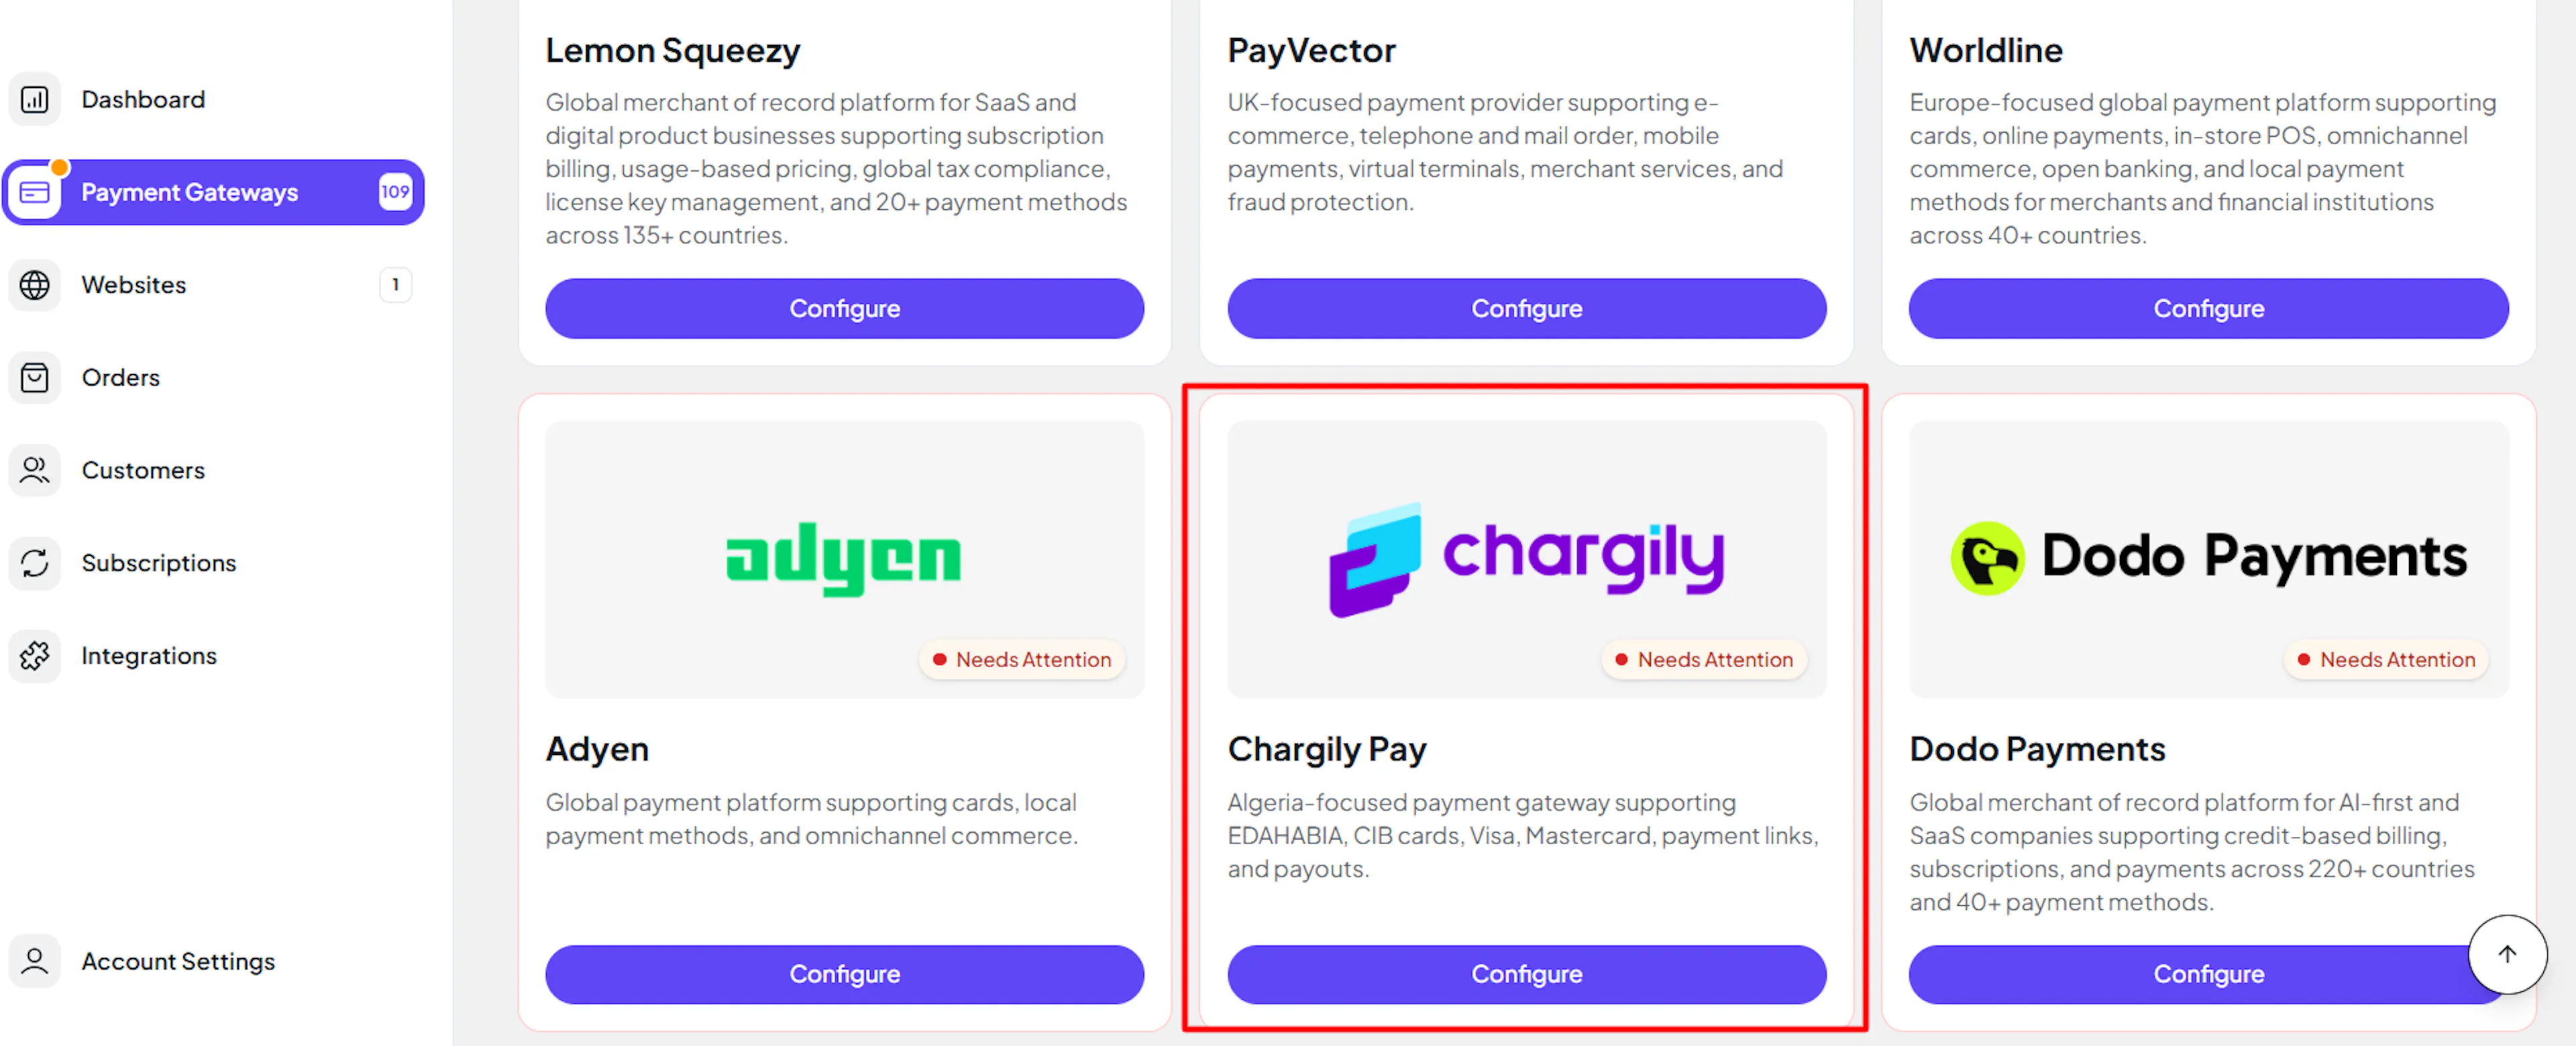
Enter your credentials
Paste the Public API Key and Secret API Key you copied from Chargily Pay into the corresponding fields.
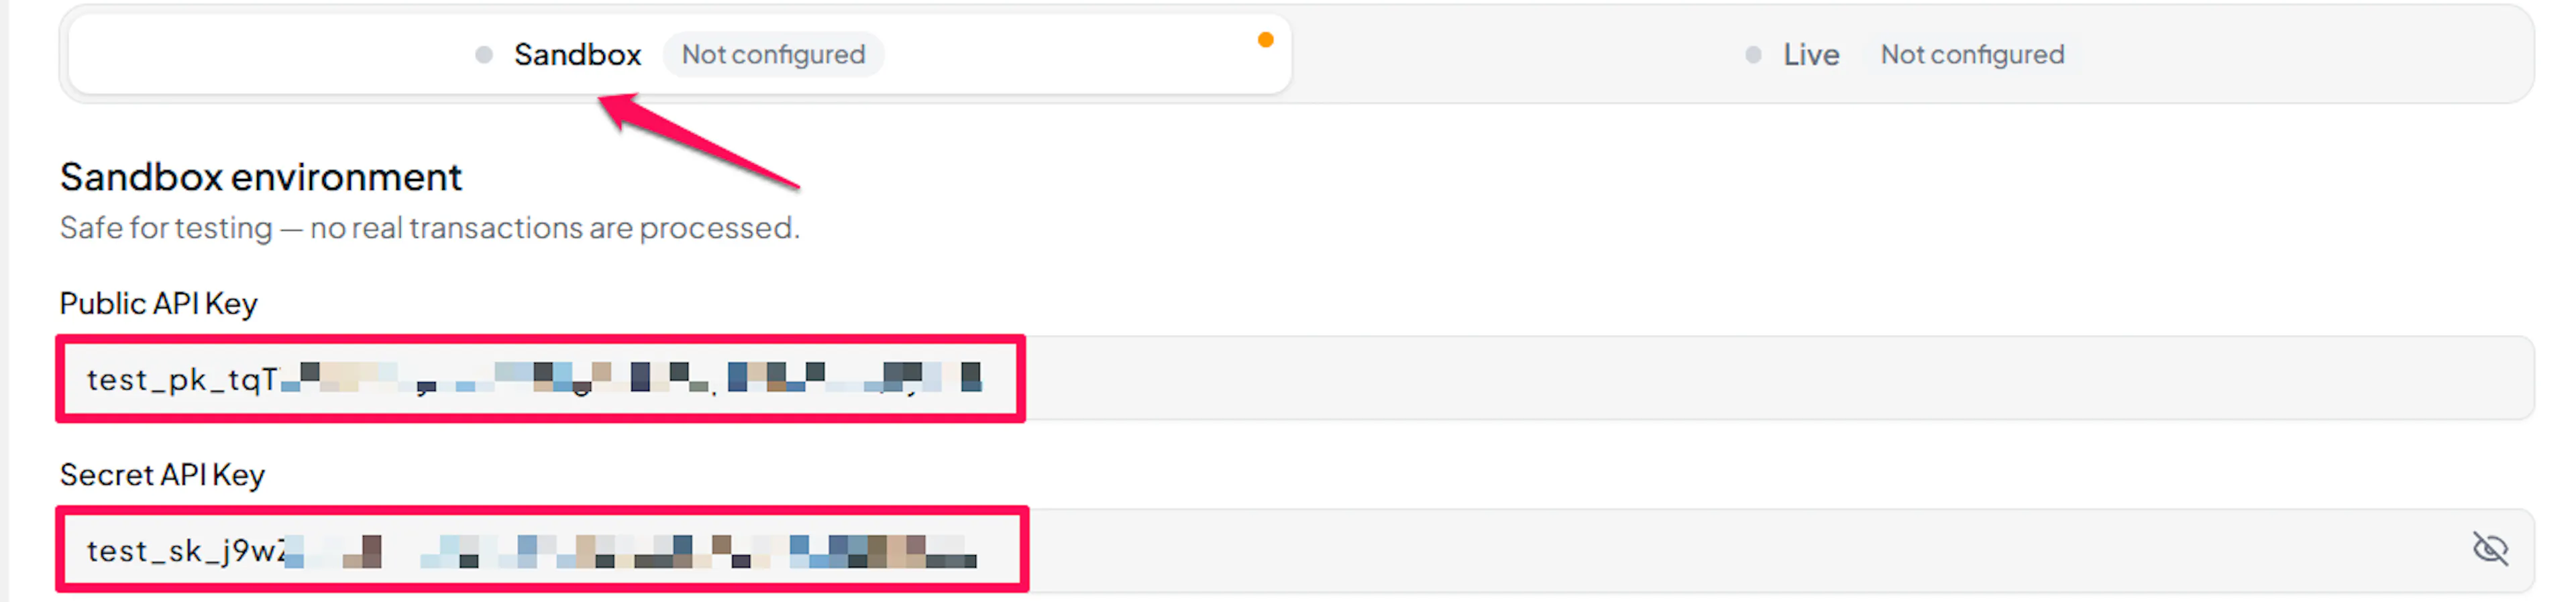
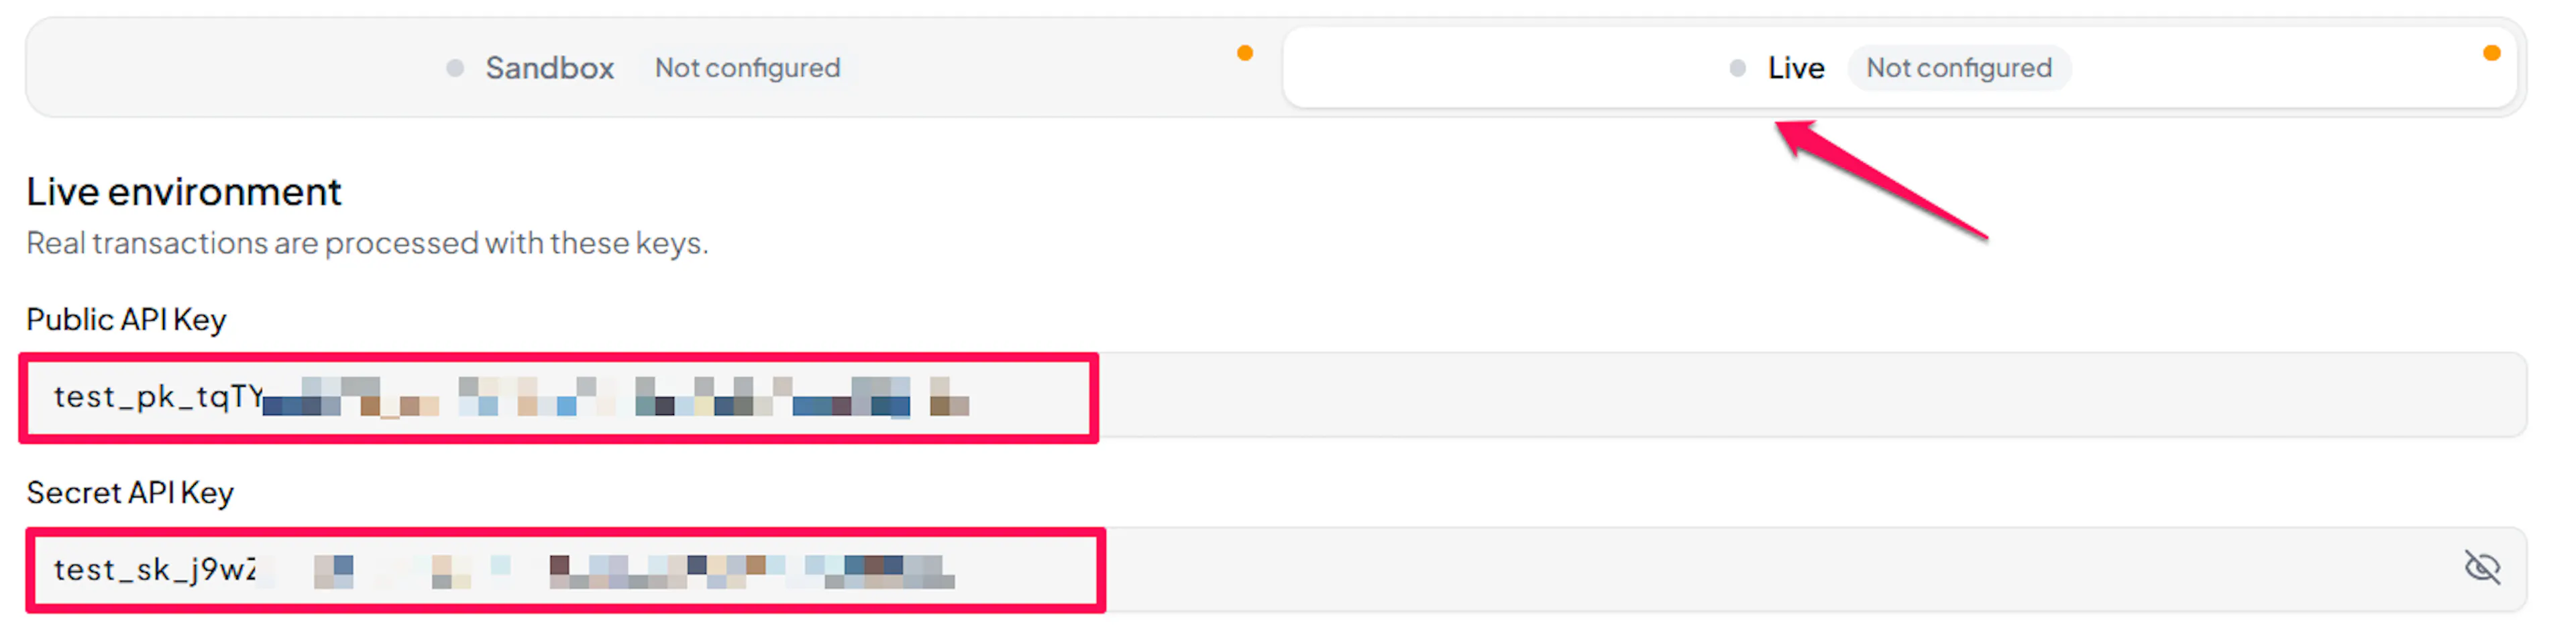
Understanding Live/Production and Sandbox Settings:
| Environment | Purpose |
|---|---|
| Live / Production | Used for real transactions. |
| Test / Sandbox | Used for testing only. No real money is processed. |
How PayLexer selects credentials:
- Debug/Test mode ON → Test credentials are used
- Debug/Test mode OFF → Live credentials are used
Test and save
Click Save to save your configuration and verify your credentials. Click Verify Connection to test the connection.
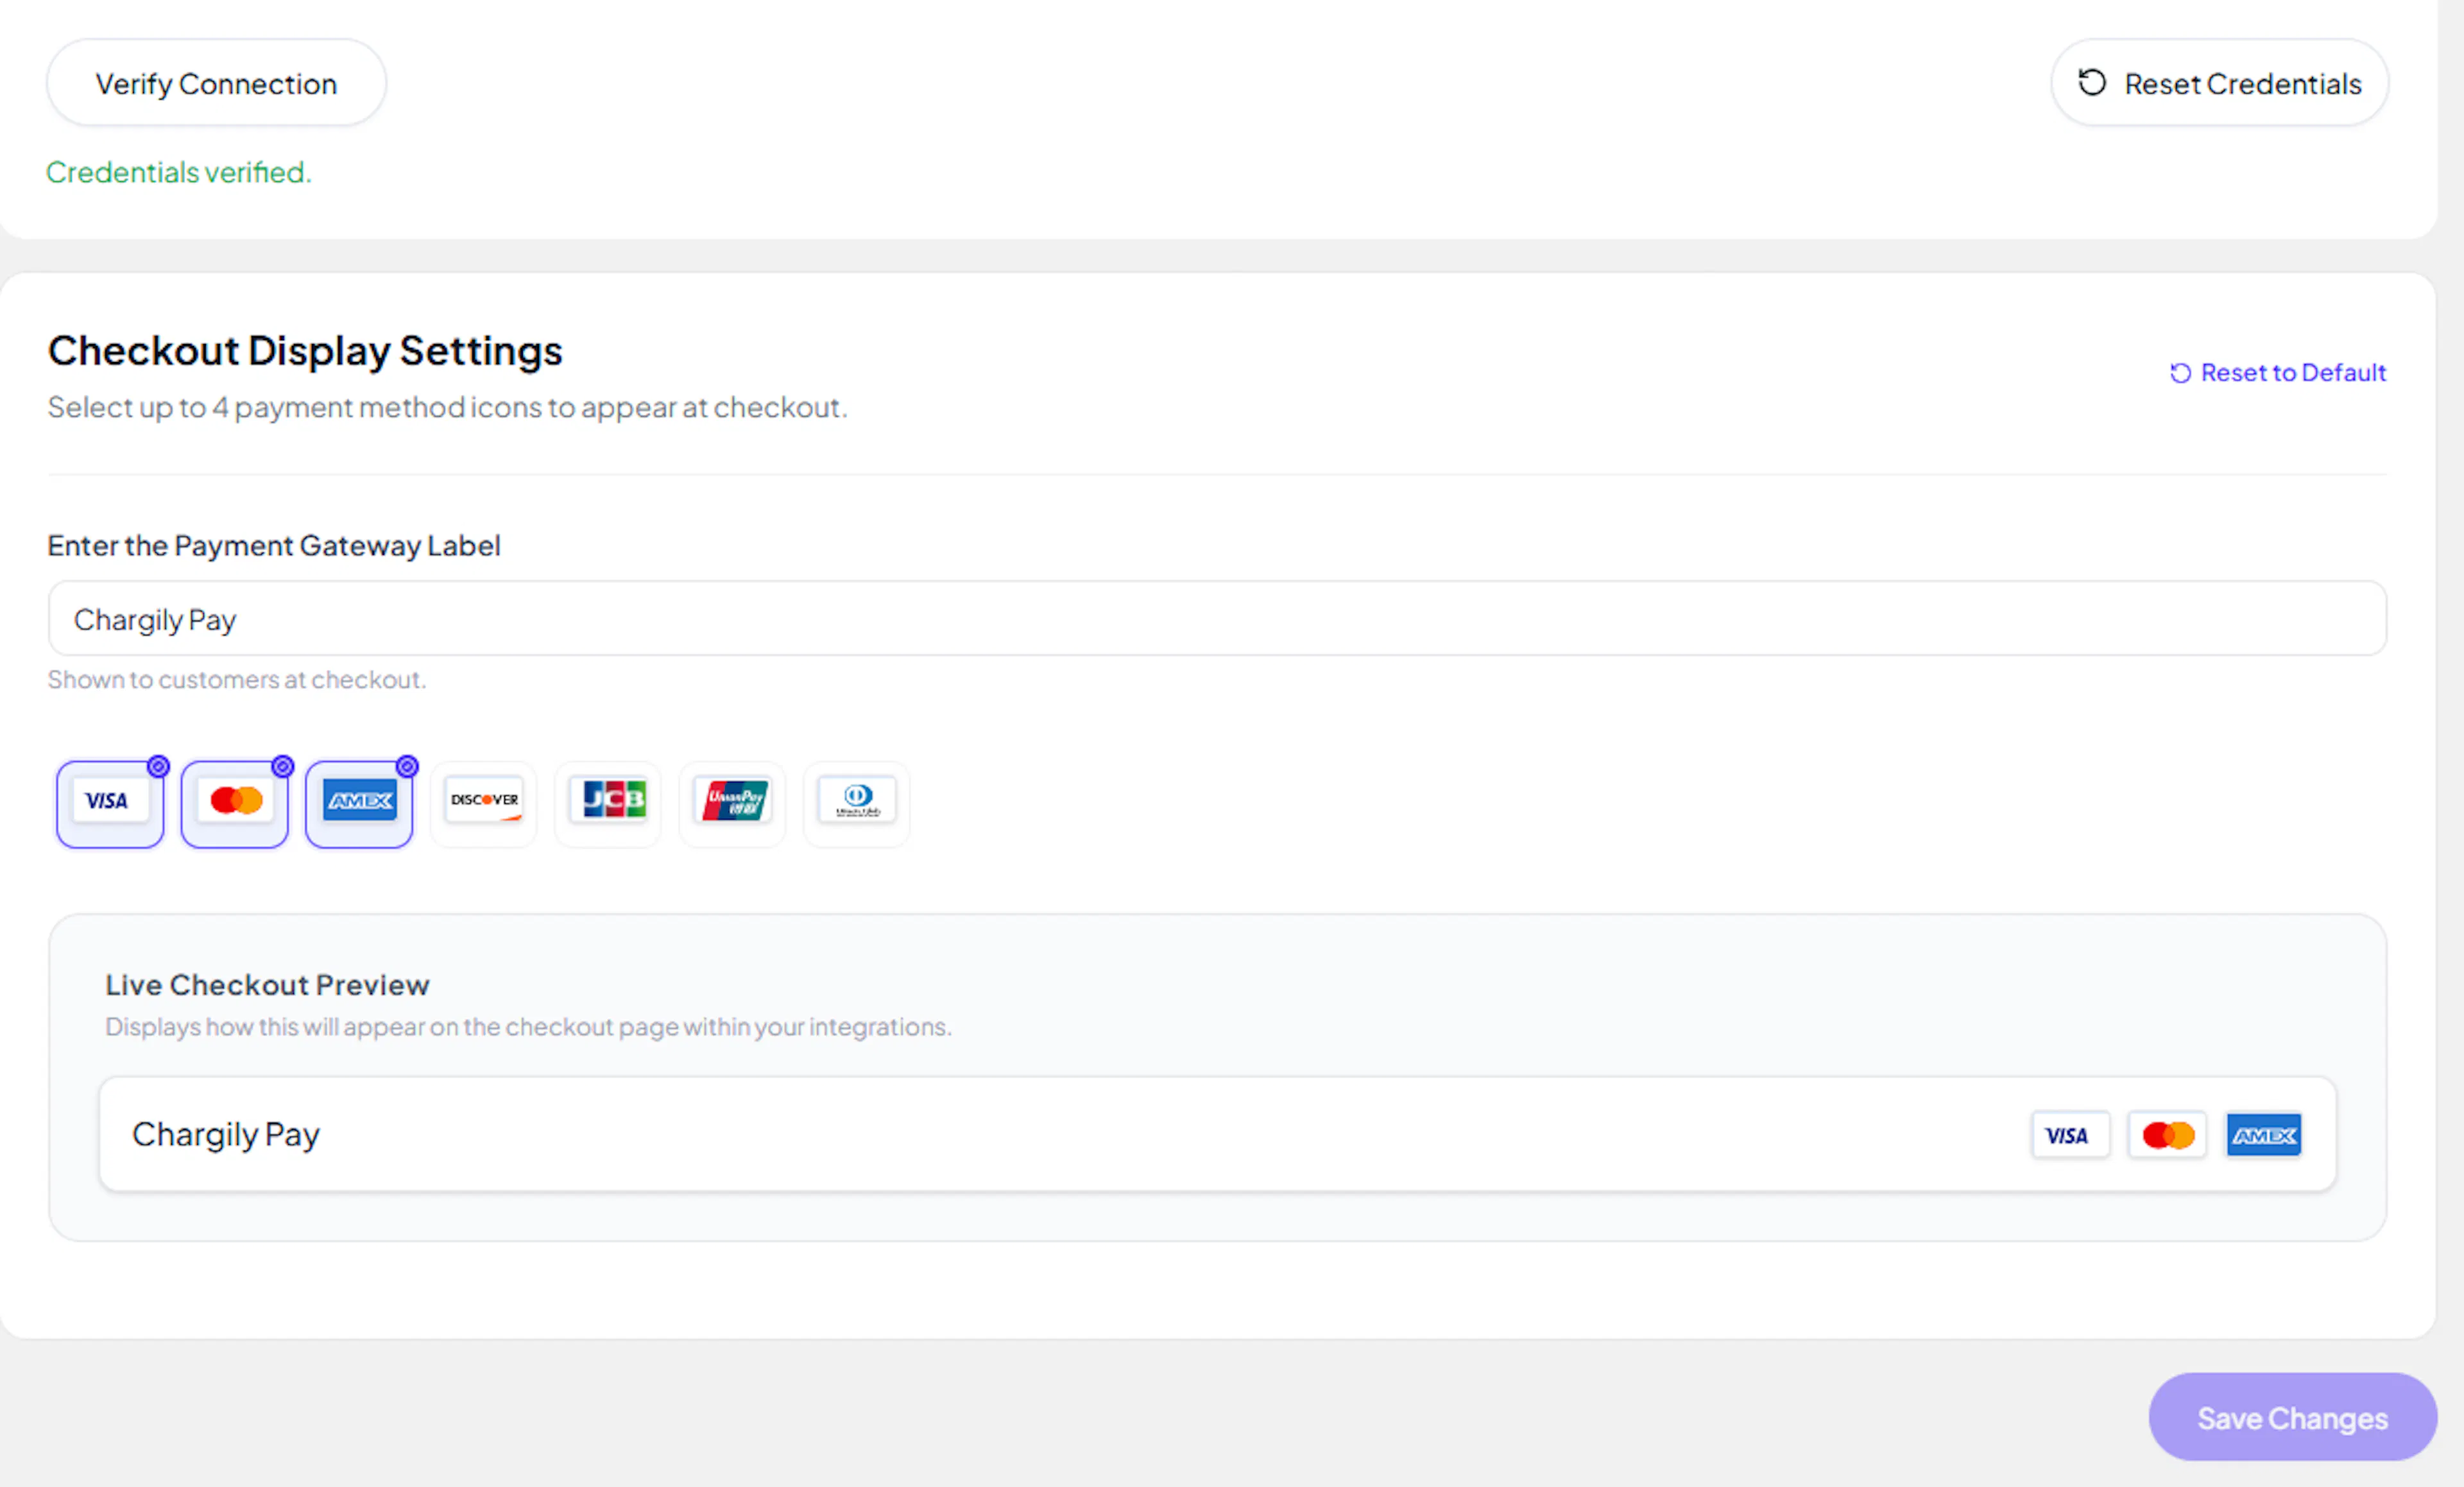
Configuring Webhooks (Mandatory)
Webhooks enable real-time payment updates and significantly improve reliability.
Benefits of Webhooks:
- Instant payment status updates
- Faster order confirmation for shoppers
- Reliable detection of failed or expired checkouts
Chargily Pay sends an HMAC-SHA256 signed webhook (signature header) for authoritative, server-to-server confirmation, signed with the same Secret API Key you already added above. Unlike gateways that issue a separate webhook secret, Chargily Pay only needs PayLexer's webhook URL, which you register in its own dashboard.
Copy your PayLexer webhook URL
In PayLexer → Payment Gateways → Chargily Pay, copy the Webhook URL shown for your account.

Add the webhook URL in Chargily Pay
In the Chargily Pay dashboard, open Developers Corner and paste the PayLexer webhook URL into the Webhook endpoint field, for both Test and Live mode if you use both.

No separate webhook secret is needed. Chargily Pay signs every webhook with your Secret API Key, which PayLexer already has from the credentials step above.
Integrate Chargily Pay to Your Website
If you have already added and configured your site, you can enable Chargily Pay in your existing setup.
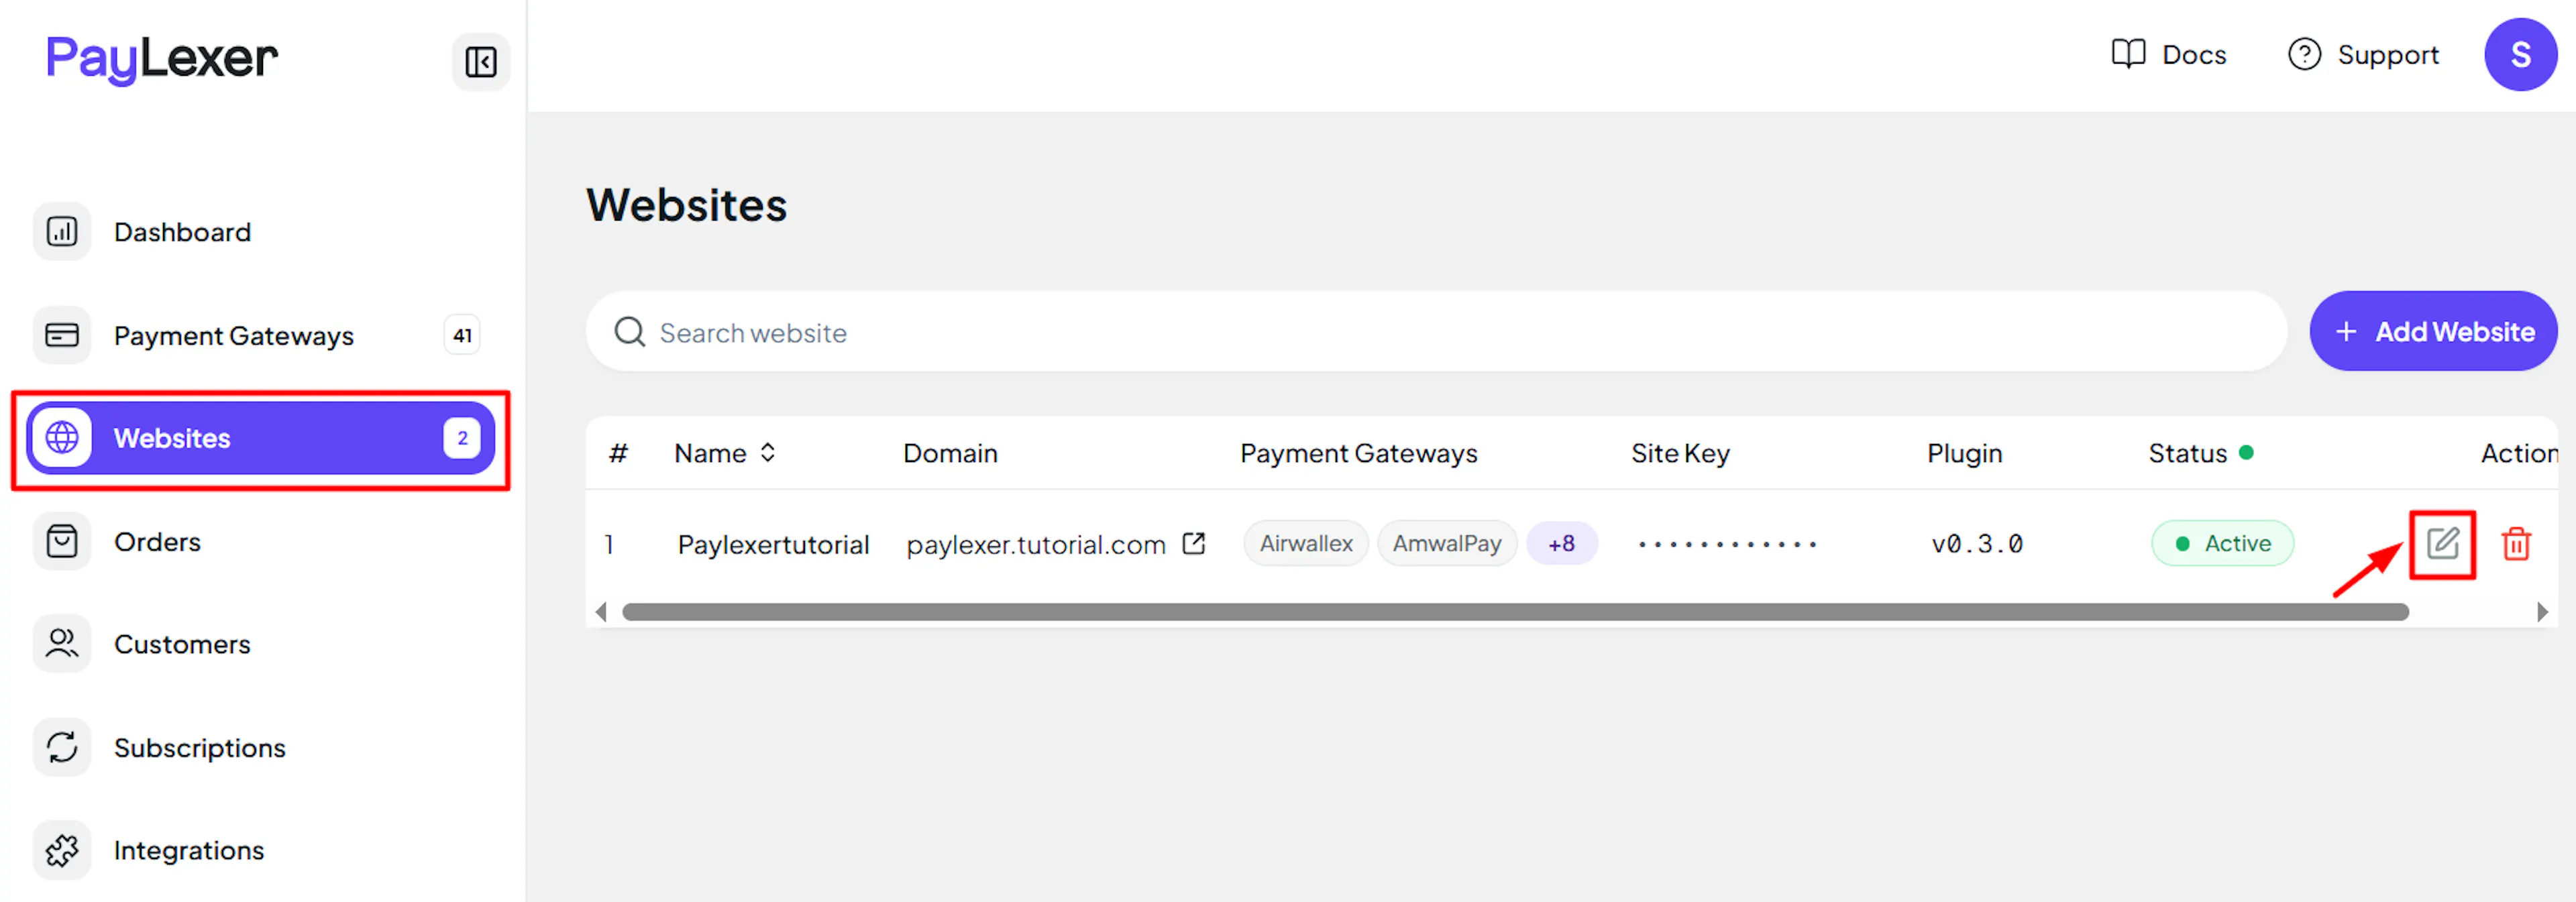
Go to Websites
Navigate to Websites in your PayLexer dashboard.
Edit your website
Click the Edit Icon of your added website.
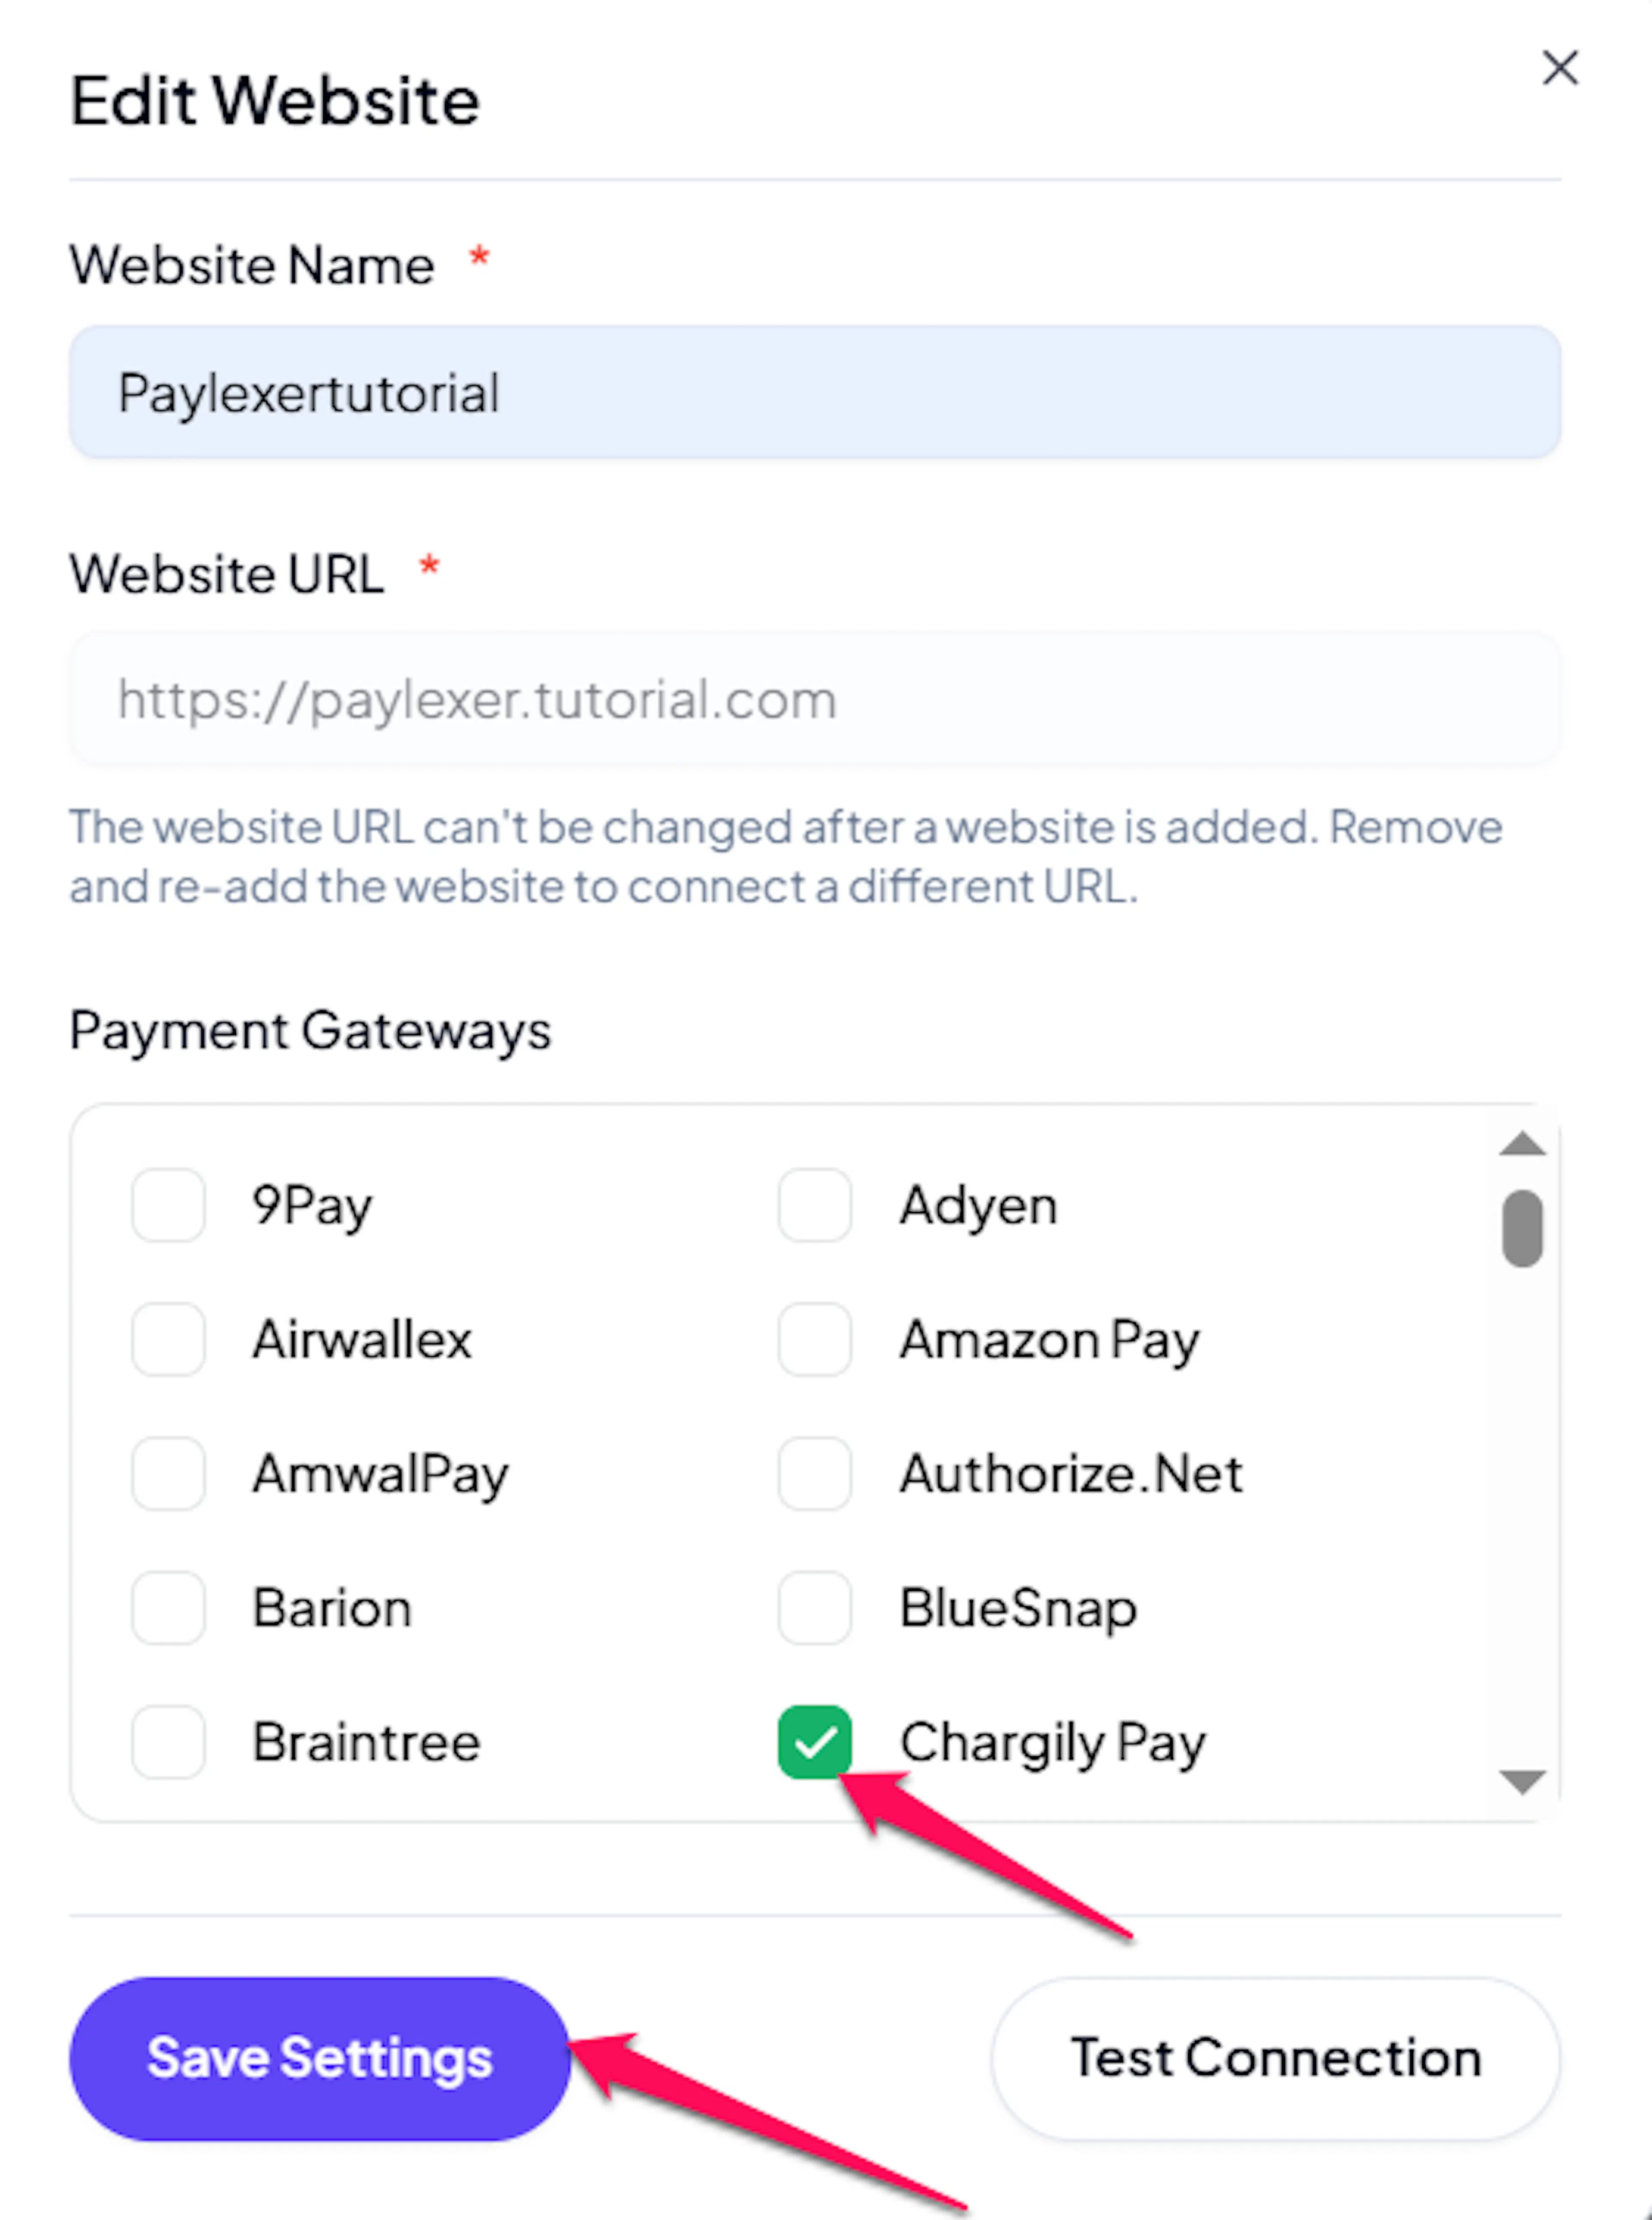
Enable Chargily Pay
Click the checkbox to enable Chargily Pay for the website.
If you haven't added a website yet, Continue to Add Your Website →
Troubleshooting
Best Practices
- Test in sandbox before enabling production. Use Test API Keys to complete a full payment before switching to live.
- Configure webhooks so payment updates sync in real time.
- Keep your Secret API Key confidential, and rotate it if you suspect exposure.
- Remember that refunds for Chargily Pay orders are processed manually from the Chargily Pay dashboard, not from PayLexer.
FAQs
Still Have Questions?
- Chargily Pay Support:
- Help Center: Chargily Help Center
- Support Email: support@chargily.com
- PayLexer Support: Contact Support