

ReservePay
Connect ReservePay to PayLexer to accept card, PromptPay, mobile banking and wallet payments from Thai shoppers, in Thai baht.
ReservePay is a Thailand-focused payment platform run by ReservePay Co., Ltd. in Bangkok. It lets merchants accept cards, PromptPay QR, mobile banking and wallets such as TrueMoney, Alipay and WeChat Pay through a single hosted checkout page, so card and bank details never touch your website or PayLexer.
- Supported Regions (Merchant Accounts): Thailand
- Supported Currencies: THB (Thai Baht)
This gateway appears in checkout only when the selected currency is THB.
Supported Features
- Hosted checkout that redirects shoppers to ReservePay's secure payment page
- Cards, PromptPay QR, mobile banking, TrueMoney, Alipay and WeChat Pay, depending on what is enabled on your ReservePay installation
- Payment result checked with ReservePay before a shopper is sent to the thank-you page
- Signed payment notifications, confirmed with ReservePay before an order is changed
- Full and partial refunds of card and wallet payments from your store
- Automatic checks about every 30 minutes that reverse refunds ReservePay later fails and record refunds made in the ReservePay dashboard, for payments made in the last 30 days
- Transaction ID in PayLexer links straight to the payment in your ReservePay dashboard (when the Merchant ID is set)
- Separate test and live credentials for safe testing
ReservePay does not run billing schedules, so subscriptions are not available on this gateway in PayLexer. Only one-time payments are supported.
After paying, customers must click ReservePay's Back to ... button. ReservePay's page does not return them to your store on its own, and if they close the tab instead, the order stays Pending. Their return to your store is the only moment PayLexer can reliably match the payment to the order.
Before You Start
Make sure you have:
- ReservePay Account – Don't have one? Sign up for ReservePay →
- ReservePay test account – Needed for testing. Test and live are separate ReservePay accounts, each with its own keys and settings.
- PayLexer Account – Required to configure the integration. Create your account →
- A website where you want to integrate
Looking for a different payment processor? View all supported gateways →
Configuring ReservePay
You need an API Key (reservepay_…) and an Installation ID from ReservePay for this integration. The Merchant ID is optional.
Getting API Credentials
Repeat these steps in both your test and your live ReservePay account.
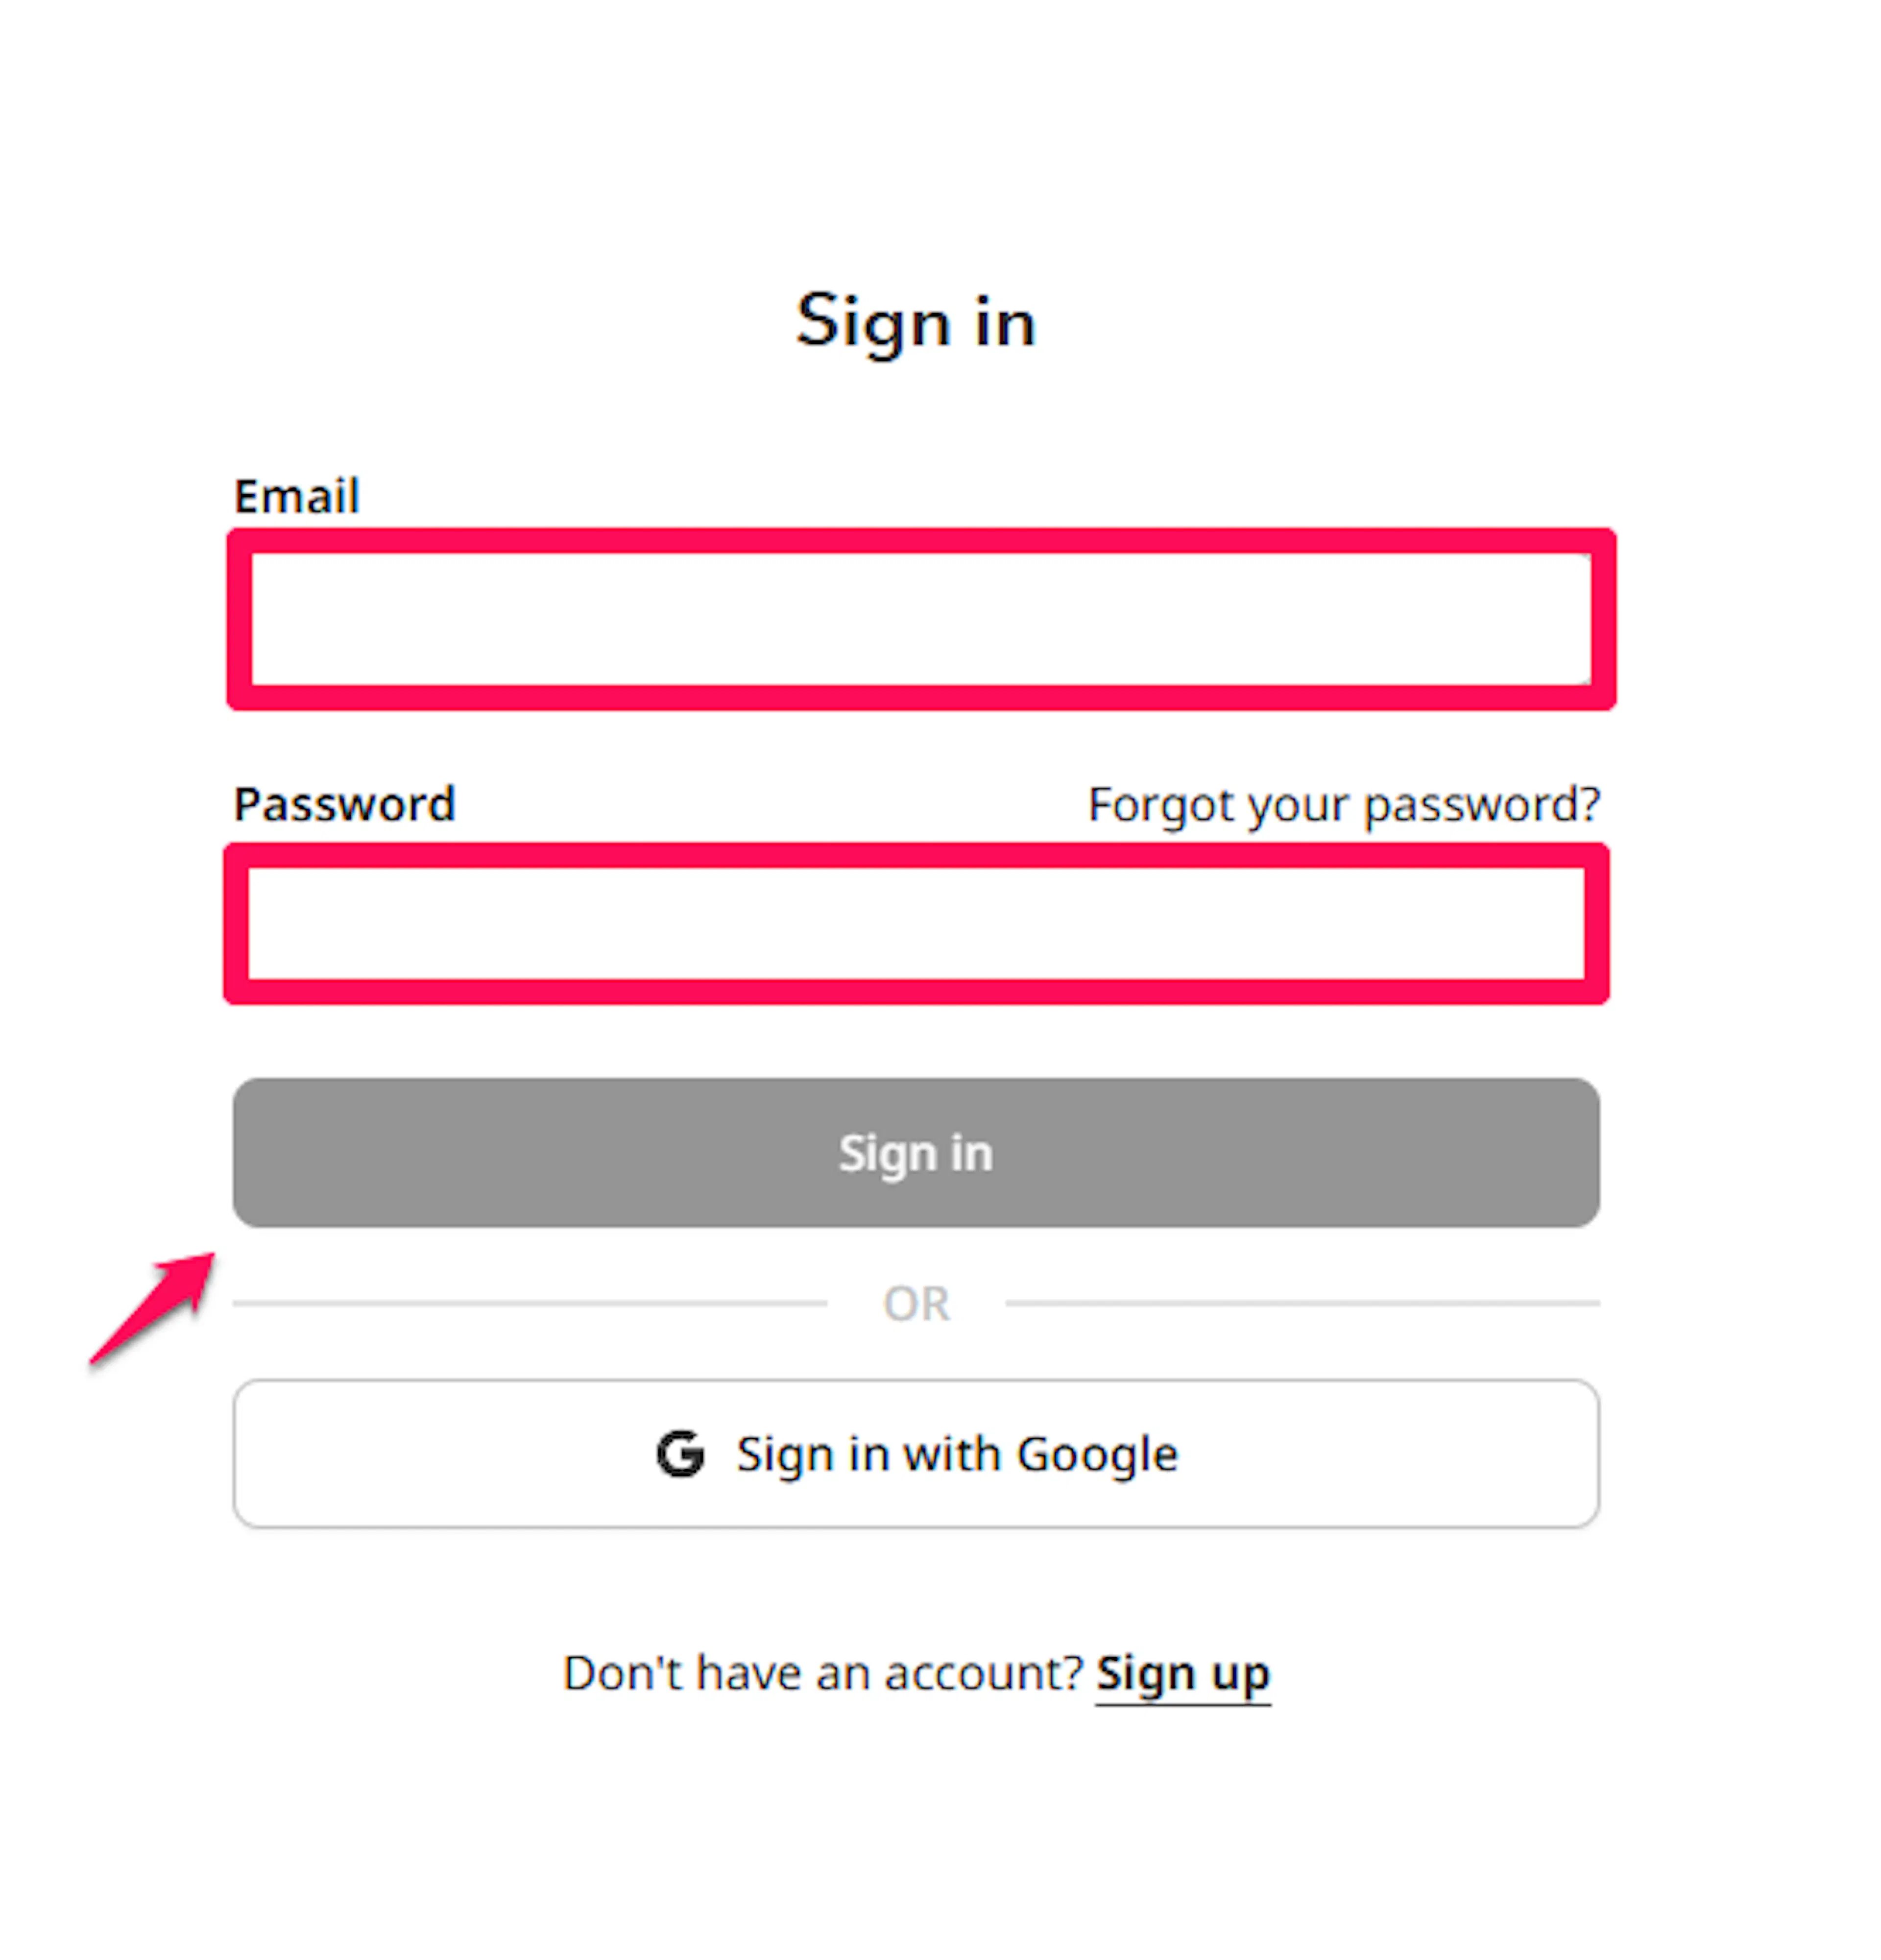
Log in to ReservePay
Sign in to your ReservePay dashboard. Make sure you are in the account (test or live) you want to set up.
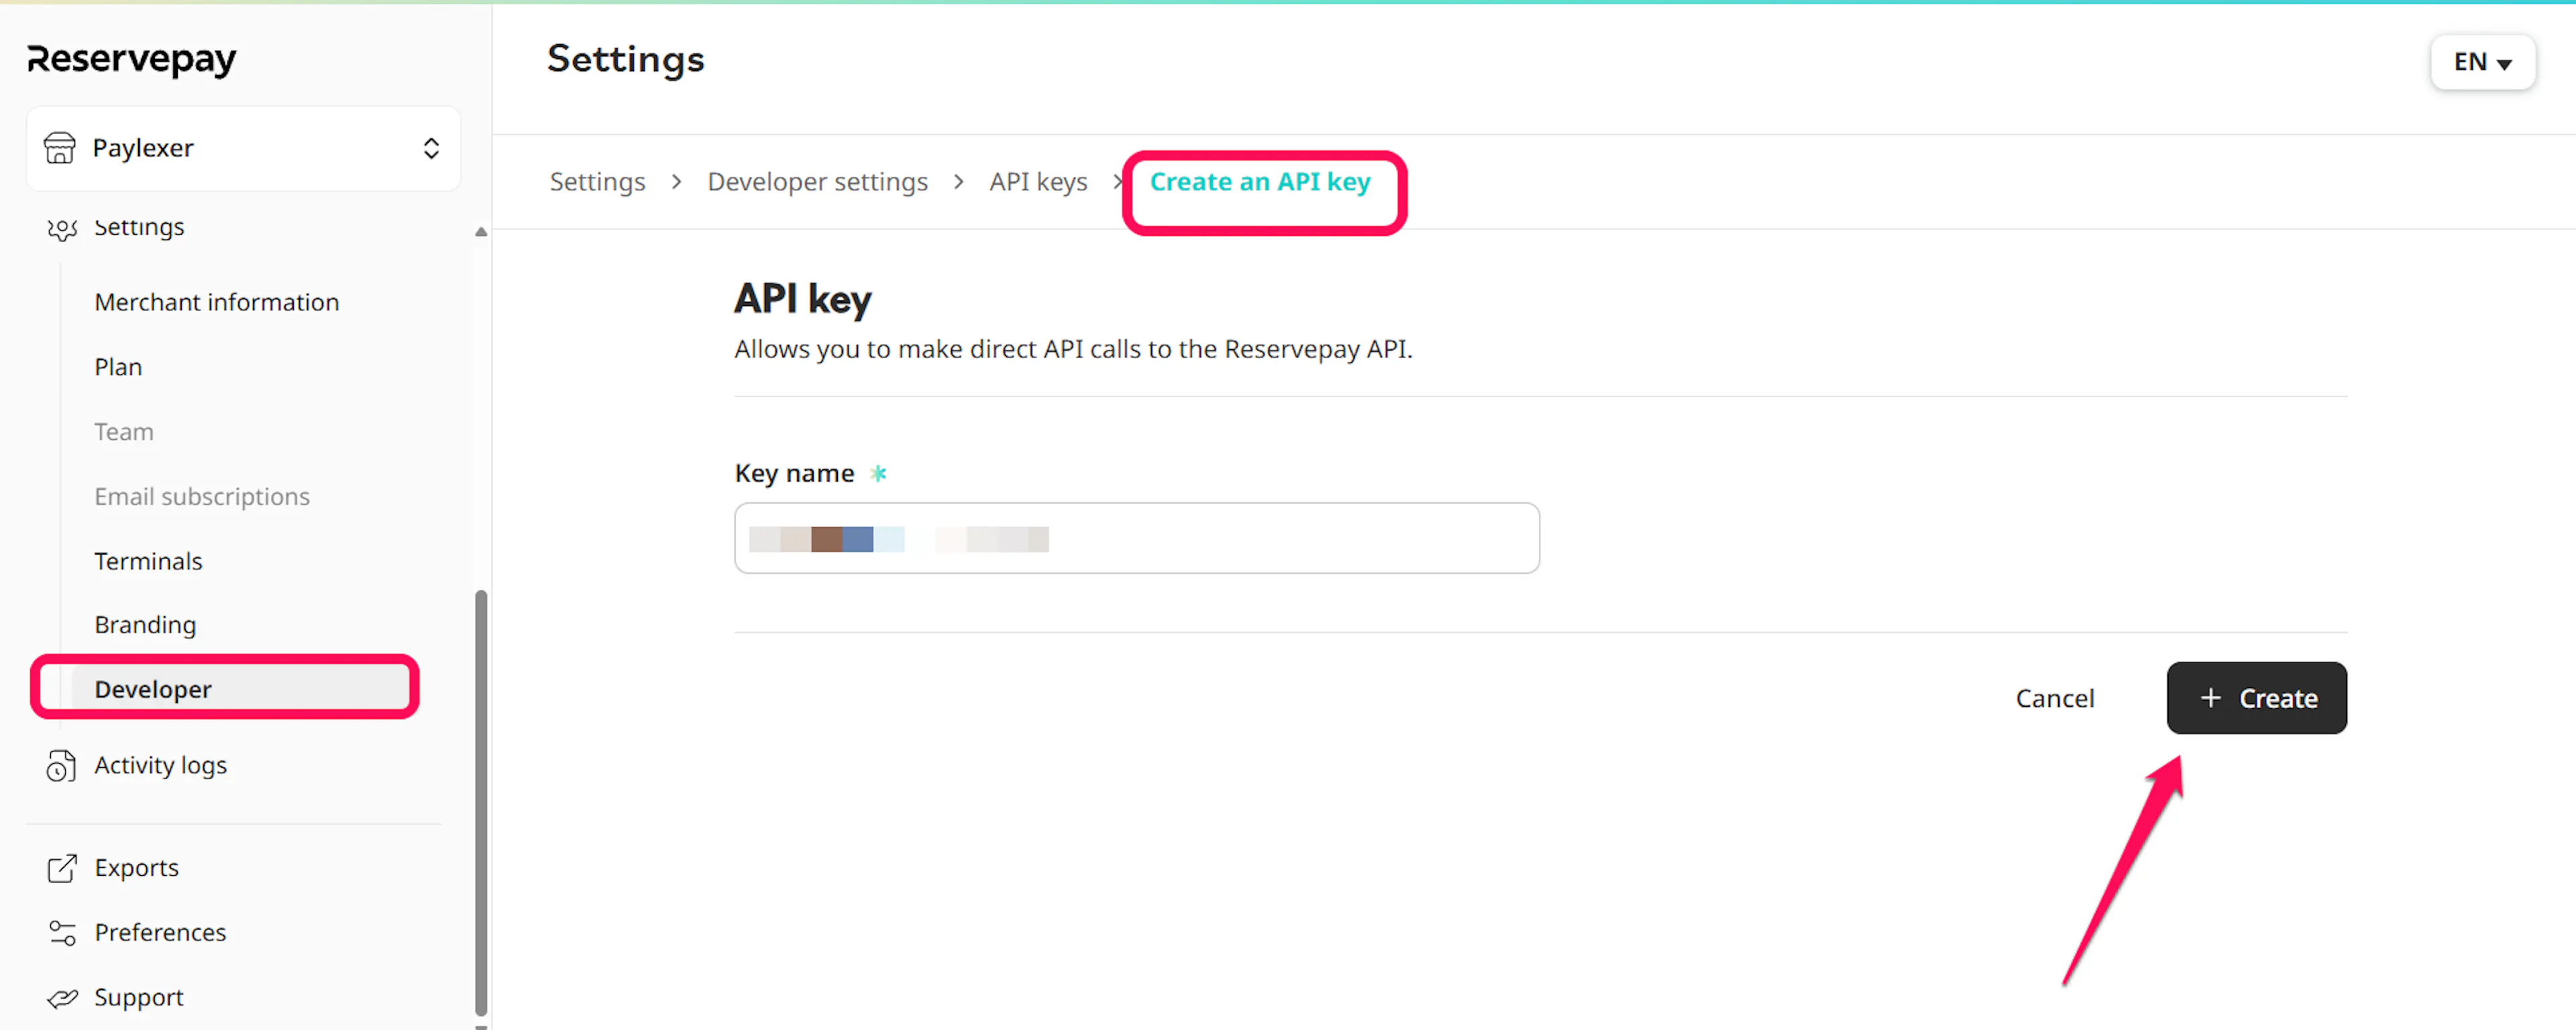
Create an API key
Open Developer Settings and create an API key. Copy the key, which starts with reservepay_. Keep it private.
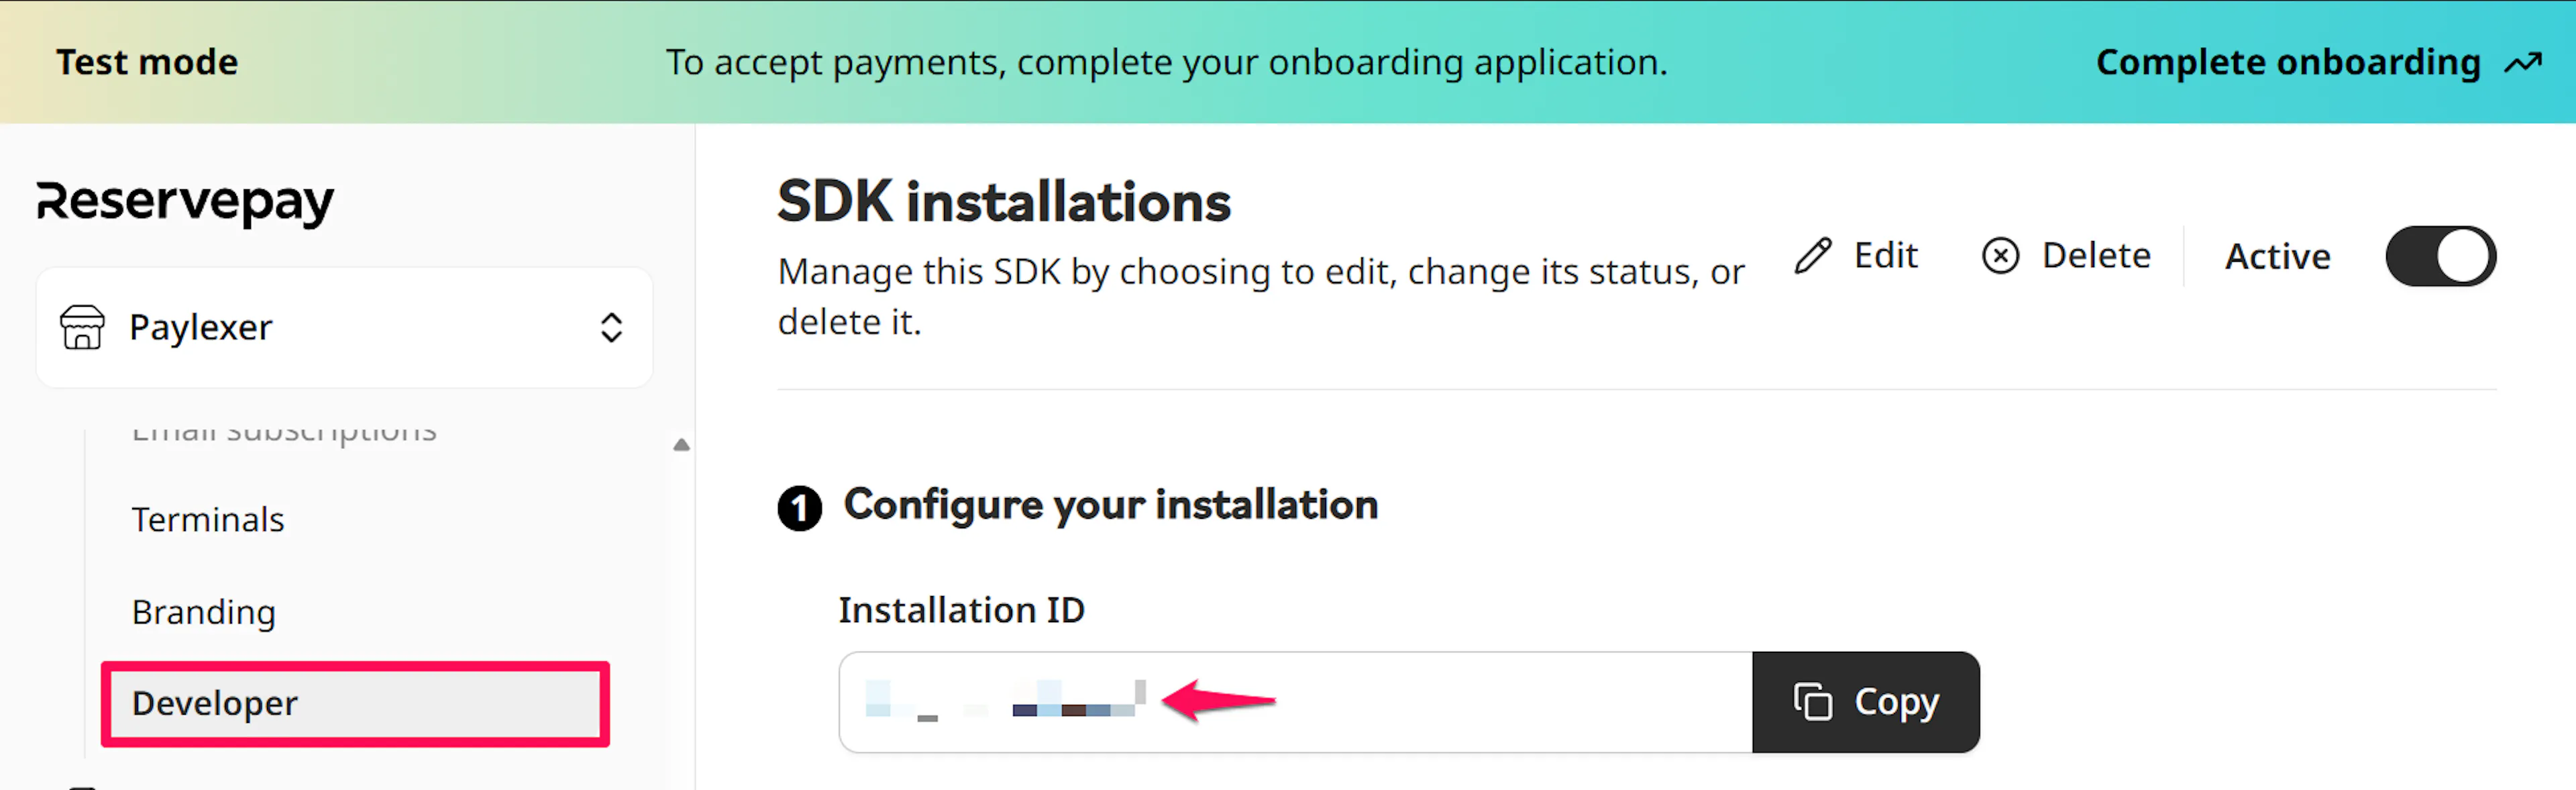
Create an installation
In Developer Settings, create an installation with the platform set to Website, and choose the payment methods you want to offer. Copy its Installation ID. Every checkout PayLexer creates uses this installation.
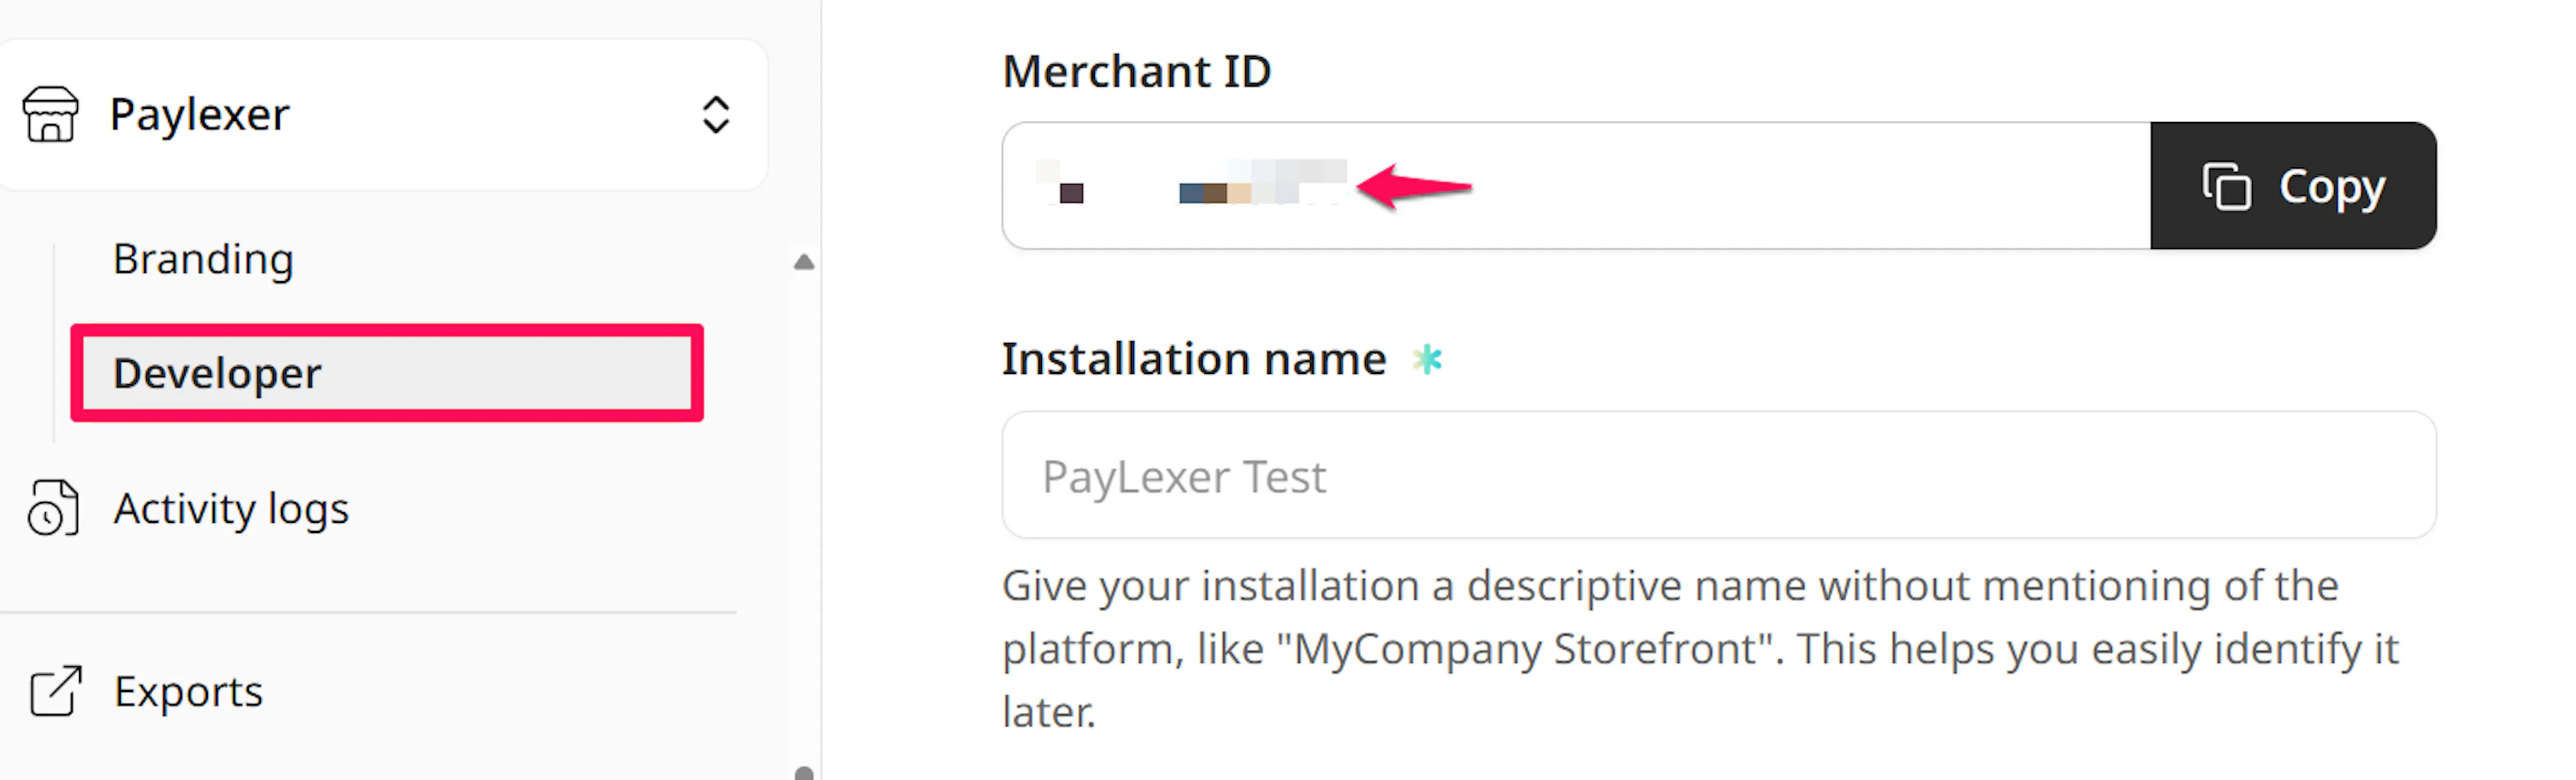
Note your Merchant ID (optional)
Go to Settings → Developer → SDK Installation, select the SDK name that's already been created, and copy the Merchant ID.
Adding Credentials to PayLexer
Open PayLexer Dashboard
Log in to your PayLexer dashboard and navigate to Payment Gateways → ReservePay.
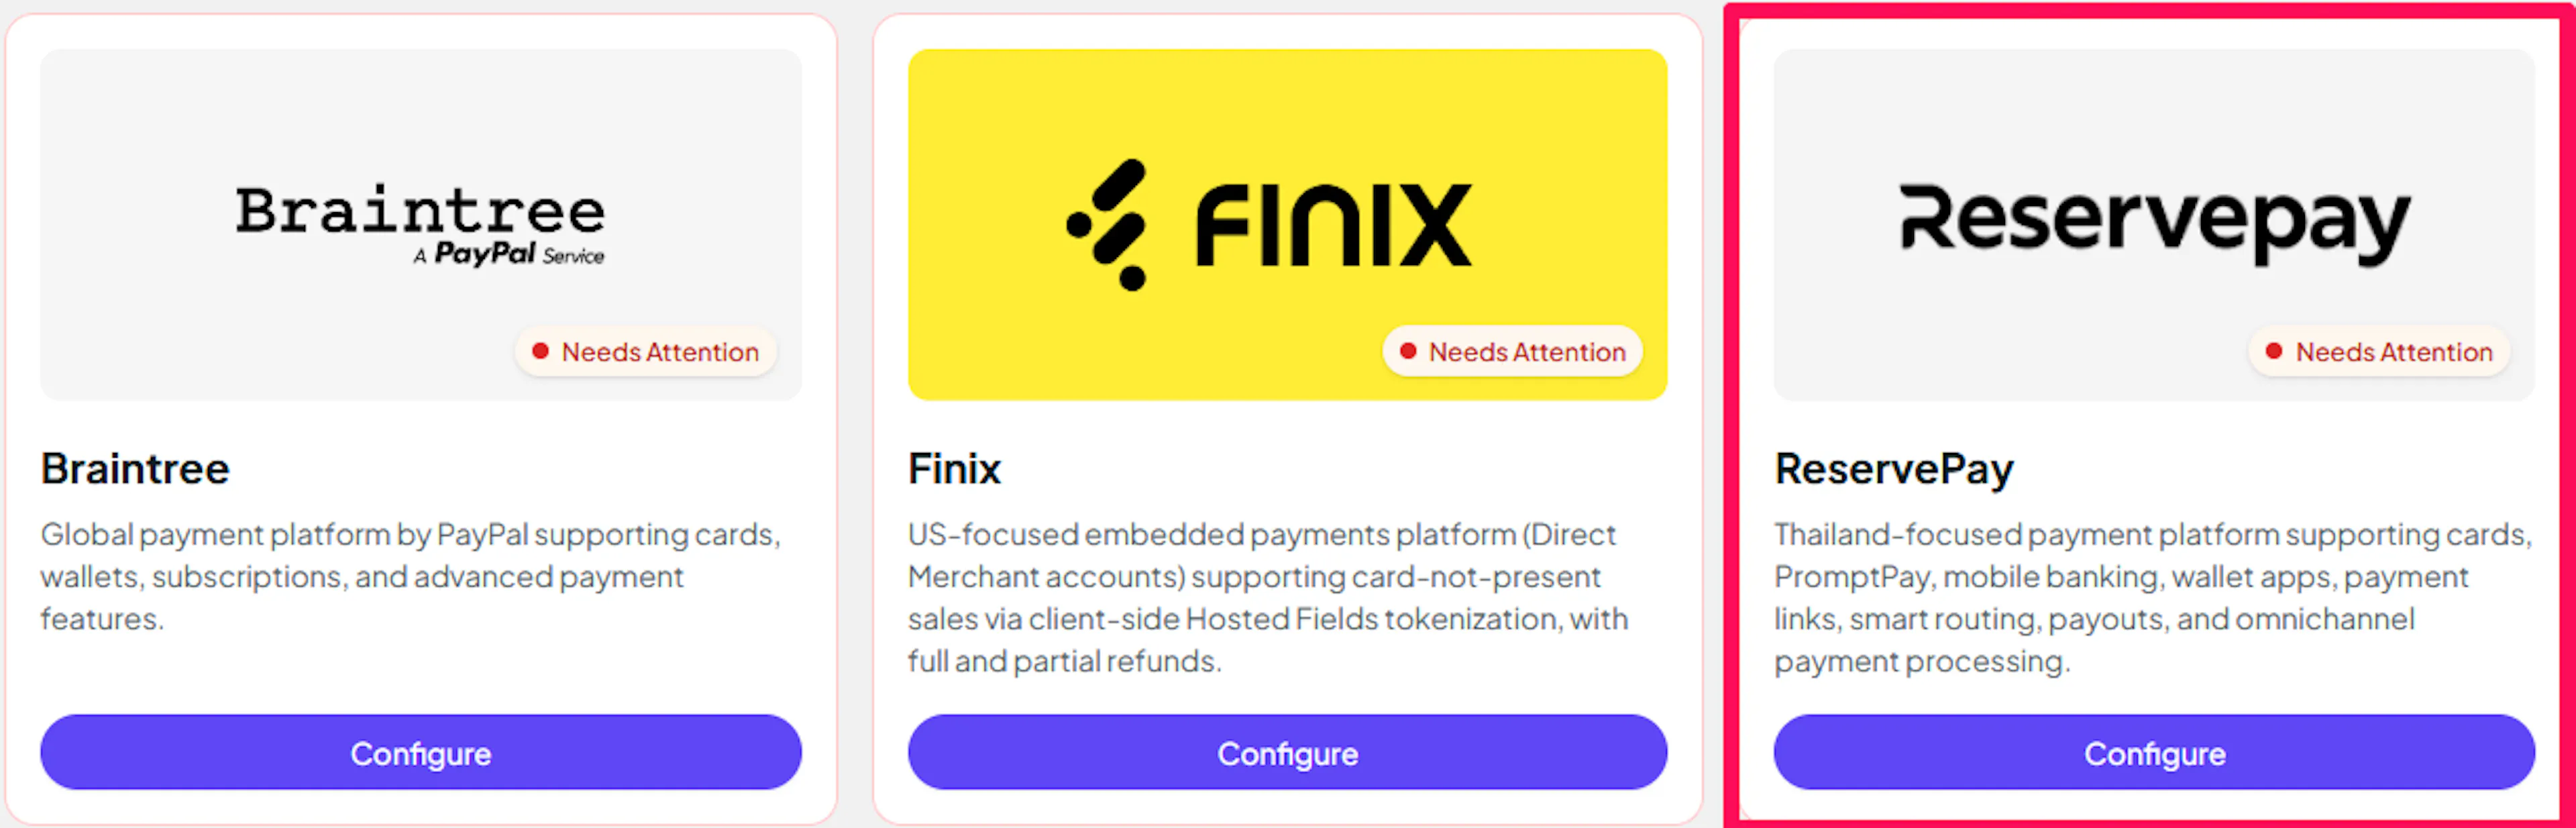
Enter your credentials
Paste the API Key (reservepay_…), Installation ID and, if you have it, the Merchant ID you copied from ReservePay into the corresponding fields.
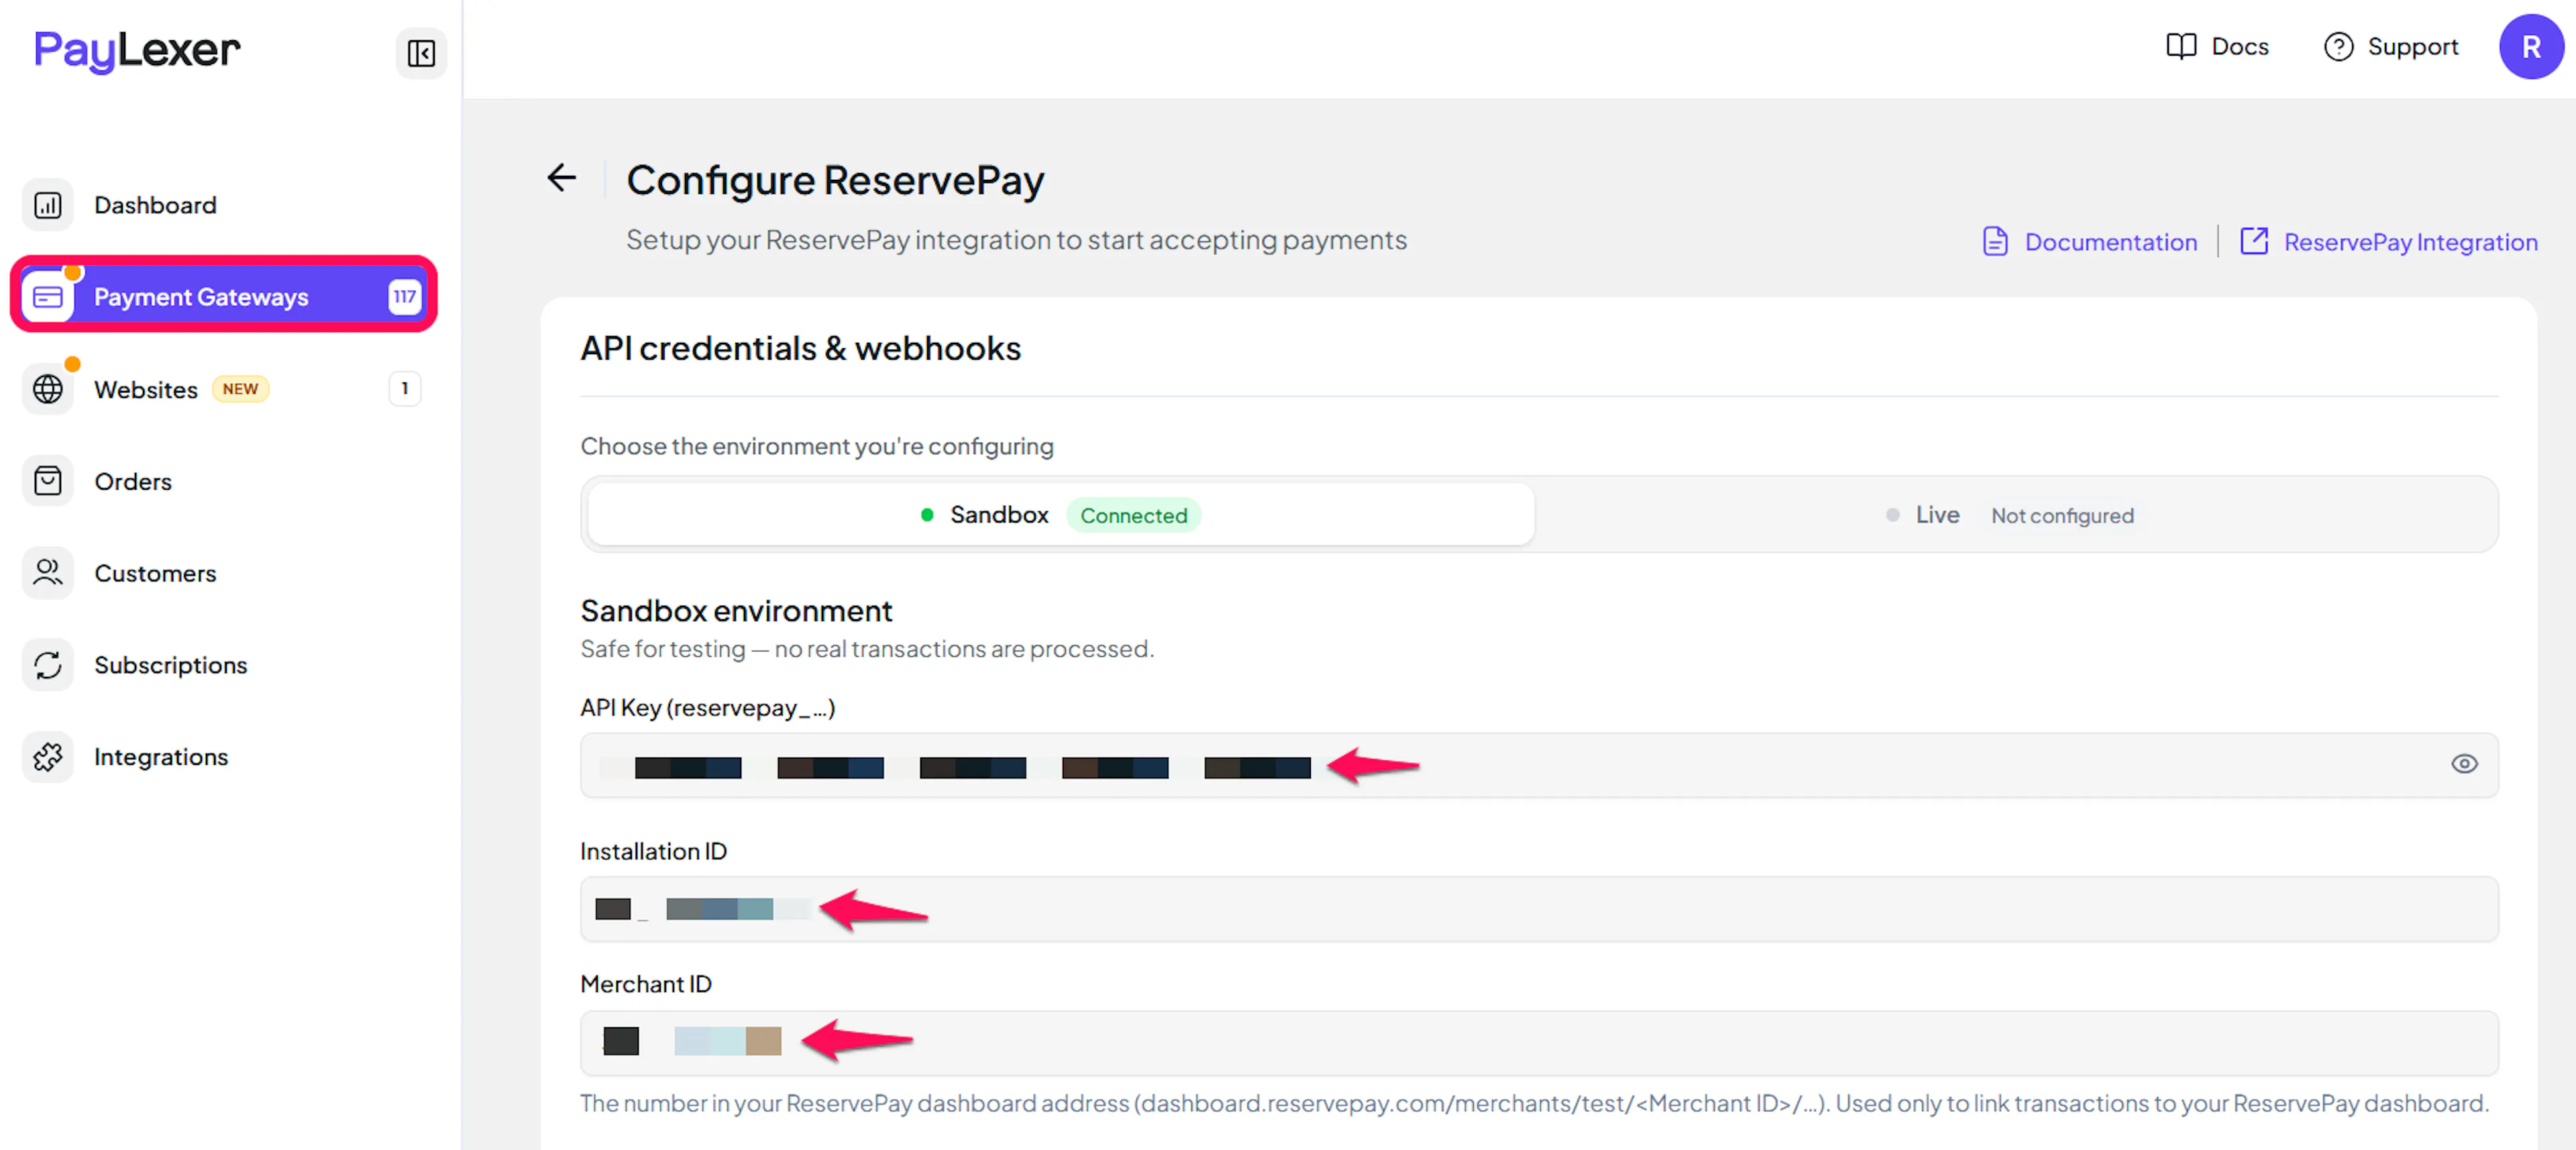
Understanding Live/Production and Sandbox Settings:
| Environment | Purpose |
|---|---|
| Live / Production | Used for real transactions. |
| Test / Sandbox | Used for testing only. No real money is processed. |
How PayLexer selects credentials:
- Debug/Test mode ON → Test credentials are used
- Debug/Test mode OFF → Live credentials are used
ReservePay uses the same dashboard and API for test and live accounts. The API key determines the account, so use the test key only in Test fields and the live key only in Live fields.
Test and save
Click Save to save your configuration and verify your credentials. Click Verify Connection to test the connection.
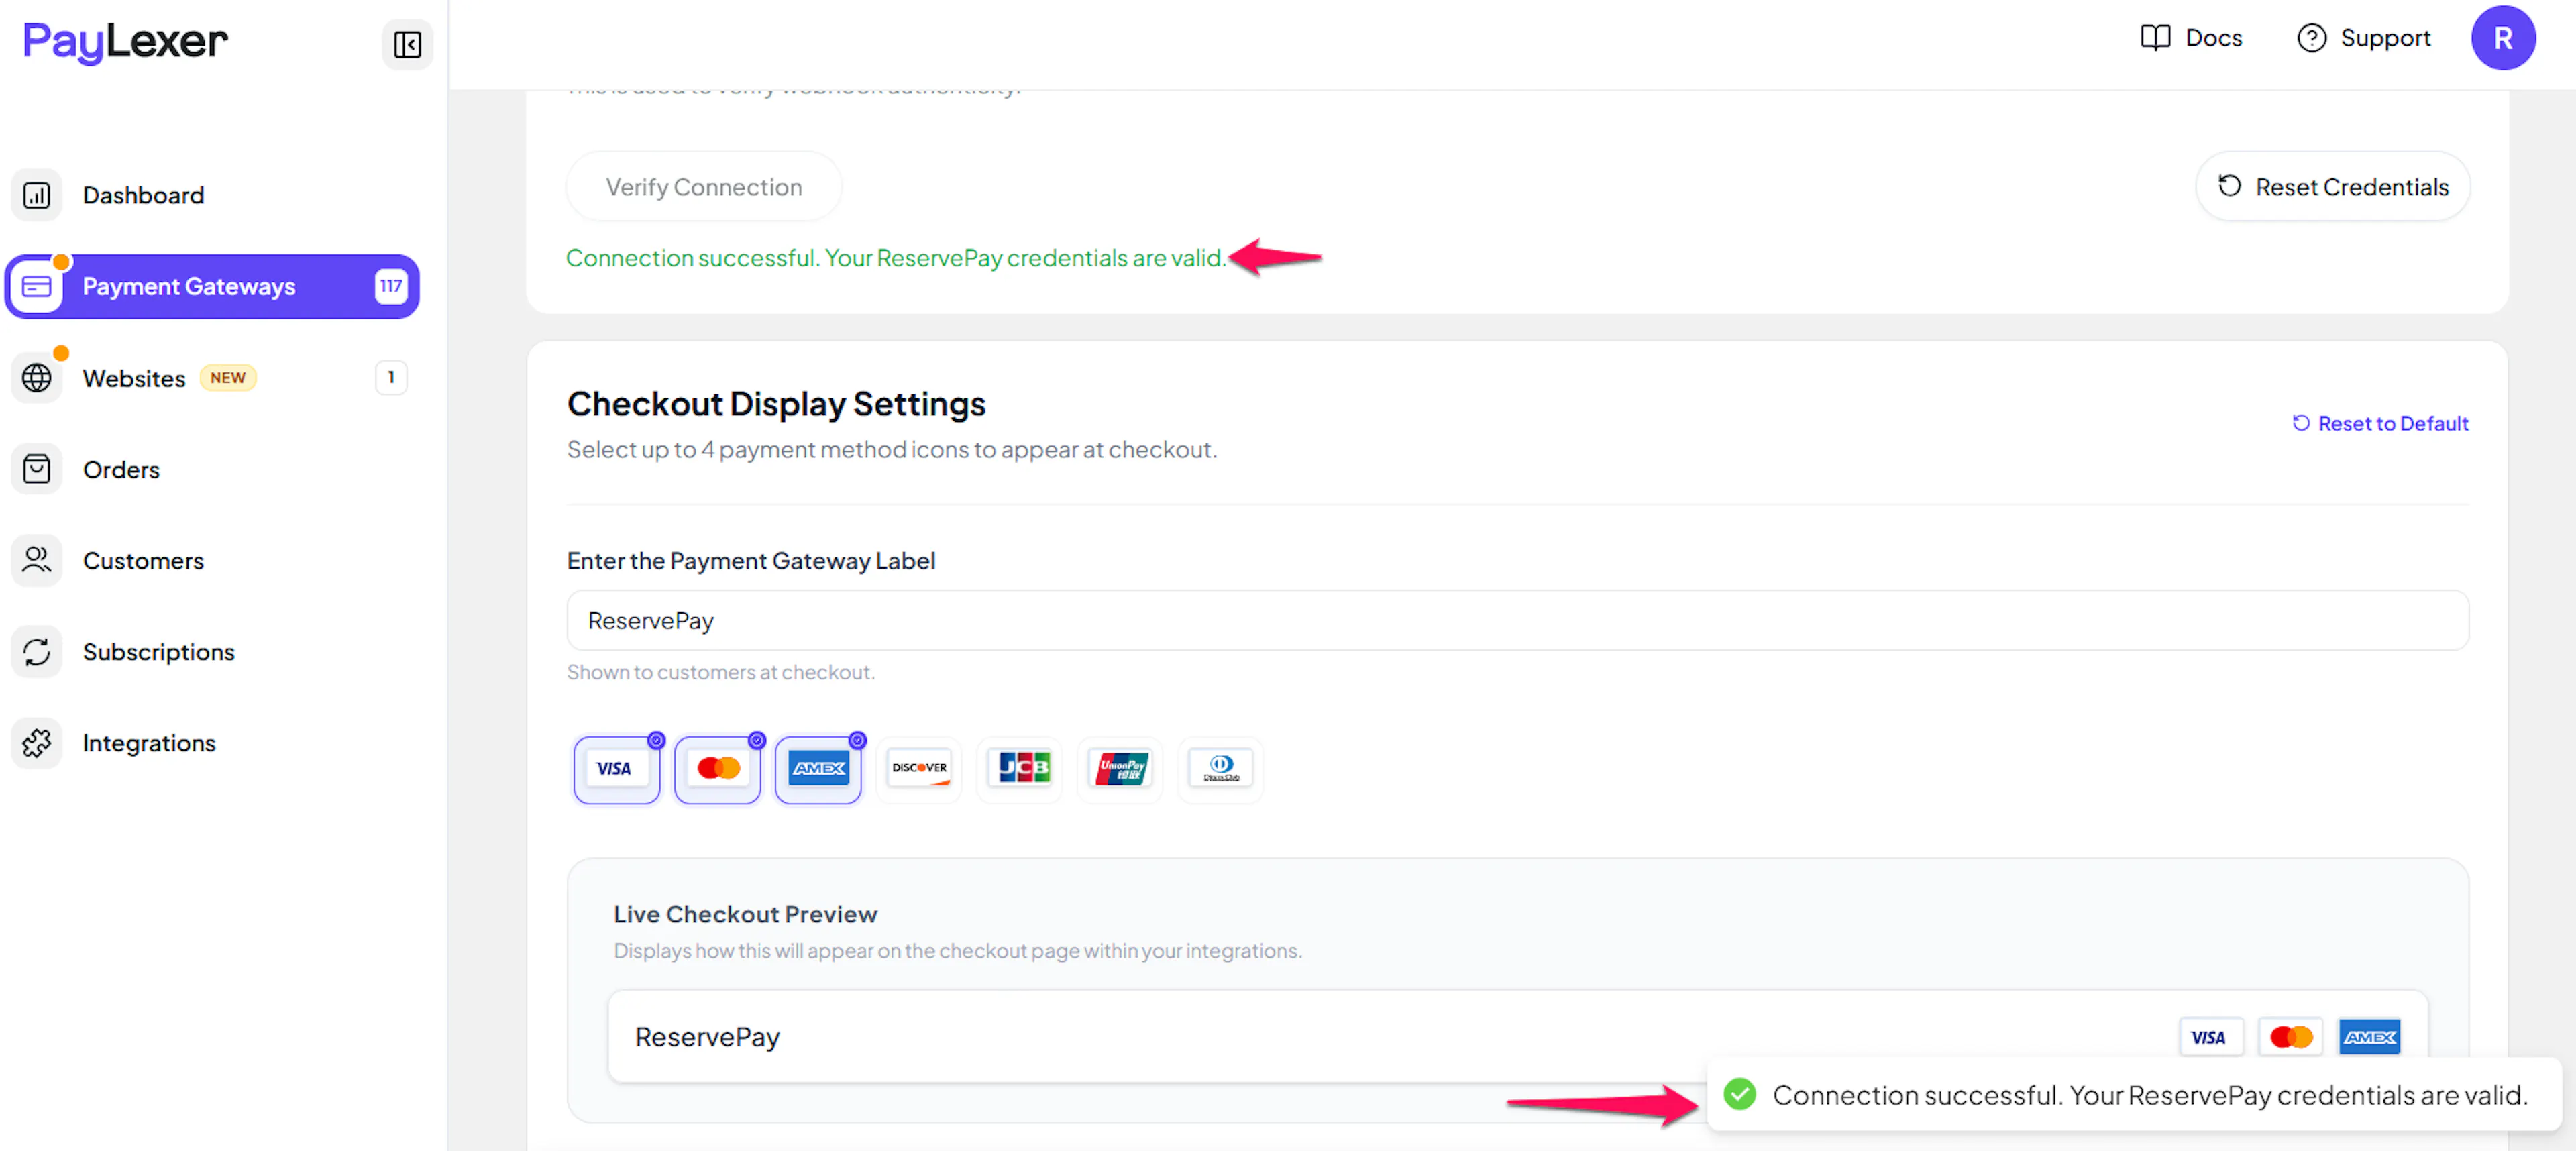
If the connection test fails because ReservePay rejected the API key, copy the key again from Developer Settings and check that it belongs to the test or live account you are configuring.
Configuring Webhooks (Mandatory)
Webhooks enable real-time payment updates and significantly improve reliability.
Benefits of Webhooks:
- Faster status updates when PayLexer can match the notification to an order
- A second, signed confirmation of every payment, checked with ReservePay before an order changes
PayLexer shows one webhook URL that serves both your test and live ReservePay accounts. Add it in each account, and save each account's verification key in the matching PayLexer environment.
Copy your PayLexer webhook URL
In Payment Gateways → ReservePay in PayLexer, copy the Webhook URL.
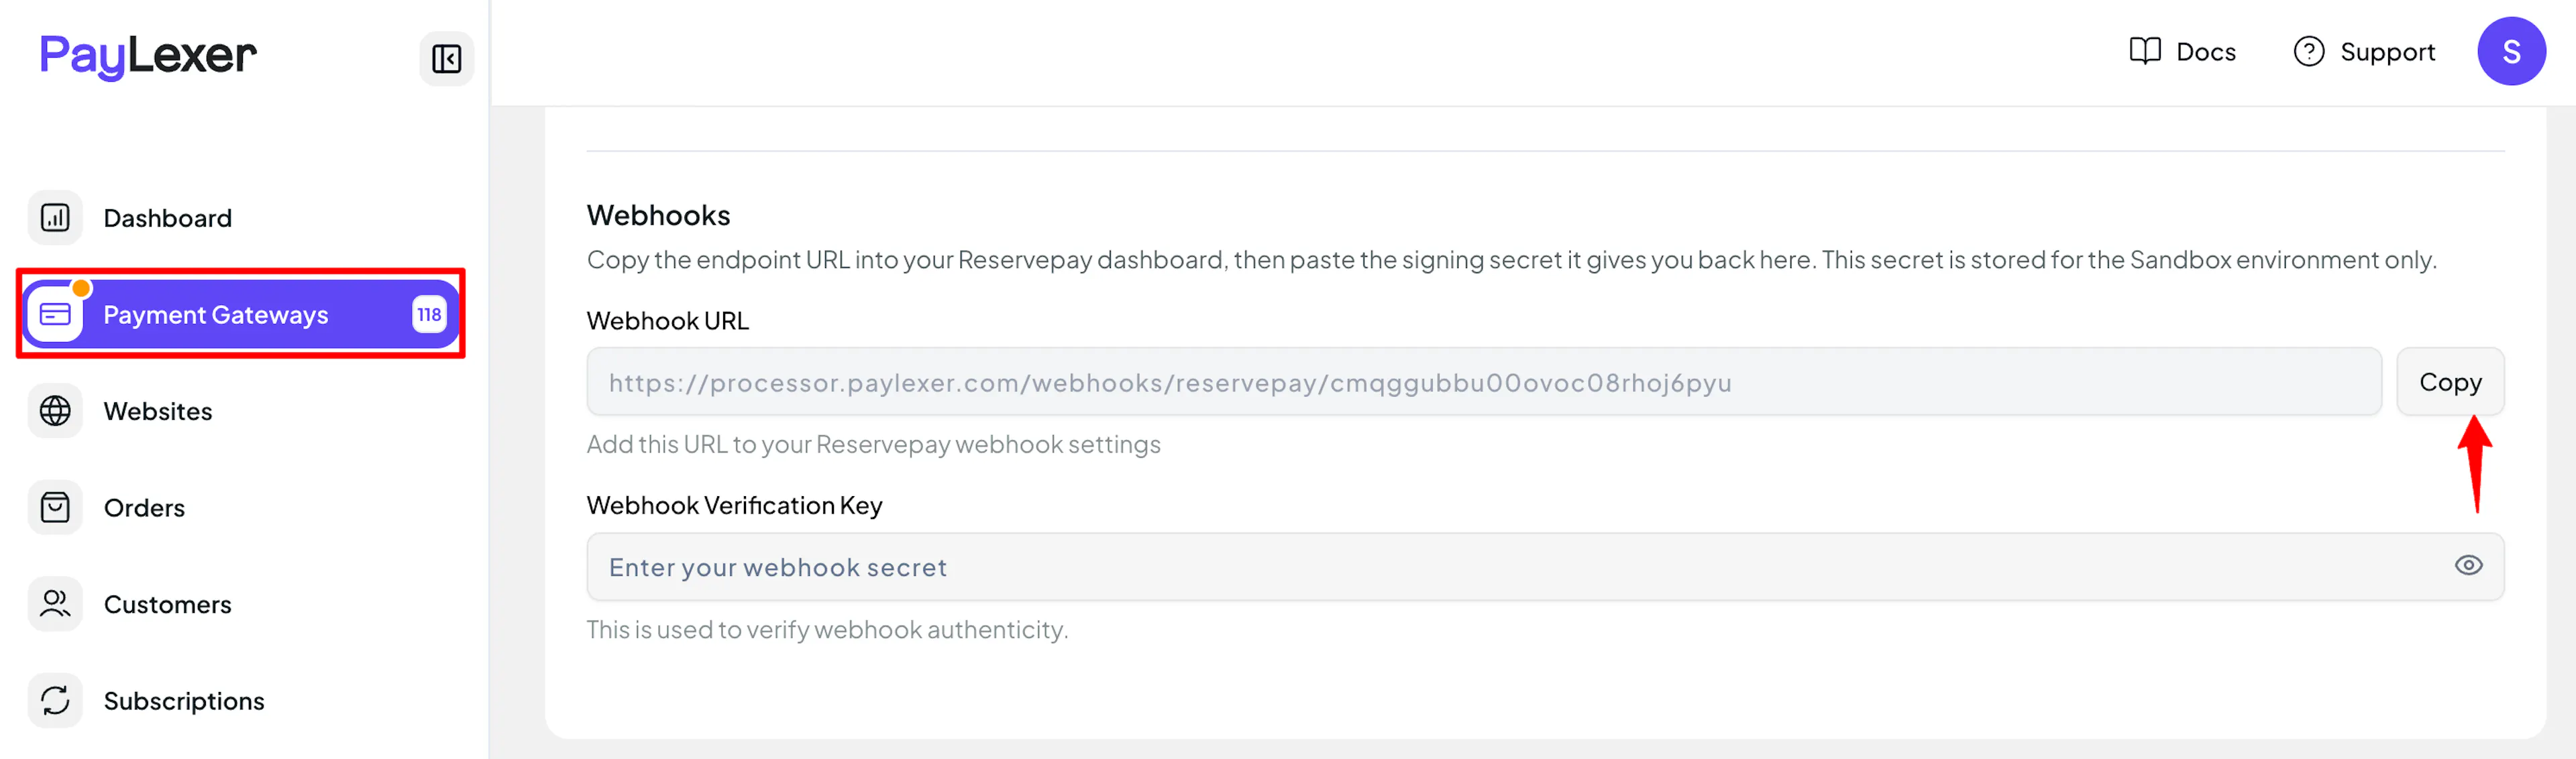
Add the endpoint in ReservePay
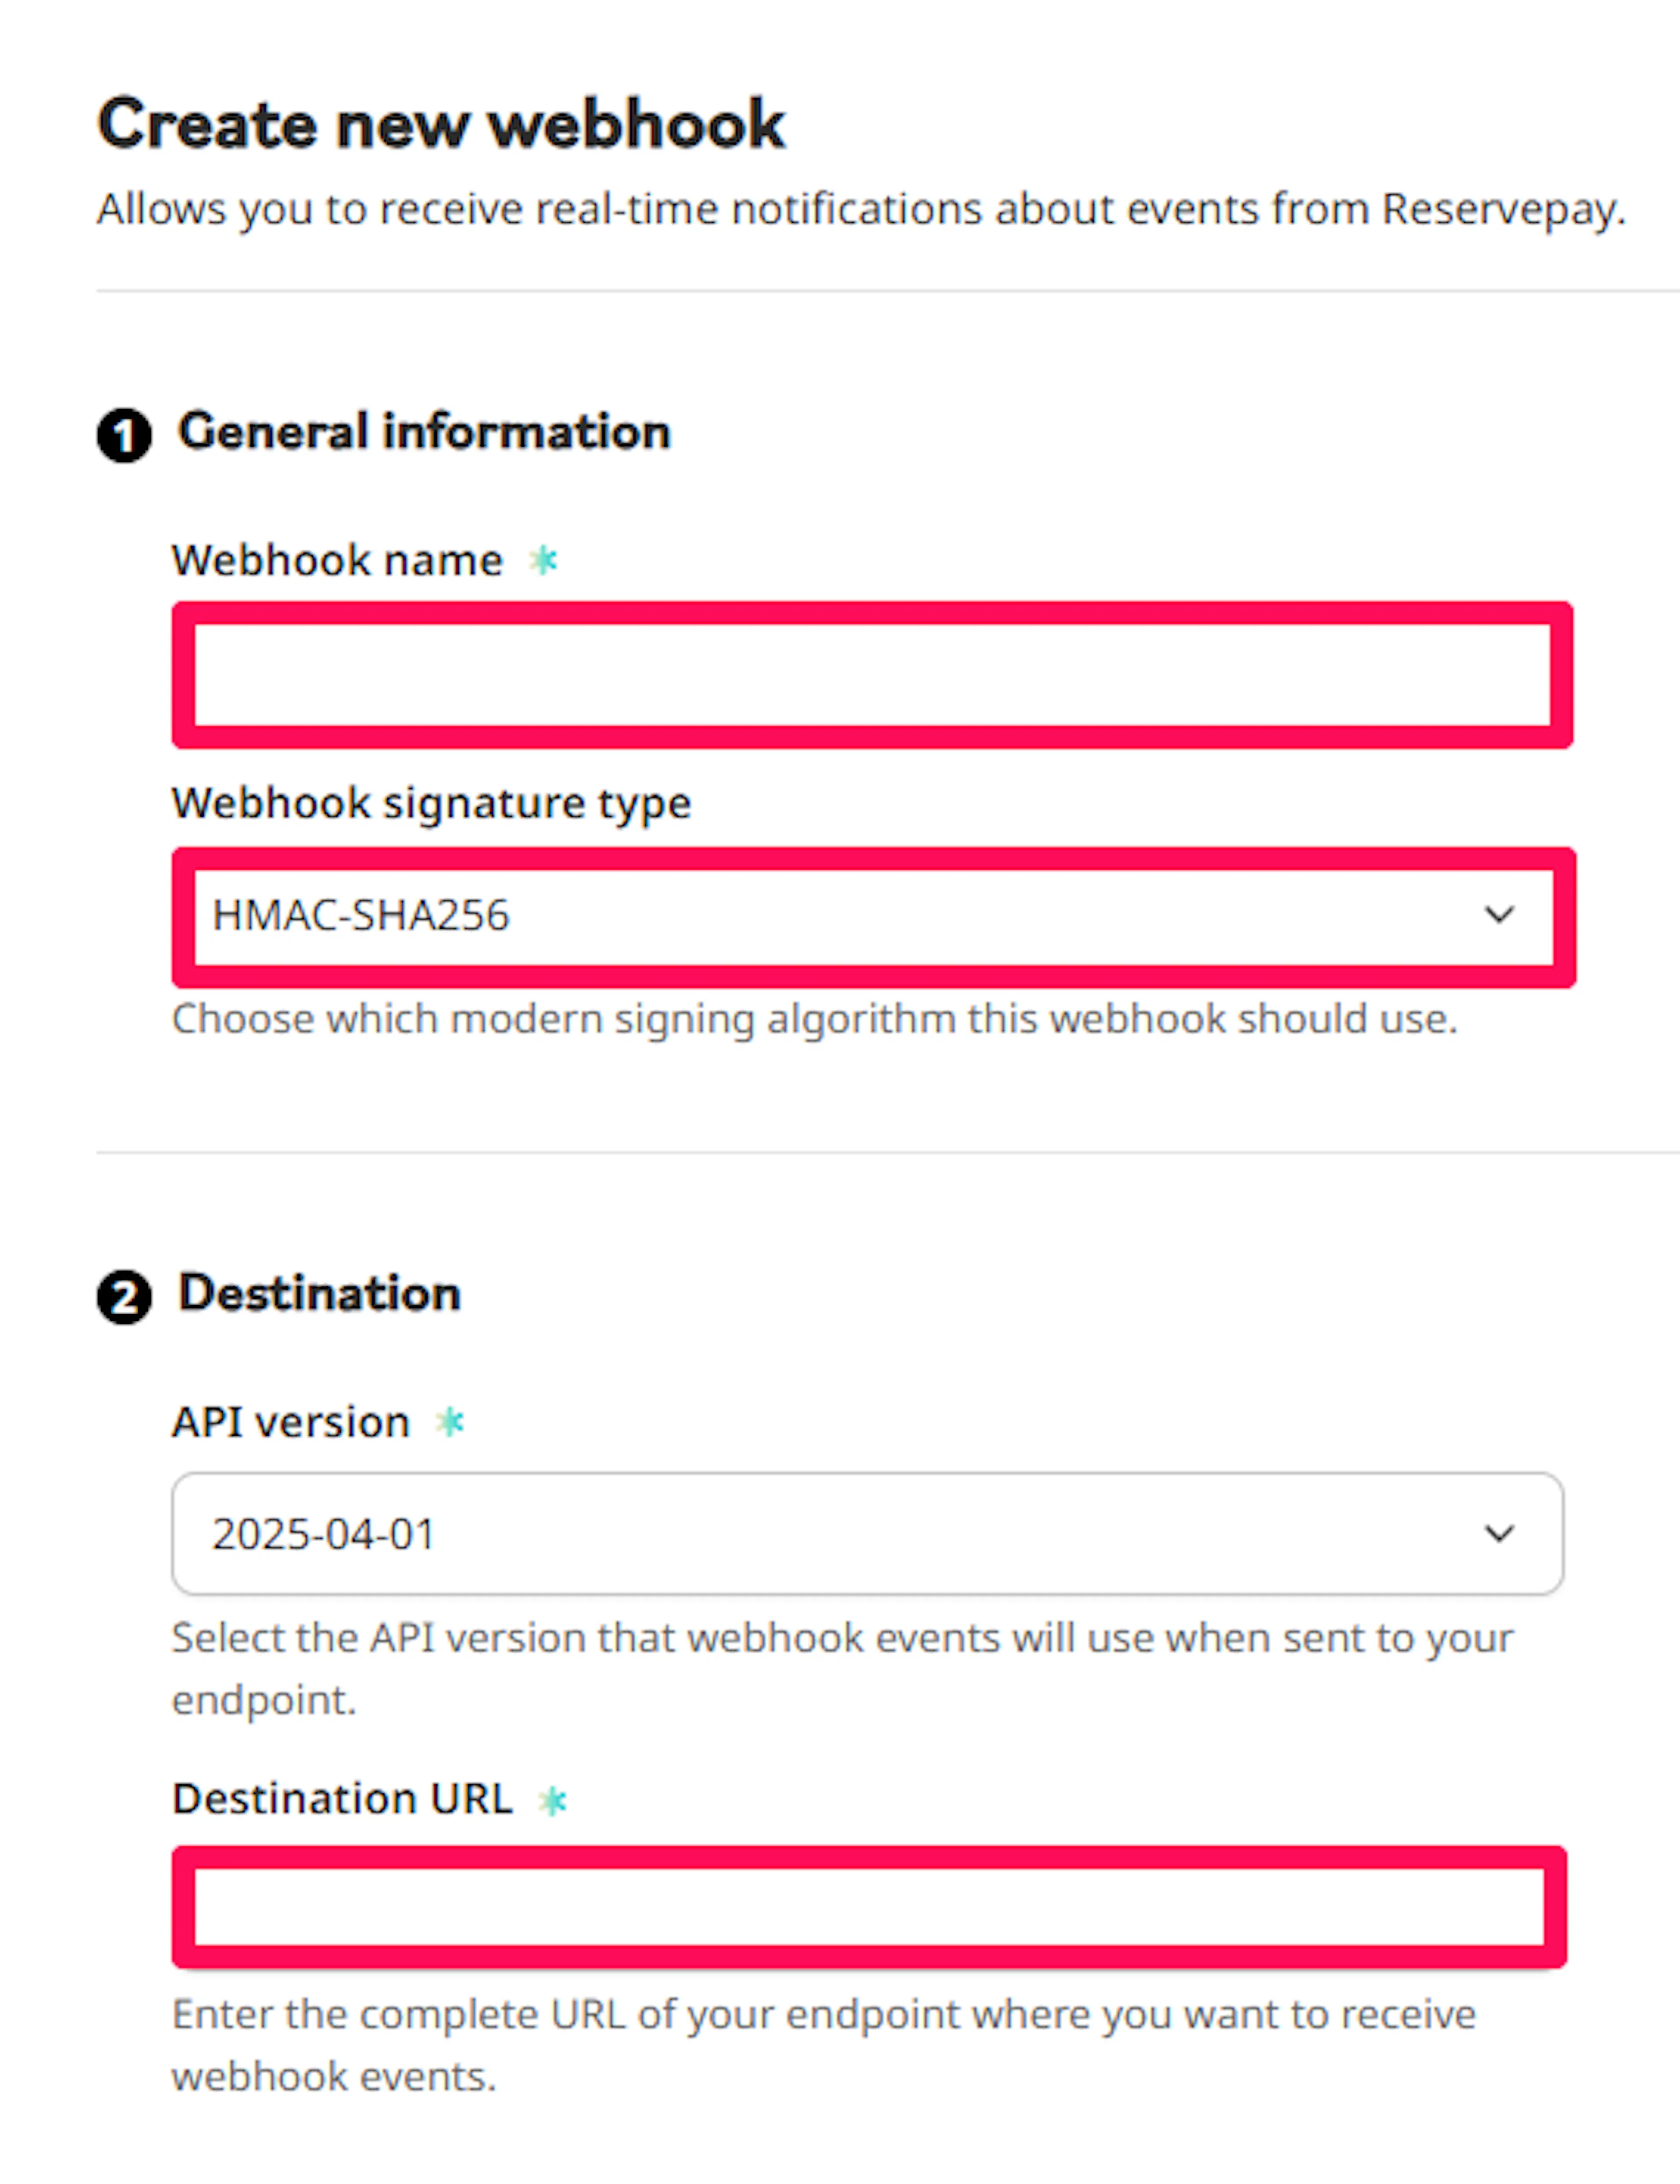
In the ReservePay dashboard, open Developer Settings → Webhooks and add an endpoint with:
- URL: the PayLexer webhook URL
- Signature type:
HMAC_SHA256 - Events: the payment events (payment completed, expired, voided and reversed)
Save the Webhook Verification Key
Copy the endpoint's verification key and paste it into the Webhook Verification Key field in PayLexer, in the same environment (Test or Live) as the ReservePay account. Click Save.
Repeat these steps in your other ReservePay account. PayLexer uses the key that matches each notification's signature to tell test and live notifications apart, so a missing or wrong key makes PayLexer reject that account's notifications.
Integrate ReservePay to Your Website
If you have already added and configured your site, you can enable ReservePay in your existing setup.
Go to Websites
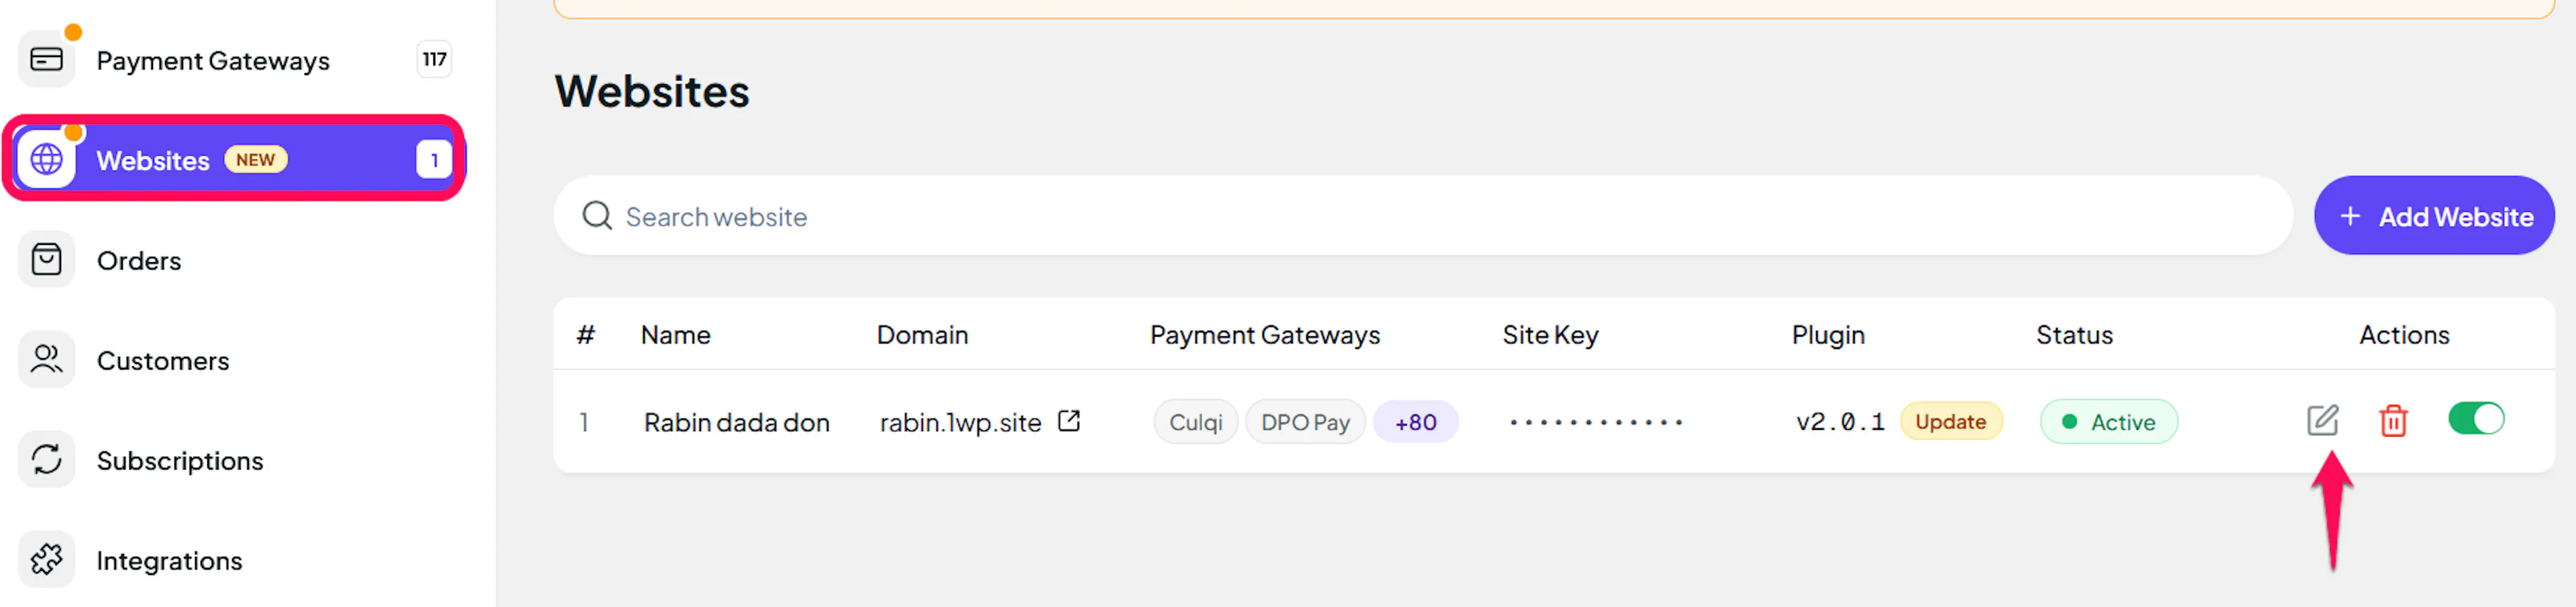
Navigate to Websites in your PayLexer dashboard.
Edit your website
Click the Edit Icon of your added website.
Enable ReservePay
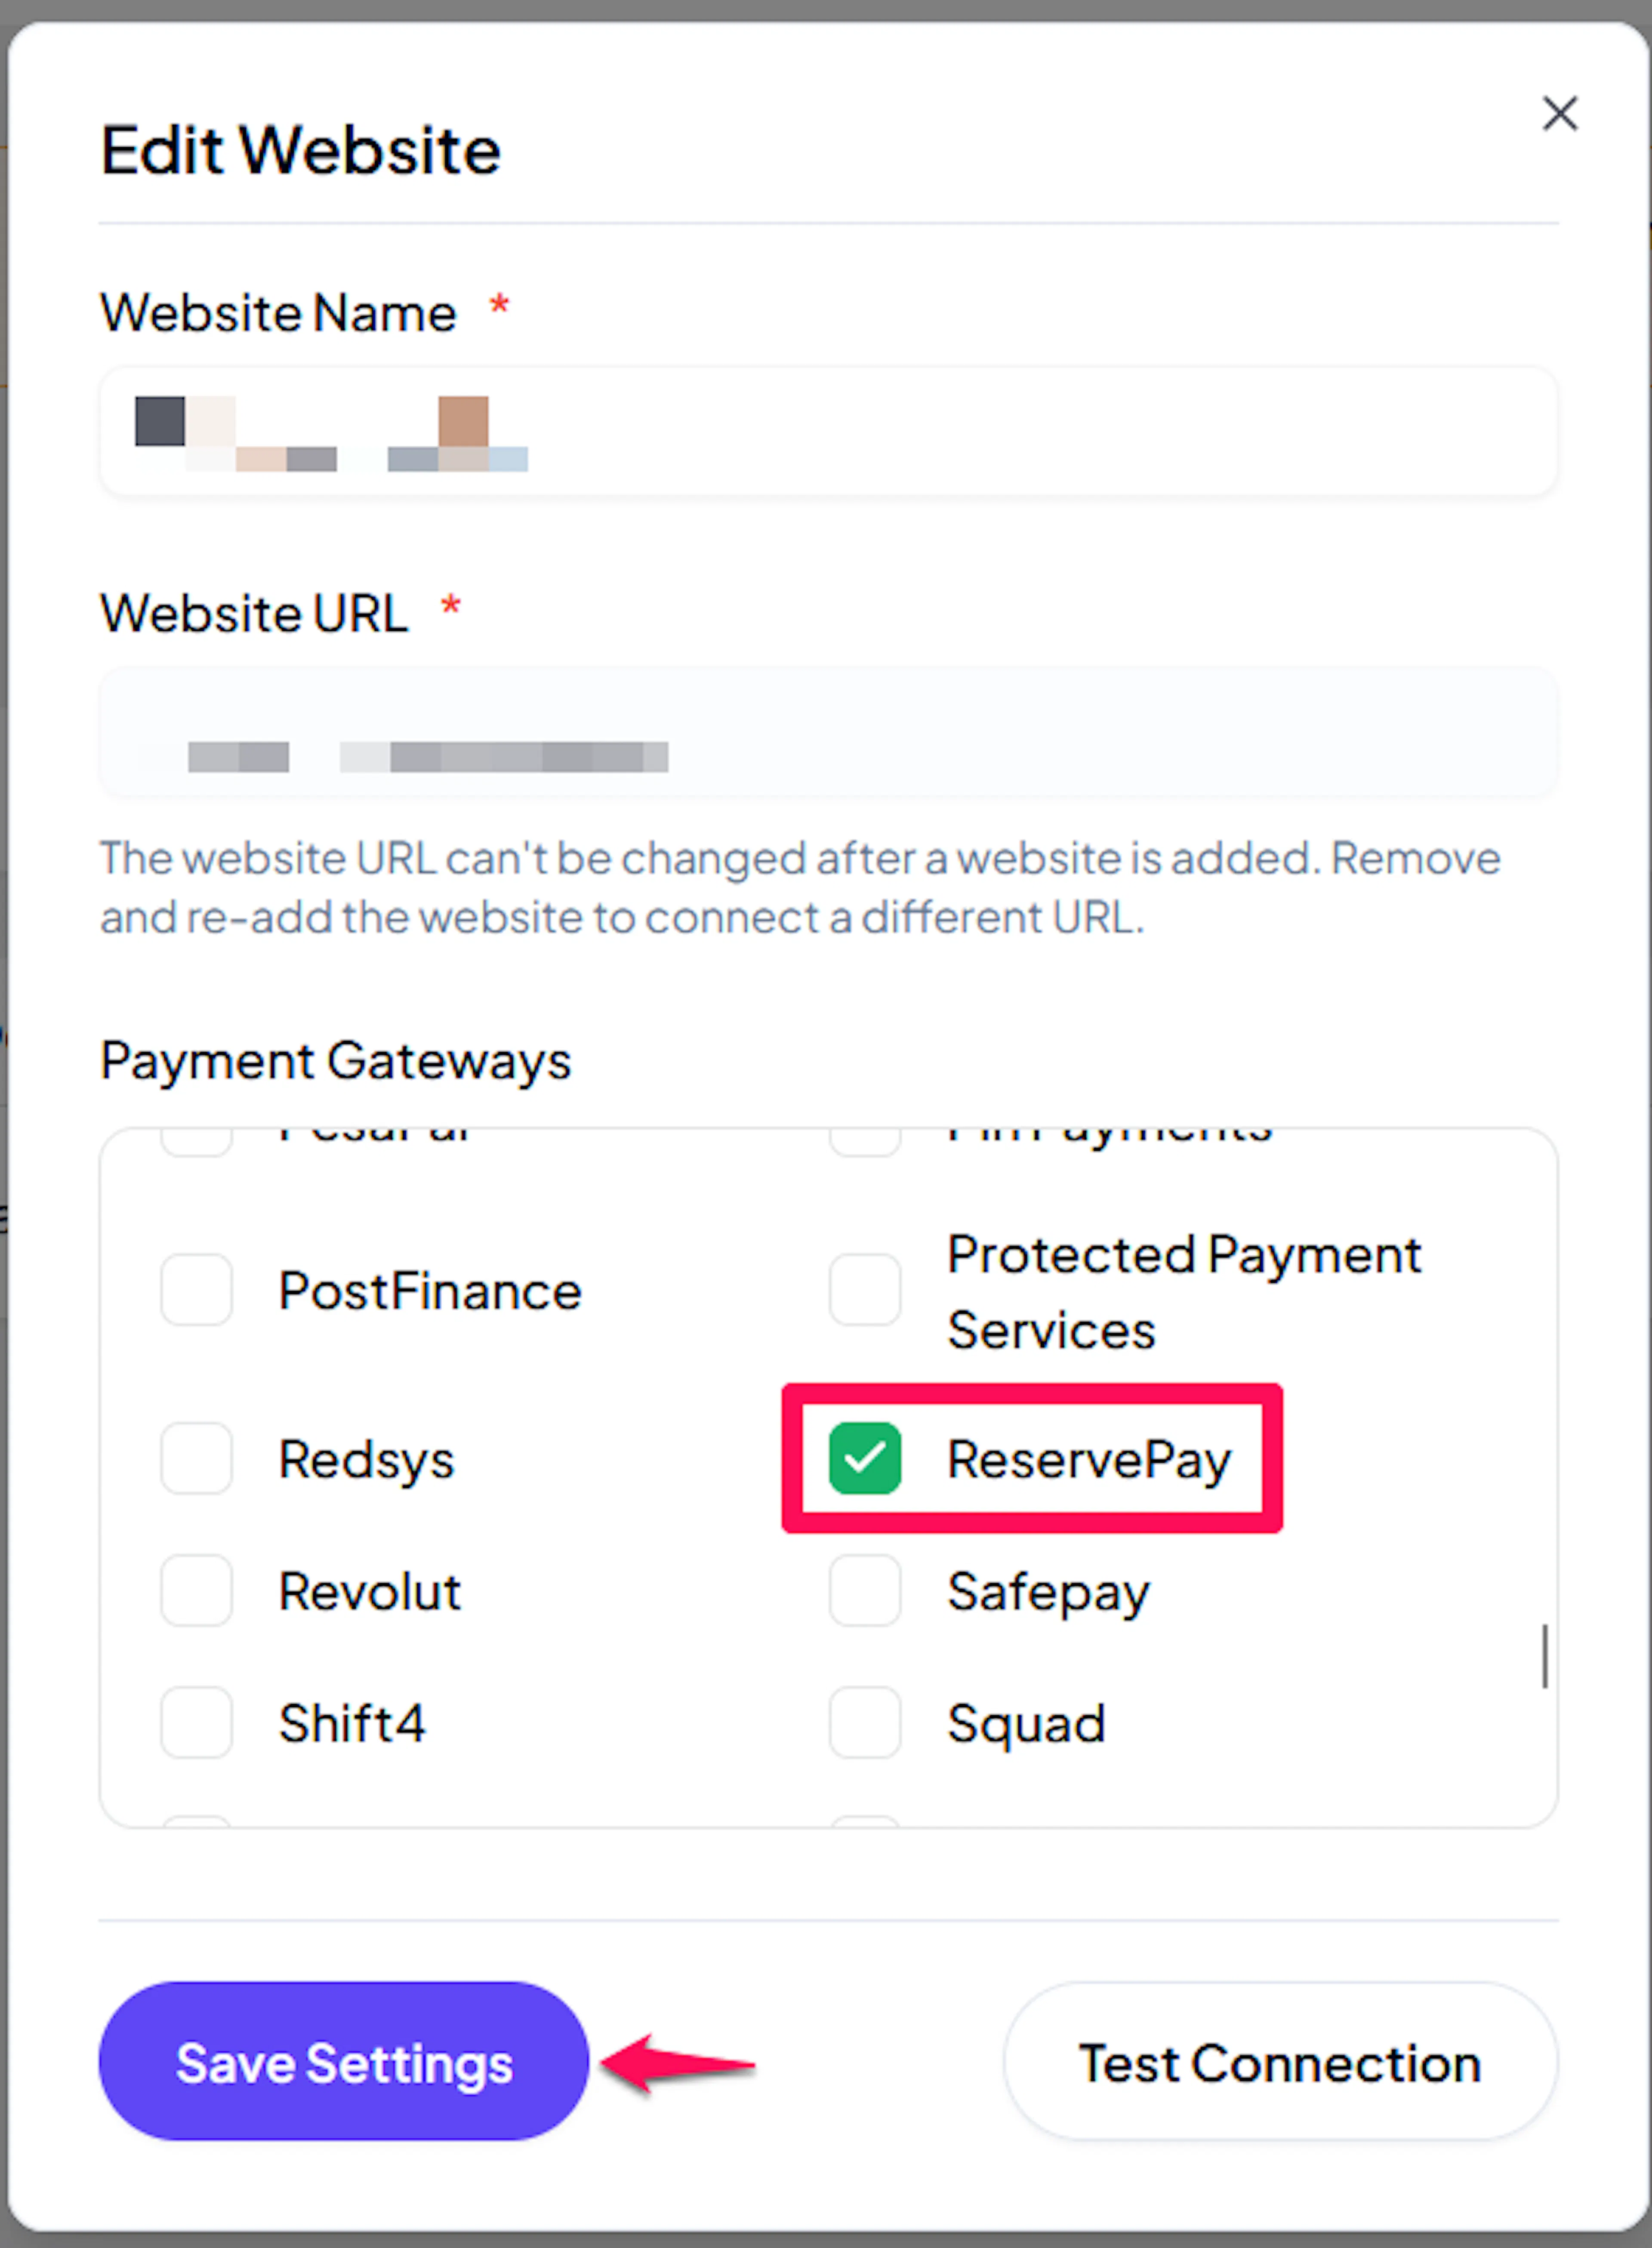
Click the checkbox to enable ReservePay for the website.
If you haven't added a website yet, Continue to Add Your Website →
Troubleshooting
Best Practices
- Test in sandbox before enabling production, using your ReservePay test account with Debug/Test mode ON
- Set up the API key, installation and webhook endpoint in both your test and live ReservePay accounts
- Use ReservePay's test card generator to try approved, declined and 3-D Secure card payments
- Add the Merchant ID so transaction IDs in PayLexer link straight to the payment in ReservePay
- Remind customers to click Back to ... after paying, so their order completes straight away
- Keep your API key private, and update PayLexer straight away if you change your credentials in ReservePay
- Reconcile your PayLexer orders against your ReservePay transaction history periodically
FAQs
Still Have Questions?
- ReservePay Support:
- Contact Support: ReservePay Support
- Developer Docs: ReservePay Developer Docs
- PayLexer Support: Contact Support