

PayVector
Connect your PayVector gateway account to PayLexer to accept card payments in the UK through PayVector's own hosted payment page, with 3-D Secure handled for you.
PayVector is a UK card gateway operated by Iridium Corporation Ltd, a London company. The platform underneath it is The ai Corporation's UK Gateway, a system also sold under other brand names. You sign up with PayVector directly and are issued a gateway account, which is what accepts cards. PayLexer connects to that account, so shoppers pay on PayVector's own hosted payment page and 3-D Secure runs there.
- Supported Regions (Merchant Accounts): United Kingdom, with accounts also offered in the United States, Australia, Canada, France and Germany
- Supported Currencies: GBP, EUR, USD, AUD, CAD
Supported Features
- PayVector-hosted payment page, so card details are never entered on your site or in PayLexer
- 3-D Secure 2 authentication run by PayVector as part of the hosted page
- Full and partial refunds, issued from PayLexer or your store
- Scheduled reconciliation that settles payments PayVector never had a chance to report
- Card brand, card class, authorization code and security-check results recorded against each order
Always refund or cancel a PayVector payment from PayLexer or your store, never by hand in the PayVector MMS. An MMS action becomes a separate transaction that PayLexer has no way to discover, so the order here would go on reading as fully paid.
Before You Start
Make sure you have:
- PayVector Gateway Account – Don't have one? Sign up for PayVector →
- PayLexer Account – Required to configure the integration. Create your account →
- A website where you want to integrate
Looking for a different payment processor? View all supported gateways →
Configuring PayVector
You need a Merchant ID, Gateway Account Password, Pre-Shared Key, and Hash Method from PayVector for this integration.
These four values come from two different places. The first two arrive by email when your gateway account is created. The last two are read from the MMS, PayVector's merchant administration portal.
PayVector issues you two separate sets of credentials, and confusing them is the most common setup mistake. The gateway account Merchant ID and password are what belong below; your MMS user is a login for the admin portal only and is never used here.
Getting API Credentials
Open your New Gateway Account email
When your account is created, PayVector emails you a New Gateway Account message containing your Merchant ID and your Gateway Account Password.
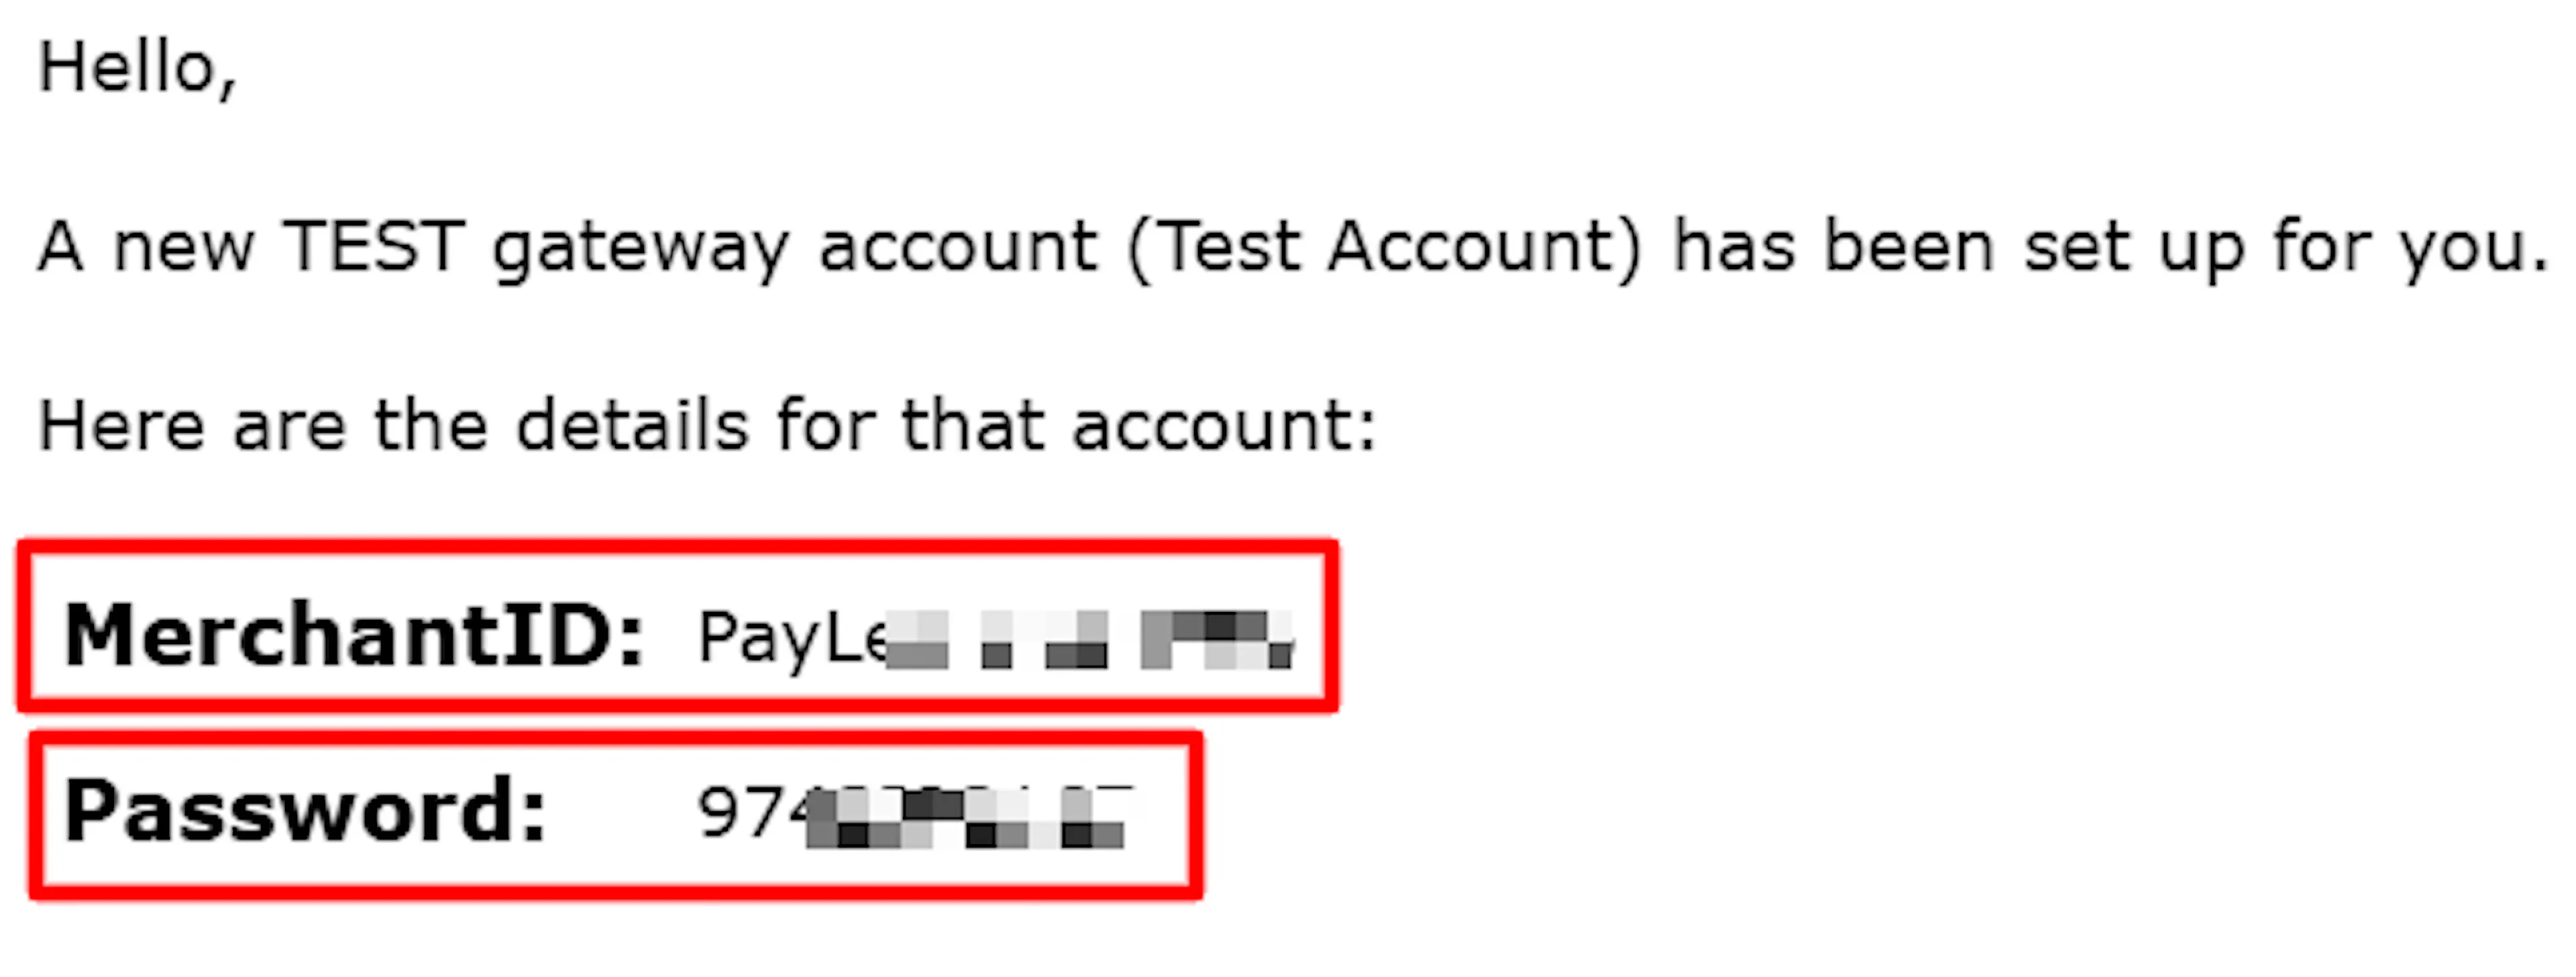
The Merchant ID usually looks like a company name followed by digits, for example Example-1234. Both values are at most 15 characters.
Do not use the username and password from your MMS user confirmation email. That is the portal login and it will not authenticate against the payment API.
Log in to the PayVector MMS
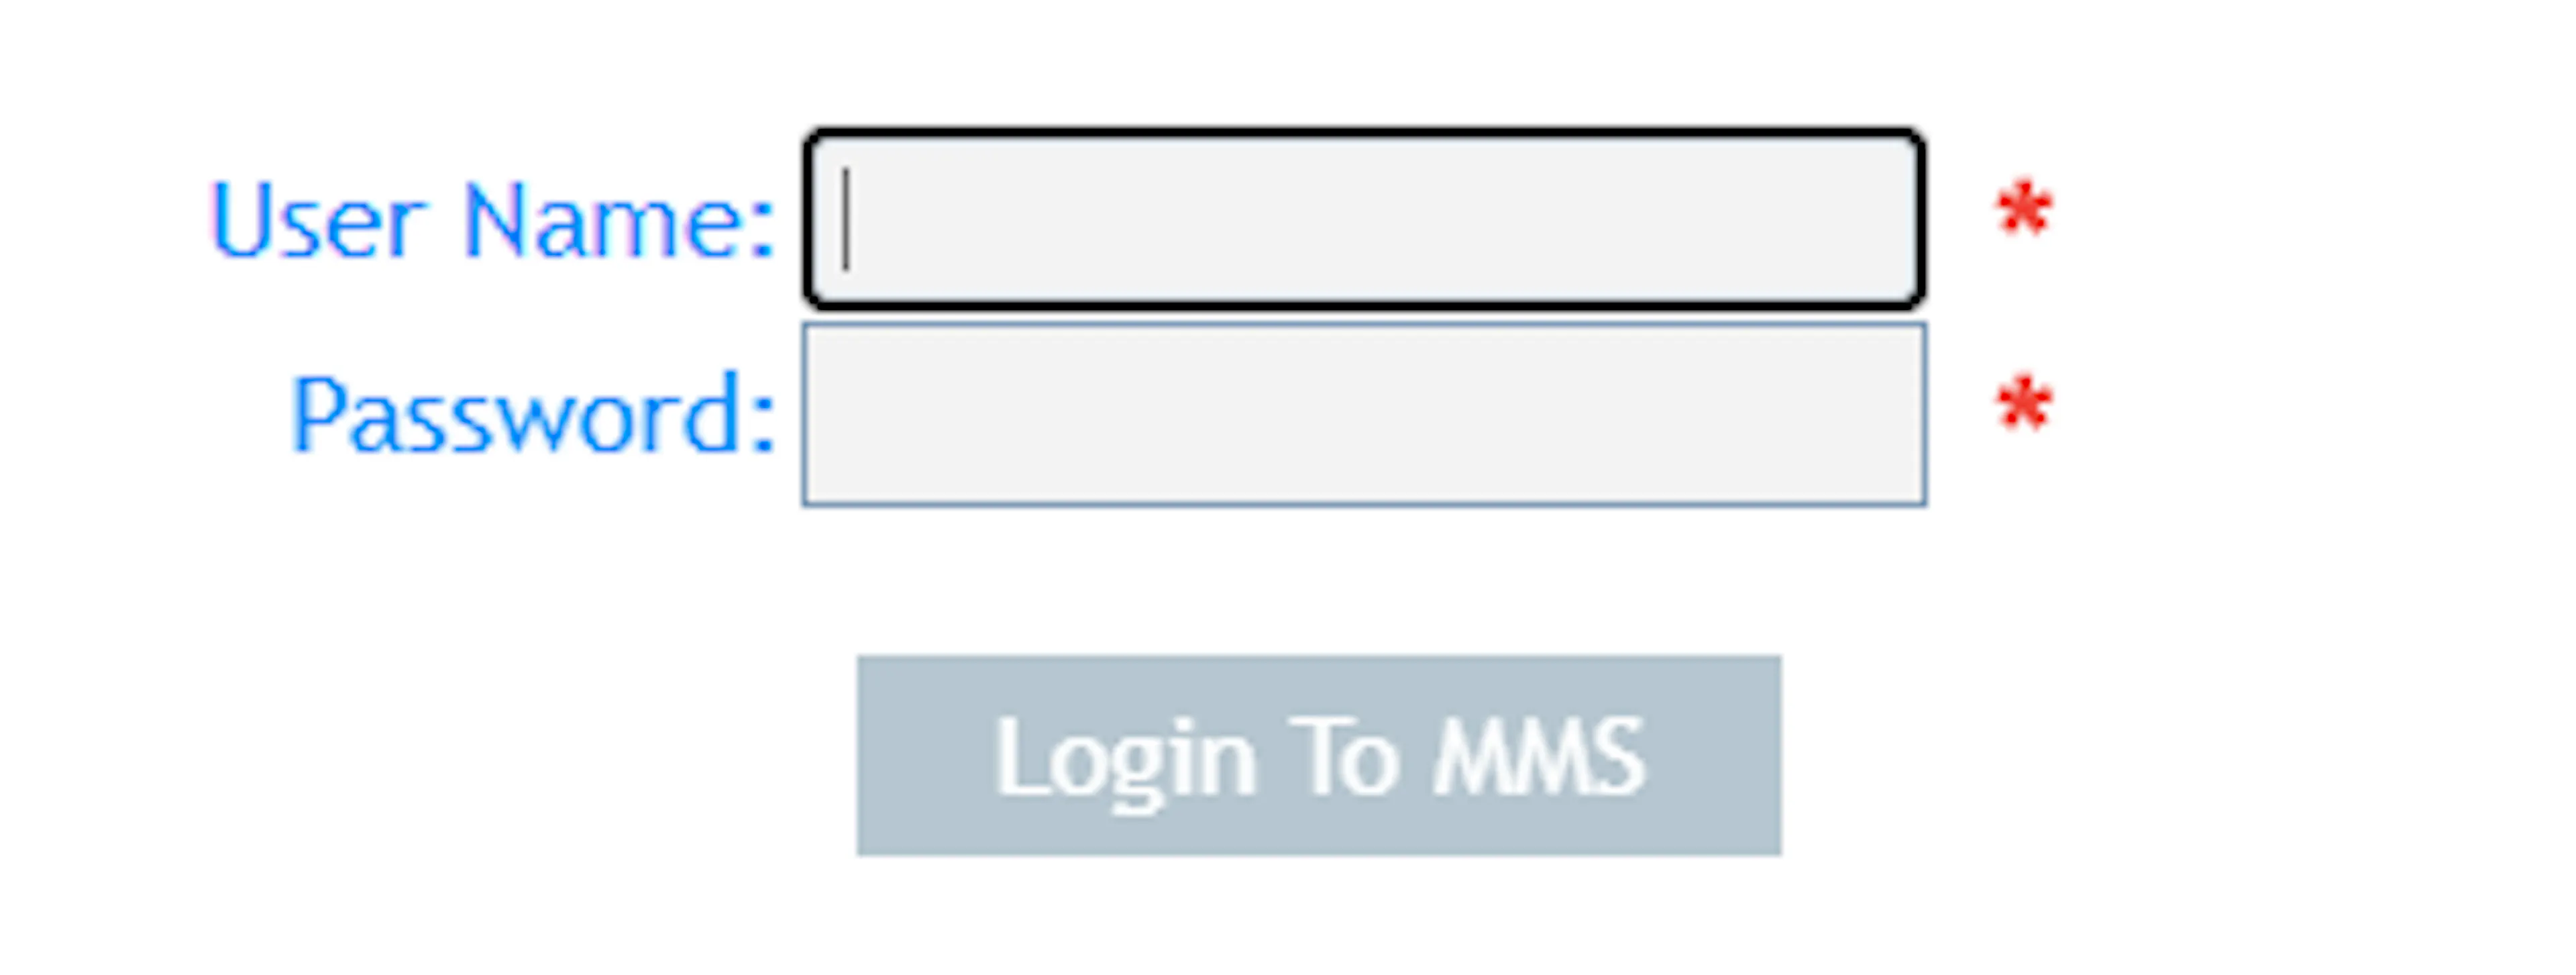
Open the PayVector MMS and sign in with your MMS user.
Copy your Pre-Shared Key
Go to Account Admin and find your Pre-Shared Key. It is not included in any email, so the MMS is the only place to read it.

The Pre-Shared Key is never transmitted to PayVector. It signs the payment page and verifies the result that comes back, so a working API connection does not prove the key is correct, and PayLexer checks it separately.
Read your Hash Method
Still in Account Admin, open Account Settings and note the hash method your account is set to. The dropdown offers six values: SHA1, HMACSHA512, HMACSHA256, HMACSHA1, HMACMD5 and MD5.
A new PayVector account arrives set to SHA1.
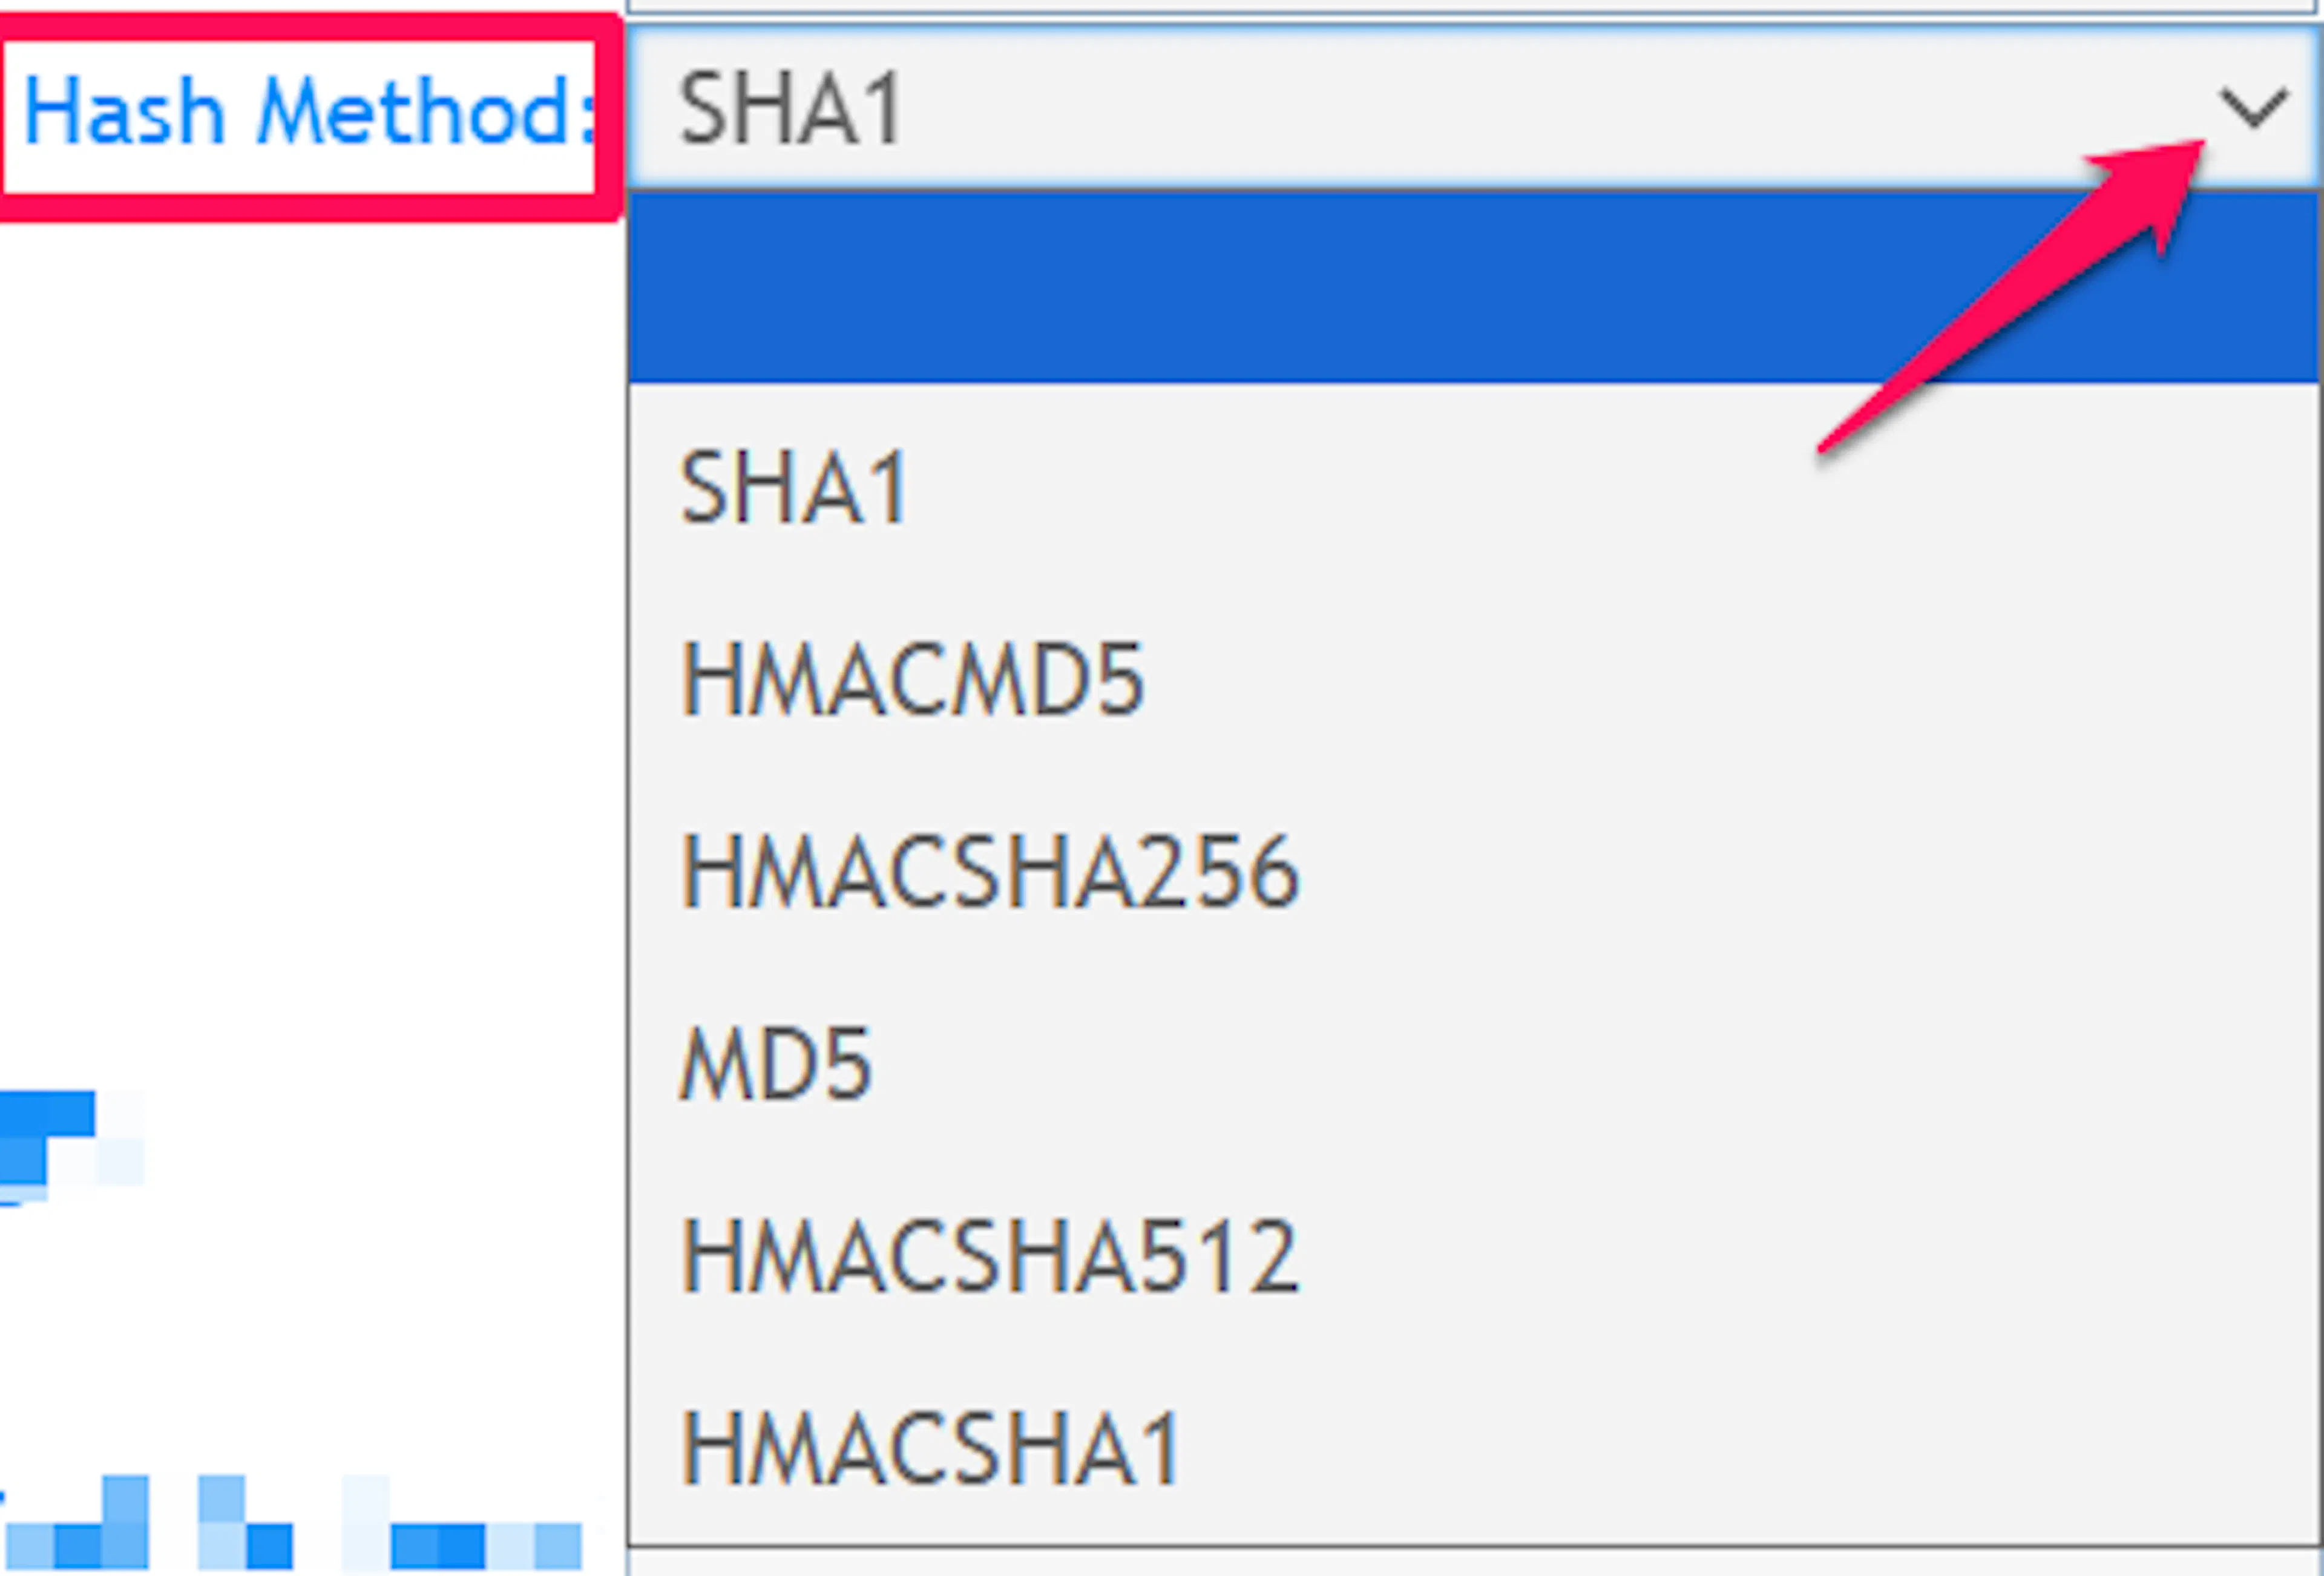
Match whatever the MMS shows. A mismatch fails every payment with "HashDigest does not match.", which never names the hash method as the cause. To change the method, change it in the MMS first, then PayLexer.
Adding Credentials to PayLexer
Open PayLexer Dashboard
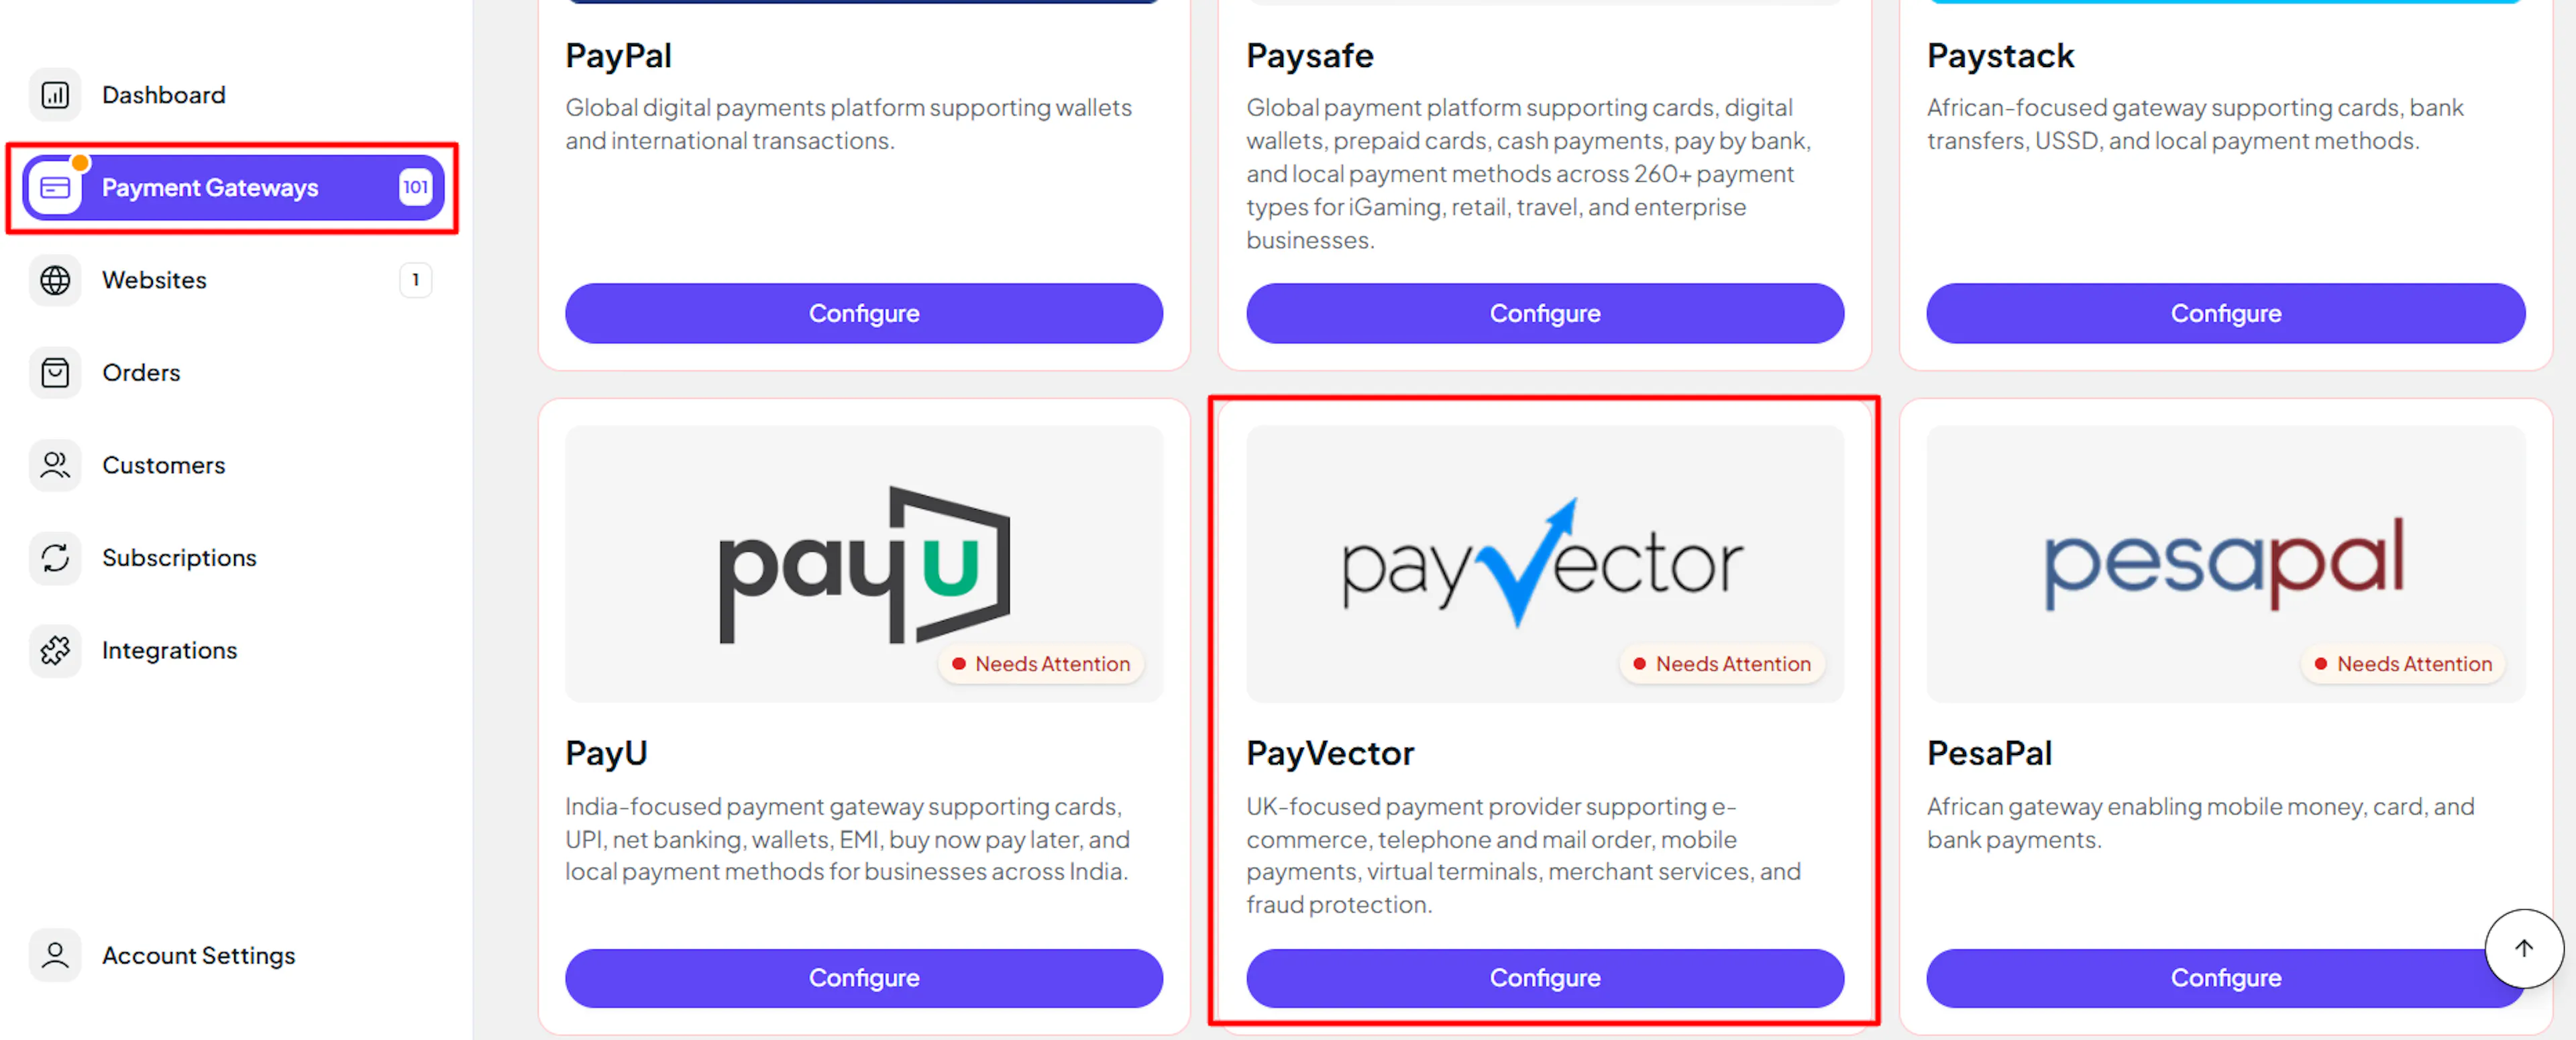
Log in to your PayLexer dashboard and navigate to Payment Gateways → PayVector.
Enter your credentials
Paste the Merchant ID, Gateway Account Password and Pre-Shared Key you copied from PayVector into the corresponding fields, then choose your Hash Method from the dropdown.
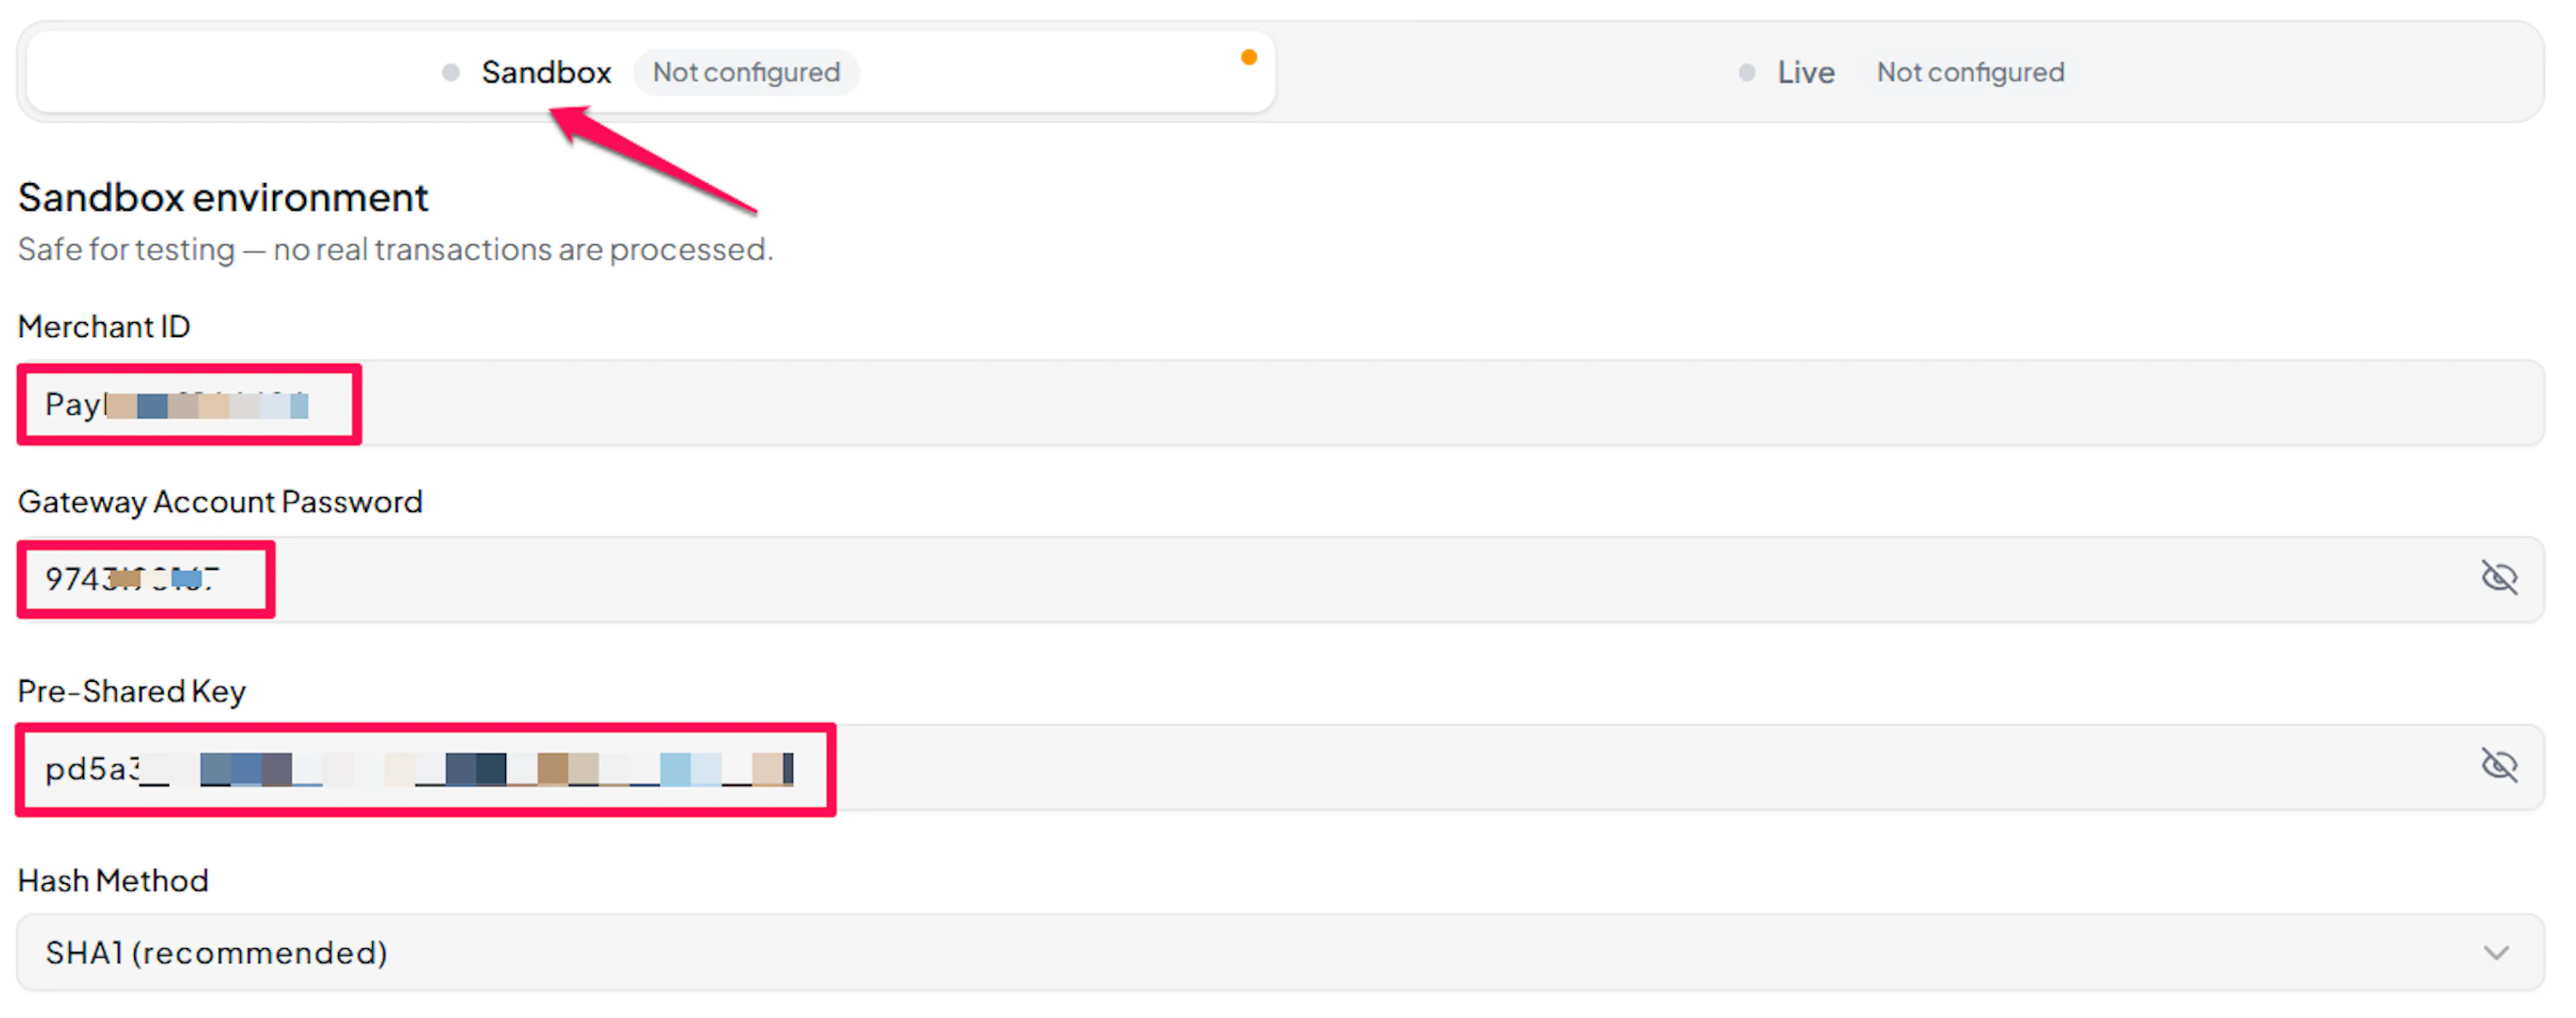
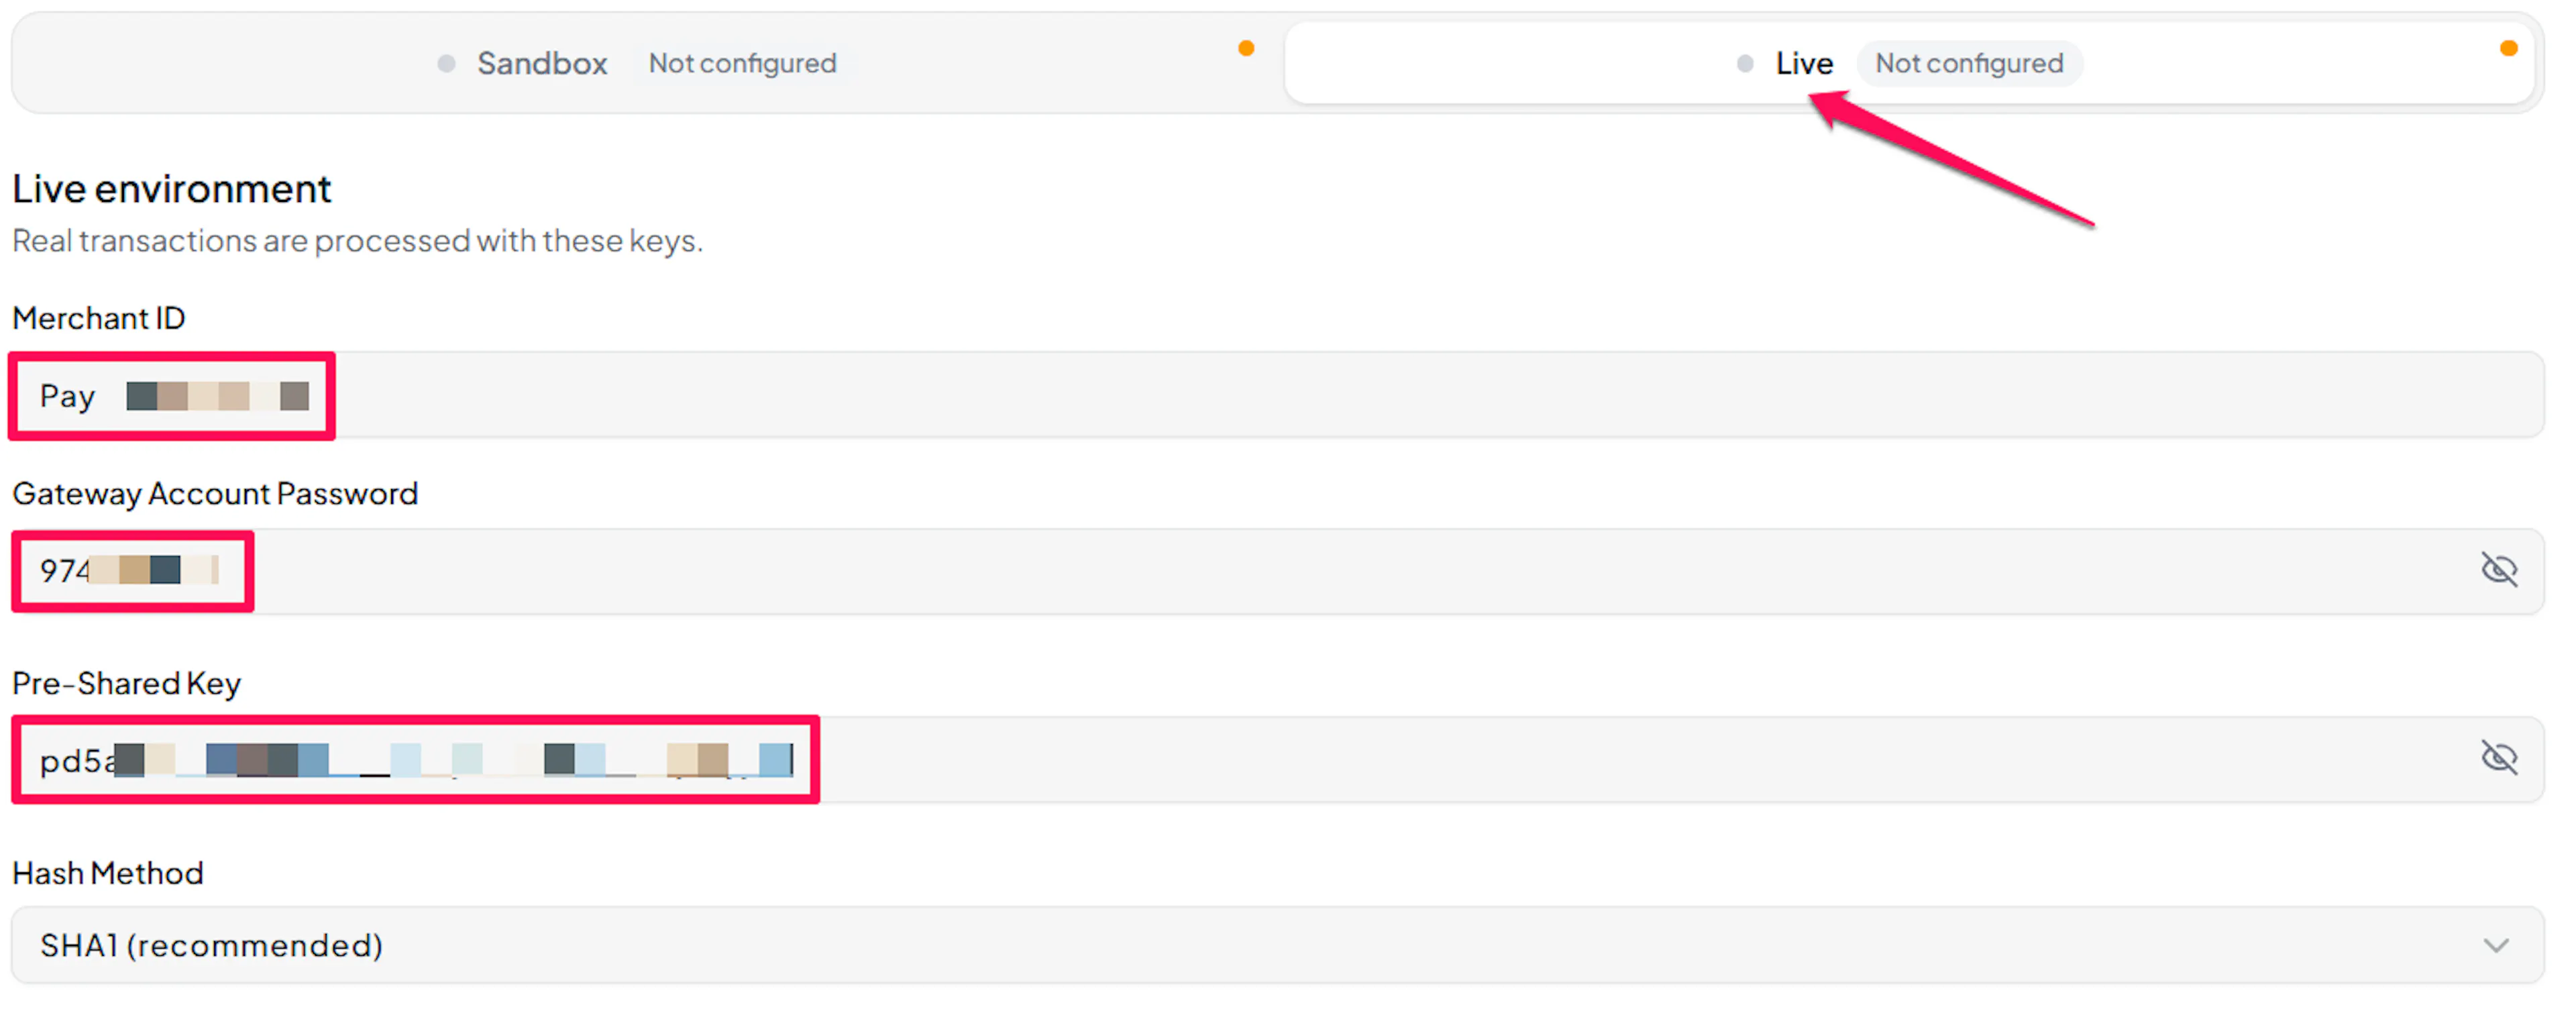
Understanding Live/Production and Sandbox Settings:
| Environment | Purpose |
|---|---|
| Live / Production (Mandatory) | Used for real transactions. Cannot be empty, even when testing. |
| Test / Sandbox (Optional) | Used for testing only. No real money is processed. |
How PayLexer selects credentials:
- Debug/Test mode ON → Test credentials are used
- Debug/Test mode OFF → Live credentials are used
The Hash Method dropdown is blank by design. PayVector offers no way to ask an account which method it uses, so PayLexer cannot fill it in for you. Select the value your MMS shows.
Test and save
Click Save to save your configuration and verify your credentials. Click Verify Connection to test the connection.
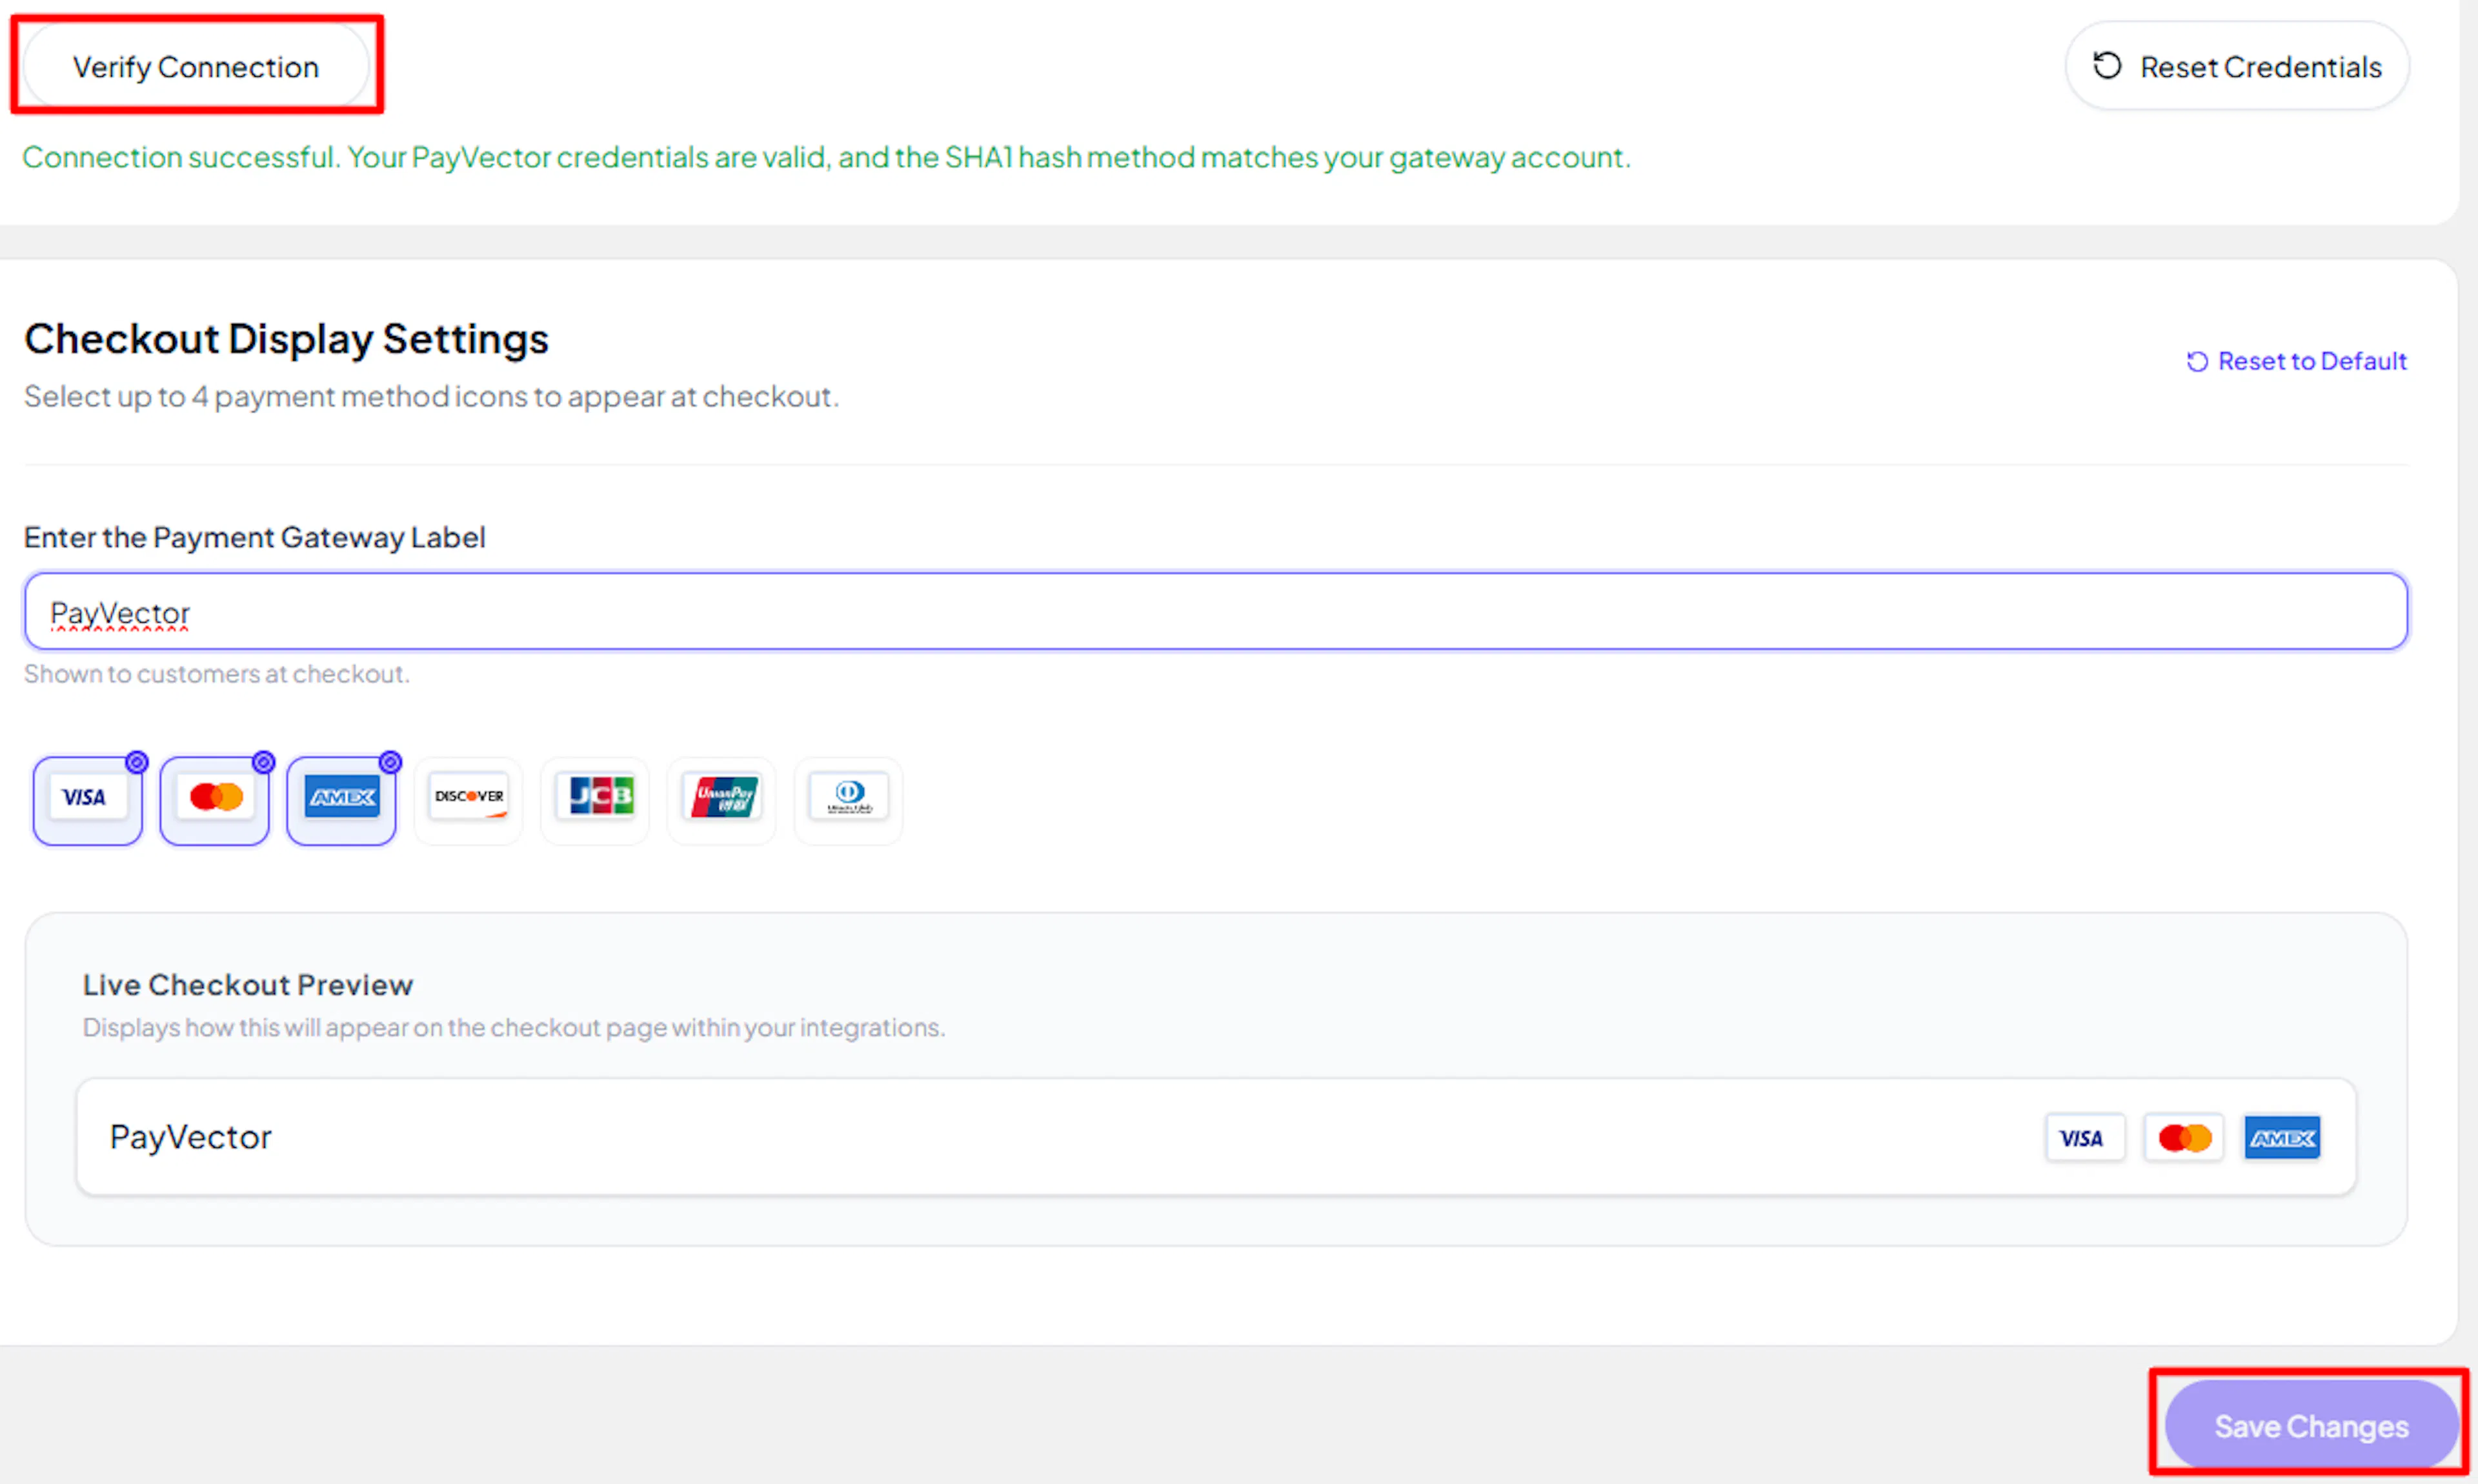
Verify Connection runs two checks: one that PayVector accepts your Merchant ID and password, and one that your Pre-Shared Key and Hash Method produce a signature it will accept. Both must pass.
Webhooks (Not Supported)
PayVector does not currently support webhook integration.
- Payment updates are handled directly within PayVector's processing flow
- Real-time event notifications are not available
- Payment status updates occur through standard API polling
This means payment confirmations may take slightly longer to appear compared to gateways that support webhooks.
There is no webhook URL to register and no webhook secret to copy, because PayVector has nowhere to put one. PayLexer instead asks PayVector about your payments on a schedule, so anything PayVector could not tell it at the time - a shopper who closed the browser during 3-D Secure, or a payment your shopper's bank referred and later approved is picked up on the next cycle rather than lost.
Integrate PayVector to Your Website
If you have already added and configured your site, you can enable PayVector in your existing setup.
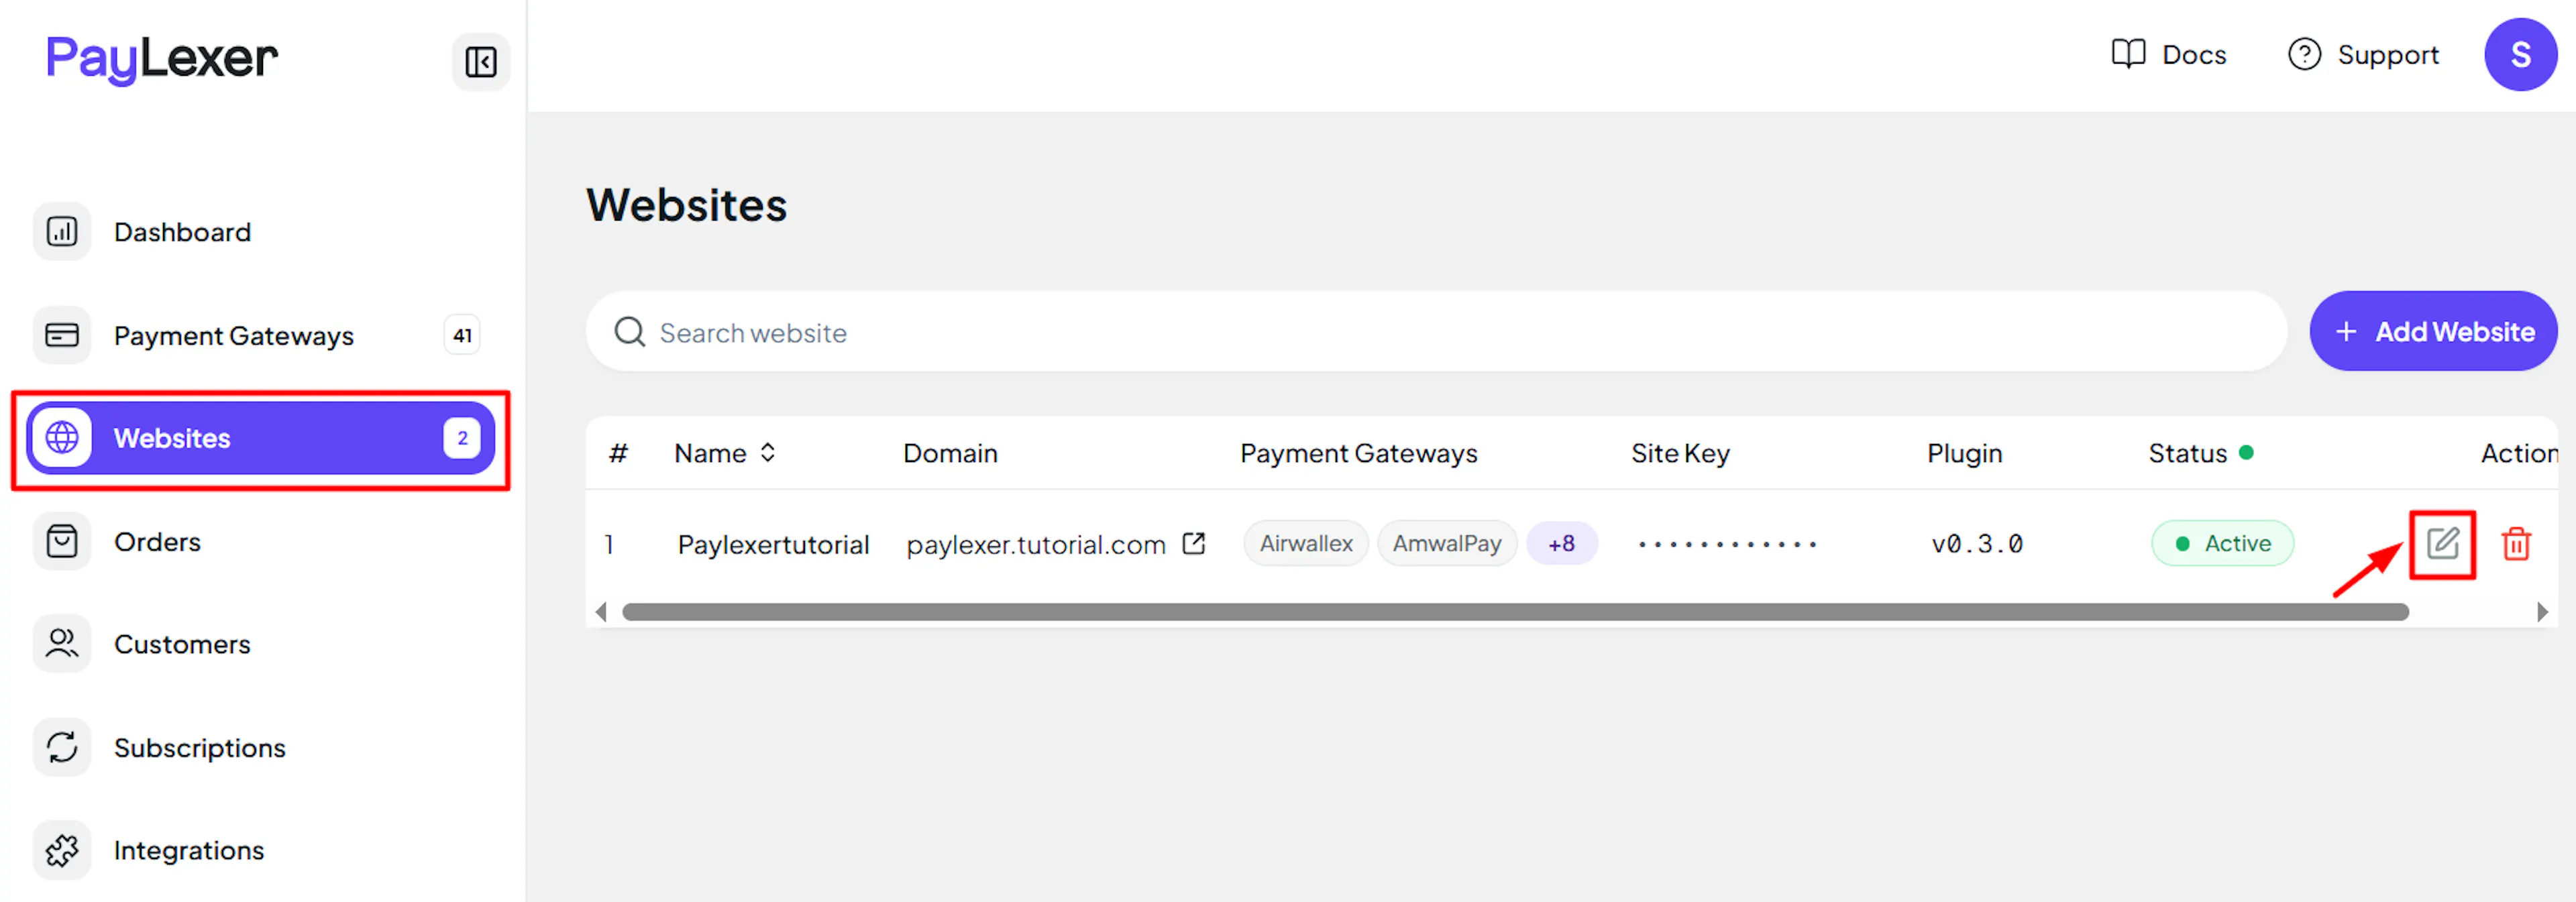
Go to Websites
Navigate to Websites in your PayLexer dashboard.
Edit your website
Click the Edit Icon of your added website.
Enable PayVector
Click the checkbox to enable PayVector for the website.
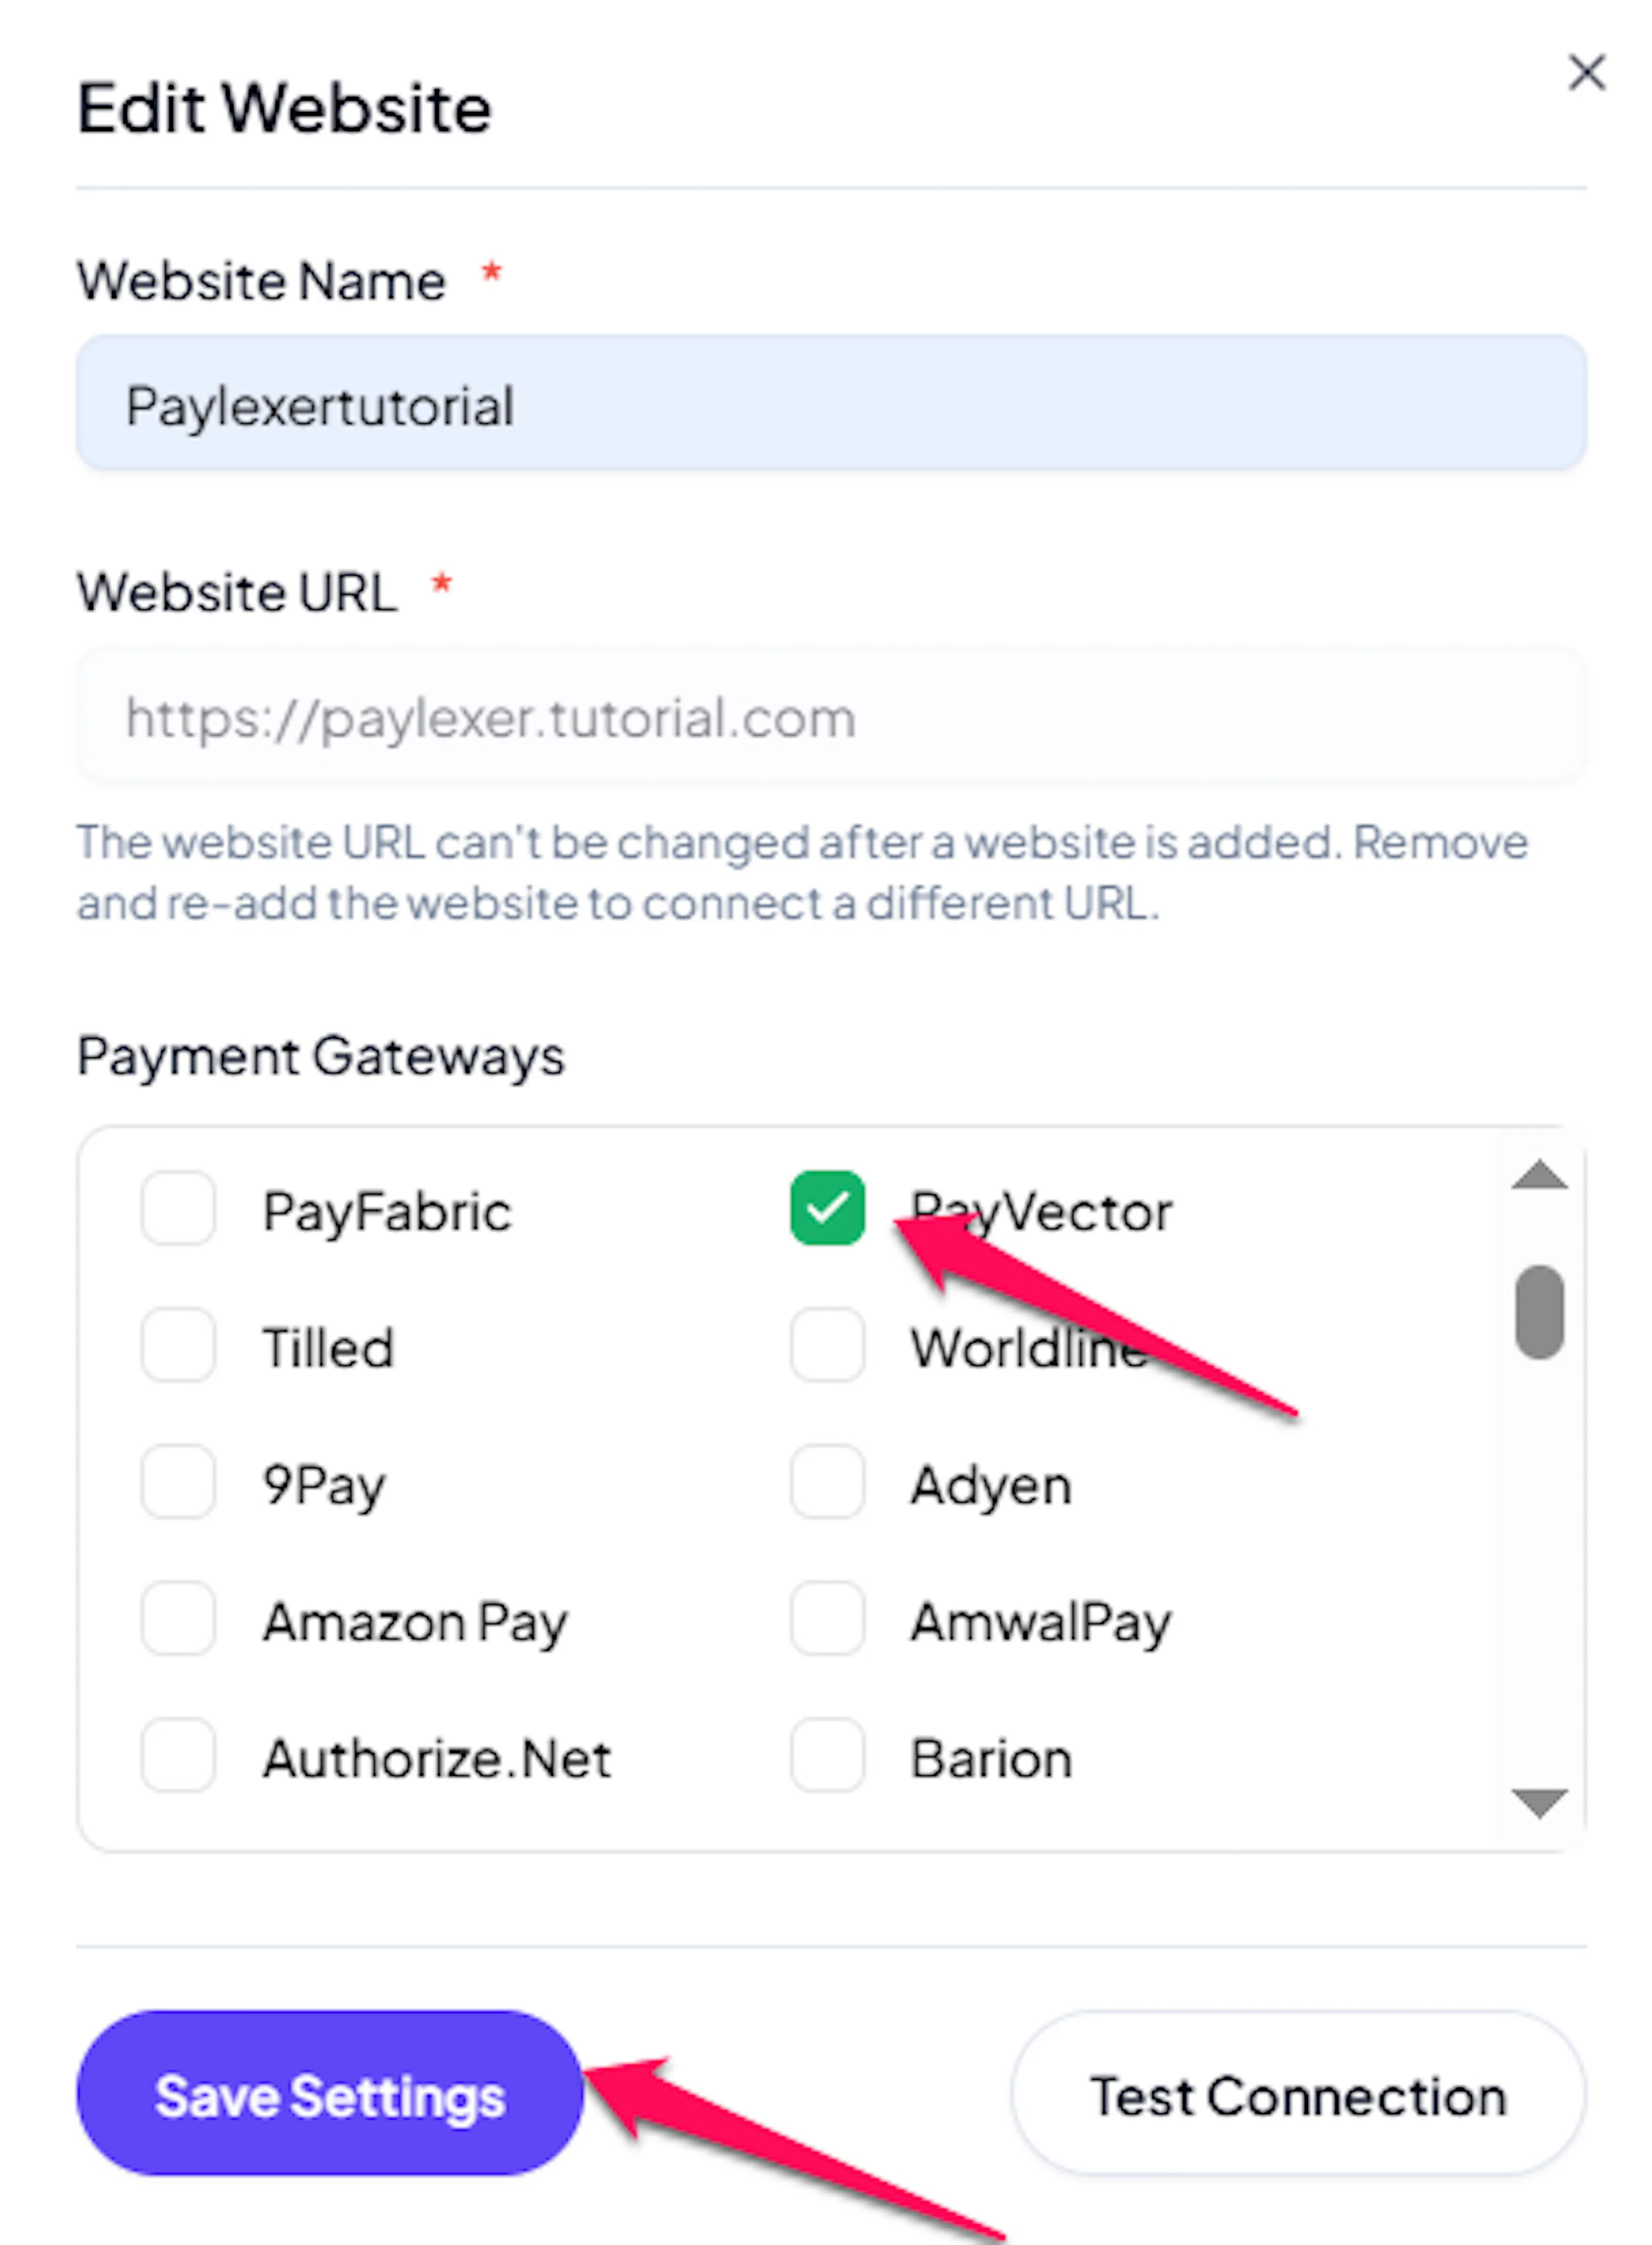
If you haven't added a website yet, Continue to Add Your Website →
Troubleshooting
Best Practices
- Test in sandbox before enabling production. Complete a full payment on your test credentials before switching to live.
- Always issue refunds and cancellations from PayLexer or your store, never by hand in the PayVector MMS. An MMS action tells PayLexer nothing and cannot be discovered afterwards, so the order here will go on reading as paid until you update it yourself.
- Confirm your Hash Method in the MMS before taking your first payment, and change it in the MMS before changing it in PayLexer. A mismatch fails every payment rather than some of them.
- Keep your Pre-Shared Key and Gateway Account Password confidential. Between them they let anyone sign payments as your account.
- Ask PayVector to confirm which currencies your account can transact and settle in before you list them on your site. An unsupported currency is only refused after the shopper has entered their card.
- Prefer a refund to a cancellation. Cancellation works only on the same calendar day, while a refund works on any payment, in full or in part.
- Allow for the scheduled check. PayVector never pushes anything, so an order that could not be confirmed at the time becomes correct on the next cycle rather than instantly.
FAQs
Still Have Questions?
- PayVector Support: PayVector Support
- PayLexer Support: Contact Support