

Mercado Pago
Connect MercadoPago to PayLexer to accept card and local payments across Latin America through MercadoPago's hosted Checkout Pro page, with recurring subscriptions and signed webhooks.
MercadoPago is the largest payment platform in Latin America, part of the MercadoLibre group and headquartered in Argentina. It supports cards and popular local payment methods across seven countries, letting shoppers pay in their own currency. PayLexer connects to MercadoPago's hosted Checkout Pro page, so shoppers are redirected to MercadoPago to complete payment and card details never touch your site.
- Supported Regions (Merchant Accounts): Argentina, Brazil, Mexico, Chile, Colombia, Peru, Uruguay
- Supported Currencies: ARS, BRL, MXN, CLP, COP, PEN, UYU
A MercadoPago account is country-specific and can only charge in its own country's currency (for example, an Argentine account charges ARS, a Brazilian account BRL). Choose the currency that matches your MercadoPago account's country.
Supported Features
- Hosted Checkout Pro page presenting cards and local payment methods, with the shopper redirected to MercadoPago to pay
- Refunds (full and partial) processed directly from PayLexer
- Signed webhooks (HMAC-SHA256) for real-time, server-to-server payment confirmation
Recurring subscriptions are not supported for MercadoPago yet. This integration handles one-time payments and refunds.
Before You Start
Make sure you have:
- MercadoPago Account – Don't have one? Sign up for MercadoPago →
- PayLexer Account – Required to configure the integration. Create your account →
- A website where you want to integrate
Looking for a different payment processor? View all supported gateways →
Configuring MercadoPago
You need an Access Token and Public Key from MercadoPago for this integration.
Getting API Credentials
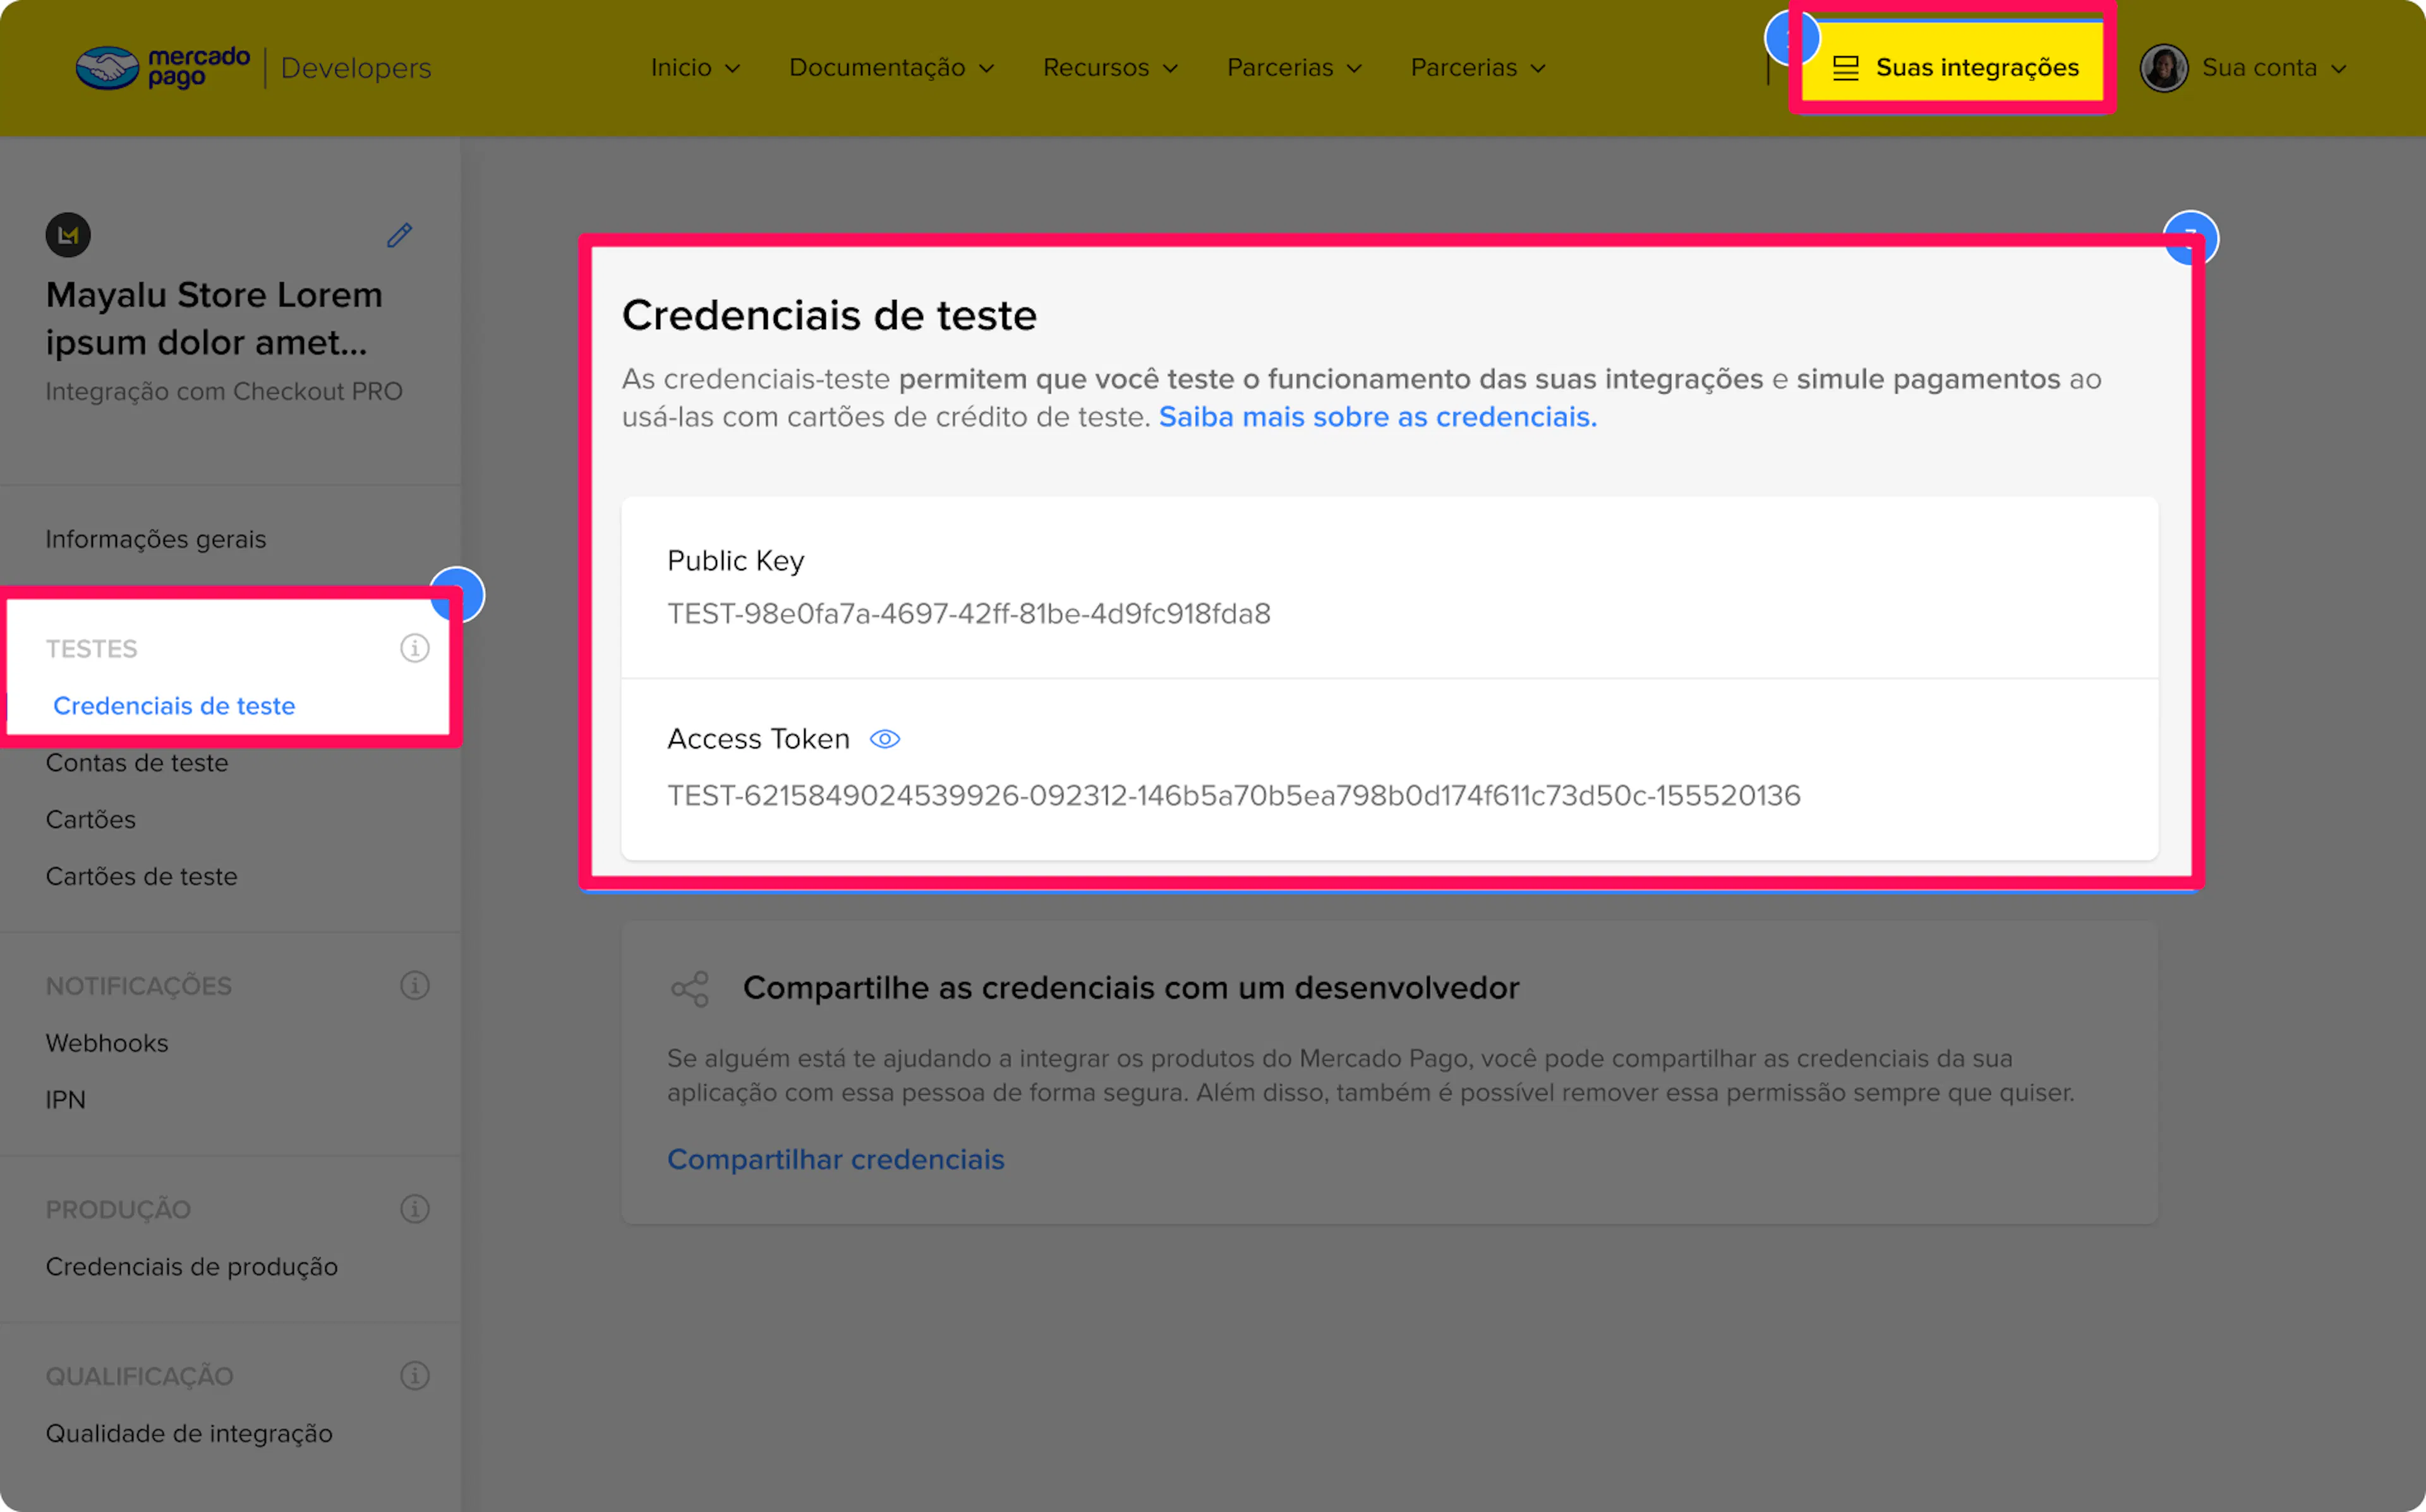
Open your MercadoPago Developer panel
Log in and open Your integrations in the MercadoPago Developer panel.
Create or open an application
Create a new application (or open an existing one). MercadoPago generates a separate set of credentials for Test and Production under the application.
Copy your Access Token
Copy the Access Token for the environment you are setting up. A test token starts with TEST-; a production token starts with APP_USR-. Optionally copy the Public Key as well.
Treat the Access Token like a password. Anyone with it can create charges and refunds on your MercadoPago account. Never use a production (APP_USR-) token while testing.
Adding Credentials to PayLexer
Open PayLexer Dashboard
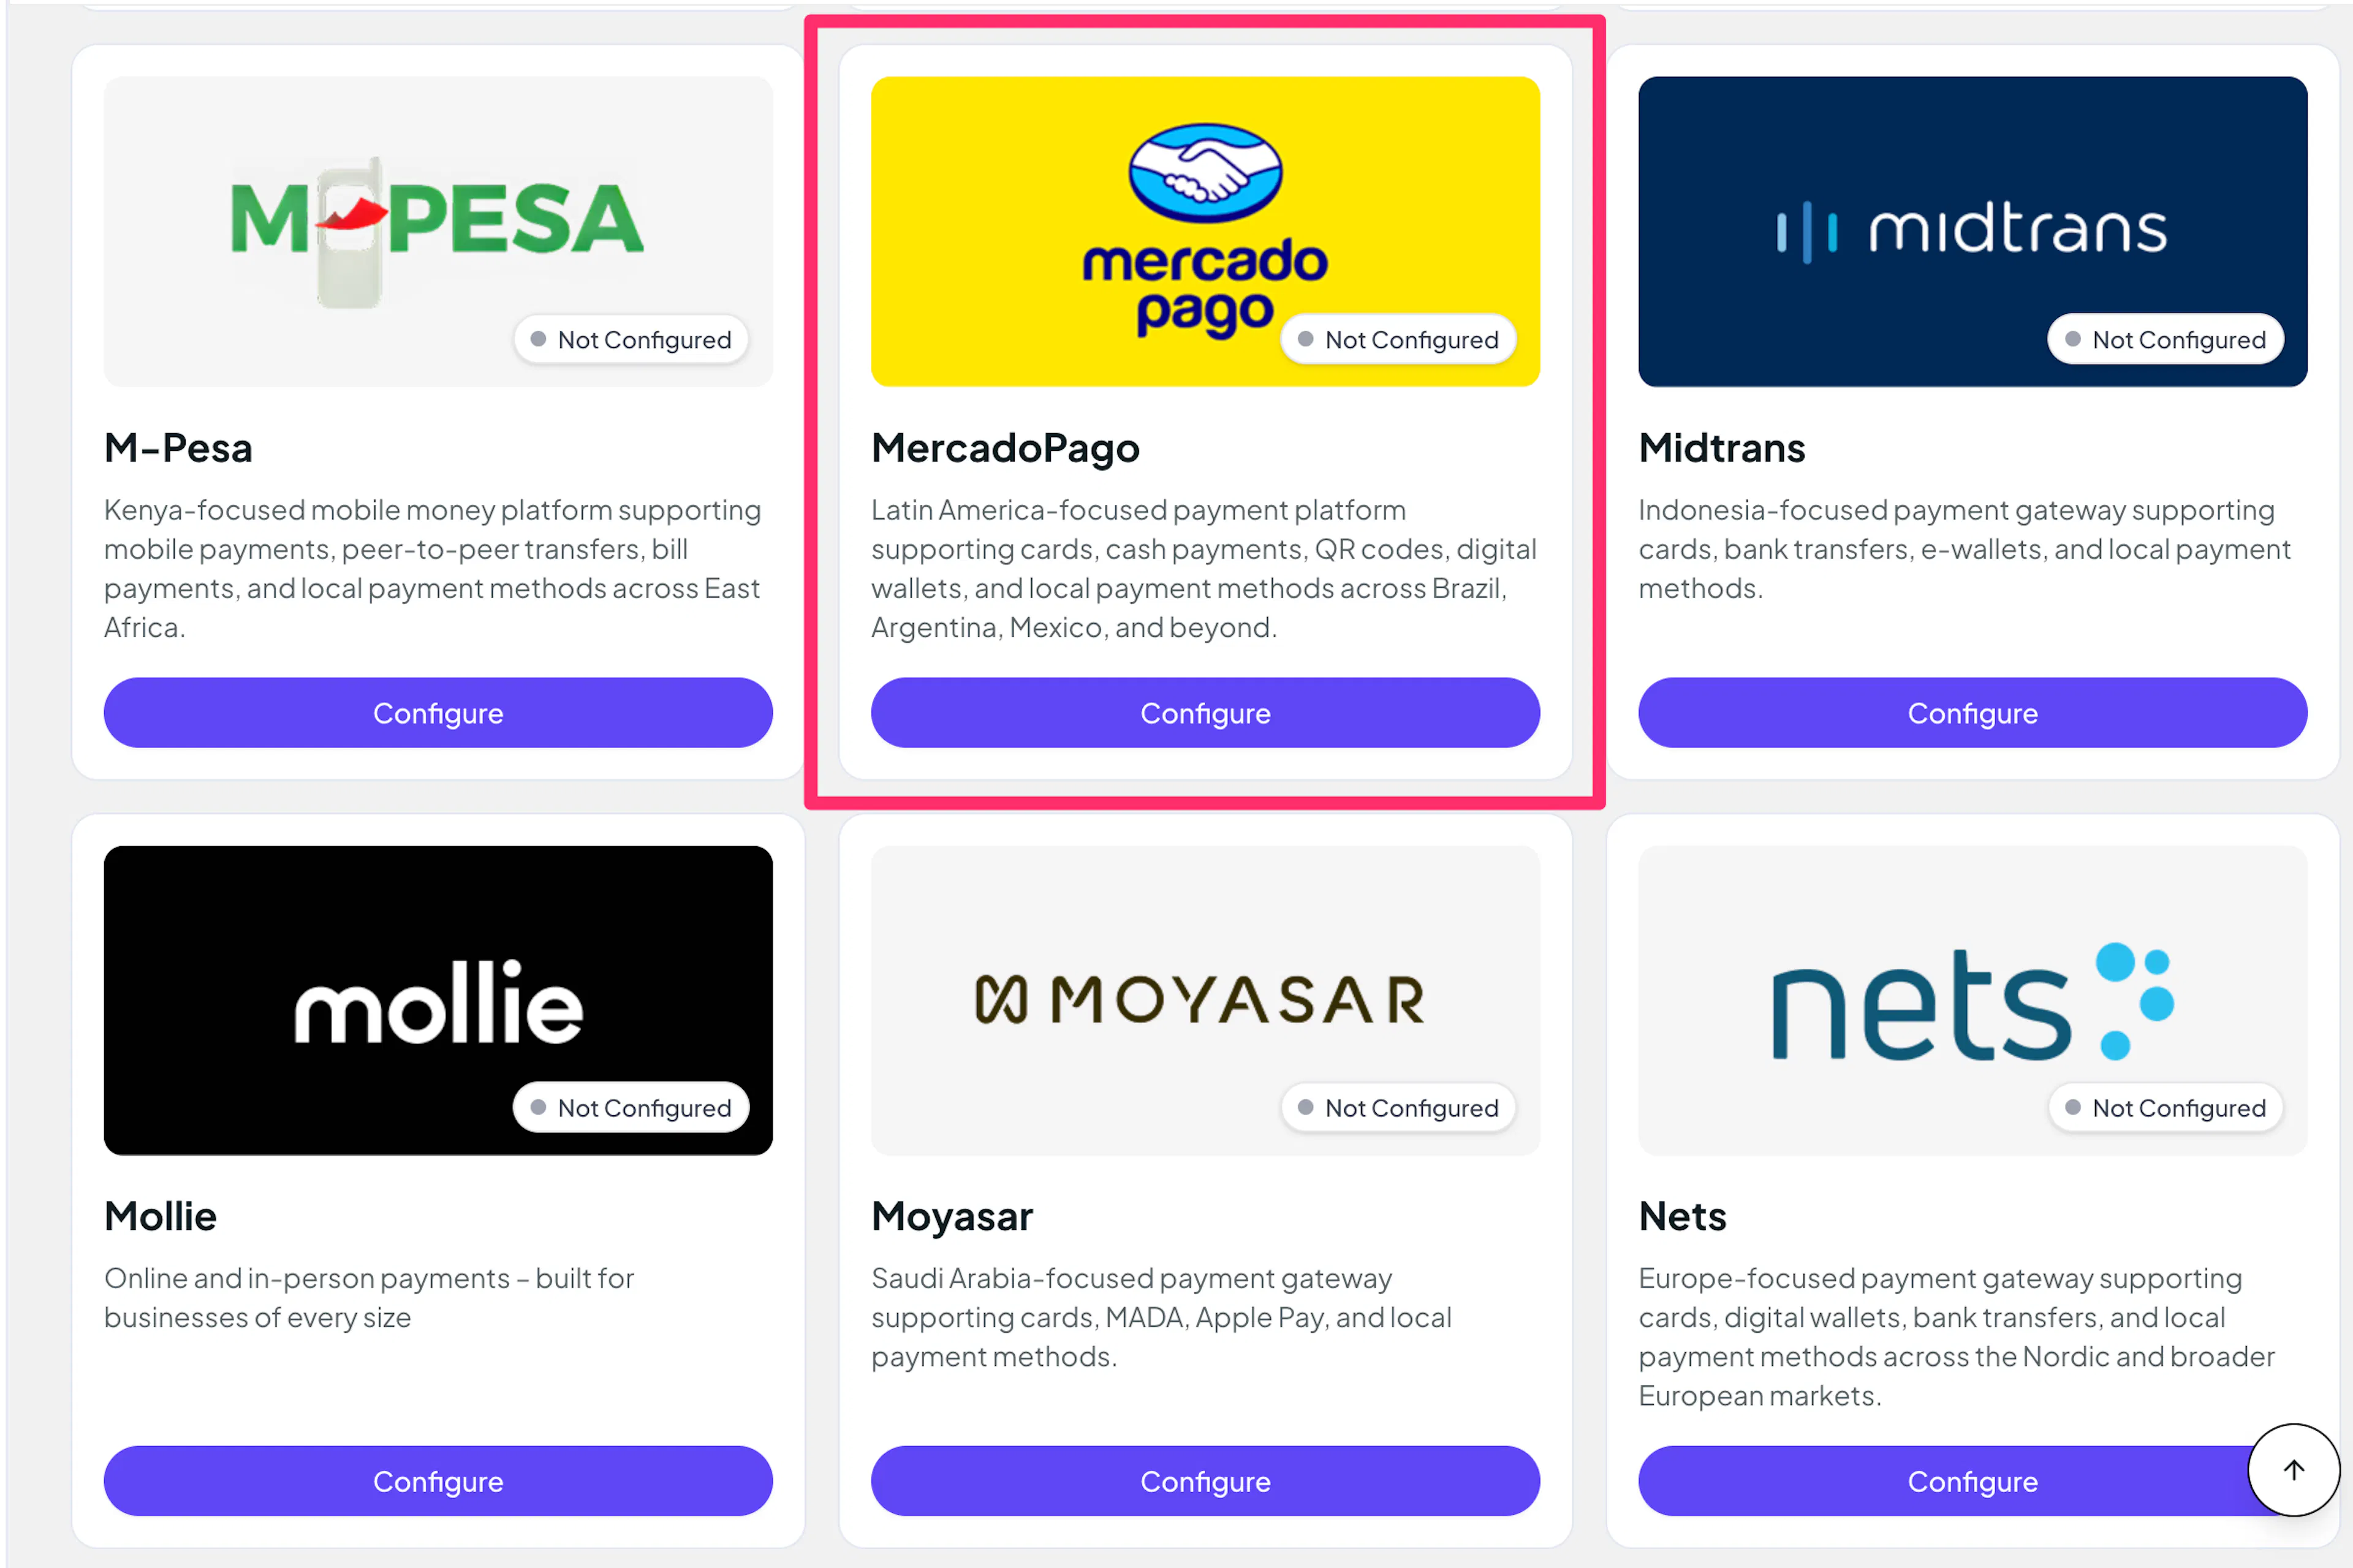
Log in to your PayLexer dashboard and navigate to Payment Gateways -> MercadoPago.
Enter your credentials
Paste the Access Token (and optionally the Public Key) you copied from MercadoPago.
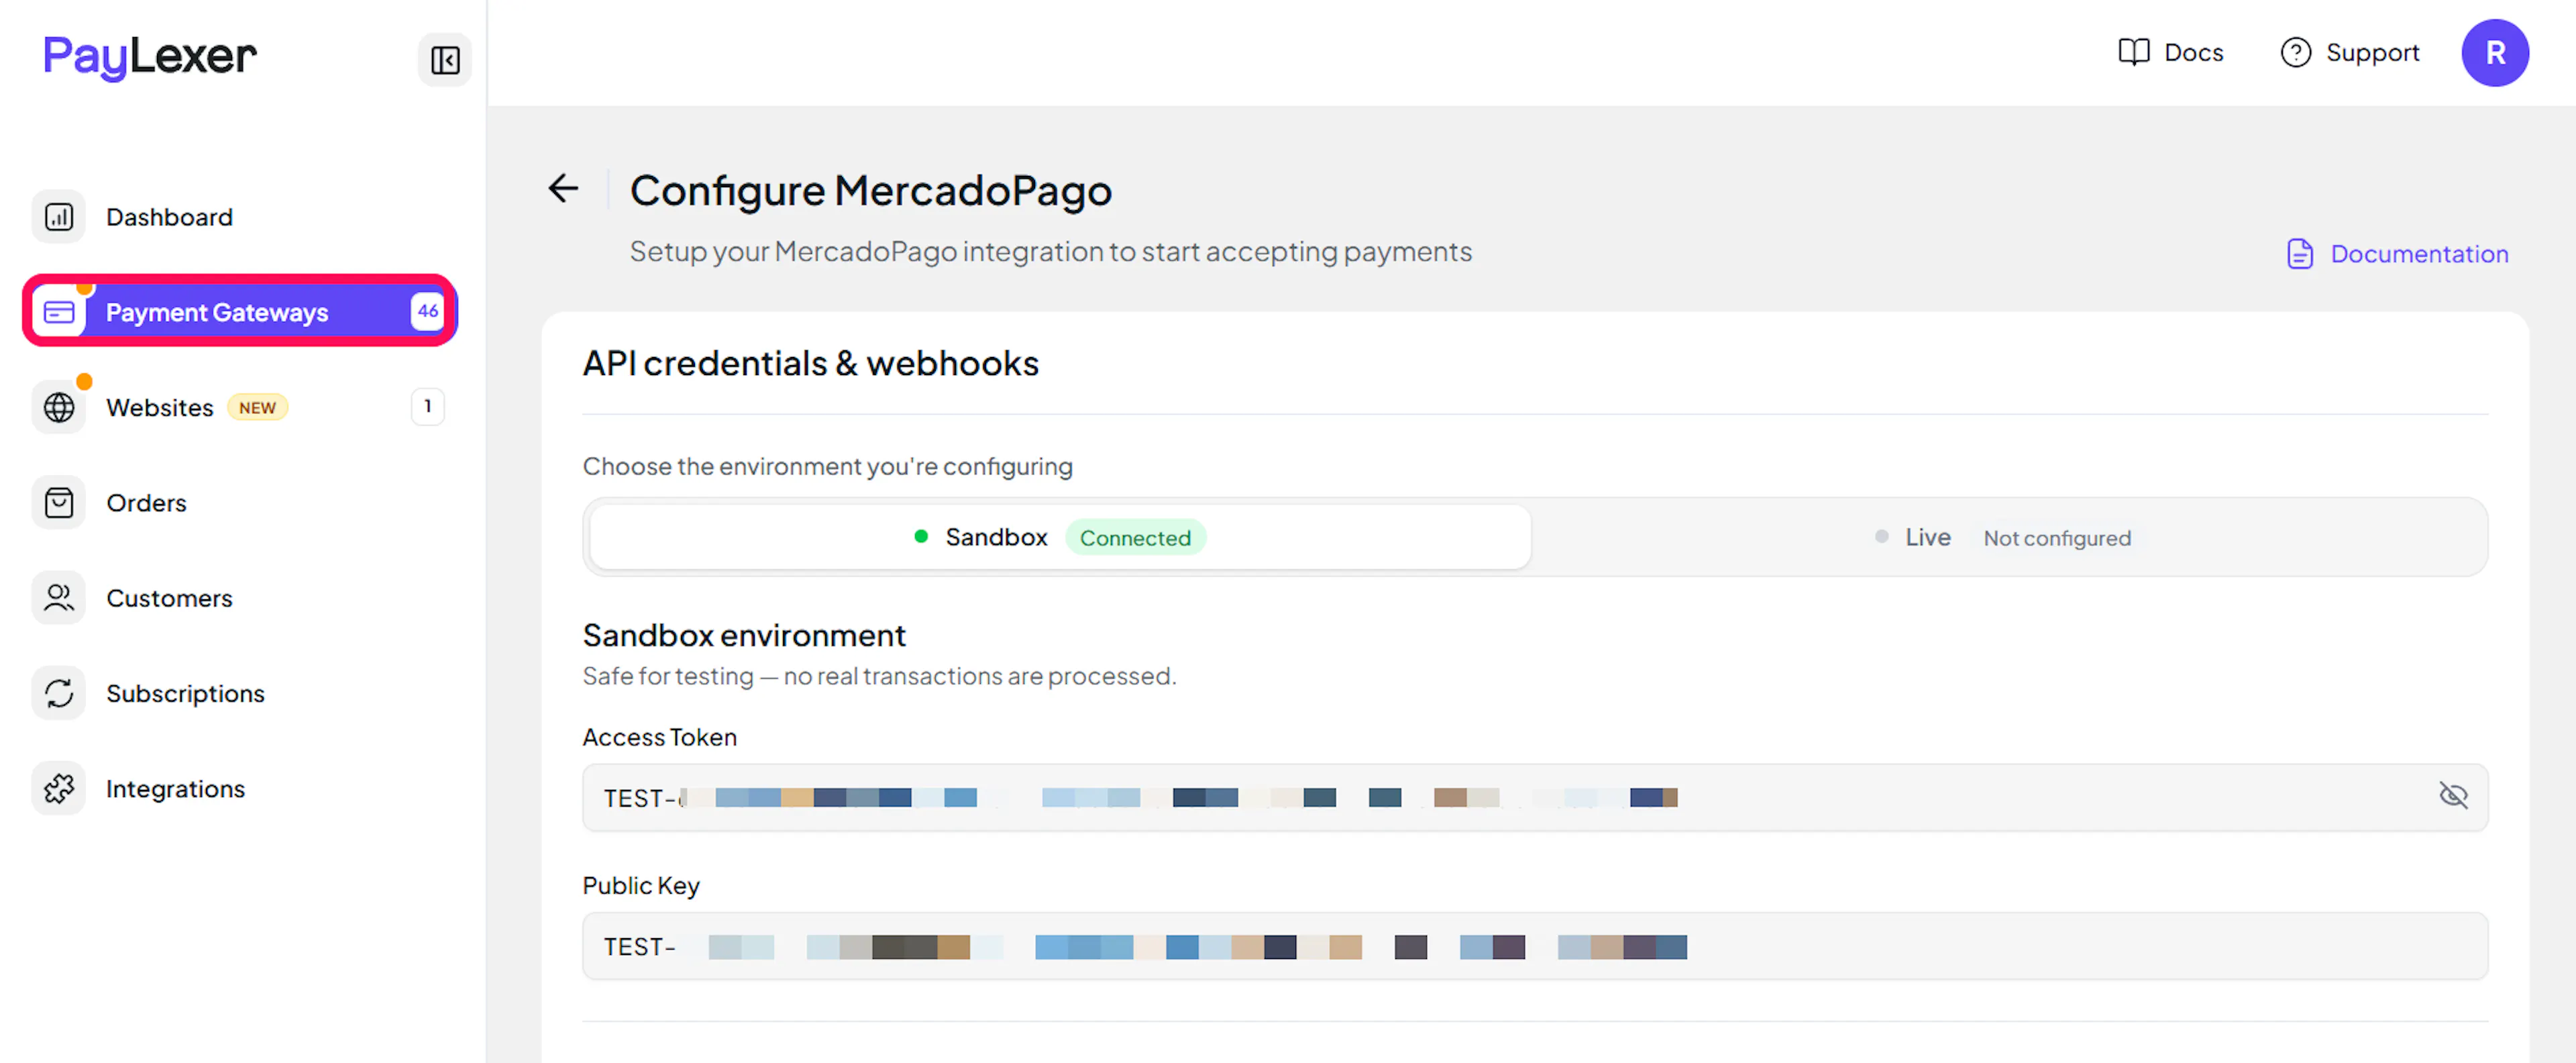
Understanding Live/Production and Sandbox Settings:
| Environment | Purpose |
|---|---|
| Live / Production (Mandatory) | Used for real transactions. Cannot be empty, even when testing. |
| Test / Sandbox (Optional) | Used for testing only. No real money is processed. |
How PayLexer selects credentials:
- Debug/Test mode ON → Test credentials are used
- Debug/Test mode OFF → Live credentials are used
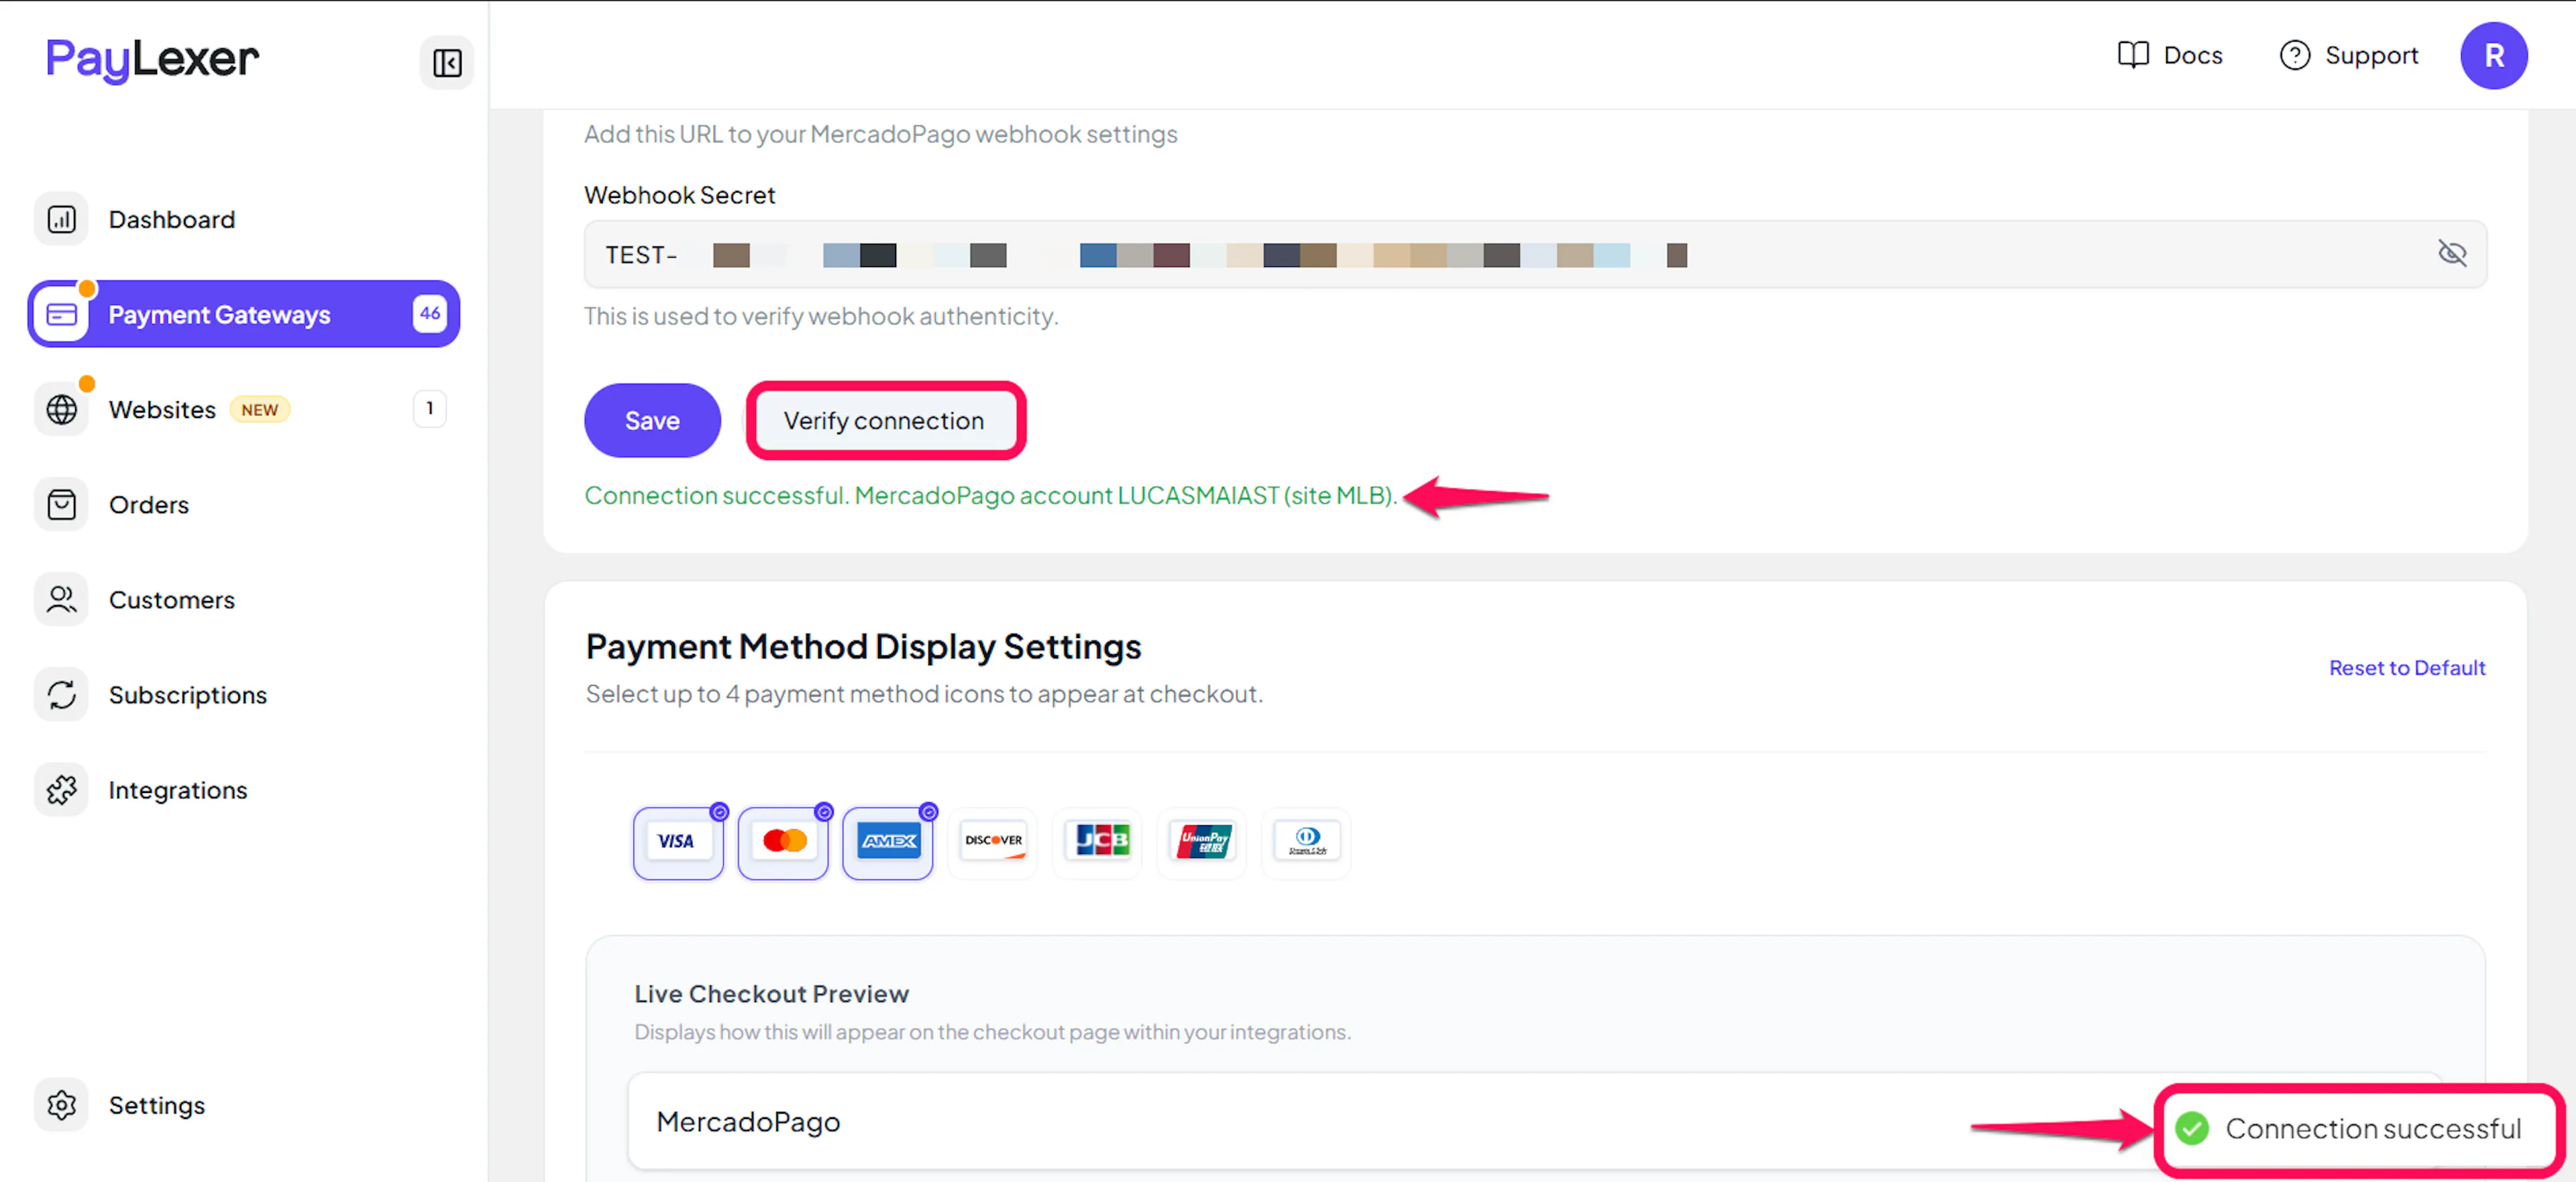
Test and save
Click Verify Connection to verify your credentials, then click Save.
Configuring Webhooks (Mandatory)
Webhooks enable real-time payment updates and significantly improve reliability.
Benefits of Webhooks:
- Instant payment status updates
- Automatic refund processing
MercadoPago notifications carry only a reference id, so PayLexer fetches the full payment from MercadoPago to confirm it. When you configure a signing secret, MercadoPago also signs each notification (HMAC-SHA256) and PayLexer verifies the x-signature header against your Webhook Secret.
Copy your PayLexer webhook URL
In PayLexer -> Payment Gateways -> MercadoPago, copy the Webhook URL shown for your account.
Create the webhook in MercadoPago
In the MercadoPago Developer panel, open your application and go to Webhooks -> Configure notifications. Paste the PayLexer webhook URL as the notification URL.
Select the Payments topic
Subscribe to the Payments topic, then save.
Add the Webhook Secret to PayLexer
Copy the secret signature MercadoPago shows for the webhook, paste it into the Webhook Secret field in PayLexer, and click Save Configuration.
If you do not set a Webhook Secret, PayLexer still confirms every notification by fetching the payment directly from MercadoPago, but adding the secret enables an extra signature check and is recommended.
Integrate MercadoPago to Your Website
If you have already added and configured your site, you can enable MercadoPago in your existing setup.
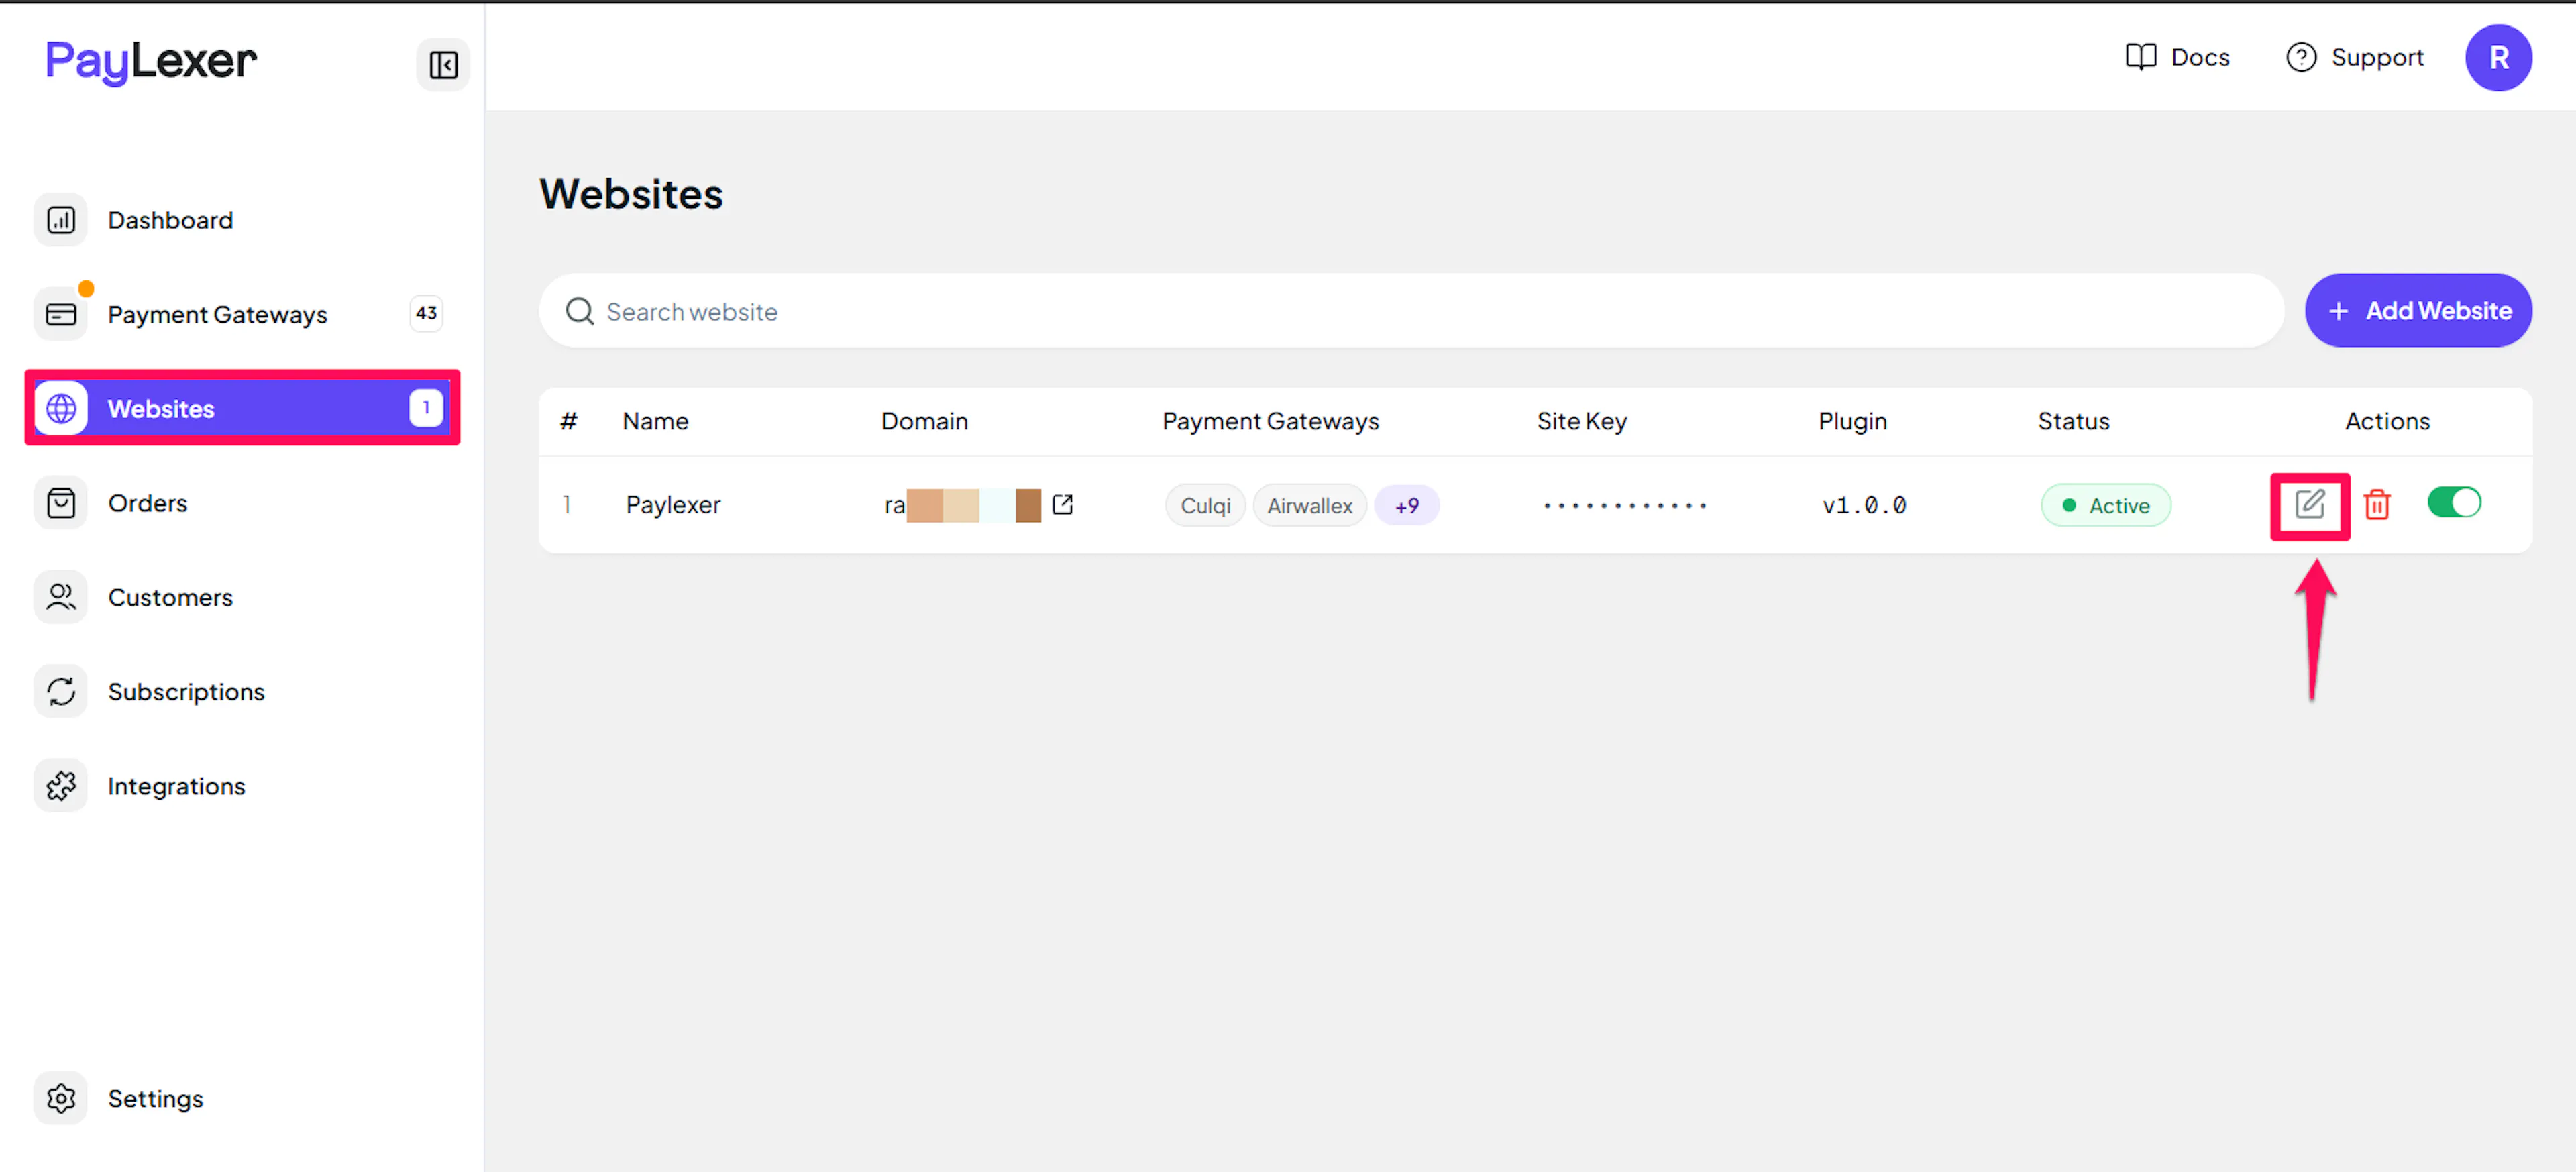
Go to Websites
Navigate to Websites in your PayLexer dashboard.
Edit your website
Click the Edit Icon of your added website.
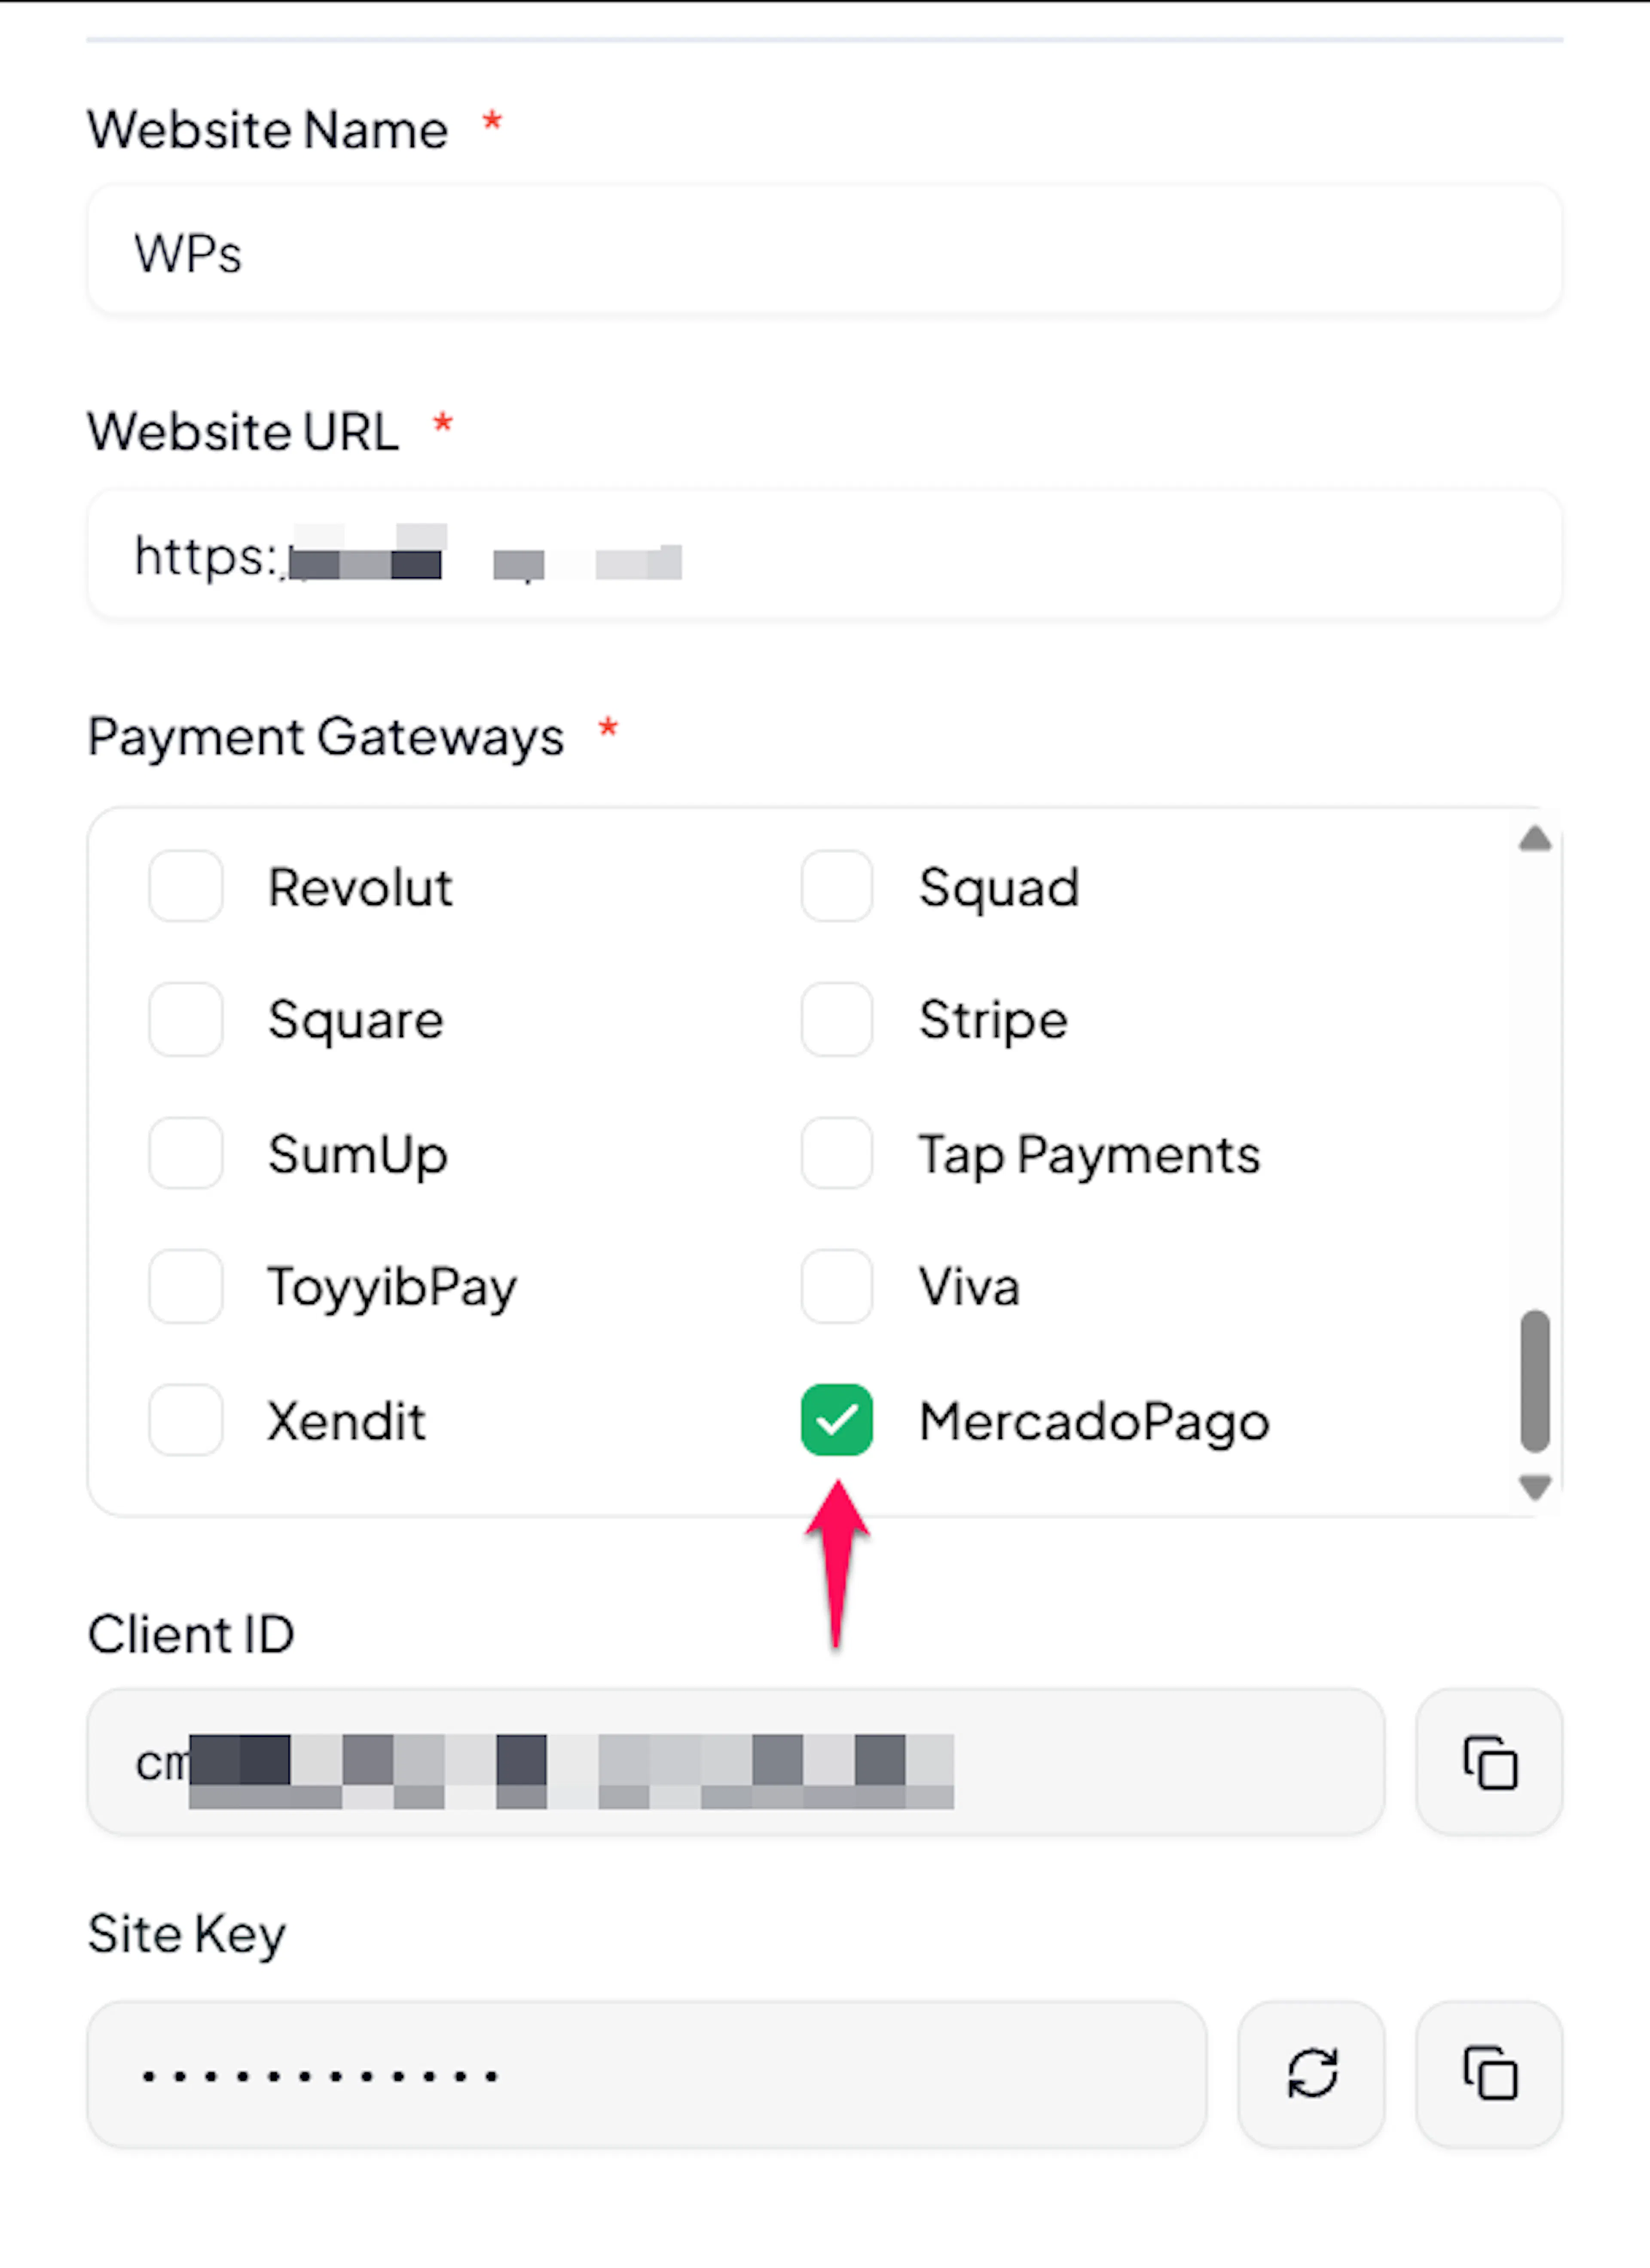
Enable MercadoPago
Click the checkbox to enable MercadoPago for the website.
If you haven't added a website yet, Continue to Add Your Website →
Troubleshooting
Best Practices
- Test in sandbox before enabling production. Use a
TEST-Access Token and MercadoPago's test cards to complete a full payment before switching to live. - Configure webhooks so payment and refund updates sync in real time.
- Add a Webhook Secret so PayLexer can verify each notification's signature in addition to fetching the payment.
- Keep your Access Token confidential, and regenerate it if you suspect exposure.
- Make sure your checkout currency matches your MercadoPago account's country to avoid rejected payments.
FAQs
Still Have Questions?
- MercadoPago Support: MercadoPago Developer Documentation
- PayLexer Support: Contact Support