

Global Payments
Connect Global Payments to PayLexer to accept card payments on a secure hosted payment page, with refunds and automatic status reconciliation.
Global Payments is an enterprise payment provider headquartered in Atlanta, Georgia, integrated with PayLexer through its unified GP API. Shoppers are taken to Global Payments' own secure hosted payment page to enter their card details, so sensitive card data never passes through your website or PayLexer.
- Supported Regions (Merchant Accounts): North America, Europe, and Asia-Pacific - view full list
- Supported Currencies: USD, EUR, GBP - view full list
Supported Features
- One-time card payments through Global Payments' secure hosted payment page
- Full and partial refunds on completed payments
- Payments in US Dollars (USD), Euros (EUR), and British Pounds (GBP)
- Automatic payment status reconciliation, so payments are not left stuck if a shopper's browser drops the connection after paying
- Cryptographically signed notifications, verified before any order is updated
Before You Start
Make sure you have:
- Global Payments Account – Your merchant account for processing payments. Don't have one? Sign up for Global Payments →
- Global Payments Developer Account – Needed to create an app and generate your App ID and App Key. Register on the Developer Portal →
- PayLexer Account – Required to configure the integration. Create your account →
- A website where you want to integrate
Looking for a different payment processor? View all supported gateways →
Configuring Global Payments
You need an App ID and App Key from Global Payments for this integration.
Getting API Credentials
Global Payments issues credentials as an app - a set of credentials made up of an App ID and an App Key. You create an app in the Global Payments Developer Portal to generate them.
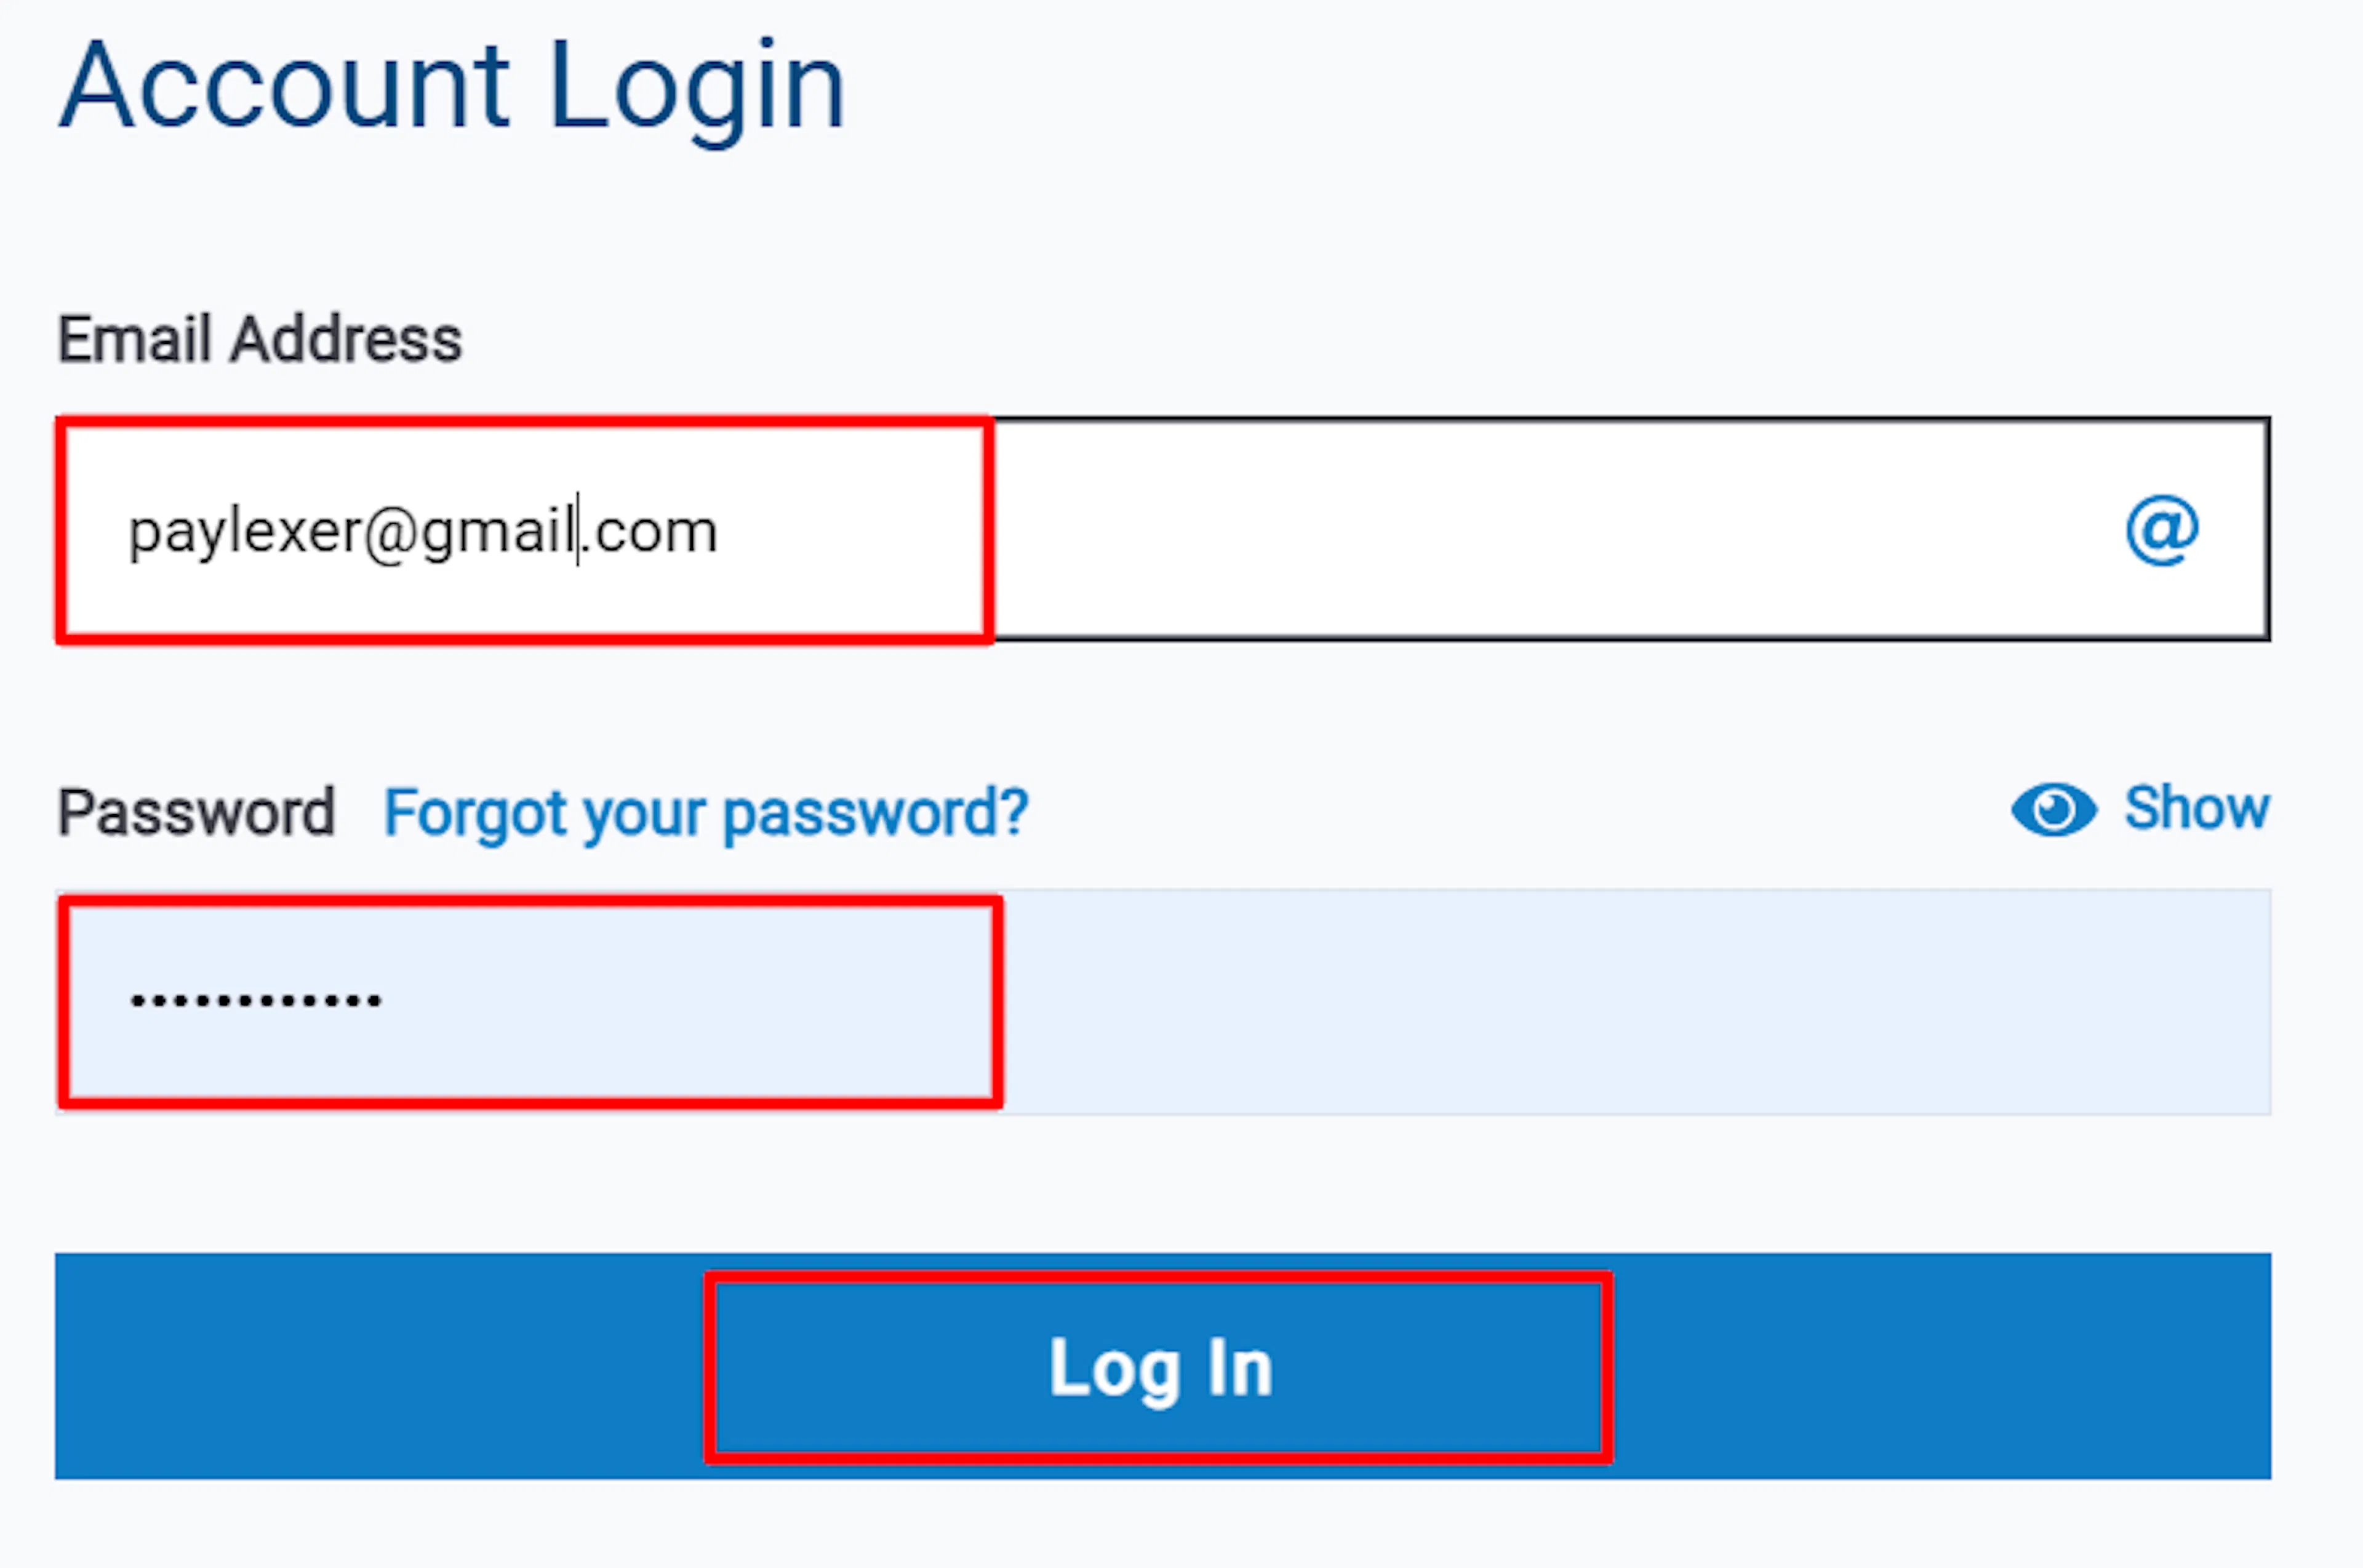
Log in to the Developer Portal
Log in to your Global Payments Developer Portal account. If you already use the Global Payments Reporting or Disputes tools, you can sign in with the same login.
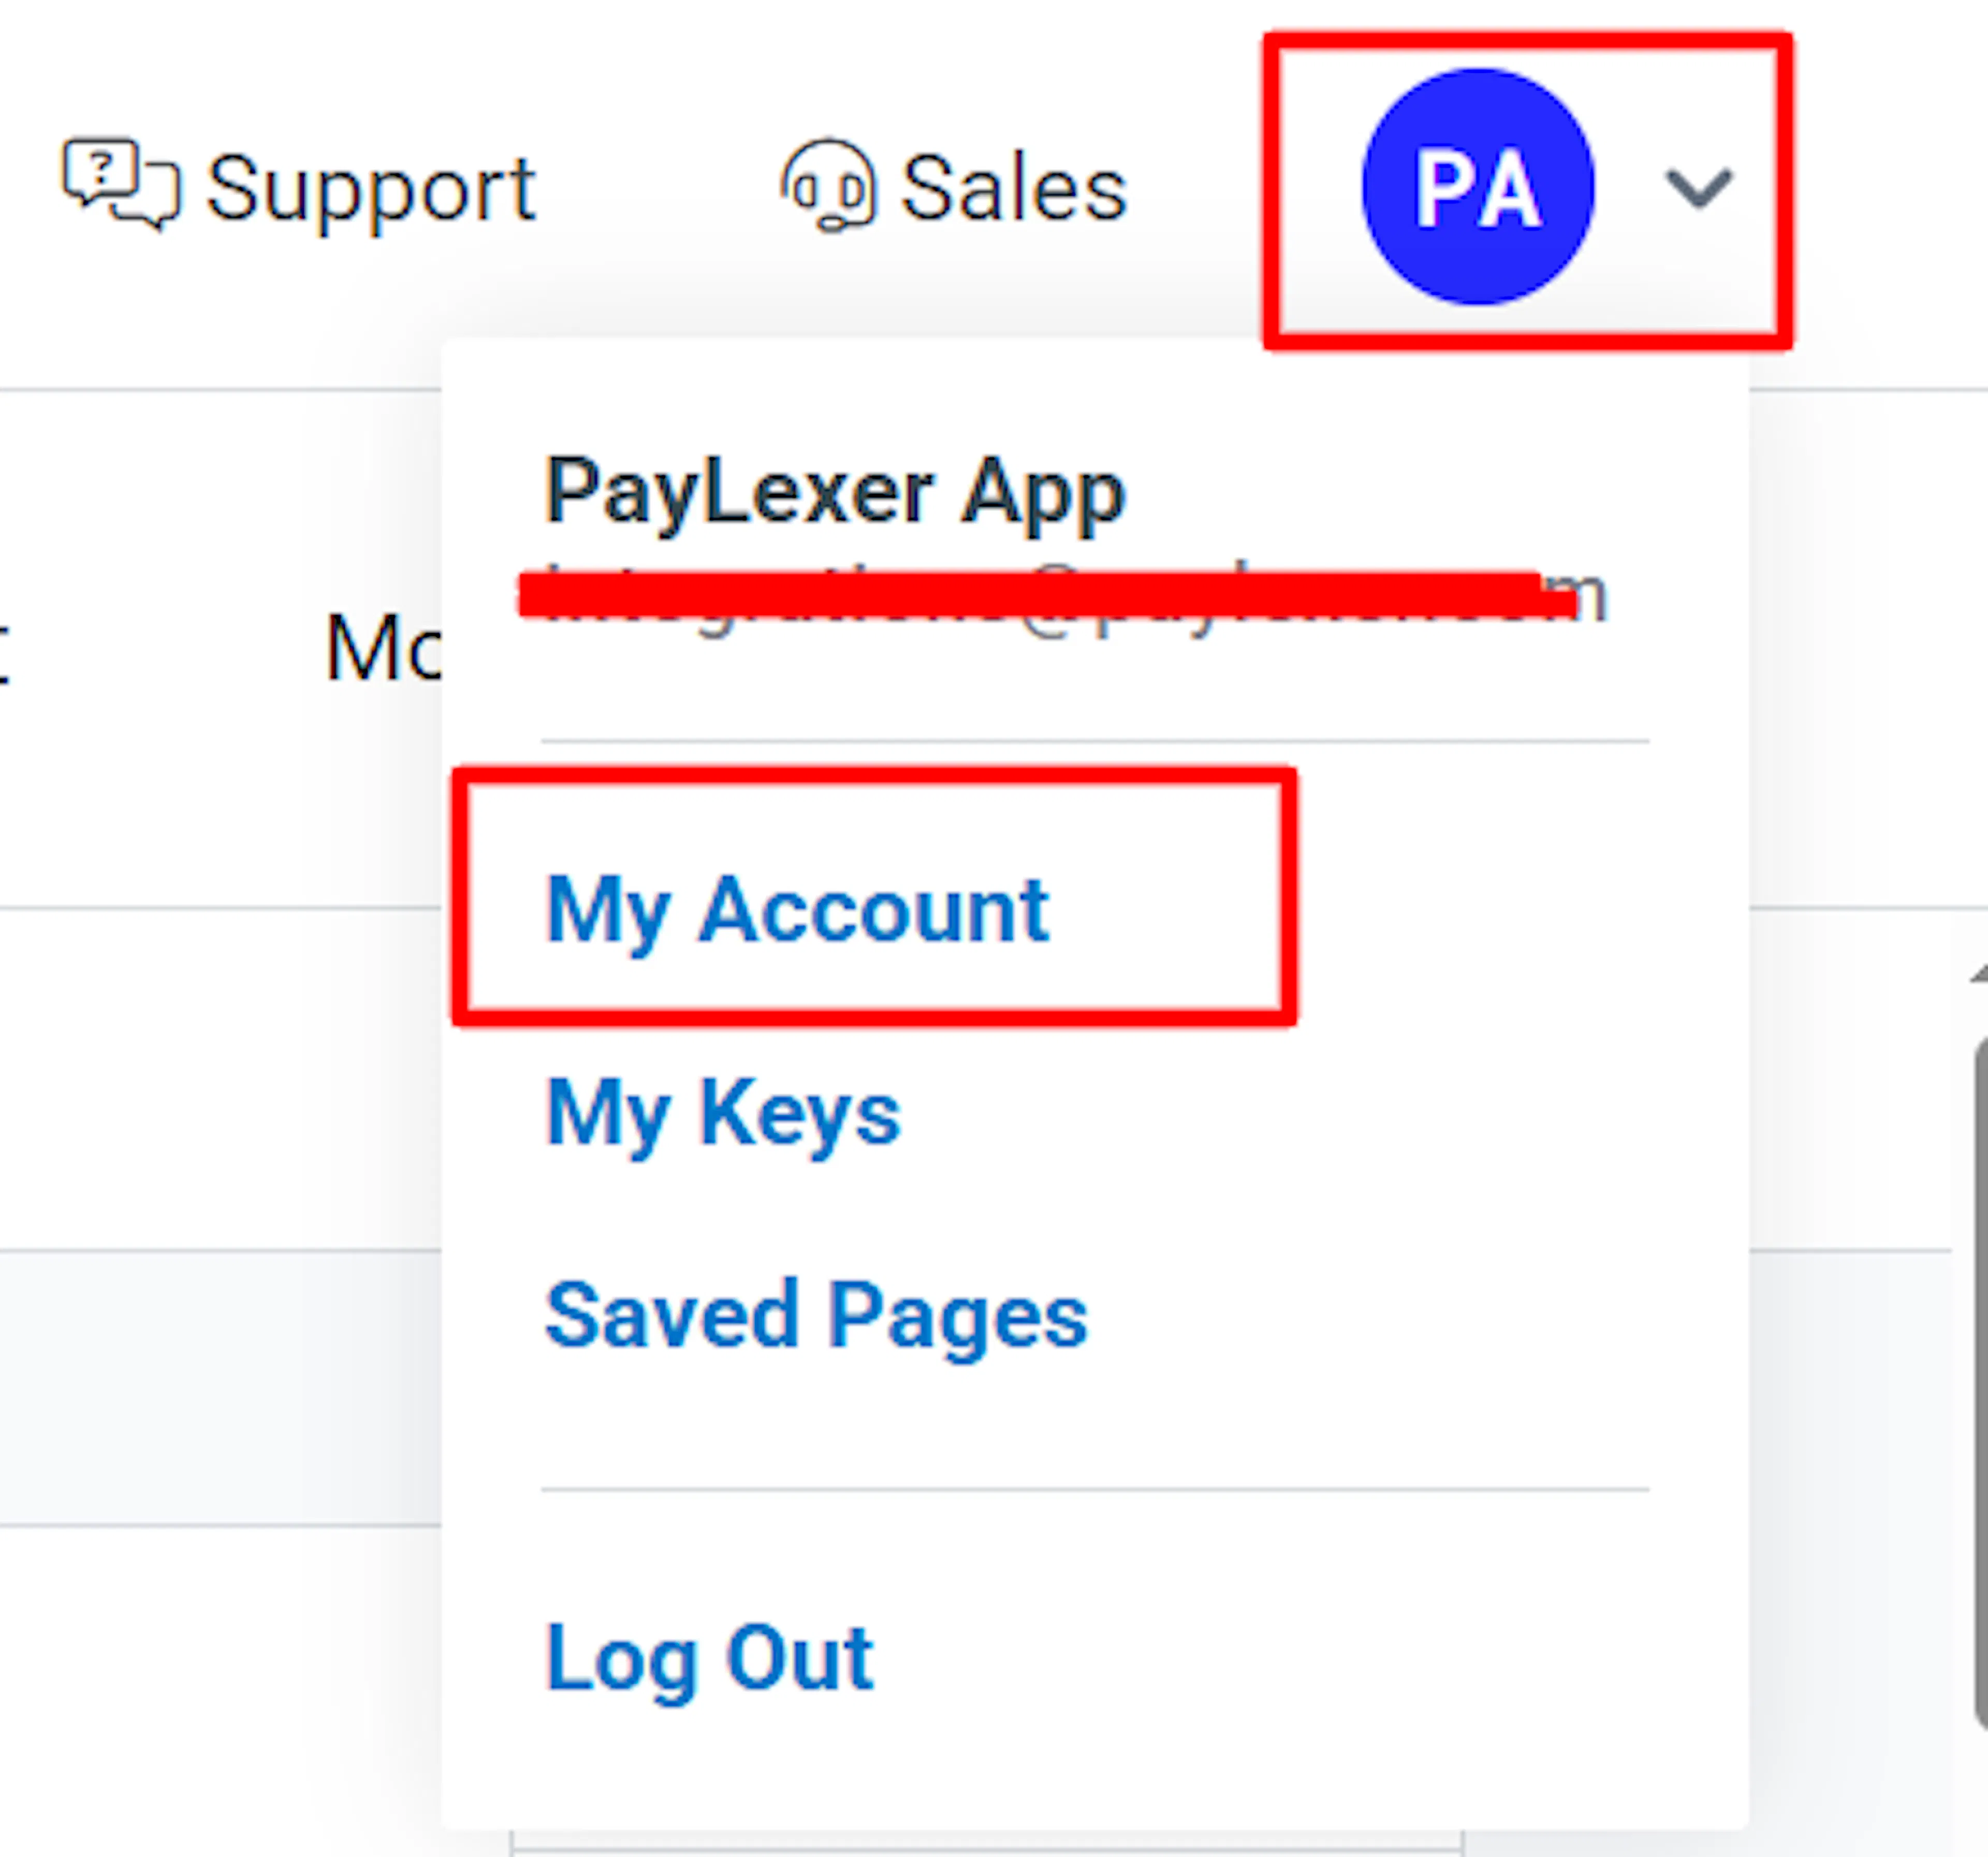
Open your account dashboard
Click the Profile icon and select My Account to open your dashboard.
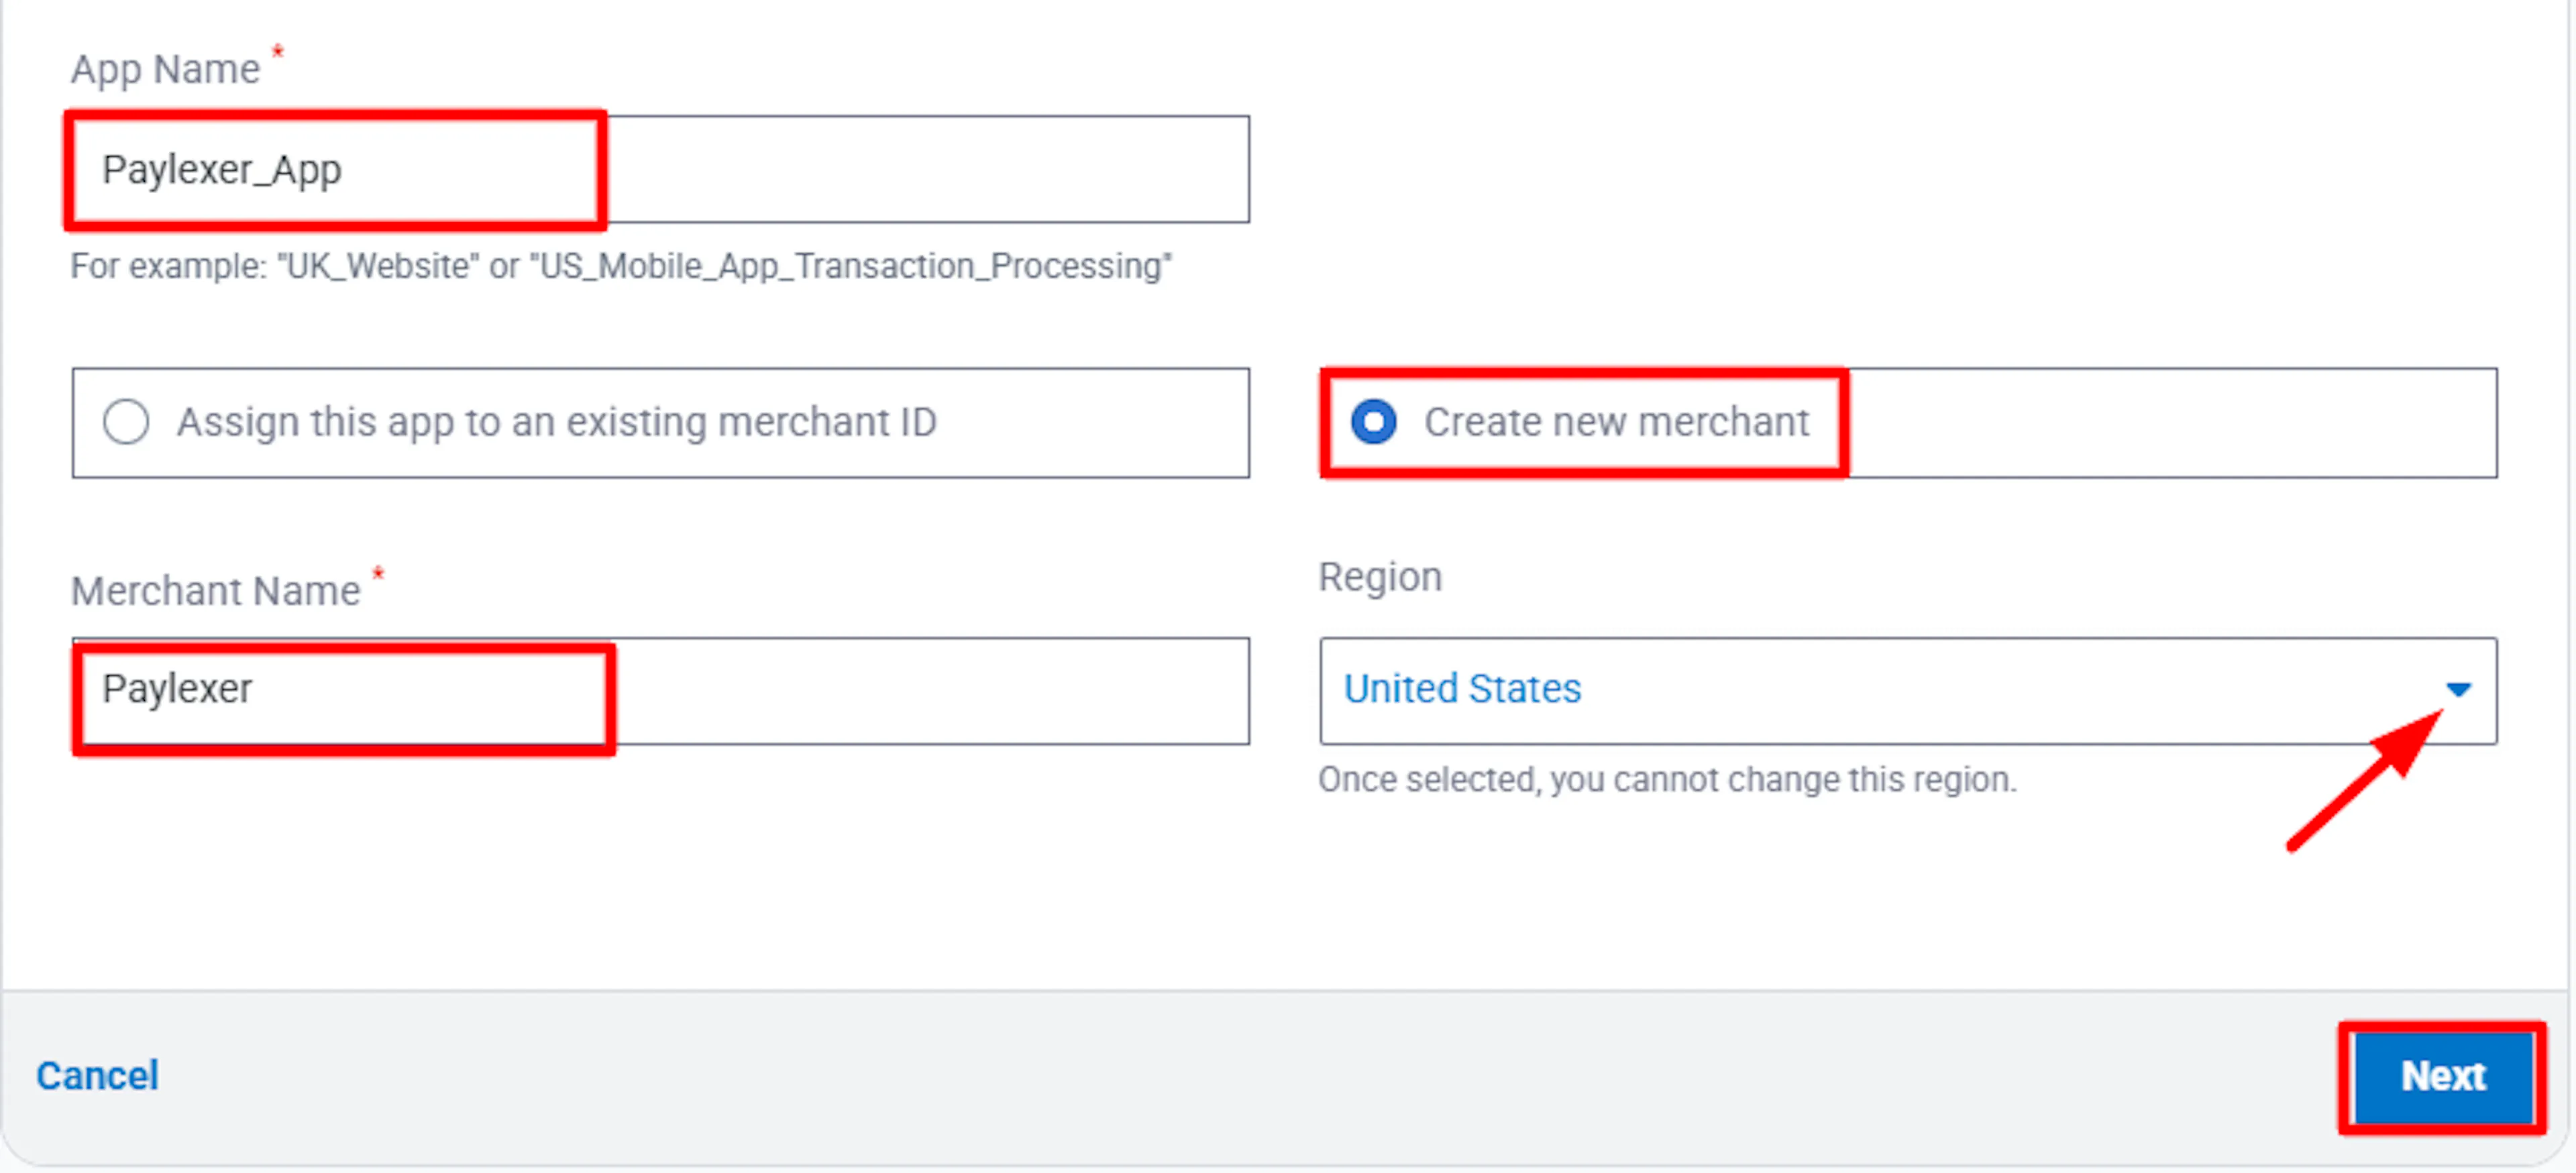
Create a new app
Start creating a new app and enter an App Name. Select the Create New Merchant option, then enter a Merchant Name and choose your Region.
Generate your credentials
Click Next. Your credentials are generated automatically - there is no separate "generate keys" step.


View and copy your credentials
Click View Credentials to open your App ID and App Key. Copy both - you will paste them into PayLexer.
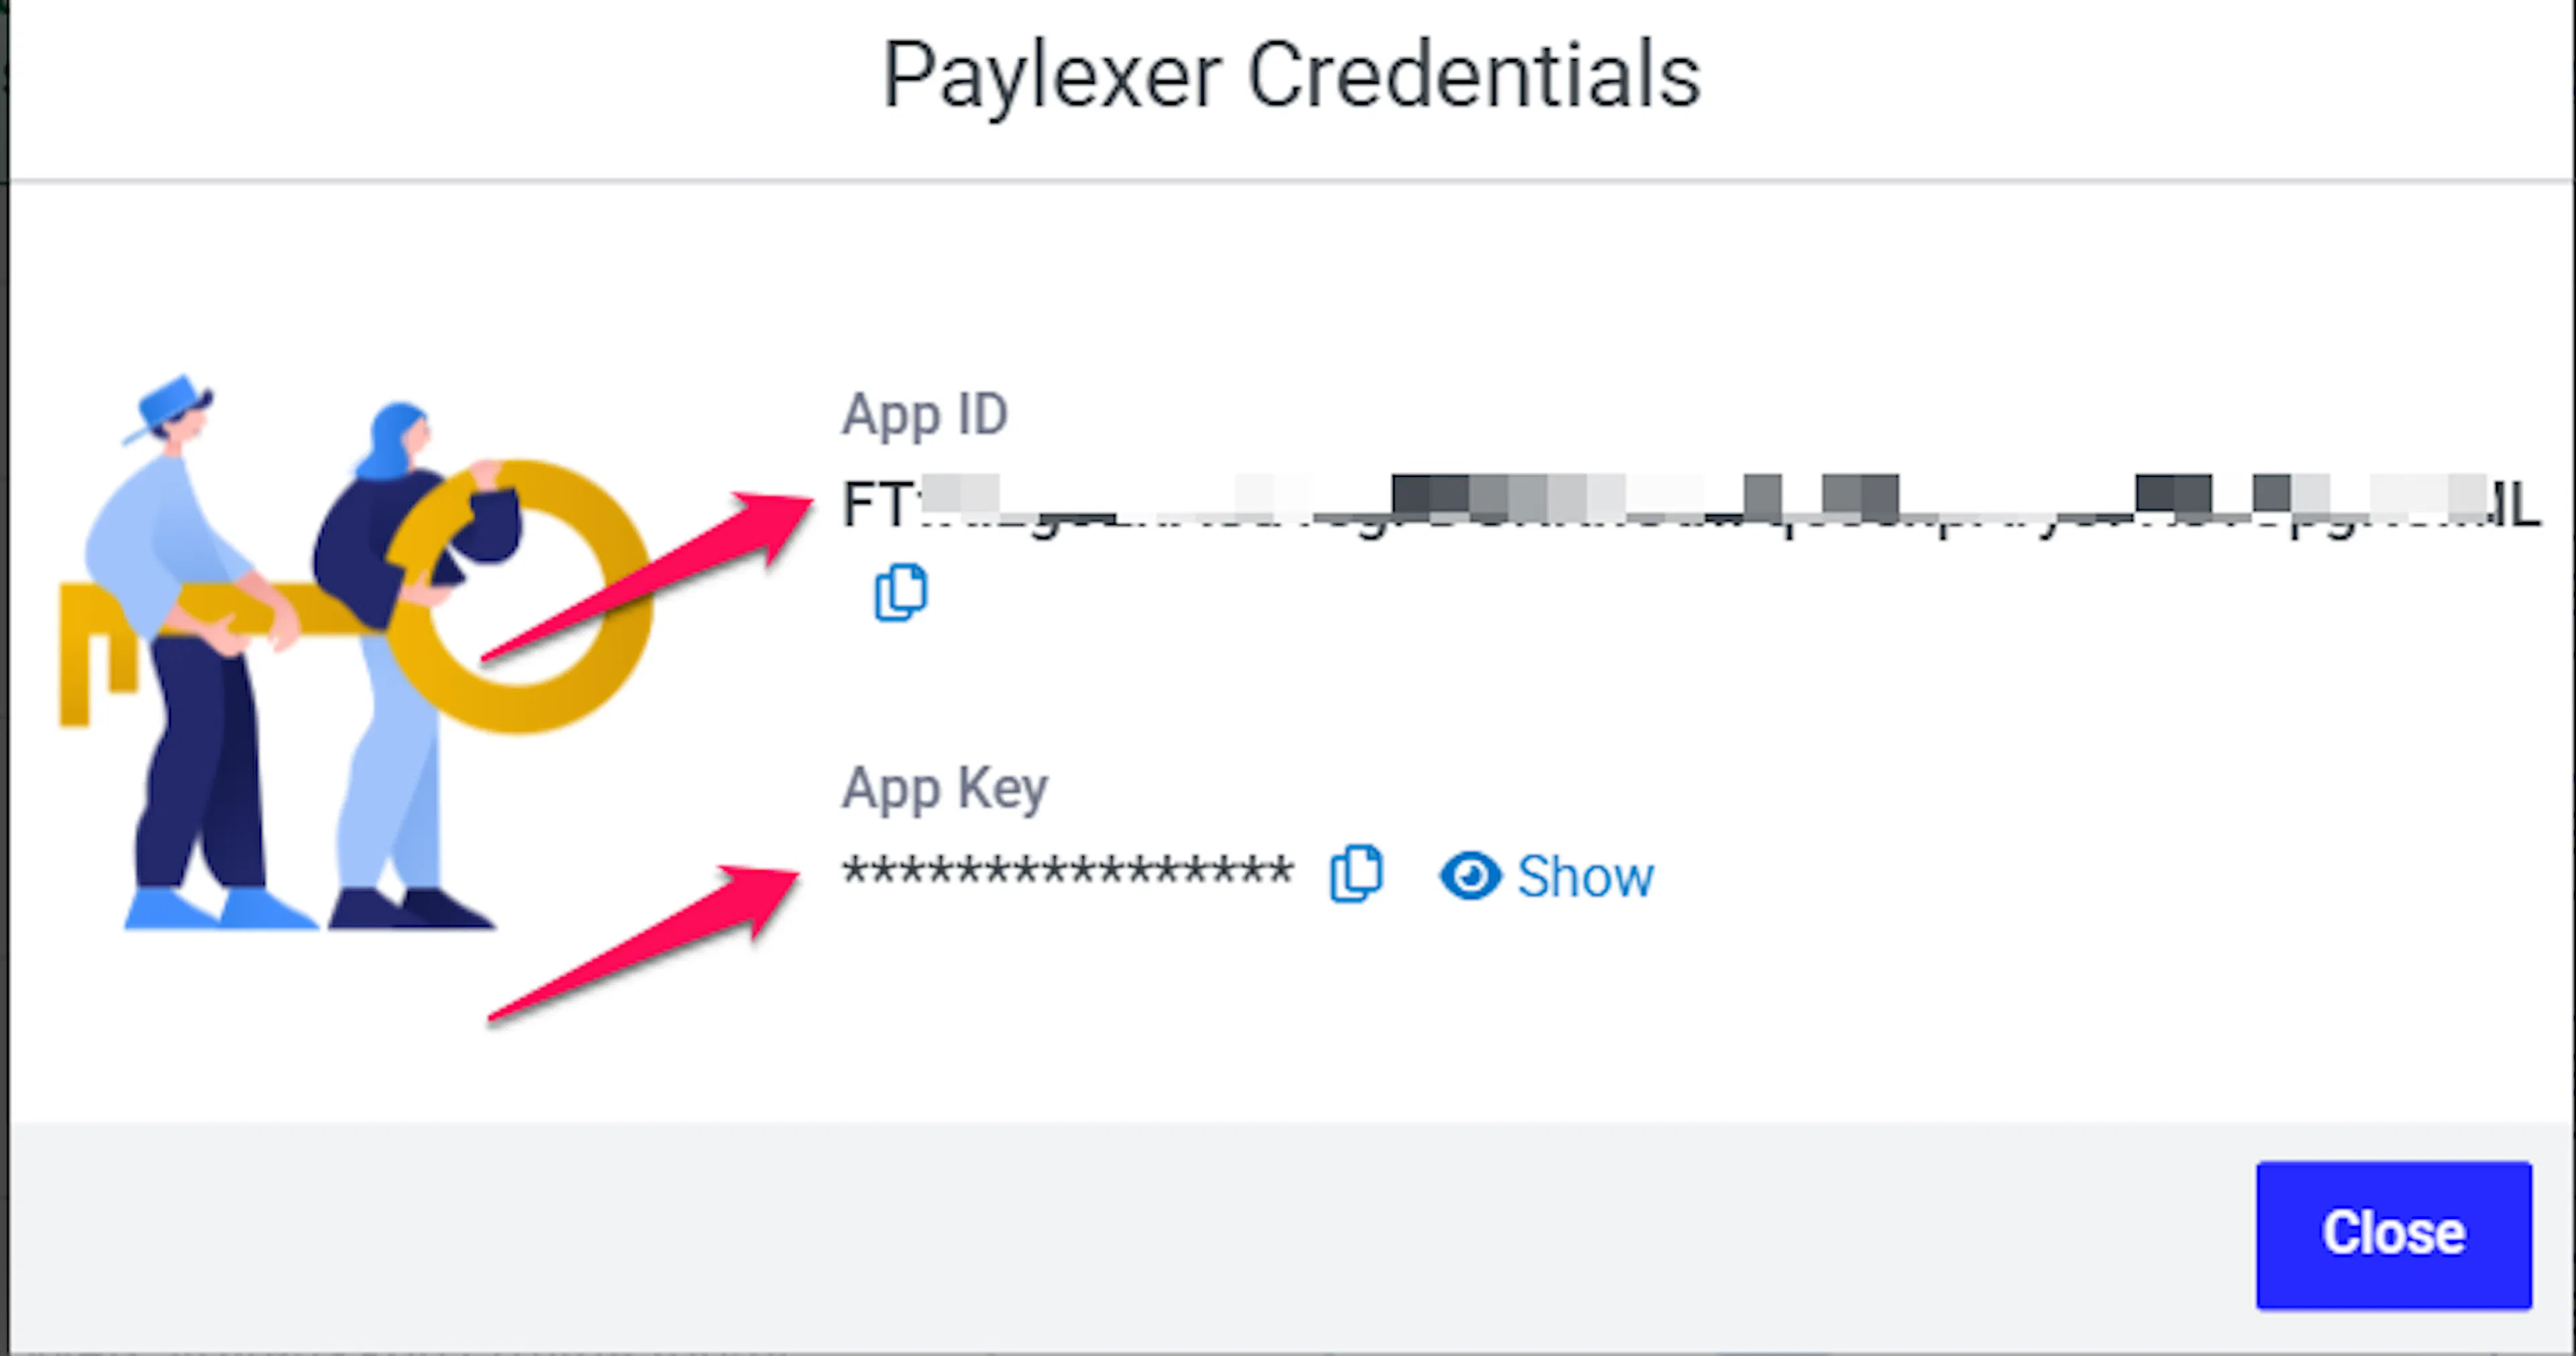
Your App ID and App Key are specific to your merchant account and must never be shared. The App Key is a secret - store it securely.
For live payments, your Global Payments account manager configures your production app based on the capabilities you sign up for. Use your Sandbox app credentials for testing and your Production app credentials for live payments.
Adding Credentials to PayLexer
Open PayLexer Dashboard
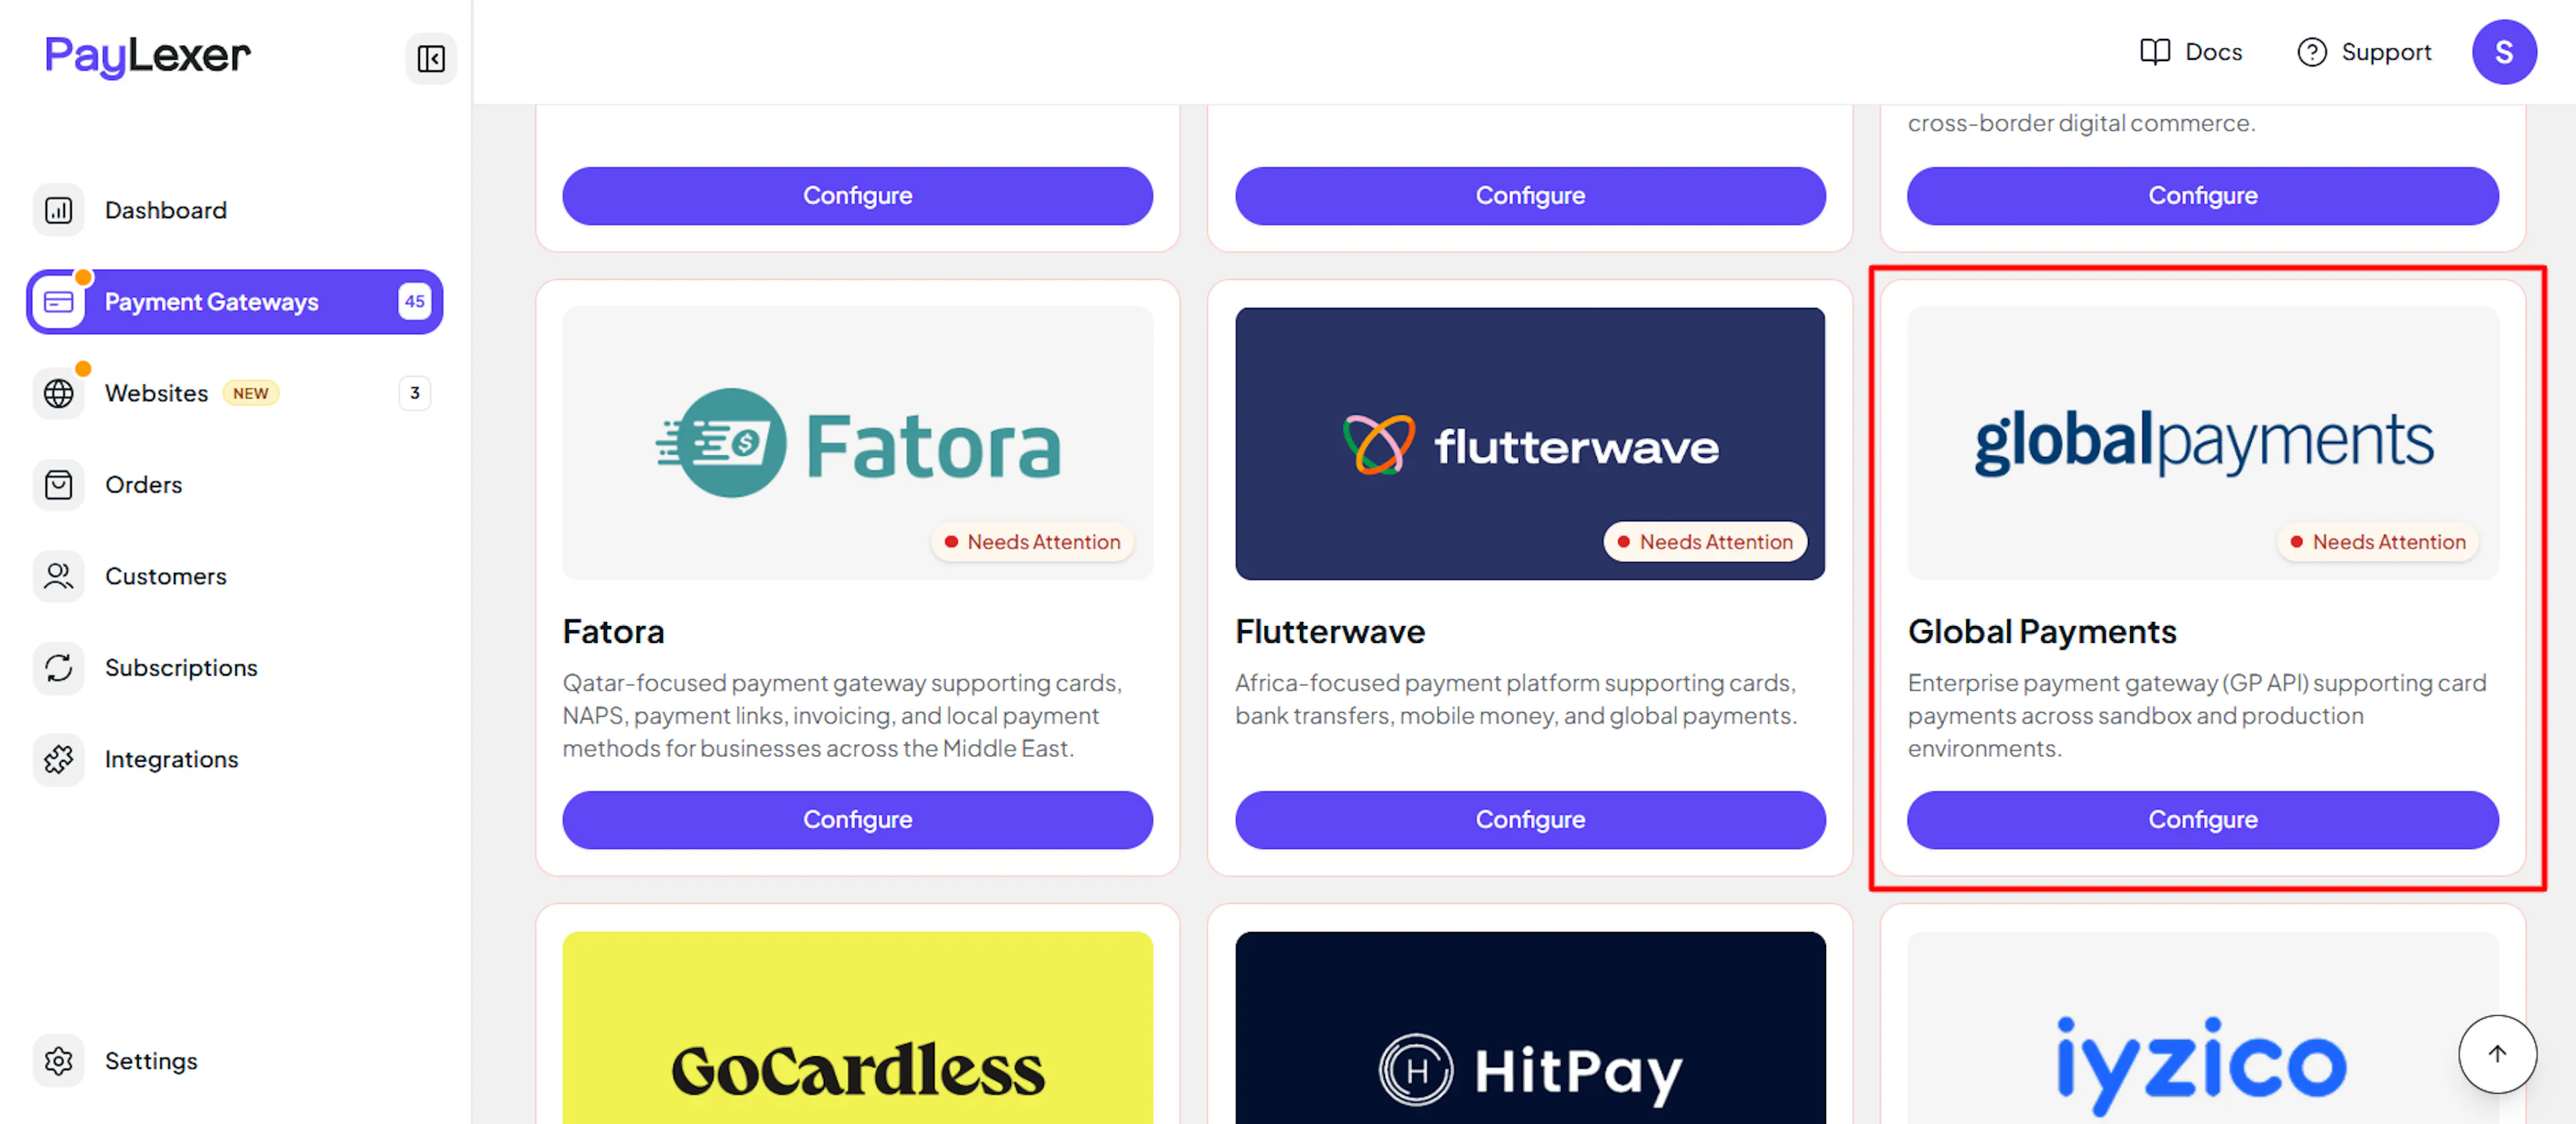
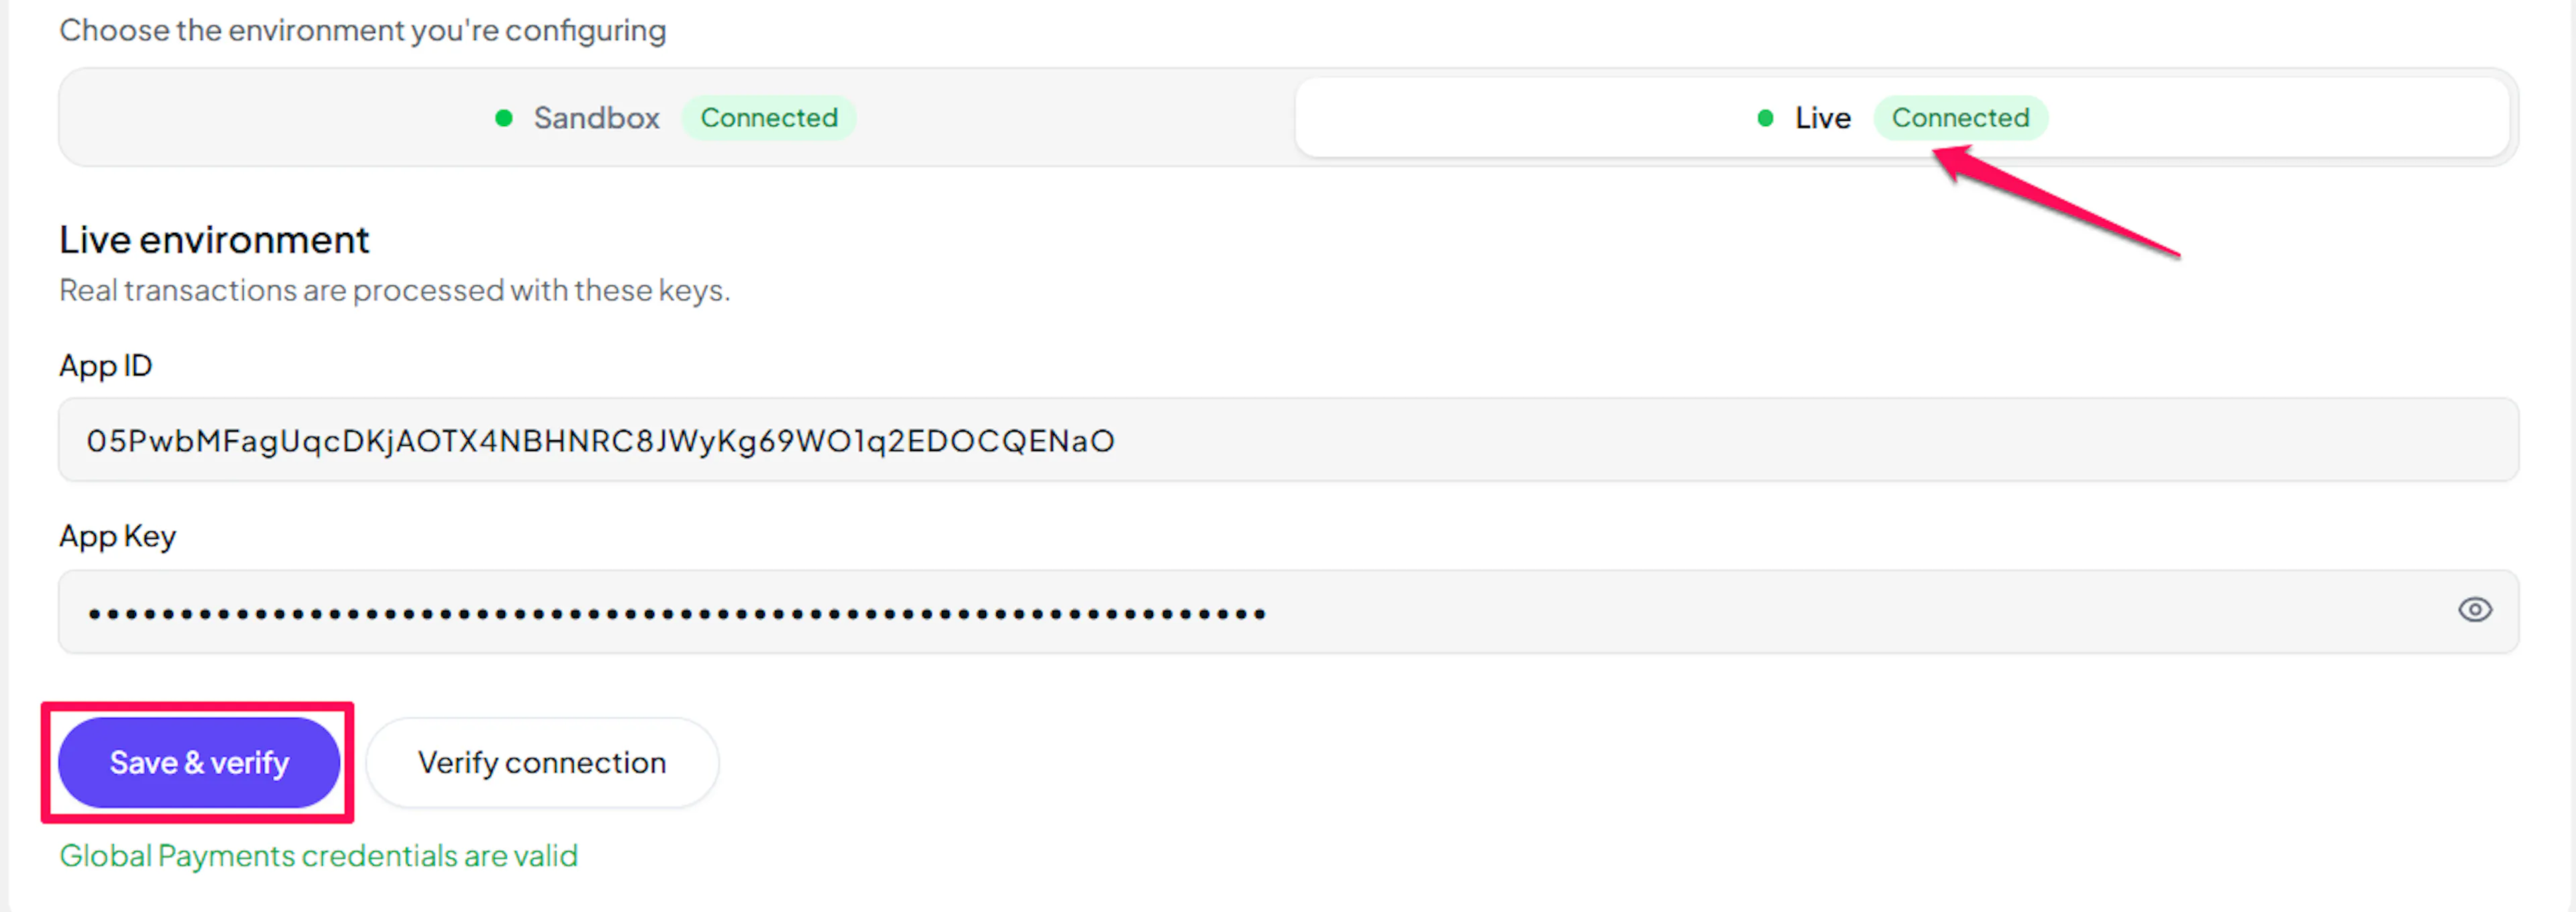
Log in to your PayLexer dashboard and navigate to Payment Gateways → Global Payments.
Enter your credentials
Paste the App ID and App Key you copied from Global Payments. You only need these two values - there is no webhook URL or webhook secret to enter.
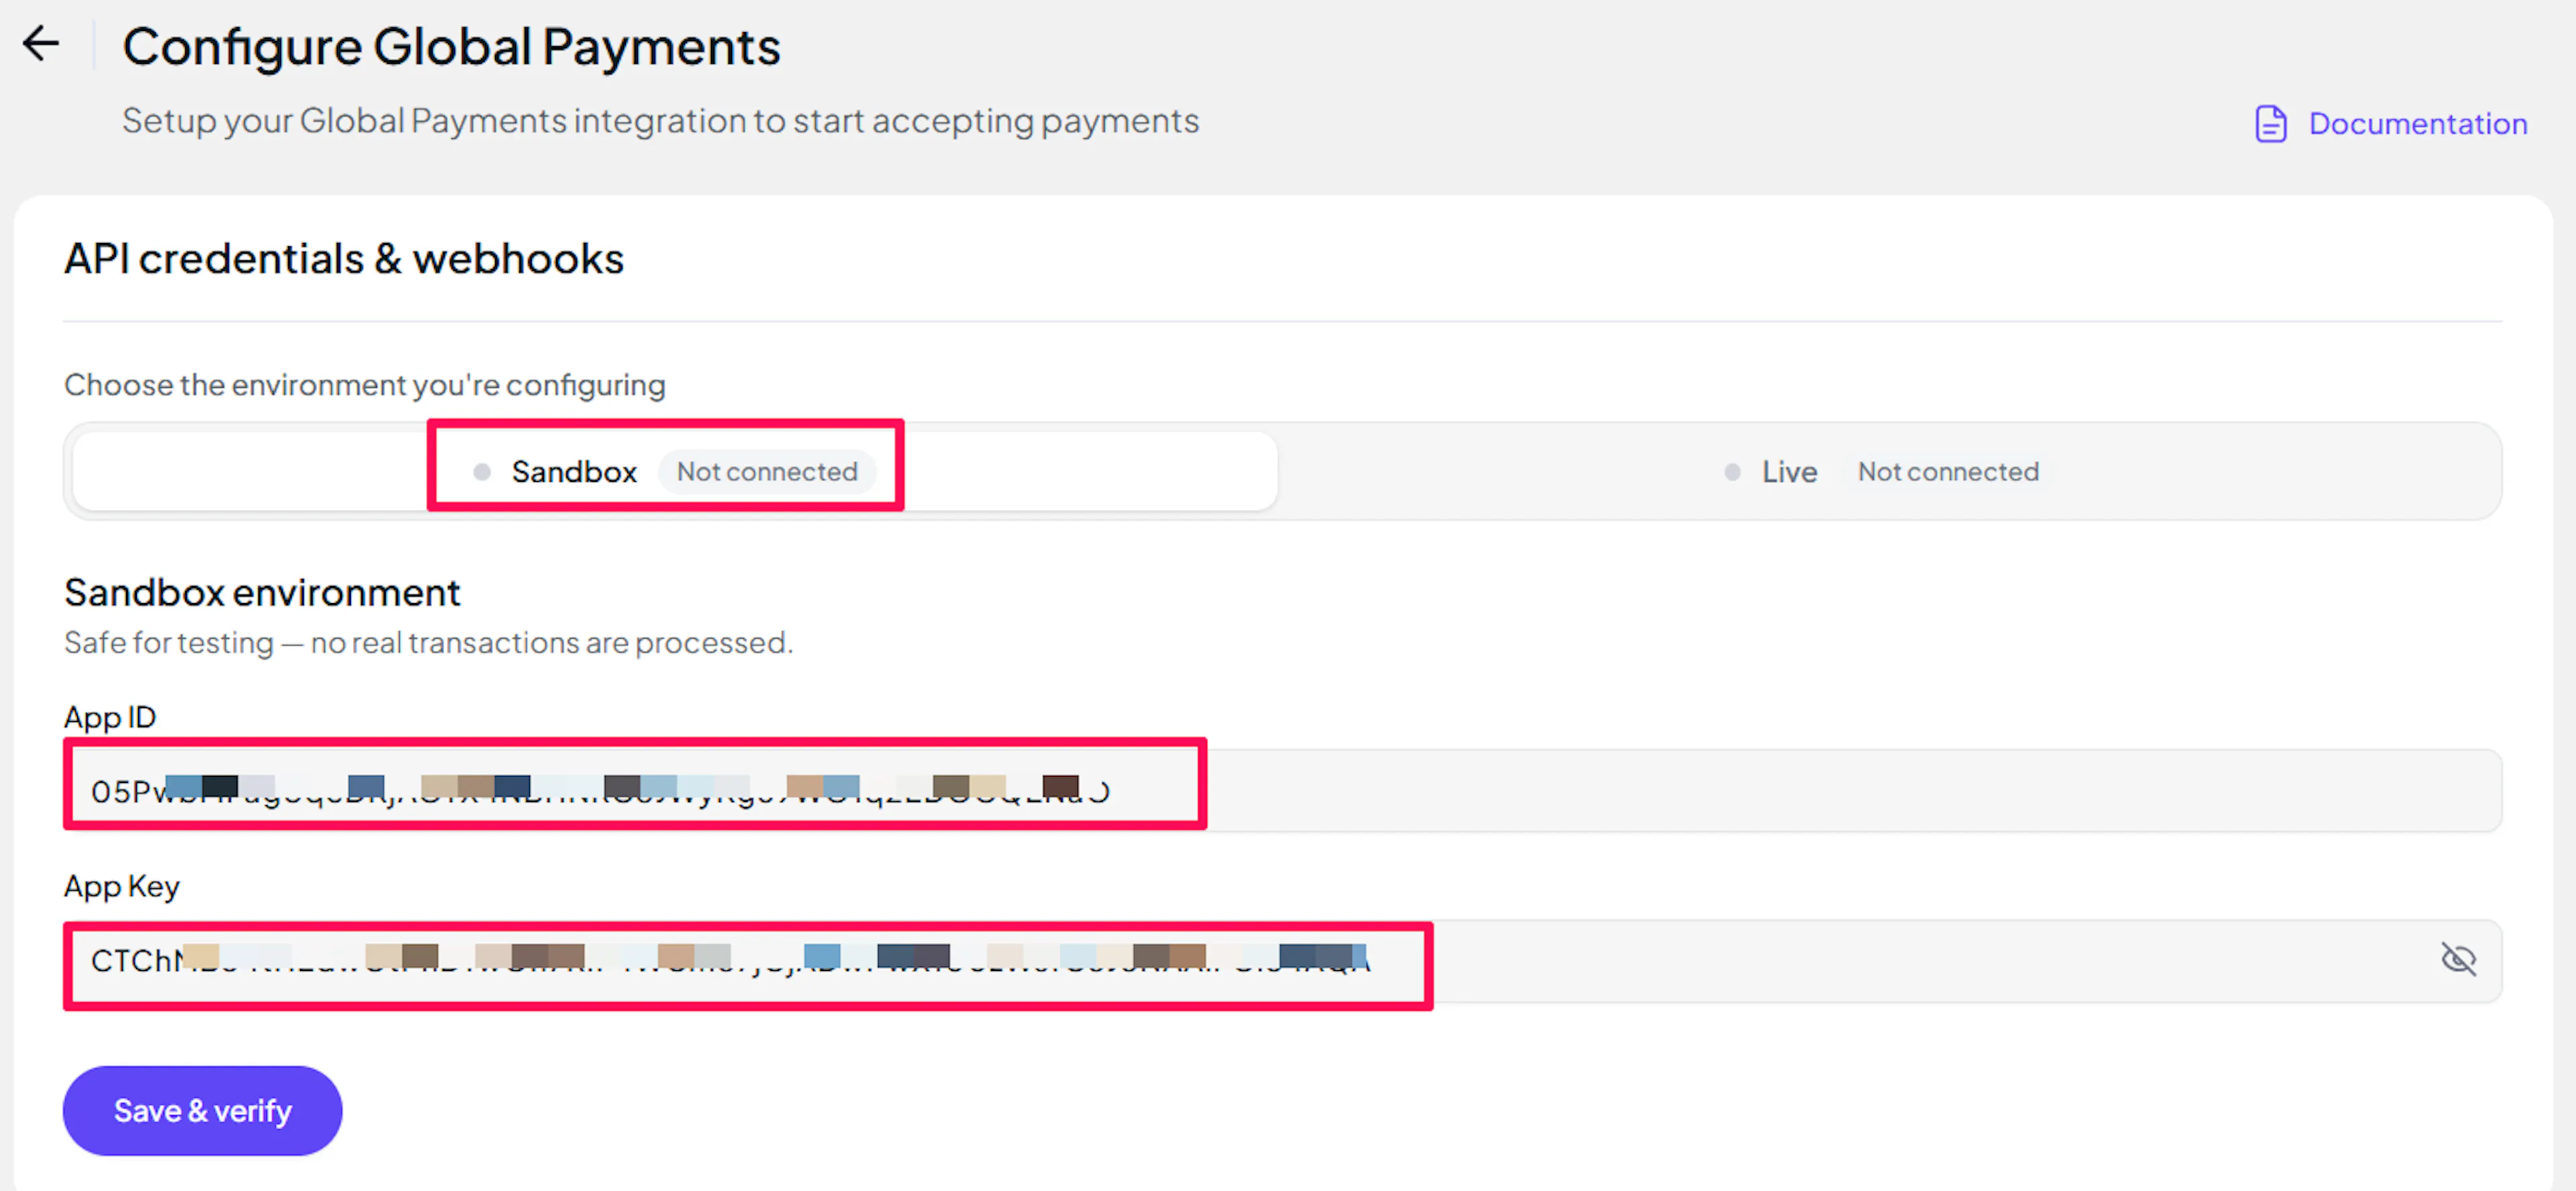
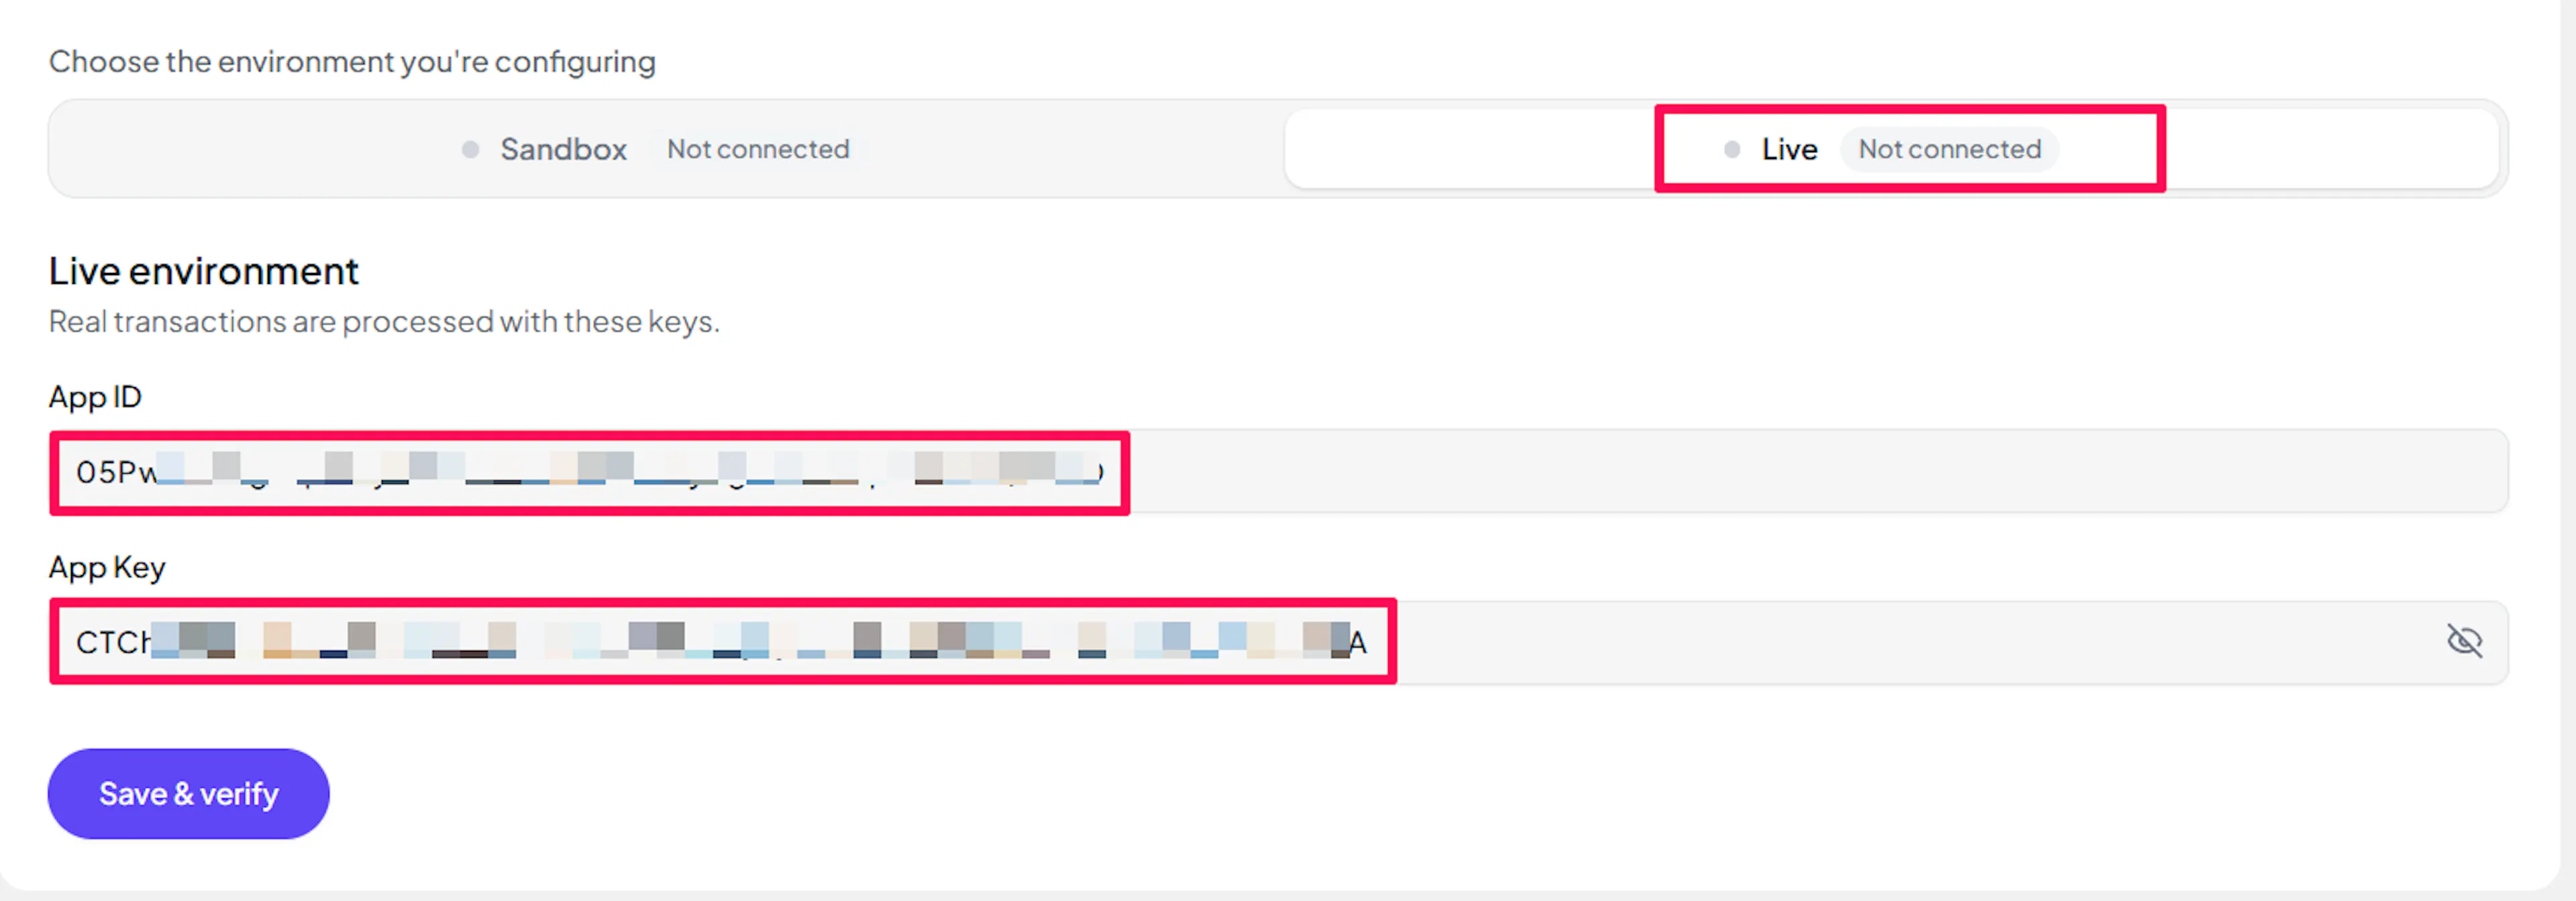
Understanding Live/Production and Sandbox Settings:
| Environment | Purpose |
|---|---|
| Live / Production (Mandatory) | Used for real transactions. Cannot be empty, even when testing. |
| Test / Sandbox (Optional) | Used for testing only. No real money is processed. |
How PayLexer selects credentials:
- Debug/Test mode ON → Test credentials are used
- Debug/Test mode OFF → Live credentials are used
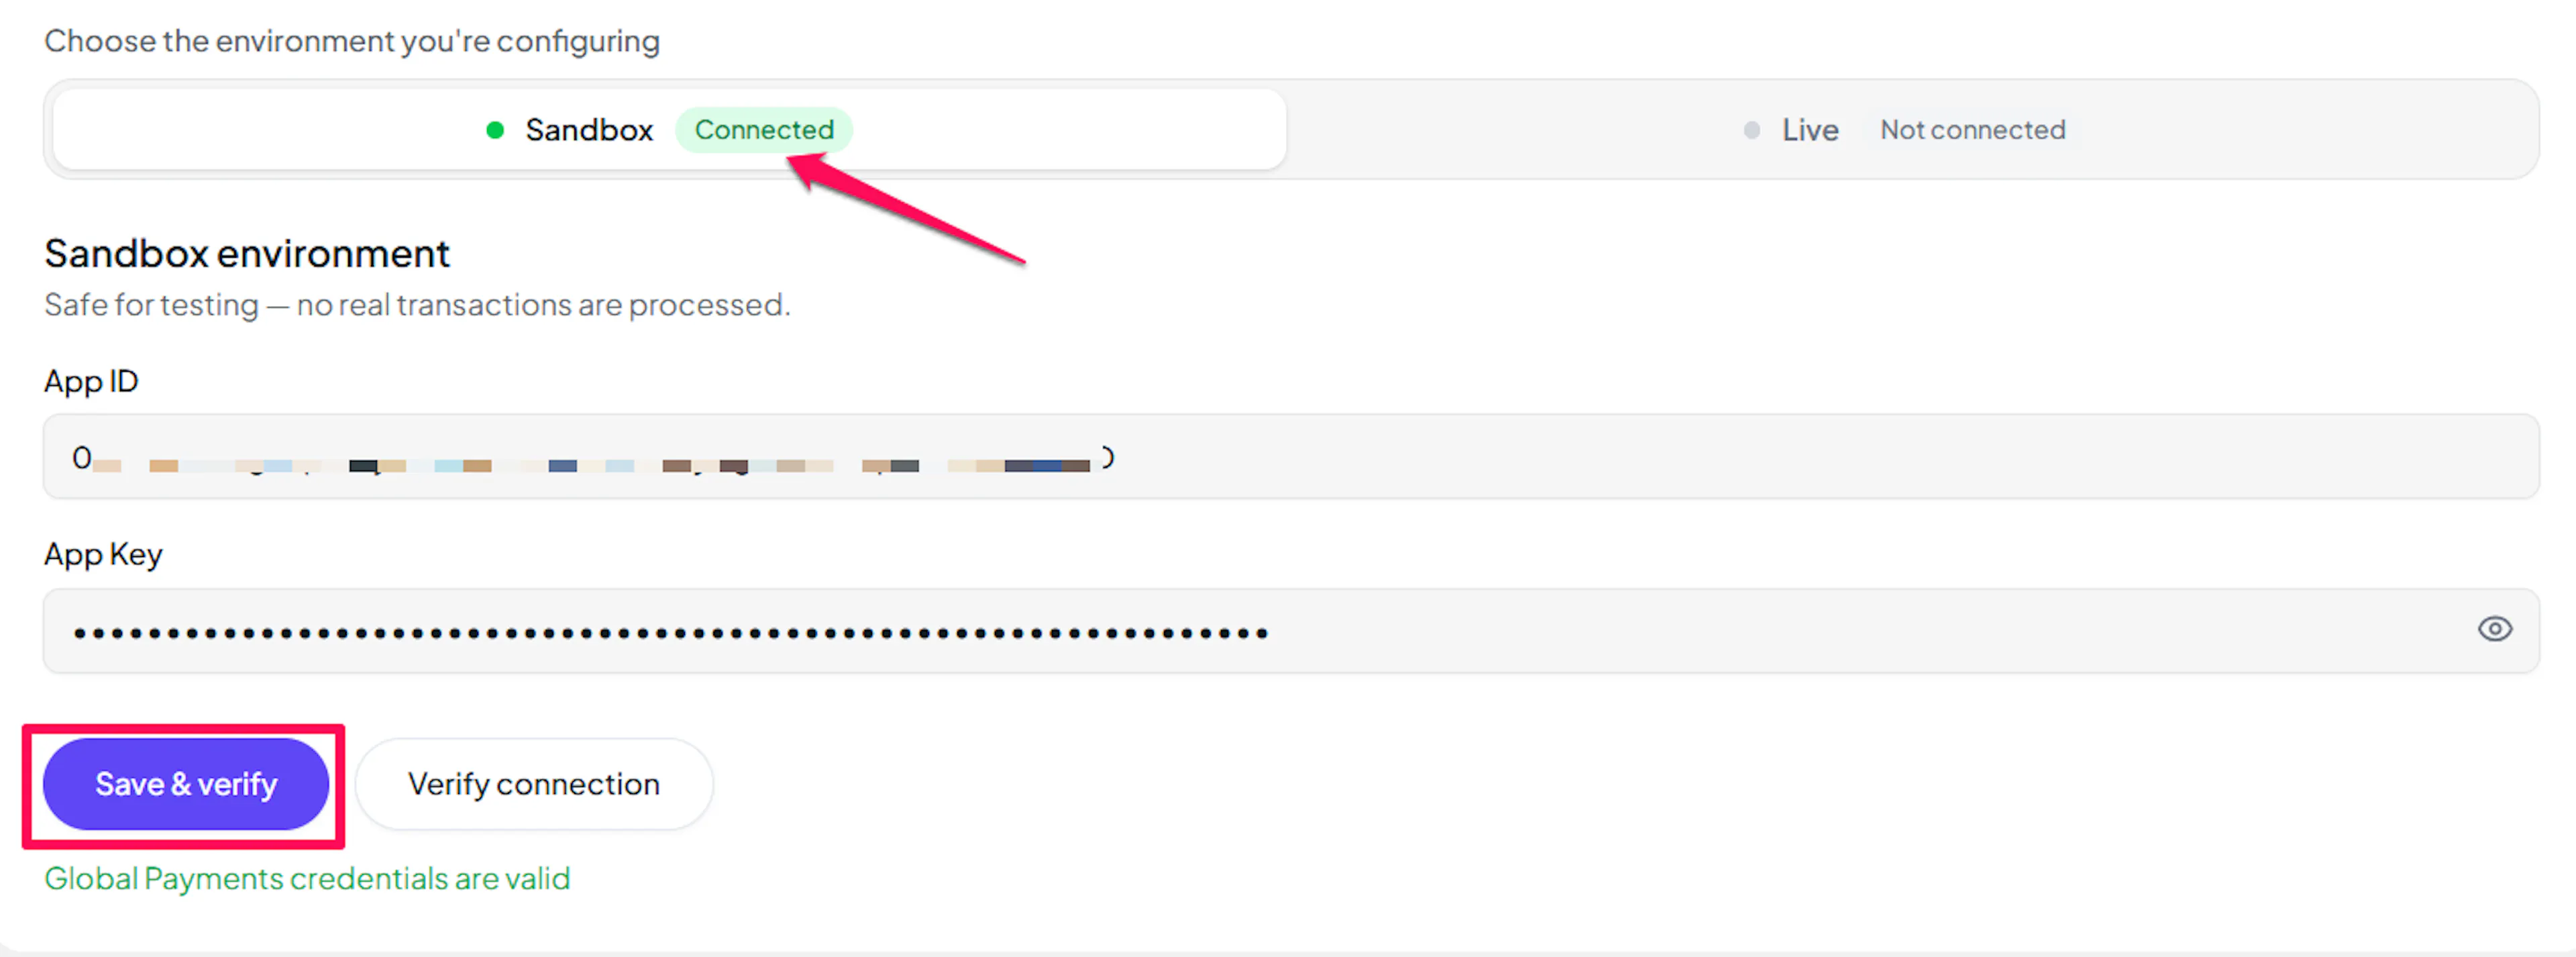
Test and save
Click Test Connection to verify your credentials, then click Save Configuration.
Webhooks (Automatic)
Global Payments reports every payment result back to PayLexer in real time, and PayLexer sets this up automatically. There is nothing for you to configure - no webhook URL to register and no webhook secret to enter.
Global Payments only needs your App ID and App Key. You will not see (and do not need) a webhook URL field for this gateway - PayLexer attaches its own secure notification address to every payment for you.
How it works:
- Automatic registration - On each payment, PayLexer tells Global Payments where to send the result, so there is no webhook URL to copy into a Global Payments dashboard.
- Signed and verified - Global Payments signs every notification, and PayLexer verifies that signature using the App Key you already entered. Unsigned or tampered notifications are rejected.
- Safety-net check - If a shopper's browser drops the connection right after paying and the notification does not arrive, PayLexer asks Global Payments directly for the transaction status and reconciles the order within a few minutes - so payments are never left stuck.
Integrate Global Payments to Your Website
If you have already added and configured your site, you can enable Global Payments in your existing setup.
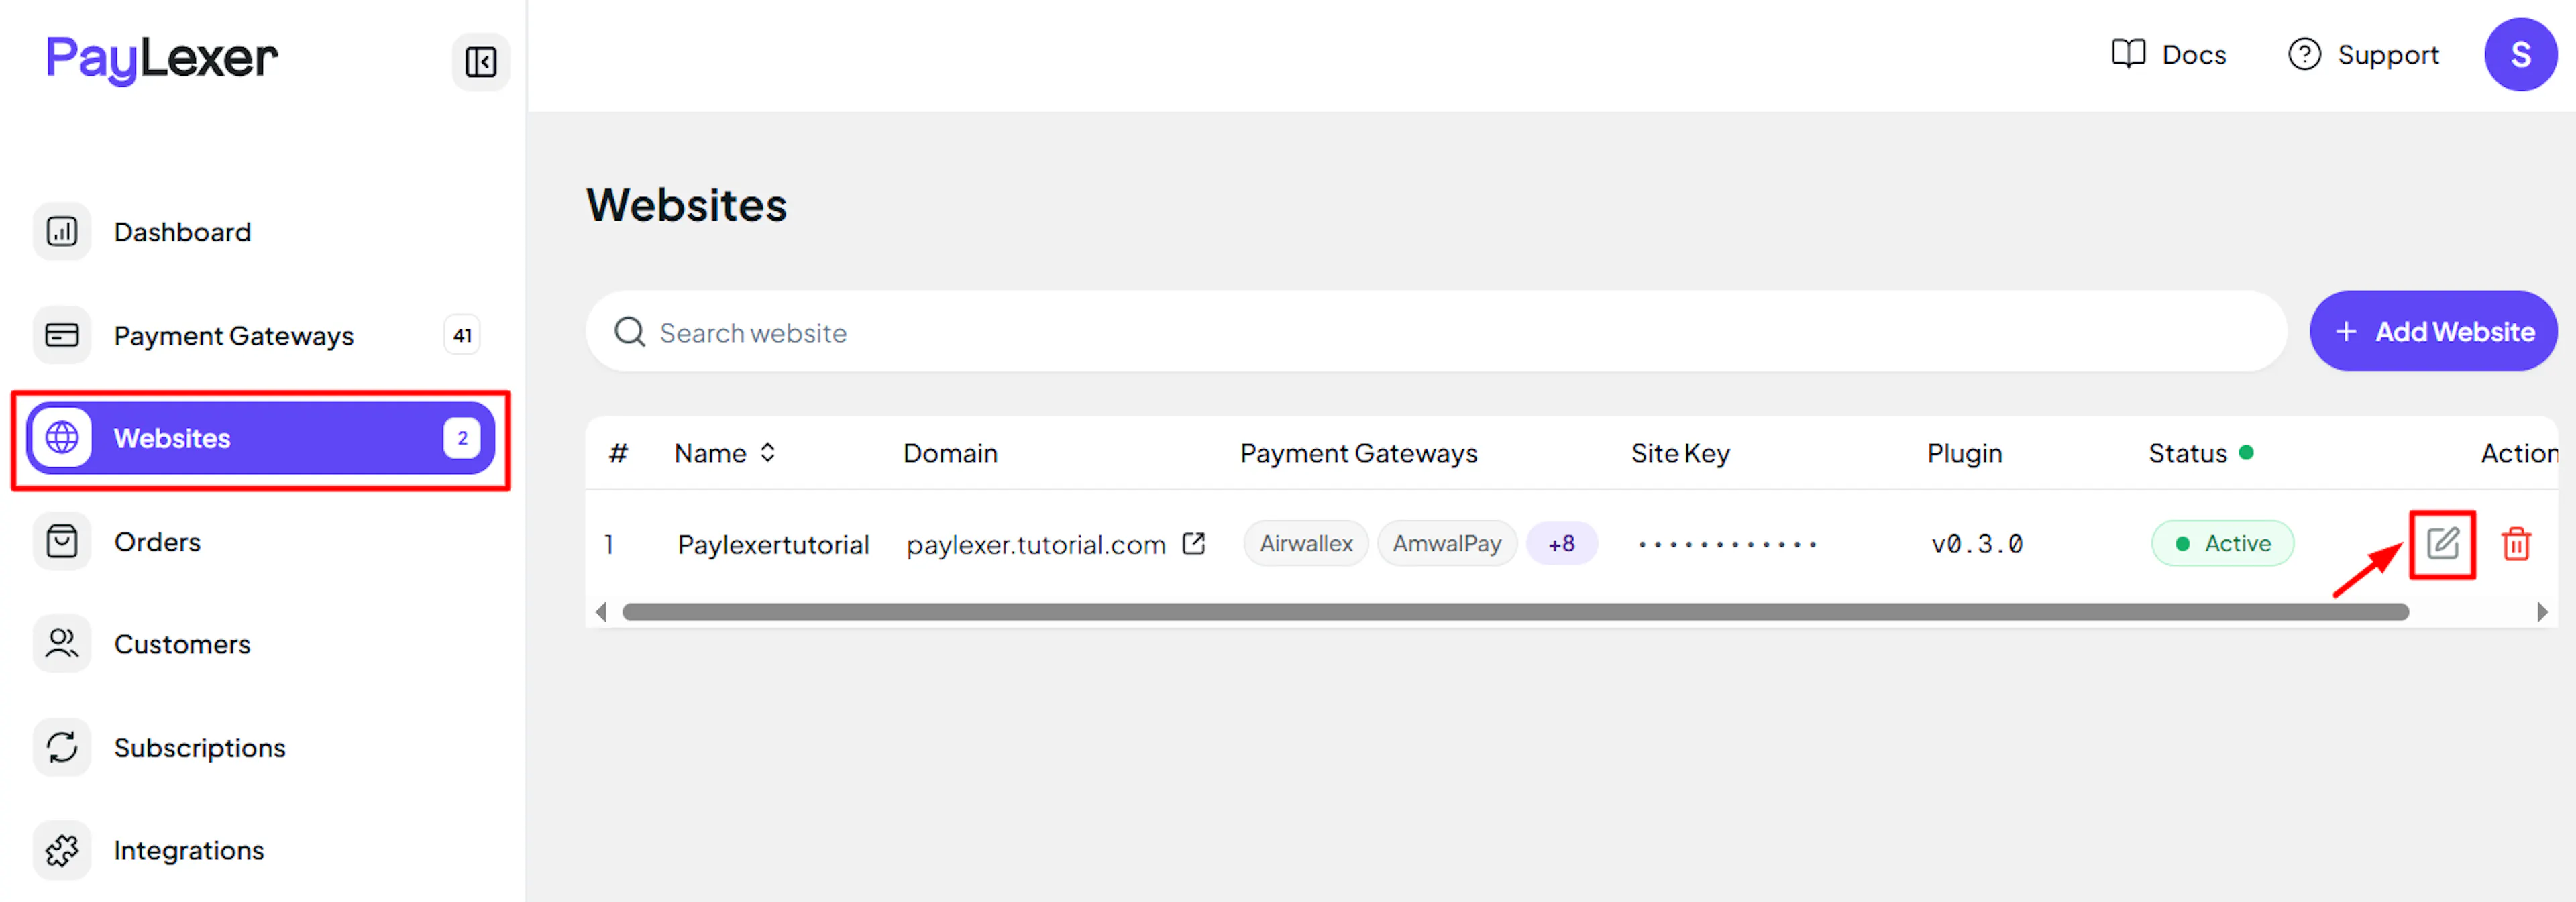
Go to Websites
Navigate to Websites in your PayLexer dashboard.
Edit your website
Click the Edit Icon of your added website.
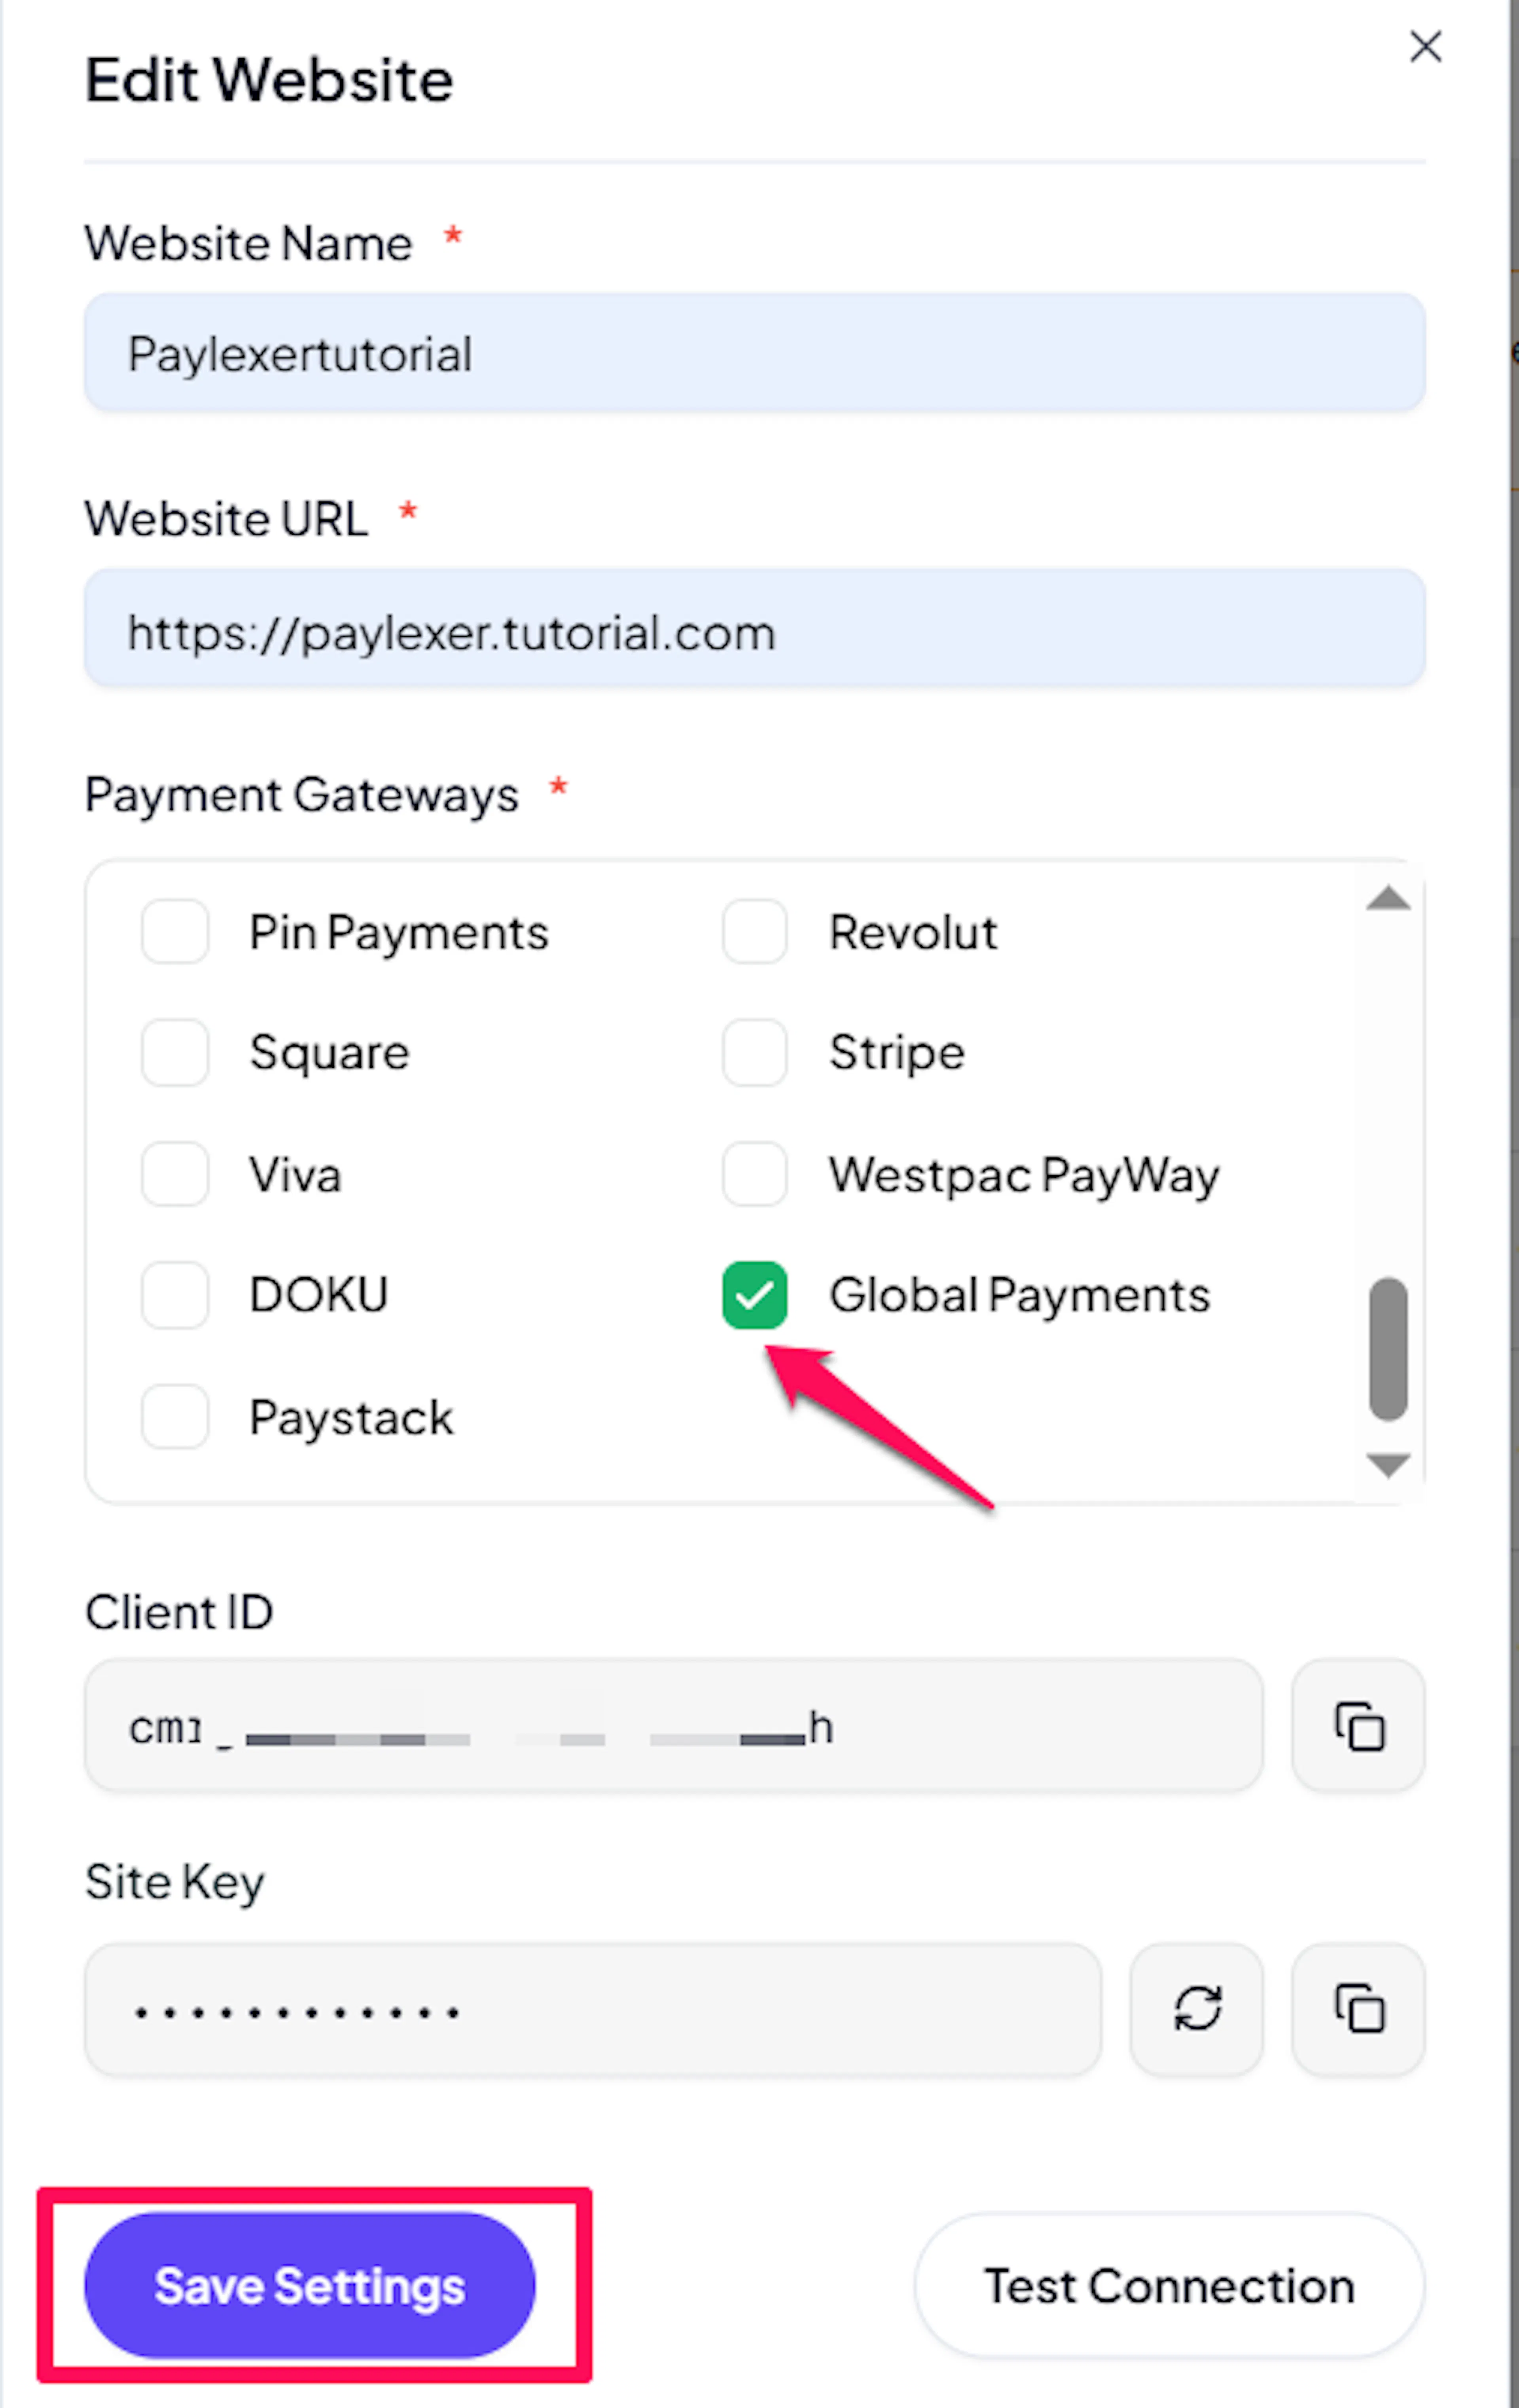
Enable Global Payments
Click the checkbox to enable Global Payments for the website.
If you haven't added a website yet, Continue to Add Your Website →
Troubleshooting
Best Practices
- Test in the Global Payments Sandbox before enabling production credentials.
- Keep your App Key secret - never share it or expose it in client-side code.
- Use only supported currencies (USD, EUR, GBP) at checkout to avoid declined payments.
- Confirm refunds are enabled on your Global Payments account with your account manager before relying on them in production.
FAQs
Still Have Questions?
- Global Payments Support: Global Payments Help Center
- PayLexer Support: Contact Support