

Saferpay
Connect Saferpay (Worldline) to PayLexer to accept card and local payment method payments on a secure hosted Payment Page, with full and partial refunds.
Saferpay is a Swiss online payment solution operated by Worldline, formerly part of SIX Payment Services, supporting merchants across Switzerland and Europe. It offers 30+ payment methods, including major cards, digital wallets, and local payment methods such as TWINT and PostFinance Pay, through a secure hosted Payment Page that keeps card details off the merchant's website.
- Supported Regions (Merchant Accounts): Switzerland, Liechtenstein, Austria, Germany, France, and other European countries
- Supported Currencies: CHF, EUR, USD, GBP, AUD, CAD, DKK, JPY, NOK, SEK, PLN, CZK, HUF
Supported Features
- One-time card payments through Saferpay's secure hosted Payment Page
- Support for major cards and 30+ local European payment methods, including Apple Pay, Google Pay, and TWINT
- Full and partial refunds on captured payments
- Automatic reconciliation of refunds issued directly from the Saferpay Backoffice
- Reliable settlement even when a shopper's return trip is interrupted, through PayLexer's direct status verification
- Payments in Swiss Francs, Euros, US Dollars, British Pounds, and other major currencies
Before You Start
Make sure you have:
- Saferpay Account – Don't have one? Sign up for Saferpay →
- PayLexer Account – Required to configure the integration. Create your account →
- A website where you want to integrate
Looking for a different payment processor? View all supported gateways →
Configuring Saferpay
You need a Customer ID, Terminal ID, API Username, and API Password from Saferpay for this integration.
Getting API Credentials
The Customer ID and Terminal ID identify your Saferpay account, and the API Username and API Password are the JSON API credentials PayLexer uses to talk to Saferpay. You find all four in the Saferpay Backoffice.
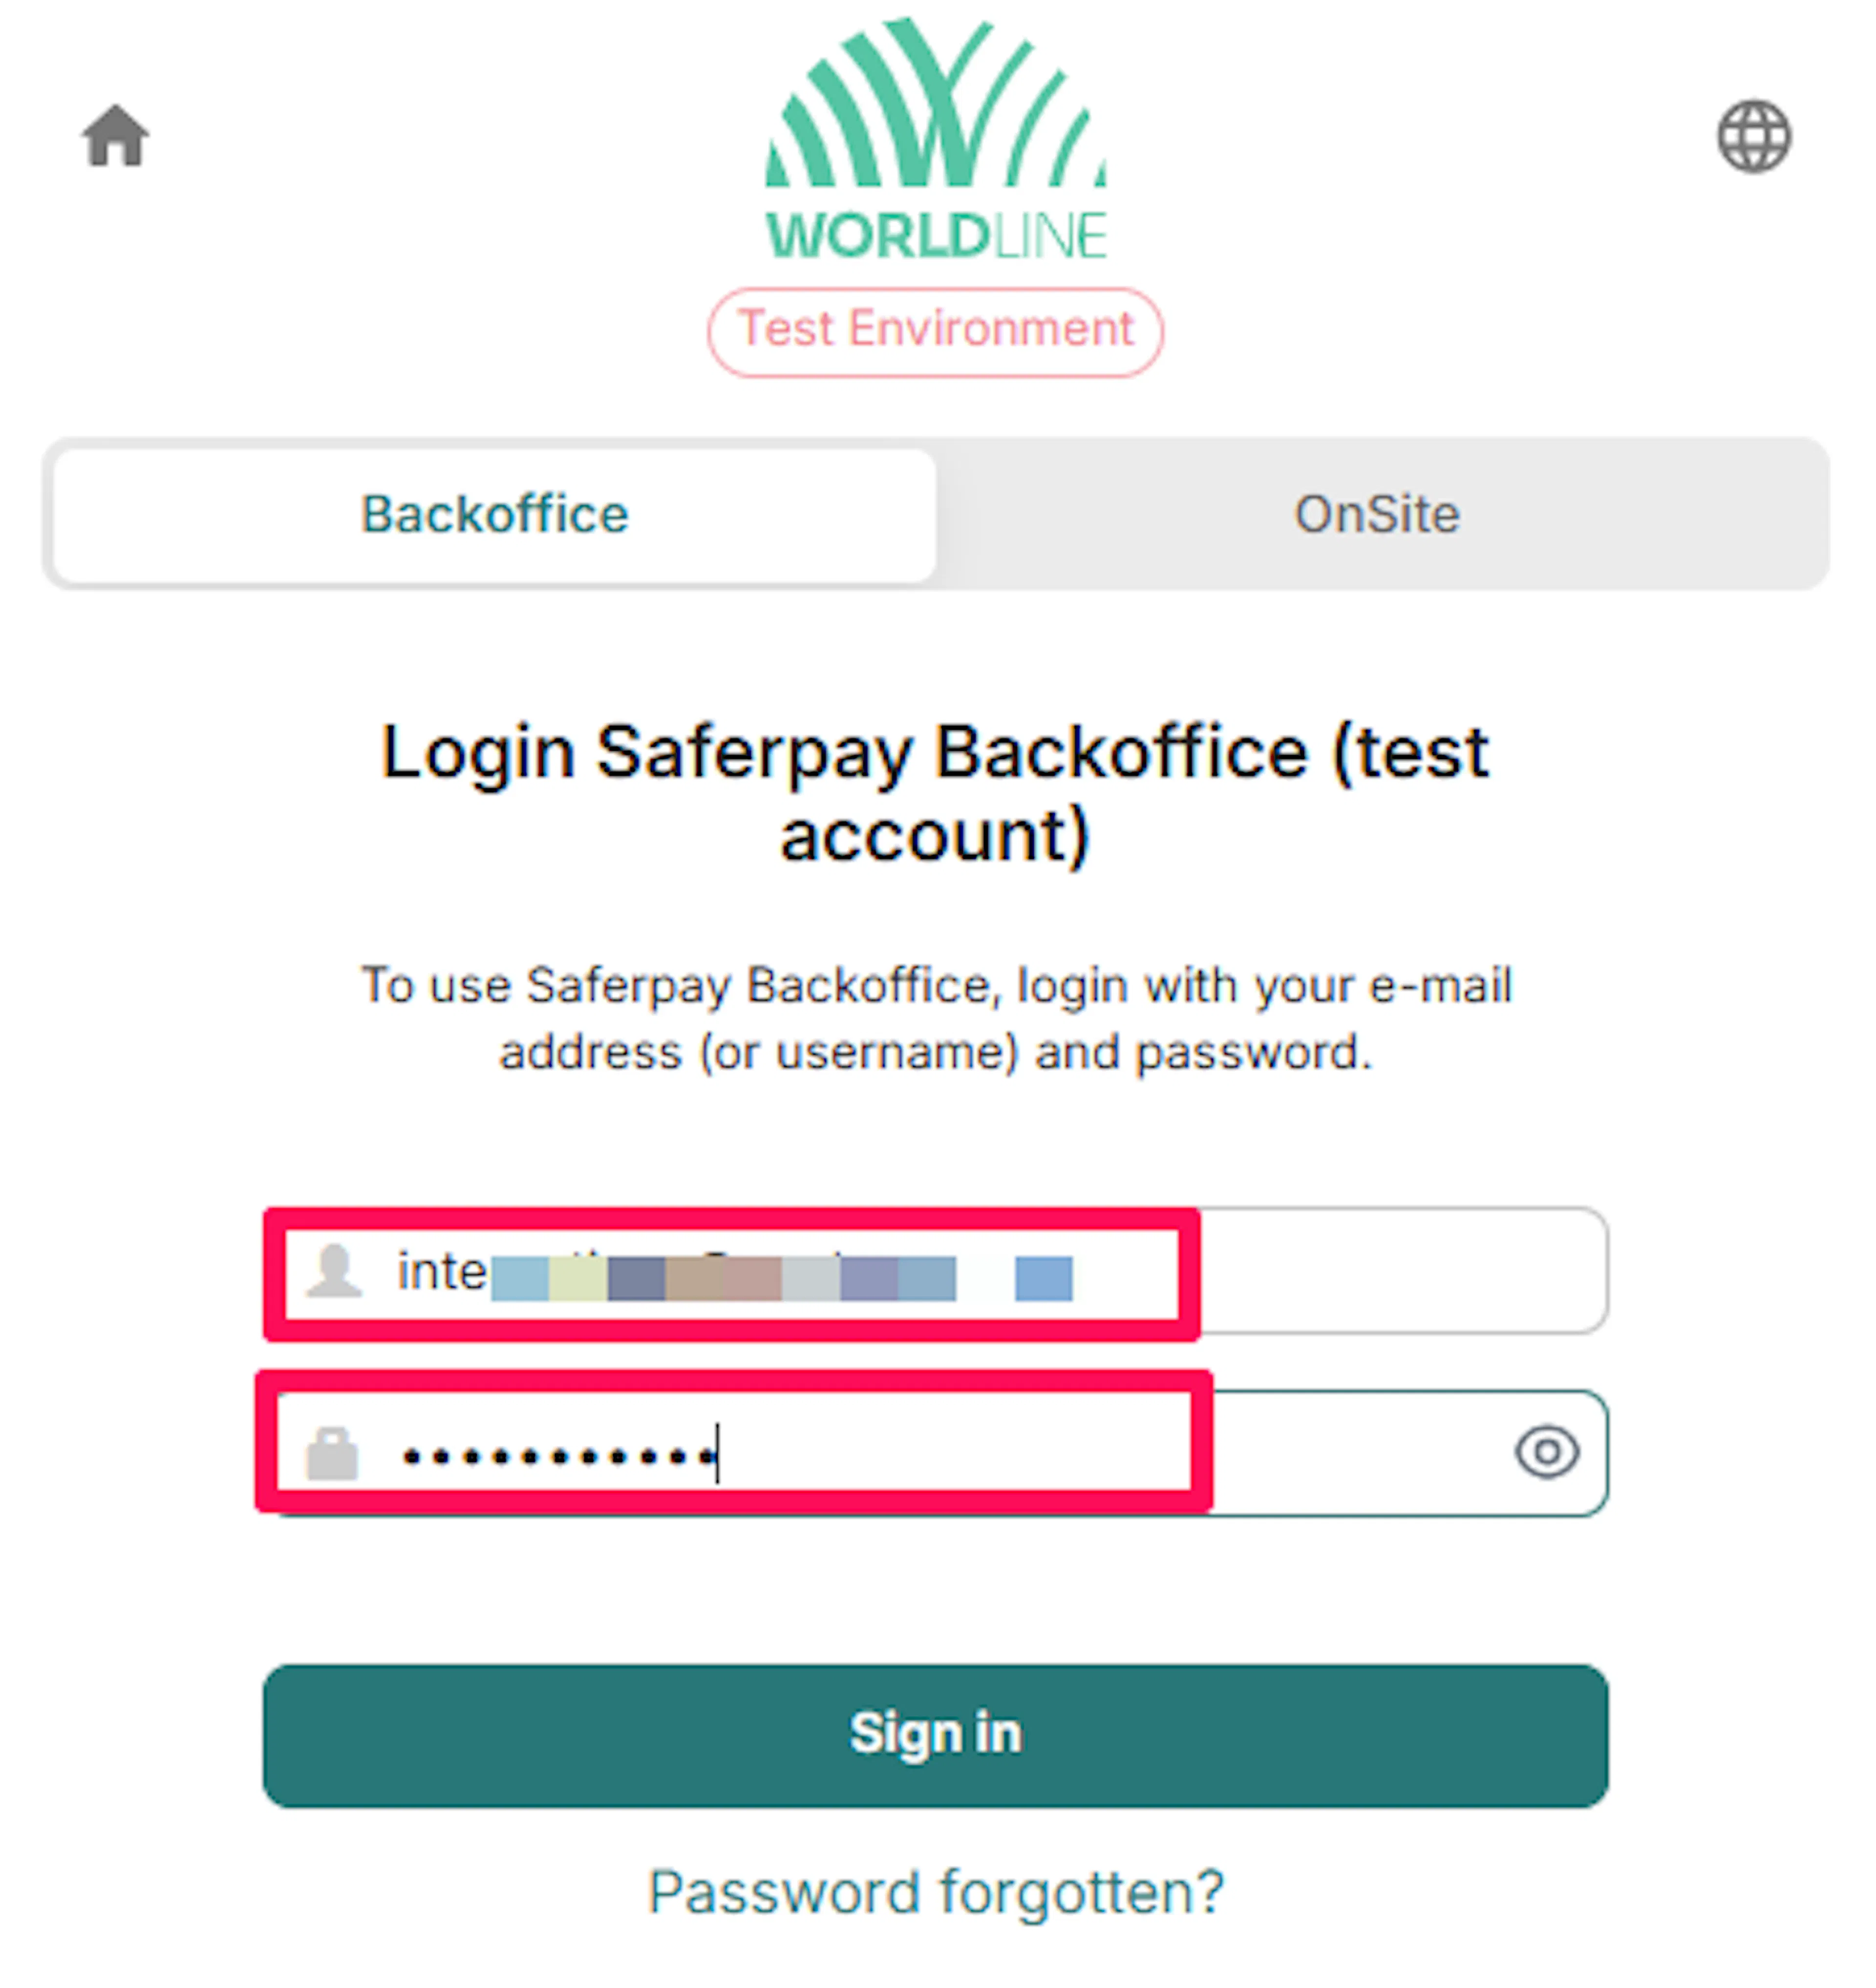
Log in to the Saferpay Backoffice
Test and live are completely separate Saferpay systems on mirrored URLs. For production, log in to the Live Saferpay Backoffice with your merchant login. For sandbox testing, use the Test Saferpay Backoffice instead. Your test and live credentials are separate and cannot be used interchangeably.
Copy your Customer ID and Terminal ID
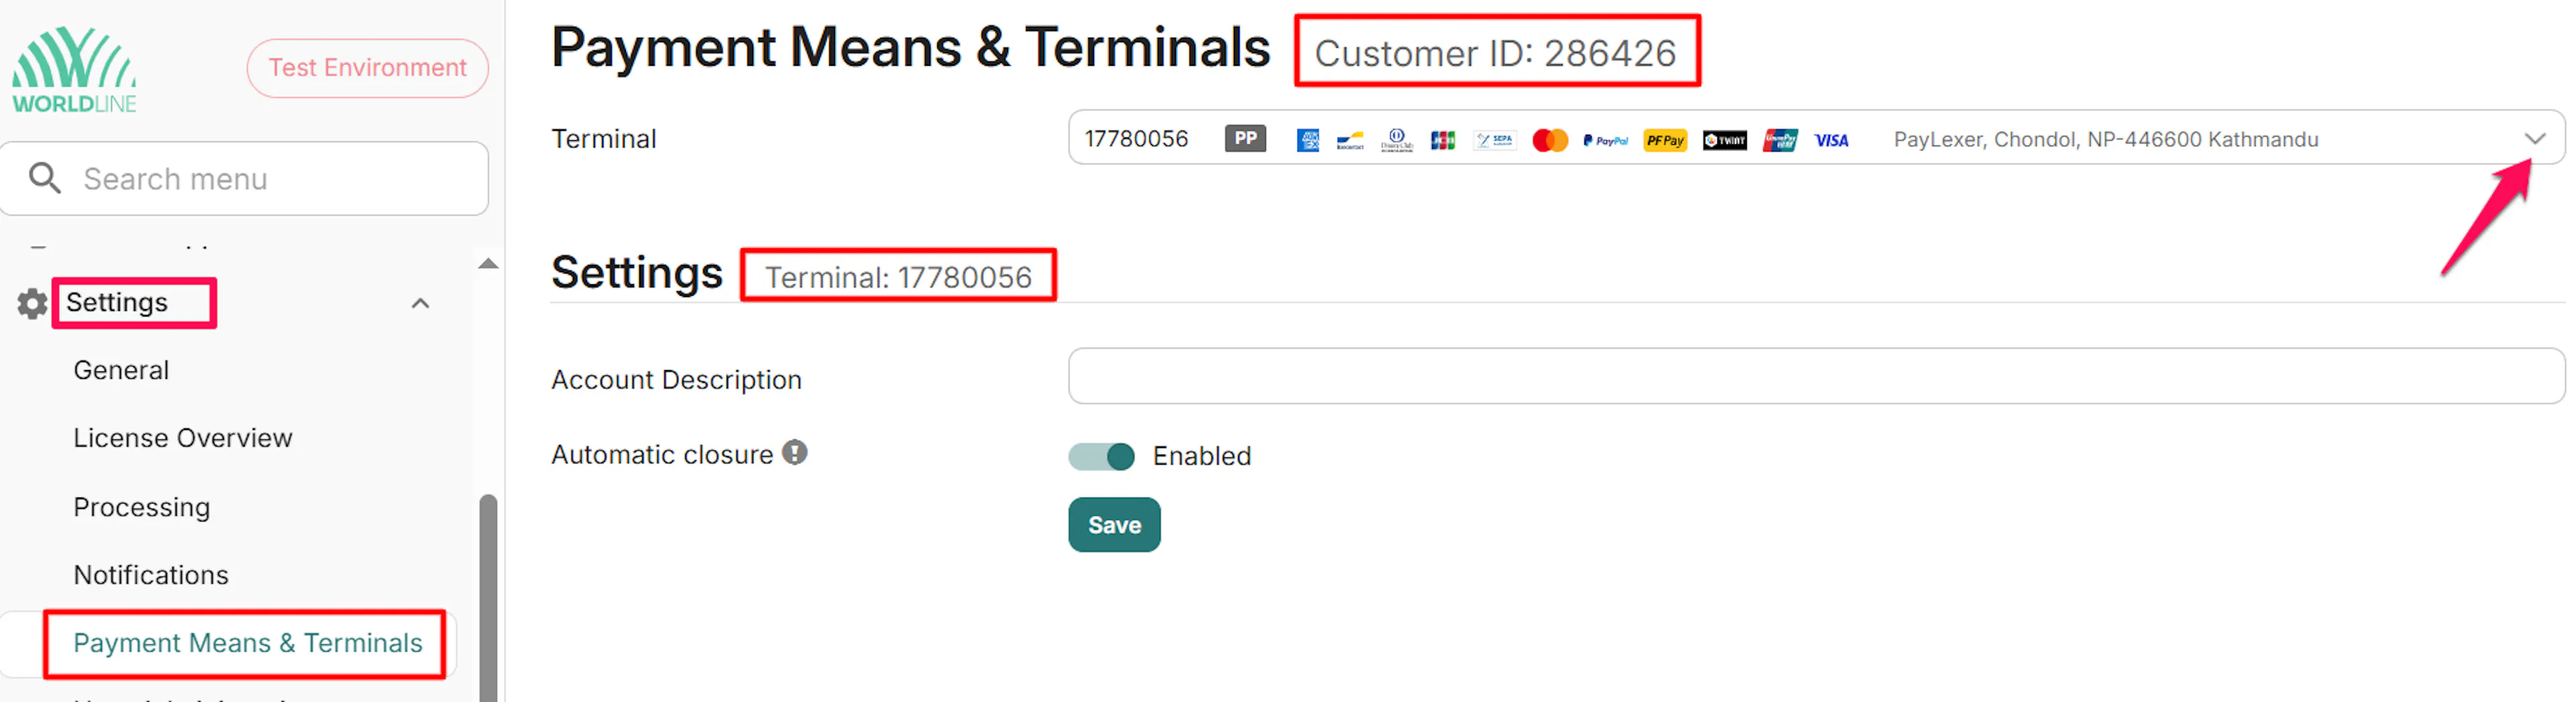
Your Customer ID identifies your account and your Terminal ID identifies the terminal that processes payments. Find them on the account overview and under Settings → Payment Means & Terminals. Copy both - you need to paste them into PayLexer.
Create your JSON API credentials
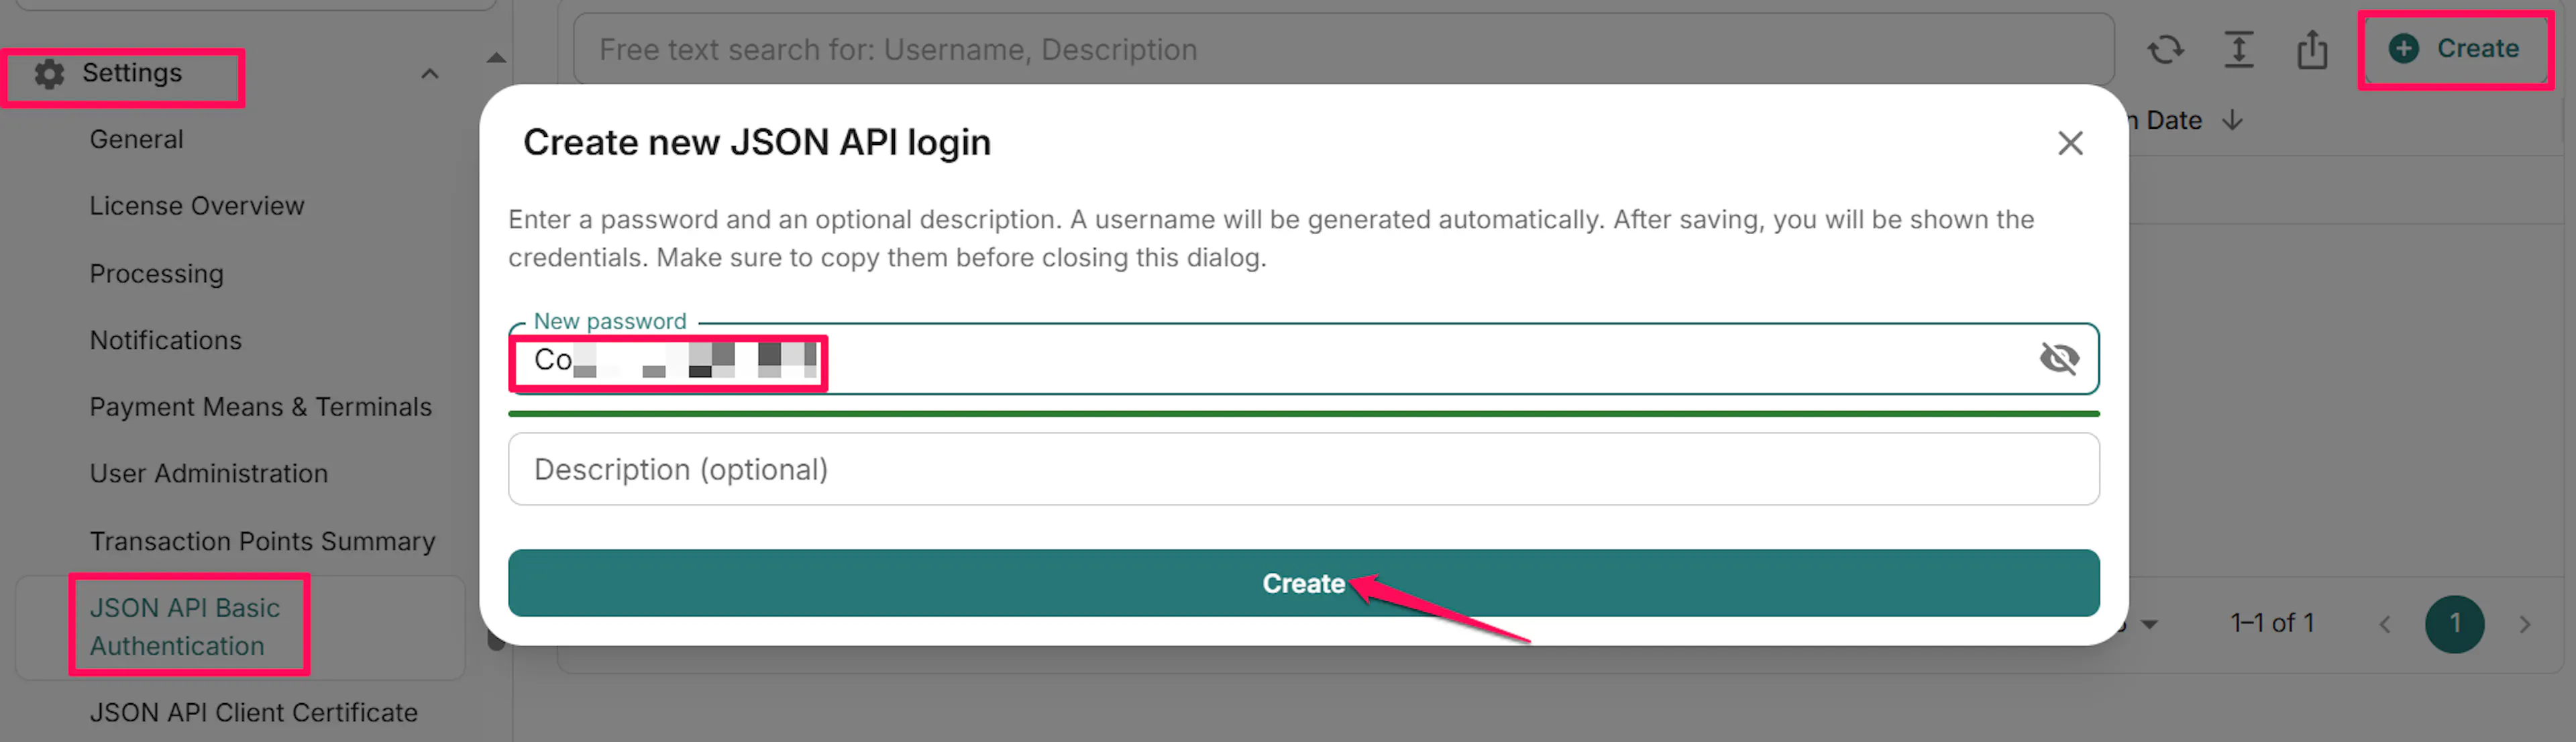
Go to Settings → JSON API Basic Authentication and create a new API user. Saferpay generates an API Username and an API Password - copy both.
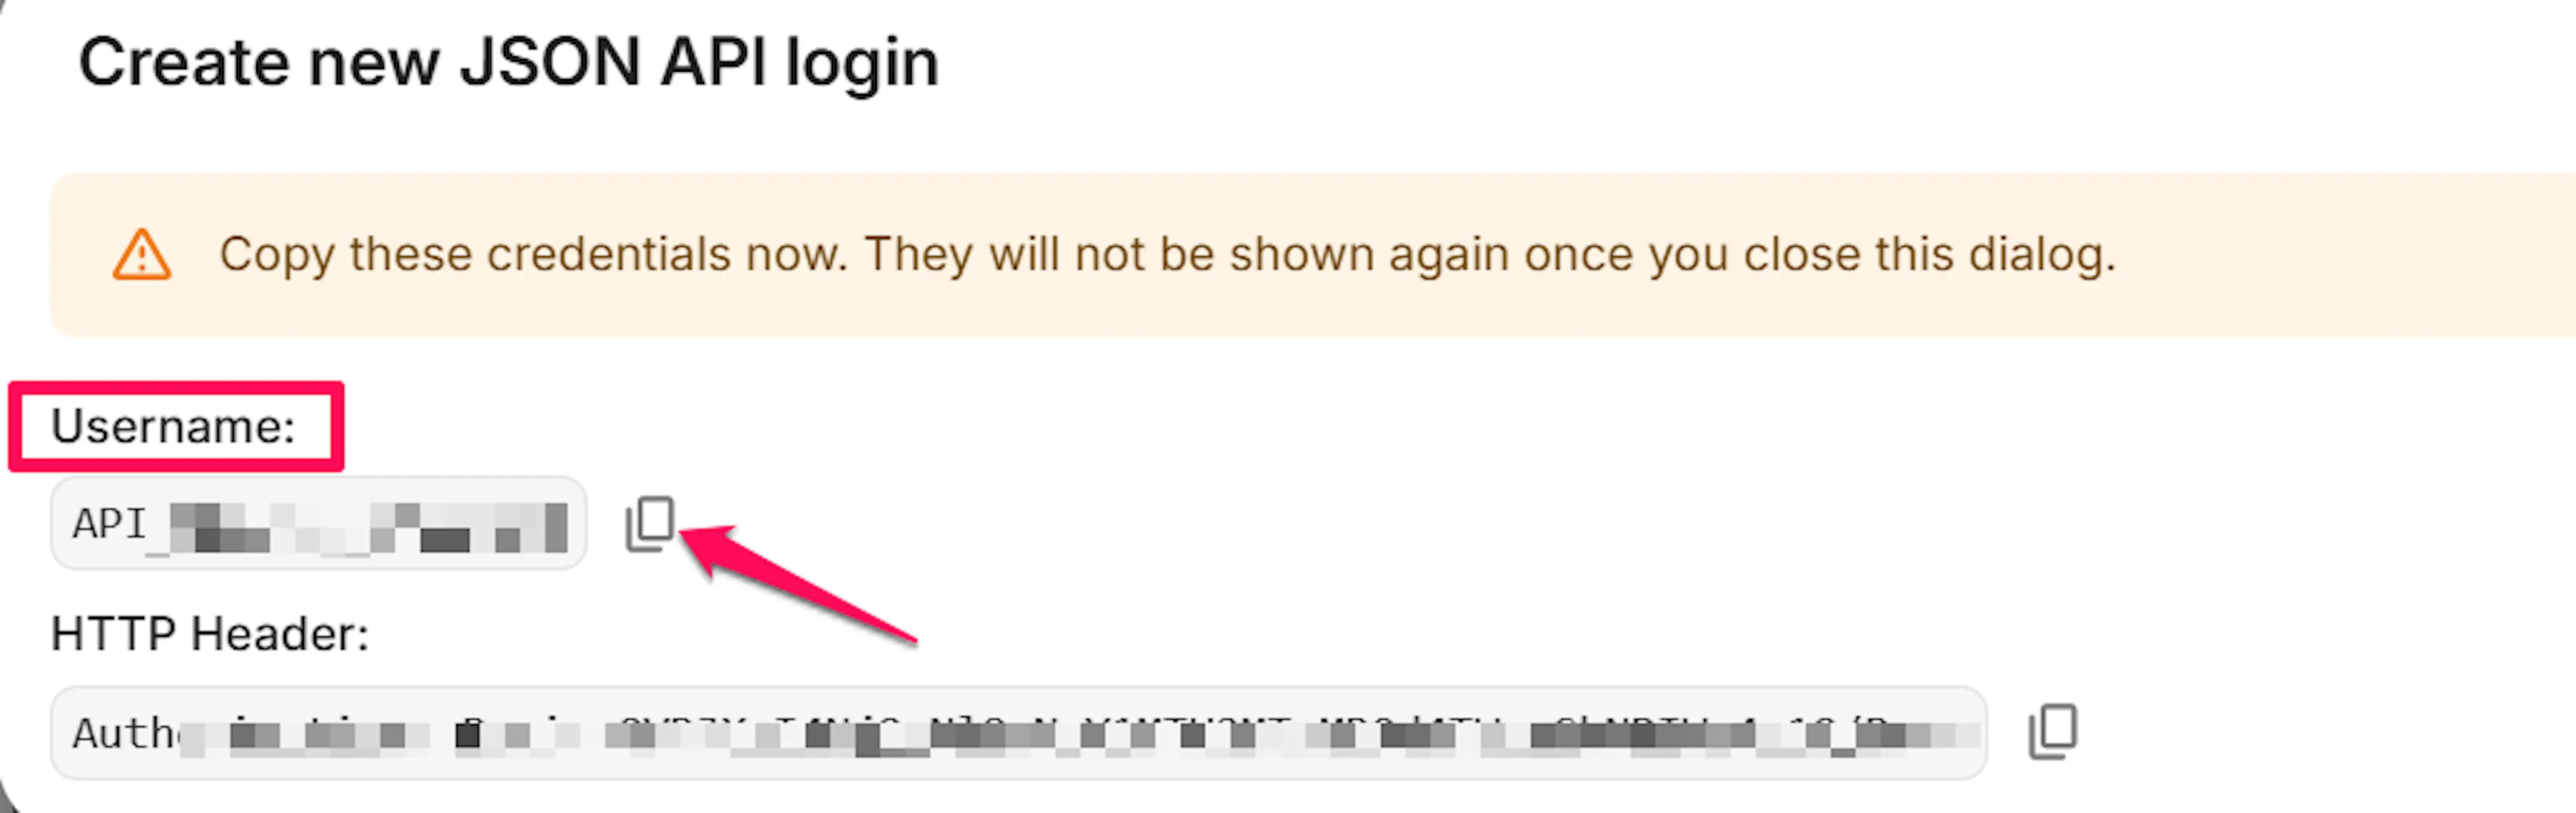
The API Password is a secret. Store it securely and never share it or expose it in client-side code.
Test and live use separate Saferpay hosts and accounts. Use Test Backoffice credentials for sandbox and Live Backoffice credentials for production. For refunds made in the Saferpay Backoffice, ask Saferpay to enable Management API (Transaction Reporting) access.
Adding Credentials to PayLexer
Open PayLexer Dashboard
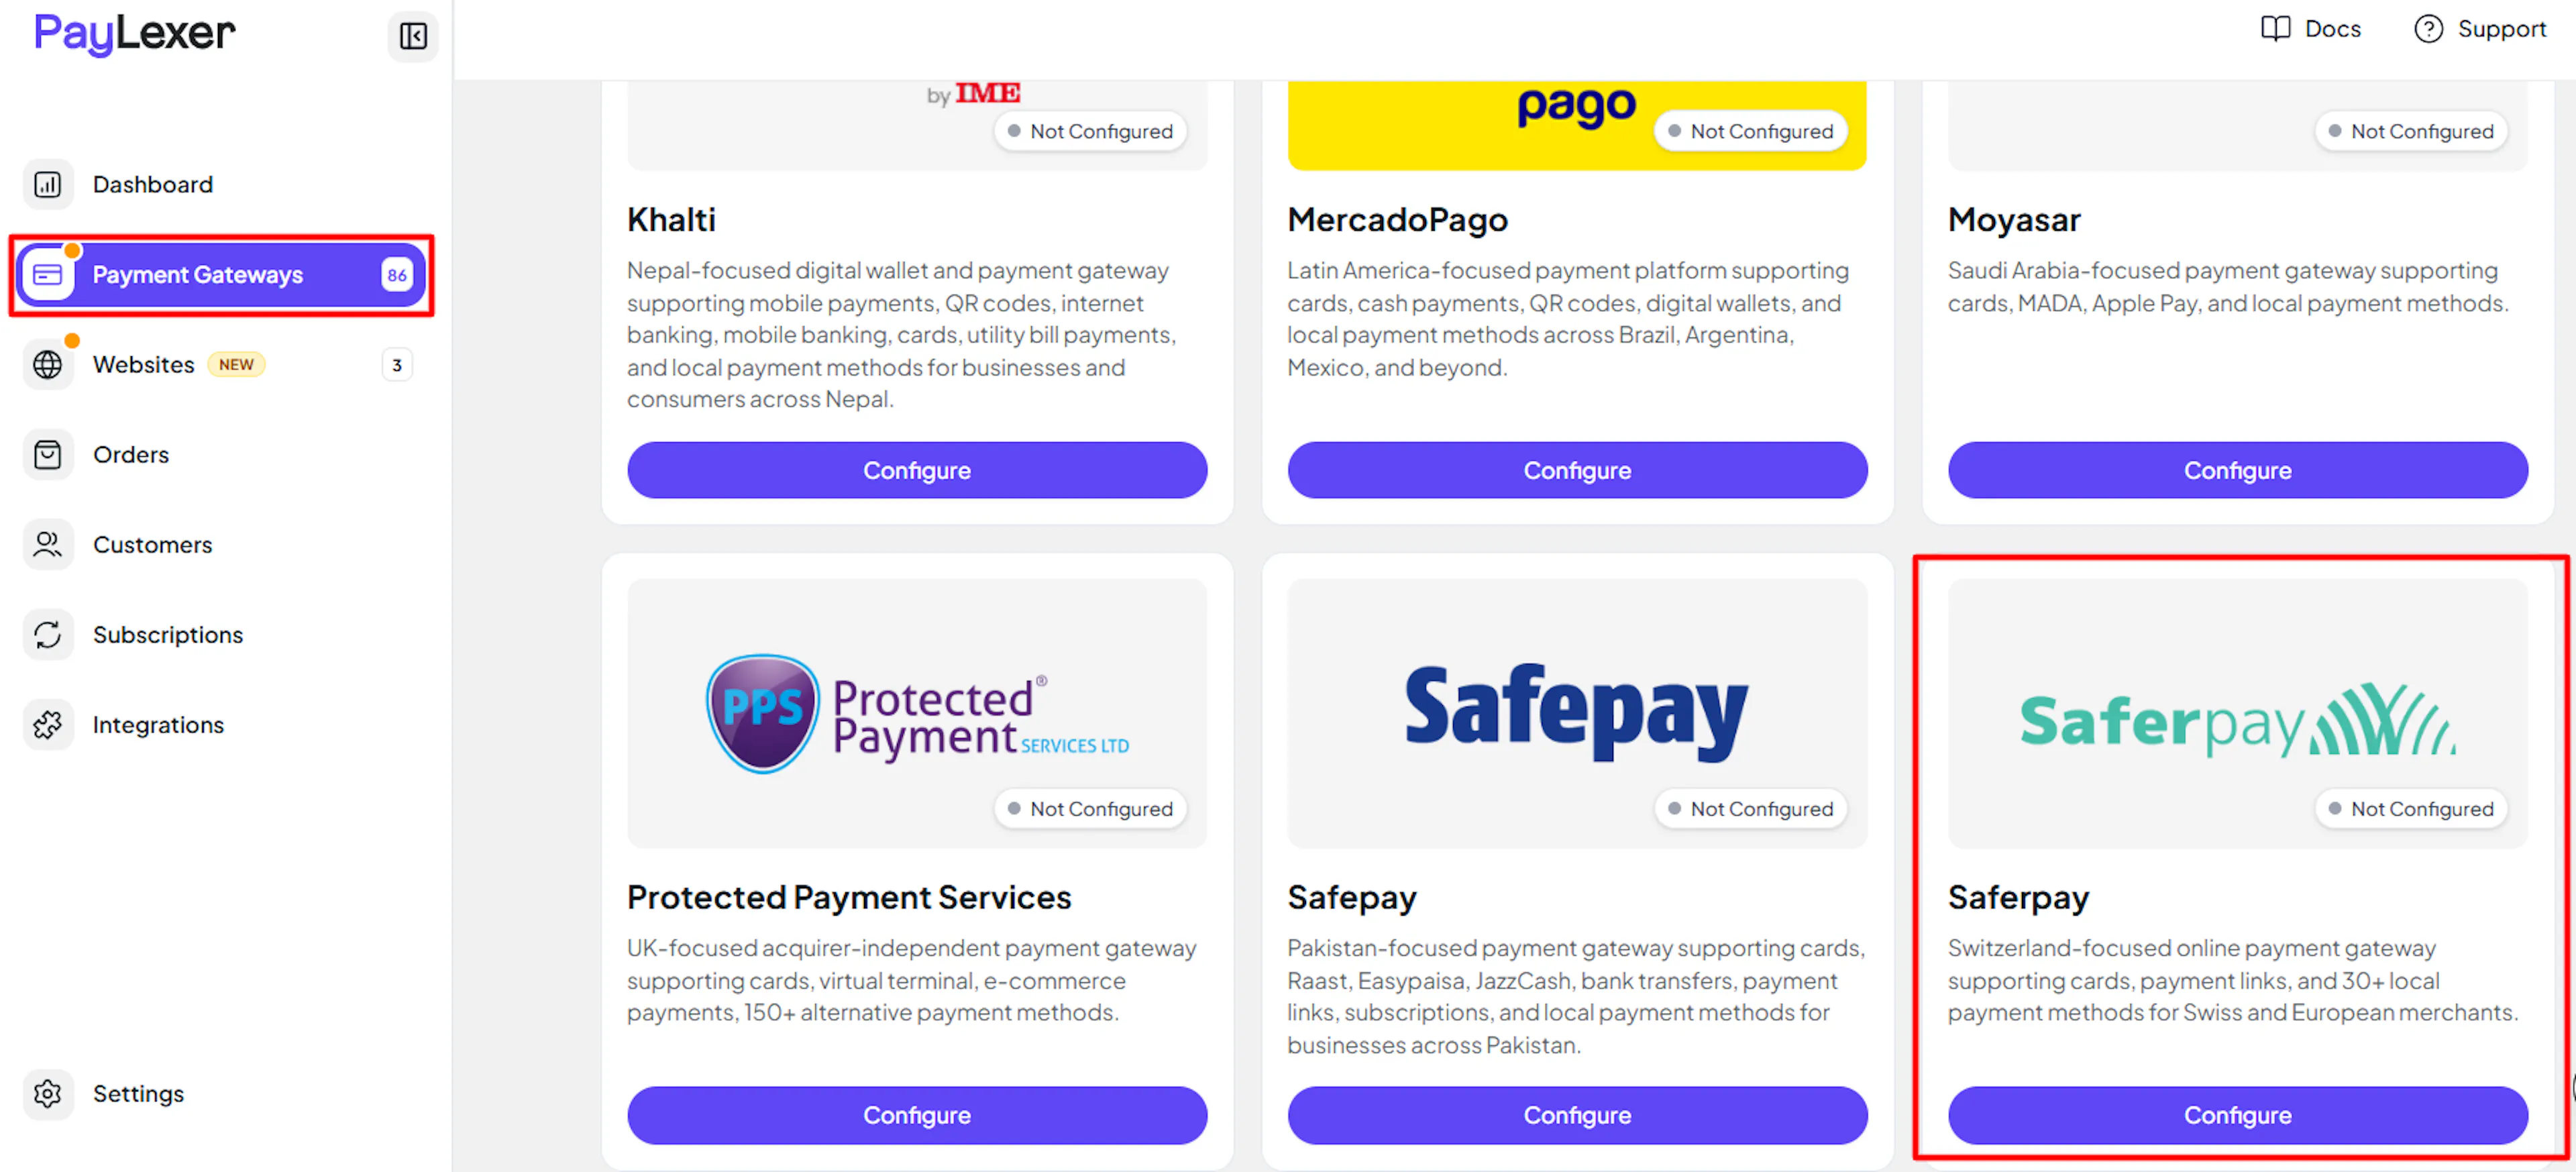
Log in to your PayLexer dashboard and navigate to Payment Gateways → Saferpay.
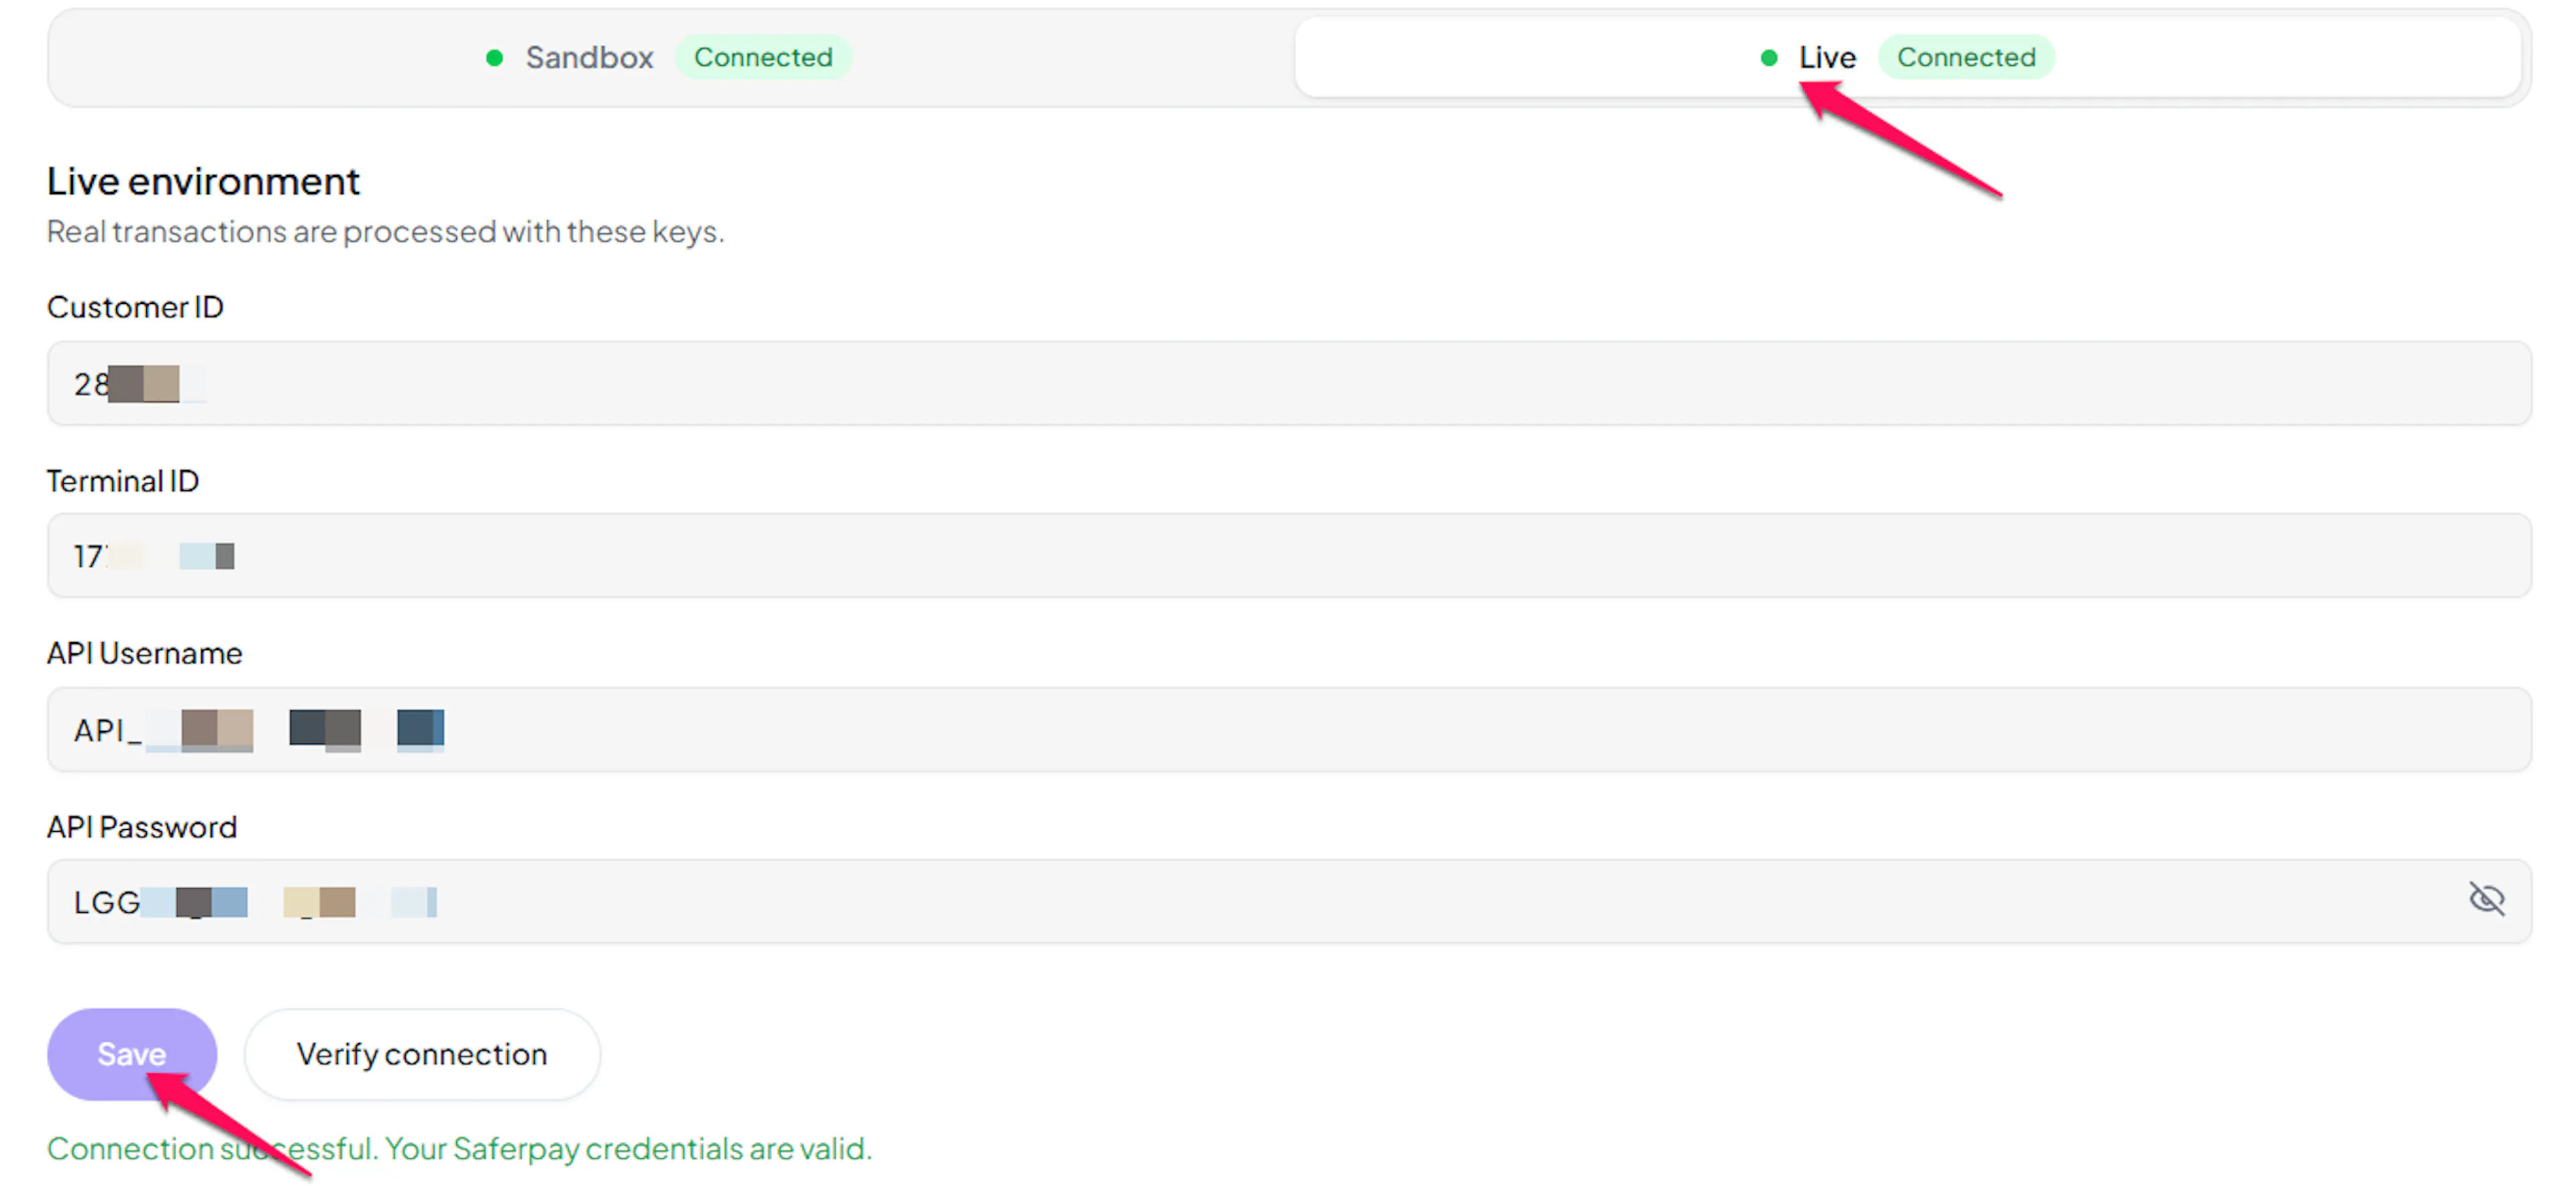
Enter your credentials
Paste the Customer ID, Terminal ID, API Username, and API Password you copied from Saferpay into the corresponding fields.
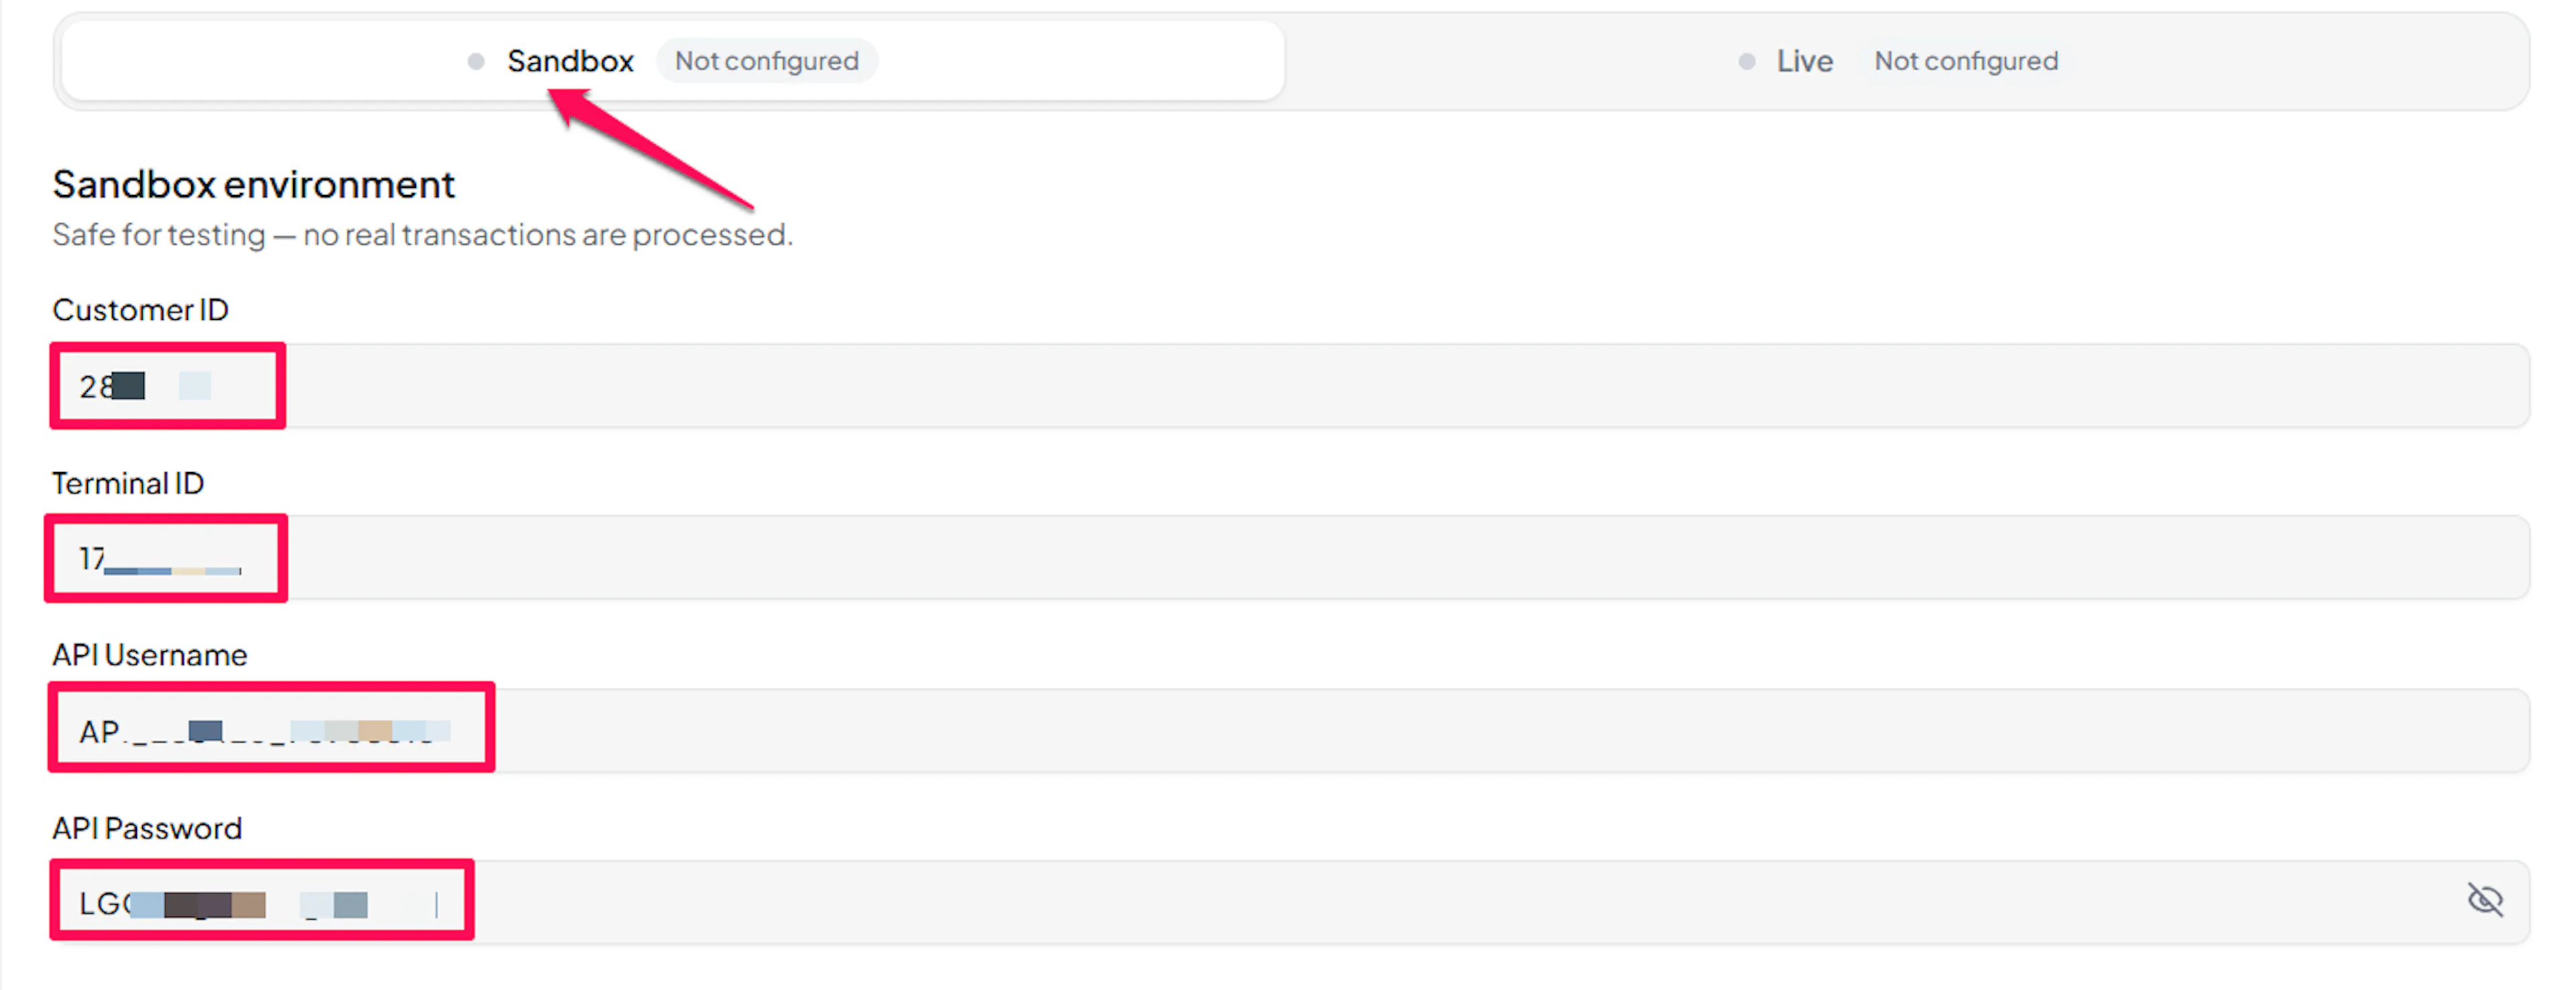
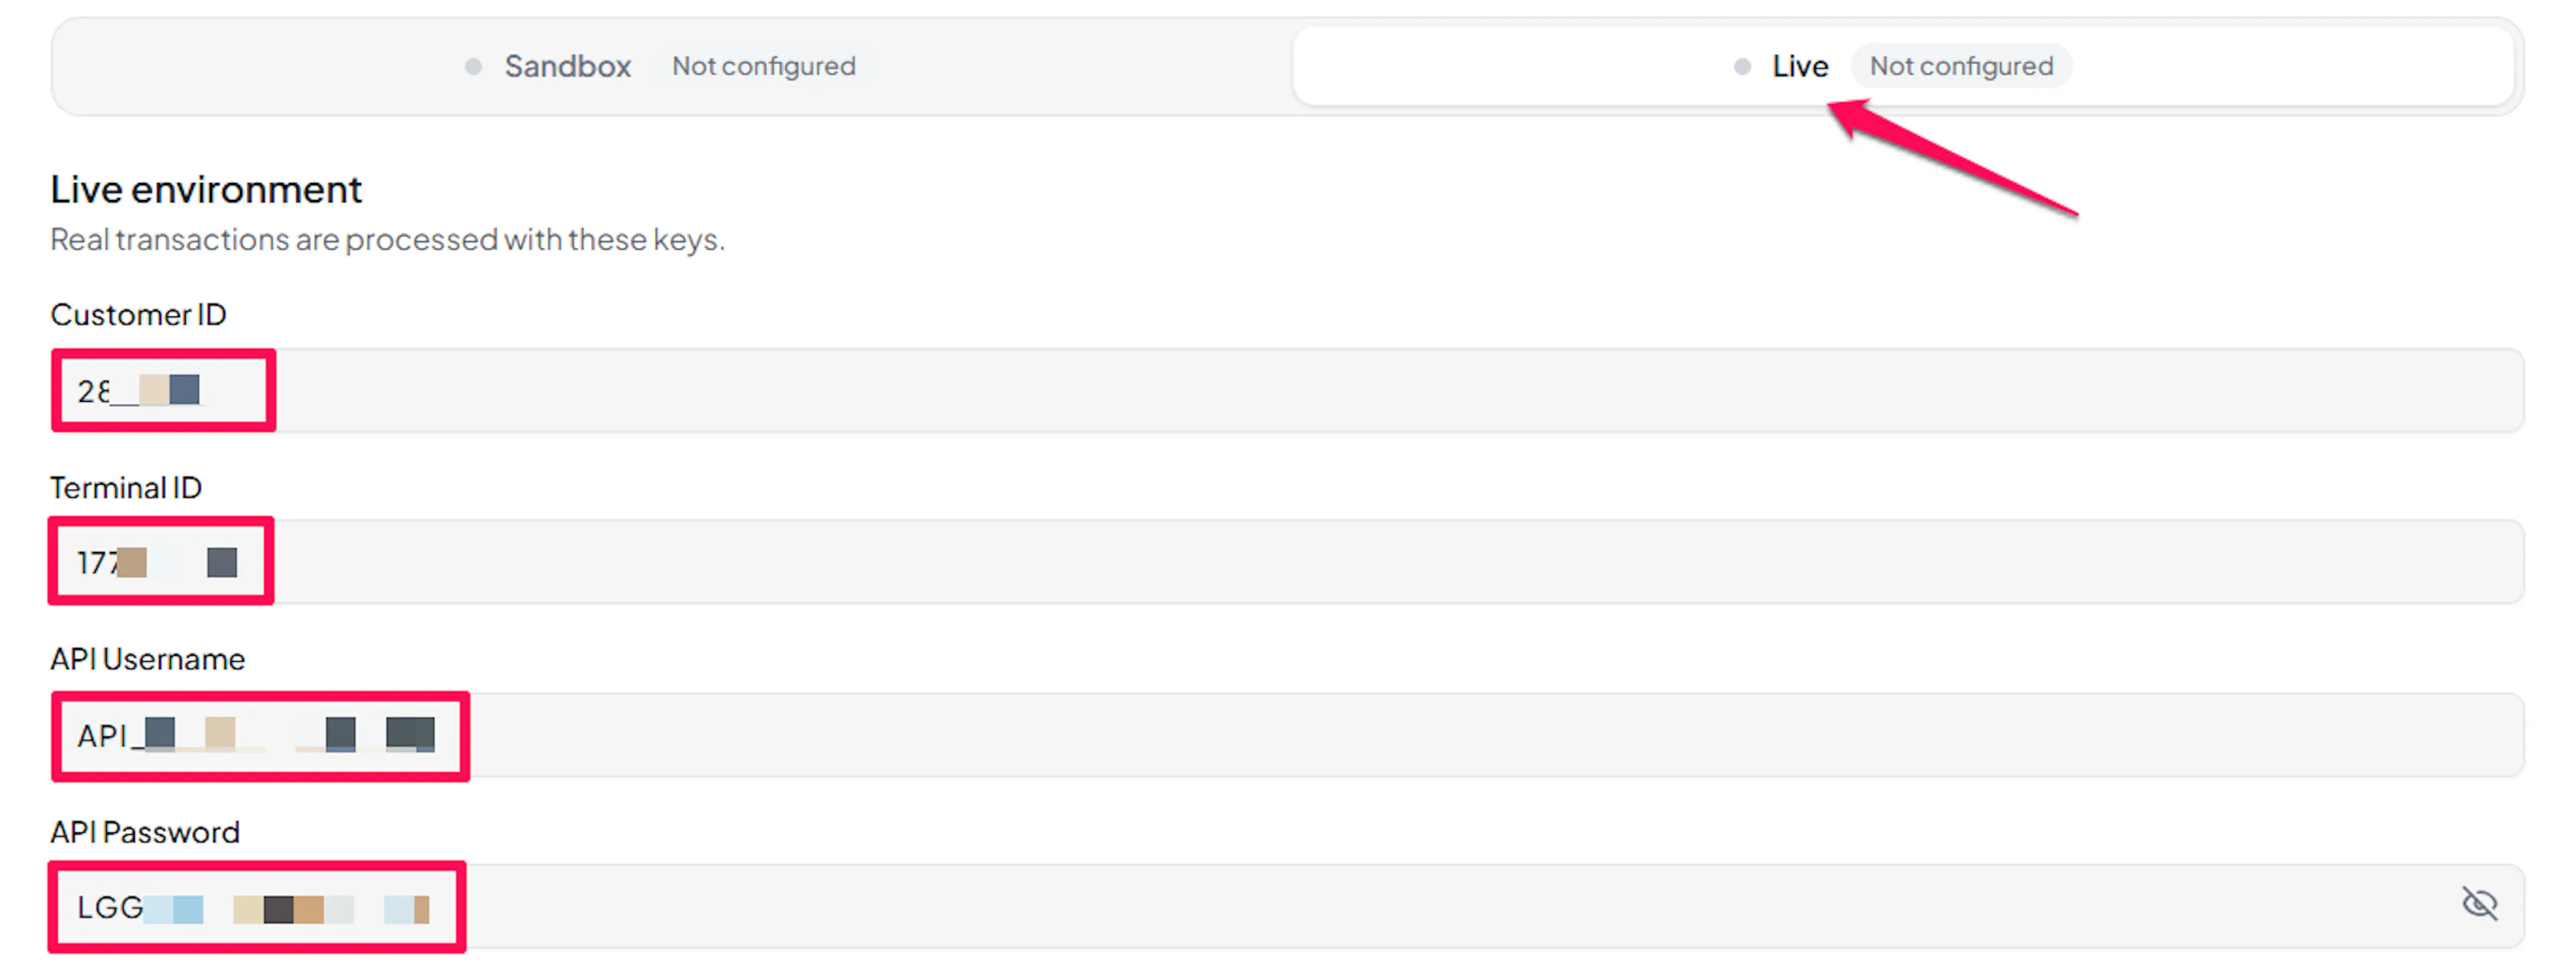
Understanding Live/Production and Sandbox Settings:
| Environment | Purpose |
|---|---|
| Live / Production (Mandatory) | Used for real transactions. Cannot be empty, even when testing. |
| Test / Sandbox (Optional) | Used for testing only. No real money is processed. |
How PayLexer selects credentials:
- Debug/Test mode ON → Test credentials are used
- Debug/Test mode OFF → Live credentials are used
Test and save
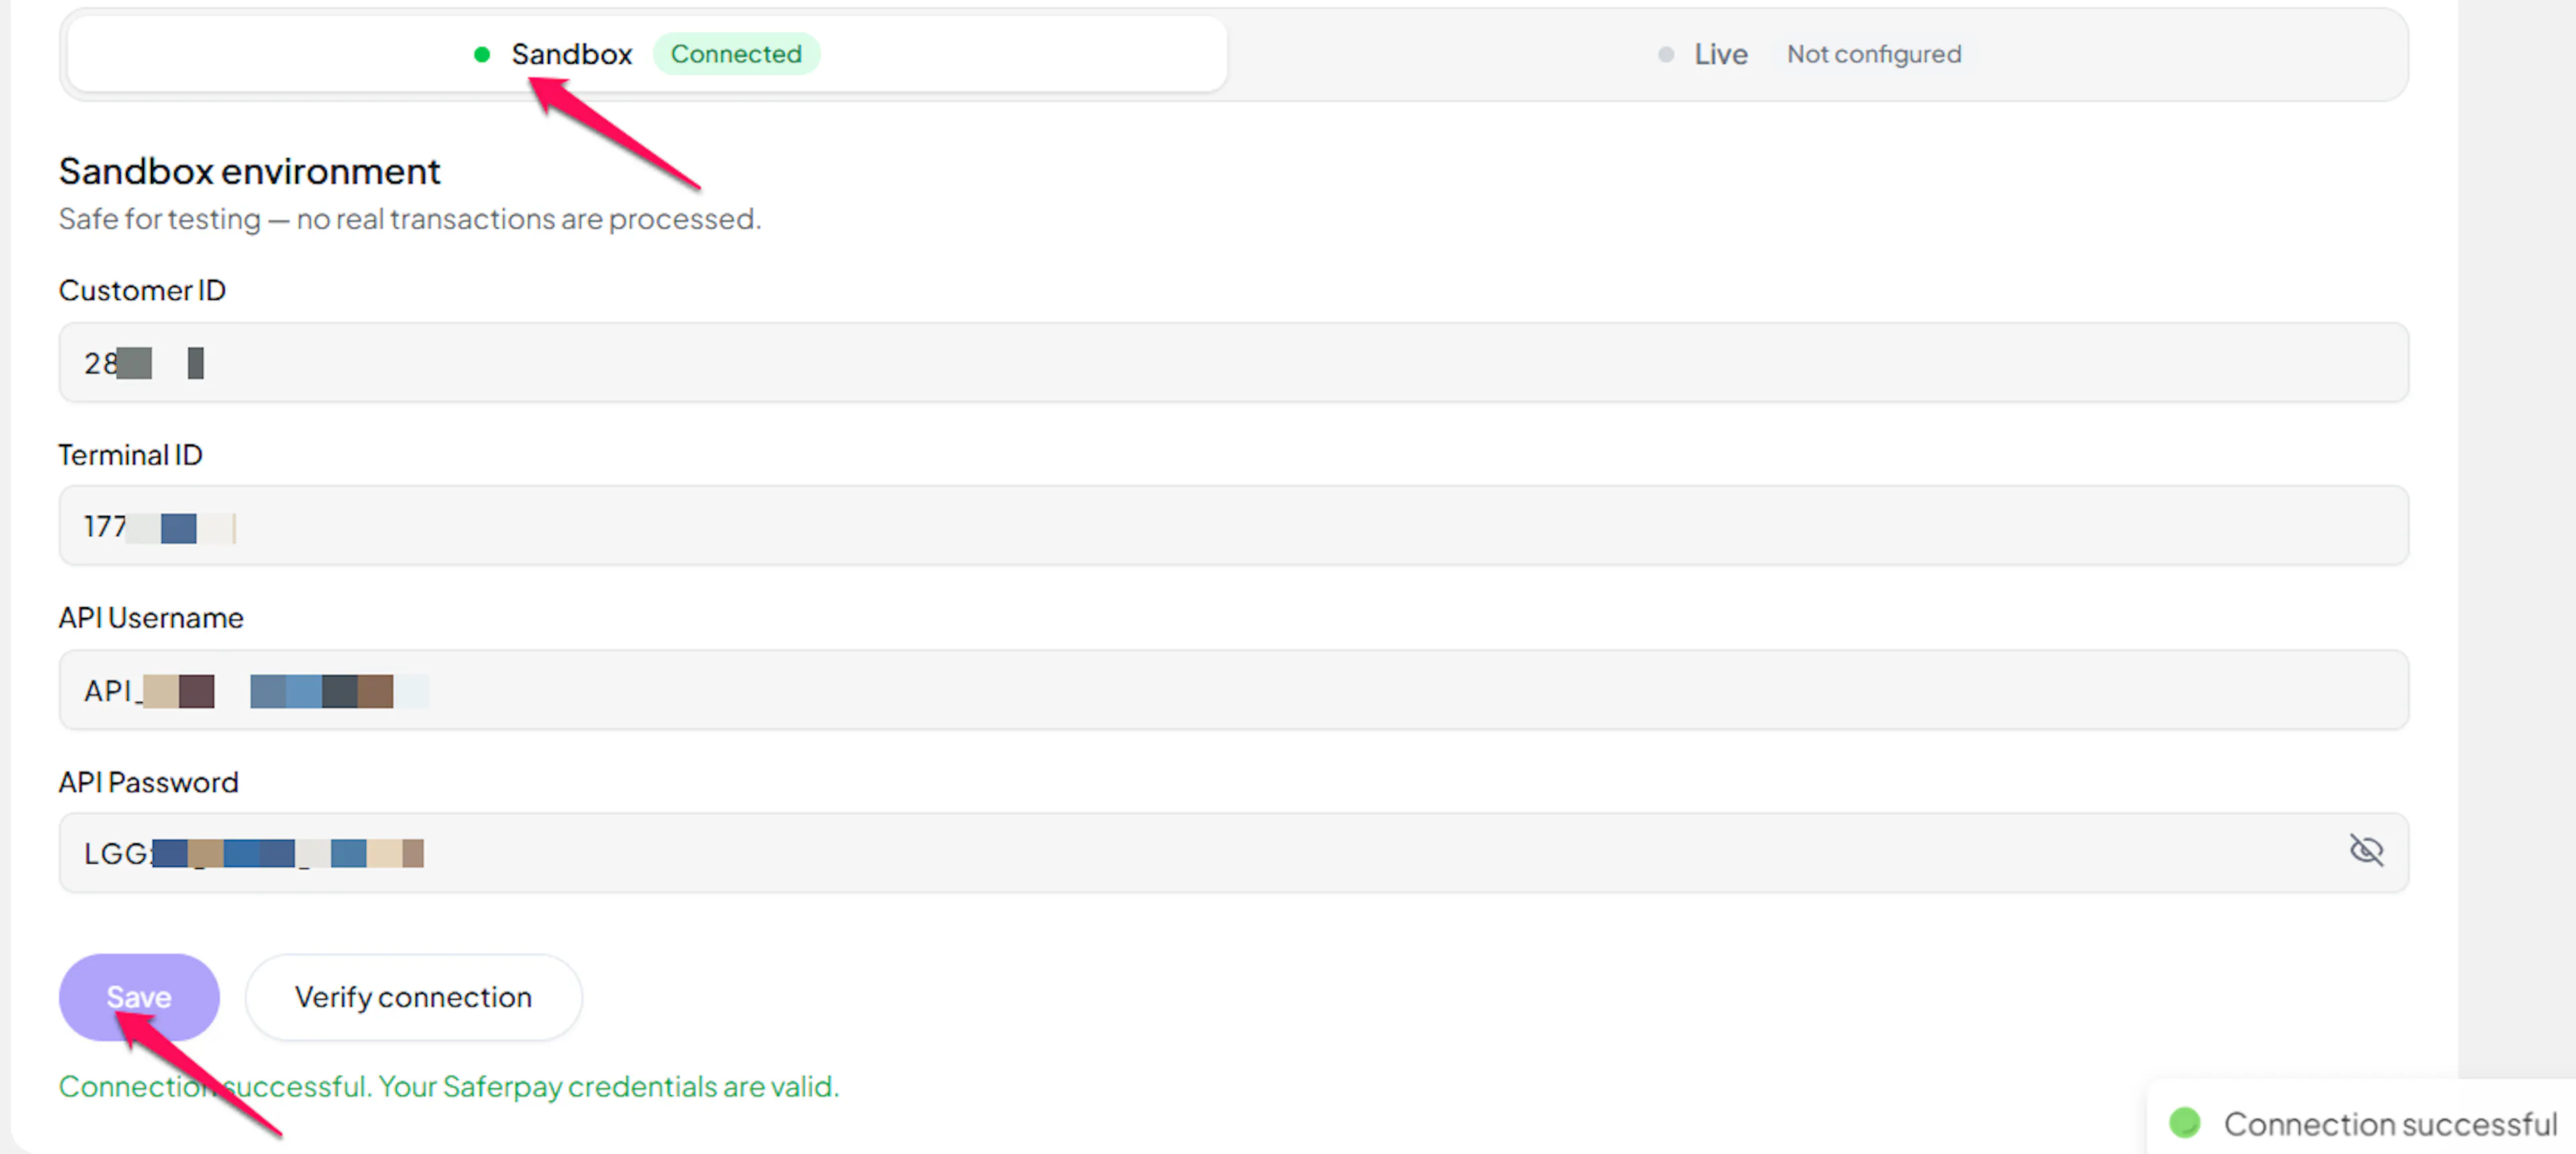
Click Save to save your configuration and verify your credentials. Click Verify Connection to test the connection.
Webhooks
Saferpay doesn't send classic event webhooks. Instead, it notifies PayLexer server-to-server the moment a payment finishes, using Saferpay's built-in Notification URL. This notification fires in addition to the shopper's return to your store, independently of whether that return succeeds. PayLexer registers the notification URLs automatically on every payment, so no manual setup is required.
Benefits of automatic notifications:
- Real-time payment status updates
- Reliable settlement even if the shopper's return trip is interrupted, since PayLexer verifies the outcome directly with Saferpay
- No configuration needed - the notification URL is registered automatically
When a shopper completes payment, PayLexer confirms the result and they return to your store. Saferpay also sends a server-to-server notification for the same result. If the shopper's return is interrupted - they close the tab or lose their connection - PayLexer already has this notification and verifies the outcome directly with Saferpay to complete the order, so the order is confirmed even when the redirect back to your store fails.
Refunds are handled separately, because Saferpay sends no notification for them:
- Refunds you make inside PayLexer are recorded immediately.
- Refunds you issue directly in the Saferpay Backoffice are picked up by PayLexer's back-office refund reconciliation on its next scheduled run. This requires the Management API (Transaction Reporting) permission on your Saferpay account.
Because Saferpay confirms each payment both on the shopper's return and through a server-to-server notification, payments settle reliably even if the shopper never makes it back to your store. Saferpay's refund reporting only covers completed days, so a refund issued directly in the Backoffice may take until the following day to appear in PayLexer.
Integrate Saferpay to Your Website
If you have already added and configured your site, you can enable Saferpay in your existing setup.
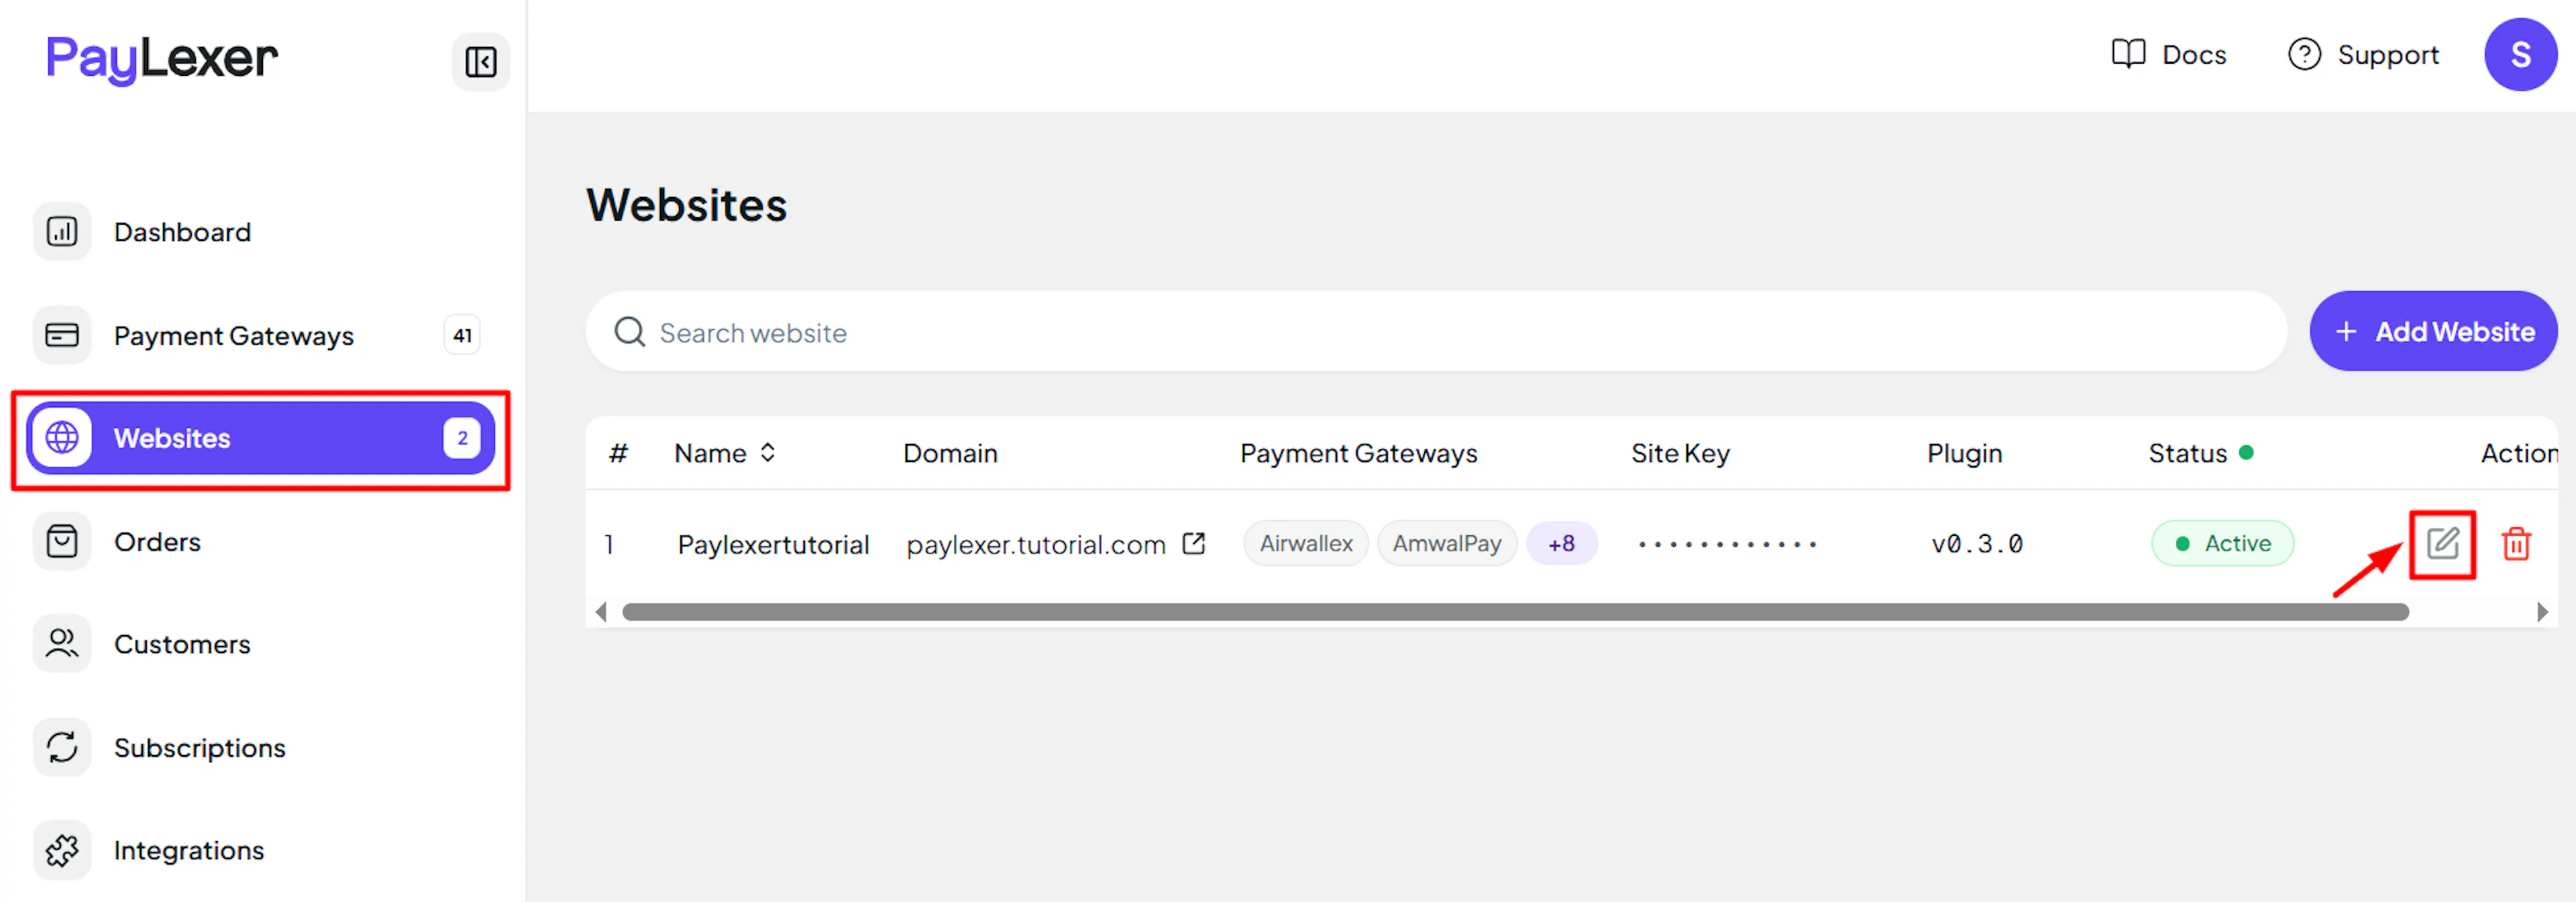
Go to Websites
Navigate to Websites in your PayLexer dashboard.
Edit your website
Click the Edit Icon of your added website.
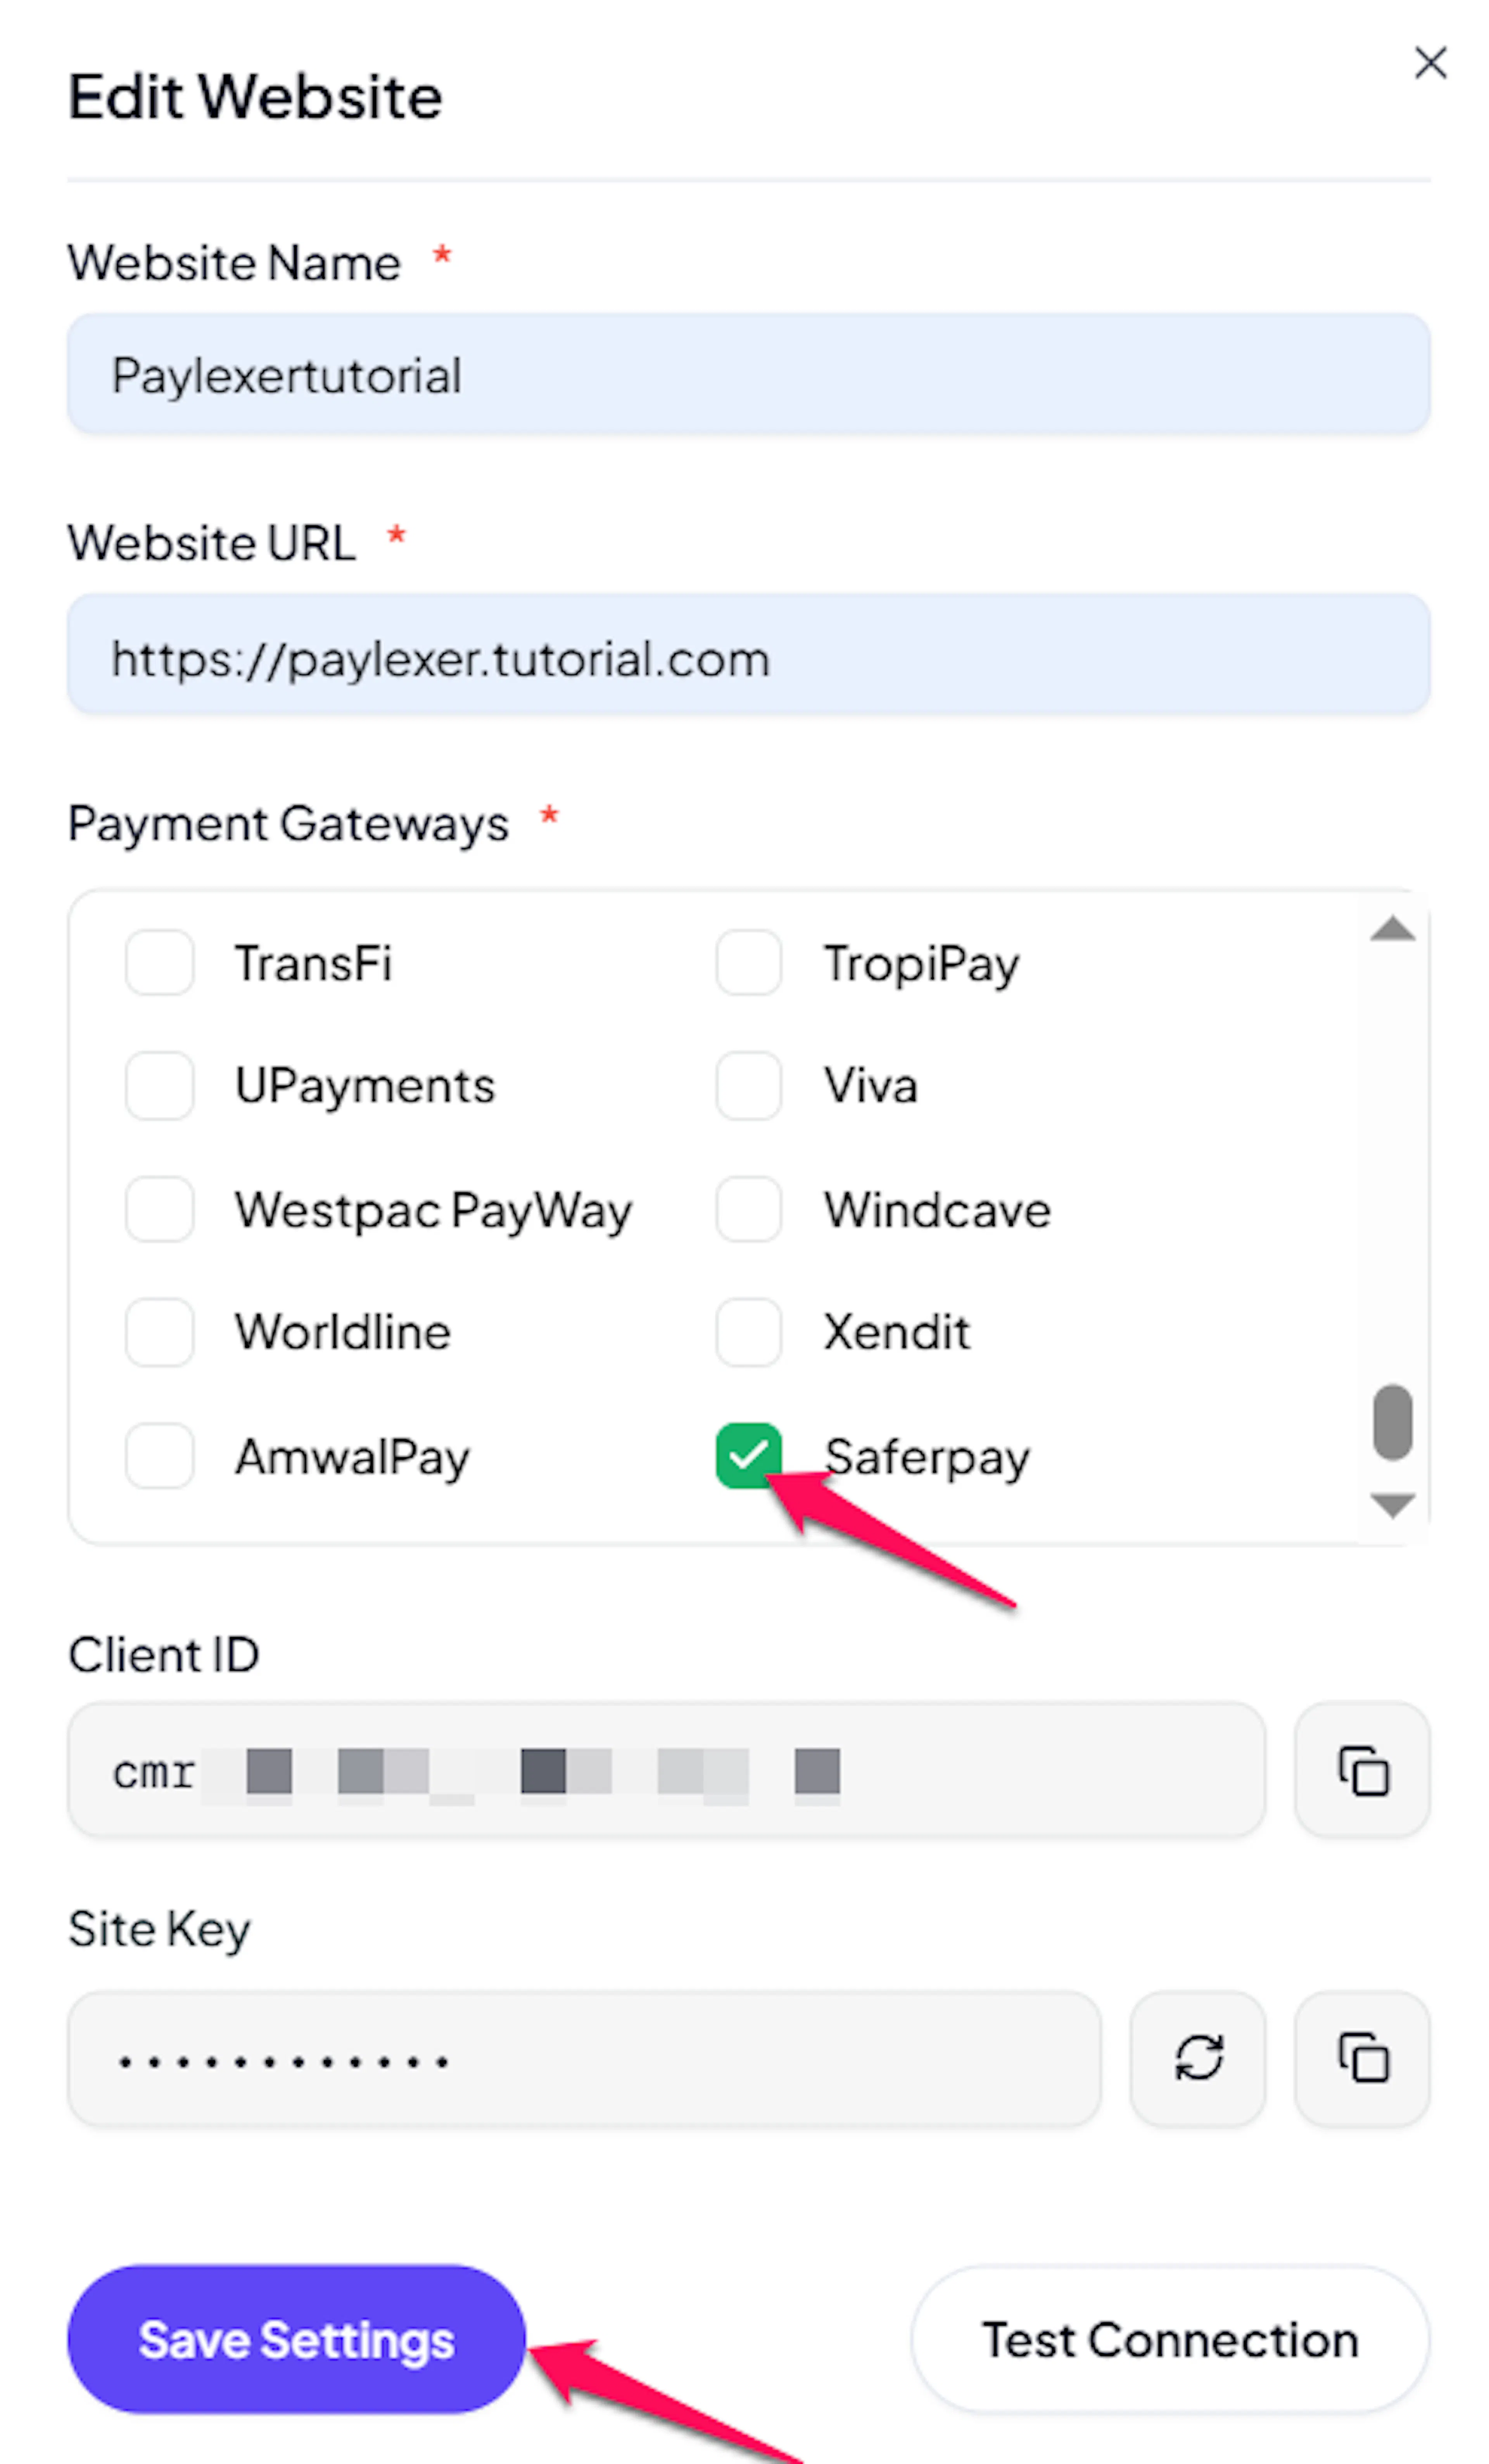
Enable Saferpay
Click the checkbox to enable Saferpay for the website.
If you haven't added a website yet, Continue to Add Your Website →
Troubleshooting
Best Practices
- Test in your Saferpay Test Backoffice before enabling production credentials.
- Keep your API Username and API Password secret - never share them or expose them in client-side code.
- Use only supported currencies at checkout to avoid declined payments.
- Enable the payment methods you want to offer on your Saferpay terminal before going live.
- To keep refunds in sync, prefer issuing refunds from PayLexer. If you refund in the Saferpay Backoffice, make sure the Management API (Transaction Reporting) permission is enabled so PayLexer can reconcile it.
FAQs
Still Have Questions?
- Saferpay Support: Saferpay Documentation and Support
- PayLexer Support: Contact Support