

Datatrans
Connect Datatrans to PayLexer to accept card, TWINT and PostFinance payments across Switzerland and the DACH region, and issue full or partial refunds.
Datatrans is Switzerland's best-known payment gateway, headquartered in Zurich. It is the payment processor already used by Swiss merchants and their banks, bringing together the local payment methods Swiss shoppers expect, including TWINT and PostFinance, along with international cards. PayLexer connects to Datatrans and sends shoppers to Datatrans' secure payment page to complete their payment, so card details never pass through your website or PayLexer.
- Supported Regions (Merchant Accounts): Switzerland, Liechtenstein, Austria, Germany and neighbouring European markets
- Supported Currencies: CHF, EUR, USD, GBP, DKK, NOK, SEK, PLN, CZK and HUF - view full list
Datatrans accepts a currency only when your own acquiring contract covers it. If a currency in the list above is not part of your contract, Datatrans rejects the payment rather than charging a different currency.
Supported Features
- Accept payments on Datatrans' hosted payment page, so card data never reaches your website
- Offer every payment method your Datatrans account has enabled, including cards, TWINT and PostFinance
- Charge in ten currencies, subject to your acquiring contract
- Capture payments automatically at authorization, so funds are taken rather than only reserved
- Issue full refunds on completed payments
- Issue partial refunds, including several partial refunds against the same payment
- Pick up refunds and cancellations you perform in the Datatrans dashboard, so your store's orders stay correct either way
- Receive signed, real-time payment notifications with 3-D Secure and PSD2 SCA handled by Datatrans
- Separate Test (sandbox) and Live (production) credentials, servers and merchant IDs
Datatrans on PayLexer supports one-time payments and refunds. Recurring subscription billing is not available for this gateway, because Datatrans does not run the billing schedule itself.
Before You Start
Make sure you have:
- Datatrans Account – Datatrans issues merchant accounts through its sales team rather than self-service signup. Contact Datatrans to request an account →
- PayLexer Account – Required to configure the integration. Create your account →
- A website where you want to integrate
Looking for a different payment processor? View all supported gateways →
Configuring Datatrans
You need a Merchant ID, a Server-to-Server Security Password and an HMAC Key from Datatrans for this integration.
The Server-to-Server Security Password is not the password you use to log in to the Datatrans dashboard. It is a separate value on the dashboard's security page. Confusing the two is the most common Datatrans setup mistake and produces a rejected-credentials error.
Getting API Credentials
Log in to the Datatrans dashboard
Sign in at admin.datatrans.com for production, or admin.sandbox.datatrans.com for sandbox. Test and live are separate accounts with separate merchant IDs, so make sure you are in the right one.
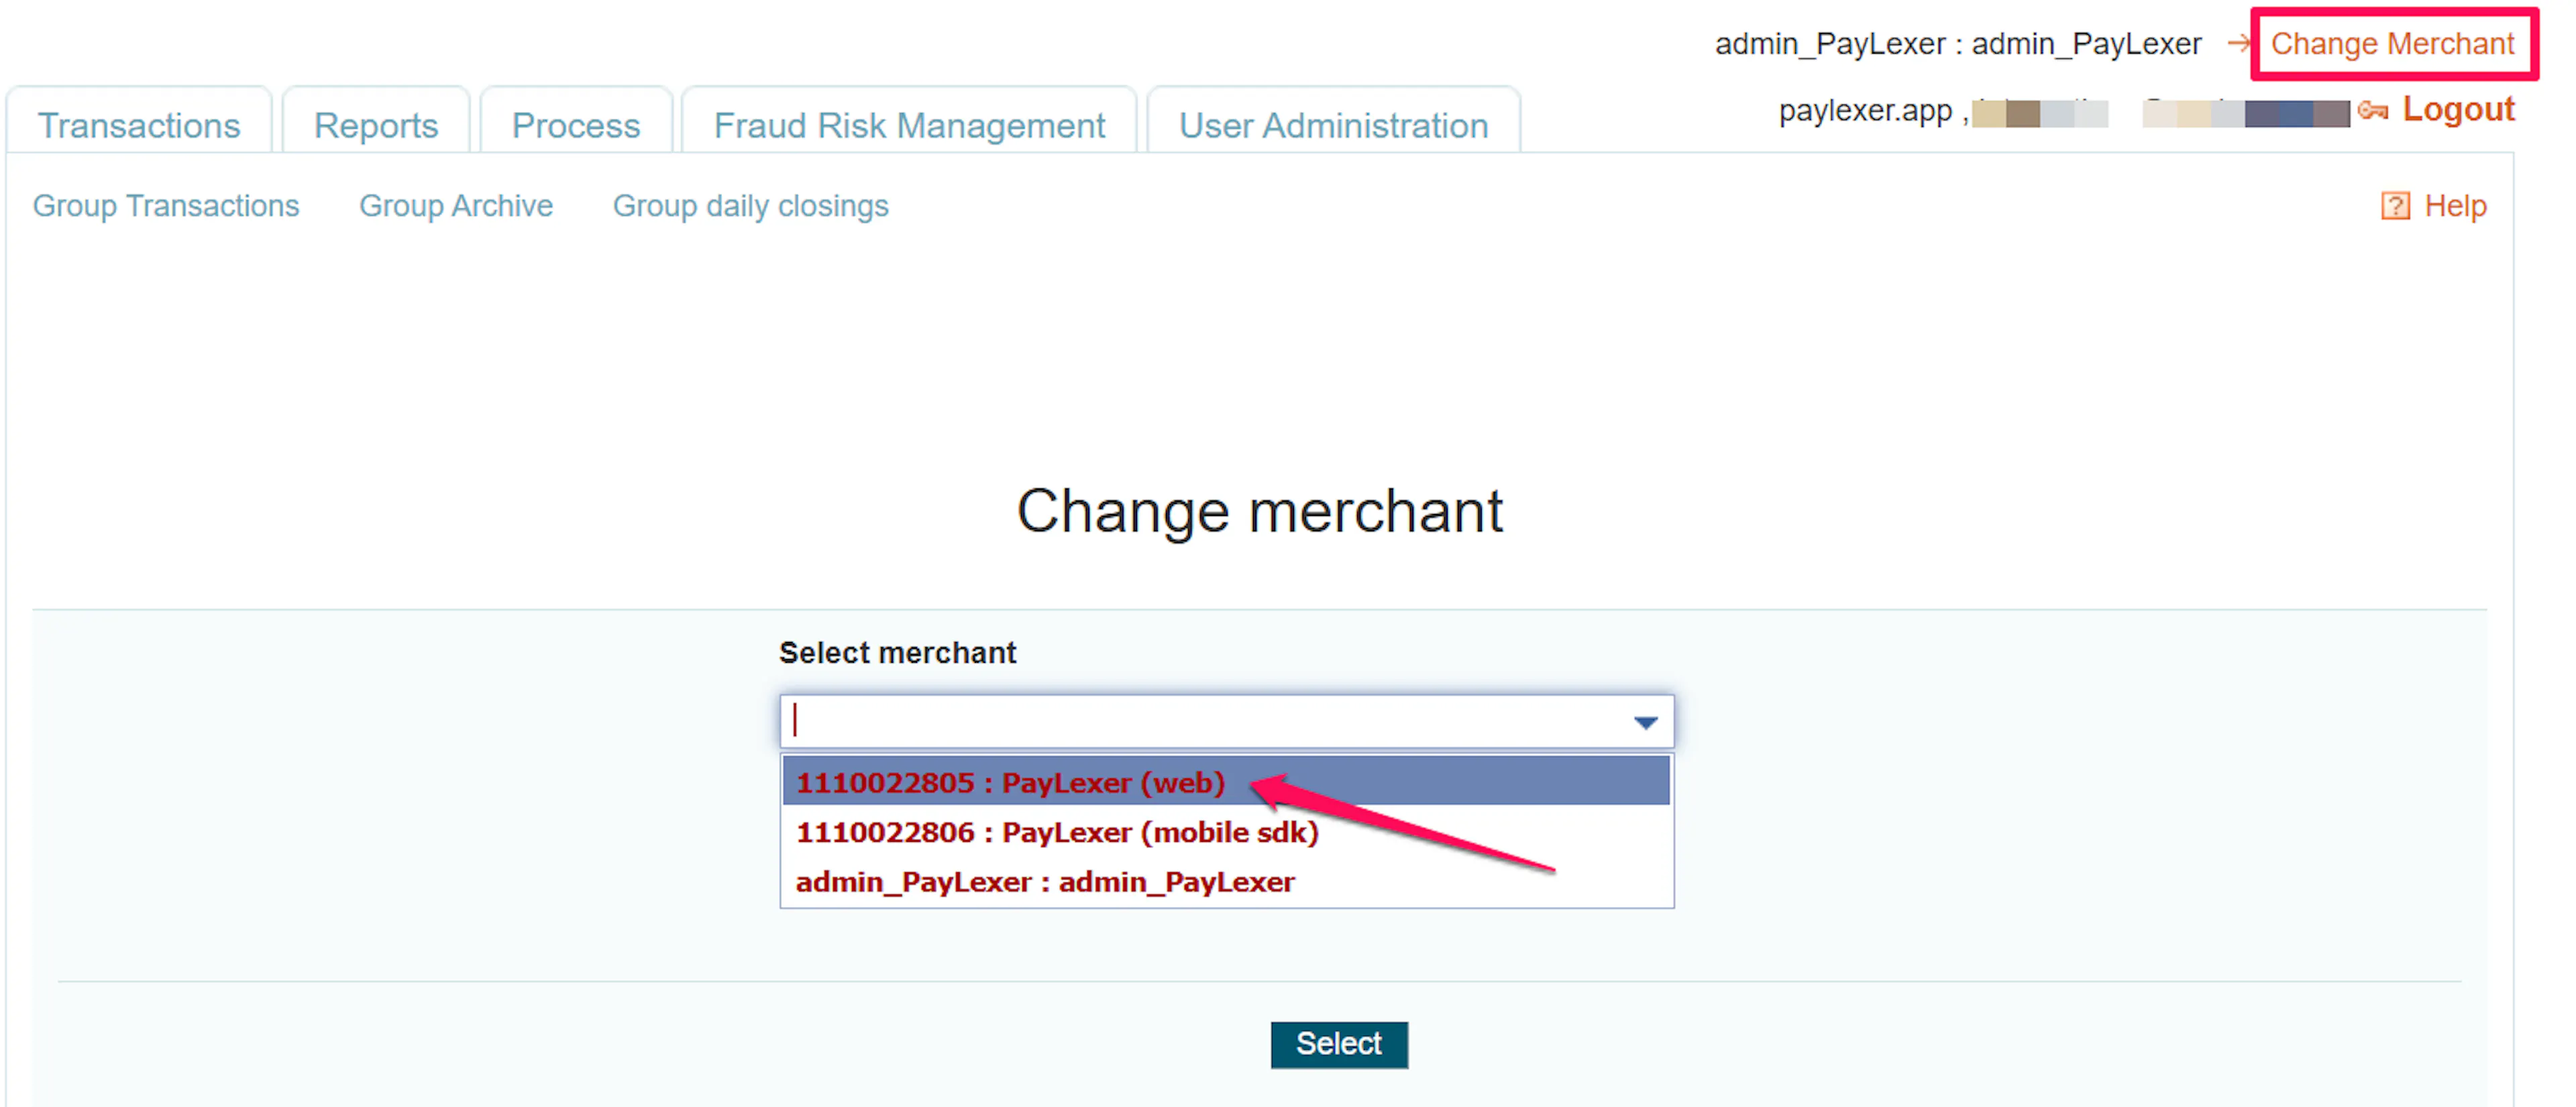
Copy your Merchant ID
Select the webshop you are integrating. Its Merchant ID is shown with the account details, as a numeric identifier.

Copy your Server-to-Server Security Password
Open UPP Administration → Security for that webshop and find the server-to-server security settings. Copy the password shown there, or generate one if the webshop does not have one yet.
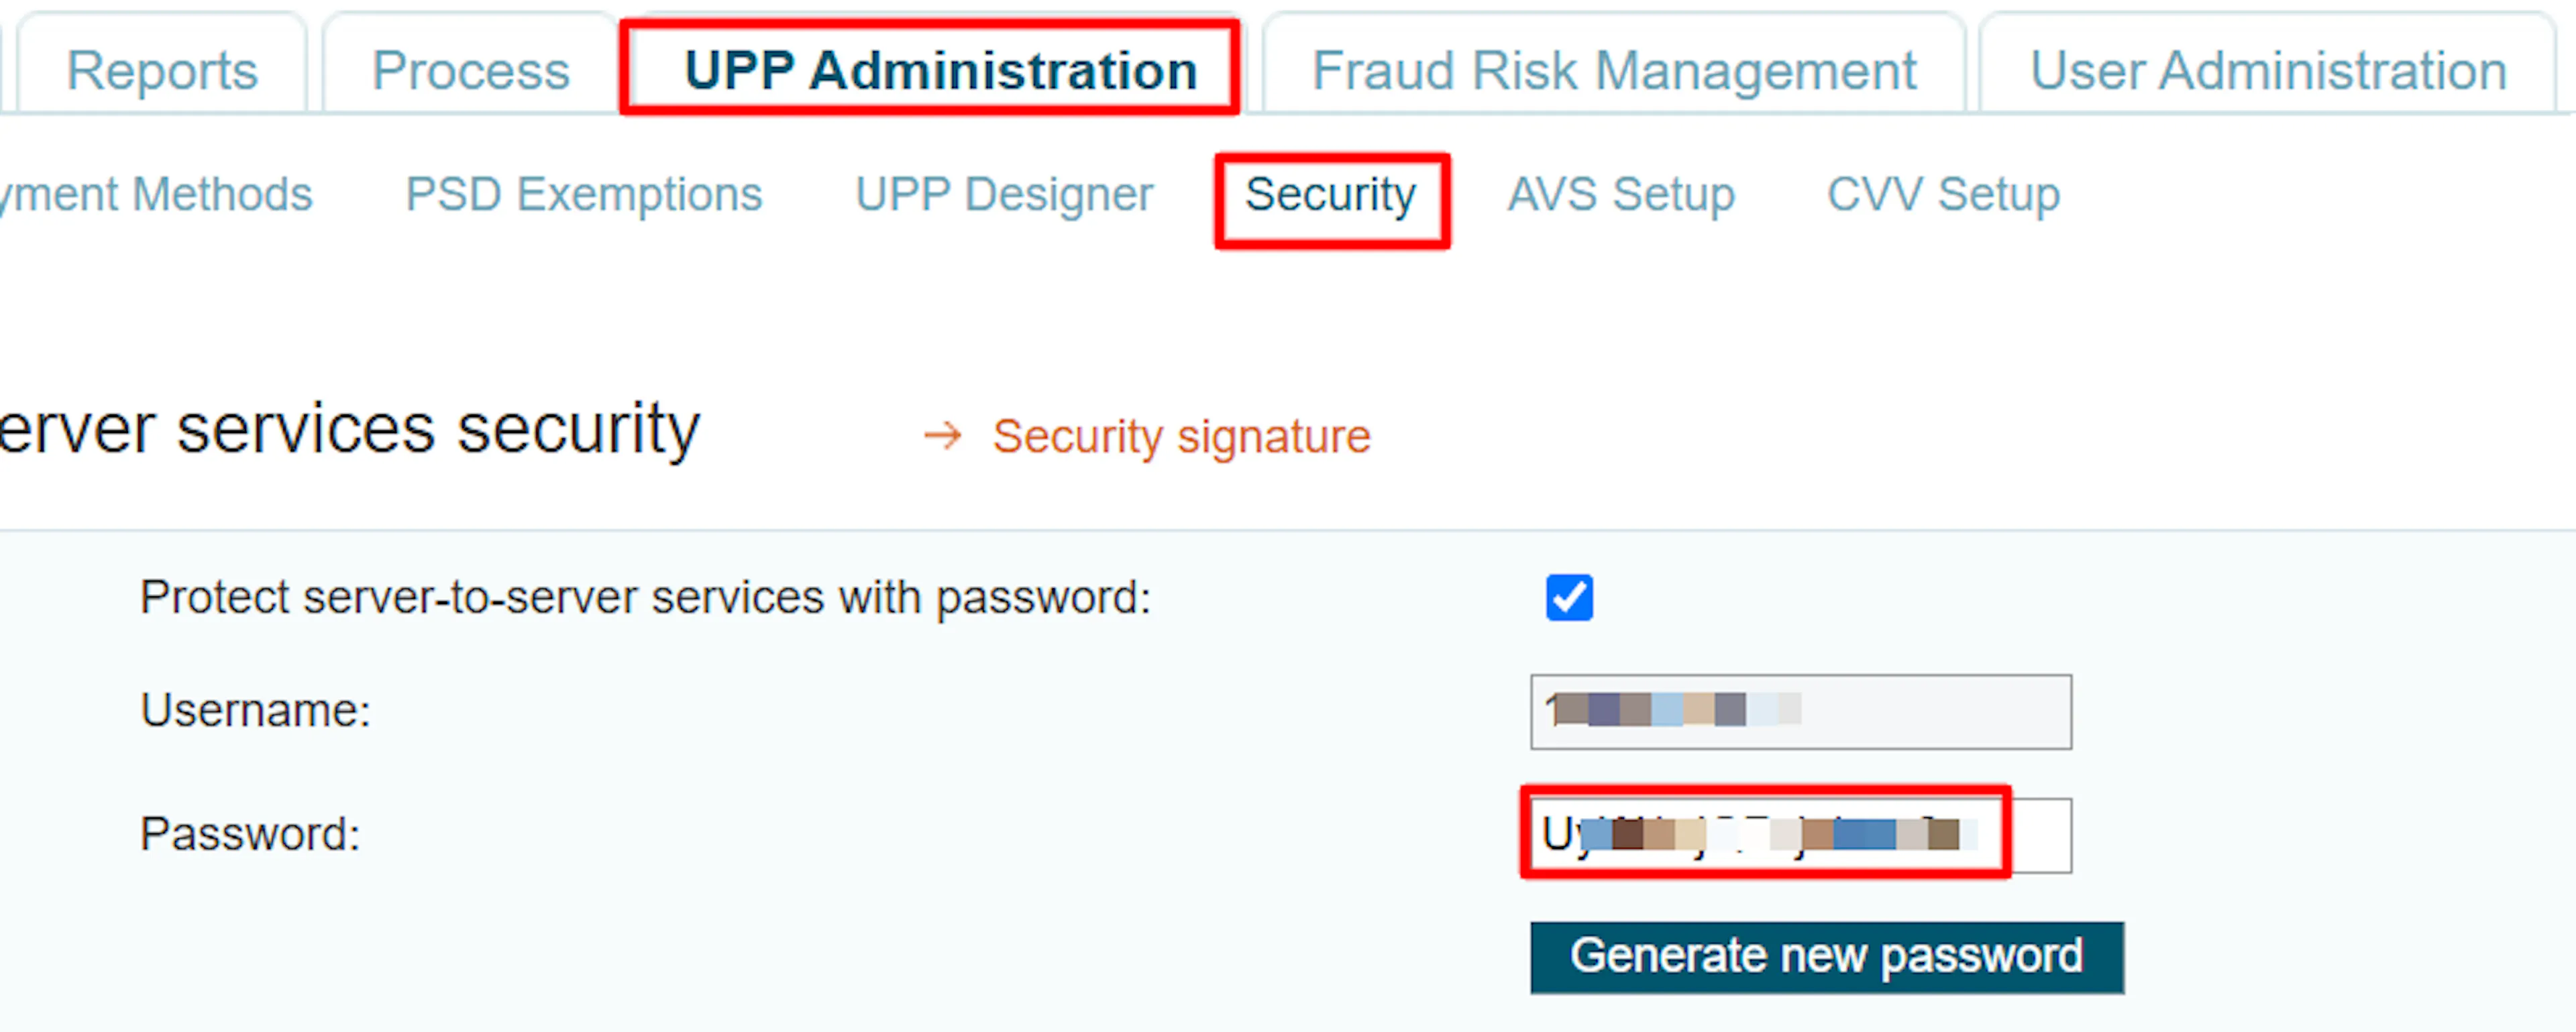
Generating a new password invalidates the old one. If your website is already live, update PayLexer immediately after generating a new value or payments will start failing.
Copy your HMAC Key
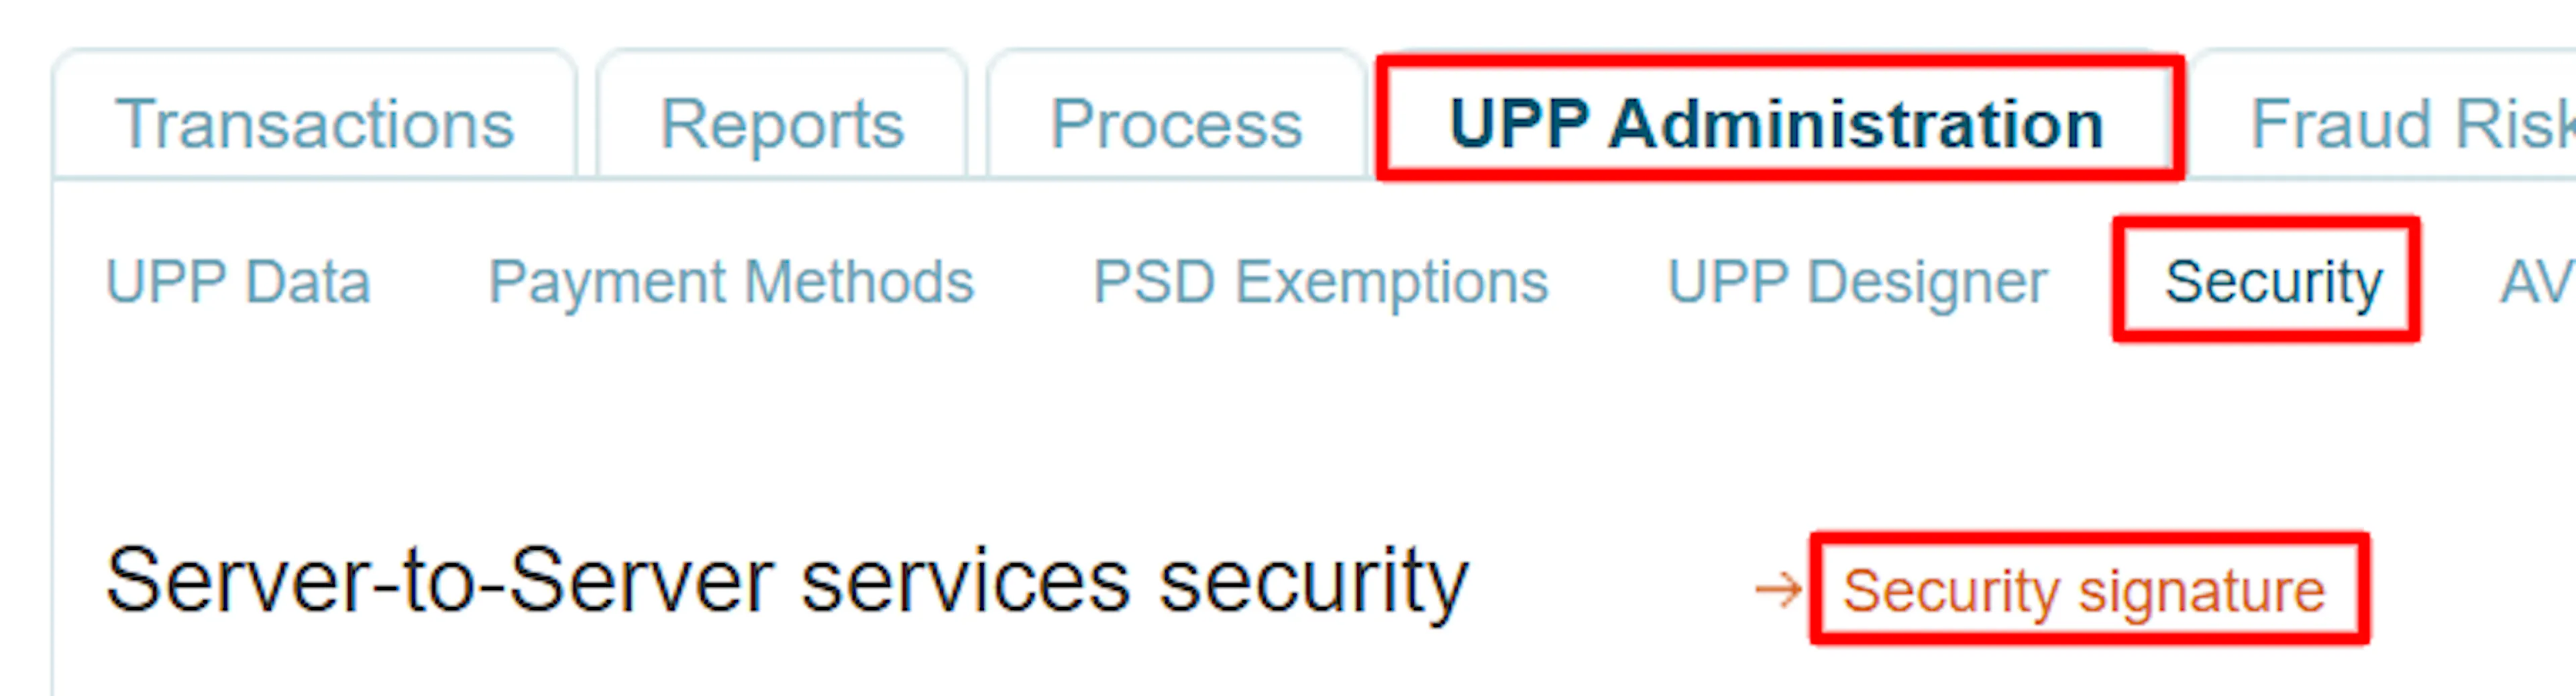
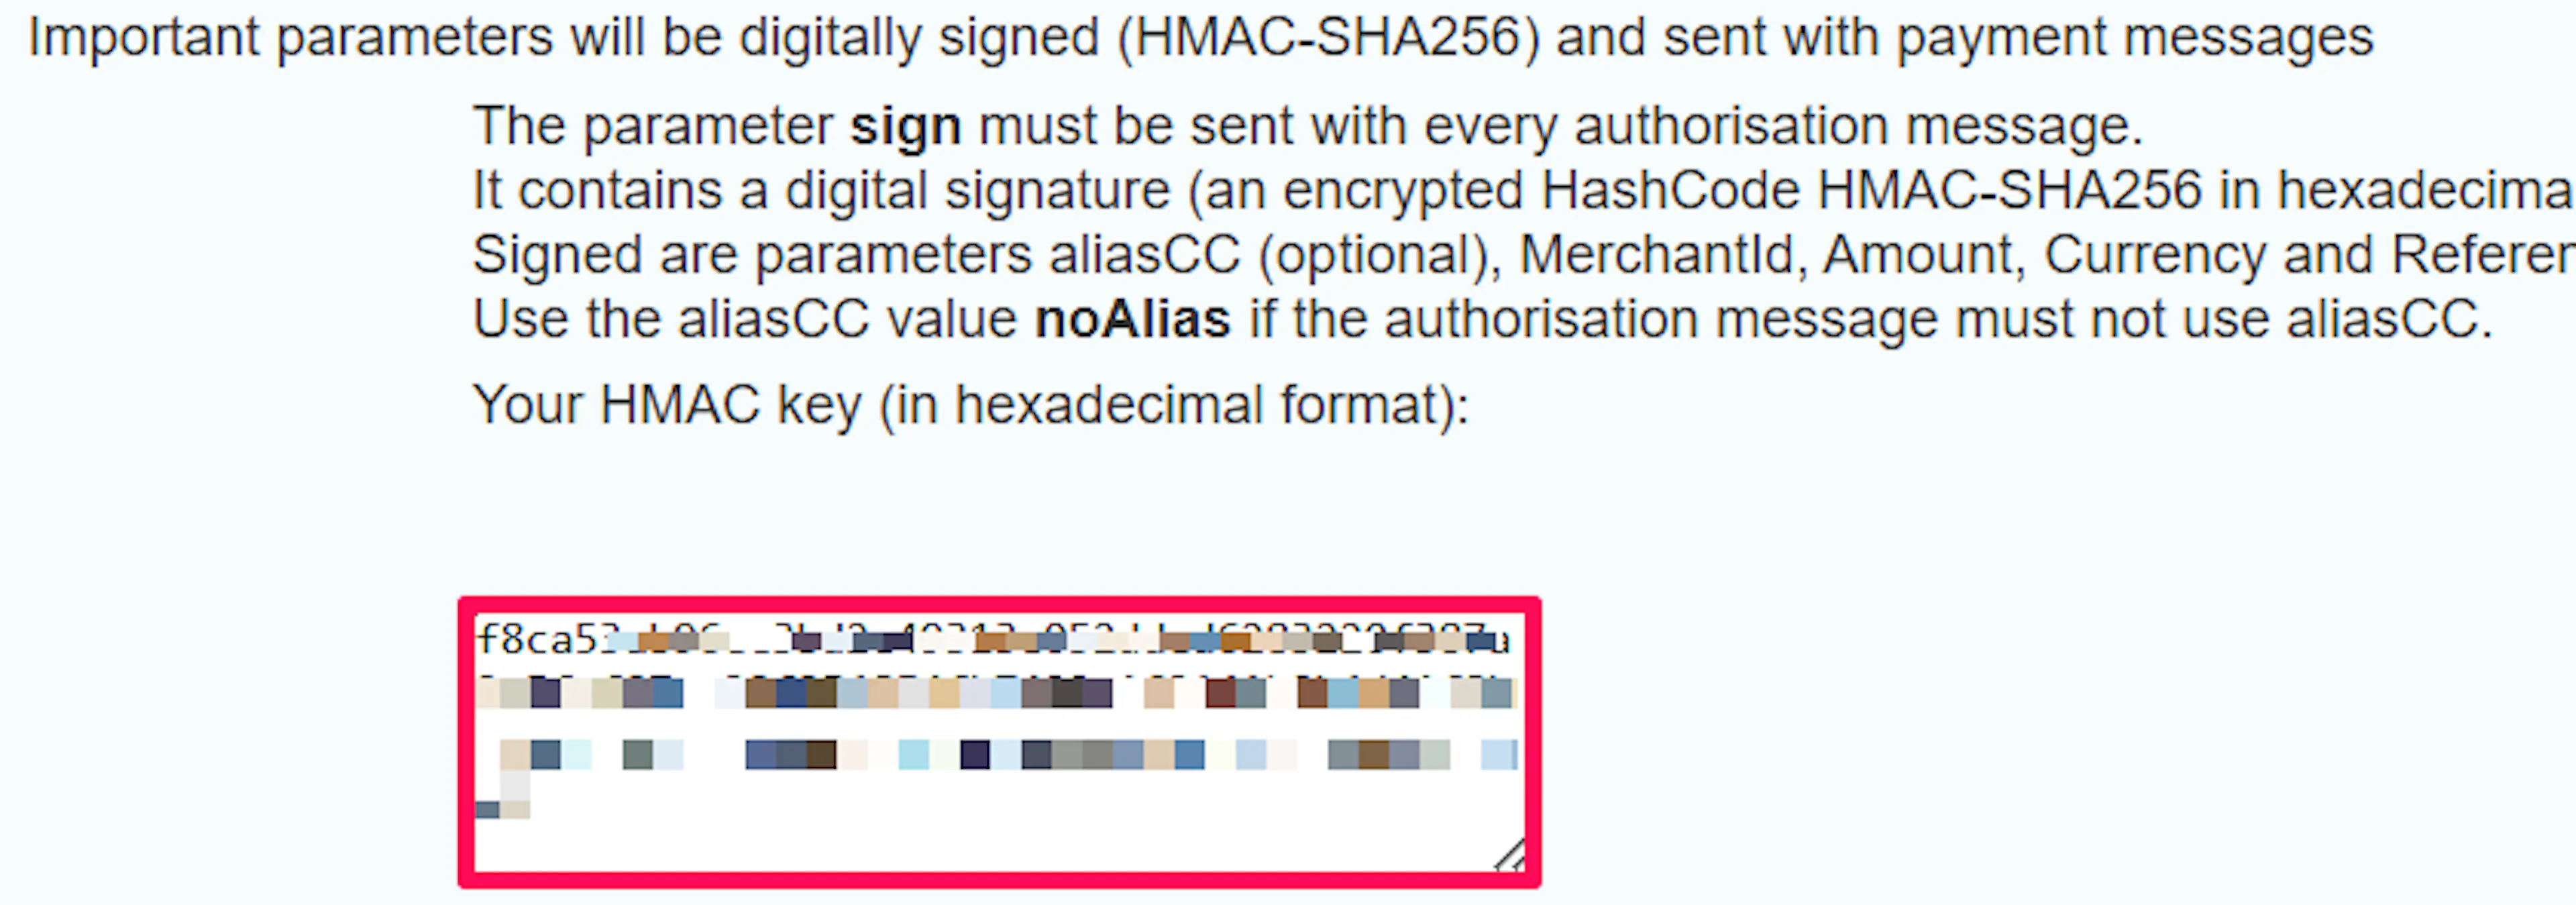
On the same UPP Administration → Security → Security signature page, copy the HMAC key. It is a long hexadecimal value, and PayLexer uses it to verify that each payment notification genuinely came from Datatrans.
Confirm your enabled payment methods
Check which payment methods are active on the webshop. The dashboard shows which are enabled but does not let you switch new ones on. To add a method such as TWINT or PostFinance, contact Datatrans support.
Adding Credentials to PayLexer
Open PayLexer Dashboard
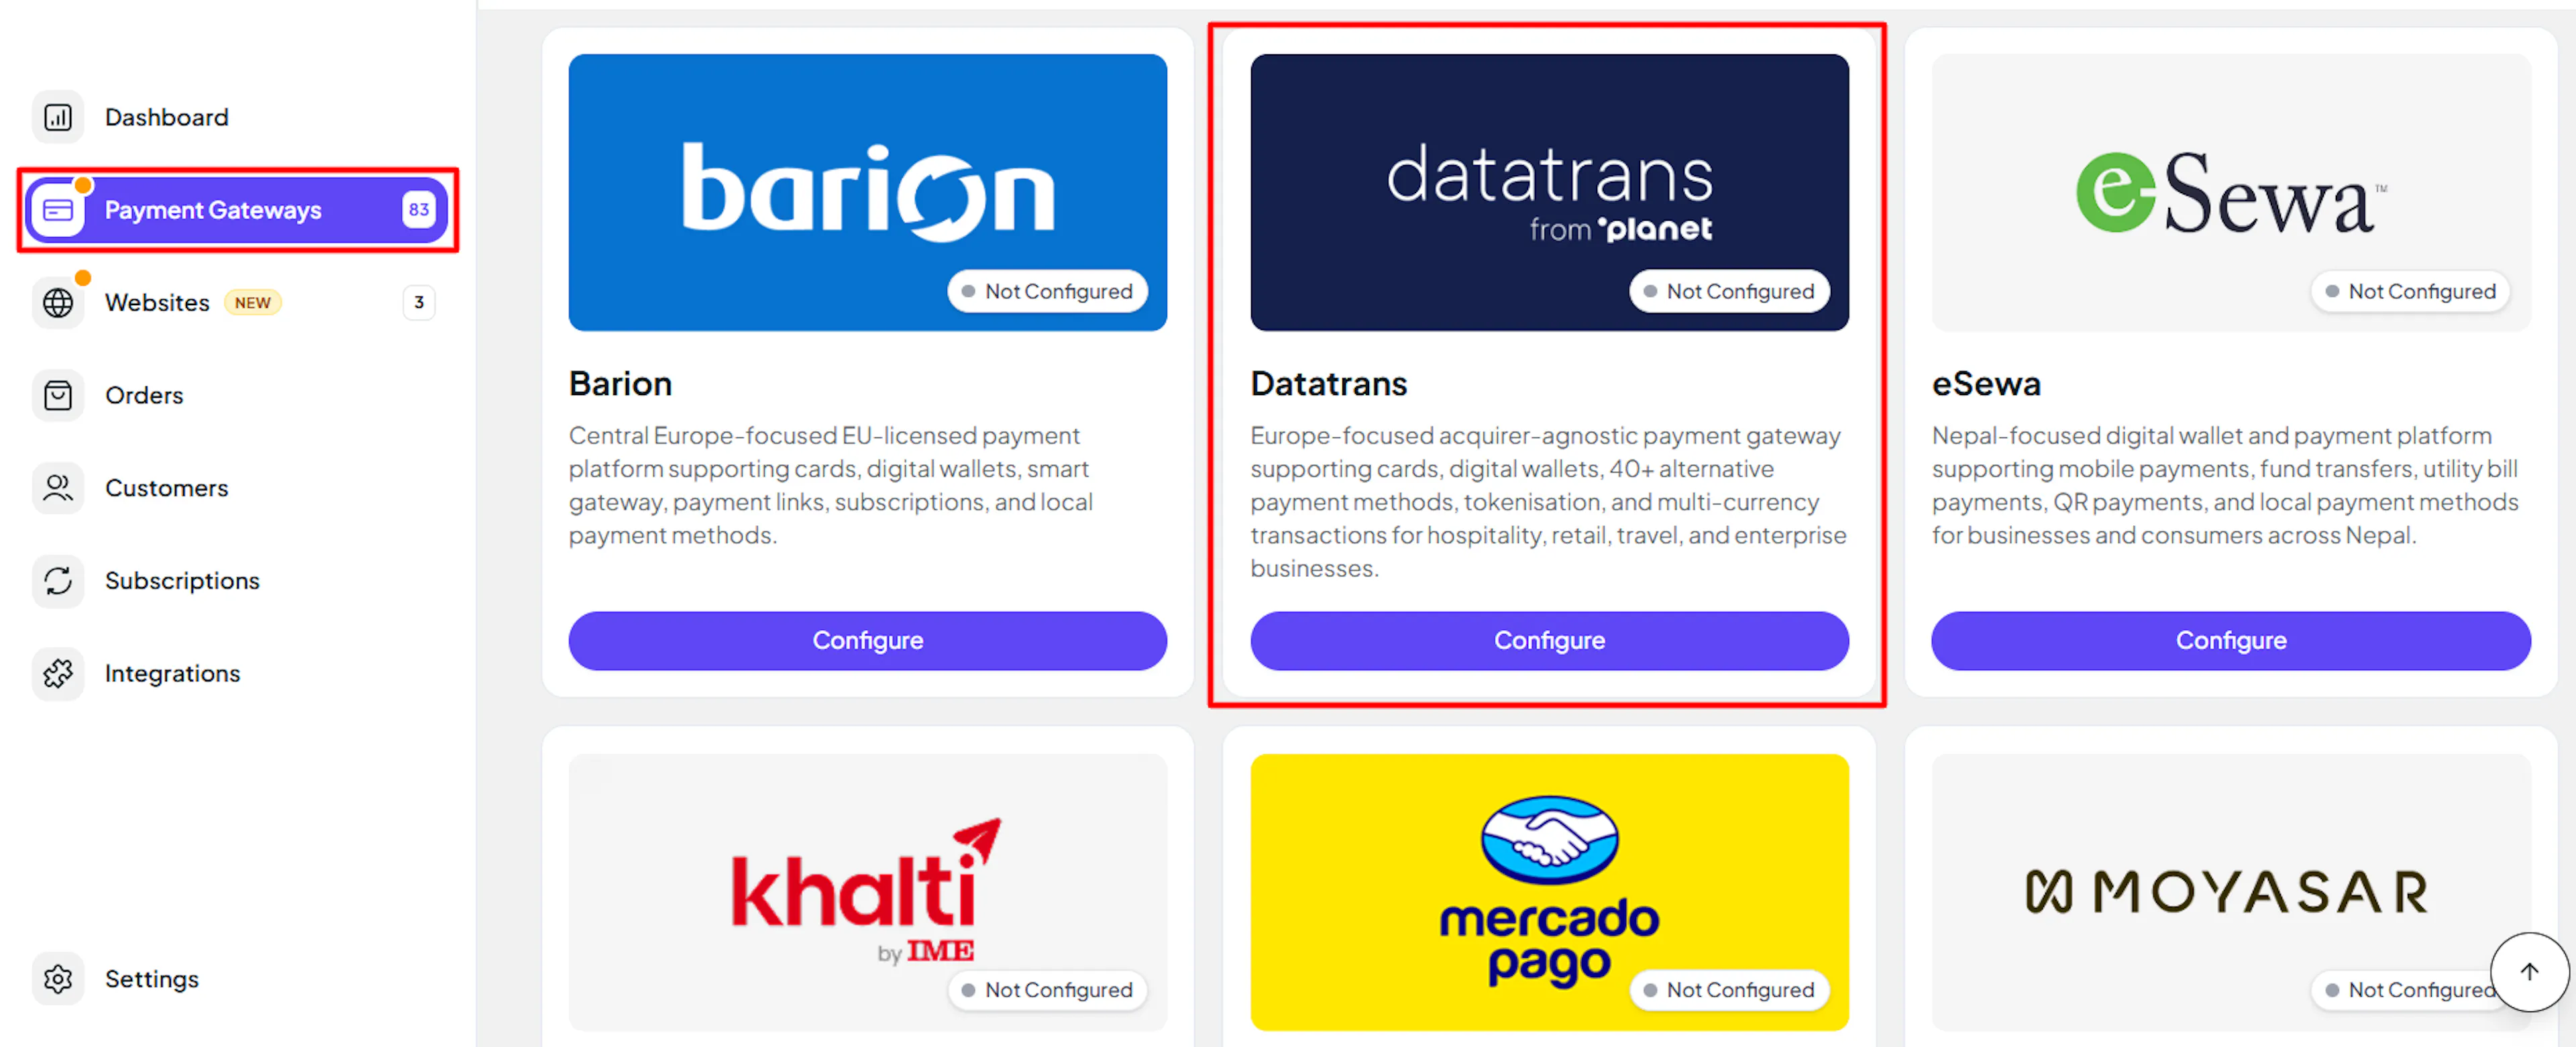
Log in to your PayLexer dashboard and navigate to Payment Gateways → Datatrans.
Enter your credentials
Paste the Merchant ID and Server-to-Server Security Password you copied from Datatrans into the corresponding fields.
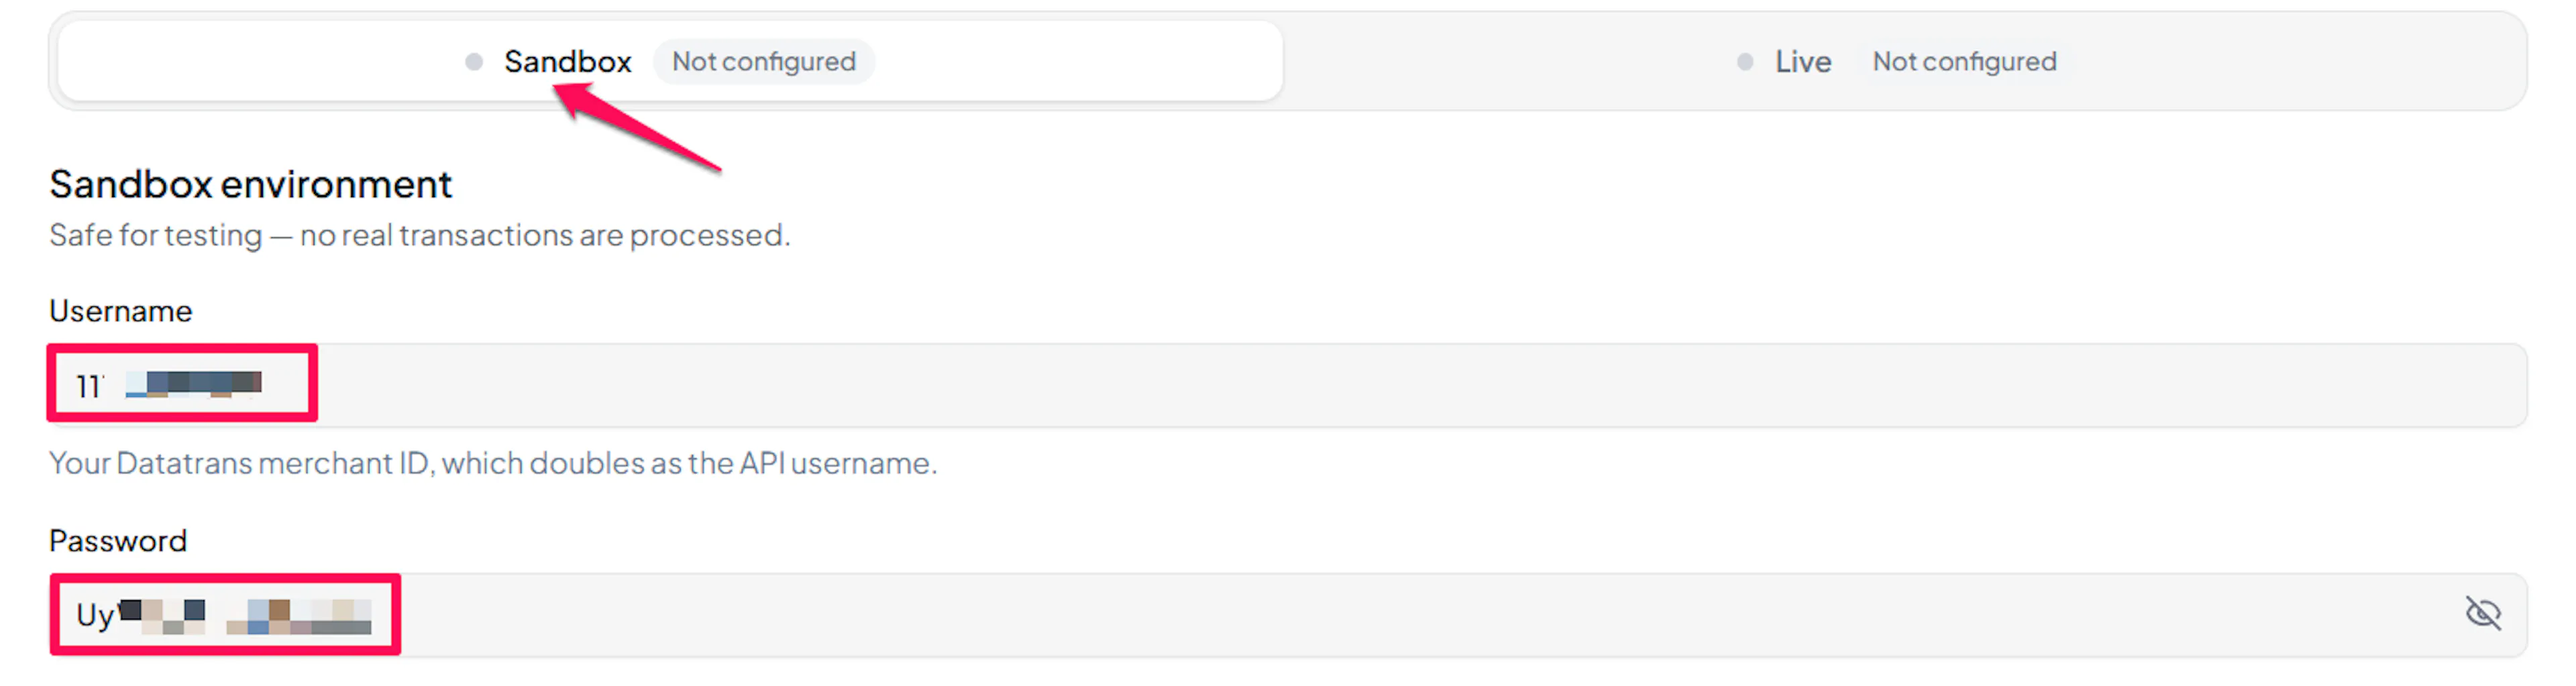
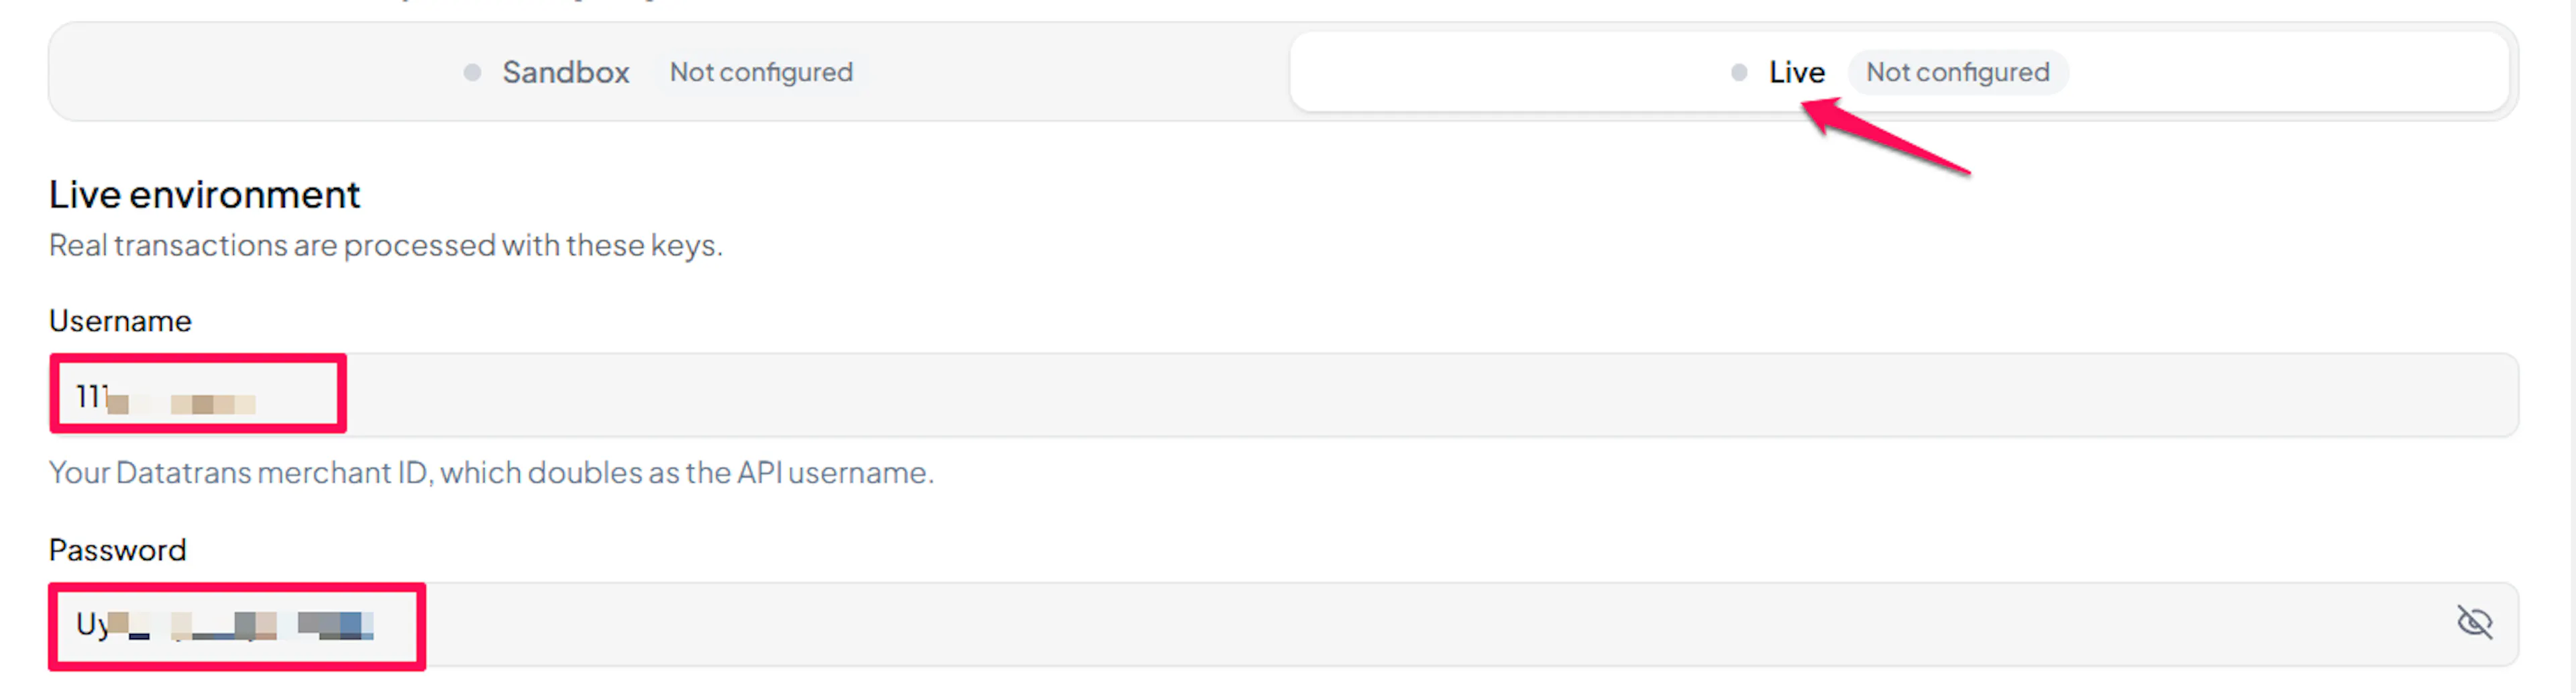
Understanding Live/Production and Sandbox Settings:
| Environment | Purpose |
|---|---|
| Live / Production | Used for real transactions. Cannot be empty, even when testing. |
| Test / Sandbox | Used for testing only. No real money is processed. |
How PayLexer selects credentials:
- Debug/Test mode ON → Test credentials are used
- Debug/Test mode OFF → Live credentials are used
Your sandbox and production Datatrans accounts have different Merchant IDs. Entering a live Merchant ID in the Test fields produces a rejected-credentials error even when the password is correct.
Test and save
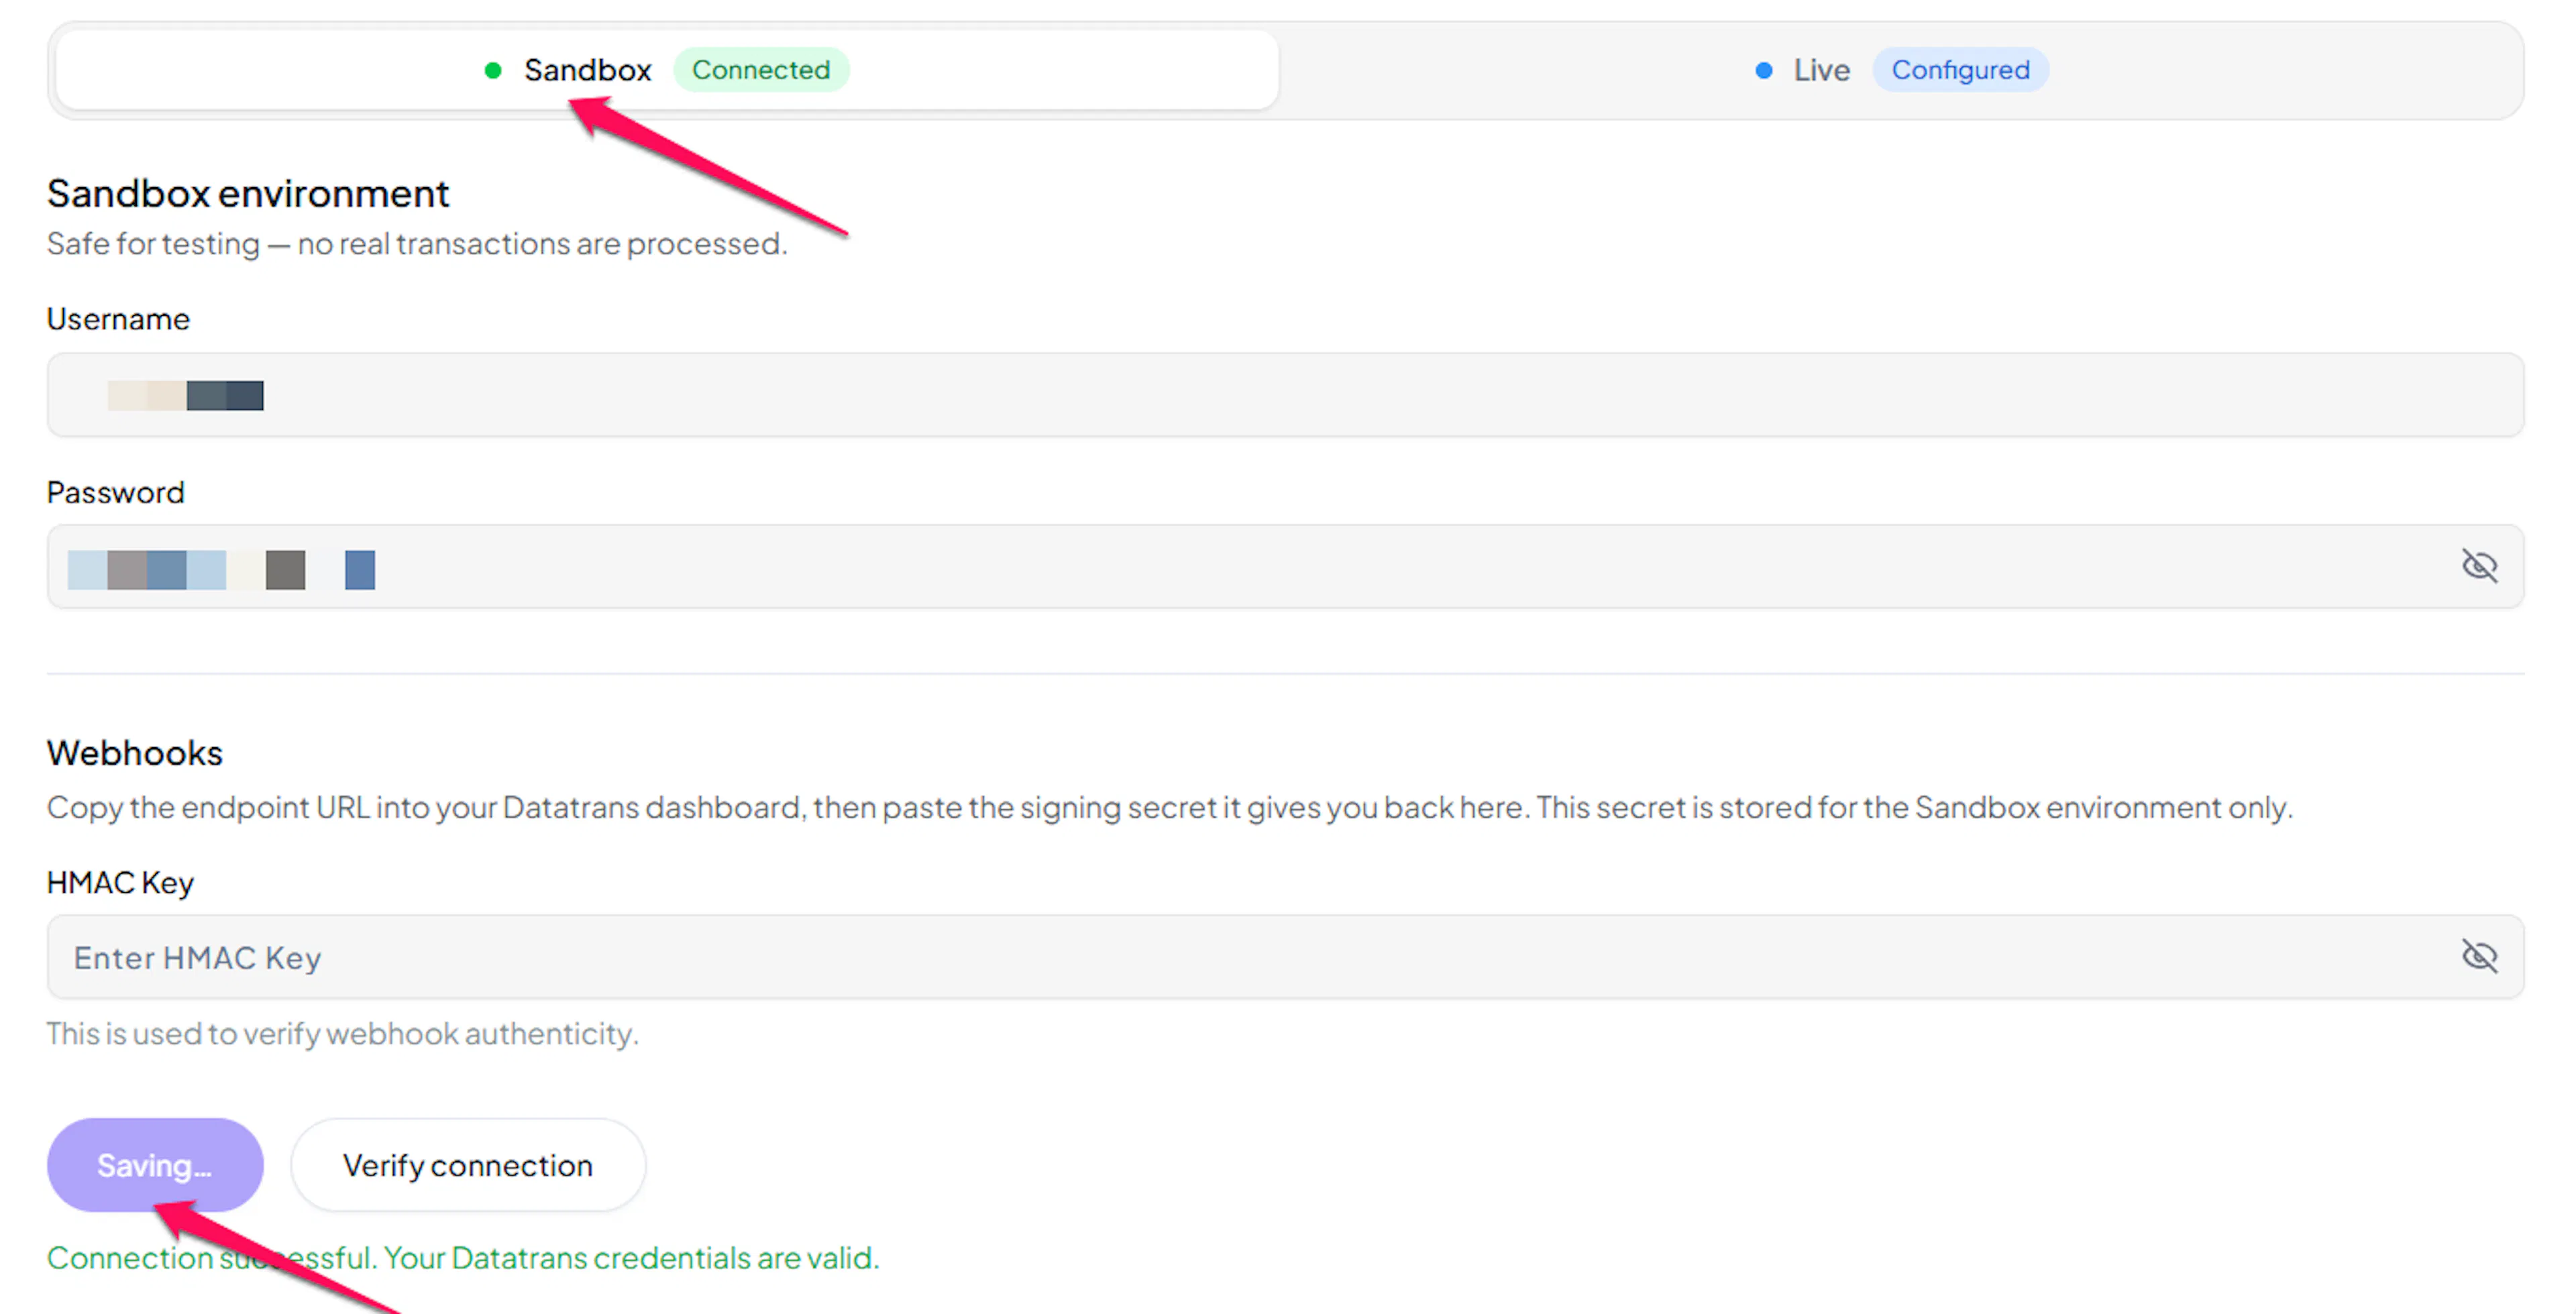
Click Save to save your configuration and verify your credentials. Click Verify Connection to test the connection.
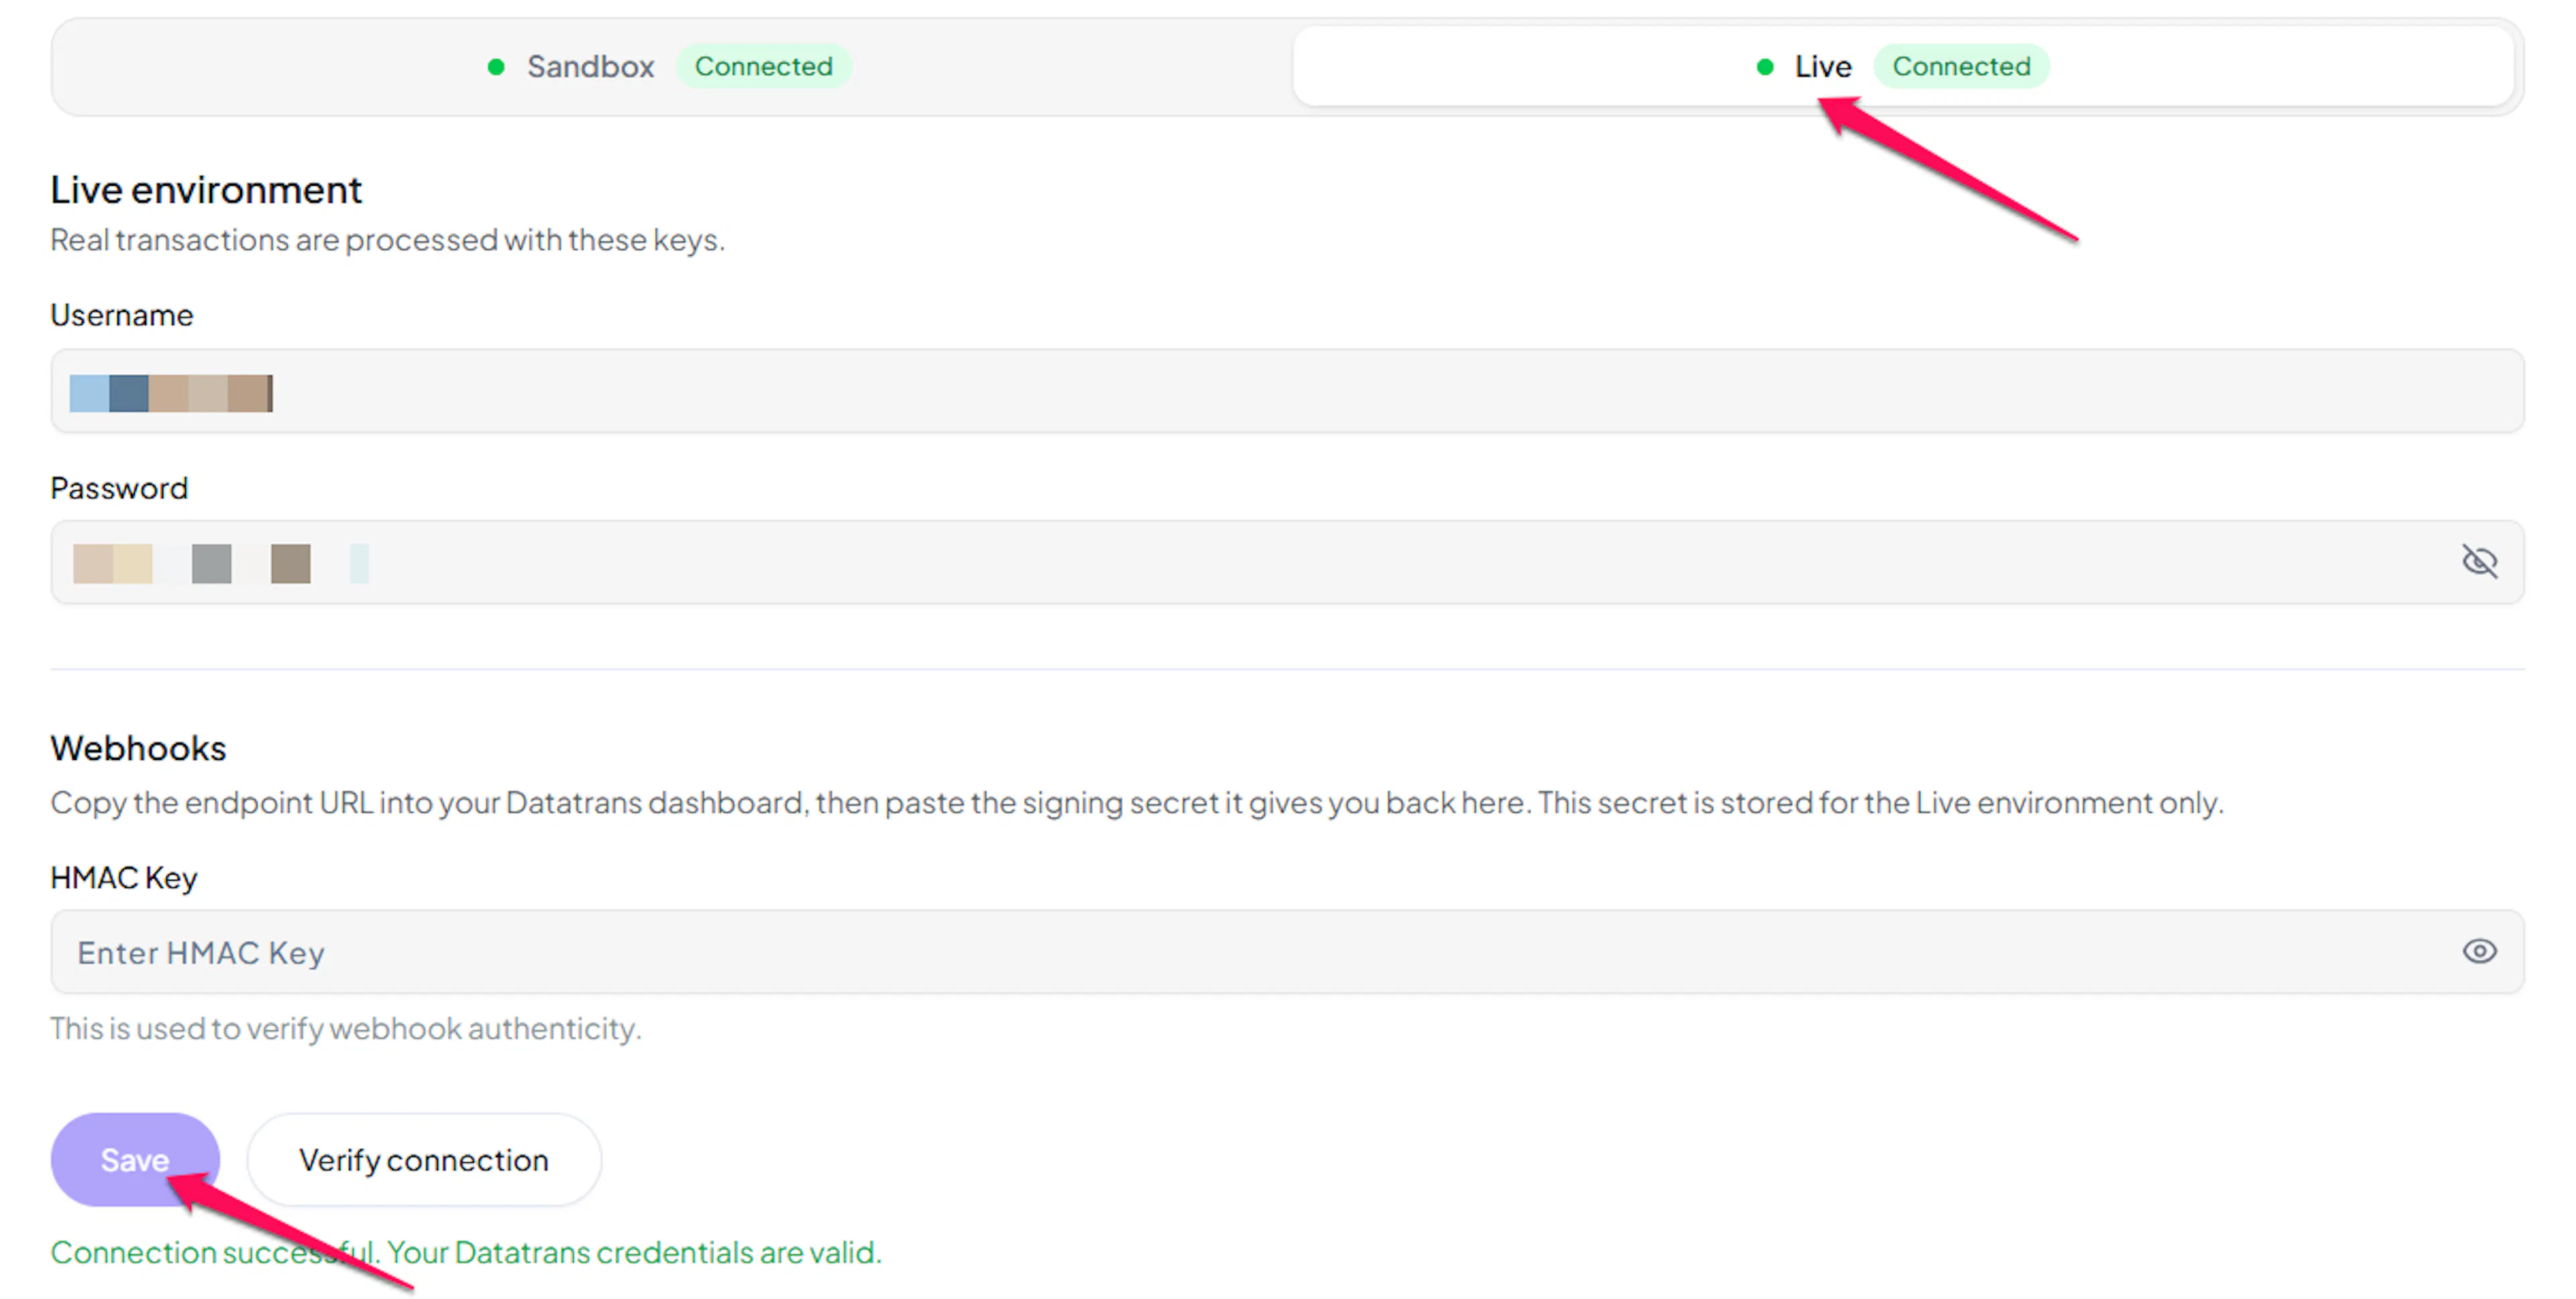
Configuring Webhooks (Mandatory)
Webhooks enable real-time payment updates and significantly improve reliability. The only mandatory step is giving PayLexer the HMAC Key, since PayLexer sends its own notification address to Datatrans inside every payment it creates — there is no endpoint for you to register in the Datatrans dashboard.
Benefits of Webhooks:
- Instant payment status updates
- Automatic refund processing
- Dispute notifications
Add the HMAC Key to PayLexer
In PayLexer → Payment Gateways → Datatrans, paste the HMAC Key you copied from the Datatrans security page into the HMAC Key field, then click Save.
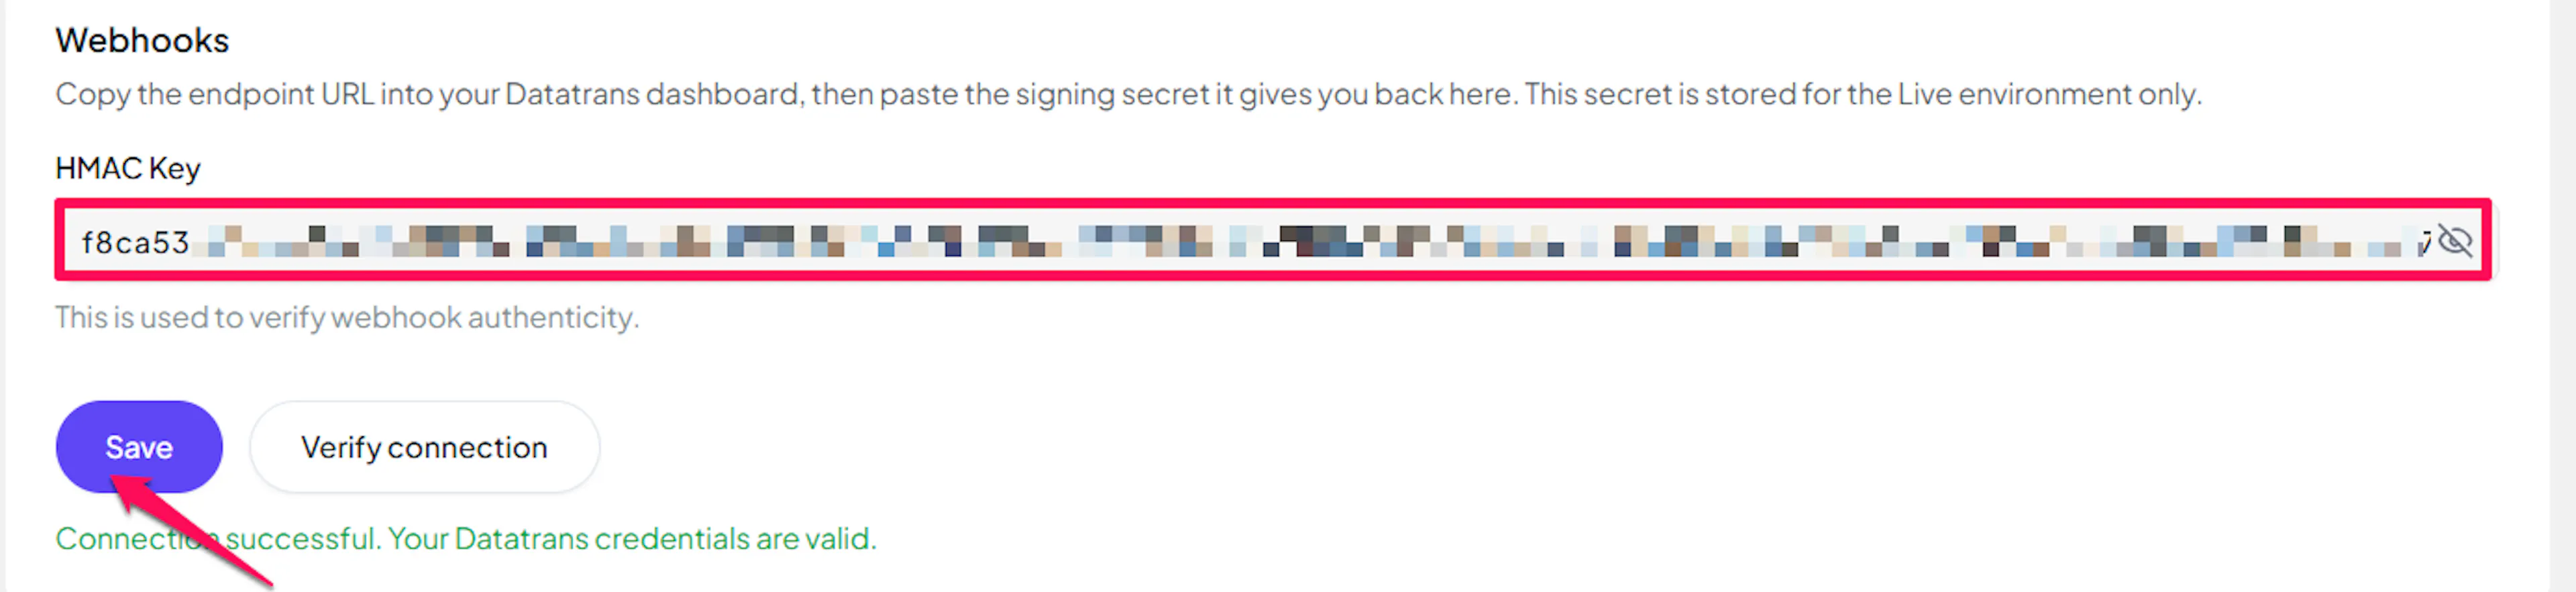
The HMAC Key is separate from your Server-to-Server Security Password. Both come from the same Datatrans security page, but they are different values and are not interchangeable.
Add the key for both environments
Your sandbox and production accounts each have their own HMAC key. Paste the sandbox key into the Test field and the production key into the Live field so notifications verify in both modes.
Confirm the notification format is JSON
In UPP Administration, check that URL Post data format is set to JSON. Datatrans can also post its older XML format, which PayLexer cannot read.
Datatrans attempts each notification only once and never retries a failed delivery. PayLexer covers this with two additional safety nets: it confirms the payment's real status with Datatrans when the shopper returns to your site, and it re-checks any order still unresolved in the background. No payment is left permanently stuck.
Integrate Datatrans to Your Website
If you have already added and configured your site, you can enable Datatrans in your existing setup.
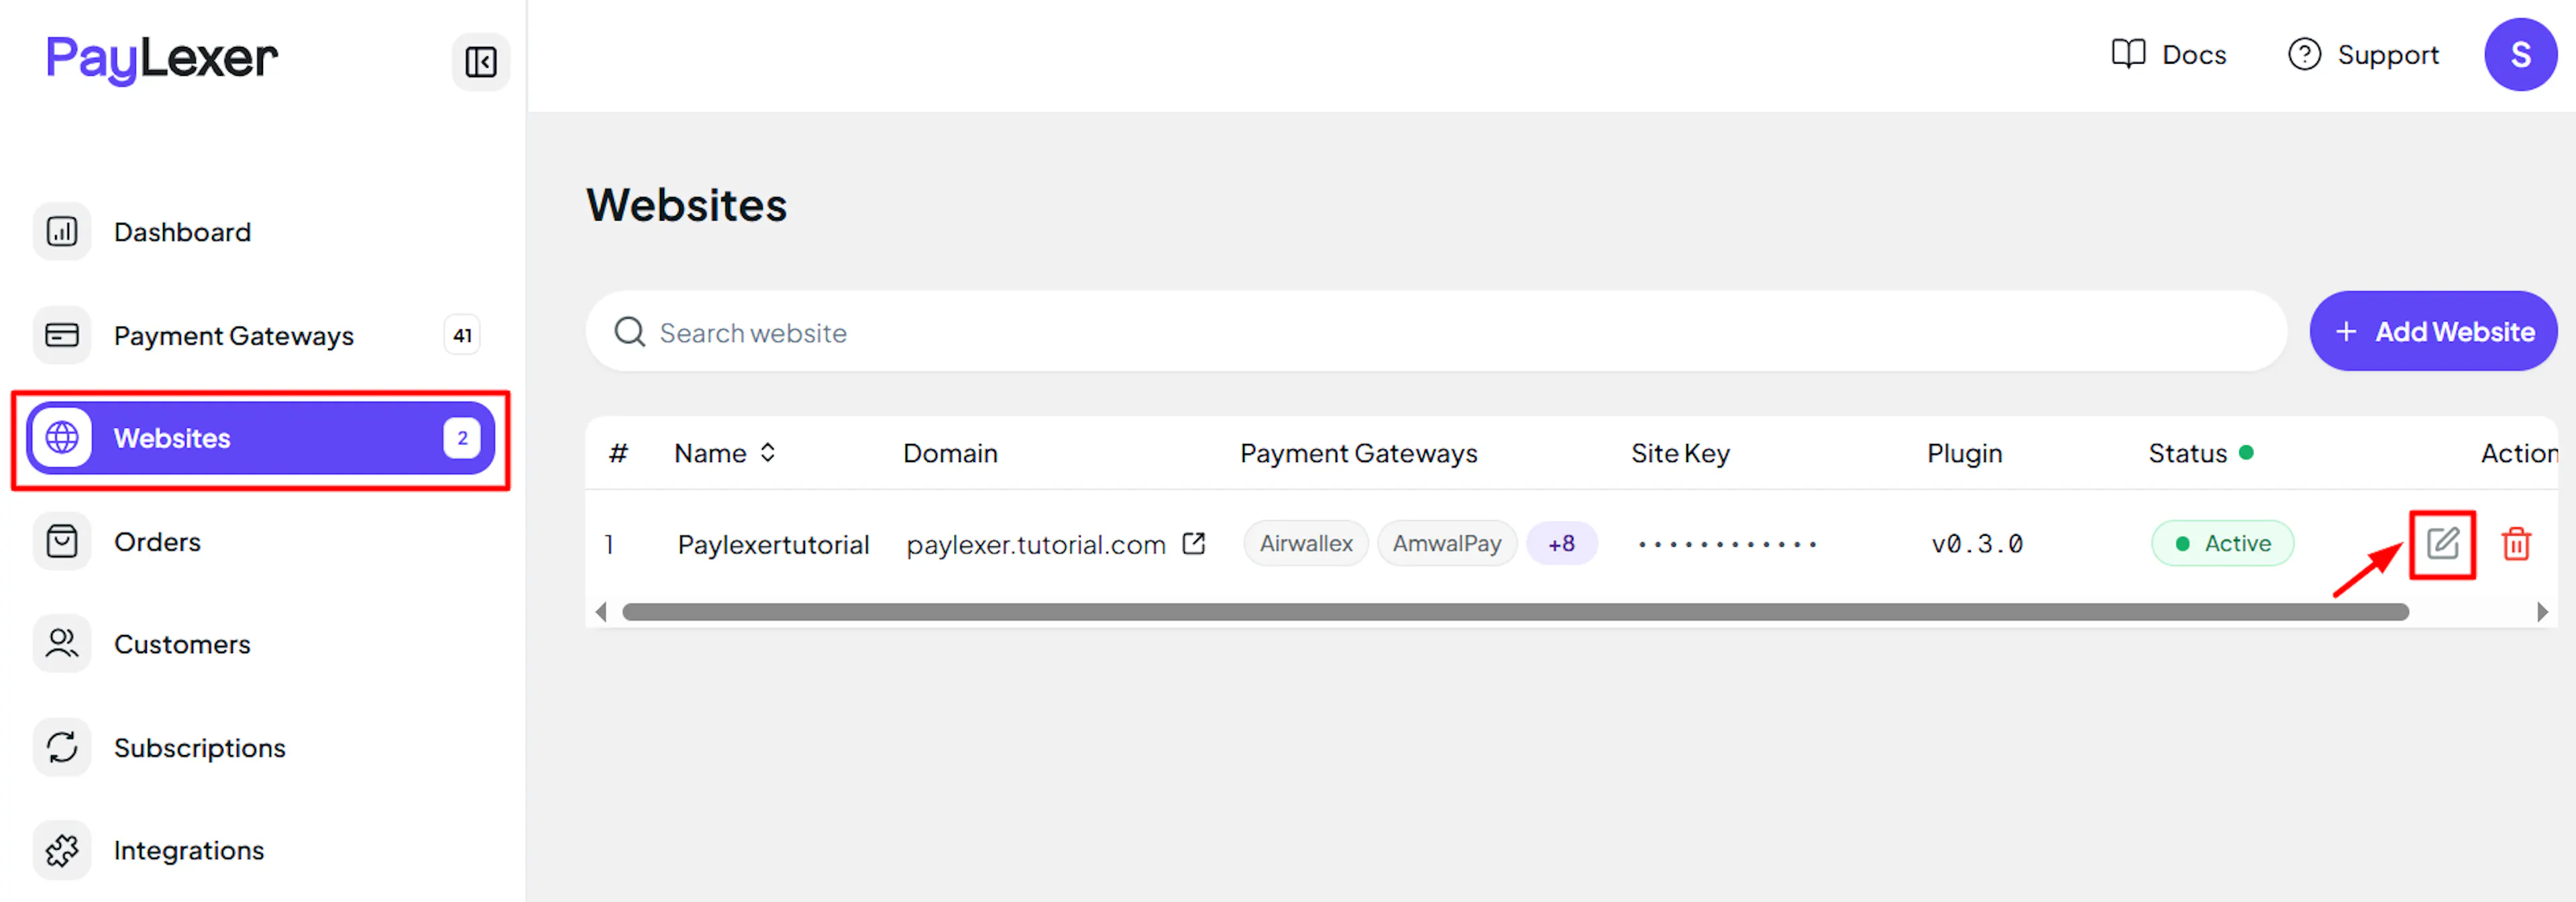
Go to Websites
Navigate to Websites in your PayLexer dashboard.
Edit your website
Click the Edit Icon of your added website.
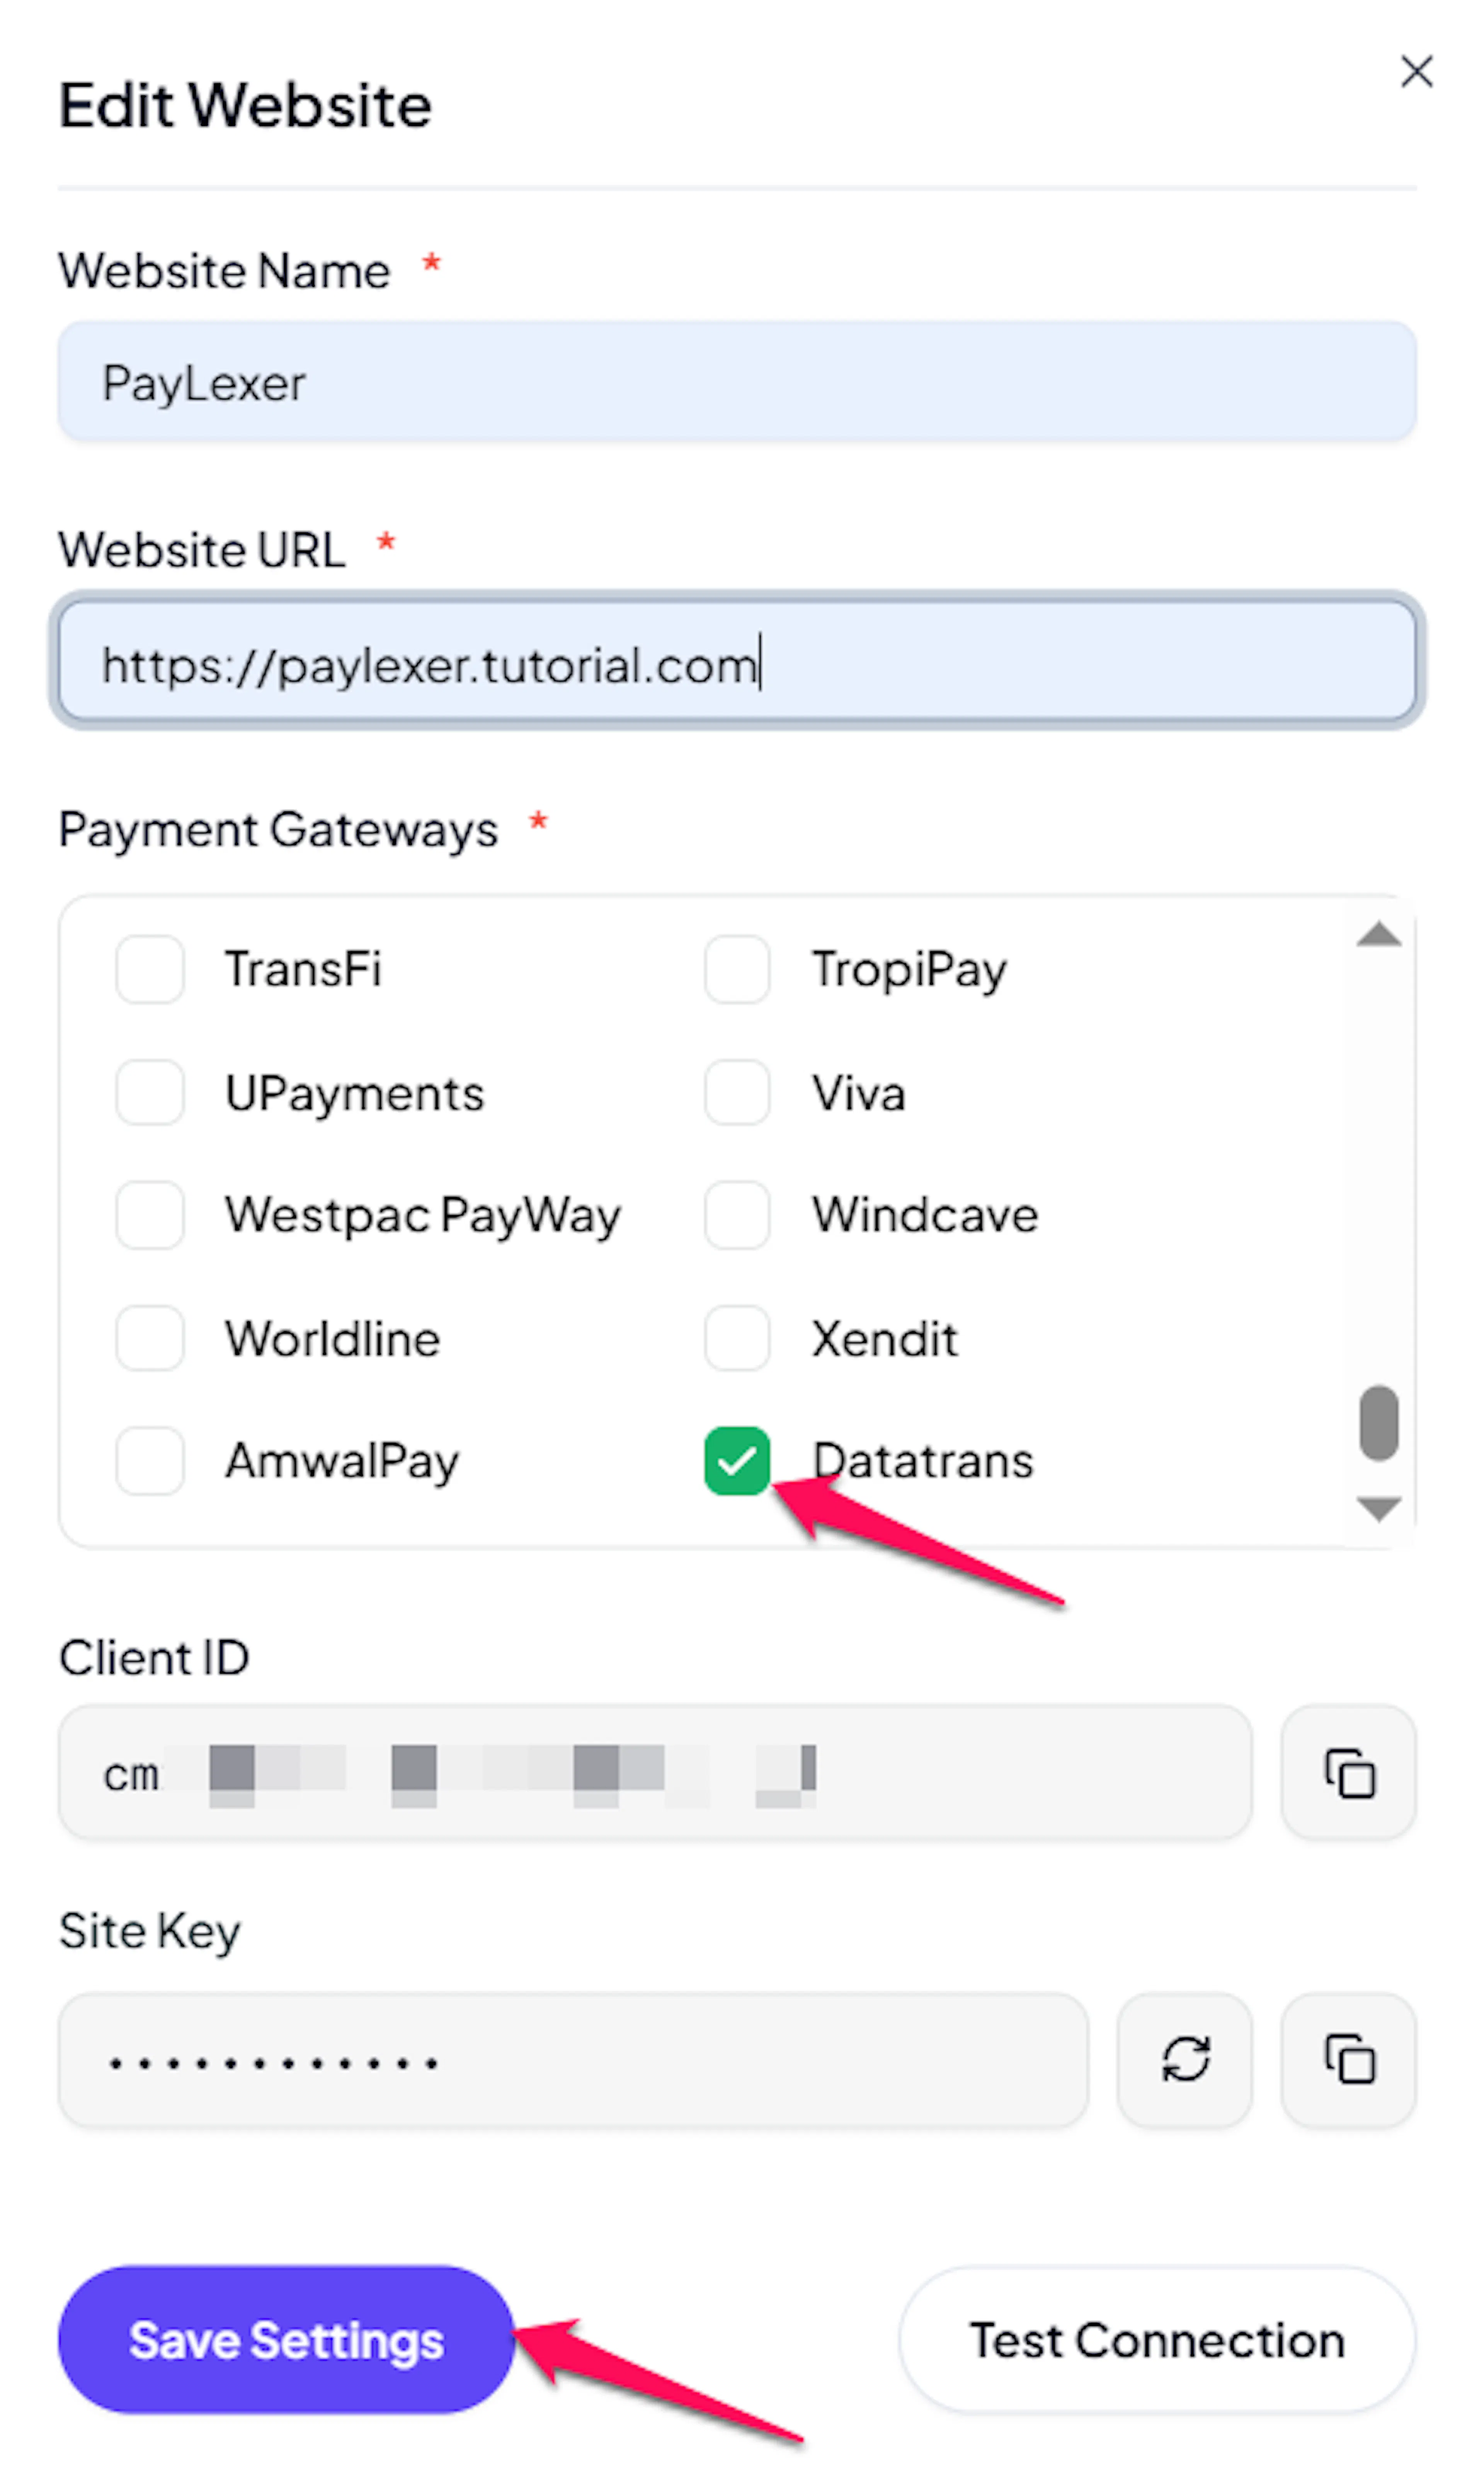
Enable Datatrans
Click the checkbox to enable Datatrans for the website.
If you haven't added a website yet, Continue to Add Your Website →
Troubleshooting
Best Practices
- Test in sandbox before enabling production so you can validate payments and refunds without moving real money.
- Store the Server-to-Server Security Password and HMAC Key securely and rotate them if you suspect either was exposed. Update PayLexer in the same sitting, because the old value stops working immediately.
- Enter both Test and Live credentials, including both HMAC keys, so you can switch safely between testing and production.
- Confirm with Datatrans that your acquiring contract covers every currency your website charges in.
- Ask Datatrans support to enable TWINT and PostFinance before launch if you sell to Swiss shoppers, since a shopper who cannot pay with TWINT often does not pay at all.
- Leave the address-verification filter switched off unless you have configured its country whitelist, because an empty whitelist declines all transactions.
- Reconcile PayLexer orders against your Datatrans dashboard regularly.
FAQs
Still Have Questions?
- Datatrans Support: Datatrans Documentation
- PayLexer Support: Contact Support