

VNPAY
Connect VNPAY to PayLexer to accept VNPAY-QR, Vietnamese domestic cards and bank accounts, and international cards through VNPAY's hosted payment page, with signed IPN payment confirmation.
VNPAY is a Hanoi-headquartered payment company and one of Vietnam's most widely used payment gateways, best known for VNPAY-QR, which works across Vietnamese banking apps and e-wallets. PayLexer connects to VNPAY's hosted payment page, so shoppers pay by QR code, domestic ATM card or bank account, international card, or the VNPAY app on VNPAY's secure page before returning to your site, while a signed IPN (payment notification) confirms the final outcome.
- Supported Regions (Merchant Accounts): Vietnam
- Supported Currencies: VND (Vietnamese Dong)
This gateway appears in checkout only when the selected currency is VND.
Supported Features
- Hosted payment page with VNPAY-QR, domestic ATM cards and bank accounts, international cards, and the VNPAY app
- Signed IPN (HMAC-SHA512) for server-to-server payment confirmation
- Full and partial refunds
Before You Start
Make sure you have:
- VNPAY Merchant Account – For testing, register a free sandbox account. Register a VNPAY sandbox → Live accounts are issued by VNPAY under a merchant contract. Contact VNPAY →
- PayLexer Account – Required to configure the integration. Create your account →
- A website where you want to integrate
Looking for a different payment processor? View all supported gateways →
Configuring VNPAY
You need a Terminal Code and a Hash Secret from VNPAY for this integration.
Getting API Credentials
Register with VNPAY
For testing, fill in VNPAY's sandbox registration form. For live payments, complete VNPAY's merchant onboarding and contract.
Open VNPAY's welcome email
VNPAY emails your connection details after registration. Find the Terminal ID / Website Code (vnp_TmnCode) and the Secret Key / Checksum generation secret string (vnp_HashSecret). In PayLexer these are the Terminal Code and the Hash Secret.
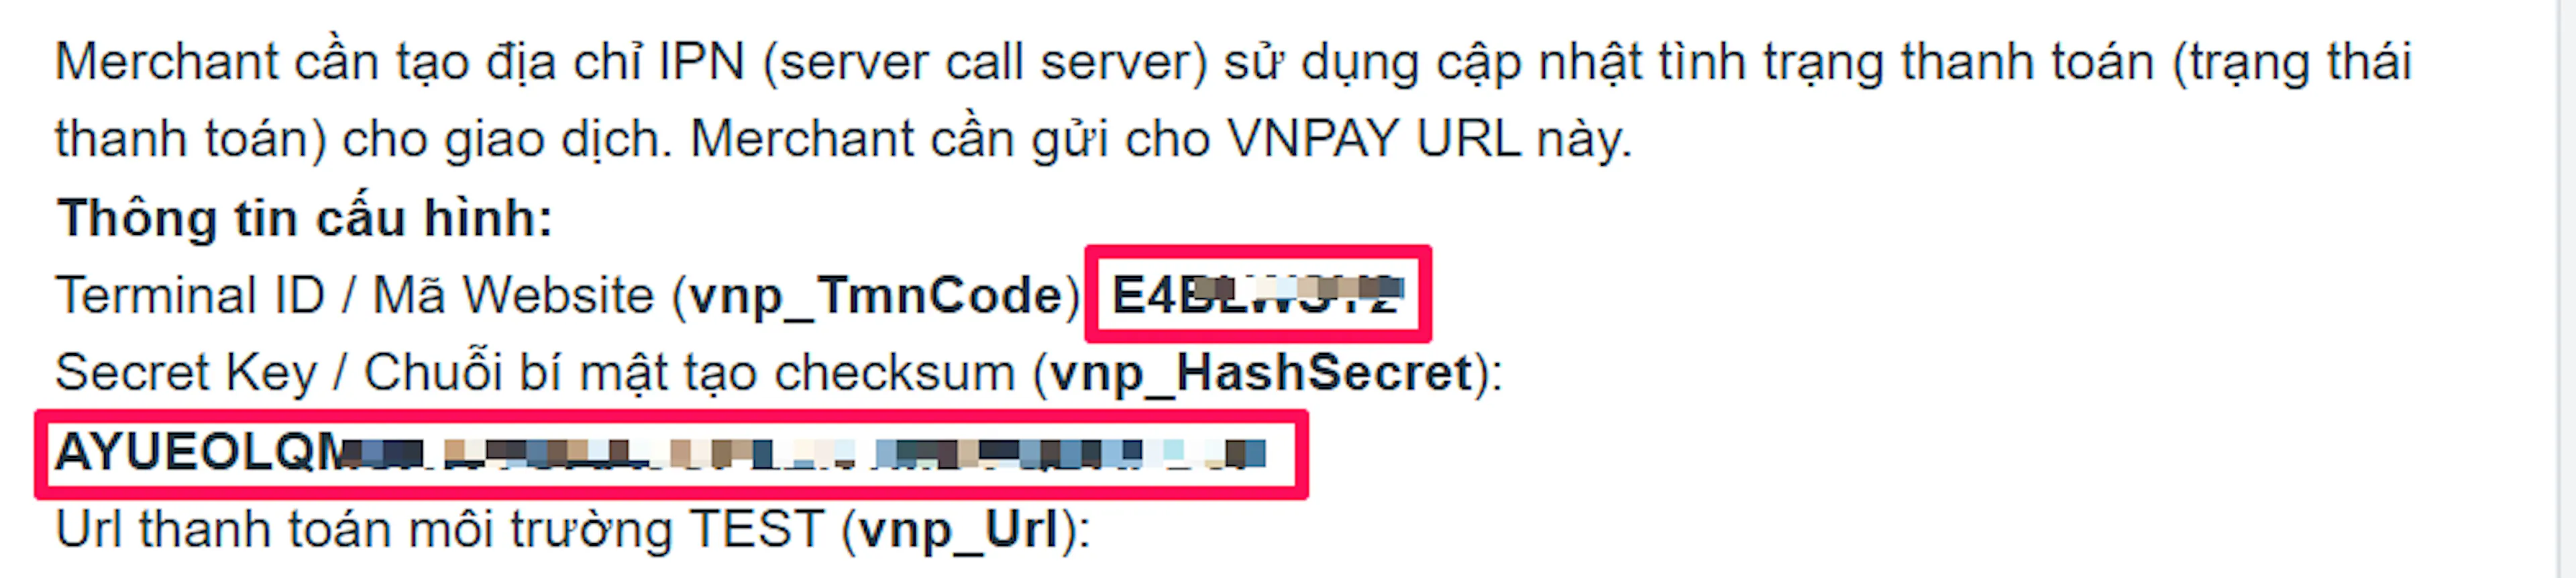
Copy both values directly from VNPAY's original email. A translated copy of the email can alter the Hash Secret, and VNPAY's merchant portal does not show it again.
Keep your Hash Secret private
The Hash Secret signs every request PayLexer sends to VNPAY and proves every notification VNPAY sends back. Never share it or place it in client-side code.
Adding Credentials to PayLexer
Open PayLexer Dashboard
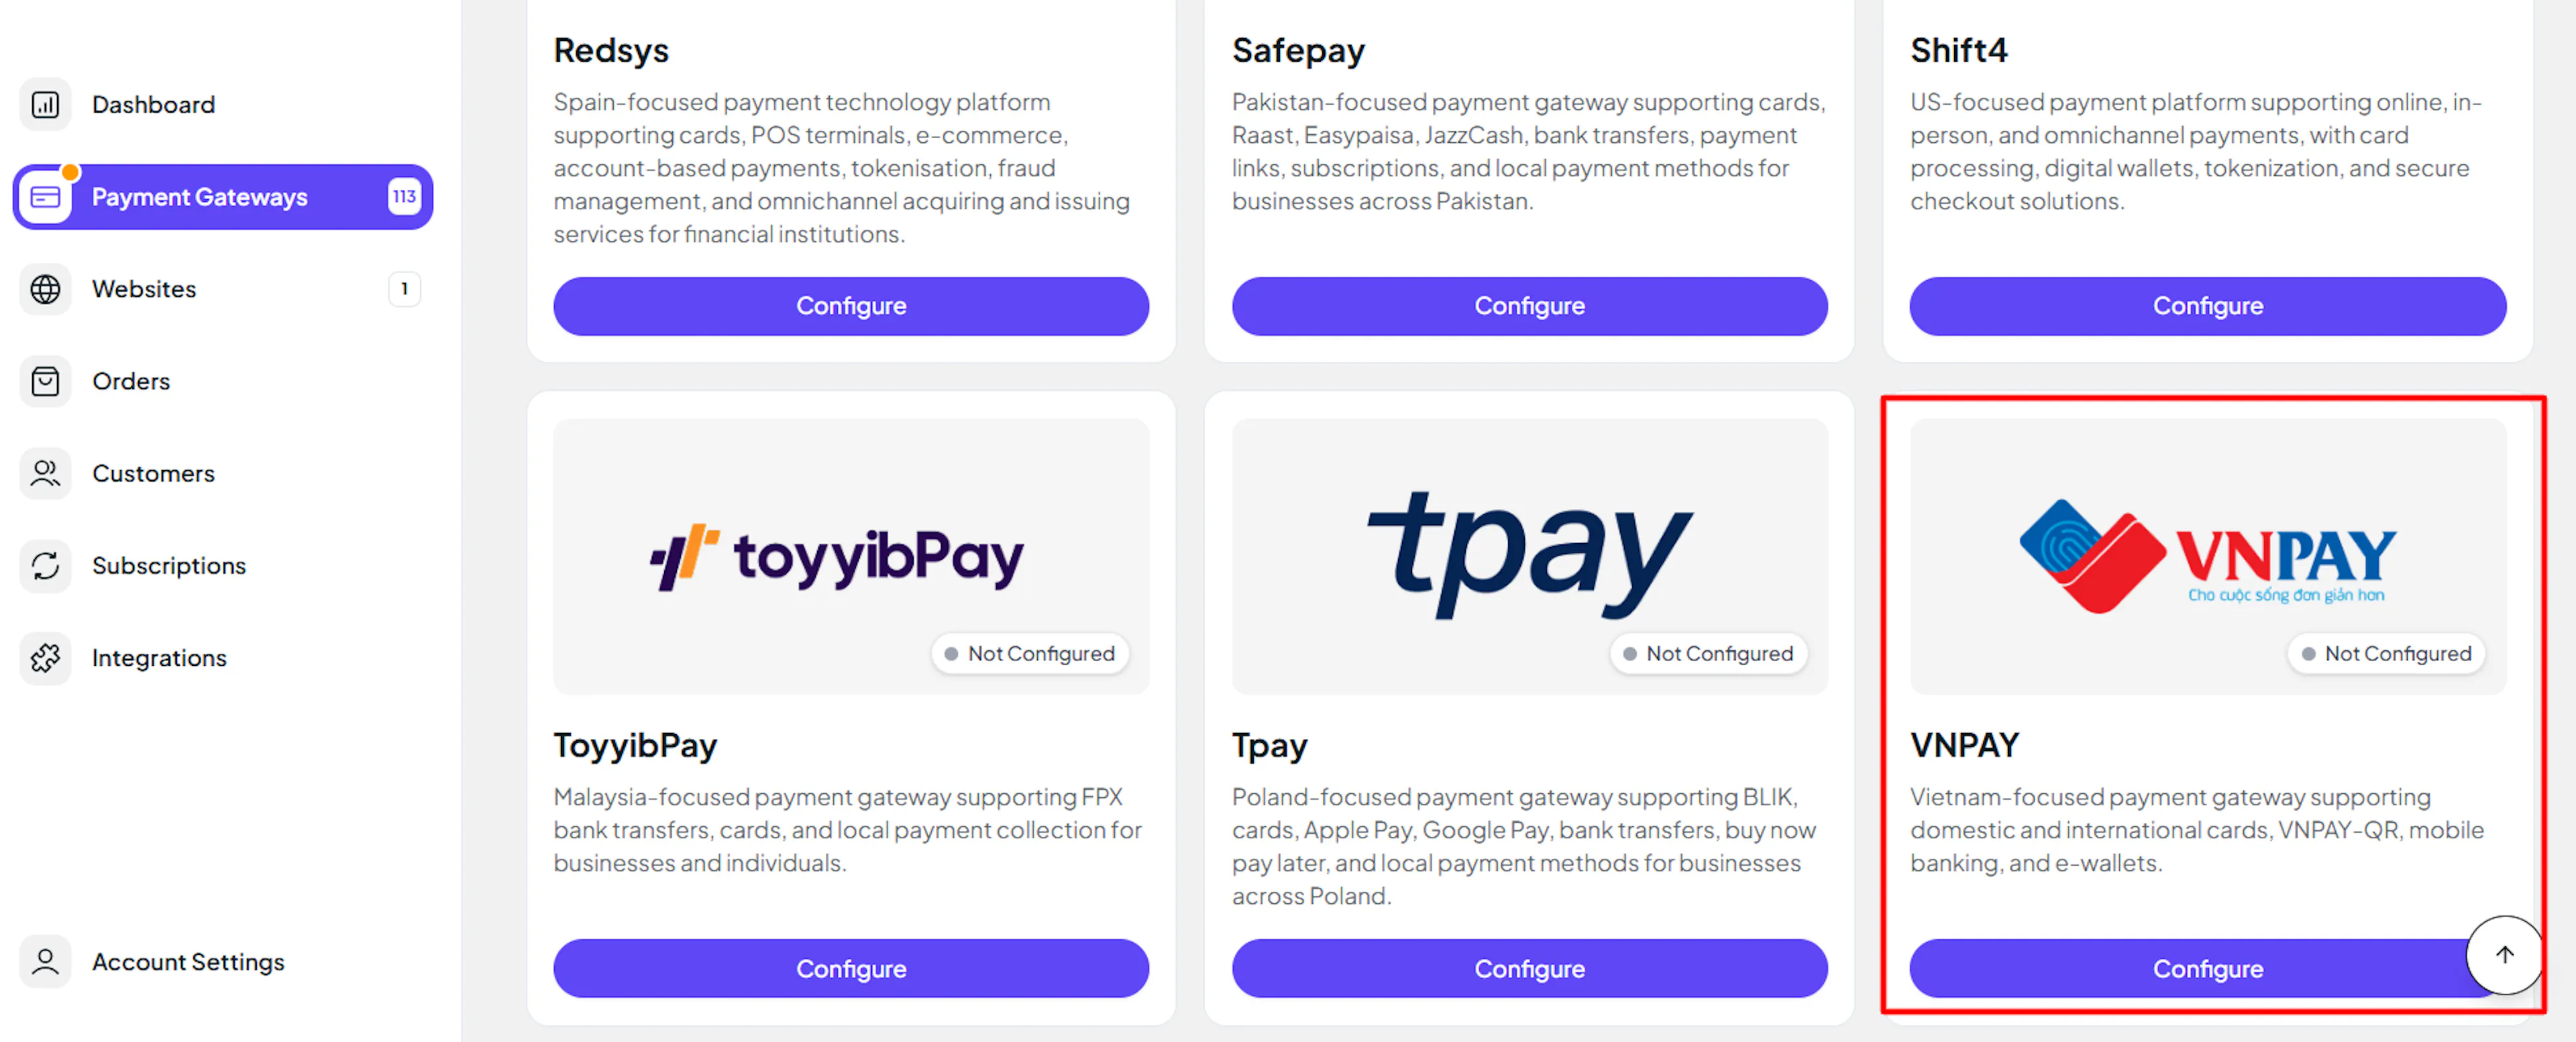
Log in to your PayLexer dashboard and navigate to Payment Gateways → VNPAY.
Enter your credentials
Paste the Terminal Code and Hash Secret you copied from VNPAY into the corresponding fields.
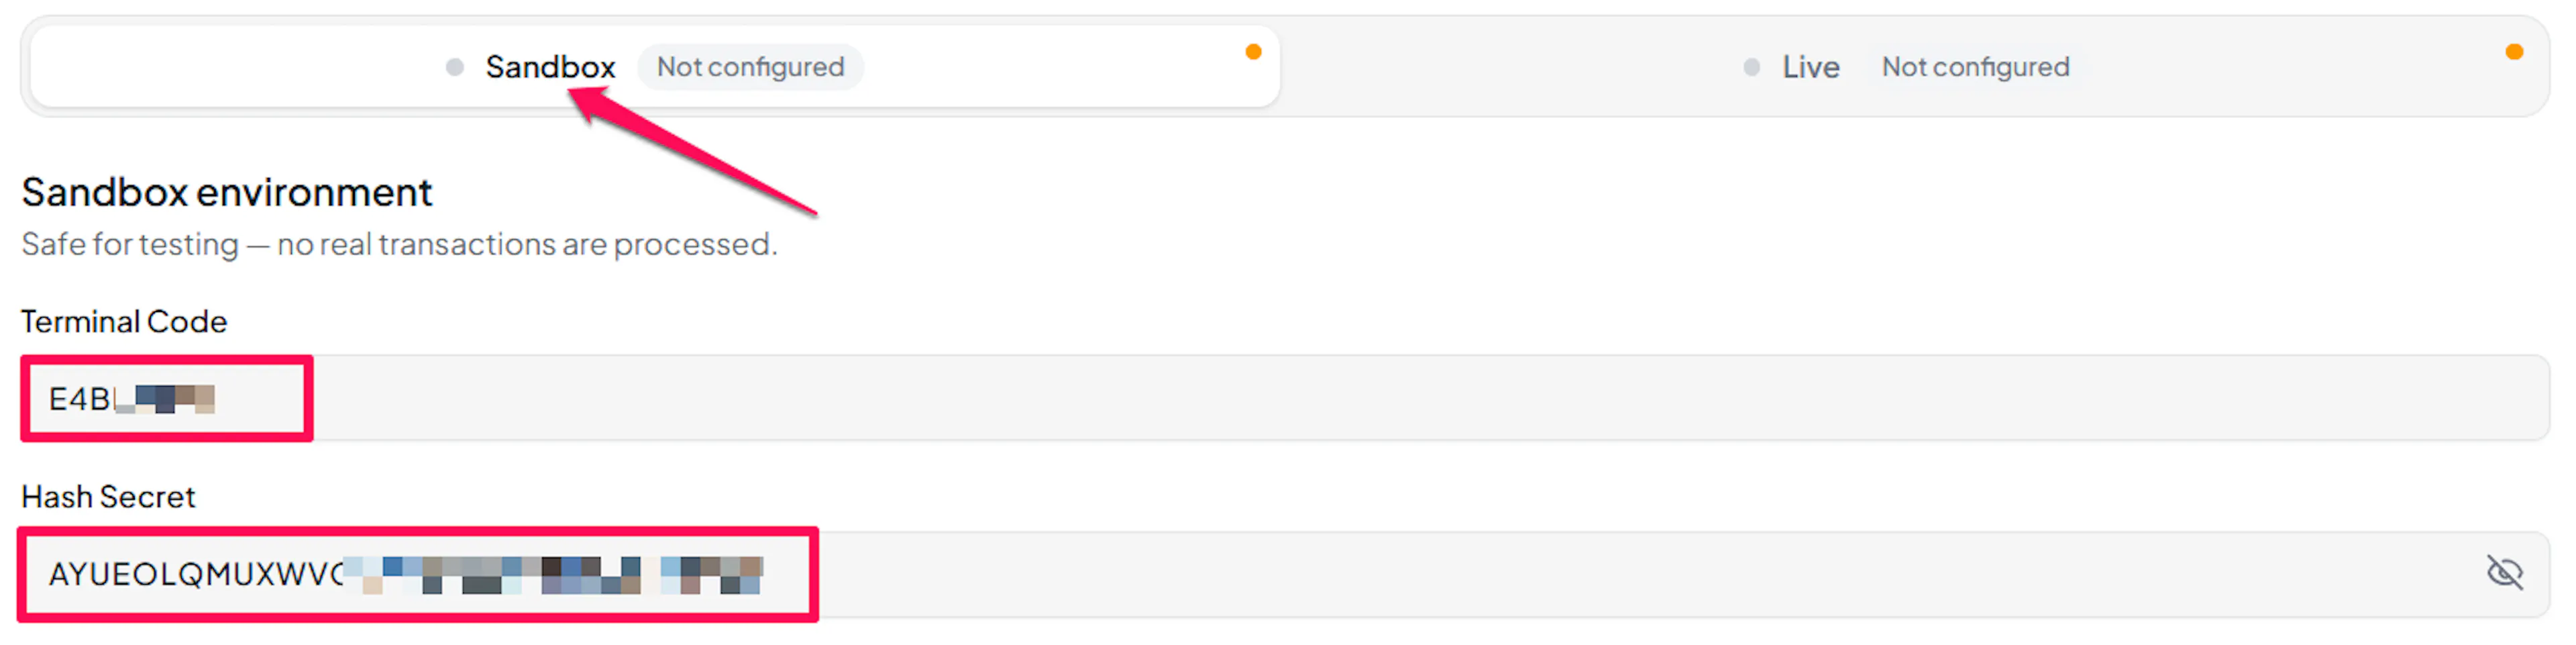
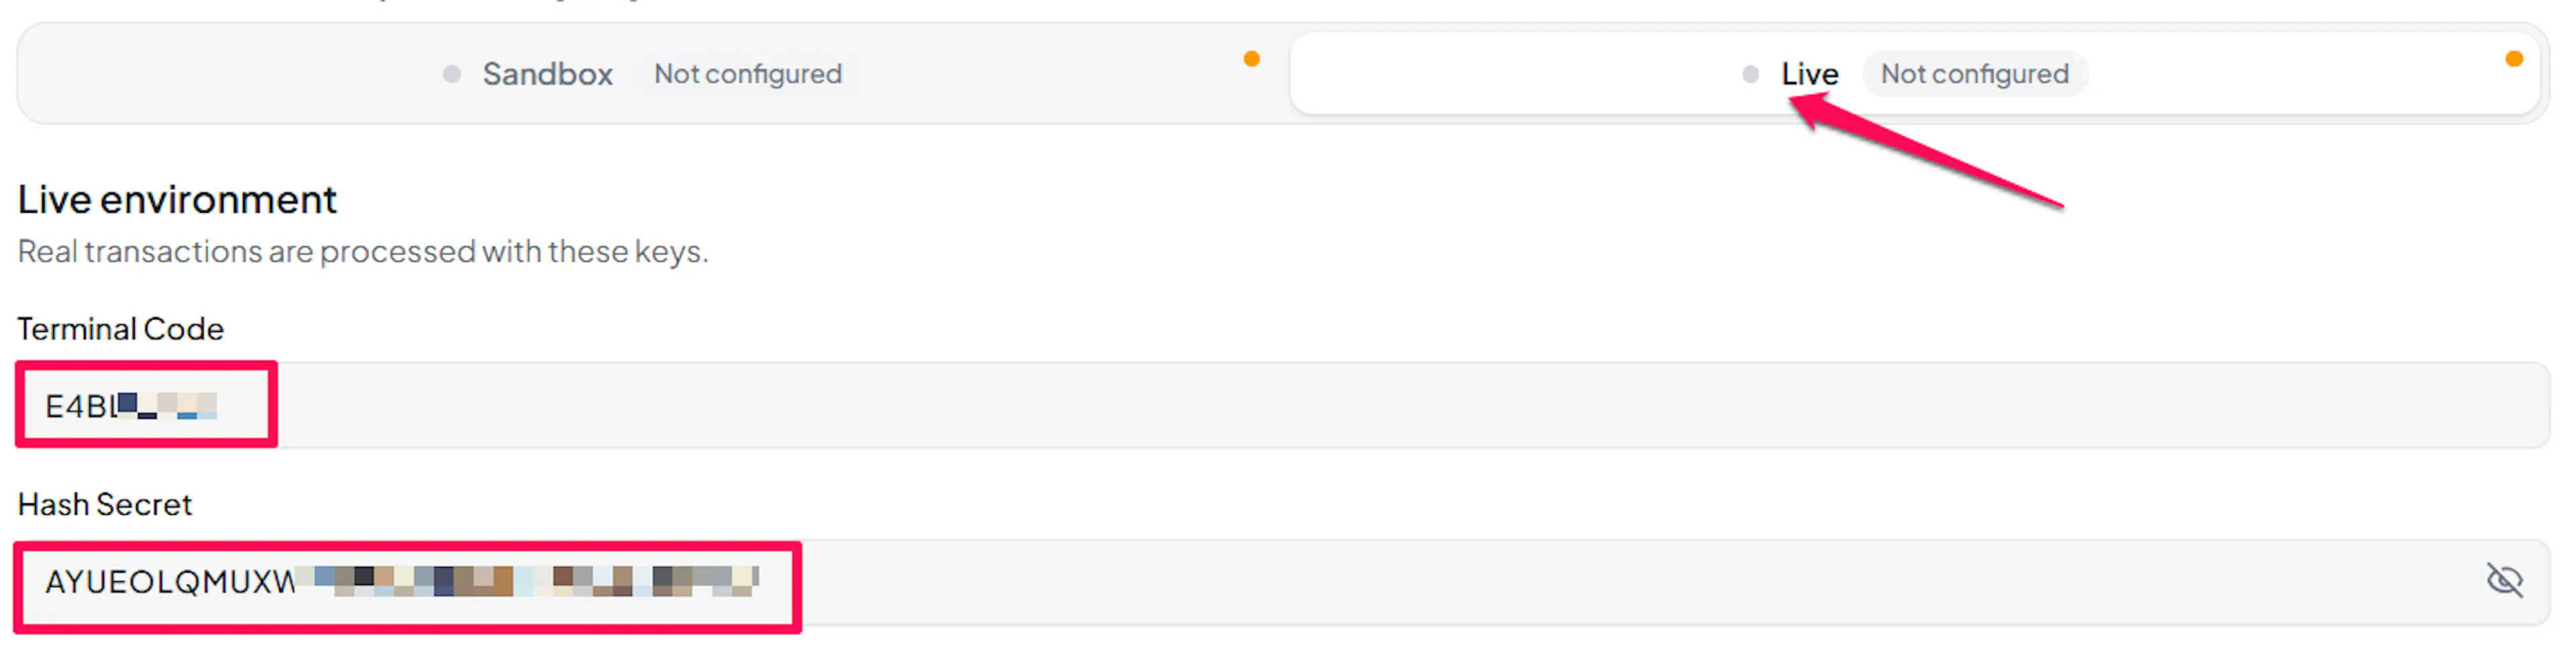
Understanding Live/Production and Sandbox Settings:
| Environment | Purpose |
|---|---|
| Live / Production (Mandatory) | Used for real transactions. Cannot be empty, even when testing. |
| Test / Sandbox (Optional) | Used for testing only. No real money is processed. |
How PayLexer selects credentials:
- Debug/Test mode ON → Test credentials are used
- Debug/Test mode OFF → Live credentials are used
Configuring Webhooks (Mandatory)
Webhooks enable real-time payment updates and significantly improve reliability.
Benefits of Webhooks:
- Instant payment status updates
- Faster order confirmation for shoppers
- Reliable detection of failed and cancelled payments
VNPAY calls its webhook the IPN URL. VNPAY stores one IPN URL per terminal and you register it with VNPAY yourself. No separate webhook secret is needed: VNPAY signs every IPN with your Hash Secret.
Copy your PayLexer IPN URL
In PayLexer → Payment Gateways → VNPAY, copy the IPN URL shown for your account.

Register the IPN URL for your sandbox terminal
Log in to VNPAY's SIT testing portal with your sandbox account, open Cấu hình IPN URL (Configure IPN URL), click Sửa (Edit) next to your terminal, paste the PayLexer IPN URL, and click Cập nhật (Update).

Register the IPN URL for your live terminal
Send the same PayLexer IPN URL to VNPAY during live onboarding. VNPAY configures it for your live terminal.
Test and Save
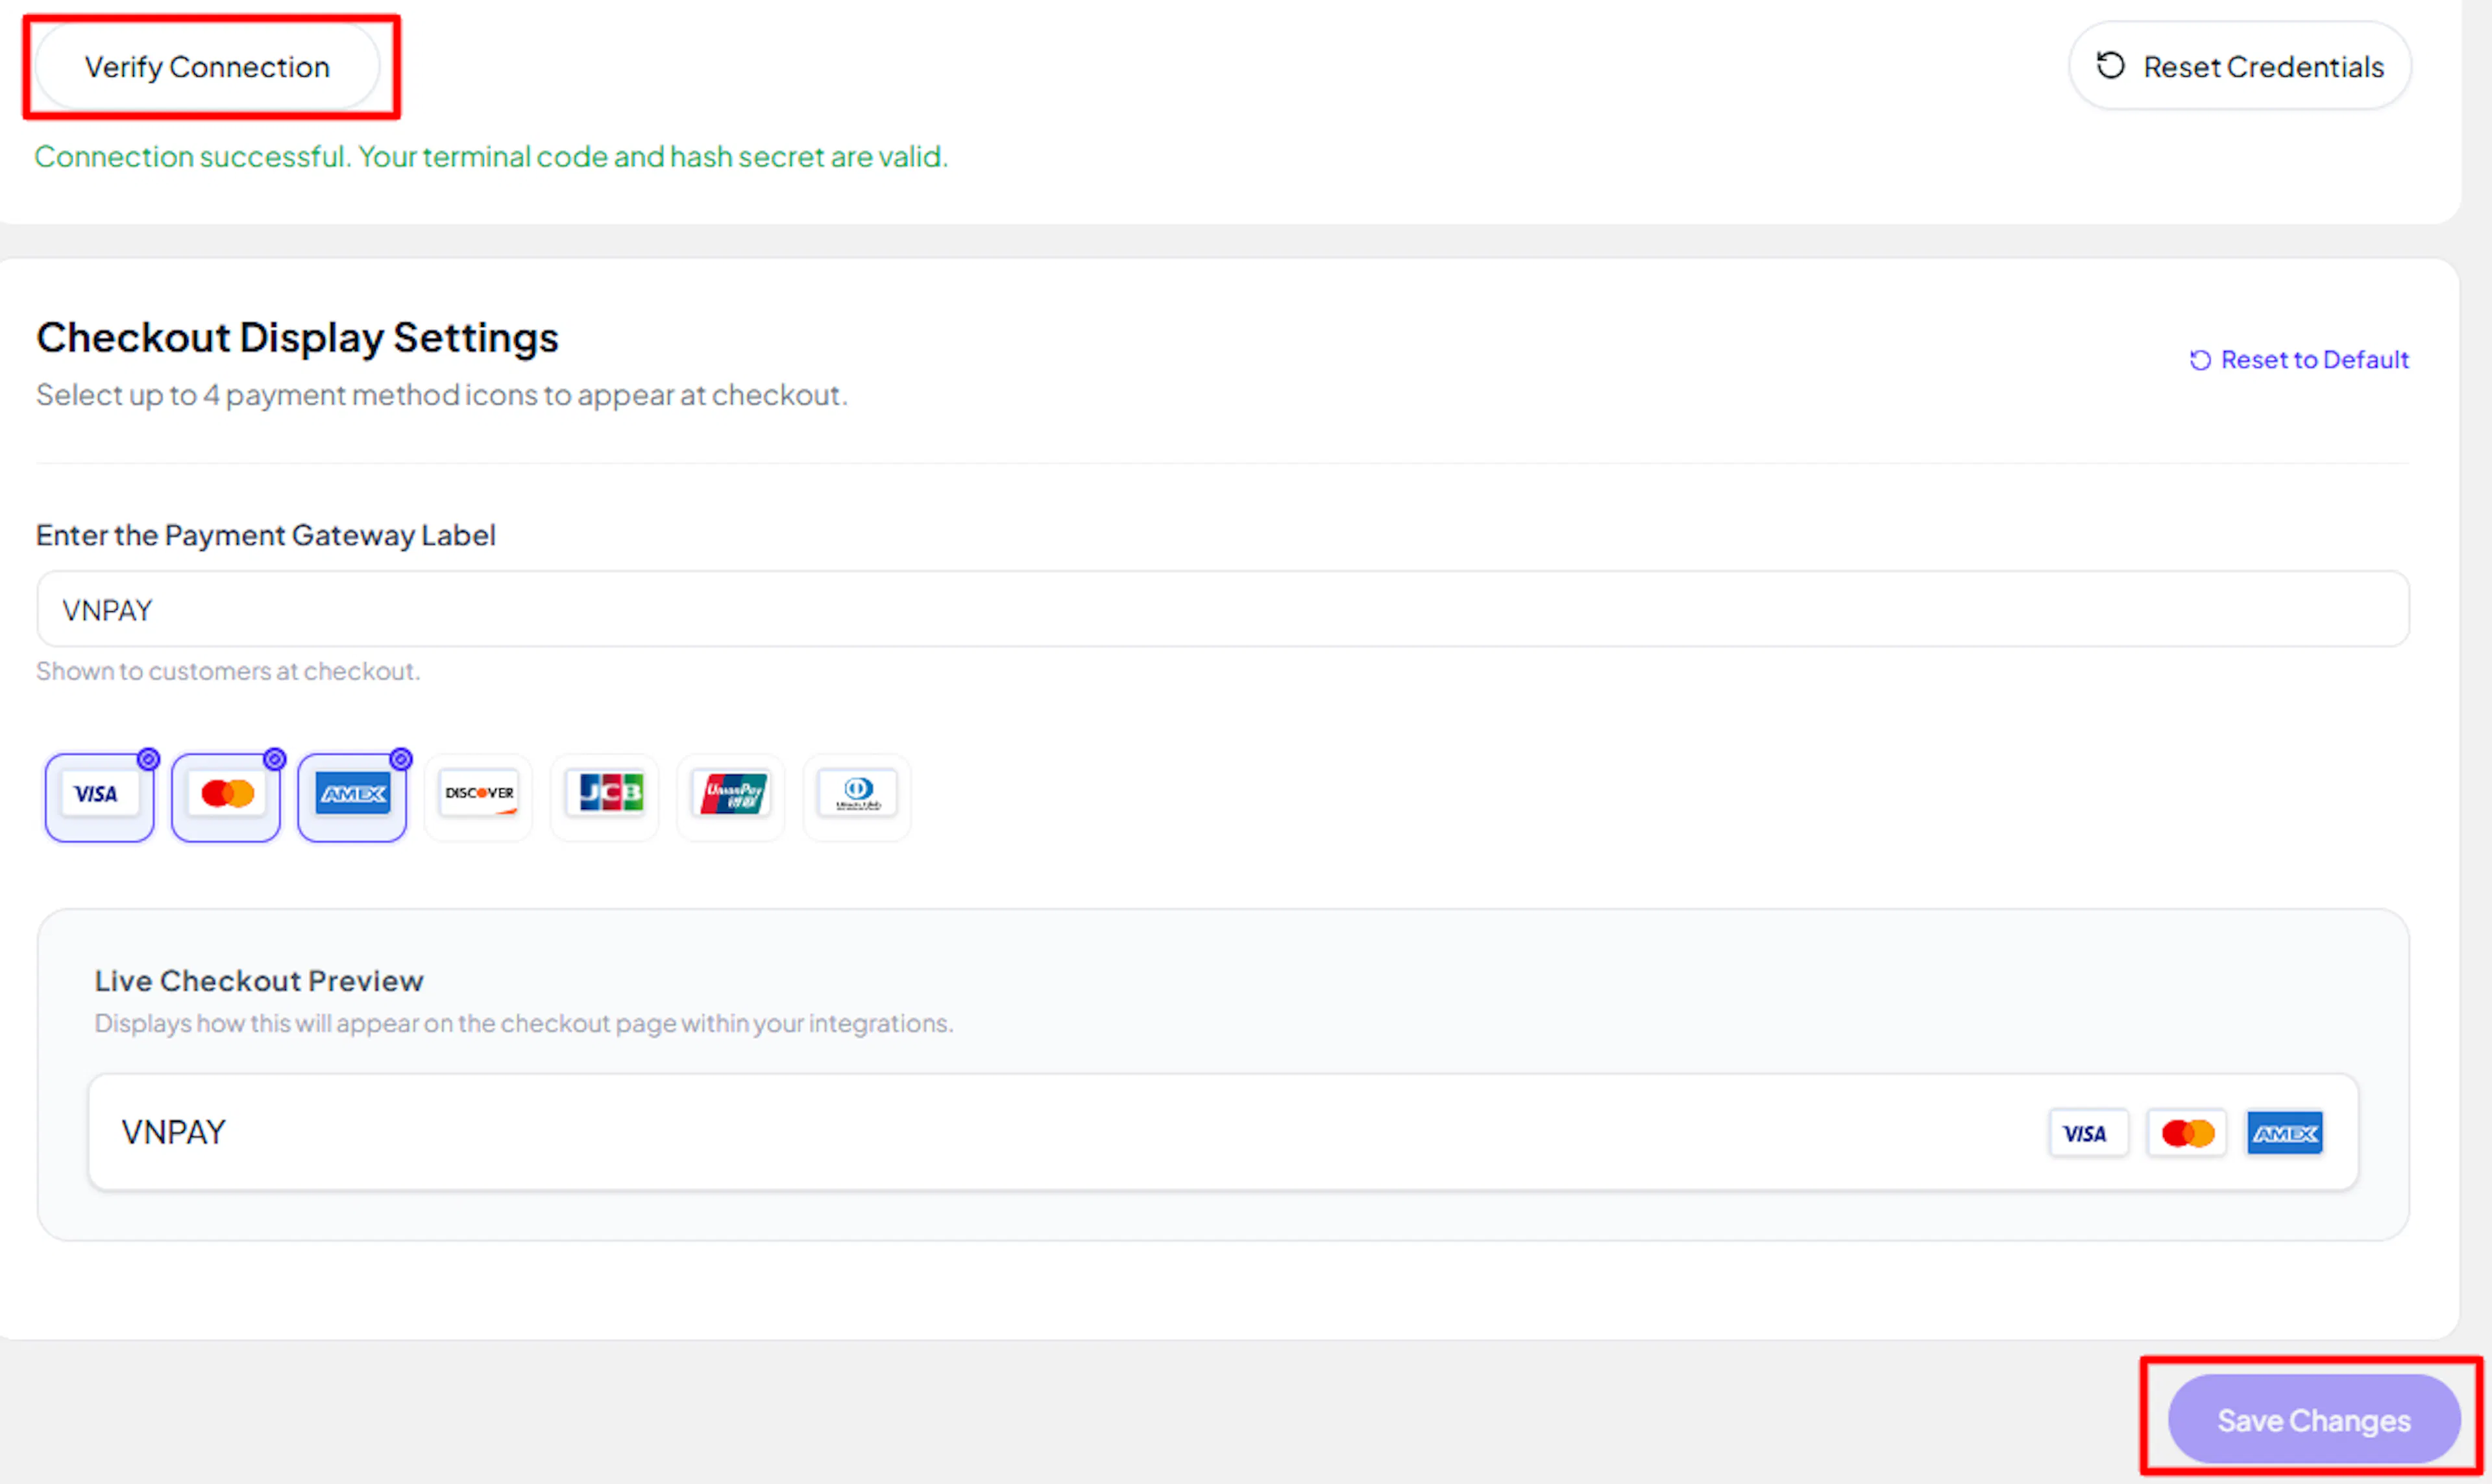
Click Save to save your configuration and verify your credentials. Click Verify Connection to test the connection. PayLexer tells you whether both credentials are valid, or which one VNPAY rejected.
Integrate VNPAY to Your Website
If you have already added and configured your site, you can enable VNPAY in your existing setup.
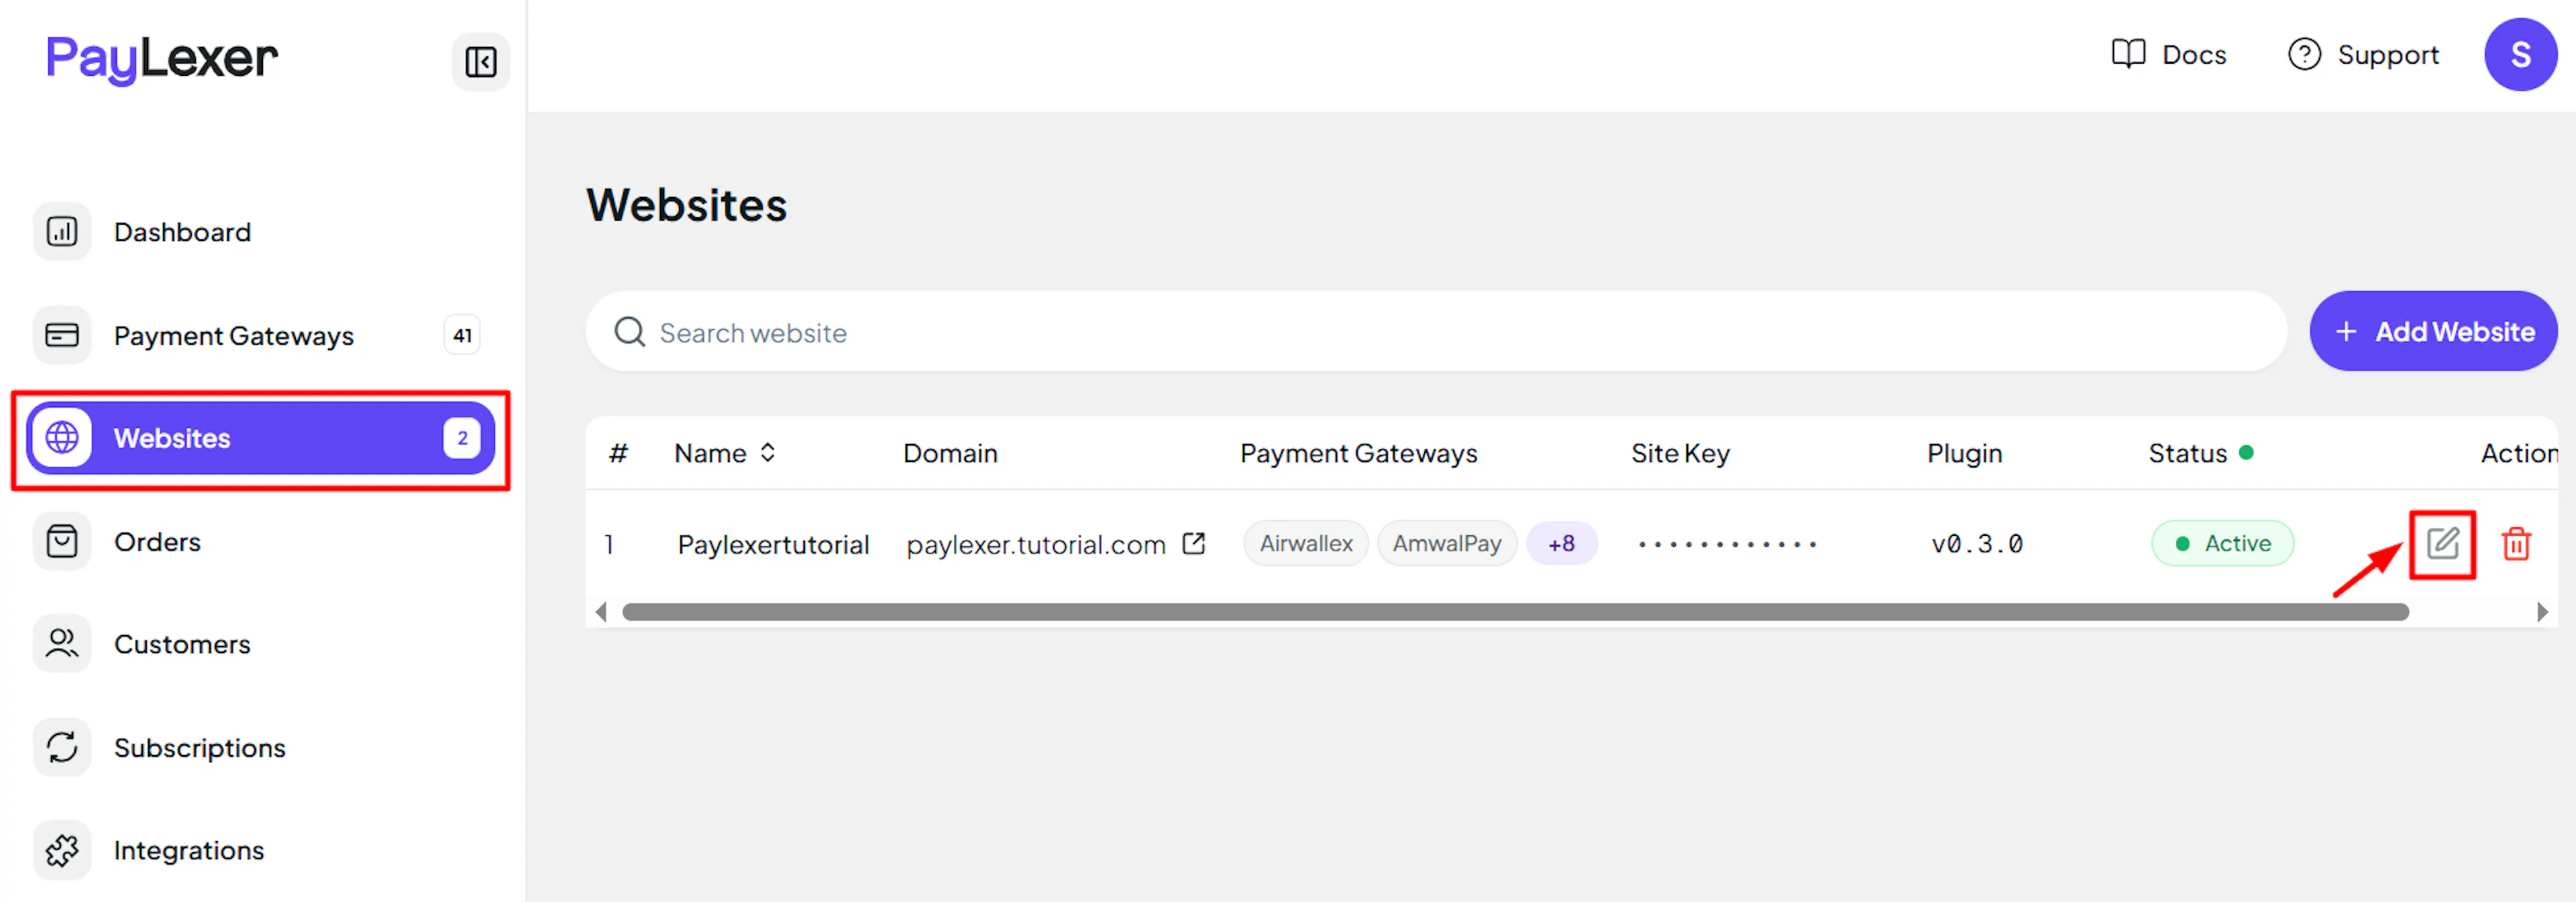
Go to Websites
Navigate to Websites in your PayLexer dashboard.
Edit your website
Click the Edit Icon of your added website.
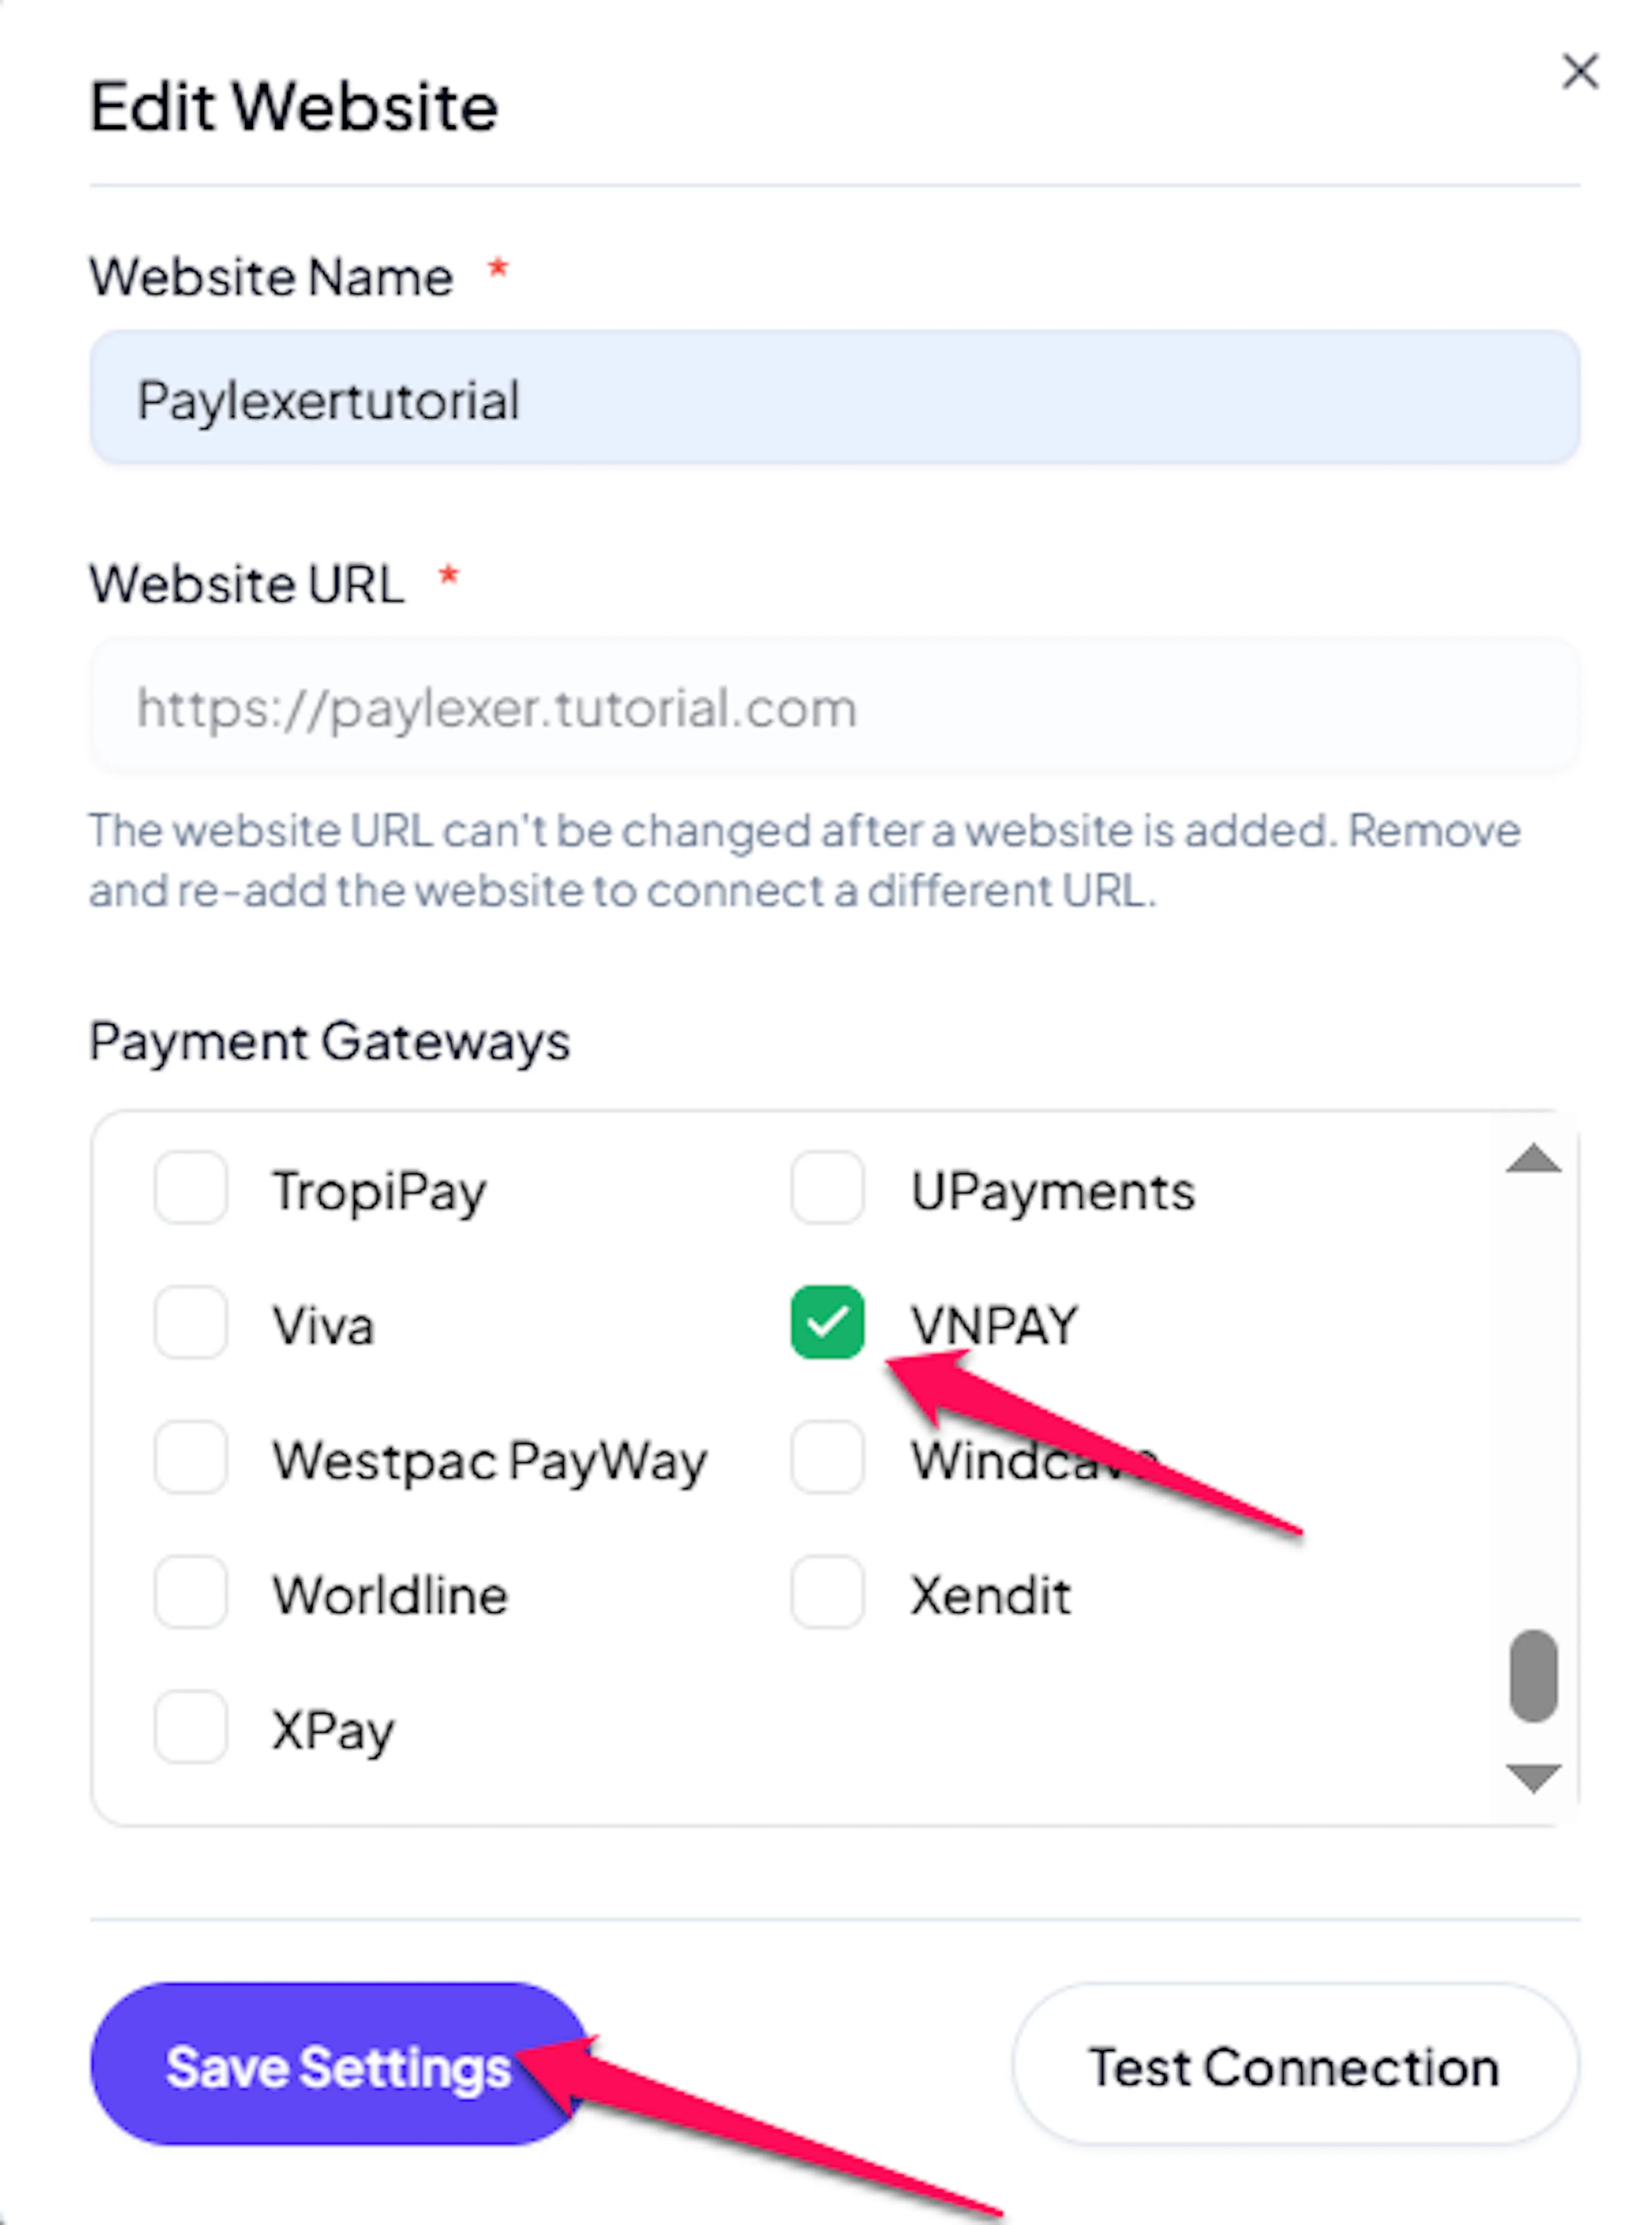
Enable VNPAY
Click the checkbox to enable VNPAY for the website.
If you haven't added a website yet, Continue to Add Your Website →
Troubleshooting
Best Practices
- Test in sandbox before enabling production.
- Register your IPN URL with VNPAY for every terminal you use, so payment updates sync in real time.
- Run VNPAY's SIT test scenarios before requesting live credentials.
- Issue refunds from PayLexer, not the VNPAY merchant portal, so your store's order records stay in sync.
- Keep your Hash Secret confidential. If you suspect it has been exposed, contact VNPAY to replace it.
FAQs
Still Have Questions?
- VNPAY Support:
- Contact Link: Contact VNPAY
- Support Email: hotrovnpay@vnpay.vn
- PayLexer Support: Contact Support