

PPS (Protected Payment Services)
Connect Protected Payment Services (PPS) to PayLexer to accept card payments from a UK-focused, acquirer-independent gateway.
Protected Payment Services (PPS) is a UK-focused, acquirer-independent payment gateway that can connect to more than 50 different acquiring banks behind the scenes, so your merchant account isn't tied to a single bank's processing. Shoppers pay on a page PPS itself hosts, so card details never touch your site or PayLexer's servers.
- Supported Regions (Merchant Accounts): United Kingdom
- Supported Currencies: GBP, EUR, USD
Supported Features
- Hosted checkout page - shoppers pay on a PPS-hosted page, so card data never touches your site or PayLexer
- One-time payments
- Real-time payment confirmation - PPS notifies PayLexer the moment a payment completes
- Full refunds - refunds you issue from your PayLexer dashboard are confirmed immediately once the underlying payment has finished settling with the bank
Before You Start
Make sure you have:
- PPS Merchant Account – Don't have one? PPS issues merchant accounts through its own onboarding process rather than instant self-service sign-up. Please contact PPS support for it.
- PayLexer Account – Required to configure the integration. Create your account →
- A website where you want to integrate
Looking for a different payment processor? View all supported gateways →
Configuring PPS
You need a Merchant ID, Signing Secret, Hosted Integration URL and Direct Integration URL from PPS for this integration.
Getting API Credentials
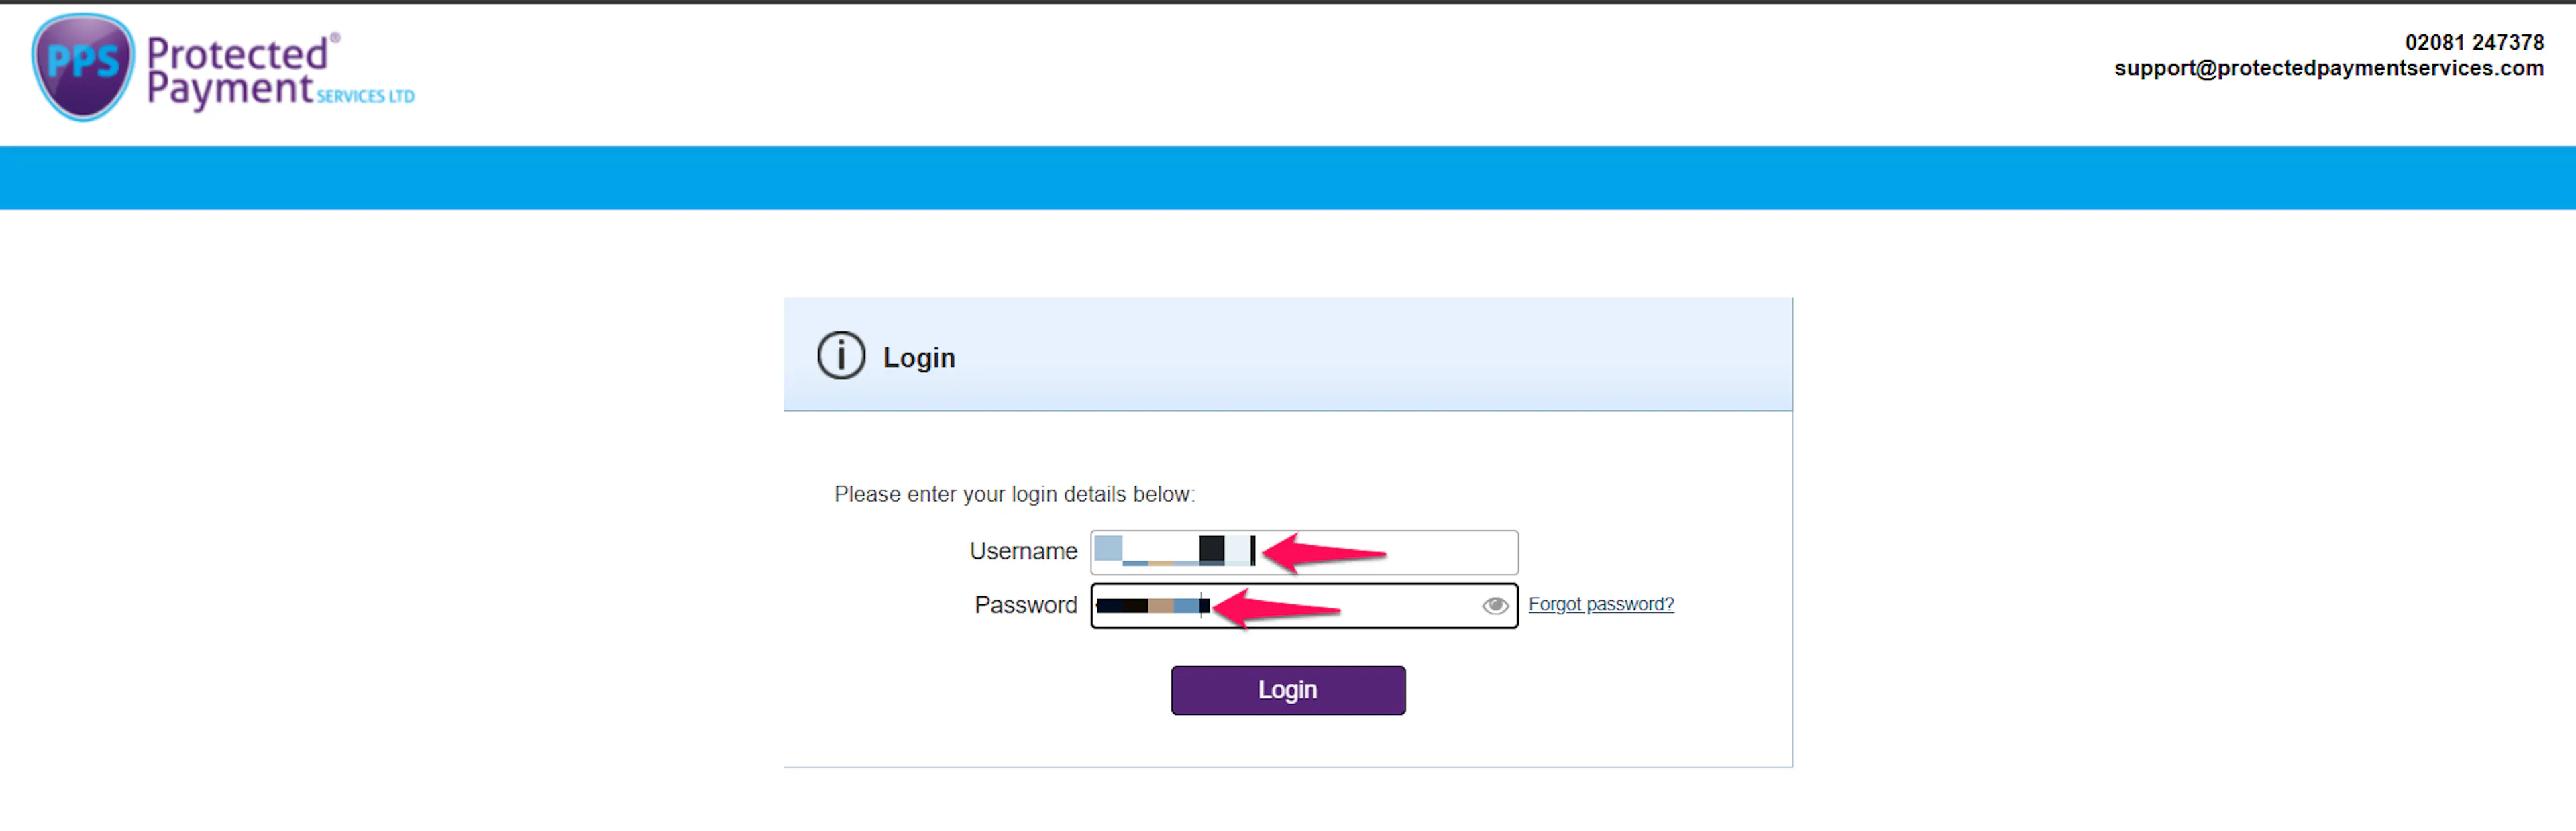
Log in to the PPS admin portal
Use the credentials PPS support issued you during onboarding.
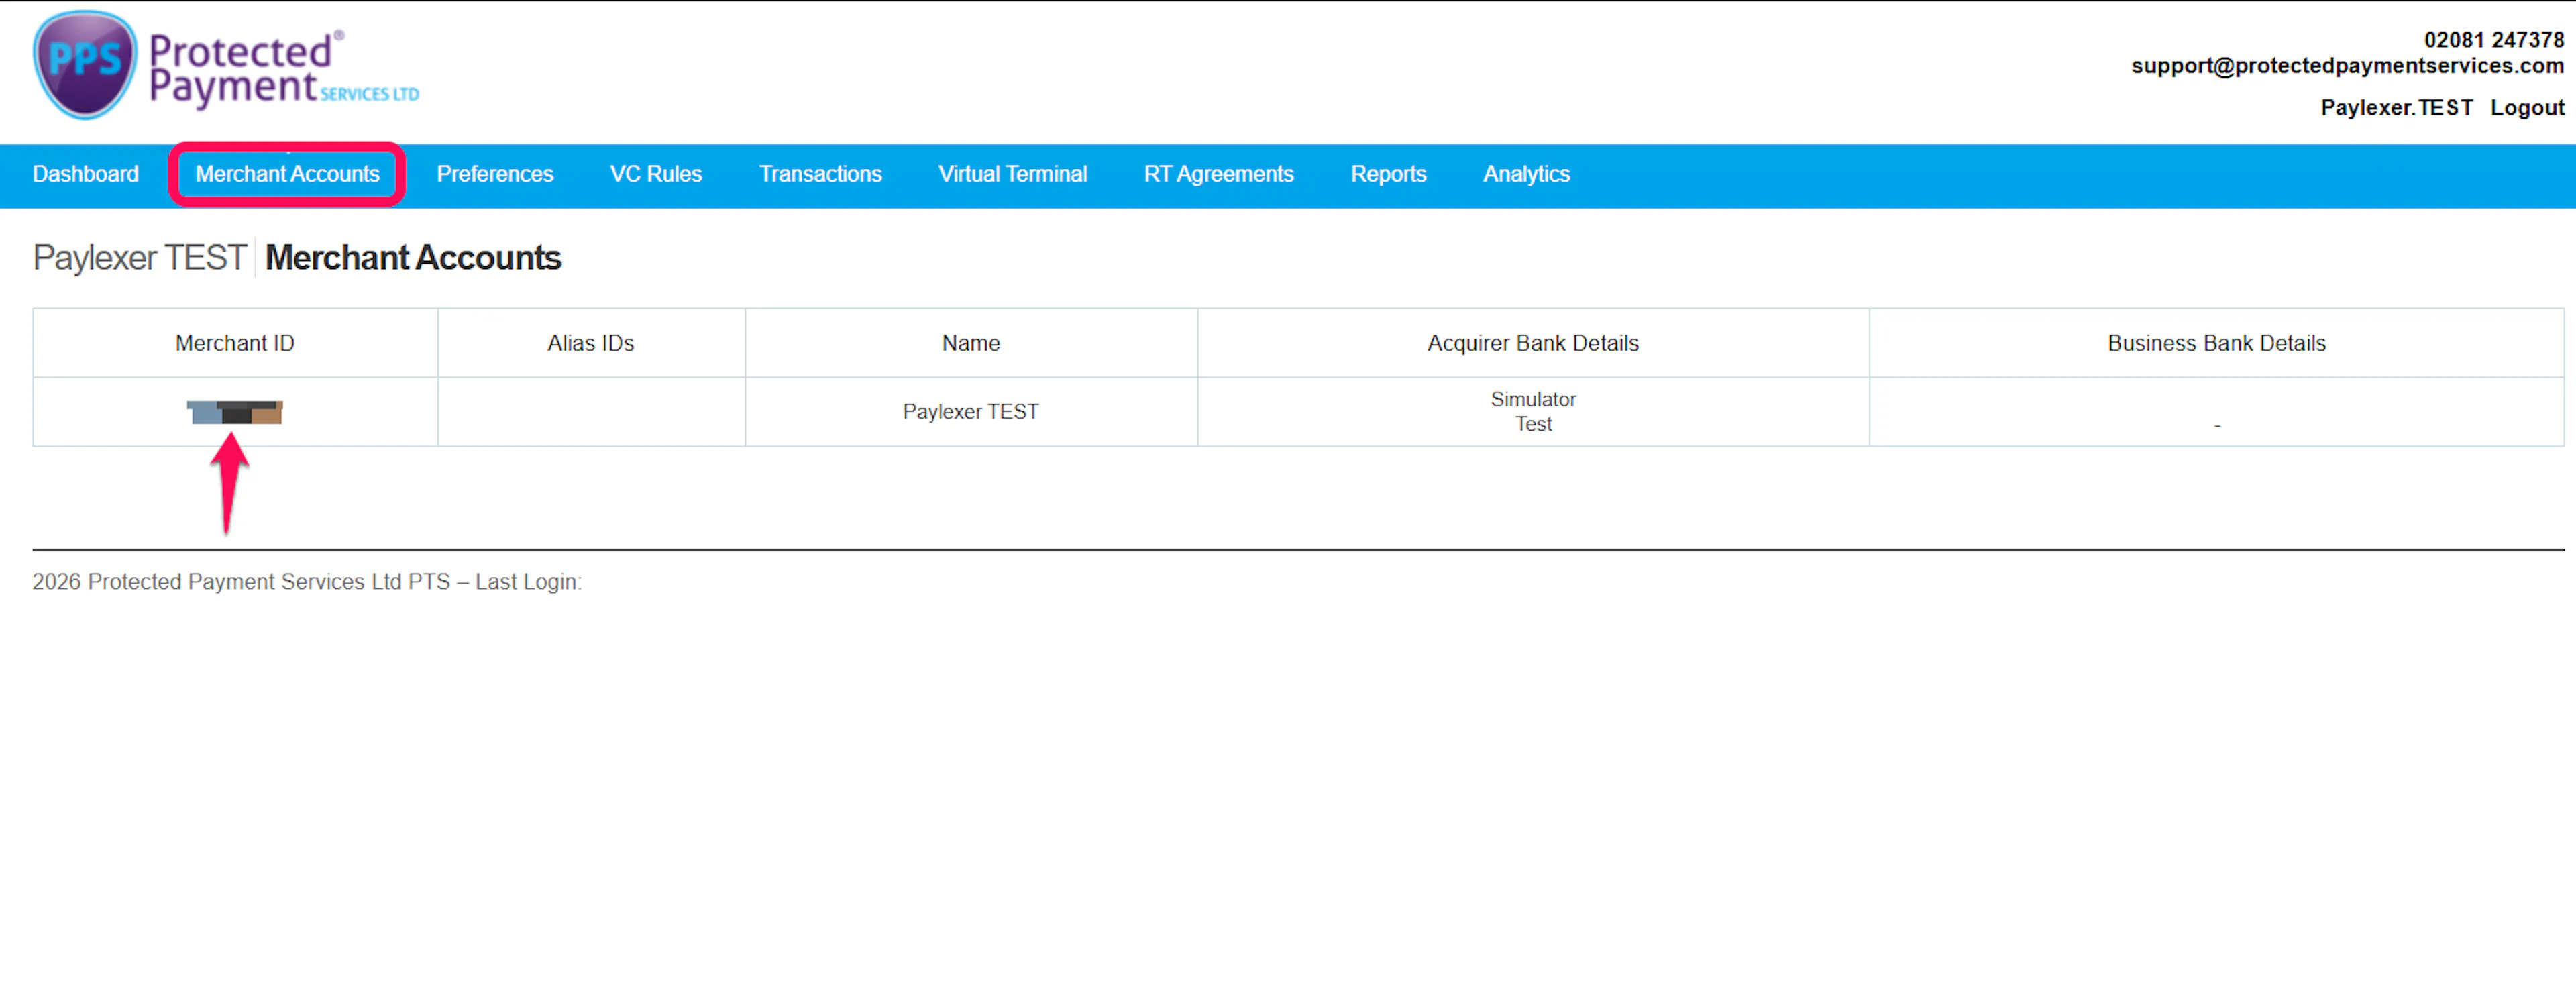
Find your Merchant ID
Click Merchant Accounts to find your Merchant ID. This is unique to your account and not shared across merchants.
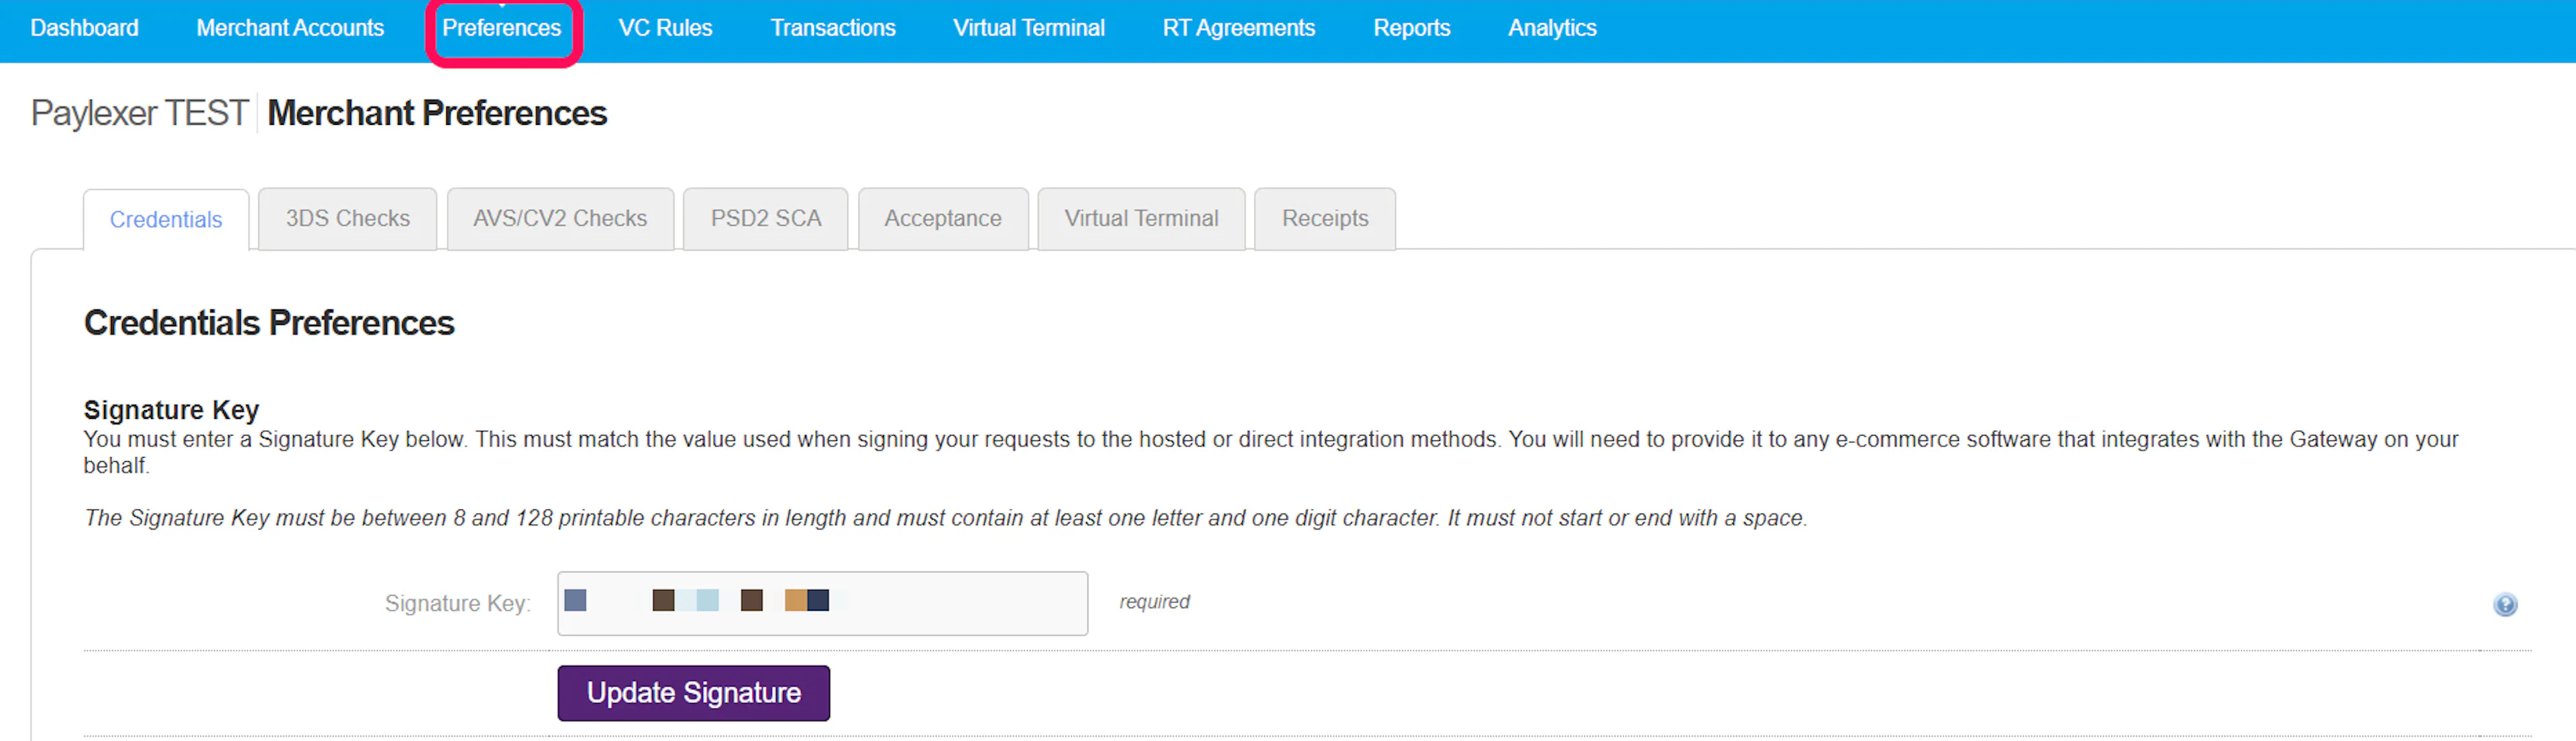
Find your Signing Secret
Go to Preferences → Credentials to find your Signing Secret. This is also unique to your account.
- Contact PPS support to request your per-merchant Hosted Integration URL - it isn't shown in the admin portal.
- Refunds and cancellations need one more credential: a Direct Integration URL. This is also requested separately from PPS support, after your account is set up. Checkout works without it, but refunds and cancellations won't until it's added.
- Test and Live credentials are separate - request both if you plan to test before going live.
Adding Credentials to PayLexer
Open PayLexer Dashboard
Log in to your PayLexer dashboard and navigate to Payment Gateways → PPS.
Enter your credentials
Paste the Merchant ID, Signing Secret, and Hosted Integration URL you received from PPS into the corresponding fields. Add the Direct Integration URL as well if PPS support has issued it - it's optional, but required for refunds and cancellations to work.
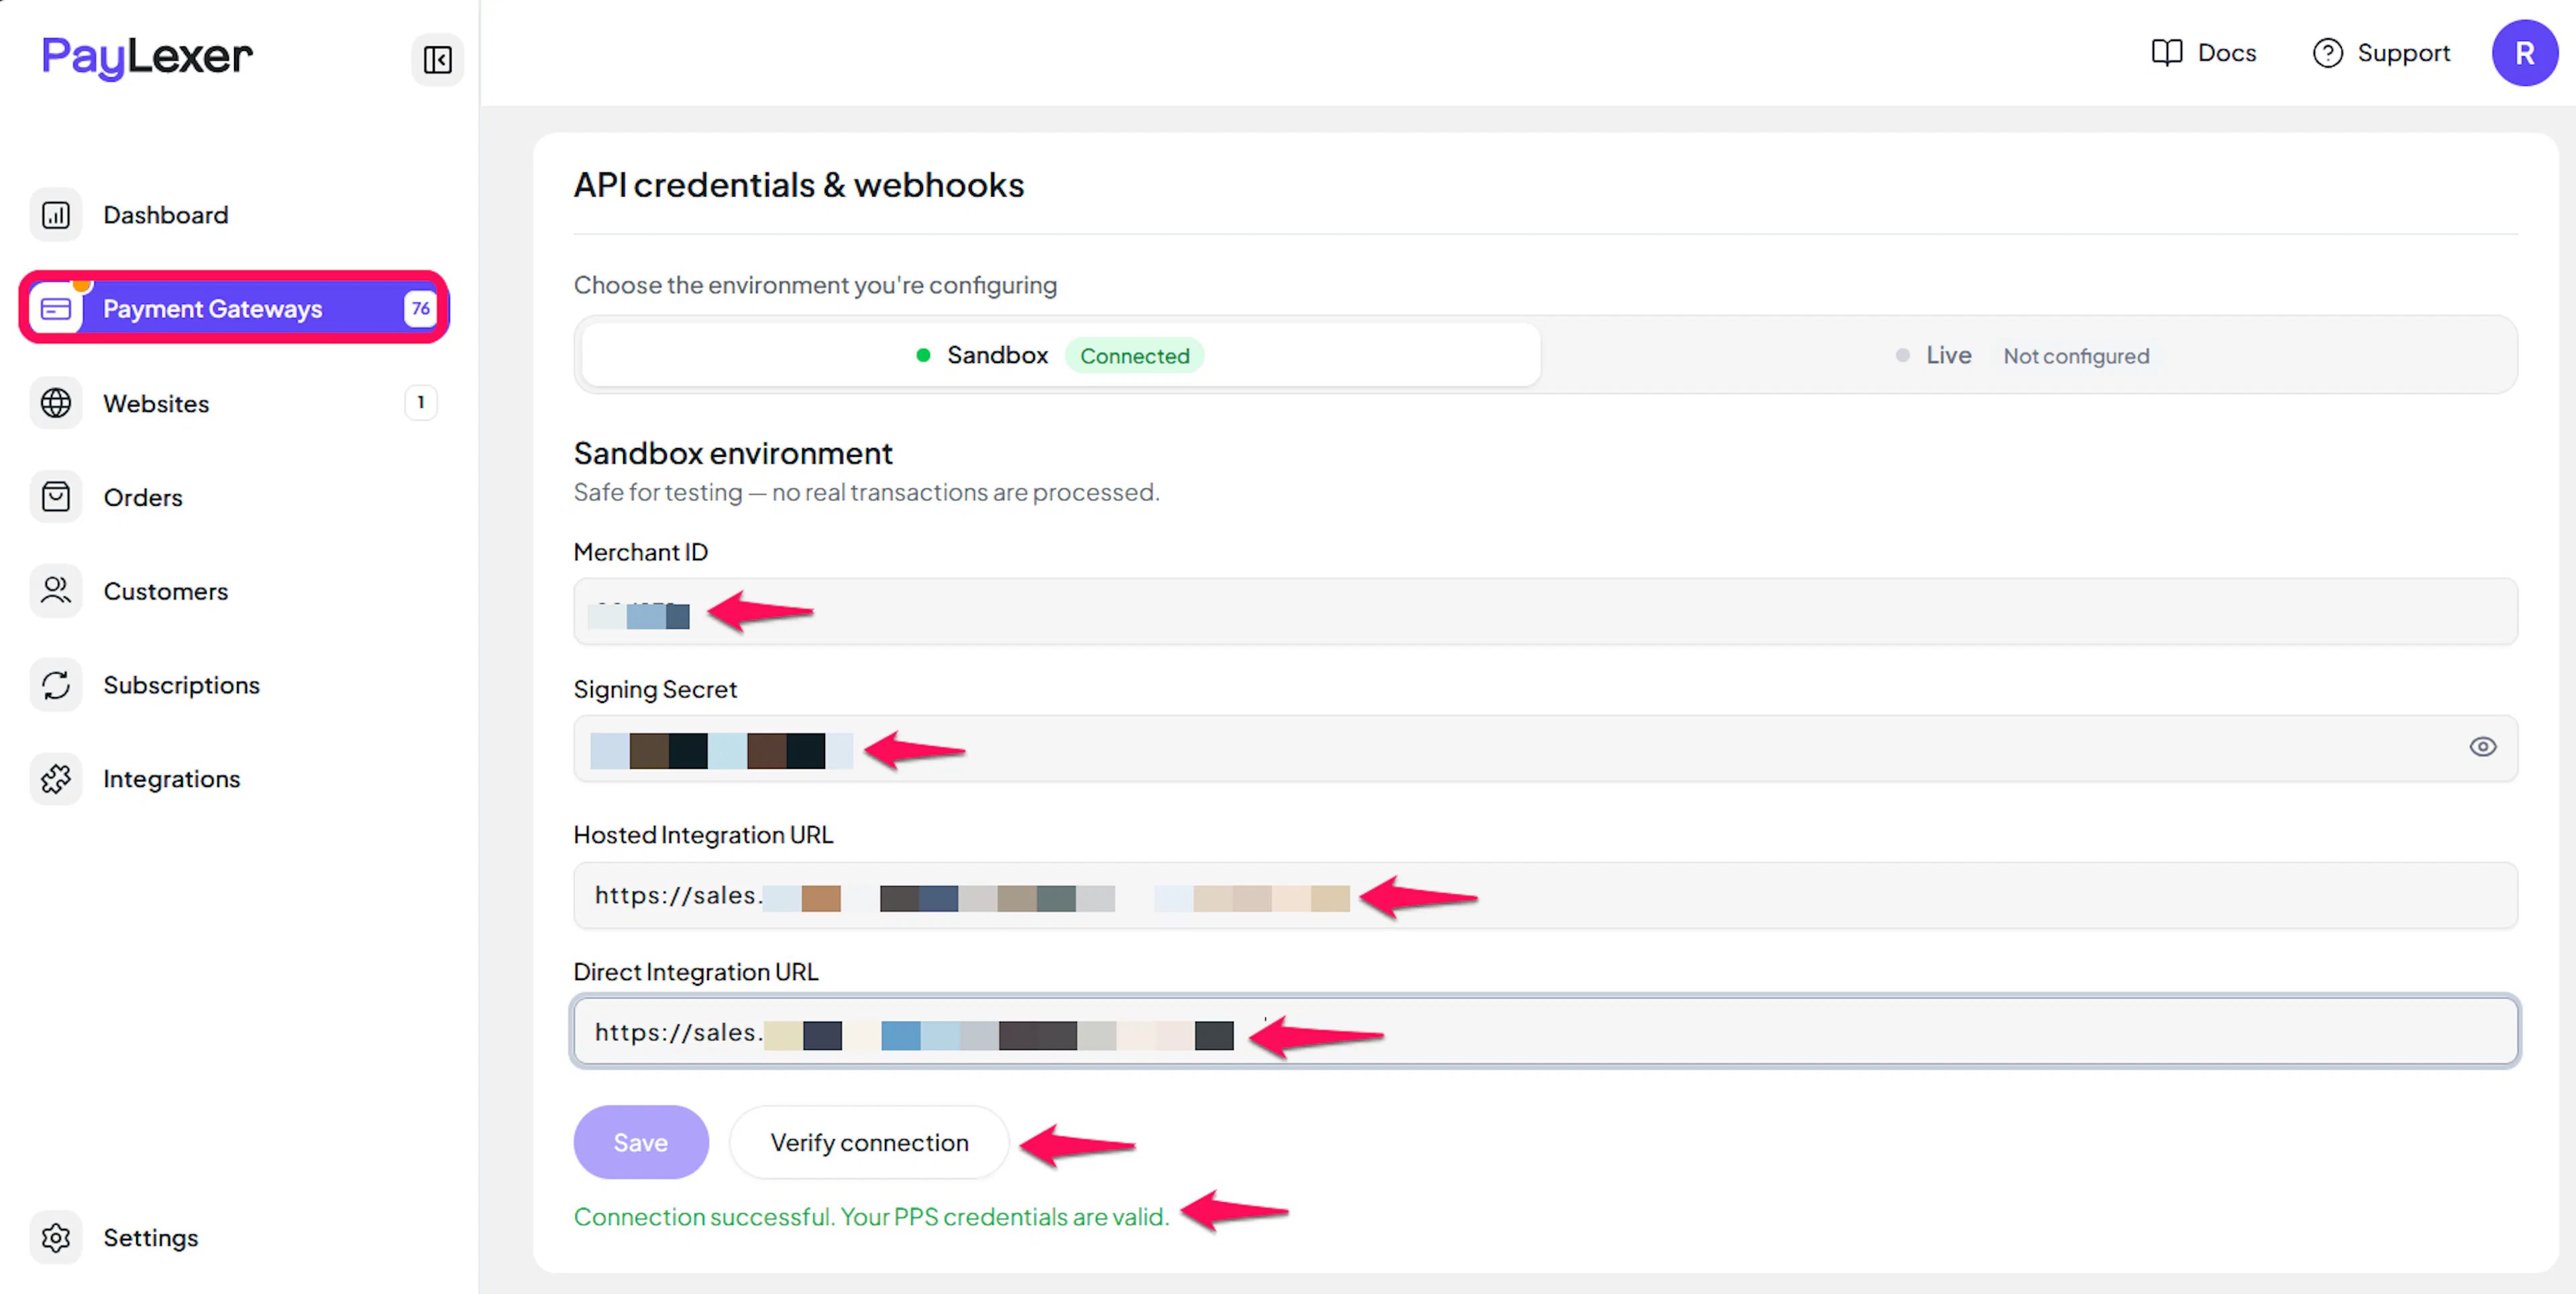
Understanding Live/Production and Sandbox Settings:
| Environment | Purpose |
|---|---|
| Live / Production (Mandatory) | Used for real transactions. Cannot be empty, even when testing. |
| Test / Sandbox (Optional) | Used for testing only. No real money is processed. |
How PayLexer selects credentials:
- Debug/Test mode ON → Test credentials are used
- Debug/Test mode OFF → Live credentials are used
Test and save
Click Save to save your configuration and verify your credentials. Click Verify Connection to test the connection.
If your Direct Integration URL isn't added yet, Verify Connection still succeeds - checkout doesn't need it. Refund and cancellation attempts will fail with a clear message until it's added.
Configuring Webhooks
PPS delivers payment results exclusively through a real-time, server-to-server webhook - there's no separate polling fallback for this gateway, which makes webhook delivery essential rather than just a reliability improvement.
Benefits of Webhooks:
- Instant payment status updates
- No manual configuration required
No setup is needed on your part. PayLexer automatically builds a unique, signed webhook URL for your account and passes it to PPS with every checkout, so there's no webhook URL to copy into a PPS dashboard and no separate webhook secret to manage - the same Signing Secret you entered above also secures webhook delivery.
Because PPS has no status-polling fallback, a payment can only be confirmed once its webhook is delivered. If your server is unreachable when PPS sends it, that specific payment may need manual follow-up - see Troubleshooting below.
Integrate PPS to Your Website
If you have already added and configured your site, you can enable PPS in your existing setup.
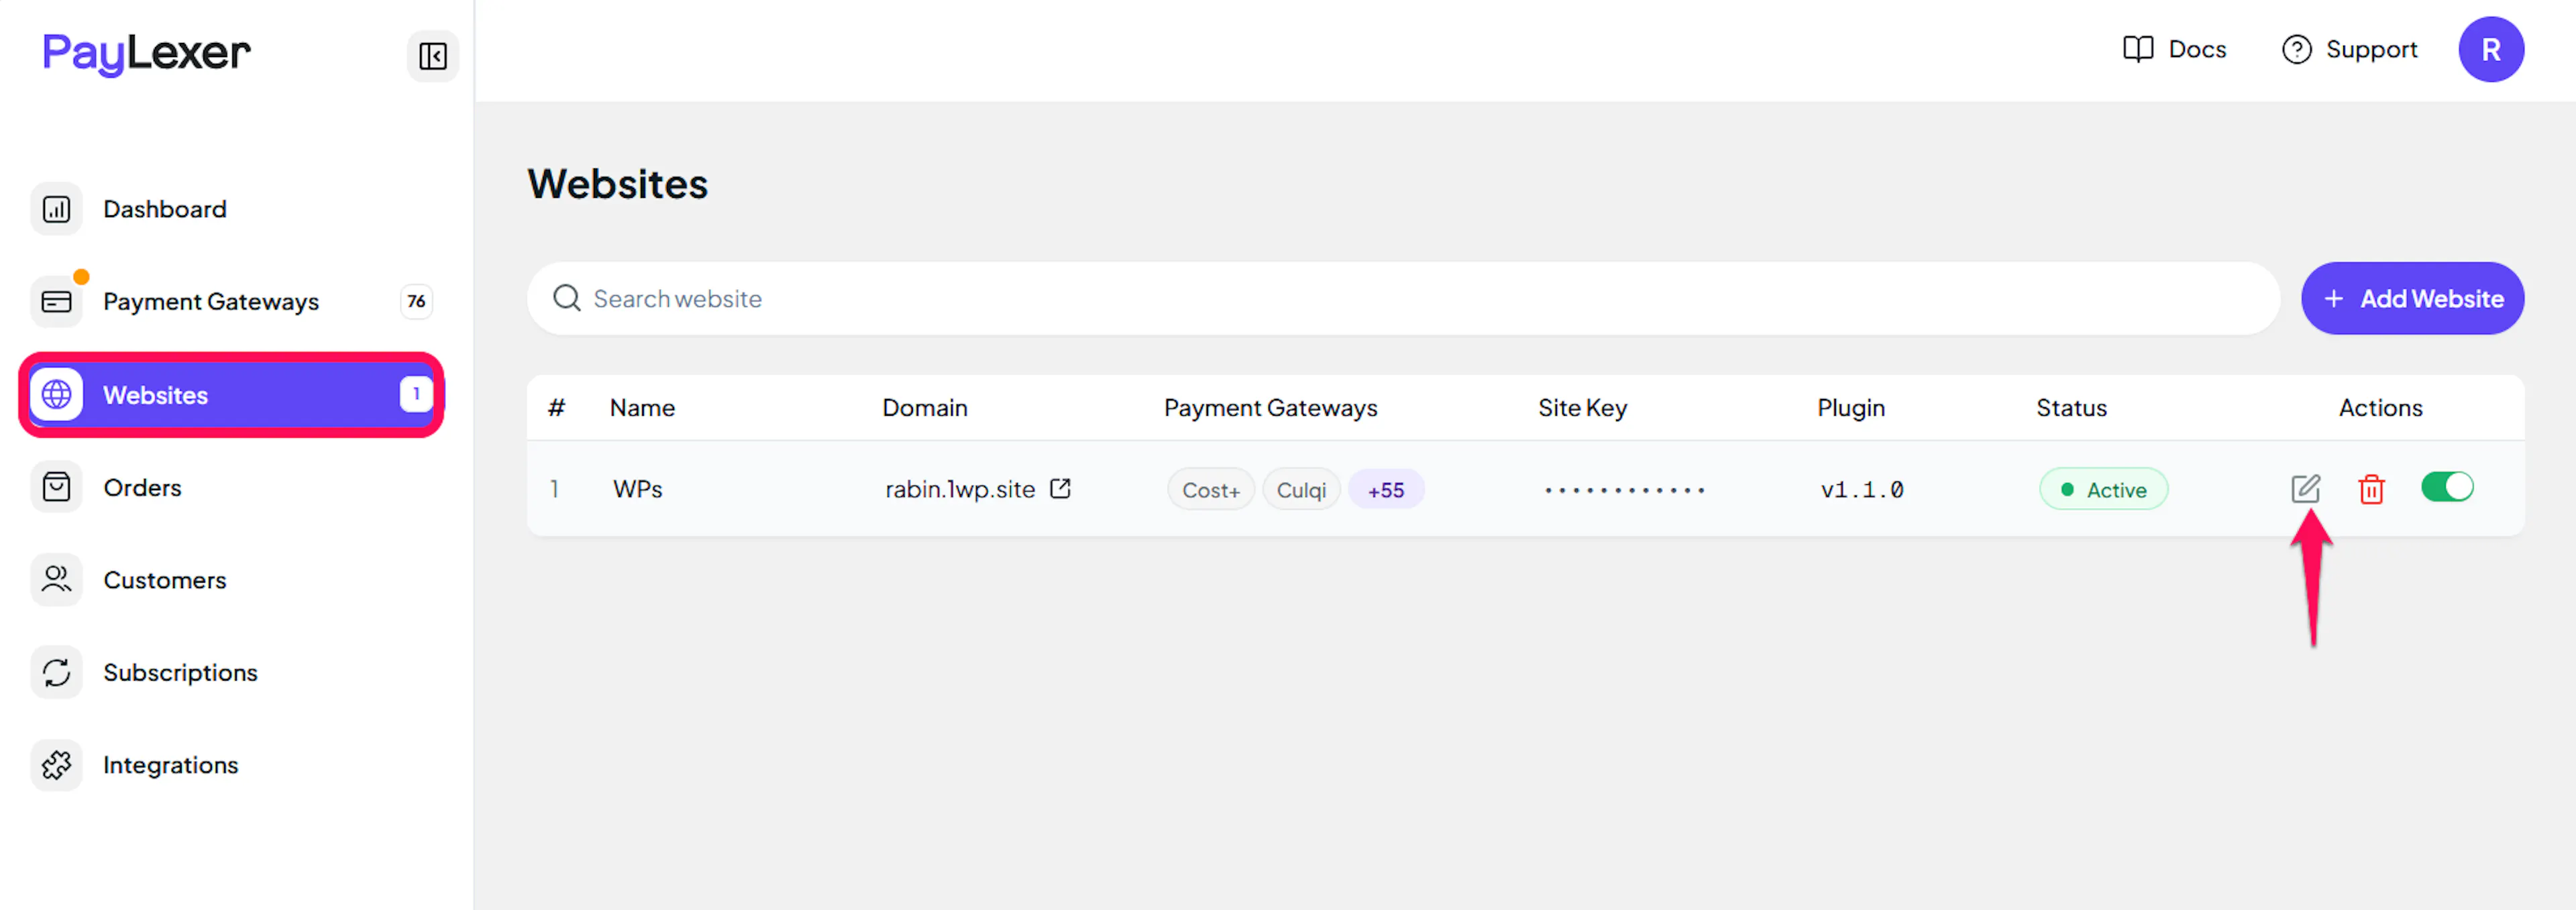
Go to Websites
Navigate to Websites in your PayLexer dashboard.
Edit your website
Click the Edit Icon of your added website.
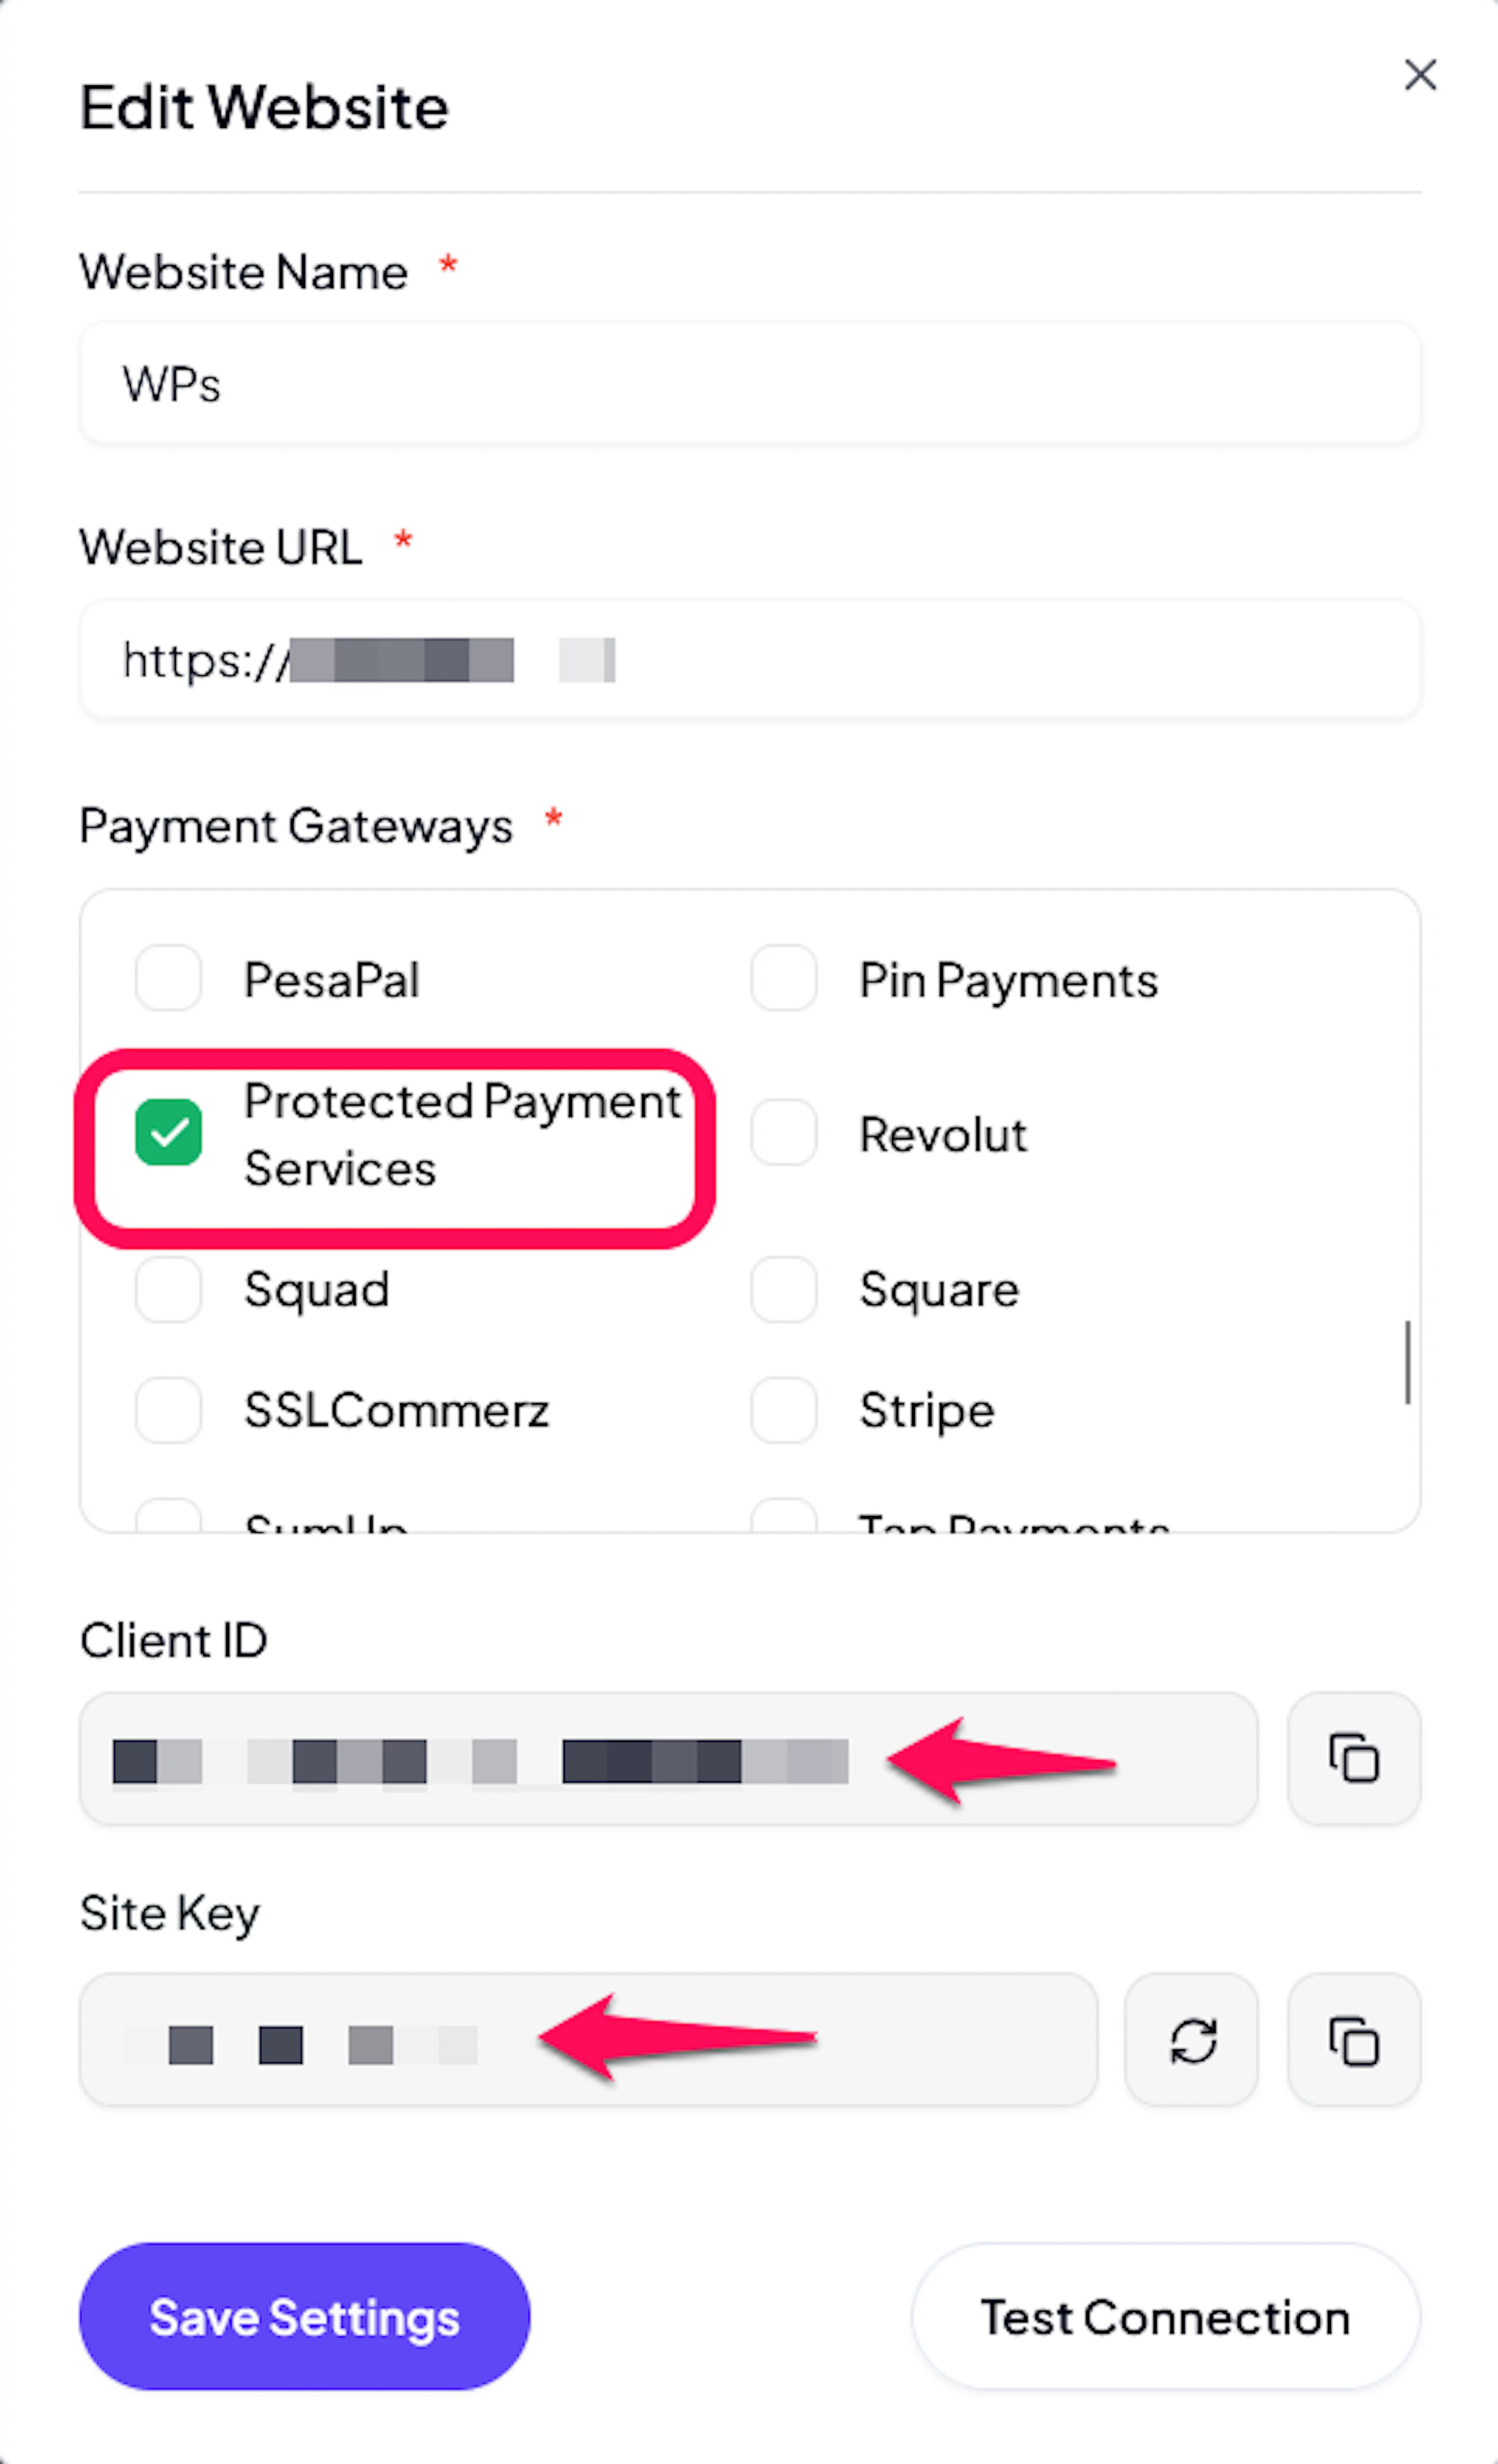
Enable PPS
Click the checkbox to enable PPS for the website.
If you haven't added a website yet, Continue to Add Your Website →
Troubleshooting
Best Practices
- Test in sandbox before enabling production
- Add your Direct Integration URL as soon as PPS support issues it - checkout works without it, but refunds and cancellations silently fail until it's added
- Keep your Test and Live credentials in their correct fields - they point to entirely separate PPS environments
- Confirm your server accepts inbound webhook requests before going live, since PPS has no fallback if delivery fails
FAQs
Still Have Questions?
- PPS Support: PPS FAQ
- PayLexer Support: Contact Support