

GetPayIn
Accept card payments through GetPayIn's hosted checkout with support for EGP, EUR, USD, and GBP. Includes real-time webhook notifications and full or partial refunds.
GetPayIn is an Egyptian E-Payment System for merchants accepting card payments through a secure hosted checkout page. Shoppers are redirected to GetPayIn's own payment page to complete their purchase - no card data ever touches your website. GetPayIn handles payment collection, refund processing, and webhook-signed payment notifications natively.
- Supported Currencies: EGP, EUR, USD, GBP
Supported Features
- Hosted checkout - shoppers pay on GetPayIn's secure page; card data never enters your store
- Full and partial refunds
- Signed webhook notifications for real-time payment updates
Before You Start
Make sure you have:
- GetPayIn Account - Don't have one? Sign up for GetPayIn →
- PayLexer Account - Required to configure the integration. Create your account →
- A website where you want to integrate
Looking for a different payment processor? View all supported gateways →
Configuring GetPayIn
You need an Authentication Token and a Hash Token from GetPayIn for this integration. Both are generated inside a GetPayIn Integration, which also registers your PayLexer webhook URL - so credentials and webhooks are configured in a single flow.
Copy your Webhook URL from PayLexer
Grab the PayLexer Webhook URL before opening GetPayIn - you will paste it directly into the GetPayIn integration form.
Open PayLexer Dashboard
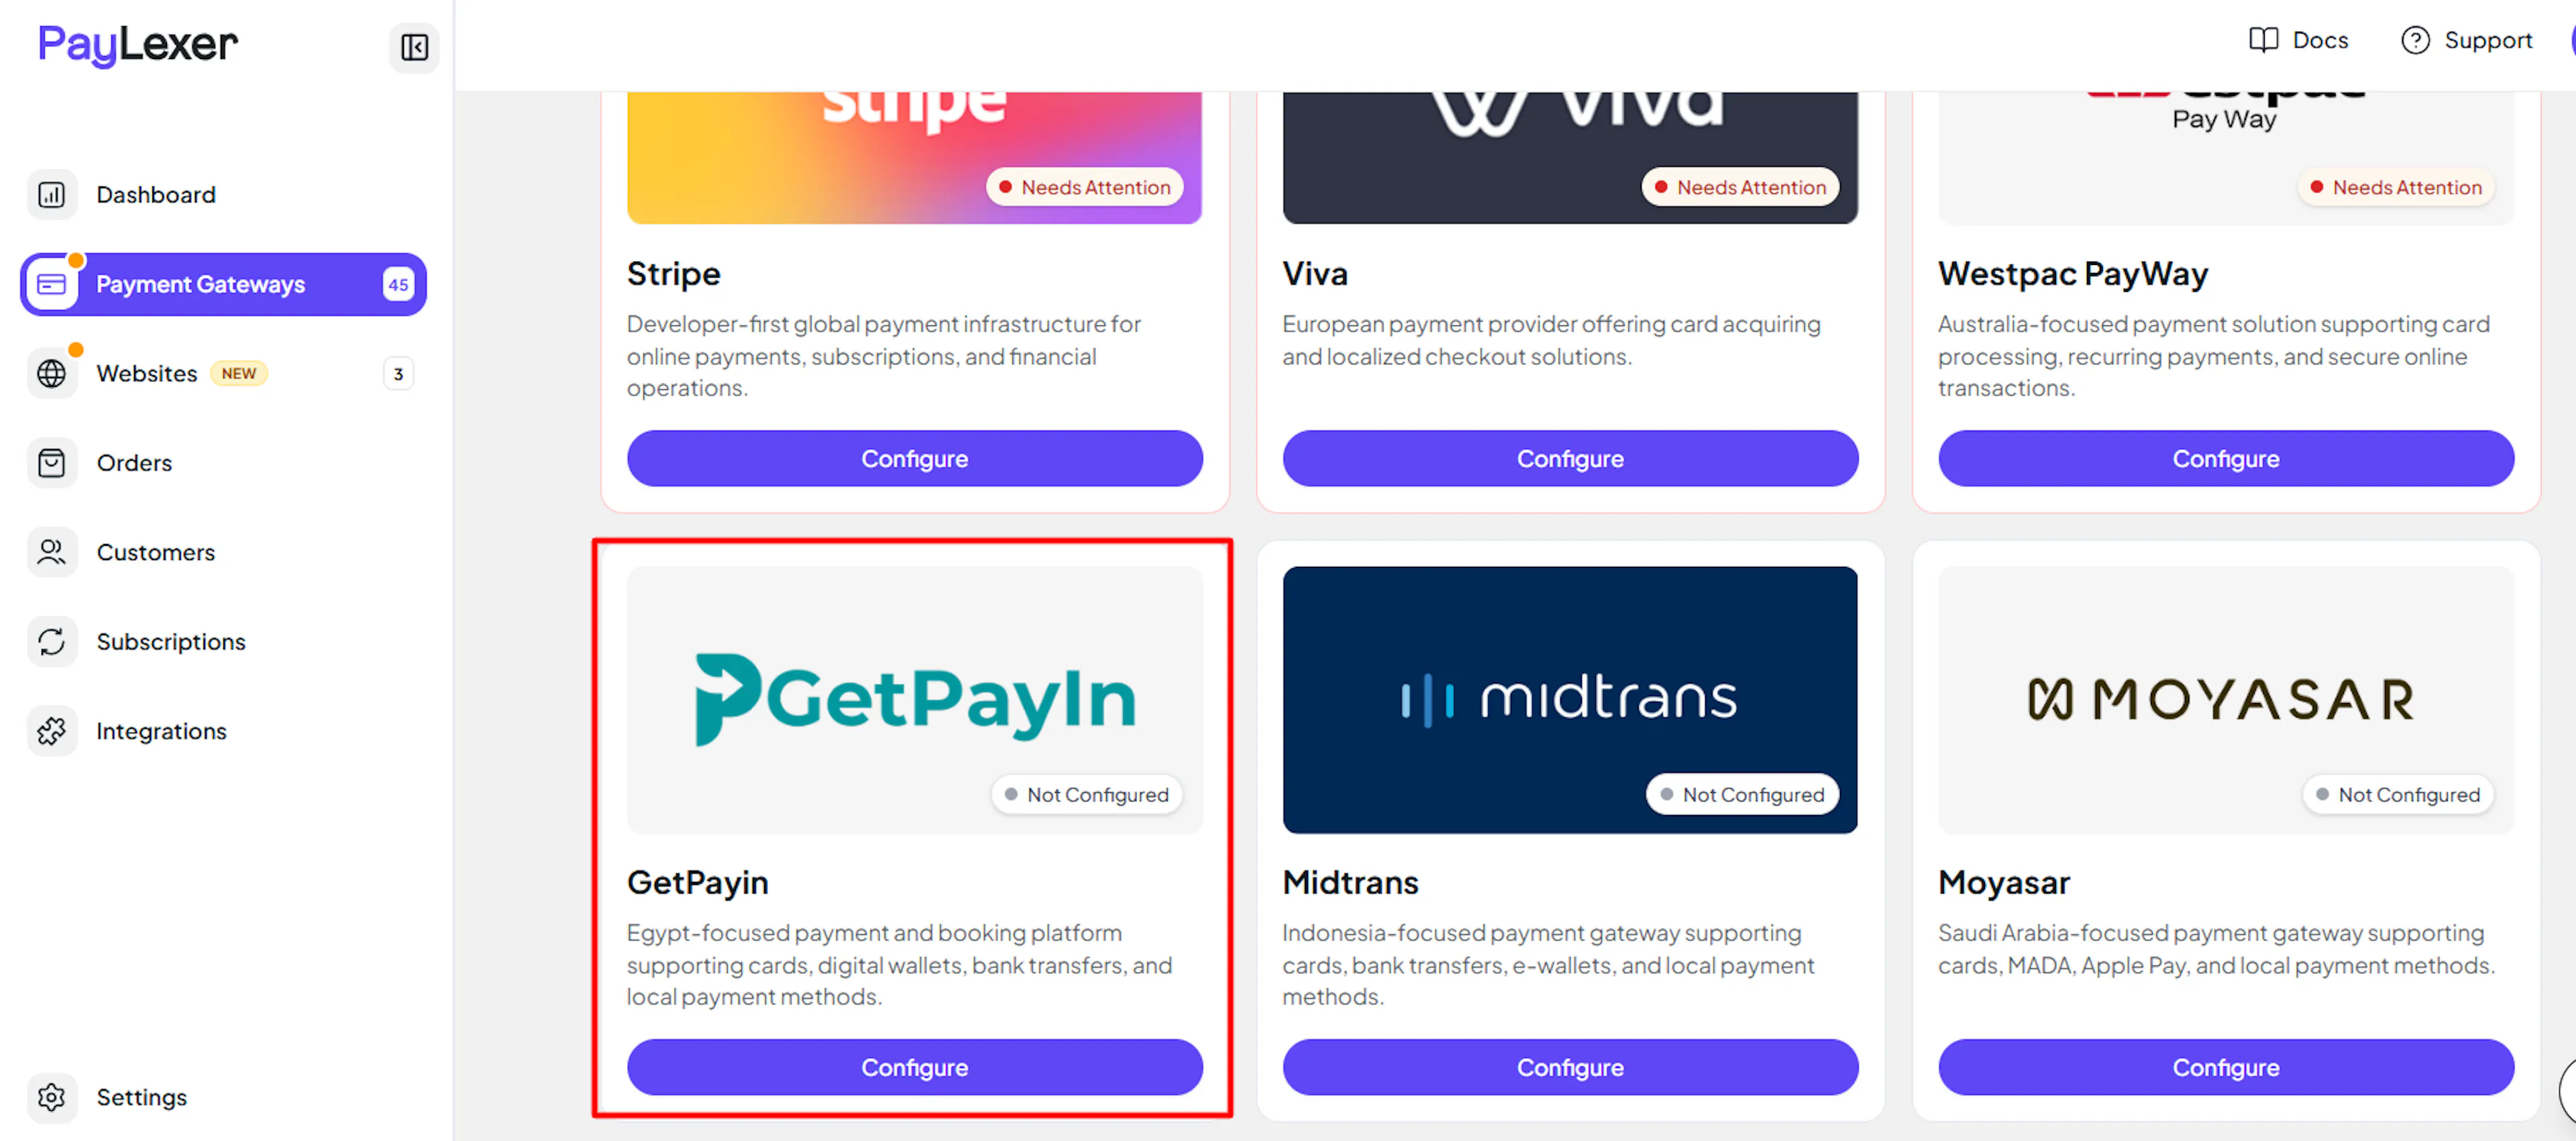
Log in to your PayLexer dashboard and navigate to Payment Gateways → GetPayIn.
Copy the Webhook URL
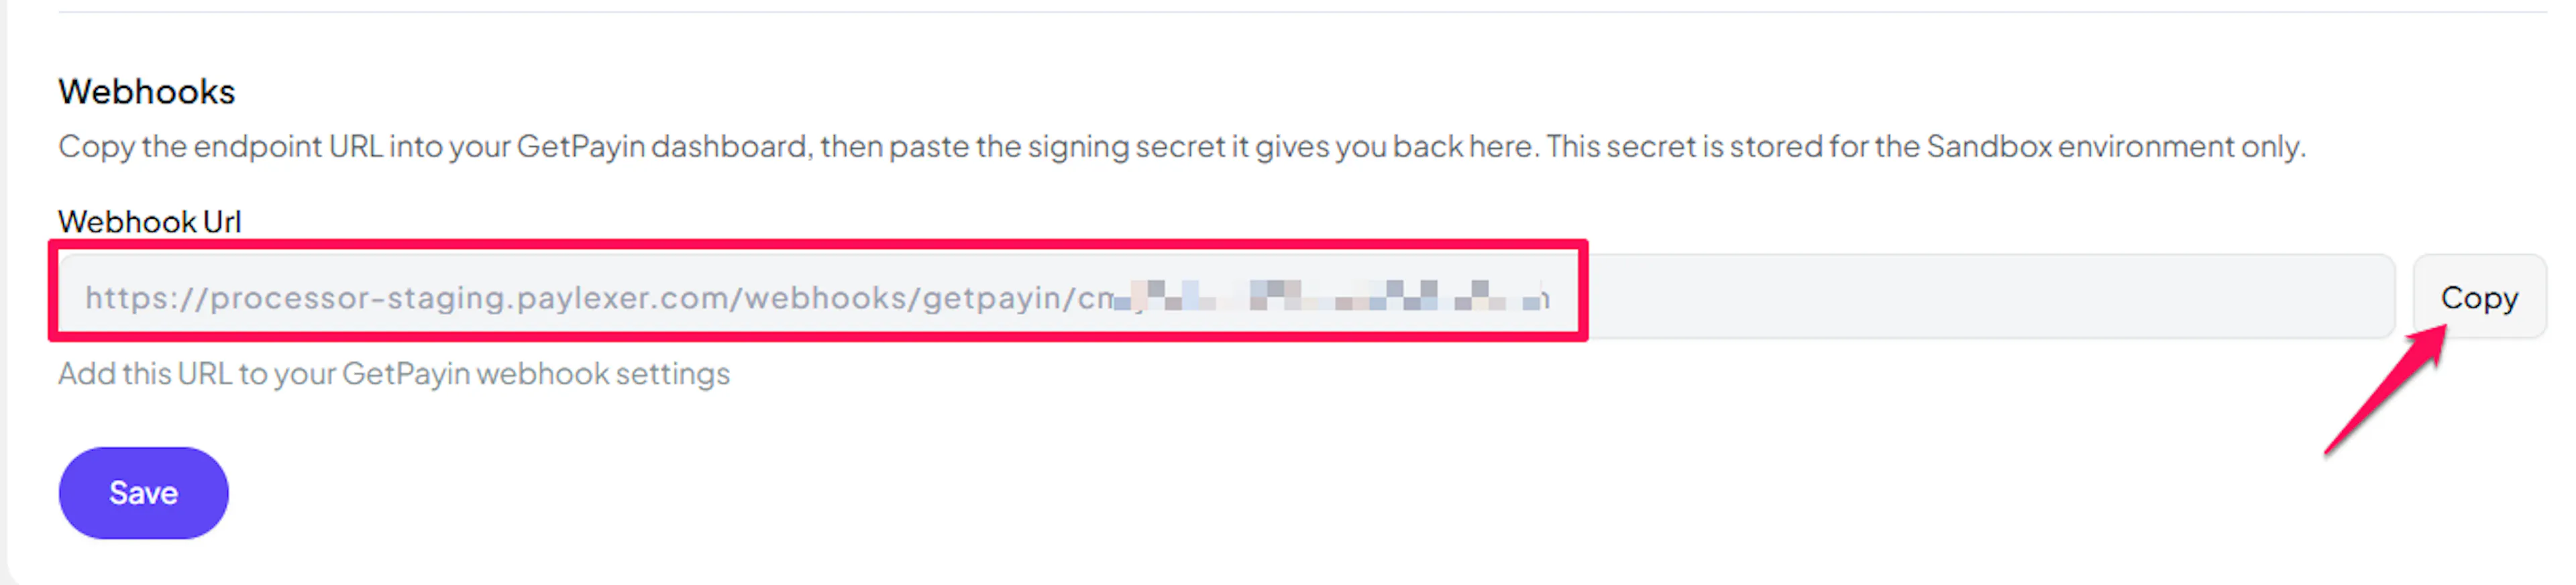
Copy the Webhook URL shown on the GetPayIn configuration page. You will paste it into the GetPayIn integration form in the next section.
Creating a GetPayIn Integration
A GetPayIn Integration is where you register your webhook URL, choose which events trigger notifications, and generate your credentials. Create one integration per store.
Open Payment Integrations
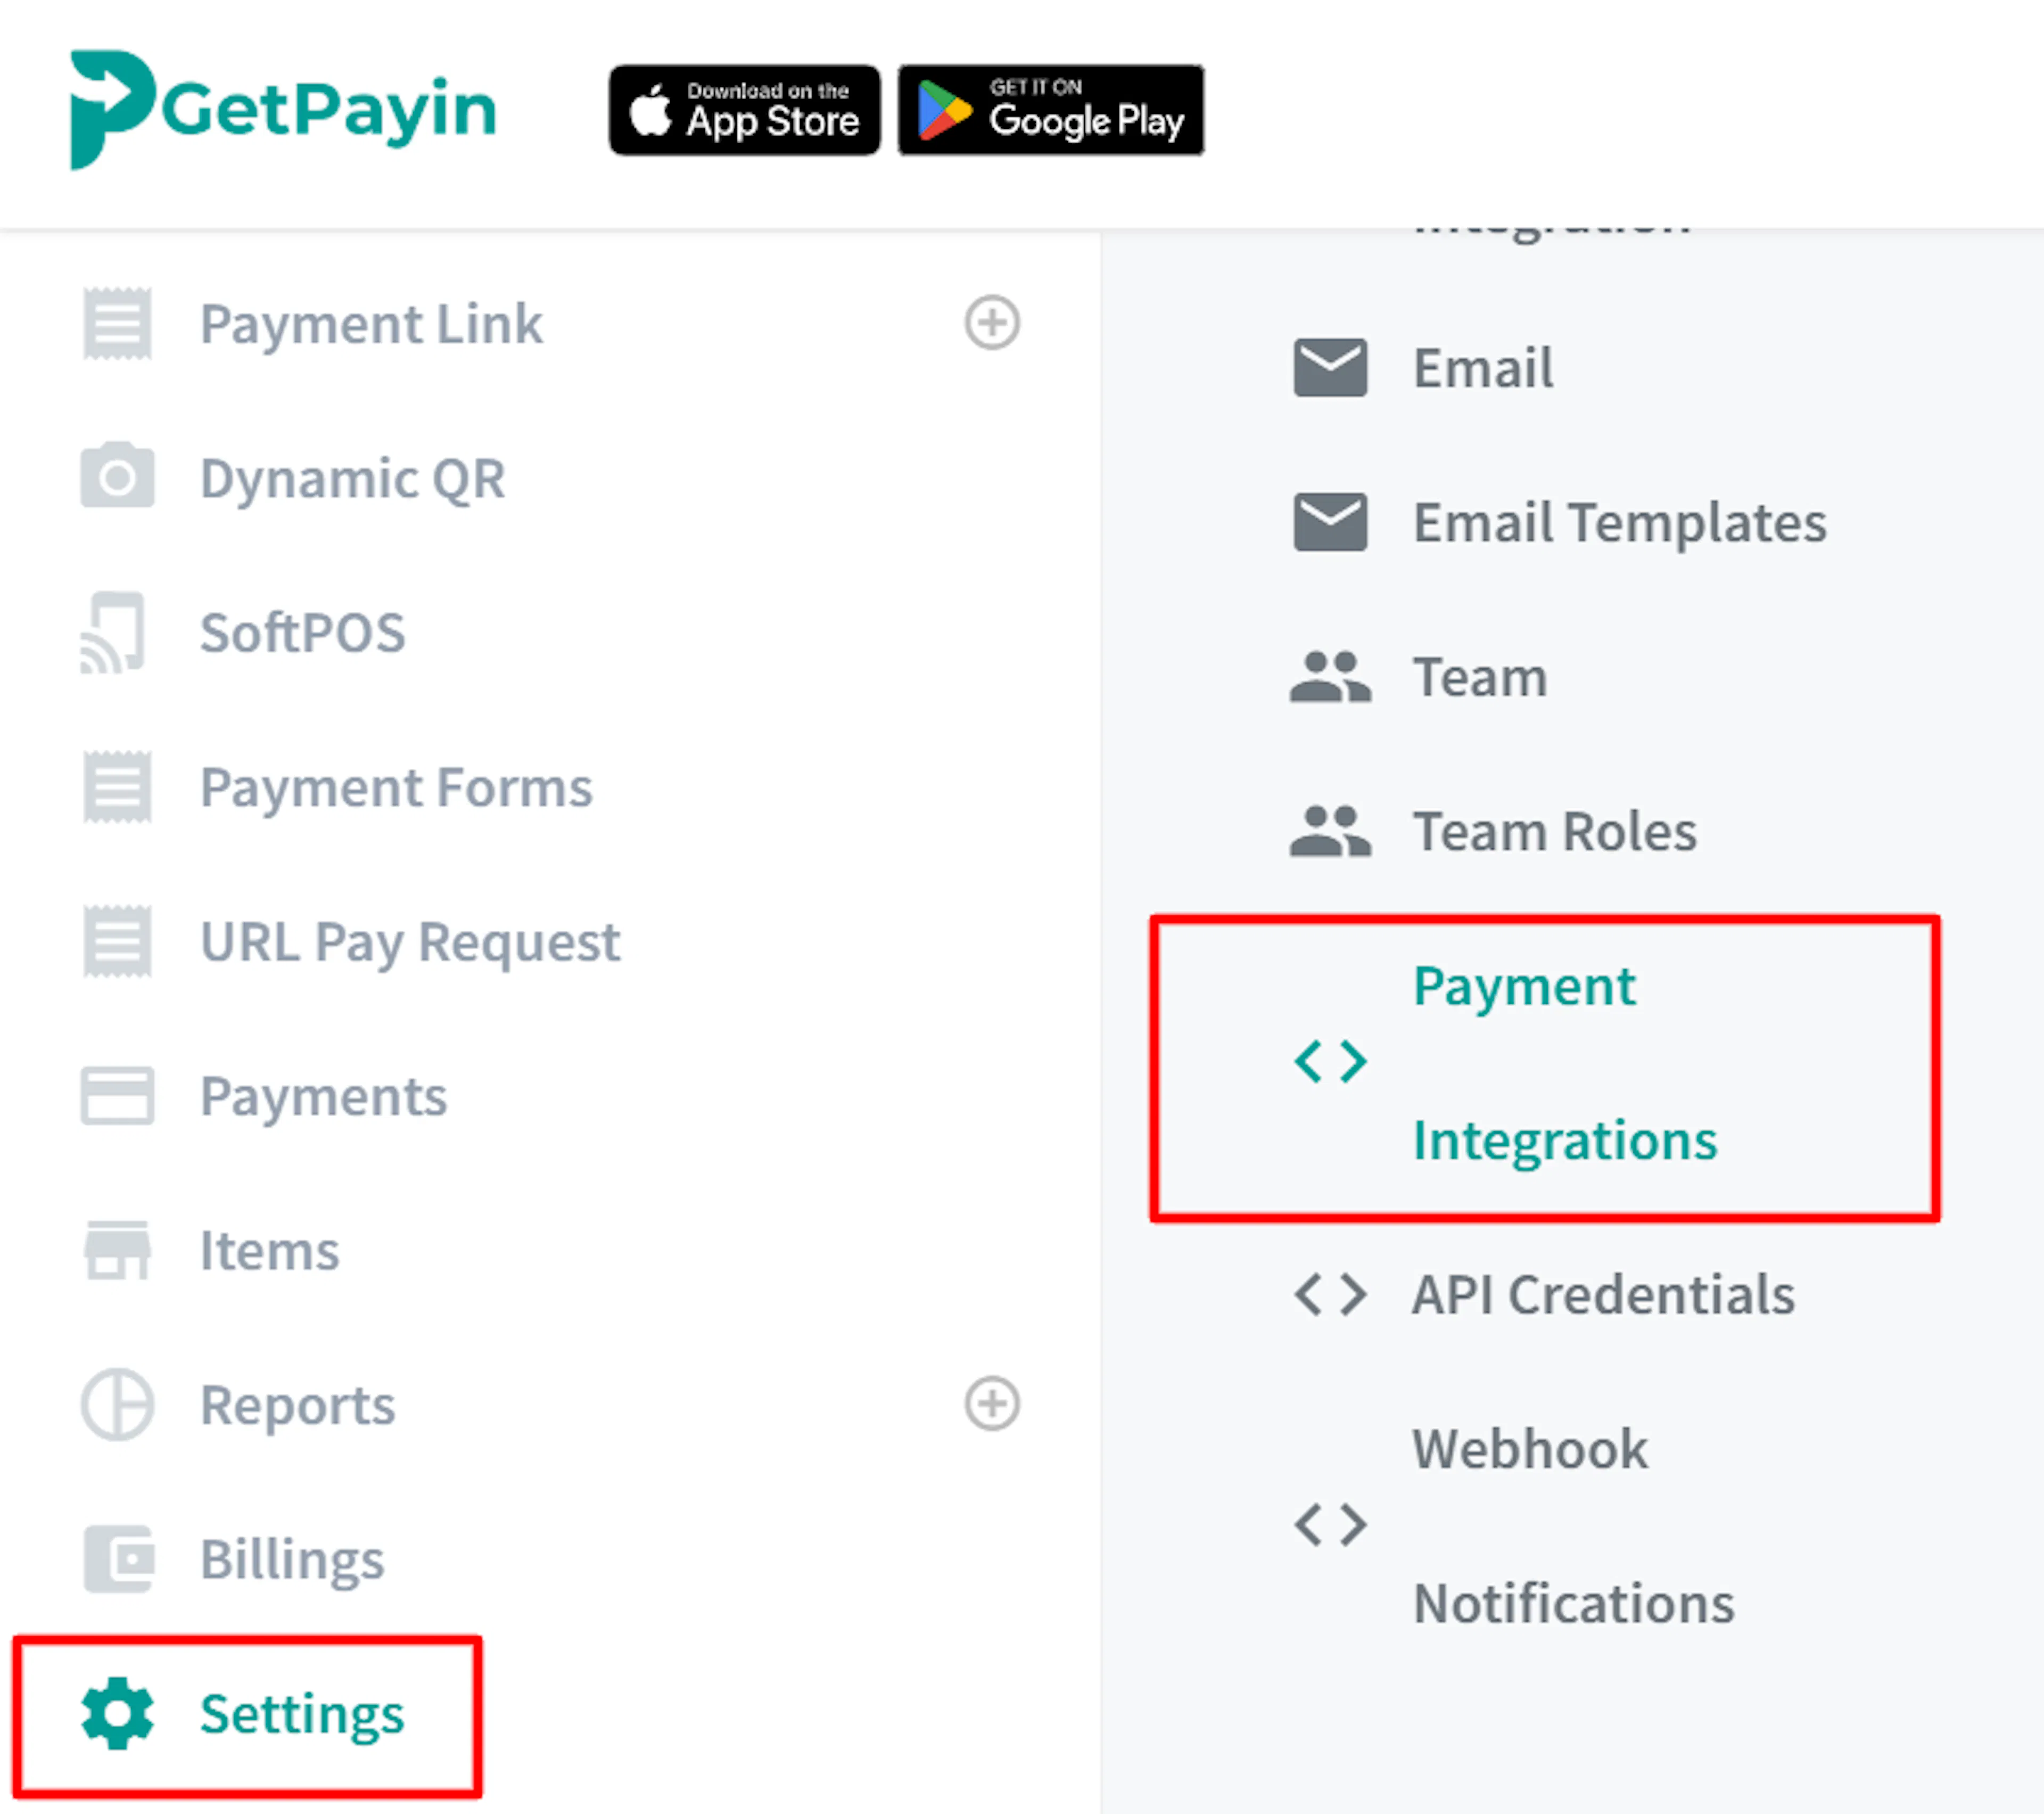
In the GetPayIn Dashboard, click Settings in the sidebar menu to open Account Settings. Click Payment Integrations, then click Add Integration.
Fill in the integration form
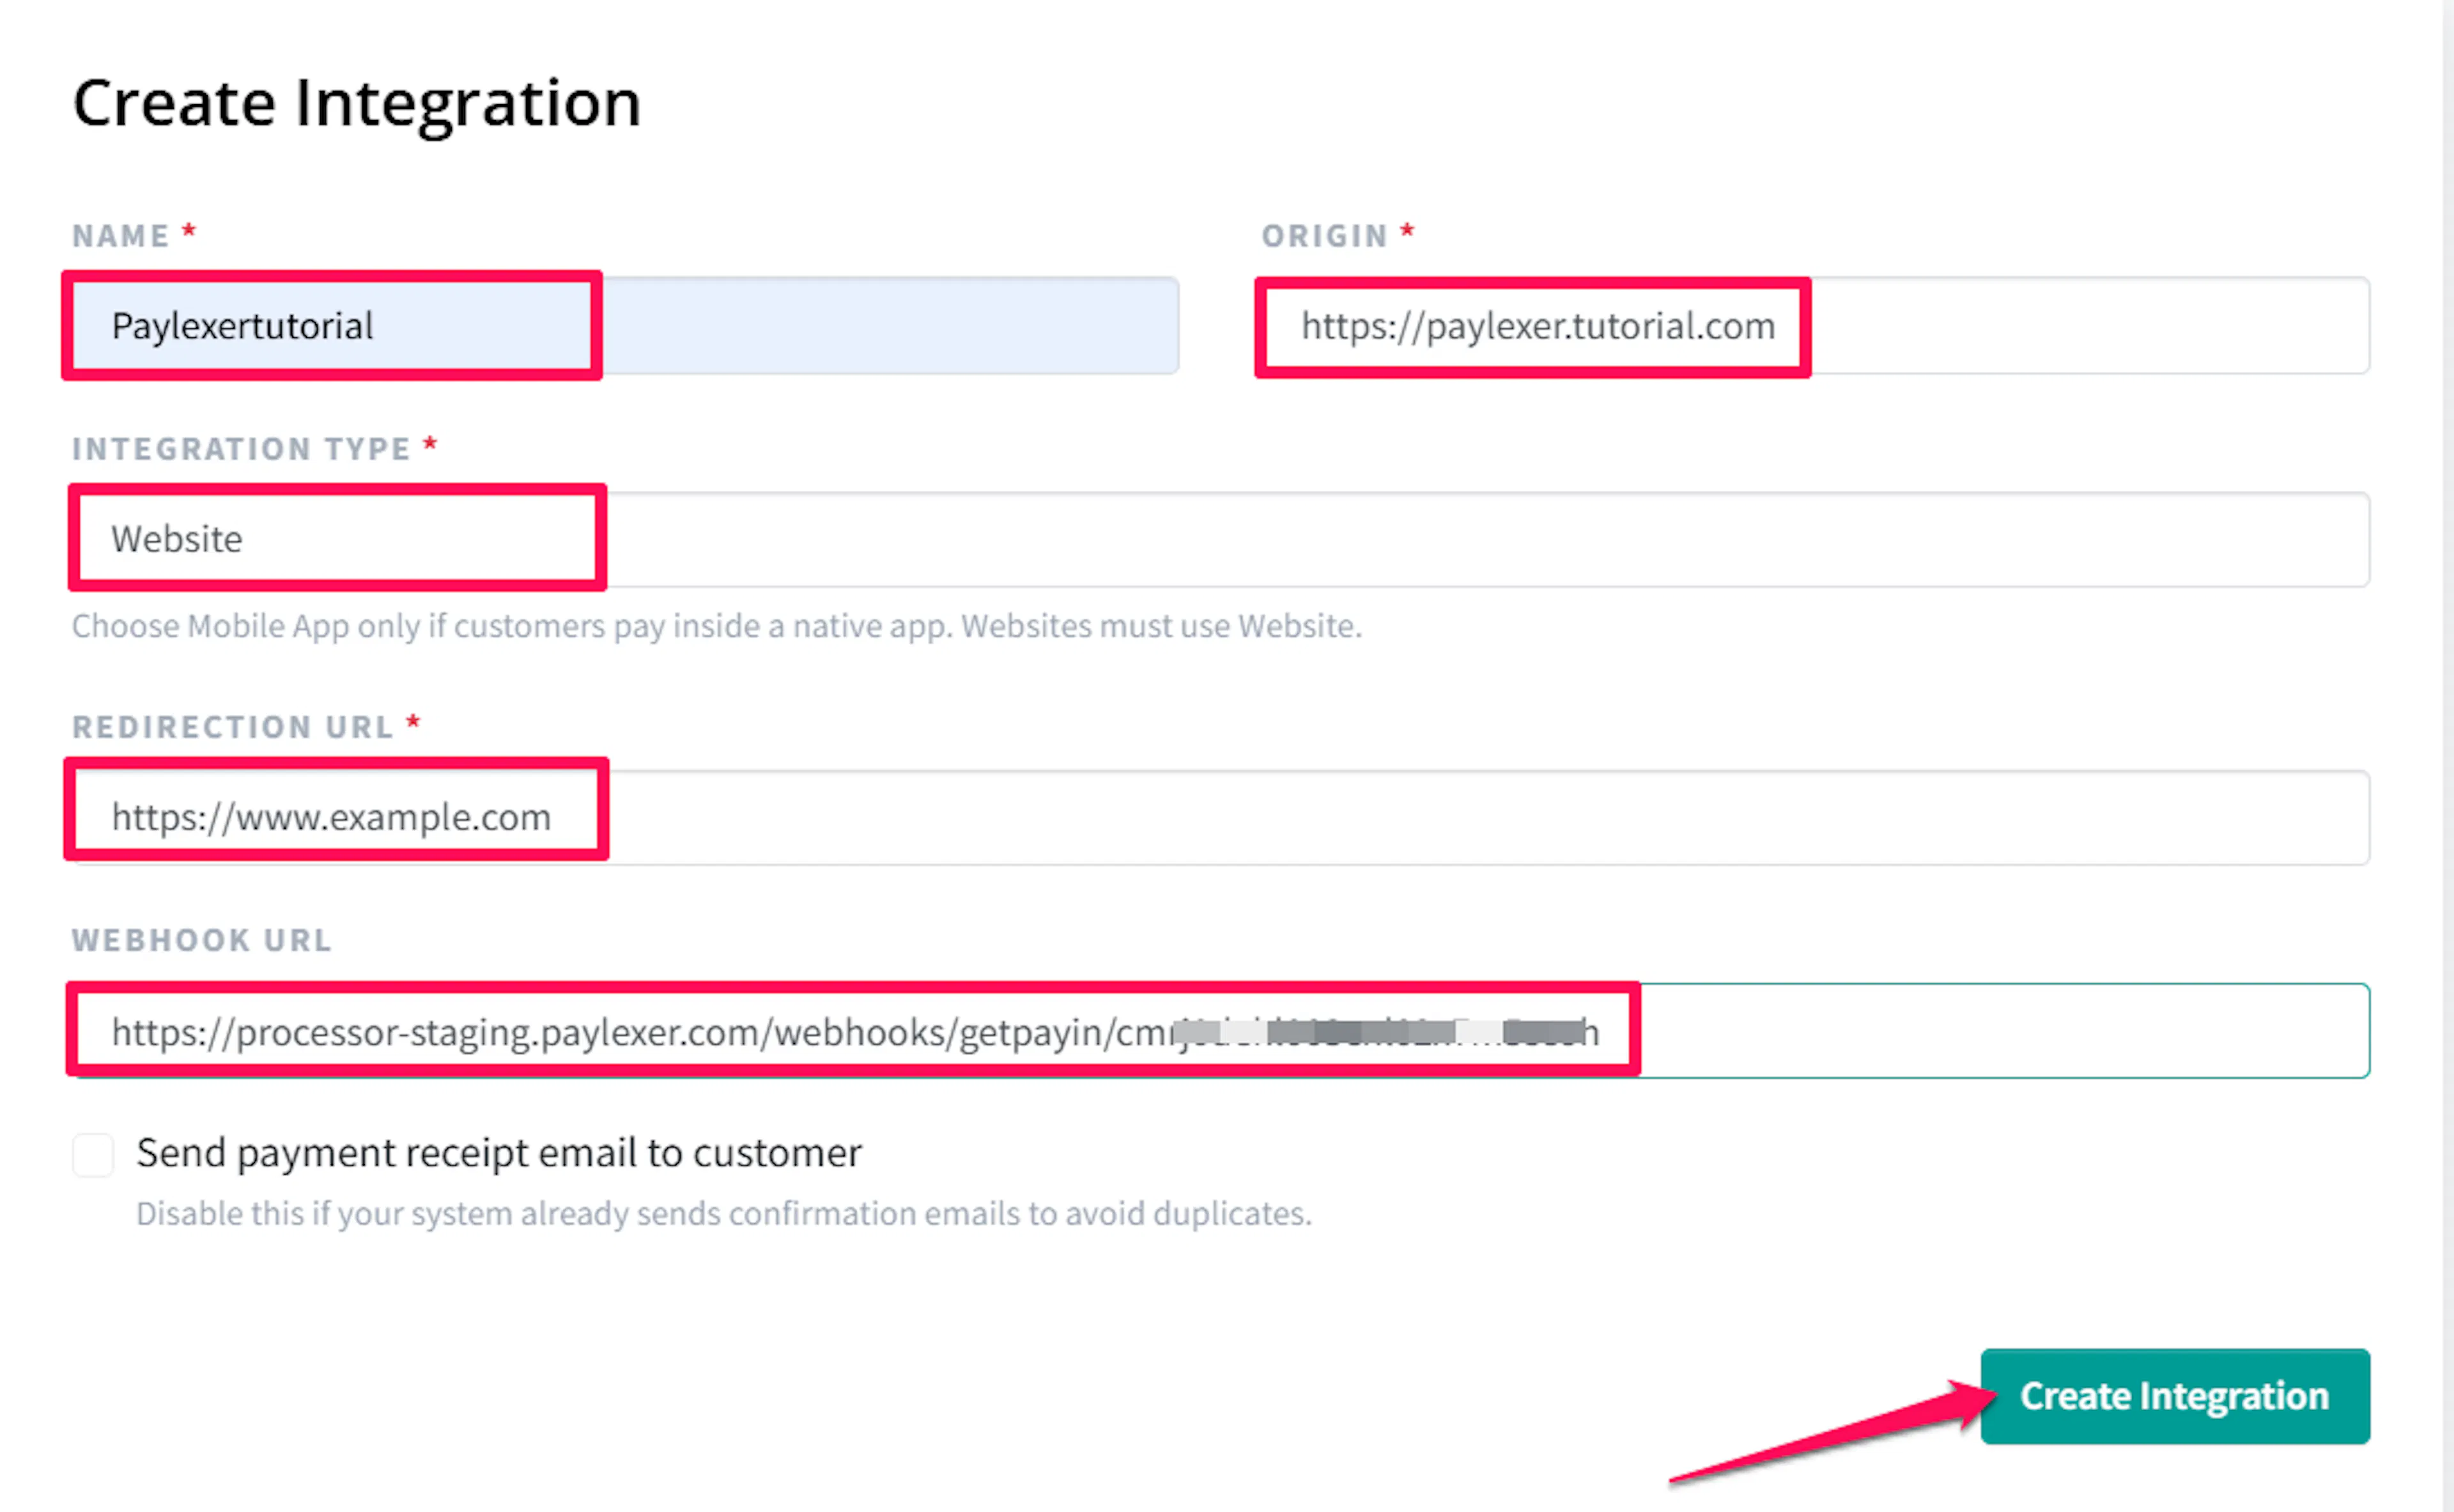
Complete the form with your store details:
- Name - a label to identify this integration (e.g. "My Store")
- Origin - your website domain (e.g.
https://yourstore.com) - Integration Type - select Website
- Redirection URL - enter any URL (e.g. your homepage). PayLexer passes the actual return URL at checkout time, so this field is not used in practice
- Webhook URL - paste the PayLexer Webhook URL you copied earlier
Set Integration Type to Website. The Mobile App option is only for native mobile apps and will cause checkout failures in a browser.
Leave the Send payment receipt email to customer toggle enabled unless your platform already sends its own payment confirmation emails, to avoid sending duplicates.
Click Submit to create the integration.
Enable webhook events
From the Payment Integrations page, find your newly created integration and click Edit button.
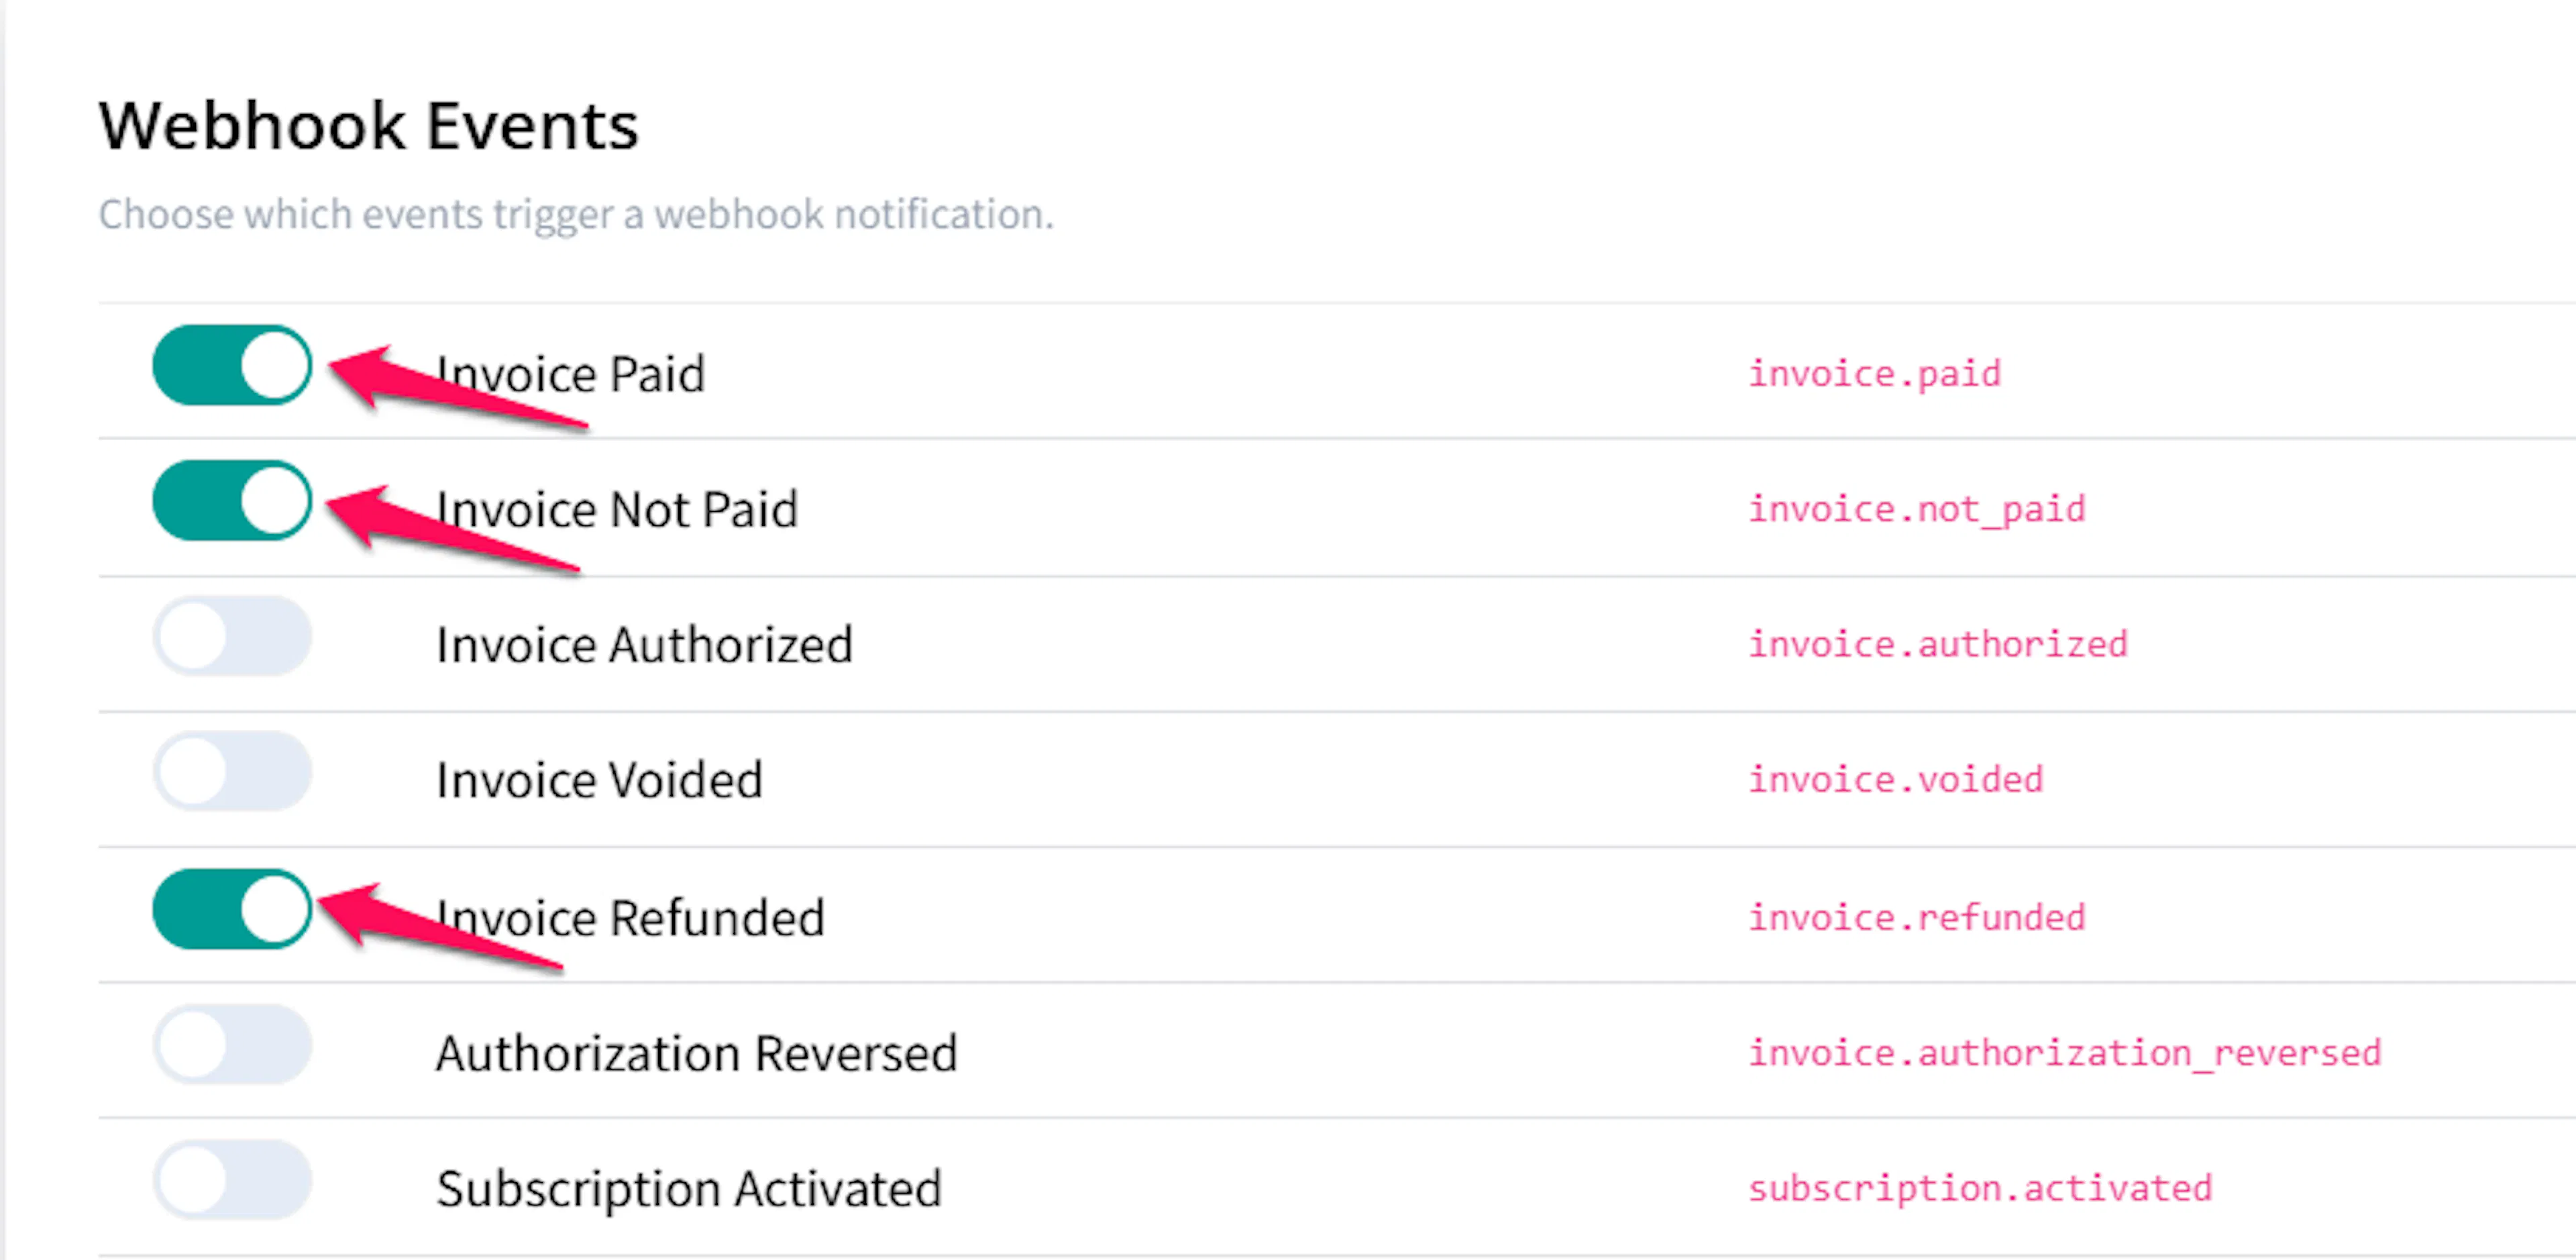
In the Webhook Events section, enable the following events so PayLexer receives all relevant payment and refund notifications:
invoice.paidinvoice.not_paidinvoice.refunded
Generate your tokens
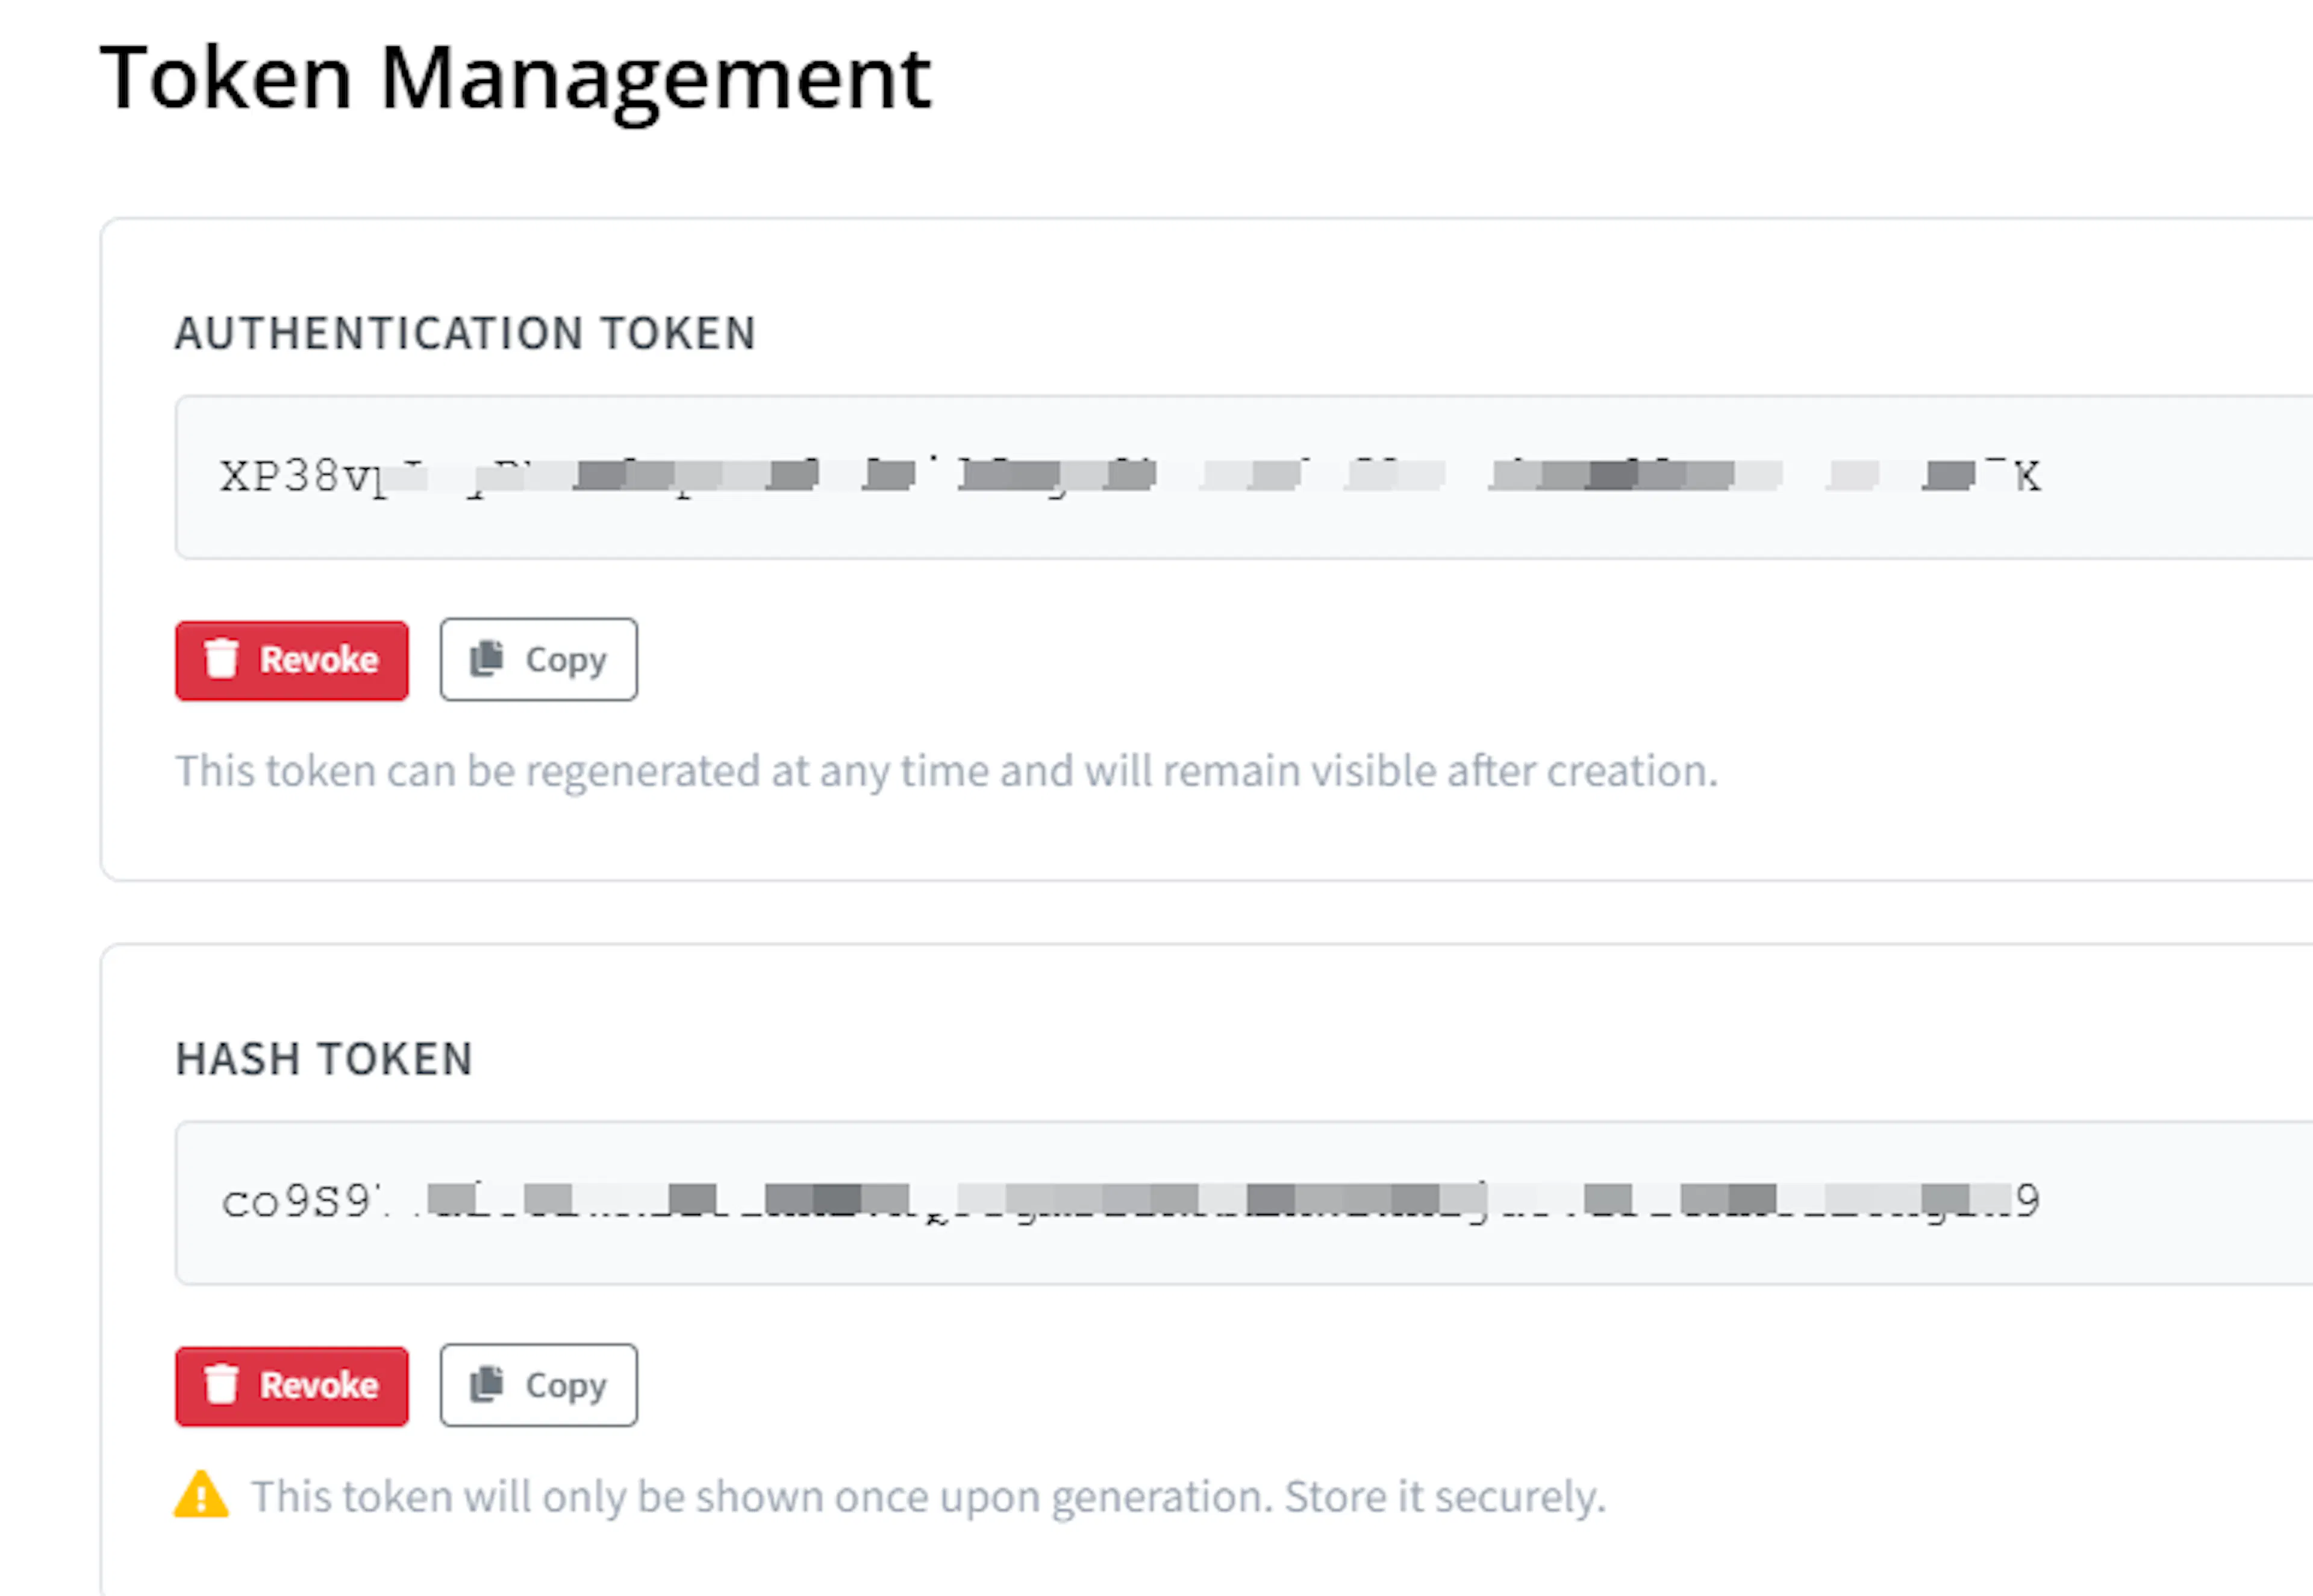
Scroll down to the Token Management section and generate both tokens:
- Click Generate next to Authentication Token and copy the value.
- Click Generate next to Hash Token and copy the value immediately.
The Hash Token is shown only once. Copy and store it somewhere secure before leaving this page. If you lose it, you must generate a new one, which invalidates the previous token.
Adding Credentials to PayLexer
Open PayLexer Dashboard
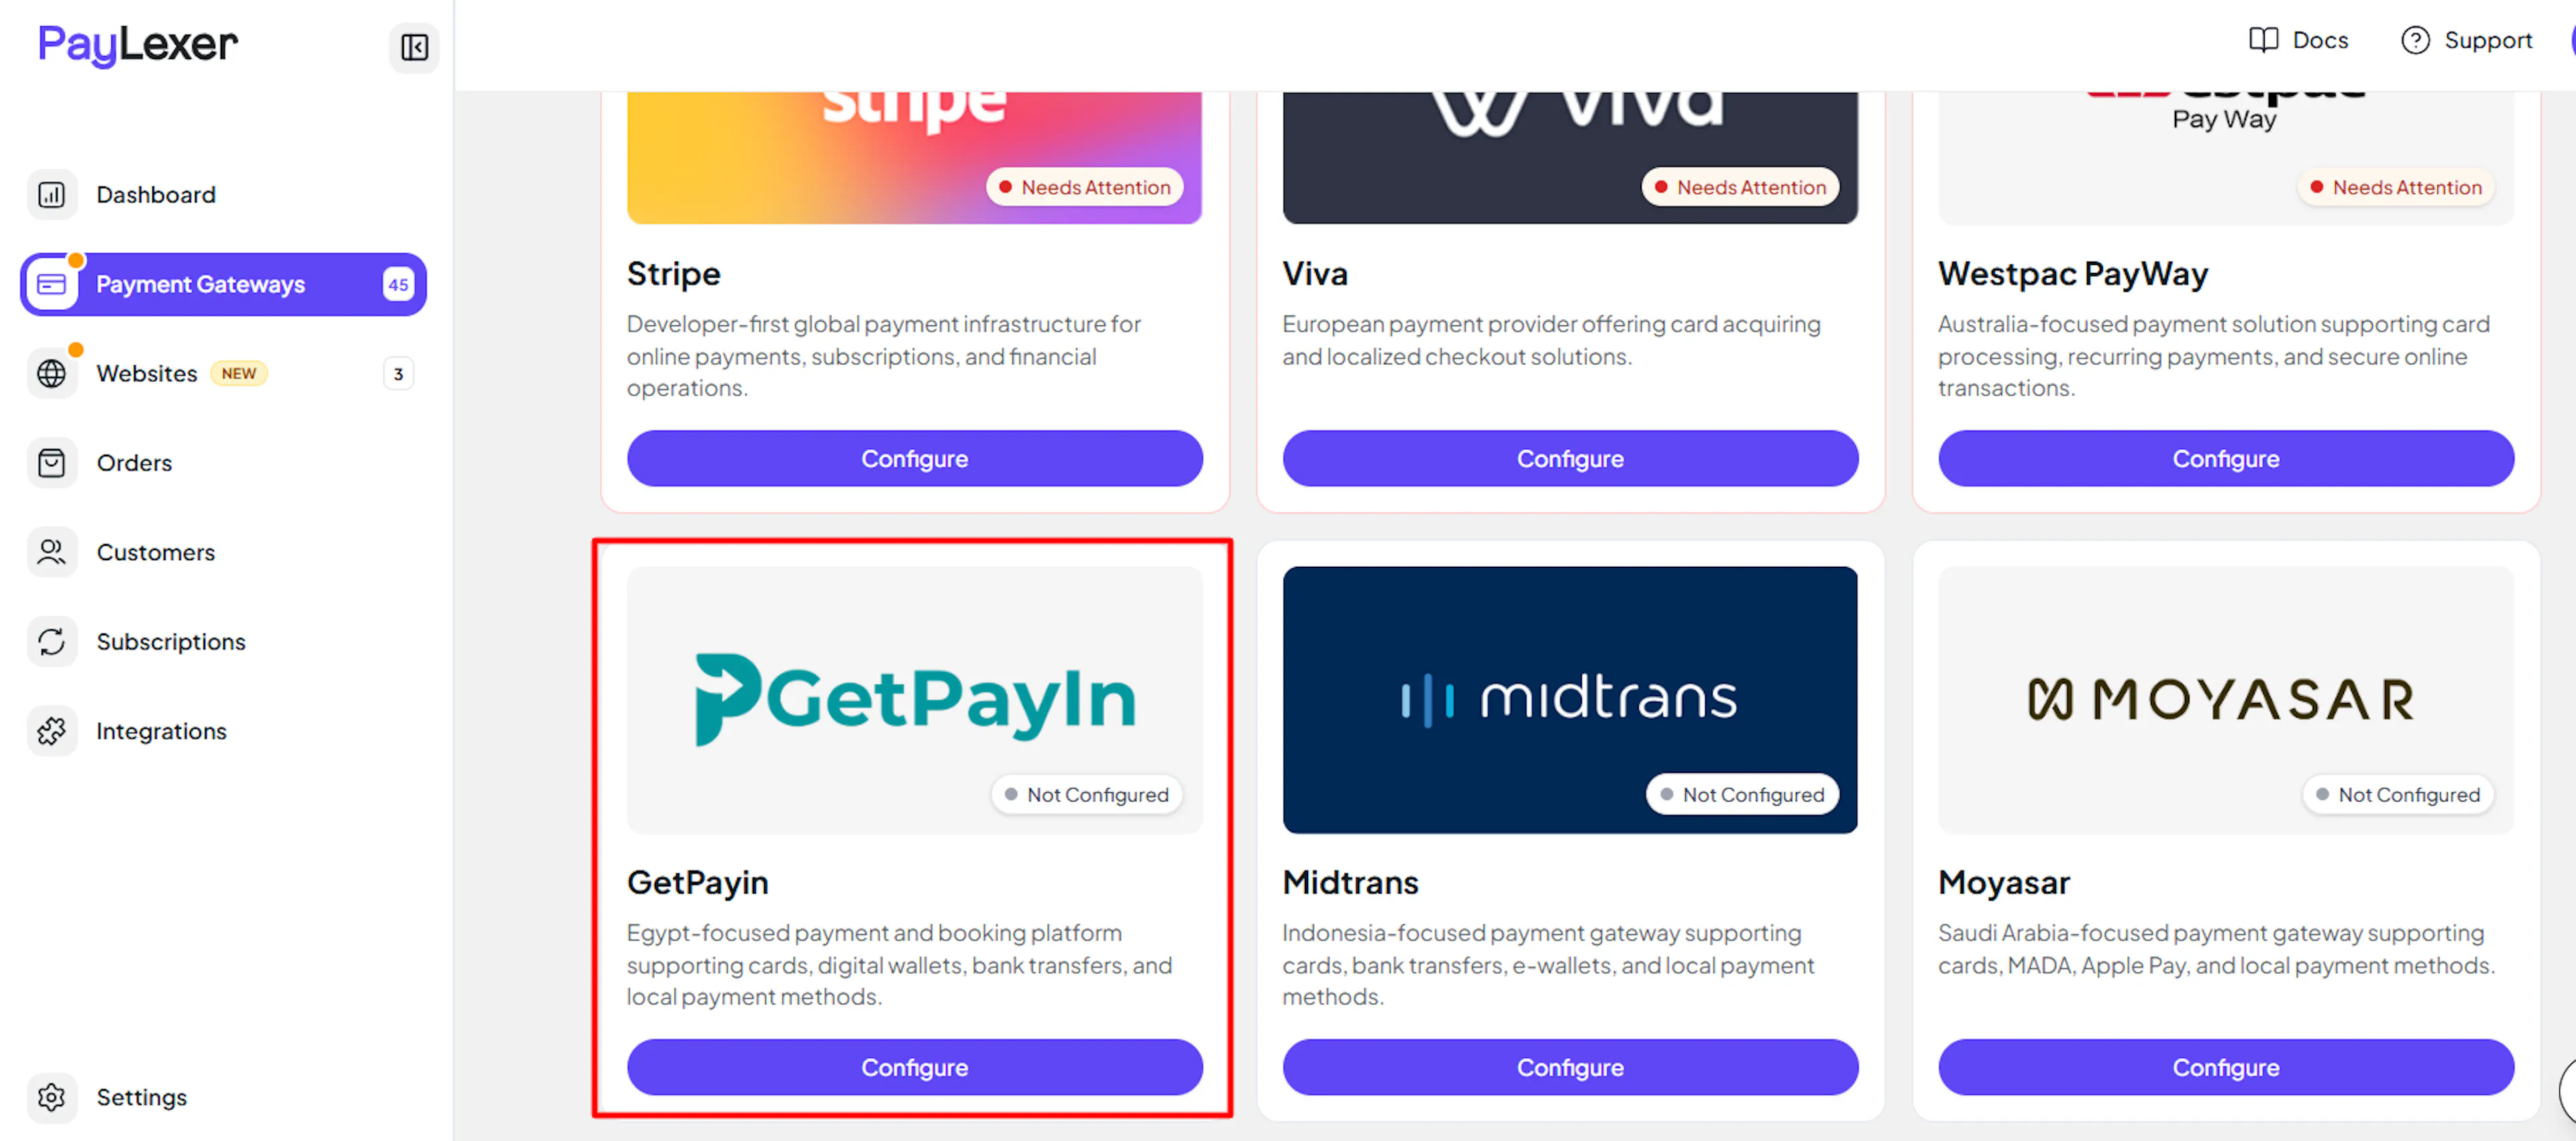
Log in to your PayLexer dashboard and navigate to Payment Gateways → GetPayIn.
Enter your credentials
Paste the Authentication Token and Hash Token you copied from GetPayIn into the corresponding fields. Enter the same tokens in both the Live and Test credential sections.
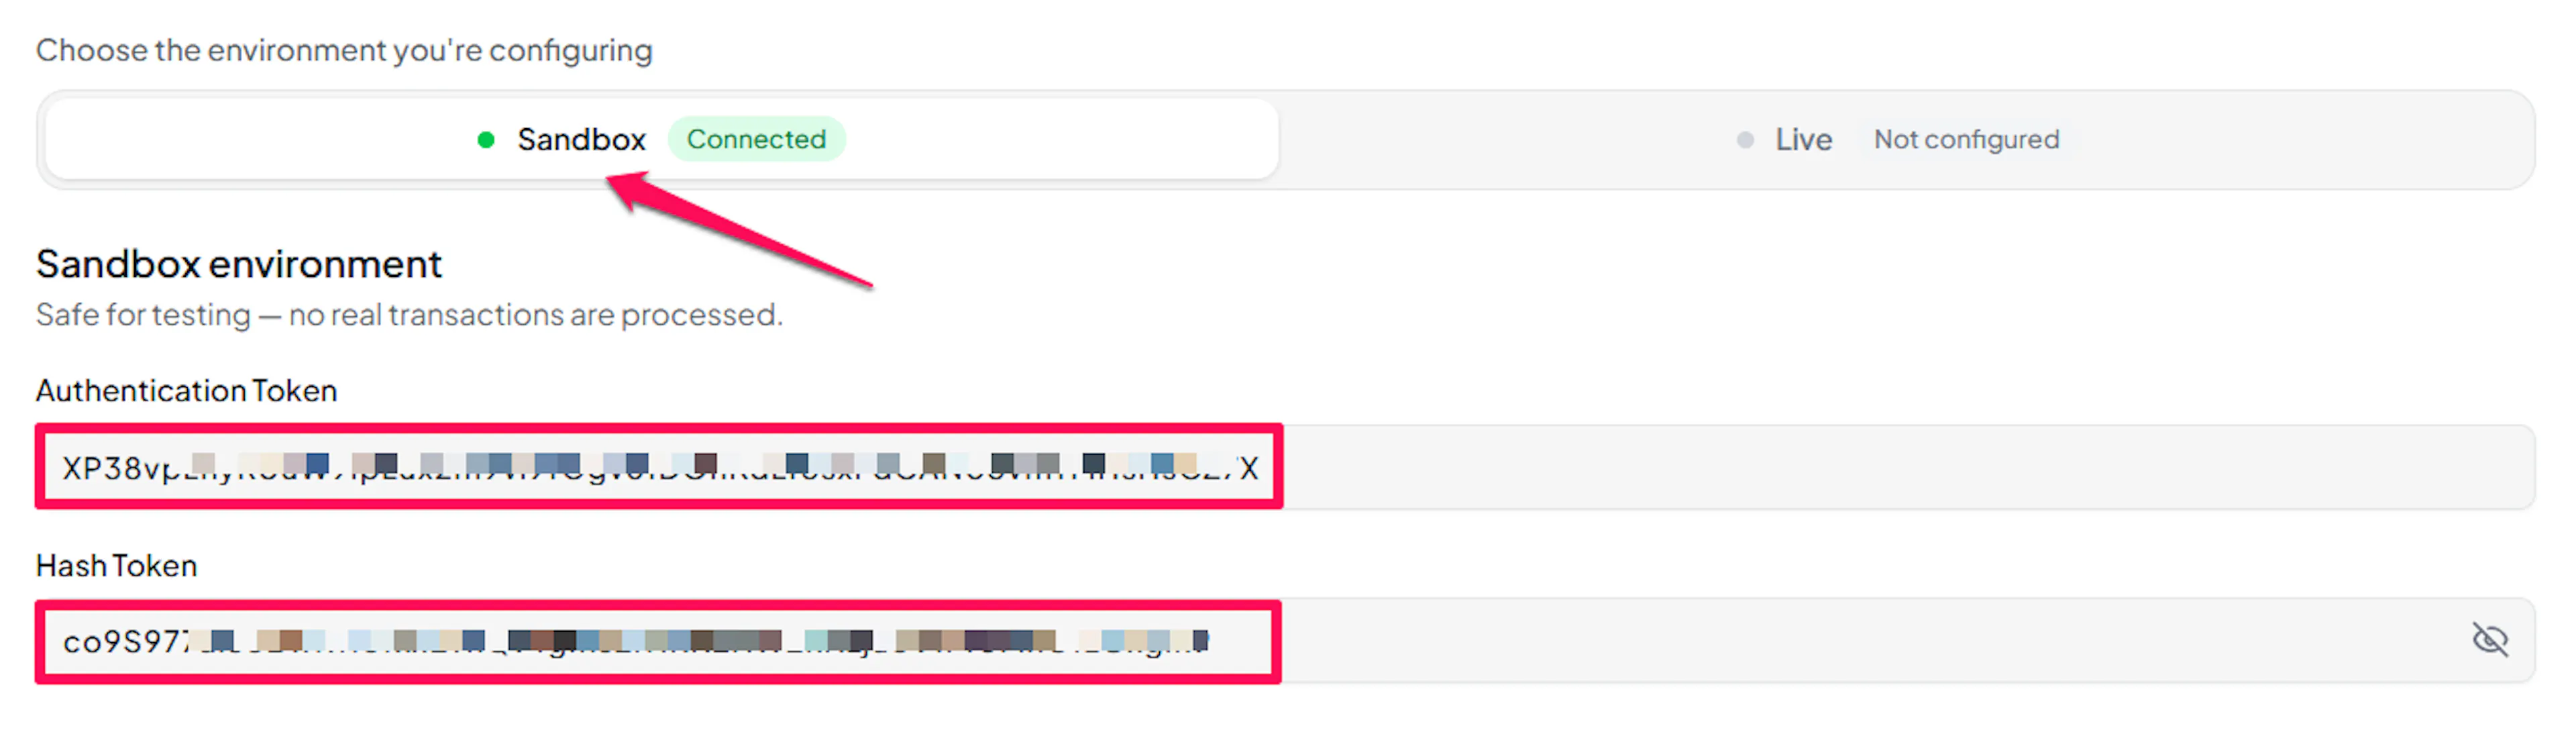
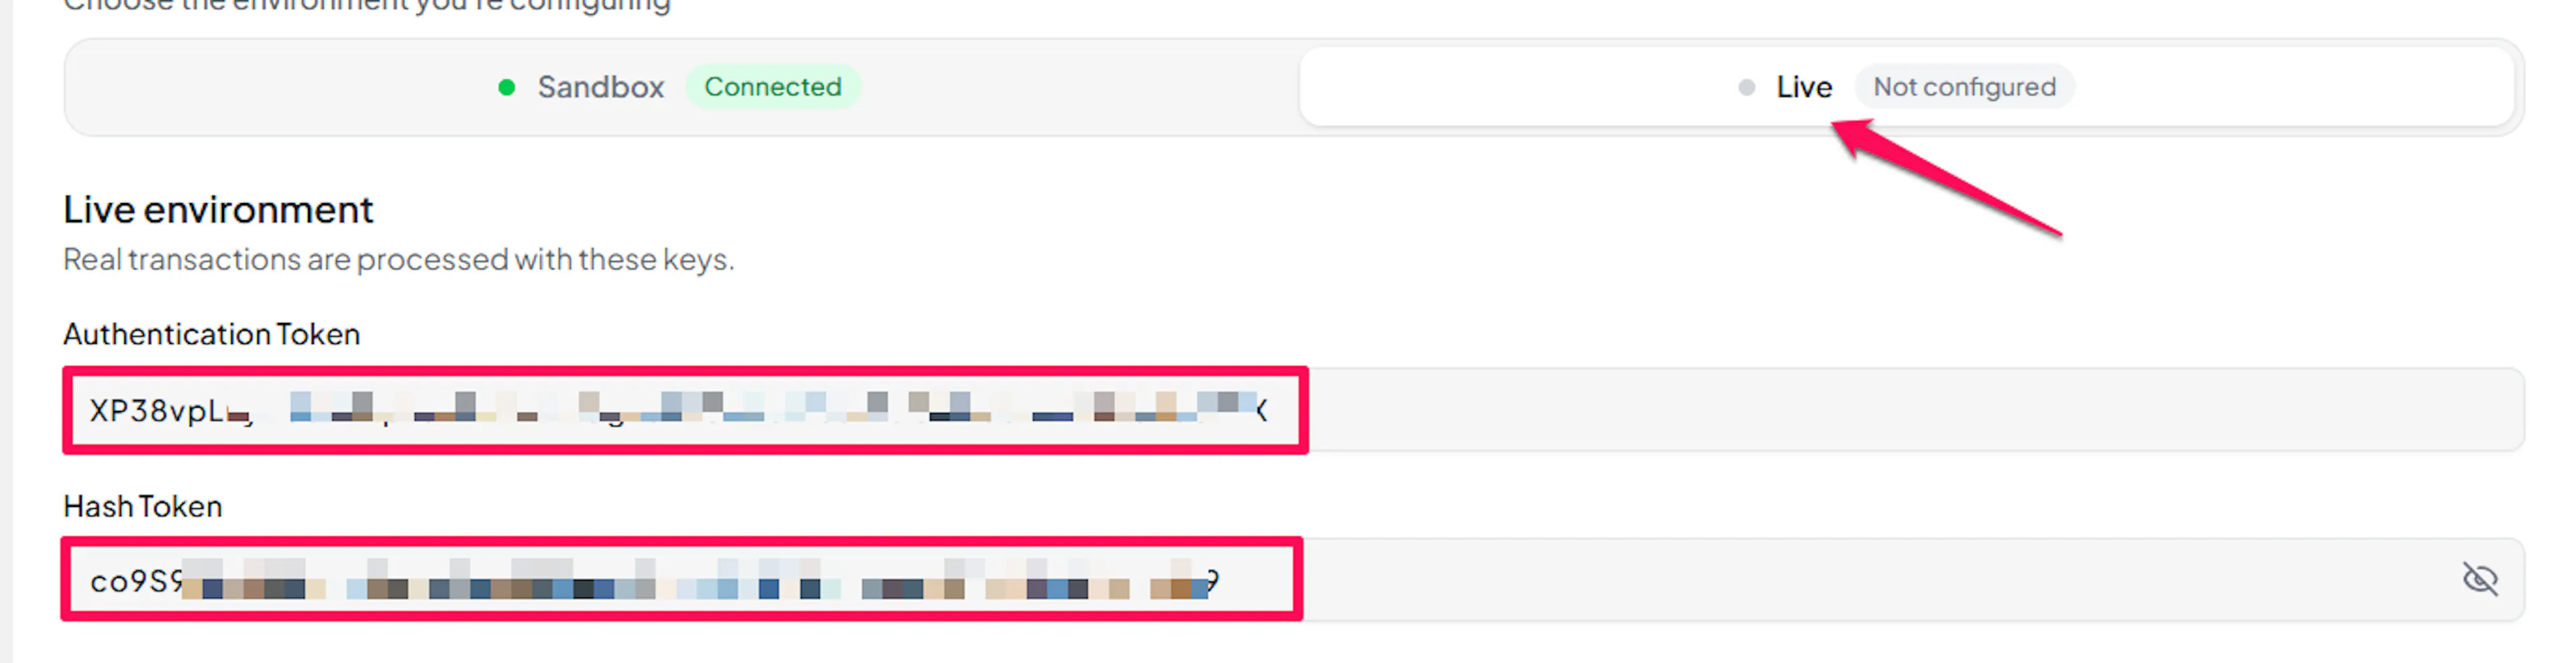
Understanding Live/Production and Sandbox Settings:
| Environment | Purpose |
|---|---|
| Live / Production | Used for real transactions. |
| Test / Sandbox | Used for testing only. No real money is processed. |
How PayLexer selects credentials:
- Debug/Test mode ON → Test credentials are used
- Debug/Test mode OFF → Live credentials are used
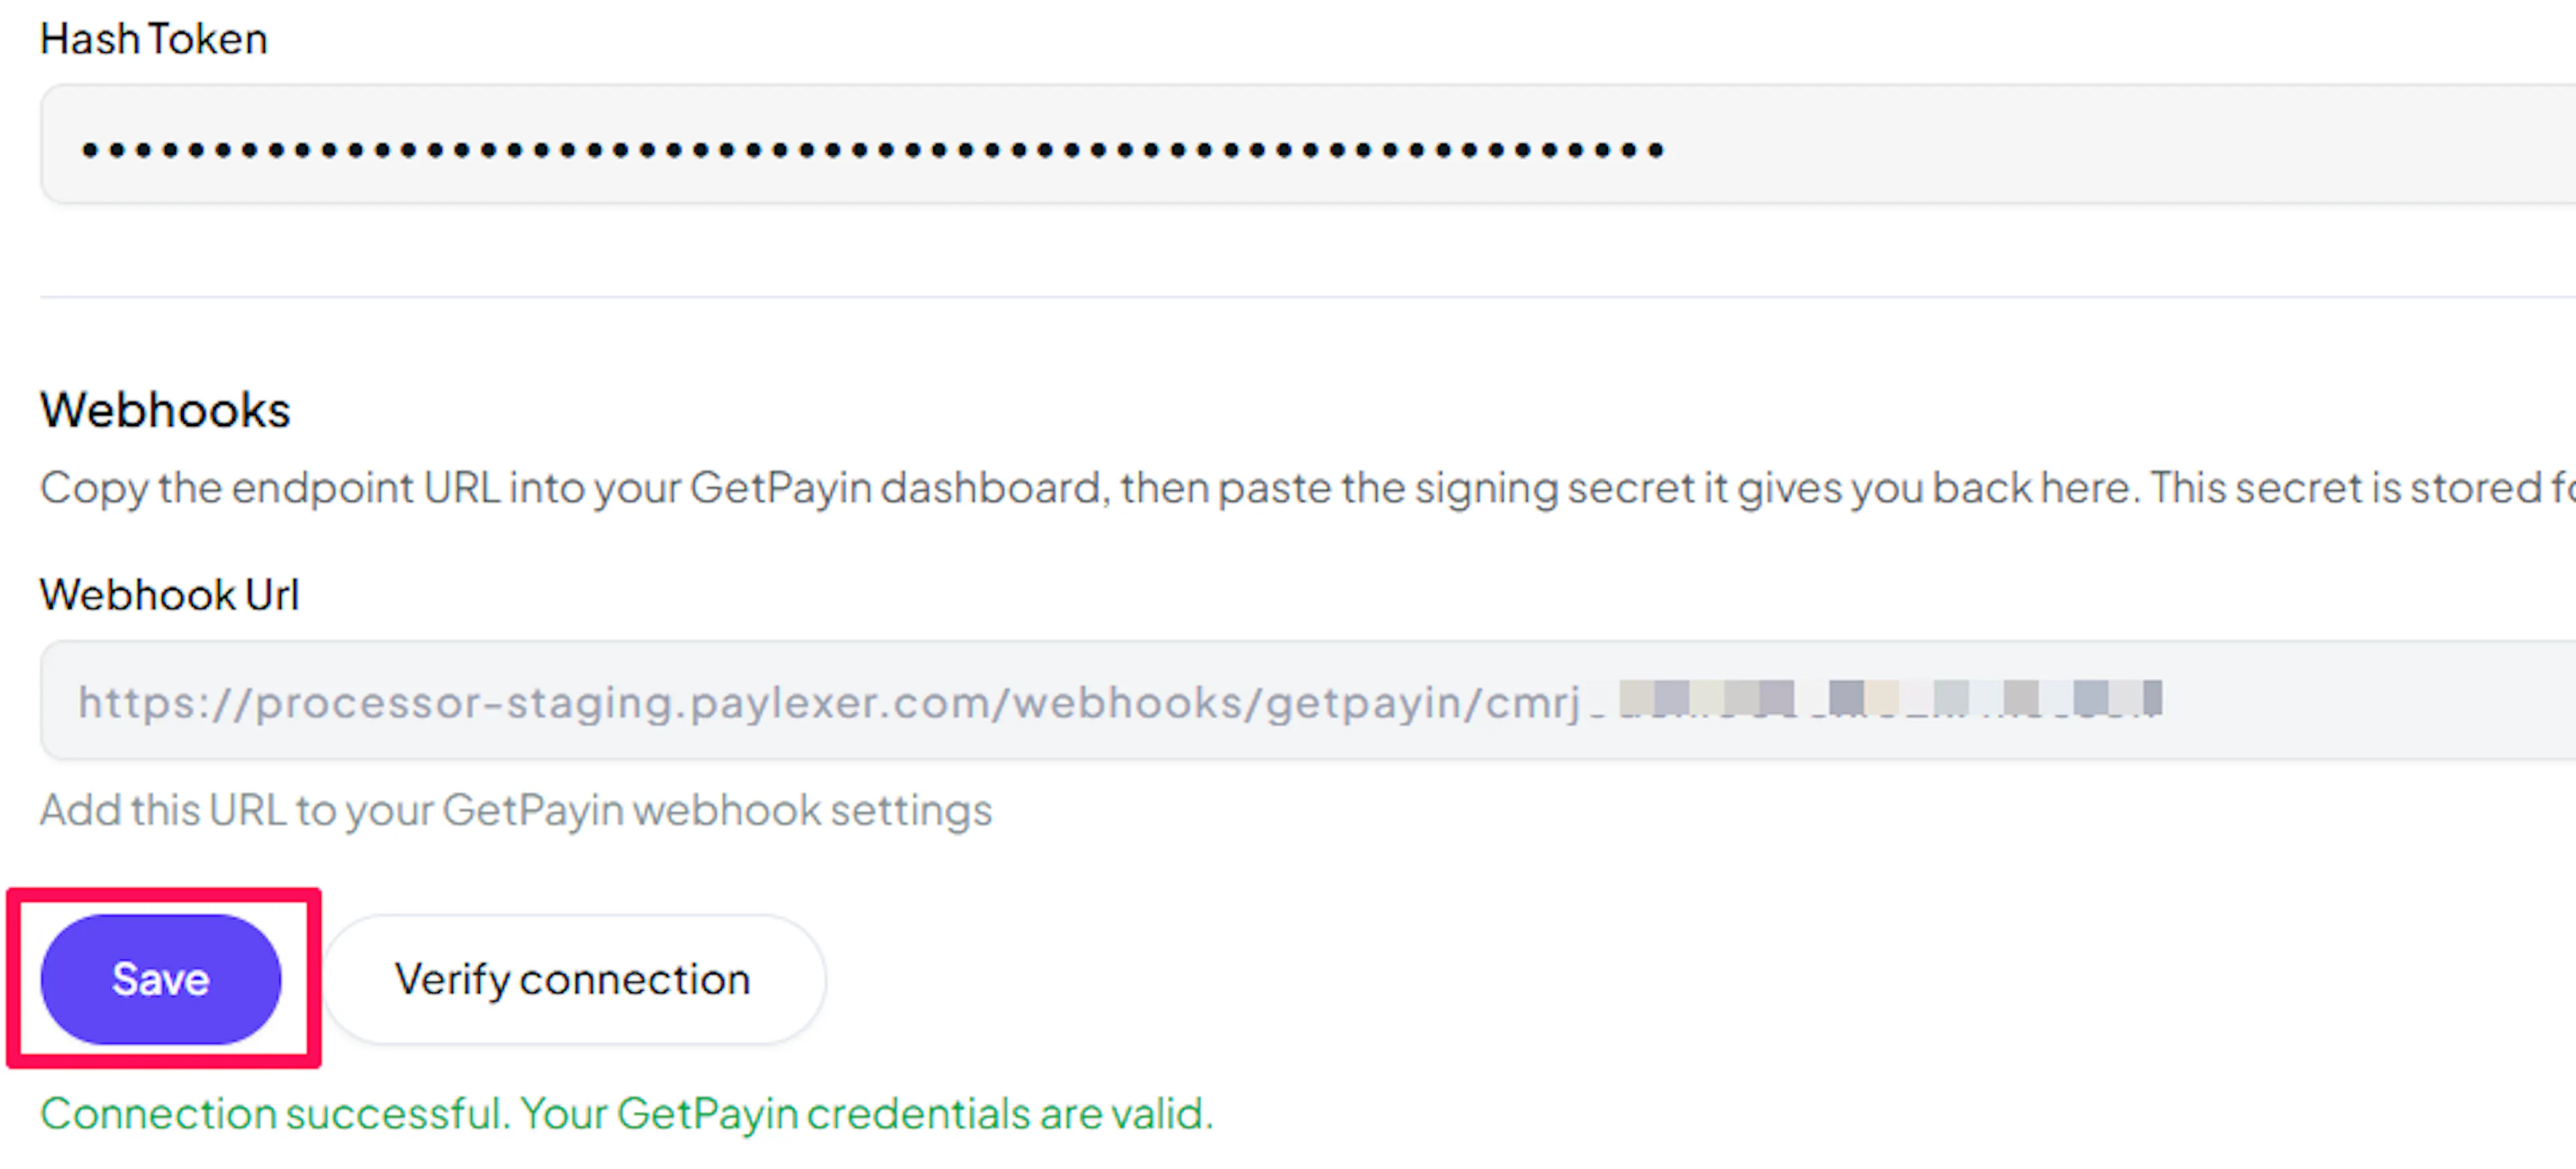
Test and save
Click Save and Verify Connection to verify and save your credentials.
Integrate GetPayIn to Your Website
If you have already added and configured your site, you can enable GetPayIn in your existing setup.
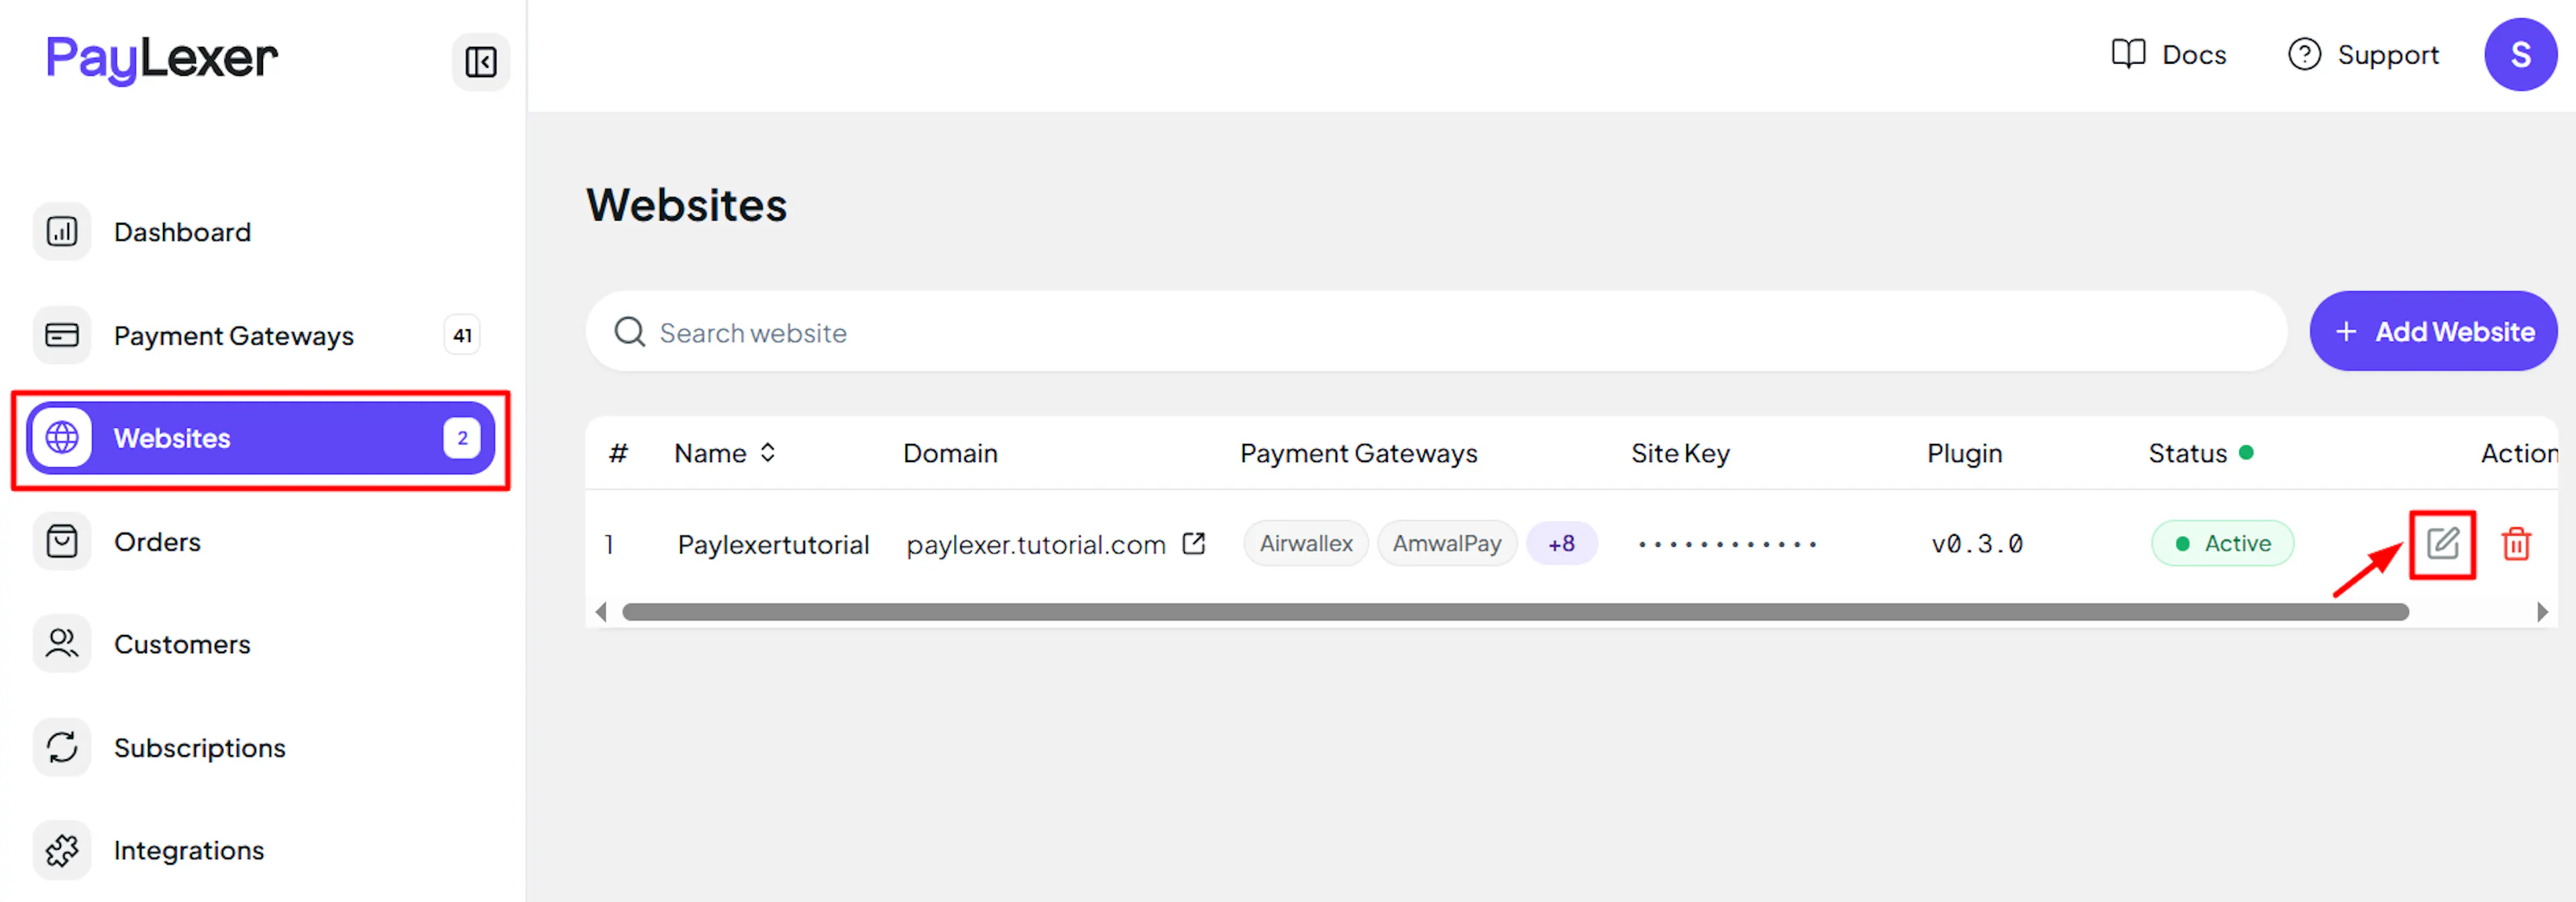
Go to Websites
Navigate to Websites in your PayLexer dashboard.
Edit your website
Click the Edit Icon of your added website.
Enable GetPayIn
Click the checkbox to enable GetPayIn for the website.
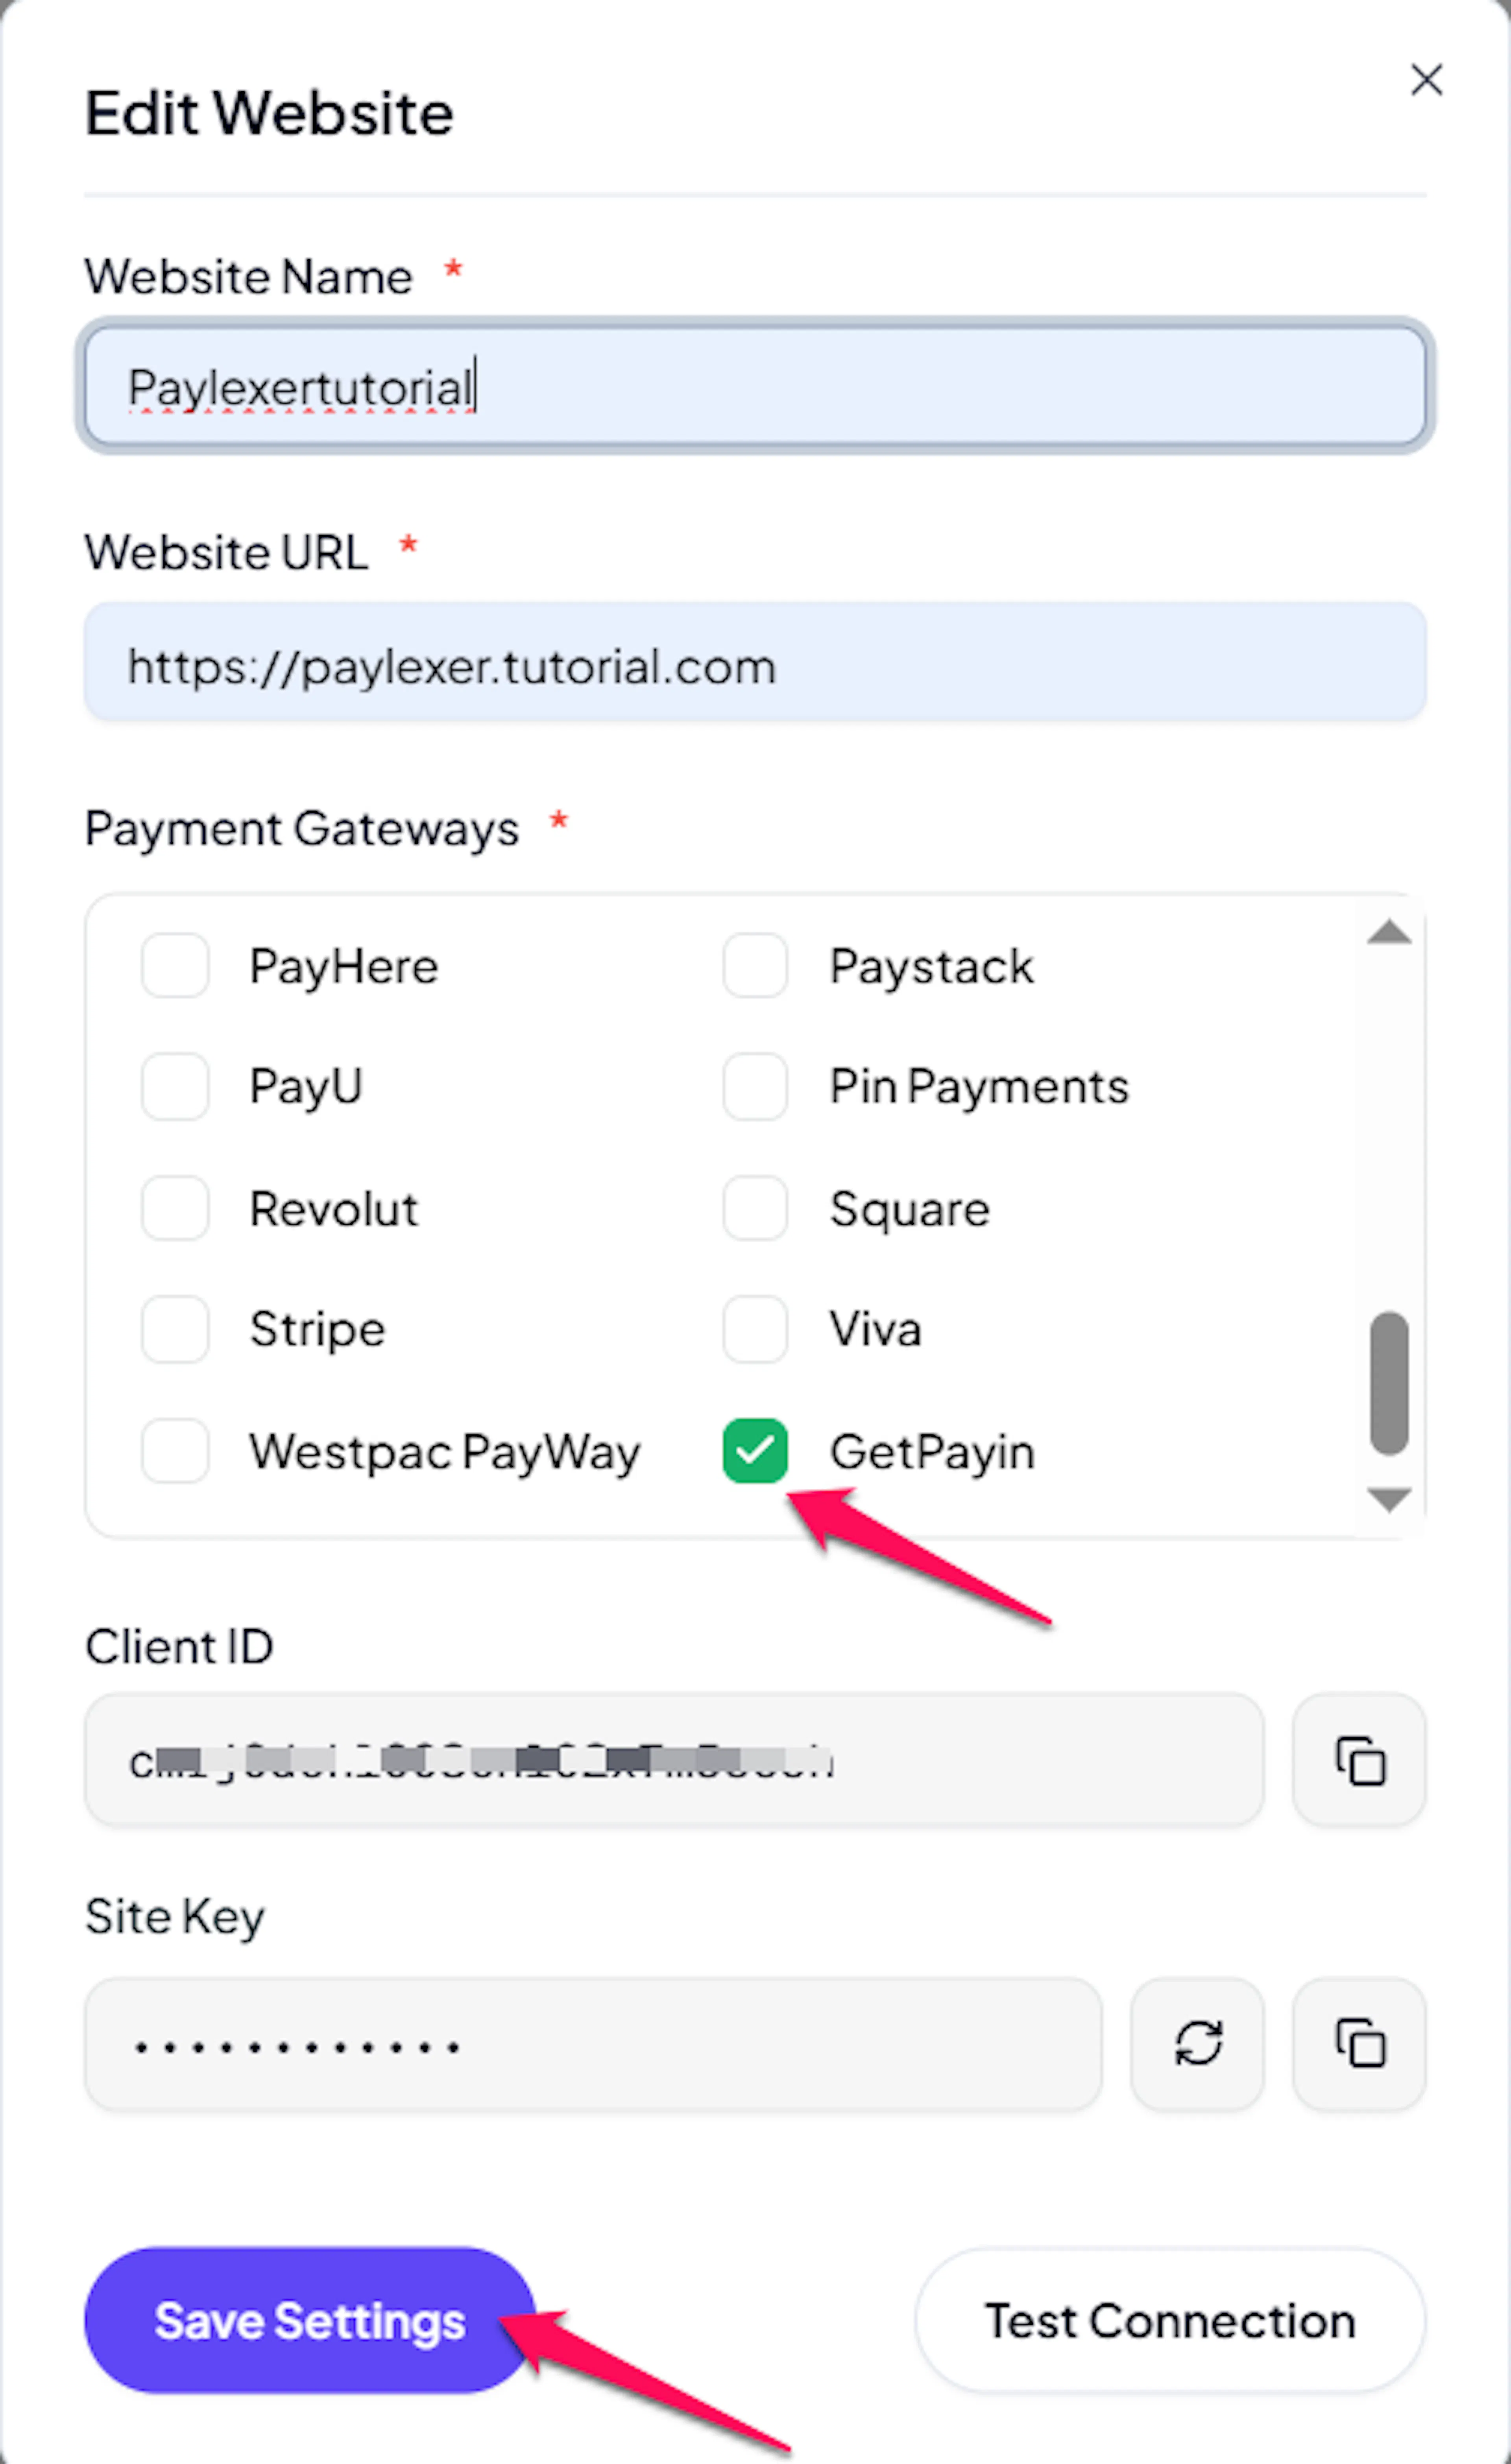
GetPayIn is now active for this website. Complete a test purchase in test mode before switching to live.
If you haven't added a website yet, Continue to Add Your Website →
Troubleshooting
Best Practices
- Test in sandbox mode before enabling live. Use test credentials to run a complete checkout, including the redirect to GetPayIn's hosted page and back to your site.
- Configure all required webhook events so payment and refund updates sync in real time. Without webhooks, PayLexer falls back to the 30-minute safety poller, which may delay order confirmations.
- Store your Hash Token securely as soon as you generate it. GetPayIn shows it only once - if you lose it you must regenerate it, which invalidates the old token and requires updating PayLexer.
- Always set Integration Type to Website when creating the GetPayIn integration. Using Mobile App type can break checkout redirects in a browser.
FAQs
Still Have Questions?
- GetPayIn Support: GetPayIn Help Center
- PayLexer Support: Contact Support