

Finix
Connect Finix to PayLexer to accept card payments through a secure embedded checkout form, with signed webhooks and full or partial refunds.
Finix is a US-focused payments platform built for merchants who want a dedicated account for their own card processing, rather than sharing an account with other businesses. Shoppers enter their card details in a secure form embedded directly on the merchant's own checkout page - there is no redirect and Finix confirms every payment and refund outcome with a cryptographically signed notification.
- Supported Regions (Merchant Accounts): US-based businesses
- Supported Currencies: USD
This gateway appears in checkout only when the selected currency is USD.
Supported Features
- Card payments through a secure form embedded directly on the merchant's own checkout page, with no redirect
- Full and partial refunds
- Real-time payment and refund updates through cryptographically signed webhooks
- Idempotent payment and refund requests, so a retried request can't accidentally charge or refund twice
Before You Start
Make sure you have:
- Finix Account – Don't have one? Sign up for Finix →
- PayLexer Account – Required to configure the integration. Create your account →
- A website where you want to integrate
Looking for a different payment processor? View all supported gateways →
Configuring Finix
You need a Username, Password, and Merchant ID from Finix for this integration.
Getting API Credentials
Log in to Finix
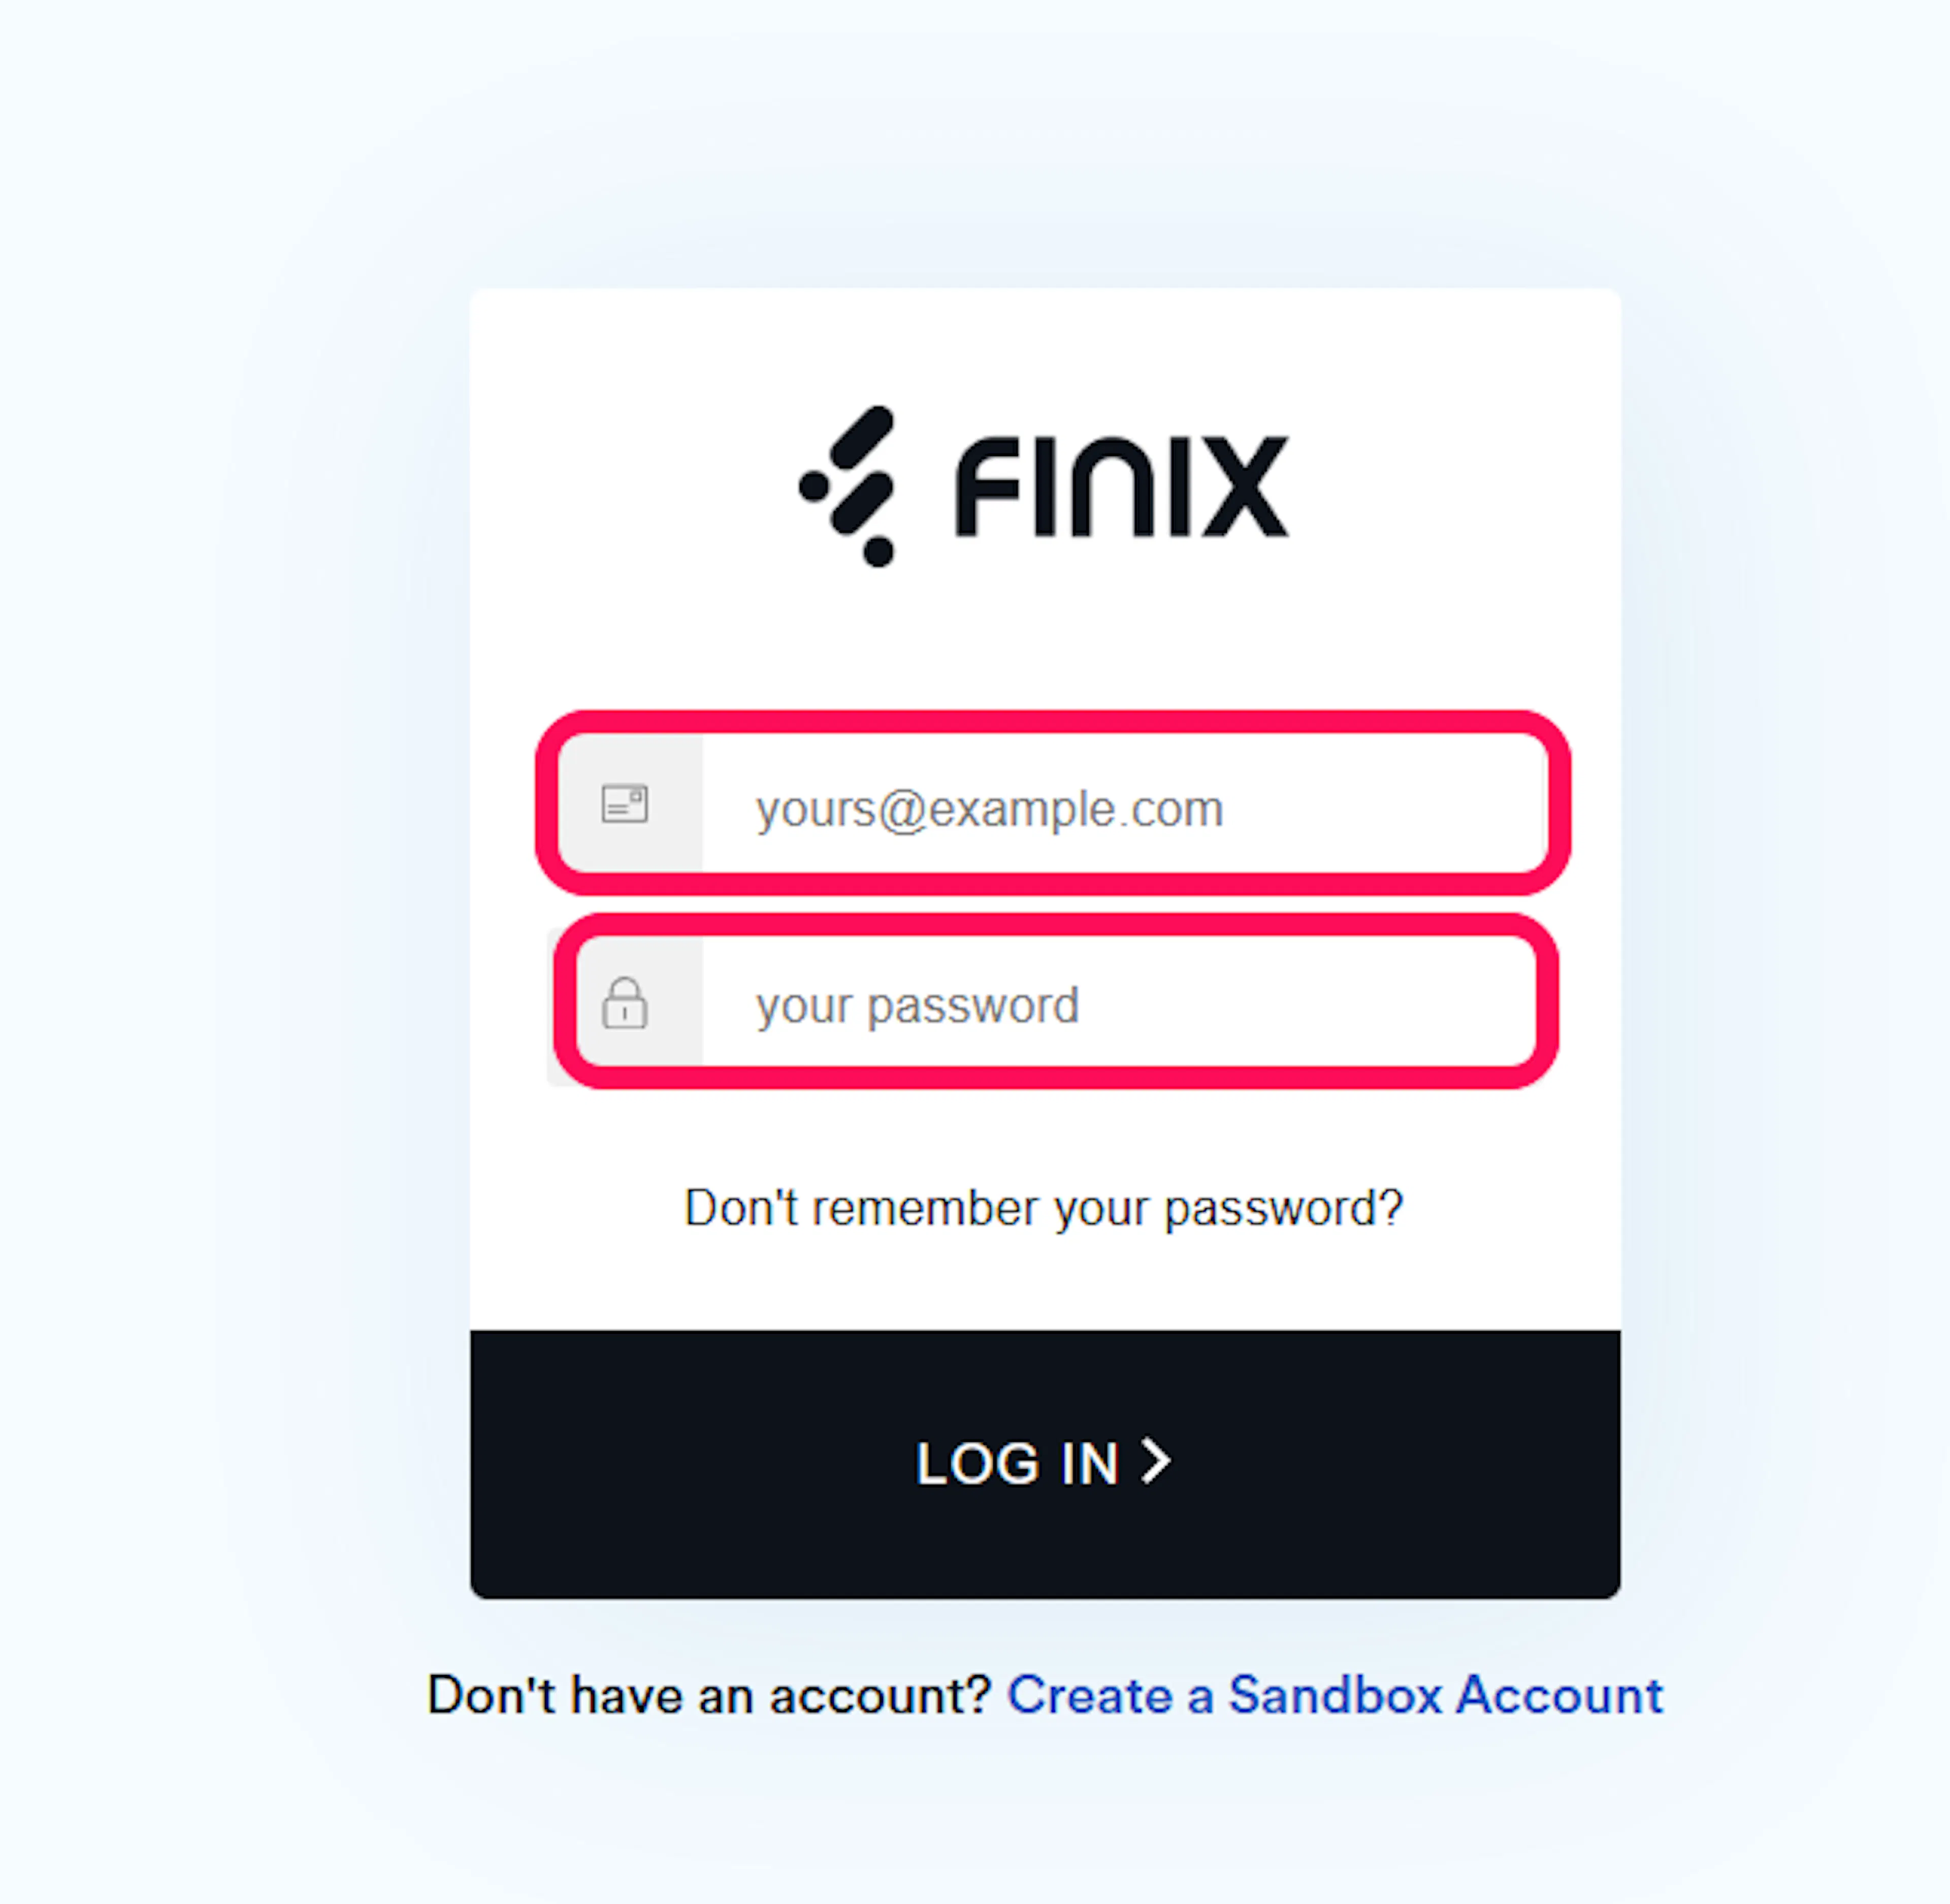
Sign in to your Finix dashboard.
Sandbox and Live
Finix keeps Sandbox and Live as two entirely separate accounts, each with its own credentials. Nothing you do in Sandbox ever touches real money.
Open the Developer page and copy your Merchant ID
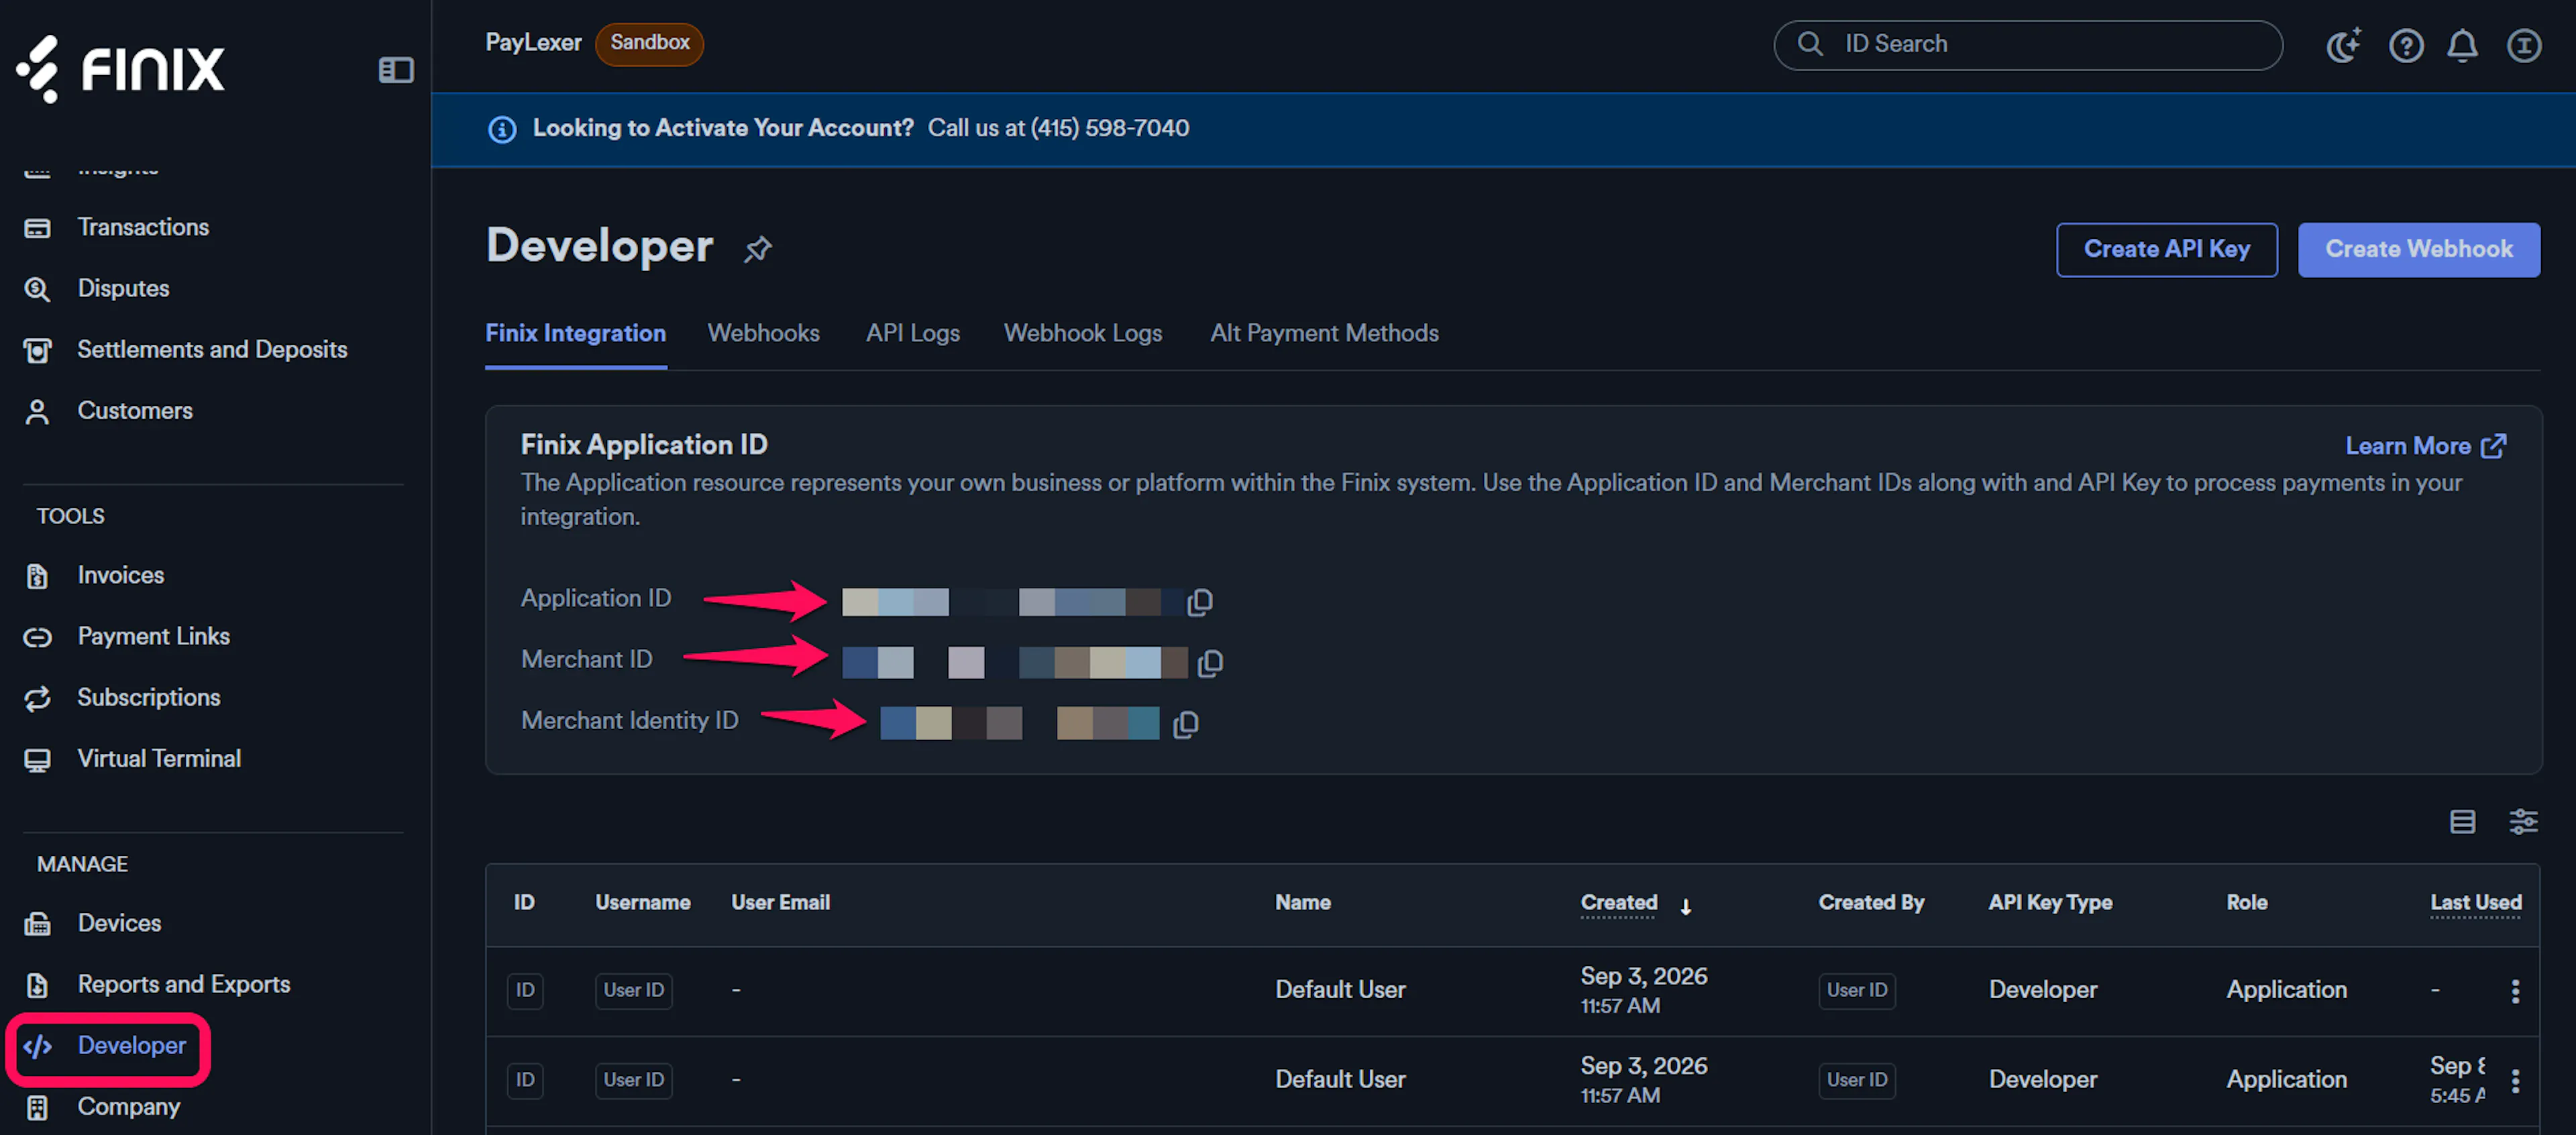
Go to Developer in the left navigation. Its default Finix Integration tab shows a Finix Application ID card with your Application ID, Merchant ID, and Merchant Identity ID side by side, each with a copy icon. Copy the Merchant ID from here.
Create an API Key
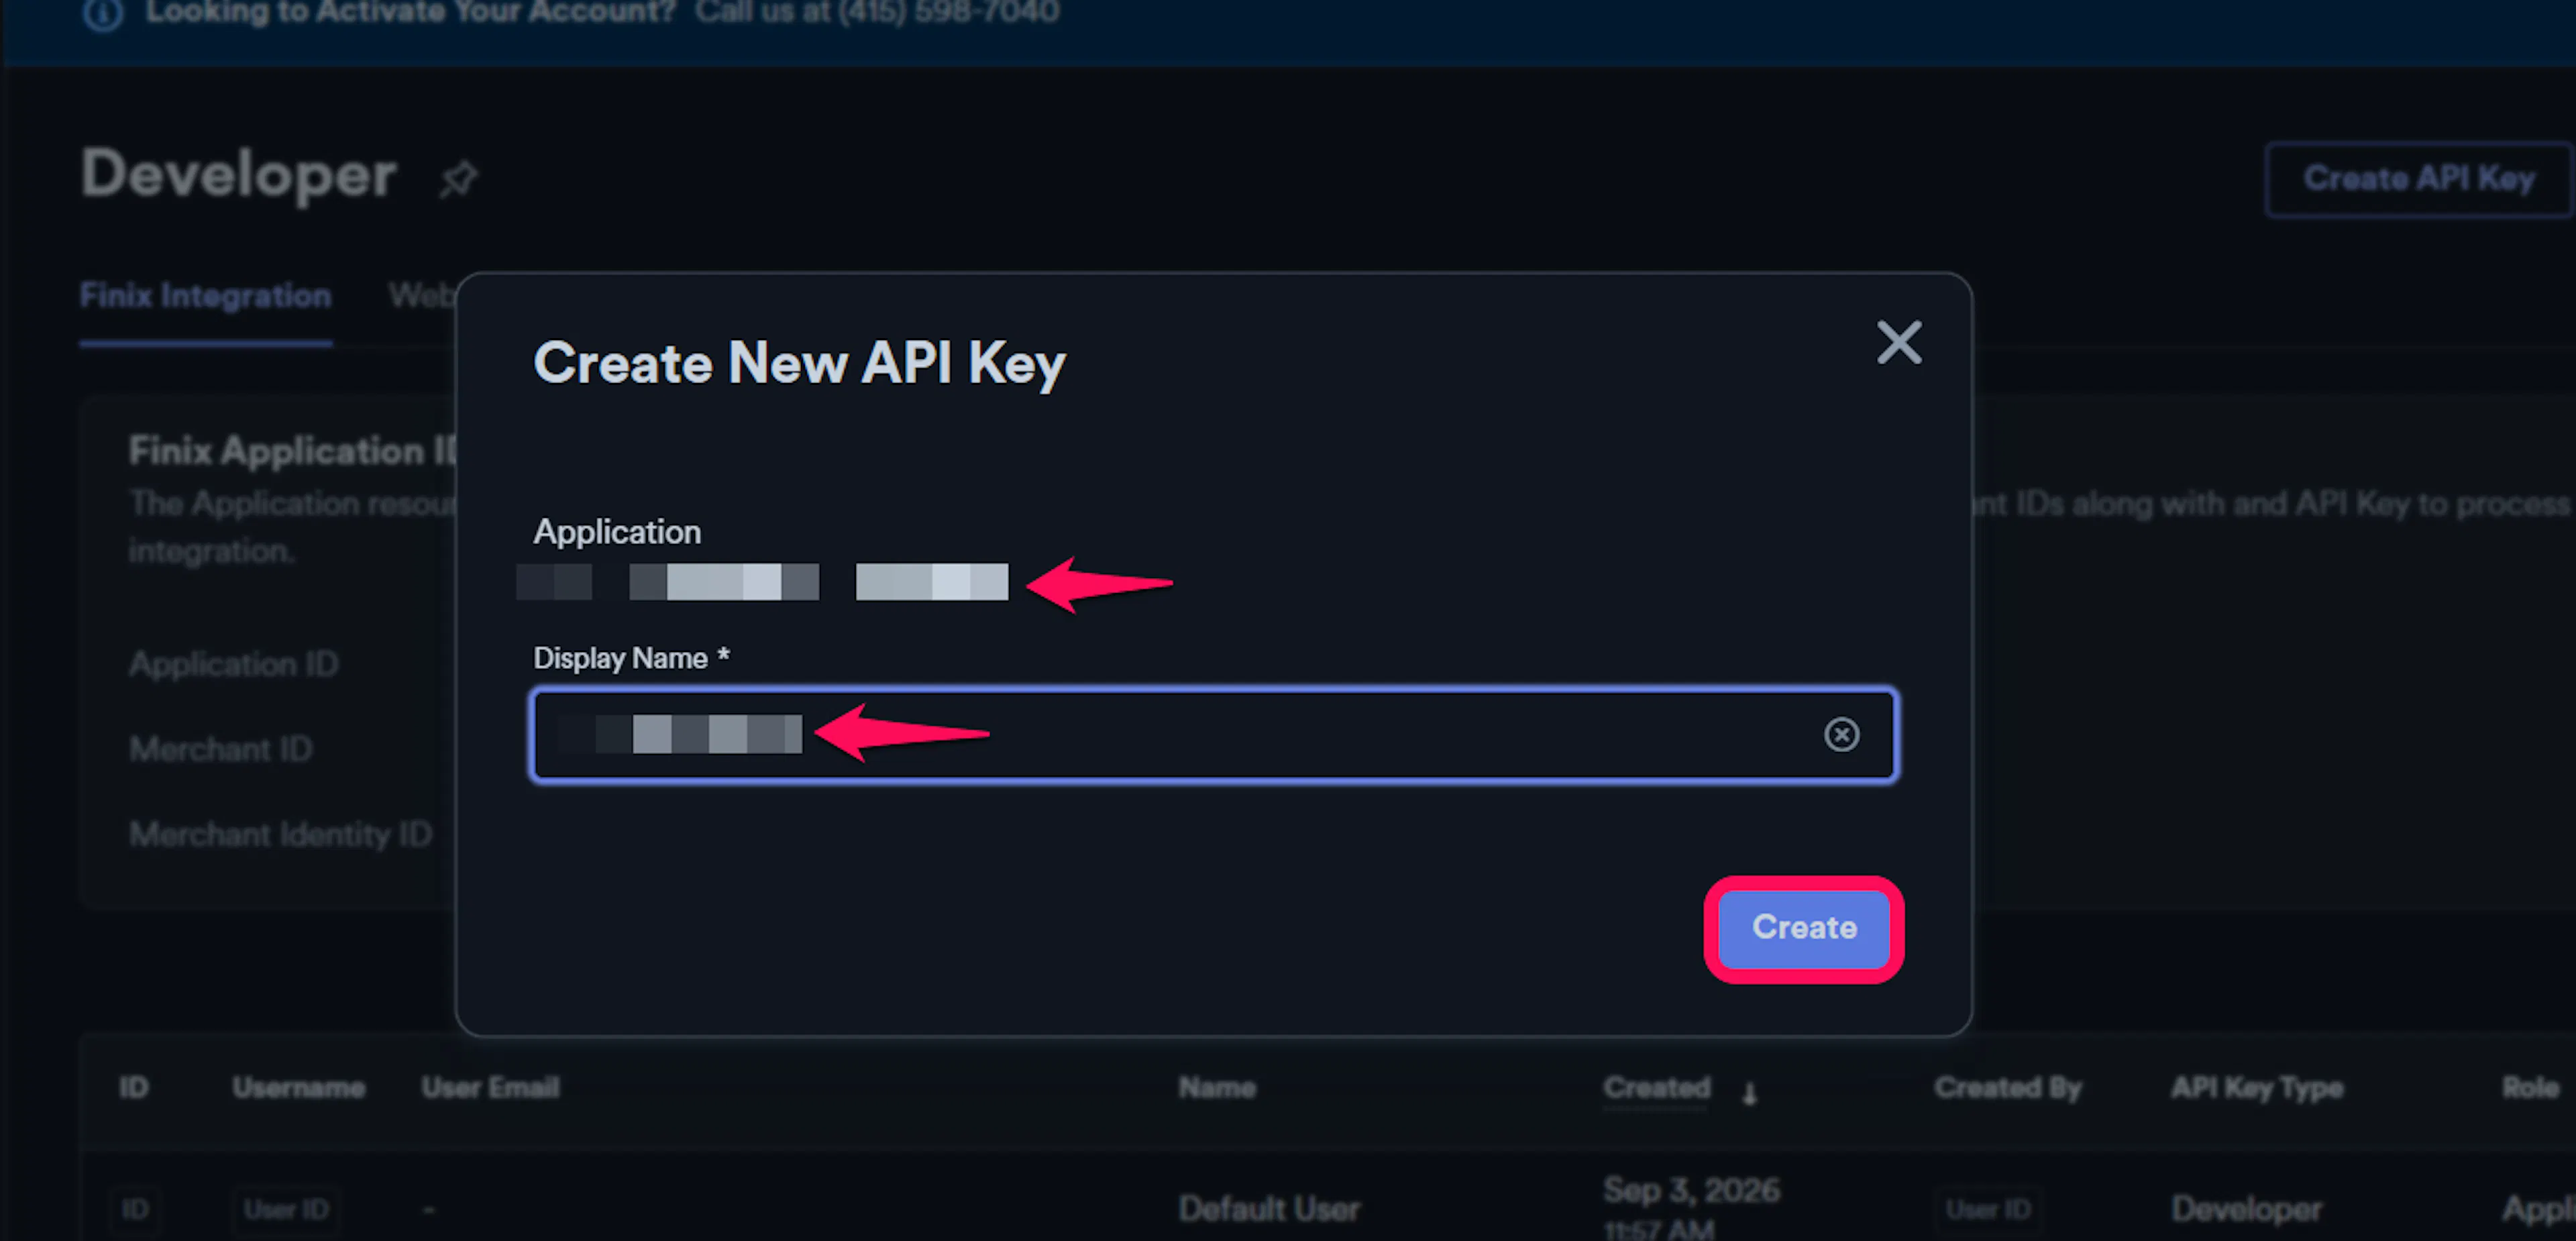
On that same Developer page, click Create API Key. In the dialog that opens, the Application field is already filled in for you - enter a Display Name for the key and click Create.
Finix then generates a Username and Password pair for that key - copy the password immediately, since Finix only shows it once.
Repeat both of these steps once for your Sandbox account and once for your Live account, so you end up with both sets of credentials.
Adding Credentials to PayLexer
Open PayLexer Dashboard
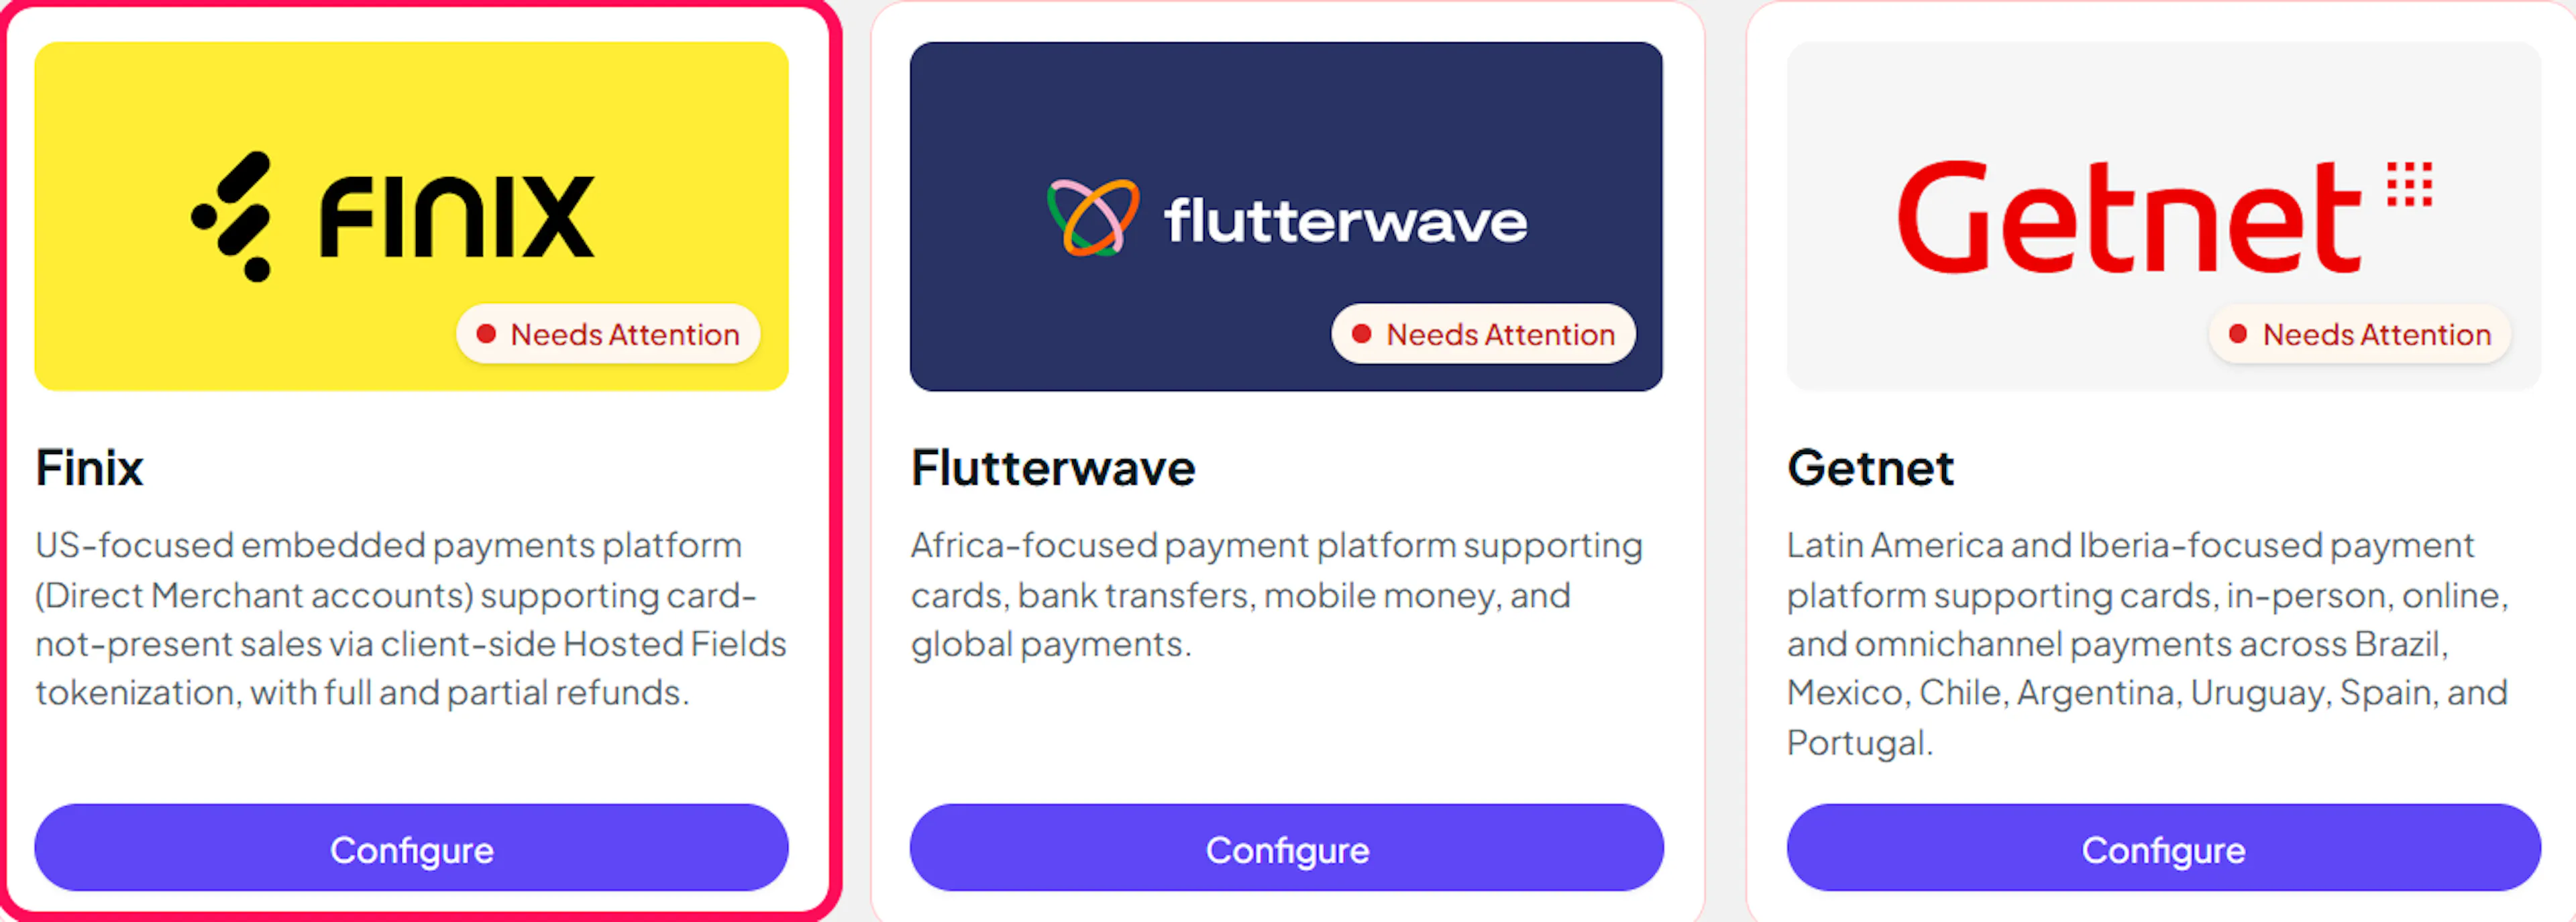
Log in to your PayLexer dashboard and navigate to Payment Gateways → Finix.
Enter your credentials
Paste the Username, Password, and Merchant ID you copied from Finix into the corresponding fields.
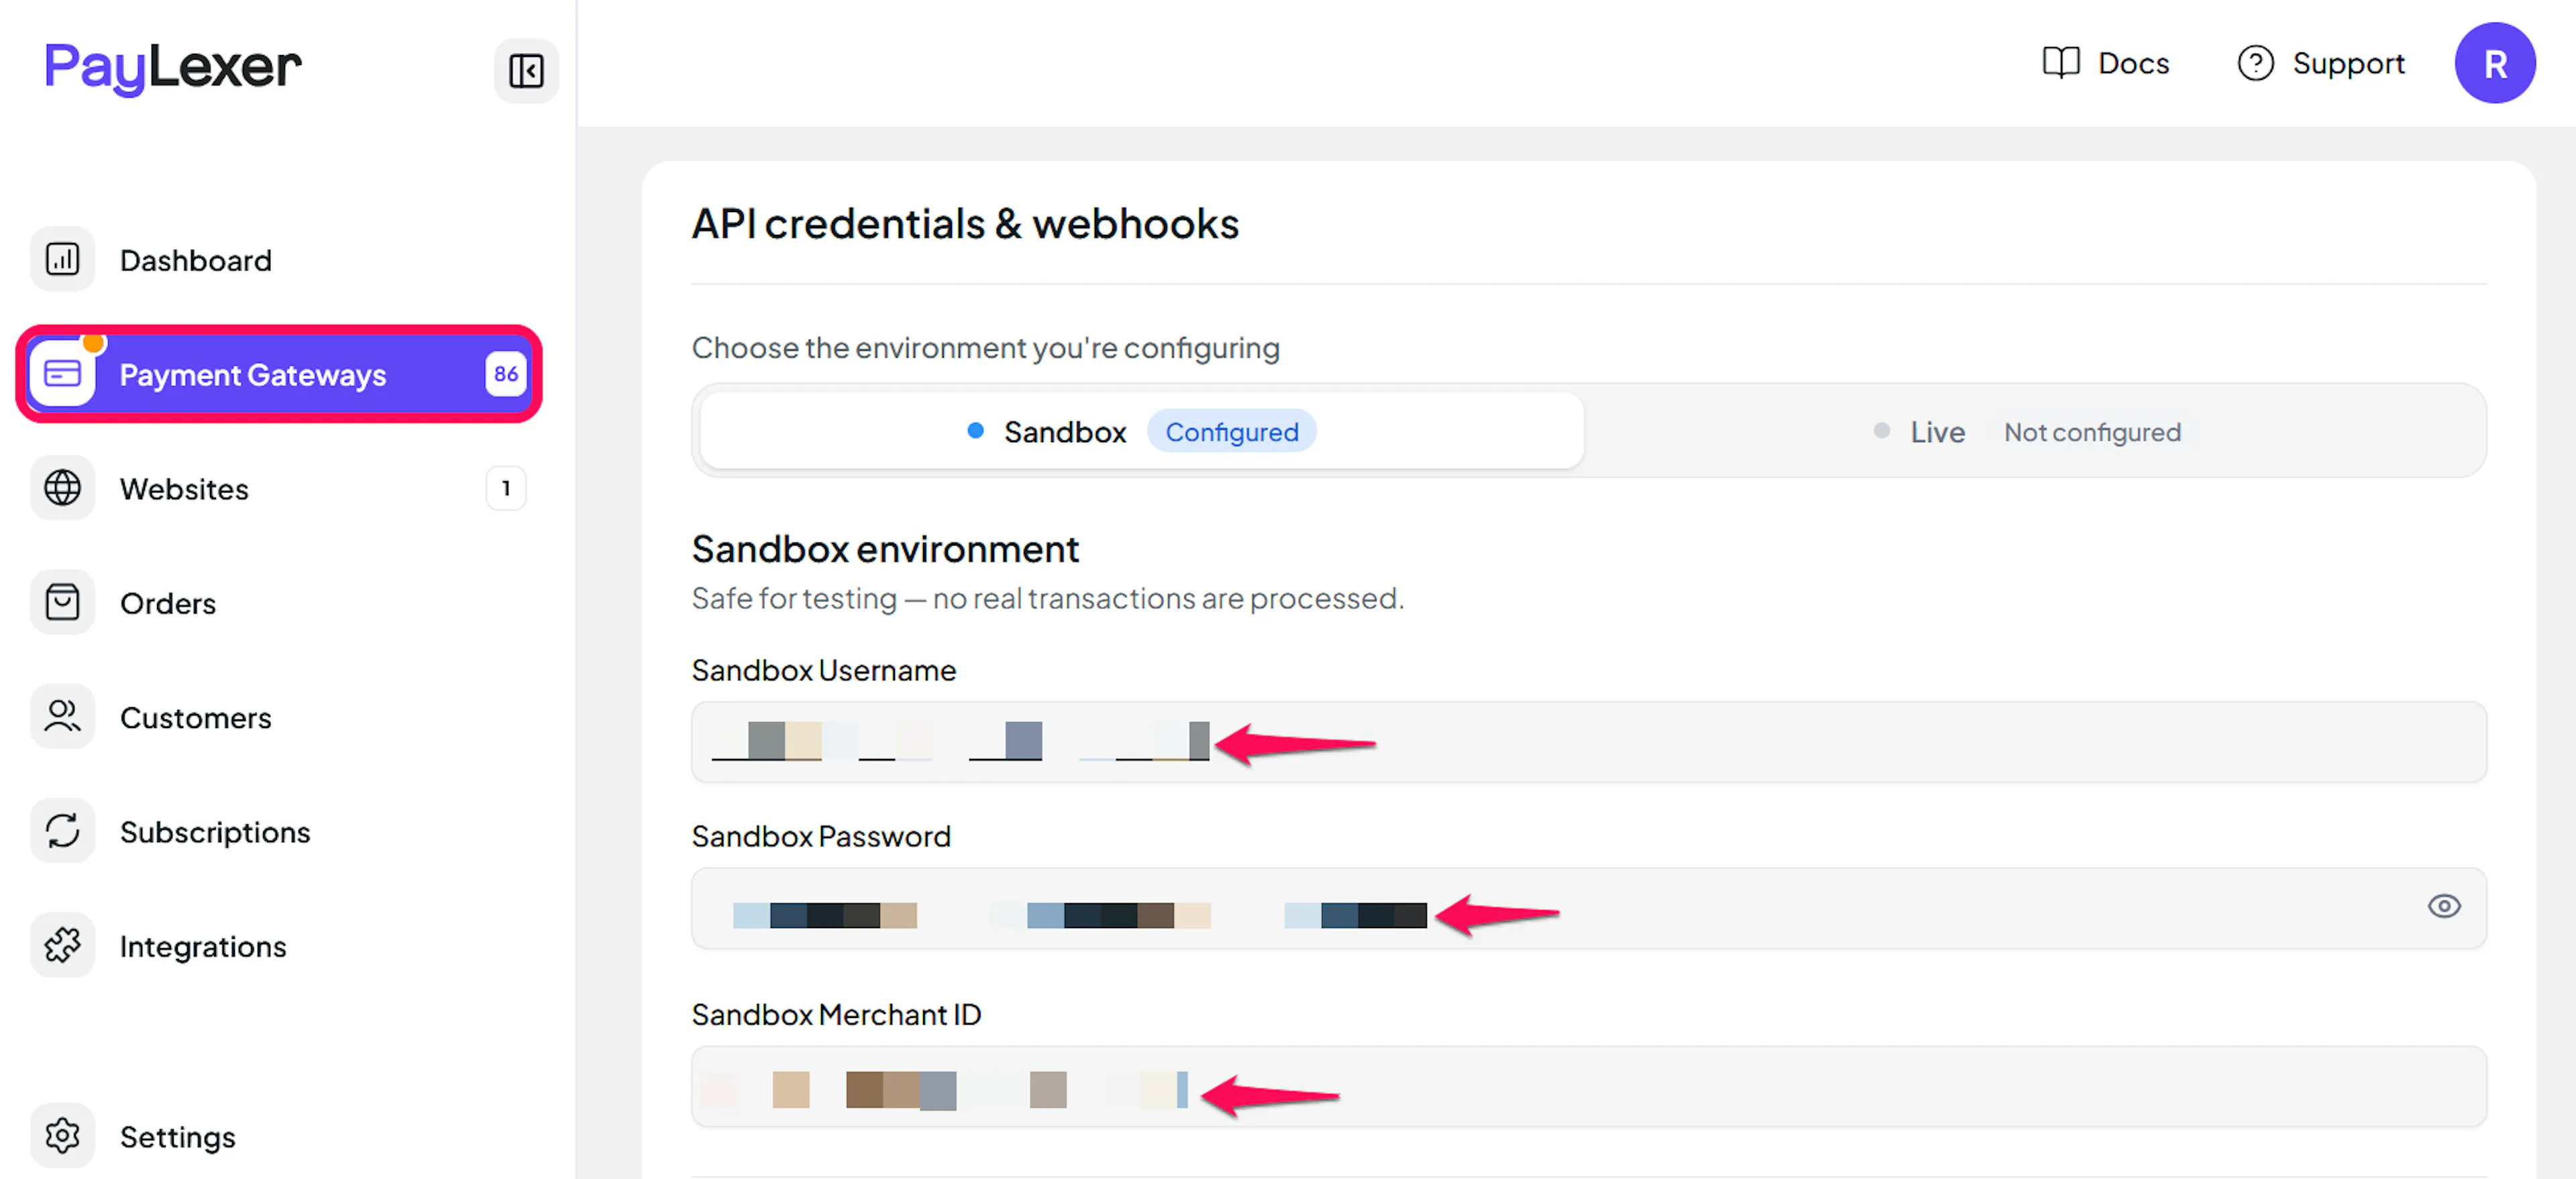
Understanding Live/Production and Sandbox Settings:
| Environment | Purpose |
|---|---|
| Live / Production | Used for real transactions. |
| Test / Sandbox | Used for testing only. No real money is processed. |
How PayLexer selects credentials:
- Debug/Test mode ON → Test credentials are used
- Debug/Test mode OFF → Live credentials are used
Test and save
Click Save to save your configuration and verify your credentials. Click Verify Connection to test the connection.
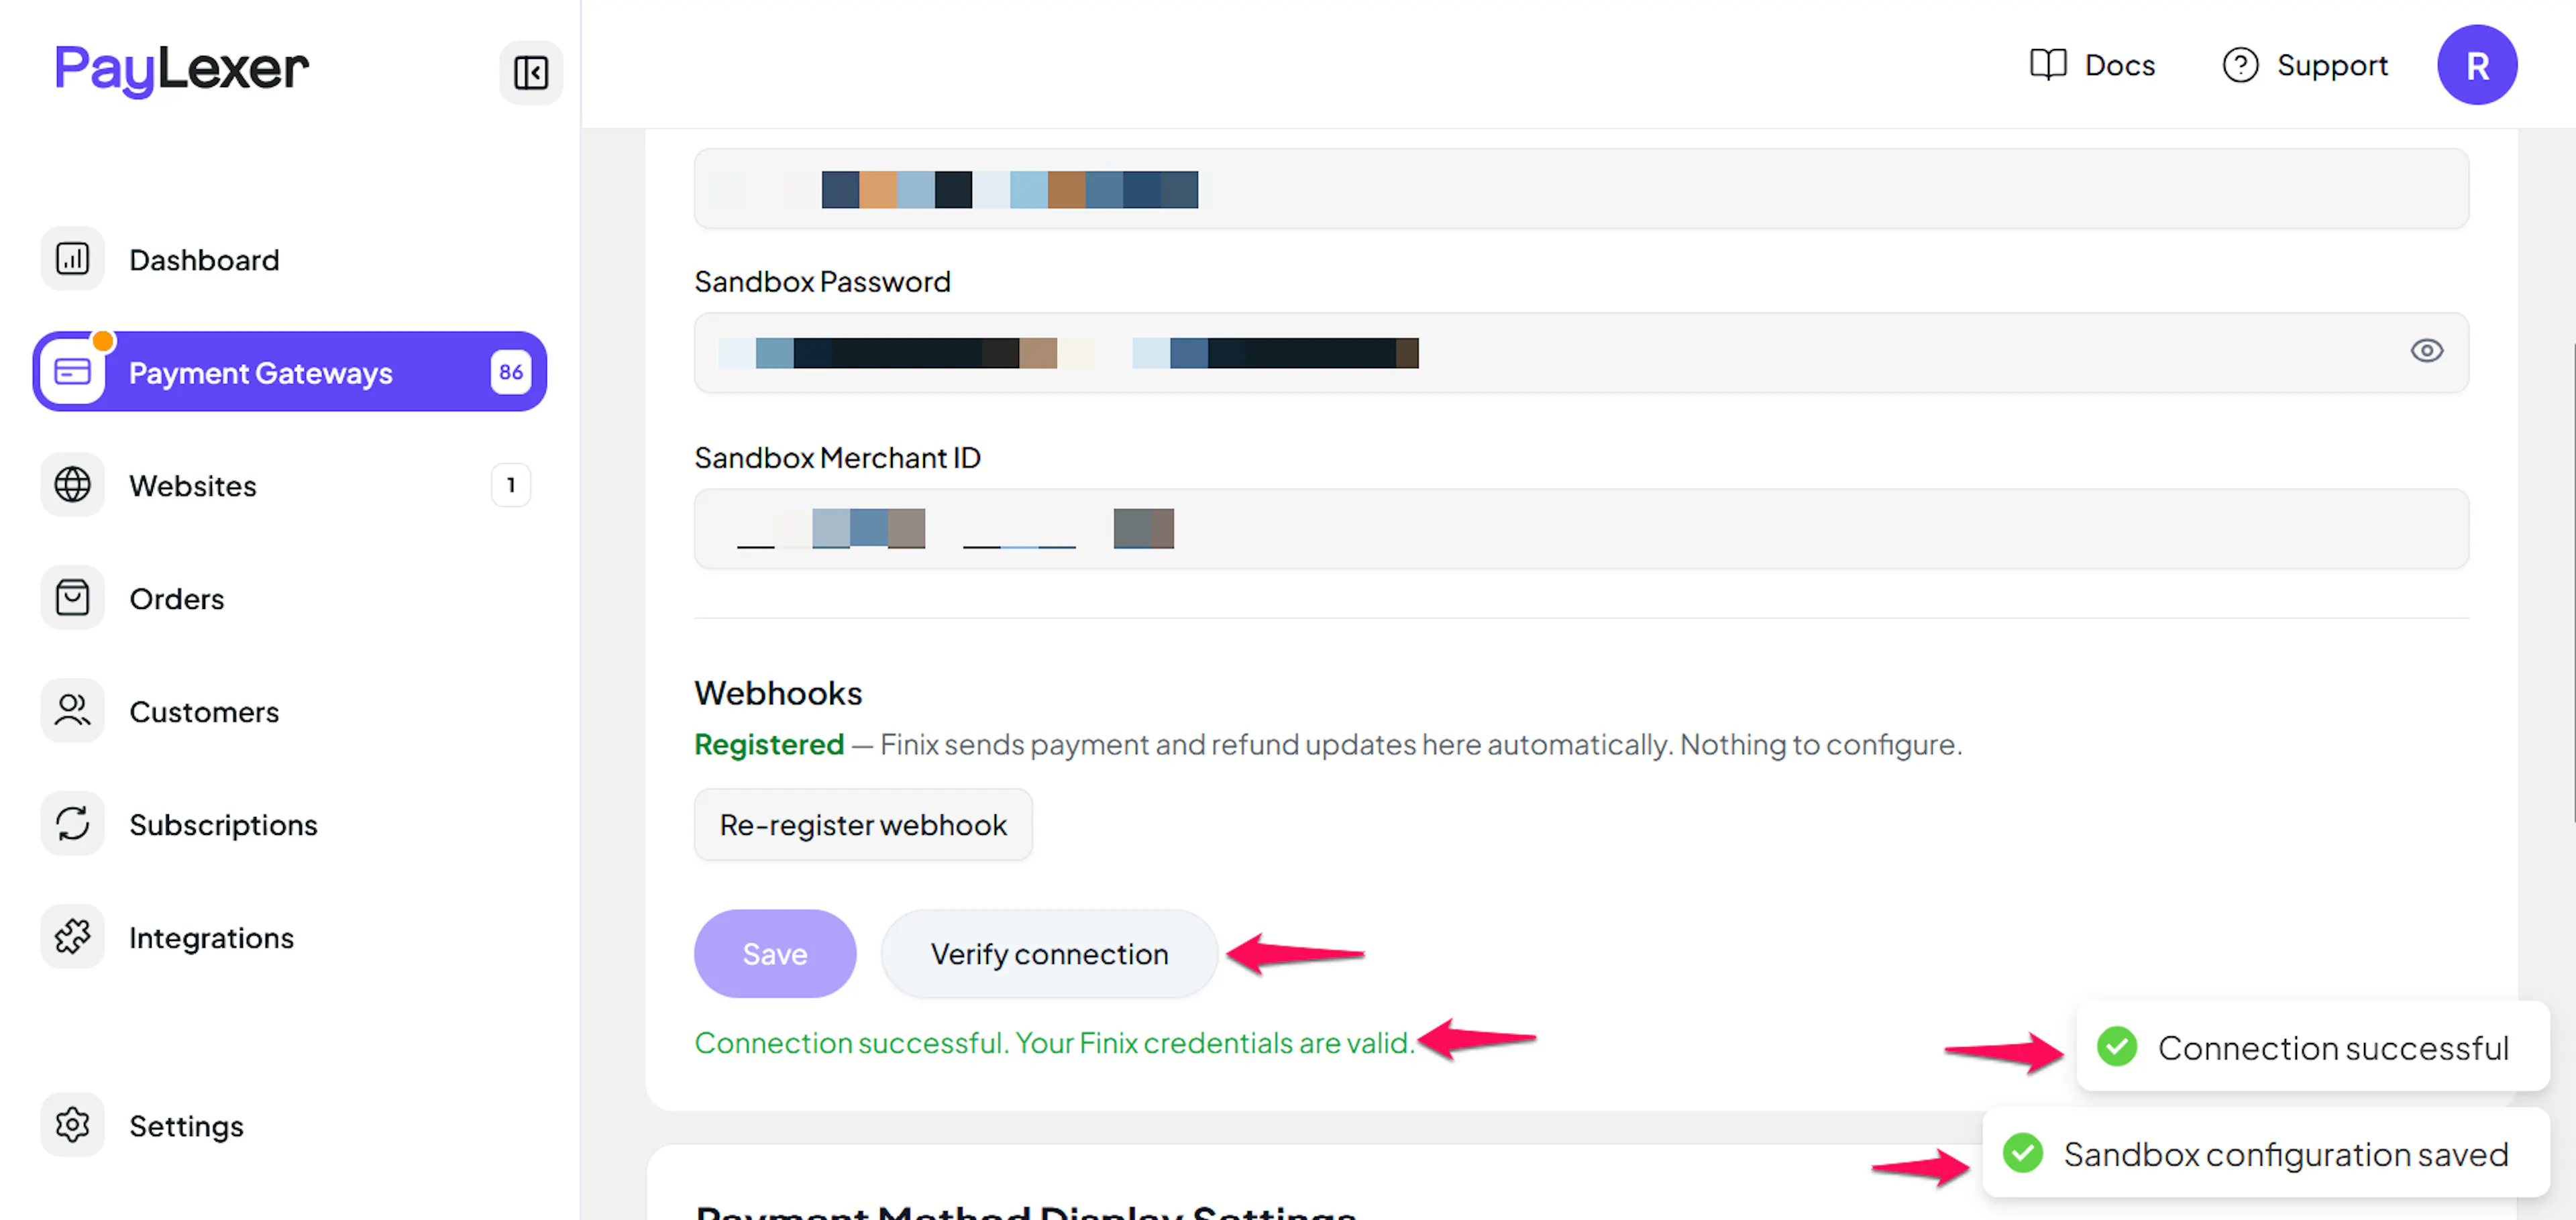
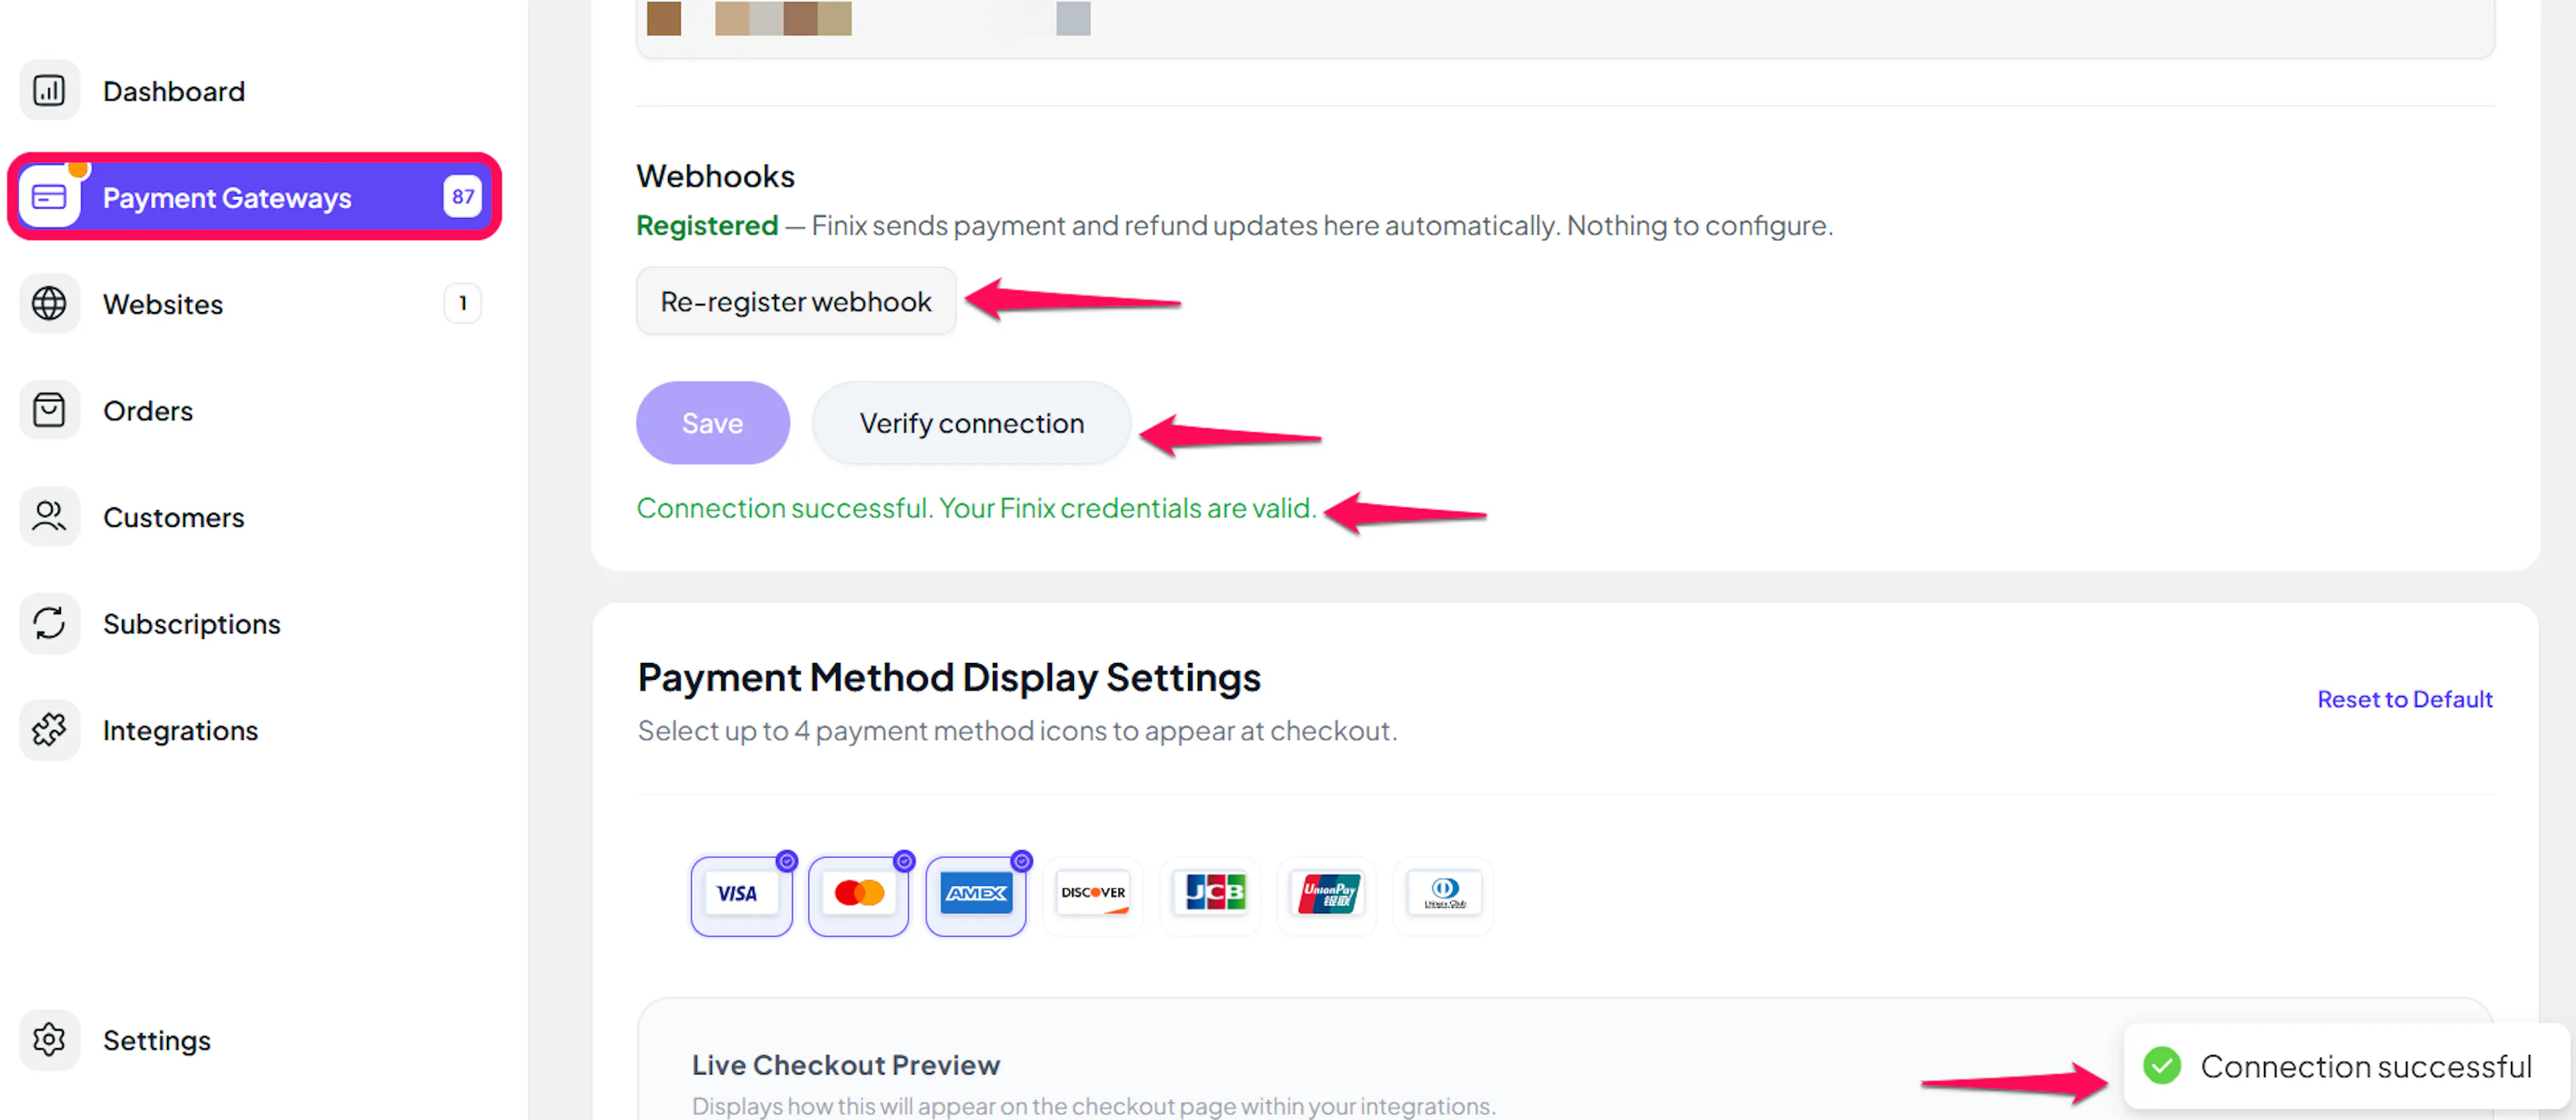
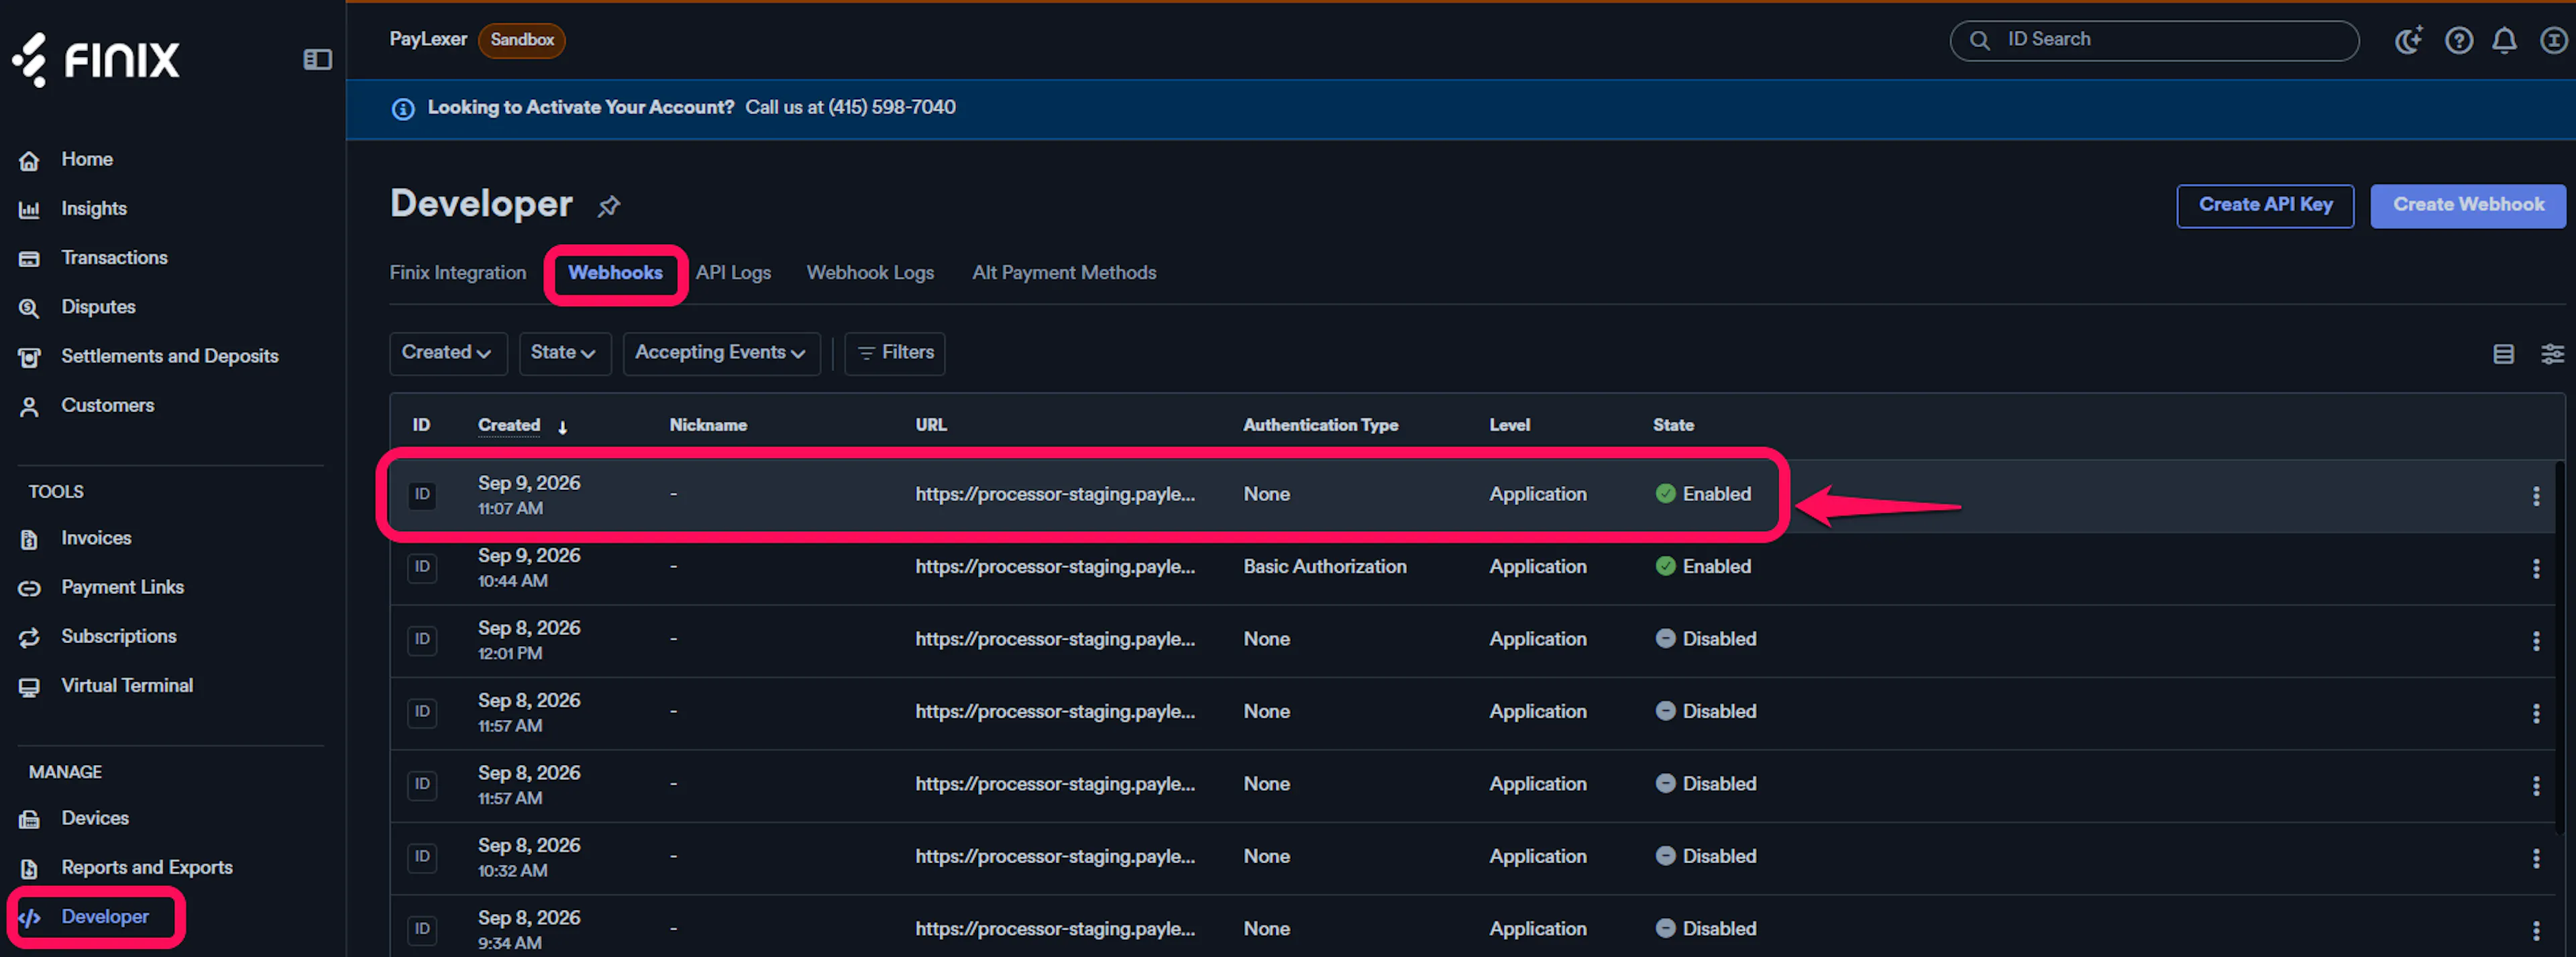
Webhooks (Automatic on first save, with a manual re-register option)
PayLexer registers your Finix webhook automatically the first time you save valid credentials for an environment - no URL, no screen in Finix, no signing secret to paste in. Payment Gateways → Finix shows a status line per environment (Sandbox and Live register separately, since they're separate Finix accounts) plus a Register webhook / Re-register webhook button.
Refunds depend on this webhook: a Finix refund is accepted immediately but only confirmed complete moments later, and PayLexer learns that only from this notification. If registration fails, refunds sit as "pending" indefinitely even though Finix already completed them.
- If a secret is rotated or the webhook goes stale, automatic registration won't retry on its own - click Re-register webhook (uses your saved credentials, no retyping needed)
- Button reads Register webhook if nothing's registered yet, Re-register webhook once it is registered.
Integrate Finix to Your Website
If you have already added and configured your site, you can enable Finix in your existing setup.
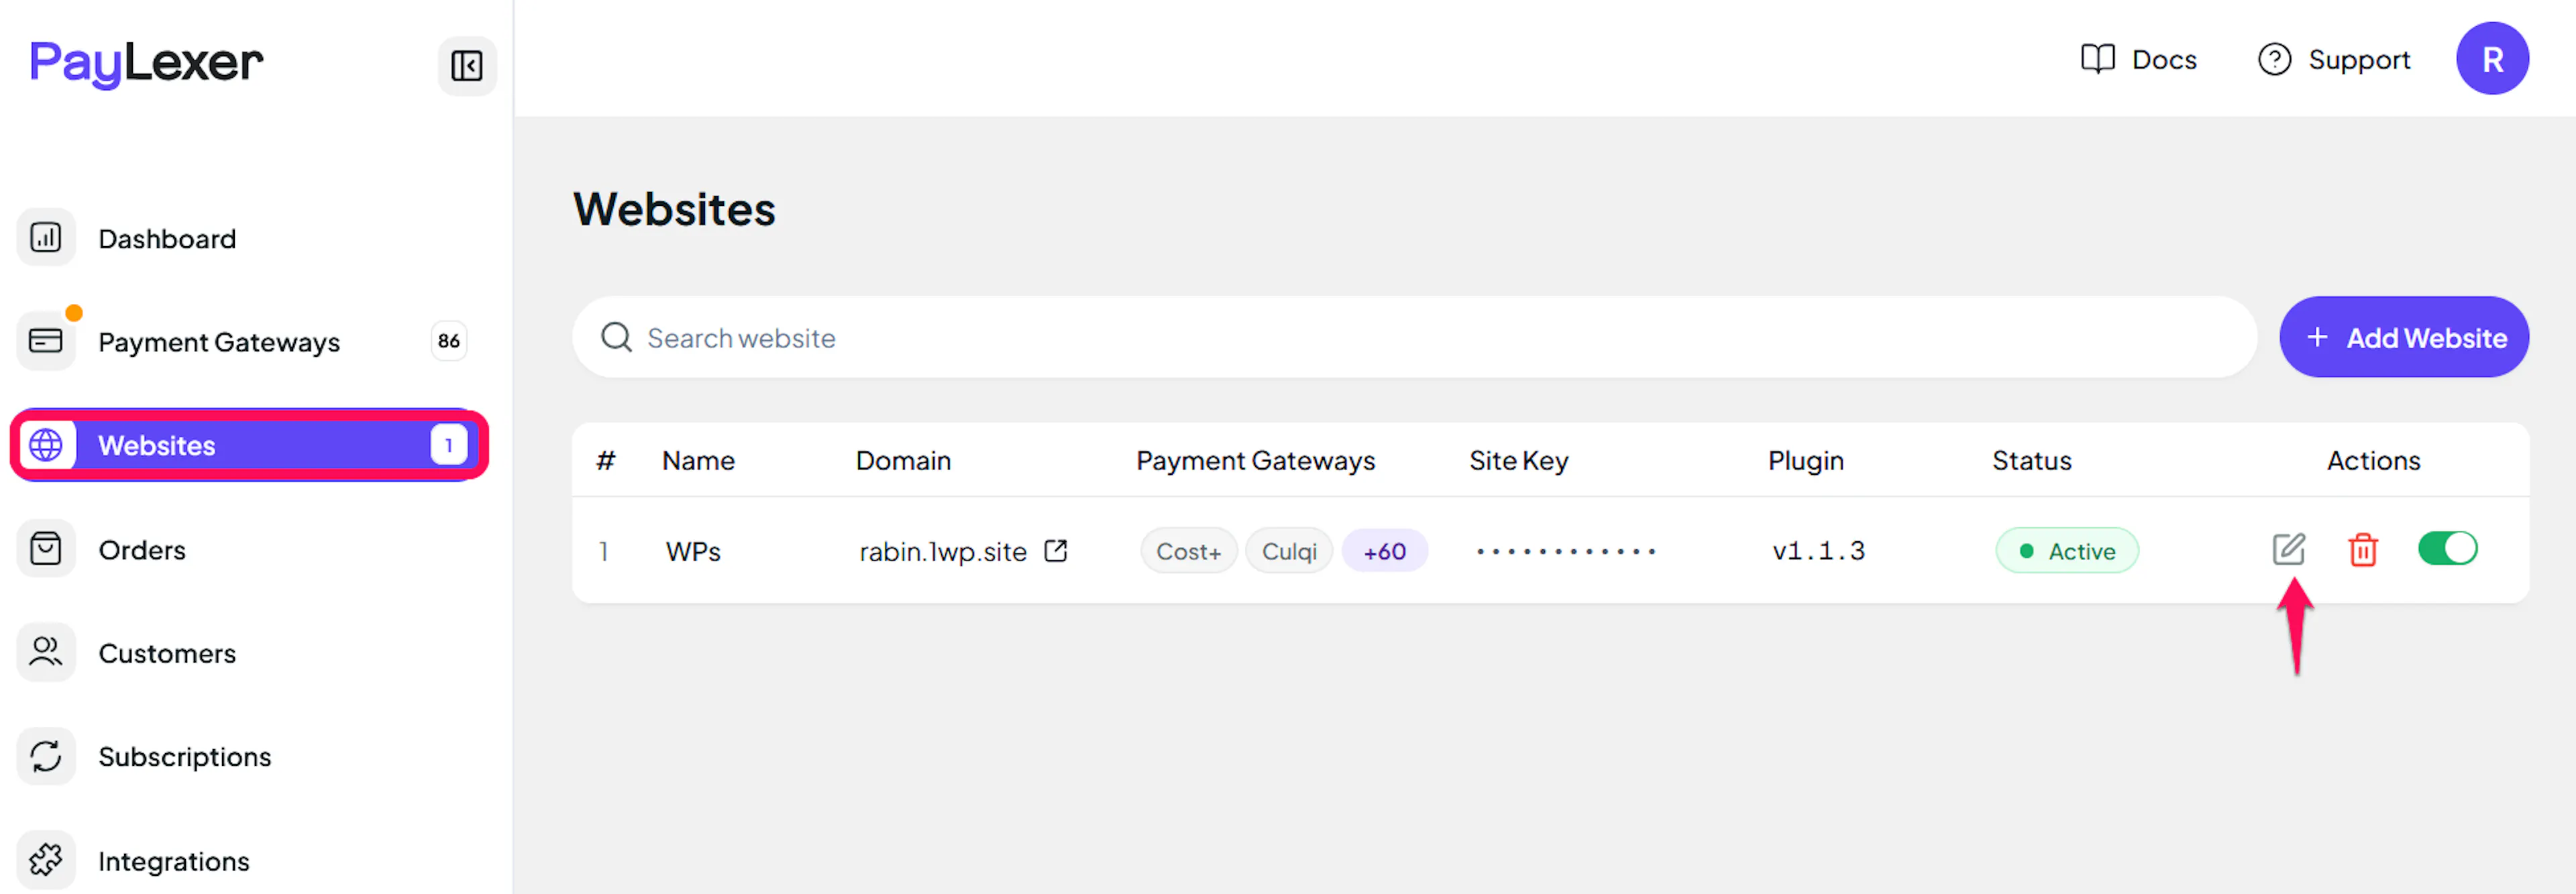
Go to Websites
Navigate to Websites in your PayLexer dashboard.
Edit your website
Click the Edit Icon of your added website.
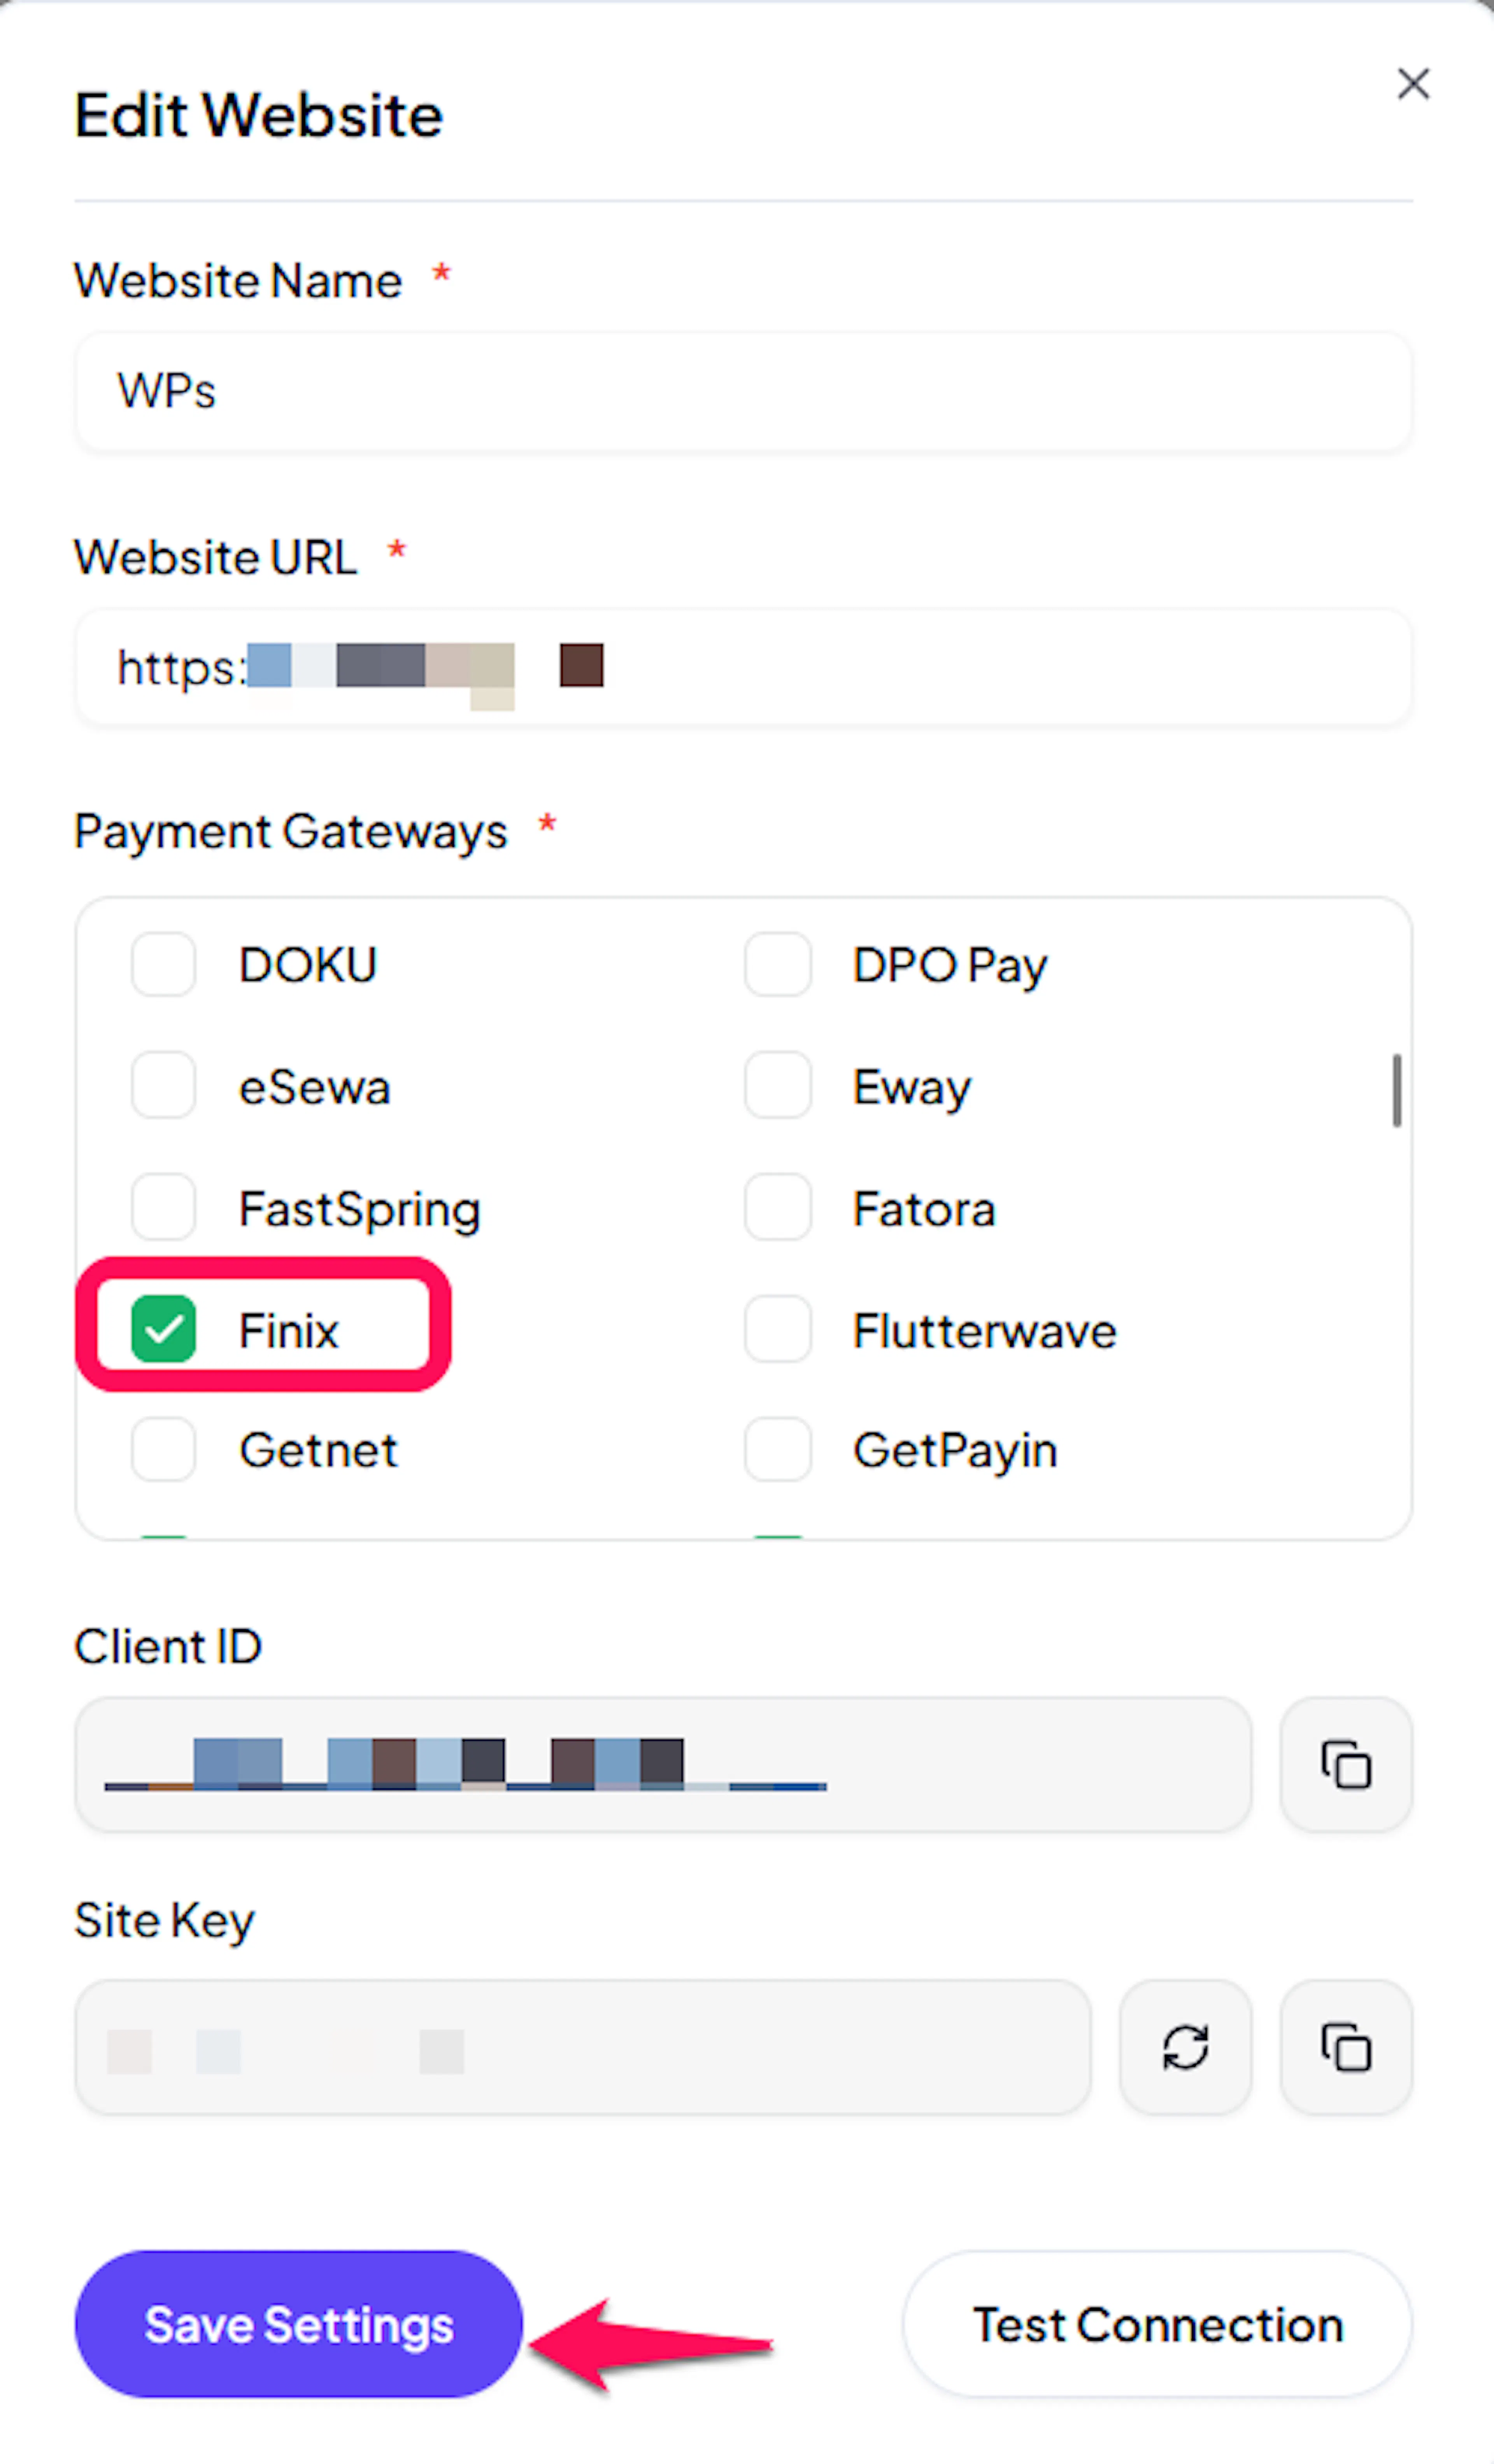
Enable Finix
Click the checkbox to enable Finix for the website.
If you haven't added a website yet, Continue to Add Your Website →
Troubleshooting
Best Practices
- Test in sandbox before enabling production.
- Confirm your webhook shows as registered for both Sandbox and Live on Payment Gateways → Finix before going live, so refund confirmations arrive reliably instead of only ever showing as pending.
- Keep your Sandbox and Live credentials from their separate Finix accounts - never reuse one in place of the other.
- Remember Finix only settles in USD when pricing orders you expect it to handle.
- Complete Finix's annual PCI self-assessment questionnaire when Finix sends it, so your account isn't restricted for missing it.
FAQs
Still Have Questions?
- Finix Support: Contact Support
- PayLexer Support: Contact Support