

Flitt
Connect Flitt to PayLexer to accept Visa, Mastercard, Apple Pay and Google Pay payments through Flitt's hosted payment page, for merchants in Georgia, Uzbekistan, Armenia, Moldova and Kazakhstan.
Flitt is a payment provider owned by TBC Group, the largest banking group in Georgia. It lets merchants in the Caucasus and Central Asia accept card payments in their local currency, as well as US Dollars and Euros. Shoppers pay on Flitt's own secure hosted payment page, so your website never handles card data.
- Supported Countries (Merchant Accounts): Georgia, Uzbekistan, Armenia, Moldova, Kazakhstan - view full list
- Supported Currencies: GEL, USD, EUR, AMD, AZN, KZT, MDL, UZS - view full list
Which currencies you can collect depends on the country your Flitt account is registered in. Shoppers can pay with a card issued almost anywhere.
Supported Features
- Hosted payment page for one-time payments by Visa and Mastercard
- Apple Pay and Google Pay on Flitt's payment page
- 3-D Secure and bank verification handled on Flitt's page
- Full and partial refunds from PayLexer, including several partial refunds on one payment
- Automatic, signed payment notifications with no webhook setup in Flitt
- Transaction IDs that link straight to the payment in your Flitt Merchant Portal
Before You Start
Make sure you have:
- Flitt Account – Don't have one? Sign up for Flitt →
- PayLexer Account – Required to configure the integration. Create your account →
- A website where you want to integrate
Looking for a different payment processor? View all supported gateways →
Configuring Flitt
You need a Merchant ID and a Payment Key from Flitt for this integration.
Getting API Credentials
Your Merchant ID and Payment Key are in your Flitt Merchant Portal. The key in your portal is for live payments only. For testing, Flitt publishes a shared test merchant that everyone uses.
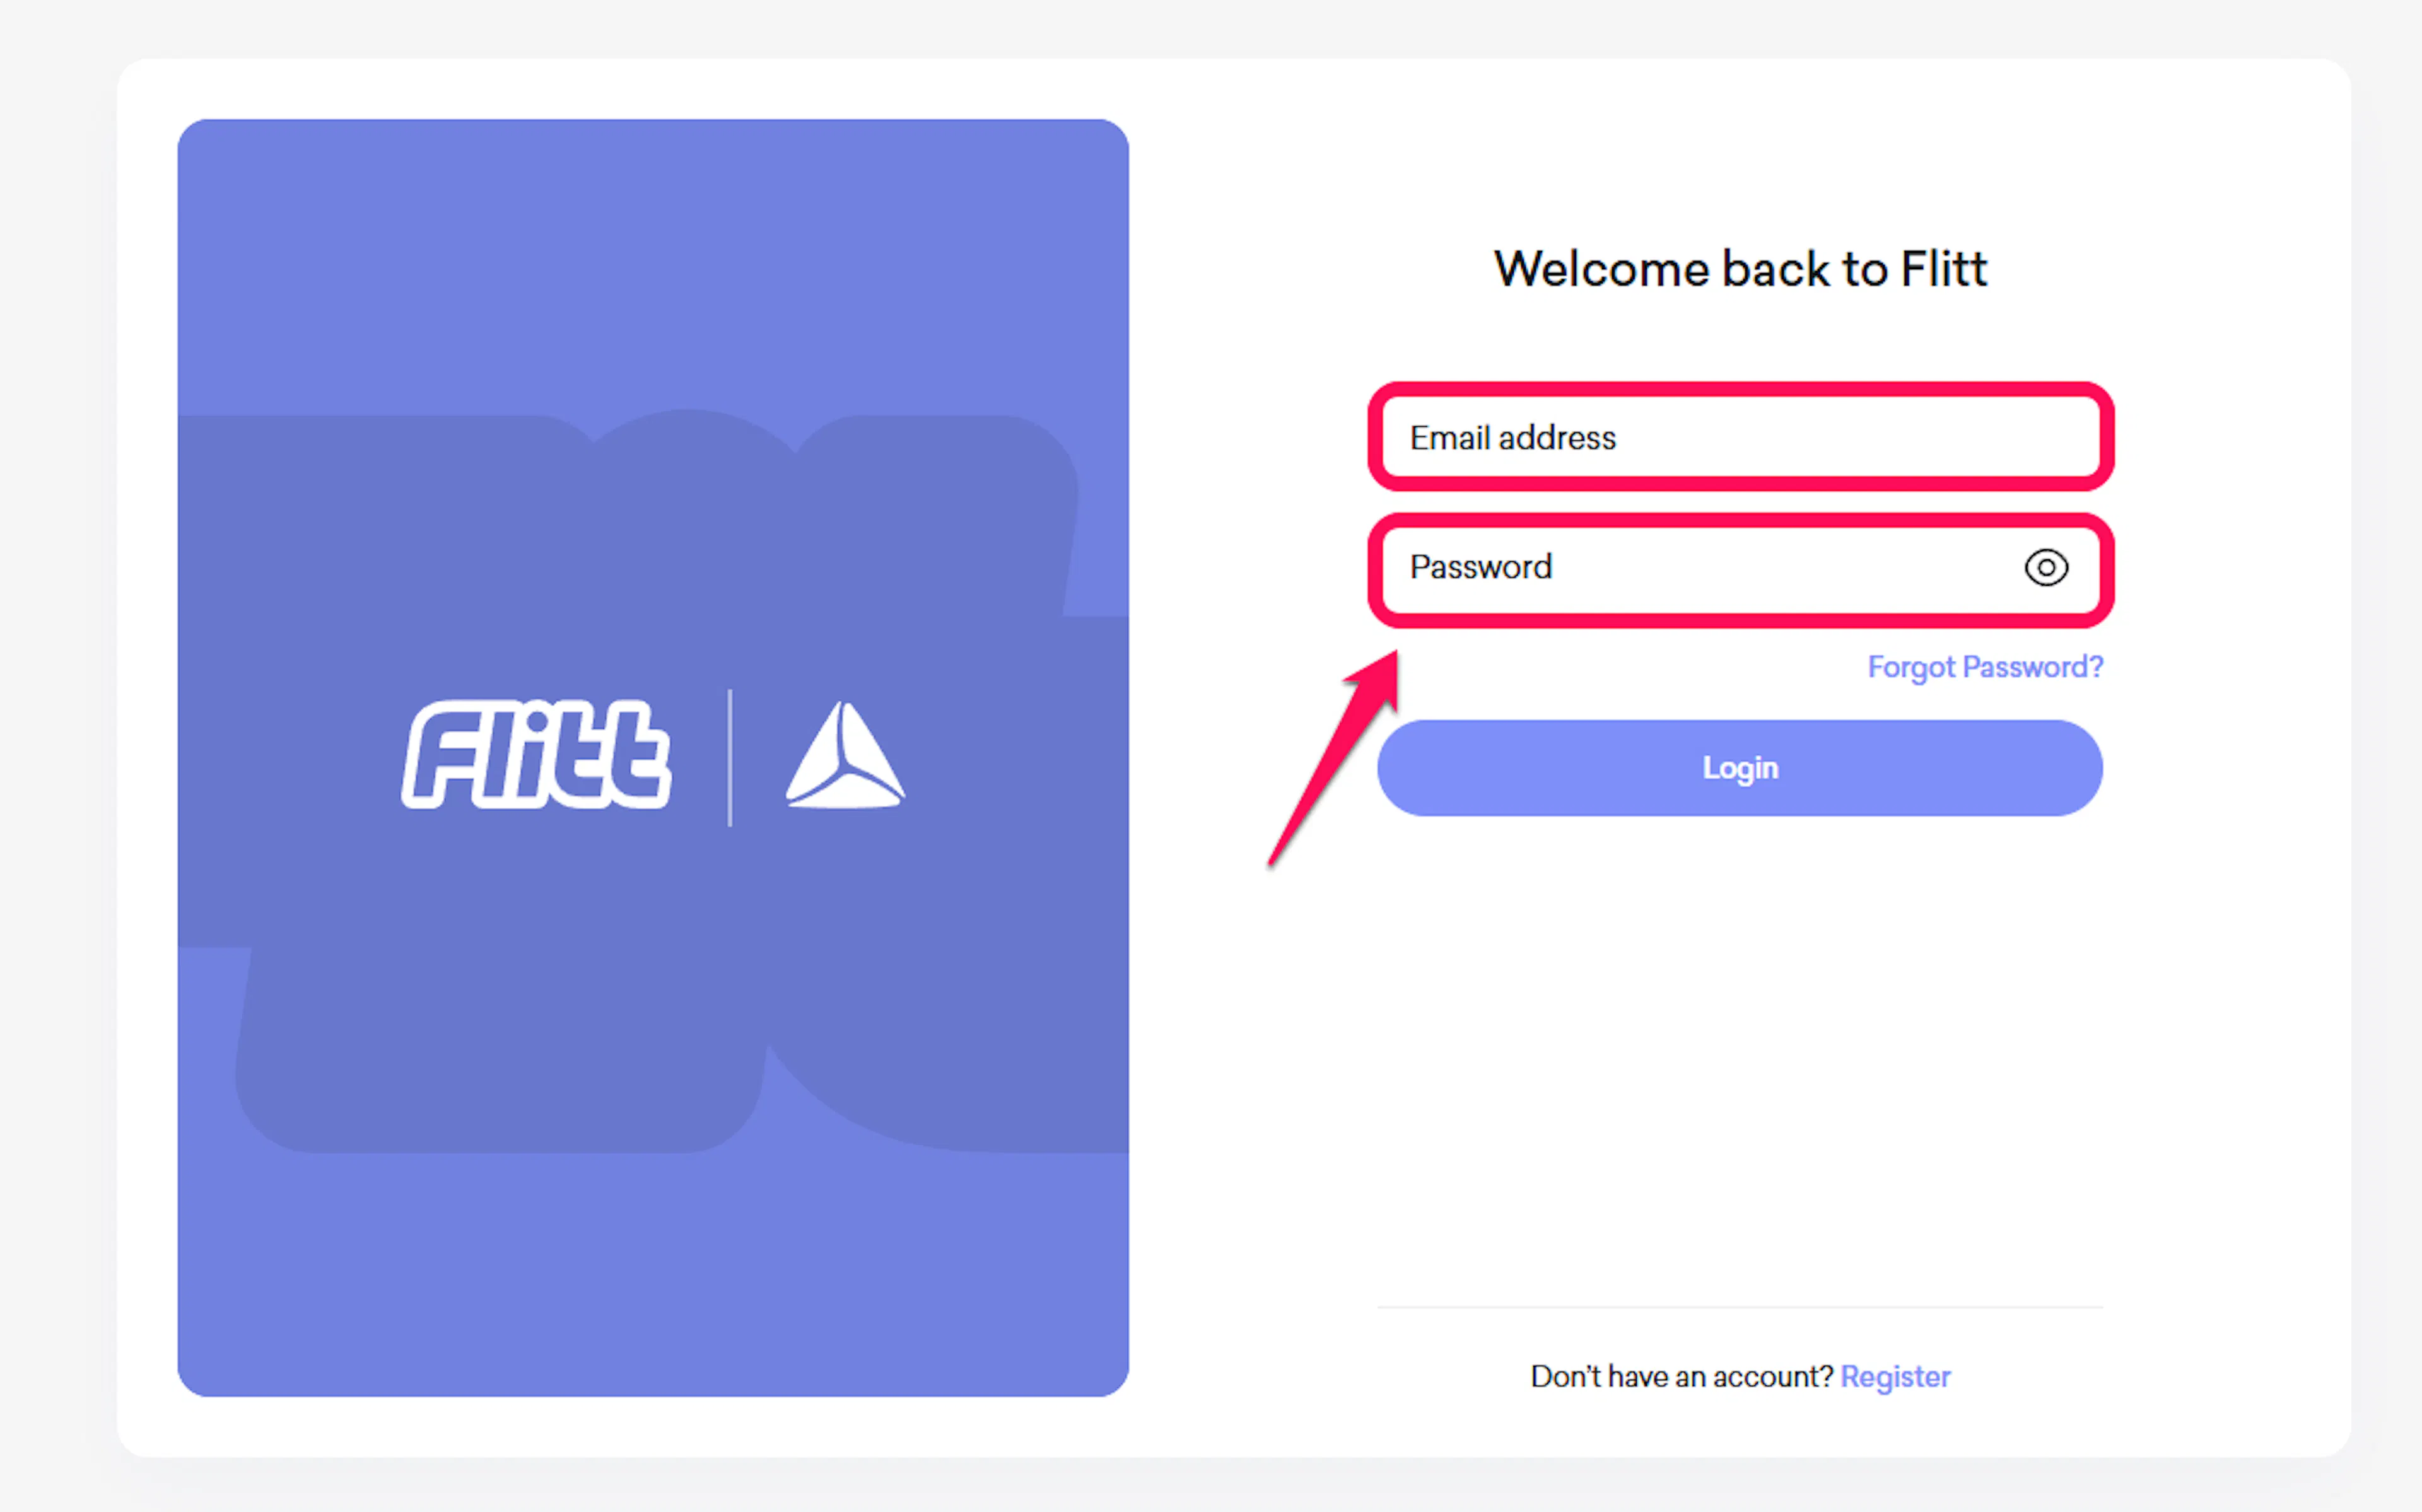
Log in to the Flitt Merchant Portal
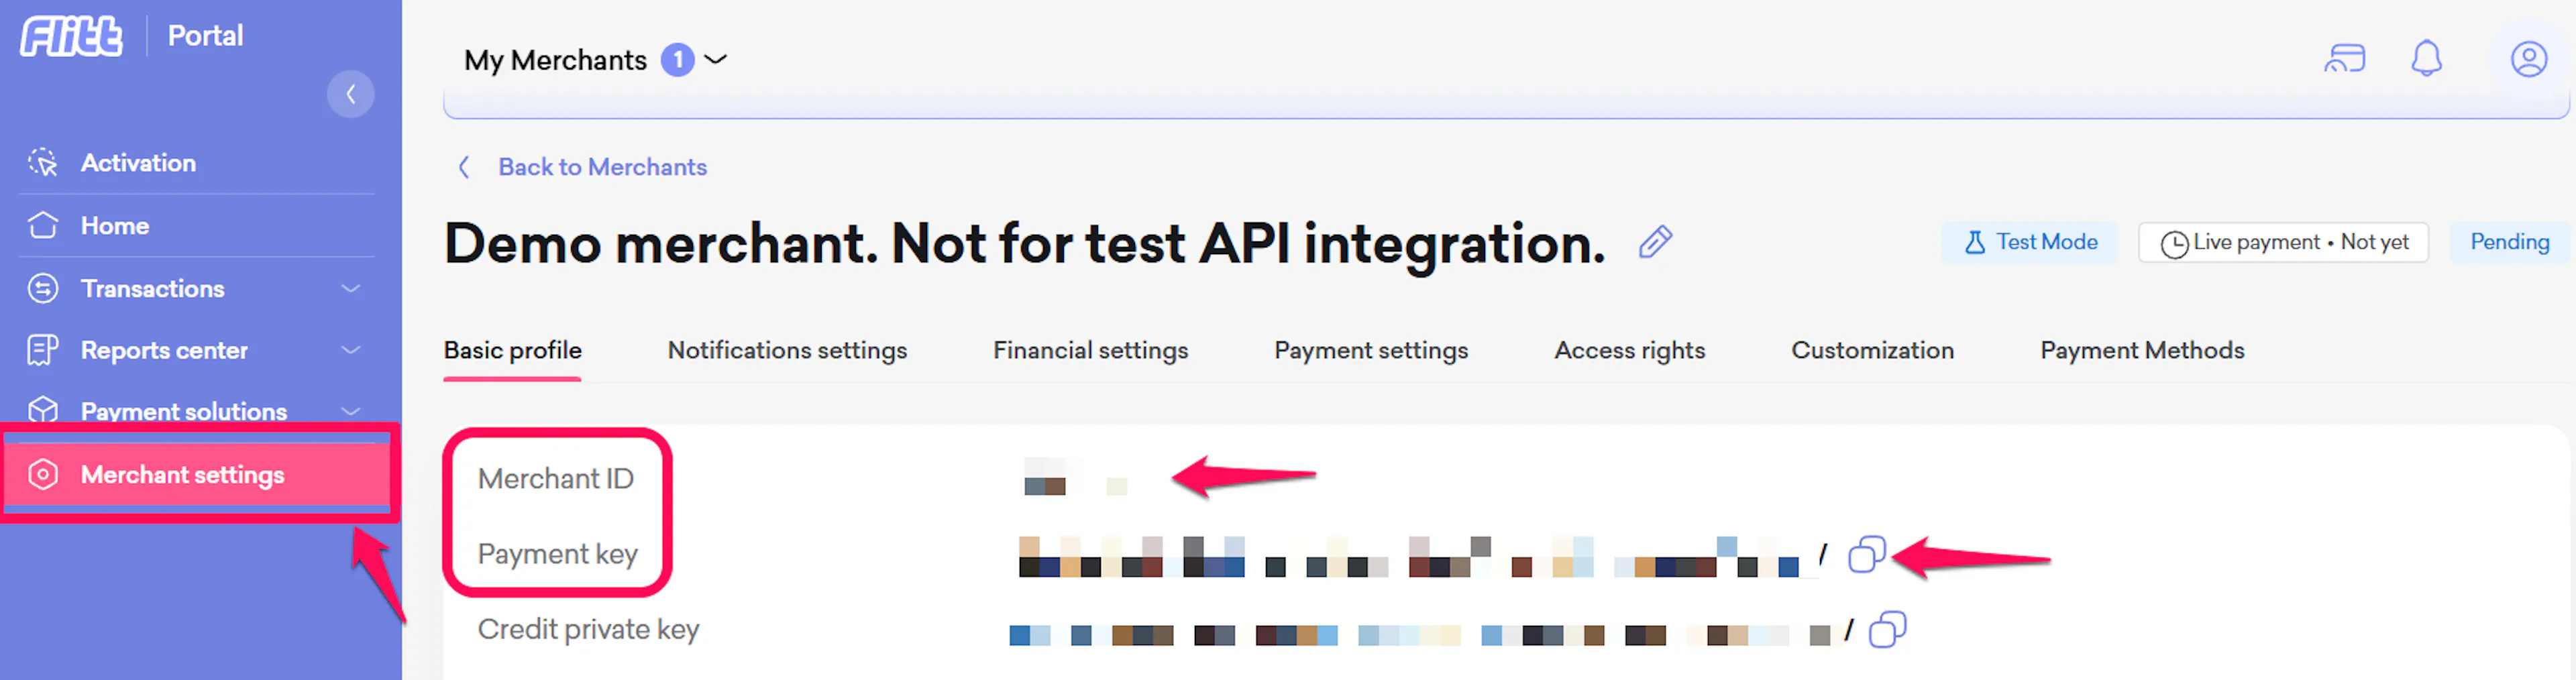
Sign in to the Flitt Merchant Portal and open your merchant's settings.
Copy your live credentials
Copy your Merchant ID and Payment Key. Keep the Payment Key private. It signs every request PayLexer sends to Flitt and verifies every payment notification Flitt sends back.
Note the test credentials
For the Sandbox tab in PayLexer, use Flitt's published test merchant from the Flitt testing page:
| Field | Value |
|---|---|
| Merchant ID (Test) | 1549901 |
| Payment Key (Test) | test |
To run test payments, use these cards with any expiry date and any CVV:
| Card number | Result |
|---|---|
| 4444555566661111 | Approved |
| 4444111166665555 | Declined |
Use only the purchases test merchant. Flitt's testing page also lists a reports-only merchant (1549902) and a payouts key (testcredit). Neither works for payments, and mixing values from different rows fails with an "invalid signature" error.
Adding Credentials to PayLexer
Open PayLexer Dashboard
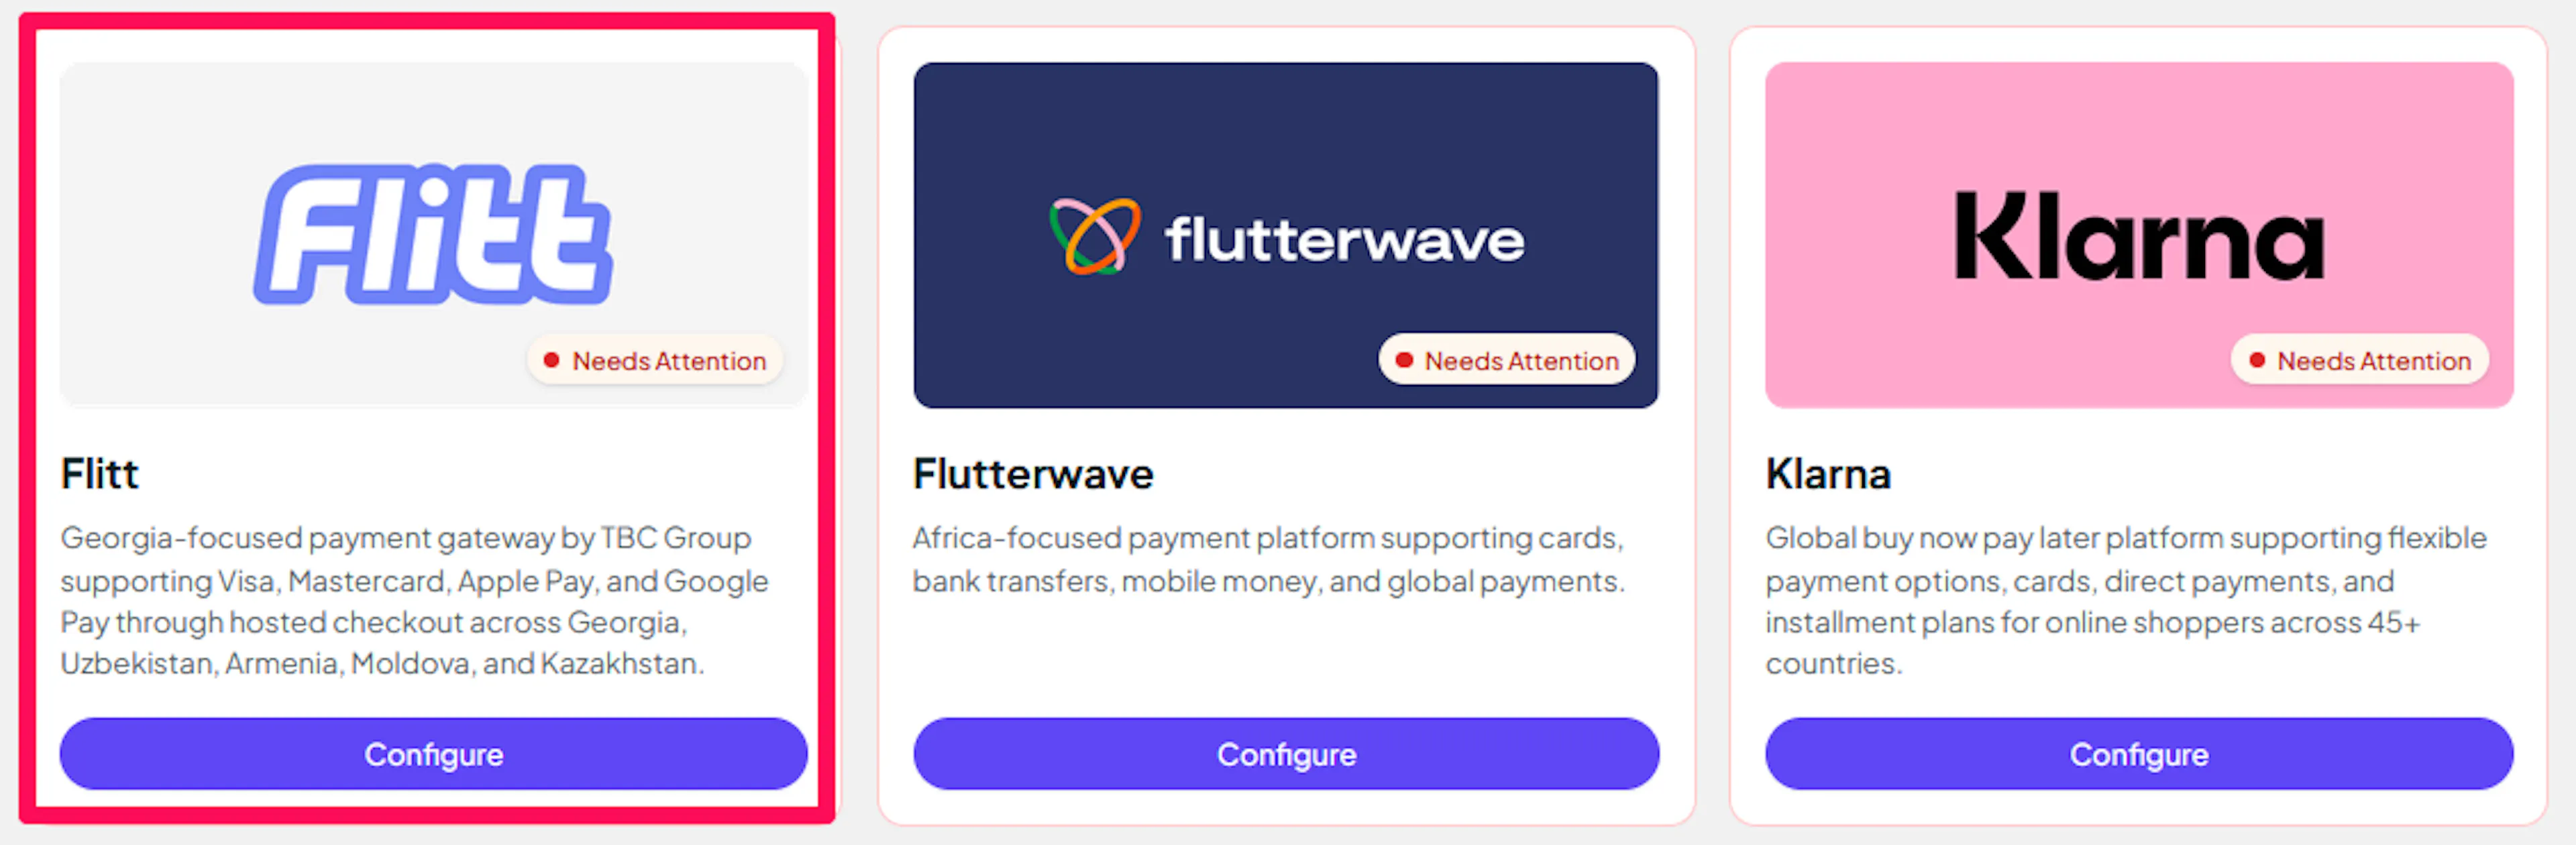
Log in to your PayLexer dashboard and go to Payment Gateways, find Flitt and click Configure.
Enter your credentials
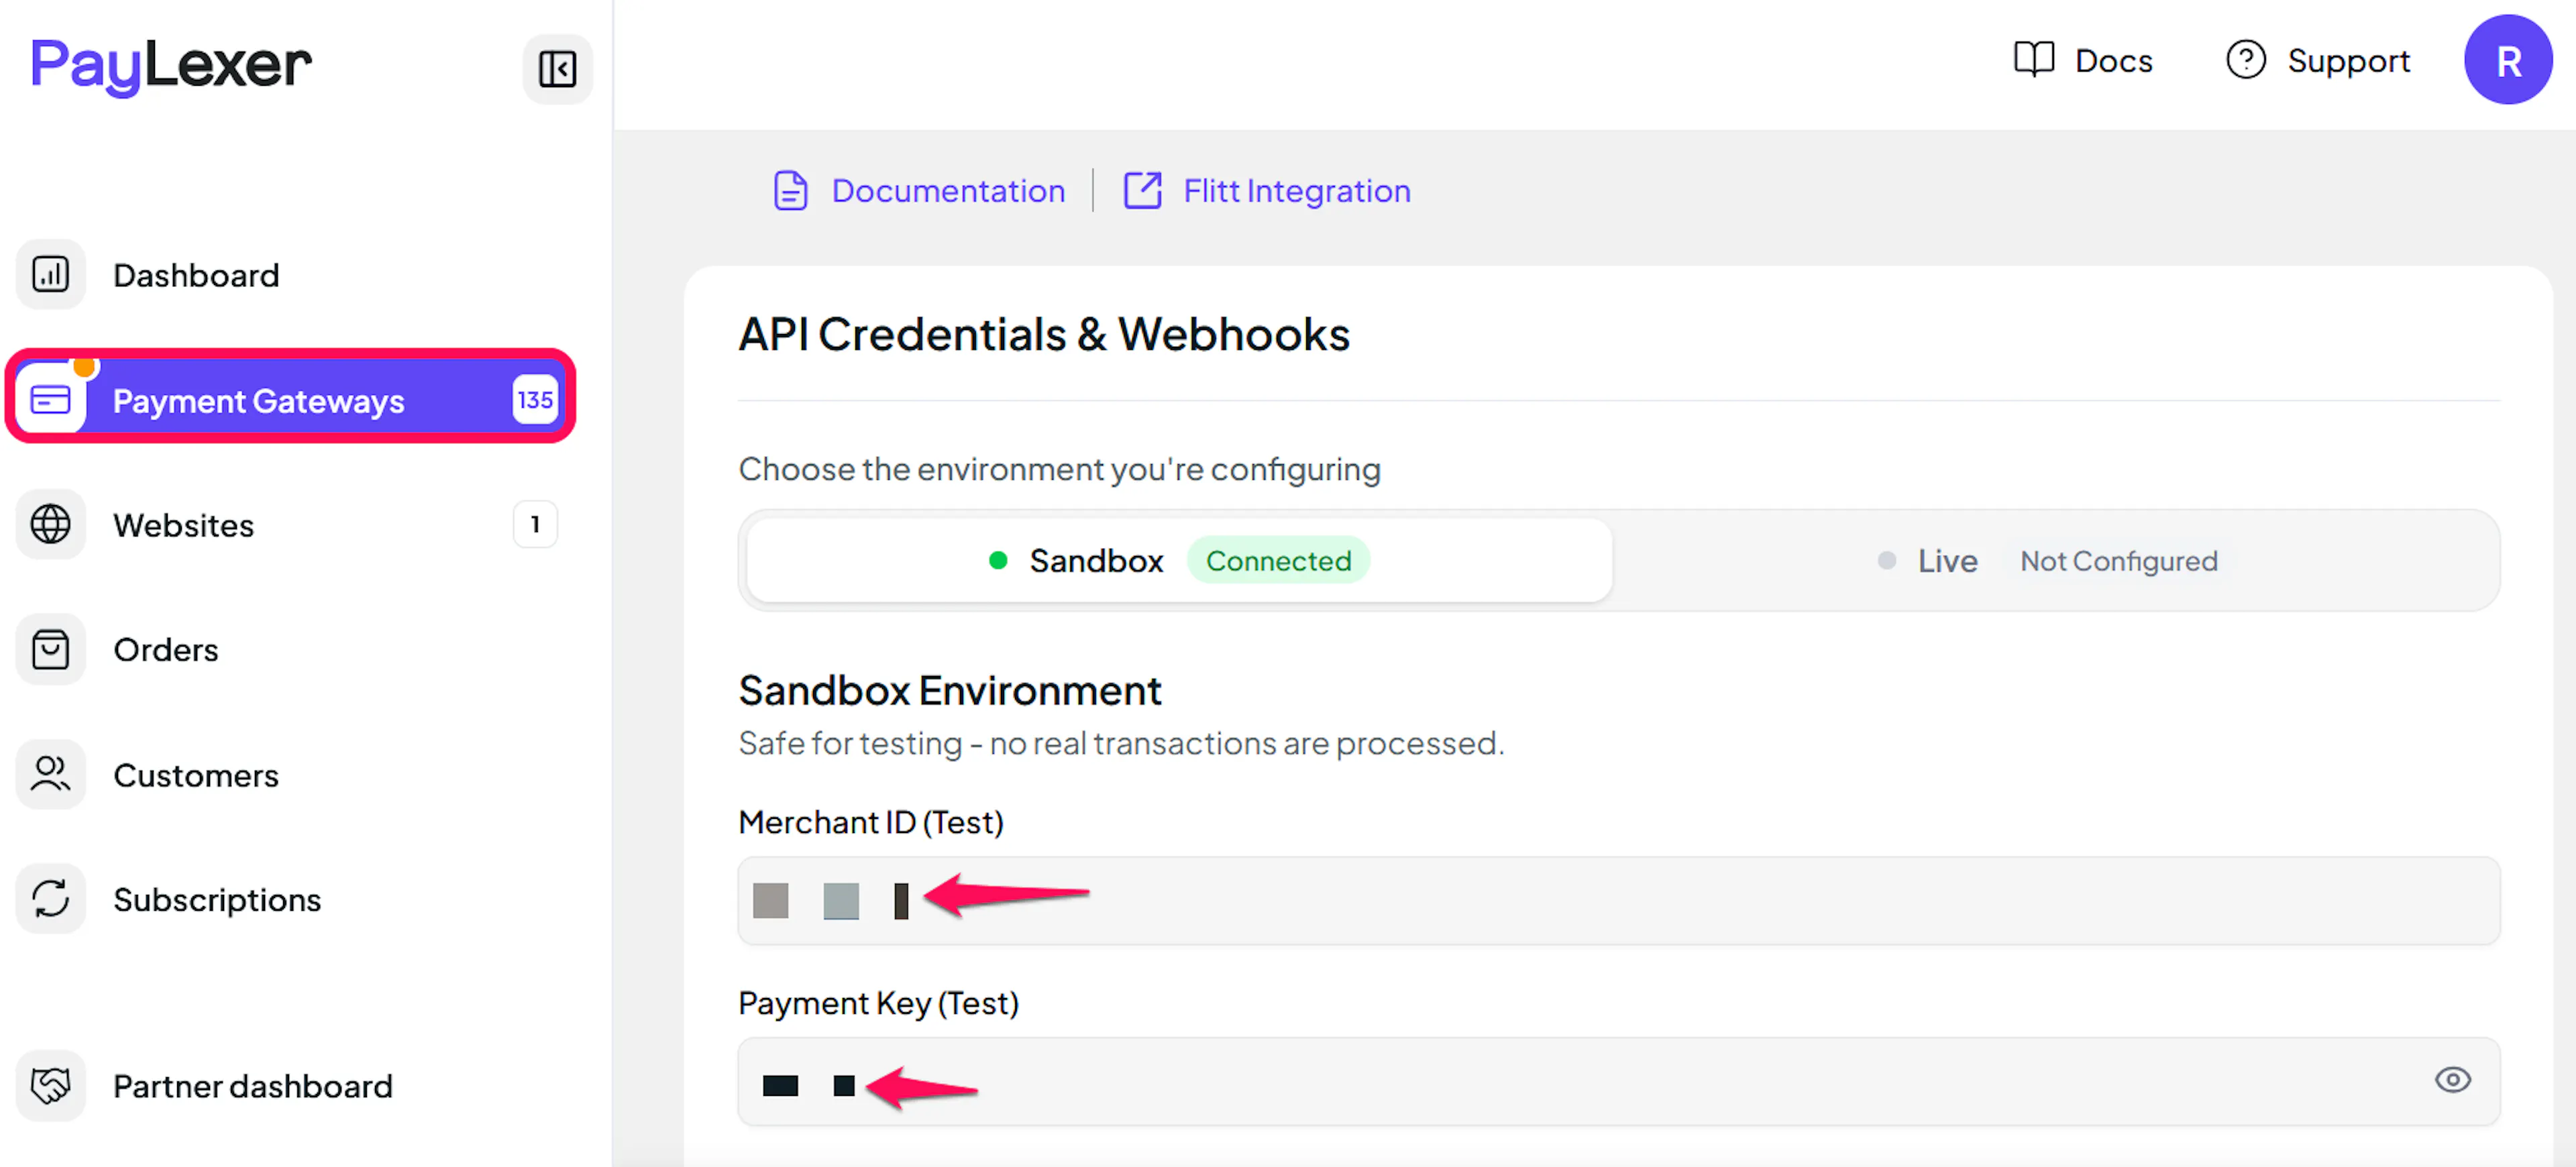
Paste the Merchant ID and Payment Key you copied from Flitt into the corresponding fields. Enter your own credentials under the Live tab, and Flitt's test merchant in the Merchant ID (Test) and Payment Key (Test) fields under the Sandbox tab.
Understanding Live/Production and Sandbox Settings:
| Environment | Purpose |
|---|---|
| Live / Production | Used for real transactions. |
| Test / Sandbox | Used for testing only. No real money is processed. |
How PayLexer selects credentials:
- Debug/Test mode ON → Test credentials are used
- Debug/Test mode OFF → Live credentials are used
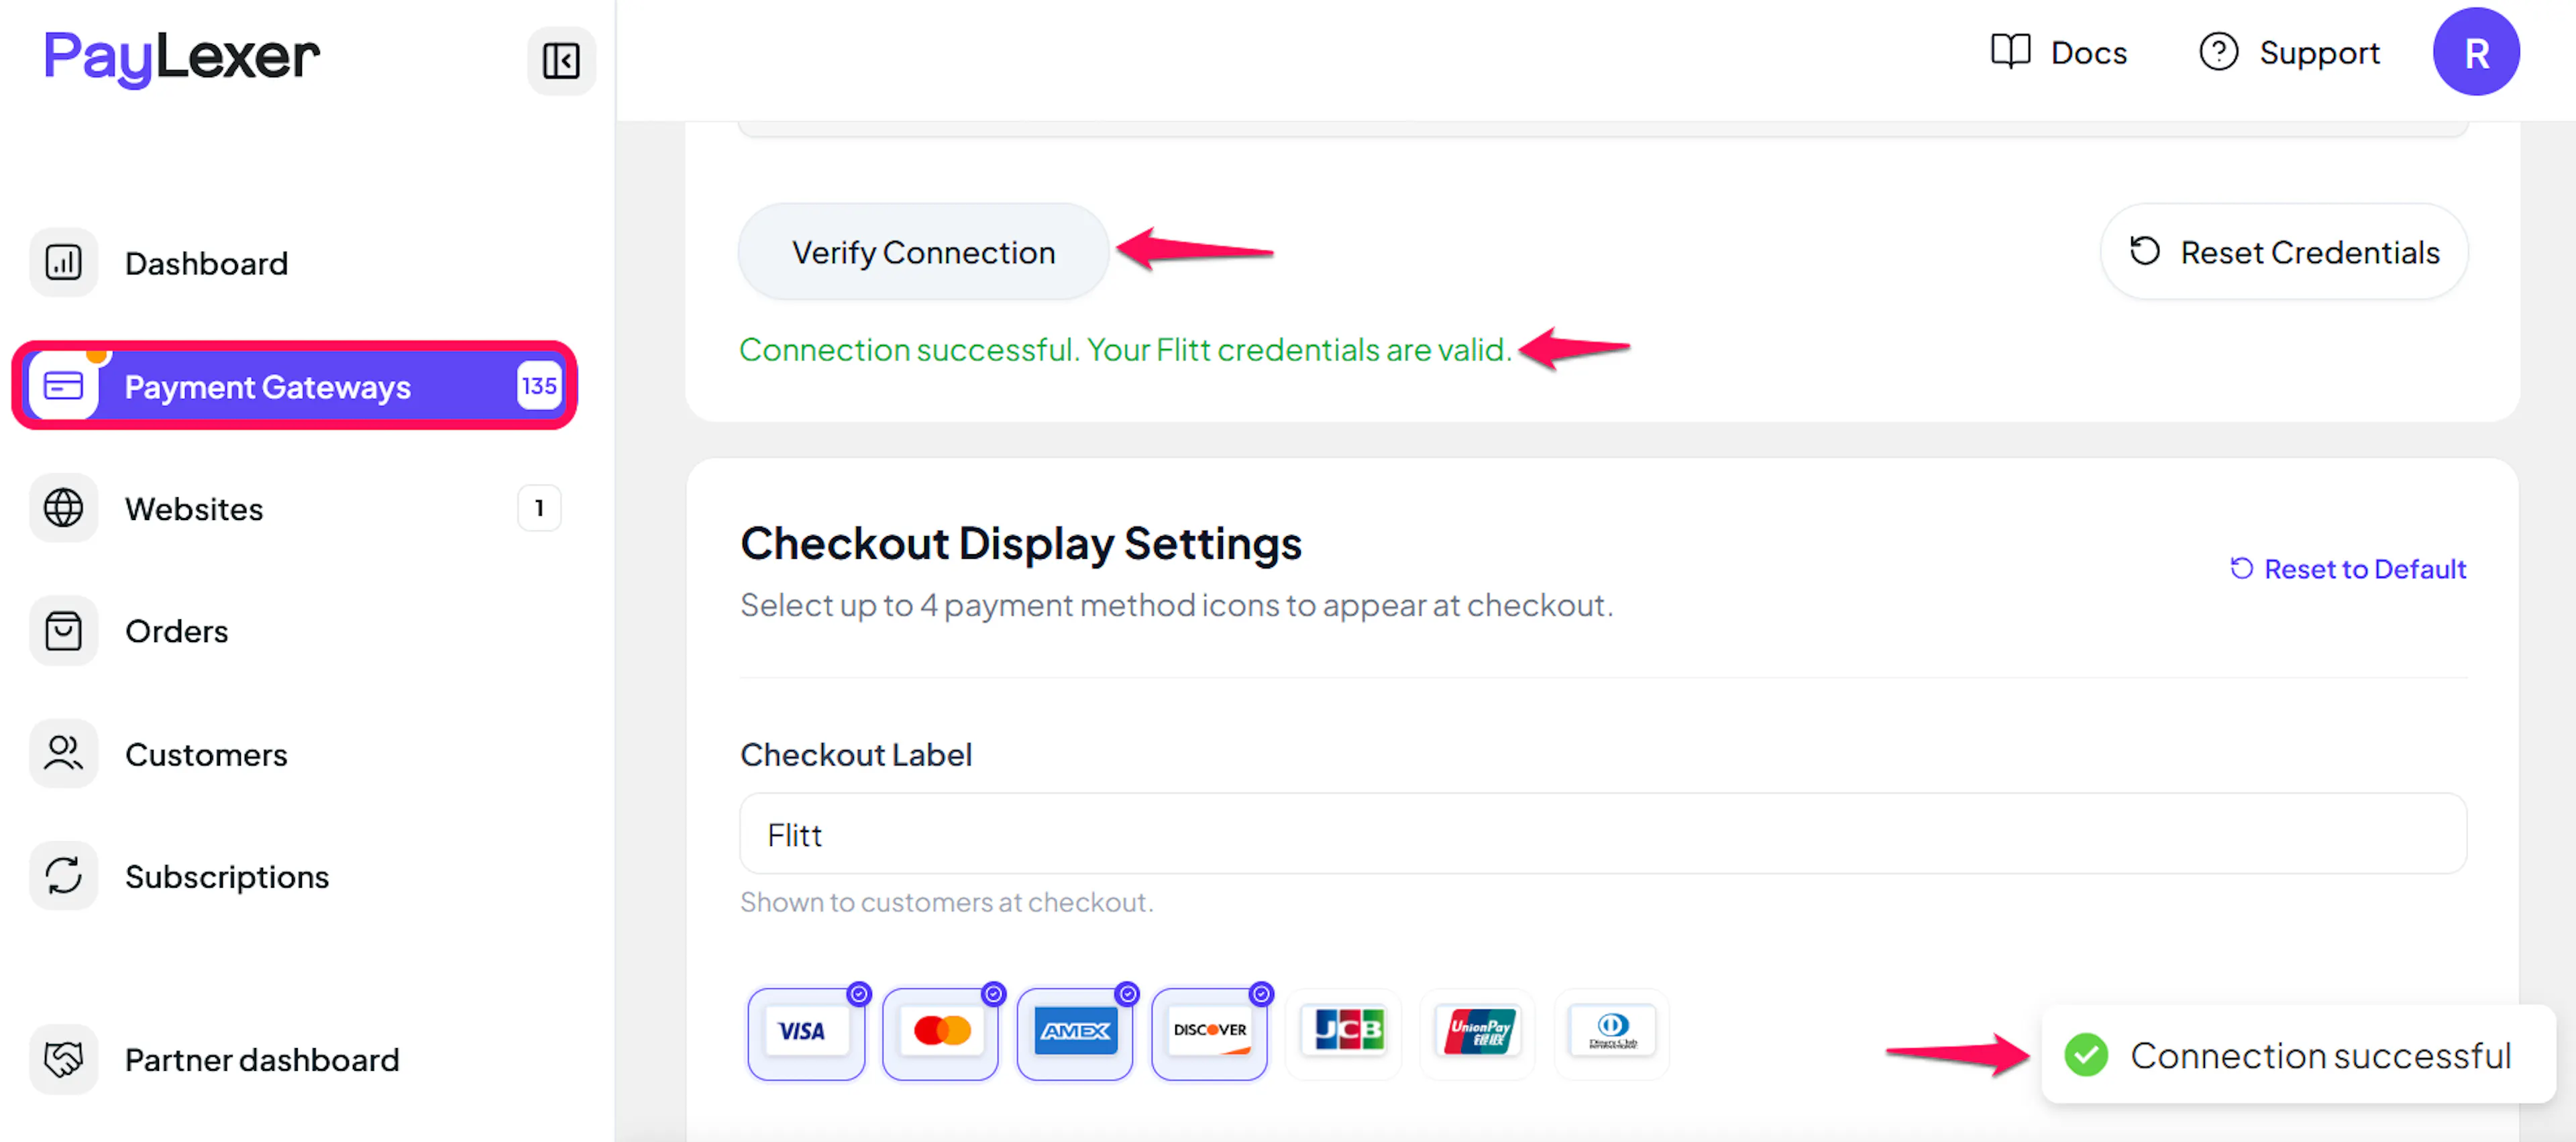
Verify and save
Click Verify Connection to check your credentials with Flitt, then click Save Changes.
Webhooks (Automatic - No Setup Required)
Flitt doesn't use a separate webhook secret or a webhook URL in its portal. PayLexer sends Flitt a notification address with every payment, and verifies each notification using the Payment Key you already entered. There's nothing extra to copy, paste, or generate.
- No webhook URL to add in Flitt
- No separate signing secret to manage
- Successful and failed payments are confirmed in near real time
If PayLexer can't be reached, Flitt retries the notification for about a day, and PayLexer also re-checks any order that is still waiting. A payment is not lost if a notification fails.
Integrate Flitt to Your Website
If you have already added and configured your site, you can enable Flitt in your existing setup.
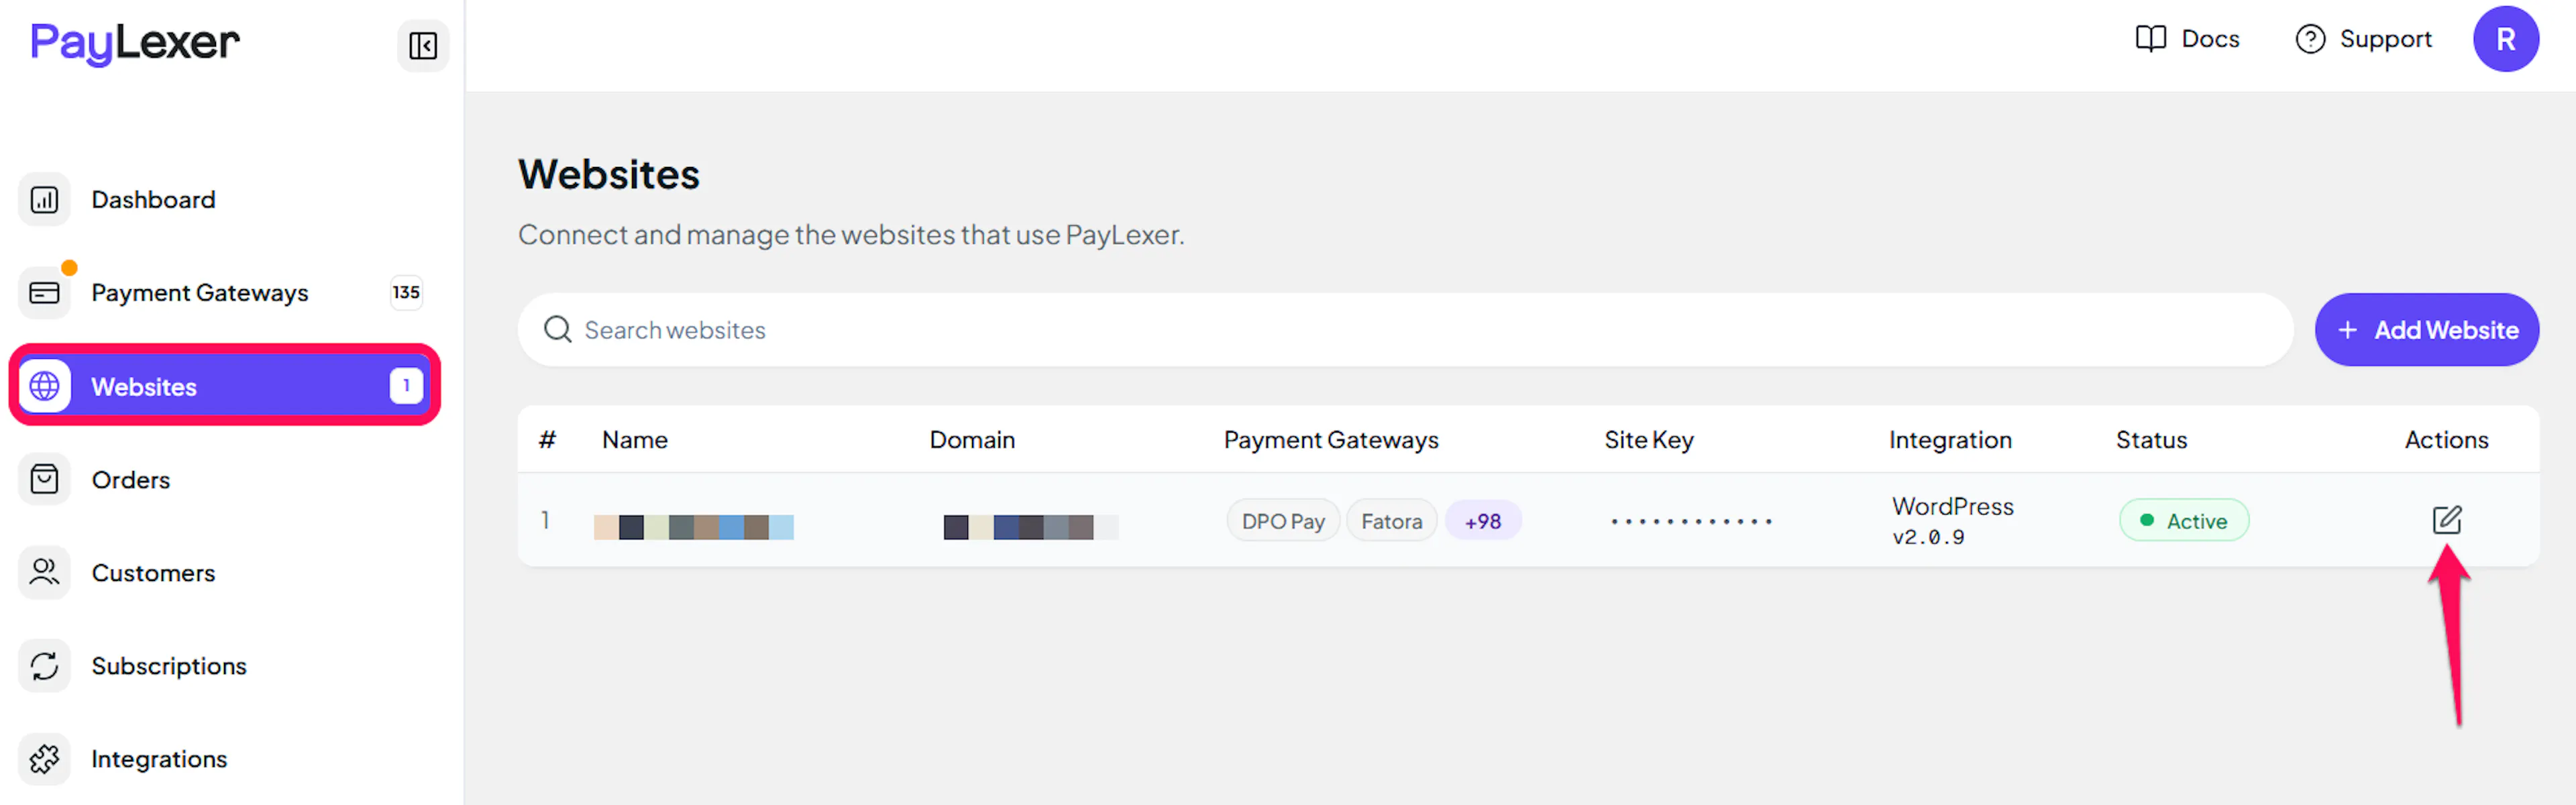
Go to Websites
Navigate to Websites in your PayLexer dashboard.
Open your website
In your website's row, click the Edit icon (pencil) in the Actions column to open its page.
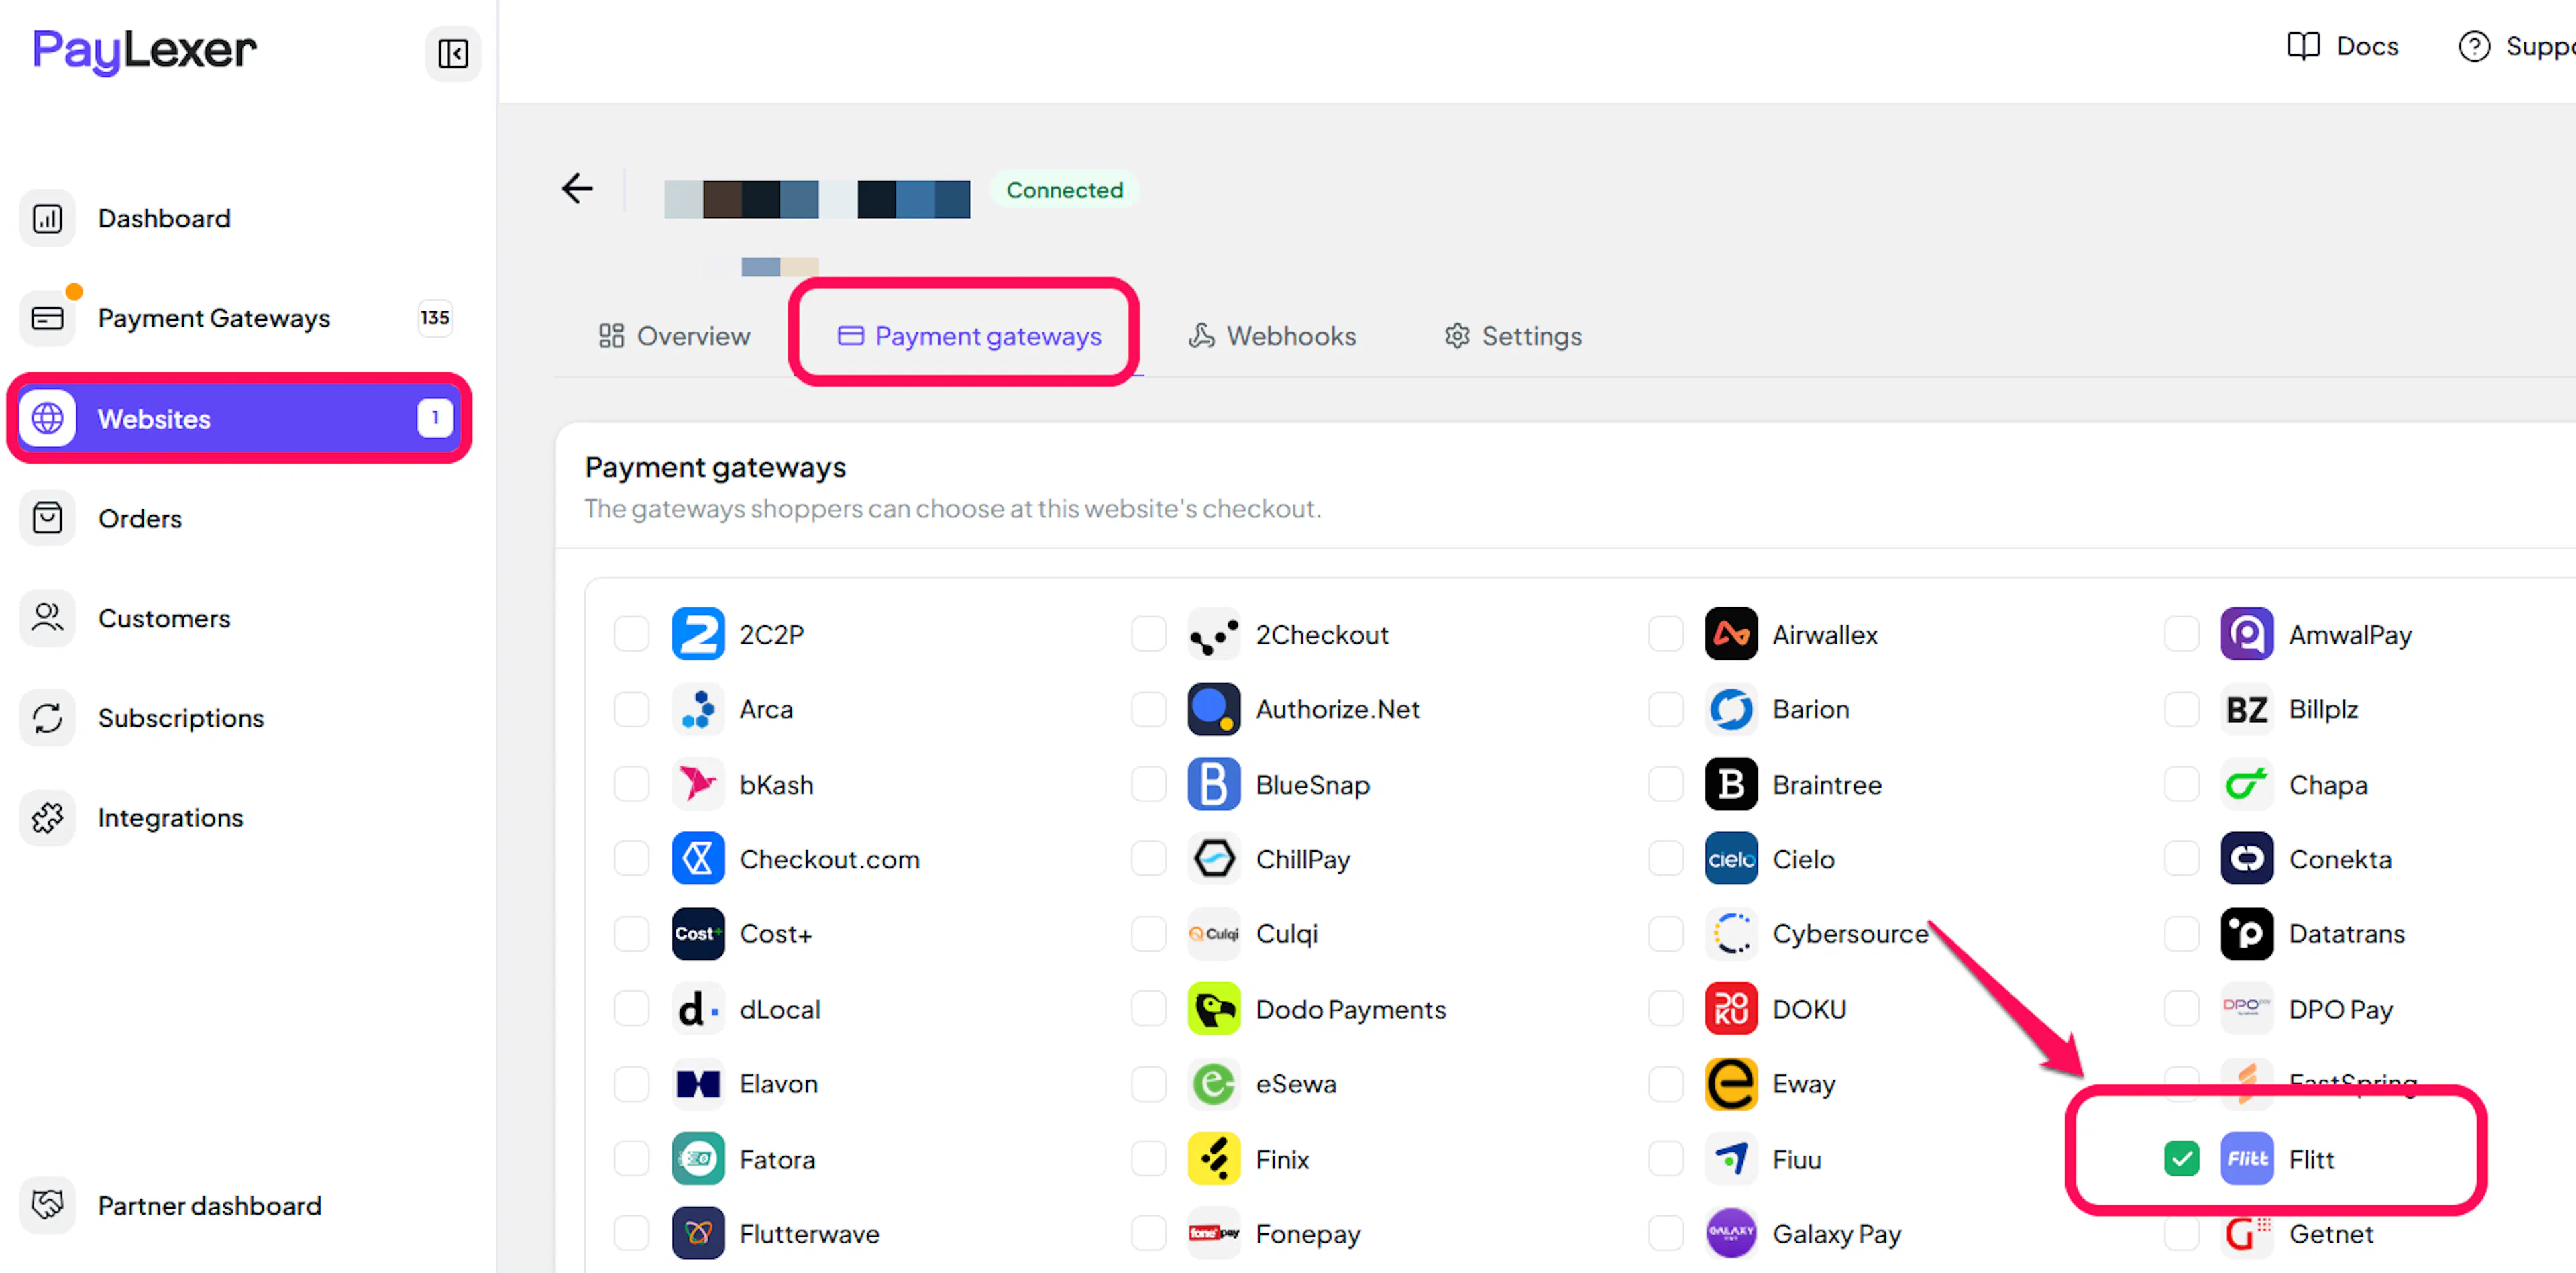
Enable Flitt
Open the Payment gateways tab, tick the checkbox for Flitt, then click Save gateways.
If you haven't added a website yet, Continue to Add Your Website →
Troubleshooting
Best Practices
- Test in sandbox before enabling production
- Run one successful and one declined test payment before going live
- Store both Live and Test credentials so you can safely test before going live
- Issue refunds from PayLexer rather than the Flitt Merchant Portal
- Keep your Payment Key private and never share it outside PayLexer
FAQs
Still Have Questions?
- Flitt Support: Contact Support
- PayLexer Support: Contact Support